
LEVELING LIFT KIT
Installation Instructions

Important
Installation Steps 1
1.The actual thickness ≠ lift height. The number marked on
the item indicates the actual lift height.
2. Before driving, ensure all hardware is tightened to
factory specifications.
3. Re-torque all lug nuts on the spacer after 100–200
miles.
4. Vehicle designs and suspension systems vary. For safe
installation, we recommend having lift blocks installed
by a professional auto technician or suspension expert.
●After removing the wheel, detach all brake line and
ABS line brackets to provide sufficient slack in the lines.
●Use a wrench to remove the upper strut mount nuts
and the upper ball joint nut. Tap the side of the steering
knuckle with a hammer to separate the ball joint.
●Use a wrench to remove the steering linkage nut.

For Style A, follow the installation instructions
●Remove the sway bar nut and bushing.
●Remove the two lower strut mount bolts, then take
the strut out of the vehicle.
below.
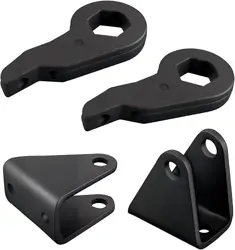
A
B C
●Install the supplied bolts into the leveling kit spacer—
they will serve as new studs. Attach the spacer to the top
of the strut using the supplied nuts.
●Rotate the strut 180° and reinstall it into the vehicle.
Reinsert the lower strut bolts—the lower mount bushing
will align.
●Raise the lower control arm to lift the spindle, while
lowering the upper control arm to reinstall the upper ball
joint. Reinstall the steering linkage.
●Complete the installation on the other side of the truck
before reinstalling the sway bar nut and bushings.
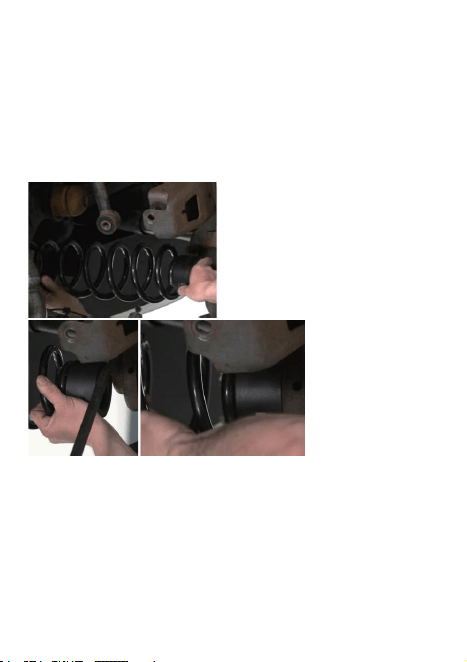
For Style B, follow the instructions below.
●Install the leveling lift kit onto the spring assembly
after removing the suspension components.

Installation Steps 2
For Style C, follow the instructions below.
●After removing the suspension components, install
the leveling lift kit onto the spring
●After installing the lift blocks, reassemble the
removed suspension components, making sure all
parts are returned to their correct positions.
●Tighten all connecting bolts and fasteners to the
manufacturer’s specified torque.
assembly.
●Align the stud with the bolt hole and pass it
upward through the shock tower.

Installation Steps 3
●After removing the wheel, detach any brake line and
ABS line brackets to provide enough
●Tighten all the nuts.
●Install the coil spring with the rubber mount in place
, ensuring it is properly aligned with the suspension
components. Adjust the suspension height as needed.
slack.

●Use a wrench to remove the upper strut mount nuts
and the upper ball joint nut. Tap the side of the knuckle
with a hammer to separate the ball joint.
●Use a wrench to remove the steering linkage nut.
●Remove the sway bar nut and bushing.
●Remove the two lower strut mount bolts and loosen the
three upper strut mount nuts. Remove the two lower
spring clip nuts and discard them.
●Insert the spacer between the lower control arm and the
lower strut mount, aligning the holes.
●Insert the bolts from the top, with the nuts on the
bottom. Do not insert from the bottom, as they may
contact the CV shaft.
Installation Steps 4
●Raise the lower control arm to lift the spindle, while
lowering the upper control arm to reinstall the upper ball
joint. Then, reinstall the steering linkage.
●Complete the installation on the other side of the
truck before reinstalling the sway bar nut and bushings.
●Jack up the front of the truck and support under the
frame rails with jack stands.
●Work one side at a time, unbolt the shock and its mount
from the control arm, then remove.
●Attach the new shock mount with factory hardware,
straight edge facing the engine. Then install the shock
using factory hardware and tighten.
NOTE: This extender is for use with stock-length shocks.

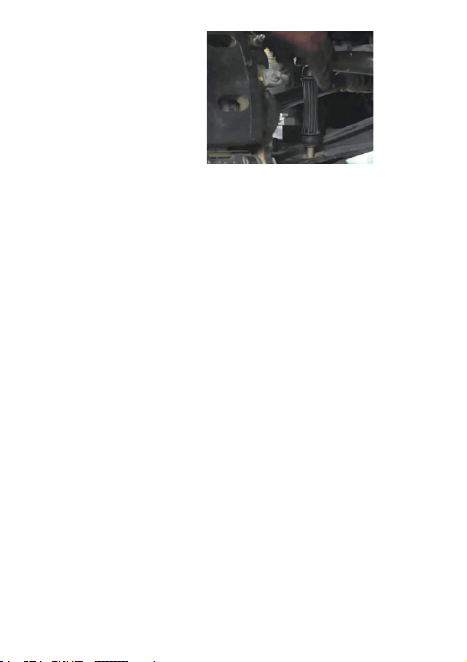
Installation Steps 5
●Block the rear tires to prevent the vehicle from rolling.
Safely lift the front and support the frame with jack stands
on both sides. Remove the front tires. Locate the torsion
bar adjuster bolt behind the lower control arms and note
the remaining threads—it will be used to set the new key.
●Remove the adjuster bolt and torsion bar block. Take out
the old key and install the new one. Reinstall the adjuster
bolt to the original position, remove the unloading tool, and
make any minor adjustments equally on both
Installation Steps 6
sides.

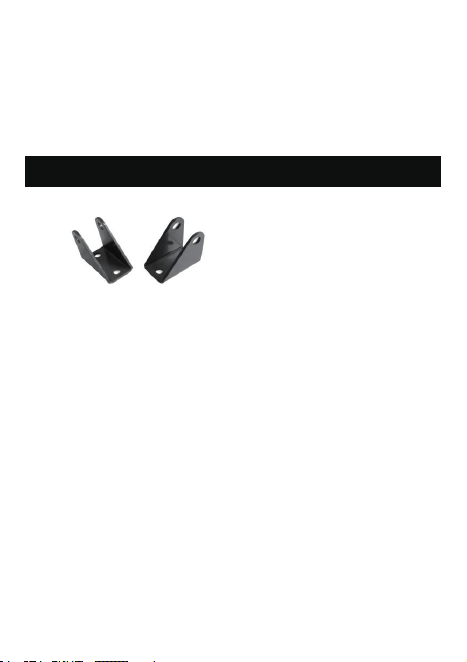
●Remove the factory rear U-bolts and discard
Installation Notes: The new rear blocks are tapered to
correct the pinion angle, with the smaller end facing the
front of the truck.
●Support the rear axle with a jack and jack stands.
●Remove the brake and parking brake cables so there
is slack in the lines.
●Remove the lower rear shock mount nut and bolt.
them.
●Lower the axle to remove the factory block.
●Install the new rear block with the smaller end of
the spacer facing the front of the truck.
Installation Steps 7
●Install the new supplied U-bolts and torque to factory
spec.
●Finish installing the kit on the other side, then reconnect
any brake or ABS lines. After 100 miles, recheck all bolts to
factory torque specifications.
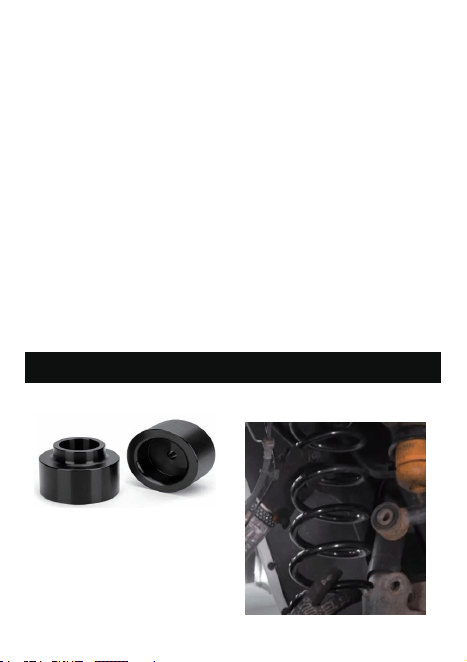
●Remove the old rear axle spring by loosening and
removing its bolts and nuts with a ratchet wrench and
socket. Carefully take out the spring, avoiding damage to
nearby components.
●Place the new lift block under the coil spring and install
the assembly onto the vehicle.
Tighten all bolts and fasteners securely, then gentlyshake
the vehicle to check for any looseness or unusual
suspension noise.