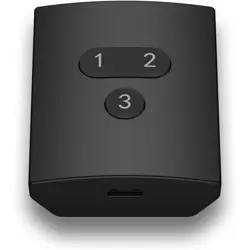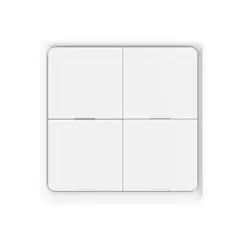
Scene Switch
Instructional Manual
User Manual
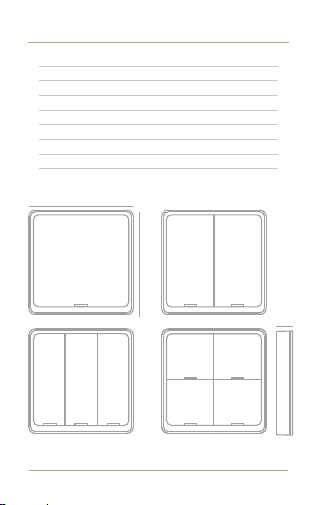
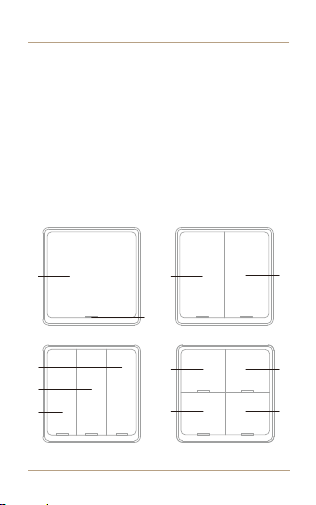
1 Button 2 Button 3 Button 4 Button
ZT-SY-EU-MS-CG19

Bitte scannen Sie den QR-Code, um das deutsche Handbuch,
das Installationsvideo und die Funktionsein-führung zu erhalten
Escanee el código QR para obtener el manual en español,el
video de instalación y la introducción de la función
Veuillez scanner le code QR pour obtenir le manuel en el video
de instalación y la introducción de la función fonctions
Отсканируйте QR-код, чтобы получить руководство на
русском языке, видео по установке и описание функций
Scansionare il codice QR per ottenere il manuale in italiano, il
video di installazione e la guida alle funzionalità. Video di
installazione e funzionalità
Leia o código QR para obter o manual em português, o vídeo
de instalação e a introdução das funções
Zeskanuj kod QR, aby uzyskać instrukcję obsługi, film
instalacyjny i wprowadzenie do funkcji
请扫描二维码获取中文的说
明书、安装视频及功能介绍
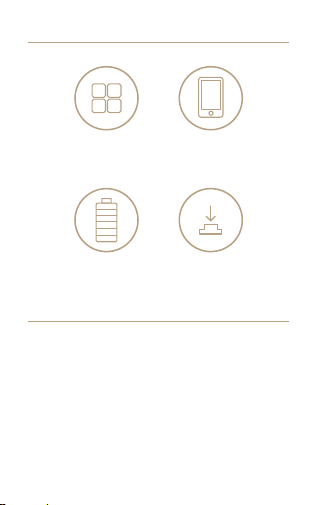
Features
Product Introduction
Remote ControlScene Setting
Battery Power Mechanical Push
ON/OFF Switch
- This scene switch is powered by battery, which is
developed under ZigBee/Bluetooth communication. After
connecting with ZigBee/Bluetooth gateway and adding on
Smart life App, it allows you to quickly “set the scene” for a
particular room or living scene, like Reading, Movie, and so
on.
- Scene switch is a time and energy-saving alternative to
the traditional hard-wired switch, the push-Button It can be
stick on the wall or put it on everywhere you like.
Specification
86
86
13
Input Power:
Communication:
Dimension:
Standby Power:
Working Temperature:
Working Humidity:
Button lifecycle:
CR 2430 button battery
ZigBee 802.15.4/BT Mesh
86*86*13mm
10uA
-10°C~45°C
<90%RH
50K
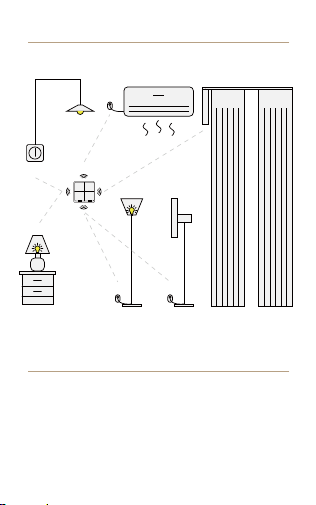
AC
Smart Plug
Smart Plug
Smart Dimmer
Switch
Sence Switch
Traditional Bulb
Smart Plug
Smart Bulb
Smart Plug
Fan
Smart Curtain
Scene Switch with Your Smart Home
Installation
Please follow this instruction to install battery or remove
battery tap when first time use this product.
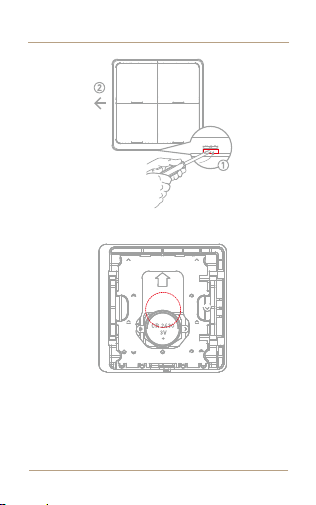
Installation
2. Remove the old battery when it runs out, then insert the
new CR2430 battery into the slot.
After replacing the battery, the smart scene switch will
automatically reconnect to the ZigBee/BLE MESH network
and resume normal working status, and the user does not
need to make any APP settings.
1. Lift the pick with your finger or a tool, and slide left at
same time.
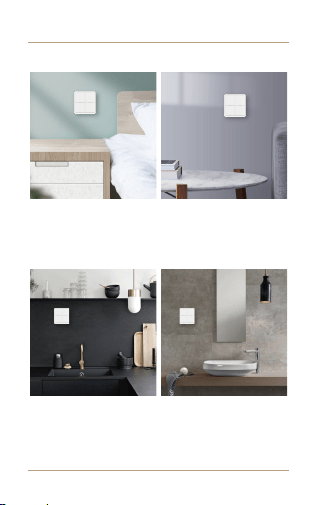
Fix it as Where as You Want
Bedroom Living Room
Kitchen Bathroom
Connection & Operation
Indicator
LED
Button 4
Button 2
Button 3
(Reset)
Button 1
(Reset)
Button 1
(Reset)
Button 1
Button 2
(Reset)
Button 2
(Reset)
Button 3
(Reset)
Button 1
(Reset)
· Indicator LED
Press the button, the indicator will turn on.
The indicator flash quickly,it means that the switch under
process of network connecting
· Scene Switch Operate
Single Click: Activate the 1st scene
Double Click: Activate the 2nd scene
Long Hold 5s: Activate the 3nd scene
Press and Hold Reset Button for 10s get into pair mode, LEDs
will quick flash
Each one button can be adapted upto three different scenarios
through the APP
APP Operation
1
2
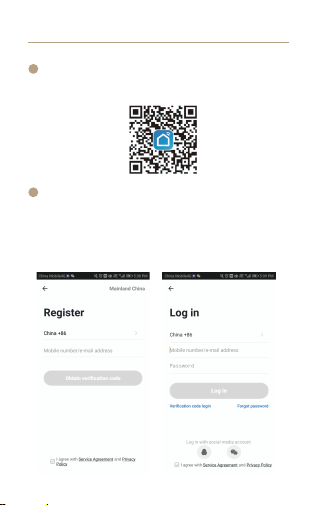
Search the App in the store or scan the QR code on the
package / manual to download and install the App.
If you download for the first time, please click the “register”
button to register your account. lf you have an account, click
the “login” button.
Register and login
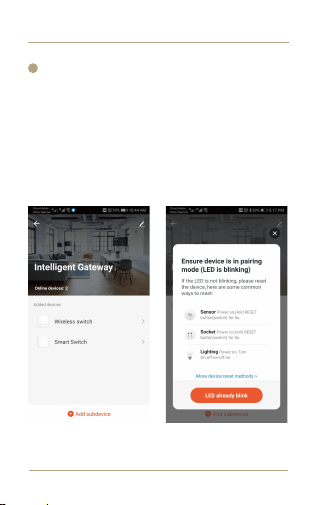
Add devices
Note: If what you choose is the ZigBee or Bluetooth
version, then a ZigBee or Bluetooth hub is requied for
connection first before successful pairing.
Connect the device to the power supply, press and hold the
Reset Button to put the device into the network configuration
mode, and ensure that the mobile phone is connected to the
network. Open the app, on the “smart gateway” page, click
“add subdevice”, and click “LED already blink”.
APP Operation
3
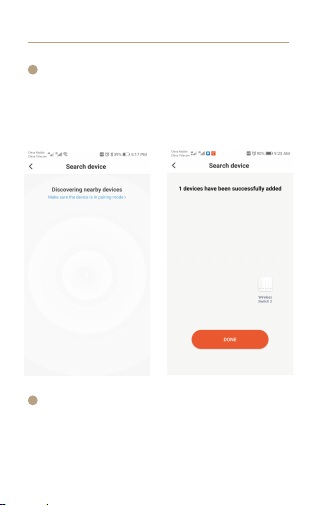
to add the device successfully.
Wait for device networking to succeed, Click “DONE”
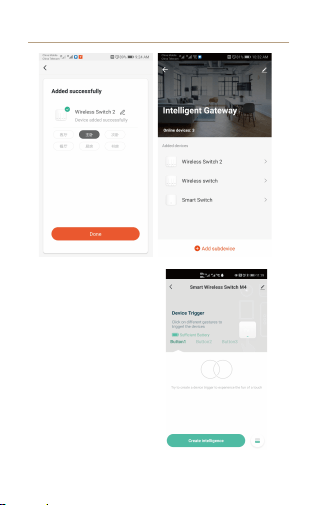
After connecting the network successfully, you will see
the lntelligent Gateway page, choose the WIRELESS
SWITCH 2 to enter the controlling page, then choose “Add
intelligence” enter to the setting mode
*NOTE: lf you fail to add the device, please move the
gateway closer to the product and reconnect the network
after powering on.
APP Operation
5
4
APP Operation

APP Operation
6
Choose “Add condition” to choose the the controlling
condition, such as “Single click”, the choose “Add task”
choose the controlling achion.
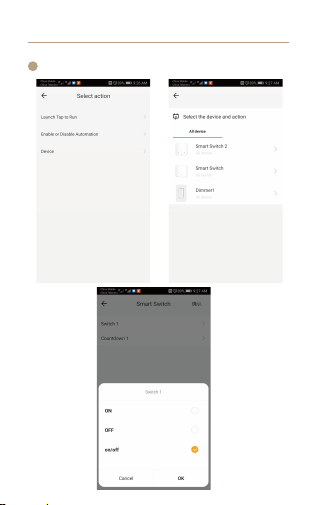
Such as choose the On/Off status of the switch.
APP Operation
7
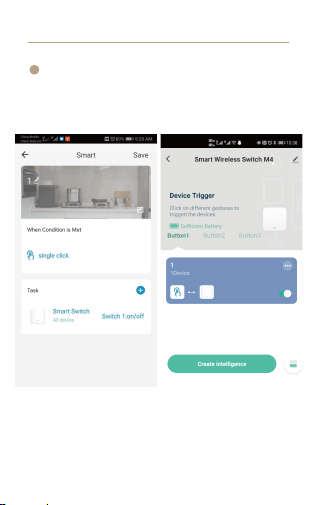
Save your collocation, then you could use the scene
switch to control the light.
APP Operation
8
Note:
UI interface or functions may change according to firmware
version or application scenarios, the actual APP interface
shall prevail.

FAQ
1. Why does the device fail to link to the APP?
Q1: ZigBee products work with the MOES/TUYA ZigBee
gateway needed;
Q2: Check whether the router connected to the gateway is
connected to the external network. Ensure that the Wi-Fi
signal of the gateway is good and try to connect the
gateway again .
Q3: Check whether the device is too far away from your
gateway or other ZigBee devices to form a mesh
network.Keep the ZigBee gateway and the ZigBee device
close as recommended,where the distance should be
moderate (less than 5 m).
Q4: Check whether the device enters the network
distribution mode.
2.After the device is installed, why is the light not
responding when I click the switch button?
Q1: Please cut off the power supply and check whether
the wiring is correct according to the manual.
3.When the Zigbee gateway is not connected to the
Internet, can devices on the Zigbee gateway interact with
each other locally?
Q1:If the linkage scenario is set in advance when the ZigBee
gateway is connected to the extranet and the App prompts
for local linkage after setting the scenario, then the ZigBee
gateway can be linked locally as long as any scenario is
triggered when there is no extranet.

SERVICE
Thank you for your trust and support to our products, we
will provide you with a two-year worry-free after-sales
service (freight is not included), please do not alter this
warranty service card, to safeguard your legitimate rights
and interests. If you need service or have any questions,
please consult the distributor or contact us.
Product quality problems occur within 24 months from the
date of receipt, please prepare the product and the
packaging, applying for after-sales maintenance in the site
or store where you purchase; If the product is damaged due
to personal reasons, a certain amount of maintenance fee
shall be charged for repair.
We have the right to refuse to provide warranty service if:
1. Products with damaged appearance, missing LOGO or
beyond the service term
2. Products that are disassembled, injured, privately
repaired, modified or have missing parts
3. The circuit is burned or the data cable or power interface
i damaged
4. Products damaged by foreign matter intrusion (including
but not limited to various forms of fluid, sand, dust, soot,
etc.)

RECYCLING INFORMATION
All products marked with the symbol for separate collection
of waste electrical and electronic equipment (WEEE
Directive 2012/19 / EU) must be disposed of separately
from unsorted municipal waste. To protect your health and
the environment, this equipment must be
disposed of at designated collection points for
electrical and electronic equipment designated
by the government or local authorities. Correct
disposal and recycling will help prevent
potential negative consequences for the
environment and human health. To find out
where these collection points are and how they work,
contact the installer or your local authority.

CB03
Product Information
Product Name_________________________________________
Product Type__________________________________________
Purchase Date_________________________________________
Warranty Period_______________________________________
Dealer lnformation_____________________________________
Customer's Name______________________________________
Customer Phone_______________________________________
Customer Address_____________________________________
______________________________________________________
Maintenance Records
Failure date Cause Of Issue Fault Content Principal
WARRANTY CARD