4.7 Presets
Table of content
1 Introduction
1.1 Safety
1.2 Features
1.3 Carton contents
2 Controls, connectors and display
2.1 Main controls
2.2 Connectors
2.3 Remote control
3 Started and setup
3.1 Setup wizard
3.2 Other settings
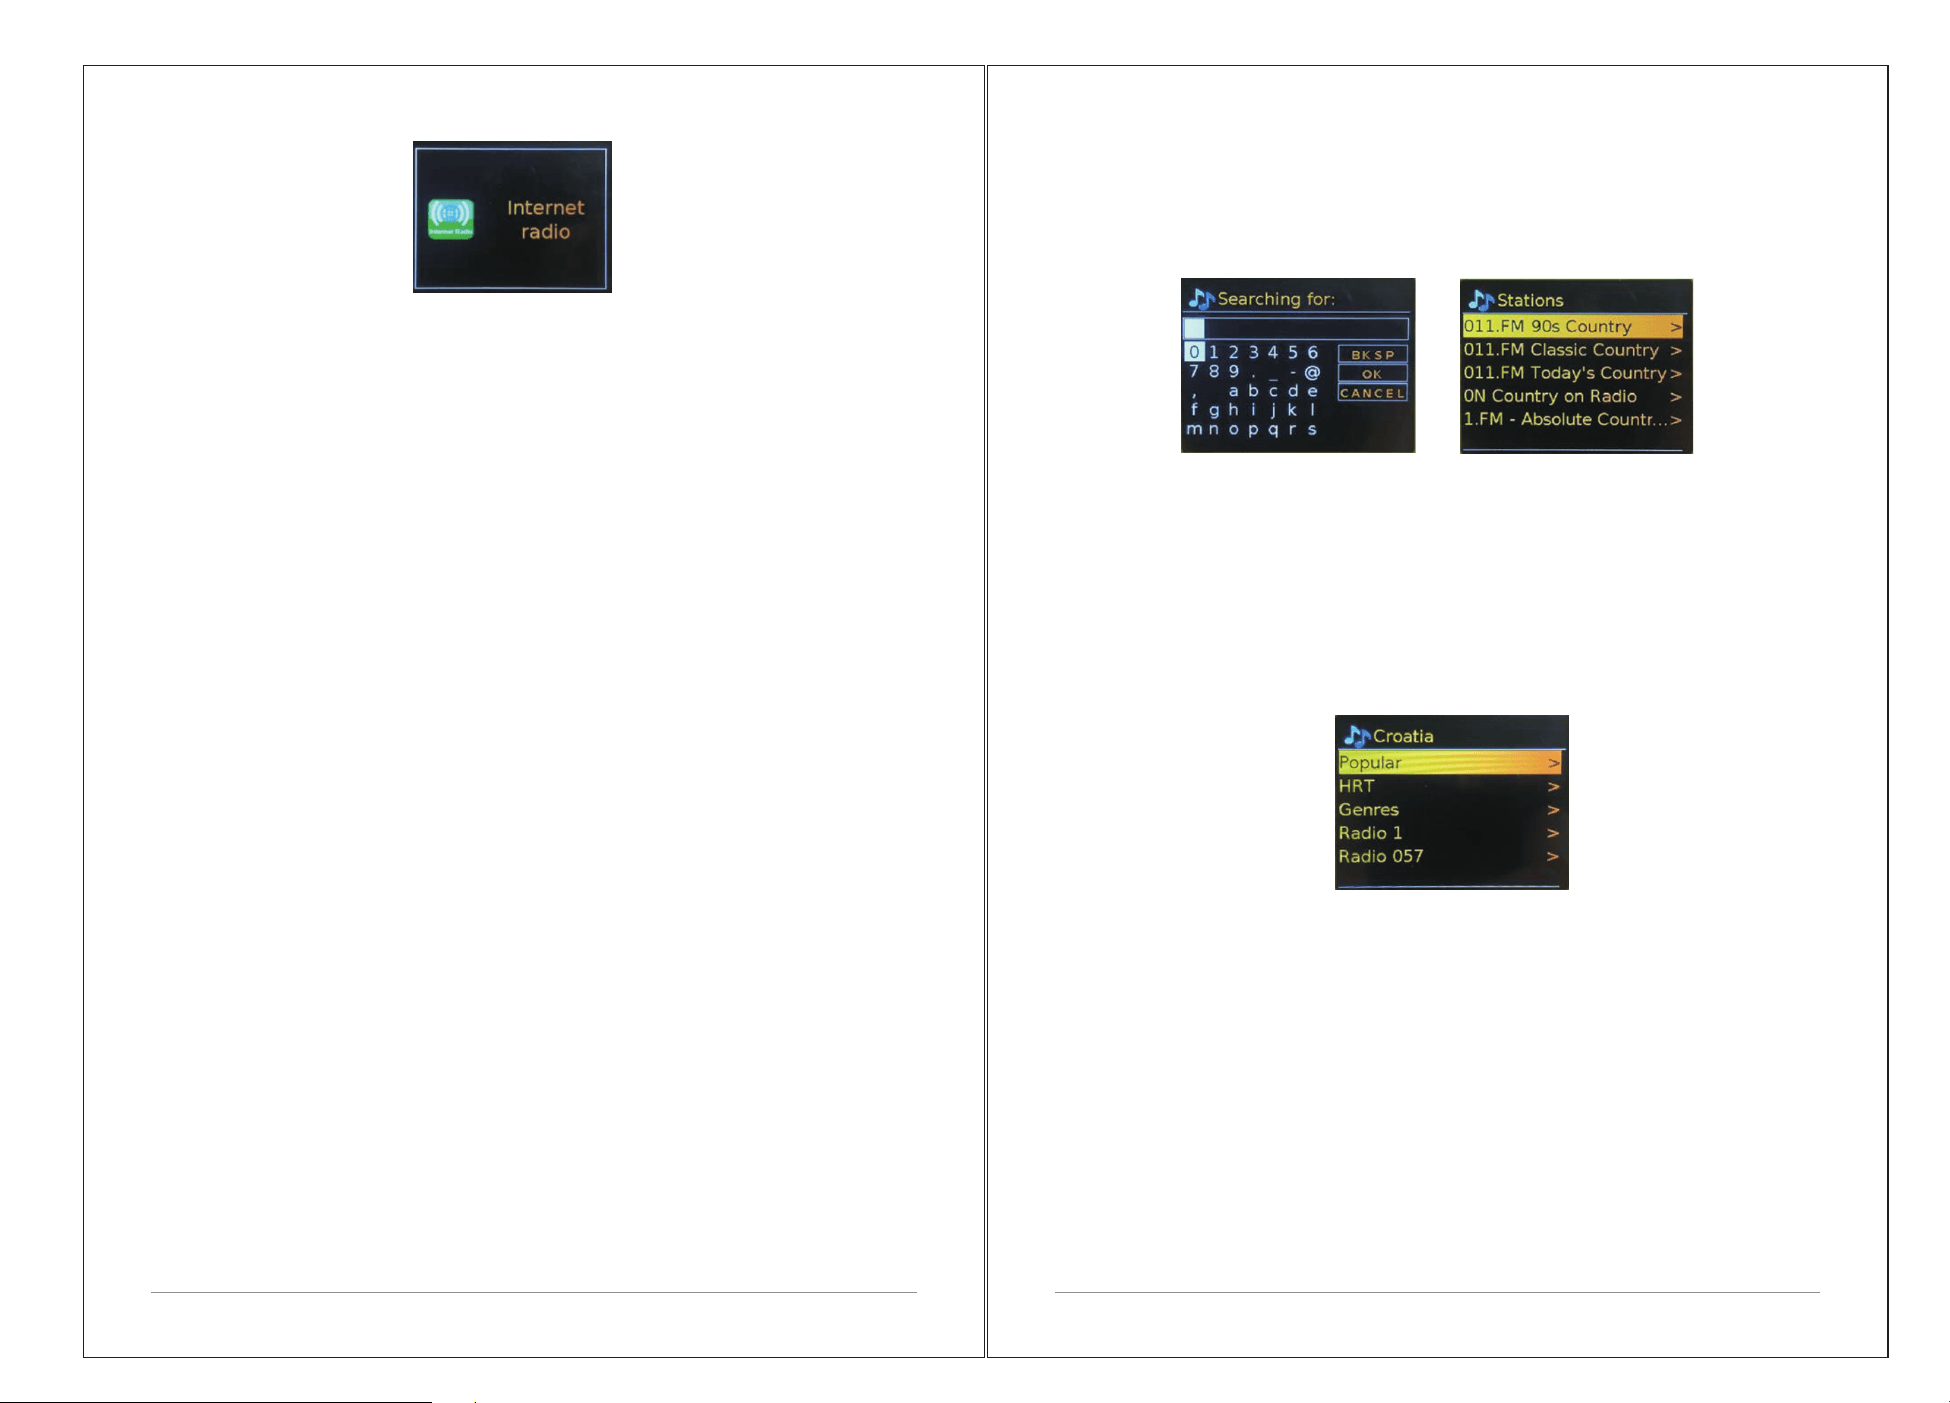
4. Internet radio mode
4.1 Country
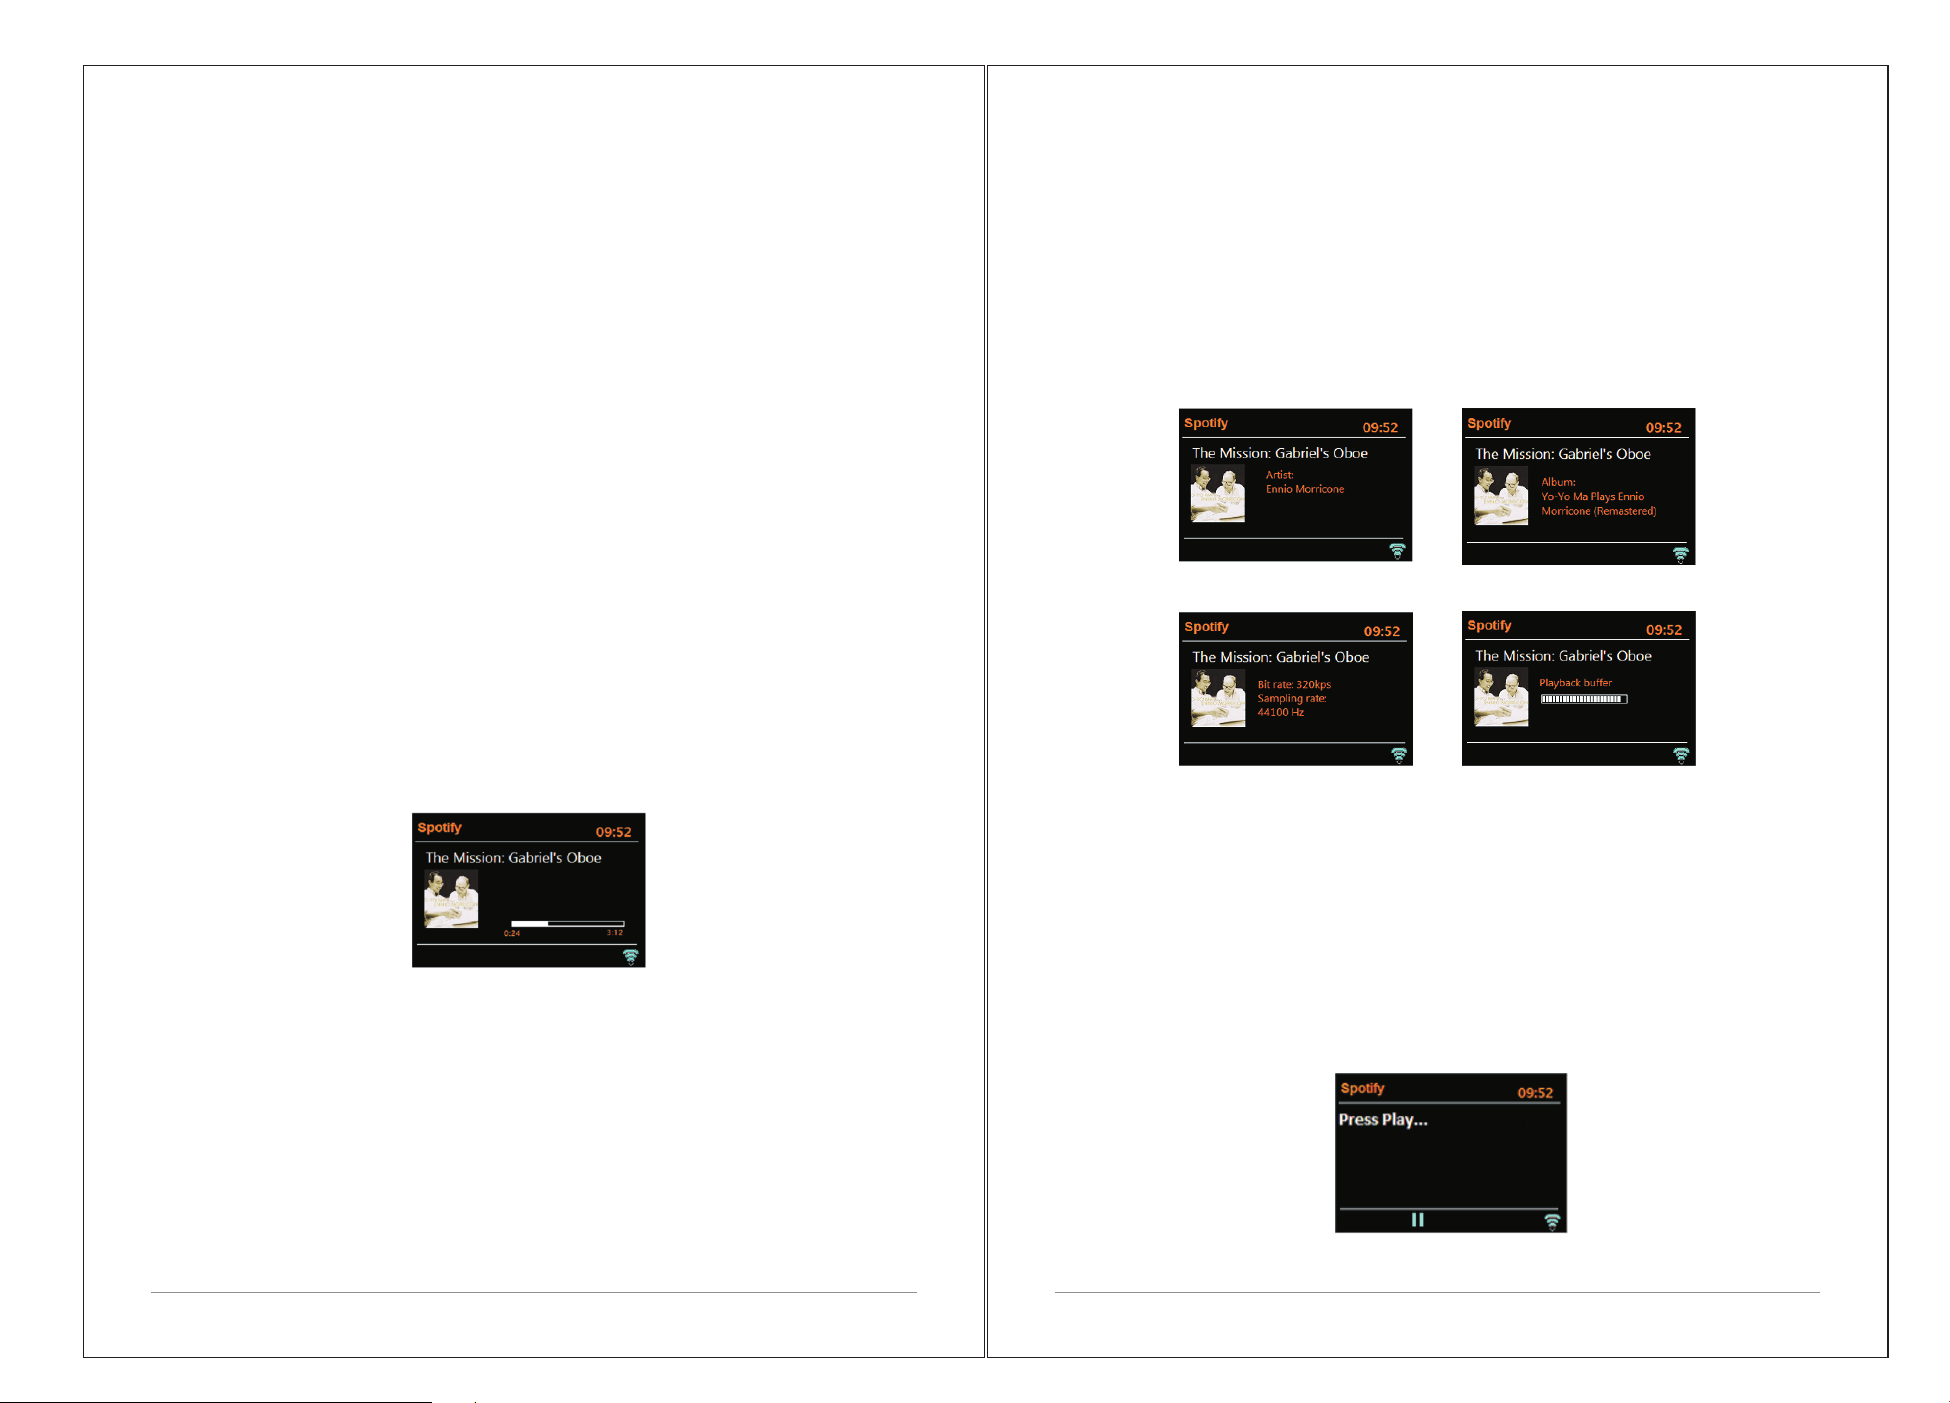
4.2 Search
4.3 Location
4.4 Popular
4.5 Discover
4.6 Now playing information
5. Spotify Connect
5.1 Control from M3P
5.2 Info
5.3 Info message
5.4 To use Spotify Connect
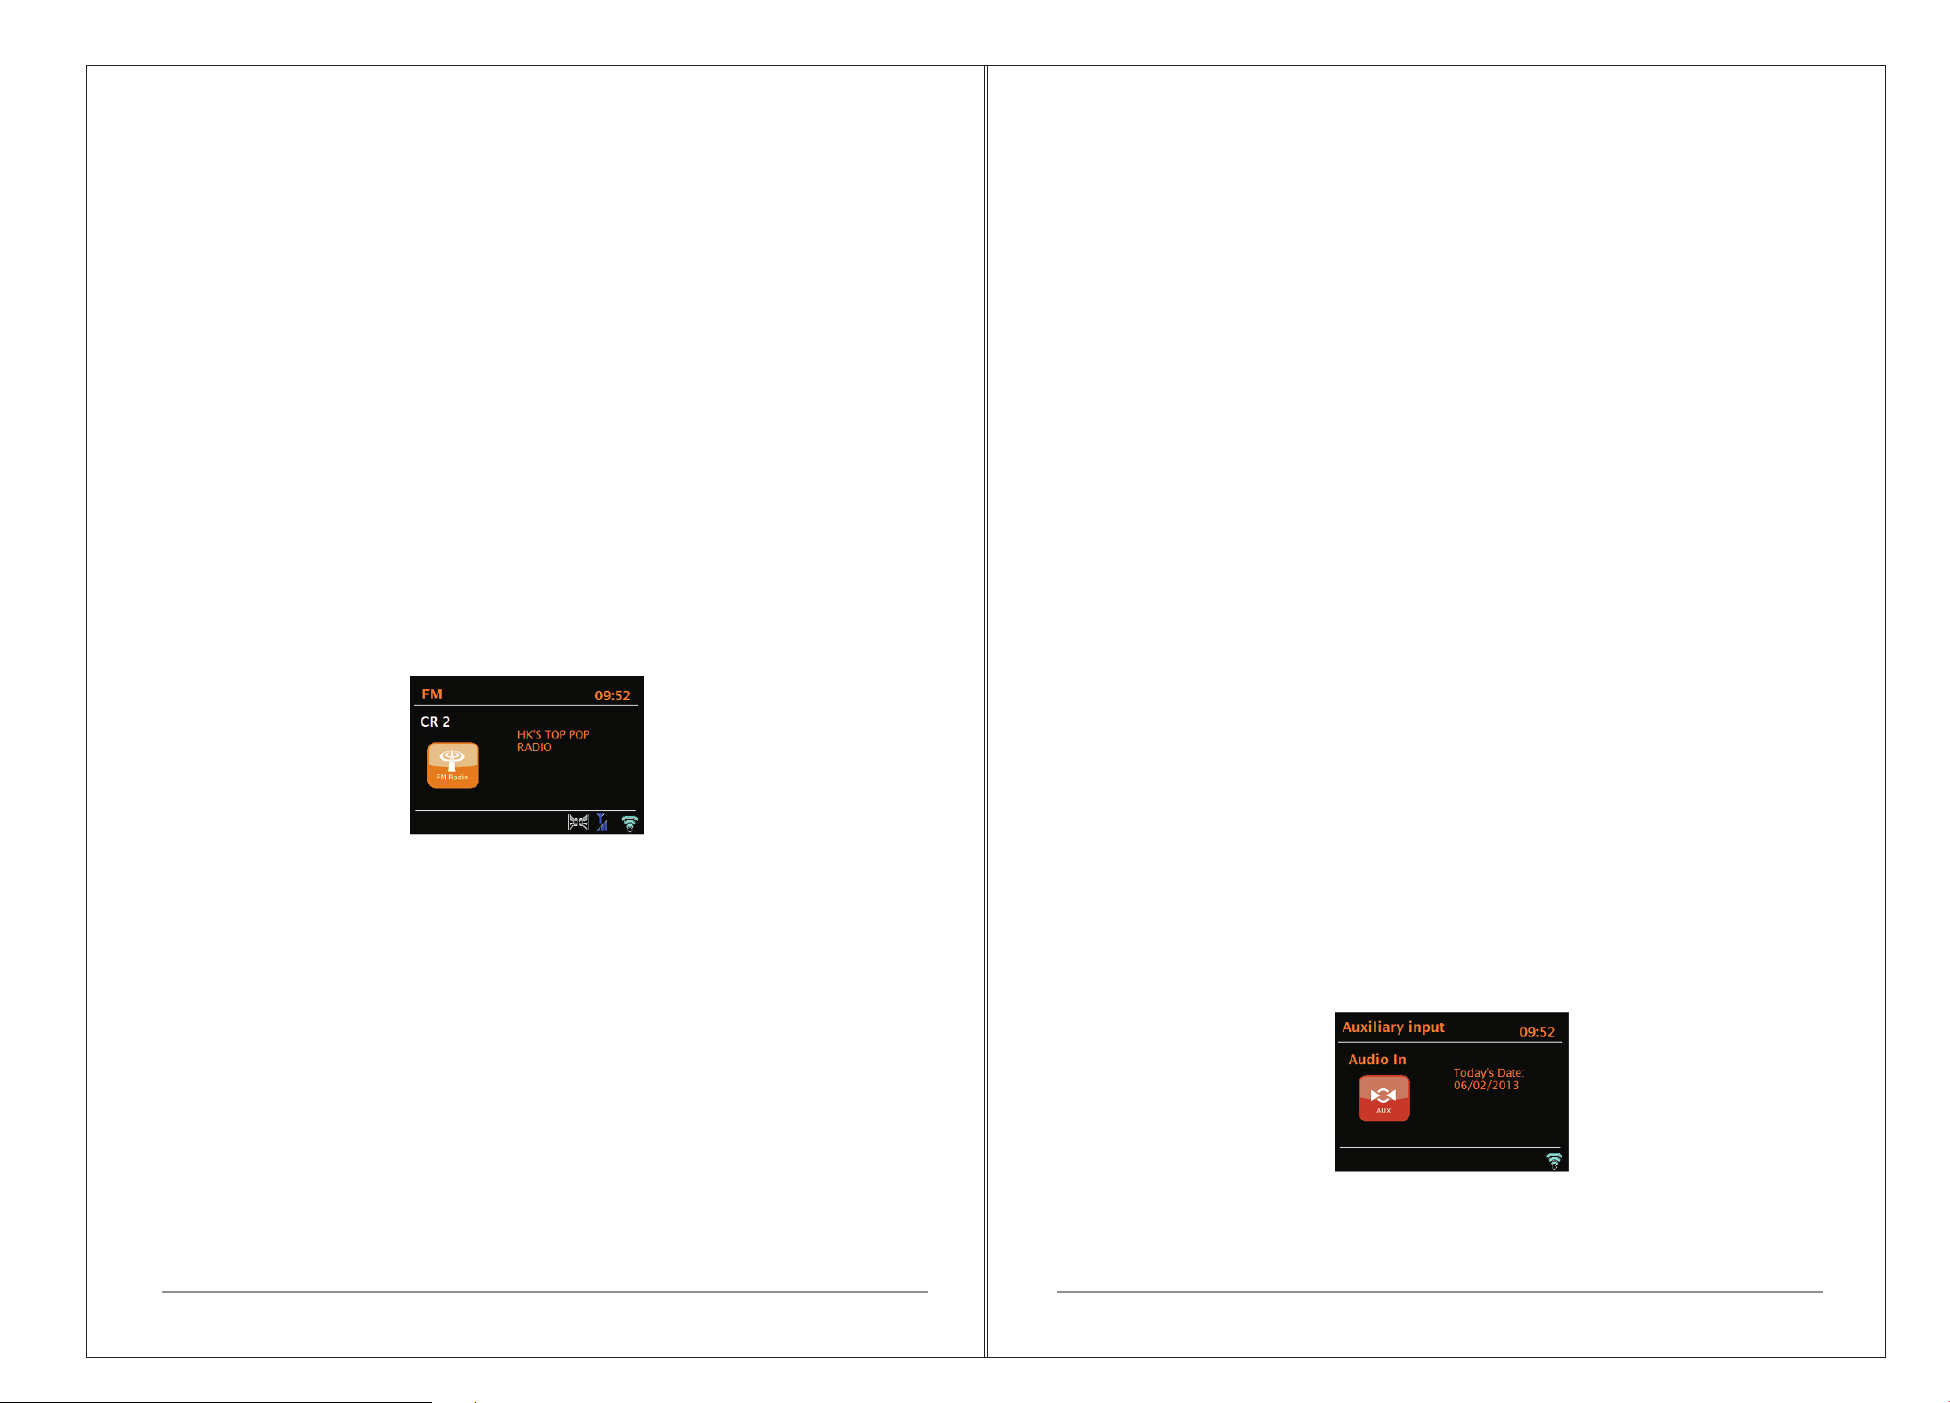
6 DAB radio mode (Optional)
6.1 Scanning for stations
6.2 Selecting stations
6.3 Now playing information
6.4 Settings
…… …………………………………01………………
…… …………………………………02………………
…… …………………………………03…………
…… …………………………………03……
…… ………………………03……
…… ………………………03……
…… … ………………………………05…… …
…… … ………………………………06…… …
…… … ………………………………07…… …
…… …………………………………07………
…… …………………………………10………
…… …………………………………11………
…… …
………………………………12
…… …
…………………
…………………12
…………
………………
……………13
………
……
… 13……
…………
…………………………
……………………………………………13
…… …… ……………………14… ………
… …… ……………………16… ………
…… …… ……………………15… ………
…… …… ……………………17… ………
…… …… ……………………16… ………
…… …… ……………………17… ………
…… …… ……………………13… ………
…… …… ……………………15… ………
…… …… ……………………16… ………
…… …… ……………………14… ………
…… …… ……………………15… ………
…… …… ……………………17… ………

7 FM radio mode
7.1 Selecting stations
7.2 Now playing information
7.3 Settings
8 Aux mode
9 Bluetooth mode
10 Alarms and sleep
10.1 Alarms
10.2 Sleep
11 Software upgrade and factory reset
11.1 Software upgrade
11.2 Factory reset
12 Troubleshooting and error messages
12.1 Error messages
12.2 Troubleshooting
13 Technical Specification
…… …………………………21……………
…… ………………………………18………
…… ………………………………19………
…… ……………………………22…………
…… ………………………………18………
…… ………………………………20………
…… ………22……………
…… ………………………………18……
…… ………………………………20………
…… …………………………22……………
…… ………………………………19………
…… ………………………………19………
…… ………………………………21………
…… ………………21………
……………………………………………23
…… …………………………25…………
1. Safety
1.1 Safety Instructions
Please store this instruction manual for future reference.
Ÿ WARNING: To reduce the risk of fire or electric shock, do not expose this
apparatus to rain or moisture. The apparatus shall not be exposed to dripping
or splashing and that objects filled with liquids, such as vases, shall not be
placed on apparatus.
Ÿ WARNING: The direct plug-in adapter is used as disconnect device, the
disconnect device shall remain readily operable.
Ÿ This lightning flash with arrowhead symbol within an equilateral triangle is
intended to alert the user to the presence of non-insulated “dangerous
voltage” within the product's enclosure that may be of sufficient magnitude to
constitute a risk of electric shock.
Ÿ Warning: To reduce the risk of electric shock, do not remove cover(or
back) as there are no user-serviceable parts inside. Refer servicing to
qualified personnel.
Ÿ The exclamation point within an equilateral triangle is intended to alert
the user to the presence of important operating and maintenance
instructions in the literature accompanying the appliance.
Ÿ Correct Disposal of this product. This marking indicates that this
product should not be disposed with other household wastes throughout the
EU. To prevent possible harm to the environment or human health from
uncontrolled waste disposal, recycle it responsibly to promote the
sustainable reuse of material resources. To return your used device, please
use the return and collection systems or contact the retailer where the
product was purchased. They can take this product for environmental safe
recycling.
Ÿ No naked flame sources, such as lighted candles, should not be placed
on the apparatus.
Ÿ Do not use this product near water or moisture.
Ÿ Clean only with a dry cloth.
Ÿ Unplug this product from the wall outlet before cleaning.
Ÿ Place th unit on a solid surface.
1 of 25

3 of 25
Ÿ Do not put it in a closed bookcase or a cabinet that may keep air from
flowing through its ventilation openings.
Ÿ Do not install near any heat sources, such as radiators, heat registers,
stoves or other appliances that produce heat.
Ÿ Protect the power cord from being walked on or pinched, particularly at
plugs and the point where they exit from the product.
Ÿ Servicing is required when the product has been damaged. Do not attempt
to service this product yourself. Opening or removing covers may expose you
to dangerous voltages or other hazards. Please contact the manufacturer to
be referred to an authorized service center near you.
Ÿ To prevent risk of fire or electric shock, avoid over loading wall outlets,
extension cords, or integral convenience receptacles.
Ÿ Do not let objects or liquids enter the product.
Ÿ Use proper power sources. Plug the product into a proper power source,
As described in the operating instructions or as marked on the product.
1.2 Features
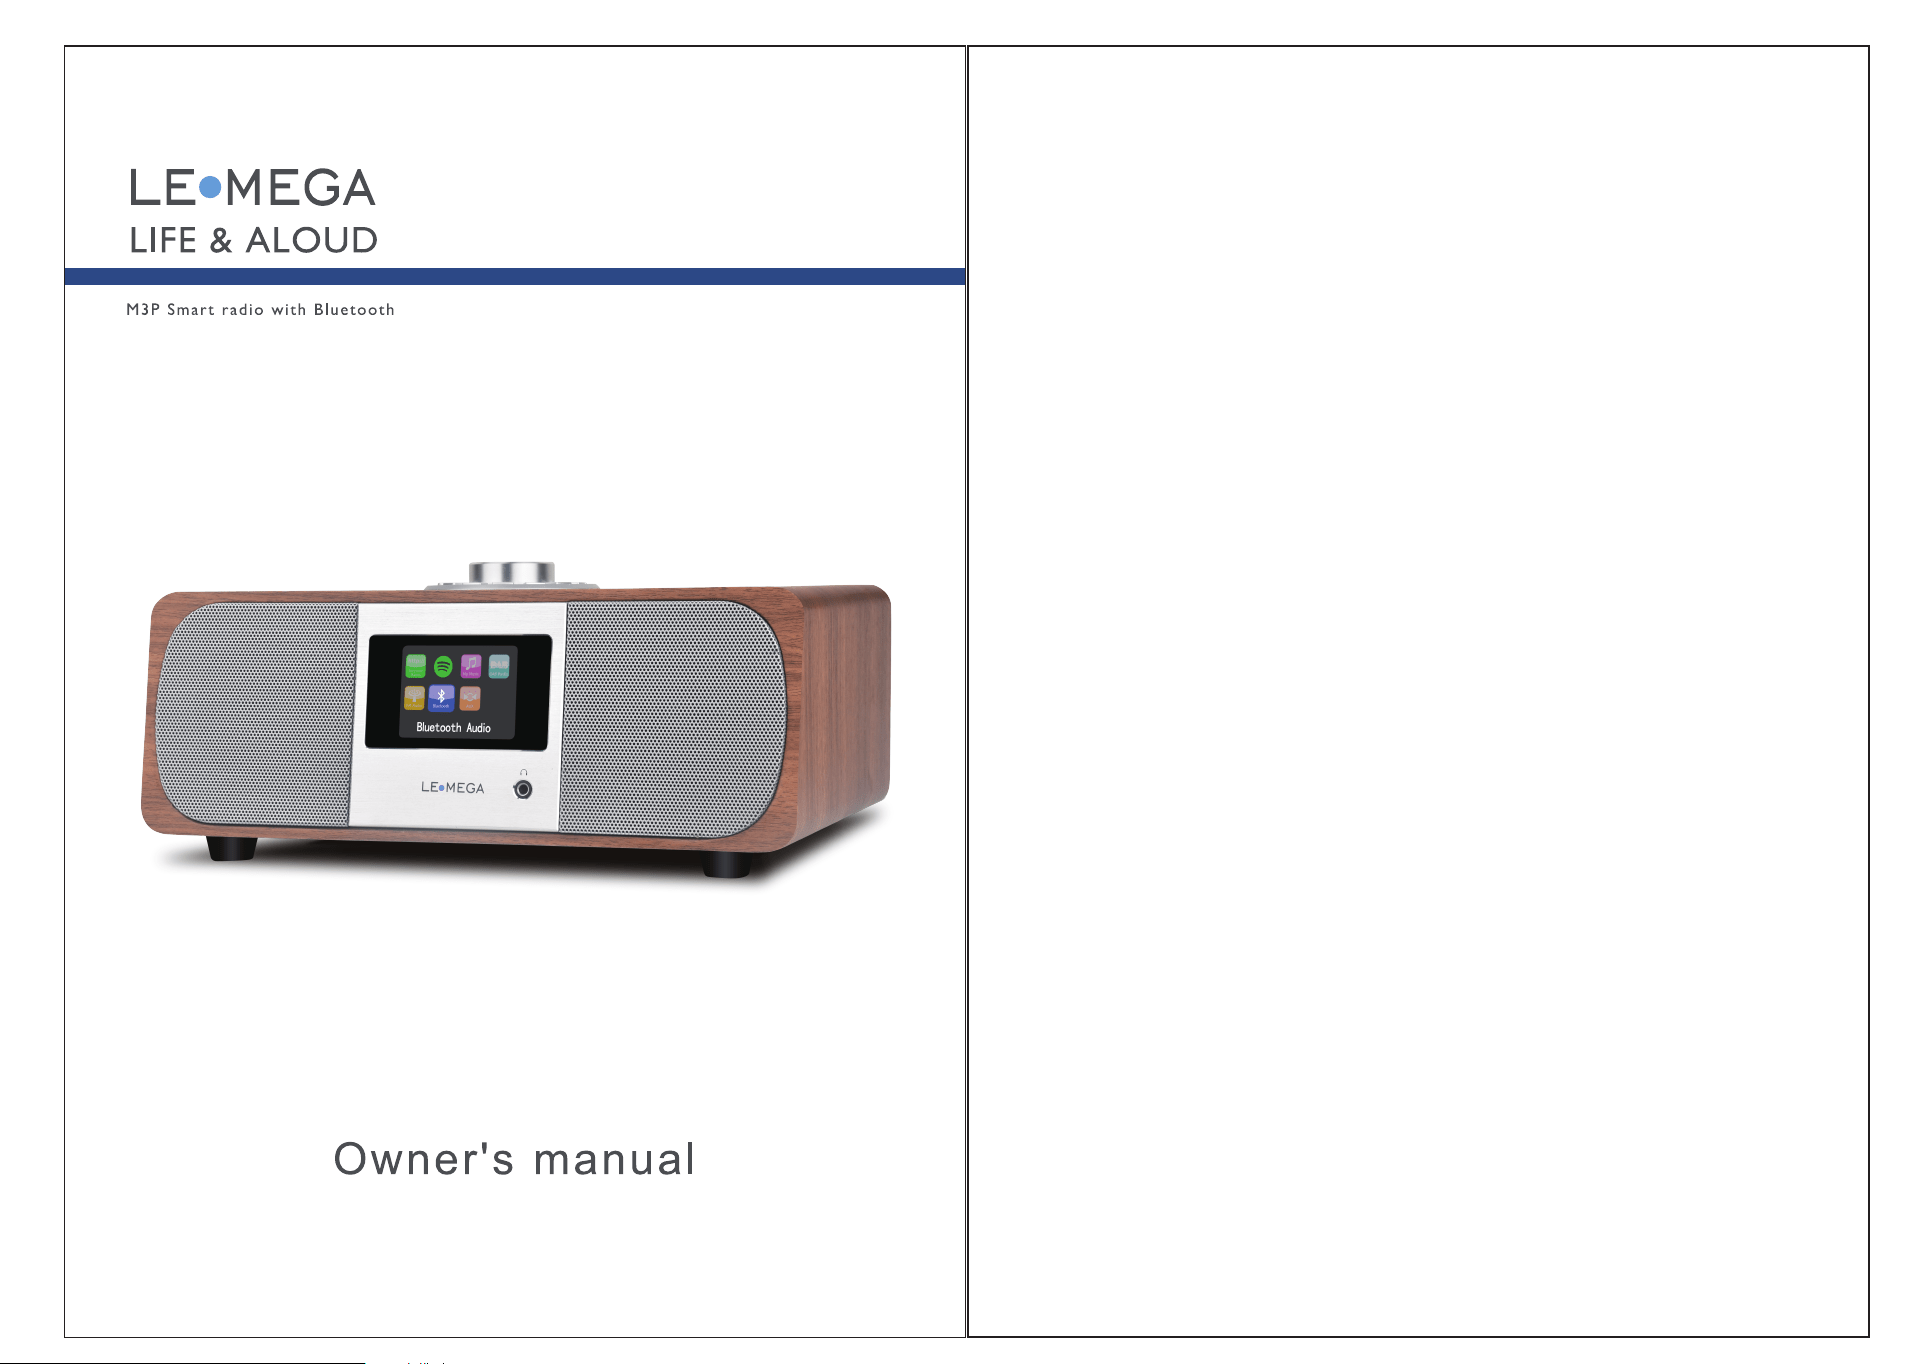
This manual describes how to use the M3P, an advanced but easy-to-use
Wi-Fi connected audio system with the following modes:
9. Two Alarm timers with snooze feature to wake you to either a buzzer
or a radio alarm.
10. Adjustable sleeper timer can be set to turn the audio system off after a
delay.
11. Menu display in a choice of languages.
12. Auxiliary input for playing audio from Mp3 players, iPods or other audio
equipment.
1.3 Carton contents
After you unpack the box, you will find the following items
Ÿ 1 M3P unit
Ÿ 1 DC12V 2.5A power adapter
Ÿ 1 owner's manual
Ÿ 1 Remote Control
Ÿ 1 warranty card
2. Controls, connectors and display
2.1 Main controls
2 of 25
1. Listen to local, regional, national and international broadcasts using FM,
DAB and Internet radio
2. Listen to thousands of radio stations from around the world and listen to
podcasts from a wide range of broadcasters.
3. Radio station presets (20 internet radio, 20 DAB, 20FM)
4. Mp3, WMA,AAC,FLAC and WAV formats are supported.
5. Spotify Connect allows your spotify selections to be played through the
audio system, remotely controlled from your iPhone, iPad, Android device.
6. Supports remote control and play music from Apple iPhone, iPad android
devices using the UNDOK app.
7. Bluetooth streaming to play your music or video soundtracks from your
smartphone, tablet or similar device.
8. Large clock display with time and date when in Standby.
7
3
8
4
9
5
10
6
1
11
12
13
14
15
2
5 of 25
4 of 25
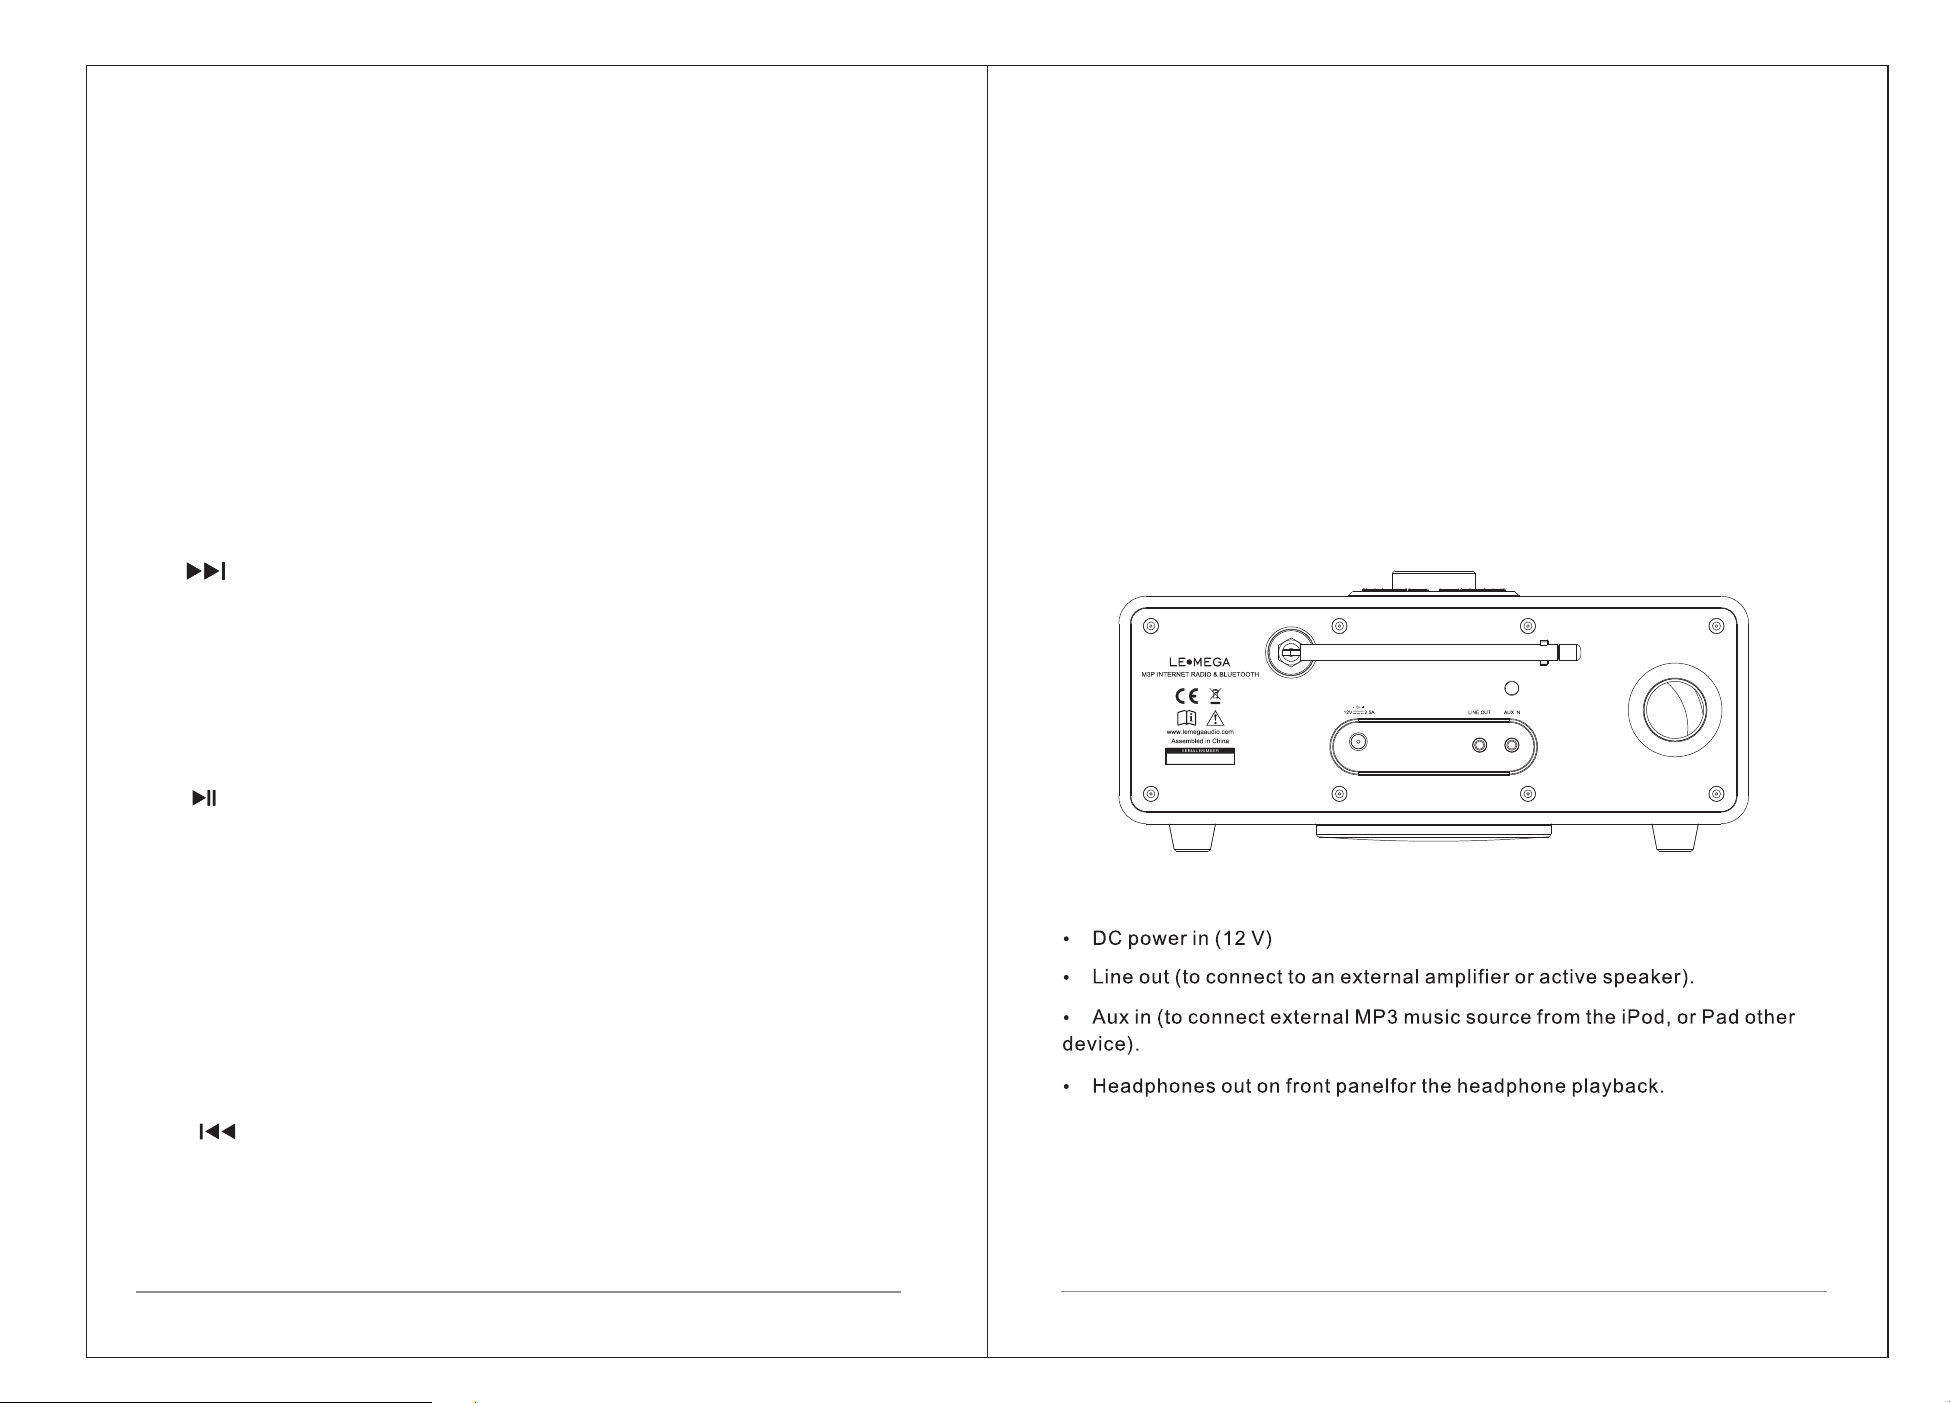
1. SELECT/ VOLUME/MUTE/SNOOZE:
a. SELECT: Turn to scroll through a menu or station list. The chosen option is
highlighted, Press to the button to select.
b. VOLUME: Turn to the button to adjust the volume up or down when
playback.
c. MUTE: Press to the button to mute the music when playing.
d. SNOOZE: Press the button to snooze a set time when alarm sounding.
e. POWER ON | OFF the unit: Long press this button to power on/off the unit.
2. INFO: View more information about the station or track playing. Press
again to cycle through further information screens then return to the normal
Now playing screen.
3. / [TUNE+] : Next: Press to select the next track under FM/DAB/
Bluetooth mode; Press and hold the Tune+ button 2 seconds to auto scan the
stations under the FM mode.
4. MENU: press the MENU to show the MENU for the current mode. Press
again to show now playing screen.
5. BACK : press the BACK to return to the previous screen.
6. : Press to select Play/Pause under internet radio, Spotify, Bluetooth
mode. In FM mode, press to do auto scan the stations.
7. SOURCE: Press to Source to select different modes internet radio, Spotify,
Music Player, DAB, FM, Bluetooth and AUX.
8. SLEEP: When playing, press Sleep, M3P will back to set sleep time. When
playing, opens the sleep menu to set the time interval before the unit is set to
Standby mode. When alarm is sounding, allows you to set the snooze interval.
9. ALARM: Press to Alarm, the screen will display Alarm 1 and Alarm 2; then
Rotate and press the SELECT button to select alarm 1 or alarm 2 to set up.
10. / [TUNE-] : Previous: Press to select the previous track under
FM/DAB / Bluetooth/CD mode; Press and hold the Tune- button 2 seconds to
auto-scan the stations under the FM mode.
11. PRESET: Long press preset to preset and save the favorite stations (save
20 favorite stations); Short Press to preset to select the favorite station or
Preset recall. You can preset 20 stations by scroll the preset list to achieve.
12. BT PAIR: In BT mode, Press this button for pairing and unpaired.
13. DIM: Press Dim to adjust the brightness to High/Mid/Low in turn.
14. SUB: Press to turn on Subwoofer on or Off.
15. EQ: Press this button to access Flat/Rock ……directly.
2.2 Connectors
As shown below has connectors (from left to right)for the followings:
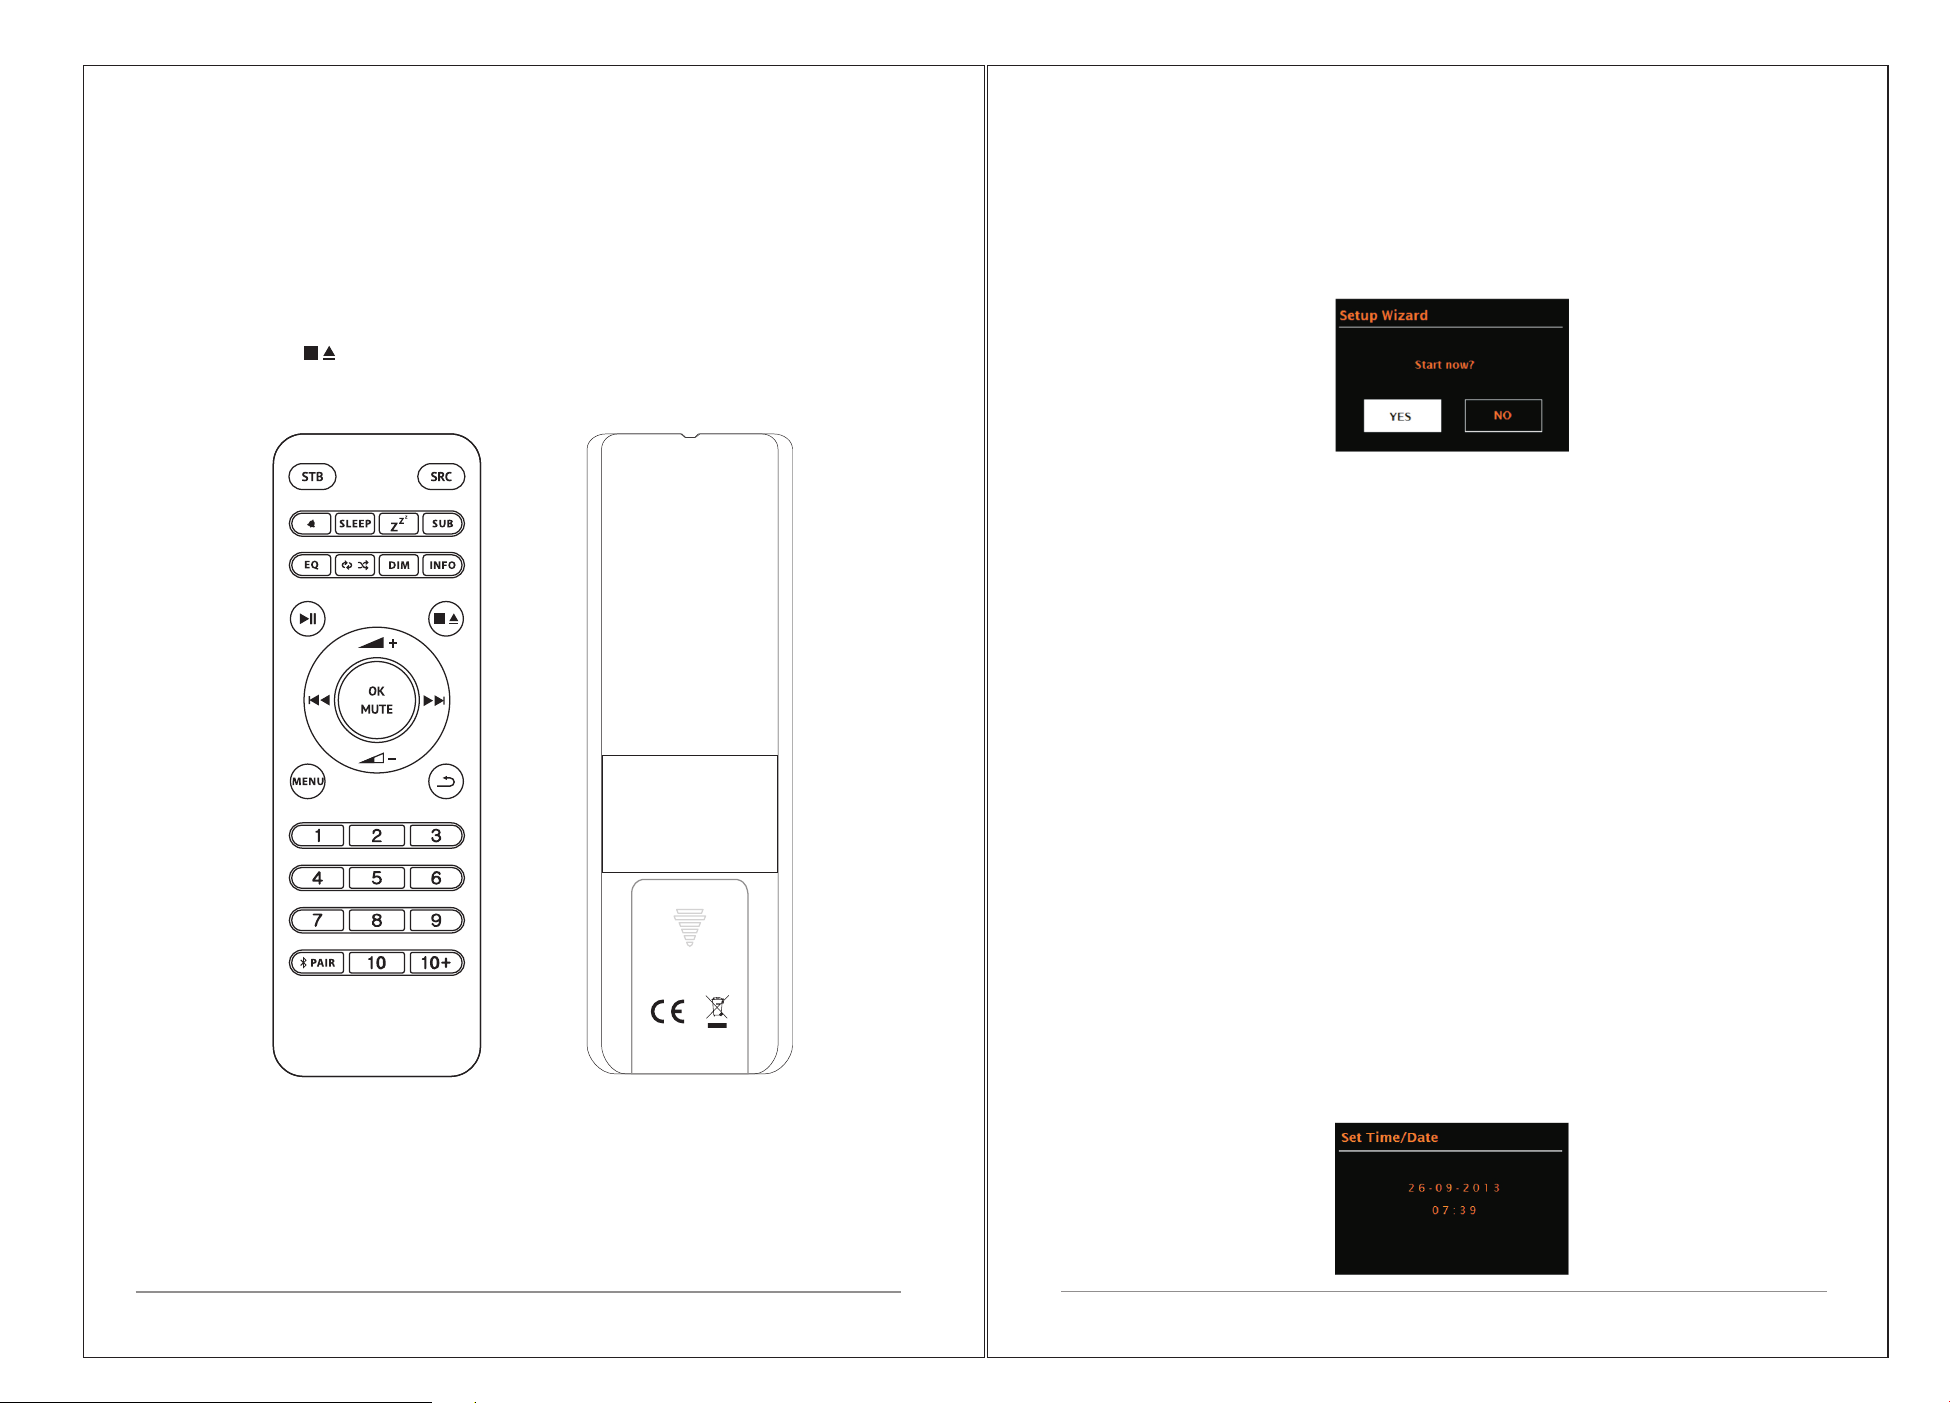
For Internet-
3. Started and setup
M3P is easy to use. To play DAB or FM radio, all you need is a power source (a
100-240 V mains supply);
connected modes such as
Internet radio, you also need a broadband Internet
connection.
3.1 Setup wizard
When M3P is started for the first time, it runs through a setup wizard to
configure settings for date/time and network. Once this has finished, the
system is ready to use in most modes.
Note: To change these settings later, select Menu > System settings >.
To run the setup wizard again, select Menu > System settings > Setup wizard.
Select Yes to start the setup wizard.
If you choose No, the next screen asks if you would like to run the wizard next
time M3P is started. The system then starts without configuring time/date and
network settings and enters the Main Menu.
Note: If power is removed while the wizard is in progress, the wizard will run
again next time M3P is started.
3.1.1 12/24 hour display
To change between 12 and 24 hour display, select Set 12/24 hour and then
select your preference.
3.1.2 Set Time/Date (wizard)
The date and time are displayed as dd-mm-yyyy and hh:mm AM/PM with the
first value, dd, active (flashing).
Adjust each value with the Select control. As each value is set by pressing the
Select control, the next value becomes active ready for adjustment.
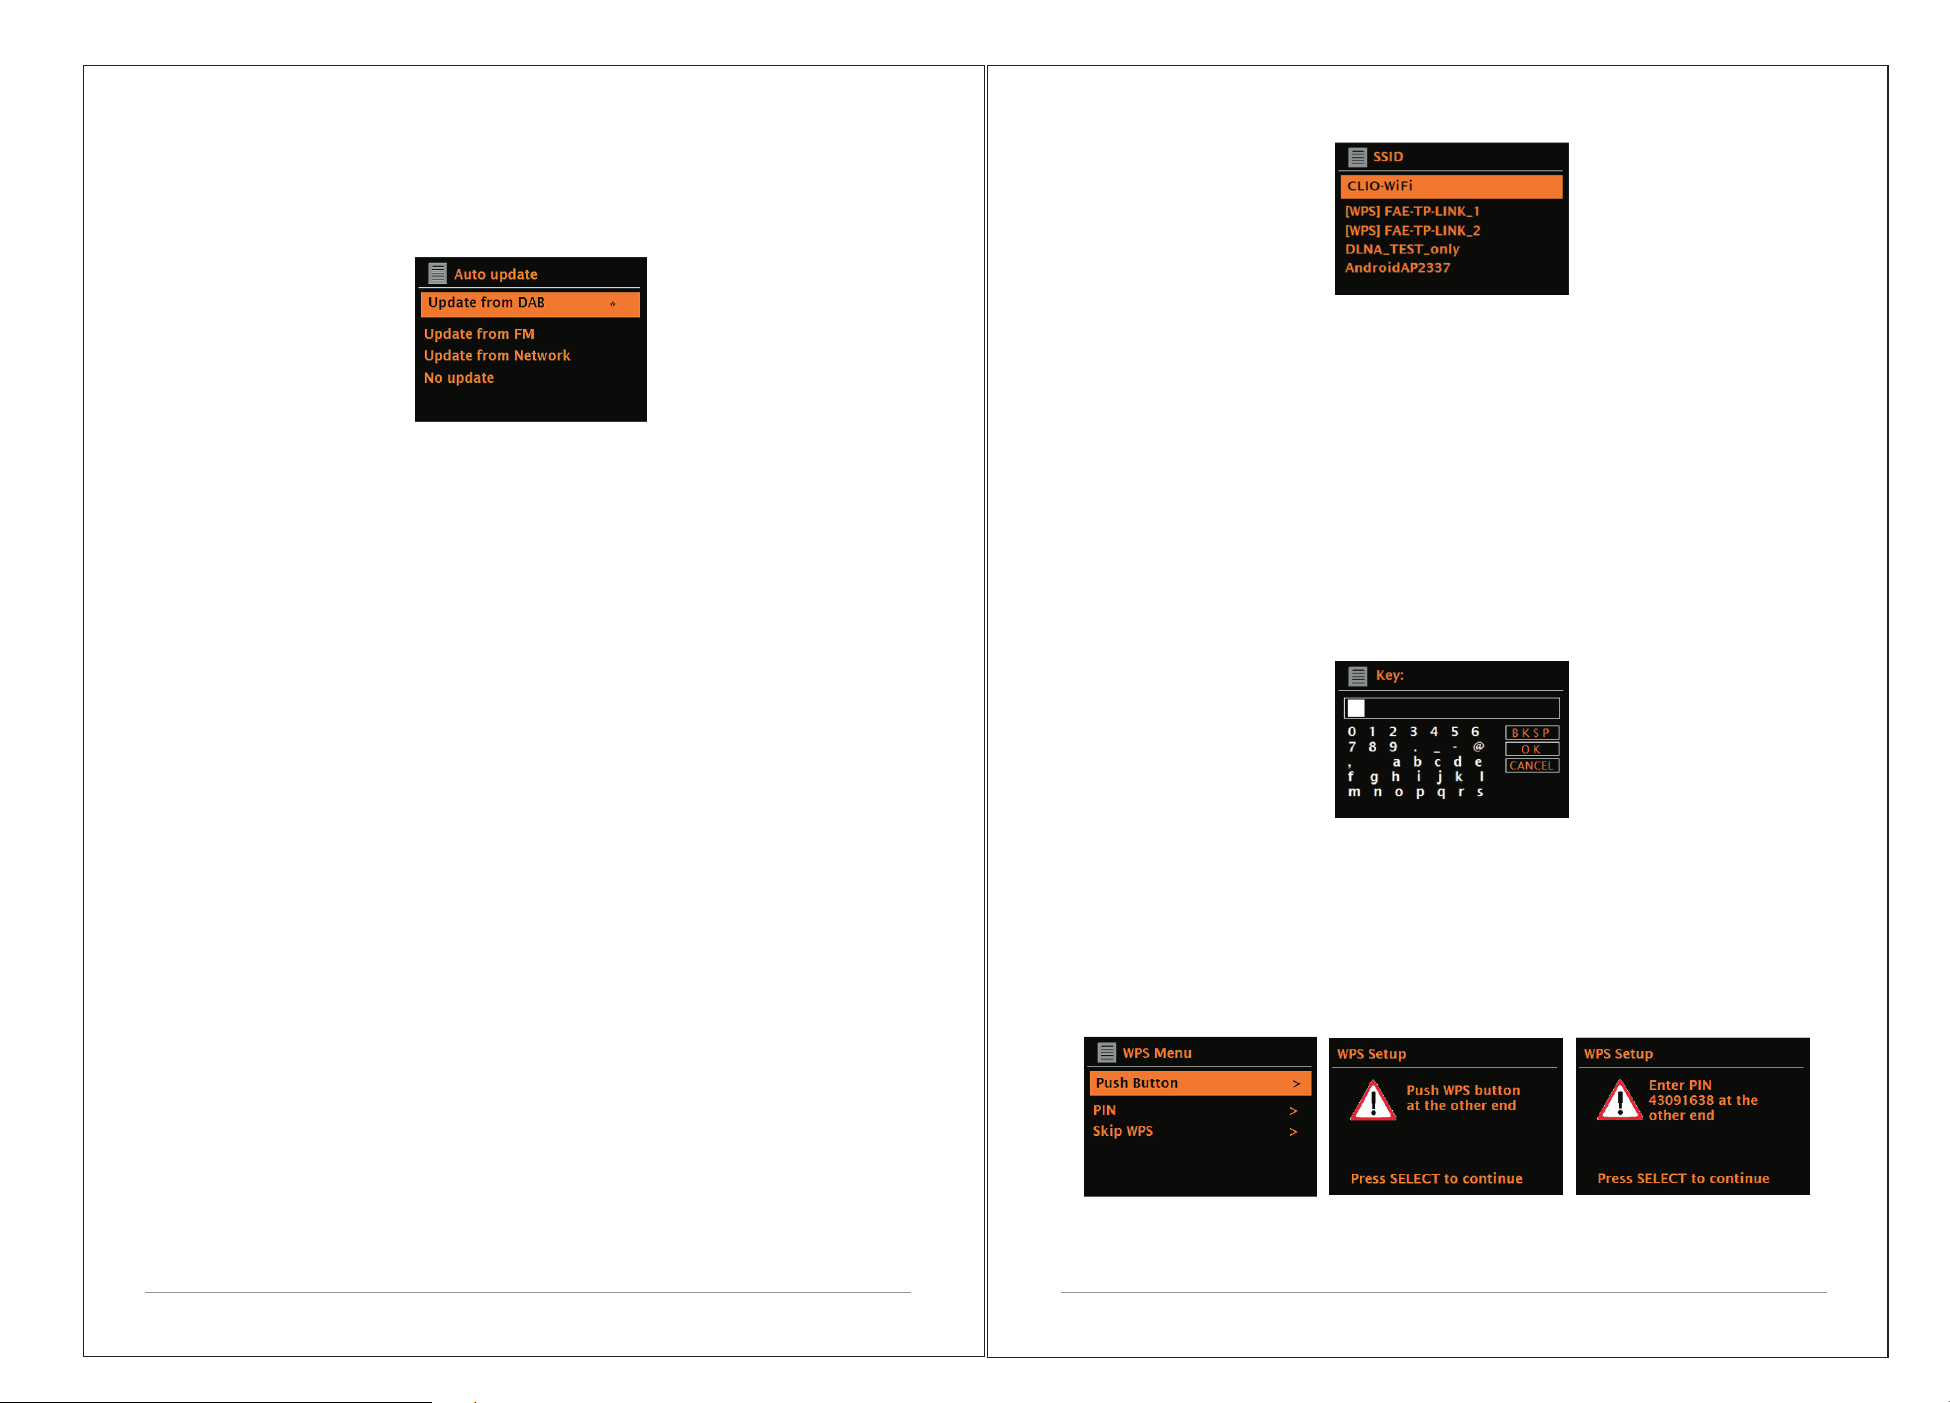
In additional to duplicating most of buttons on top of the unit, the remote
control adds the following functions:
1 . 1 , 2, 3, 4, 5, 6, 7, 8, 9, 1 0, 1 0+: Press to preset the favorite stations. The
presets recalled using the 1 through 10+ buttons on the remote control.
Note:
This button is for CD models and no use on M3P model.
The remote is shared with other models so some buttons is not in
correct action.
2.3 Remote Control
7 of 25
6 of 25
9 of 25
8 of 25
Auto-update
Auto-update works with data sent over DAB, FM or the Internet. The clock is
only updated when in a corresponding mode, so it is best to select a mode you
use regularly.
DAB and FM use time signals broadcast with radio transmissions.
Network uses a time signal sent from the Internet radio portal when in any
network-connected mode.
1.Select Update from DAB, Update from FM, Update from Network or No
update.
2. If you are updating from the network, set your time zone.
3. If your country uses daylight saving, the automatically updated time from
the network may be wrong by one hour. When daylight savings are in effect
(during the winter), turn on the Daylight savings option to rectify this.
Note that if you are updating the time from DAB or FM, the Daylight savings
option has no effect on the clock's time.
M3P will auto-update from the selected source when time information is
available.
Manual set
If you set No update, the wizard now prompts you to set the time and date
manually.
The date and time are displayed as dd-mm-yyyy and hh:mm AM/PM with the
first value, dd, active (flashing).
Adjust each value with the Select control.
As each value is set, the next value becomes active and flashes.
3.1.3 Network
M3P is compatible with all common network protocols and encryption
methods, including Wi-Fi Protected Setup (WPS).
To connect M3P to your network, you need a Wi-Fi wireless router, together
with password key if set Select WLAN region/country >Wi-Fi network (SSID),
and then select a network from the list.
If the network is open (non-encrypted), M3P connects and no further details
are required; see Completion below.
Standard encrypted network
To enter the network’s key (password), use the Select control to highlight the
next relevant character and press to select each character in turn. As each
character is selected, the key is built up near the top of the display.
The three options – Backspace, OK and Cancel are included in the selection
loop.
These can be accessed just using the Select control, or, a short cut Is
available, pressing the Info key, which moves the selection highlight to the
Back Space option.
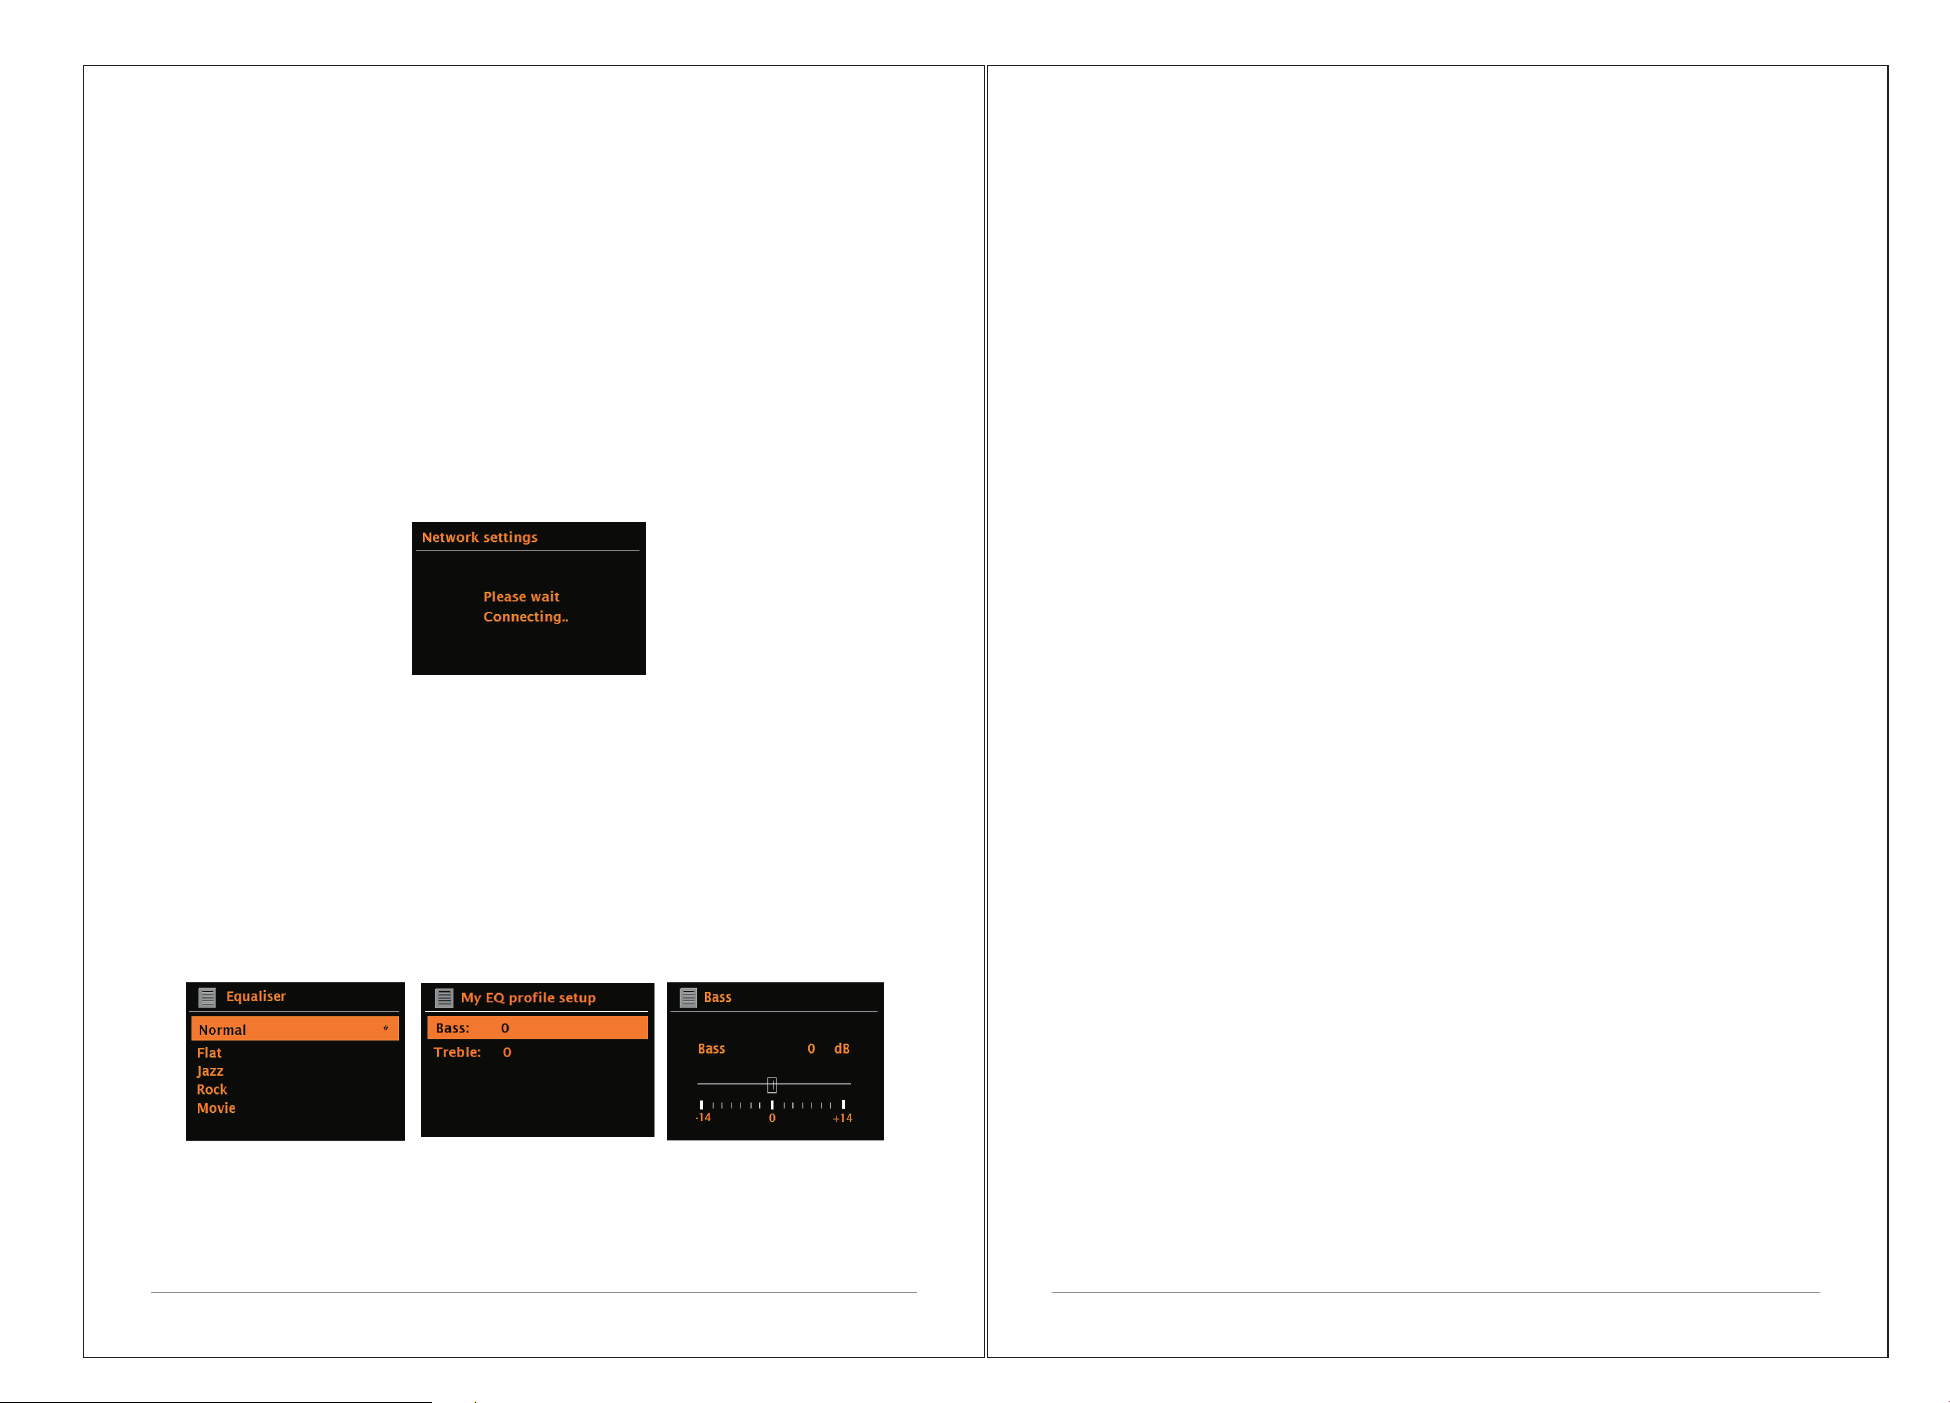
WPS setup
WPS encrypted networks are identified by ‘[WPS]’ at the start of the network
name, and have two methods of connection. Select one and follow the
prompts. When using the network wizard an additional option to Skip WPS is
available.
Select one and follow the prompts:
Ÿ
M3P prompts you to press the connect button on the router. It then press the
Push Button
10 of 25 11 of 25
select control.
Ÿ Pin > (code number)
M3P generates an 8-digit code number which you enter into the wireless
router, access point.
Ÿ Skip WPS >
Enter key as for a standard encrypted network, above. For more information
on setting up a WPS encrypted network, see your WPS router’s instructions.
On completion
M3P connects to the selected network.
If connecting fails, M3P returns to a previous screen to try again. To exit the
process use the Back/Menu button.
3.2 Other settings
Sections for those modes. Common settings are covered below.
3.2.1 Equalizer
Several preset EQ modes are available; also a user-defined setting (My EQ).
To choose an EQ setting, select Menu >System settings > Equalizer. You can
then choose from a variety of preset modes and My EQ
The last option ‘My EQ profile setup’ allows you to define your own settings
for the ‘My EQ’ option, with custom bass, and treble settings.
3.2.2 Network
M3P remembers the last four wireless networks it has connected to, and
automatically tries to connect to whichever one of them it can find. You can
see the list of registered networks through Menu > System settings >Network
> Network profile >From here you can delete unwanted networks by turning
and pressing Select then confirming delete Yes.
There are also other options for viewing and manually altering network
settings from Menu > System settings > Network > (for example setting up a
wired network).
Users experienced with networking may find these options useful for
diagnosing and fixing network problems.
3.2.3 Language
The default language is English. To change, select Menu > System settings
> Language >then select your language.
3.2.4 Connection your smartphone with the radio via UNDOK APP
To connect your Smartphone with M3P you need to download the free app
“UNDOK“ from Apple Store or Google Play Store. IMPORTANT: The phone
must be in the same wireless network as the music system.
Ÿ Download the app and open it.
Ÿ The app automatically searches for available devices. Select “LEMEGA
M3P” from the list.
Ÿ Open SOURCE to choose between different input signals.
Ÿ Open BROWSE to get a list of available stations. Select the desired station.
Ÿ Open NOW PLAYING to get more information about the channel.
Ÿ Open the settings to adjust the equalizer, set sleep timer and other
functions easily.
4. Internet radio mode
M3P can play thousands of radio stations and podcasts from around the world
though a broadband Internet connection.
When you select Internet radio mode, M3P contacts the Frontier Silicon
Internet radio portal to get a list of stations, organized into different
categories like Country, Most popular and Genre.
Once you select a station, M3P connects directly to that station.
12 of 25 13 of 25
Enter a keyword by selecting characters in turn, then OK.
The search entry screens are similar in operation to the Wi-Fi passphrase
entry screen.
Select a broadcast from the list.
4. 3 Location
To select an Internet broadcast from a particular location, select Menu >
Location >.
Select a continent from the menu and a list of countries available is
presented, select a country and the available internet radio stations are
presented.
Choose a radio station from the list to tune to that station.
4. 4 Popular
Presents a list of the most popular internet stations from around the world.
4. 5 Discover
Allows you to select from a list of stations defined by either their origin
(Country), Genre (style of music) or language. Navigate through the category
options; once you have made your selection a screen confirms your selected
category and the number of stations within that category. To see the list,
select the option showing the number of available stations.
4. 6 Now playing information
While the stream is playing, the screen shows its name and description. If
artist and track information is available, this is also shown. To view further
information, press Info .
To enter Internet Radio mode, press Source until the display shows Internet
Radio.
Note: The station list menu is provided from the Internet radio portal, so it is
only accessible when M3P is connected to the Internet. Station lists and
submenus may change from time to time.
The Station list is organized into various categories and search facilities:
Ÿ <Country> This menu item is localized for each country, for example, 'UK',
please update accordingly
Ÿ Search
Ÿ Location
Ÿ Popular
Ÿ Discover.
4. 1 Country
This menu item is localized for each country, for example, 'UK', please
update accordingly.
Presents a sub-menu to search for stations using a variety of categories, for
example, local stations, BBC stations, Genres or stations from a specific city.
Choose the required category and either a further list of sub categories is
shown, or (if there are no further cub-categories) the available stations for the
chosen category are listed.
4. 2 Search
You can also search through Internet broadcasts for stations with particular
keywords in their title.
To search, select Menu > Search .
14 of 25 15 of 25
Each time you press Info, another set of information is displayed, cycling
through the following details:
Ÿ Slogan (default; where available)
Ÿ Language/Location
Ÿ Codec and sampling rate
Ÿ Playback buffer
Ÿ Today's Date
4. 7 Presets
There are up to
resets available for Spotify. Presets are stored in
the radio and cannot be accessed from other radios.
To Store current radio source as a preset, Press and hold Preset until the
display shows the save preset screen. Select on of the presets to save the
currently playing audio source.
To Select a preset, Press Preset briefly, then select one of the listed preset
audio sources. When a preset source is playing, its preset store number ☆n
(☆1,2 etc) is shown in the bottom of the screen.
5. Spotify Connect
M3P is compatible with Spotify connect and allowing M3P to act as wireless
speakers controlled by the Spotify App.
Spotify is all the music you'll ever need. Millions of songs available instantly.
Just serch for the music you love or let Spotify play you something great.
Spotify works on your phone, tablet, computer and home speakers. Go to
Spotify.com/connect to learn more.
Note: Ensure M3P has the Keep Network Connected option turned On. This
will enable Spotify streaming to the M3P when in sleep or a non-network mode
(DAB/FM/AUX IN)
20 presets each for Internet radio ,Podcasts (Combined), DAB
and FM modes. Up to 10 p
5.1 Control from M3P
You can change volume, play/pause the radio and jump forwards and
backwards through your playlist.
Changes made on the M3P are reflect on the Spotify App and vice versa.
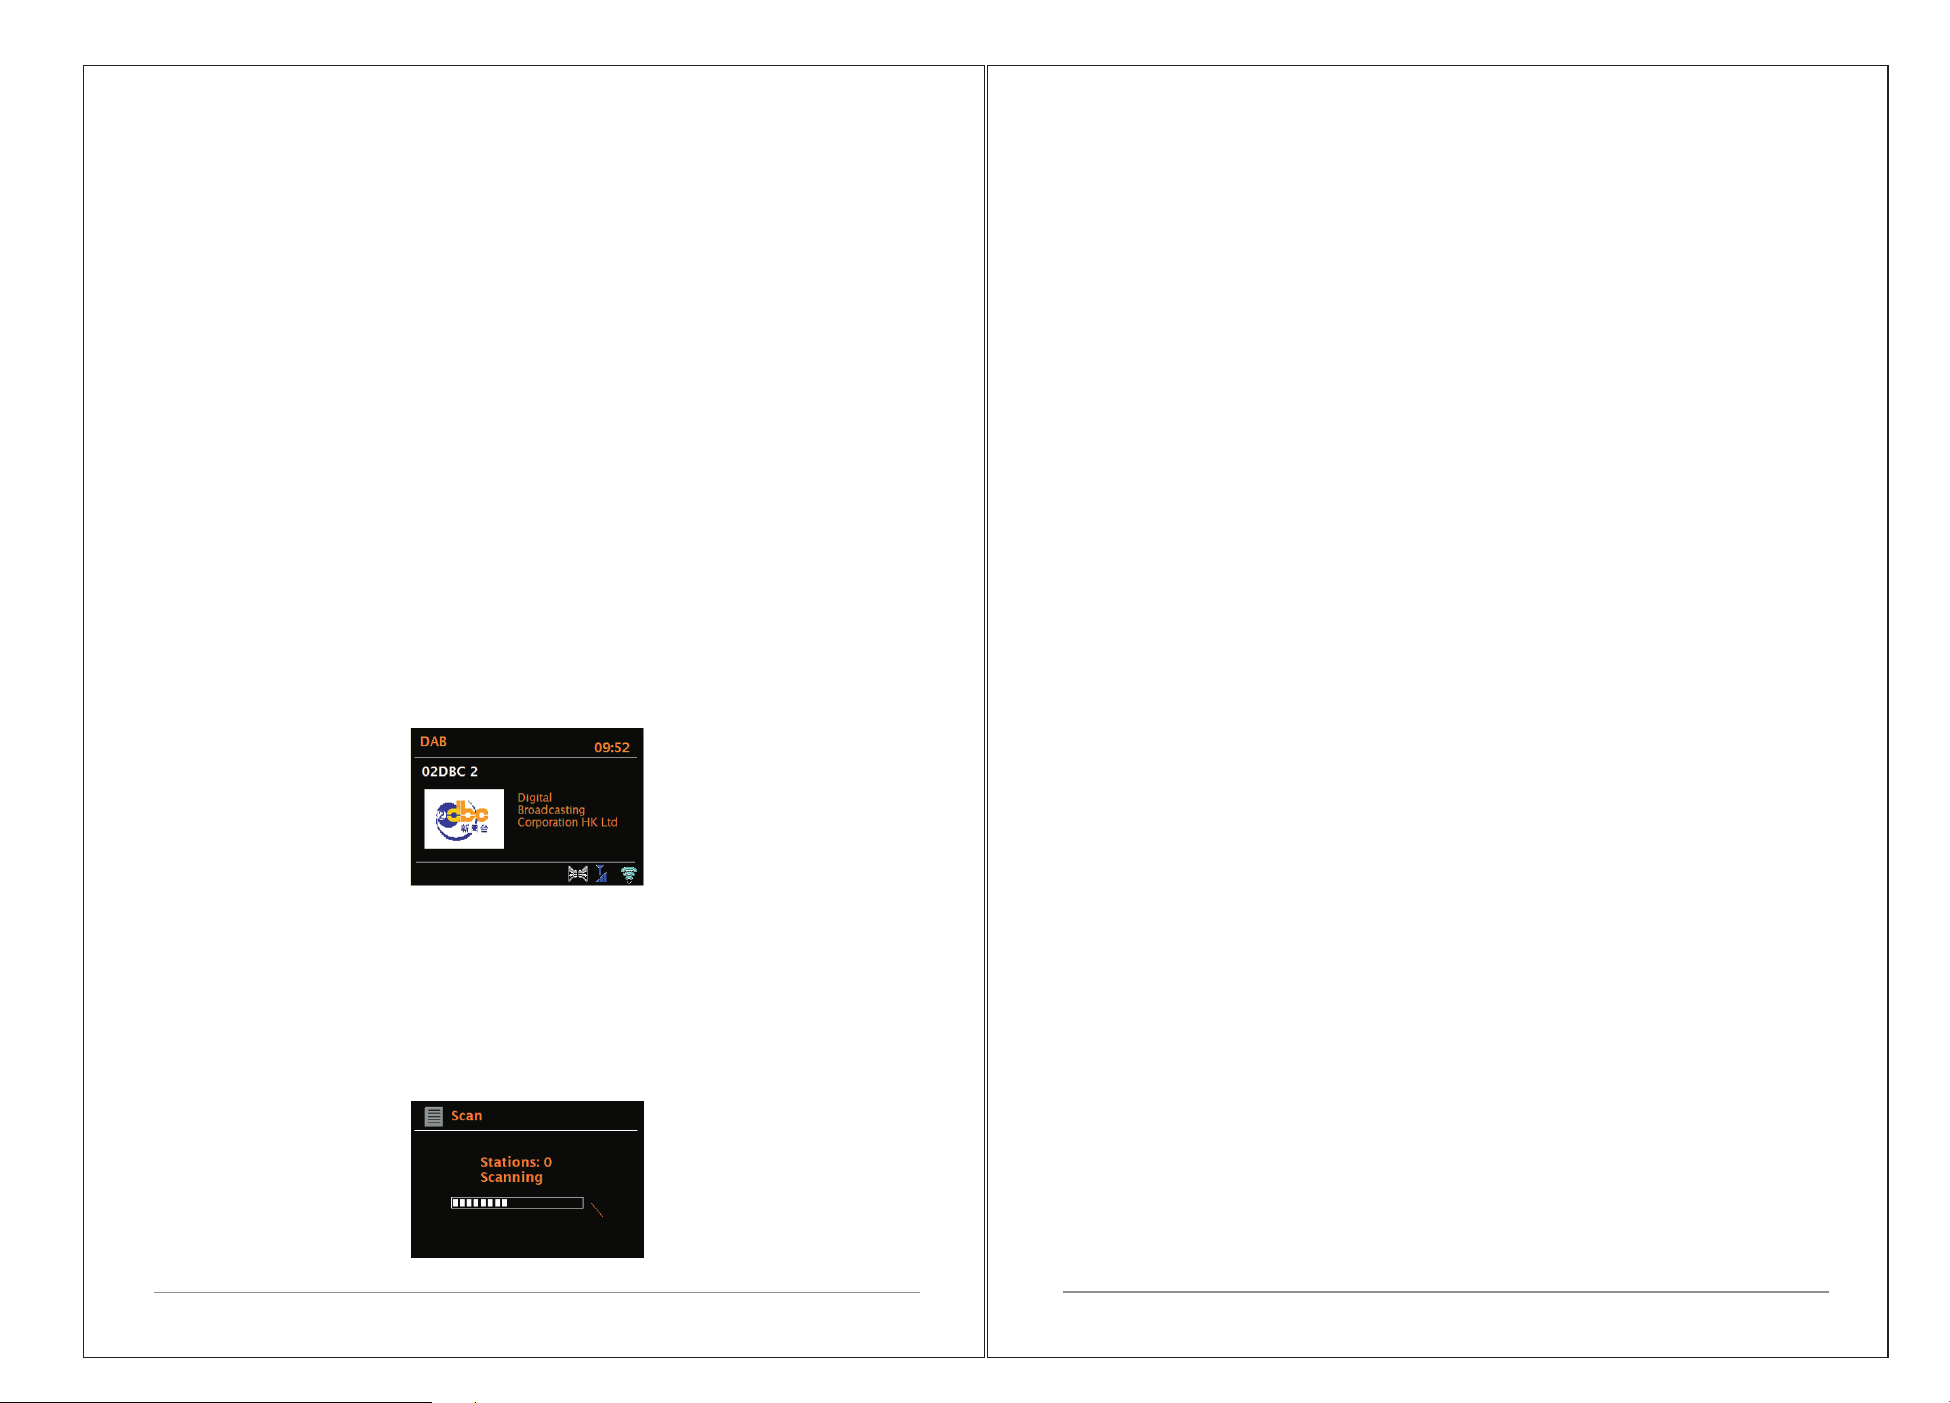
5.2 Info
Pressing the Info button on the M3P cycles through extra information in the
following sequence.
5.3 Info message
Messages are displayed on the M3P when appropriate to show the current
play status. For example: Should the audio stream from Spotify Connect be
interrupted or stopped (For example: When the audio playback is moved by
the Spotify app to a different audio speaker or the smart device itself.) The
message “Press Play…” is displayed. Shuffle and Repeat icons are also
displayed when appropriate along the bottom of the screen.
Artist Album
Playback buffer
Capacity
Streaming data
16 of 25
5.4 To use Spotify Connect
1. Download Spotify app for your Smartphone or tablet ( iOS or Android) .
2. Connect the radio to the same wireless network as your Smartphone or
tablet, and then press the SOURCE button repeatedly to select Spotify Connect
mode.
3. Open Spotify app on your Smartphone or tablet and play a song.
4. Touch the picture of the album at the bottom left of the screen. Then press
Connect icon
5. Press M3P to select your radio and it will start playing from you M3P.
Note that radio is that " LEMEGA M3P "
in Spotify app.
6. DAB radio mode (Optional)
DAB radio mode receives DAB/DAB+ digital radio and displays information
about the station, stream and track playing.
To enter DAB mode, either press Mode until the display shows DAB Radio or
select;
Menu > Main menu > DAB
6.1 Scanning for stations
The first time you select DAB radio mode, Or if the station list is empty, M3P
STEREO automatically performs a full scan to see what stations are
available. You may also need to start a scan manually to update the list of
stations for one of the following reasons: .
Available stations change from time to time.
If reception was not good for the original scan (for example the antenna was
not up), this may result in an empty or incomplete list of available stations.
If you have poor reception of some stations (burbling), you may wish to list
only stations with good signal strength.
To start a scan manually, select Menu > Scan.
Once the scan is complete, the radio shows a list of available stations.
To remove stations that are listed but unavailable, select Menu > Prune
invalid.
6.2 Selecting stations
To listen to or change a station, turn the Select control to view a list of stations
and press to select. Once selected, the station plays and the screen shows
information about the station, track or show as broadcast.
Presets
To store a DAB preset, press and hold Preset until the display shows the Save
preset screen.
Select one of the 20 presets (on the remote) to save the currently playing
station.
To select a preset, press Preset briefly, then select one of the listed preset
stations.
When a preset station is playing, it shows ☆1,2,3 etc in the bottom middle of
the screen.
6.3 Now playing information
While the stream is playing, the screen shows its name and DLS (Dynamic
Label Segment) information broadcast by the station giving real-time
information such as programme name, track title and contact details. Stereo
broadcasts are indicated with an icon at the top of the screen. To view further
information, press Info .
Each time you press Info , another set of information is displayed, cycling
through DLS text, programme type, ensemble name/frequency, signal
strength/error rate, bit rate/codec/channels and today's date.
6.4 Settings
Dynamic range compression
Some DAB broadcasts offer dynamic range compression (DRC). This feature
allows radios to compress the dynamic range of the output audio stream, so
that the volume of quiet sounds is increased, and the volume of loud sounds is
reduced. This can be useful if you are listening to music with a high dynamic
range in a noisy environment (for example, classical music while cooking).
17 of 25
18 of 25
To change the DRC of the M3P, select Menu > DRC, and then DRC high,
DRC low or DRC off.
Note: The M3P's DRC setting does have any effect if DRC data is not included
in the broadcast.
Station order
You can choose the order of the DAB station list to be either Alphanumeric,
Ensemble or Valid. Ensemble lists groups of stations that are broadcast
together on the same ensemble, for example BBC or South Wales local. Valid
lists valid stations first, alphanumerically, then off-air stations.
To change station order, select Menu > Station order > then Alphanumeric,
Ensemble or Valid.
7. FM radio mode
FM radio mode receives analogue radio from the FM band and displays RDS
(Radio Data System) information about the station and show (where
broadcast).
To enter FM mode, either press mode to choose FM Radio or select Menu
>Main menu >FM.
7.1 Selecting stations
To find a station, press Select. The frequency display starts to run up as M3P
scans the FM band. Alternatively, you can scan up or down by pressing and
holding the TUNE+ or TUNE- buttons or tune manually with quick presses, or
by turning the Select control.
Presets to store an FM preset, press and hold button Preset until the
display shows the Save preset screen. Select one of the 20 presets to save
the currently playing station.
To select a preset, press Preset briefly, then select one of the listed Preset
stations. When a preset station is playing, it shows ☆1,2,3 etc in the bottom
middle of the screen.
7.2 Now playing information
While an FM station is playing, the screen shows one of the two following sets
data:
19 of 25
If RDS information is available, by default the service name (i.e. station
name) is displayed.
Main menu > AUX in.
3). Adjust the volume of M3P (and, if necessary, the audio source device) as
required.
9. Bluetooth mode
Prior to pairing, verify your device supports Bluetooth 4.0+EDR A2DP and
your device is not connected to any other Bluetooth product. Devices may
pair differently. Below is a general guide.
You can cycle through further RDS information by pressing Info .Each time
you press Info, another set of information is displayed, cycling through RDS
radio text, RDS programme type, frequency and today's date.
If no RDS information is available, the currently tuned frequency is shown.
7.3 Settings
Scan settings
By default, FM scans stop at any available station. This may result in a poor
signal-to-noise ratio (hiss) from weak stations. To change the scan settings to
stop only at stations with good signal strength, select Menu > Scan setting >
Strong stations only? > Yes.
Audio settings
By default, all stereo stations are reproduced in stereo. For weak stations,
this may result in a poor signal-to-noise ratio (hiss). To play weak stations in
mono, select Menu >Audio setting > FM weak reception: Listen in mono only
> Yes.
8. AUX mode
Aux in mode plays audio from an external source such as an MP3 player.
To play audio with Aux in mode,
1).Connect the external audio source to the Aux In 3.5 mm stereo socket.
2). Either press Source until the display shows AUX in or select Menu>
1. Press to source to Bluetooth mode. This will power on the Bluetooth. Turn
the volume up about ¼ to start. Also turn up the volume on the source device
(the device you are streaming from).
2. Turn on the Bluetooth on your enabled device.
3. Select Bluetooth device name “LEMEGA M3P” when it appears on your
device's screen to initiate searching.
4. You can start to play your music files wirelessly. Adjust the volume level on
your device.
You should not have to pair your device again.
Depending on your device, you may need to make multiple attempts at Pairing
and/or Connecting to the “LEMEGA M3P”, but please give your device
adequate time to Pair or Connect before repeating the process.
10. Alarms and sleep
As well as a clock/calendar, there are two versatile wake-up alarms with
snooze facility, and a sleep function to turn the system off after a set period.
Each alarm can be set to start in a particular mode.
10.1 Alarms
To set or change an alarm, either press Alarm or select Menu > Main Menu
>Alarms.
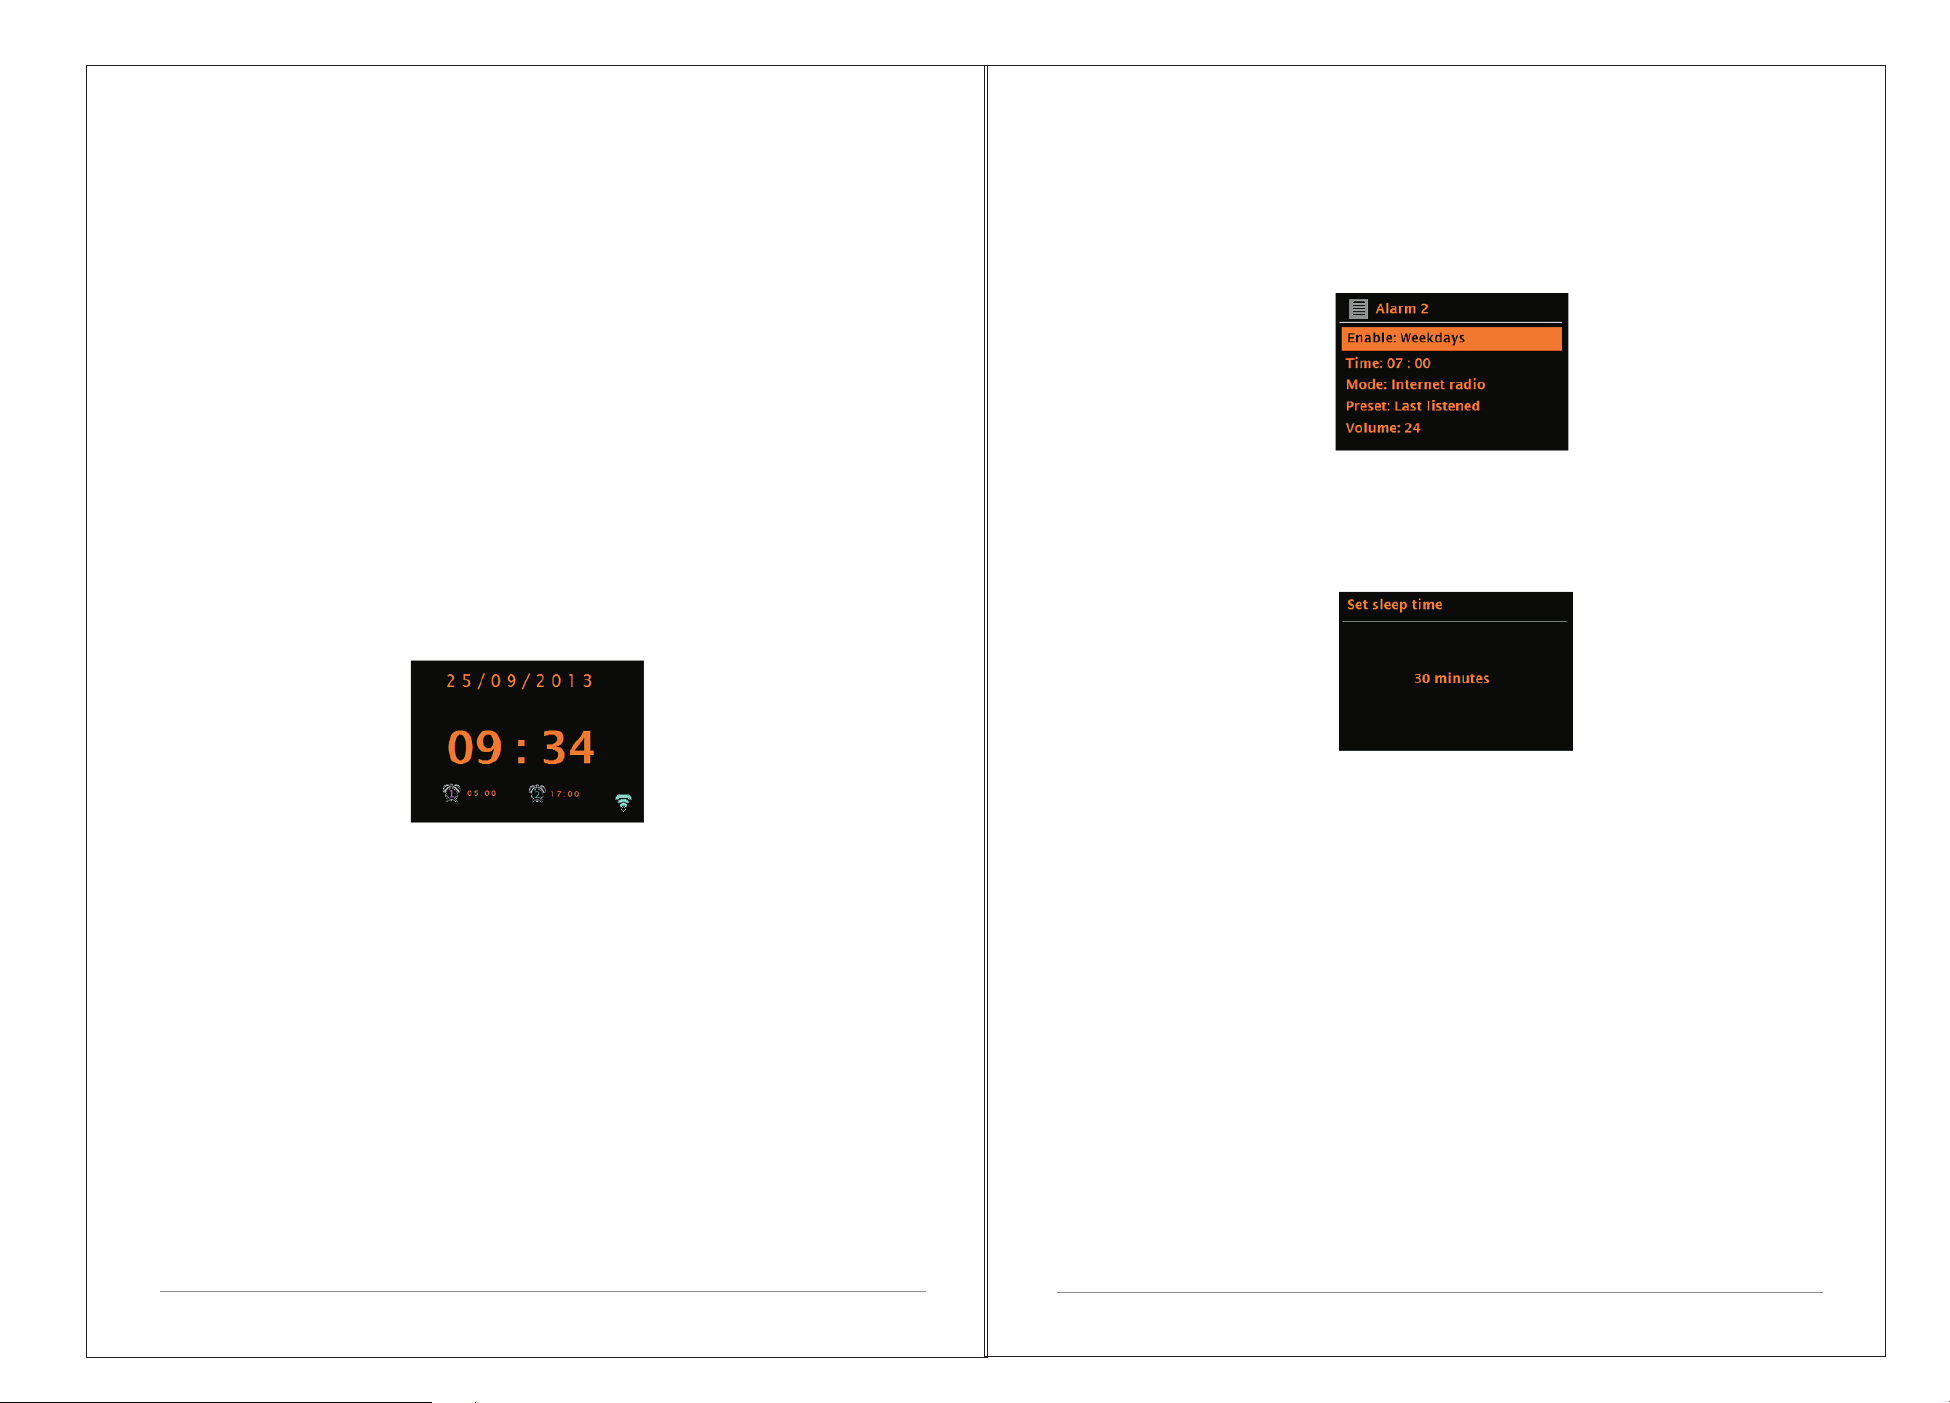
Select the alarm number (1 or 2) then configure the following parameters:
?Enable: on/off,
?Frequency: Daily, Once, Weekends or Weekdays,
?Time,
?Date,
?Mode: Buzzer, Internet radio, DAB, FM
?Volume: 0 - max.
?Save.
To activate the new settings, scroll down and select Save.
The screen shows active alarms with an icon at the bottom left.
20 of 25
At the set time, the alarm will sound. To temporarily silence it, press Snooze .
You can change the snooze period with the Select control if you like. The
radio returns to standby for the set period, with the silenced alarm icon
flashing.
10.2 Sleep
To set the sleep timer, select Menu > Main menu > Sleep then choose from
Sleep OFF, 15 MINS,30 MINS, 45 MINS or 60 MINS.
Once you select a sleep period, the system returns to the main menu.
Press Menu to return to the Now playing screen.
11. Software upgrades and factory reset
11.1 Software upgrade
From time to time, M3P may make software upgrades available with bug
Fixes and/or additional features. You can either check manually, or set M3P to
check periodically automatically (this is the default). If M3P detects that
newer software is available, it asks if you want to go ahead with an update.
If you agree, the new software is then downloaded and installed. After a
software upgrade, all user settings are maintained.
CAUTION: Before starting a software upgrade, ensure that M3P is
plugged into a stable mains power connection. Disconnecting power
during a software update may permanently damage the unit.
To turn automatic checking on or off, select Menu > System
settings>Software update >Auto-check setting.
21 of 25
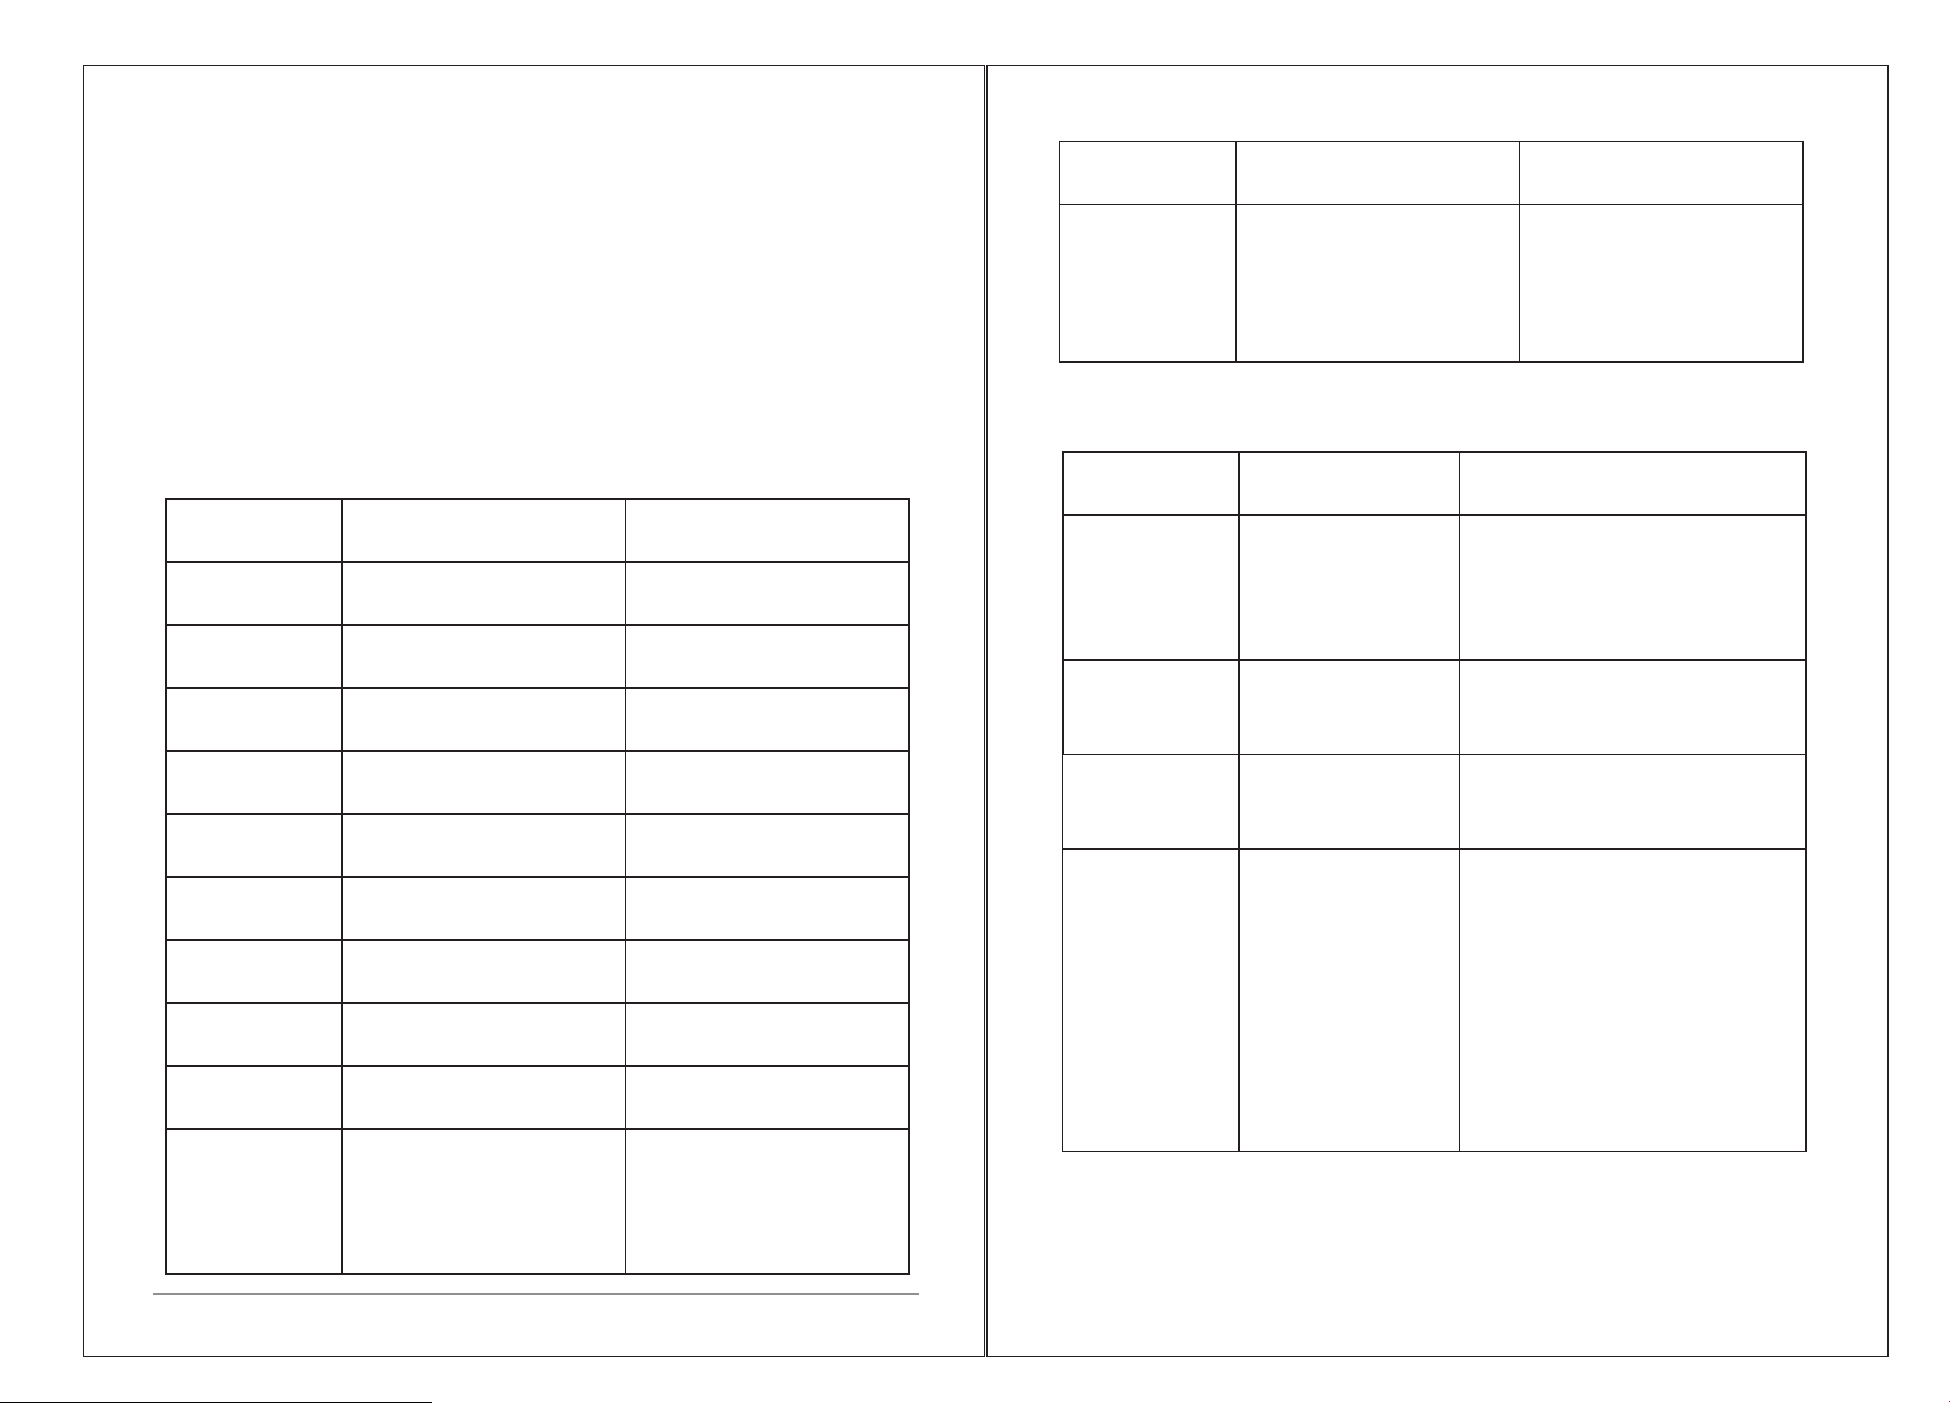
Software upgrade failed
Update failed
Example
MAC filtering enabled on
Received.wma,but found
Data obtained from server
Router switched off
Streaming IR station and
suddenly station becomes
unavailable
that the stream wasn't WMA
is unreadable.
when trying to decode
when trying to decode
Description
Correct key entered,
But router rejects request
Cannot recognise file format
Problem past router -
Problem with connection to
Problem past router – no
No UPnP servers found
No DAB reception
UPnP server settings
Allow access for M3P in
UPnP server
Access not granted by
-independent of network
incorrect data being
router
response being received
received from network
from network
from network
Messege
Failed to connect
Format error
Network error
Network not ready
Network timeout
No UPnP media
Service not
Unauthorised
available (DAB)
found
router
11.2 Factory reset
A factory reset resets all user settings to default values, so time/date, network
configuration and presets are lost. However, the radio's current software
version is maintained, as is registration with the Internet radio portal. Internet
radio favorites therefore remain unless you re-register your radio with another
account on the portal website.
To perform a factory reset, select Menu > System settings > Factory reset
proceed >Yes.
12. Troubleshooting and error messages
12.1 Error messages
22 of 25
Waiting for Users
'Press Play…'
Spotify mode - No Spotify
account credentials
available on the M3P
audio system. Connect to
the audio system using a
Spotify Connect account.
Spotify mode – Waiting for
playback information;
for example, when the
audio playback is moved by
the Spotify app to a
different audio speaker
or the smart device itself.
Example
Description
Messege
23 of 25
12.2 Troubleshooting
'DAB:'No stations
available'
message'
Low signal strength
Low signal strength
Network down
Solutions
Cause
Problem
FM: Hiss
DAB: burbling/
intermittent
cut-out
Check/move antenna
Move radio
Rescan local (high-strength)
stations only
For DAB, check local coverage at
www.ukdigitalradio.com/coverage
As above then rescan
stations.
Check that network is working
between a computer and
the router
'Cannot connect
to network
'Cannot connect
to network
Obtain the M3P MAC address
from Menu < System settings >
Network > View settings and
add to router list.
Router restricts
access to listed
MAC addresses
Note: M3P has separateMAC
addresses for wired and wireless
networks only the current network
adaptor method address is
displayed, but the other address
can be obtained by changing the
first pair of digits between '00'(
wireless) and '02'(wired)

Insufficient Wi-Fi
signal strength
Unusual network
configuration
Unknown
encryption method
Firewall
preventing
access
Check distance to router; see if a
computer can connect to the
network in this location
Setup network manually through
Menu> System settings > Network
>Manual settings
Change encryption method on router.
M3P supports WEP, WPA and WPA2
Check the following ports are open on
the router: UDP and TCP ports 80 and
123; DNS port 53.
Windows shares:ports 135–139 and
445.
Windows Media Player: varies– non-
Microsoft firewalls may require
configuration for UPnP.
'Cannot connect
to network
Solutions
Cause
Problem
Internet connection
down
Firewall preventing
access
Station not
broadcasting,
overloaded or
insufficient
bandwidth.
Station broadcasting
using unknown
codec.
Link out of date.
Check that Internet is working for
a computer connected to the
same network
Check the following ports are open:
UDP and TCP ports 80 and 123;
DNS port 53.
Some Internet radio stations may
require additional ports to be opened.
Try other stations; try listening on
computer via Internet radio portal
website; try later.
'
Cannot connect
to Internet
'
Cannot play
particular
Internet radio
station
24 of 25
Power Supply: 12V DC
Dimension (mm): 280W x 105H x 185D
Weight: 2,6 KG
Specifications are subject to change without notice.
13. Technical Specification:
Model: M3P
Type:
Speaker: 2 x 2 ” full range driver 1 x 4” woofer½
Smart radio with Bluetooth
Power: 25W RMS
25 of 25
If you have any questions or suggestions, please share with us.
info@lemegaaudio.com
www.lemegaaudio.com
This device complies with Part 1 5 of the FCC rules. Operation is subject to
the following two conditions:
1 ) this device may not cause harmful interference, and
2) this device must accept any interference received, including interference
that may cause undesired operation.
Changes or modifications not expressly approved by the party responsible
for compliance could void the user's authority to operate the equipment.