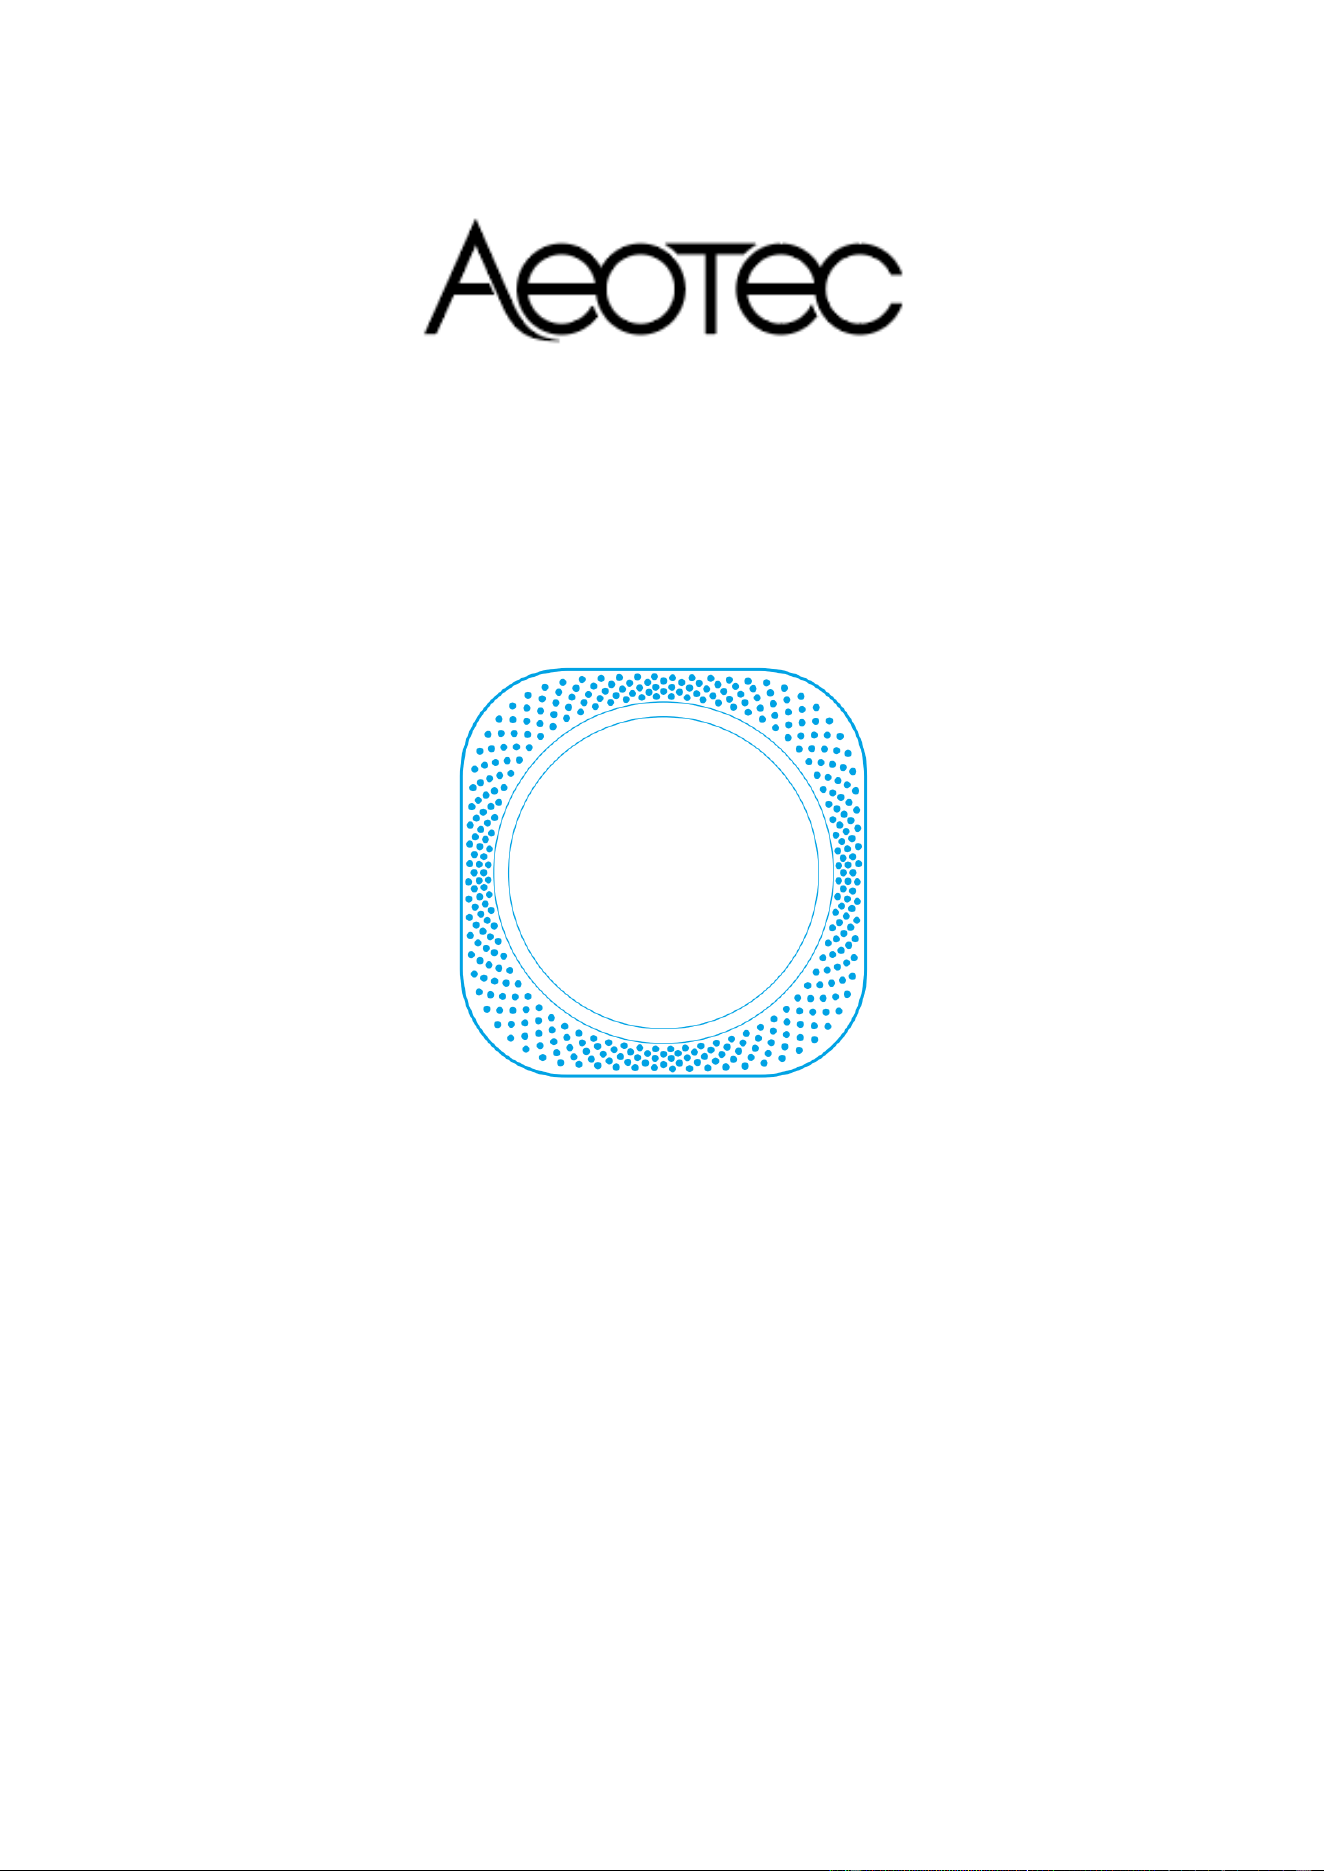
MultiSensor 8
ZWA066-A
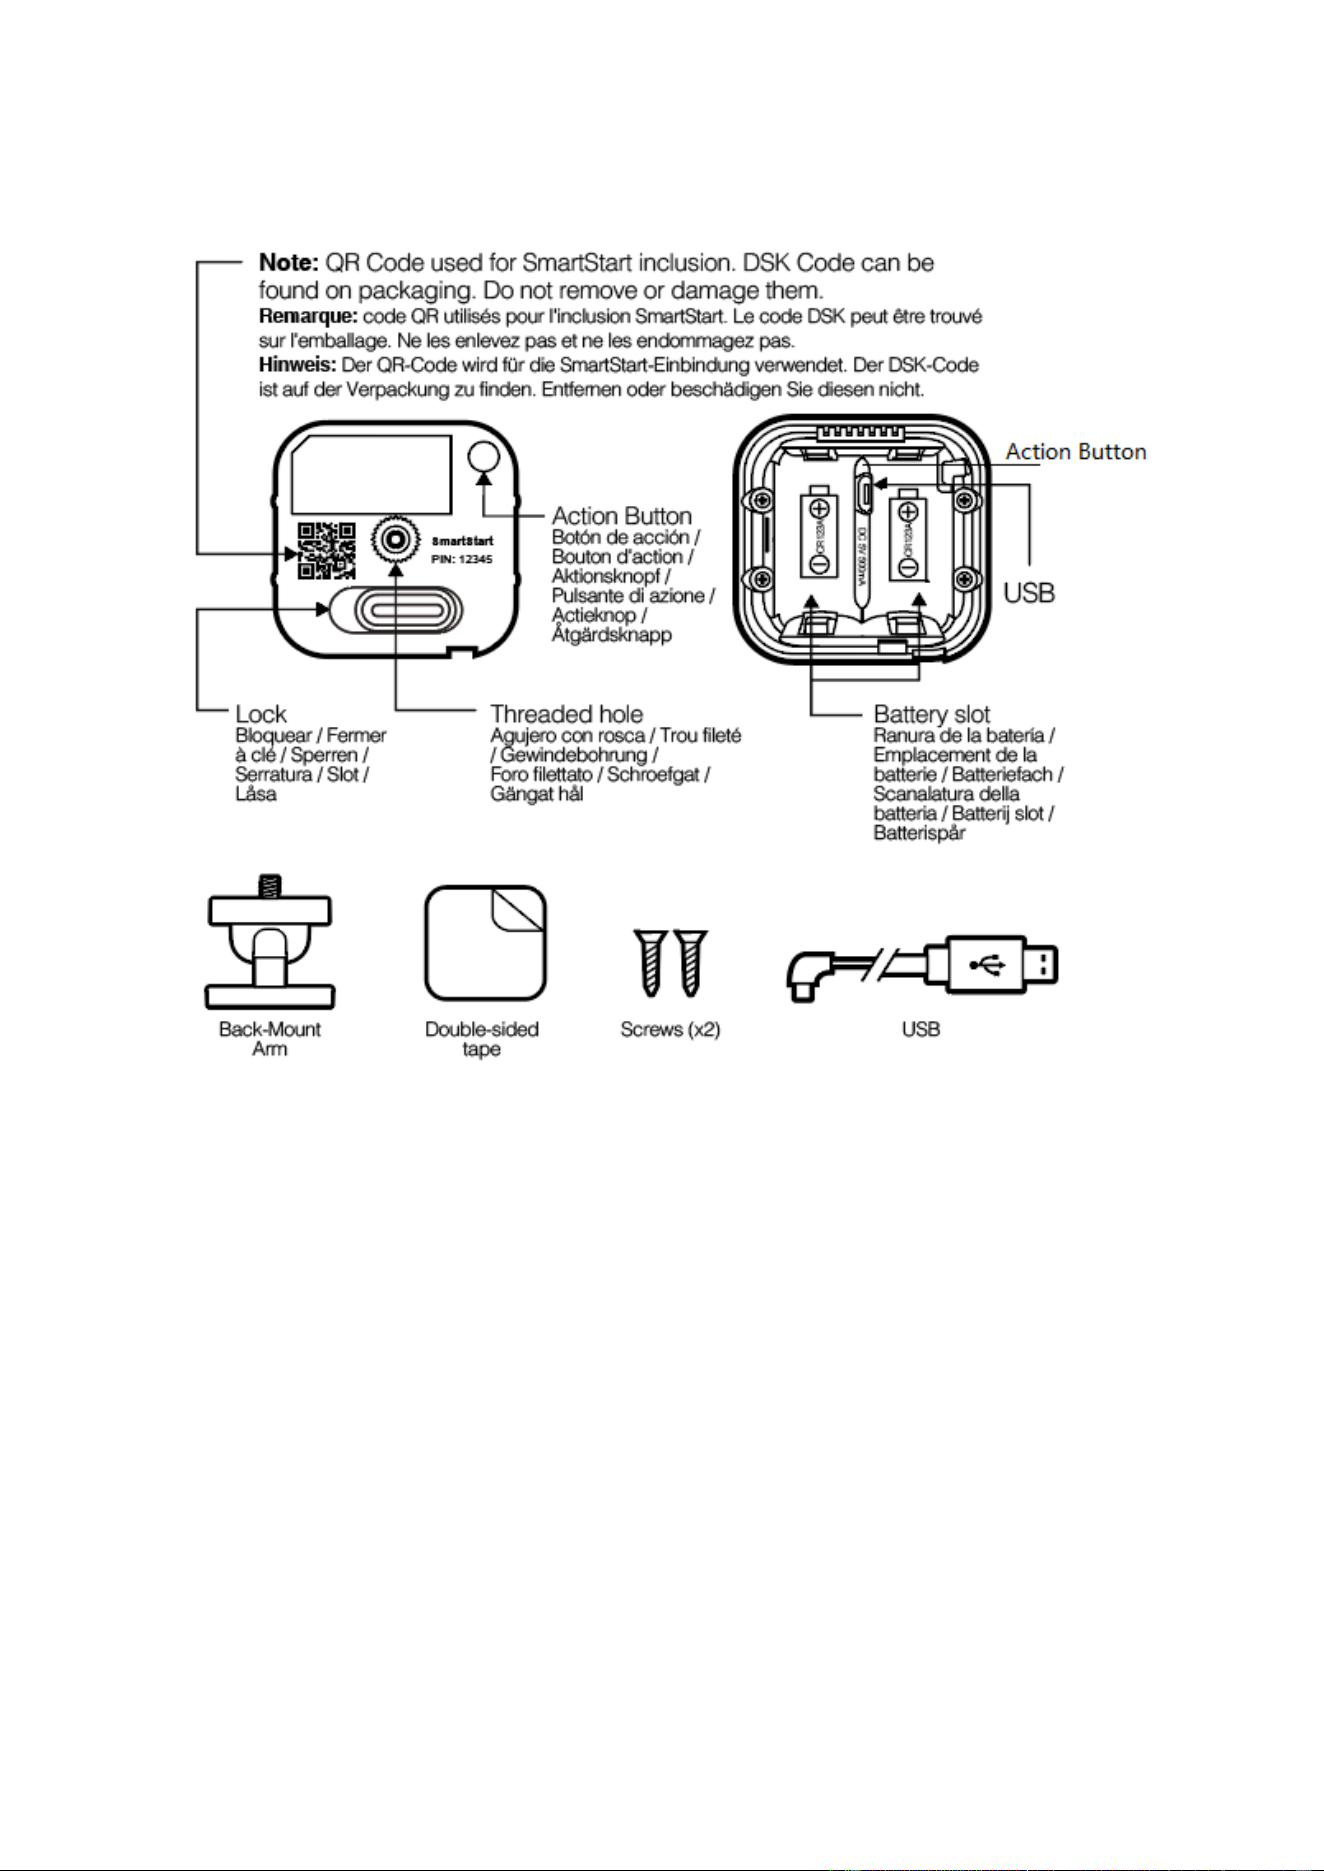
Used in this guide.
Important safety information.
Please read this and the online guide(s) at support.aeotec.com/multisensor7 carefully.
Failure to follow the recommendations set forth may be dangerous or cause a violation of the
law. The manufacturer, importer, distributor, and / or reseller will not be held responsible for
any loss or damage resulting from not following any instruction in this guide or in other
materials.
MultiSensor 8 is intended for use in dry locations only. Do not use in damp, moist, and / or
wet locations.
Do not use rechargeable batteries. Use only CR123A batteries with a 3.0V rating.
Contains small parts; keep away from children.
Determine the power type you want to use.
MultiSensor 8 can be a sleeping battery device or a repeater as a USB-powered device.
Make sure you select your preferred power type before you start pairing.
Note - Any time you change the input power type (ie. Battery to USB power), you should re-
include as your Z-Wave hub will only understand if it is a sleeping device or a Repeater
device upon its first pair into your controller. You can continue to use it normally even without
re-pairing although but odd issues may arise.
For a USB-powered installation (acts as a repeater when paired on USB power):
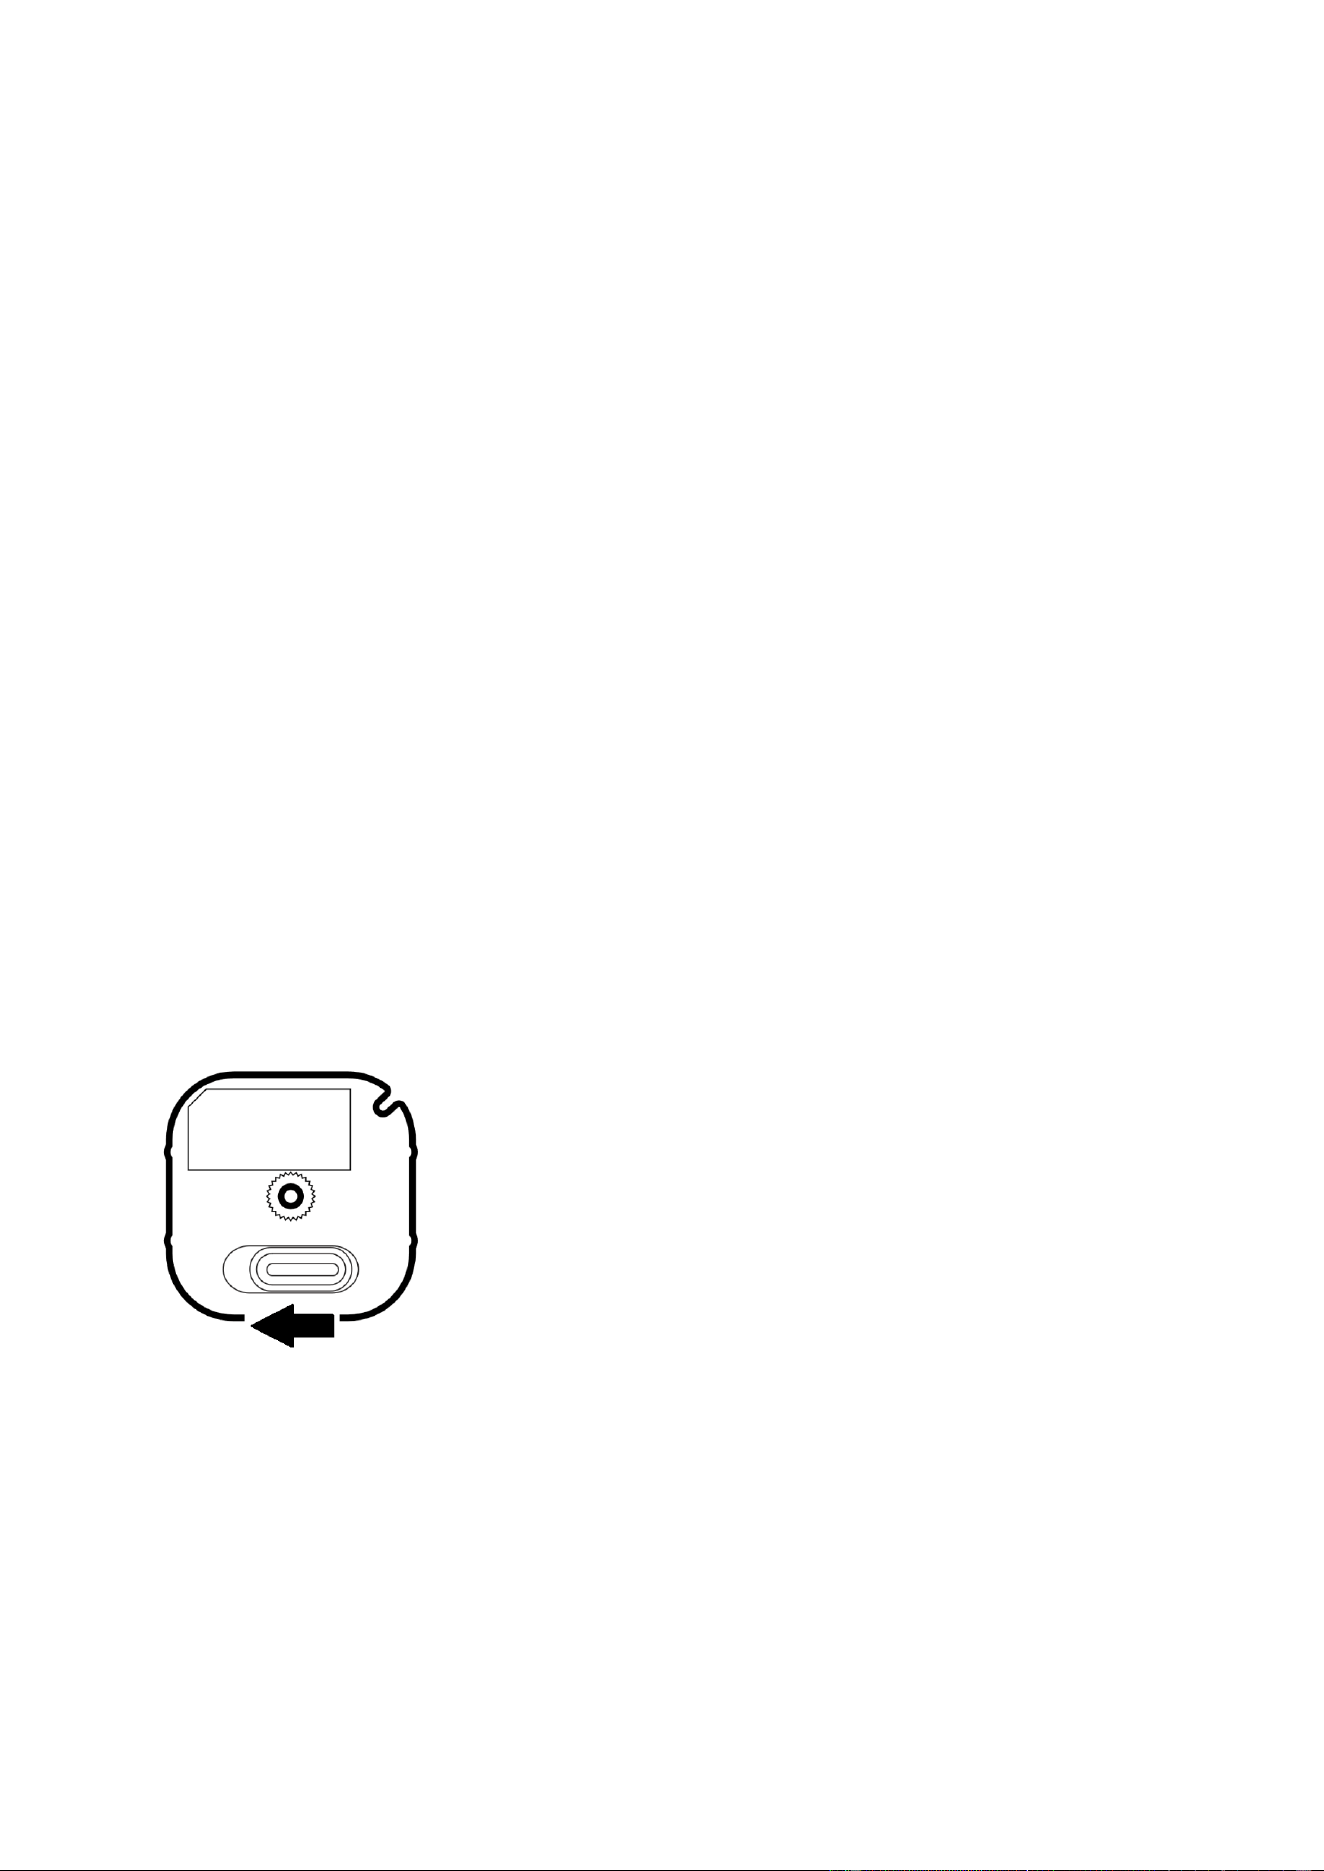
1. Remove the battery cover by sliding the Unlock button LEFT, then pull the cover off.
2. Insert the MicroUSB of the provided USB cable into your sensor's MicroUSB port.
3. Insert the larger end of the USB cable into a computer or any 5V adapter which will
immediately power your MultiSensor 8.
4. Make sure to seat the Battery Cover back onto the MultiSensor 8 and lock it in by sliding
the Unlock button RIGHT.
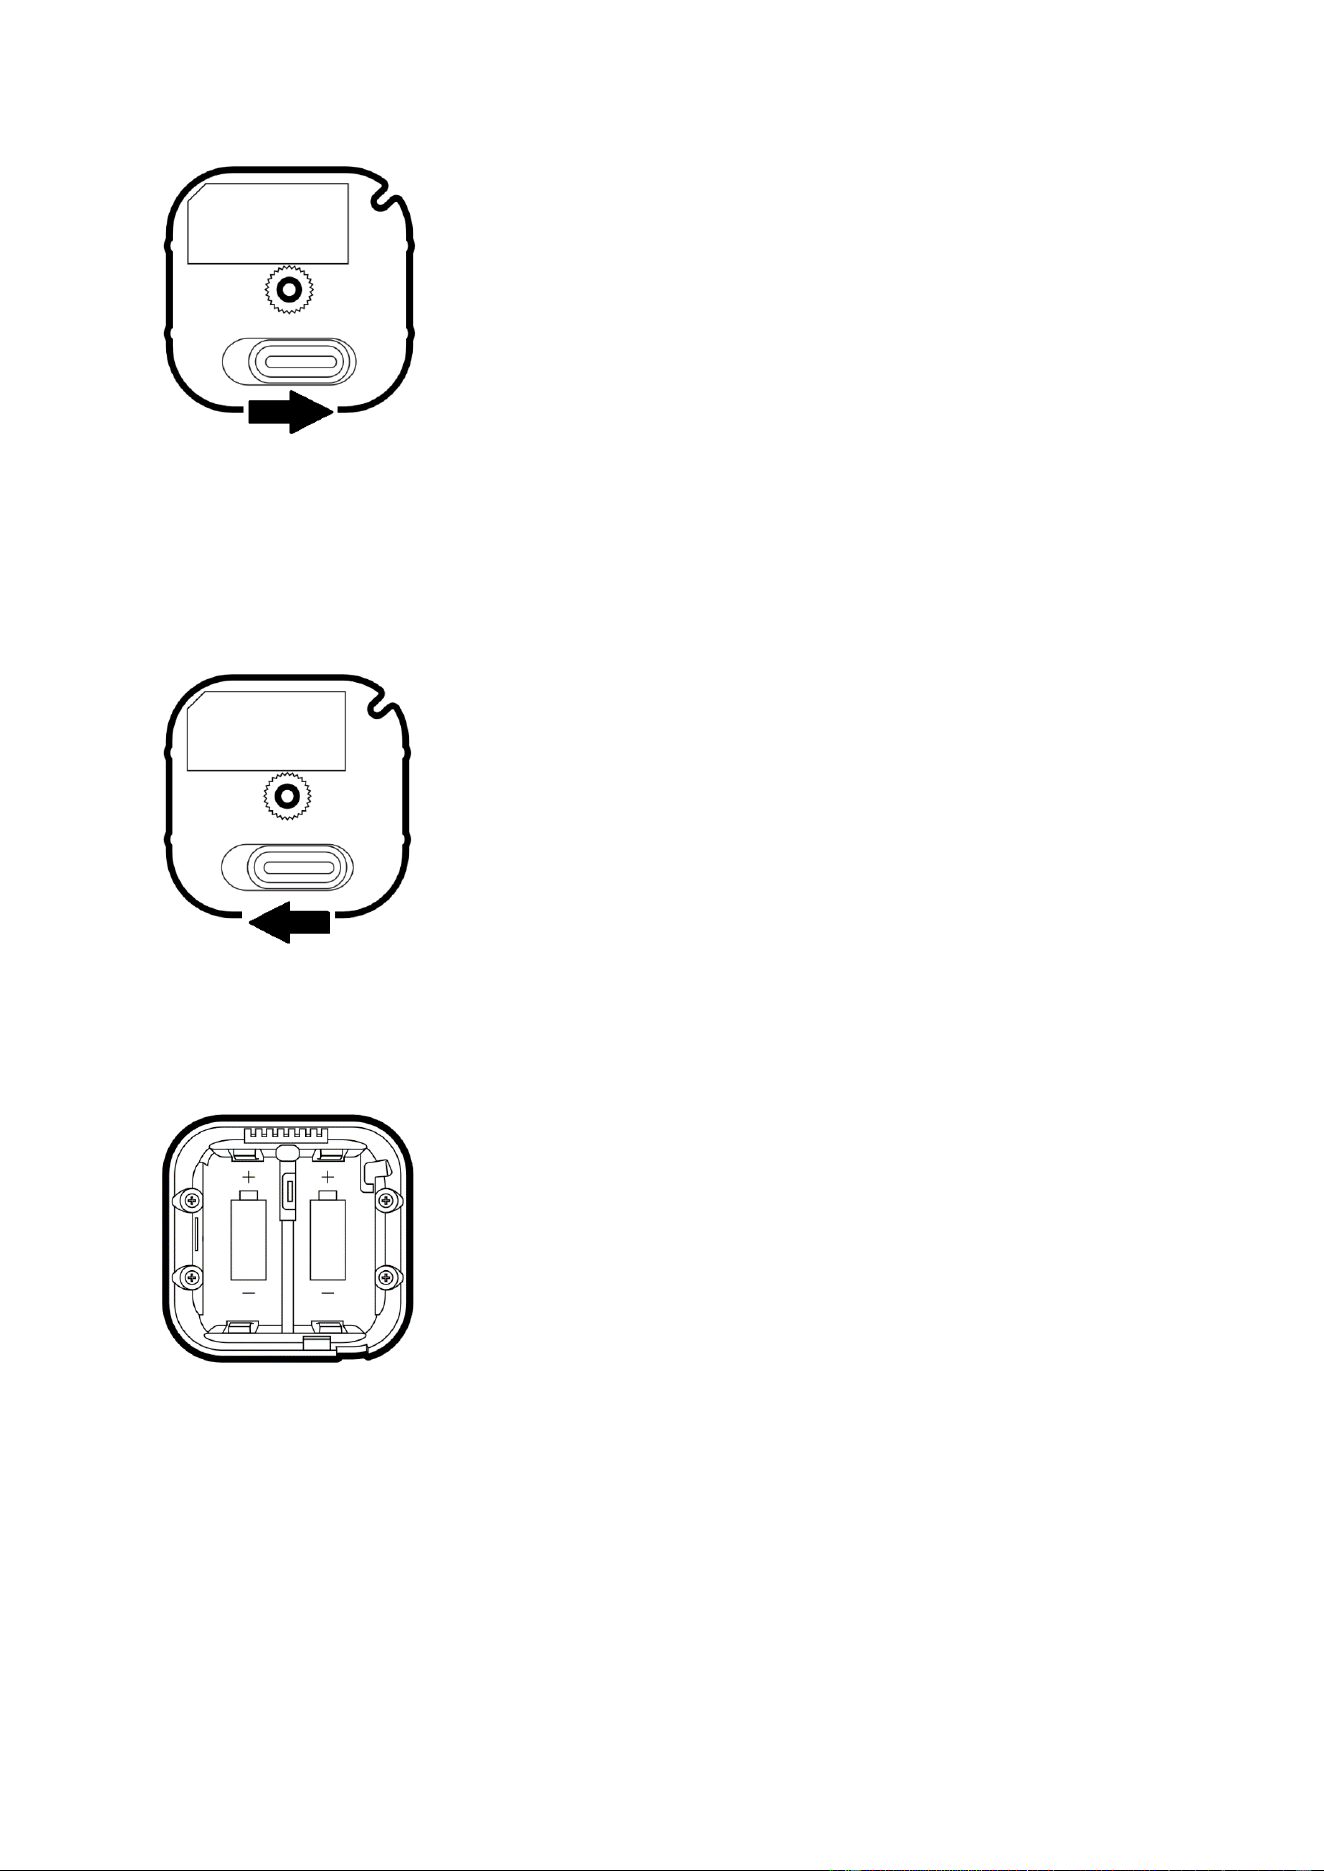
For a battery-powered installation (acts as a sleeping device when paired on battery
power):
1. Remove the battery cover by sliding the Unlock button LEFT, then pull the cover off.
2. Insert two CR123A lithium batteries orientated according to the diagram within your
sensor.
Try inserting the batteries flat rather than at an angle.
Note: MultiSensor 8 can be powered by a single CR123A (doesn't matter which port),
though batteries will require changing more frequently (half the expected battery life).
WARNING: Not compatible with rechargeable CR123A batteries (3.6V).
3. Make sure to seat the Battery Cover back onto the MultiSensor 8 and lock it in by sliding
the Unlock button RIGHT.
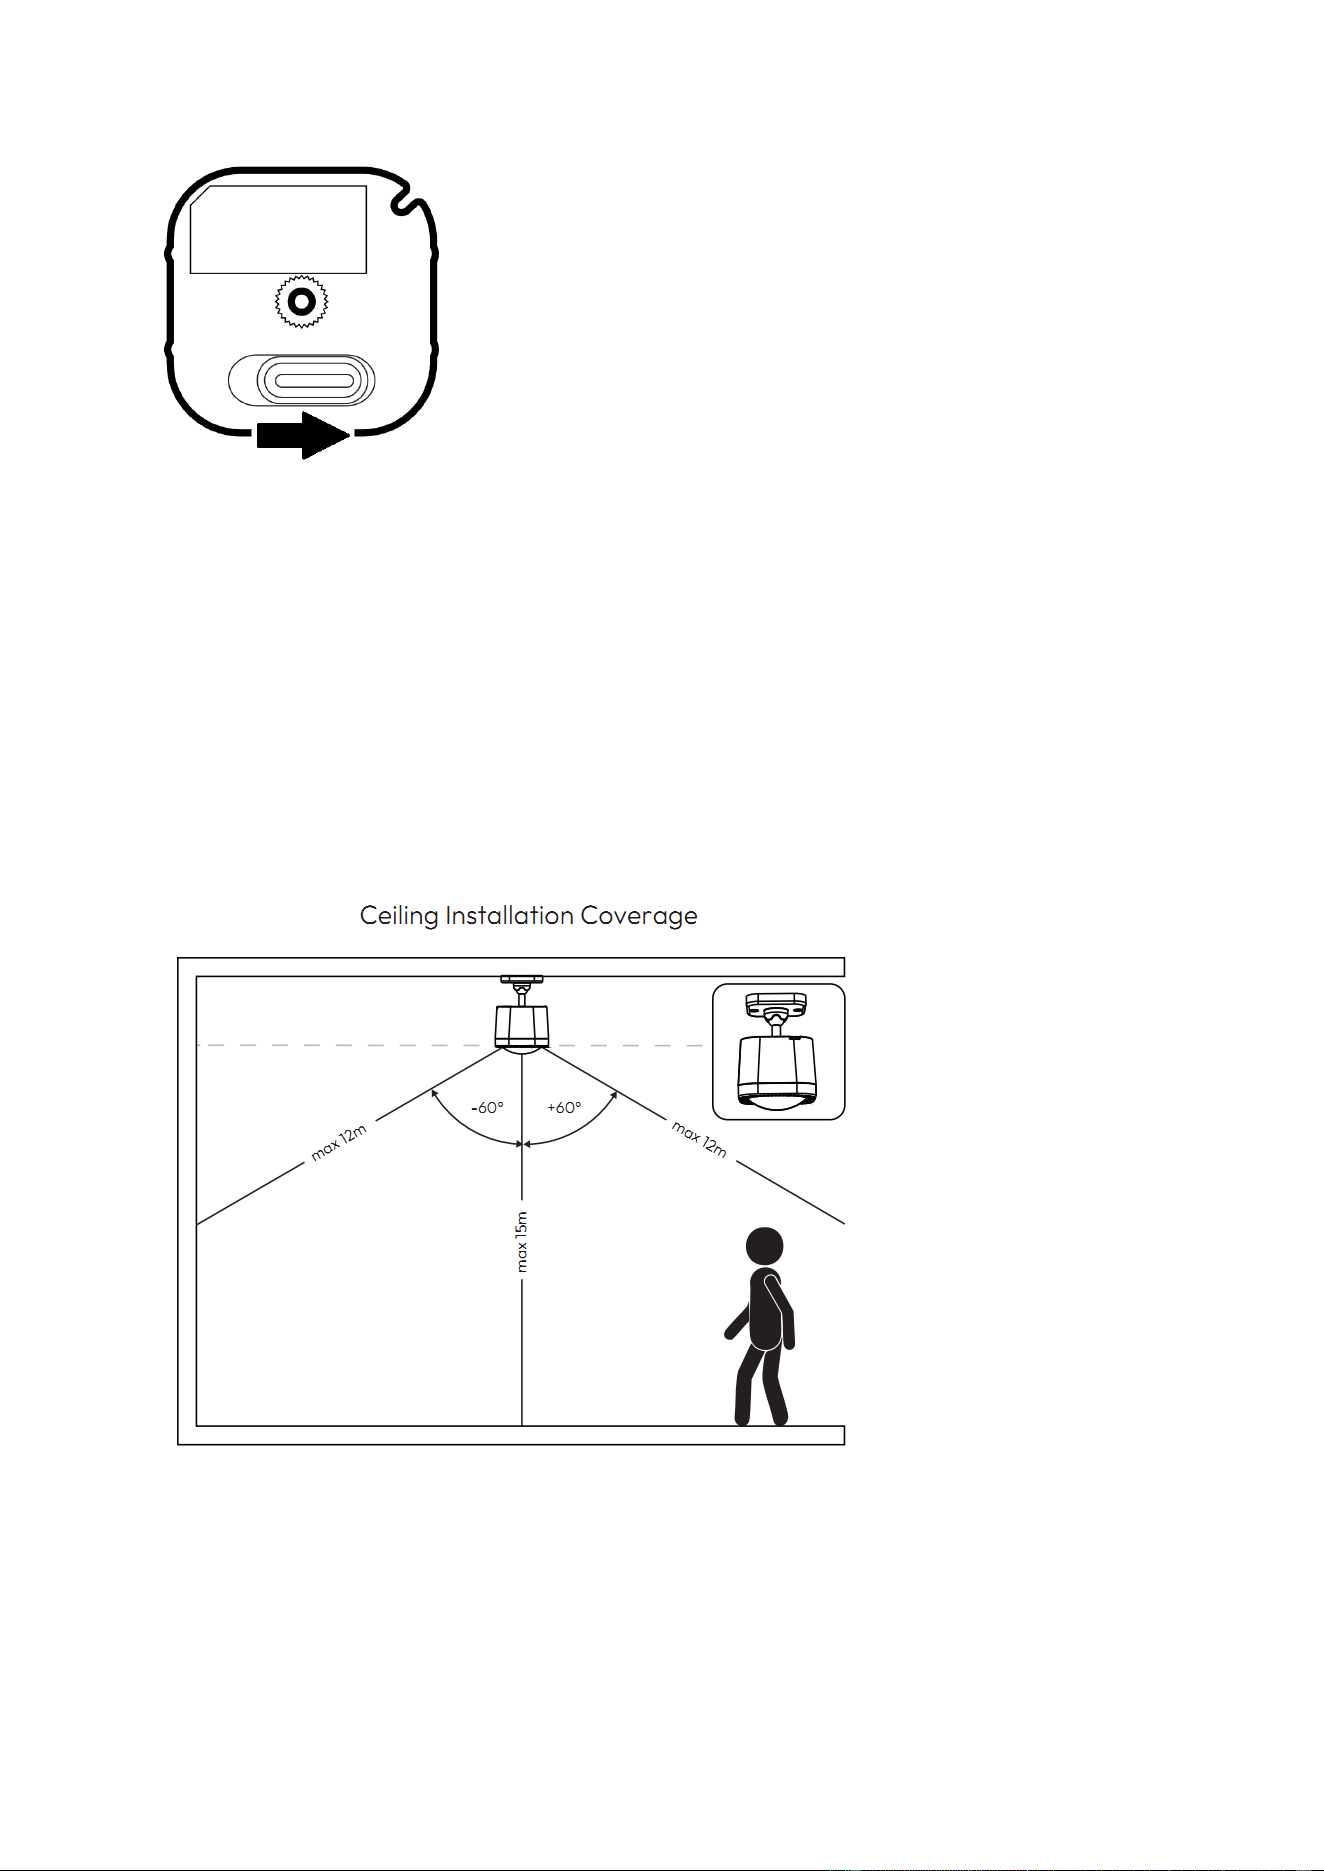
Selecting an installation location.
● Don’t install MultiSensor 8 in areas of artificial temperature change such as near air
conditioners, humidifiers, and heaters, and avoid positioning it directly opposite a
window or direct sunlight. Doing so would impact the accuracy of the sensors.
● If powering it with batteries, do not install MultiSensor 8 in a location where the
temperature can drop below 0°C / 32°F.
● Only install your sensor indoors.
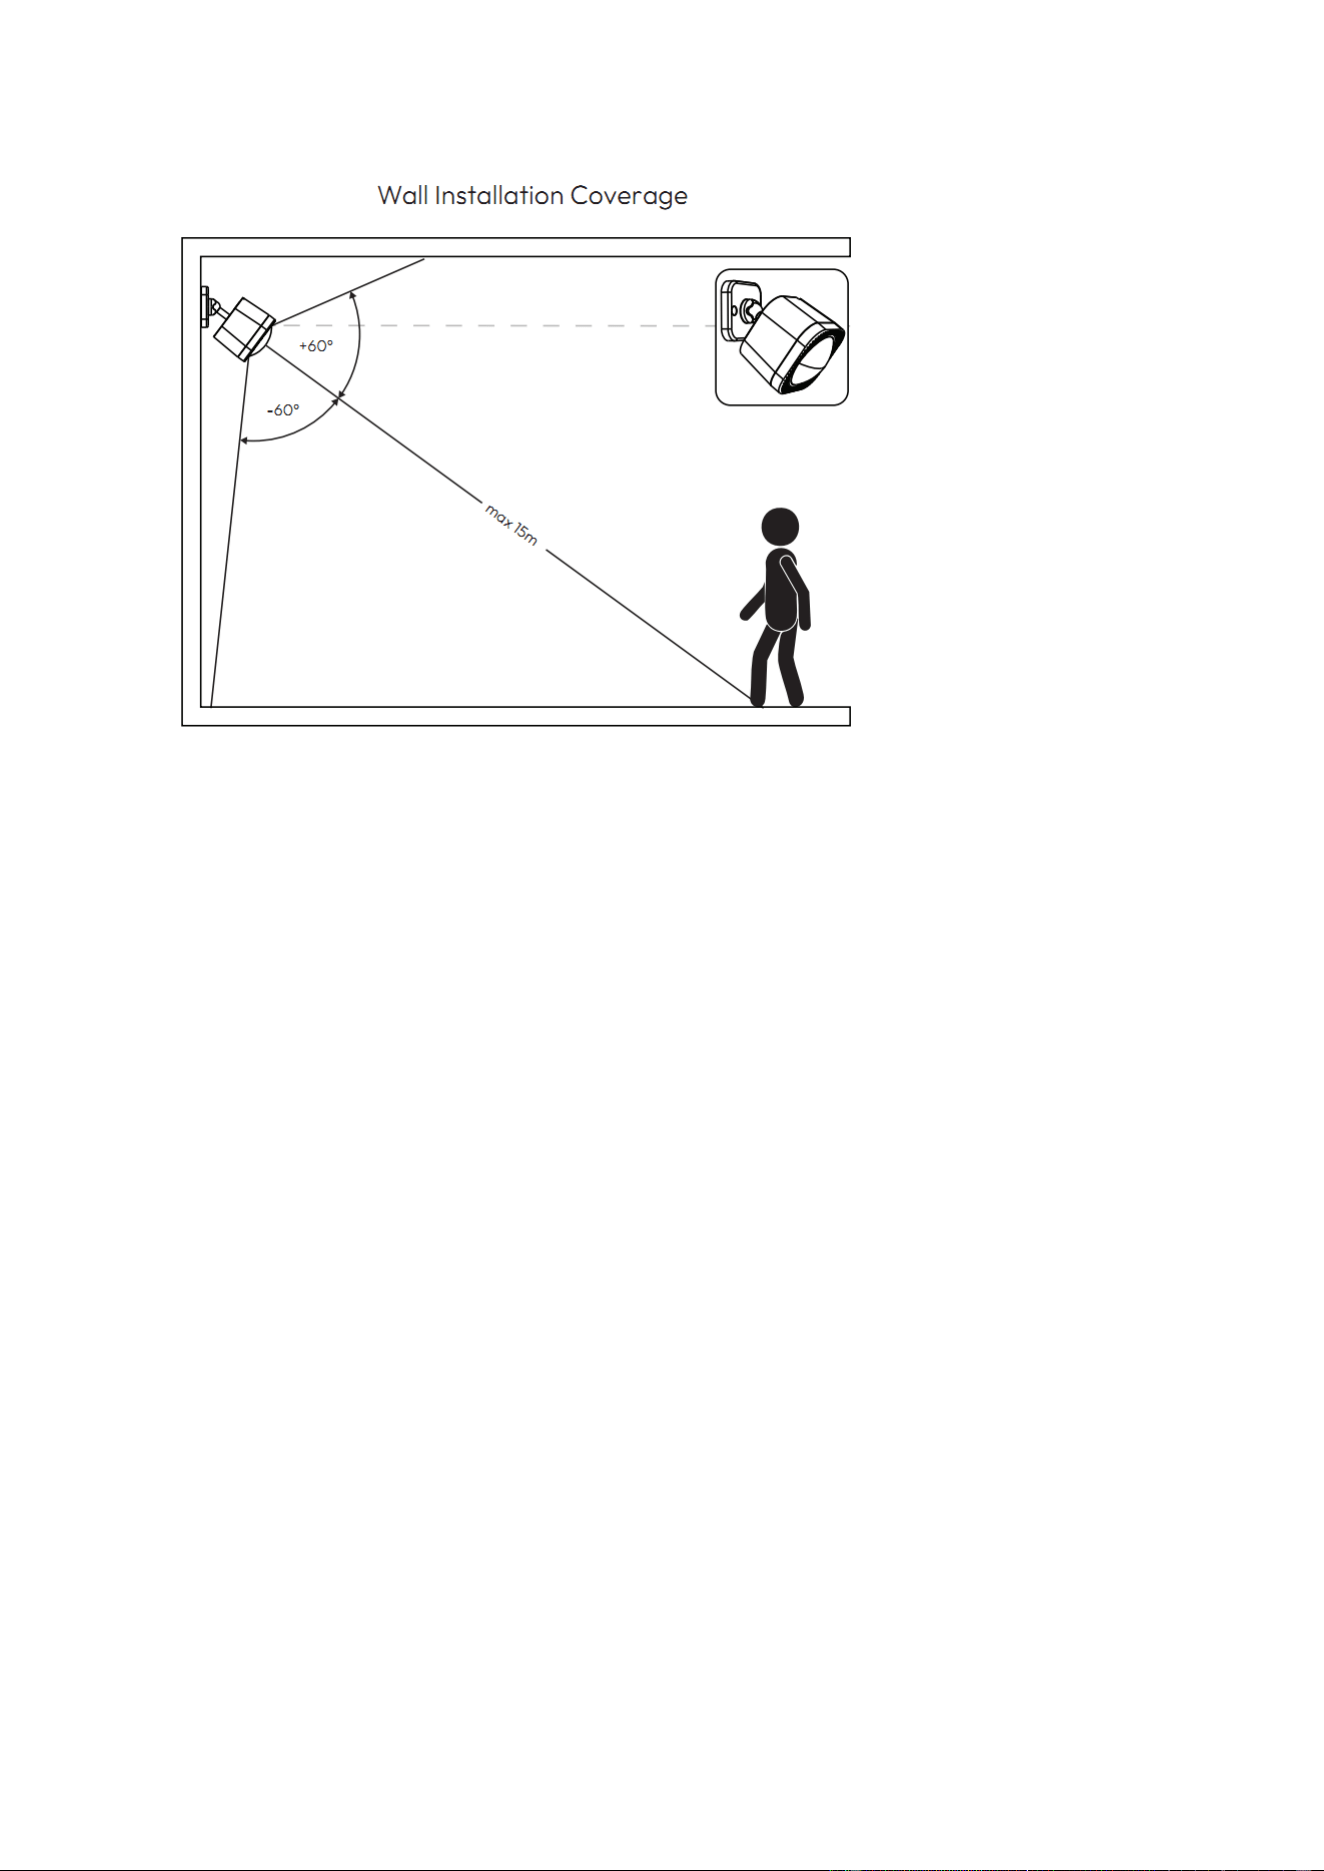
● MultiSensor 8 has a 10 metre / 33 feet detection range
● Make sure that you connect your MultiSensor 8 to your hub before finalizing
installation.
Choose your power.
1. Remove MultiSensor 8’s backplate.
2. Select your power method; battery power or USB power. IMPORTANT: do not
connect MultiSensor 8 to your hub and then switch from one power method to
another - MultiSensor 8 will perform poorly if you do. If you need to change power-
mode, first fully remove MultiSensor 8 from your installation, change the power-
mode, and then add it again after switching the power-mode.
a. Batteries: insert two CR123A batteries with the correct orientation.
MultiSensor 8 can be powered by one battery, though with reduced battery
life.
b. USB: insert a Micro USB cable into your sensor and a power adapter.
Important: the USB adapter must output a minimum current of 120mA.
c. Once powered, the LED will fade a blue color in and out.
i. On USB, it will fade in and out indefinitely unless connected.
ii. On battery, it will fade in and out for 2 seconds and then stop.
d. If the LED does nothing:
i. Tap the Action Button, the LED should light up.
1. If it lights up purple, reset your MultiSensor 8 by pressing
and holding its action button for 20 seconds to reset it.
2. If it lights up yellow, then you should be able to connect it.
ii. Power cycle your MultiSensor 8.
1. remove power for 30 seconds
2. Then power it up again. LED should fade blue in and out
for at least 2 seconds upon initial power up.
3. Replace MultiSensor 8’s backplate.

Connecting MultiSensor 8 to hub.
A. Aeotec AutoPilot:
a. Select DEVICES.
b. Select + Add new.
c. Select +.
d. Select + Add.
e. Tap the Action Button on MultiSensor 8, the LED will light up solid yellow
while MultiSensor 8 attempts to connect.
f. If prompted by your hub, enter the 5 digit DSK if on browser, or scan the QR
code if using your Smartphone.
B. Aeotec Smart Home Hub or SmartThings:
a. Open SmartThings app.
b. Tap +.
c. Tap Device.
d. Find and select Aeotec.
e. Tap Multipurpose sensor.
f. Tap MultiSensor 8.
g. Tap Start, then follow the remaining instructions to pair MultiSensor 8.
h. When prompted by your hub, tap the Action Button on MultiSensor 8, the
LED will light up solid yellow while MultiSensor 8 attempts to connect.
i. Scan the QR code, if you prefer, tap “Enter pin code instead” and enter the 5
digit PIN under the QR code.
C. Z-Stick Gen5 / Z-Stick Gen5+:
a. Unplug Z-Stick Gen5, then press it’s Action Button to put it into its ‘add
device’ mode.
b. Tap the Action Button on MultiSensor 8, the LED will light up solid yellow
while MultiSensor 8 attempts to connect.
D. SmartStart QR code scanning:
a. If supported by your Z-Wave gateway, supports SmartStart: scan the QR
code on MultiSensor 8 using the gateway’s app. Your sensor will join your Z-
Wave network automatically.
E. For most other hubs;
a. Set your Z-Wave hub to connect Z-Wave devices.
b. Tap the Action Button on MultiSensor 8, the LED will light up solid yellow
while MultiSensor 8 attempts to connect.
c. If prompted by your hub, enter the 5 digit DSK located under the QR code on
MultiSensor 8.
Connection LED states.
If the connection steps were followed correctly, the LED will change from a solid yellow color
to one of these LED states depending on success or failure.
● Success: LED will flash white/green for 2 seconds.
● Fail: LED will flash white/red for 2 seconds.
Not connecting? Try these steps;
1. Move your sensor closer to your hub.

2. Set your hub to remove Z-Wave devices.
3. Tap the button on MultiSensor 8, the LED will light up with a purple or yellow color.
If successful; the LED will fade a blue color in and out; On battery power, for 2
seconds. On USB power, indefinitely.
4. Try connecting MultiSensor 8 again.
5. Get further help and tutorials at support.aeotec.com/multisensor7
Affix your MultiSensor 8.
1. MultiSensor 8 can be installed on a flat surface such as a shelf, in a corner or on a
wall using the Back-Mount Arm, or within a ceiling or wall using its Recessor
accessory (sold separately). If using the Back-Mount Arm;
a. Screw Back-Mount Arm into the corresponding threaded hole on the back of
MultiSensor 8.
b. Affix Back-Mount Arm to your desired location using the provided double-
sided tape or KA2.5×20 mm screws.
c. Angle the MultiSensor 8 as desired.
Using your MultiSensor 8:
Scan this QR Codes to get more help on how to setup and use your MultiSensor 8.
Need help? Contact us.
Contact our support teams at aeotec.com/contact.
Gateway compatibility.
To see if this device is known to be compatible with your Z-Wave gateway, please refer to
aeotec.com/z-wave-gateways/compatibility.
Declaration of Conformity.
Aeotec Limited declares that ZWA022 is in compliance with the essential requirements and
other relevant provisions of RED 2014/53/EU, RoHS 2011/65/EU, IEC62321:2008 and
EN50581:2012. The full text of the declaration is available from
support.aeotec.com/multisensor7/doc
Specifications. Z-Wave devices operate between 868.40 & 926.3 MHz depending on local
restrictions. It uses up to -0.59 dBm ERP transmit power, enabling wireless connectivity. Full
information on device specifications and certifications at
support.aeotec.com/multisensor7/specs
FCC ID: 2AOGIZWA066
Aeotec is a ® Registered Trademark of Aeotec Limited amongst other intellectual property. A
non-exhaustive list can be found at aeotec.com/legal/. All rights reserved. Z-Wave is a ®
Registered Trademark of Aeotec Group GmbH and / or its subsidiaries. All rights reserved.
Aeotec Americas operates under exclusive license from Aeotec Limited. Aeotec Limited is
the owner of Aeotec, the Aeotec logo, and a number of other patents and trademarks utilised
by products distributed by Aeotec Americas. Products and services offered by Aeotec
Americas which utilise wireless communications technology maybe covered by one or more
claims of patents viewable at http://sipcollc.com/patent-list/ and http://intusiq.com/patent-list/
In Europe, contact Aeotec via Aeotec Group GmbH; Groß Johannisstraße 7, 20457
Hamburg, Germany
© & ™ Aeotec Limited. Version: 501002400001 - AB

FCC Caution
This device complies with part 15 of the FCC Rules. Operation is subject to the following two
conditions:
(1) This device may not cause harmful interference, and
(2) this device must accept any interference received, including interference that may cause
undesired operation.
Any Changes or modifications not expressly approved by the party responsible for
compliance could void the user's authority to operate the equipment.
Note: This equipment has been tested and found to comply with the limits for a Class B
digital device, pursuant to part 15 of the FCC Rules. These limits are designed to provide
reasonable protection against harmful interference in a residential installation. This
equipment generates uses and can radiate radio frequency energy and, if not installed and
used in accordance with the instructions, may cause harmful interference to radio
communications. However, there is no guarantee that interference will not occur in a
particular installation. If this equipment does cause harmful interference to radio or television
reception, which can be determined by turning the equipment off and on, the user is
encouraged to try to correct the interference by one or more of the following measures:
-Reorient or relocate the receiving antenna.
-Increase the separation between the equipment and receiver.
-Connect the equipment into an outlet on a circuit different from that to which the receiver is
connected.
-Consult the dealer or an experienced radio/TV technician for help.
The device has been evaluated to meet general RF exposure requirement. The device can
be used in portable exposure condition without restriction.