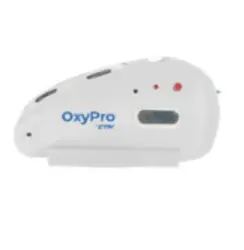
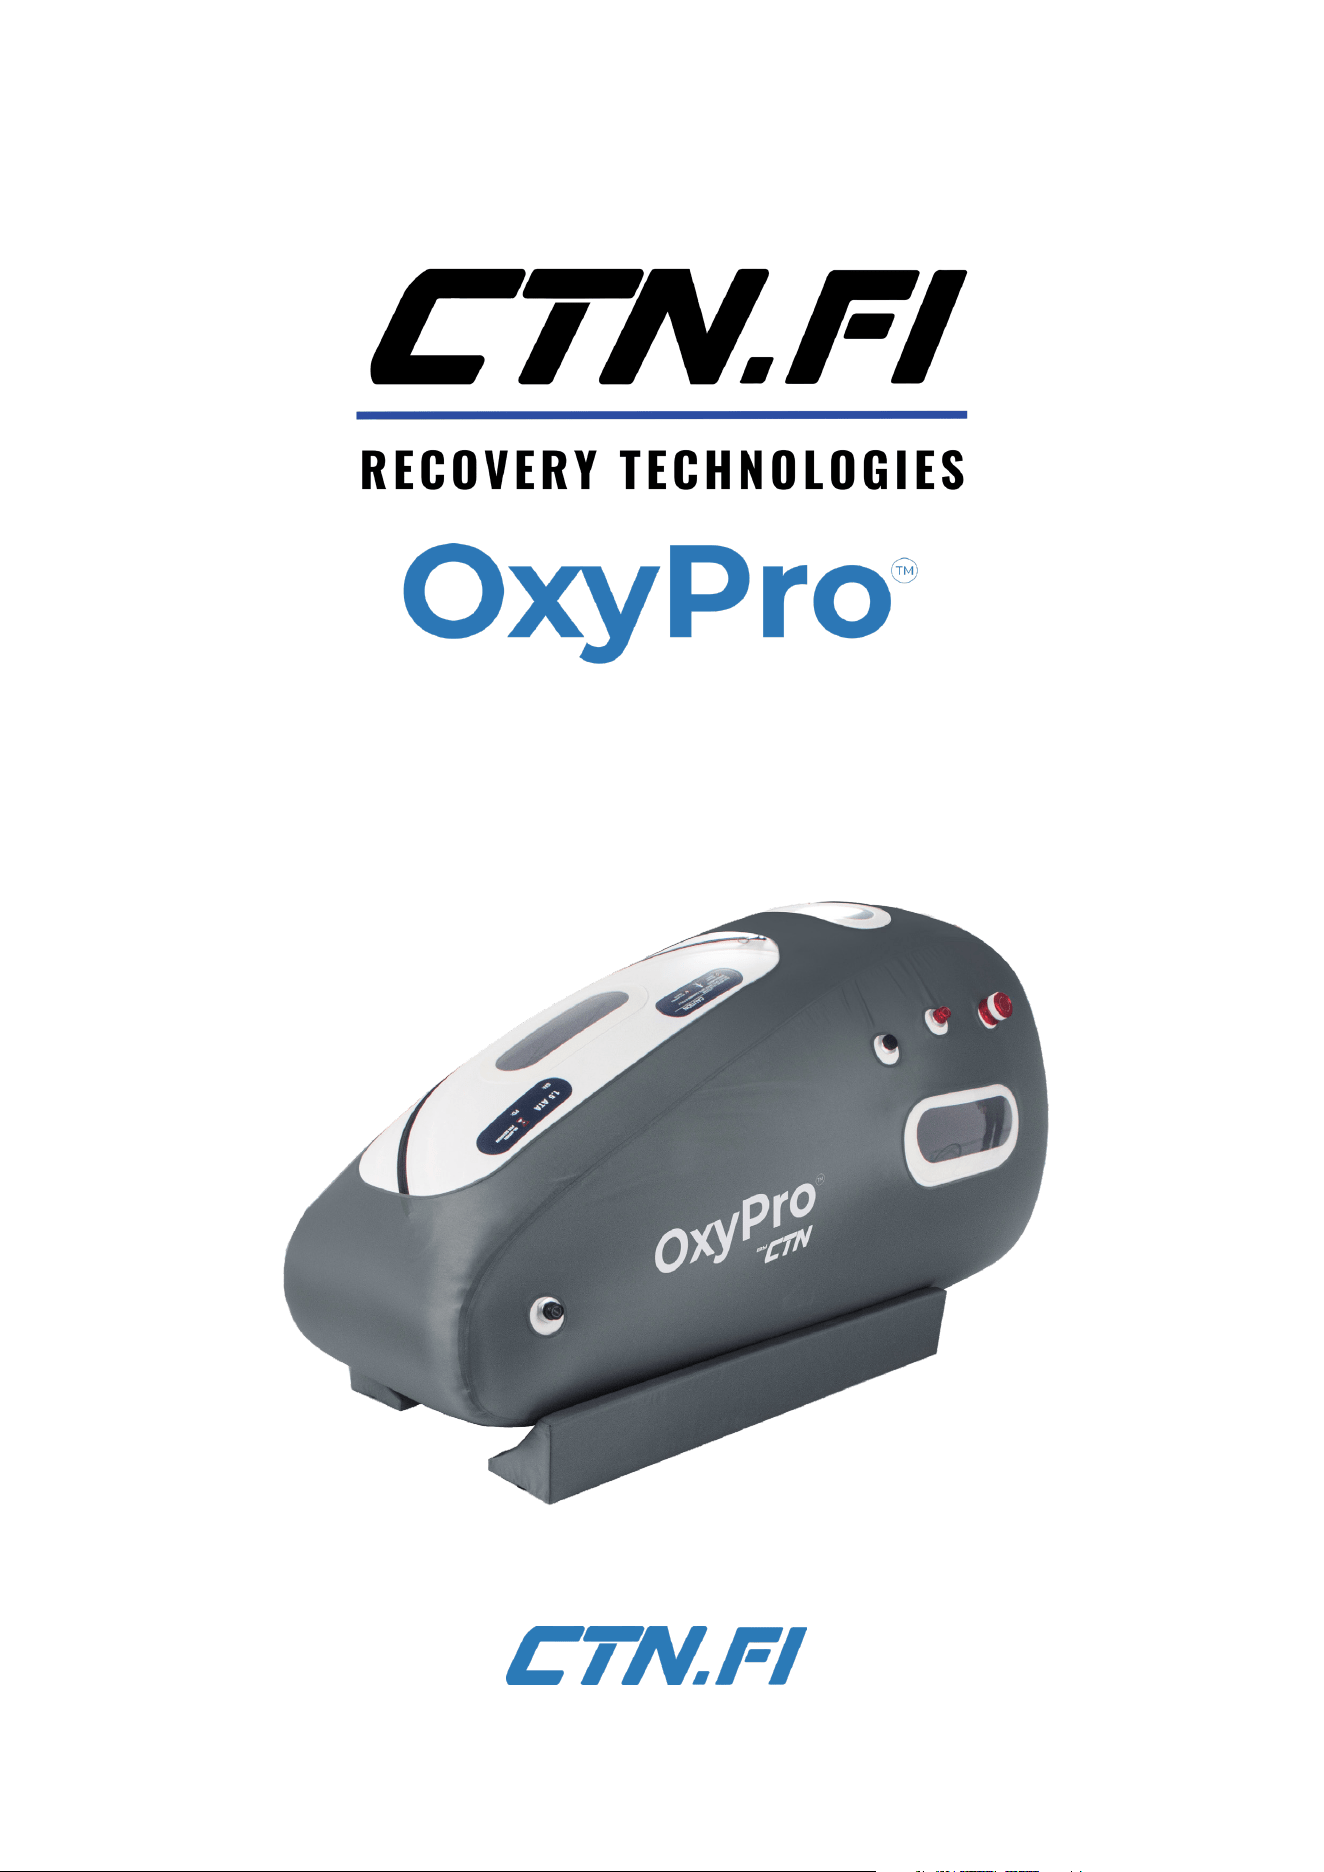
VS1 Mild Hyperbaric Oxygen Chamber
USER MANUAL
05.2024
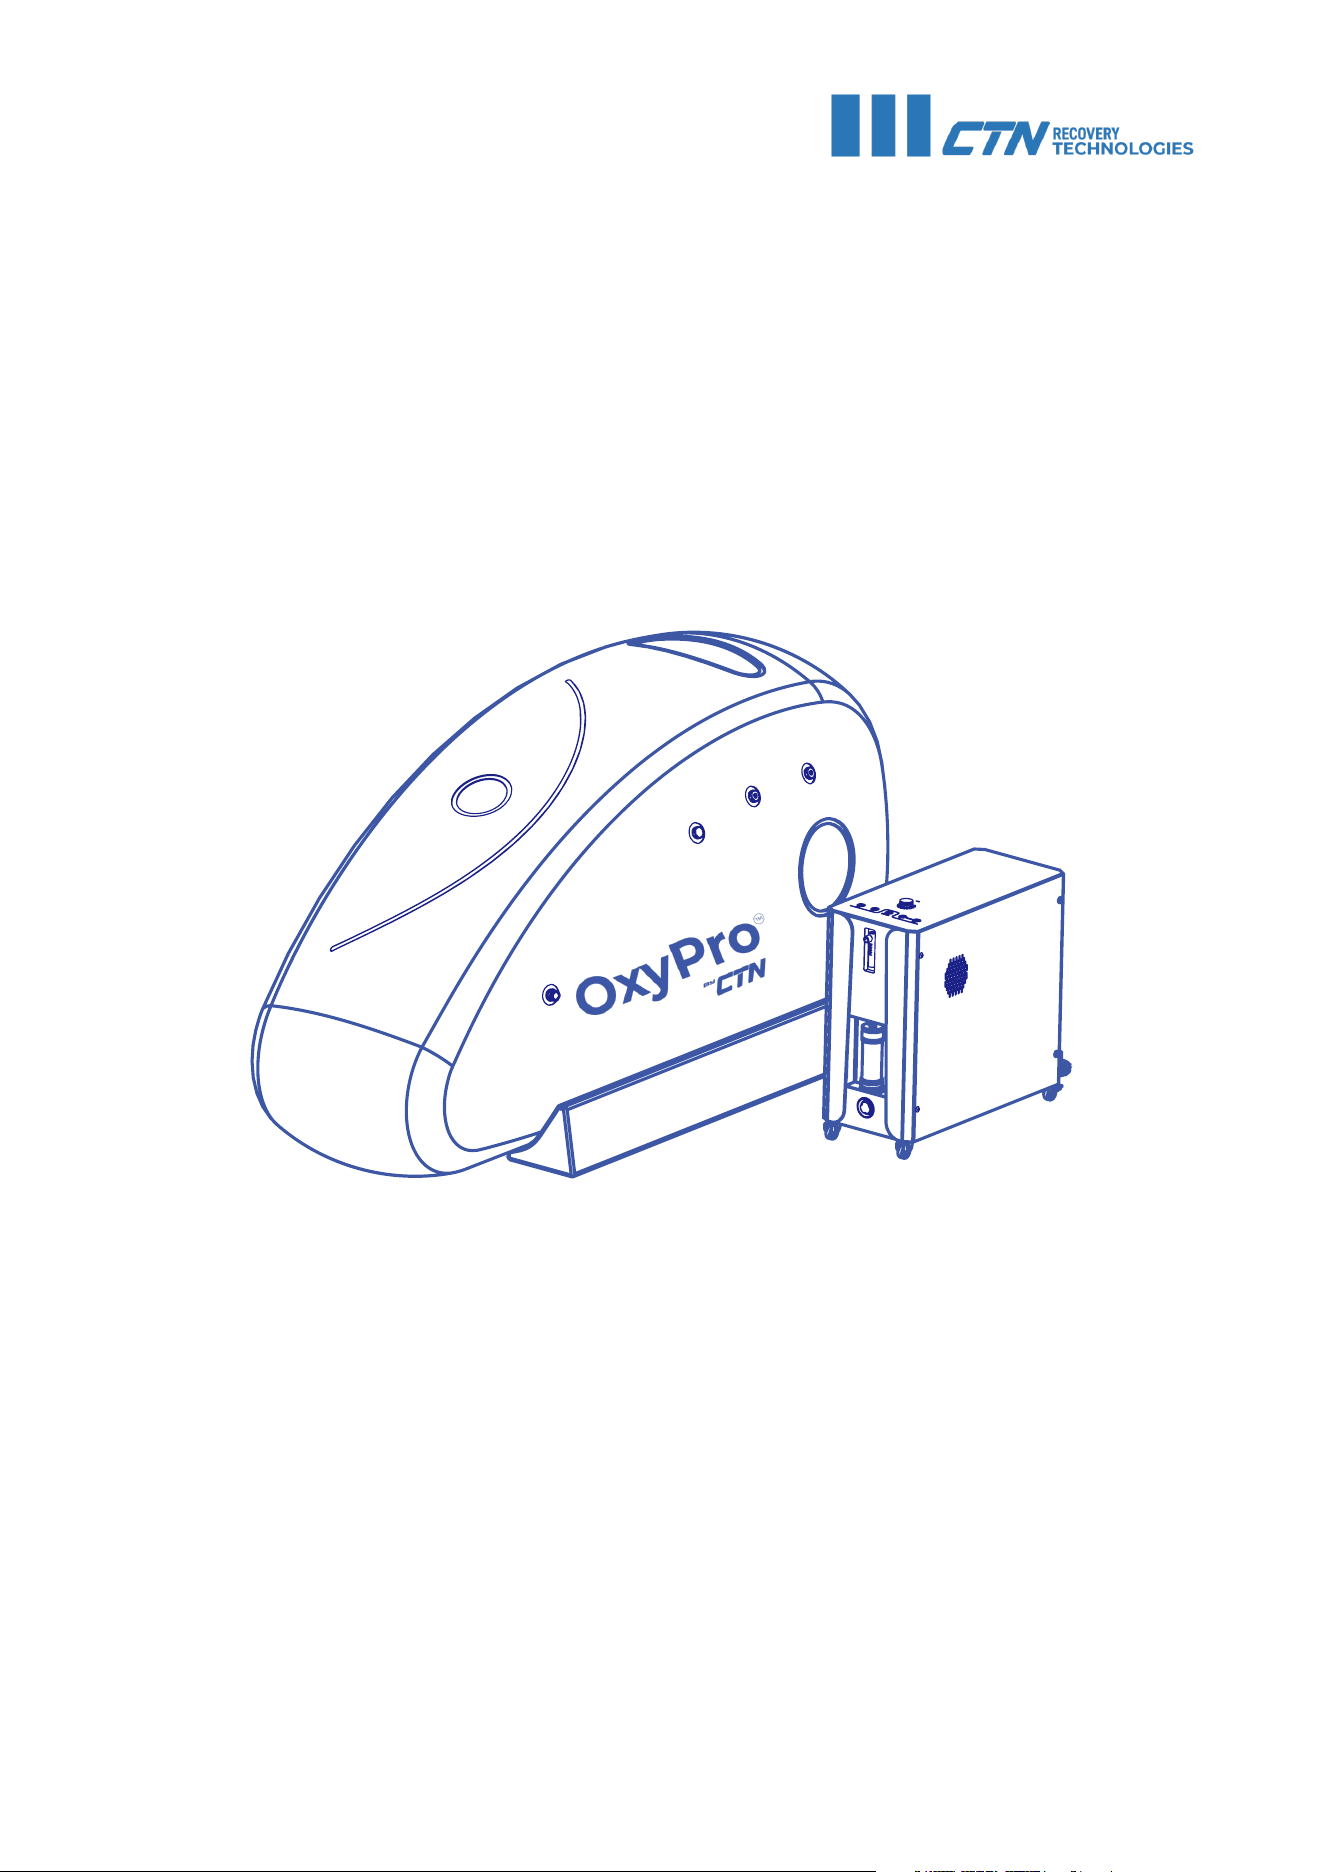
INTRODUCTION
Thank you for purchasing a CTN hyperbaric
oxygen chamber. The membrane of this
product is made of polyurethane composite
and environmentally friendly materials,
pressurized with clean air that has been
filtered through multiple times. The pressure
in the cabin is adjustable from 1.1 to 1.5 ATA.
This product is foldable and portable, safe to
use, reliable, and easy to operate without third
party assistance.
TABLE OF CONTENTS
INTRODUCTION ....................................................... 2
PRECAUTIONS AND WARNINGS ................ 3
CONTRAINDICATIONS ......................................... 3
TECHNICAL SPECIFICATIONS ......................... 4
ASSEMBLY .................................................................... 4
INSTRUCTIONS FOR USE ................................... 7
MAINTENANCE ......................................................... 9
WARRANTY INFORMATION ............................. 9
TROUBLESHOOTING ............................................ 10
2

PRECAUTIONS AND WARNINGS
• Please read the instructions carefully before using the device.
• Use a dedicated power outlet for the cord. Make sure that the power plug is fully
connected and not loose. Do not pull or twist the power cord with force
• Do not use the device in wet or humid conditions. The indoor temperature should be
maintained below 24°C and humidity below 50%.
• When cleaning or servicing the device, unplug the power wire.
• Stop using the device in case of any uncomfort.
• If an abnormal smell occurs during use, turn off the power and pull out the plug.
• Do not attempt to disassemble the machine or make modifications.
• Children can only use this product under adult supervision.
• Do not place heavy objects on top of the machine
• Do not touch electrical components with wet hands.
• Do not open the inner or outer zippers during use or before the chamber has depressurized
to 0kPa.
BEFORE FIRST USE:
• Test an empty chamber first to make sure that the device is operating normally.
• If the equipment is operating abnormally, please do not use it and contact support.
• When using the device for the first time, people can feel uncomfort in the ears, which
is normal. Swallowing saliva or yawning can help adapt to the change in pressure, just as
one would do during a plane takeoff. This is a normal phenomenon caused by increased
pressureand should disappear once the pressure in the chamber has stabilized at 35-40kPa.
After several times of use, this phenomenon will gradually disappear.
IN CASE OF AN EMERGENCY OR WHEN THE MANUAL PRESSURE REDUCING VALVE FAILS
TO WORK NORMALLY:
• Please press the emergency pressure reducing valve to relieve the pressure. When the
pressure reaches 0 kPa, open the zipper and exit the cabin. Do not open the zippers by force
during use or when the pressure relief is not completed.
CONTRAINDICATIONS
Whenever unsure about any listed or other potential contraindications, please make sure that
the client consults their doctor or seeks medical advice from the treating medical professional
before administering any treatments.
Below are some of the possible contraindications:
• Infectious diseases and other serious illnesses
• Open cuts or wounds
• Pregnancy
• Intoxication
• Chest or lung diseases, a severe cold
• Use of pacemakers
• Use of heavy medications
• Untreated pneumothorax (pneumothorax)
• Chemotherapy drugs (adriamycin, cisplatin and bleomycin)
• Acute sinusitis (inflammation of the sinus cavity)
• Severe imbalanced asthma
• Claustrophobia
3
•

INTRODUCTION
TECHNICAL SUMMARY OF DEVICE FUNCTIONALITY
CTN OxyPro™ devices are non-medical mild pressure oxygen therapy (mHBOT) devices and
are intended to enhance overall well-being and recovery. The devices are produced in both soft
shell (PVC Vinyl) or steel construction. The devices are available in single-seater, 2/3 person and
four-seater. The information presented here applies to all CTN OxyPro™ models, regardless of
size or material of manufacture.
DESCRIPTION OF THE TREATMENT EVENT
During operation of the device, the internal pressure of the OxyPro™ is raised from normal sea
surface air pressure to slightly less than 0.5 atmospheres (ATA), which corresponds to a depth
of about 4-5 meters underwater. An increase in pressure below 0.5 ATA means that the OxyPro
device is not classified as a pressure vessel according to applicable EU laws and regulations and
is not subject to EU classification and inspection regulations for pressure vessels. The non-med-
ical oxygen concentrator attached to the device increases the oxygen concentration inside
the device from 21% to a maximum of 33% of normal indoor air. Due to this relatively modest
increase in oxygen content, phones, laptops, etc. can be used in OxyPro during its use. Unlike
medical high-pressure HBOT devices, which, in addition to higher pressure, breathe 100% pure
medical oxygen, which together make the chamber fire sensitive.
SUMMARY OF THE USE OF THE DEVICE AND MARKETING OF TREATMENTS
Because OxyPro devices are not medical devices, medical claims should not be used in connec-
tion with them or when marketing treatments made with them. The devices are designed and
intended for general well-being therapy, and although breathing oxygen-rich air in a low-pres-
sure space has been proven to be beneficial for the client and refreshing and restorative in
various ways, not enough medical studies have been conducted on mHBOT treatments. Due to
the modest increase in pressure and oxygen levels compared to normal indoor air, CTN Oxy-
Pro™ is safe and easy to use. Nevertheless, in commercial use, it is recommended that staff be
present and the client monitored throughout the treatment to ensure that the client’s treat-
ment experience is pleasant and that treatment can be interrupted immediately if the client so
wishes.
The following page lists the most significant differences between HBOT and mHBOT
devices: https://hyperbarium.com/en/blog/different-hyperbaric-chambers.
4
HBOT chambers mHBOT chambers
Maximum working pressure
3 ATA (tested up to 6 ATA) 1.4 ATA
Quality of inhaled oxygen
Pure medical oxygen (100%) Pure oxygen 24% - 90%
Personnel requirements for the operation of the device
At least one clinical specialist with hyperbaric
medicine skills + At least 2 hyperbaric operators,
certified + medical assistant
mHBOT chambers do not require the presence of
a certified user or medical professional
Materials of the chamber
C-Steel hard shell, PED certified + acrylic PMMA,
PVHO-1 and NFPA 99 certified
May have a hard or soft shell. There are no sepa-
rately set standards for materials
Authorisation requirements
HBOT chambers require medical permission mHBOT chambers do not require medical permis-
sion
Classification and certification in the USA and EU
Class IIb medical device Not classified as a medical device
Fire extinguishing system
HBOT chambers are equipped with an effective
fire mist and water extinguishing system (HSFS)
as a mandatory feature
There is no need for a fire extinguishing system in
mHBOT chambers
Duration of treatment
Most often from 120 to 150 minutes 60 - 90 minutes
Site requirements
HBOT chambers can only be used in authorized
hospitals or medical clinics
mHBOT devices are often used in beauty salons,
gyms, various wellness clinics and home use
Medical examinations
More than 300 published medical studies proving
the effectiveness of treatment in HBOT chambers
The number of studies demonstrating the effec-
tiveness of medical treatment in mHBOT devices
is limited
Protection against voltage drops
A system of protection against voltage fluctua-
tions or drops in electrical voltage is mandatory
mHBOT chambers do not have mandatory protec-
tion against voltage fluctuations or drops
Medical recognition
The FDA approved 14 different diseases, the
European Committee of Hyperbaric Medicine
(ECHM) approved more than 30 different diseas-
es, the Society of Hyperbaric and Underwater
Medicine (UHMS) approved 14 different diseases,
the Society approved the European Baromedical
Association (EUBS)
The FDA and the Underwater and Hyperbaric
Medicine Society (UHMS) recommend one dis-
ease: acute altitude sickness (AMS) and its asso-
ciated mild symptoms. It has not been approved
or recommended by the European Committee of
Hyperbaric Medicine (ECHM). It is not approved or
recommended by the European Baromedical
Association (EUBS)
Source: https://hyperbarium.com/en/blog/different-hyperbaric-chambers
5
6
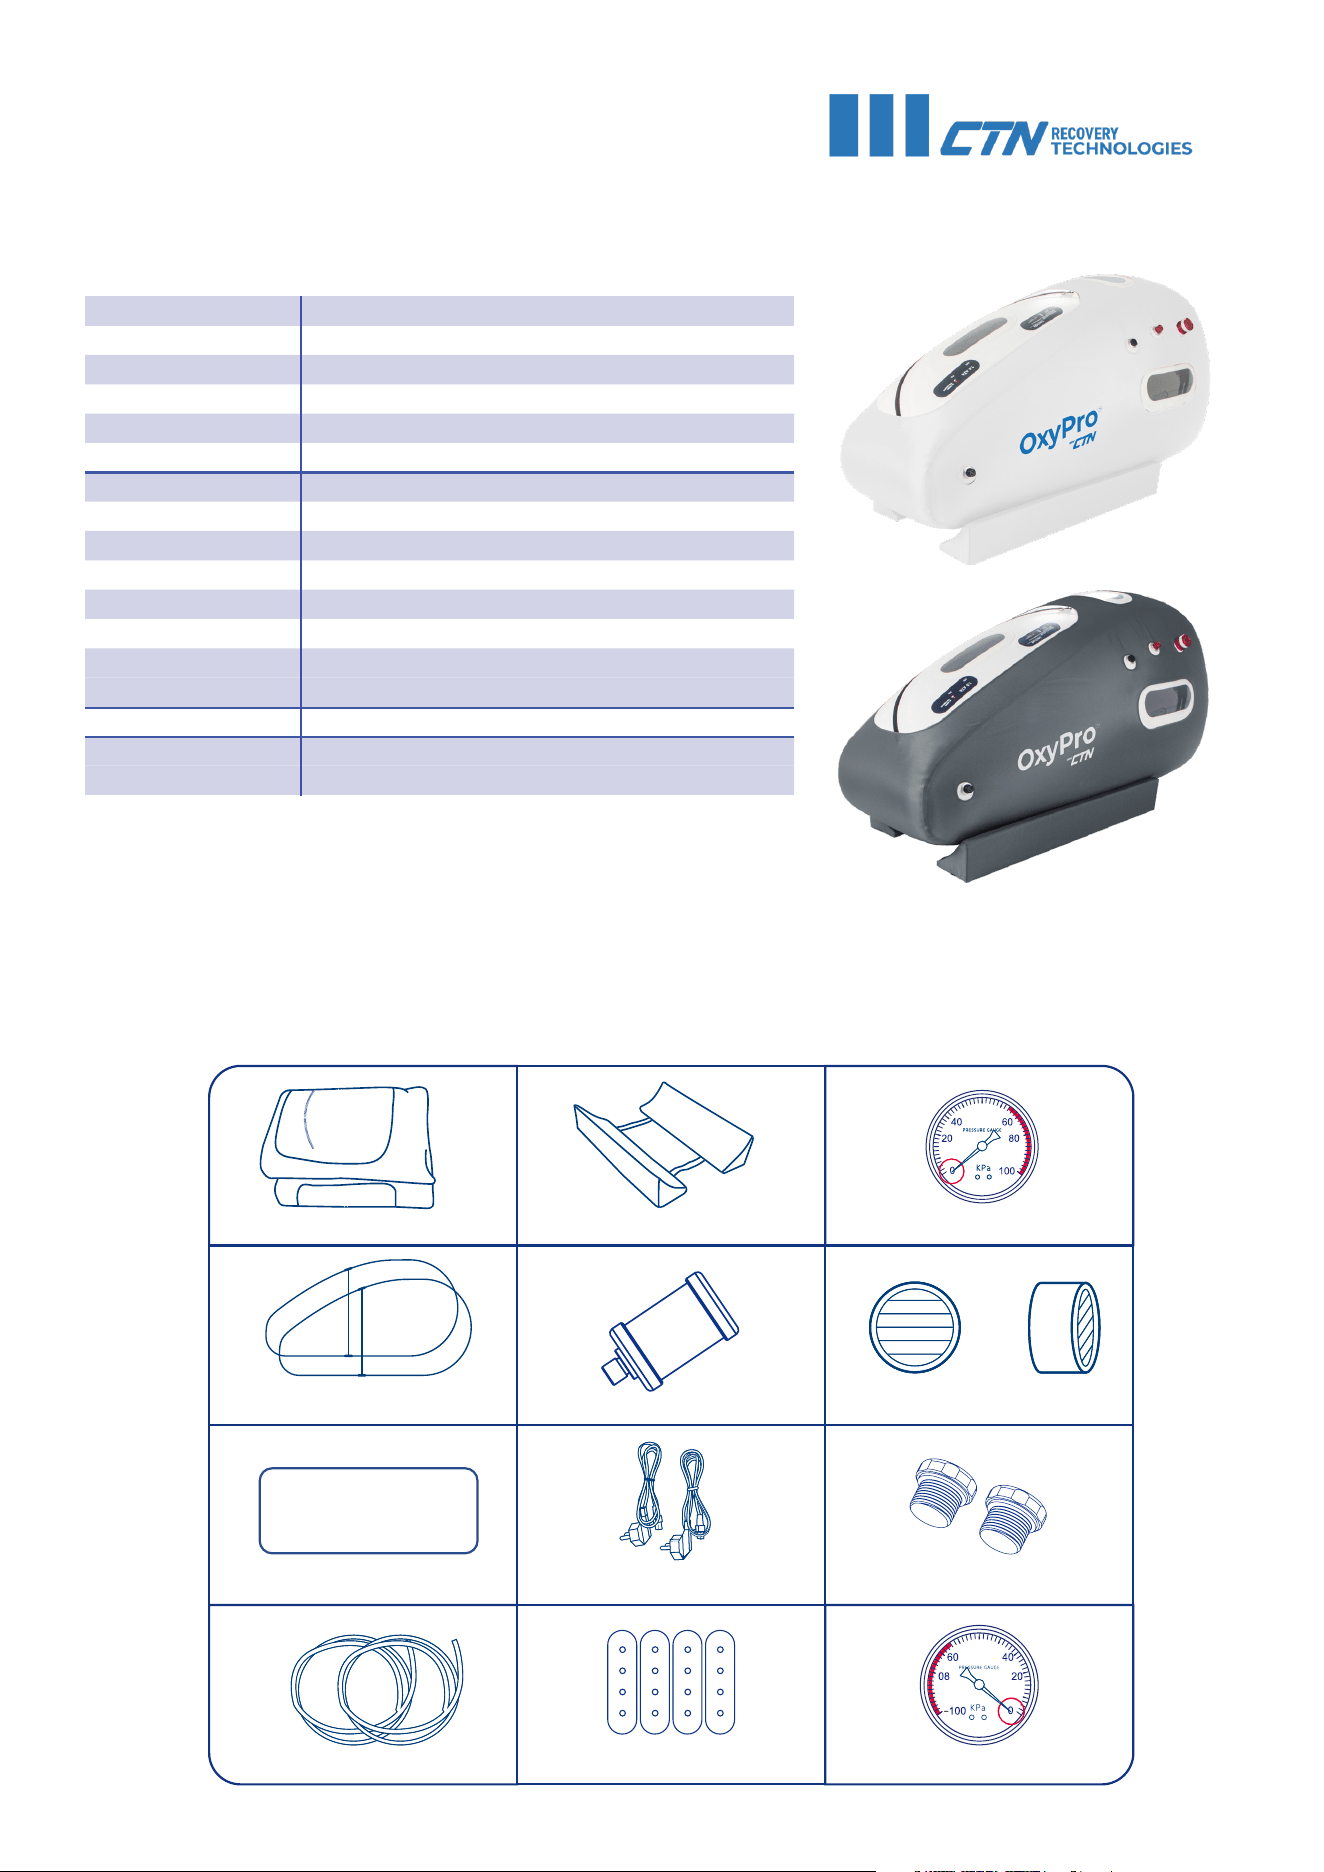
TECHNICAL SPECIFICATIONS
OxyPro™ VS1
1.5 ATA
TPU
L2300 x W1000 x H 1200 (mm)
46 KG
White/ grey exterior, white interior.
L 766 x W 350 x H 750 (mm)
72L/min
110 KG
1100 W, 110 V/60 Hz, 220 V/50 Hz
10 L / min
Functions as an air compressor, O
2
concentrator, dehumidifyer, ozonator.
Included with the compressor
Single-person device, easily portable.
Controllable internally and externally.
Chamber:
Pressure:
Material:
Size:
Weight:
Colors:
Compressor:
Size:
Flow of air:
Weight:
Power:
Flow of oxygen:
Features:
Concentrator:
Additional info:
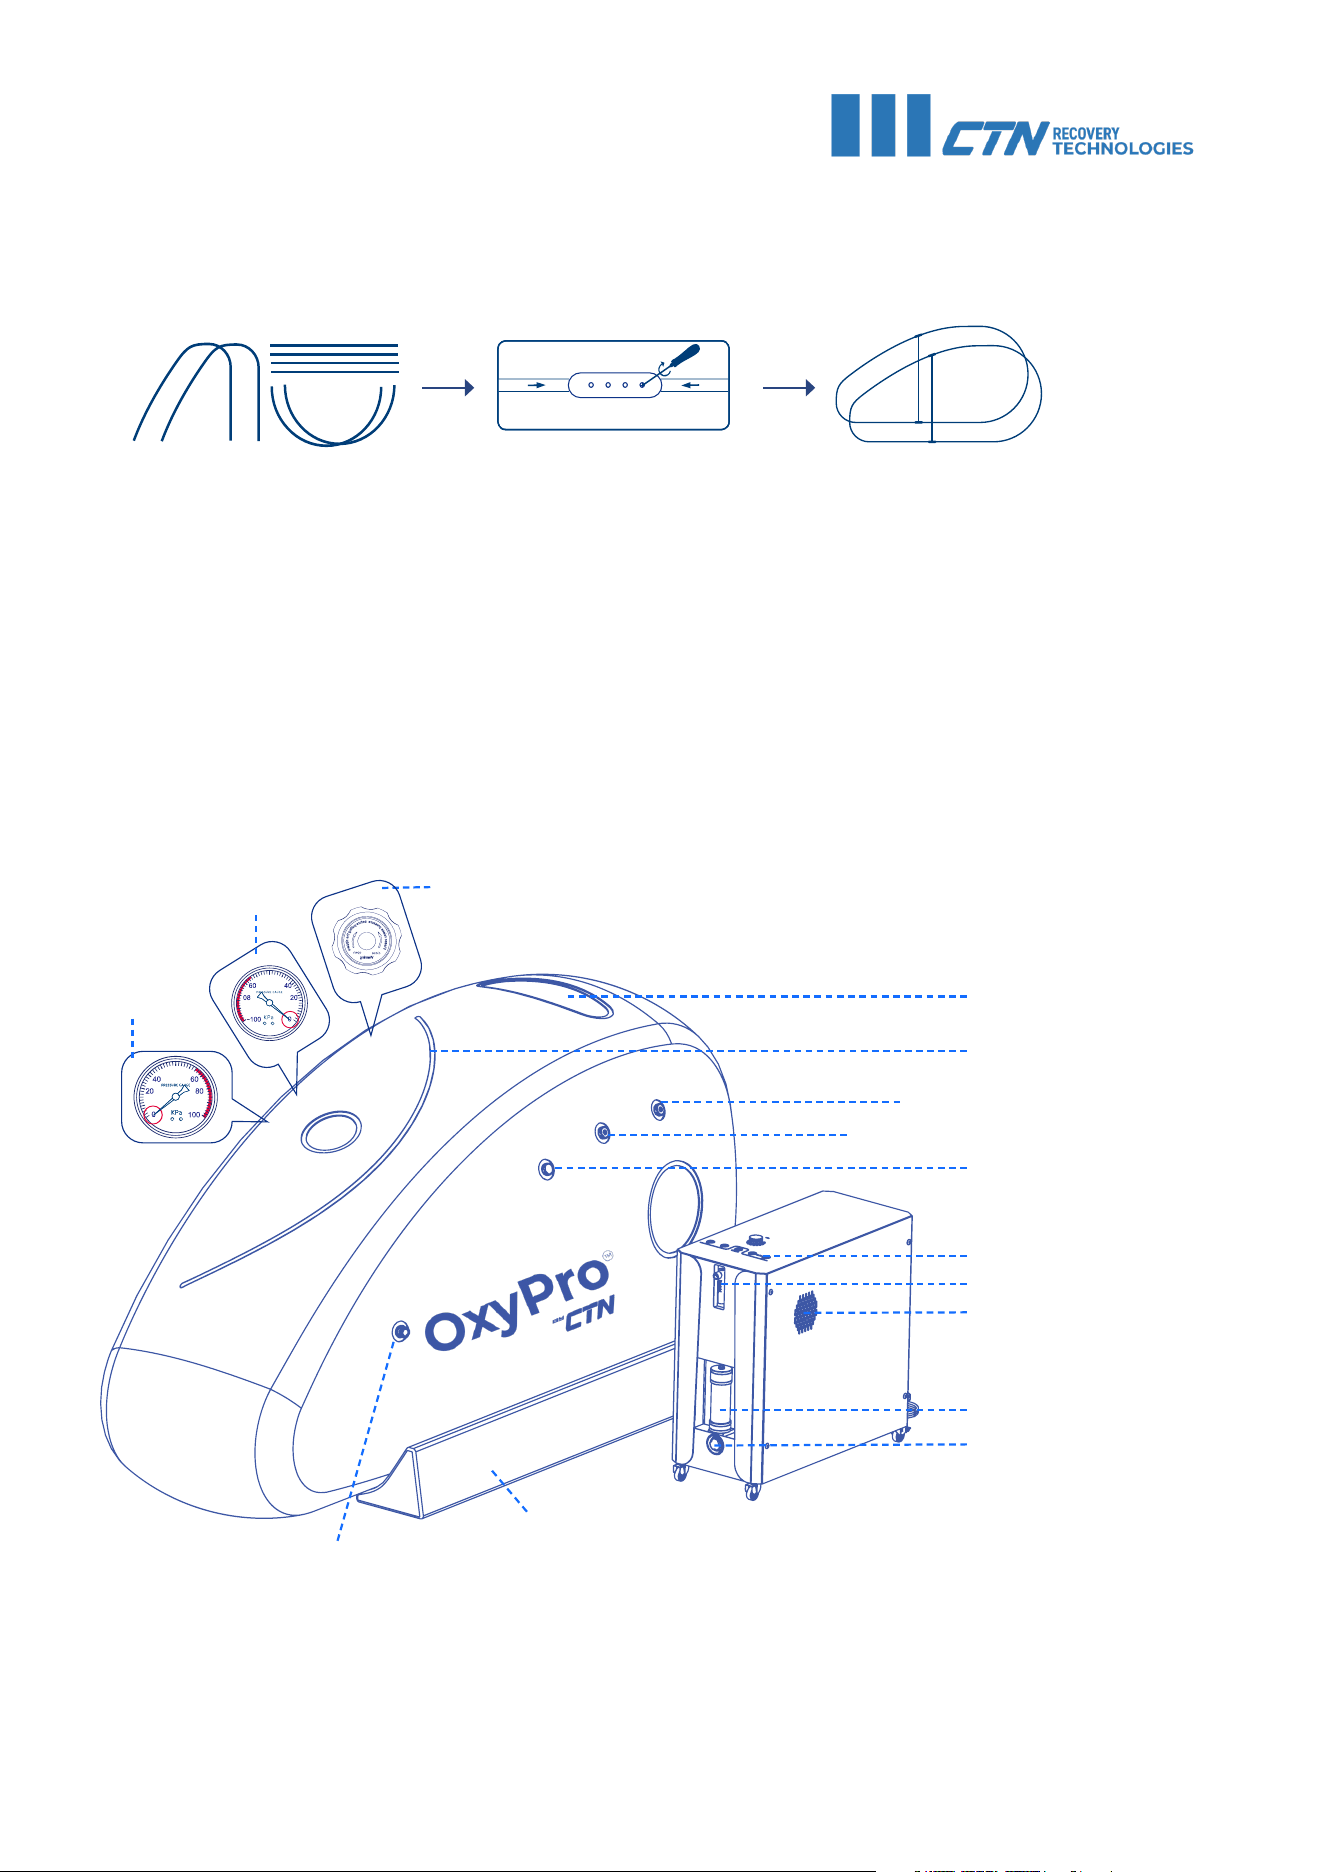
Chamber
Metal frame
Matress
Oxygen/ air tube
Anti-roll support
Silencer
Power cable
Frame connectors Internal pressure gauge
Plug
Filter sponge
External pressure gauge
ASSEMBLY
1. Please make sure to unpack all of the components before assembly. The AIO compressor unit has
straps at the bottom that need to be loosened up and removed.
7
2. Assemble the frame. It is easiest to assemble the frame outside of the chamber first, then re-
move the center pieces and put the curved ends inside the chamber. When everything has been
placed inside, reinstall the middle parts.
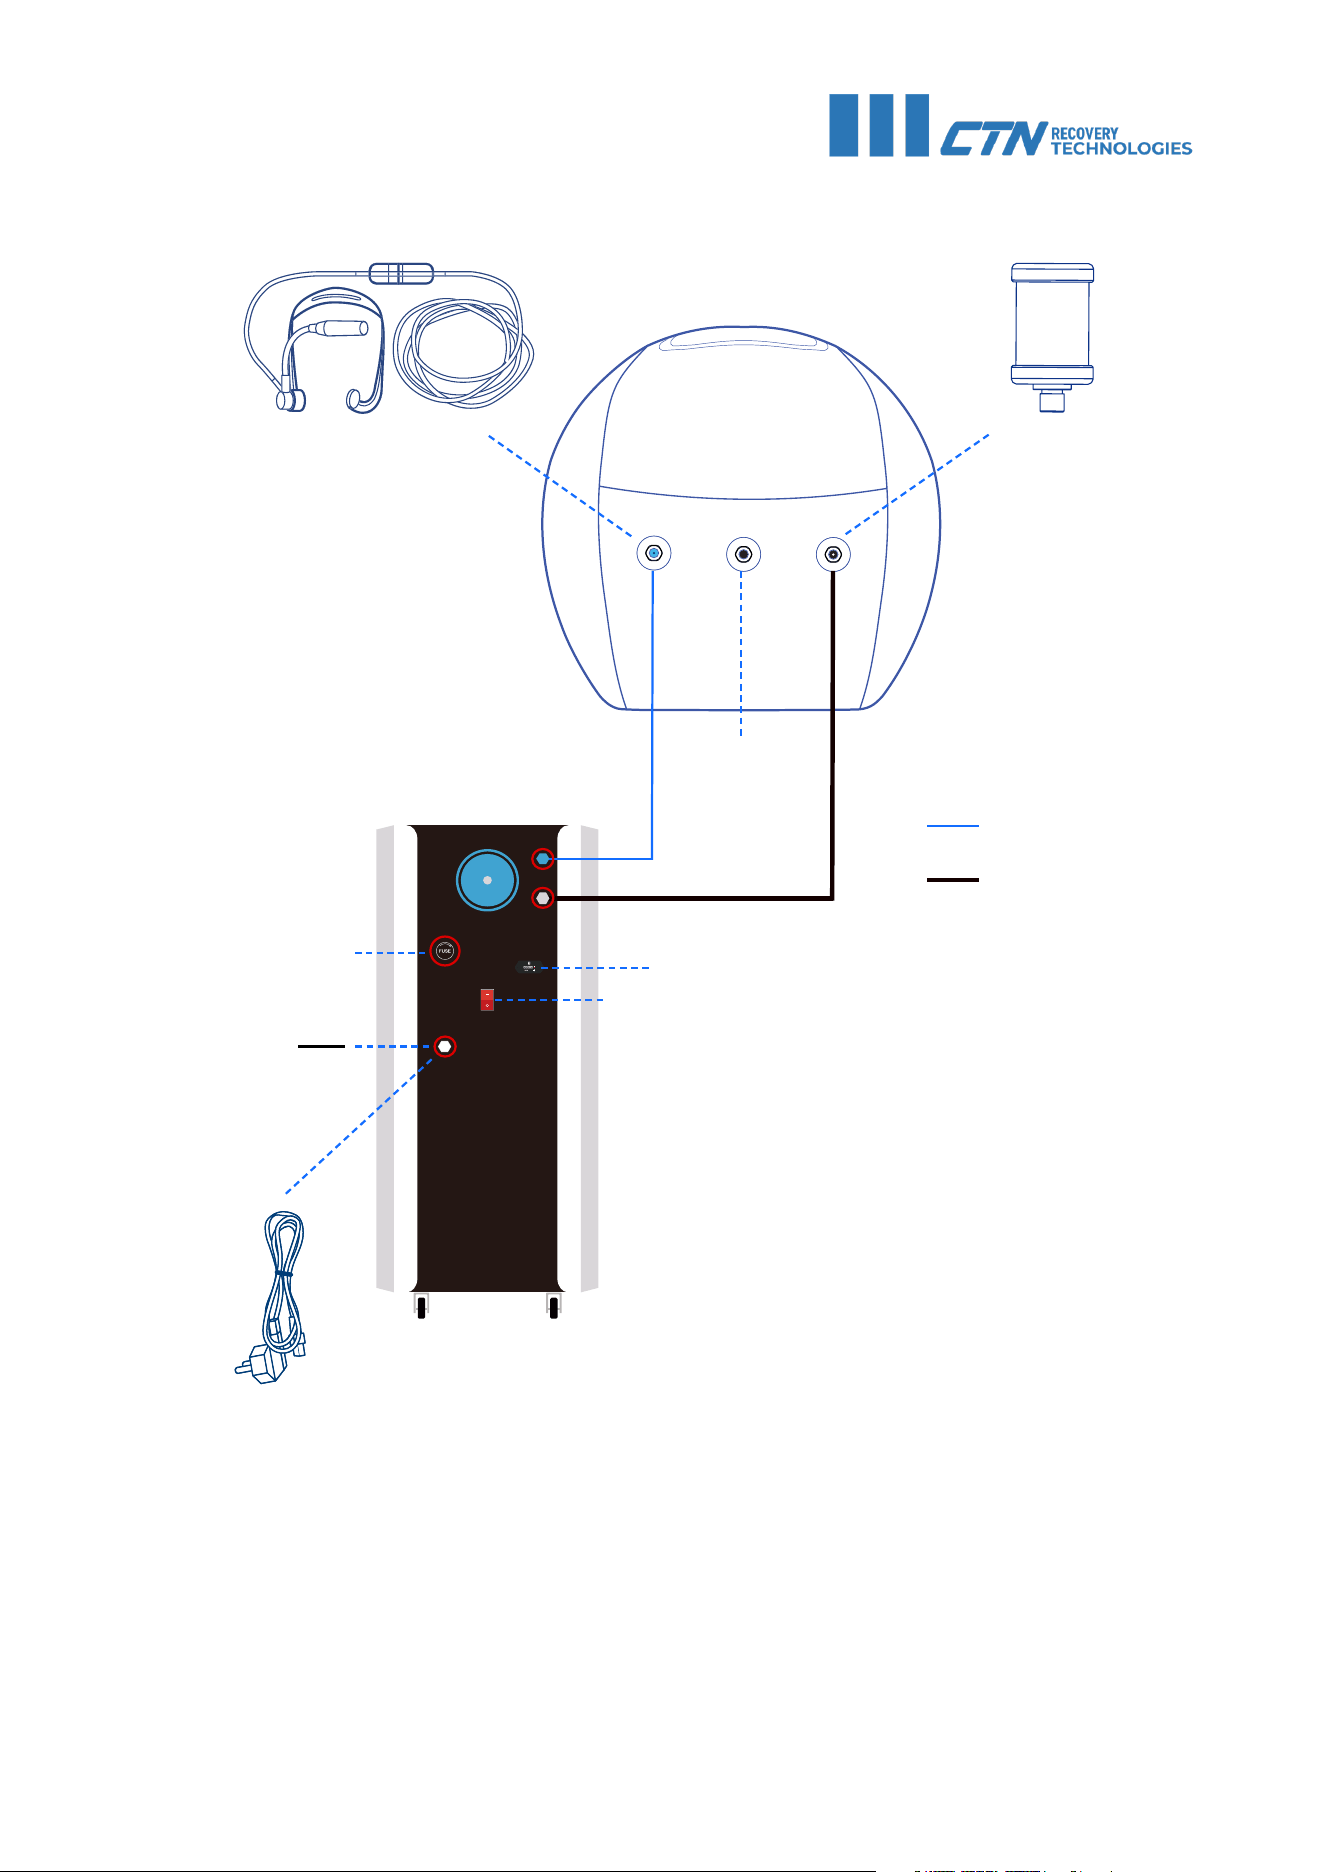
3. Install the following list of components according to the schemes on the following schemes:
• Internal pressure gauge
• External pressure gauge
• Oxygen hose
• Air hose
• Silencer
• Oxygen mask/ nasal cannula
• Power cable
Observation window
Pressure switch valve
Emergency pressure relief valve
Operation panel
Oxygen flow meter
Vents
Condensation cup
Air filter
Anti-roll support
Automatic pressure relief
nozzle
Pressure relief
valve
External
Pressure
gauge
Zipper
Spare port (plugged)
Internal
Pressure
gauge
8
Oxygen hose
Air hose
Silencer
(installed
inside)
Power input
Fuse
ON/OFF button
Oxygen mask/
nasal cannula
(installed inside)
Power cable
5. Connect the compressor unit to a power outlet and turn it on from the back of the unit. The
chamber will begin to inflate. It will take about 5 to 7 minutes for the pressure to build up.
Hour meter
Spare port
(plugged)
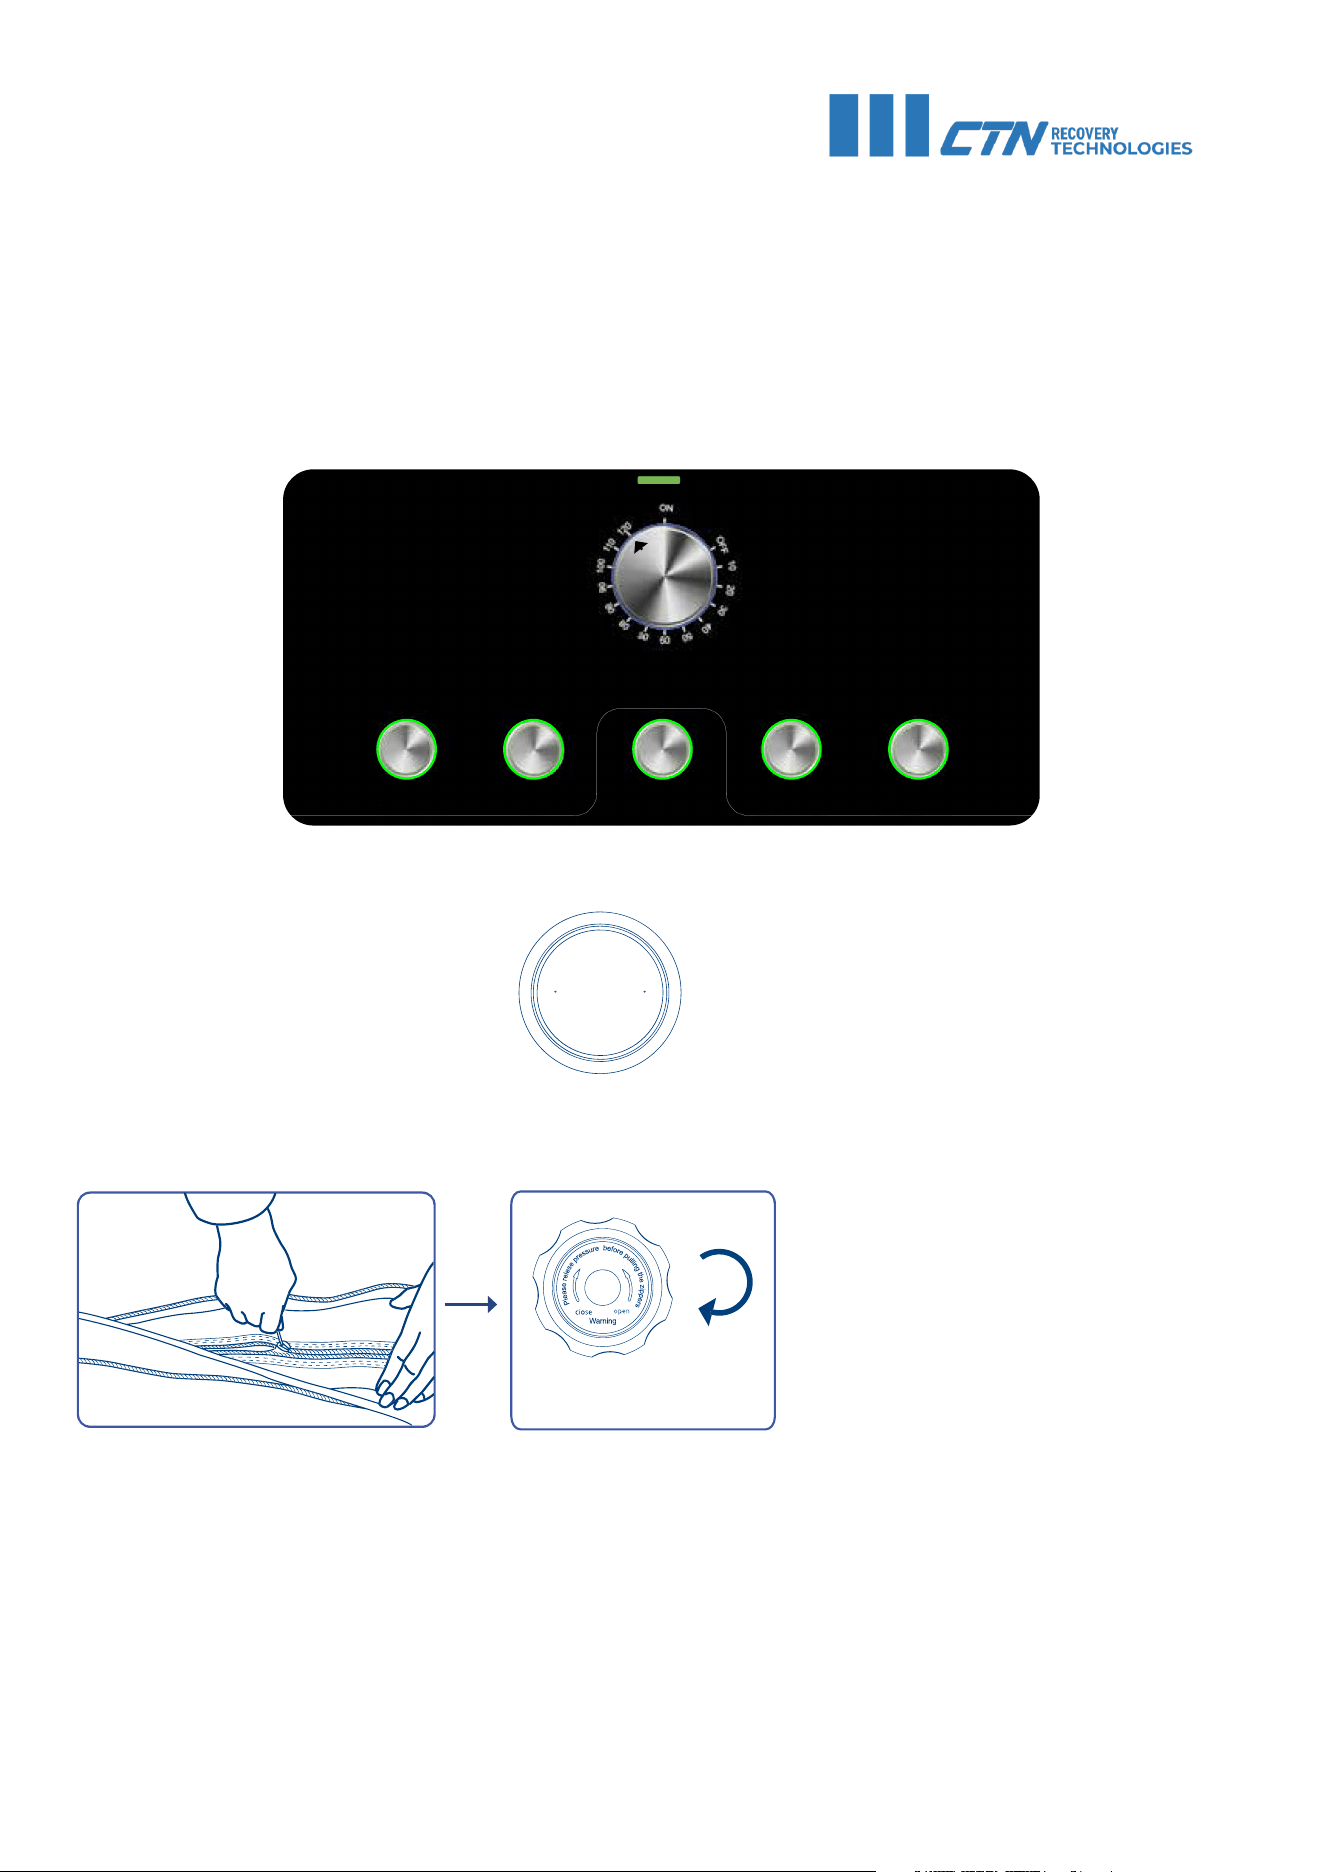
2. By turning the pressure switch valve, the user can switch between 1.1 - 1.2 - 1.3 - 1.4 - 1.5 ATA pressure
according to preference.
3. Enter the cabin, close the inner and outer zippers in turn, making sure to get a proper seal.
Then close the manual pressure relief valve.
9
Timer
ON/OFF
O
2
AirPurifier/
Anion
Dehumidify Refrigerate
INSTRUCTIONS FOR USE
The zippers and pressure valve can
be operated both from the inside and
outside of the chamber.
P
r
e
s
s
u
r
e
s
w
i
t
c
h
v
a
l
v
e
P
r
e
s
s
u
r
e
s
w
i
t
c
h
1. Power on the AIO unit. The timer indicator should should be at “ON” position for use without a time
limit. The operating time in minutes can be selected by turning the knob clockwise. Turn on the ON/
OFF, O
2
, AirPurifier/ANION, Dehumidify and Refrigerate functions.
The indicators will turn green.
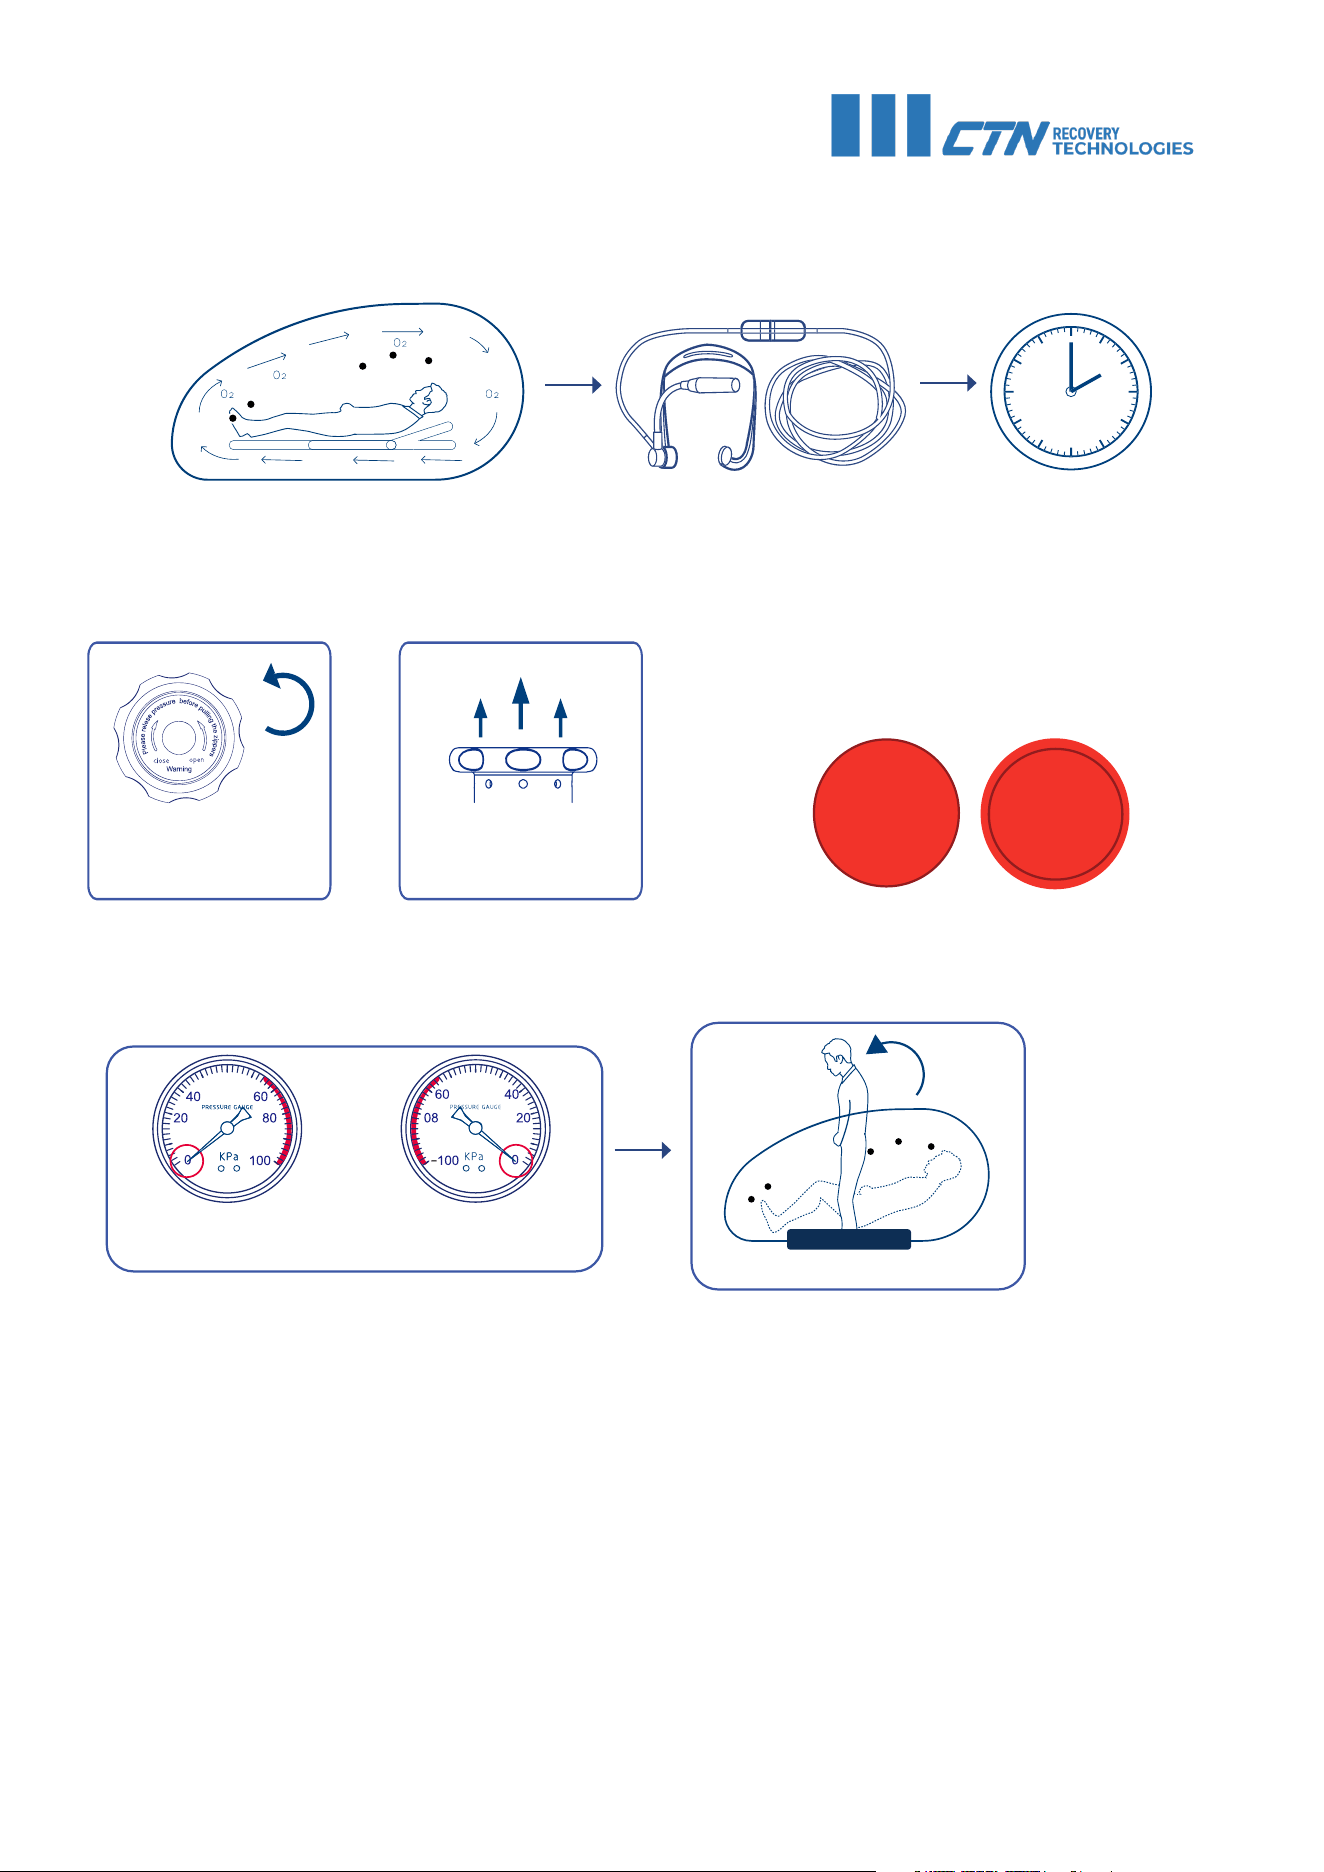
4. After entering the chamber, the pressure gauge will slowly rise to ~40kPa in about
ten minutes. The automatic constant pressure valve will start to work and make a hissing
sound as it relieves the excess air pressure.
Turn the internal pressure
valve clockwise
10
External pressure
gauge
Internal pressure
gauge
5. Wear a connected nasal cannula for optimal results. The recommended session time is 1-2 hours.
6. Before leaving the cabin after use, please open the pressure valve. Wait for the pressure to drop to 0
kPa before opening the zippers.
Turn the internal pressure
valve anti-clockwise
Lift the internal pressure
valve to reduce pressure
or
7. When the pressure gauge shows 0 kPa, open the inner and outer zippers one
by one, get up and exit the chamber.
7. After exiting the chamber, press the power switch to turn off the AIO unit.
8. Clean and disinfect the cabin after use.
1-2 hours
Push
E
m
e
r
g
e
n
c
y
P
r
e
s
s
u
r
e
R
e
l
i
e
f
In case of an emergency, push the emergency
relief valve from the inside, or pull from the out-
side of the chamber
WARRANTY INFORMATION
Void of factory warranty. A 36 months limited manufacturers factory warranty is applied to each sold
CTN device, and is valid from the date of delivery. The term is 36 months for materials and manufactur-
ing defects, and 12 months for computers and electronic components. Each device has its own specific
requirements for the ambient conditions of the space it will be installed in or used. These include but are
not limited to square meters, cubic meters, maximum ambient temperature and humidity, power feed
etc. Non-compliance with the safety information, installation and operating instructions or specifications
and ambient conditions of the space the device is used, can lead to danger for people, the environment,
endanger the device and its functions, and lead to the loss of claims for damages of any kind.
MAINTENANCE
CHAMBER MAINTENANCE AND CLEANING
Maintain the chamber by using a deodorizing and sterilizing spray and/or
alcohol wipes. The run the AIO machine for 20 minutes.
MAINTENANCE AND CLEANING OF THE AIO UNIT
While maintaining the air compressor, make sure that the device is turned off.
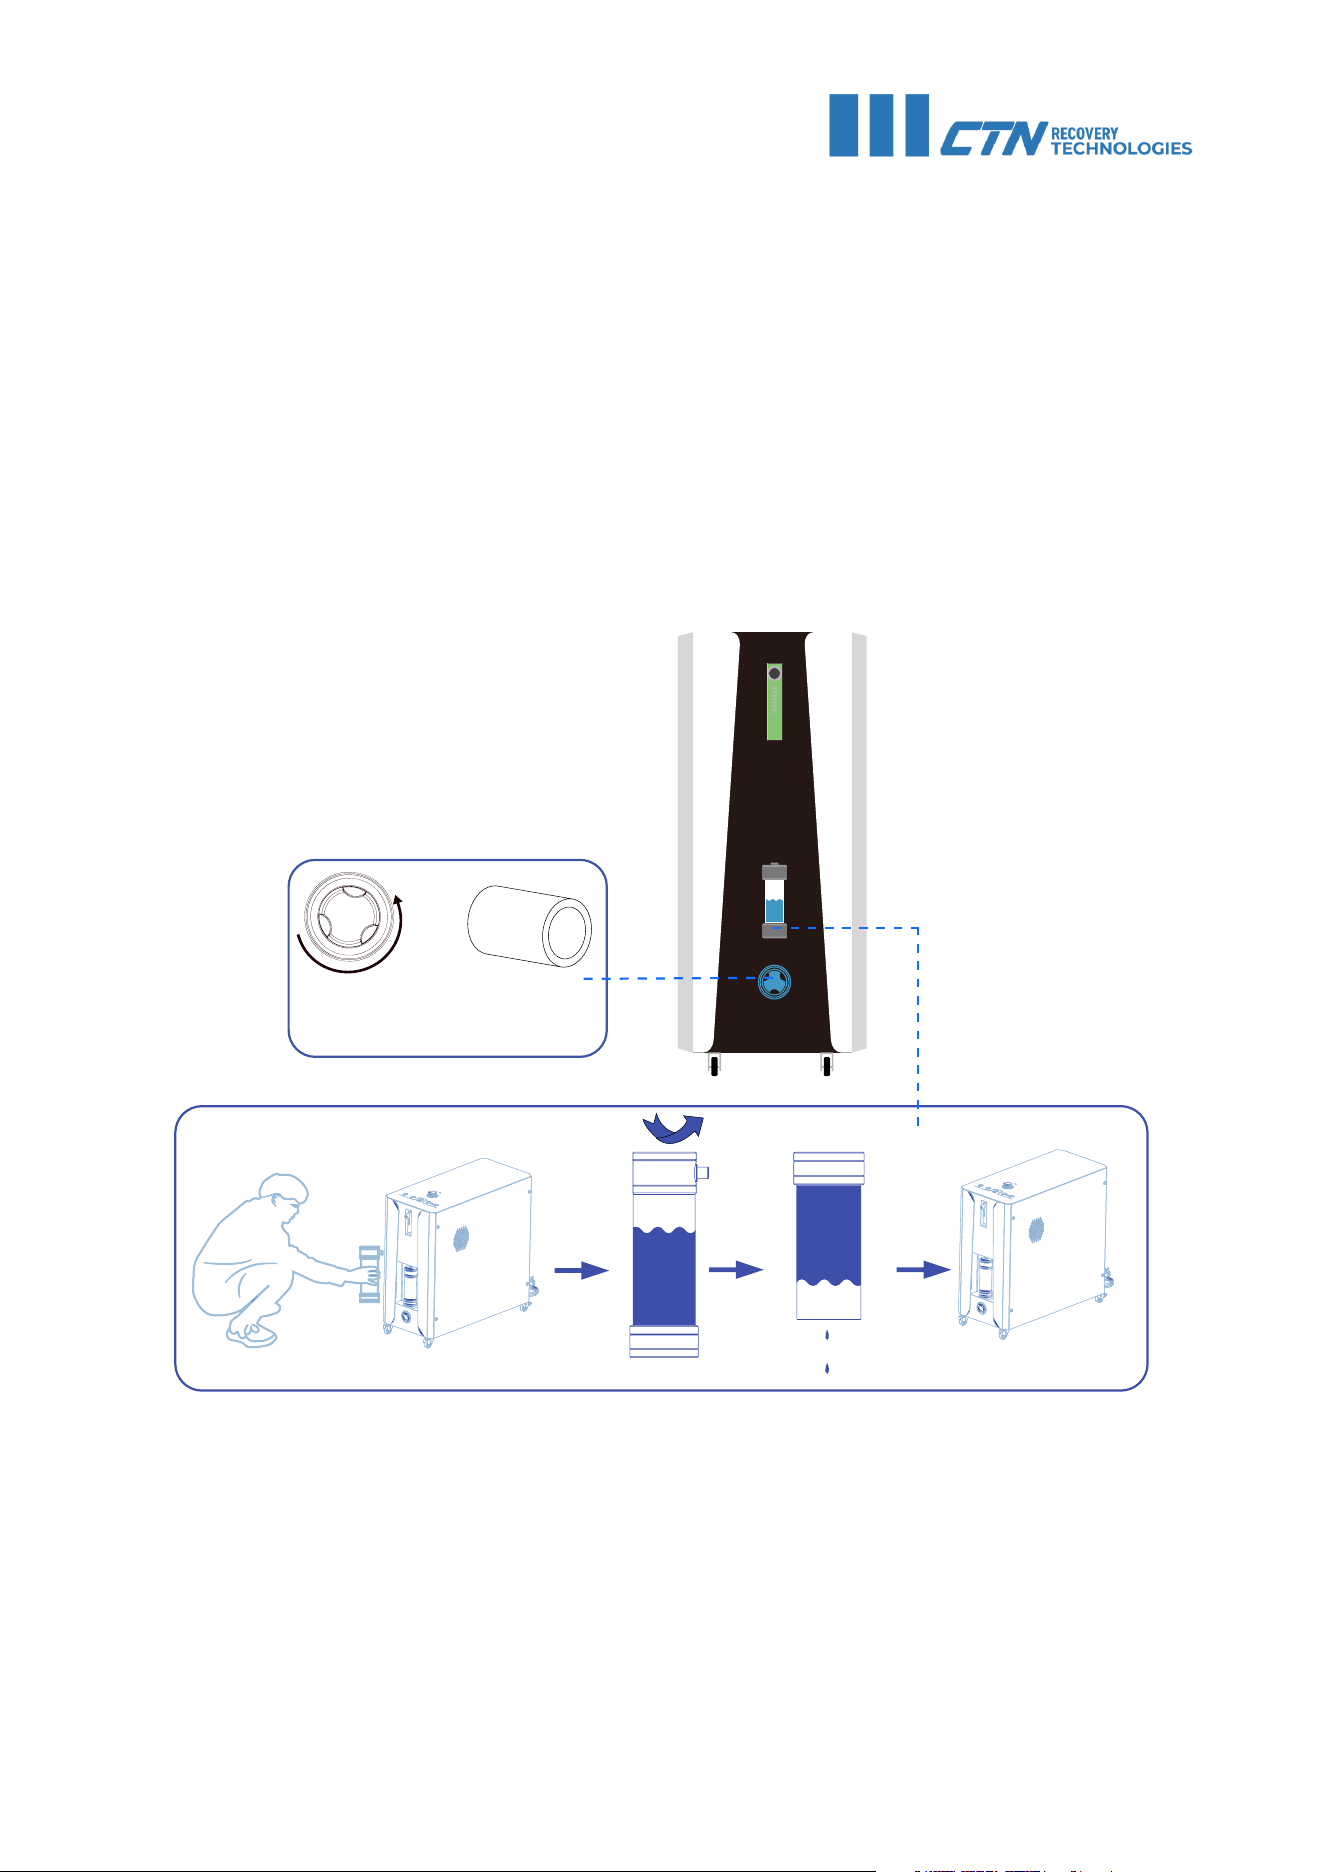
The activated carbon filter should be replaced every 12 months.
Regularly drain the condensed water out of the condensation cup. Make sure to correctly
align the drainage port when reinstalling the cup.
Unscrew the cap, then remove
the filter element to replace
HDPE-filter
11

TROUBLESHOOTING
If your device does not function properly, please refer to the troubleshooting table below. If the
problem can not be resolved, please contact the our support team at service@ctn.fi.
Possible cause
What to do?
1. The air hose is not properly
connected or has a leak
2. The air filter is full of dust
3. The air inlet is blocked
4. The manual pressure reducing
valve is not fully closed
1. The chamber is not fully sealed
2. The manual pressure reducing
valve is not closed or not fully
tightened
3. The air hose is not connected
properly
4. The gray sealing strip is stuck
in the middle of the inner and
outer zippers, and it is not laid
flat.
1. The air filter is clogged
2. The air intake of the air
compressor is blocked
3. The air compressor screws are
loose
1. Inspect the hose and
connection points
2. Replace or clean the filter
3. Clean the air inlet of the air
compressor
4. Close the manual pressure
reducing valve
1. First release the pressure in the
chamber, then open and close
the zippers, restart
2. Please tighten the manual
pressure reducing valve
3. Inspect the connections
4. Make sure the grey sealing
strip remains flat
1. Inspect, clean or replace
2. Clean the air inlet of the air
compressor
3. Tighten the screws of the air
compressor
The pressure inside the
chamber does not rise
Abnormal noise or
vibration inside the AIO
unit
Description
The chamber
inflates slowly
12

CTN CENTER - JAAKONKATU 2 - 01620 VANTAA - FINLAND
CTN GROUP - IRELAND - FINLAND - ESTONIA - SPAIN
WORLD’S #1 IN SPORTS RECOVERY
The original language of this manual is English. Other versions are translations.
User manual version: 09.05.2025