16
SERVICE CENTRE
AUTHORISED RETAILER
Ed. 01/2020 - ver. 002
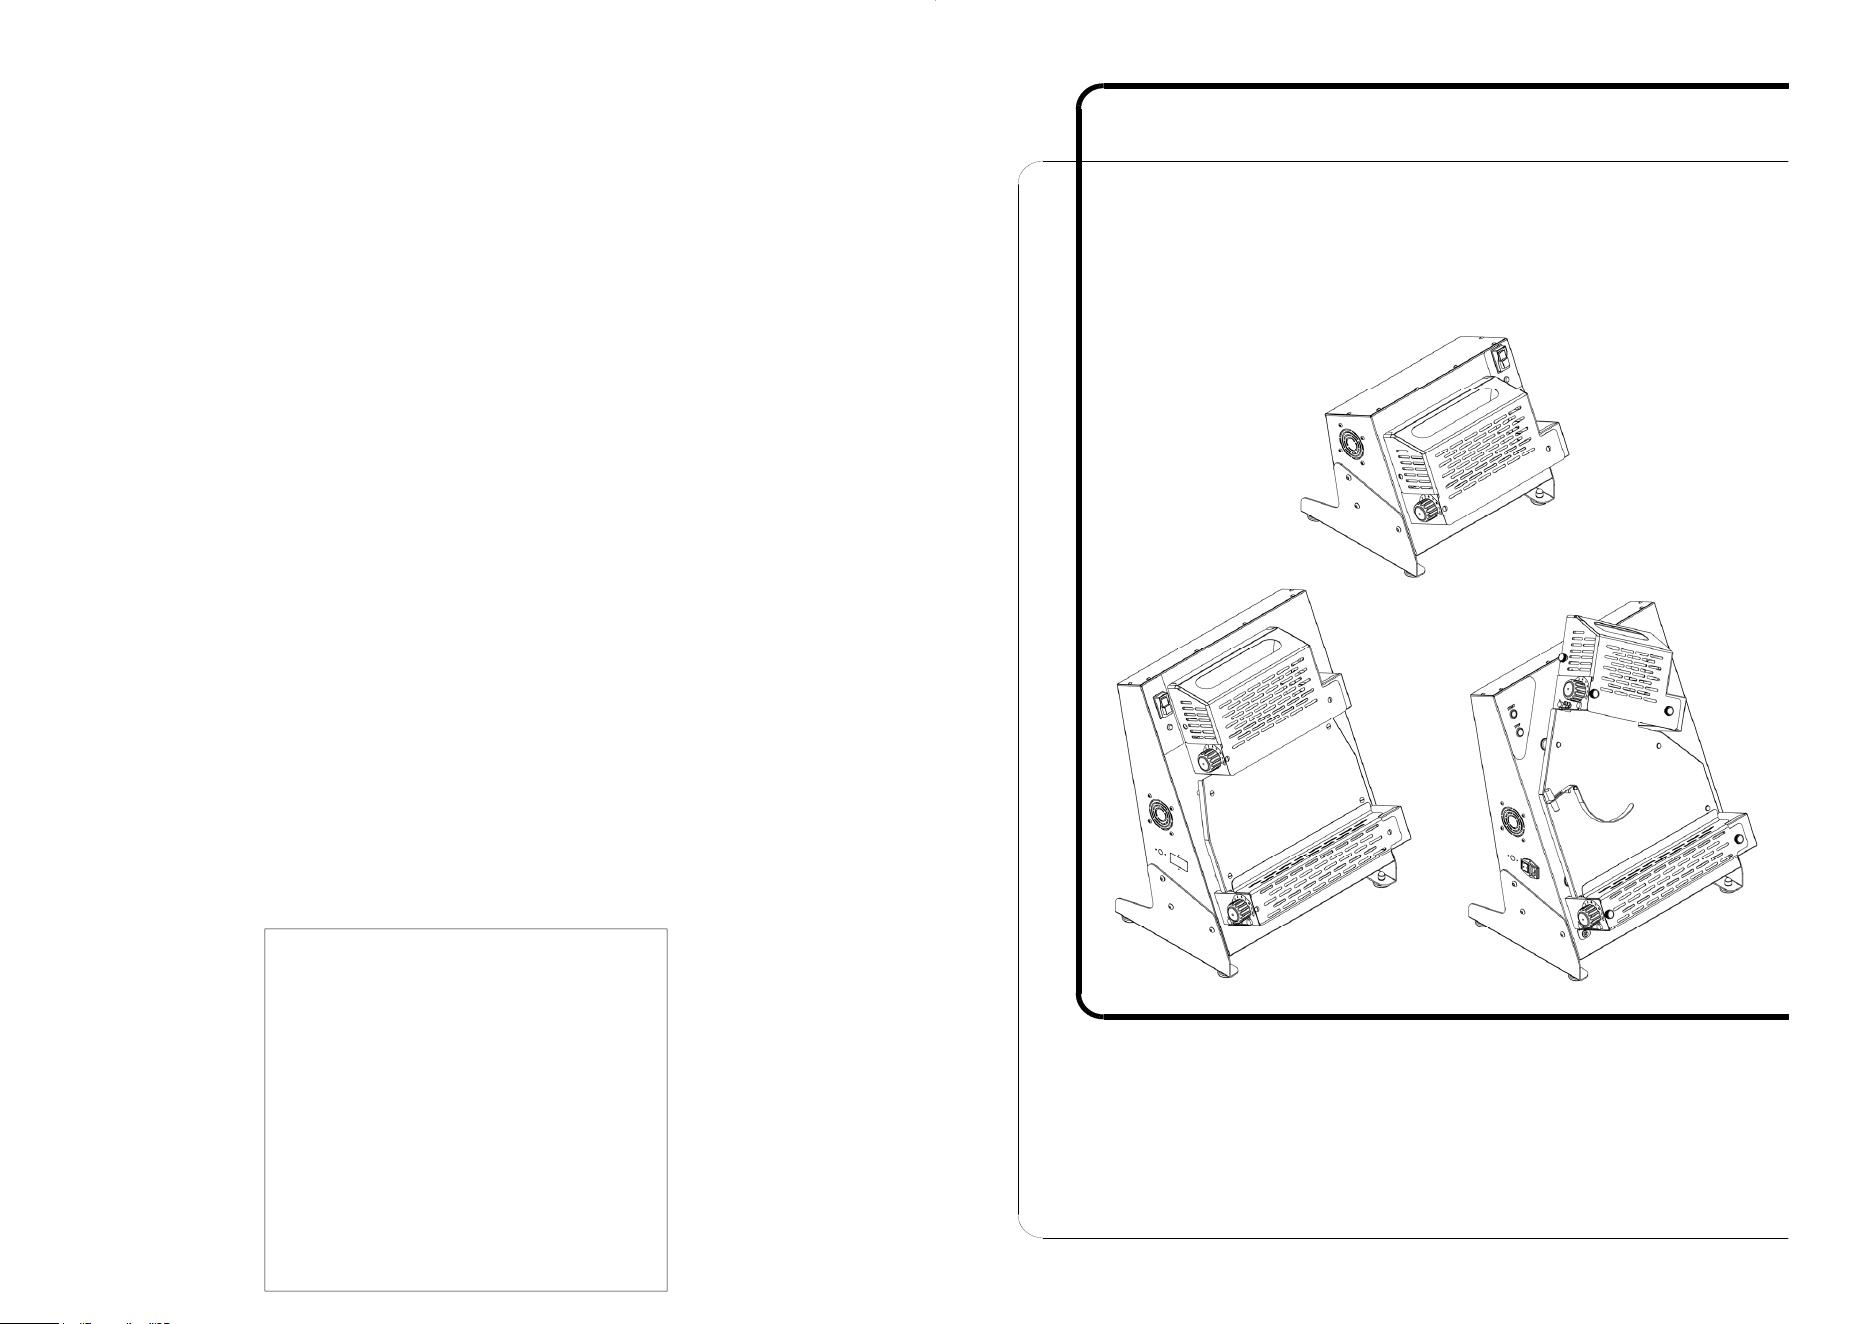
USER AND MAINTENANCE MANUAL
Rolling machine
32/1 - 32/2
42/2 - 42 RP

2 15
CHAP. 7 - MAINTENANCE
7.1 - General information
CAUTION! Before you service the machine, disconnect its power plug from the
mains to isolate it completely from the rest of the system.
7.2 - Power cable
Check the condition of the cable regularly and call the SERVICE CENTRE if it needs
replacing.
CHAP. 8 - DISMANTLING AND DISPOSAL
8.1 - Decommissioning
If you decide to put the product out of service for any reason, make sure that it cannot
be used by other persons: disconnect and cut the electrical connections.
8.2 - Disposal
Once the machine has been decommissioned, it can be disposed of. This should be
done by a waste management company, and its materials sorted for disposal.
8.3 - WEEE (Waste Electrical and Electronic Equipment) regulations
Pursuant to Art. 13 of Italian Legislative Decree n. 151 of 25 July 2005
“Implementation of Directives 2002/95/EC, 2002/96/EC and 2003/108/EC relating
to the reduced use of hazardous substances in electrical and electronic devices,
and to waste disposal”.
The rubbish bin symbol on the machine or on its package indicates that the product
must be disposed separately from other waste, at the end of its useful life.
The recycling waste collection of this machine is organised and managed by the
manufacturer. If the user wishes to dispose of this machine, they must contact the
manufacturer and follow the given procedure to make sure the recycling waste
collection procedure is followed at the end of the machine's useful life.
The correct disposal of the machine for subsequent recycling, management and
treatment of its parts in an environmentally-friendly way contributes towards avoiding
any possible adverse effects on the environment and promotes the reuse and/or
recycling of the machine materials.
Unlawful disposal of the product by the user will lead to the application of
administrative penalties under current law.

14
CHAP. 6 - CLEANING THE MACHINE
CAUTION!
Before cleaning the machine, pull its plug out of the power socket to
isolate the machine completely from the rest of the system.
6.1 - General information
- The machine must be cleaned with neutral detergents at room temperature, using a
soft damp cloth.
- The machine must be cleaned carefully in all its parts, especially those that come
into contact with food.
- Do not use a jet of water or a pressure cleaner to clean the machine.
- Do not use tools, scrubbing brushes or anything that may damage the machine's
surfaces.
- Do not wash the machine or any of its parts in a dishwasher.
- Never use non-foodsafe, abrasive or corrosive chemical products when cleaning
the machine.
Clean the machine after every use, as required by hygiene regulations in order
to keep the machine in good working order.
Use a brush to remove most of the dough and flour residues. Take the two guards and
slides off, release the springs, extract the scrapers and turn the adjuster knob so that
the rollers are fully open. Carefully clean the machine and all its parts, including those
you have disassembled, using a sponge or cloth with water and detergent.
Now rinse off all traces of detergent.
Dry the machine and its parts with foodsafe paper towel, then wipe over all parts that
come into contact with food and the machine as a whole with a clean cloth soaked
with food processing machinery disinfectant.
CAUTION!
The PLUS version has an AISI 430 ceramic coated slide which is held
in place with magnets so that it is easy to remove for cleaning; it is easier to
remove the scrapers once the slide has been taken off. The hand guards are
equipped with handles for easy removal.
6.2 - Maintenance
Before you use the machine, always check that it is perfectly clean in all its parts,
especially those that come in contact with dough. Clean it as described above, if
necessary.
6.3 - Lubricating the shafts and rollers
The shafts and rollers must be lubricated once a year.
Remove the plexiglass guards, slides, springs and scrapers, then undo the screws
holding the back panel and mounts in place.
Extract the rollers and their couplings, then clean them carefully with a sponge with
neutral foodsafe detergent and hand warm water.
Rinse them off and dry them with paper towel. Now lubricate the shafts and the holes
in the rollers with paraffin oil.
Restore and secure all parts in reverse order with respect to removal.
3
INTRODUCTION
- This manual provides the client with information about the machine and applicable
regulations, as well as the user and maintenance instructions required to use the
machine properly and keep it in good working order.
- The manual must be made available to all users and maintenance technicians.
CONTENTS
CHAP. 1 - INFORMATION ABOUT THE MACHINE 4
1.1 - General precautions
1.2 - Safety equipment
1.3 - Description
1.3.1 - General description
1.3.2 - Construction
1.4 - Structure of the machine
CHAP. 2 - TECHNICAL DATA 7
2.1 - Overall dimensions, weight, specifications
CHAP. 3 - DELIVERY 8
3.1 - Shipping
3.2 - Checks on delivery
3.3 - Disposing of packaging
CHAP. 4 - INSTALLATION 9
4.1 - Positioning
4.2 - Electrical hookup
4.3 - Wiring diagrams
CHAP. 5 - USE 10
5.1 - Adjustments
5.1.1 - Setting the thickness of the dough
5.1.2 - Setting the rocker
5.2 - Standard version controls
5.3 - Plus version controls
5.4 - Start up
5.5 - Using the pedal control (PLUS version only)
CHAP. 6 - CLEANING THE MACHINE 14
6.1 - General information
6.2 - Maintenance
6.3 - Lubricating the shafts and rollers
CHAP. 7 - MAINTENANCE 15
7.1 - General information
7.2 - Power cable
CHAP. 8 - DISMANTLING AND DISPOSAL 15
8.1 - Decommissioning
8.2 - Disposal
8.3 - WEEE (Waste Electrical and Electronic Equipment) regulations
4
CHAP. 1 - INFORMATION ABOUT THE MACHINE
1.1 - General precautions
- The rolling machine may be used only by trained staff familiar with the safety
information given in this manual.
- New staff must be trained in the use of the machine before using it.
- Do not use the rolling machine for any other purpose than rolling out soft pizza
dough.
- Before you clean or service the machine, disconnect it from its power supply.
- The residual risks must be assessed when servicing or cleaning the machine with
the guards removed.
- When servicing or cleaning the machine, concentrate on the job in hand.
- Periodically check the condition of the power cable; damaged or worn power cables
pose a serious electrical hazard.
- If the machine is malfunctioning, do not use it; contact the Service Centre
immediately.
- Do not attempt to make repairs yourself; always contact an authorised service
centre.
- Never tamper with the machine in any way. Contact the manufacturer if you
encounter any anomalies.
- Attempting to disassemble, modify or tamper with any part of the machine by the
user or unauthorised personnel immediately voids its certification pursuant to Low
Voltage Directive EEC 2006/42, voids the warranty and relieves the manufacturer
of any liability for the consequences of such action.
- The manufacturer is also relieved of all liability for the consequences of:
improper use or tampering with the machine by inadequately trained personnel;
lack of or negligent maintenance;
use of non-original spare parts which are not specified for the model;
total or partial failure to follow the instructions given in this manual;
use of unsuitable products to treat the machine's surfaces.
1.2 - Safety equipment
The mechanical and electrical safety equipment is conforming with Directives 2014/35
and 2006/42.
The rolling machine is equipped with an NVR device which prevents it from starting up
automatically after a power failure. It is equipped with fixed roller guards which, in the
PLUS version, can be removed and are fitted with interlock switches which stop the
machine when the hand guards are removed.
There are nevertheless “RESIDUAL RISKS” which cannot be completely eliminated,
which are highlighted in this manual by the wording “CAUTION
”; they are related to
the risks of electric shock and crushing when loading and handling the product, as well
as when cleaning the machine or using it improperly.
1.3 - Description
1.3.1 - General description
The rolling machine is designed and fabricated specifically to guarantee that:
- all its parts are stable and robustly constructed;
13
is ready to pass through the bottom rollers that were previously adjusted to the desired
gap (Fig. 2-3 letter B); the disk which comes out of these rollers has a good shape, but
must be finished by hand for better results.
The 42 RP version does not have the rocker (ref. 5 - Fig. 3); when using this
machine, the dough must be moved by hand from the top rollers to the bottom rollers
by rotating it at 90° and feeding it through the second set of rollers.
5.5 - Using the pedal control (PLUS version only)
The pedal control is supplied on request as an accessory for the Plus version. This
function must not be confused with the OFF control (Fig. 16 and 17); it is designed
solely to limit power consumption to when it is needed.
Hook the control pedal up by inserting the cable into the socket on the side of the
machine (ref. 7 - Fig. 3).
CAUTION!
The machine works properly even without the use of the pedal control.
Pedal start:
Press the pedal switch to “O”: the machine does not start
running, but waits for the next step. Lightly depress the
pedal control: the rollers will start to rotate and the machine
is ready for use (Fig. n°18).
Temporary stop with the pedal:
Lift your foot off the pedal; the machine will stop.
When you have finished using the machine or when you
leave it unattended, always press the OFF button (Fig. 16
and 17).
To operate the machine normally without the pedal control, set the pedal switch to “I”.
Fig. n°18
12
Start the machine without dough to check that it is working properly.
CAUTION!
The rollers must rotate downwards when viewed from the front.
The machine has been designed for food processing, to roll out flour products with a
high water temperature (soft dough) without affecting the characteristics of the
product.
5.4 - Start up
Press the START button; the rollers start to rotate and the machine is ready to use.
Before you insert the ball of dough into the opening (the dough must be lightly dusted
with flour and risen for at least 6-8 hours), squash the front edge of the ball into a
wedge to help it run into the top rollers (Fig. 1-2-3 letter A). Use the adjuster knob to
set the gap between the top rollers (Fig. 13). The top rollers flatten the dough into an
oval shape; the dough now slides into the rocker and rotates sideways at 90° so that it
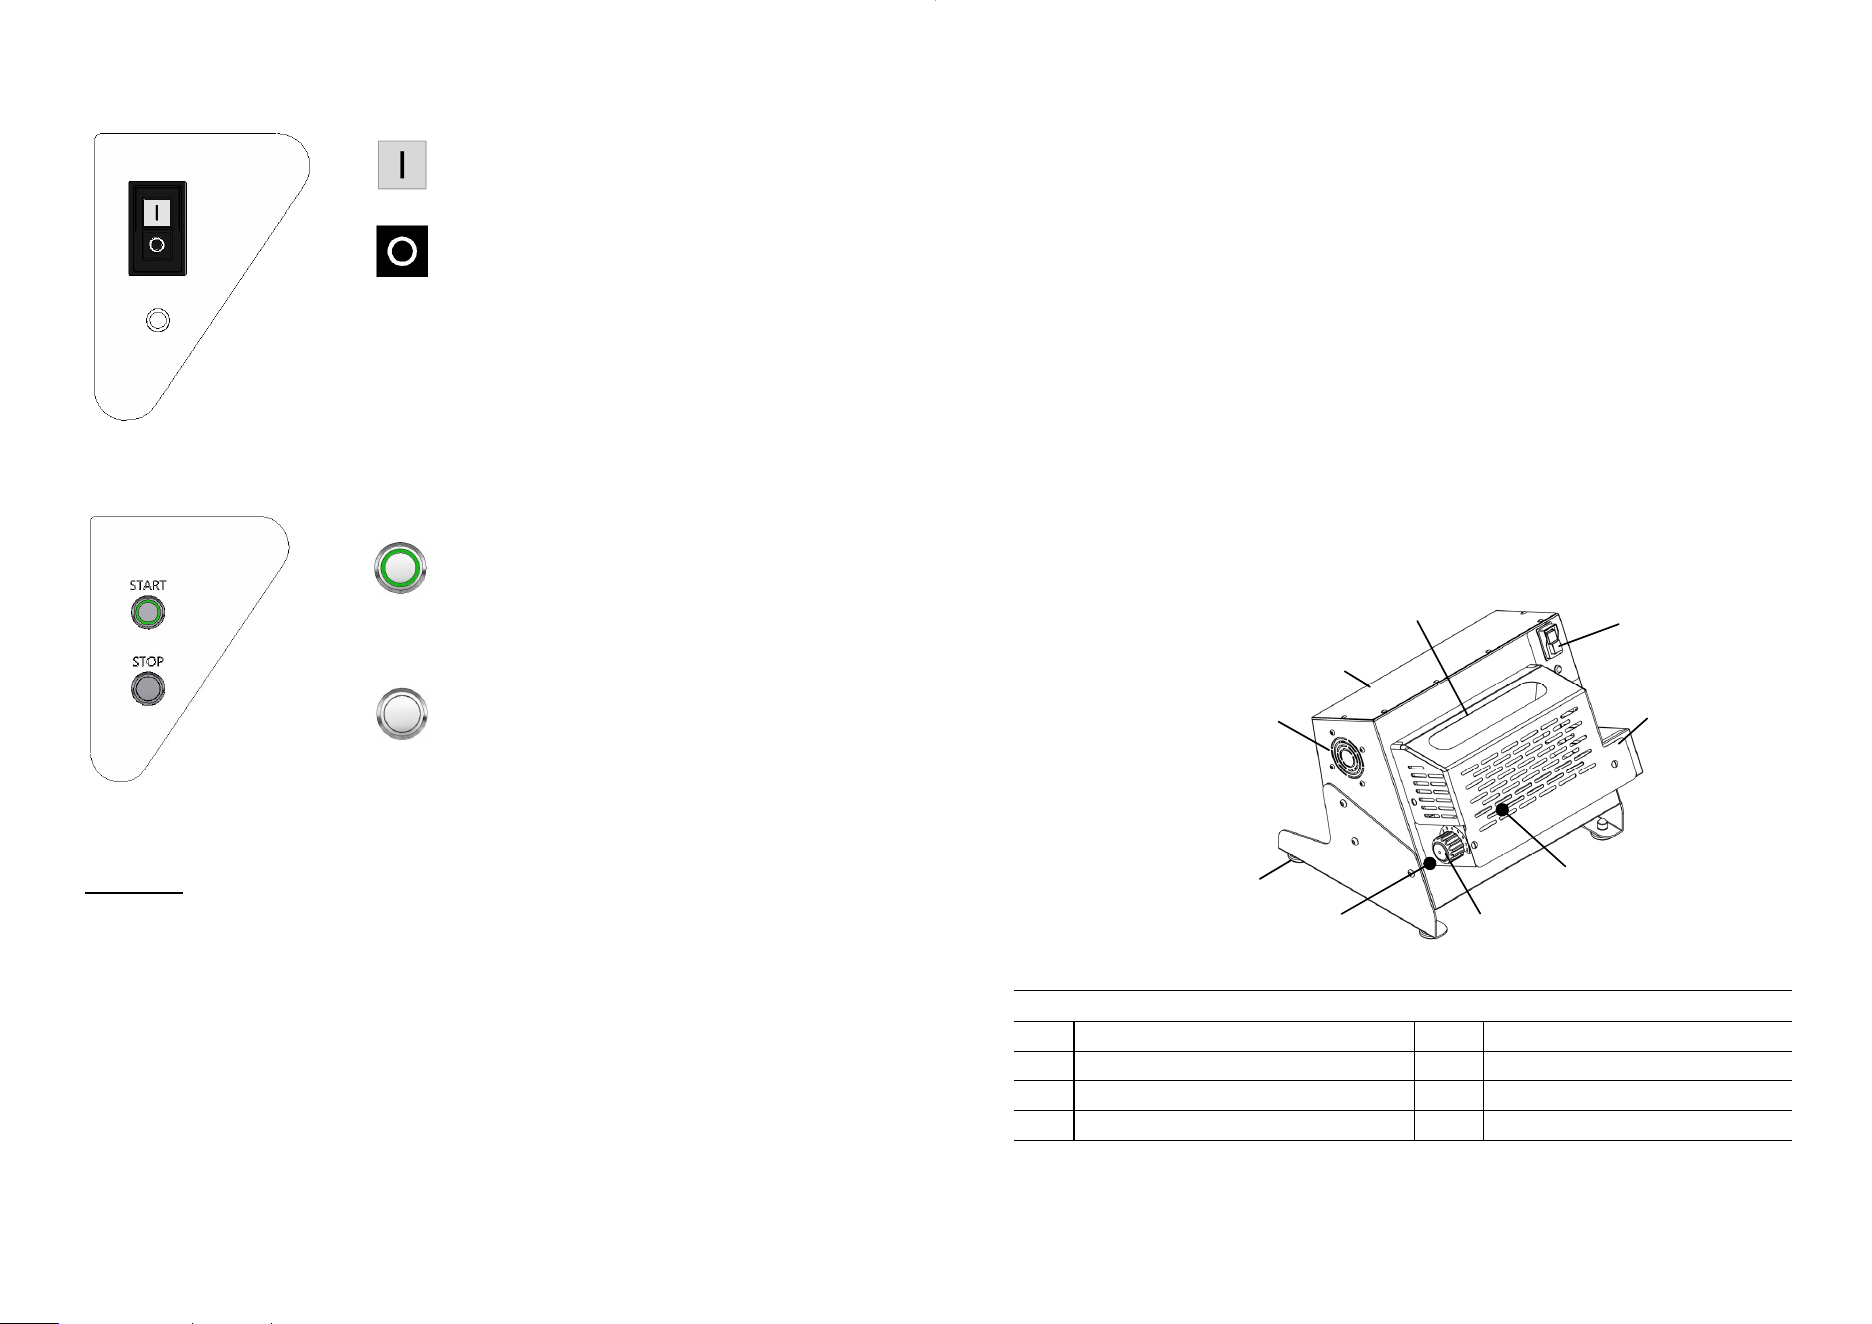
5.2 - Standard version controls
5.3 - Plus version controls
START button: starts the cycle.
OFF button: stops the cycle.
When the machine is running, the led under
the controls turns on.
START button: starts the cycle. When the
machine is running, the green led turns on.
OFF button: stops the cycle.
Fig. n°16
Fig. n°17
5
- it is perfectly hygienic, thanks to the careful choice of materials in contact with food
products;
- maximum safety during use, cleaning and maintenance operations;
- its operating temperature is in a range from 15 °C to 45 °C.
1.3.2 - Construction
The rolling machine is made of AISI stainless steel throughout; this ensures that it is
hygienic, unaffected by acid and salt, and very resistant to rusting. The pair of PE 300
foodsafe rollers are driven by a worm screw gearmotor.
The PLUS version has an enamelled AISI 430 stainless steel slide, which is easy to
remove when cleaning the machine.
A start/stop pedal can also be fitted to it through the provided socket. (PLUS version -
optional equipment).
1.4 - Structure of the machine
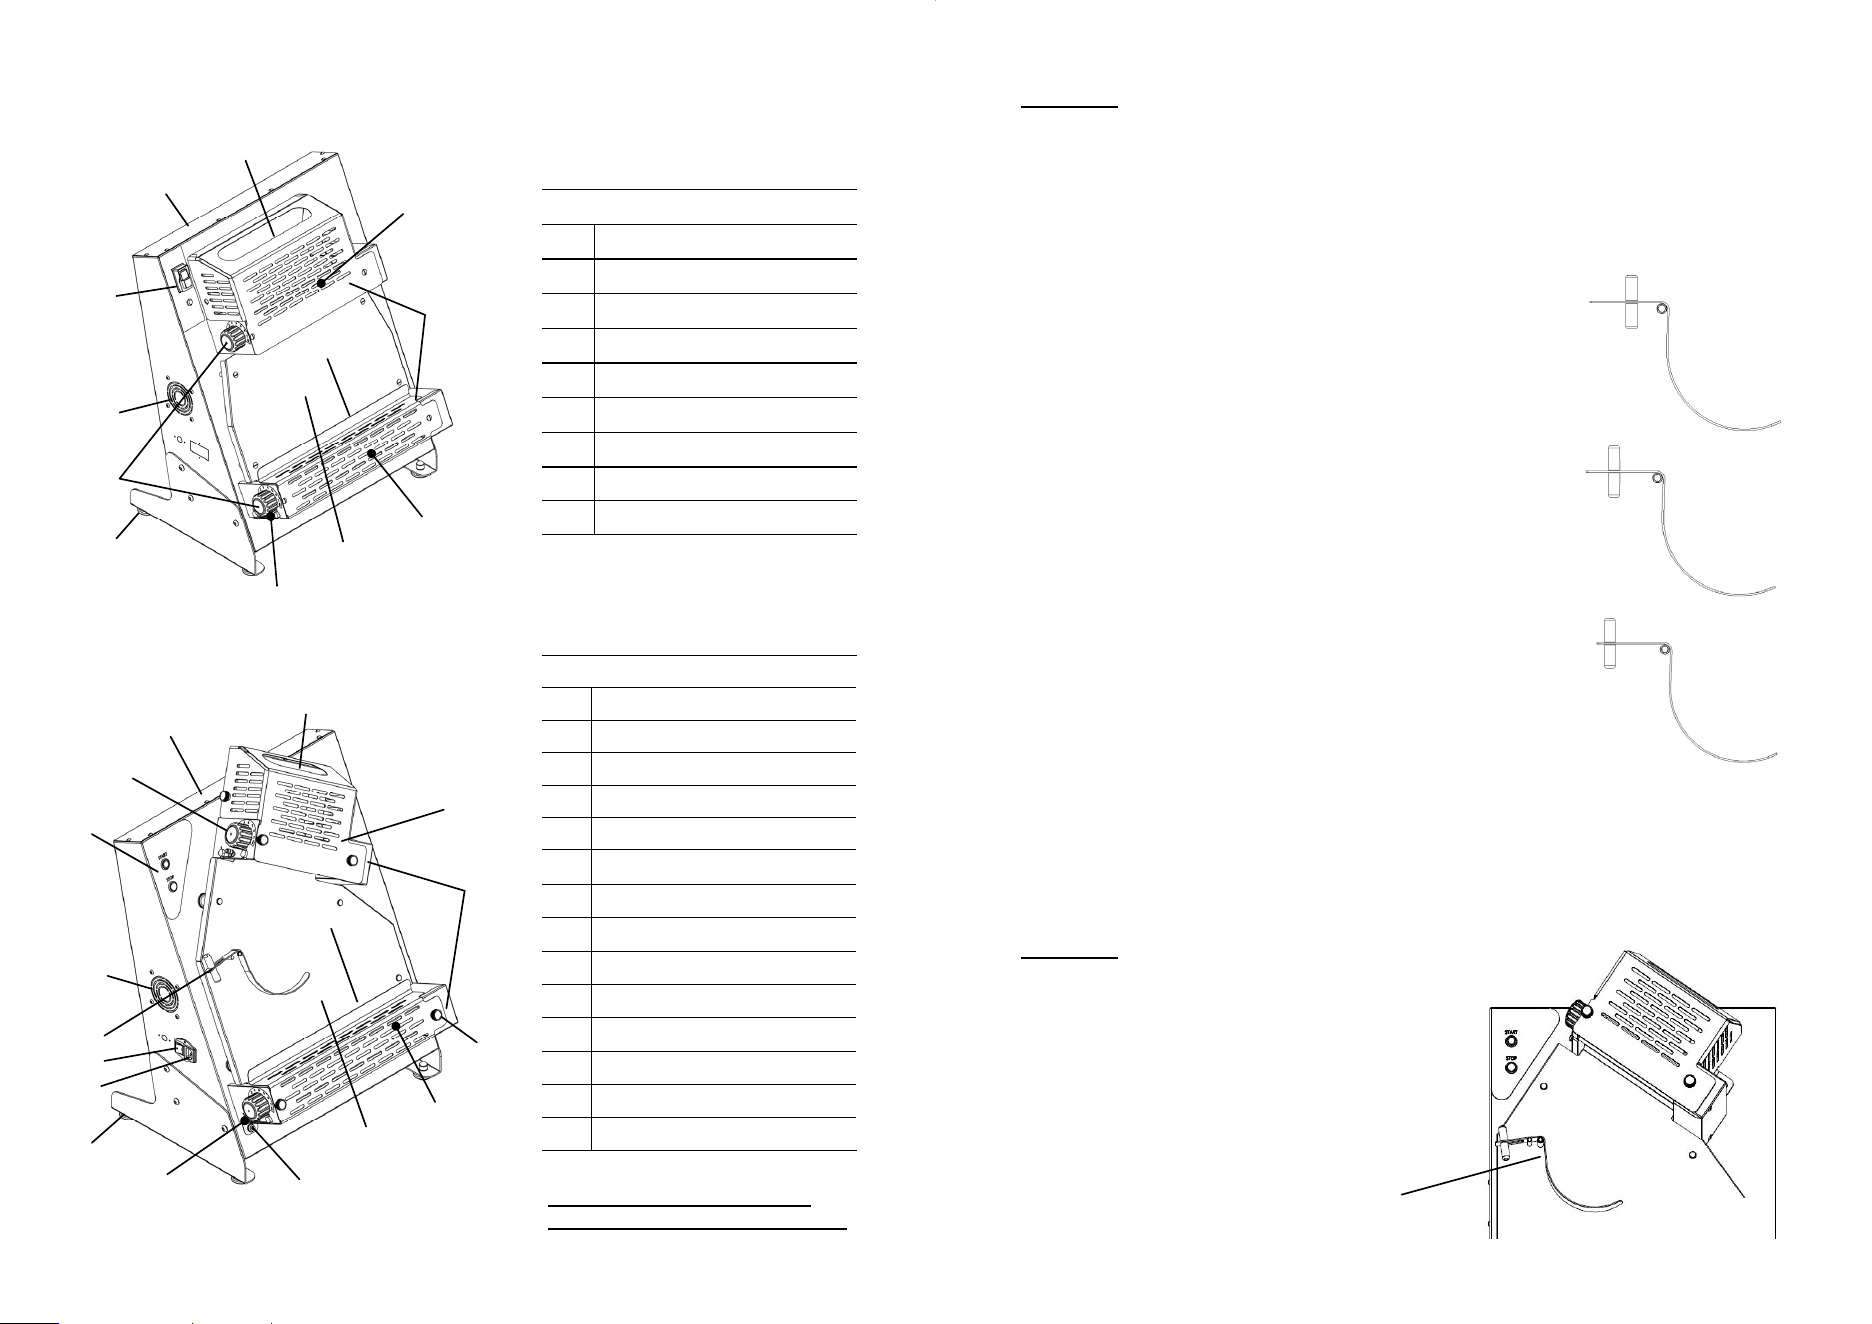
Fig. n°1
Mod.32/1
1
5
7
6
2
8
3
4
A
LEGEND
1 Frame 5 Adjuster knob
2 Cooling fan 6 Rollers
3 Foot 7 Roller housing
4 Scrapers 8 Controls/power led
6
LEGEND
1 Frame
2 Controls/power led
7 Slide
8 Rollers
9 Roller housing
3 Cooling fan
6 Scrapers
5 Foot
4 Adjuster knob
Mod. 32/2 - 42/2 PLUS
Fig. n°3
Mod. 42 RP
4
9
1
8
6
3
2
5
7
8
A
B
4
2
11
7
12
3
1
8
6
5
9
10
13
12
14
A
B
Fig. n°2
LEGEND
1 Frame
2 Adjuster knob
3 Controls
4 Cooling fan
5 Rocker
6 Pedal control
7 Pedal control socket
8 Foot
9 Scrapers
10 Interlock switch
11 Slide
12 Rollers
13 Housing lock knob
14 Roller housing
A= Dough infeed top rollers
B= Dough infeed bottom rollers
11
Fig. n°14
Fig. n°12
Fig. n°13
CAUTION!
Only run the dough through the rollers once, otherwise it may break up and
become sticky.
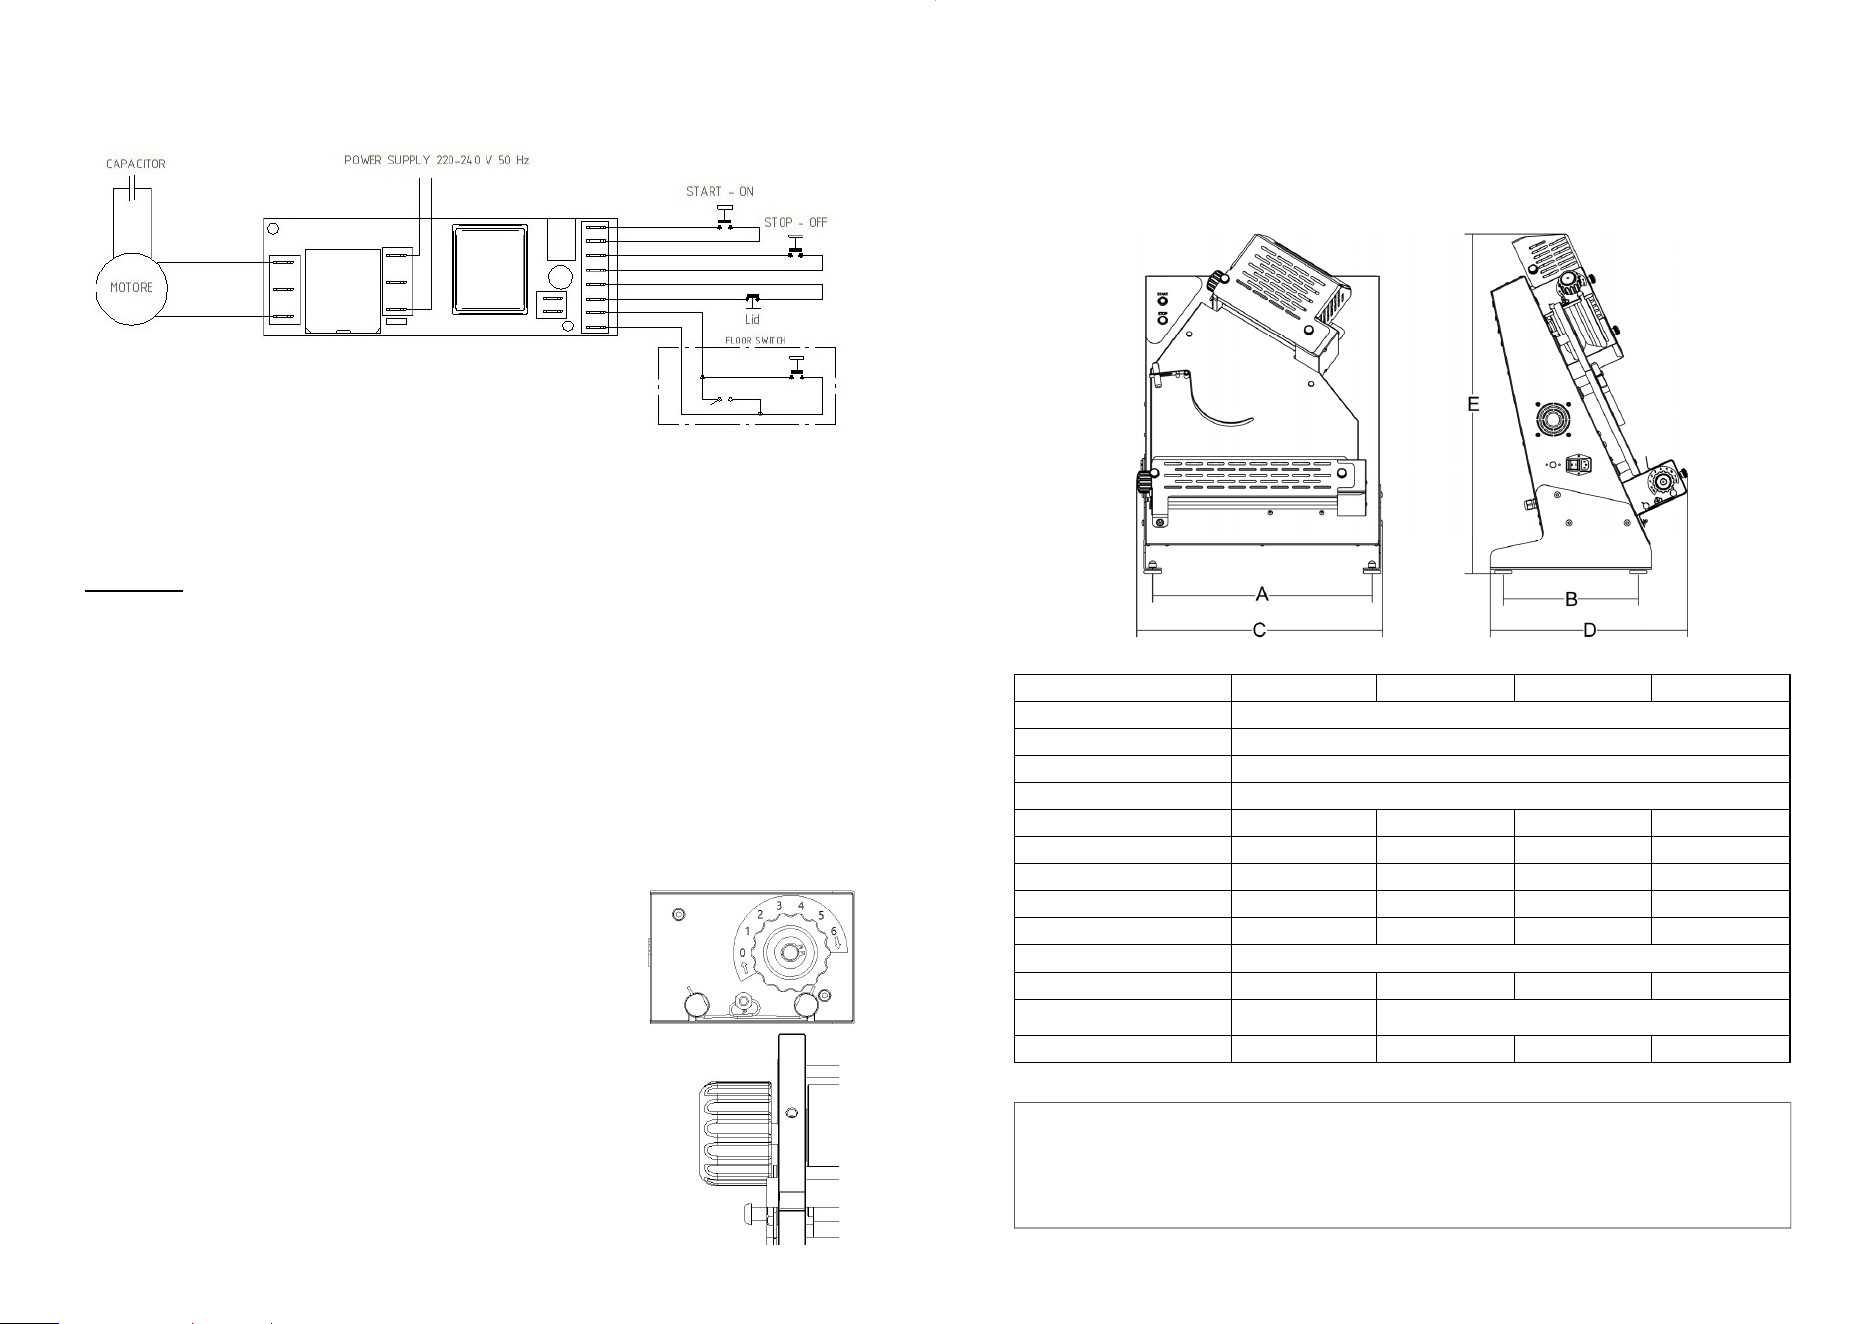
5.1.2 - Setting the rocker
This varies the rotational speed of the dough. Undo the lock screw to change the
position of the counterweight and hence the sensitivity by adjusting the position in the
rocker's slot.
Once the adjustment is made, lock the counterweight in position with the lock screw.
In order to shape the disk properly, the sensitivity of the rocker must be set to suit the
weight of the dough, so that the dough is perfectly horizontal before it passes through
the bottom rollers.
CAUTION!
Make sure that the rocker, when in the standby
position, is always upwards (Fig. 15).
Maximum sensitivity:
- place the counterweight inside the slot;
- recommended for low weights (Fig. 12).
Moderate sensitivity:
- place the counterweight at the centre of the slot;
- recommended for medium weights (Fig. 13).
Minimum sensitivity:
- place the counterweight outside the slot;
- recommended for heavy weights (Fig. 14).
Fig. n°15
Rocker in standby position
10
CHAP. 5 - USE
5.1 - Adjustments
CAUTION!
All adjustments (adjuster knob and rocker) must be done with the machine shut
off.
The following adjustments are for illustrative purposes only, since many different
variables must be taken into account: the characteristics of the dough, its weight,
thickness and form.
5.1.1 - Setting the thickness of the dough
This adjustment is done with the plastic knob, by setting the gap between the rollers;
once the adjustment is made, the knob can be locked with a pawl.
For better results, we recommend adjusting the top and bottom rollers separately.
Mod. PLUS
Fig. n°9
Fig. n°11
Fig. n°10
The thickness is set by rotating the knob (Fig. 10):
- Minimum thickness (0) turn counterclockwise.
- Maximum thickness (6) turn clockwise.
To make the adjustment, pull the knob out towards you
(Fig. 11); this engages the spring, allowing you to make
the adjustment.
7
CHAP. 2 - TECHNICAL DATA
2.1 - Overall dimensions, weight, specifications
Fig. 4 and 5 - Dimensions and clearances.
Model
32/1 32/2 42/2 42 RP
Power supply
240 watt / 0,33 Hp
Power supply
230V 50/60 Hz F+N
Motor speed
1400 r.p.m
Roller speed
96 r.p.m
A
mm 411 mm 411 mm 511 mm 511
B
mm 315 mm 315 mm 315 mm 315
C
mm 470 mm 470 mm 570 mm 570
D
mm 460 mm 460 mm 460 mm 460
E
mm 390 mm 715 mm 800 mm 690
Noise level
db 70
Net weight
Kg 29 Kg 40,5 Kg 47,5 Kg 48,5
Packaging dimension
750x400x510 750x580x1005
Gross weight
Kg 32 Kg 52,5 Kg 59,5 Kg 60,5
Fig. n°5 Fig. n°4
CAUTION!
The machine's electrical specifications are marked on its nameplate, mounted to the
rear of the machine itself; before hooking the machine up electrically, refer to the
section “Electrical hookup.”
8
Fig. n°6
CHAP. 3 - DELIVERY
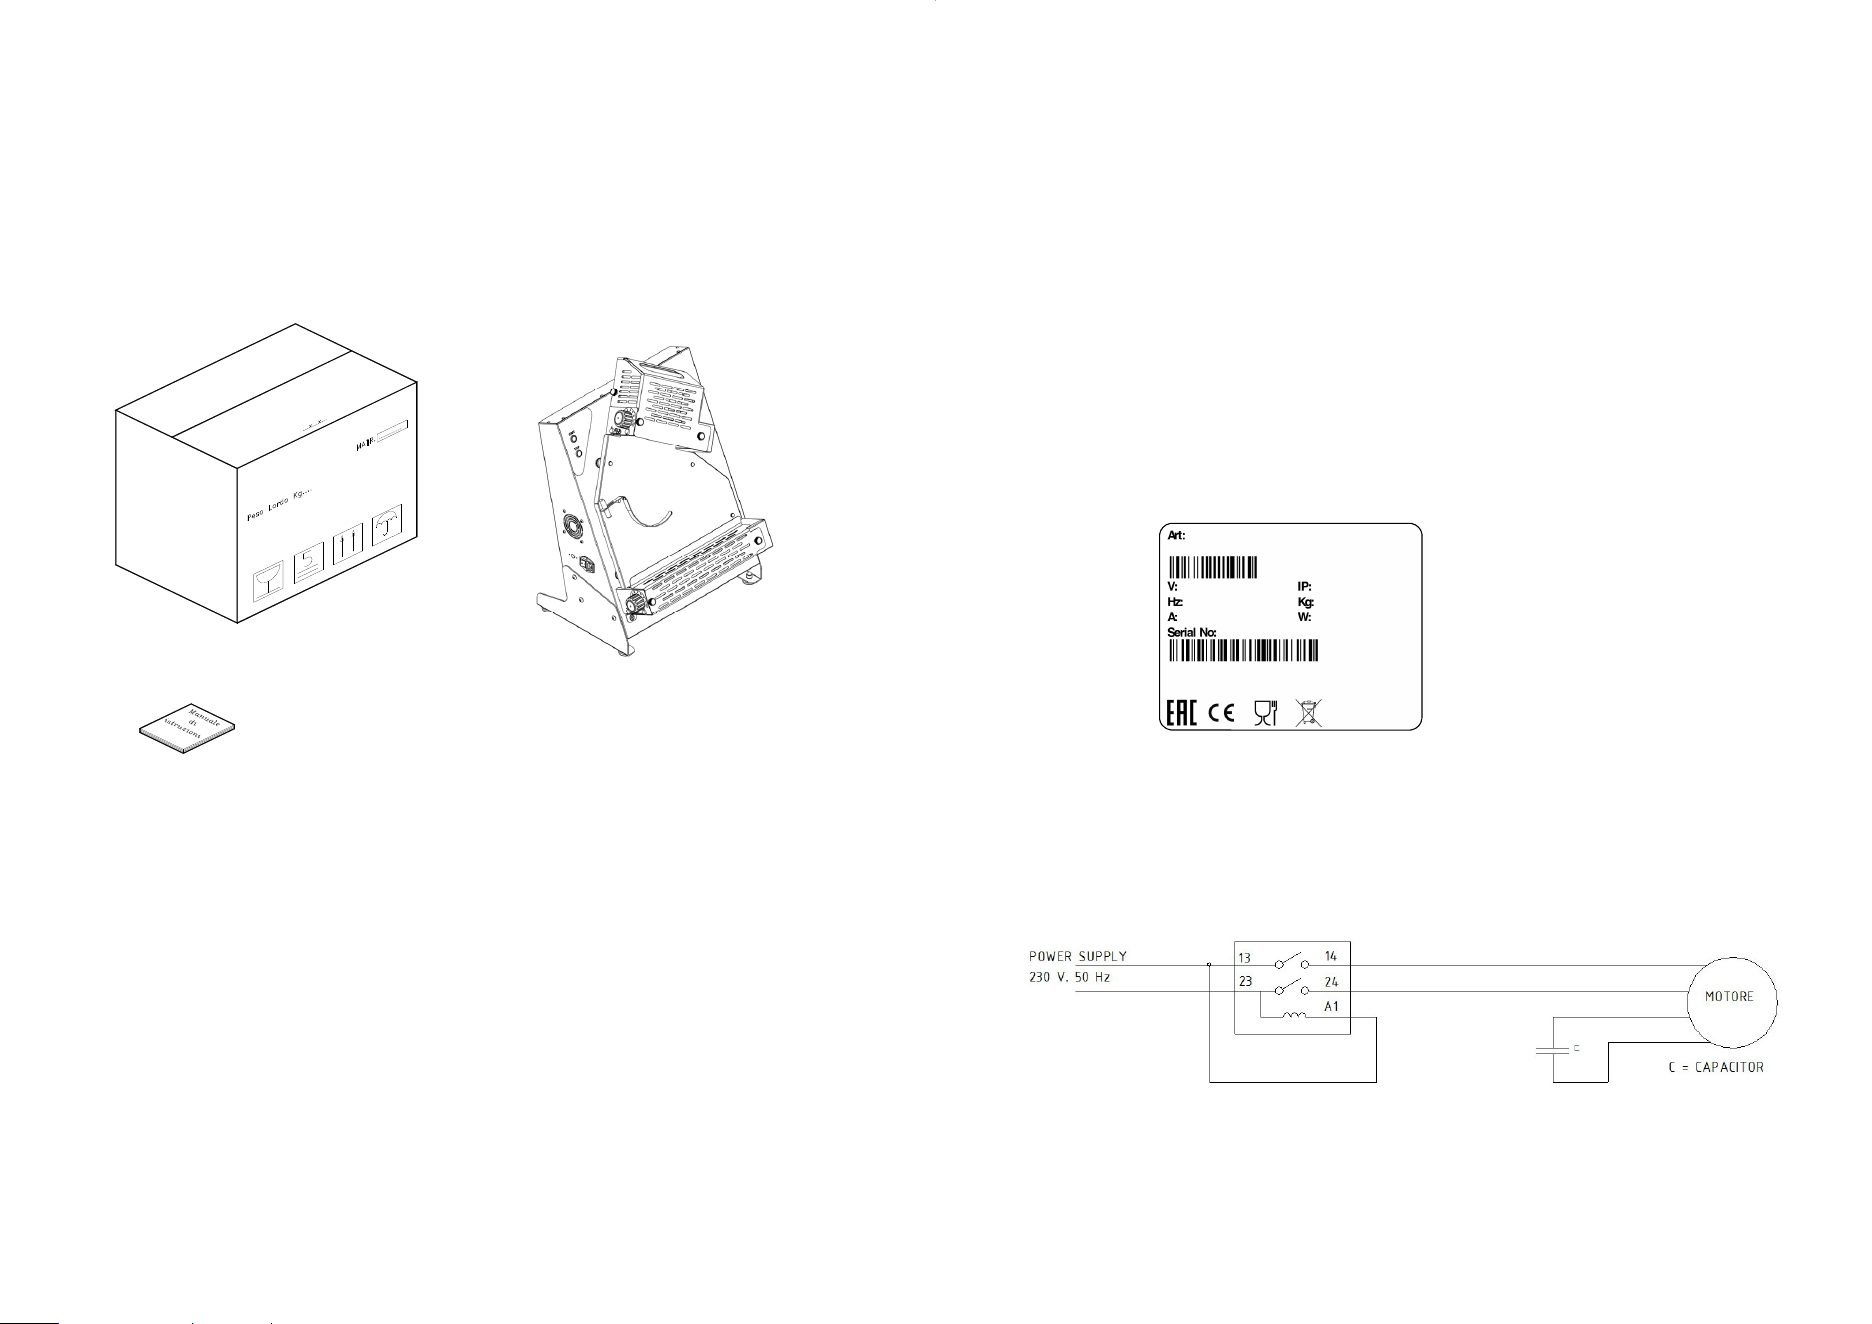
3.1 - Shipping (see Fig. 6)
The machines are carefully packed before shipping.
The packaging is made of:
- wood pallet;
- robust cardboard external box with lateral supports, if needed;
- the machine;
- this manual.
3.2 - Checks on delivery
When you receive the package containing the machine, carefully check the packaging
for signs of damage during shipping. If the packaging shows signs of mishandling,
impacts or dropping, report the damage to the shipping agent within three days of the
date of delivery indicated on the documents and draw up a detailed report on any
damage to the product.
3.3 - Disposing of packaging
The packaging materials (cardboard box, plastic strap and polyurethane foam) can be
disposed of as normal domestic waste; there is no difficulty in disposing of them.
If the machine is installed in a country in which special regulations apply, dispose of
the material in a regulatory manner.
9
CHAP. 4 - INSTALLATION
4.1 - Positioning
Place the rolling machine on a solid table about 80 cm off the ground, with a smooth
non-slip surface, keeping at least a 10 cm distance from walls or any other surfaces
which may block its ventilation. Keep the machine away from sources of heat and
humidity. Remove the protective film - do not use tools which may damage the
machine's surfaces while doing so. Carefully remove all process waste from the
machine before using it.
4.2 - Electrical hookup
The machine has a power cable with a cross section of 3x1.5 mm², a length of 1.5 m
and a 16A Schuko plug. Hook the machine up to the 230 Volt 50 Hz power supply with
a differential circuit breaker rated 0.03A. Check that it is properly earthed.
Also check that the information on the machine's nameplate match the specifications
given in the delivery and shipping documents, and that both the master switch and
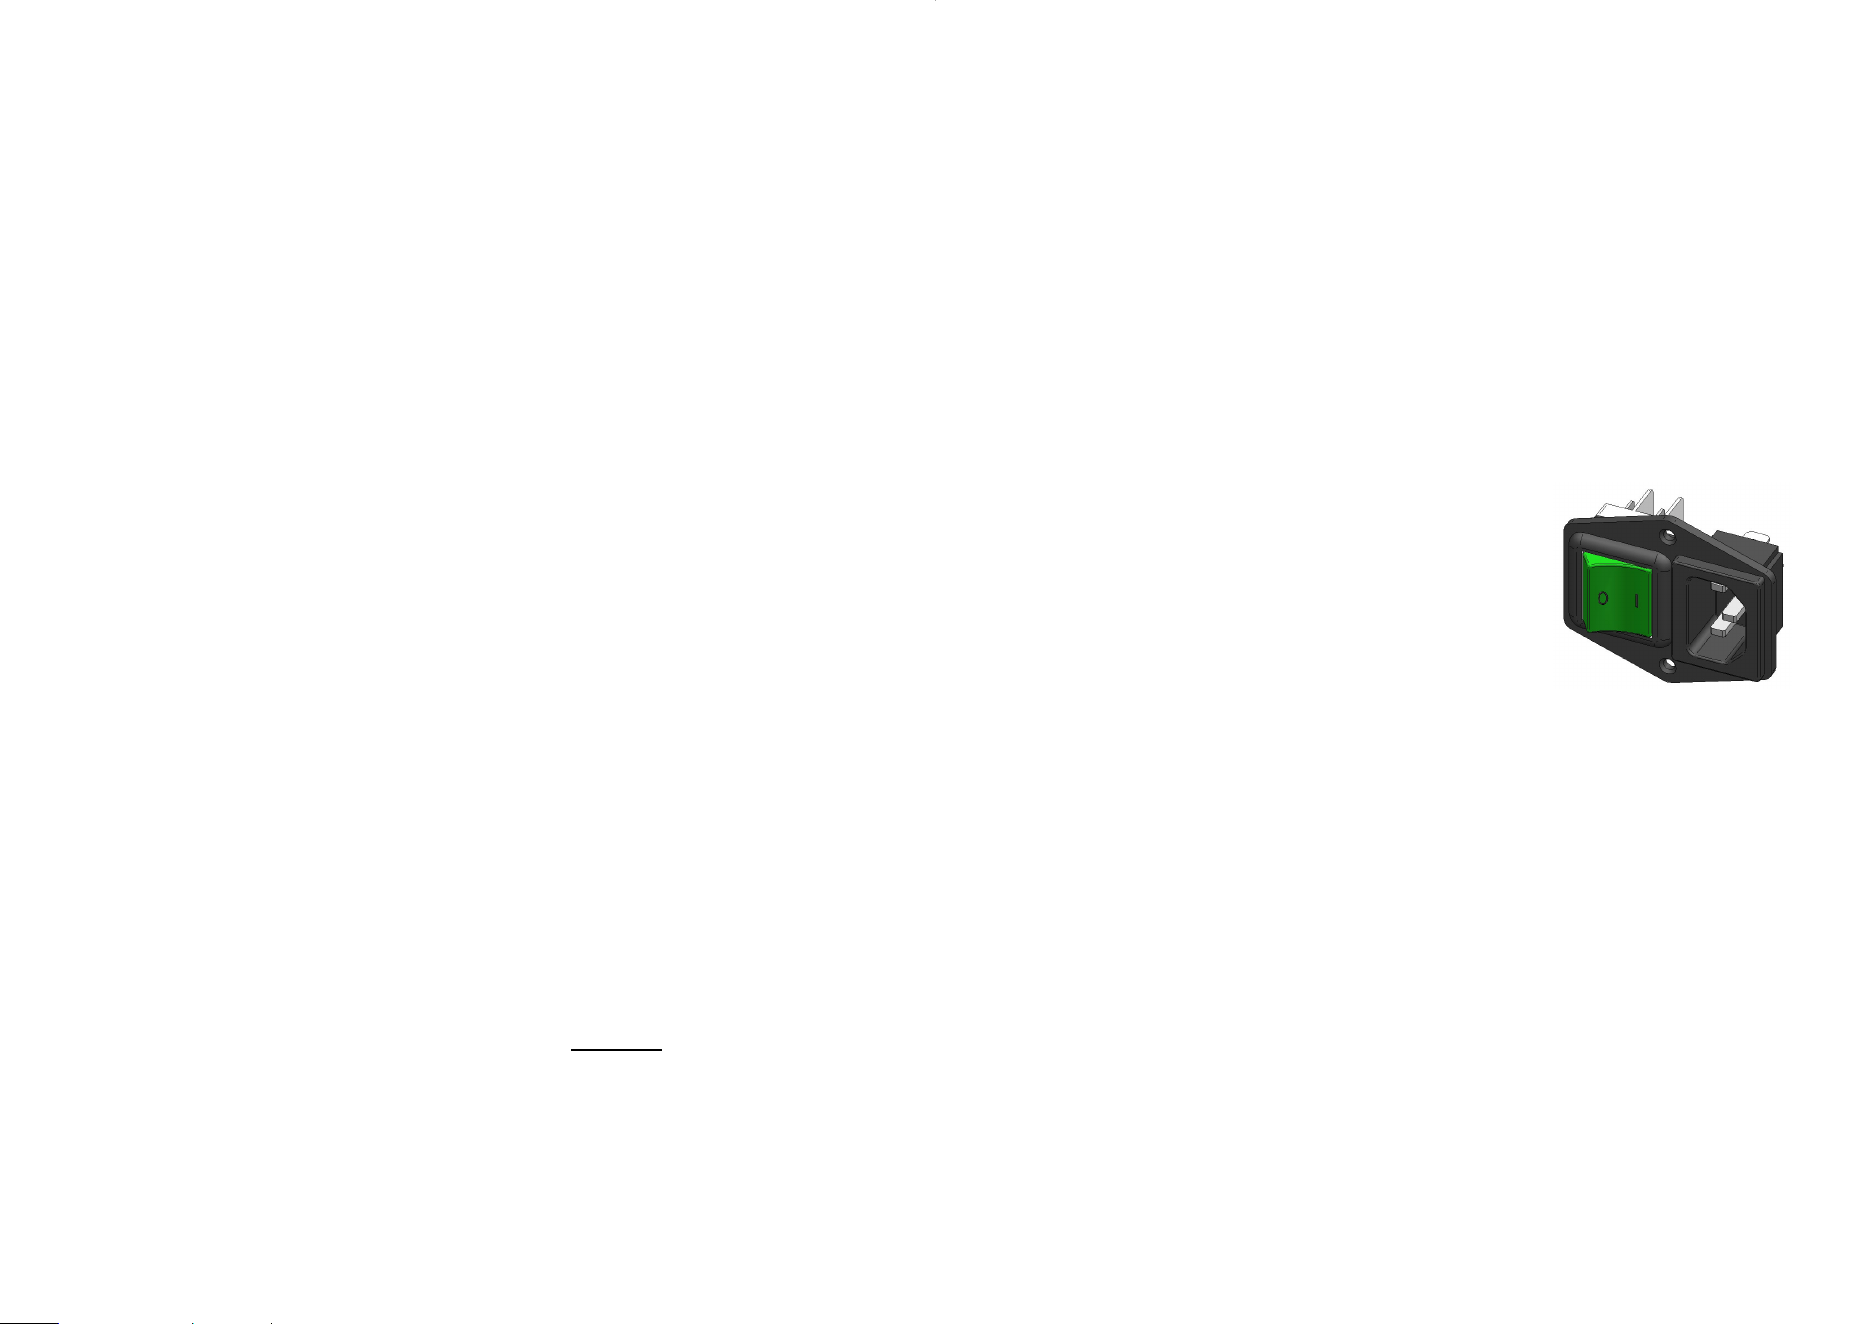
cable are easily accessible while the machine is in use (see Fig. 7).
4.3 - Wiring diagrams
Fig. n°7
LEGEND
(A) = Product code and name
(B) = Power supply
(C) = Motor frequency
(D) = Amperage
(E) = Serial number
(F) = Barcode
(G) = Manifacturer
(H) = International Protection
(I) = Weight
(L) = Power
(M) = Origin
(A)
(B)
(C)
(D)
(E)
(H)
(I)
(L)
(F)
(G)
(M)
Fig. n°8