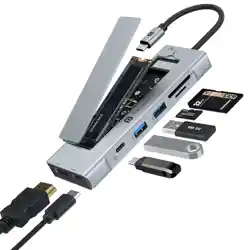
8-in-1 Type-C Hub with Built-In SSD Slot
MPORT SPACE
User Manual
Thank you for purchasing the Portronics Mport Space 8-in-1 USB-C
Hub. Please read this manual carefully before using the product to
ensure optimal performance and extended life.
INTRODUCTION
PRODUCT OVERVIEW
• SD Card Reader – Access and transfer photos, videos, and media
files seamlessly.
• HDMI Output – Connect your display to any standard HDMI screen.
• 100W USB-C PD Charging Port – For charging only, not for data
transfer.
• M.2 Slot – Supports M.2 NVMe/SATA SSDs.
B. KEY FEATURES
• SSD On/Off Switch – Manually turn the internal SSD ON or OFF to save
power and prolong SSD life.
• LED Status Indicator –
1. Blue Light : SSD feature is OFF.
2. White Light : SSD feature is ON (ready for use).
SPECIFICATIONS
HDMI (4K @ 30Hz) : Supports up to 4K/30Hz output
USB-A 3.2 Port : Supports 10 Gbps transmission rate
USB 2.0 Port : Supports 480 Mbps transmission rate
USB-C PD Port : 100W Power Delivery – Charging only (no data)
USB-C 3.2 Port : Supports 10 Gbps transmission rate
SD Card Slot : Up to 104 MB/s transfer speed
TF Card Slot : Up to 480 MB/s transfer speed
M.2 SSD Slot : Supports NVMe & SATA SSDs (M-Key / B+M-Key)
Compatible with : M.2 NVMe & M.2 SATA SSDs
Supported Keys : M-Key & B+M-Key
Compatible sizes : 2242 / 2260 / 2280.
FREQUENTLY ASKED QUESTIONS (FAQ)
Q: Can I use this hub with my Microsoft Surface Book 2?
A: Yes. First, check that your device has a USB-C port. If it does, the hub
is compatible — it works with multiple systems including Windows,
macOS, and more.
Q: Why can’t my M.2 SSD in the hub’s slot allow writing in macOS, even
though it works fine in Windows?
A: macOS may not support writing to NTFS drives by default.
Format your SSD to exFAT for full read/write access in both macOS
and Windows.
You can also install third-party NTFS drivers on macOS if you
want to keep NTFS format.
Q: The M.2 enclosure is not recognized after connecting — what should
I do?
A: Open the hub, remove the SSD, and reinstall it, ensuring the position
and pins are aligned. If it is a brand-new SSD, format it first following
the steps in the manual.
On macOS, install NTFS drivers if you are using NTFS format.
Q: Is there a sleep setting for this enclosure? Will my SSD stop data
transfer automatically?
A: The hub includes an SSD On/Off Switch. Turn OFF the SSD when not in
use to prolong its life. If your computer is actively reading/writing (e.g.,
during file transfer or antivirus scans), it will not automatically sleep.
Q: Can the USB-C data port be used for video output?
A: No. The USB-C data port is for data transfer only. For video, use the
HDMI output port.
Q: How can this hub achieve 85W power delivery charging?
A: Use a USB-C wall charger and a USB-C to USB-C cable that both
support 100W PD charging.
This hub expands your device’s connectivity with 8 versatile ports,
including an M.2 SSD slot for instant storage expansion.
A. INCLUDED PORTS
• USB-C 3.2 Port – Provides up to 10Gbps high-speed data transfer.
• USB-A 3.2 Port – Provides up to 10Gbps high-speed data transfer.
• USB 2.0 Port – Ideal for printers, wired keyboards, mice, and
other peripherals.
• TF Card Reader – Access and transfer photos, videos, and media
files seamlessly.
INSTALLATION & SETUP GUIDE
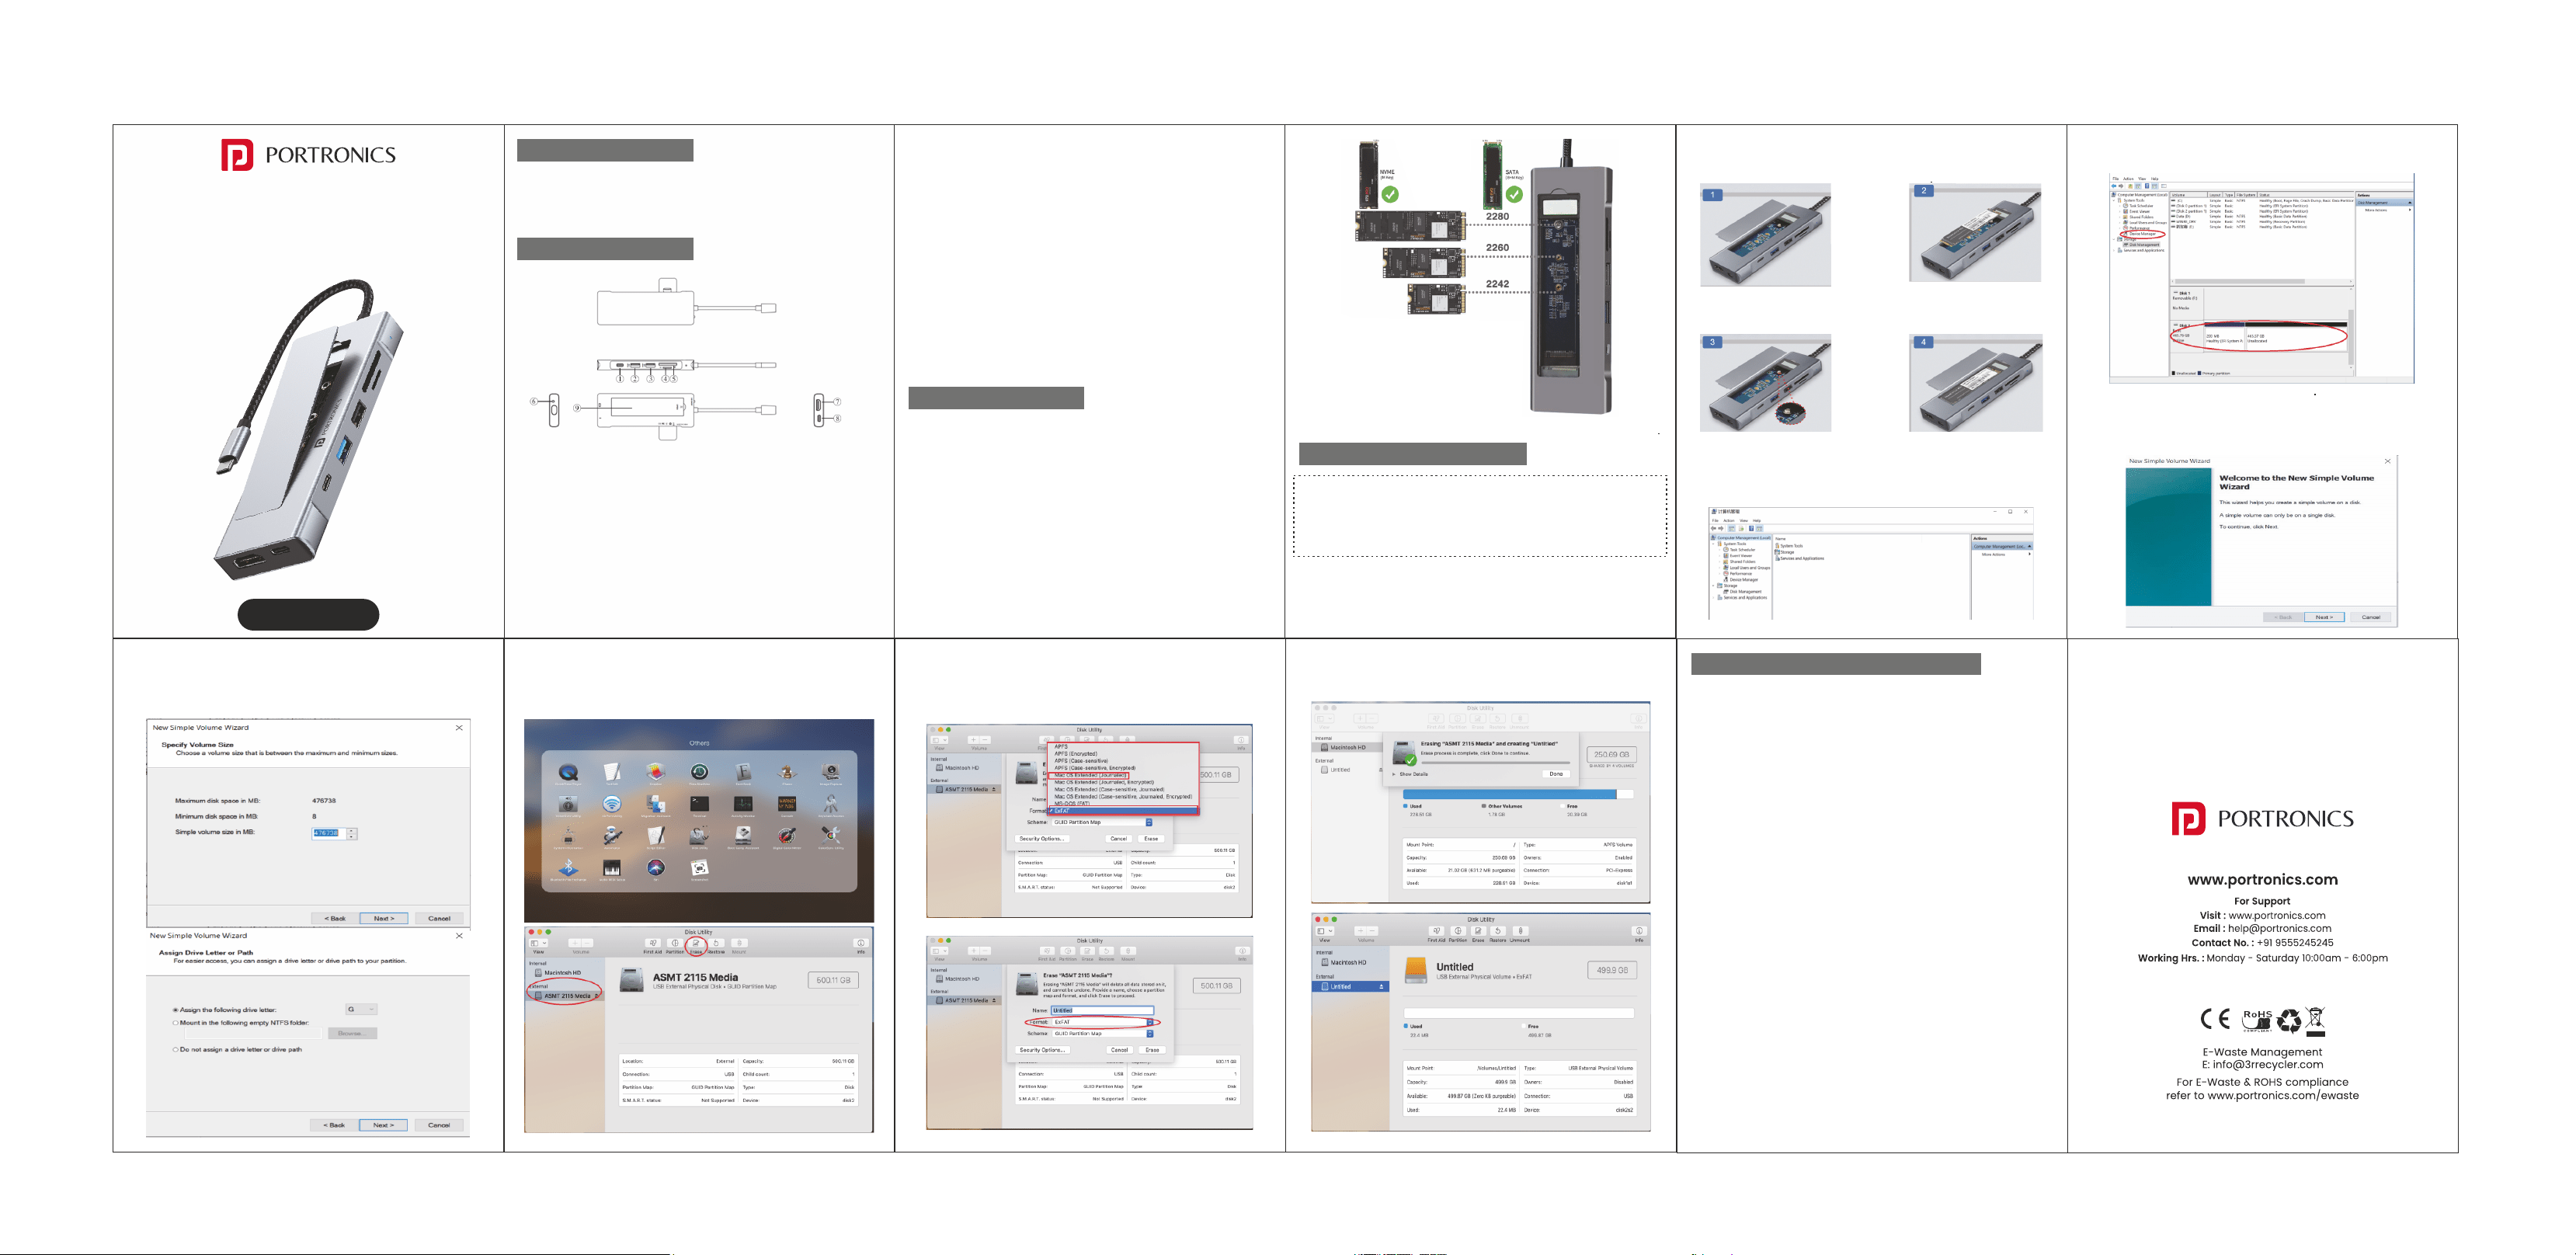
IMPORTANT NOTES :
• Supported SSDs : M.2 NVMe (M-Key) and M.2 SATA
(M-Key or B+M-Key)
• First-Time Setup : If using a brand-new SSD, you must initialize and
format it before use to create a partition.
1. SSD INSTALLATION GUIDE :
Follow these steps to install your M.2 SSD safely
STEP 2 : Click "Disk Management" in the left panel. A new unallocated
hard disk (your SSD) will appear
STEP 3 : Right-click on the unallocated disk. Select "New Simple
Volume" → The "New Simple Volume Wizard" will open.
STEP 4 : Click "Next" on each screen to keep default settings
(volume size, drive letter, file system). Click "Finish" to complete the
process.
3. FORMATTING ON MACOS :
Step 1 : Go to Applications > Others > Disk Utility. Select your new SSD
from the left-hand panel.
STEP 2 : Click Erase on the top menu. In the pop-up dialog box,
select : Name : (Choose any name for your SSD)
Format : ExFAT (Recommended — works with both macOS and
Windows) Scheme: GUID Partition Map
STEP 3 : Click Erase to format the SSD. Wait for the process to finish.
The new SSD volume will appear in Disk Utility, ready for use.
2. FORMATTING ON WINDOWS :
STEP 1 : Right-click "This PC" (or "My Computer") on your desktop.
Select "Manage" → "Computer Management" window opens.
STEP 1 : Remove the SSD
cover from the hub.
STEP 2 : Insert the M.2 SSD
into the slot at a slight angle,
making sure the notch aligns
correctly.
STEP 3 : Secure the SSD using
the provided screw. Tighten
gently — do not overtighten.
STEP 4 : Close the SSD
cover and ensure it is
aligned properly.
