USER MANUAL
10 Qt Fish Fryer Kit
with Burner
THANK
YOU!
Thank You for Purchasing from
Made in China
NOTE:
To continuously improve its products, reserves the right to
modify this information without prior notification.
For any questions regarding assembly, please watch the video on the
product page or contact our customer service. Our customer service will
Thank you for using products in your home!

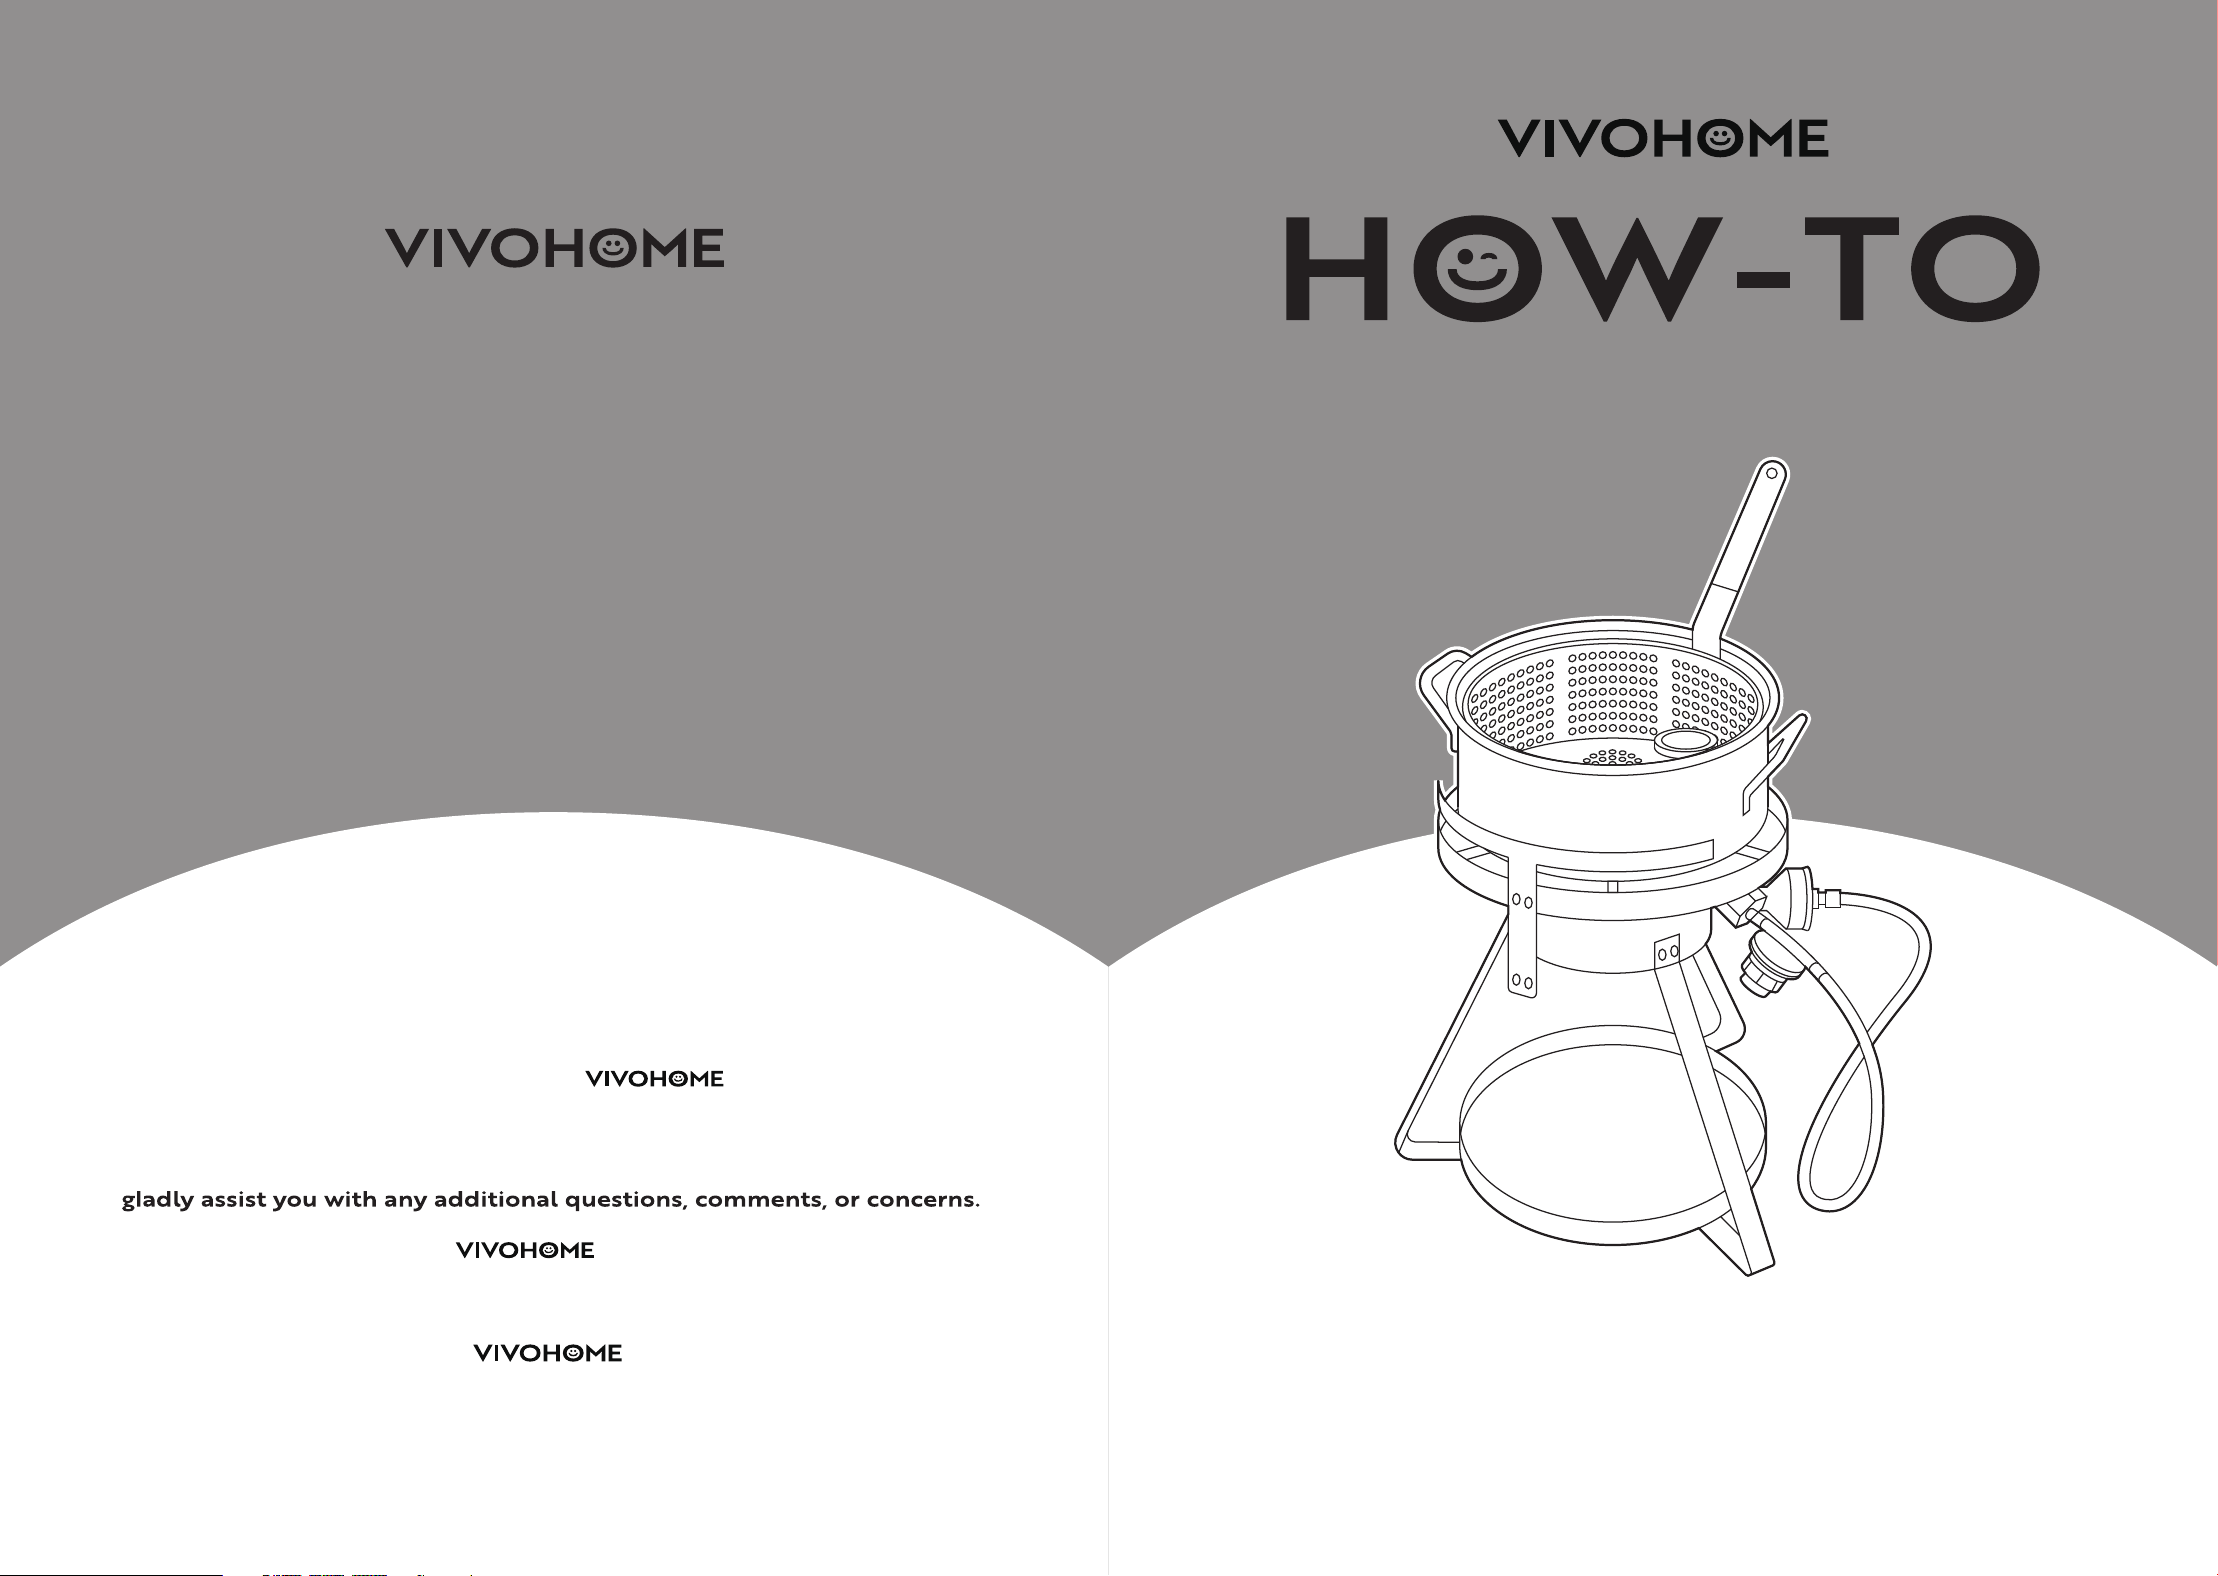
USER MANUAL
HOW-TO
10 Qt Fish Fryer Kit
with Burner
CONTENTS
Parts List and Diagram.................................................1
Instructions
Maintenance & Care
Assembly Instructions
Safety Instruction
........................................................................3
.....................................................5
................................................6
...........................................................7
Warranty
.............................................................................9
Assembly is EASY!
WE WANT
YOU TO
ENJOY LIFE
AT
GO TO THE PRODUCT LISTING PAGE
FOR AN INSTRUCTIONAL VIDEO!
1 2
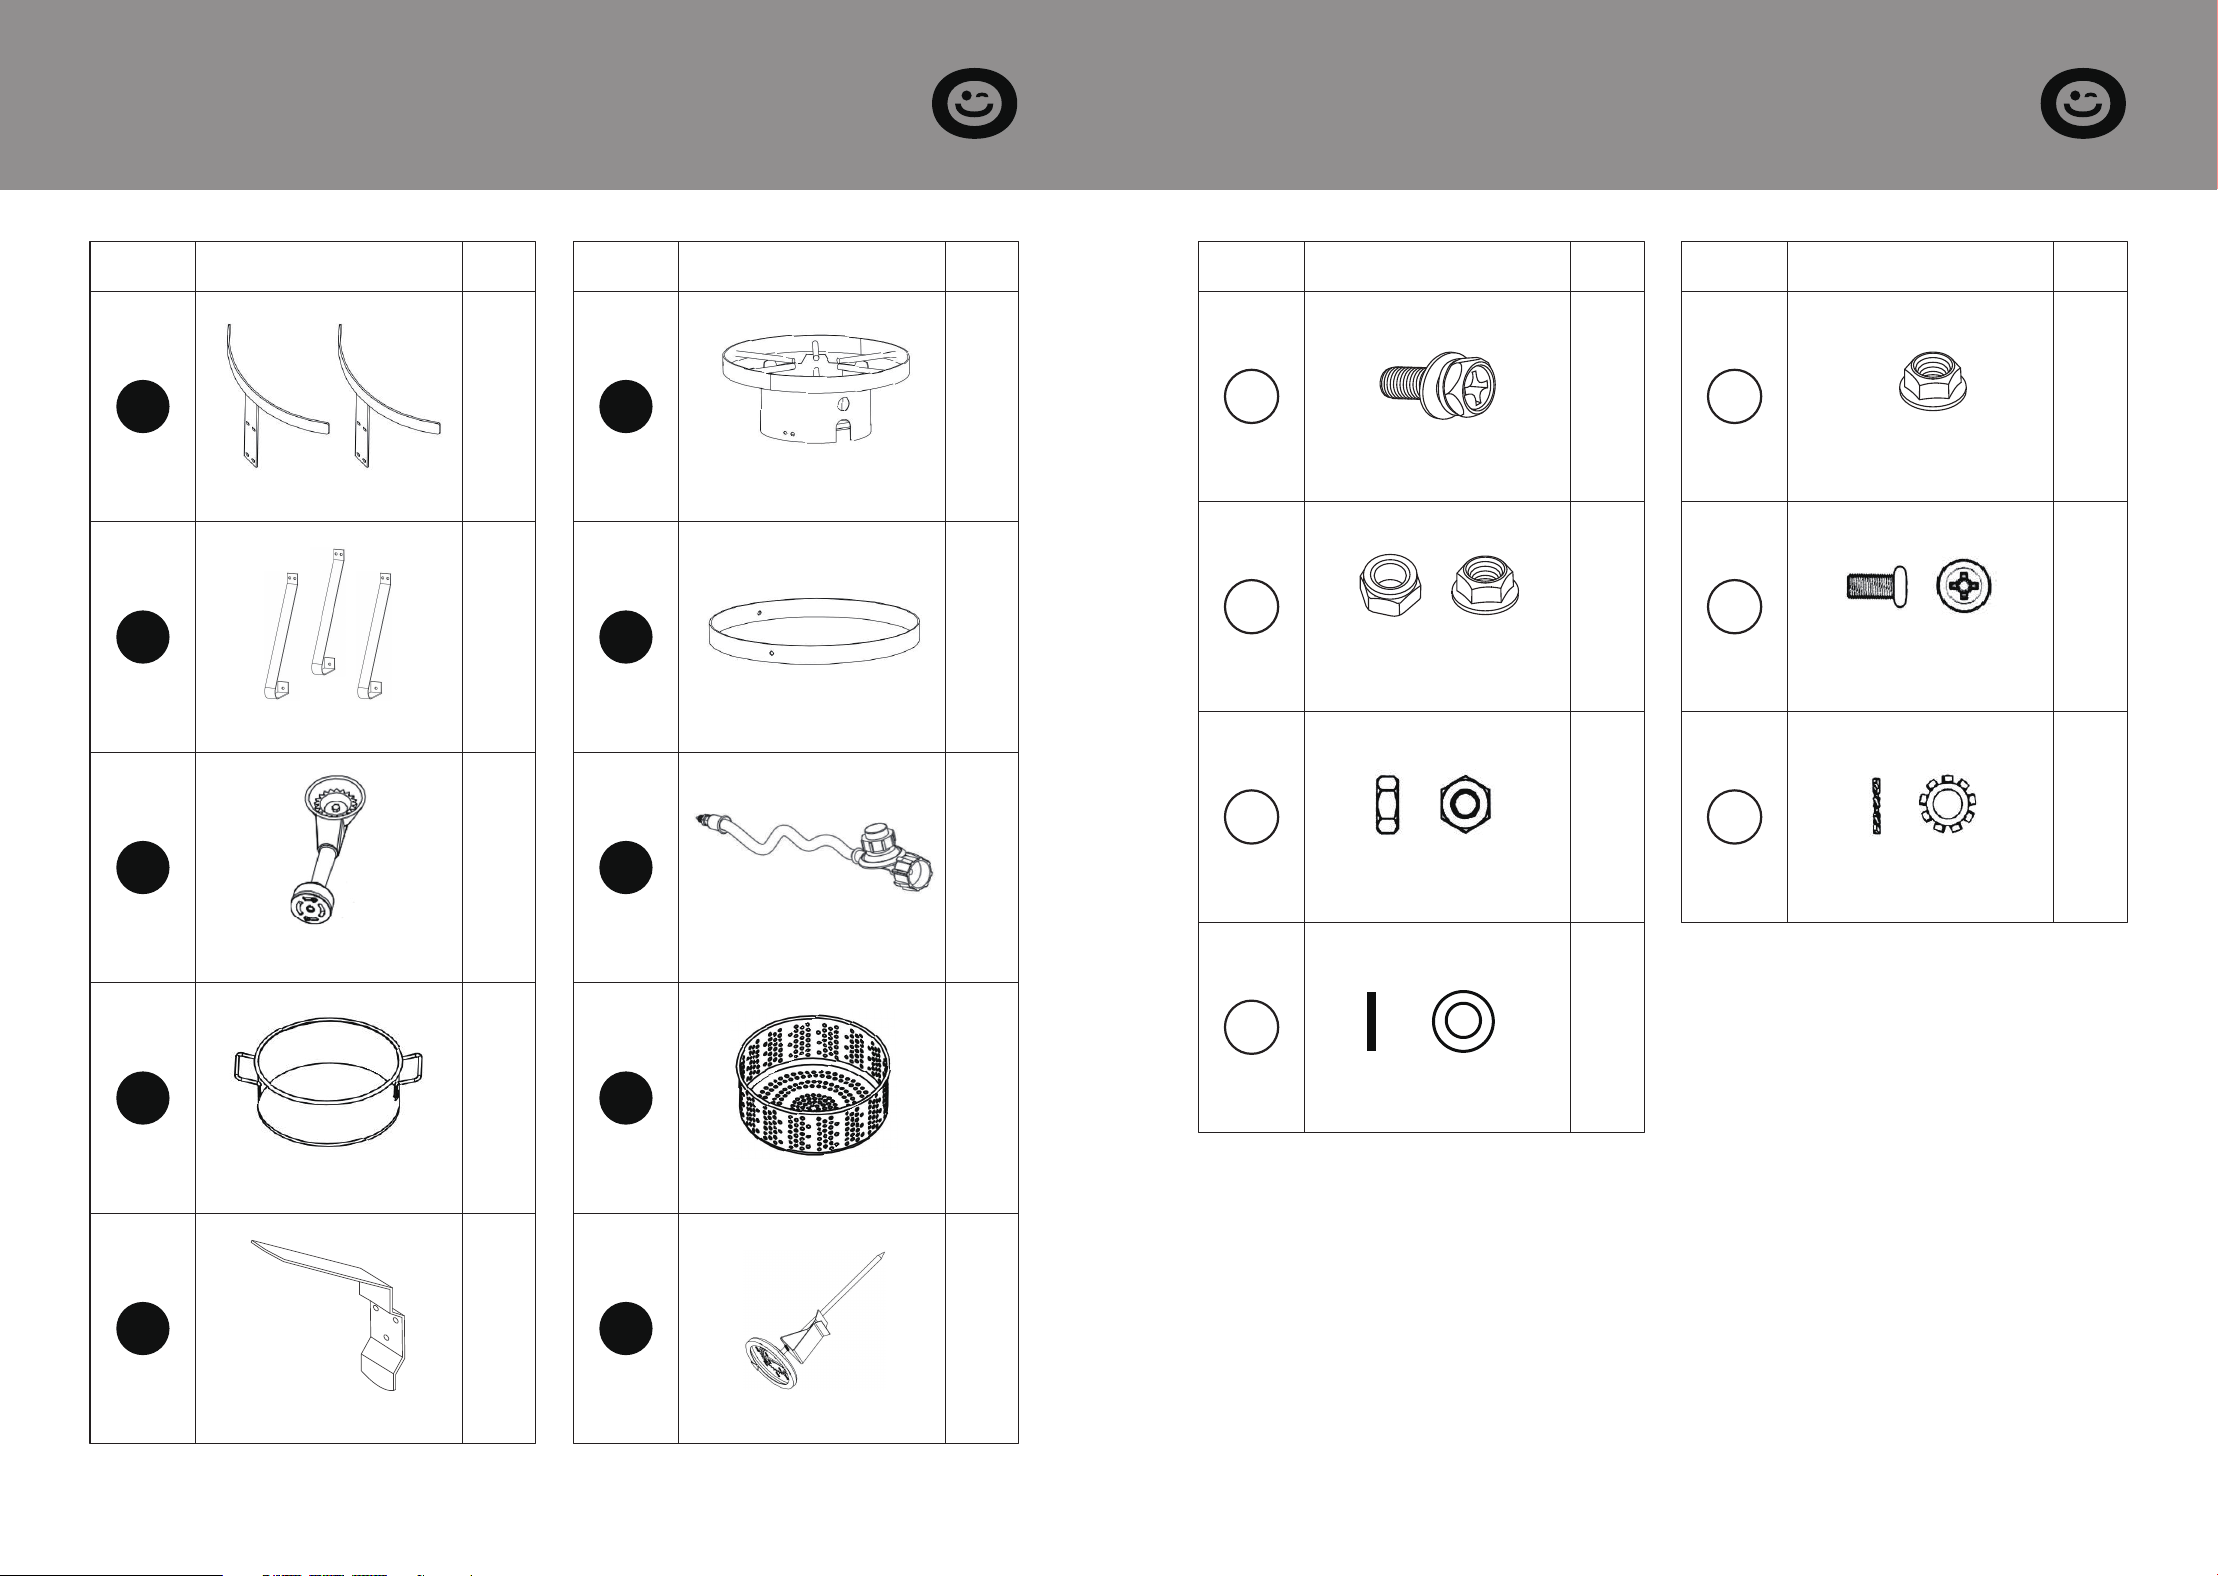
SECTION A
Parts List and Diagram
x1
Item No. Reference Image Qty.
1
Pot Holders
x2
Item No. Reference Image Qty.
2
Top
Frame Assembly
x3
3
Legs
x1
4
Bottom Ring
x1
5
Cast burner
x1
6
Regulator/Hose
x1
7
10Qt Pot
x1
8
Basket
x1
9
Basket Handle
x1
10
4"Thermometer
SECTION A
Parts List and Diagram
x13
Item No. Reference Image Qty.
A
M6 Hex head bolt
x13
Item No. Reference Image Qty.
B
M6 Flange nut
x1
C
Nylon lock nut M6
Flange nut M6
x3
D
M5 Bolt
x3
E
M5 Nut
x3
F
M5 Tooth Washer
x3
G
M5 Washer
* A&B for frame assembly
* C for burner assembly
* D, E, F&G for basket handle
assembly
3 4
SECTION B
Instructions
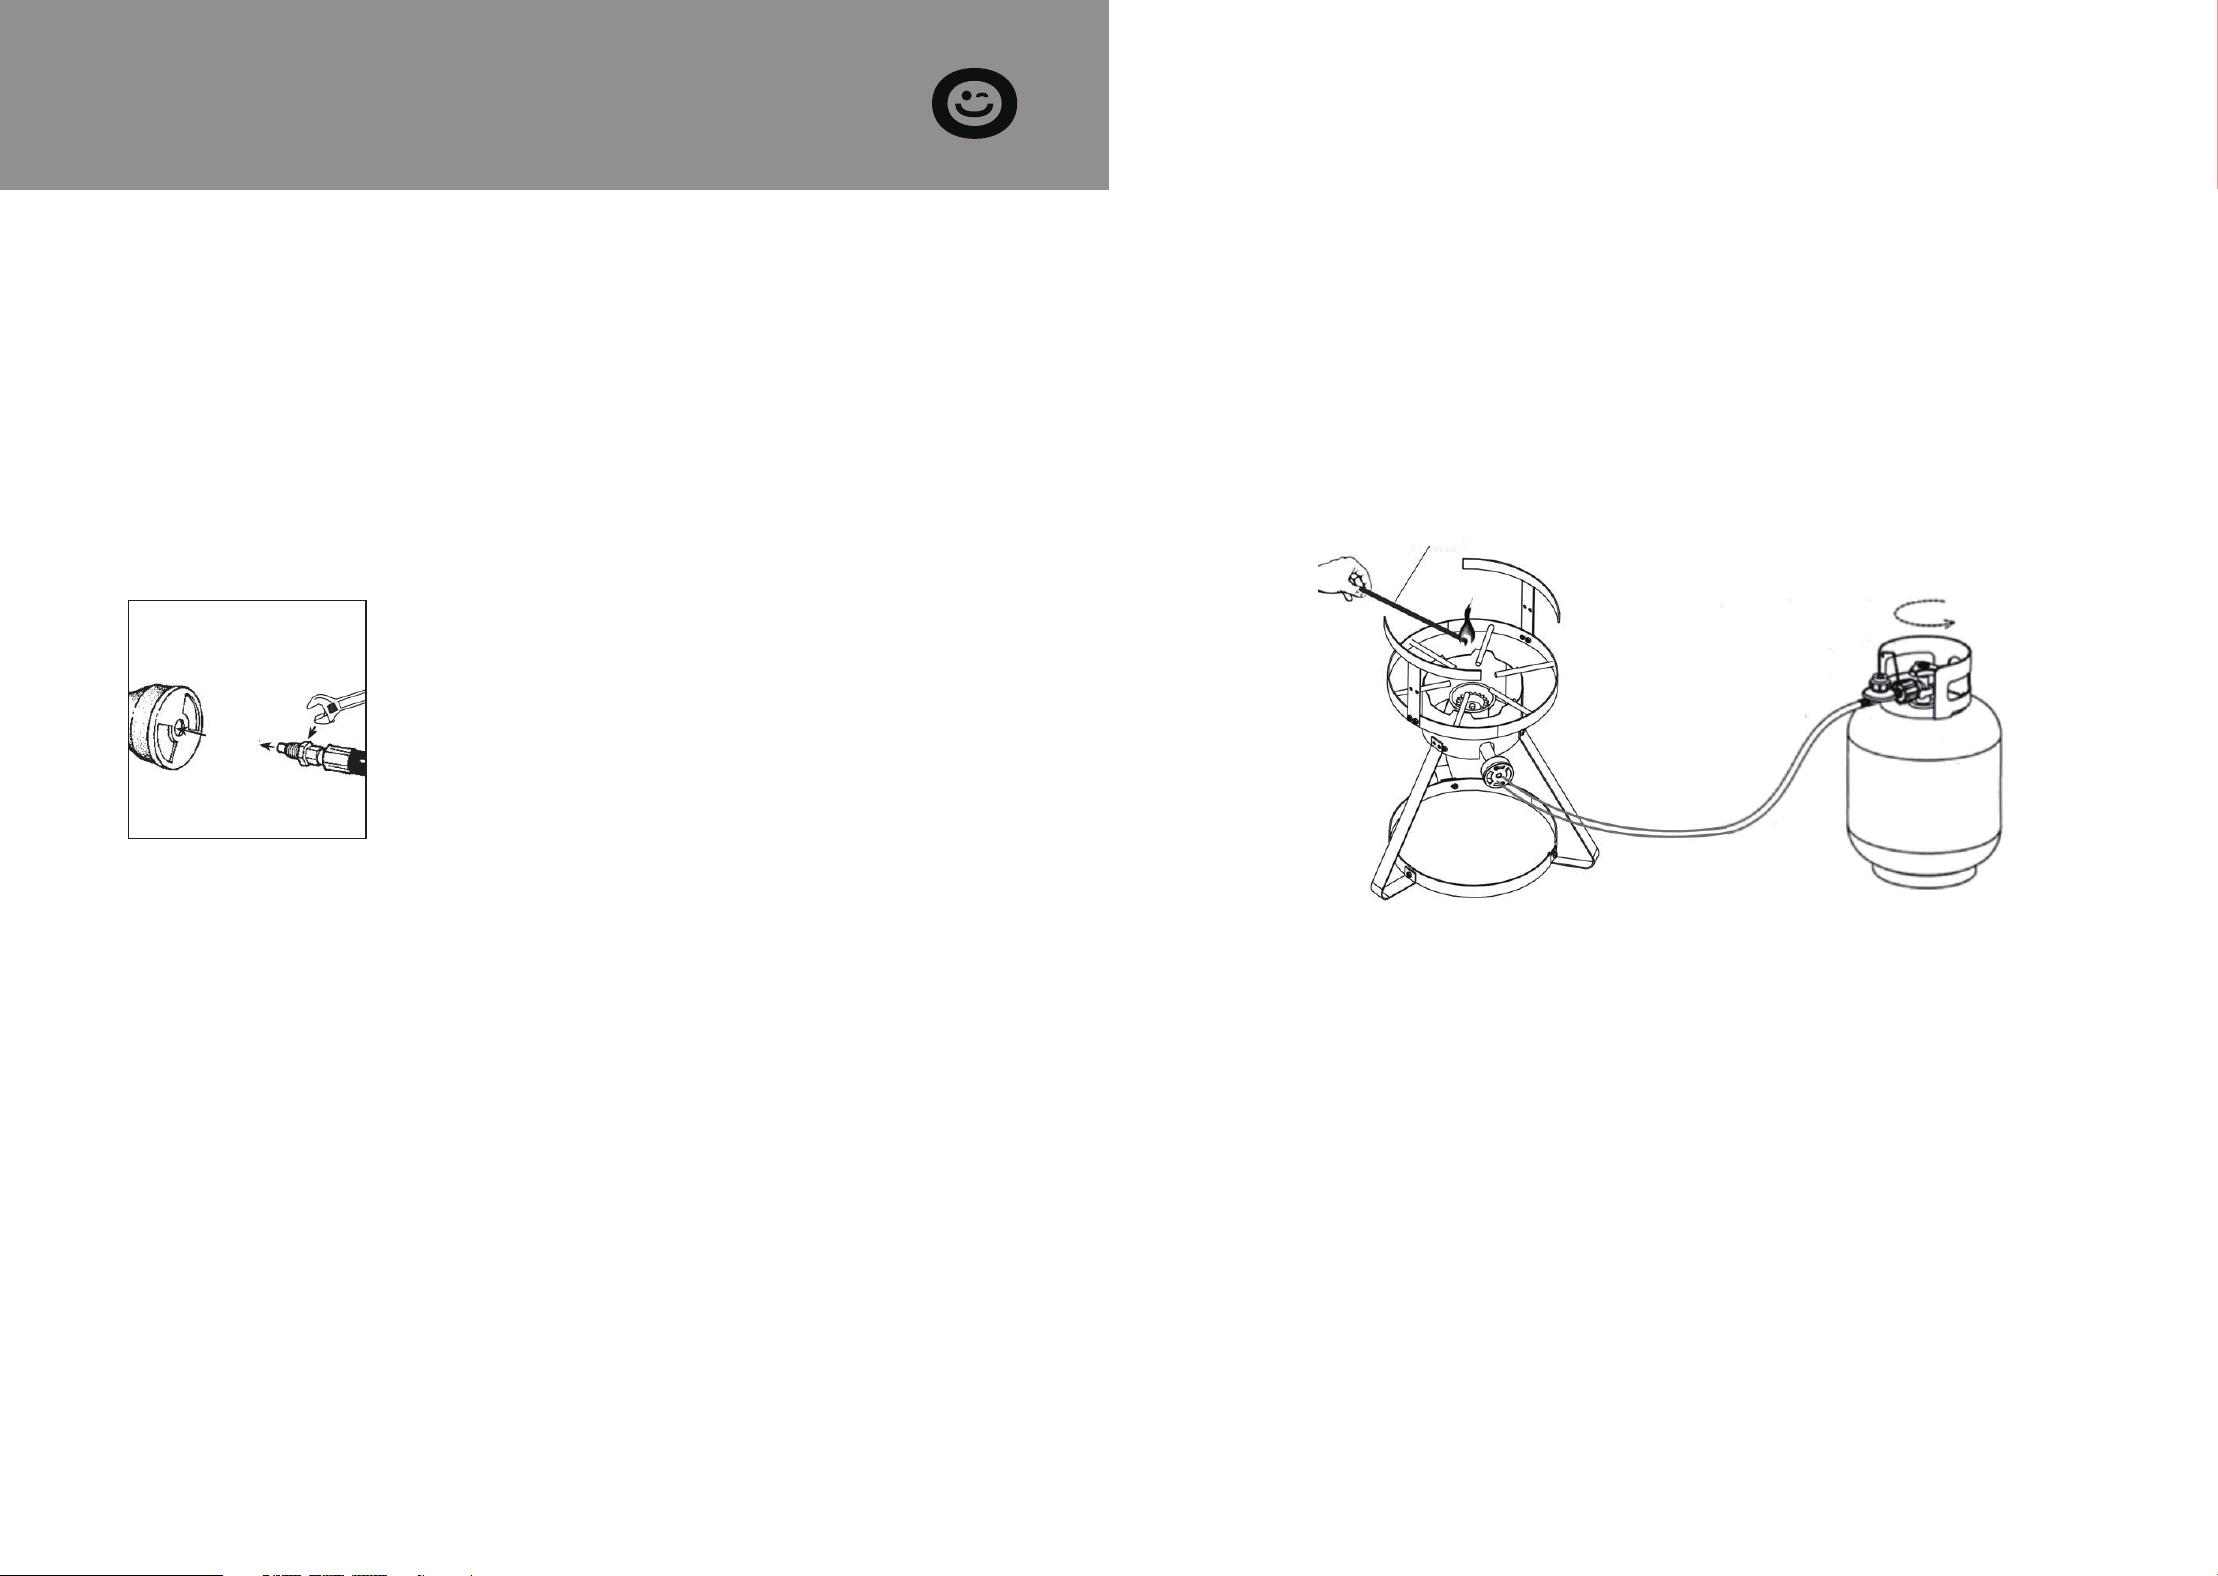
Place the stove on a level, stable surface.
Attach the propane hose to the brass stove inlet fitting.
Make sure the propane bulk tank valve is closed.
Attach the propane hose to the outlet of the propane tank.
Slowly open the propane tank valve and check for leaks by
applying a small amount of liquid soap and looking for bub-
bles to appear.
Note: When connecting the hose to the
unit, insert the male fitting of the hose.
Tighten the fitting onto the throat of the
burner using a wrench.
Do not overtighten. You should be able to
turn on the air control panel.
PREPARATION
1.
2.
3.
4.
5.
Read the instructions before lighting.
When you are sure there are no leaks, turn the cylinder valve
and regulator control valve on the hose to the closed position.
Have a fireplace match or long-nosed lighter lit over the burner
from the side. Keep your hands and faces away from the burner.
Slowly open the gas supply until the burner ignites, keeping
hands and faces away from the burner.
Adjust the regulator control valve for the desired flame height.
The flame should be compact and blue with a slight yellow tip.
If the flame is too “yellow,” adjust the air mixture valve under the
throat of the cast burner until the flame color is achieved.
LIGHTING INSTRUCTIONS
1.
2.
3.
4.
5.
When finished using the cooker, turn off the gas cylinder
valve first. It will take a few seconds for the fire to go out and
for the propane gas to bleed from the hose and regulator
assembly.
After the fire is completely out, turn the regulator control
valve to the OFF position.
To relight, repeat steps 1–6. Always use CAUTION as the
cooker will be hot.
If ignition does not occur in 5 seconds, turn the burner con-
trol(s) off, wait 5 minutes, and repeat the lighting procedure.
After use, let it cool for 15 minutes before storage or trans-
port.
DO NOT leave the propane tank attached to the stove during
storage or transport.
Wipe the burners, steel cooking grate, and propane hose
before storing.
It is suggested to store stove and hose in a nylon storage bag
to keep them clean.
STORAGE
1.
2.
3.
6.
7.
8.
9.
Match
20 Ib. LP
Gas Cylinder
Counter clockwise to
open the gas supply
5 6
SECTION C
Maintenance & Care
The area where the cooker will be used must be kept clear
and free from combustible materials, gasoline, and other
flammable vapors and liquids. Before each use of the cooker,
inspect and remove any combustible items.
The flow of combustion and ventilation of air must not be
obstructed. The cooker must be set in an open area with
10 ft. (3.05m) of space on all sides and no roof or overhang
overhead. Check the location and placement of the cooker
before each use.
Before each use of the appliance, check the burner/venturi
tube for insects, insect nests, and other obstructions. A
clogged tube can lead to a fire beneath the appliance.
Follow all Lighting Instructions on pages 6-7 each time the
cooker is used. Check the flame for proper color and
appearance. The flame should burn predominantly blue. If a
strong yellow flame is present, this could indicate an obstruc-
tion in the burner or ventilation tube. If there is any obstruc-
tion or a yellow flame and the air shutter adjustment
has not solved the problem, turn off the cooker and allow
time for it to cool. Disconnect the hose from the cooker.
Remove the air shutter using a Phillips head screwdriver.
Check the venturi tube with a flashlight to see if there is a
blockage. If a blockage is present, use a wire, such as a coat
hanger, to slide into the venturi tube to remove the
blockage. Reattach the air shutter to the venturi tube using
the Phillips screwdriver. Assemble and light the cooker
again as per the instruction manual.
Always use the LP Hose/Regulator assembly supplied with
the appliance. Before each use of the appliance, check the
LP Hose for evidence of abrasion, wear, cuts, or leaks. If there
is any damage to the hose, the hose/regulator assembly
must be replaced before using the appliance.
1.
2.
3.
4.
5.
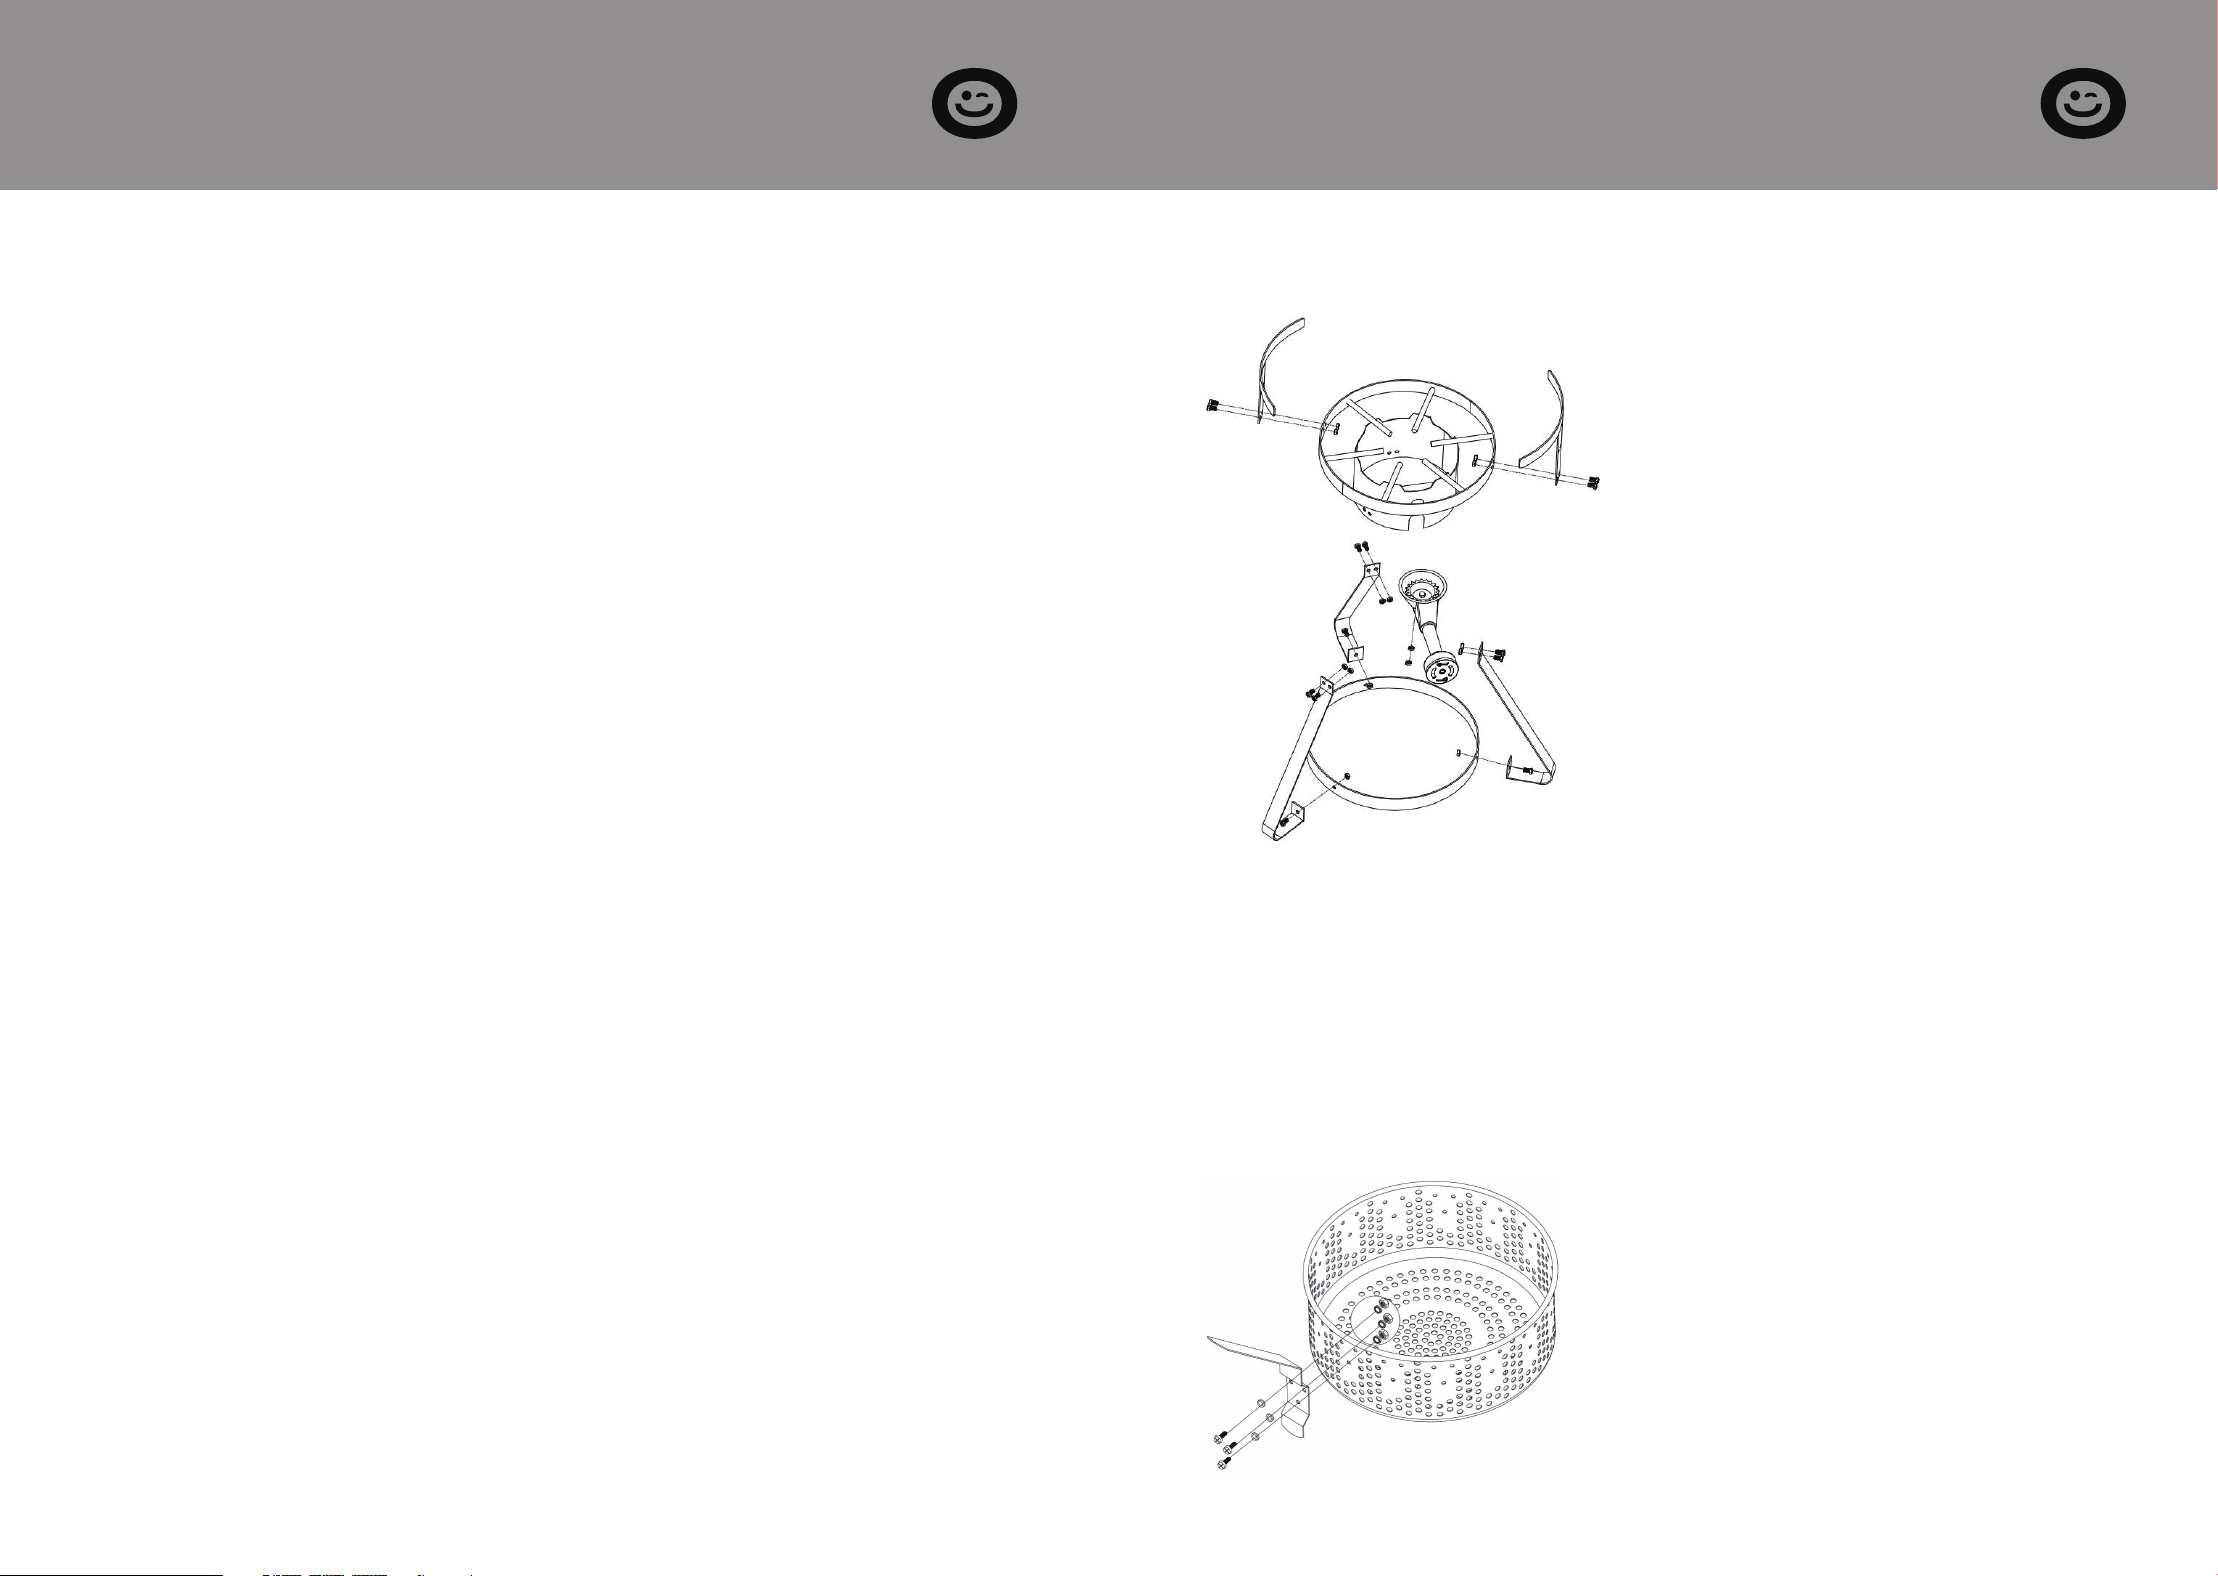
BASKET ASSEMBLY
SECTION D
Assembly Instructions
Attach three legs to the wind-
shield of the top frame with six
bolts and nuts.
Attach 3 legs to the bottom
ring with 3 pieces of bolts and
nuts.
Attach two adjustable side pot
holders to the top frame with
four bolts and nuts.
Unscrew the pre-assembled
lock nut and flange nut from
the threaded pin of the cast
iron burner, then insert the
threaded pin of the burner
through the hole of the sup-
port bar of the top frame,
wrench, and tighten the flange
nut and lock nut.
Insert the M5 Bolts and flat washer
through the Basket Handle and
Basket, and tighten 3 Nuts with 3
Tooth Washers.
(1)
(2)
(3)
(4)
Required Tools: Adjustable Wrench and Screwdriver
*Make sure all hardware is used and the wrench is tightened.
FRAME ASSEMBLY

7 8
SECTION E
Safety Instruction
Read and follow all instructions.
When used in an enclosed area, allow for ample ventilation.
Do not expose the propane source to excessive heat.
Always inspect the stove, propane source, and connectors for
damage, debris, or dirt before attaching the cylinder to the
stove.
Always attach/detach the propane source away from any
open flame or pilot light, and only after the stove has cooled.
Always inspect the burner holes for obstructions prior to
operation. Do not operate if any blockage is found.
Do not use or operate if either the stove or propane source is
found to be damaged.
Always disconnect the propane source when not in use and/
or transporting. Store in an upright position and in a cool,
well-ventilated area.
Be sure to tightly secure all connections to the propane cyl-
inder prior to usage.
Absolutely never operate the stove near any flammable liq-
uids or vapors, and keep all flammable or combustible
materials.
Discontinue operation and close the valve if:
● Ambient temperature drops below -10ºF (-23ºC).
● There is no fuel remaining in the propane cylinder.
● Lighting cannot be performed quickly and easily.
● Combustion becomes unstable or there are repeated
flame-outs.
Absolutely do not use it as a space heater, for illumination,
or in a tent.
Keep it out of the reach of children.
1.
2.
3.
4.
5.
6.
7.
8.
9.
10.
11.
12.
13.
FOR OUTDOOR USE ONLY
FOR YOUR SAFETY
Do not store or use gasoline or other liquids with flammable
vapors in the vicinity of this or any other appliance.
IF YOU SMELL GAS:
1. Do Not attempt to light an appliance.
2. Extinguish any open flame.
3. Disconnect from the fuel supply.
CARBON MONOXIDE HAZARD
This appliance can produce carbon monoxide, which has no
odor. Using it in an enclosed space can kill you.
Never use this appliance in an enclosed space, such as a
camper, tent, car, or home.
Supply plenty of fresh air when using the camp stove. Do not
obstruct the flow of combustion air or ventilation air.
Do not use it as a space heater.
Stoves produce heat. Keep the stove away from burnable
materials. Do not place the stove any closer than 24” to com-
bustibles.
Use a flat, level support surface where the stove is safe from
accidental tipping.
Use only with propane fuel tanks.
Use only the regulator included with your stove. Do not
attempt to alter.
●
●
●
●
●
●
WARNING
PROPANE FUEL IS HIGHLY FLAMMABLE AND UNDER PRES-
SURE.
Do not store at temperatures over 120˚F.
Never use a flame to check for leaks. Use soapy water.
Keep it out of the reach of children at all times.
●
●
●
●
CAUTION

9 10
SECTION F
Warranty
The VIVOHOME warranty program is our commitment to you.
We are committed to providing you with a high-quality product
that meets your needs and expectations. To demonstrate our
confidence in the durability and performance of our products,
we offer the following warranty.
This warranty program applies to any orders, purchases, receipts,
or use of any products sold by VIVOHOME and is valid for a
period of 1 year from the date of purchase. However, please note
that this warranty period is only valid for the original order. If
you receive a replacement order during the warranty period, it
will not include a separate warranty period.
WARRANTY COVERAGE
This warranty does not cover damage resulting from misuse,
accident, unauthorized modification, or any other circumstances
not directly related to the manufacturing and design of the
product, including but not limited to:
Parts lost during use.
Normal wear and tear of products or parts.
Incorrect installation (such as using the wrong voltage) or
assembly.
Exceeding the bearing capacity of the product.
Use under extremely harsh conditions.
WARRANTY EXCLUSIONS
●
●
●
●
●
SECTION F
Warranty
VIVOHOME will provide technical support, replacement, refund,
or other solutions based on the nature of the issue. If you wish
to return the original package for any reason, please contact us
for confirmation before proceeding. You can expect to receive a
response within 48 hours.
Thank you for choosing VIVOHOME. We are committed to en-
suring the quality and satisfaction of your purchase. If you have
any questions or need assistance, please do not hesitate to con-
tact our customer service team.
If you find any defects that affect the use of the product or if the
product stops working and cannot be repaired during the war-
ranty period, please contact our customer service team at our
email or via Amazon & app’ s direct messaging service as soon as
possible. Provide the following information to expedite the
process:
HOW TO MAKE A WARRANTY CLAIM
Order number
Images and/or videos illustrating the issue
A detailed description of the problem
●
●
●
Improper cleaning or maintenance.
Damage caused by any reason other than the intended use
of the product.
Indirect loss or damage caused by the product.
●
●
●