USER MANUAL
THANK
YOU!
Thank You for Purchasing from
Made in China
NOTE:
To continuously improve its products, reserves the right to
modify this information without prior notification.
For any questions regarding assembly, please watch the video on the
product page or contact our customer service. Our customer service will
Thank you for using products in your home!
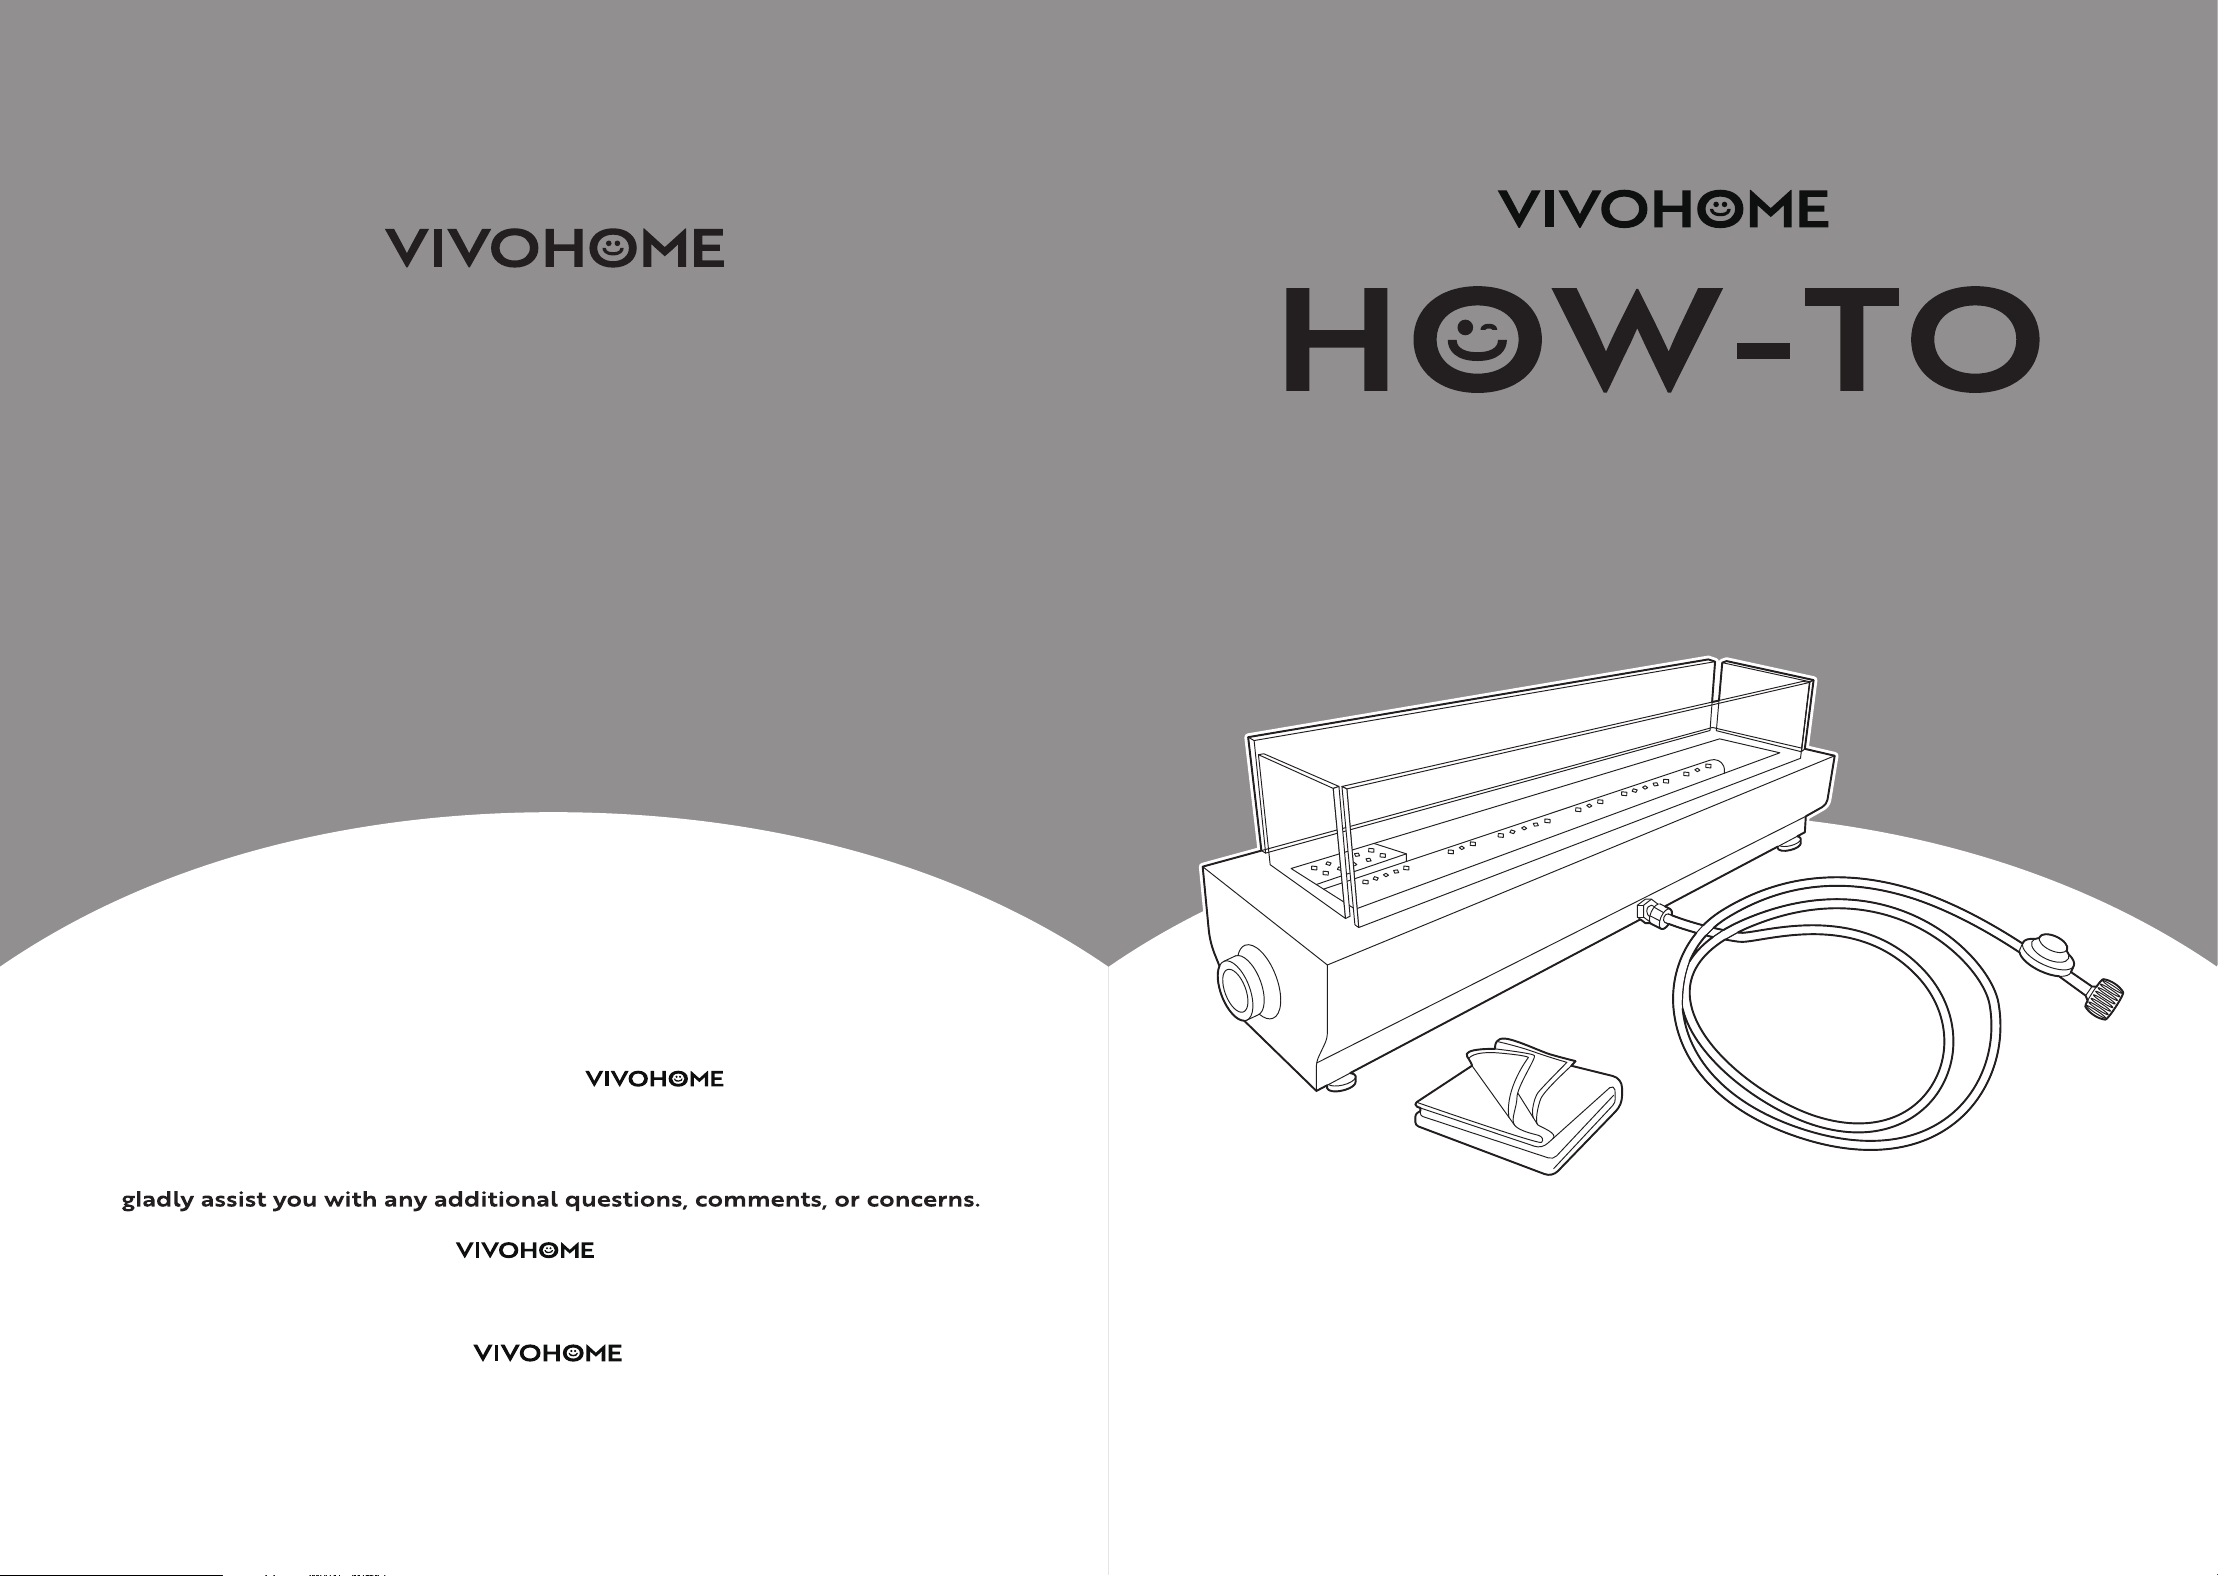
Tabletop Gas Fire Pit

Assembly is EASY!
WE WANT
YOU TO
ENJOY LIFE
AT
GO TO THE PRODUCT LISTING PAGE
FOR AN INSTRUCTIONAL VIDEO!
USER MANUAL
HOW-TO
Tabletop Gas Fire Pit
CONTENTS
Safety Information .........................................................1
Connection & Disconnection ...................................5
Leak Test .............................................................................6
Assembly Steps ...............................................................7
Maintenance ....................................................................11
Warranty ...........................................................................12
1 2
SECTION A
Safety Information
FIRE OR EXPLOSION HAZARD
If you smell gas:
1. Shut off the gas to the appliance.
2. Extinguish any open flame.
3. If the odor continues, leave the area immediately.
4. After leaving the area, call your gas supplier and fire department.
DANGER
Do not store or use gasoline or other flammable vapors and liquids in
the vicinity of this or any other appliance.
An LP-cylinder not connected for use shall not be stored in the vicinity
of this or any other appliance.
Do not smoke around the appliance when connecting or operating.
Installation and service must be performed by a qualified installer,
service agency, or the gas supplier.
WARNING
INSTALLER: Leave this manual with the appliance.
CONSUMER: Retain this manual for future reference.
WARNING
Failure to follow these instructions could result in fire or explosion, which
could cause property damage, personal injury, or death.
WARNING
Do not store spare LP-gas cylinders under or near the fire pit appliance.
Never fill the cylinder beyond 80 percent full.
If the information in Section A and B is not followed exactly, a fire causing
death or serious injury may occur.
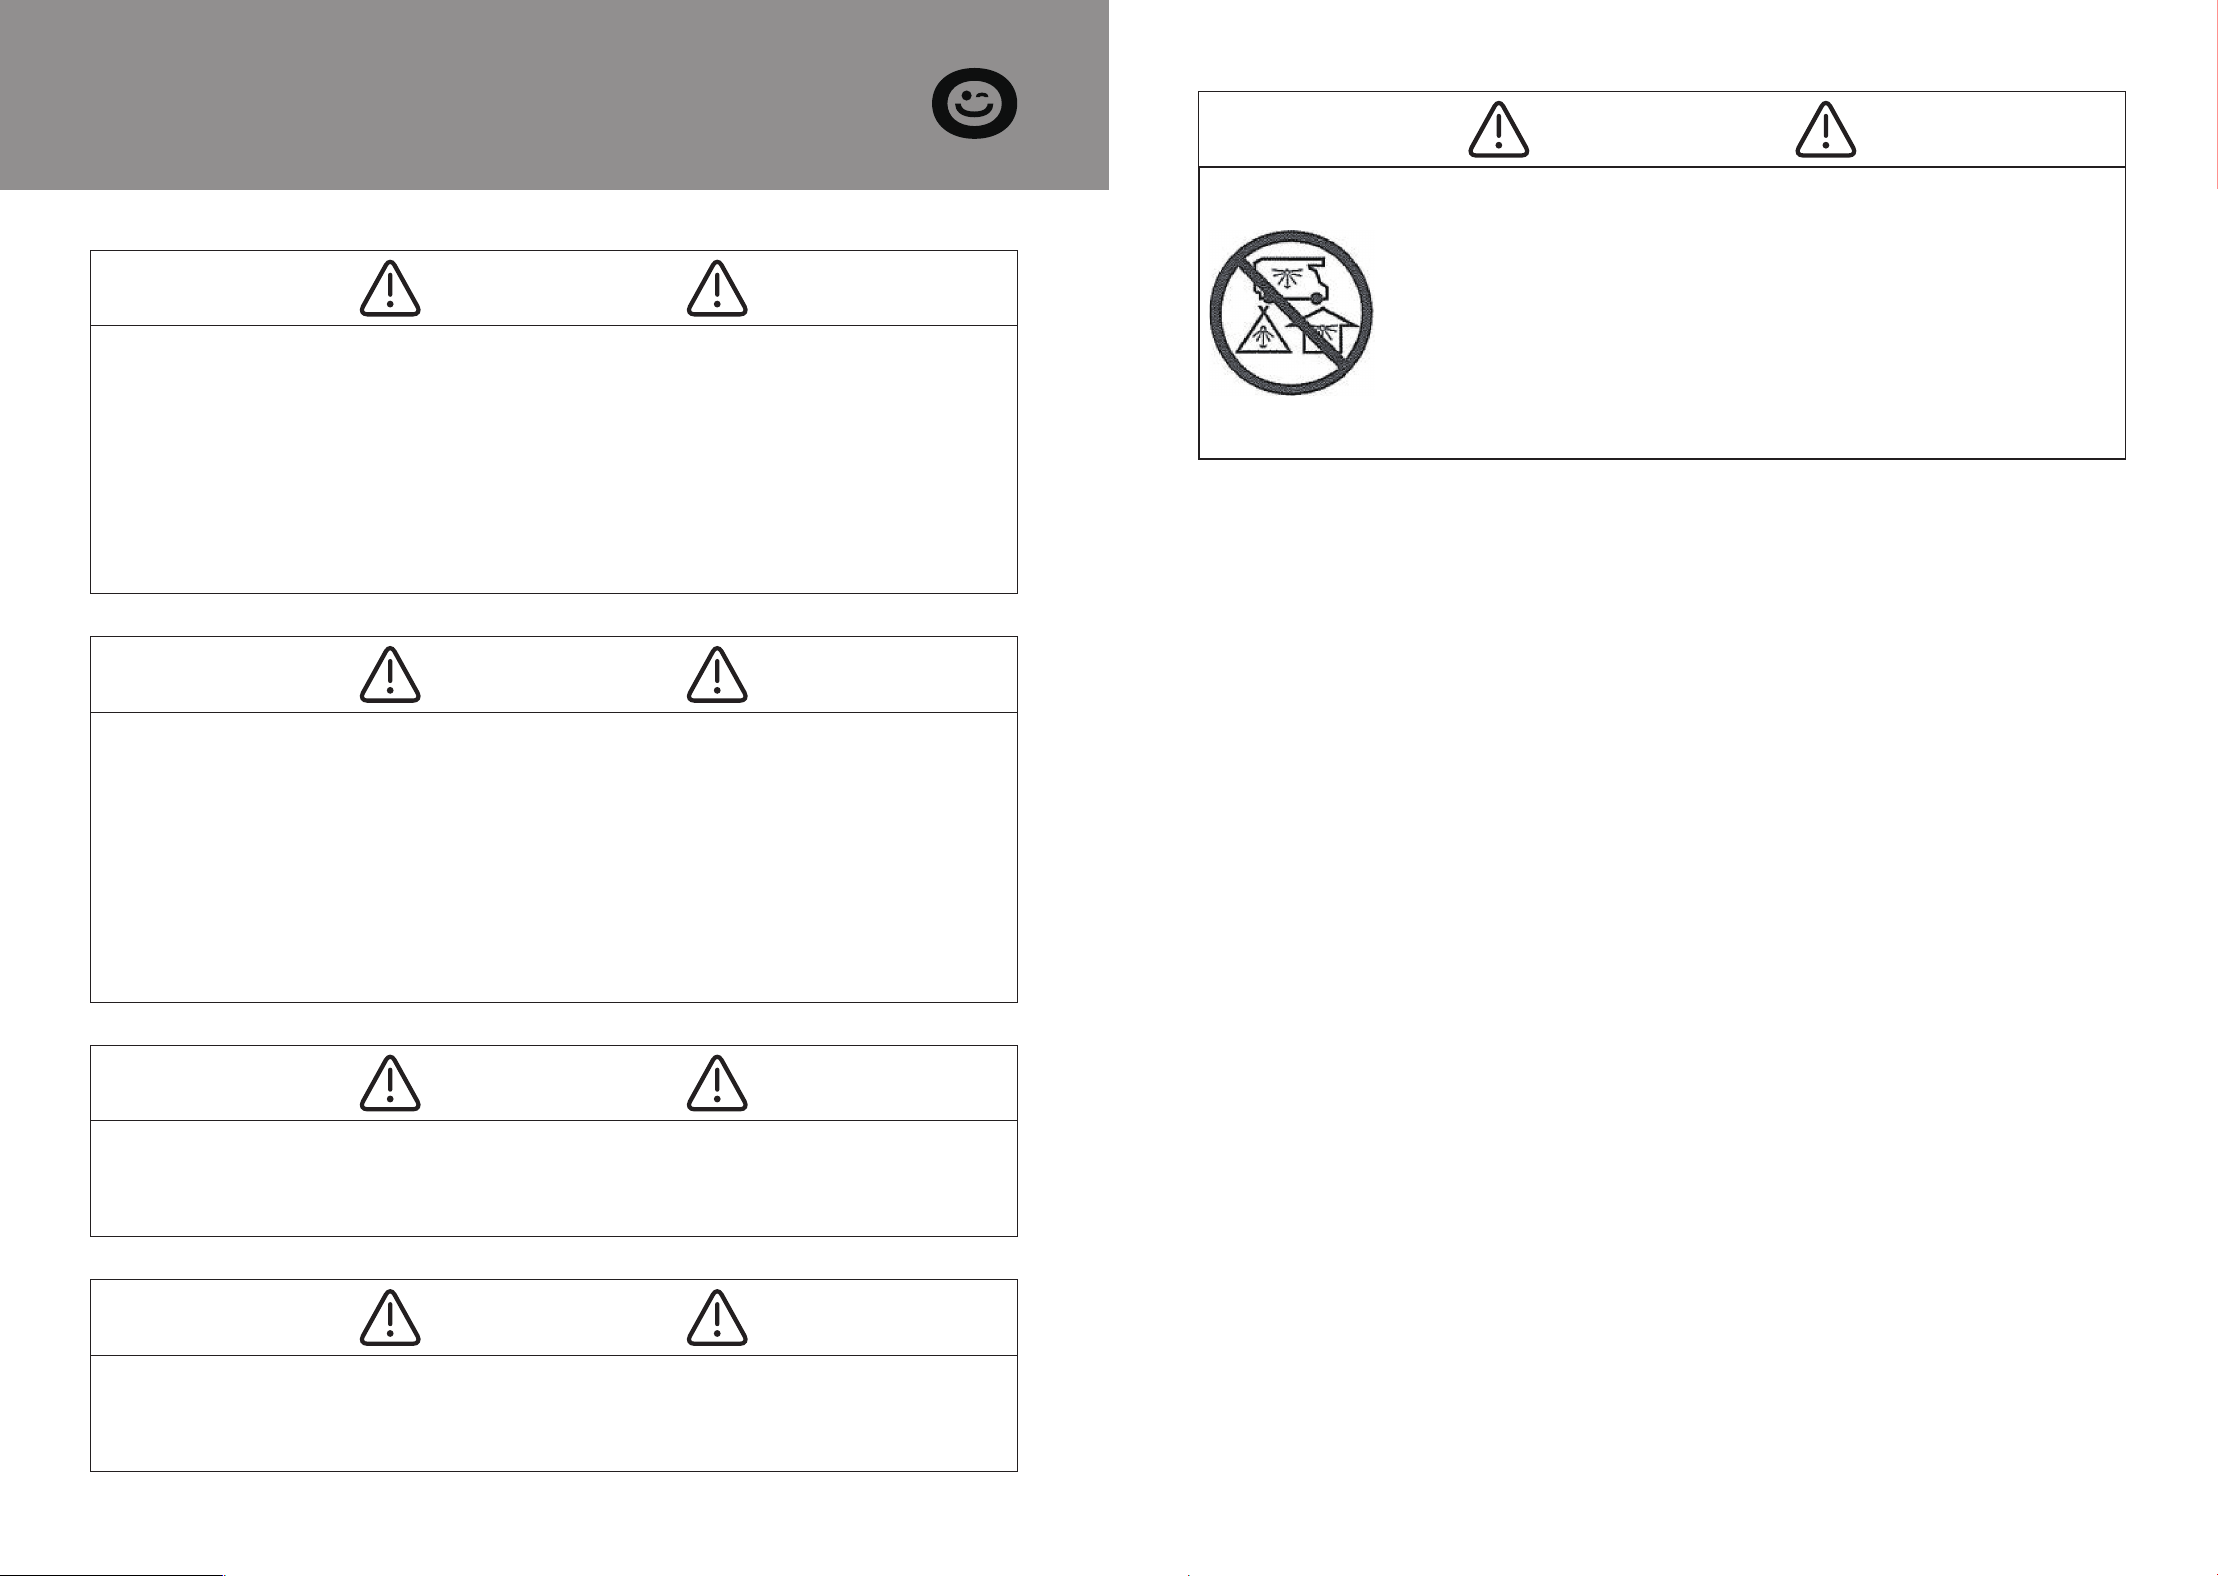
Do not use this appliance under overhead combustible surfaces.
a.
b.
c.
d.
CARBON MONOXIDE HAZARD
This appliance can produce carbon monoxide which has
no odor.
WARNING: FOR OUTDOOR USE ONLY
Using it in the enclosed space can cause death and injuries.
Never use this appliance in an enclosed space such as a
camper, tent, car, or home.
DANGER
LP Safety
Bottom: Non-combustible surface
Top: 80 inches or greater
Sides: 36 inches or greater
For install ation on (or over) non-combustible floors only.
Maximum Output: 58,000 BTU/Hr (17.0kW)
Maximum Gas Supply Pressure: 250 PSI
The minimum inlet gas supply pressure for the purpose of input adjust-
ment: 25 PSI
●
●
●
●
●
●
●
Minimum Clearances
3 4
Every opening shall have minimum dimensions so as to permit the entrance
of a 1/8 in. (3.2 mm) diameter rod. Ventilation openings in sidewalls shall not
communicate directly with other enclosures of the appliances.
Constructed and marked in accordance with the U.S. Department of Trans-
portation (D.O.T.) Specifications for LP-Gas Cylinders, or the Standard for
Cylinders, Spheres and Tubes for Transportation of Dangerous Goods and
Commission, CAN/CSA-B339, as applicable;
Provided with a listed overfilling prevention device;
Provided with a cylinder connection device compatible with the connec-
tion for the appliance;
1)
2)
3)
The LP gas cylinder used for this appliance must be 20 lbs. (9 kg).
Approximately 18” (46 cm) high & 12” (30 cm) diameter.
The use of an approved LP gas cylinder stabilizer is recommended when
using this appliance in order to prevent the LP gas cylinder from tipping
over.
a.
b.
c.
A statement that the propane gas supply cylinder to be used
must be:
This appliance shall be used outdoors only in well-ventilated space and shall
never be used in building, garages, or any other enclosed areas.
When the appliance is not in use, the gas cylinder as well as the appliance
must be turned off.
Indoor storage of this appliance is permissible only if the gas cylinder is
disconnected and removed from the appliance.
Gas cylinders must be stored outdoors in a well-ventilated area out of reach
of children.
Disconnected gas cylinders must have properly installed valve plugs, and
must not be stored in a building, garages, or other enclosed areas.
The gas pressure regulator provided with this appliance must be used, and
must be the same model as supplied with the appliance.
The gas cylinder supply system must be arranged for vapor withdrawal.
Gas cylinders used with this appliance must have a coll ar to protect the
cylinder valve.
An approved LP-cylinder stabilizer, such as the stabilizer ring included, must
be utilized when the appliance is in use.
Children and adults should be alerted to the hazards of high surface
temperatures and should stay away to avoid burns or clothing ignition.
Young children should be carefully supervised when they are in the area
of the appliance.
Clothing or other flammable materials should not be hung from the
appliance or placed on or near the appliance.
Any guard, barrier, or other protective devices removed for servicing the
appliance shall be replaced prior to operating the appliance.
Install ation and repair should be done by a qualified service person. The
appliance should be inspected before use and at least annually by a
qualified service person. More frequent cleaning may be required as
necessary. It is imperative that the control compartment, burners, and
circulating air passageways of the appliance are kept clean.
CAUTION
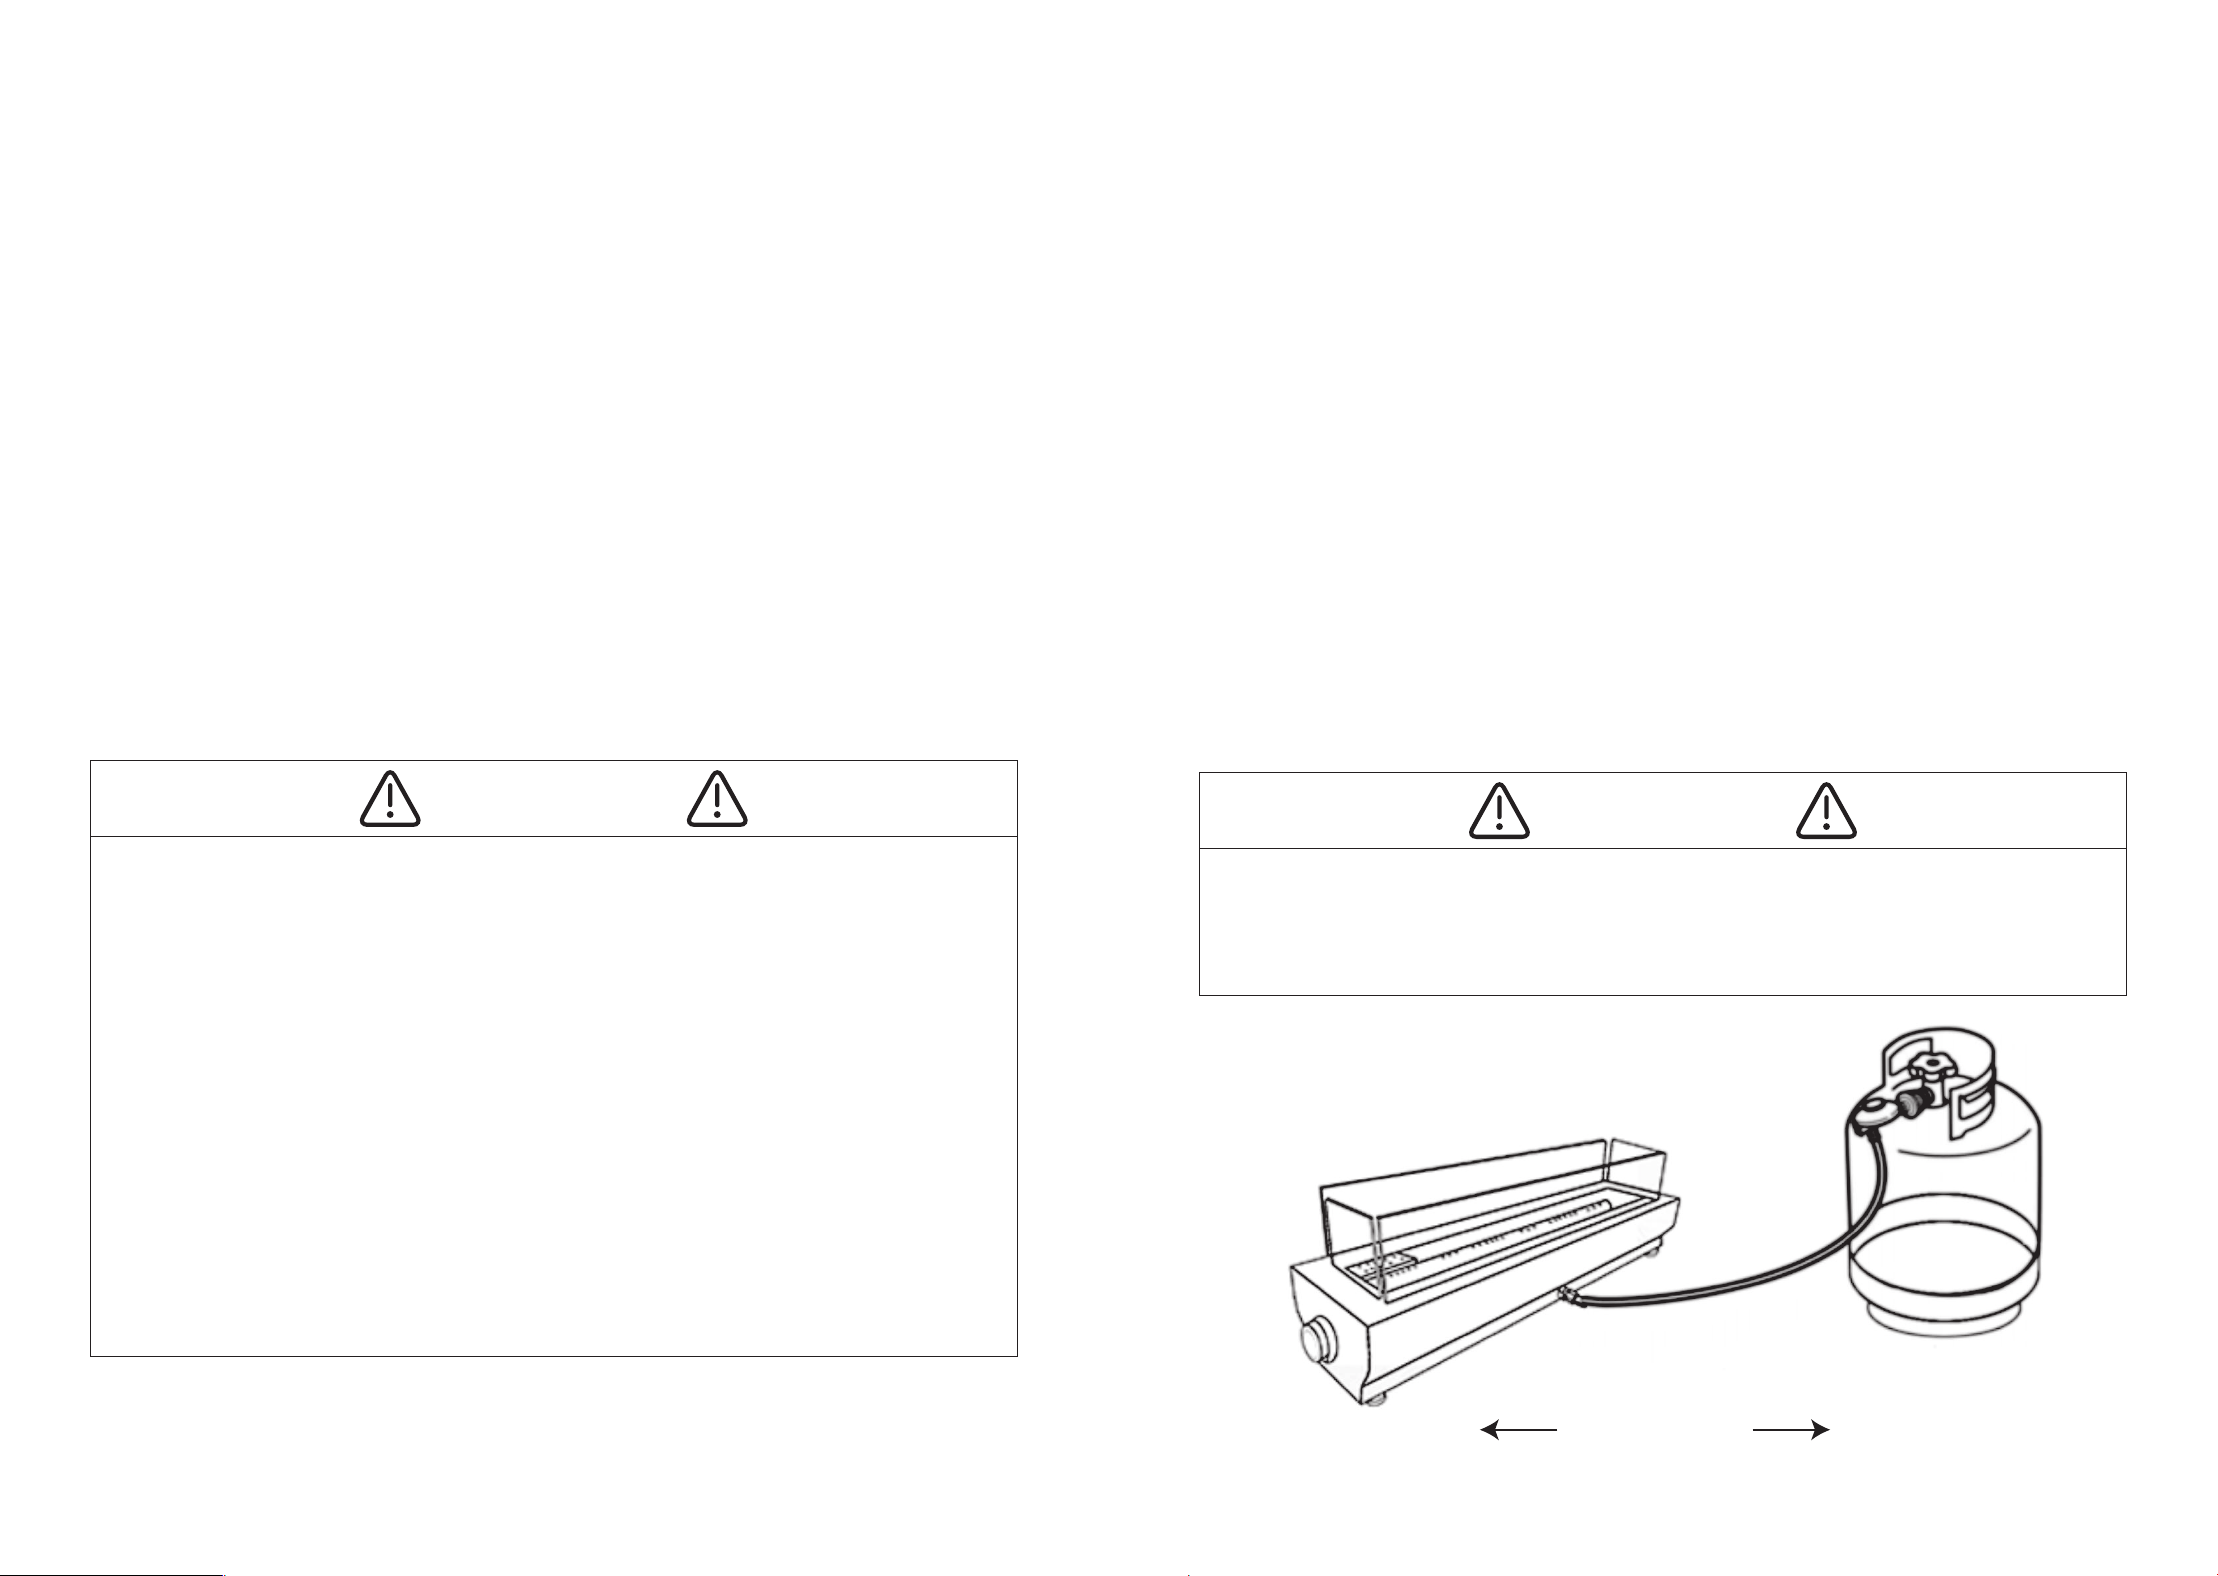
Ensure that the LP gas cylinder is kept at a minimum distance of three
feet (36 inches) away from the appliance at all times.
Warning: Tipping hazard.
WARNING
Appliance LP CylinderMinimum 36’’
5 6
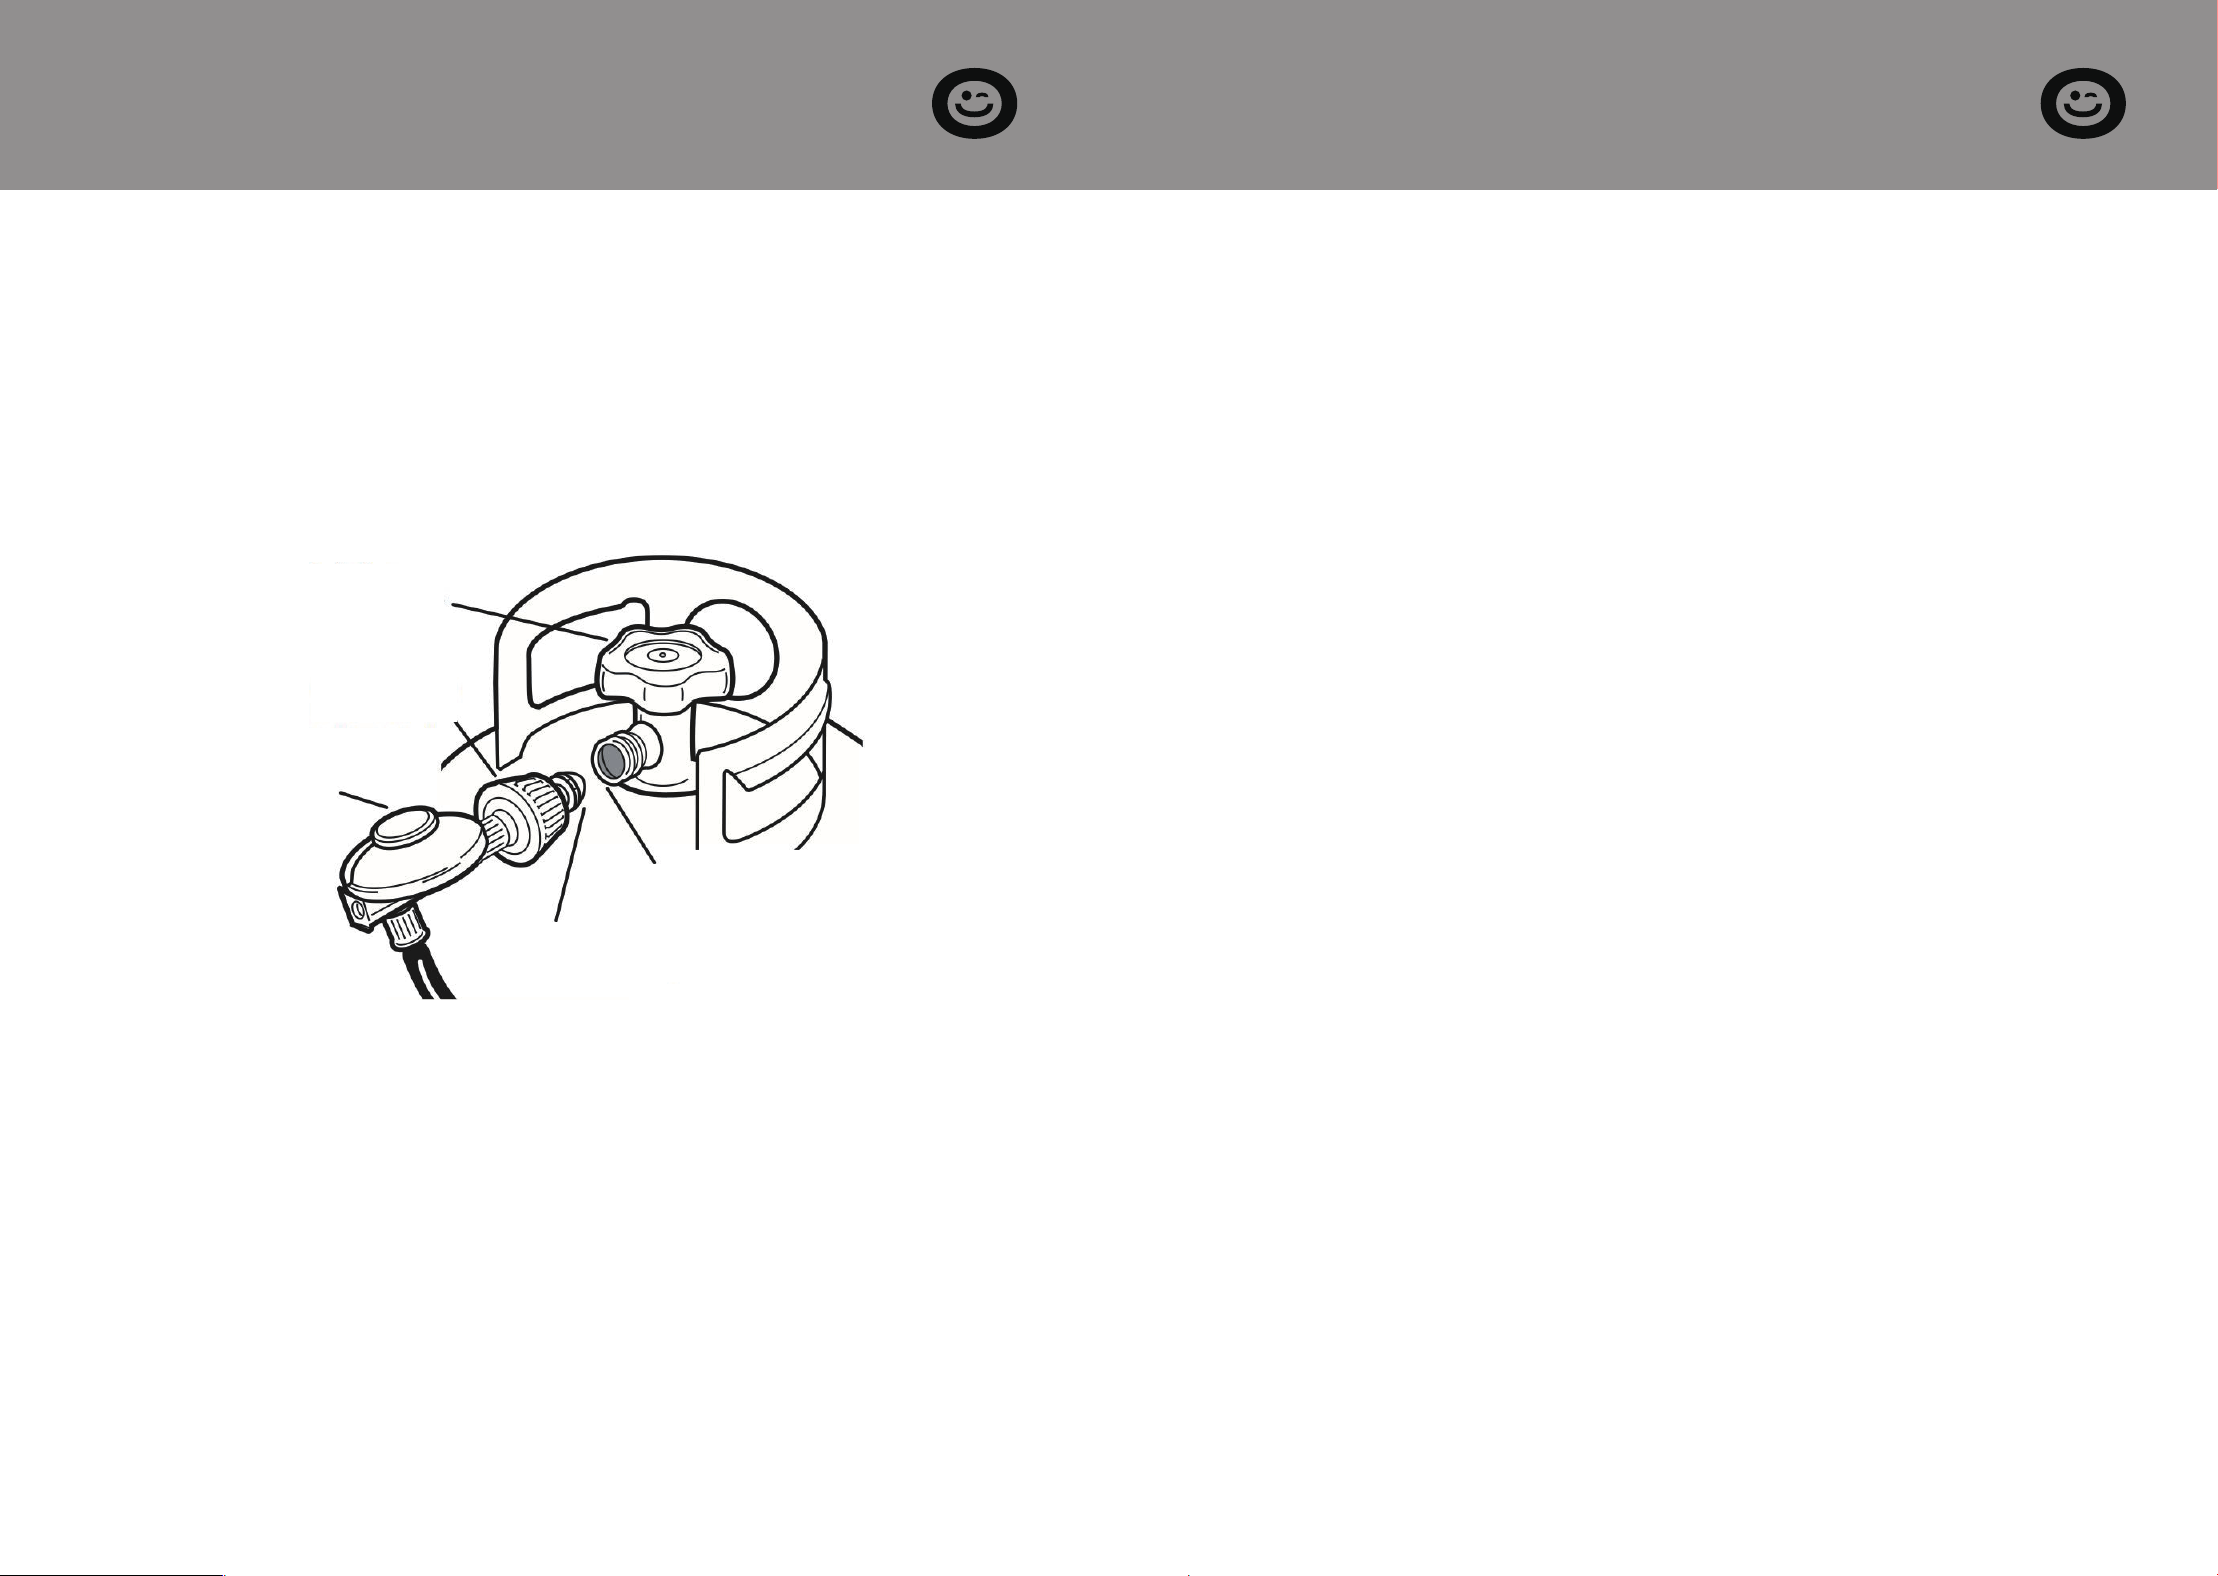
Check Valve
Nipple with
Flow Limiting Device
Regulator
Heat Sensitive
Hand Wheel
Cylinder
Shut Off Valve
SECTION B
Connection & Disconnection
Be sure the cylinder valve and appliance valves are in "OFF" position.
Place the LP gas cylinder on the tank stabilizer ring.
Center the nipple in the cylinder valve and hold in place.
Using the other hand, turn the handle wheel clockwise until there is a
positive firm stop. Do not use tools.
Hand tighten the valve only. When making the connection, hold the regu-
lator in a straight line with the cylinder valve, so as not to cross-thread the
connection.
1)
2)
3)
4)
5)
Be sure the cylinder valve and the appliance valves are in "OFF" position.
Use your hand to turn the handle wheel anticlockwise.
1)
2)
Leak test the connection. See Section C named "LEAK TEST".6)
Disconnection
Connection
SECTION C
Leak Test
DO NOT USE OR PERMIT SOURCES OF IGNITION IN THE AREA WHILE
DOING THE LEAK TEST. THIS INCLUDES SMOKING.
Leak testing should be done once a year or whenever the LP gas cylinder
or any other gas system part is replaced, whichever is more frequent.
The leak testing solution should be half liquid detergent and half water.
Apply the solution to the LP gas delivery system. Begin applying the solu-
tion slowly from gas cylinder handle and work all the way to the appliance
valve including clamps on the sides of the hose.
Bubbles in the soap solution will indicate that a leak is present.
Any leaks must be stopped before using the appliance, either by tighten-
ing the loose joints, if possible, or by replacing the faulty part(s).
1)
2)
3)
4)
5)
6)
A gas appliance repairman or LP gas dealer should be called if attempts to
stop the leak(s) are unsuccessful and, in such case, the LP gas supply must be
removed from the appliance until the leak(s) is corrected.
Inspect the hose prior to each use of the unit. The hose assembly must be
replaced prior to the appliance being put into operation if there is evidence
of excessive abrasion or wear, or if the hose is damaged. Contact us should
you require parts.
Inspect the burner prior to each use. The burner must be replaced prior to
the appliance being put into operation if there is evidence of damage. The
replacement burners are available from us.
Should any part of this appliance (including the burner) become soiled or
dirty, wipe lightly with a damp cloth. Do not use flammable or corrosive
cleaning products on or near this appliance.
Ensure that the gas hose is placed in an area where it is unlikely to be tripped
over (such as pathways or trails) or subject to other accidental damage.
THE APPLIANCE IS NOT BE USED UNTIL ANY OR ALL LEAK(S)
ARE CORRECTED.
7 8
SECTION D
Assembly Steps
Keep the appliance area clear and free from combustible materials, gasoline,
and other flammable vapors and liquids. Solid fuels shall not be burned in
this appliance. When an appliance is for connection to a fixed piping
system, the installation must conform to local codes, or, in the absence of
local codes, to the National Fuel Gas Code, ANSI Z223.1 • NFPA 54; National
Fuel Gas Code; Natural Gas and Propane Installation Code, CSA B149.1; or
Propane Storage and Handling Code, CSA B149.2, as applicable.
STEP 1
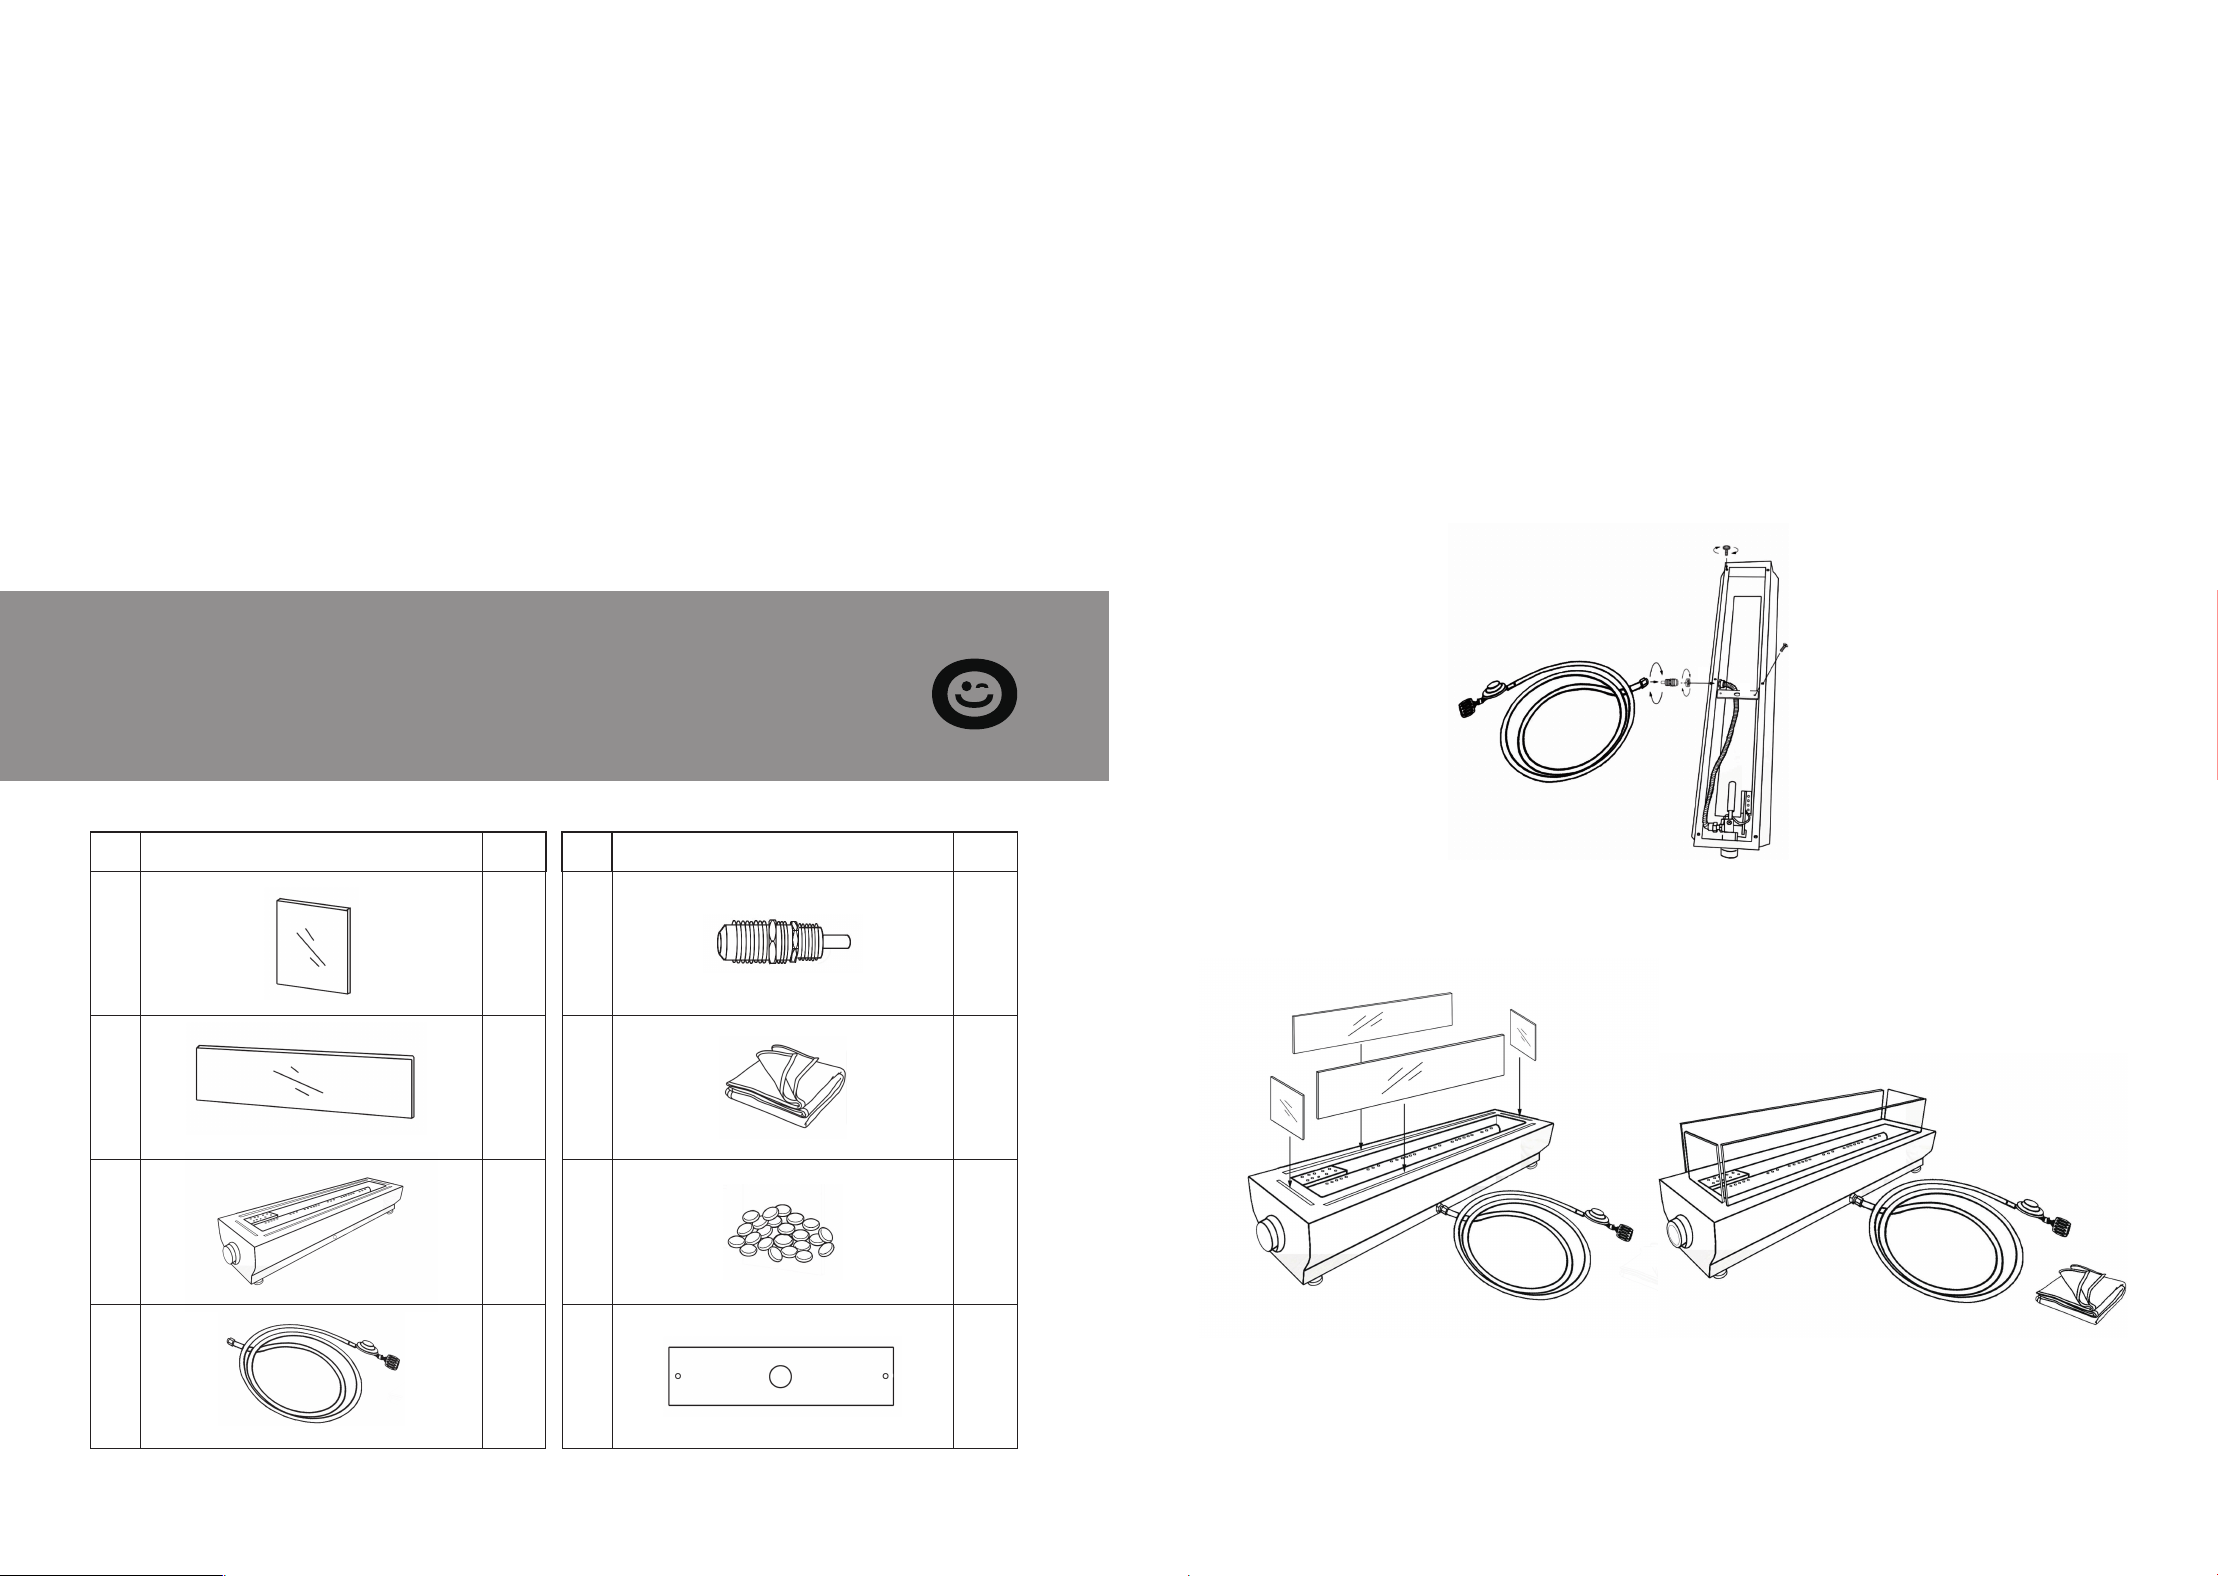
Enclosed are one bag of fire glass stone and one factory installed 8' propane-
rated hose with attached regulator.
STEP 2
Remove plastic bags containing the fire pits and accessories.
STEP 3
Assemble the fire pit with the base support. Then, attach the fast connector
and hose tube.
If your table has a parasol hole, assemble it through the hole at the bottom
(#2). If not, assemble it through the hole (#1) on the side of the fire pit.
STEP 4
After assembling the hose, turn the fire pit over, place the glass into the fire
pit, and then insert the glass properly.
Now you have finished the assembly.
After using the fire pit, please wait it cool down and use the rain cover to
protect it.
NOTE TO INSTALLER: Leave this guide with the consumer.
NOTE TO CONSUMER: Please retain and refer to this guide for as long as you
are in possession of this appliance.
No.
QtyPicture
1 2
Short Glass
No. QtyPicture
5 1
Fast Connector
2 2
Long Glass
6 1
Rain Cover
3 1
Fire Pit Body
7 1
Fire Glass Stone
4 1
Hose Tube with Regulator
8 1
Fire Pit Base Support
1
2
9 10
NOTE TO USER
Before igniting the unit for the first time, follow steps 1 through 5 in the igni-
tion section below.
Mix a solution of liquid soap and water in a spray bottle, and apply to the gas
fittings you have just connected.
If the parts of the fitting begin to produce bubbles, spray liquid, or if you
smell liquid propane gas, immediately close the valve on the tank, and leave
the unit for at least an hour undisturbed to allow excess gas to escape.
After an hour, disconnect the hose and take the unit to a certified propane
technician for consultation.
Rocks are not to exceed a maximum weight of 5 kg or 11 lbs.
STEP 5
Ensure that the unit valve dial is in the “OFF” position
by pushing and turning clockwise until the dial stops.
OFF
ON
STEP 7
Extend the hose to its full length and ensure that the propane tank is posi-
tioned as far from the fire pit as safely possible.
STEP 8
Slowly turn the cylinder valve to the "OPEN" position.
NOTE: Opening the valve too quickly may activate the excess-flow valve in
your propane cylinder, decreasing gas flow dramatically. In this case, shut the
valve off and re-open very slowly.
STEP 9
Turn the dial counter-clockwise, and the piezo igniter should ignite the unit
flame.
STEP 10
Set the dial to desired flame height.
Warning: Ensure that no parts of your body, clothing, or any other combusti-
ble material are above the burner before, during, and after ignition.
STEP 6
Securely attach the regulator (the large end of the
hose) to your propane cylinder.
Upon igniting the appliance, visually verify that the burner is indeed burning
as demonstrated in the image. The presence of flames will confirm that the
burner is burning. Periodically check that the burner flame is present during
operation by visually inspecting the burner.
If there are no flames present, the appliance is likely not burning. If this is the
case, IMMEDIATELY turn the valve to the "OFF" position if it is not already,
and repeat the ignition procedure as outlined in steps 7-10.
NOTE: When the fire pit is on,the burner will display blue and yellow flames.
If these flames are not yellow or produce thick black smoke, this would
indicate an obstruction of airflow through the burners. If excessive yellow
flames are detected, turn off the burner.
Periodic Inspection of Burner Flames
Step 1
Turn the cylinder valve to the "CLOSE" position.
Step 2
Turn the appliance valve to the "OFF" position by pushing and turning the
knob clockwise.
Step 3
Allow the unit to cool for at least 5 minutes before relighting.
Extinguish the Appliance
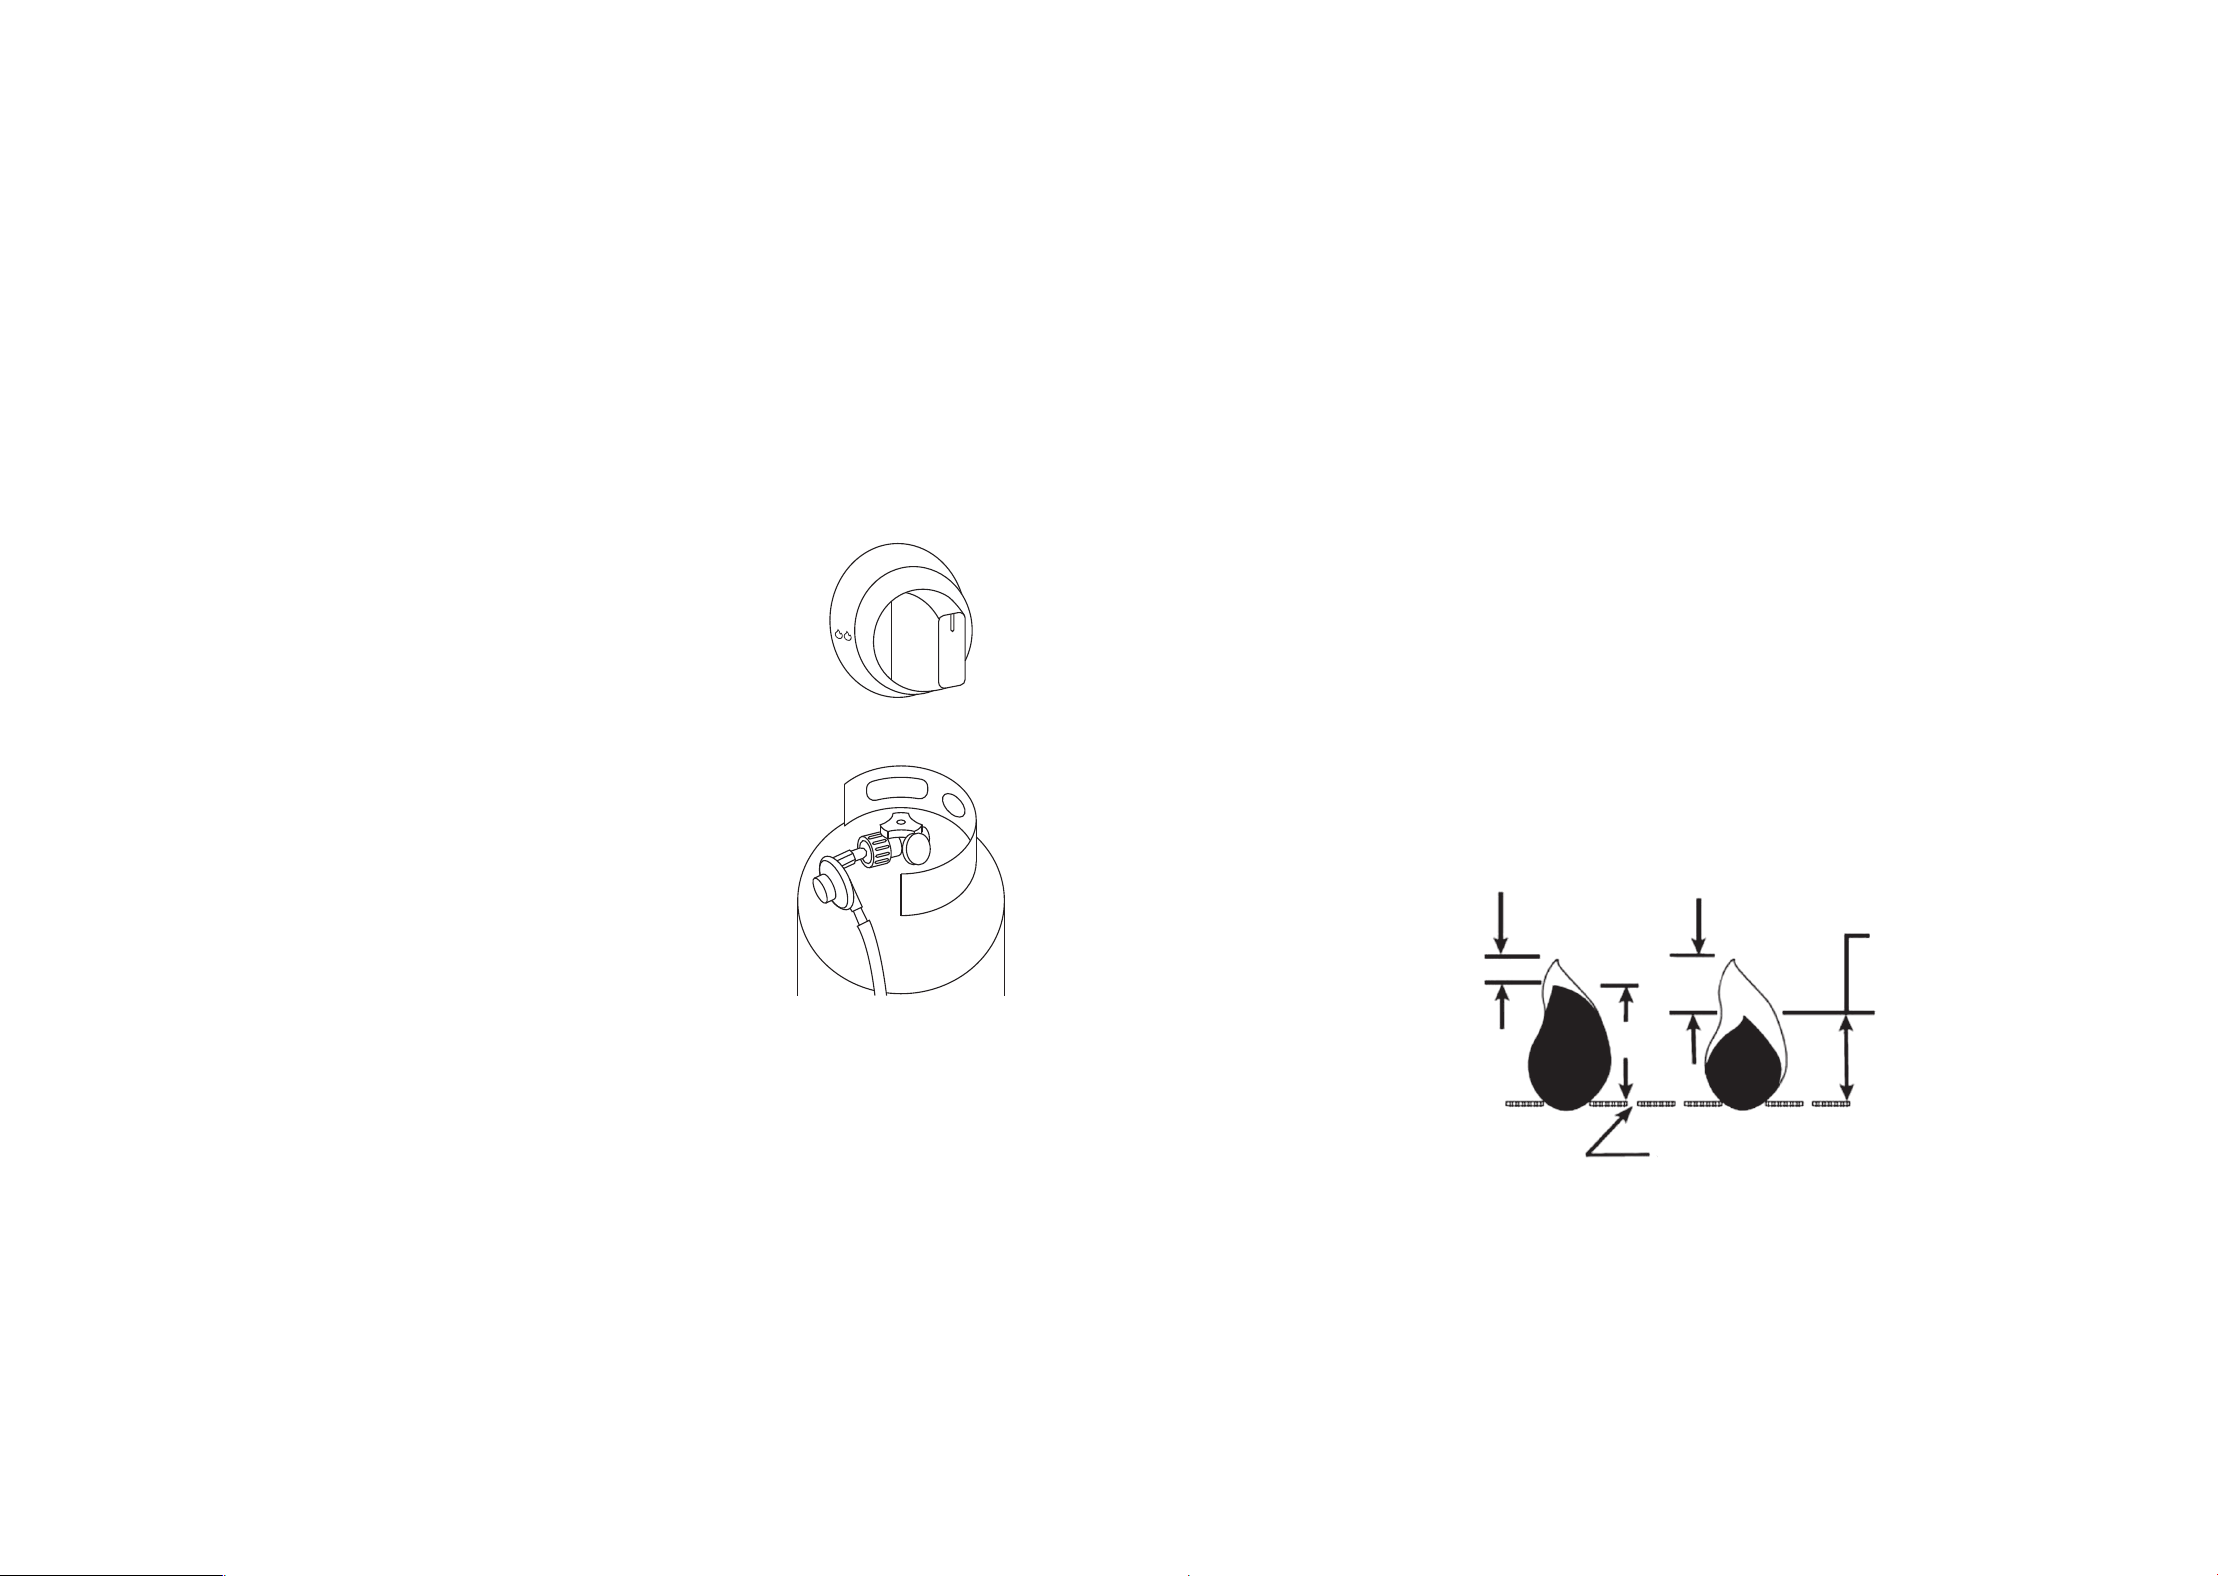
Good Bad
Blue
Blue
Yellow
Yellow
Holes in Burner

11 12
SECTION F
Warranty
SECTION E
Maintenance
The VIVOHOME warranty program is our commitment to you.
We are committed to providing you with a high-quality product that meets
your needs and expectations. To demonstrate our confidence in the durabili-
ty and performance of our products, we offer the following warranty.
This warranty program applies to any orders, purchases, receipts, or use of
any products sold by VIVOHOME and is valid for a period of 1 year from the
date of purchase. However, please note that this warranty period is only valid
for the original order. If you receive a replacement order during the warranty
period, it will not include a separate warranty period.
Warranty Coverage
This warranty does not cover damage resulting from misuse, accident, unau-
thorized modification, or any other circumstances not directly related to the
manufacturing and design of the product, including but not limited to:
Parts lost during use.
Normal wear and tear of products or parts.
Incorrect installation (such as using the wrong voltage) or assembly.
Exceeding the bearing capacity of the product.
Use under extremely harsh conditions.
Improper cleaning or maintenance.
Damage caused by any reason other than the intended use of the product.
Indirect loss or damage caused by the product.
Warranty Exclusions
●
●
●
●
●
●
●
●
Keep your fire pit out of the rain and store it in a dry place.
This device has been engineered to provide the maximum amount of heat
and comfort. If you experience any signs of your propane cylinder 'freezing
off' or start to experience lower flames than usual, please simply turn the
burner control setting to "LOW" position for 5-10 minutes, or replace the
cylinder with a full one.
Ensure that you clean the bowl of your fire pit after every use to keep it
looking GREAT. Simply wipe the outer edge of the fire pit with a damp
paper towel or cloth to remove any combustion particulates.
1.
2.
3.
Expected burning time: The anticipated burning time for your fire pit using
a full 20 lb. (9kg) propane cylinder is between 7 and 11 hours, depending on
where the flame height is set.
We recommend that you ignite this unit only when safely placed on a
non-combustible surface.
This is NOT a toy. Children should be supervised at all times when using
this unit without exception.
Do not place any objects other than the supplied rocks inside the burner
component of the fire pit.
Do not add wood or any other materials to the fire.
It is designed to safely combust propane only.
Do not connect to a remote gas supply.
Do not use this appliance if any part(s) has been under water. Immediately
call a qualified service technician to inspect the appliance and to replace
any part of the control system and any gas control that has been sub-
merged in water.
Do not leave this appliance in the rain.
●
●
●
●
●
●
●
●
●
Important Notes
Your fire pit requires periodic maintenance to keep it in good running order.
Follow the steps below to ensure your appliance will provide you with the
best possible performance.

VIVOHOME will provide technical support, replacement, refund, or other
solutions based on the nature of the issue. If you wish to return the original
package for any reason, please contact us for confirmation before proceed-
ing. You can expect to receive a response within 48 hours.
Thank you for choosing VIVOHOME. We are committed to ensuring the
quality and satisfaction of your purchase. If you have any questions or need
assistance, please do not hesitate to contact our customer service team.
If you find any defects that affect the use of the product or if the product
stops working and cannot be repaired during the warranty period, please
contact our customer service team at our email or via Amazon & app’ s direct
messaging service as soon as possible. Provide the following information to
expedite the process:
How to Make a Warranty Claim
Order number
Images and/or videos illustrating the issue
A detailed description of the problem
●
●
●
13