
Aclas ESL User Manual

Contents
I. Product Introduction
II. Daily Use in Stores

FCC Statement:
This device complies with part 15 of the FCC Rules. Operation is subject to the following two conditions:
(1) This device may not cause harmful interference, and
(2) this device must accept any interference received, including interference that may cause undesired operation.
This equipment has been tested and found to comply with the limits for a Class B digital device, pursuant to part 15 of the FCC
Rules. These limits are designed to provide reasonable protection against harmful interference in a residential installation. This
equipment generates, uses and can radiate radio frequency energy and, if not installed and used in accordance with the instructions,
may cause harmful interference to radio communications. However, there is no guarantee that interference will not occur in a
particular installation. If this equipment does cause harmful interference to radio or television reception, which can be determined
by turning the equipment off and on, the user is encouraged to try to correct the interference by one or more of the following
measures:
—Reorient or relocate the receiving antenna.
—Increase the separation between the equipment and receiver.
—Connect the equipment into an outlet on a circuit different from that to which the receiver is connected.
—Consult the dealer or an experienced radio/TV technician for help.
Caution: Any changes or modifications not expressly approved by the party responsible for compliance could void the user's
authority to operate the equipment.
This equipment complies with FCC radiation exposure limits set forth for an uncontrolled environment. This transmitter must not be
co‐located or operating in conjunction with any other antenna or transmitter.
RF Exposure Warning:
This equipment complies with radiation exposure limits set forth for an uncontrolled environment. This equipment should be
installed and operated with Minimum distance 20cm between the radiator and your body.

I. Product Introduction
Product Pictures
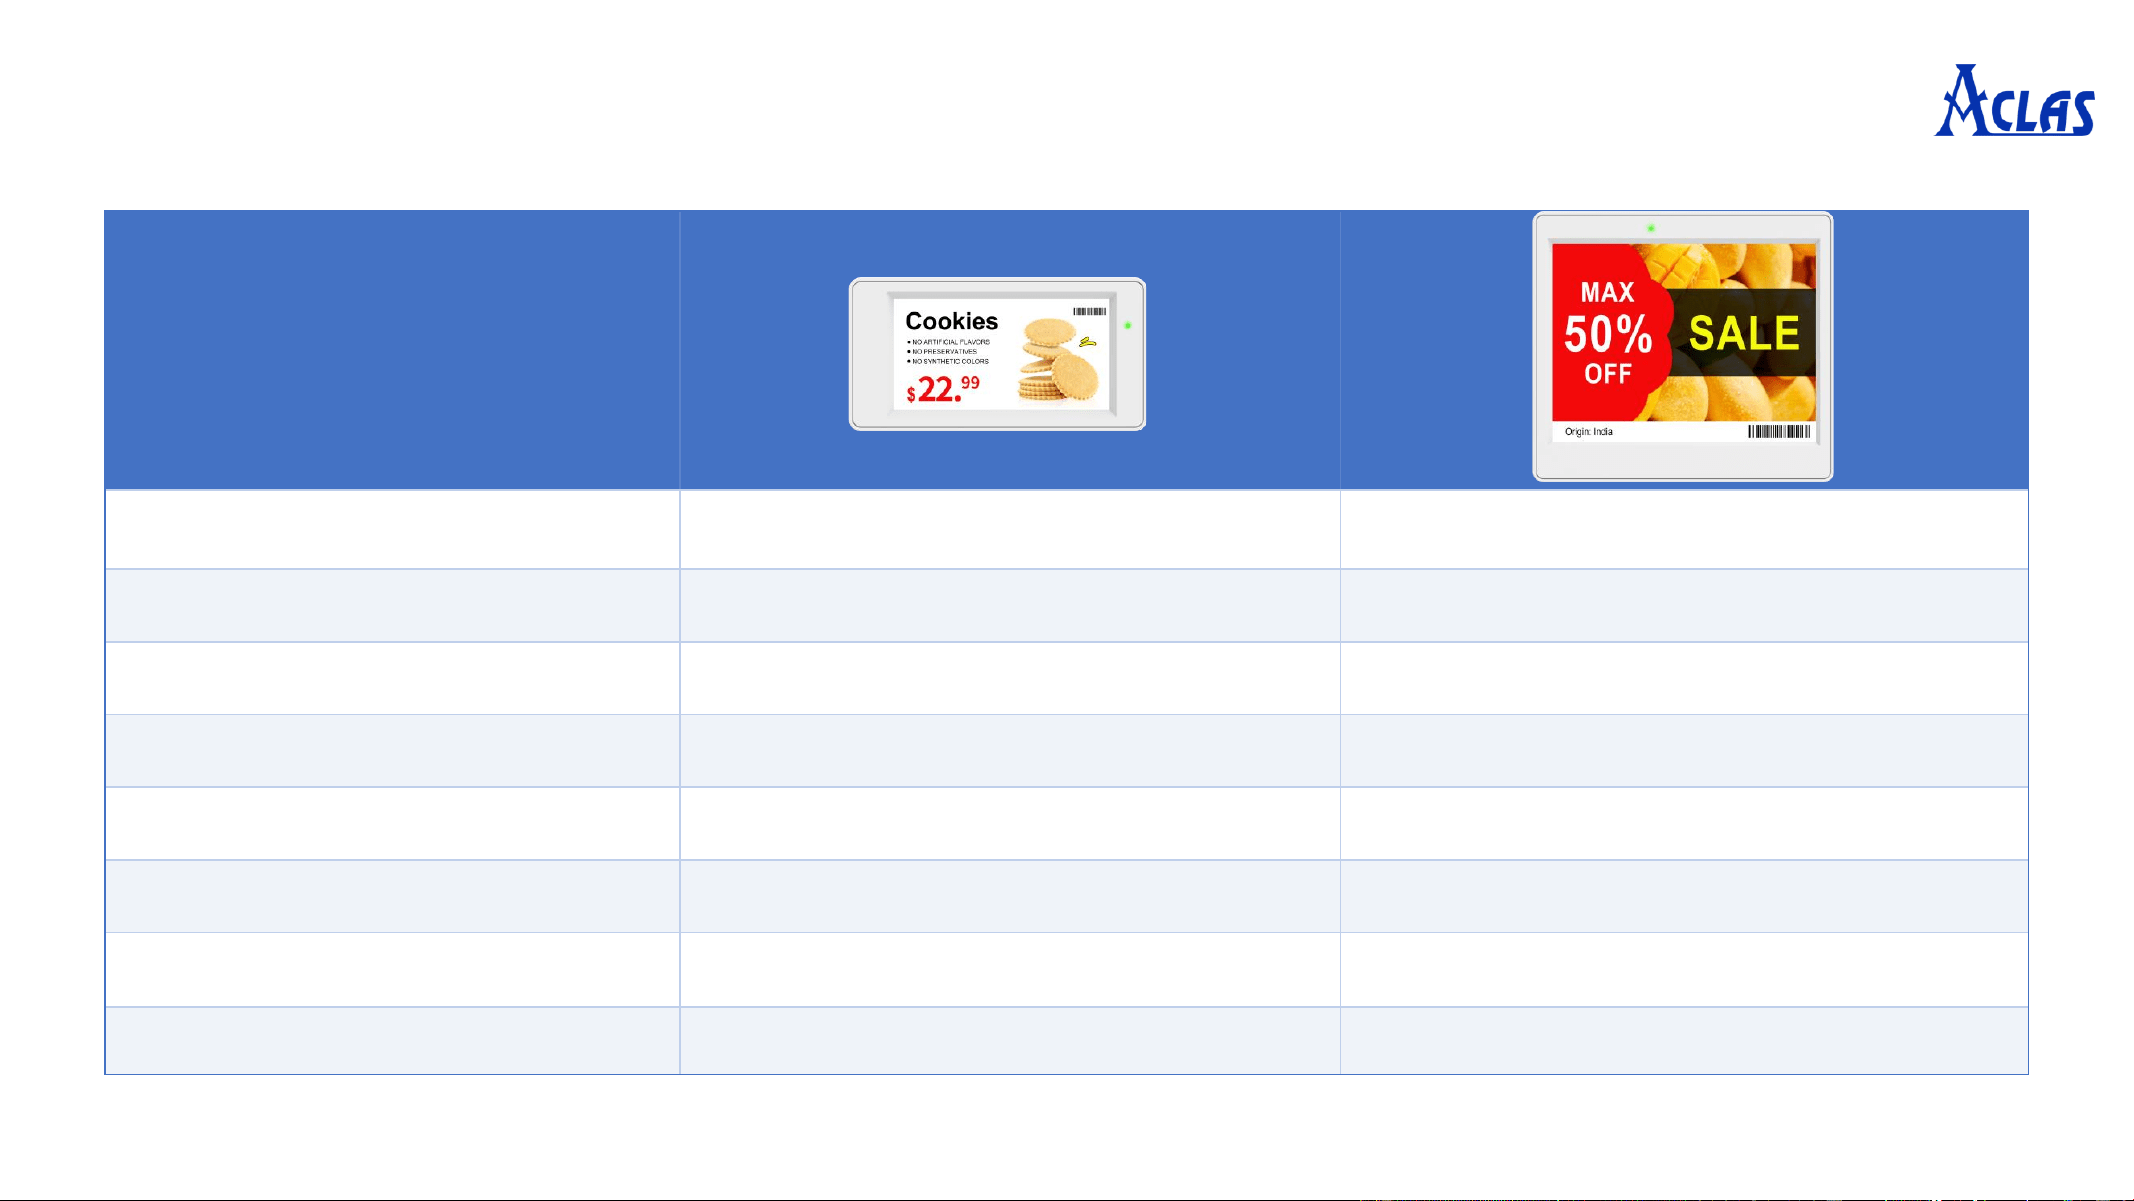
Model
SLX SL4
Screen Size
2.66 inches 4.2 inches
Resolution
296*152 400*300
Display Color
Black/White/Red/Yellow Black/White/Red/Yellow
Communication Method
2.4G Wireless 2.4G Wireless
Battery Capacity
2×CR2450 (Replaceable) 2×CR2450 (Replaceable)
LED Light
8-Color Support 8-Color Support
Operating Temperature
0~40℃ 0~40℃
1. EPD Shelf Label
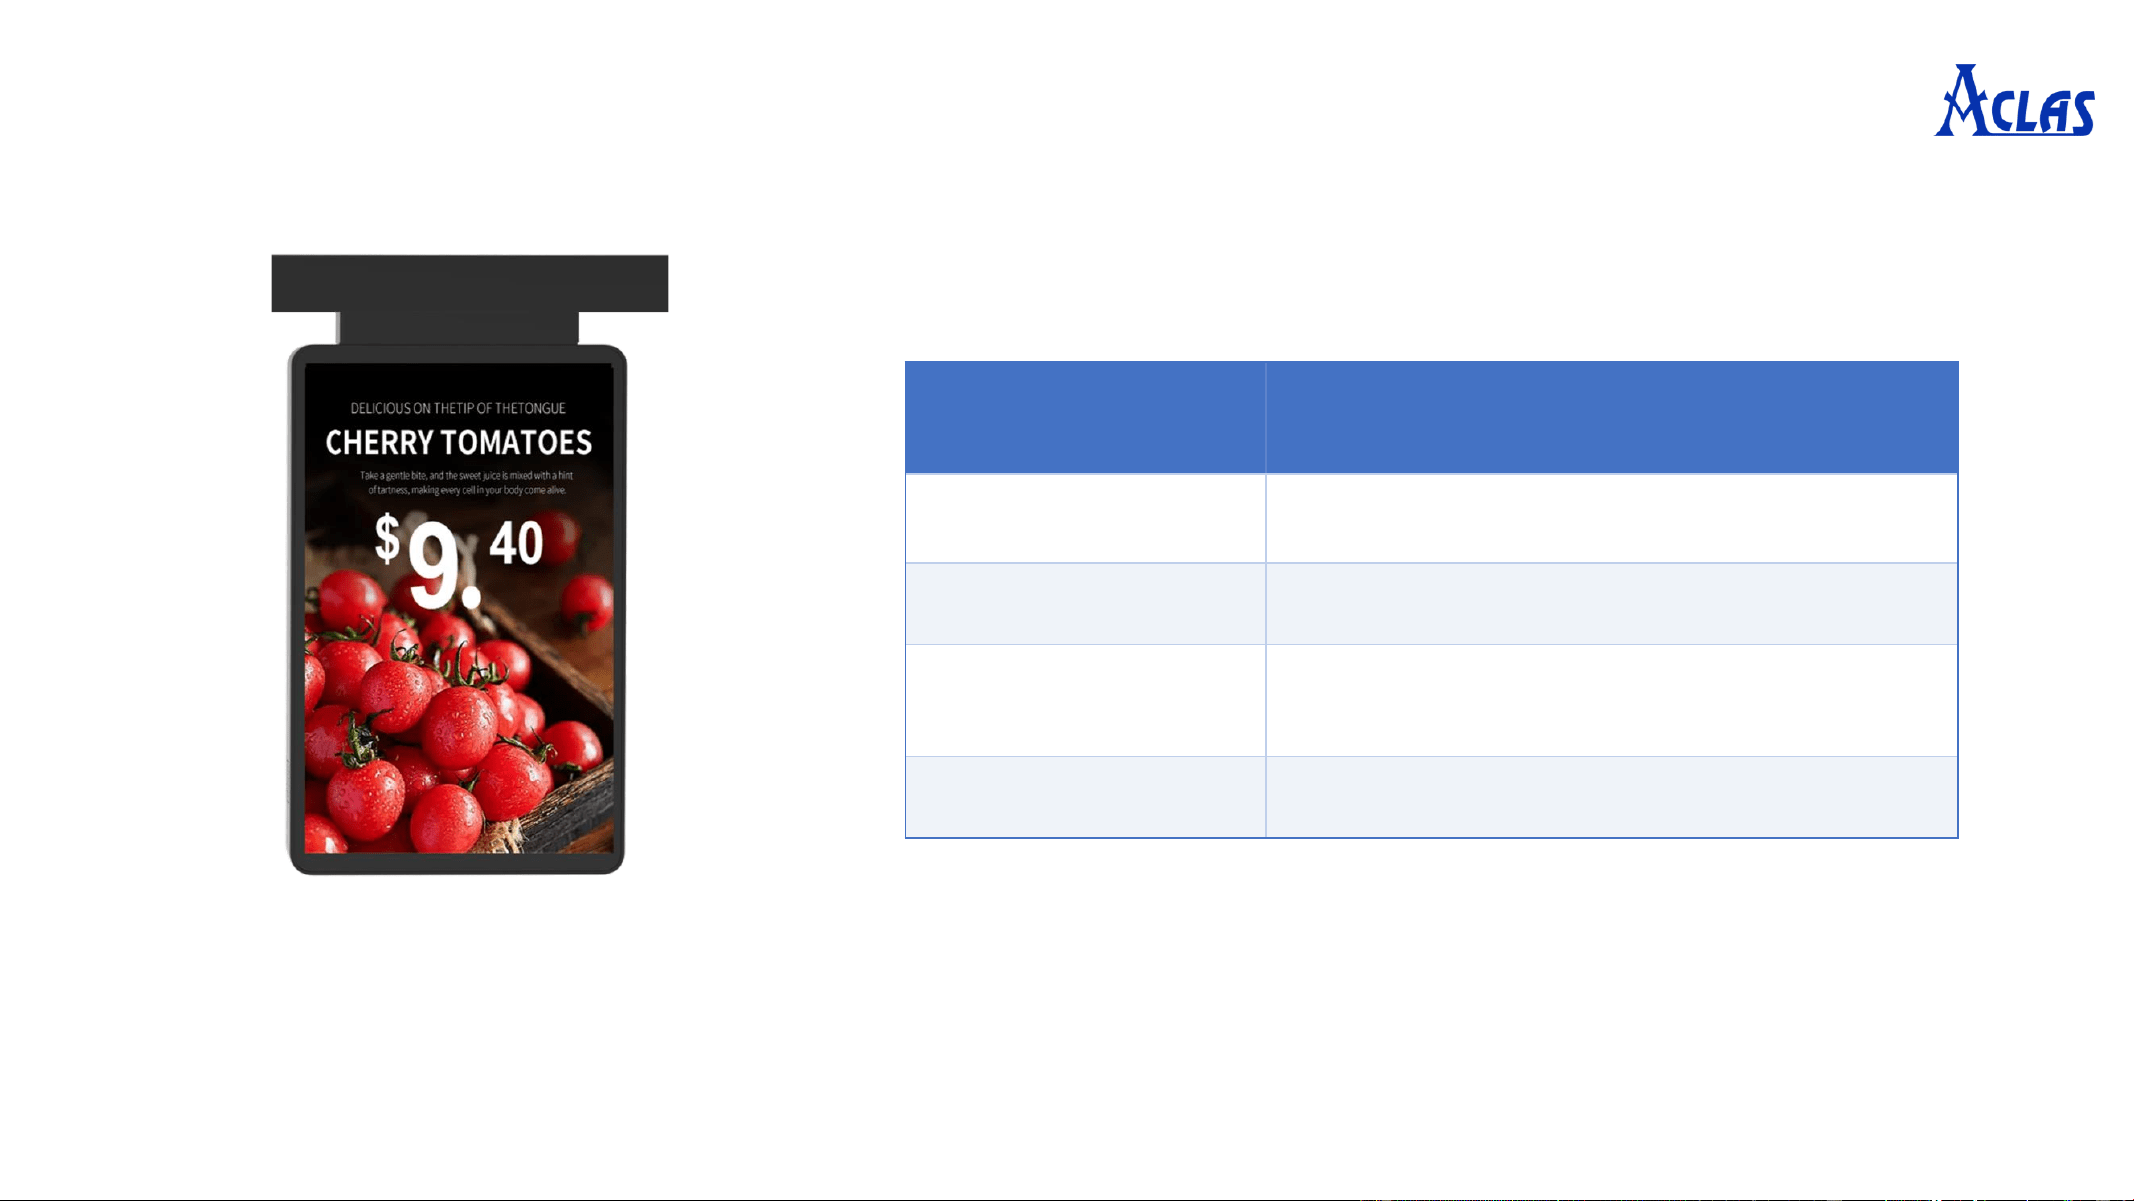
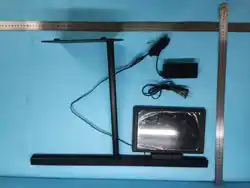
2. Color Display ESL
Model
SLD
Display
10.1
-inch TFT Color Screen
Resolution
800*1280
Communication
Method
2.4G Wireless
Power Supply
24V 2A
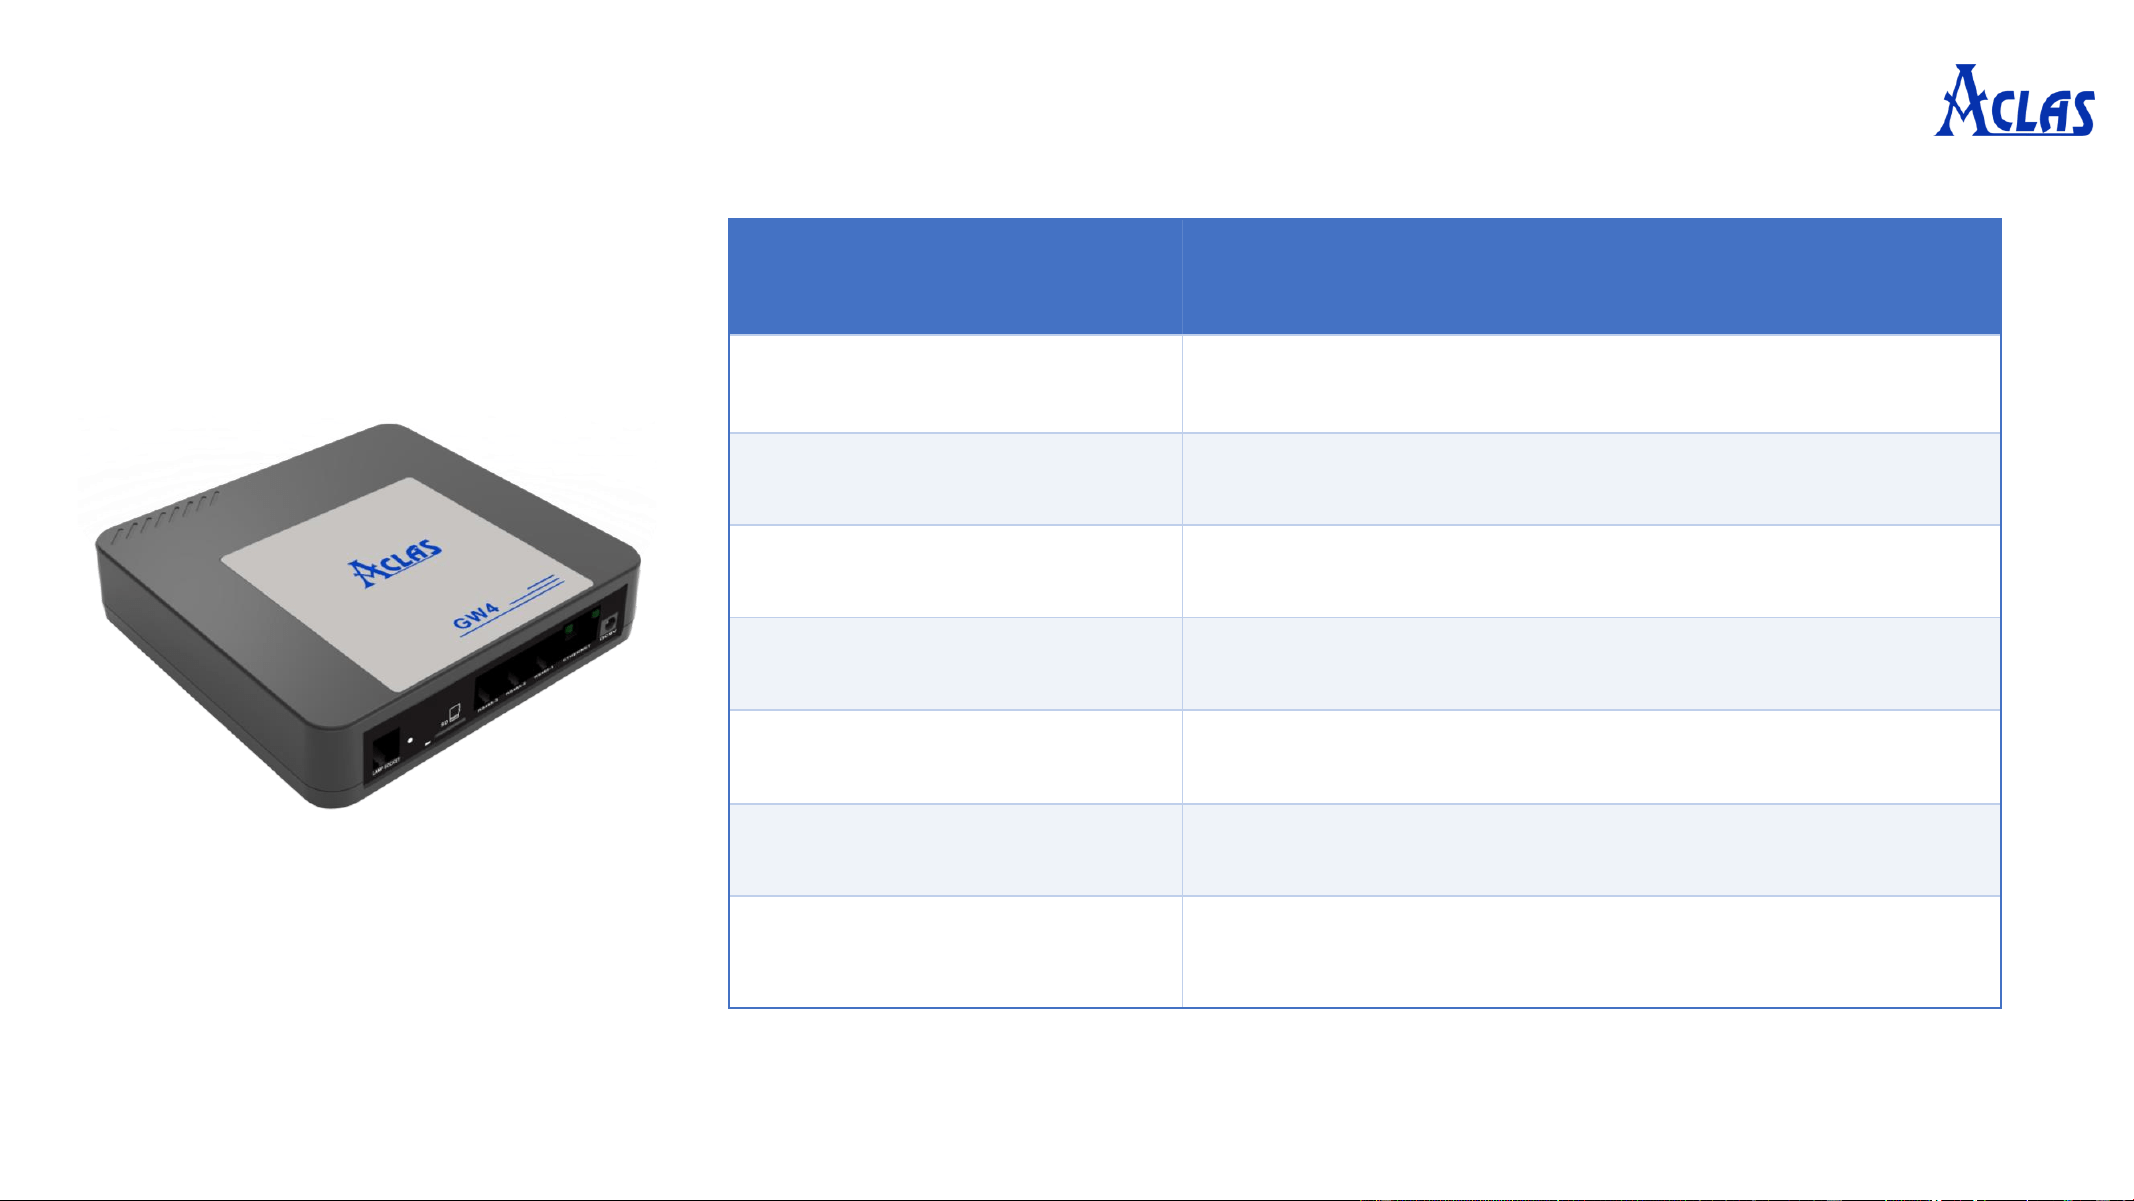
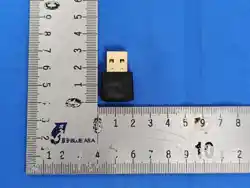
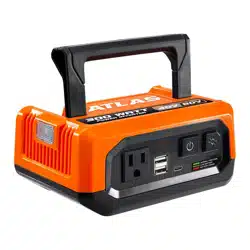
3. Controller
Model
GW4
Communication Method
2.4G Wireless
Coverage Range
Radius 15
-20m (No Obstacles)
W
i-Fi
802.11b/g/n (2.4GHz
)
Communication Ports
Ethernet, RS485 (
×3), RJ11, SD Card Slot
Power Supply
DC 9V
Dimensions
125*120*30.6
mm
Installation
Horizontal Placement (Keep away from large
power equipment, iron frames, etc.)
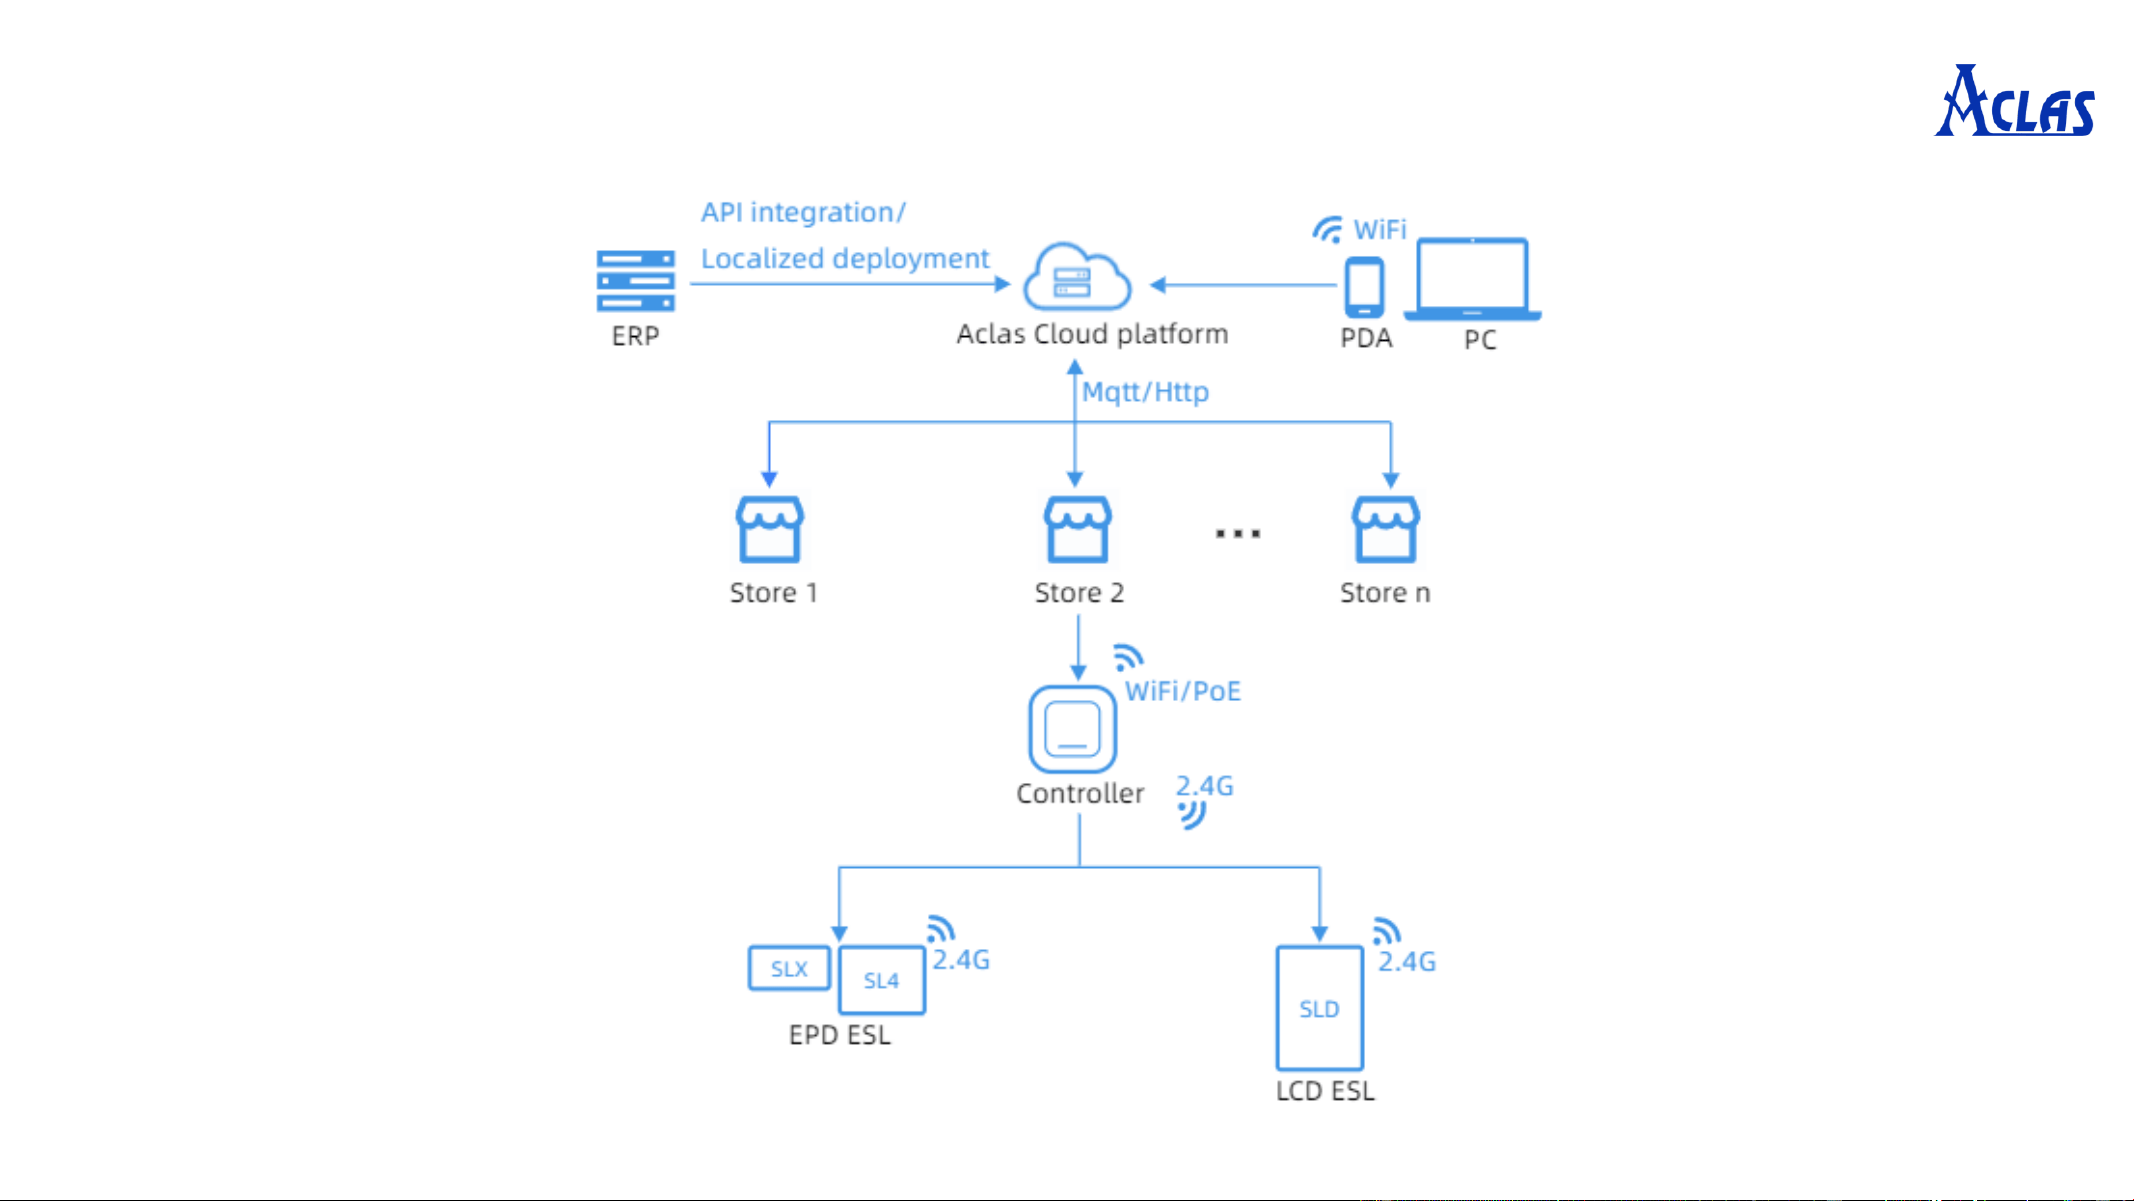
4. System Operating Principle

II. Daily Use in Stores
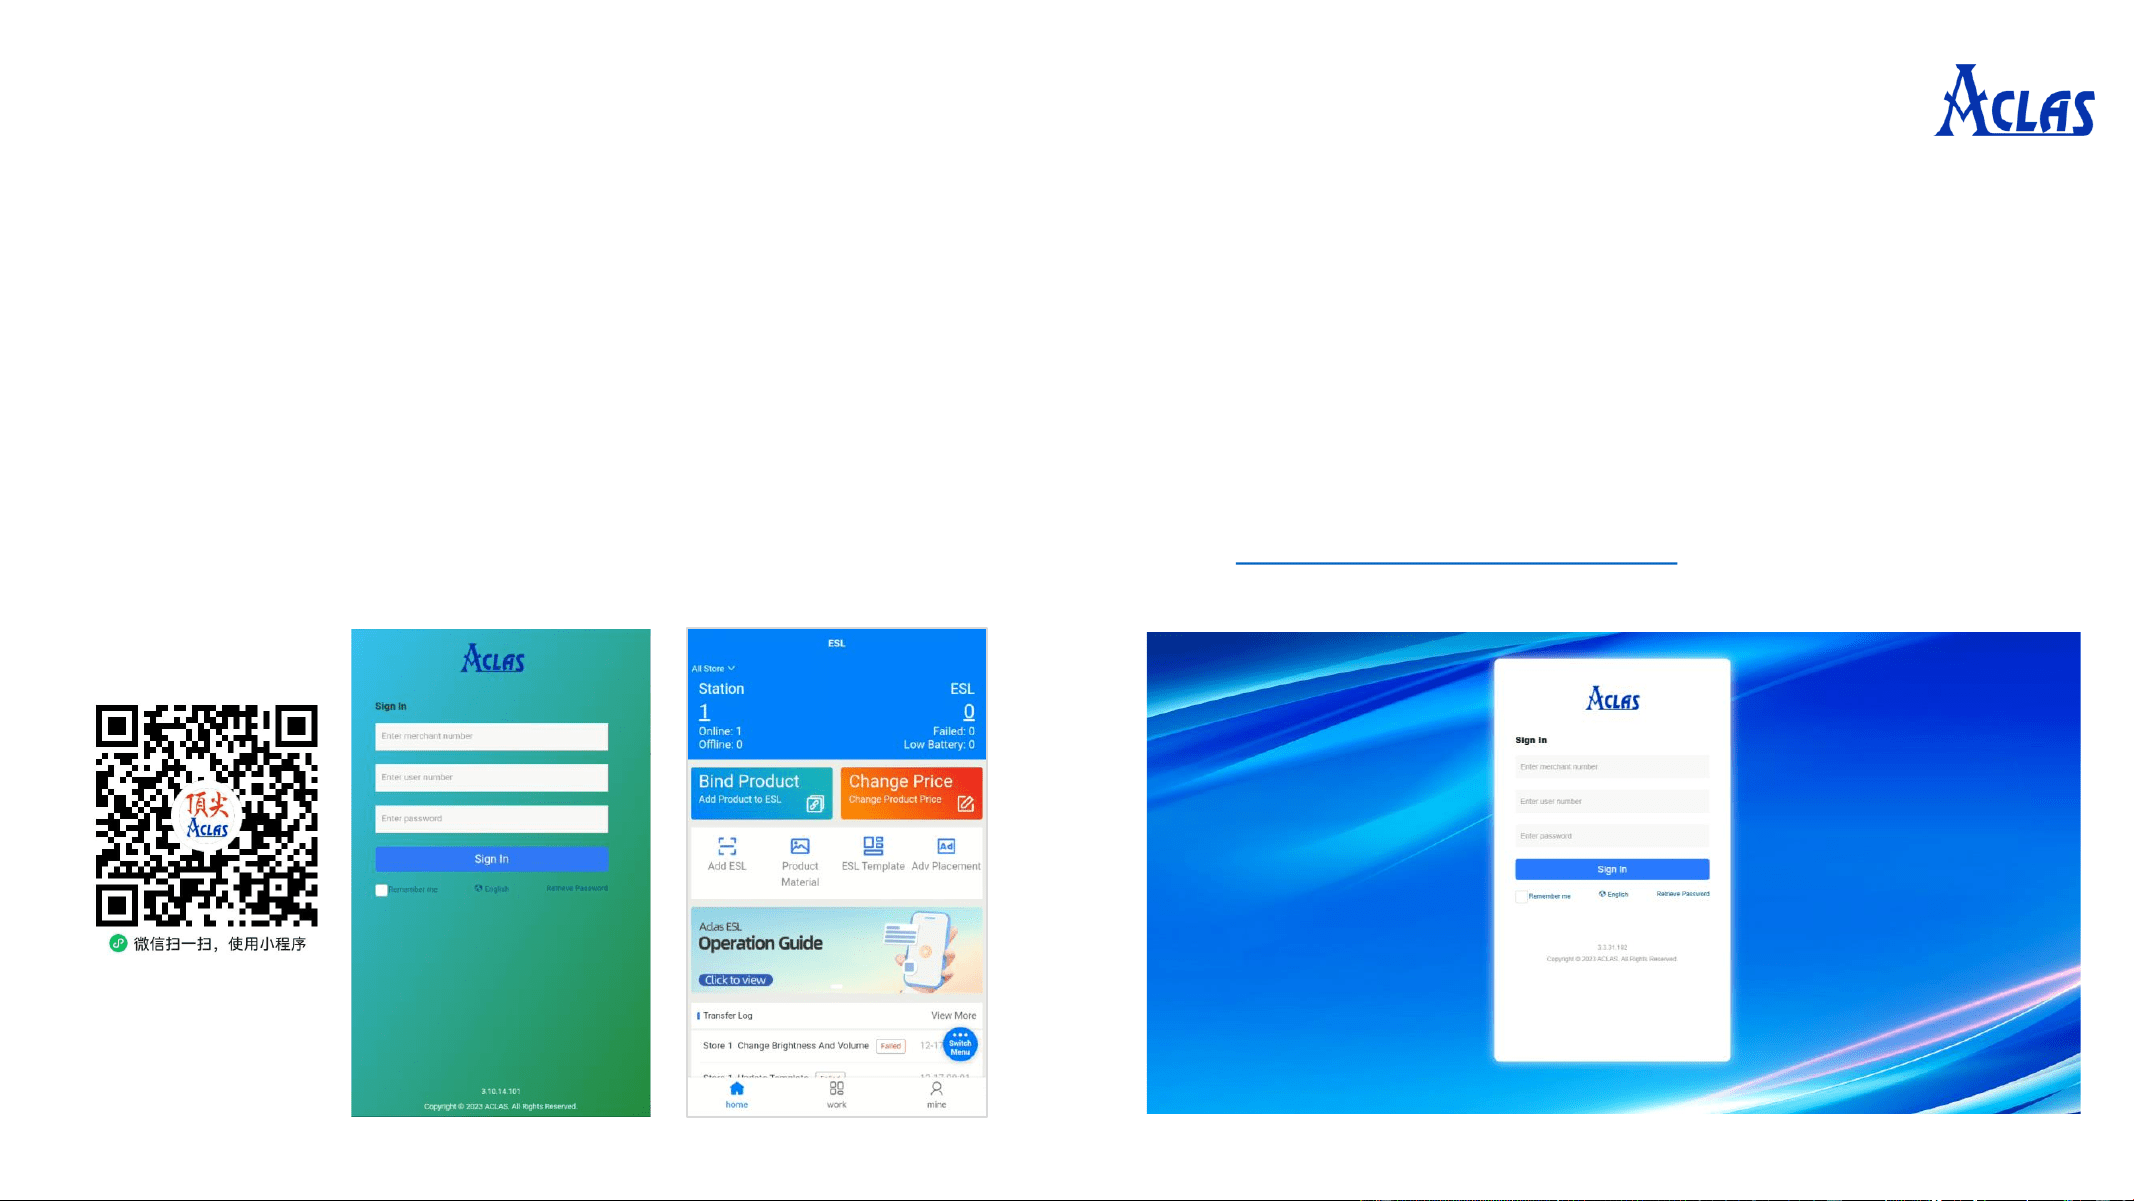
1. Login
Obtain the account and password, and log in to the Aclas Web69 Cloud Device
Manage System.
(Merchant number: 0202, User number: 0202, Password: 123456 )
• Open WeChat, scan the QR code and log in with
your merchant number/user number and password.
• Open the webpage and enter the URL:
https://web69.aclas.com/
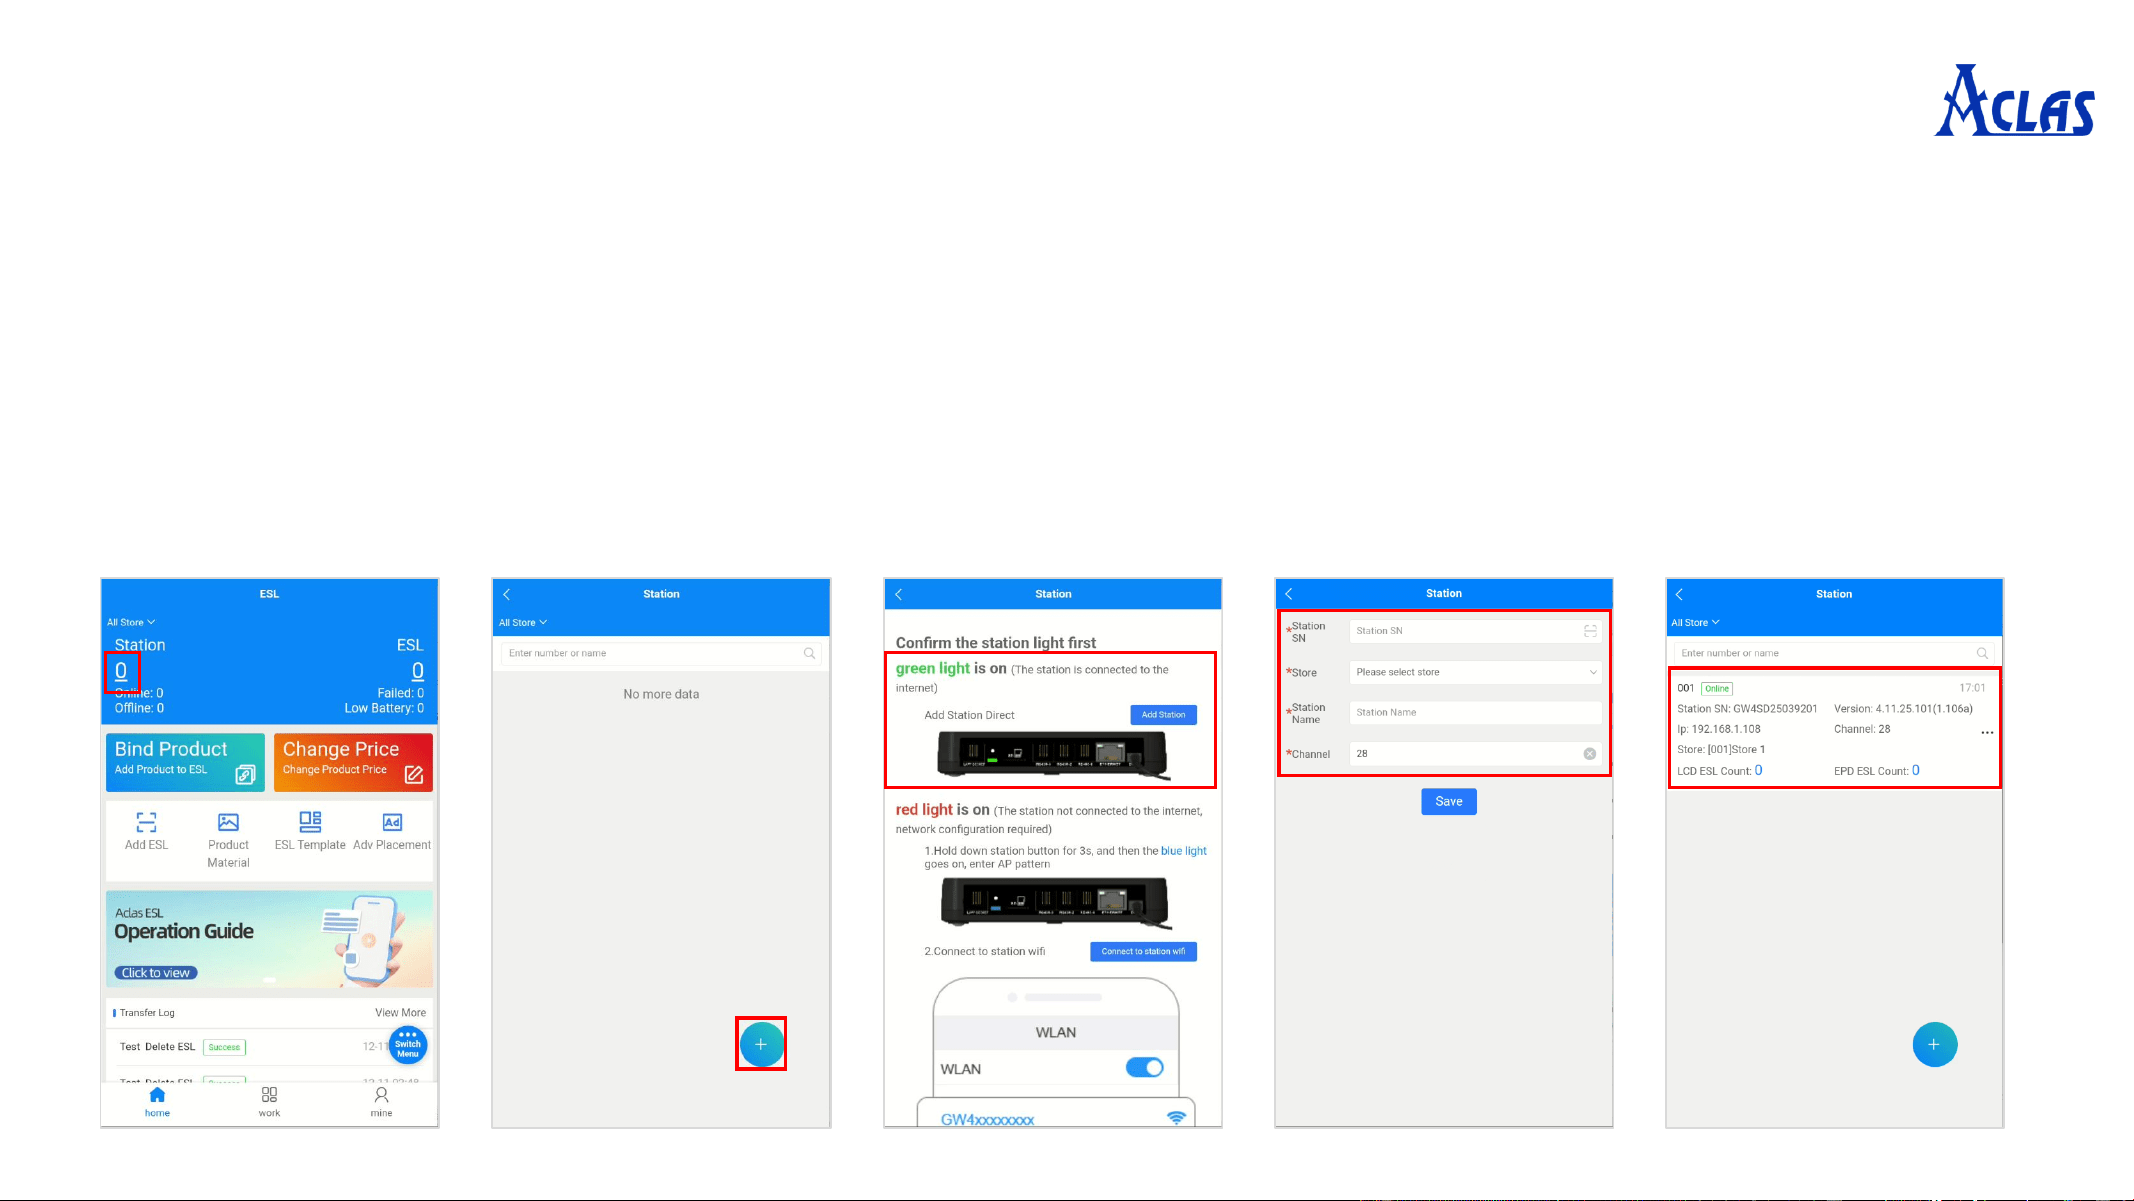
2. Add ESL Controller & Network Configuration --》1.Connect via Ethernet (DHCP)
• First connect the ESL controller to an Ethernet cable and then plug in the power supply, or use Ethernet POE for both
network connection and power supply.
• During startup: The controller first illuminates a white light (booting up), then briefly turns red (not connected to the
network), and finally stays green (successfully connected).
• On the homepage, click the numeric link under the Station (or find ‘Station’ in the Work) → click ‘+’ to add a
controller.
• Click ‘Add Station’, enter the controller's SN (check the nameplate for the SN), select the affiliated Store, set a name
and Channel, then click ‘Save’. Confirm the controller is in ‘Online’ status.
Note: The default channel is
28. Channels of controllers in
the same store must not be
duplicated!

2. Add ESL Controller & Network Configuration --》2.1 Connect to Controller AP
• Plug in the controller’s power supply. During startup: It illuminates a white light (booting up), then stays red (not
connected to the network, requiring configuration).
• Press and hold the controller's button for 3 seconds until the blue light stays steady (enters AP mode).
• On the homepage, click the numeric link under the Station (or find ‘Station’ in the Work) → click ‘+’ to add a
controller.
• Click ‘Connect to Station Wi-Fi’ (Wi-Fi name: GW4xxxxxxxx). Open your device's settings, connect to the
controller's Wi-Fi, and return to the network configuration interface after successful connection.

2. Add ESL Controller & Network Configuration --》2.2 Select Network
Configuration Type
Enable Wired Network (Set Static Ethernet IP)
• Click to open the network properties configuration window.
• Disable ‘Obtain IP Automatically’, manually enter the network
configuration.
• Click ‘Confirm’.
• Verify successful configuration: The controller's green light stays
steady = configuration completed.
Enable Wireless Network (Wi-Fi)
• Select the target Wi-Fi name in the network list.
• Enable ‘Obtain IP Automatically’, enter the Wi-Fi password
directly, then click ‘Confirm’.
Disable ‘Obtain IP Automatically’, manually enter the network
configuration and Wi-Fi password, then click ‘Confirm’.
• Verify successful configuration: The controller's green light stays
steady = configuration completed.
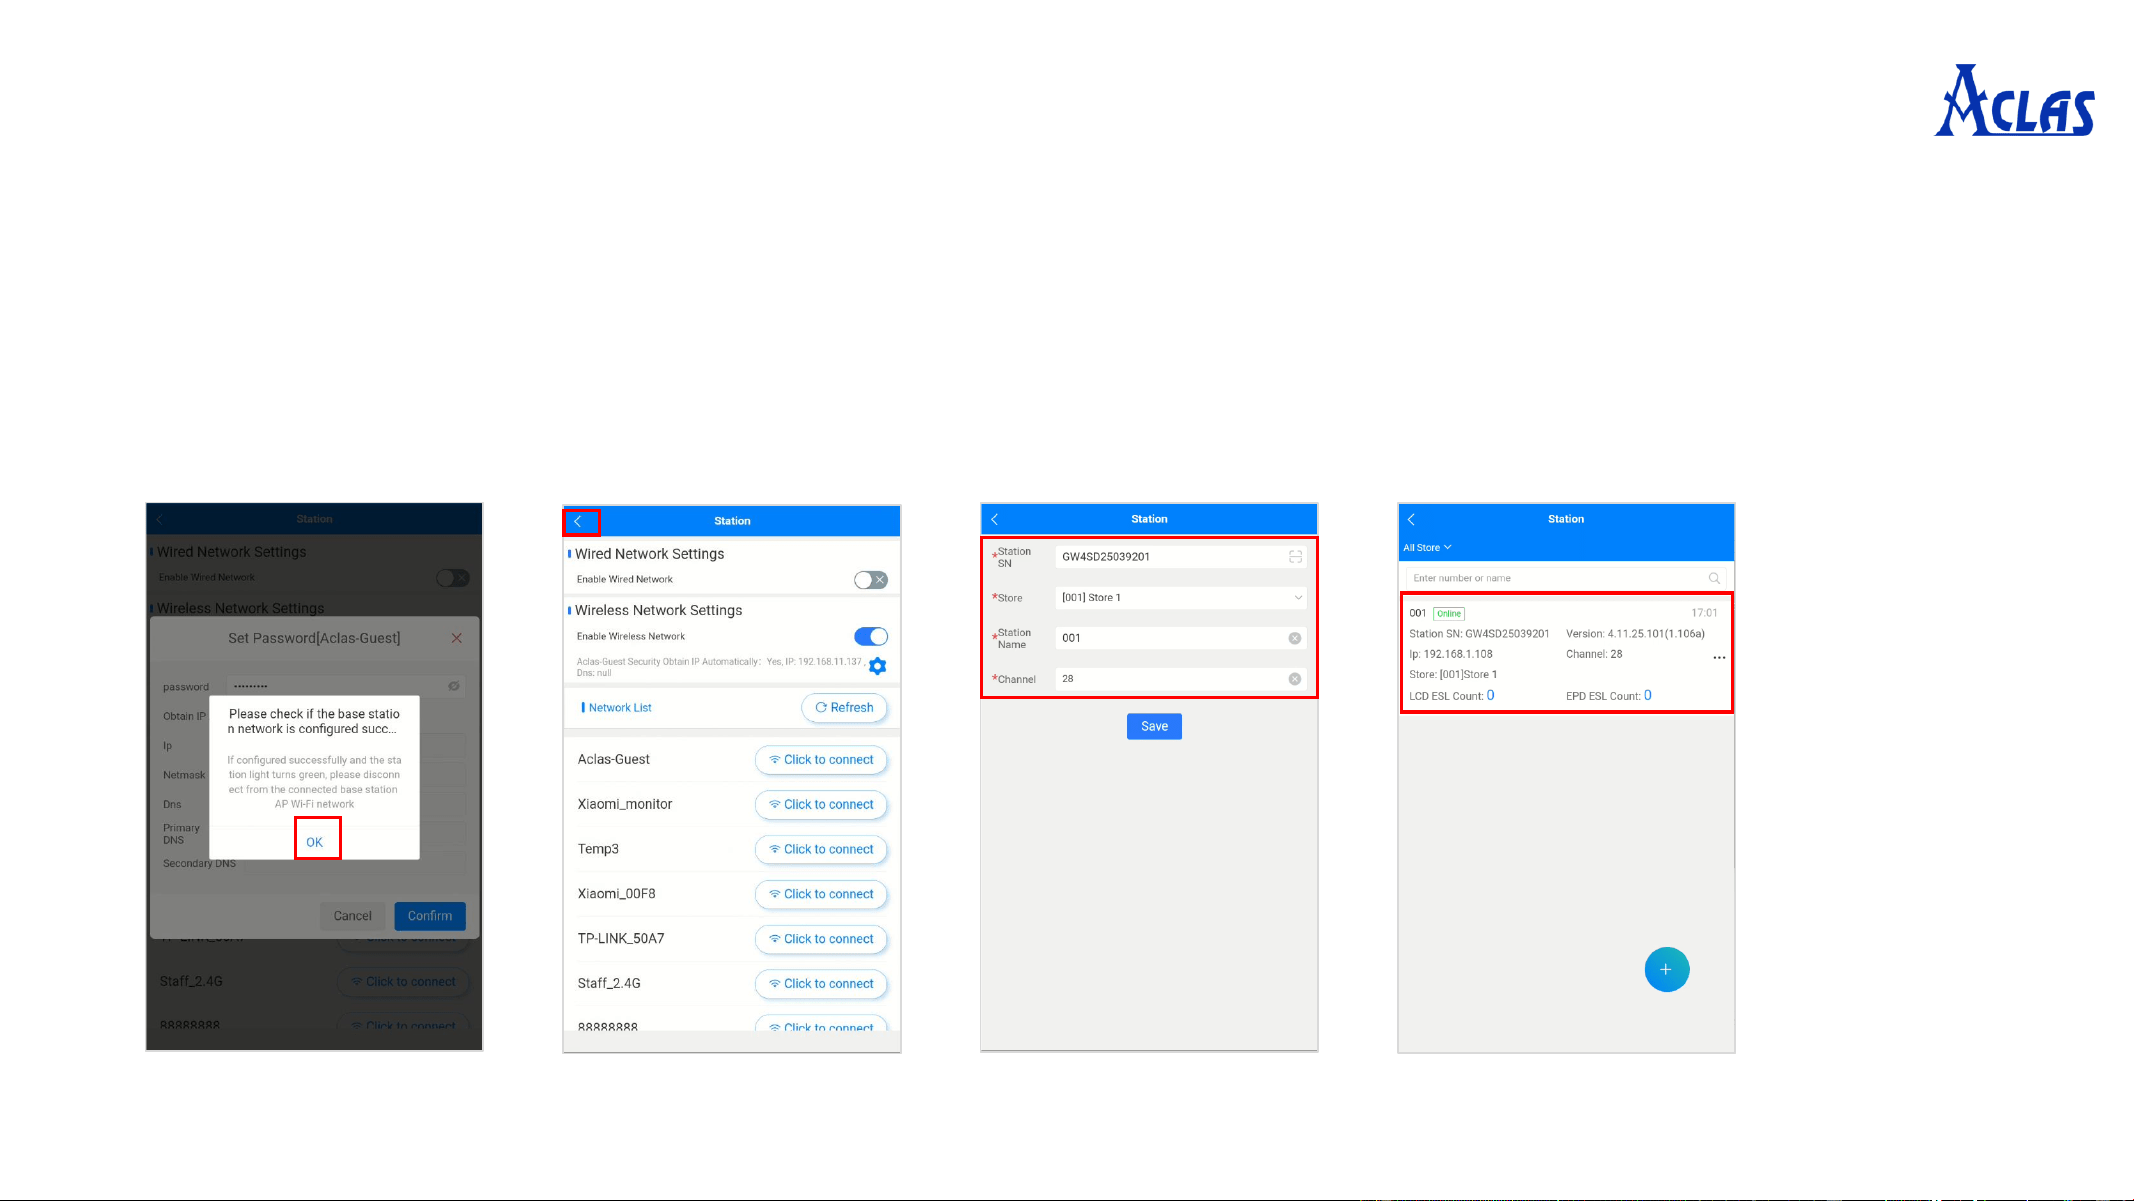
2. Add ESL Controller & Network Configuration --》2.3 Set Store and Station Name
• Verify if the controller's network configuration is successful: If the controller’s green light stays steady, disconnect
from the connected controller AP Wi-Fi and click ‘OK’.
• Once the controller network configuration is successful (green light), click ‘<’ to return to the Store and Station Name
settings.
• Select the controller’s affiliated store, enter a name, and choose a channel, then click ‘Save’.
• After the controller is successfully added, confirm that the controller status is ‘Online’ to complete the process.
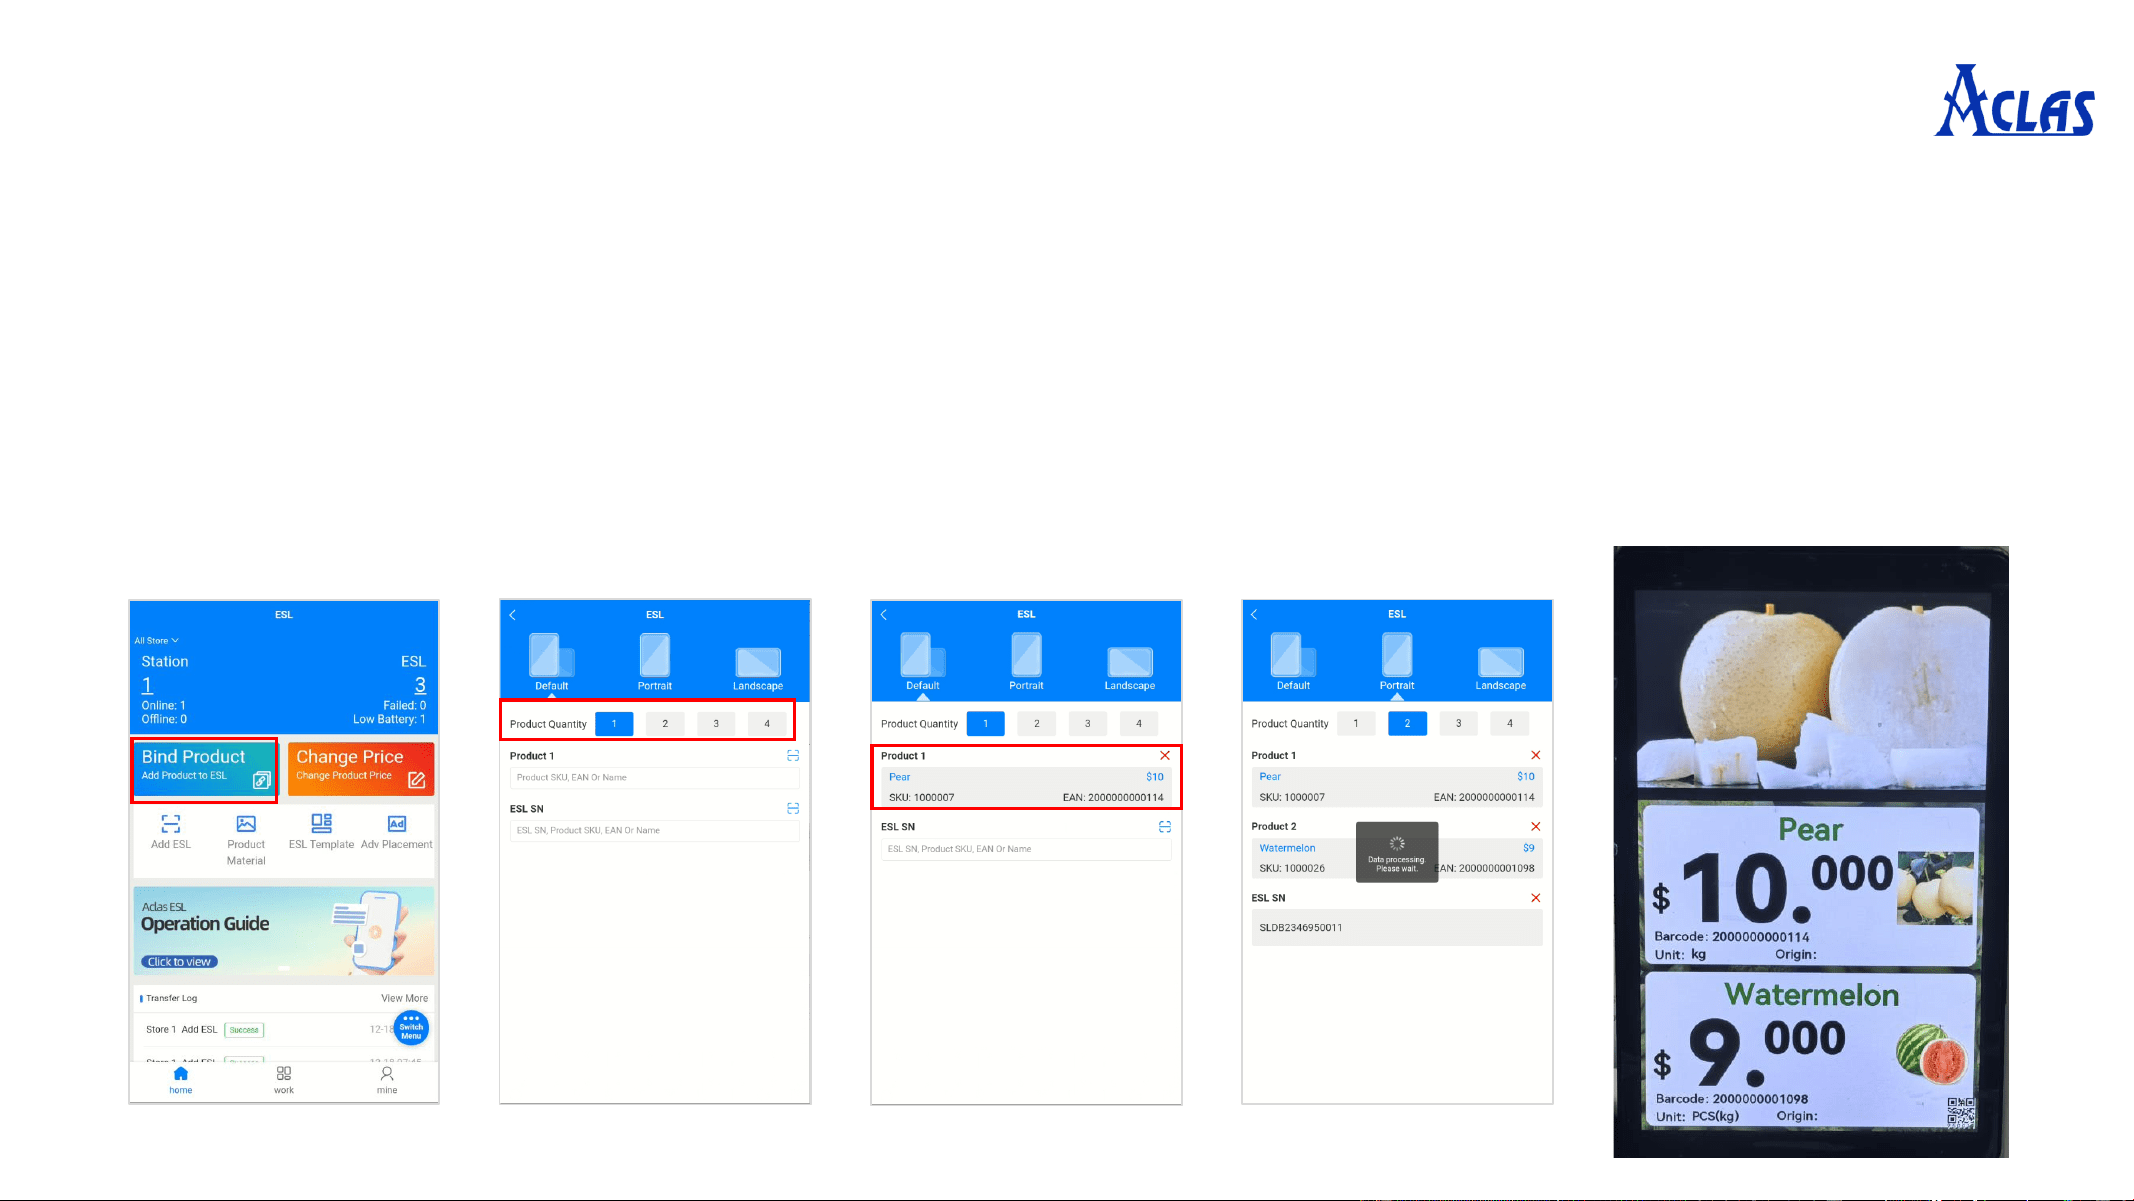
3. Bind Product
1. After successfully adding ESLs (ESL SNs exist in the ESL list), click ‘Bind Product’ directly on the homepage.
2. Enter the Product Binding page (screen orientation defaults to the one selected during ESL binding).
3. Select the number of products to bind (1-4 products supported by default for SLD; 1-2 for SL4; only 1 for
SL2/SL3/SL6).
4. Choose the desired number of products to bind, scan or enter the Product SKU/EAN/Name, and press ‘Enter’ to search
for the product.
5. After selecting the product, find the ESL to bind, click the Scan Icon, and scan the ESL's SN QR code. The product will
be automatically bound.
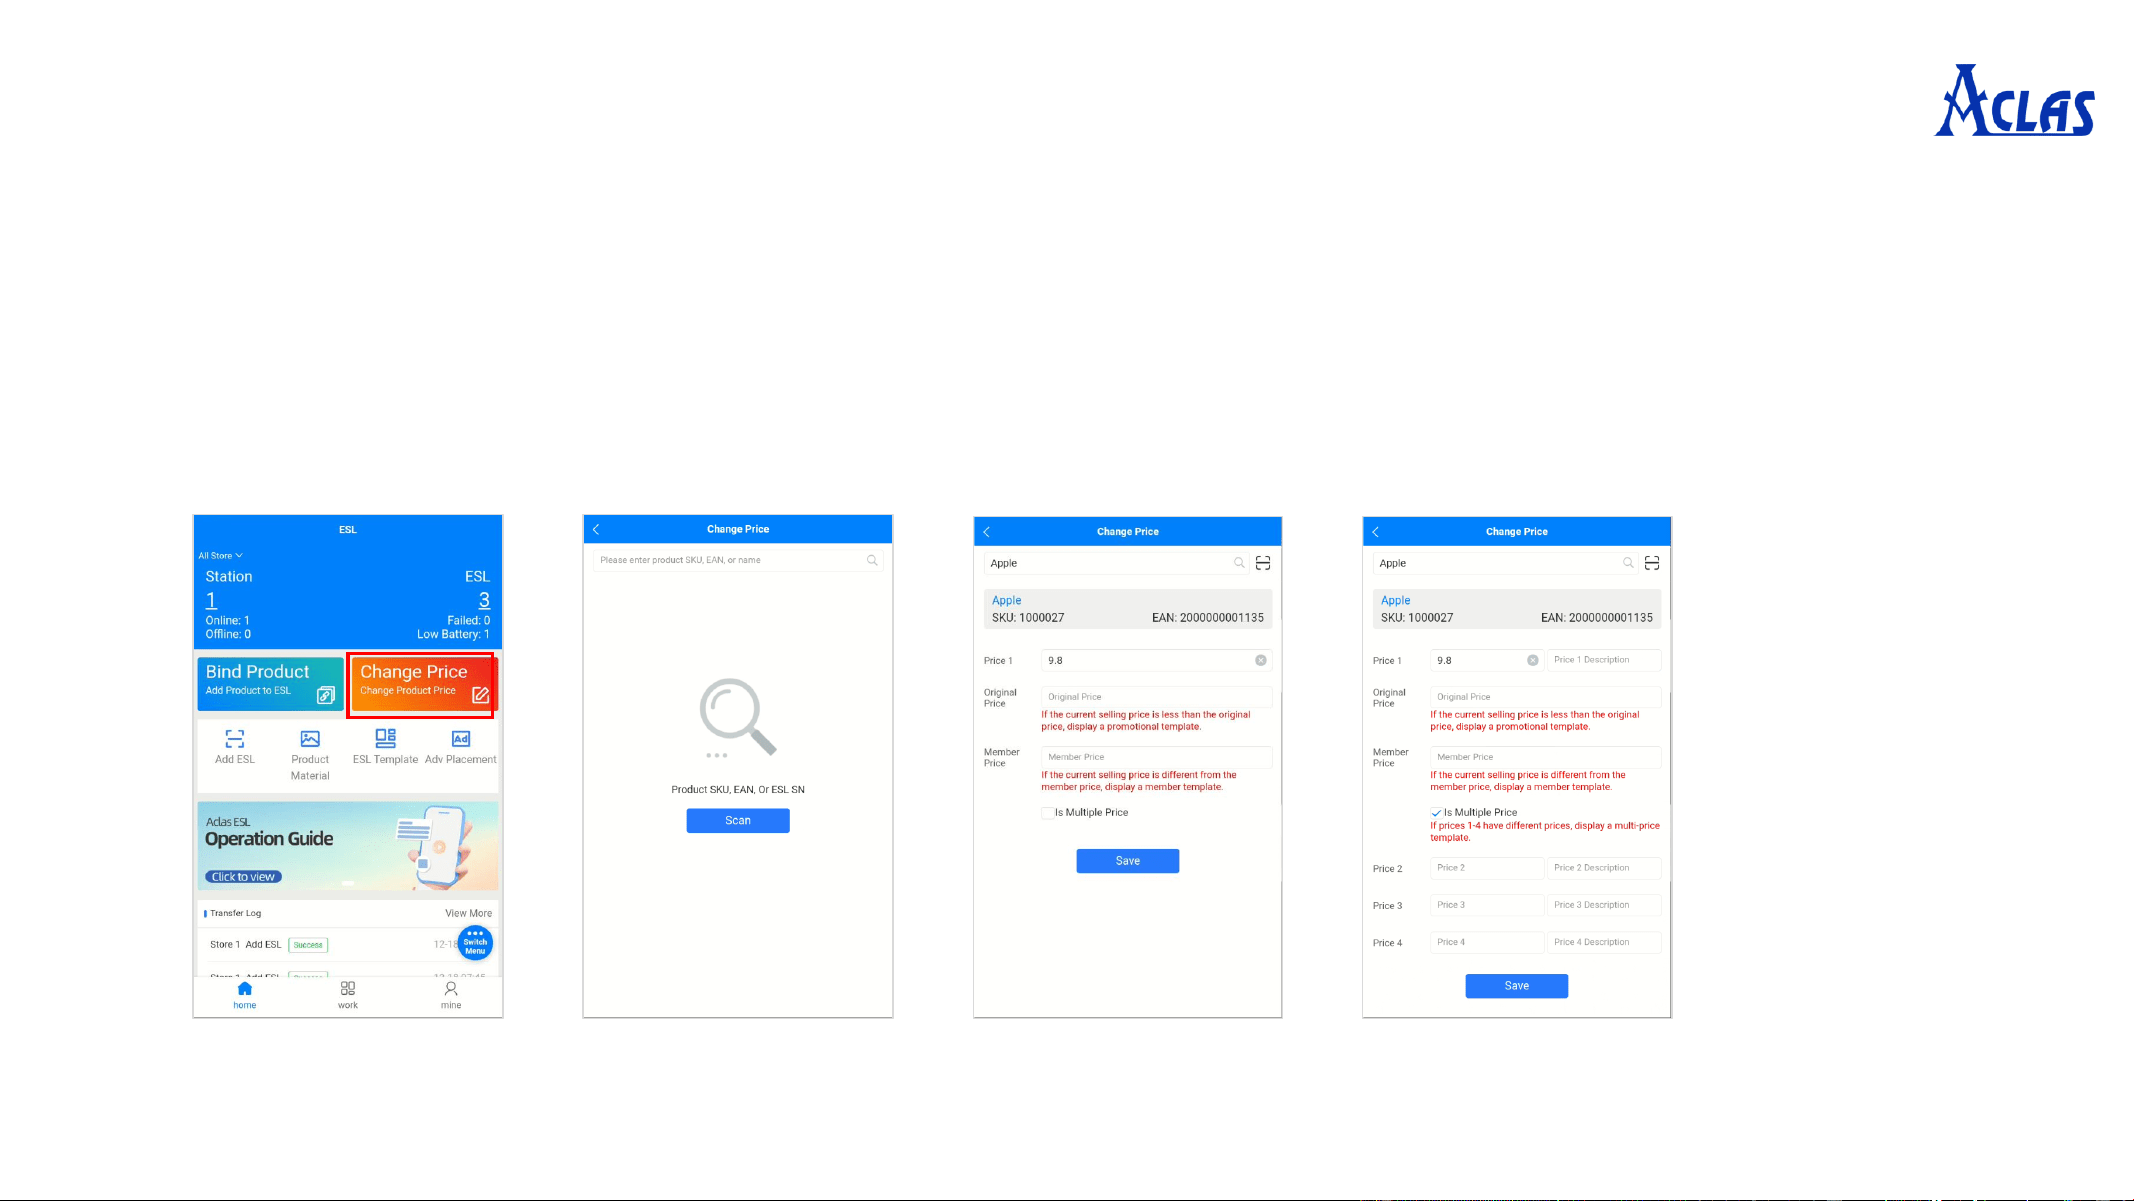
4. Change Price
1. Click ‘Change Price’ to enter the Change Price page.
2. Scan the ESL's SN to retrieve the product, or enter Product SKU/EAN/Name to search.
3. Adjust the corresponding price and click ‘Save’.