1
Hearth & Home Technologies • 6K/8K, CAL36/CAL42, MER36/MER42 Brick Refractory Kit Instructions • 2583-936 • 8/22
CAUTION! Risk of Cuts or Abrasions. Wear protective
gloves and safety glasses during installation.
NOTICE: Handle refractory panels with care. Refractory
may chip or crack if dropped or impacted.
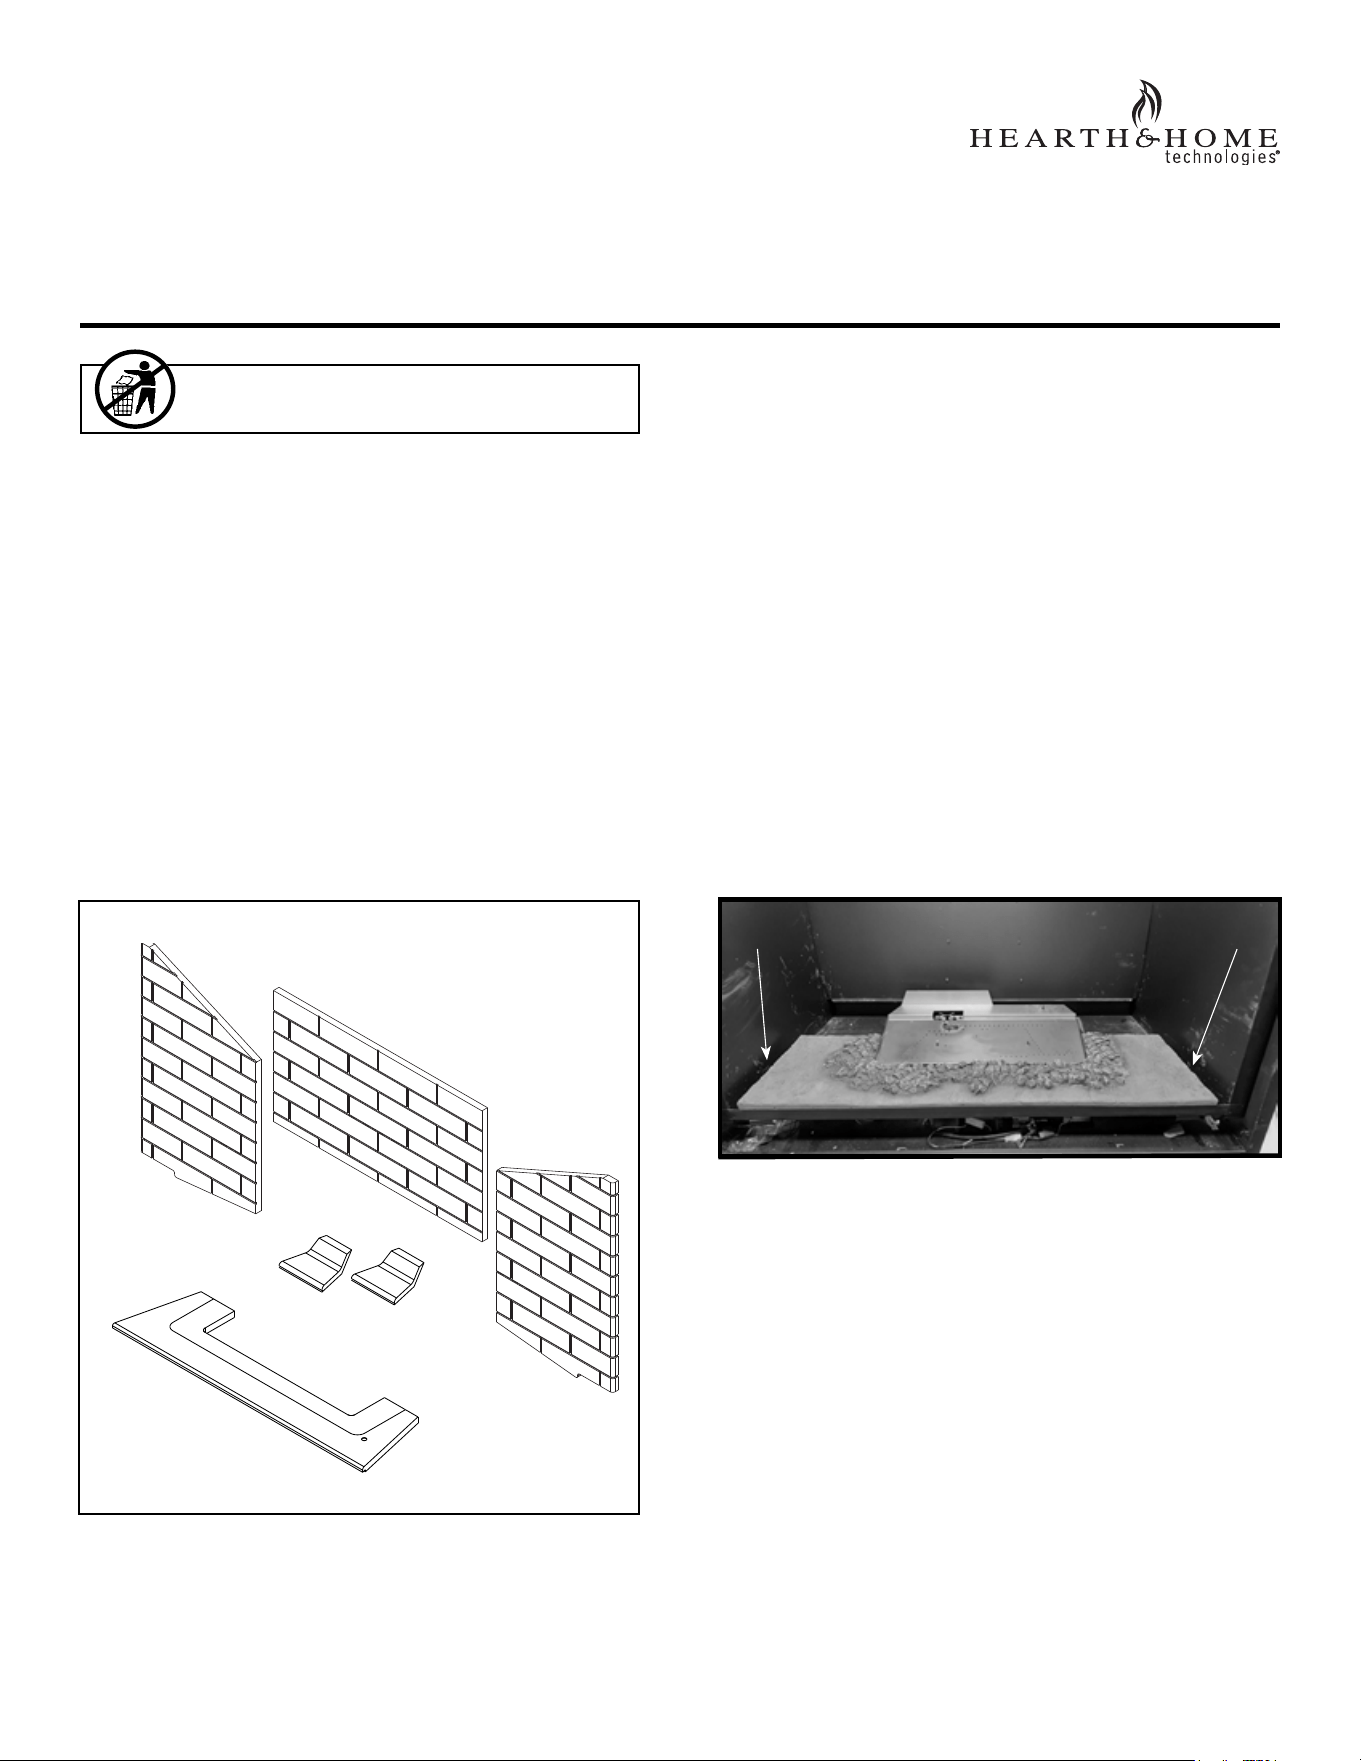
KIT COMPONENTS (Shown in Figure 1)
(1) Left Refractory
(1) Right Refractory
(1) Back Refractory
(1) Front Base Refractory
(2) Rear Base Refractory
Leave this manual with party responsible for use
and operation.
Figure 1 Refractory Kit Components
BRICK-6K/8K-TG/CU/SJ
BRICK-36M/42M-WB/SG
BRICK36MCS/42MCS/TB/TBH
- Refractory Installation Instructions -
Models: 6K/8K, CAL36/CAL42, MER36/MER42
INSTALLATION
1. Remove kit contents from package.
2. Locate base refractory. Note that the length of the
base refractory included in this kit is shorter than the
base refractory shipped with the appliance.
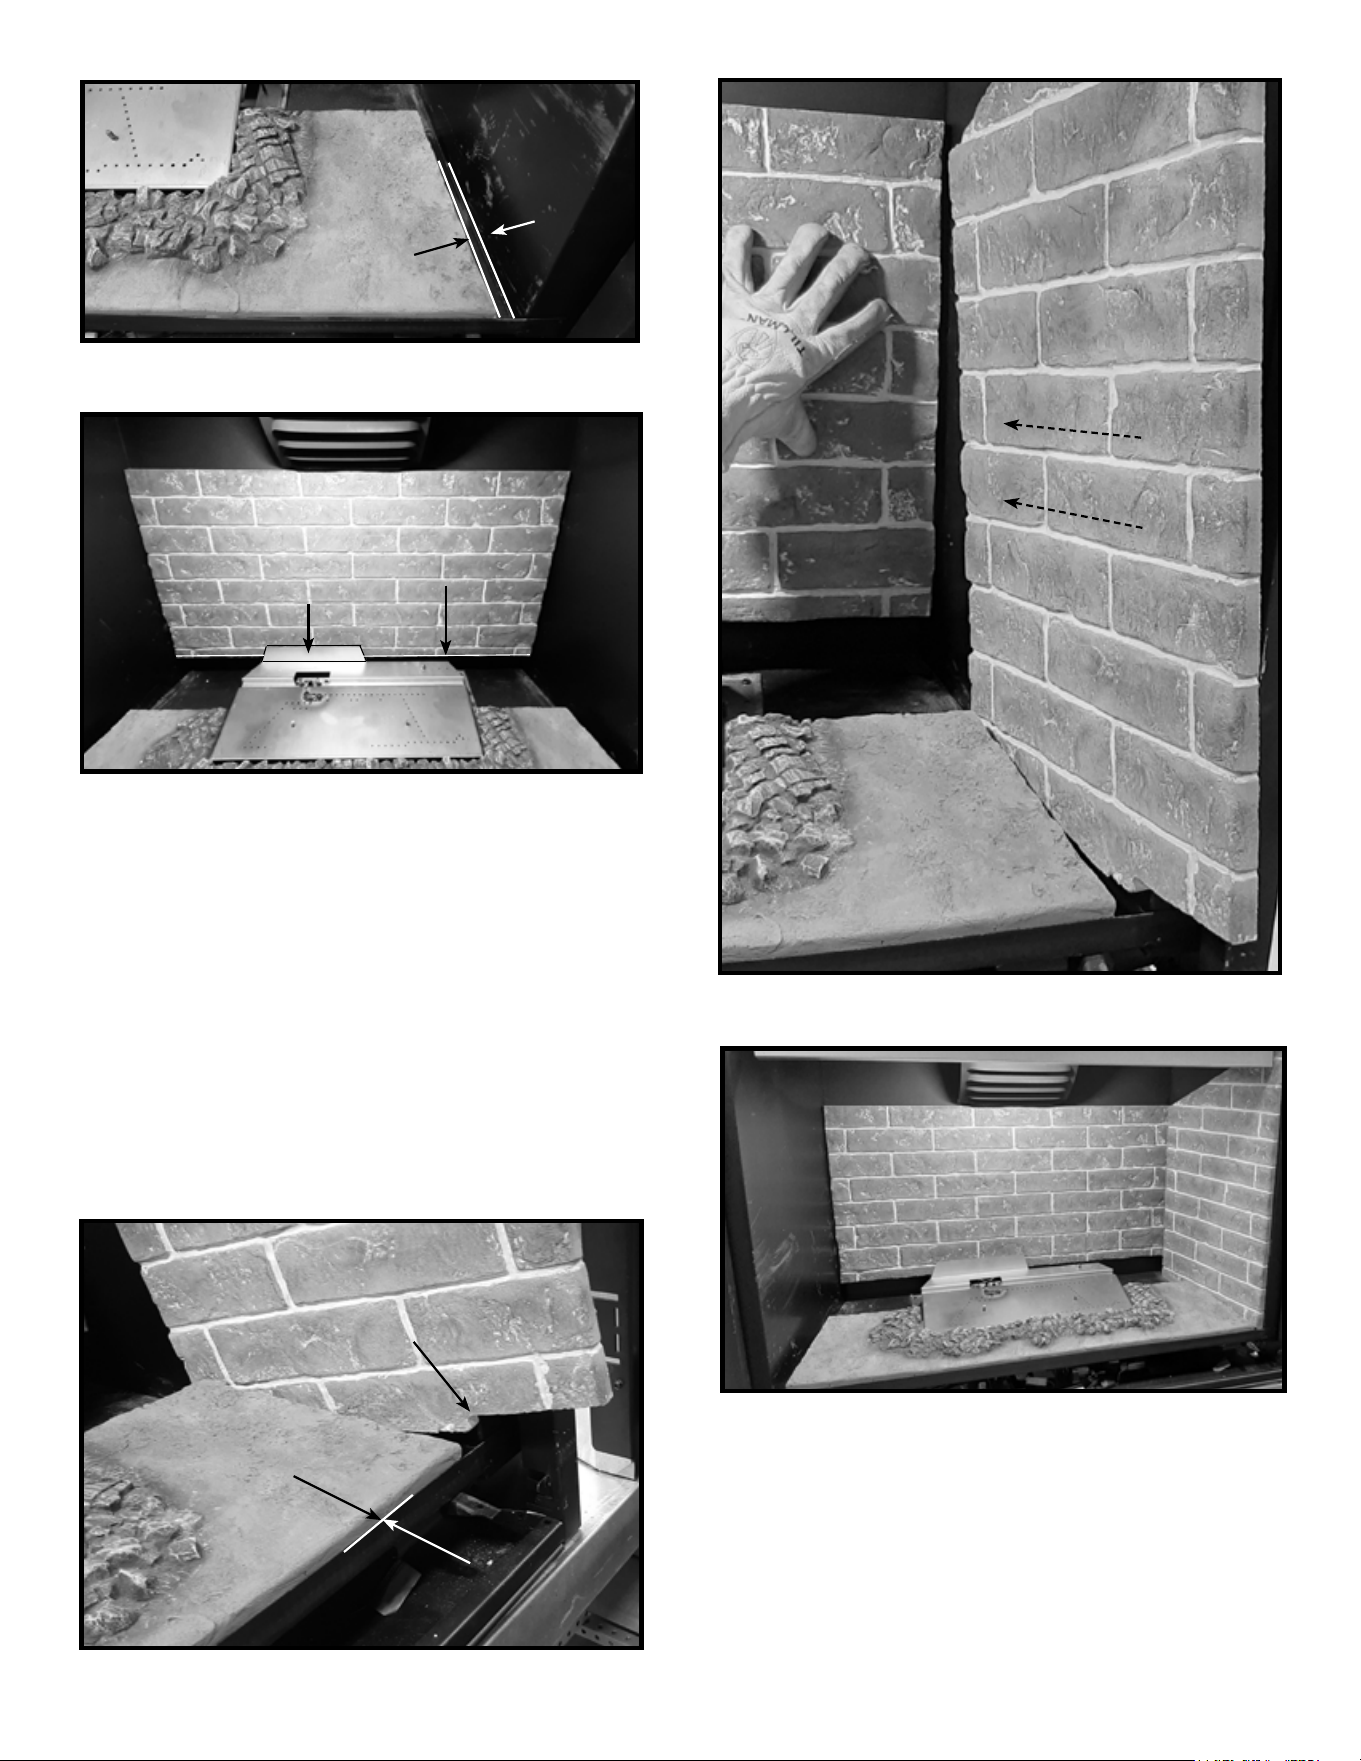
3. Installbaseintorebox.Baserefractorywilltaround
burner as shown in Figure 2. There will be a gap be-
tweenthesideofthereboxandthebaserefractory
as noted in Figure 2 and Figure 3. The gap allows
forpropertofthesiderefractory.Thefrontedgeof
therefractoryispositionedushwiththereboxreturn
bend as indicated in Figure 5.
4. Locate the back refractory panel and turn it so the
grout lines will align with the grout lines on the side
panels when installed. Install the back refractory pan-
el as shown in Figure 4. Carefully place it on the back
air passage return bend behind the log stop.
Figure 2 Base Refractory Installed
BACK
RIGHT
LEFT
REAR BASE
42 INCH MODELS ONLY
FRONT BASE
GAPS FOR SIDE REFRACTORY PANELSGAPS FOR SIDE REFRACTORY PANELS
Hearth & Home Technologies • 6K/8K, CAL36/CAL42, MER36/MER42 Brick Refractory Kit Instructions • 2583-936 • 8/22
2
5. It is necessary to hold the back refractory panel with
one hand while installing the side refractory panel.
Photosshowtherightsidebeinginstalledrst.
6. Locate the notch on the side refractory panel, high-
lighted in Figure 5.
7. Tilt the side refractory panel backward and insert it in
the gap as shown in Figure 5. Level the side refractory
panelandgentlypushittowardthebackoftherebox
until it meets the back refractory panel, holding it in
place. See Figure 6. Figure 7 shows the side refrac-
tory panel installed.
8. Repeat steps 6-7 for the other side refractory panel.
Figure 5 Install Side Refractory Panel
NOTCHNOTCH
Figure 6 Install Side Refractory Panel
Figure 7 Side Refractory Panel Installed
SLIDE BACKSLIDE BACK
Figure 4 Back Refractory Panel Installed
BACK AIR PASSAGE BACK AIR PASSAGE
RETURN BENDRETURN BEND
LOG STOPLOG STOP
Figure 3 Side Gap
RETURN BENDRETURN BEND
FRONT EDGE FRONT EDGE
3
Hearth & Home Technologies • 6K/8K, CAL36/CAL42, MER36/MER42 Brick Refractory Kit Instructions • 2583-936 • 8/22
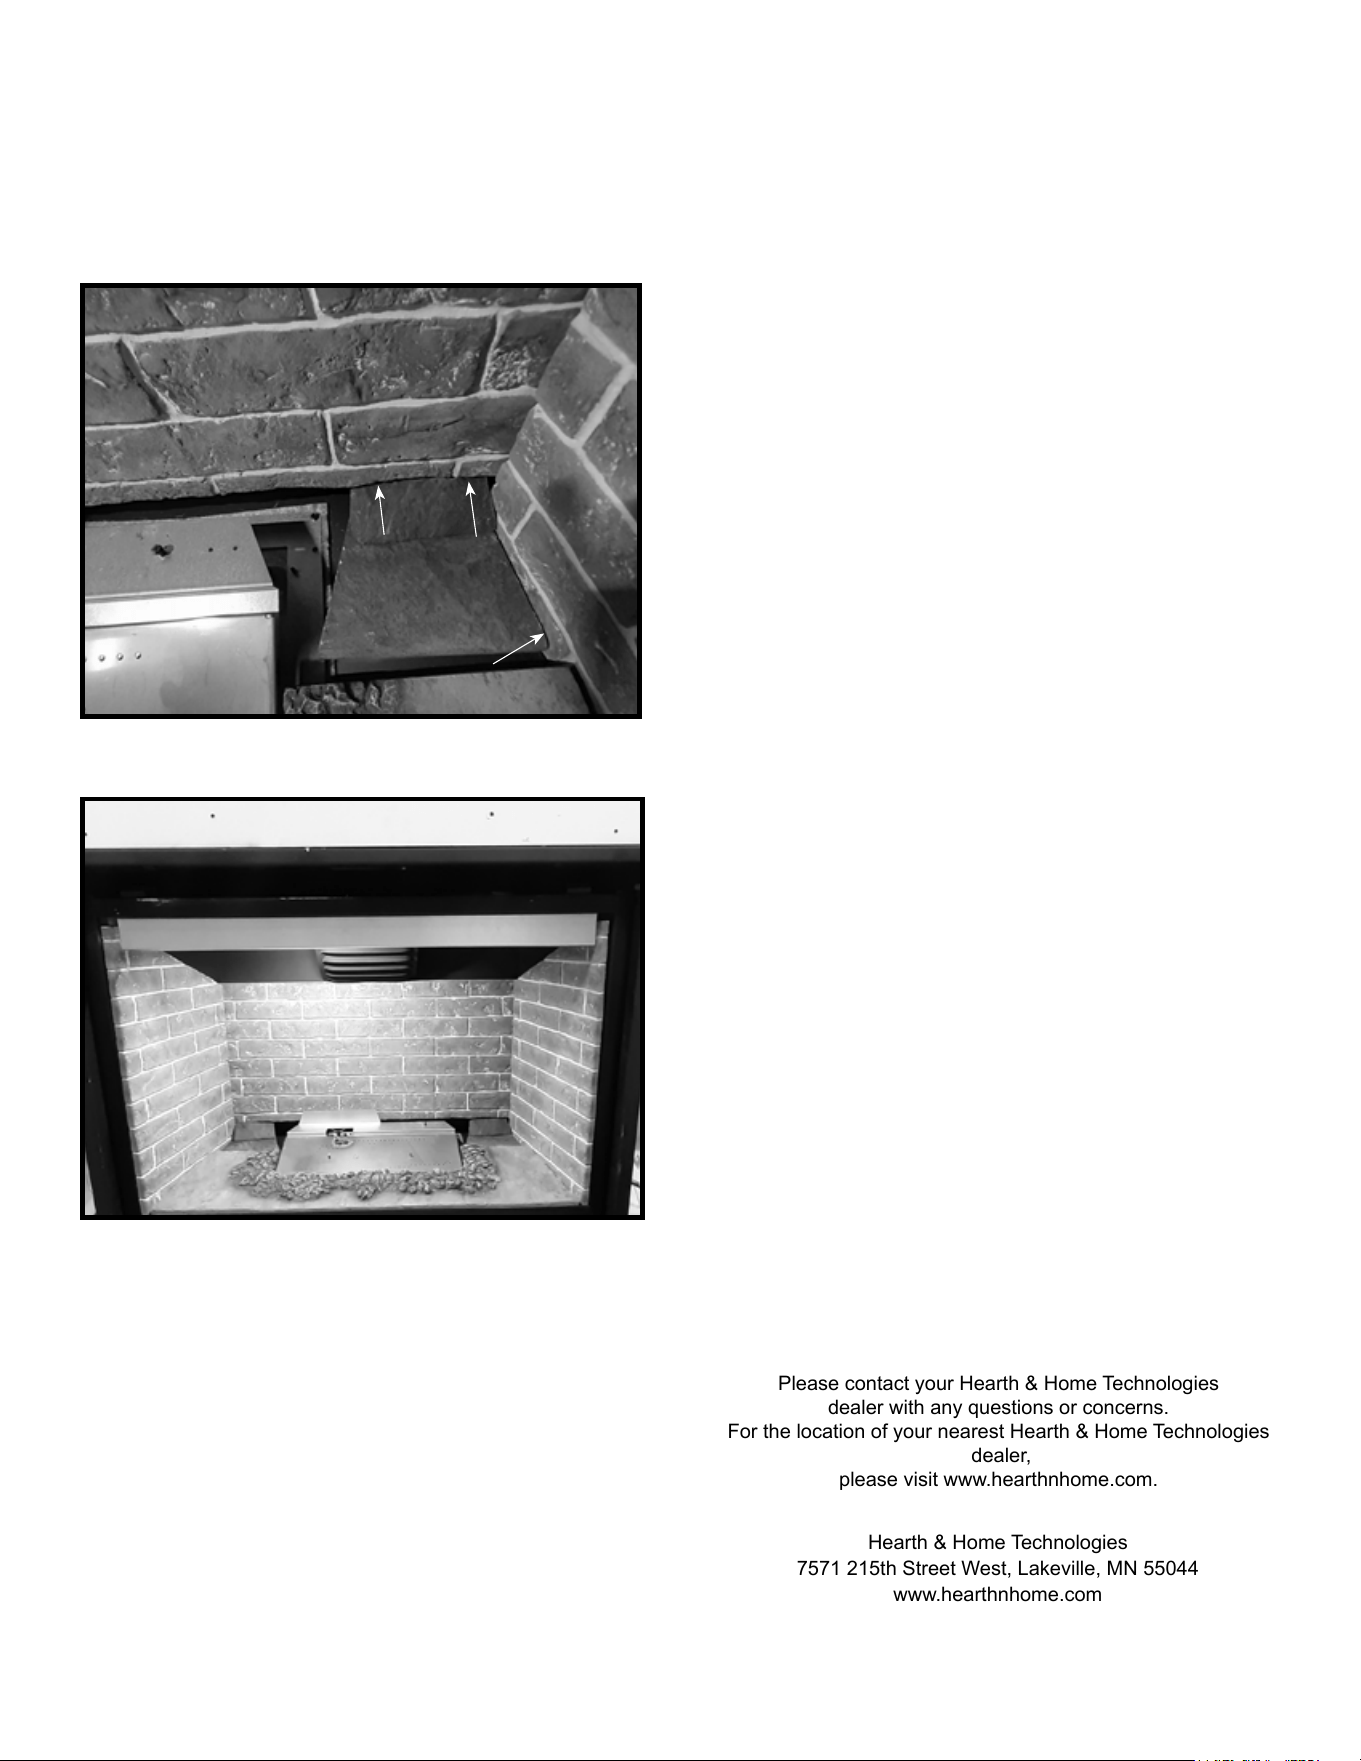
9. 42 Inch Models Only: Place the rear base refractory
piecesontheleftandrightsidesintherearofthere-
box.Pushbackandtowardthesideofthereboxas
shown in Figure 8. The base refractory piece should
contact the side refractory panel and part of the piece
will slide under the back refractory panel. Figure 9
shows the completed refractory installation.
Figure 8 Rear Base Refractory Installed (Right Side Shown)
42 Inch Models Only
Figure 9 Refractory Kit Installed
Please contact your Hearth & Home Technologies
dealer with any questions or concerns.
For the location of your nearest Hearth & Home Technologies
dealer,
please visit www.hearthnhome.com.
Hearth & Home Technologies
7571 215th Street West, Lakeville, MN 55044
www.hearthnhome.com
UNDER BACK PANELUNDER BACK PANEL
MEETS SIDE PANELMEETS SIDE PANEL
REAR BASE REAR BASE
REFRACTORY REFRACTORY