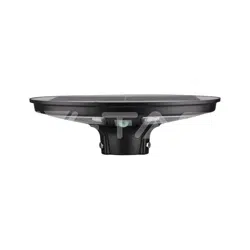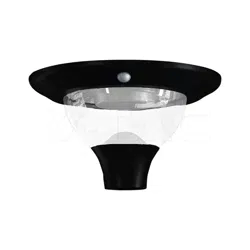
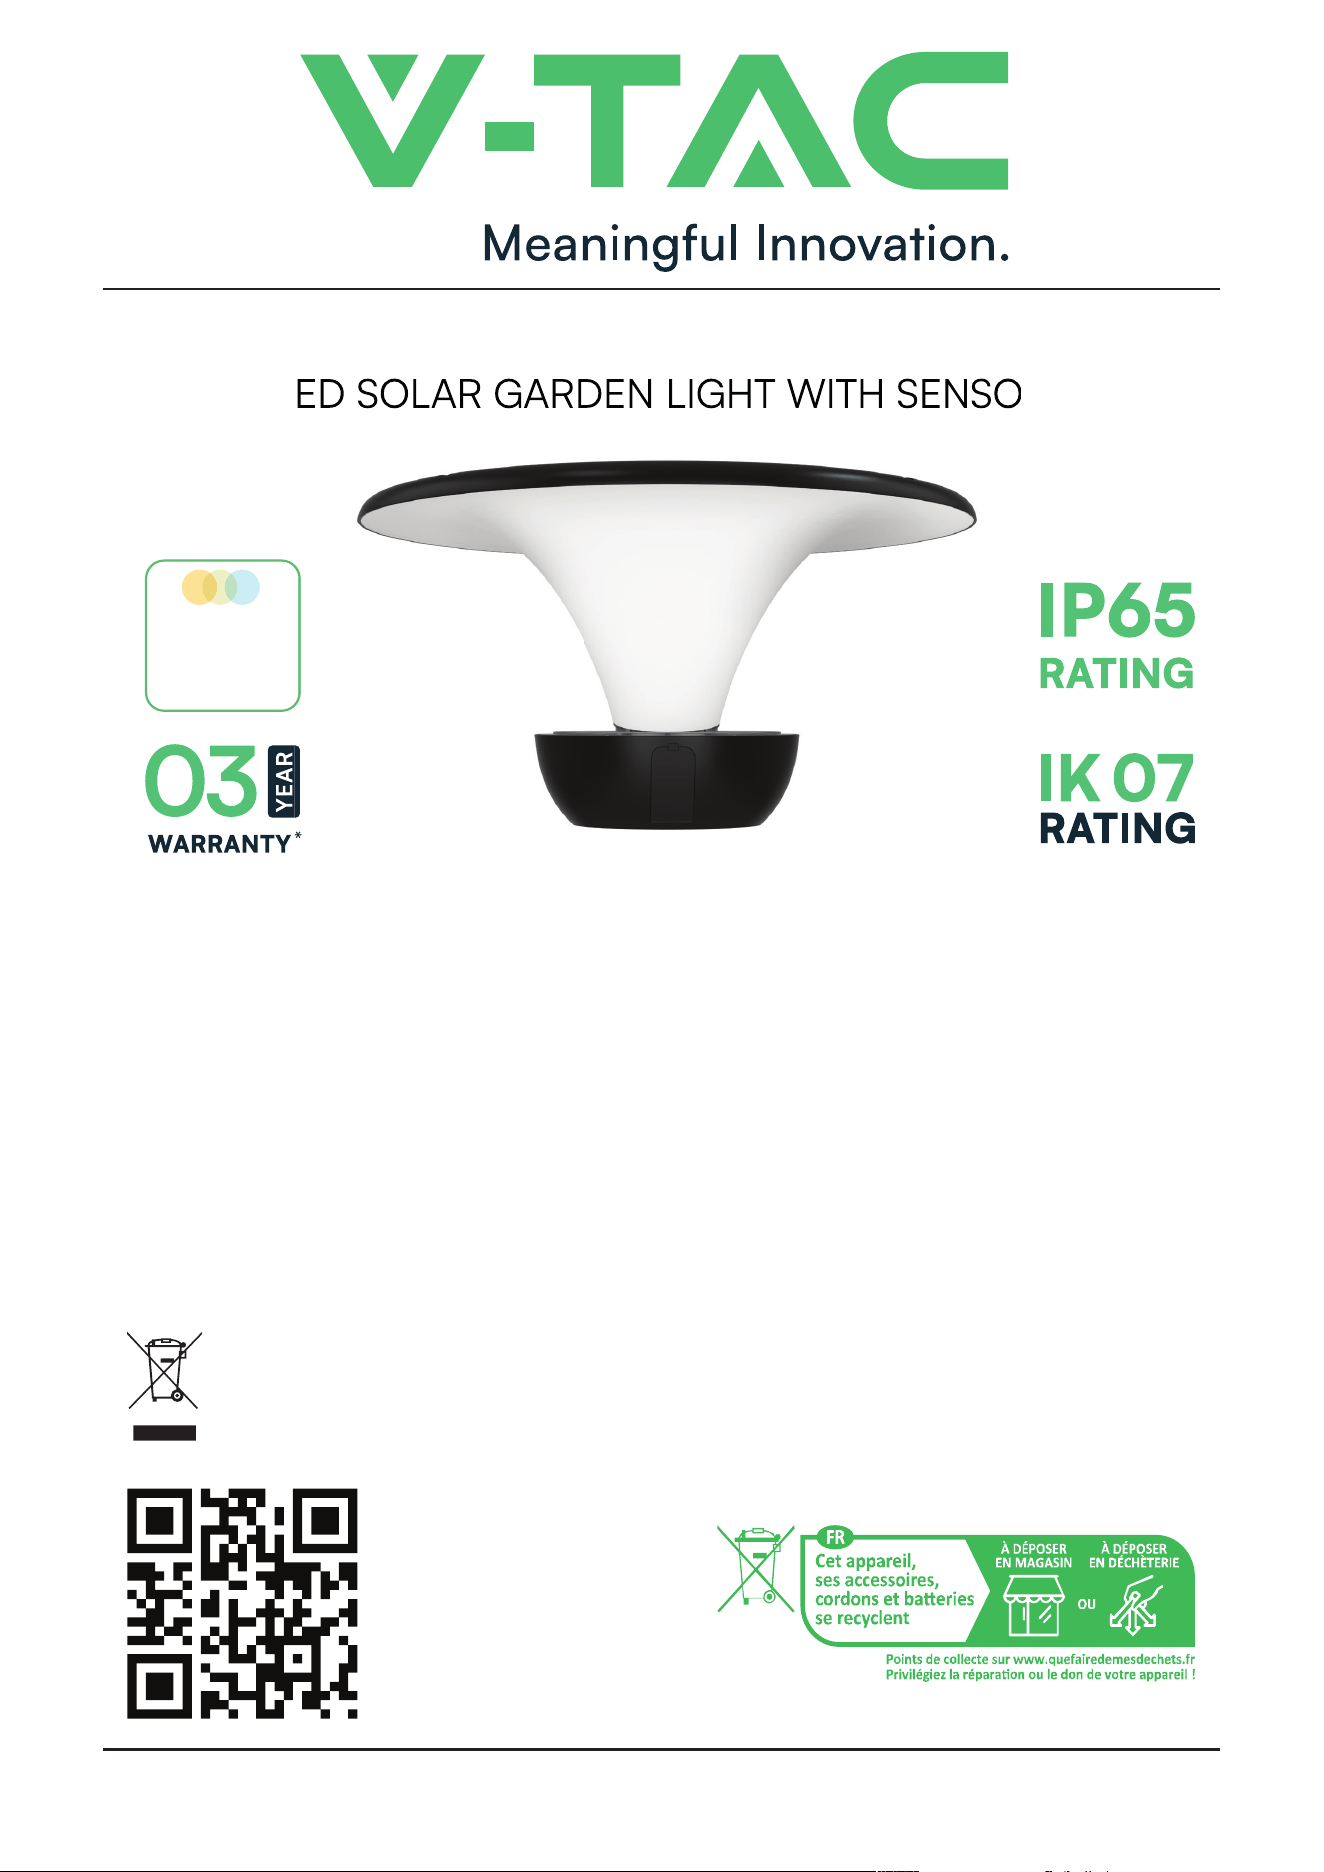
LED SOLAR GARDEN LIGHT WITH SENSOR
MULTI-LANGUAGE
MANUAL QR CODE
Please scan the QR code
to access the manual in
multiple languages.
INTRODUCTION & WARRANTY
Thank you for selecting and buying V-TAC product. V-TAC will serve you the best. Please read
these instructions carefully before starting the installation and keep this manual handy for future
reference. If you have any another query, please contact our dealer or local vendor from whom
you have purchased the product. They are trained and ready to serve you at the best. The warran-
ty is valid for 3 years from the date of purchase. The warranty does not apply to damage caused
by incorrect installation or abnormal wear and tear. The company gives no warranty against
damage to any surface due to incorrect removal and installation of the product. The products are
suitable for 10-12 Hours Daily operation. Usage of product for 24 Hours a day would void the war-
ranty. This product is warranted for manufacturing defects only.
INSTRUCTION MANUAL
IN CASE OF ANY QUERY/ISSUE WITH THE PRODUCT, PLEASE REACH OUT TO US AT: SUPPORT@V-TAC.EU
FOR MORE PRODUCTS RANGE, INQUIRY PLEASE CONTACT OUR DISTRIBUTOR OR NEAREST DEALERS.
V-TAC EUROPE LTD. BULGARIA, PLOVDIV 4000, BUL.L.KARAVELOW 9B
COLOR
CHANGING
3-IN-1
LED SOLAR GARDEN LIGHT WITH SENSOR
This marking indicates that this
product should not be disposed
of with other household wastes.
LUMENS
MODEL VT-10020
SKU 24473
2400 Lm
POWER
20W
LEDs SMD2835*36pcs & SMD3030*24pcs
BATTERY LiFePO4, 32700, 6000mAh, 6.4V, 38.4Wh
SOLAR PANEL Mono 14.5W, DC9V
COLOR TEMPERATURE CCT (6000K, 4000K, 3000K)
IK RATING IK07
BEAM ANGLE Up Light 170°; Down Light 100°
CHARGING TIME 4-6 hours strong sunshine to fully charge
WORKING TIME 50H Max
INSTALLATION HEIGHT
2-4 Meter
BODY TYPE ABS+PC+Metal, anti-UV, fireproof
DIMENSION
Ø445*231mm
LIGHTING AREA 80 m
2
INSTALLATION SPACING 8-12 Meter
WORK MODES DIY By Remote Control
TECHNICAL DATA
WARNING
1. Please press the ON/OFF button on the lamp to turn it on before installation.
2. This is a solar-powered lamp; install it in a location that receives sucient sunlight.
3. Even when the lamp is turned o, it will still charge during the day using solar energy.
4. Lighting duration depends on sunlight exposure and the selected work mode.
5. The built-in intelligent system includes overcharge and over-discharge protection,
ensuring safety and durability.
6. The lamp contains an internal, replaceable battery pack.
7. Do not disassemble the lamp unless you are a qualified professional.
8. Do not dispose of the battery with household waste, as it may pose an explosion risk.
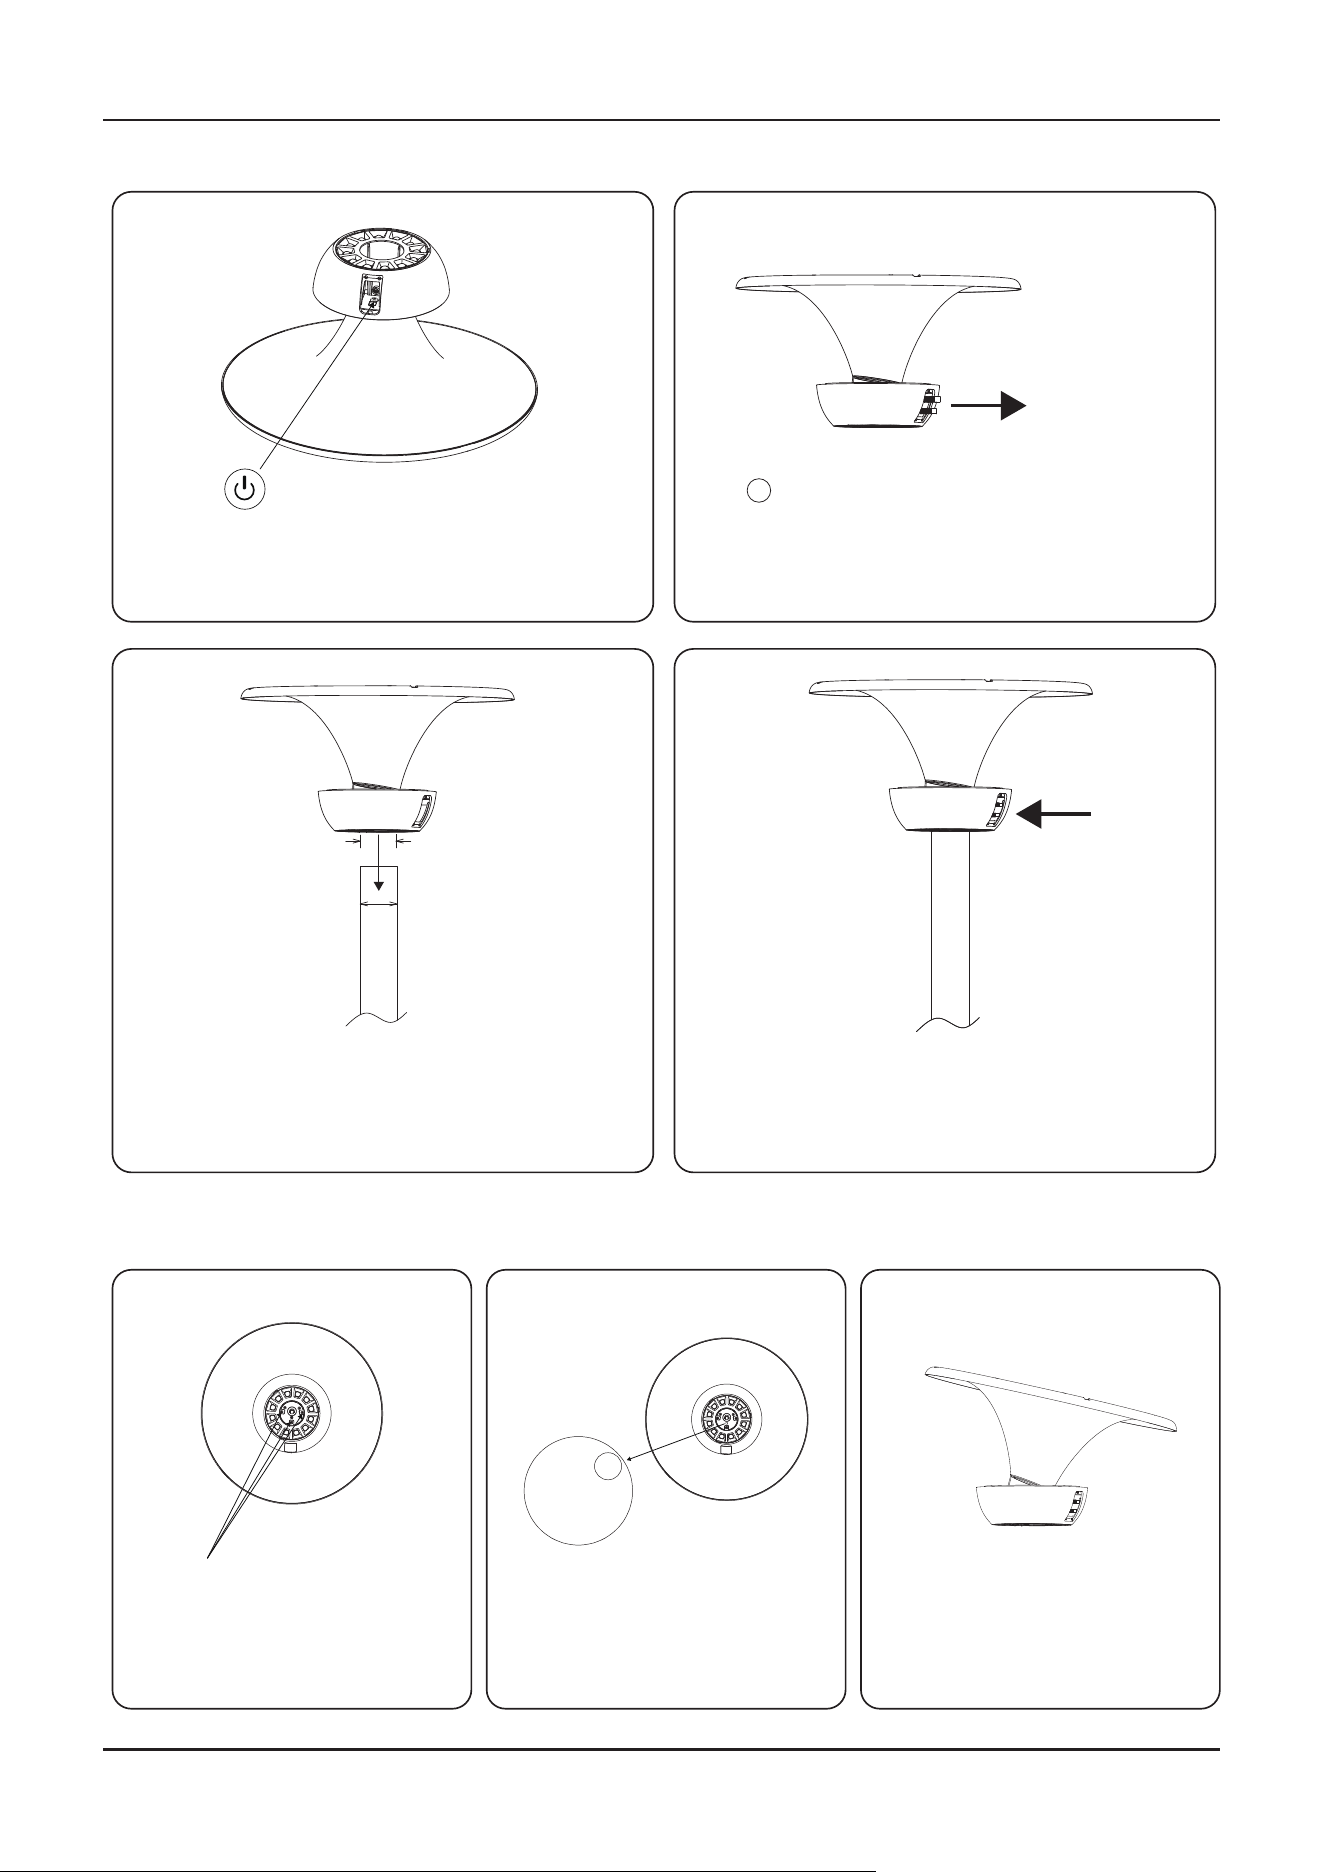
INSTALLATION INSTRUCTIONS
ANGLE ADJUSTMENT
2
50-60mm
60mm
Press the switch on the lamp to
activate the product.
Align the lamp and insert it into the pole.
Suitable for poles with a diameter
of Ø50–60 mm.
Tighten the fixing screws securely.
Loosen the two pole fixing screws.
20°
17°
15°
0°
7.5°
7.5°
Loosen the three screws by
turning each screw half a turn.
Adjust the lamp body to the required
angle according to the scale.
Available angles: 0°/ 7.5°/ 15°/ 17°/ 20°.
Aer the angle is set, tighten the three
screws securely.
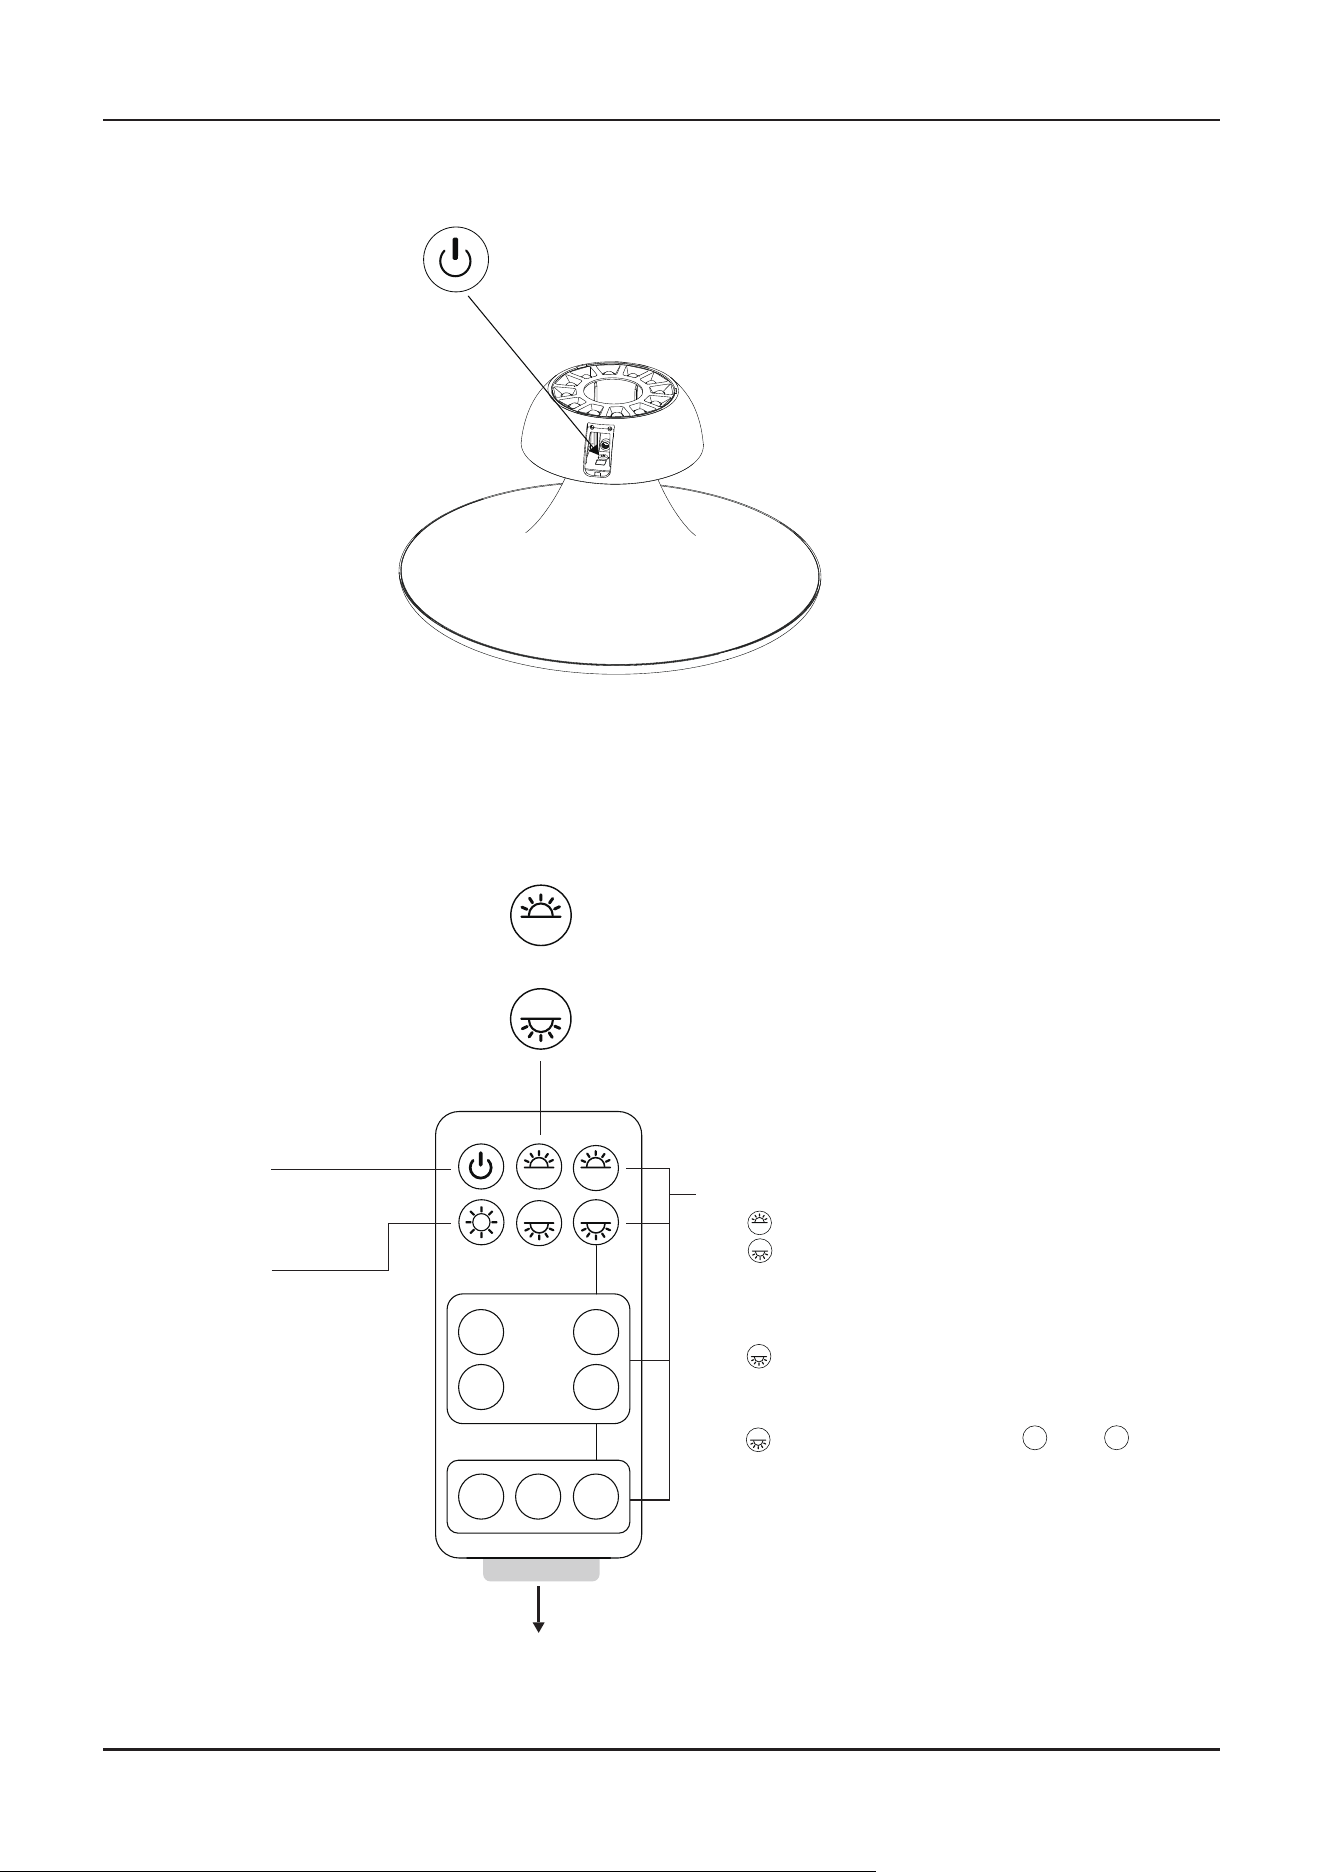
OPTIONAL OPERATING MODES & ADJUSTABLE CCT
REMOTE INSTRUCTIONS
Press the switch on the lamp
to activate the product.
Remove this film before use.
Press to adjust the up light.
Press to adjust the down light.
The light flashes once, then timer and brightness can be adjusted.
Up Light / Down Light Timer and Brightness Adjustment
The same steps apply to the up light and down light.
Note:
8H
10% 30%
60%
5H
H12
3H
AUTO
AUTO
CCT
CCT
AUTO
Short press: switch 3000K / 4000K / 6000K
Press and hold for 3 seconds: turn o the down light
Down Light CCT Button
CCT
Press for the down light to activate the default setting:
The down light will stay at 60% brightness for 5 hours,
then turn o automatically.
Example (Down Light):
AUTO
AUTO
Press for the down light, then press , then :
The down light will stay at 30% brightness for 8 hours,
then turn o automatically.
8H
30%
AUTO
Short press: switch 3000K / 4000K / 6000K
Press and hold for 3 seconds: turn o the up light
Up Light CCT Button
CCT
Press to turn the
lamp on or o.
Memory function
supported.
Smart Mode with
Dawn Function
The up light stays at full
brightness until dawn.
The down light stays on
for part of the night,
turns o automatically for
5 hours,
then turns on again for 1
hour before dawn.
• Down light operating
time adjusts automati-
cally
• by weather and
geographic location.
• Brightness and timer
settings cannot be
• adjusted in this mode.
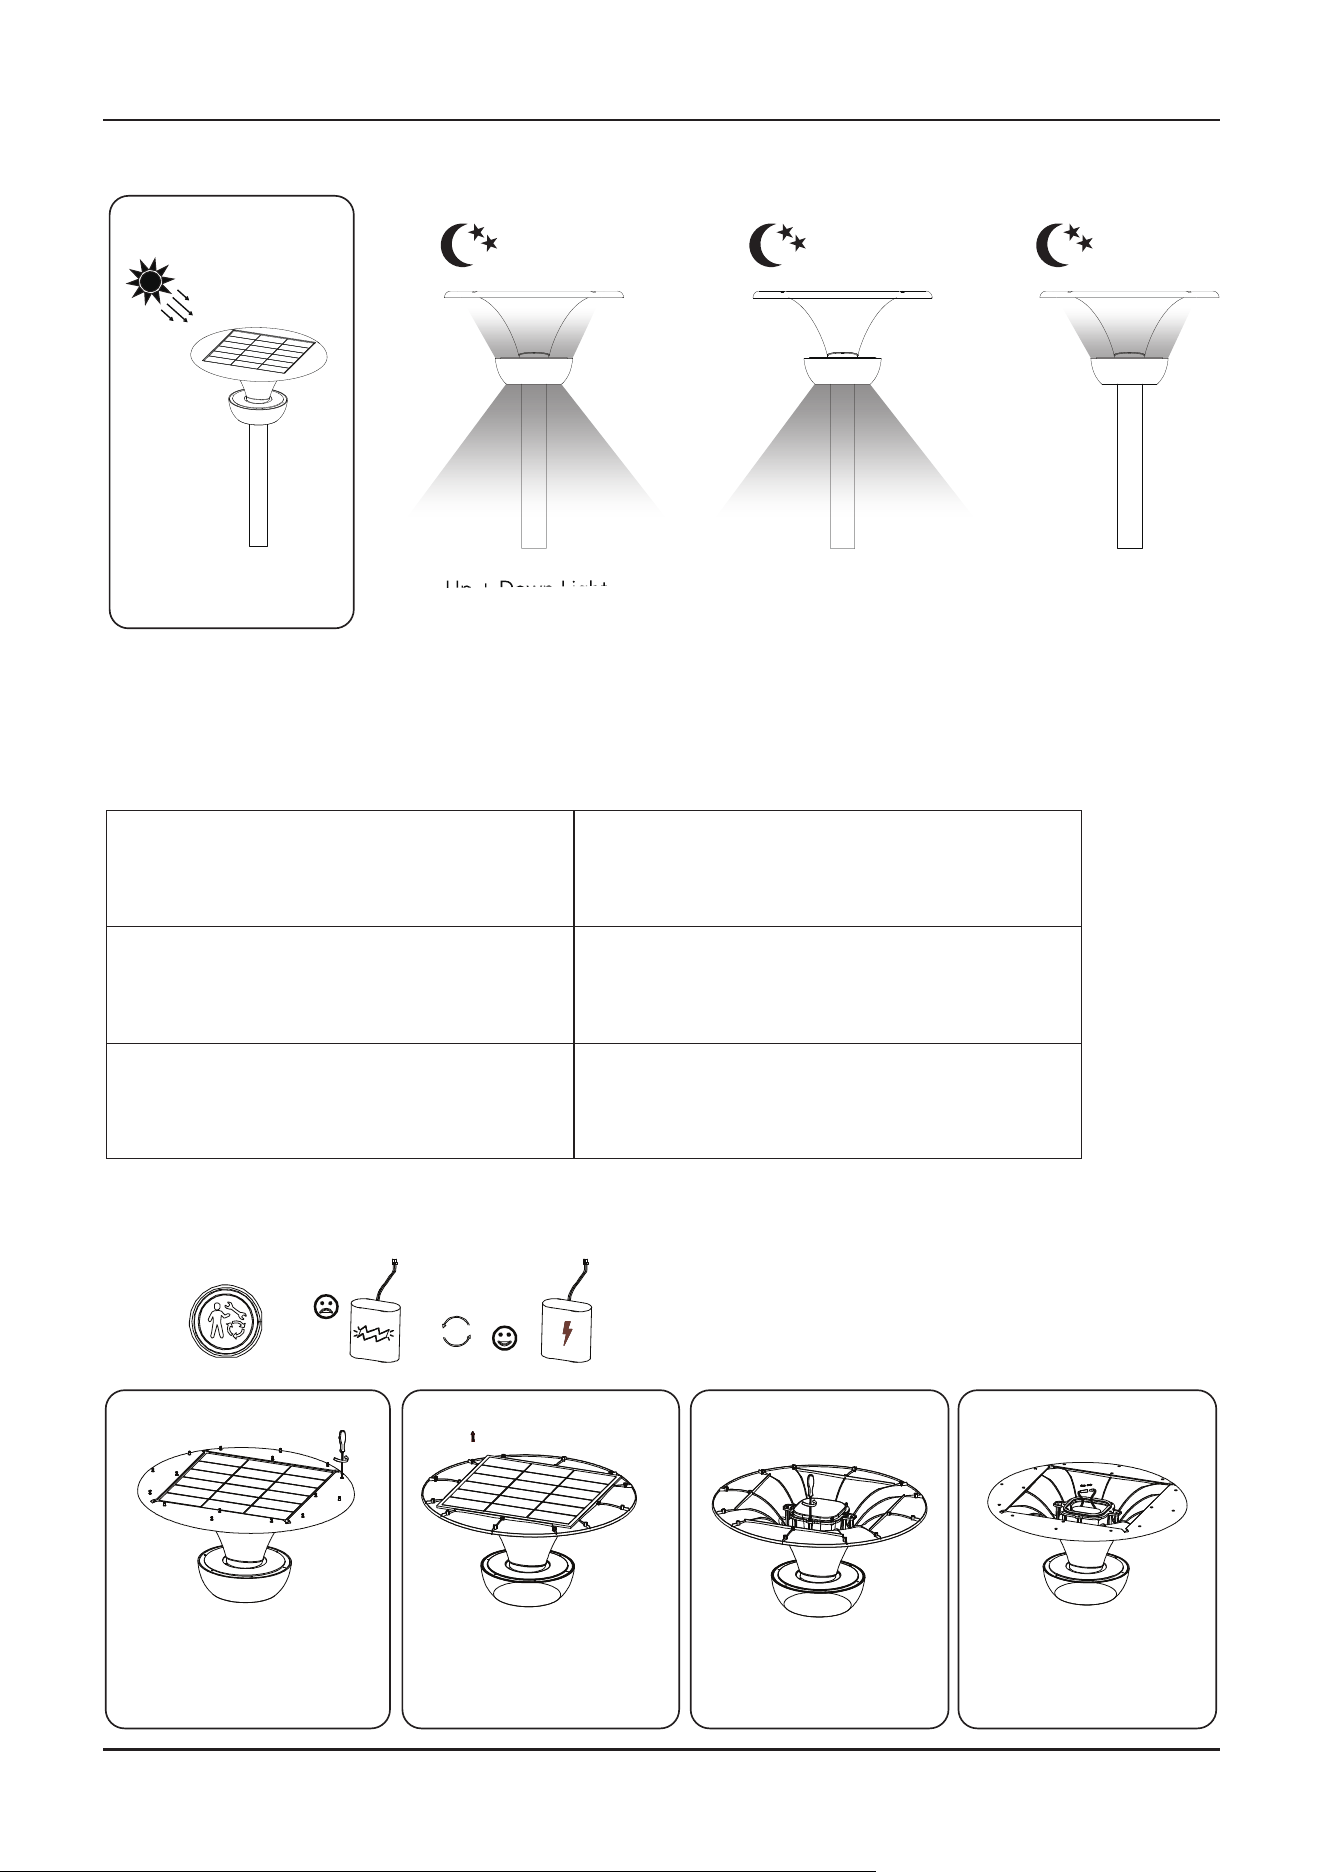
LIGHTING MODES
INDICATOR LIGHT STATUS
BATTERY REPLACEMENT INSTRUCTIONS
Unscrew all the Screws in
Solar Panel.
Unscrew the Screws
in Battery Box
Replace the Battery. it
has a fast connector.
Remove the Solar Panel.
Up + Down Light
Down Light Only Up Light Only
Up + Down Light
The RED indicator light shows the lamp status and battery level.
Day Time
Battery Charging
Night Time
Battery Discharging
Red indicator flashes
Charging
Indicator is o
Lighting normally
Red indicator stays on
Fully charged
Red indicator flashes
Battery level below 30%
V-TAC UK LTD. IN CASE OF ANY QUERY/ISSUE WITH THE PRODUCT PLEASE REACH OUT TO US AT
SUPPORT@VTACEXPORTS.COM V-TAC, 5A TUNGSTEN PARK, DOWNS ROAD, WITNEY, OXFORDSHIRE, OX29 0AX
V-TAC WEST EUROPE LTD. IN CASE OF ANY QUERY/ISSUE WITH THE PRODUCT, PLEASE REACH OUT TO US AT:
[email protected] FOR MORE PRODUCTS RANGE, INQUIRY PLEASE CONTACT OUR DISTRIBUTOR OR NEAREST DEALERS.
V-TAC WEST EUROPE LTD. GROUND FLOOR, 71 LOWER BAGGOT STREET, DUBLIN 02, IRELAND DO2 P593
• This product contains battery type "Secondary" (rechargeable).
• Electrical and electronic equipment that has become waste is known as old equipment/device. Old devices
must not be disposed of with other household waste.
• Owners of old devices at the end of its service life must return the device by taking them to the collection points
set up by public waste disposal authorities or distributors. This return does not entail any costs for you.
• Owners of old devices have an obligation to remove accessible batteries / rechargeable batteries as well as
non-destructively removable lamps from the old device prior to return. This does not apply if old devices are
being prepared for reuse with the participation of a public law firm.
• Battery removal warning: The battery contained in this product must be removed only by professional personnel
only. The battery must never be removed by the end user, if not removed correctly it could damage the battery
which could cause fire.
• Batteries removed from an old electronic device should be disposed of separately. This return of battery does
not entail any costs for you and the user is obliged to return the battery.
• Please make sure that this product is not powered on when removing the battery. Fire hazard! Avoid short-cir-
cuiting the contacts of a detached battery. Do not incinerate the battery. Please handle the battery with
Caution!
• If electrical appliances or batteries are disposed of in landfills or dumps, hazardous substances can leak into the
groundwater and get into the food chain, damaging your health and well-being.
• The symbol of "Crossed rubbish bins "indicates that this product should not be disposed of with other house-
hold wastes and must be collected separately from unsorted municipal waste at the end of its service life.
• Please use the link below to view the online directory of the collection and return points:https://www.ear-sys-
tem.de/ear-verzeichnis/sammel-und-ruecknahmestellen
IMPORTANT NOTES
REMOTE CONTROL SAFETY INSTRUCTIONS
• Before using this product, make sure that all parts are configured correctly according to
the instructions in the attached instruction.
• The product should not be used by persons under 5 years of age without supervision by
a parent or guardian.
• Ensure that the power batteries are configured correctly and have the appropriate
parameters as specified by the manufacturer.
SOLAR PANEL MAINTENANCE & WARNING
• Do not use solvents, petrol, etc. Otherwise the light will be damaged.
• Clean the light with a dry, lint-free cloth.
• Check the solar panel for dirt regularly. If dirt or is present remove it to guarantee
flawless function of the product.
• Especially during the winter, keep the product free from snow and ice.
• Confirm installation direction is correct (solar panel should be at top)
• Confirm no objects blocking the solar panel to receive sunlight
• Keep away from the fire.
• Don’t immerse in the water