20
SERVICE CENTRE
AUTHORIZED DEALER
1
USE AND MAINTENANCE MANUAL
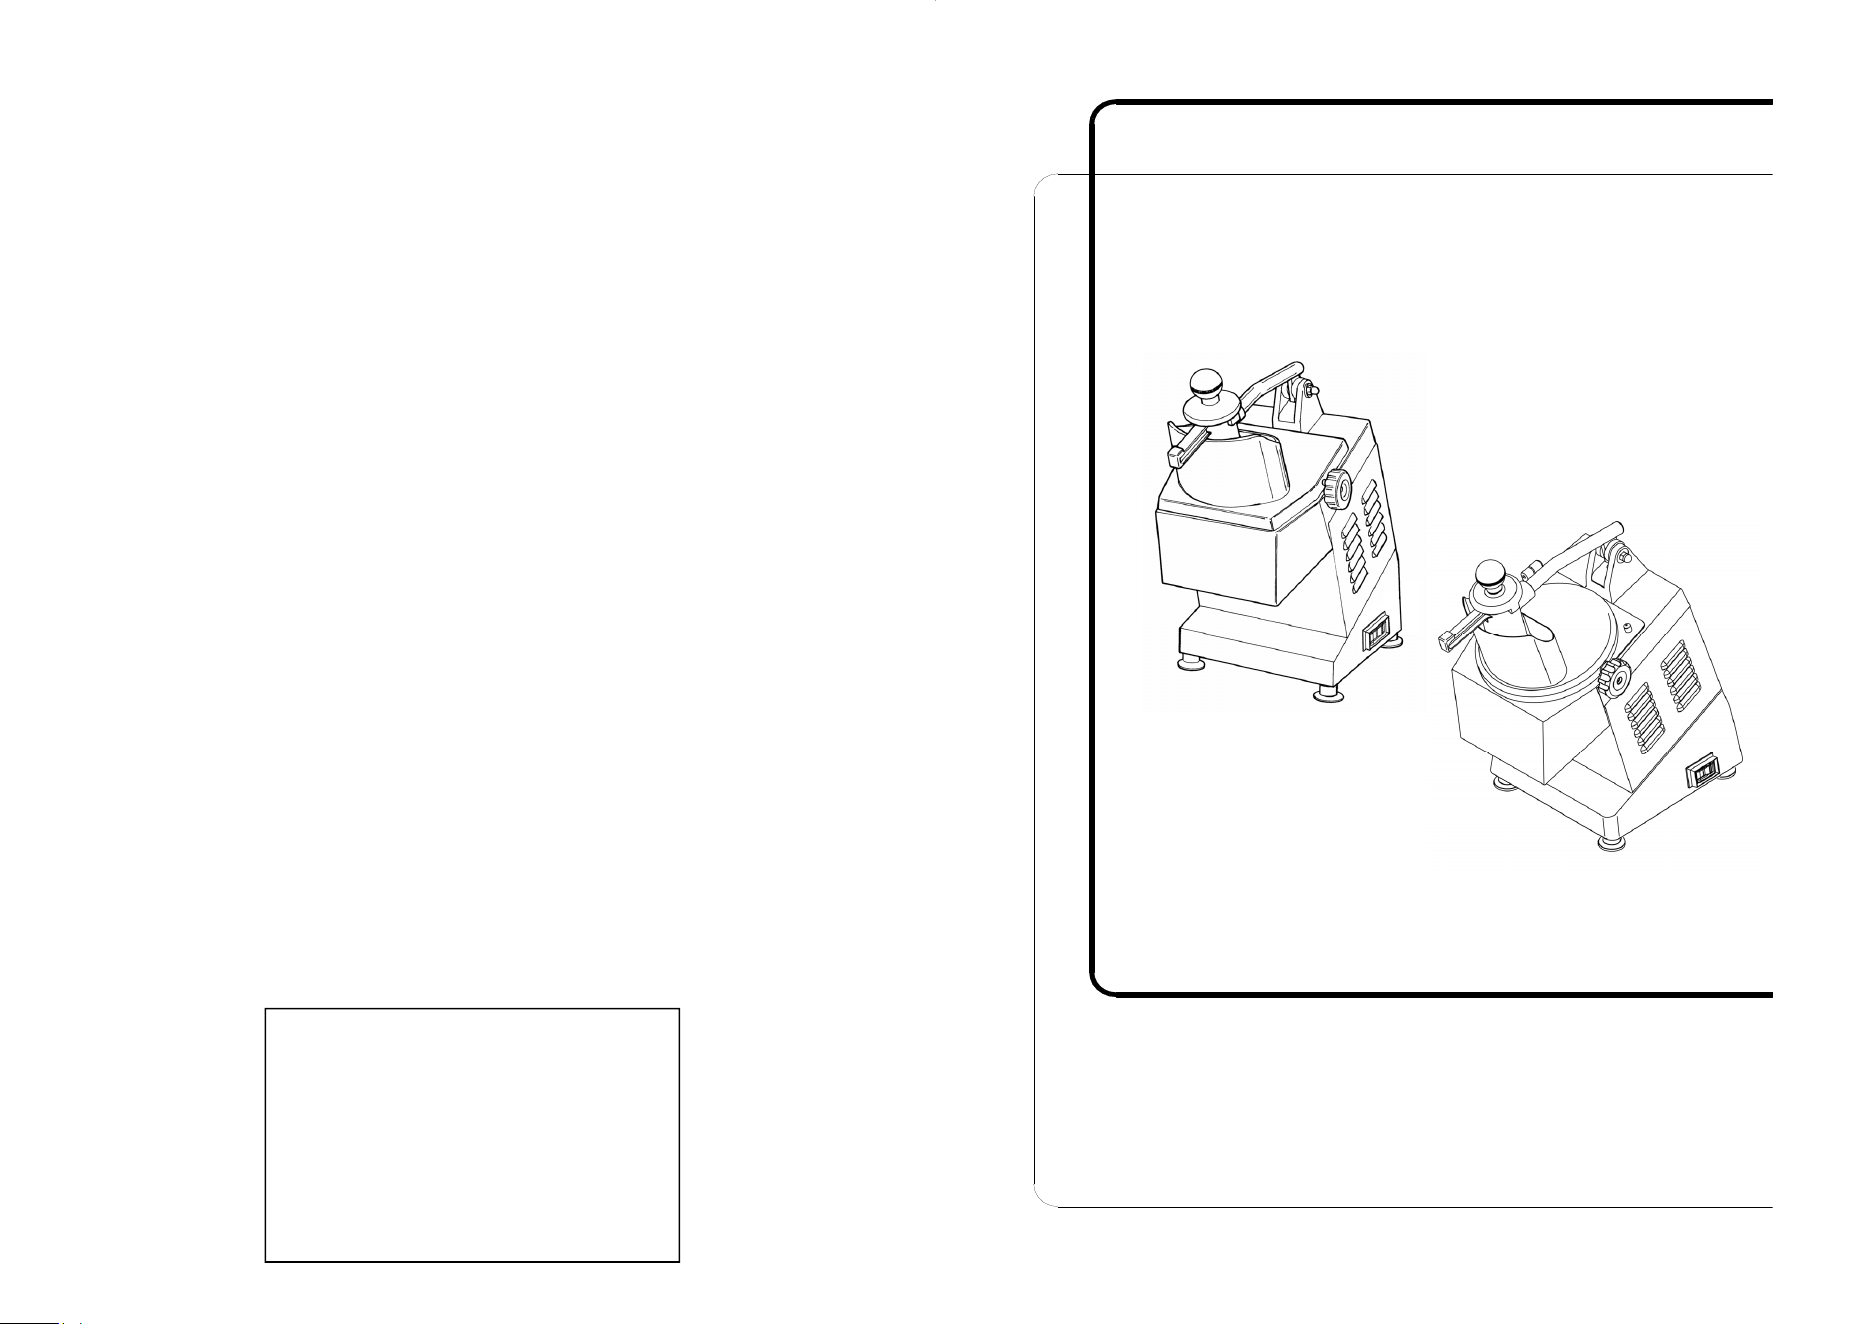
VEGETABLE CUTTER
mod. TM E / TM A E / TM R E / TM R A E
ETL
ed. 01/2020 - ver. 003

2 19
CHAP.8 - SCRAPPING
8.1 - PUTTING THE MACHINE OUT OF SERVICE
If for some reason, you decide to put the machine out of service, make
sure nobody can use it:
disconnect it from the mains and eliminate electrical connections.
8.2 - SCRAPPING
When the machine is out of service, it can be disposed of. To scrap the
machine contact your local Specialised Waste Treatment Centre, separate
components (refer to chap.1 § 2.2).
18
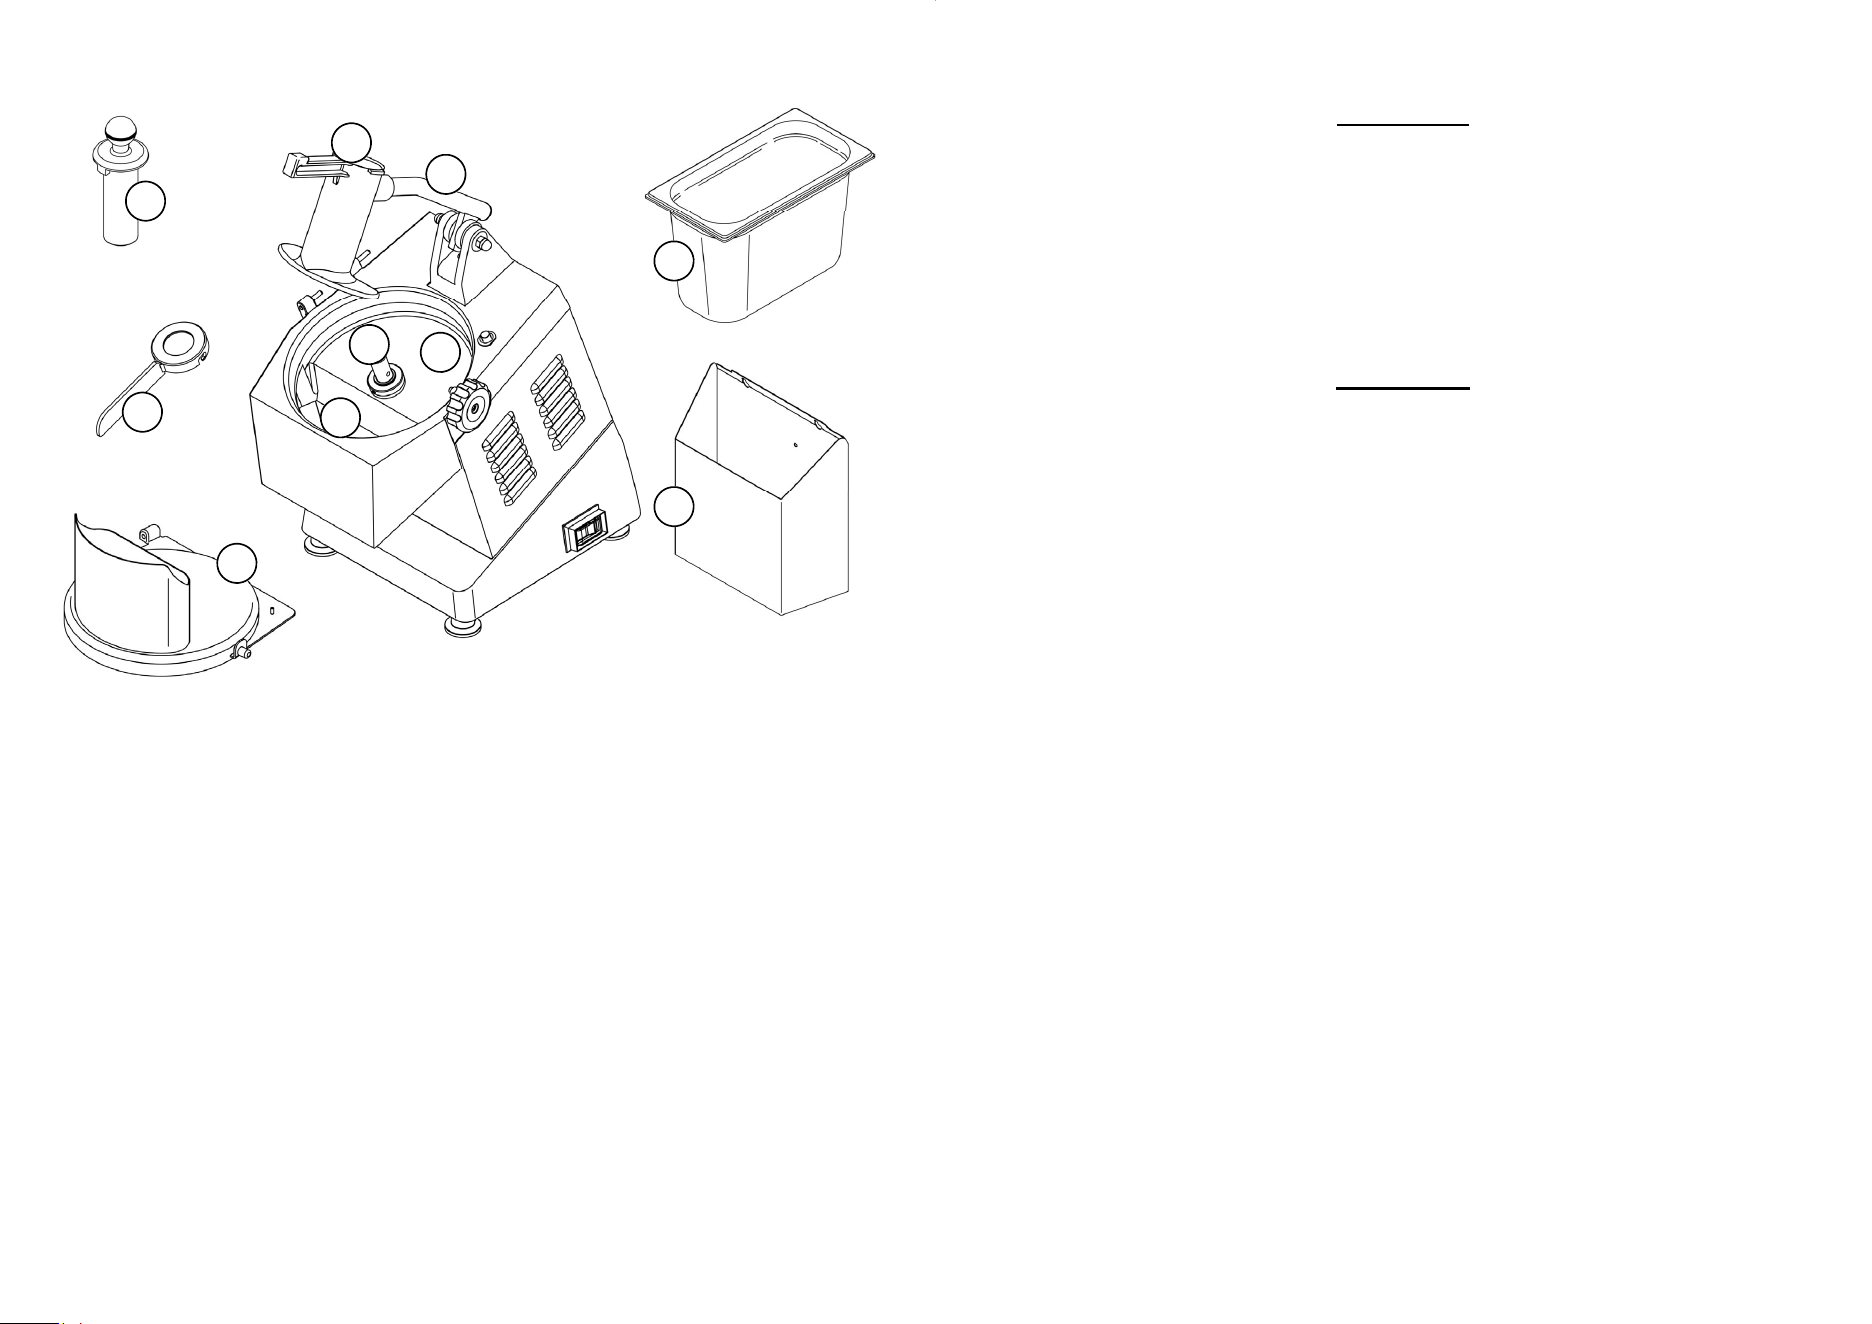
Fig. n°17 - View of the machine disassembled for cleaning.
A
B
C
D
E
F
G
H
I
L
A
MOUTH
G
PRODUCT INLET CYLINDER
B
OPERATING AREA
H
PESTLE
C
PIN
I
DISCHARGING SPATULA
D
CHUTE
L
LID
E
BOWL
F
PUSHER HANDLE
3
FOREWORD
- This manual is meant to provide Customers with information on the
machine and its specifications and the necessary operating and
maintenance instructions in order to ensure machine performance and
longevity.
- This manual is to be used by qualified and skilled operators with
thorough knowledge of machine use and maintenance.
CONTENTS
CHAP. 1 - INFORMATION ON THE MACHINE page 5
1.1 - GENERAL PRECAUTIONS
1.2 - MACHINE DESCRIPTION
1.2.1 - General description
1.2.2 - Manufacturing features (materials used)
1.3 - SAFETY DEVICES
1.3.1 - General safety devices
1.3.2 - Electrical safety devices
1.4 - ACCESSORIES + TOOLS
1.4.1 - Accessories
1.4.1.1 - Standard accessories
CHAP.2 - TECHNICAL SPECIFICATION page 10
2.1 - OVERALL DIMENSIONS, WEIGHT, FEATURES ...
CHAP.3 - RECEIVING THE MACHINE page 11
3.1 - DESPATCH OF THE MACHINE
3.2 - PACKAGE CHECK UPON RECEIPT
3.3 - PACKAGING DISPOSAL
CHAP.4 - INSTALLATION page 12
4.1 - SETTING UP OF THE MACHINE
4.1.1 - Collecting bowl
4.2 - ELECTRICAL CONNECTION
4.2.1 - Vegetable cutter TM (120 V. 60 Hz)
4.3 - WIRING DIAGRAM OF THE VEGETABLE CUTTER TM
4.4 - FUNCTIONAL CHECK

4
CHAP. 5 - USE OF THE MACHINE page 14
5.1 - DISCS ASSEMBLY
5.2 - LOADING AND CUTTING THE PRODUCT
CHAP.6 - MAINTENANCE AND ADVICE page 16
6.1 - FOREWORD
6.1.1 - Belt
6.1.2 - Feet
6.1.3 - Power supply cable
6.2 - What to do if...
6.2.1 - The fixing of the discs is faulty
6.2.2 - The lid does not lock
6.2.3 - The product is not cut correctly
6.2.4 - The product does not go out correctly or is badly cut
6.2.5 - The machine locks
6.2.6 - The micro on the pusher handle and on the lid do not work
6.2.7 - The machine does not start
CHAP.7 - CLEANING OF THE MACHINE page 17
7.1 - FOREWORD
7.2 - CLEANING PRODUCTS
7.3 - HOW TO CLEAN THE MACHINE
CHAP.8 - SCRAPPING page 19
8.1 - PUTTING THE MACHINE OUT OF SERVICE
8.2 - SCRAPPING
17
is the one indicated on the rating plate (Fig. n°11).
6.2.6 - The micro on the pusher handle and on the lid do not work:
Check that they are not dirty.
6.2.7 - The machine does not start:
Check that all the safety devices are correctly installed (See Chapter
about safety devices 1.3); that the plug and the switches are correctly
connected.
CHAP.7
- CLEANING OF THE MACHINE
7.1 - FOREWORD
The machine must be cleaned at least once a day. If necessary clean
when required during the day.
All the Vegetable cutter parts that come into contact directly or
indirectly with the food product must be cleaned thoroughly.
Before starting cleaning operations, it is necessary to:
disconnect the machine plug from the mains
to isolate it from the mains
power supply.
Pay attention to hazards of injury caused by cutting and/or sharp
machine components during cleaning o handling of discs.
7.2 - CLEANING PRODUCTS - CAUTION!
The machine must be cleaned with a normal detergent at ambient
temperature, with a wet cloth.
It must never be cleaned with pressurised water, water jets, do not use
brushes or other tools or anything that could damage the machine.
N.B. DO NEVER WASH THE MACHINE PARTS IN THE
DISHWASHER.
7.3 - HOW TO CLEAN THE MACHINE
Disconnect the machine from the power supply.
Remove the lid and the discs, the spatula, the pestle, the bowl and/or the
chute
(Fig. n°17). Clean accurately the inside of the mouth, the operating
area and the disc support pin.
Moreover clean all the external surfaces and the pusher handle. Dry with a
cloth and reassemble the machine.

16
D If you use the bowl, after 2-3 cutting cycles, empty it. The use of the
machine with a full bowl, could block the discharge of the product in the
working area, and cause a faulty cut, the machine lock or the motor
failure.
CHAP.6 - MAINTENANCE AND ADVICE
6.1– FOREWORD
Before performing any maintenance operation, it is necessary to:
Disconnect the plug from the mains to isolate it from the mains power
supply.
6.1.1 - BELT
The drive belt does not require adjustment. In general after 3-4 years, it
must be replaced, in this case call the “SERVICE CENTRE”.
6.1.2 - FEET
Feet may deteriorate or lose elasticity, reducing machine stability. If
support feet show signs of wear or damage, replace.
6.1.3 - POWER SUPPLY CABLE
Periodically check for wear in the power supply cable. If the power supply
cable shows signs of wear or damage call the “SERVICE CENTRE” for a
replacement.
6.2 - WHAT TO DO IF...
6.2.1 - The fixing of the discs is faulty:
Check that the discs and the disc support pin are clean.
6.2.2 - The lid does not lock:
Check that the lid is installed correctly and that it is clean .
6.2.3 - The product is not cut correctly:
Check that the blade is not worn.
6.2.4 - The product does not go out correctly or is badly cut:
Check that the discharging spatula has not been assembled with the
discs to cut cubes; that the bowl is not full and that the exit opening is not
obstructed.
6.2.5 - The machine locks:
Check that the product is not frozen or too hard and that the power supply
5
CHAP.1 - INFORMATION ON THE MACHINE
1.1 - GENERAL PRECAUTIONS
- The vegetable cutter must be operated only by highly qualified
personnel who are fully aware of the safety measures described in this
manual.
- In case of a personnel turnover, training is to be provided in advance.
- Although the machine incorporates safety devices and protections for
dangerous parts, it is recommended not to touch the moving parts.
- Before starting cleaning and maintenance operations, disconnect the
plug from the supply socket.
- To carry out cleaning and maintenance, assess the residual risks
carefully (as protections are removed).
- Cleaning and maintenance require concentration.
- A regular check of the power supply cable is absolutely necessary; a
worn-out or damage cord is very dangerous.
- If the machine malfunctions, it is recommended not to use it and do not
try to repair it; please call the “Service Centre”, contact details are
provided at the end of this manual.
- Do not use the machine for processing frozen products, meat and
fishes with bones or non food products.
- Do not repair the machine yourself but call the “Authorised Service
Centre”.
- Always use the pusher with the pestle to cut the food
- Do not fill too much the inlet cylinder and do not press too hard to avoid
any problem .
- The manufacturer shall not be liable for damage to things or injury to
persons in the event:
The machine or the safety devices and protections have been
tampered with by non authorised personnel;
Non original
spare parts and discs are installed;
The instructions provided in this manual are not followed
scrupulously;
The machine surface is not cleaned with the right product .
6
1.2 - MACHINE DESCRIPTION
1.2.1 - GENERAL DESCRIPTION
The vegetable cutter TM has been designed and manufactured by our firm
with the aim of ensuring:
- the highest degree of safety during use, cleaning and maintenance;
- the highest standard of hygiene due to a careful selection of materials
which come into contact with food products, elimination of sharp edges
in the machine structure that come into contact with the food product,
facilitating and ensuring perfect cleaning, as well as facilitating machine
disassembly and part removal;
- robust and stable components;
a) reduced noise emission generated by the drive belt;
b) practical and easy to move.
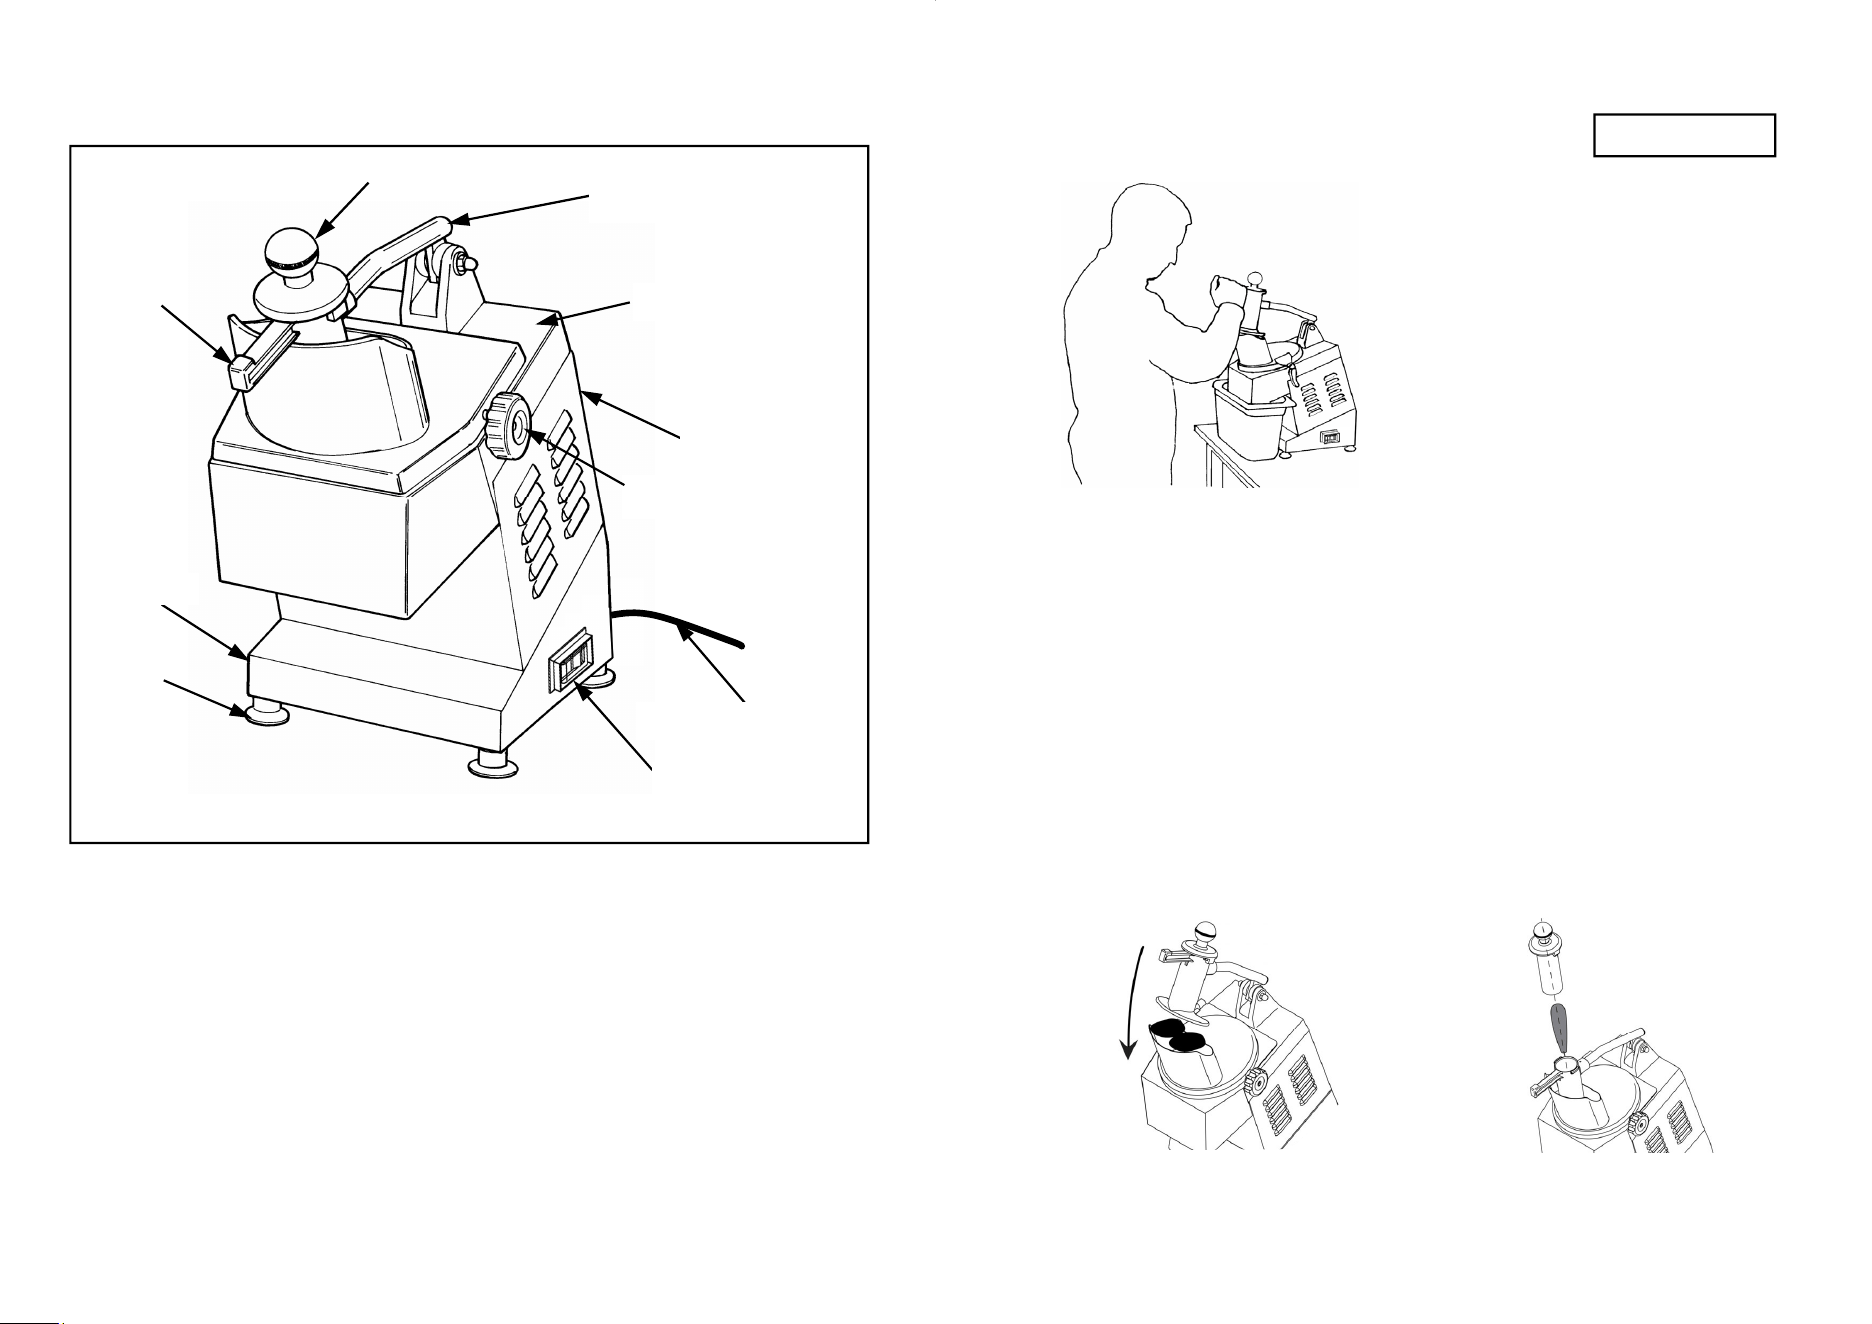
Fig. n°1 - General view of the vegetable cutter mod. “TM”
FEET
POWER SUPPLY CORD
CONTROLS
KNOB TO FIX THE LID
BASE
PUSHER
PESTLE
PUSHER HANDLE
HOPPER
BODY
15
5.2 - LOADING AND CUTTING THE PRODUCT
When the machine is working, it is
necessary to stand correctly to avoid
accidents. The body must always be
perpendicular to the working table (
see
Fig. n°18)
. Pay the maximum attention
that no members of your body enter
in contact with the machine.
N.B. The product has to be loaded in
the Vegetable cutter TM when it is
OFF.
Proceed as follows:
A Load the product in the mouth of the lid
(see Fig. n°15). If the product is
small (i.e. carrots, baby marrows, etc.) put it in the inlet cylinder placed
on the handle
(see Fig. n°16). Turn on the machine and help the cutting
by pressing slightly on the pusher handle or with the pestle if you use
the inlet cylinder.
B When the product is cut, lift the pusher handle, a safety device will
stop the machine. Load another product and lower the handle, the
machine will start automatically.
C To replace the disc and change the type of cutting, proceed as
described in point 5.1 “A”. After this operation, an electronic device will
lock the automatic restart of the machine; to restart the machine, it will
be necessary to press pushbutton “I”.
Fig. n°14 - Correct position.
CAUTION!
Fig. n°15 - Loading the product directly
in the mouth
Fig. n°16 - loading the product
through the product inlet cylinder

14
4.4 - FUNCTIONAL CHECK
To check the correct machine operation, proceed as follows:
a) Turn ON pushbutton “I” and stop pushbutton “0” and check that the
corresponding pilot lights turn on and off
(Fig. n°13).
b) Check that the motor stops and then turns on when you lift or lower the
pusher handle.
c) Check that the machine stops when your remove the lid and that it
turns on by pressing pushbutton START “I” only if the lid is correctly
installed.
CHAP.5
- USE OF THE MACHINE
5.1 - DISCS ASSEMBLY - CAUTION!
A Choose one disc to cut; remove the steel or aluminium lid, and place
the disc on the shaft. Rotate the disc until it is fixed. Replace the lid
fastening it with the specific knob.
B (TO CUT CUBES)
Choose a couple of discs. Place the first disc with the cavity turned on
the right side placing yourself in front of the machine. Then install the
other disc, proceeding as described in point “A”
(see Fig. n°20).
NB: NEVER USE THE DISCHARGING SPATULA WITH COUPLED
DISCS TO CUT CUBES.
C The spatula must be assembled on the disc support pin before any
other disc (
see Fig. n°14). After having assembled the spatula, proceed
as in point “A”.
Fig. n°13 - Control panel.
7
1.2.2 - MANUFACTURING FEATURES (Materials used)
The vegetable cutter TM has been manufactured using materials with high
resistance to mechanical worn and to corrosive agents present in the
product.
More specifically:
- The hopper and the base are made of anodised aluminium to ensure
the contact with food products (hygiene) and to ensure resistance to
acids, salts and rust.
- The body, the lid, the pusher handle and the discs support are made of
steel AISI 304.
- The pestle, the pusher, the bowl and the control panel are made of
high resistant plastic, appropriate to enter into contact with food
products.
1.3 - SAFETY DEVICES
1.3.1 - GENERAL SAFETY DEVICES
The mechanical, electrical and hygienic safety devices installed on the
vegetable cutter TM described in this manual complies with:
UL 763 and NSF 8 Standards
** The vegetable cutter is fitted with electrical and mechanical safety
devices for machine operation as well as cleaning and maintenance
operations.
However, there are RESIDUAL RISKS which cannot be eliminated
completely. These risks are listed in this manual under WARNINGS.
These risks are cutting dangers due to the machine handling during the
disc substitution and/or cleaning.
1.3.2 - ELECTRICAL SAFETY DEVICES
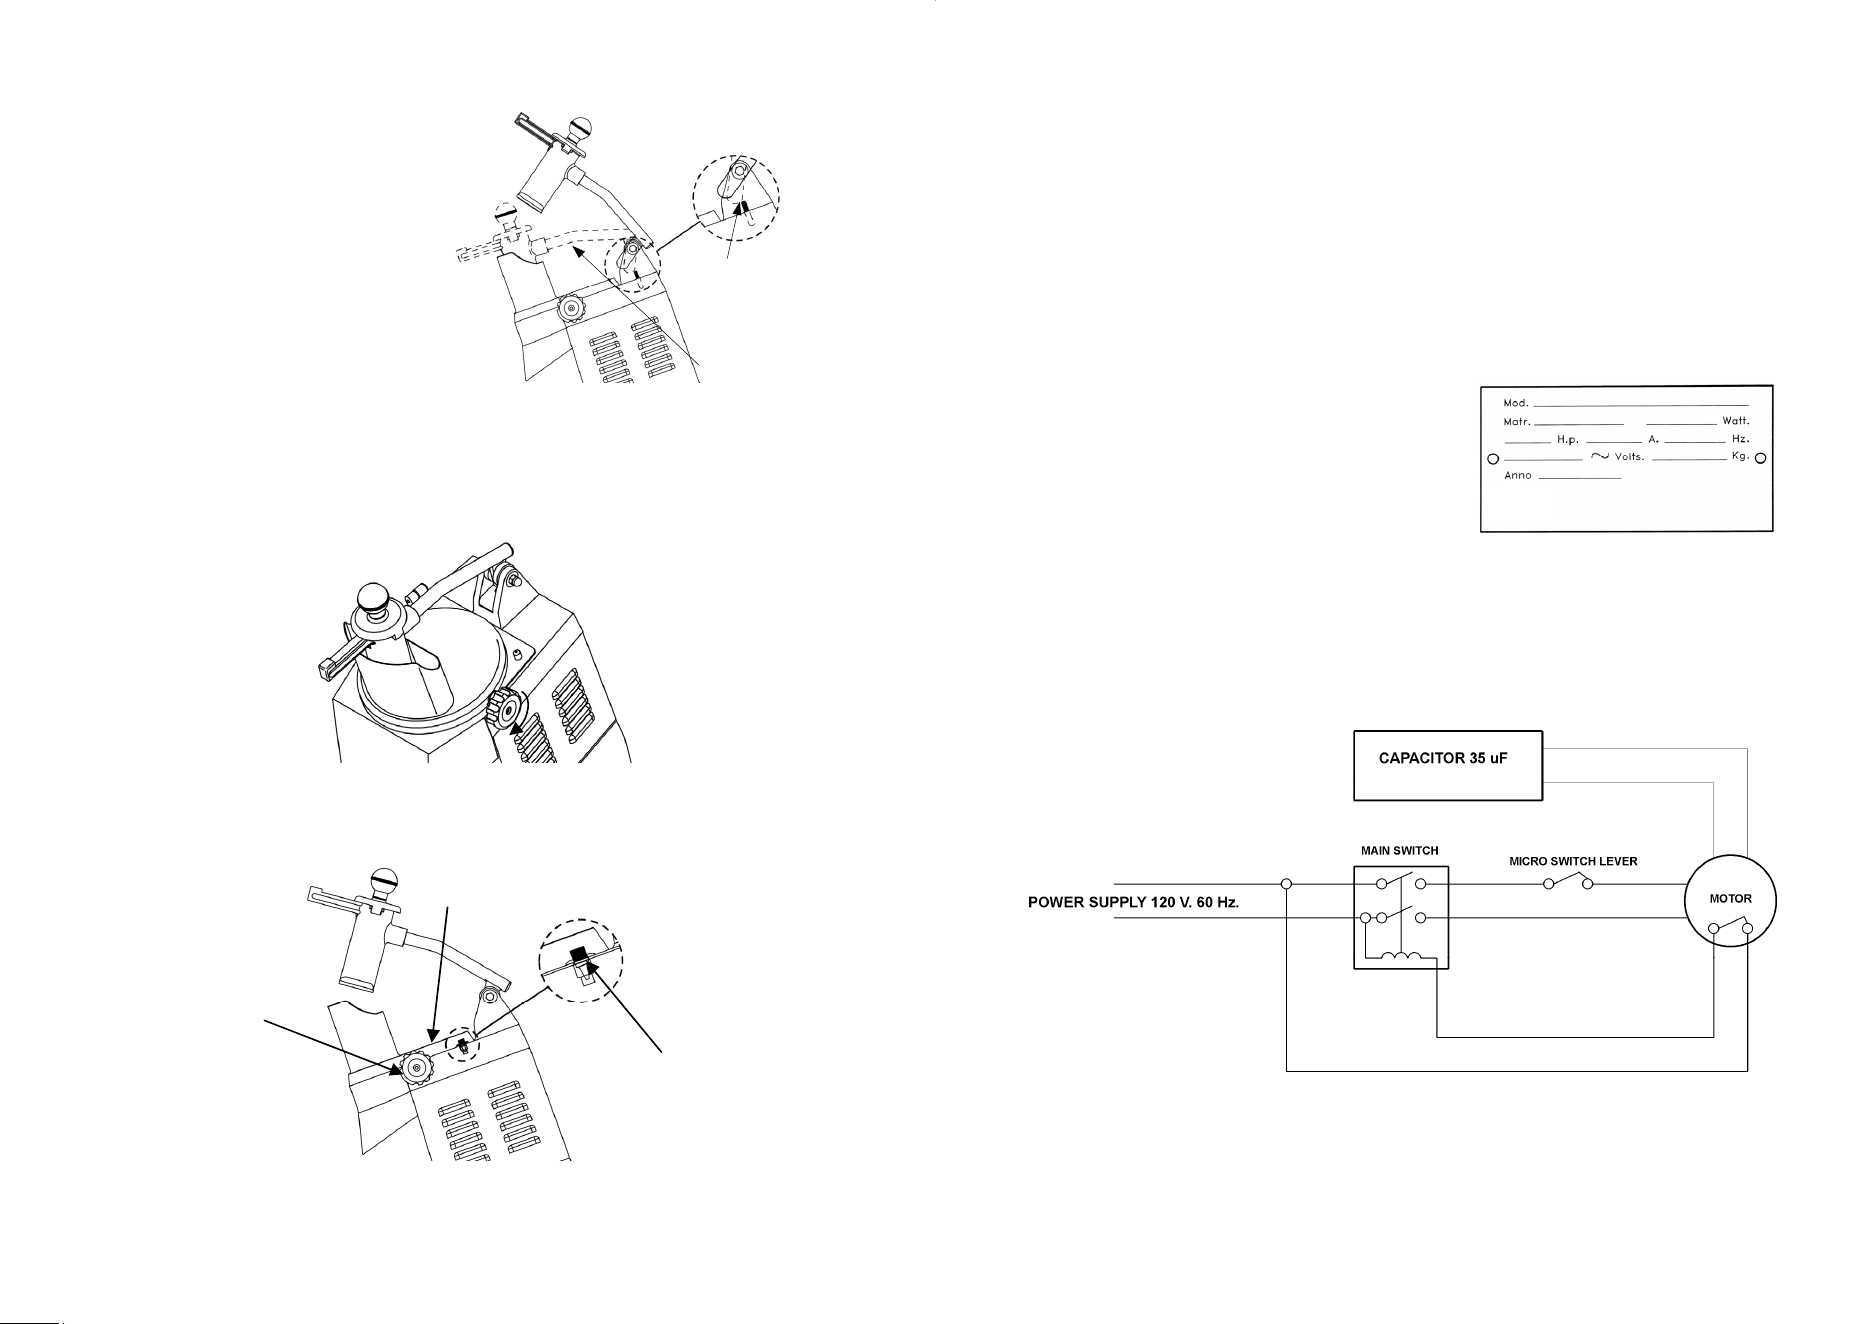
The vegetable cutter TM is fitted with microswithes:
A On the pusher lever, to stop the machine if the handle is lifted over the
mouth of the lid and to enable to turn on the machine automatically
when there is a dangerous situation
(Fig. n°2).
8
B On the hopper, to stop the machine if the lid is removed (i.e. to replace the
discs
) (Fig. n°3A), and to permit to start the machine voluntarily (by
pressing pushbutton “I”
) only when the lid is closed, correctly locked by the
knob lid
(Fig. n°3).
Fig. n°3 - Mechanical safety devices
Fig. n°3A - Electrical safety devices
HANDLE DOWN
HANDLE UP
MICROSWITCH
Fig. n°2 - Electrical safety devices
MICROSWITCH POSITION
KNOB
LID
13
4.2 - ELECTRICAL CONNECTION
4.2.1 - VEGETABLE CUTTER TM (120 Volt, 60 Hz)
The Vegetable cutter TM is equipped with a power supply cable with a
SJT 16 AWG mm
2
section; length 1,6 m and a NEMA 5-15P plug.
Connect the Vegetable cutter to 120 Volt 60 Hz, by interposing a
differential thermomagnetic switch 10 A I = 0,03 A.
Check correct machine earthing.
Moreover check that the specifications on the rating plate-serial number
(Fig. n°15) correspond to the specifications provided in the consignment and
delivery note.
Fig. n°11 - Rating plate - serial number
4.3 - WIRING DIAGRAMS OF THE VEGETABLE CUTTER TM
Fig. n°12 - Wiring diagram
12
3.2 - PACKAGE CHECK UPON RECEIPT
Upon receipt of the package containing the Vegetable cutter TM, check
accurately that the package has not been damaged during transport.
If the package shows signs of damage caused during transport, the carrier
must be informed immediately; moreover a detailed report on the extent of
the damage caused to the machine must be notified to the carrier within
three days from the delivery date on the shipping documents. DO NOT
OVERTURN THE PACKAGE!! When the package is transported, make
sure the box is lifted by the 4 corners (parallel to the ground).
3.3 - PACKAGING DISPOSAL
The components of the packaging (cardboard, pallet, plastic straps and
polyurethane foam) are urban solid waste; therefore they can be easily
disposed of.
If the machine has to be installed in countries where specific regulations
are in force, packaging must be disposed of in compliance with such
regulations.
CHAP.4 - INSTALLATION
4.1 - SETTING UP OF THE MACHINE
The vegetable cutter must be installed on a suitable and adequate size
work table refer to Fig.n°8, (and therefore sufficiently large); the machine
must be solid, stable and fixed at a height of 80 cm from the ground.
Moreover the machine must be installed in a room with max. 75% non
saline humidity at a temperature between +5°C e +35°C; in a location and
environment that does not provoke malfunctions or faults in the machine.
4.1.1 - COLLECTING BOWL
If the Vegetable cutter TM is provided with a collecting bowl, place it under
the mouth of the machine, so as to cover the product exit (Fig. n°10).
Fig. n°10 - Collecting bowl
9
1.4 - ACCESSORIES + TOOLS
1.4.1 - ACCESSORIES
The vegetable cutter TM is provided with many accessories. Some are
supplied with the cutter, other must be requested by the Client.
1.4.1.1 - STANDARD ACCESSORIES
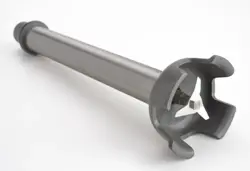
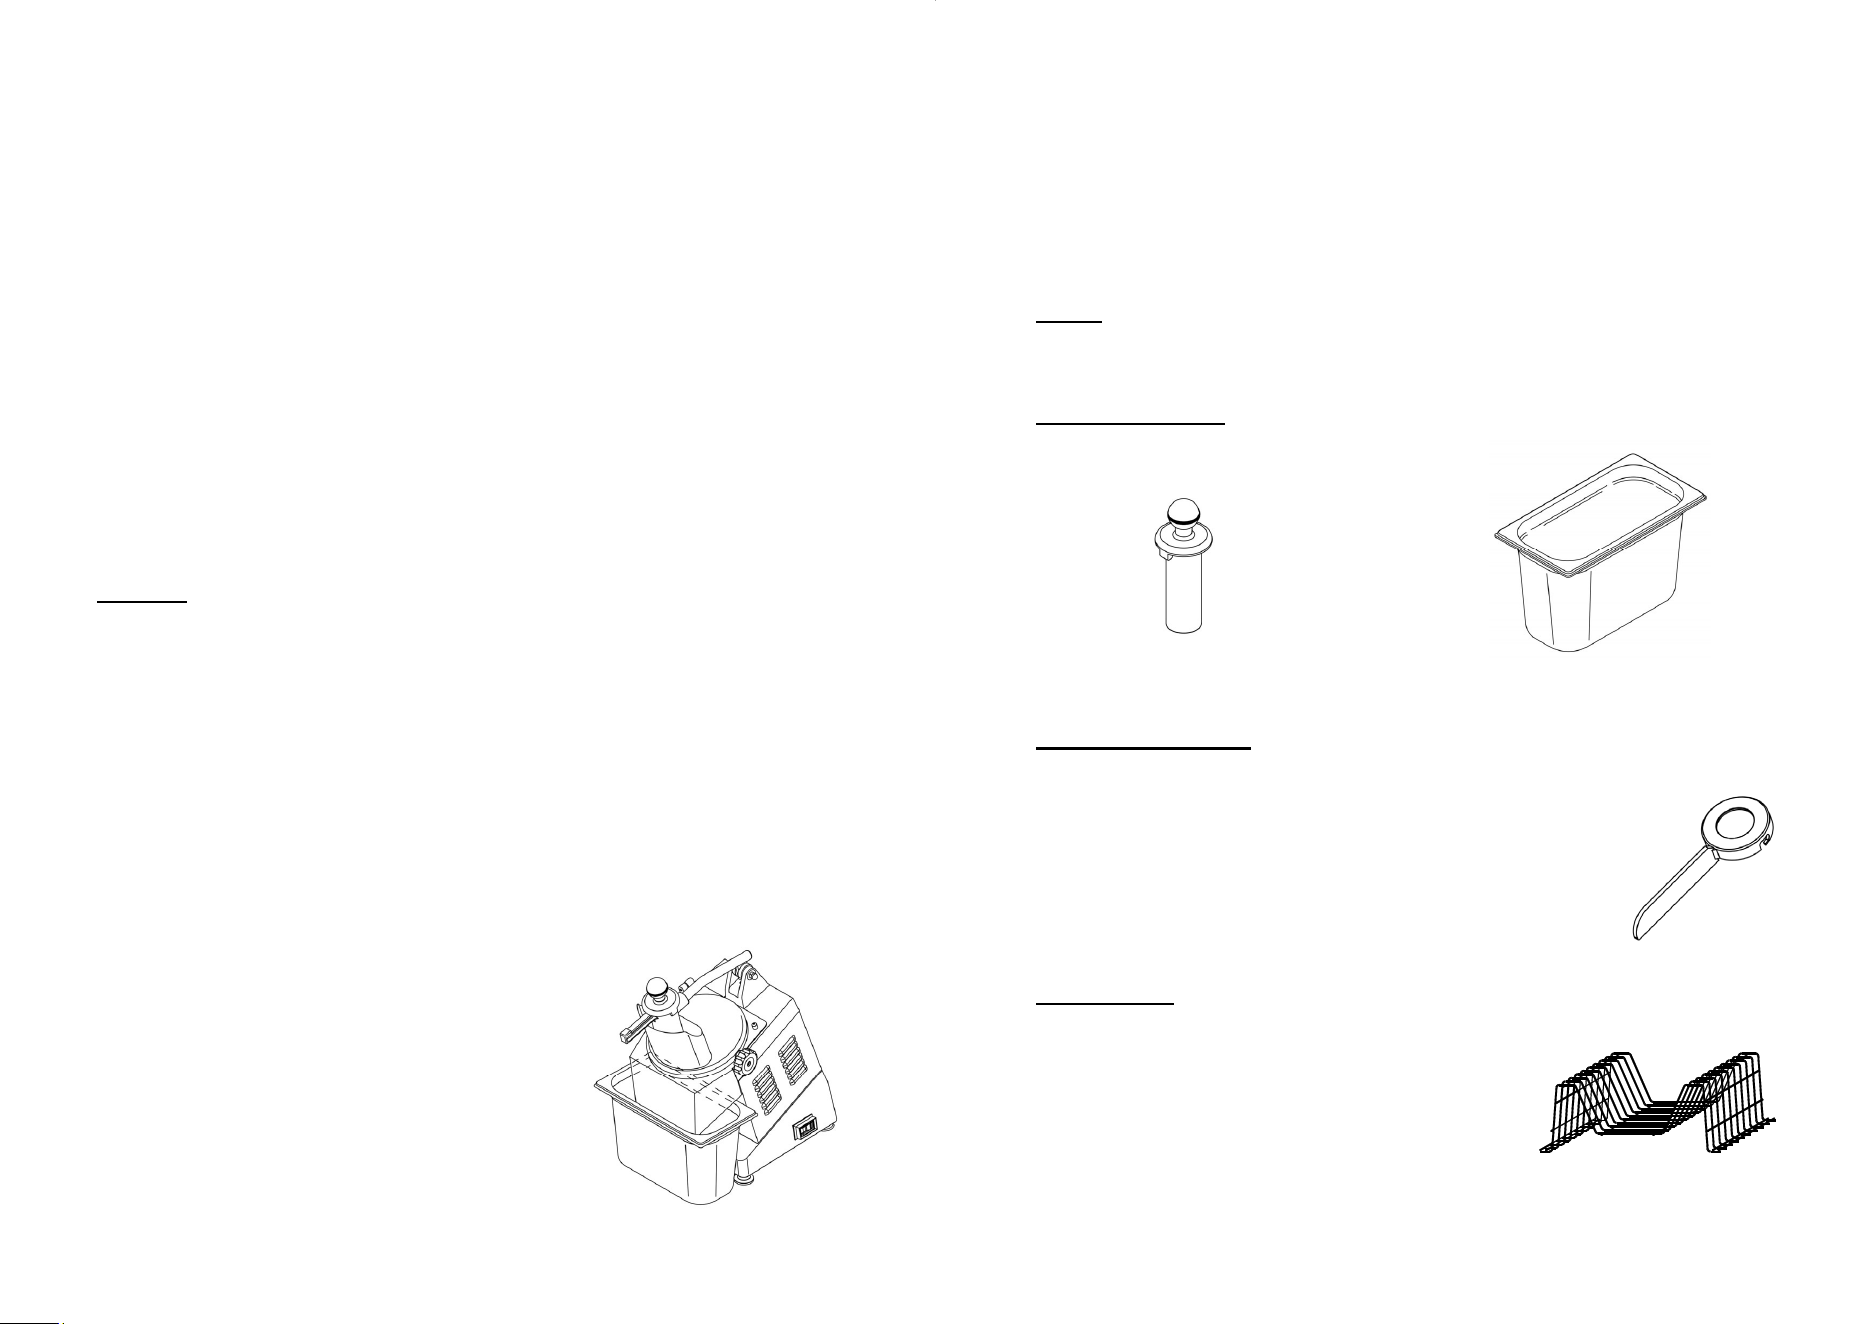
Pestle: made of polyethylene for alimentary use, to facilitate the cutting of
small product, it must be introduced in the product cylinder placed on the
pusher
(Fig. n°4).
Collecting bowl
: made of polyethylene for alimentary use,
“GASTRONORM” of 1/3, h=200; equipped with microswitch (Fig. n°5).
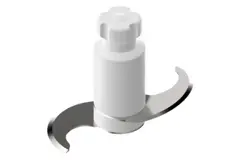
Discharging spatula: made of steel AISI 304 installed on the disc support
pin. It makes easier to discharge the product when cut. (Fig. n°6)
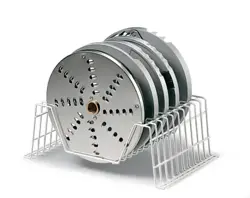
Discs holder
: made of plasticised steel for alimentary use, it is a useful
collector for discs. (Fig.n°7).
Fig. n°4 - Pressing pestle for vegetables Fig. n°5 - Bowl fitted with microswitch
Fig. n°6 - Discharging spatula
Fig. n°7 - Discs holder
10
u.m. TM steel TM aluminium
Power supply
120V / 60Hz 120V / 60Hz
Power
watt / Hp 550 / 0.75 550 / 0.75
Turns
R.P.M. 300 300
A x B x C
mm
in
225 x 195 x 255
8-
7
/
8
x 7 x 10
225 x 195 x 255
8-
7
/
8
x 7 x 10
D x E x G
mm
in
280 x 510 x 510
11 x 20-
1
/
8
x 20-
1
/
8
280 x 510 x 510
11 x 20-
1
/
8
x 20-
1
/
8
F x E x H
mm
in
400 x 510 x 770
15-
3
/
4
x 20-
1
/
8
x 30 ⁵/₁₆
400 x 510 x 770
15-
3
/
4
x 20-
1
/
8
x 30 ⁵/₁₆
Net weight
Kg / lbs. 22 / 48,4 23 / 50,6
Package Dim.
mm
In.
720 x 350 x 500
28-
3
/
8
x 13-
3
/
4
x 19-
3
/
4
720 x 350 x 500
28-
3
/
8
x 13-
3
/
4
x 19-
3
/
4
Gross weight
Kg / lbs. 24 / 52,8 26 / 57,2
Noise level
dB
70 70
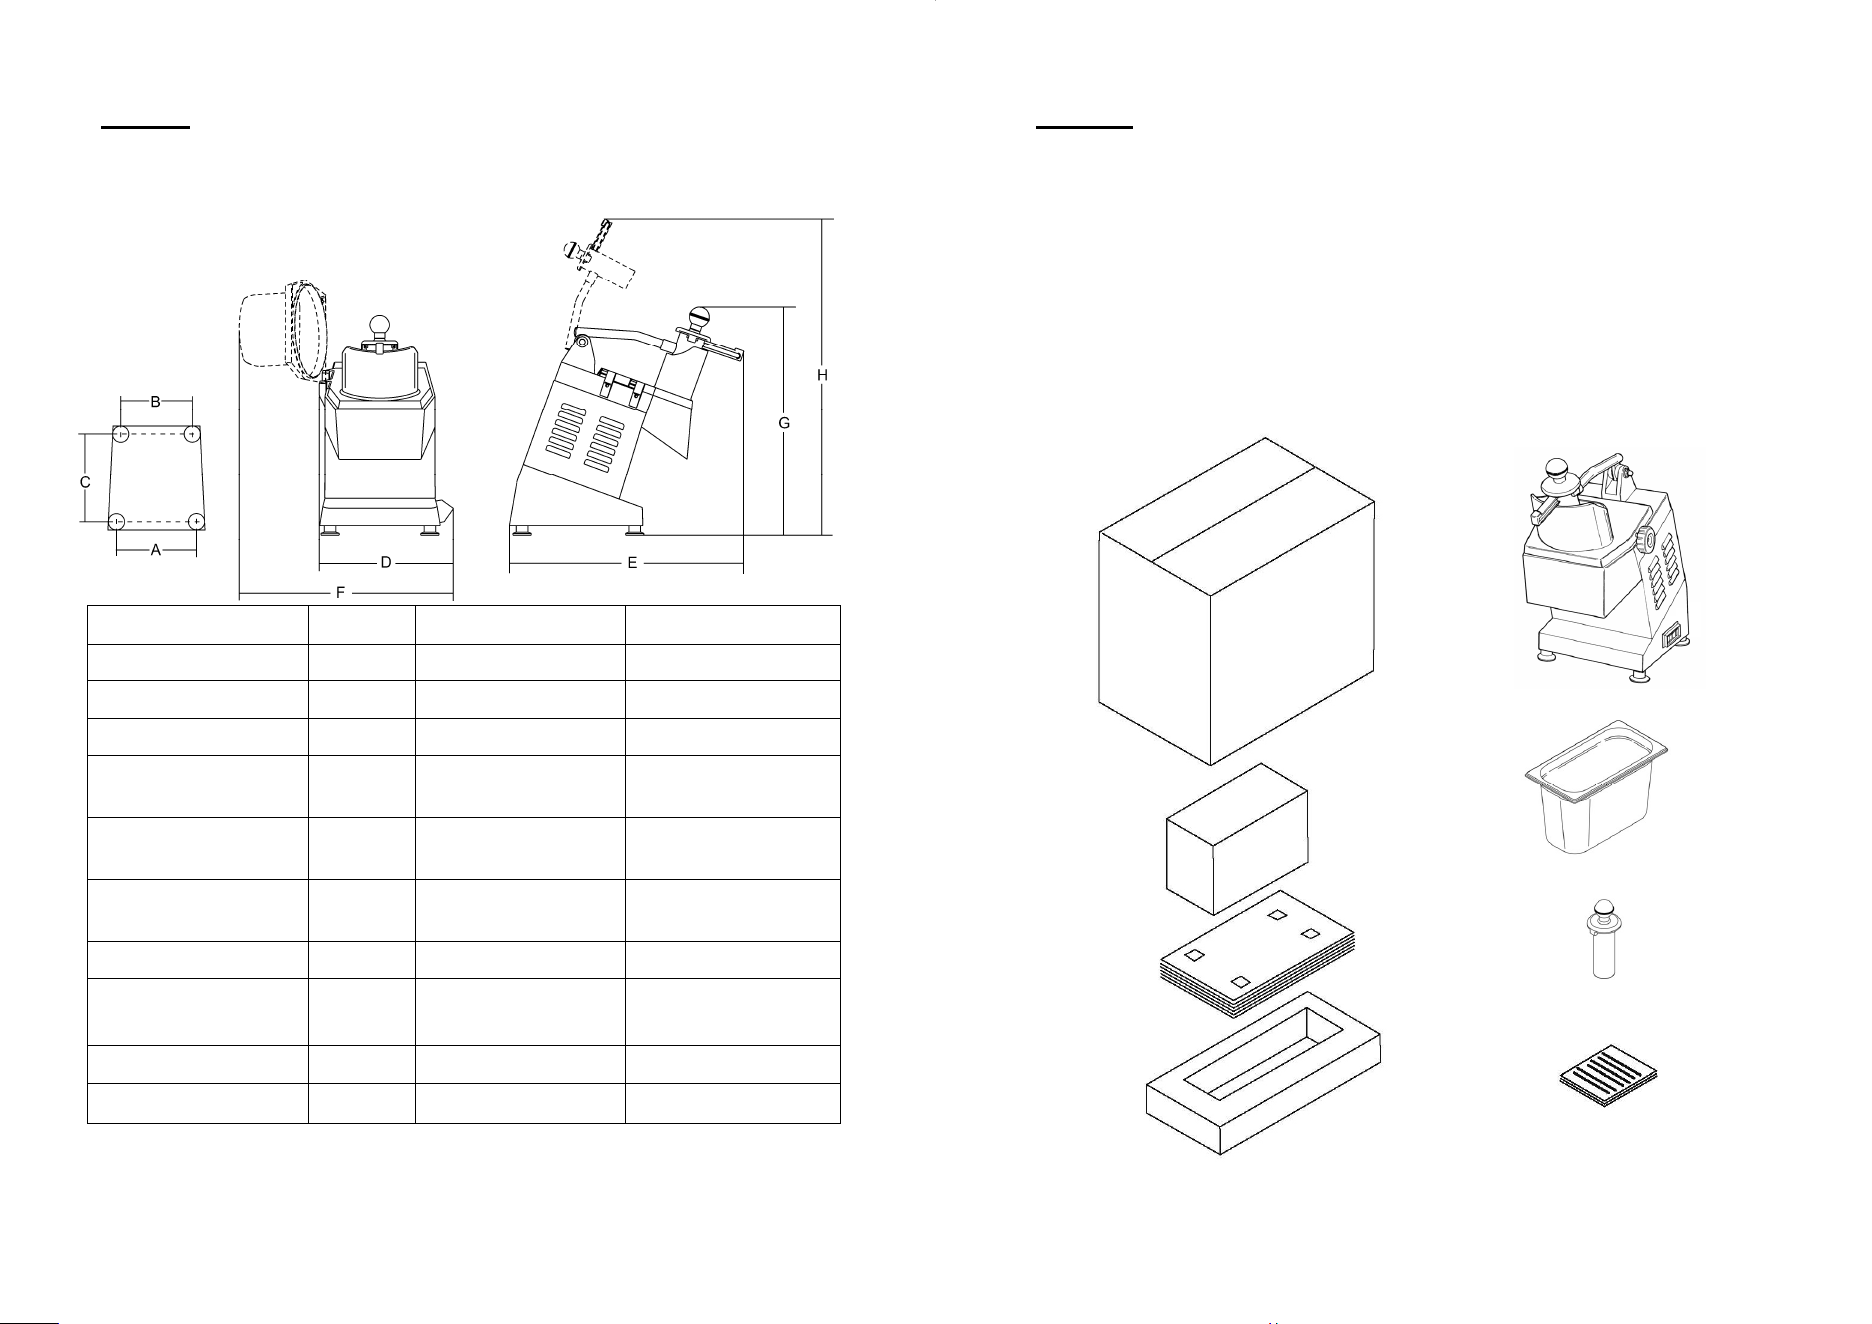
CHAP.2 - TECHNICAL SPECIFICATIONS
2.1. - OVERALL DIMENSIONS, WEIGHT, FEATURES ...
Fig. n°8 - Overall and maximum dimensions
Machine electrical specifications are indicated on the rating plate affixed to the side
of the grater; before connecting to power supply, please read § 4.2 Wiring.
11
CHAP. 3 - RECEIVING THE MACHINE
3.1 - DESPATCH OF THE MACHINE (see Fig. n°9)
The vegetable cutter TM is accurately packed and then despatched from
our warehouses. The package includes:
a) a solid cardboard box;
b) the machine;
c) some elements to keep the machine stable;
d) the bowl;
e) the pestle;
f ) the manual.
Fig. n°9 - Package description
a)
c)
b)
d)
e)
f)