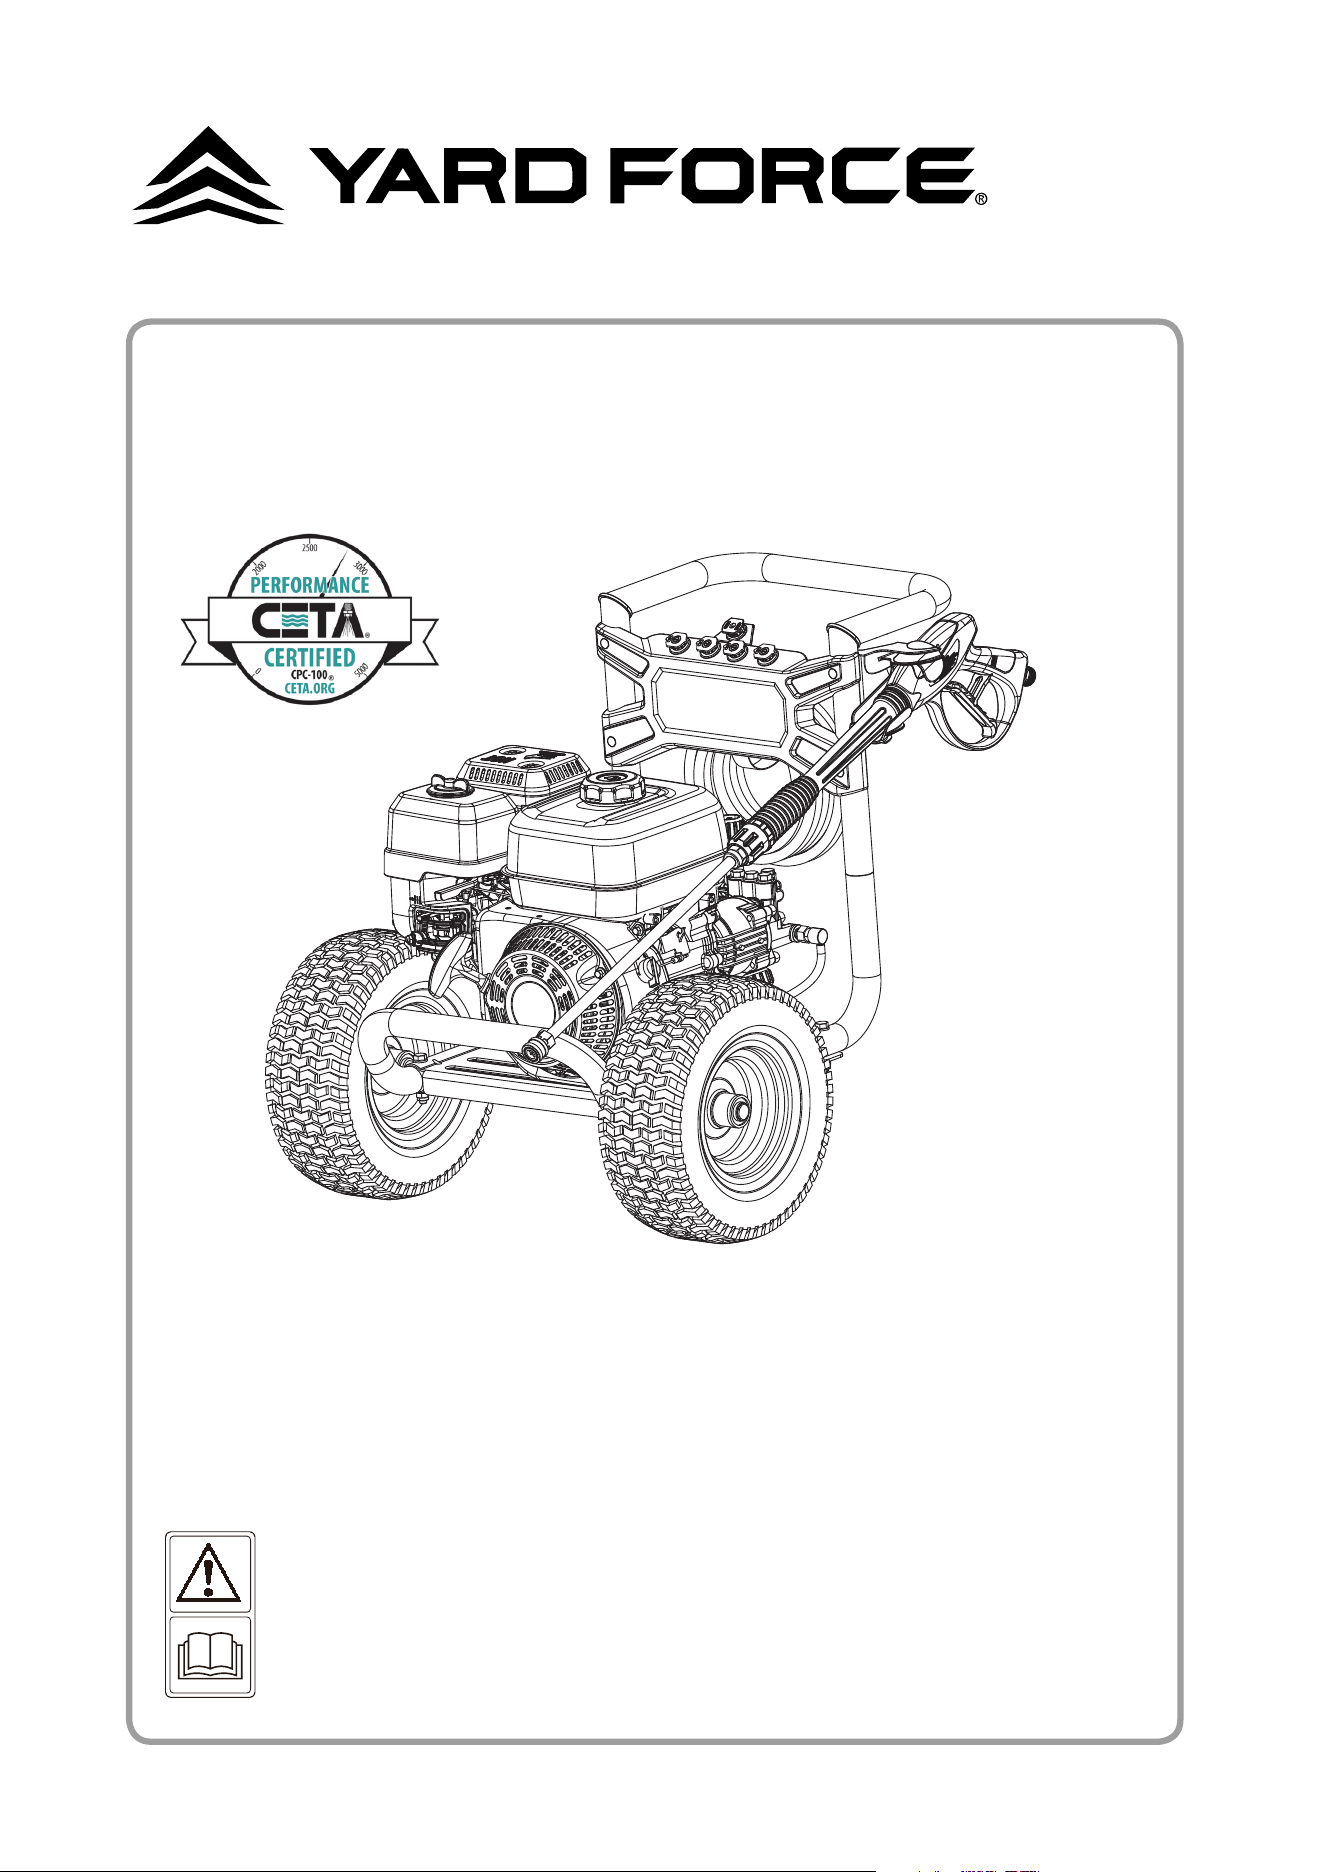
YF3600-H
GAS PRESSURE WASHER
Owner’s Manual
Our Customer Service staff is ready to provide assistance.
ln the case of a damaged or missing part, most replacement parts ship from
our facility.
For immediate help with assembly, or for additional product information, visit
www.YardForceUSA.com or email [email protected]
SAVE THIS MANUAL FOR REFERENCE
You will need this manual for safety instructions, operating
procedures, and Warranty.
The original sales receipt is required for warranty service.
2
Safety Instructions ...................................................................................................................3
Part List ........................................................................................................................11
Product Specifications .............................................................................................................12
Assembly ......................................................................................................................13
Operation .....................................................................................................................19
Maintenance ..........................................................................................................................29
Storage ...........................................................................................................................................37
Troubleshooting ..........................................................................................................39
Warranty …………….......….........….........….........….........…....…....…....…....….................….......40
TABLE OF CONTENTS
YF3600-H Original Instructions
3
SAFETY INSTRUCTIONS
Read this manual carefully and become familiar with your pressure washer. Know its
applications, its limitations, and any hazards involved.
Important Safety Information
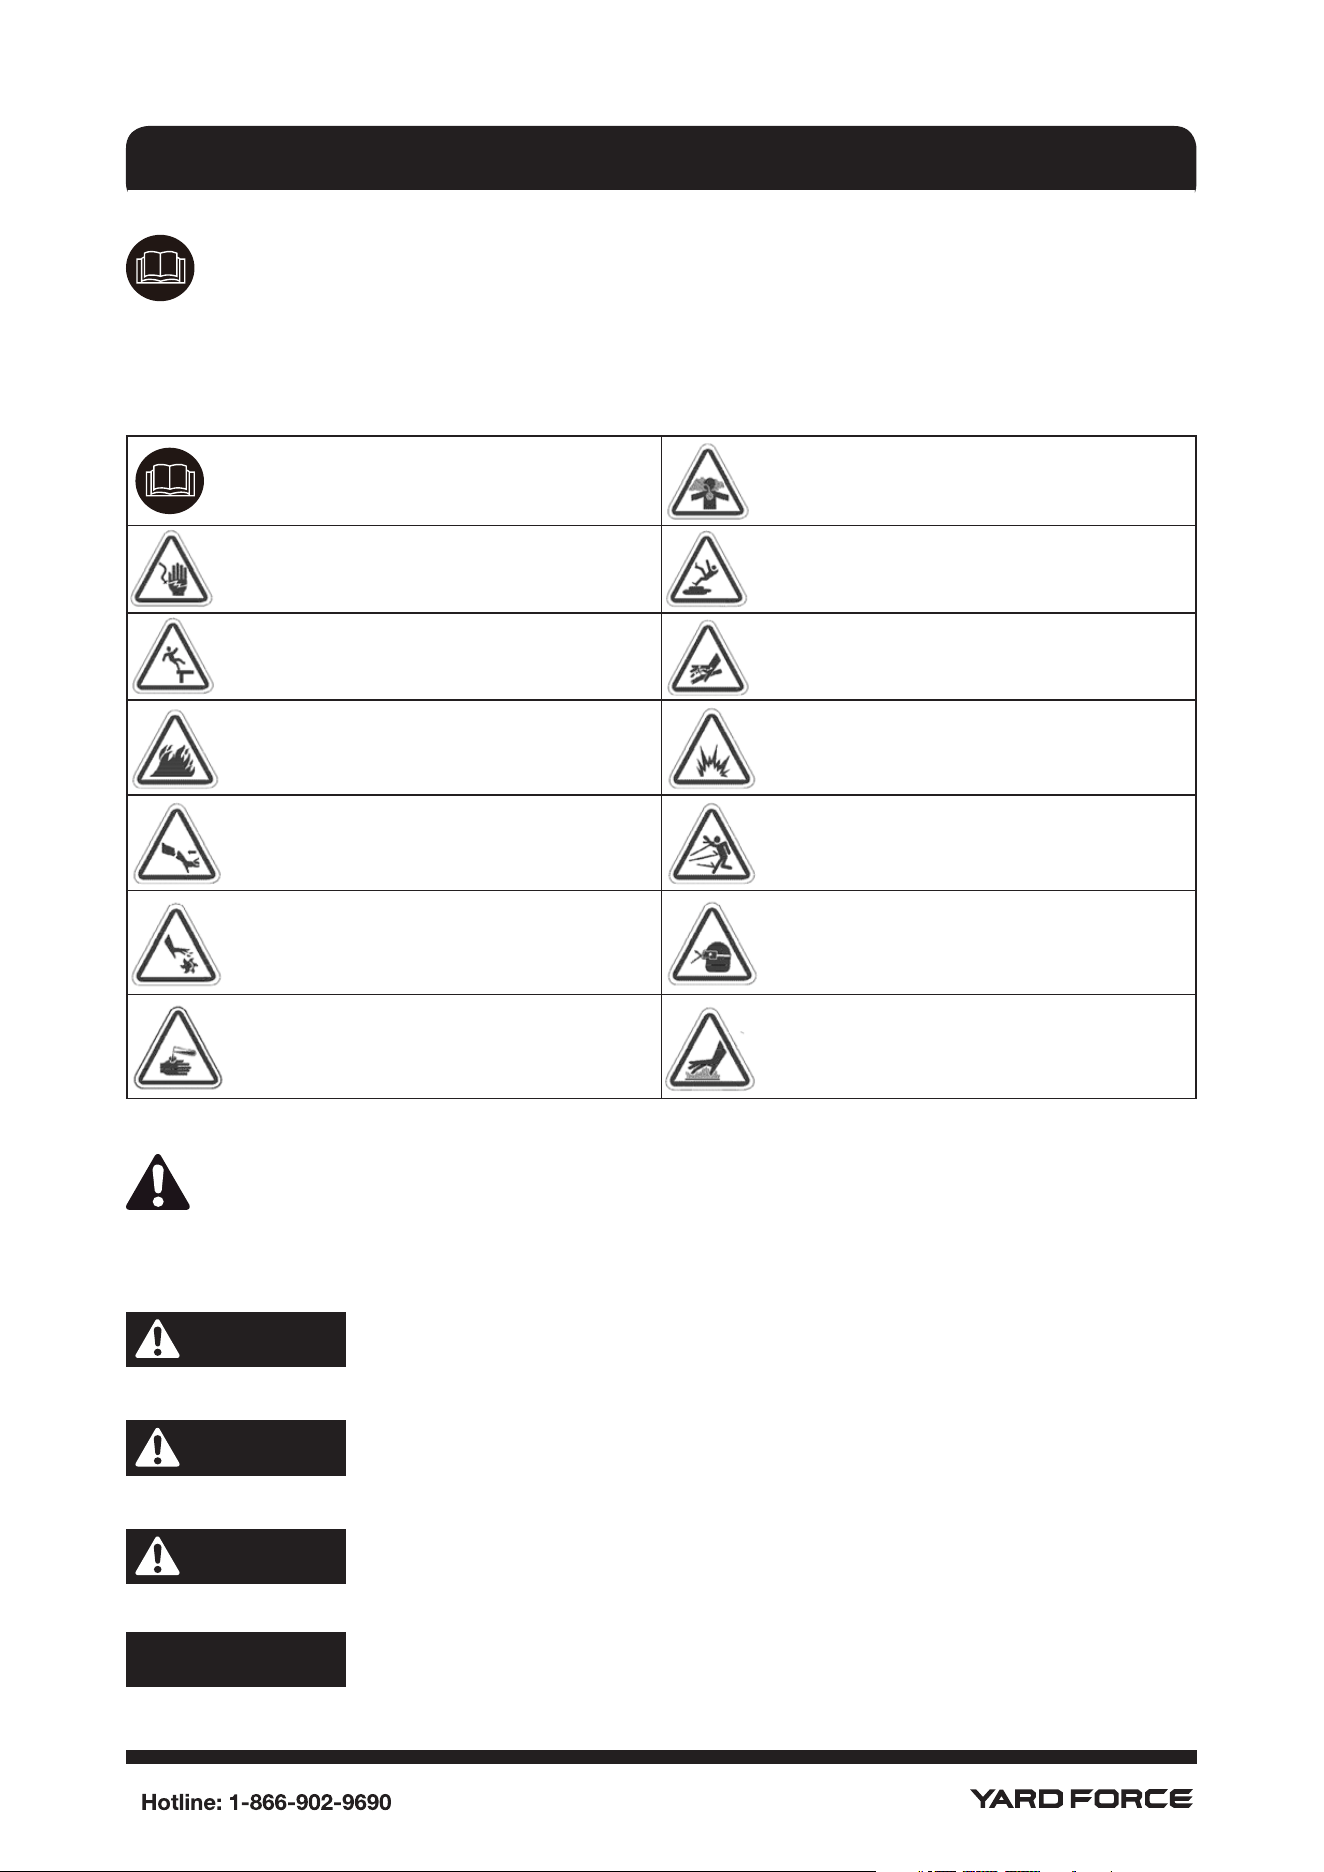
Safety Symbols and Meanings
Operator's Manual Toxic Fumes
Electrical Shock Slippery Surface
Fall Fluid Injection
Fire Explosion
Kickback Projectile
Moving Parts Flying Objects
Chemical Burn Hot Surface
The safety alert symbol indicates a potential personal injury hazard. A signal word (DANGER,
WARNING, or CAUTION) is used with the alert symbol to designate a degree or level of
hazard seriousness. A safety symbol may be used to represent the type of hazard. The
signal word NOTICE is used to address practices not related to personal injury.
DANGER
indicates a hazard which, if not avoided, will result in death or serious
injury.
WARNING
indicates a hazard which, if not avoided, could result in death or serious
injury.
CAUTION
indicates a hazard which, if not avoided, could result in minor or
moderate injury.
NOTICE
address practices not related to personal injury.
4
SAFETY INSTRUCTIONS
WARNING
The engine exhaust from this product contains chemicals known to the
State of California to cause cancer, birth defects, or other reproductive
harm.
WARNING
This product contains lead and lead compounds, known to the State of
California to cause birth defects or other reproductive harm. Wash your
hands after handling this product.
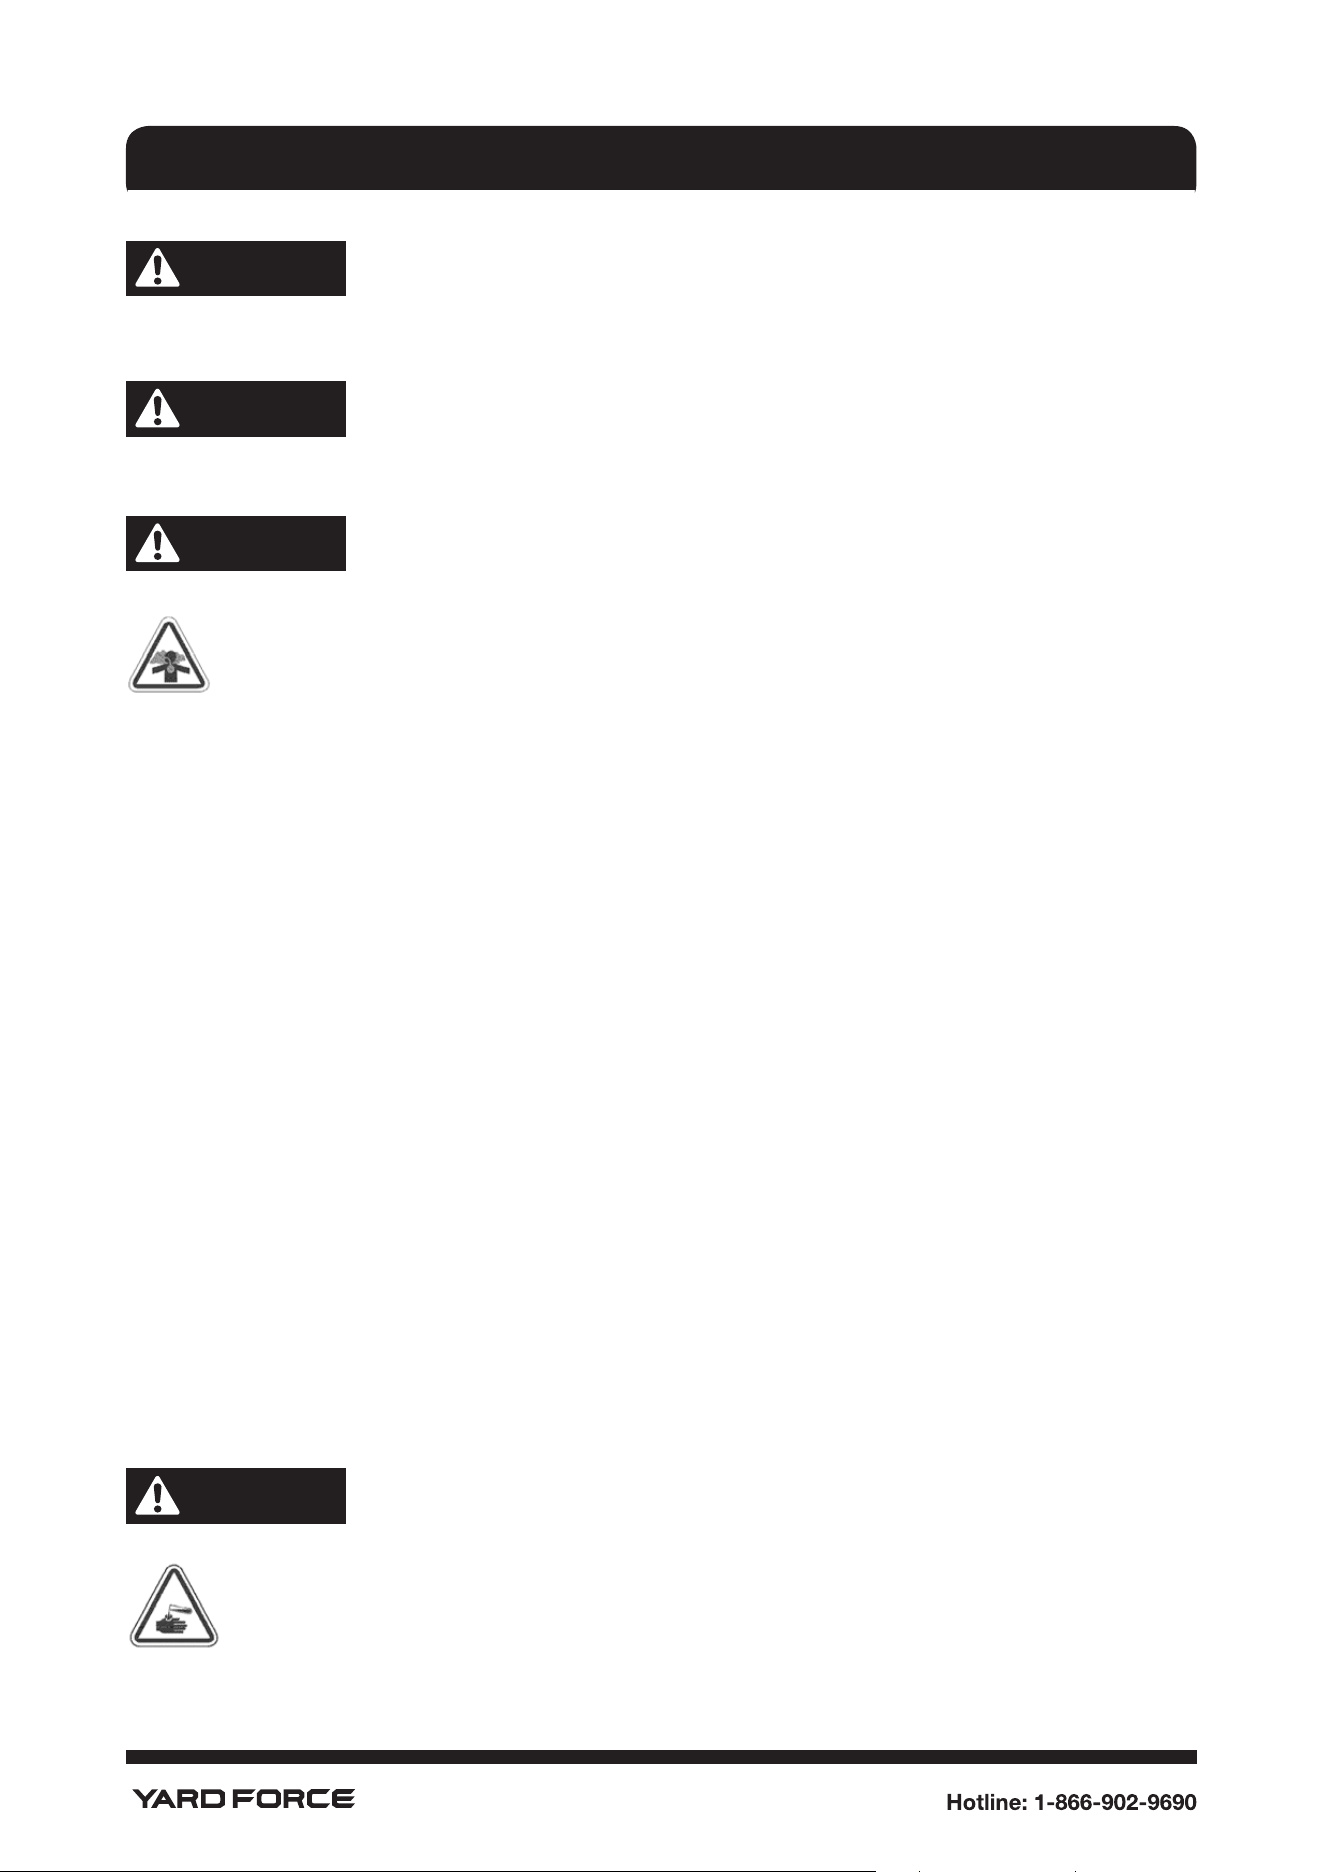
WARNING
POISONOUS GAS HAZARD.
Engine exhaust contains carbon monoxide, a poisonous gas that could kill you in
minutes. You CANNOT smell it, see it, or taste it. Even if you do not smell exhaust
fumes, you could still be exposed to carbon monoxide gas. Some chemicals or
detergents could be harmful if inhaled or ingested, resulting in death, serious injury, nausea,
fainting or poisoning.
• Operate this product ONLY outside far away from windows, doors and vents to reduce
the risk of carbon monoxide gas from accumulating and potentially being drawn
towards occupied spaces.
• lnstall battery-operated carbon monoxide alarms or plug-in carbon monoxide alarms
with battery back-up according to the manufacturer's instructions. Smoke alarms
cannot detect carbon monoxide gas.
• DO NOT run this product inside homes, garages, basements, crawlspaces, sheds, or
other partially-enclosed spaces even if using fans or opening doors and windows for
ventilation. Carbon monoxide can quickly build up in these spaces and can linger for
hours, even after this product has shut off.
• ALWAYS place this product downwind and point the engine exhaust away from
occupied spaces.
If you start to feel sick, dizzy, or weak while using this a doctor. You may have carbon
monoxide poisoning. that vapors may be inhaled when using chemicals.
• Use a respirator or mask whenever there is a chance that vapors may be inhaled when
using chemicals.
• Read all instructions with mask so you are certain the mask will provide the necessary
protection against inhaling harmful vapors when using chemicals.
WARNING
CHEMICAL BURN HAZARD.
Chemicals could cause burns resulting in death or serious injury.
• DO NOT use caustic liquid with pressure washer.
5
SAFETY INSTRUCTIONS
• Use ONLY pressure washer safe detergents/soaps.
Follow all manufacturers instructions.
WARNING
• Read all the instructions before using the product.
• To reduce the risk of injury, close supervision is necessary when a product is used near
children.
• Know how to stop the product and bleed pressures quickly. Be thoroughly familiar with
the controls.
• Stay alert-watch what you are doing.
• Do not operate the product when fatigued or under the influence of alcohol or drugs.
• Keep operating area clear of all persons.
• Do not overreach or stand on unstable support. Keep good footing and balance at all
times.
• Follow the maintenance instructions specified in the manual.
WARNING
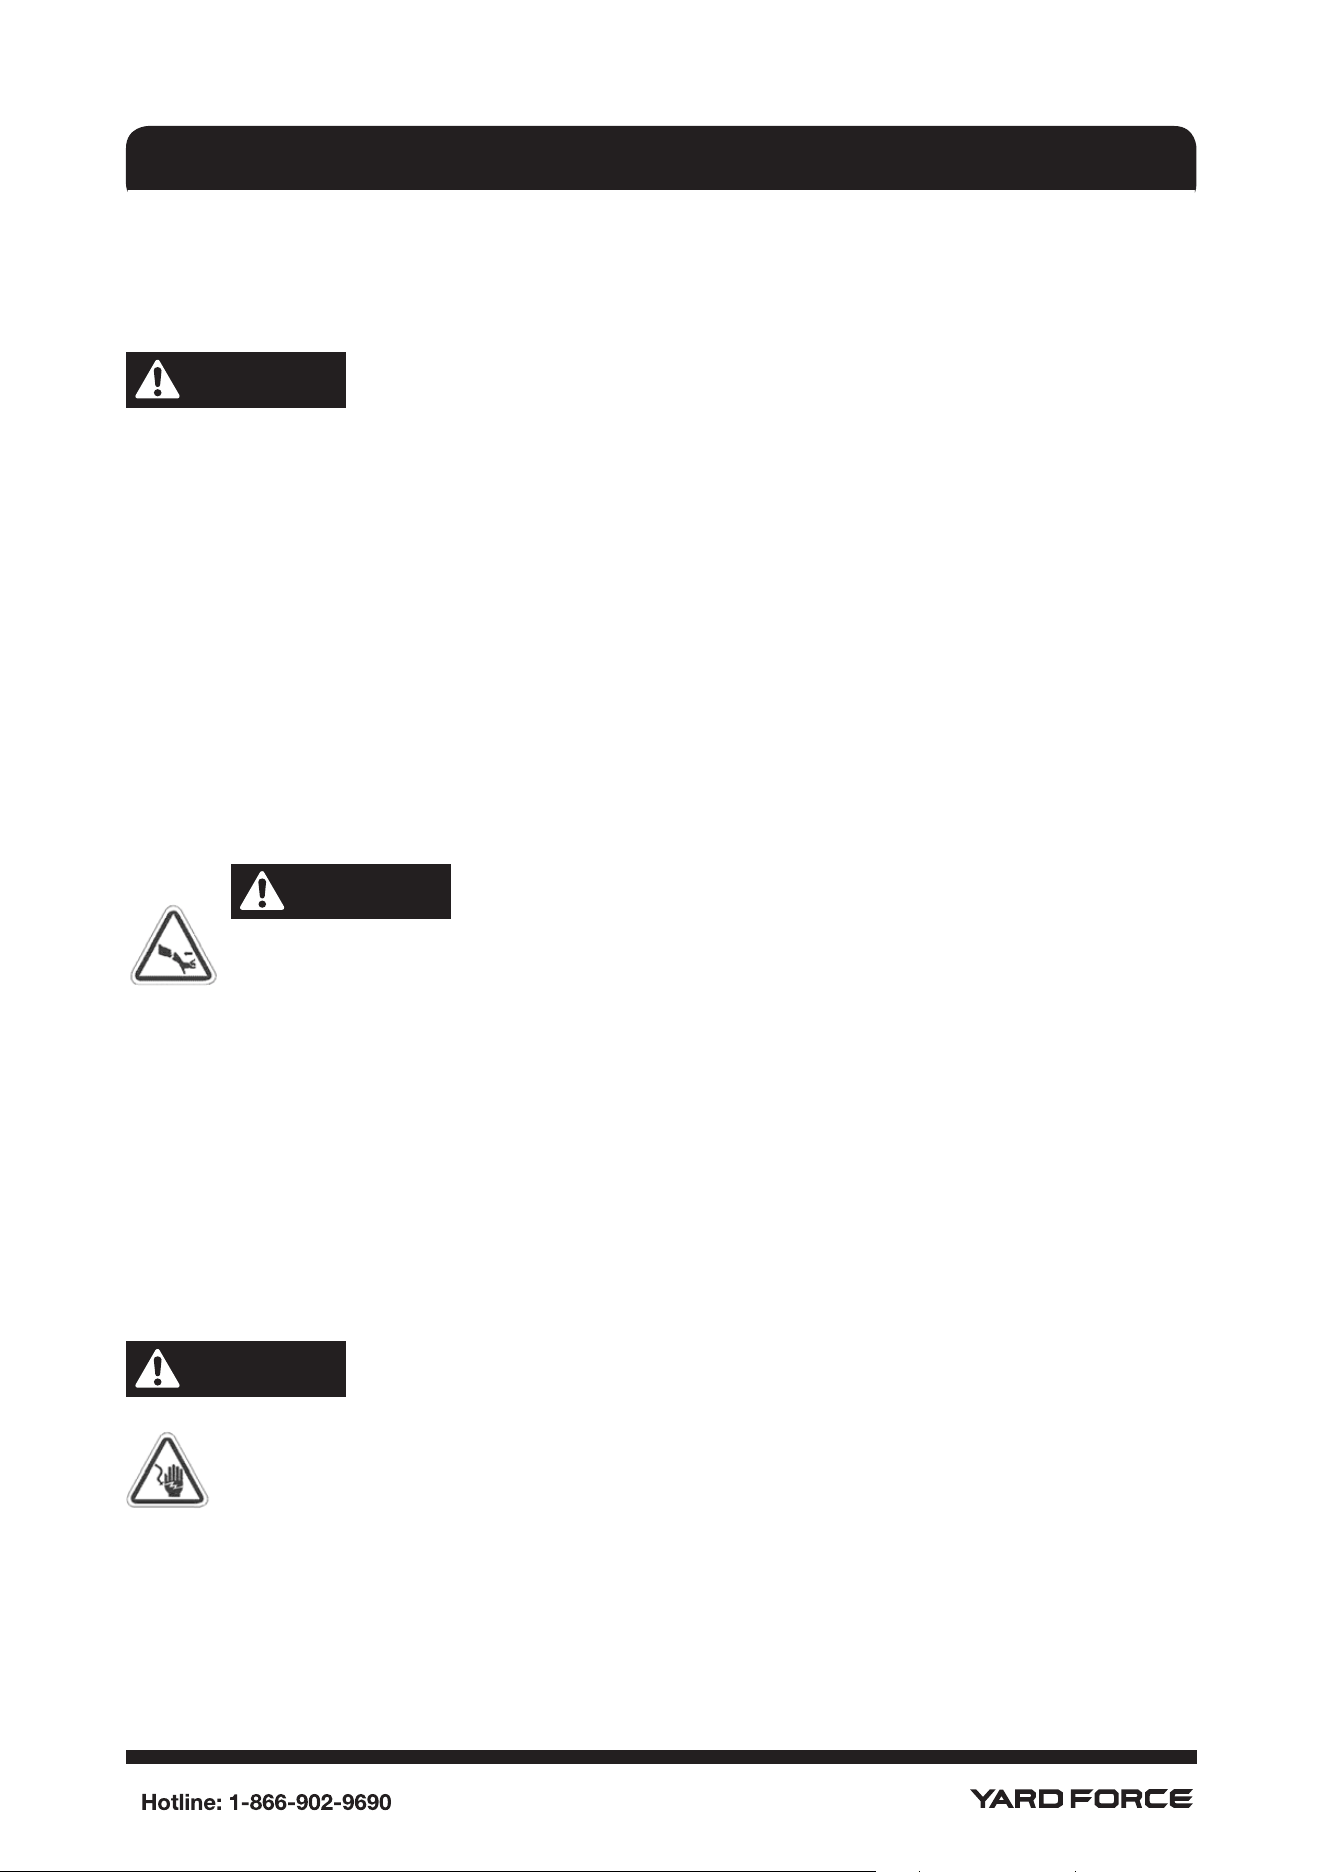
Starter cord kickback (rapid retraction) will pull hand and arm toward engine
faster thanyou can let go which could cause broken bones,fractures, bruises, or
sprains resulting in seriousinjury.
• NEVER pull starter cord without first relieving spray gun pressure.
• When starting engine, pull cord slowly until resistance is felt and then pull rapidly to
avoid kickback.
• After each starting attempt, where engine fails to run, always point spray gun in safe
direction, squeeze spray gun trigger to release high pressure.
• Firmly grasp spray gun with both hands when using high pressure spray to avoid injury
when spray gun kicks back.
WARNING
RISK OF ELECTROCUTION
Contact with power source could cause electric shock or burn resulting in death or
serious injury.
• NEVER spray near power source.
6
SAFETY INSTRUCTIONS
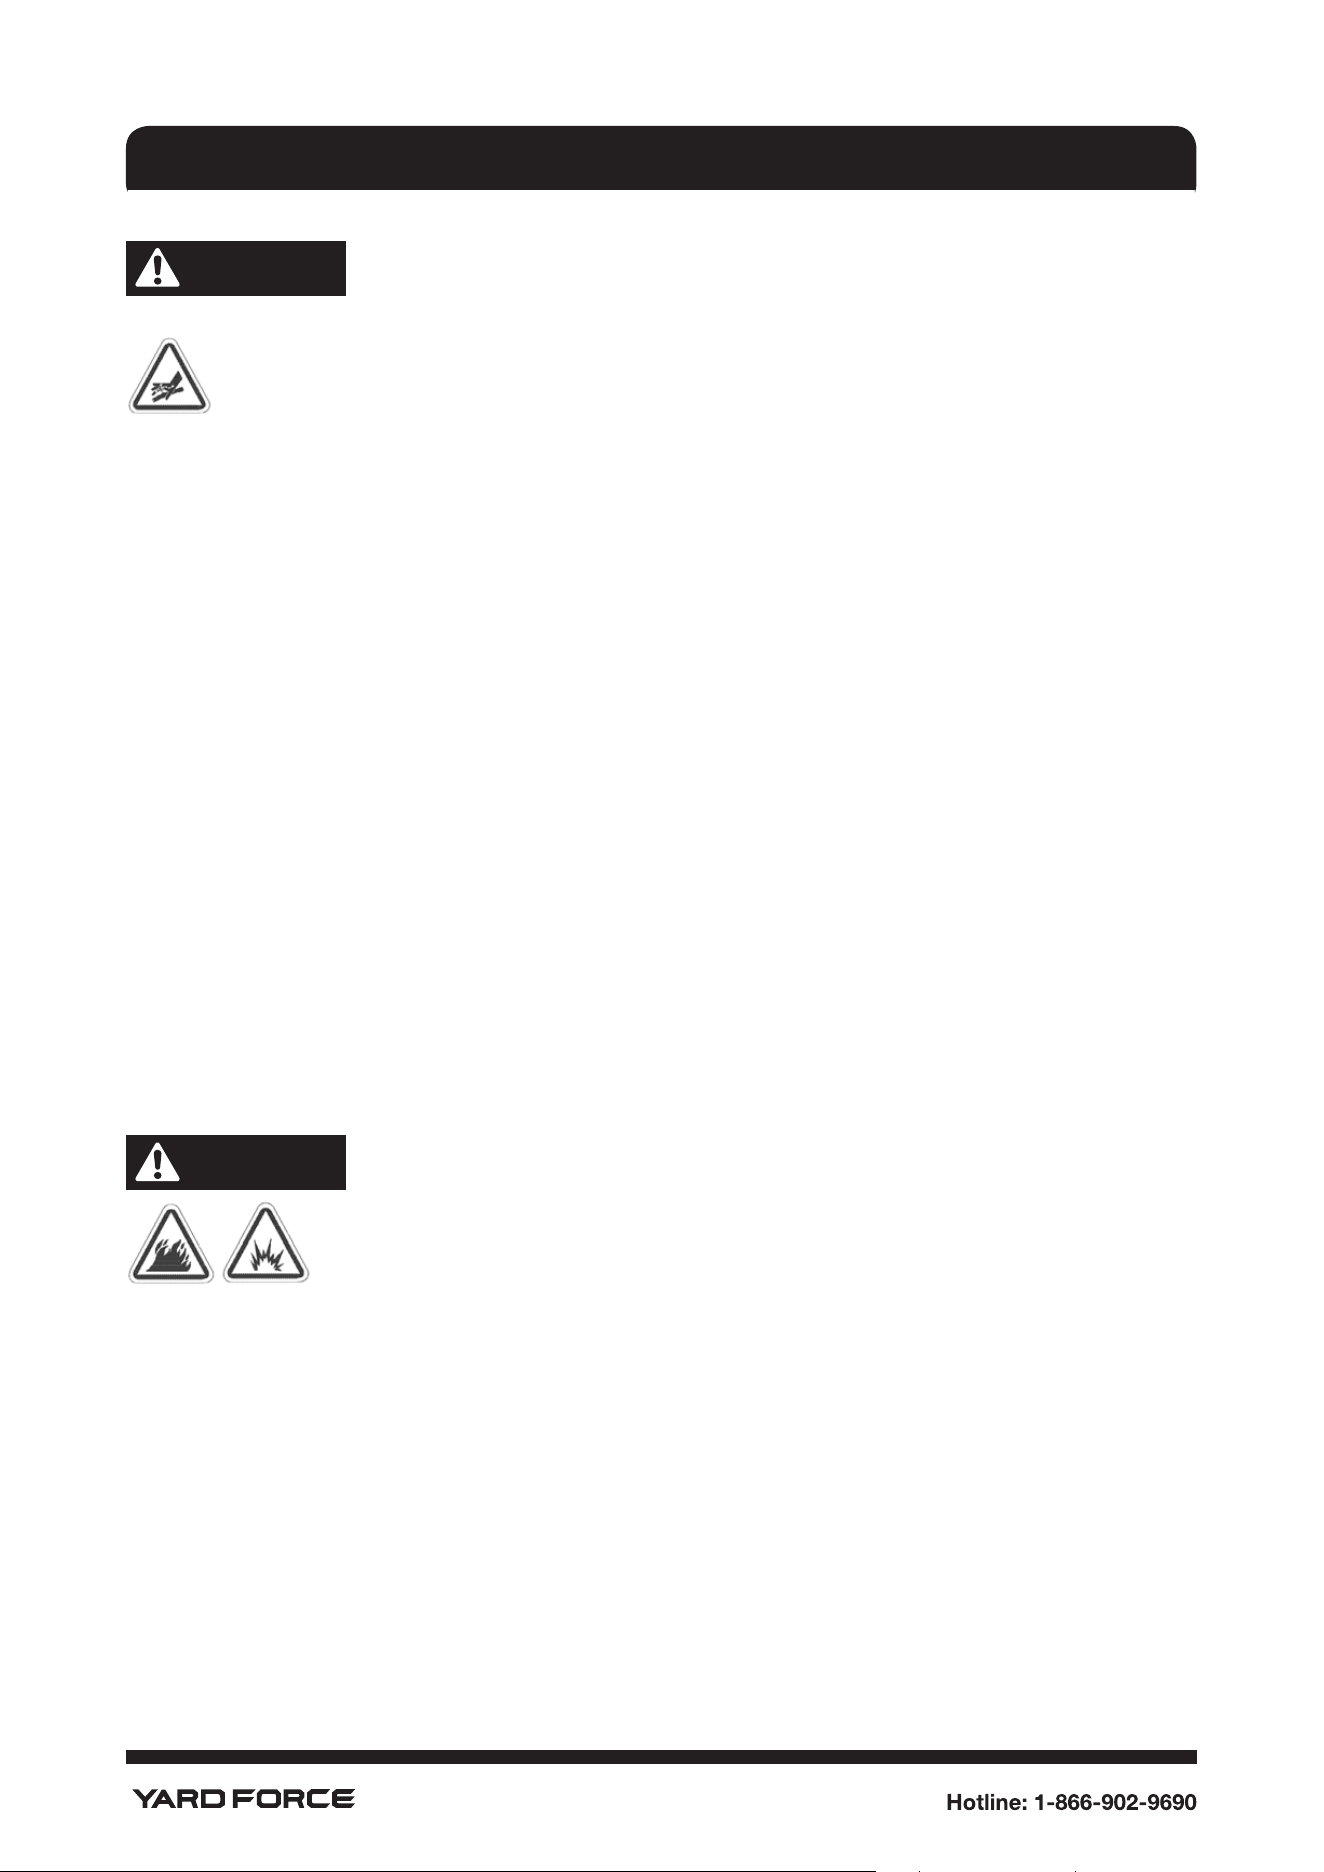
WARNING
The high pressure stream of water that this equipment produces could cut
through skin and its underlying tissues, resulting in serious injury and possible
amputation.
Spray gun traps high water pressure, even when engine is stopped and water is
disconnected, which could result in serious injury.
• lf cut by fluid, call physician immediately. DO NOT treatas a simple cut.
• DO NOT allow CHILDREN to operate pressure washer.
• NEVER repair high pressure hose. Replace it.
• NEVER repair leaking connections with sealant of any kind. Replace o-ring or seal.
• NEVER connect high pressure hose to nozzle extension.
• Keep high pressure hose connected to pump and spray gun while system is
pressurized.
• ALWAYS point spray gun in safe direction, press red button and squeeze spray gun
trigger to release high pressure, every time you stop engine.
• NEVER aim spray gun at people, animals, or plants.
• DO NOT secure spray gun in open position.
• DO NOT leave spray gun unattended while machine is running.
• NEVER use a spray gun which does not have a trigger lock or trigger guard in place
and in working order.
• Always be certain spray gun, nozzles and accessoriesare correctly attached.
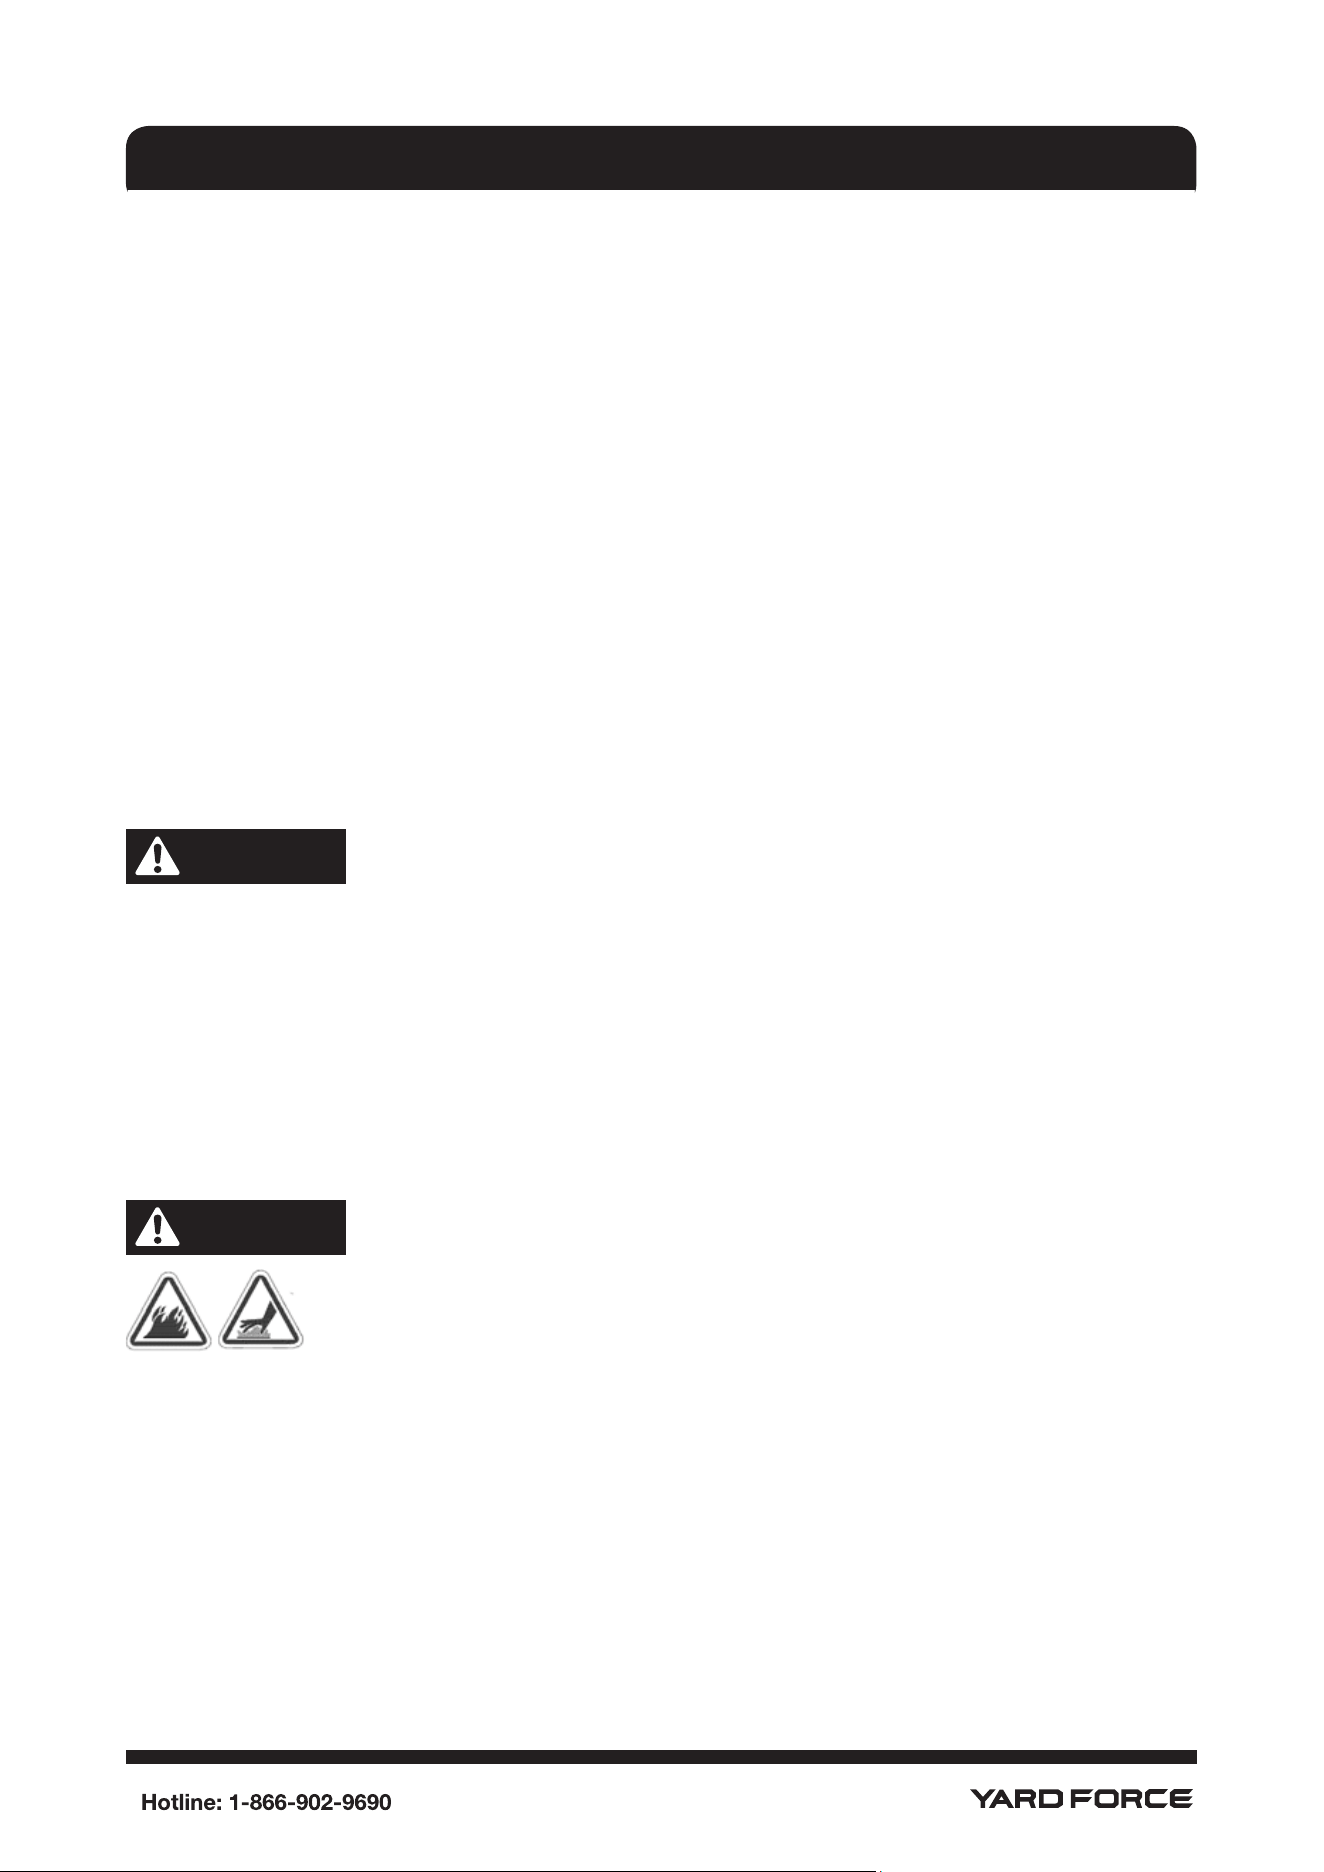
WARNING
Fuel and its vapors are extremely flammable and explosive which could
cause burns, fire or explosion resulting in death or serious injury.
WHEN ADDING OR DRAINING FUEL
• Turn pressure washer engine OFF and let it cool at least 2 minutes before removing
fuel cap. Loosen cap slowly to relieve pressure in tank.
• Fill or drain fuel tank outdoors.
• DO NOT overfill tank. Allow space for fuel expansion.
• lf fuel spills, wipe out redundant fuel before starting engine.
• Keep fuel away from sparks, open flames, pilot lights, heat, and other ignition sources.
• Check fuel lines, tank, cap and fittings frequently for cracks or leaks. Replace if
necessary.
• DO NOT light a cigarette or smoke.
7
SAFETY INSTRUCTIONS
WHEN STARTING EQUIPMENT
• Ensure spark plug, muffler, fuel cap, and air cleaner arein place.
• DO NOT crank engine with spark plug removed.
WHEN OPERATING EQUIPMENT
• DO NOT operate this product inside any building, carport, porch, mobile equipment,
marine applications,or enclosure.
• DO NOT tip engine or equipment at angle which causes fuel to spill.
• DO NOT spray flammable liquids.
WHEN TRANSPORTING, MOVING OR REPAIRING EQUIPMENT
• Transport/movelrepair with fuel tank EMPTY or with fuelshutoff valve OFF(O).
• DO NOT tip engine or equipment at angle which causesfuel to spill.
• Disconnect spark plug wire.
WHEN STORING FUEL OR EUIPMENT WITH FUEL INTANK
• Store away from furnaces, stoves, water heaters, clothes dryers, or other appliances
that have pilot light or other ignition source because they could ignite fuel vapors.
WARNING
• lf you do not follow these instructions exactly, a fire or explosion may result causing
property damage, personal injury or loss of life.
• In the event of pilot outage, wait at least five minutes to clear out any gas before
relighting.
• Use only your hand to push in or turn the gas control knob. Never use a tool. lf the
knob will not push in or turn by hand, don't try to repair it; call a qualified service
technician.
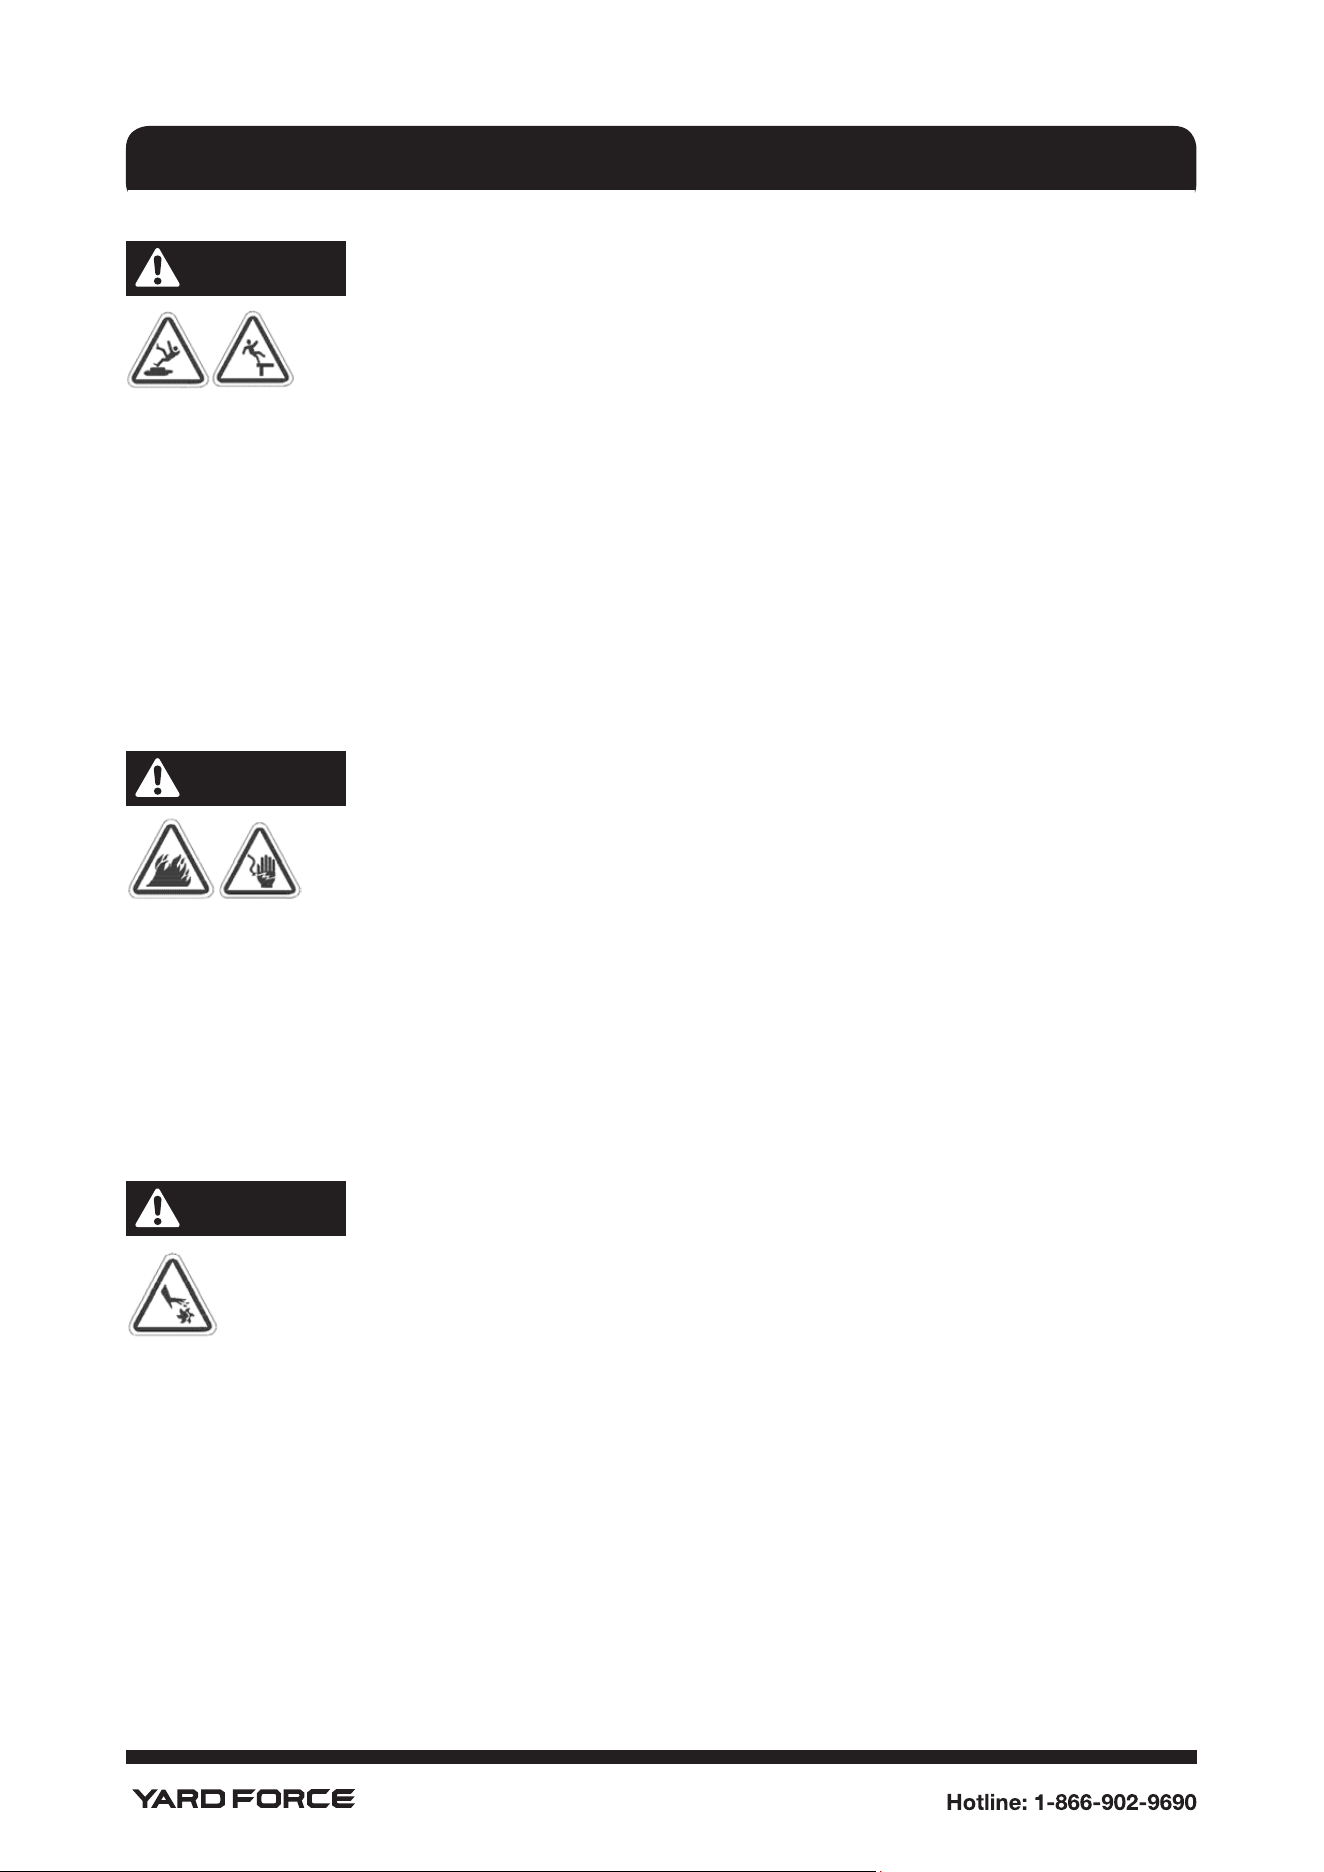
WARNING
Exhaust heat/gases could ignite combustibles, structures or damage fuel
tank causing a fire, resulting in death or serious injury.
Contact with muffler area could cause burns resulting in serious injury.
• DO NOT touch hot parts and AVOID hot exhaust gases.
• Allow equipment to cool before touching,
• Keep at least 5 ft. (1.5 m) of clearance on all sides of pressure washer including
overhead.
• Replacement parts must be the same and installed in the same position as the original
parts.
8
SAFETY INSTRUCTIONS
WARNING
Use of pressure washer could create puddles and slippery surfaces
causing you to fall resulting in death or serious injury.
Kickback from spray gun could cause you to fall resulting in death or serious injury.
• Operate pressure washer from a stable surface.
• The cleaning area should have adequate slopes and drainage to reduce the possibility
of a fall due to slippery surfaces.
• Be extremely careful if you must use the pressure washer from a ladder, scaffolding, or
any other similar location.
• Firmly grasp spray gun with both hands when using high pressure spray to avoid injury
when spray gun kicks back.
WARNING
Unintentional sparking could cause fire or electric shock resulting in death
or serious injury.
WHEN ADJUSTING OR MAKING REPAIRS TO YOUR PRESSURE WASHER
• Disconnect the spark plug wire from the spark plug and place the wire where it cannot
contact spark plug.
WHEN TESTING FOR ENGINE SPARK
• Use approved spark plug tester.
• DO NOT check for spark with spark plug removed.
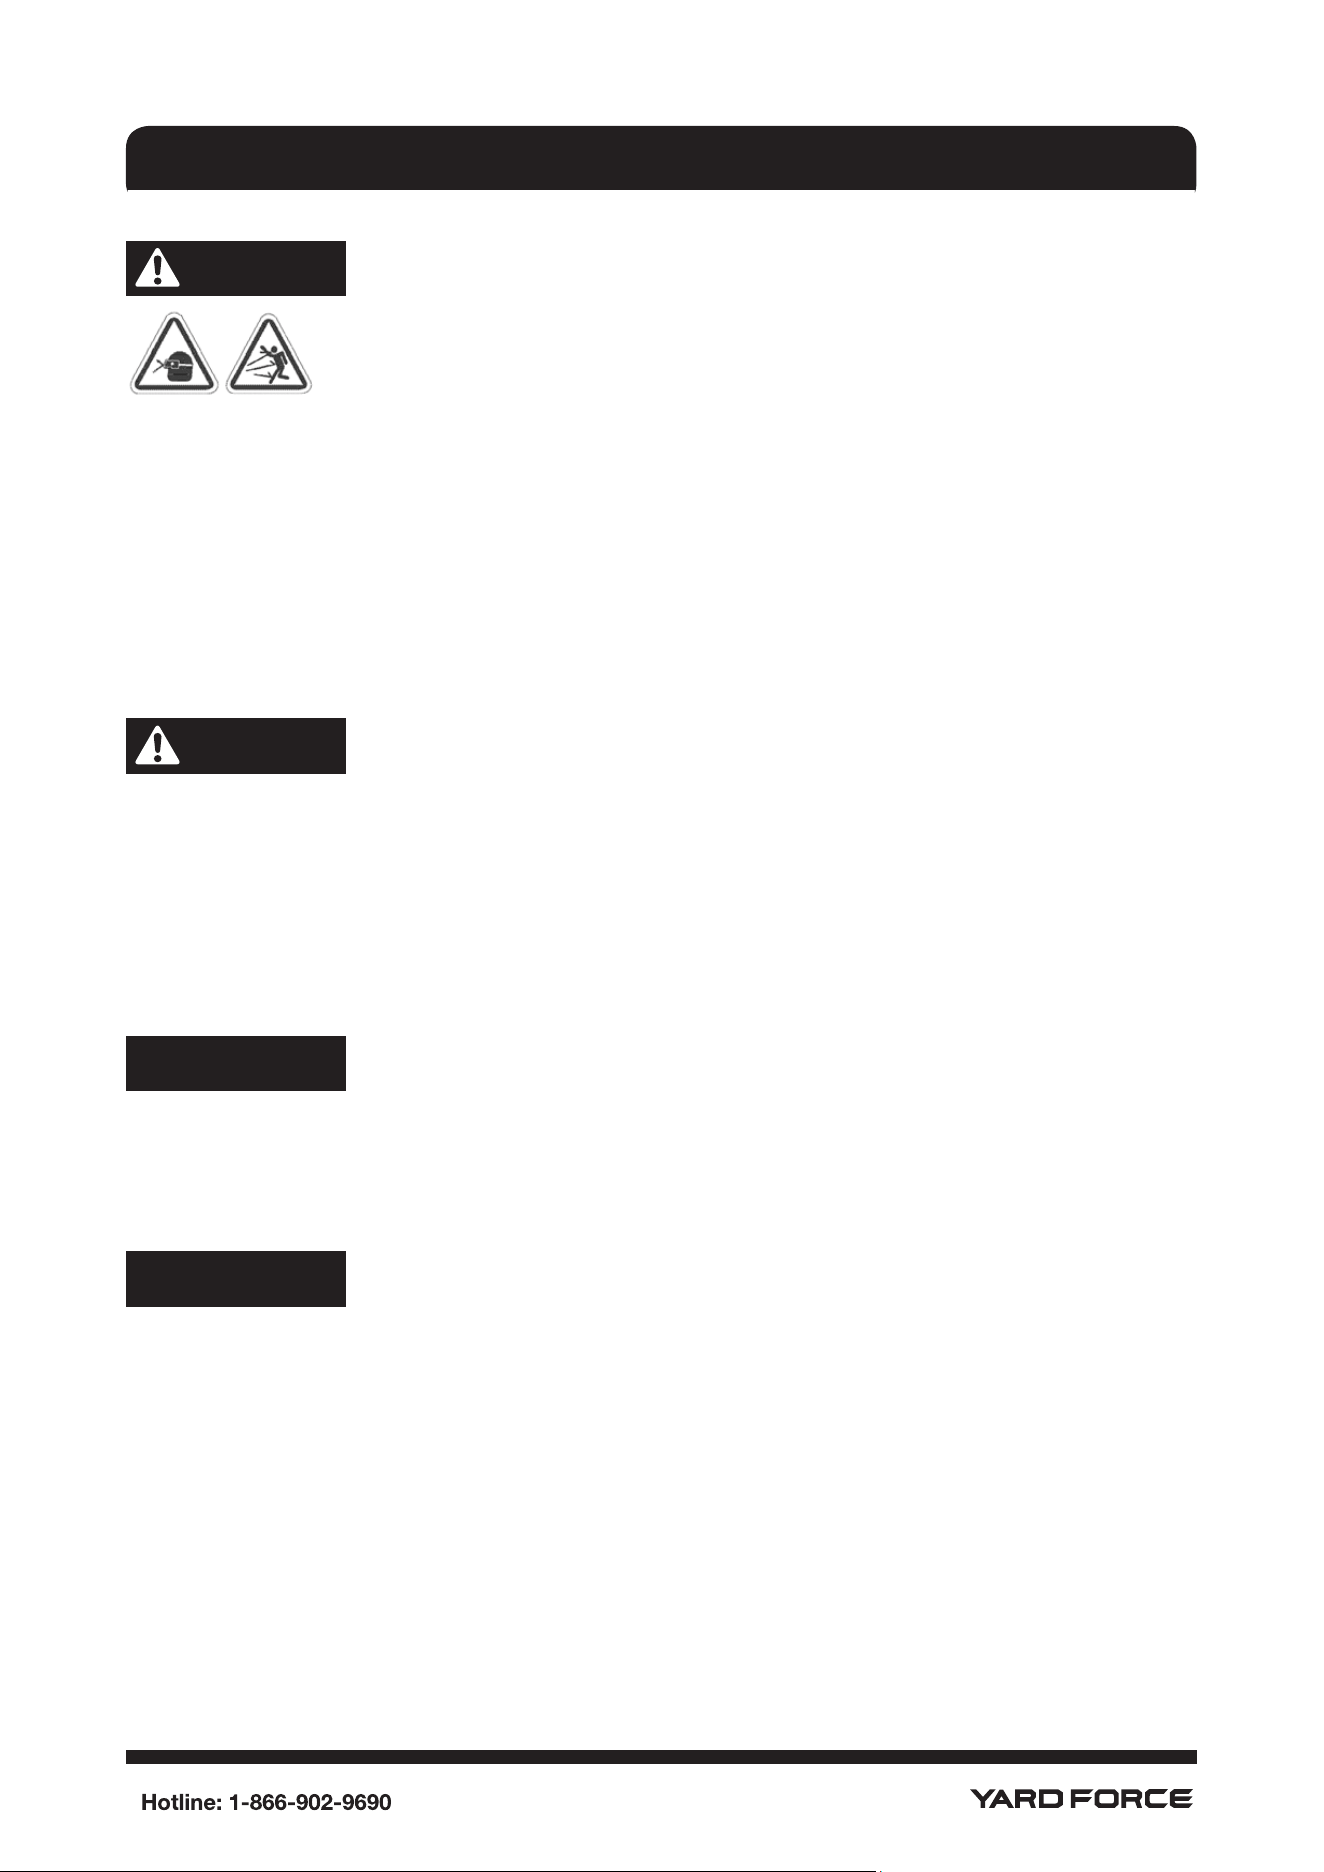
WARNING
Starter and other rotating parts could entangle hands, hair, clothing, or
accessories resulting in serious injury.
• NEVER operate pressure washer without protective housing or covers.
• DO NOT wear loose clothing, jewelry or anything that could be caught in the starter or
other rotating parts.
• Tie up long hair and remove jewelry.
9
SAFETY INSTRUCTIONS
WARNING
Risk of eye or bodily injury.
Spray could splash back or propel objects resulting in serious injury.
• Always wear indirect vented (chemical splash) safety goggles marked to comply with
ANSI Z87.1 when using or in vicinity of this equipment.
• NEVER substitute safety glasses or dry-condition goggles for indirect vented safety
goggles.
• Always wear protective clothing such as a long-sleeved shirt, long pants and close-
toed shoes.
• NEVER operate pressure washer when barefoot or wearing sandals or shorts.
CAUTION
Excessively high operating speeds could result in minor injury.
Excessively low speeds impose a heavy load.
• DO NOT tamper with governor spring, links or other parts to increase engine speed.
Pressure washer supplies correct rated pressure and flow when running at governed
speed.
• DO NOT modify pressure washer in any way.
NOTICE
High pressure spray could damage fragile items including glass.
• DO NOT point spray gun at glass when using red (0 °) spray tip.
• NEVER aim spray gun at plants
NOTICE
Improper treatment of pressure washer could damage it and shorten its life.
• If you have questions about intended use, ask dealer or contact qualified service
center.
• NEVER operate units with broken or missing parts, or without protective housing or
covers.
• DO NOT by-pass any safety device on this machine.
• DO NOT tamper with governed speed.
• DO NOT operate pressure washer above rated pressure.
• DO NOT modify pressure washer in any way.
10
SAFETY INSTRUCTIONS
• Before starting pressure washer in cold weather, check all parts of the equipment to be
sure ice has not formed there.
• NEVER move machine by pulling on hoses. Use handle provided on unit.
• Use only identical replacement parts as specified in the Parts List in this manual. User
assumes all risks and liabilities if other parts are used.
11
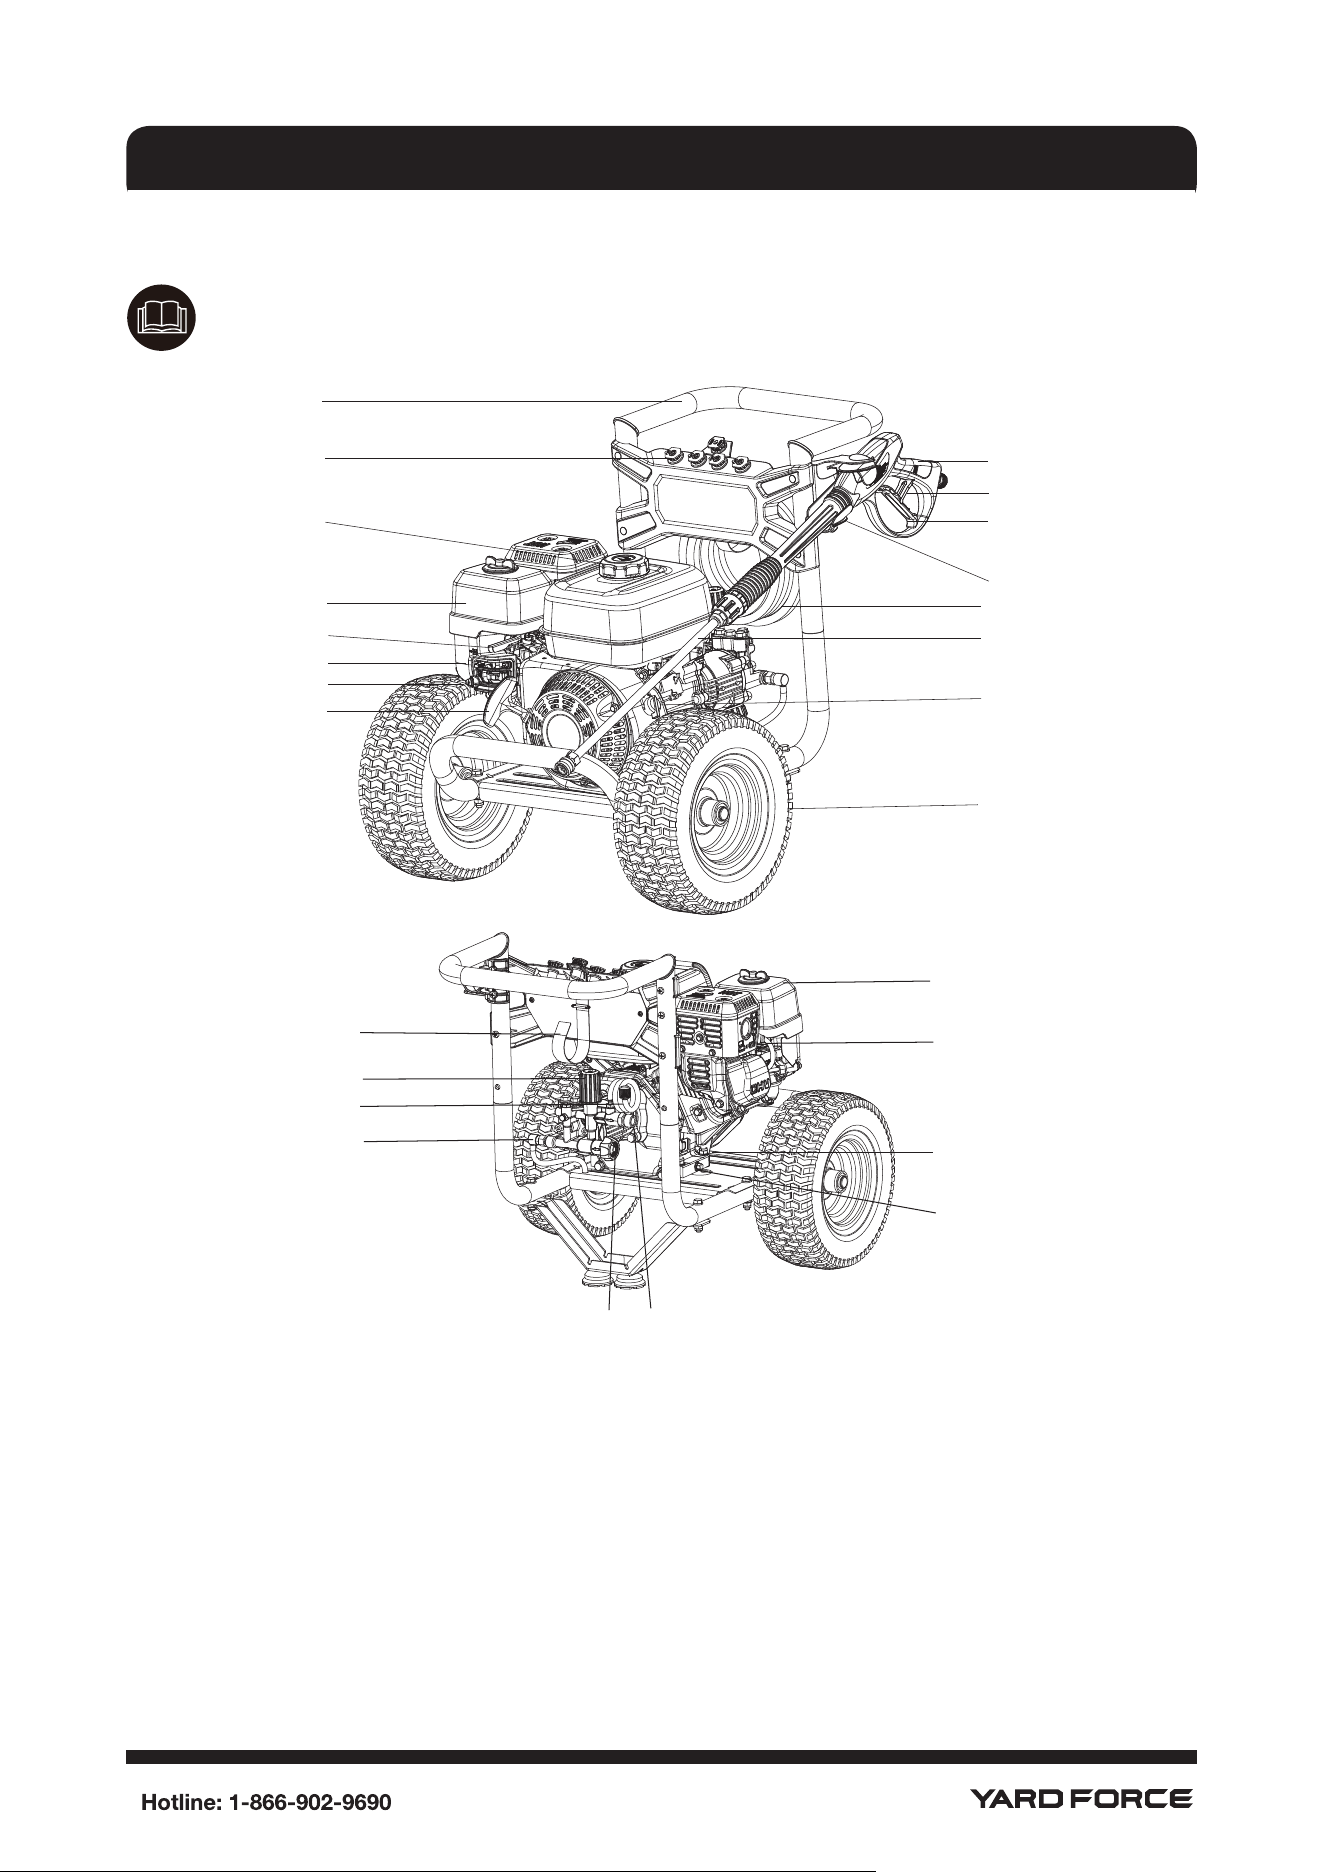
KNOW YOUR PRESSURE WASHER
Read the operator's manual and safety rules before operating your pressure washer.
Compare the illustrations with your pressure washer to familiarize yourself with the locations
of various controls and adjustments. Save this manual for future reference.
1. Engine
2. Fuel Fill Cap
3. Quick-Connect Nozzles 5 pcs (0°,10°,25°,40°,soap)
4. Upper Handle
5. Spray Gun
6. Spray Gun Trigger Lock
7. Spray Gun Trigger
8. Gun Holder
9. High Pressure Hose
10. Spray Wand with Quick Connector
11. Engine ON/OFF Switch
12. 12” Pneumatic Tires
13. Recoil Starter Grip
PARTS LIST
14. Fuel Valve Lever
15. Choke Lever
16. Throttle Lever
17. Air Filter
18. Spark Plug
19. Oil Dipstick
20. Engine Oil Drain Plug
21. High Pressure Hose Connection
22. Water Inlet
23. Thermal Relief Valve
24. Detergent Tube
25. Adjustable Pressure Regulator
26. Hose Hanger
1
2
3
4
5
6
7
8
9
10
11
12
1
3
1
5
1
6
1
4
17
18
19
20
21
22
23
24
25
26
12
Pressure Washer Specications
Max. Outlet Pressure PSI (per square inch)
Max. Flow Rate. 2.5 GPM (gallons per minute)
Water Supply Temperature. Not to Exceed 100°F
Engine Specications
Engine Model Honda GX200
Displacement 196 cc
Fuel Capacity 1.06 Quarts
Oil Capacity Max. 20 Ounces
NOTICE
For practical operation, the engine load should not exceed 85% of rated power. Engine power will
decrease 3.5% for each 1,000 ft. (300 m) above sea level and 1% for each 10° F (5.6 ° C) above
77°F (25 ° C). It should operate satisfactorily at an angle up to 15°.
* This pressure washer is rated in accordance to the Cleaning Equipment Trade Association(CETA)
CPC 100 Performance Standard.
PRODUCT SPECIFICATIONS
13
ASSEMBLY
Your pressure washer requires some assembly and is ready for use only after it has been properly
serviced with the recommended oil and fuel.
If you have any problems with the assembly of your pressure washer, please call the Yard Force
helpline at 1-866-902-9690.
IMPORTANT: Any attempt to run the engine before it has been serviced with the recommended
oil will result in an engine failure.
UNPACK THE PRESSURE WASHER
• Remove everything from carton except the pressure washer.
• Open carton completely by cutting each corner from top to bottom.
• Remove pressure washer from carton.
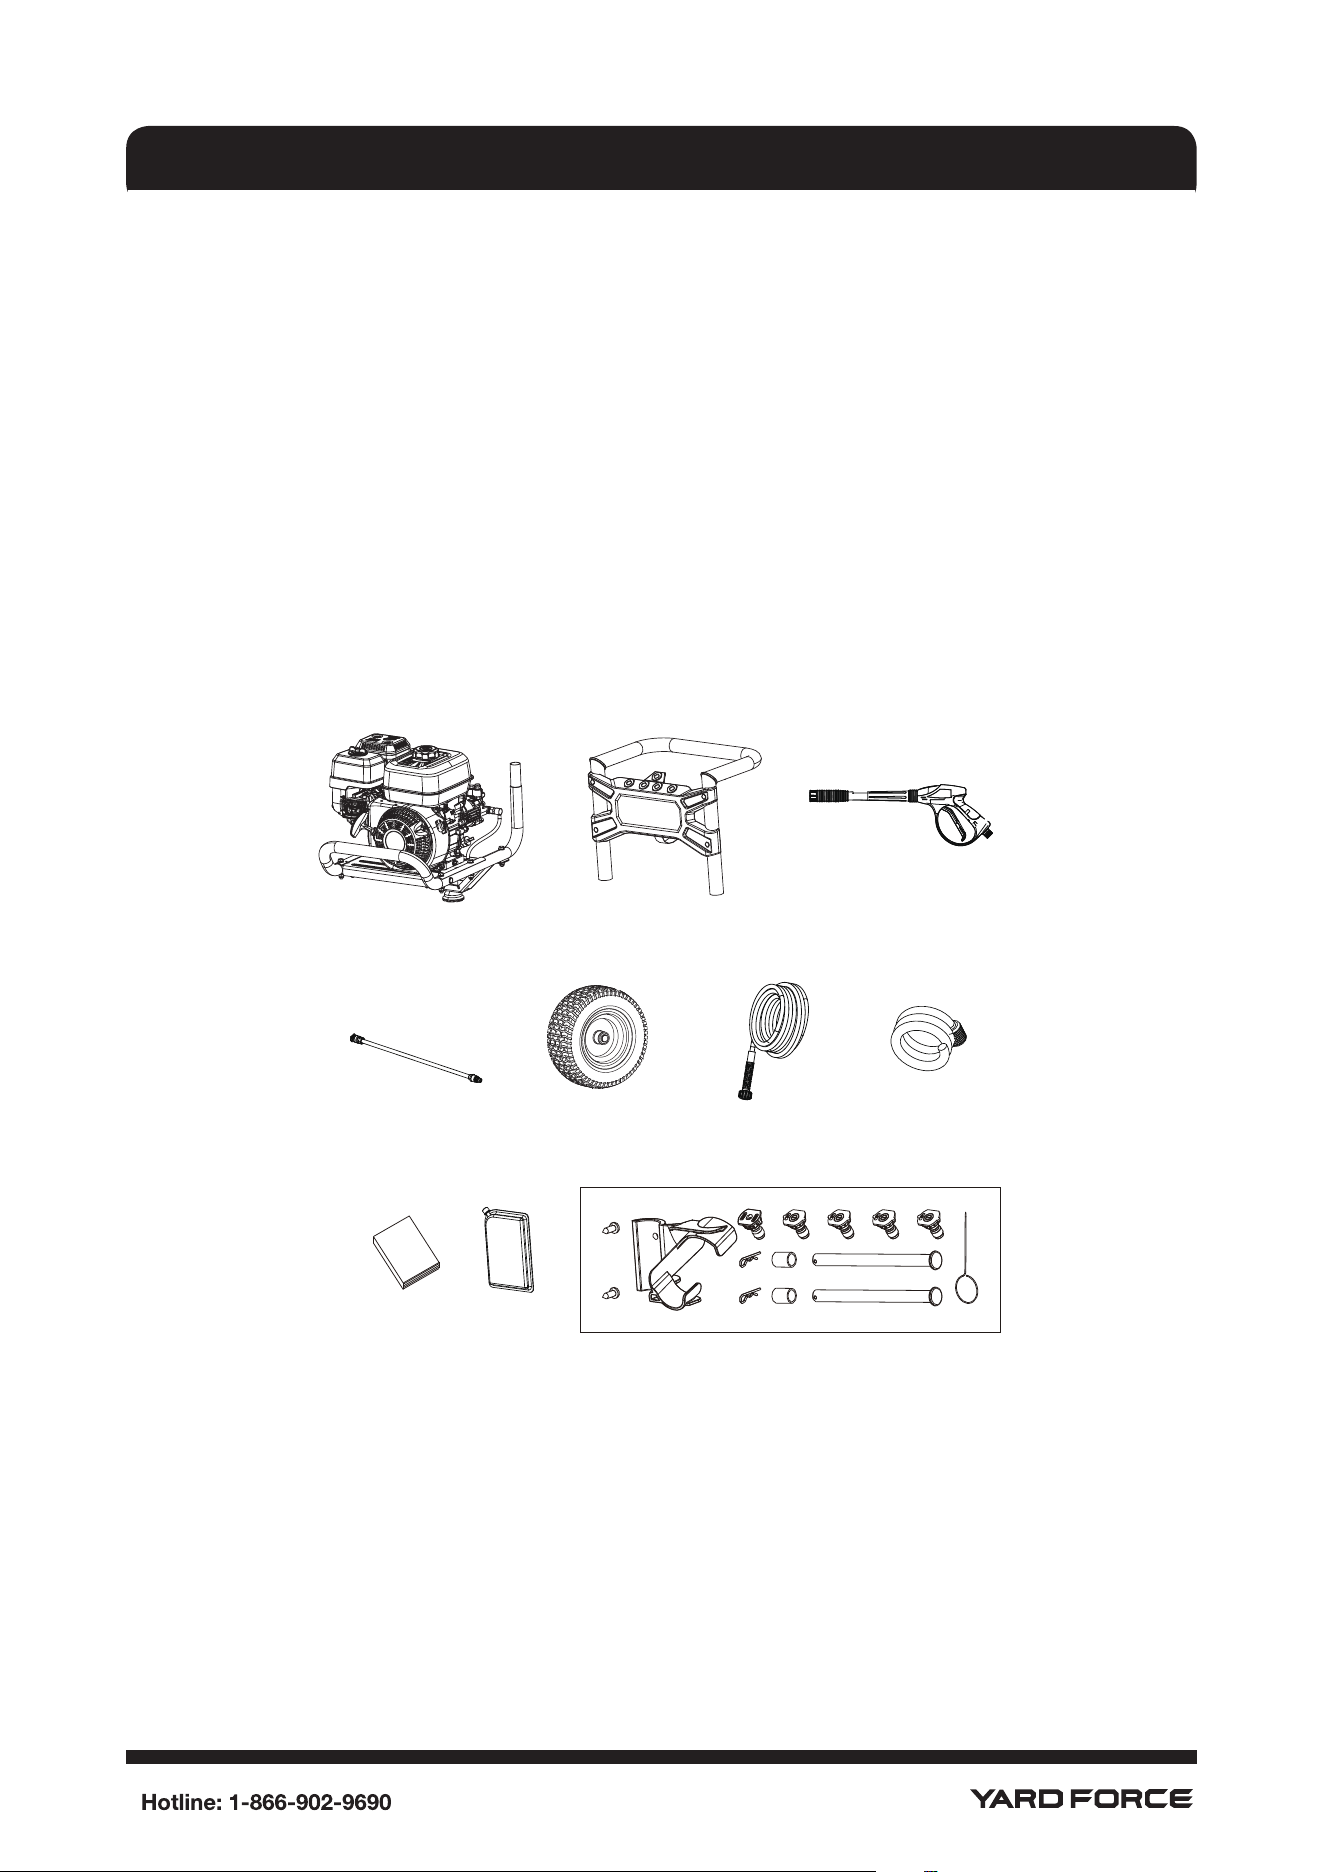
CARTON CONTENTS
Check all contents. If any parts are missing or damaged, call the Yard Force helpline at 1-866-
902-9690.
A B
C
D F
E G
H I J
A - Main Unit
B - Upper Handle Unit
C - Spray Gun
D - Spray Wand
E - Pneumatic Tires 2 pcs
F - High Pressure Hose
G - Detergent Tube
H - Manuals
I - Engine Oil (18 oz)
J - Hardware Kit: Contents Below
Wheel Axle 2pcs
Spacer 2 pcs
B-type pin 2 pcs
Spray Gun Holder 1 pc
Self-tapping Screws 2 pcs
Nozzel Cleaning Needle 1 pc
Quick-connect Nozzles 5 pcs
14
ASSEMBLY
Become familiar with each piece before assembling the pressure washer. Check all contents
against the illustration. If any parts are missing or damaged, call the Yard Force helpline at 1-866-
902-9690.
ASSEMBLING YOUR PRESSURE WASHER
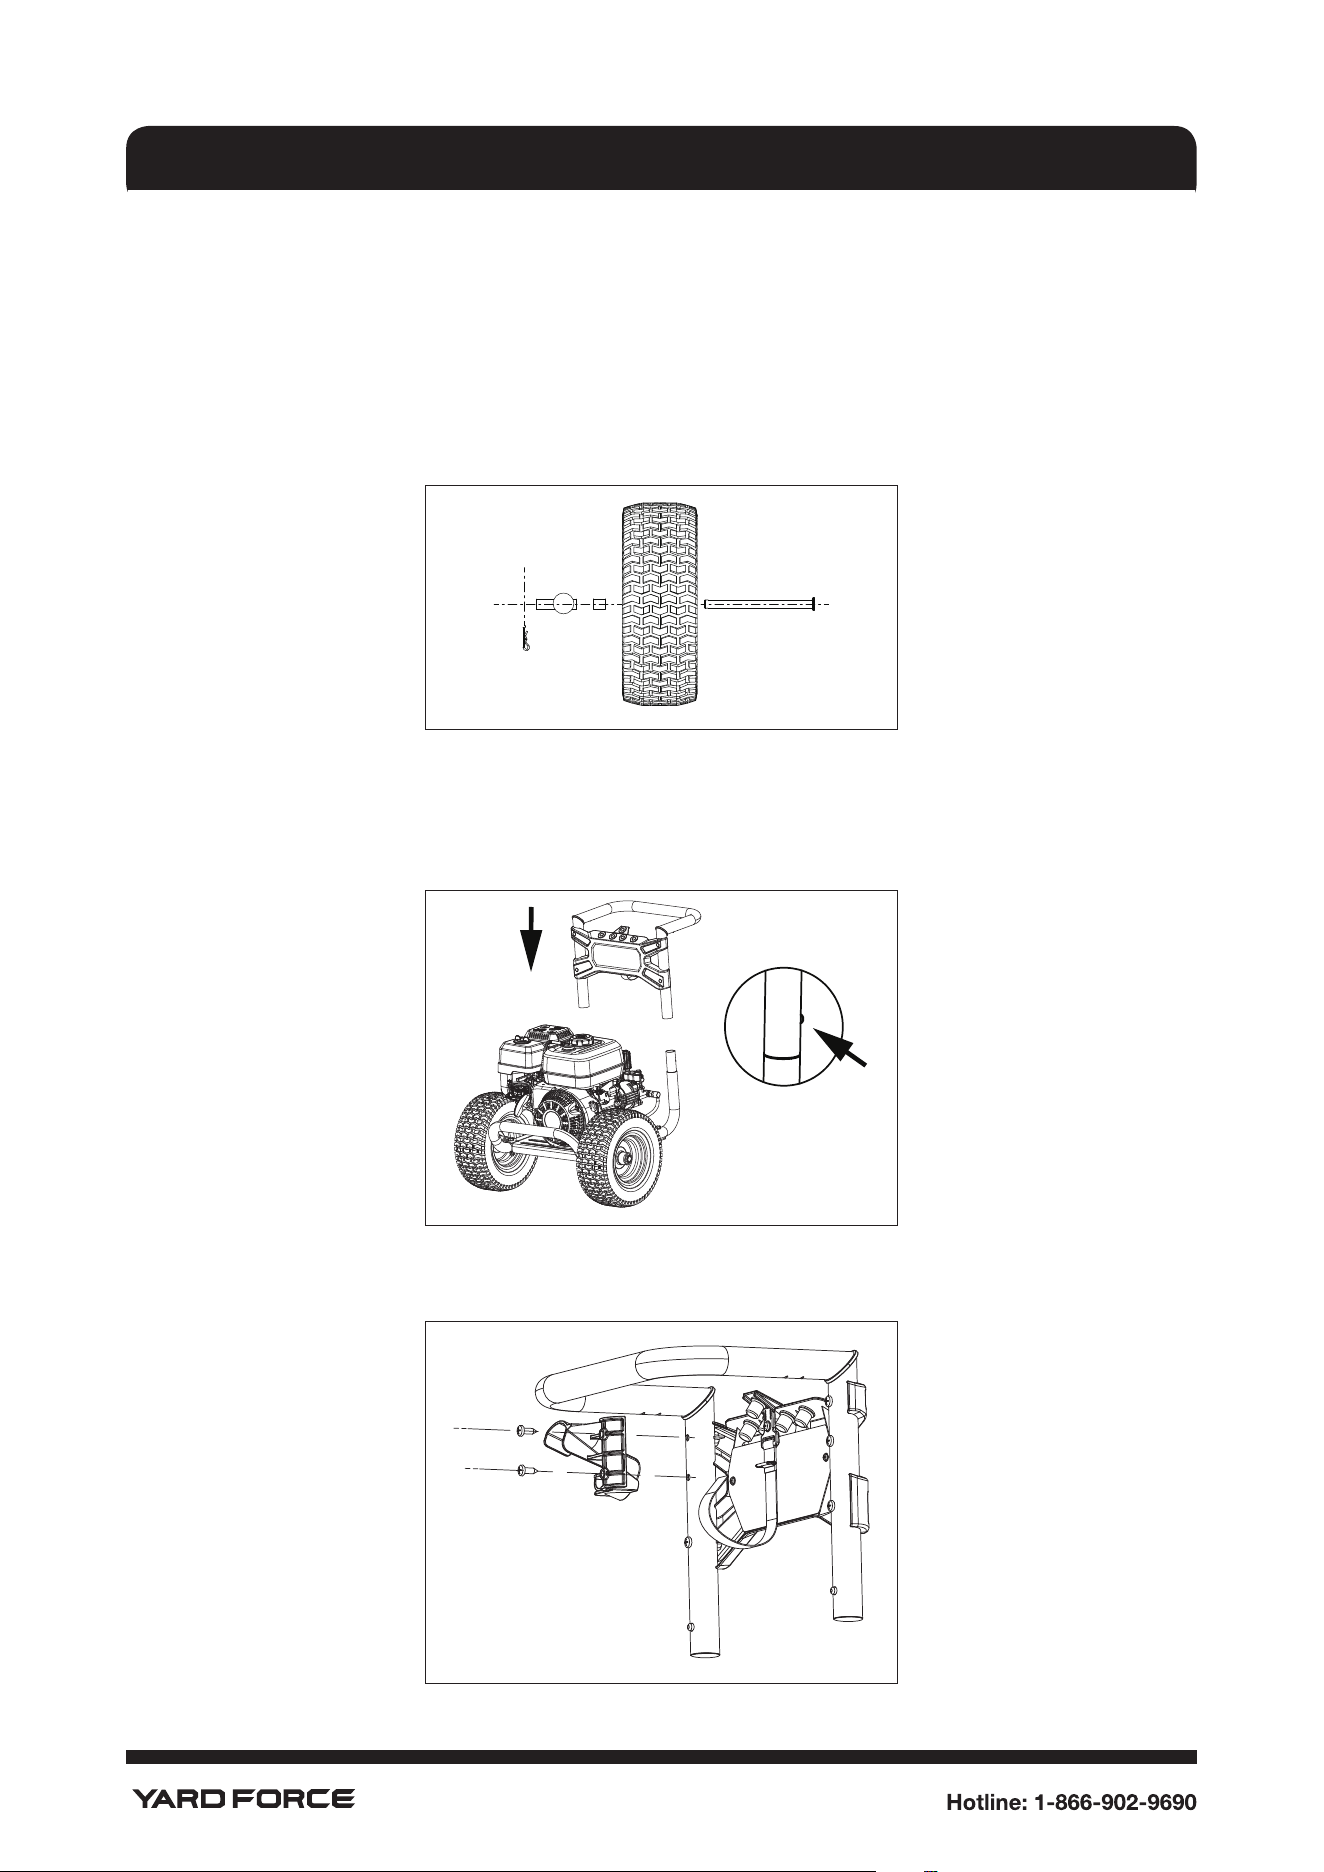
1. Assembling the tires
Insert the wheel axle into the hole of the wheel and put on the spacer, then x the axle with B-type
Pin. Be sure the valve stems point away from the pressure washer.
2. Install the upper handle unit
Install the upper handle as shown below, make sure this upper handle snaps into a locked
position.
3. Connect the spray gun holder to the handle as shown. Fasten with 2 screws.
15
ASSEMBLY
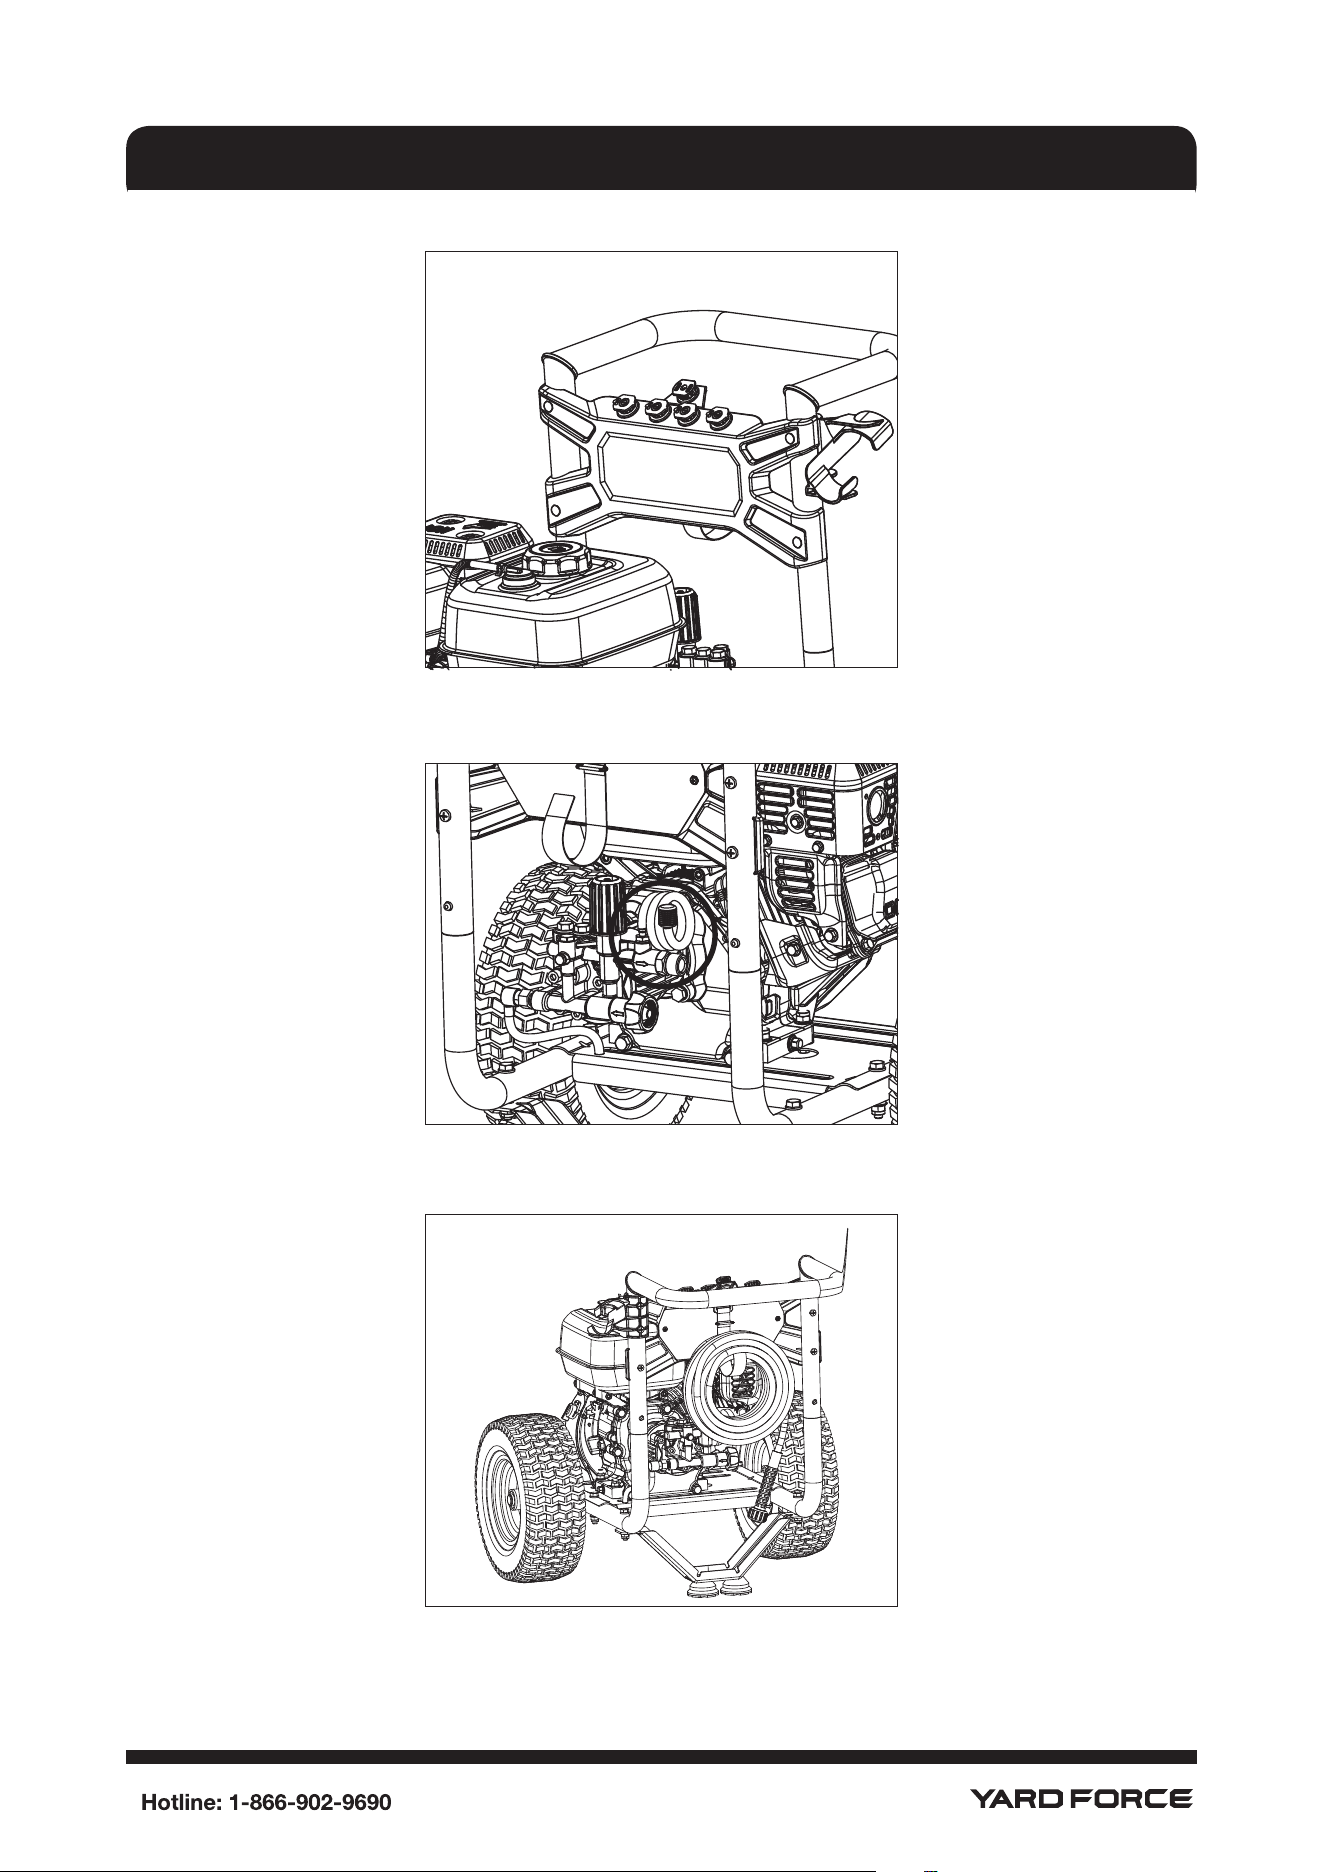
4. Insert quick-connect nozzles on the bracket of the upper handle unit.
5. Attach the detergent tube on the pump.
6. Attach the high pressure hose onto the hose hanger strap.
16
ASSEMBLY
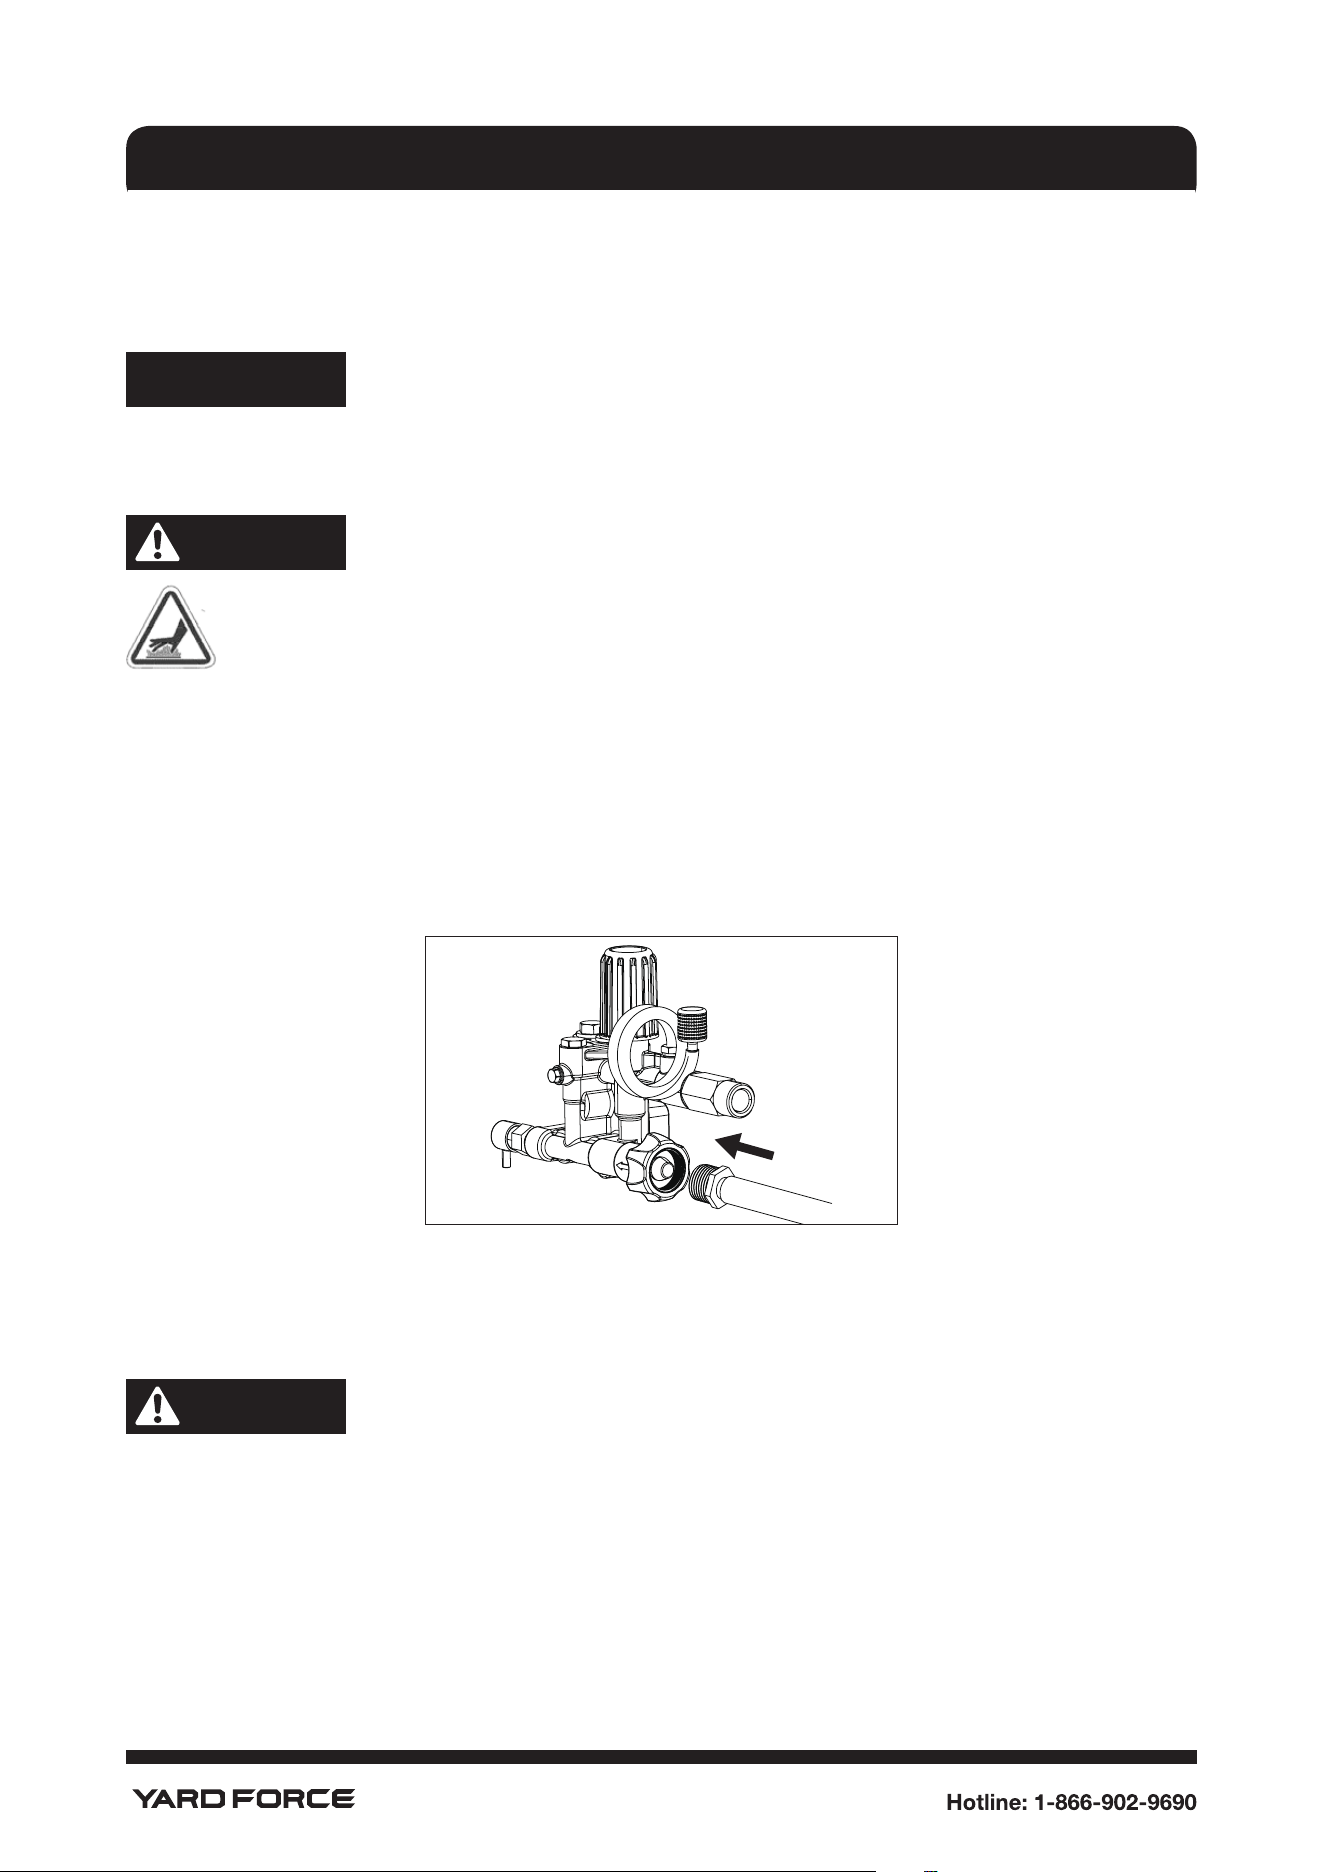
7. Connect Water Supply to Pump
IMPORTANT! DO NOT run the pump without the water supply connected and turned on.
a) Damage to pressure washer resulting from failure to follow this instruction will void warranty.
NOTICE
Remove and discard the shipping caps from the pump’s high pressure outlet and water inlet
before attaching hoses.
WARNING
The high pressure stream of water that the pressure washer produces could cut through
skin and its underlying tissues, resulting in serious injury and possible amputation.
• NEVER connect high pressure hose directly to spray wand.
• Keep high pressure hose connected to pump and spray gun while system is pressurized.
• Always be certain spray gun, wand, nozzles and other accessories are correctly attached.
Before you connect your garden hose to the water inlet, inspect the inlet screen. Clean the screen
if it contains debris or have it replaced if damaged. Do Not run the pressure washer if the inlet
screen is damaged or missing.
IMPORTANT! NEVER siphon standing water for the water supply. Use only cold water (less than
100 °F).
CAUTION!
CAUTION! Using a One Way Valve (vacuum breaker or check valve) at pump inlet could cause
pump or inlet connector damage.
b) There must be at least 10 ft. (3 m) of unrestricted garden hose between pressure washer inlet
and any device, such as a vacuum breaker or check valve.
c) Damage to pressure washer resulting from failure to follow this instruction will void warranty.
d) Runwater through garden hose for 30 seconds to ush it of debris. Turn off water.
e) Connect garden hose (not to exceed 30 ft. in length) to water inlet. Tighten by hand.
17
ASSEMBLY
NOTICE
Water supply must ow at least 3.7 GPM or more.
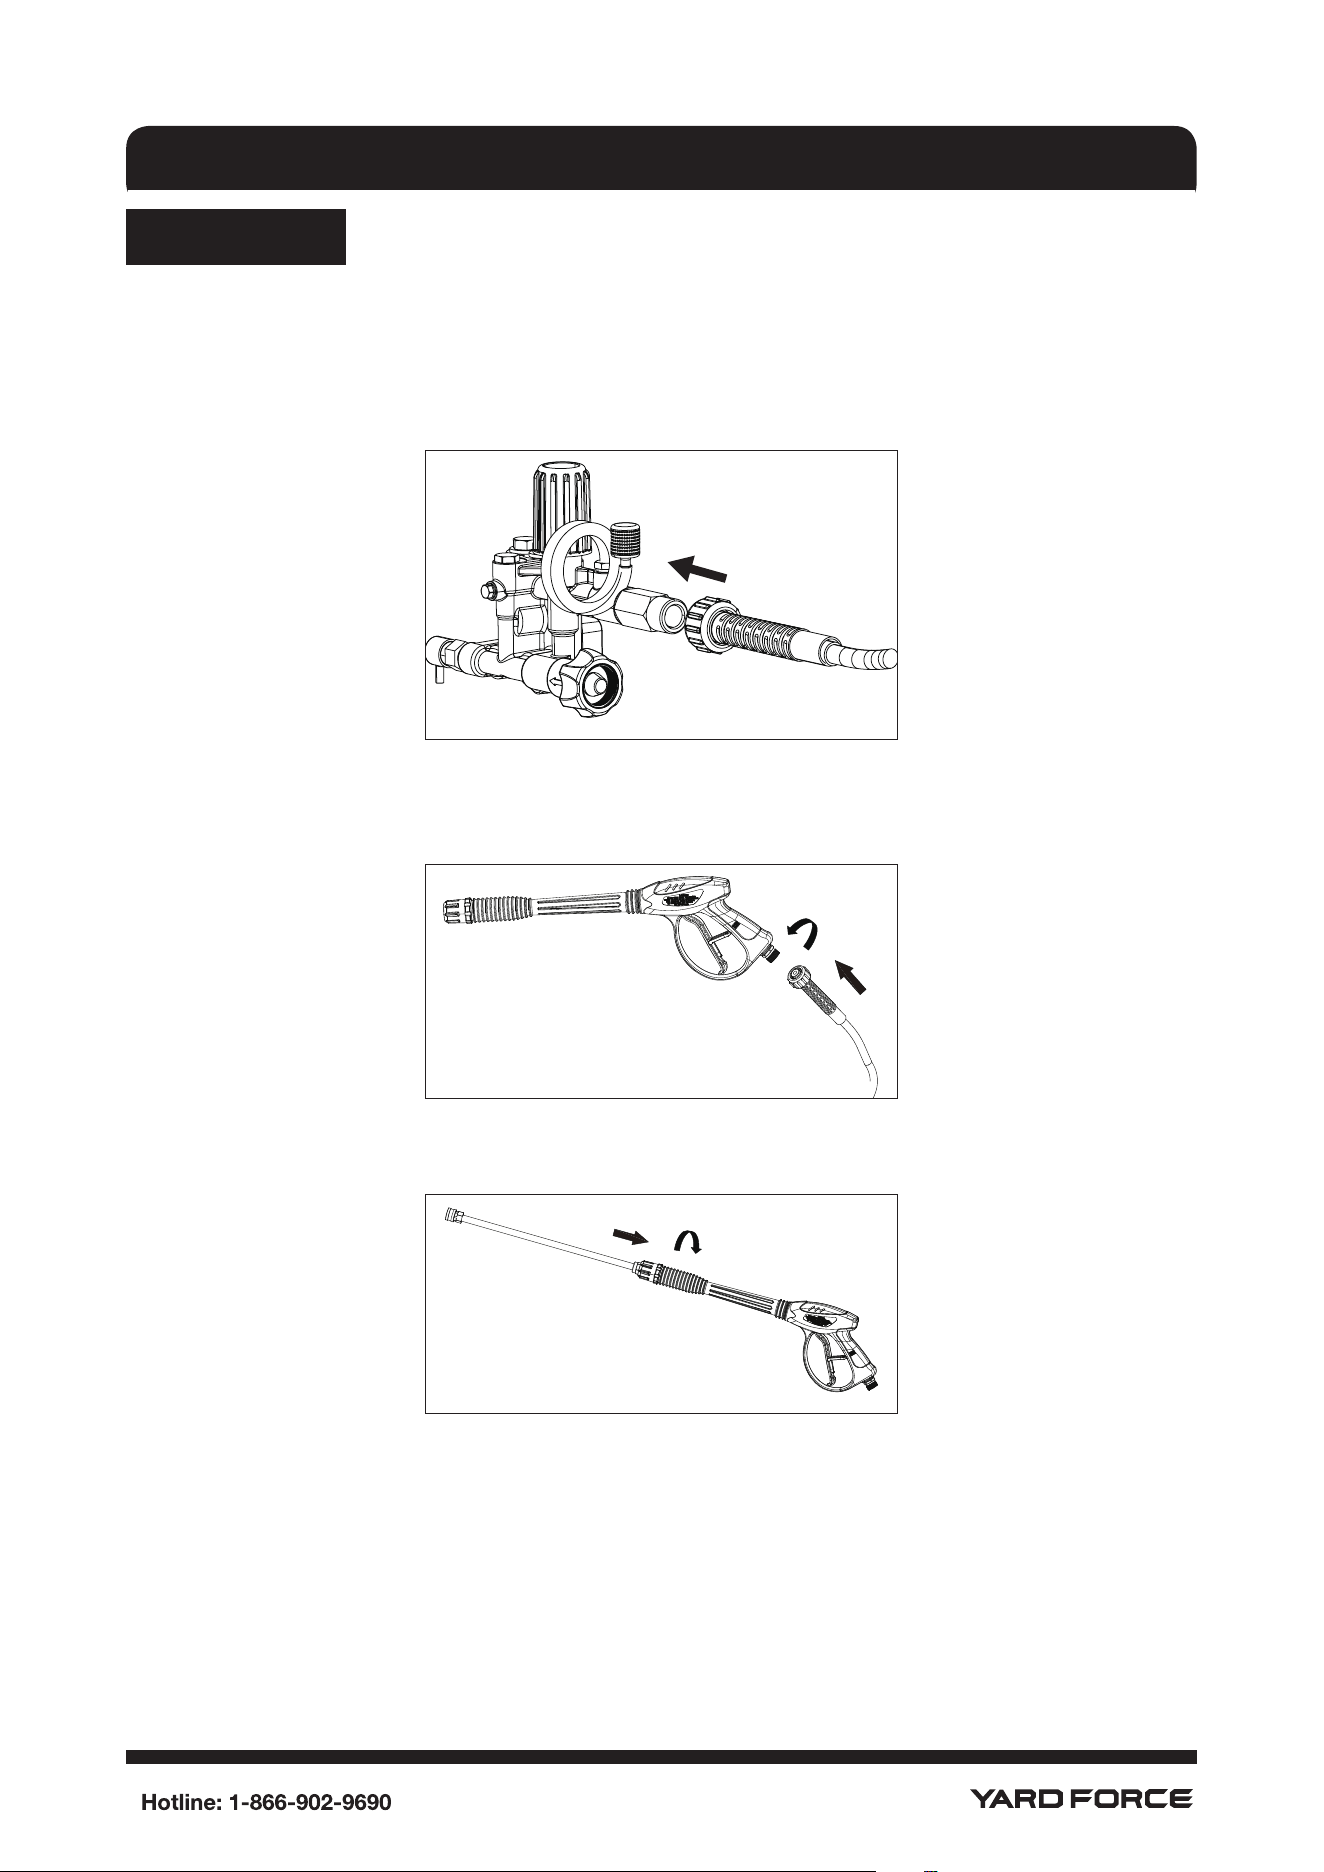
8. Connect High Pressure Hose to Pump
Take out the high pressure hose from the hose holder, uncoil high pressure hose and attach one
end of hose to high pressure oulet on pump. Tighten by hand.
9. Connect Spray Wand and Quick-Connect Nozzles
a. Attach other end of high pressure hose to base of spray gun. Tighten by hand.
b. Attach the spray wand into spray gun. Tighten by hand.
c. Turn OFF the water and set trigger to locked position. Point the spray gun at a safety direction
and make sure trigger is locked and can’t be squeezed.
18
ASSEMBLY
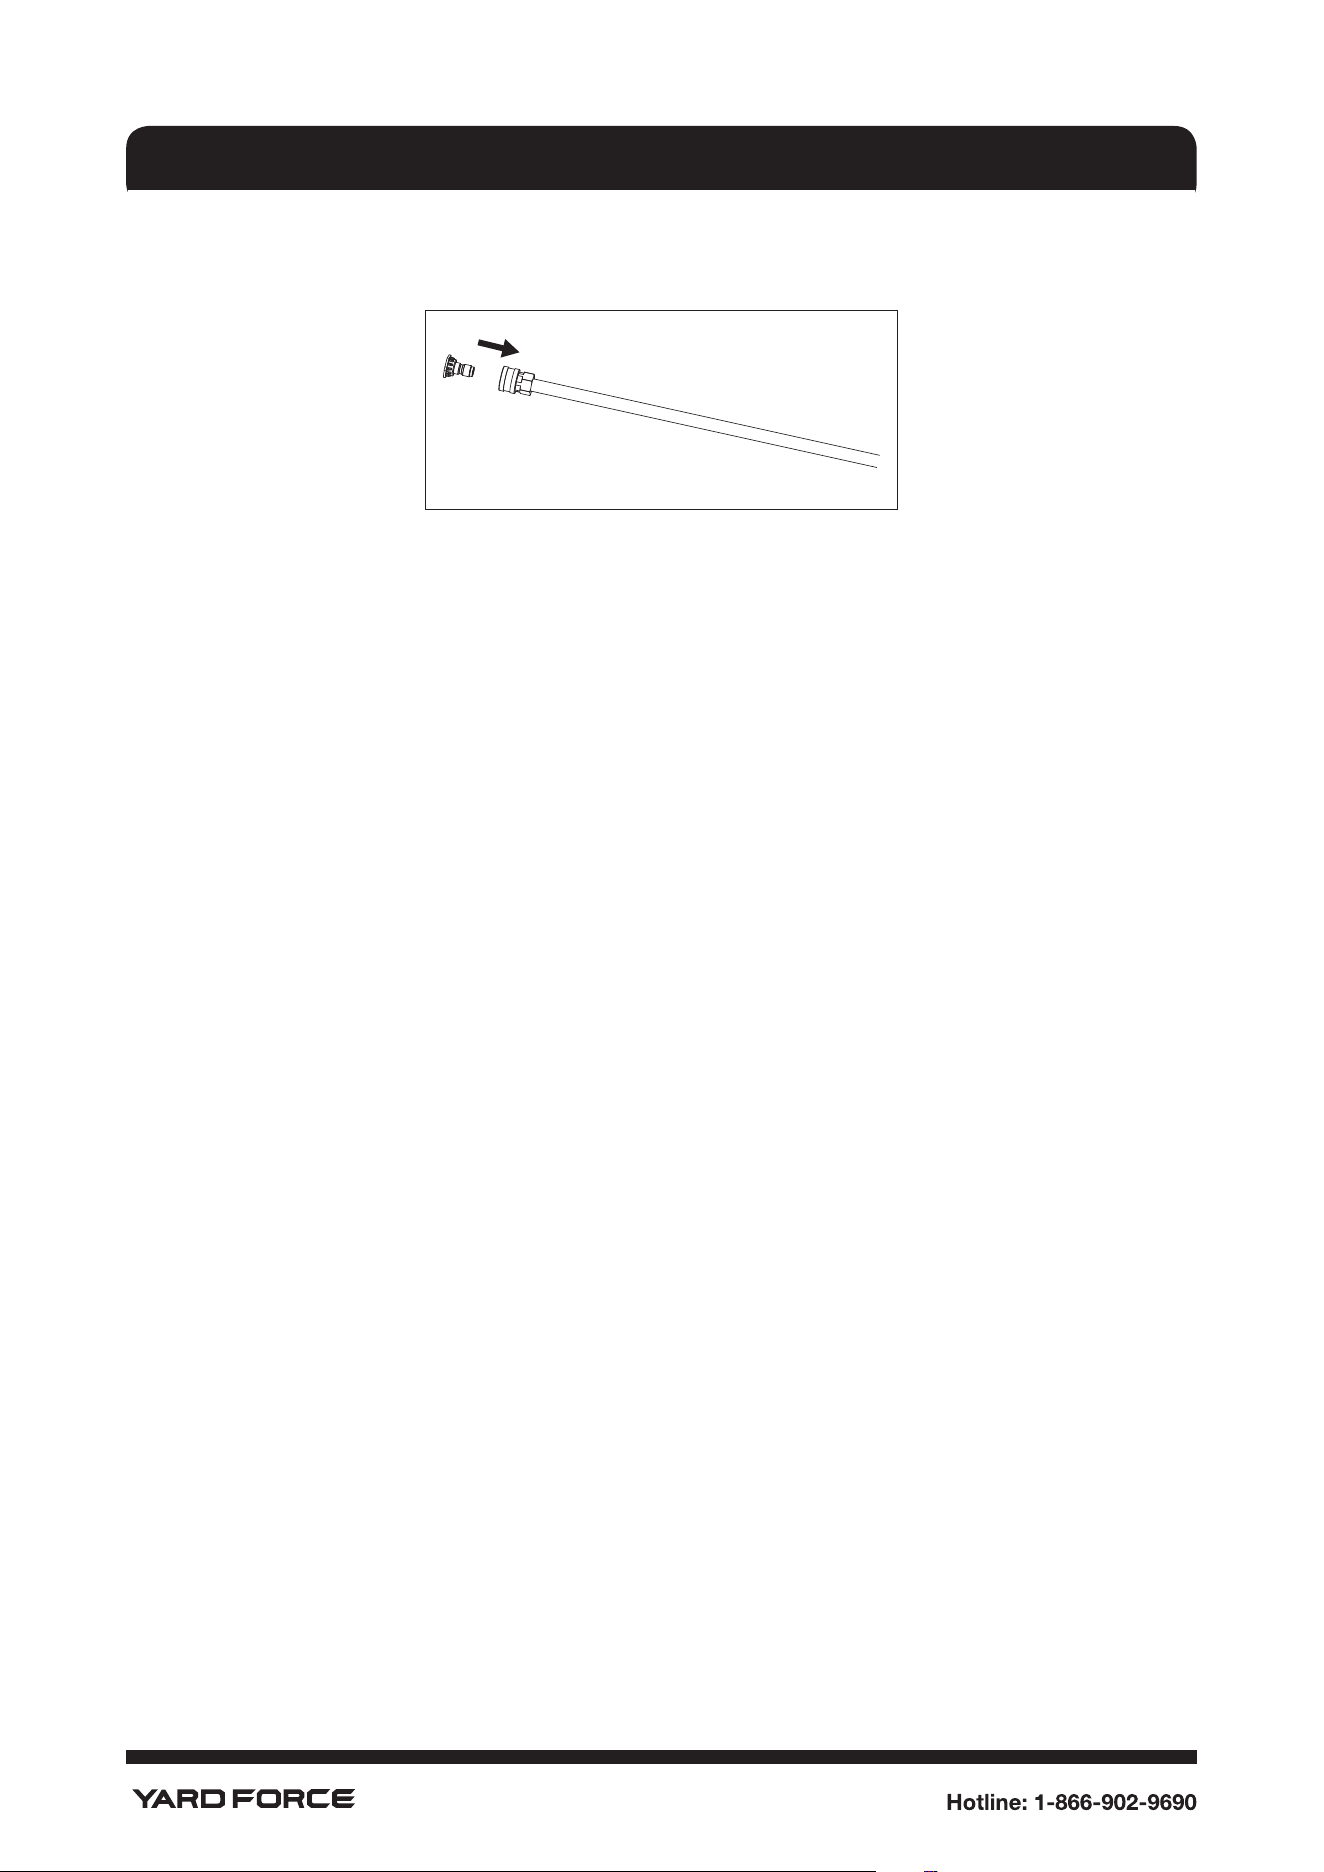
d. Choose the quick-connect nozzle you want to use, pull back on collar of spray wand , insert
the nozzle and release collar. Tug on the nozzle to make sure it is securely in place. More
information please see “How to Use Quick-Connect Nozzles” section.
CHECK-LIST BEFORE STARTING ENGINE
Review the assembly to ensure you have performed all of the following:
f) Be sure to read "Safety Rules" and "Operation" sections before using the pressure washer.
g) Make sure handle is in place and secure.
h) Check that oil has been added to proper level in engine crankcase.
i) Add proper gasoline to fuel tank.
j) Check for properly tightened hose connections (high pressure and water supply) and for tight
connections and that there are no kinks, cuts, or damage to the high pressure hose.
k) Provide proper water supply (not to exceed 100°F).
l) If starting pressure washer after storage, see "Storage" section below.
OPERATION PREPARATION
1. Filling with engine oil
IMPORTANT!
The following procedures and adjustments must be performed before the engine is started. Do not
attempt to make any of these adjustments while the engine is running.
This engine is shipped without oil or gas, any oil residue is from testing prior to shipping.
The engine must be lled with the correct grade of oil and gas before starting the engine.
Running the engine with a low oil level will cause irreparable engine damage.
Always use high-quality detergent oil classied SAE 10W-30 oil (or equivalent, e.g. 5W 30, often
termed as 4-stroke oil).
Only use additives recommended by the engine manufacturer to prolong the life of your engine, it
is important that the oil is changed after the rst 5 hours of use.
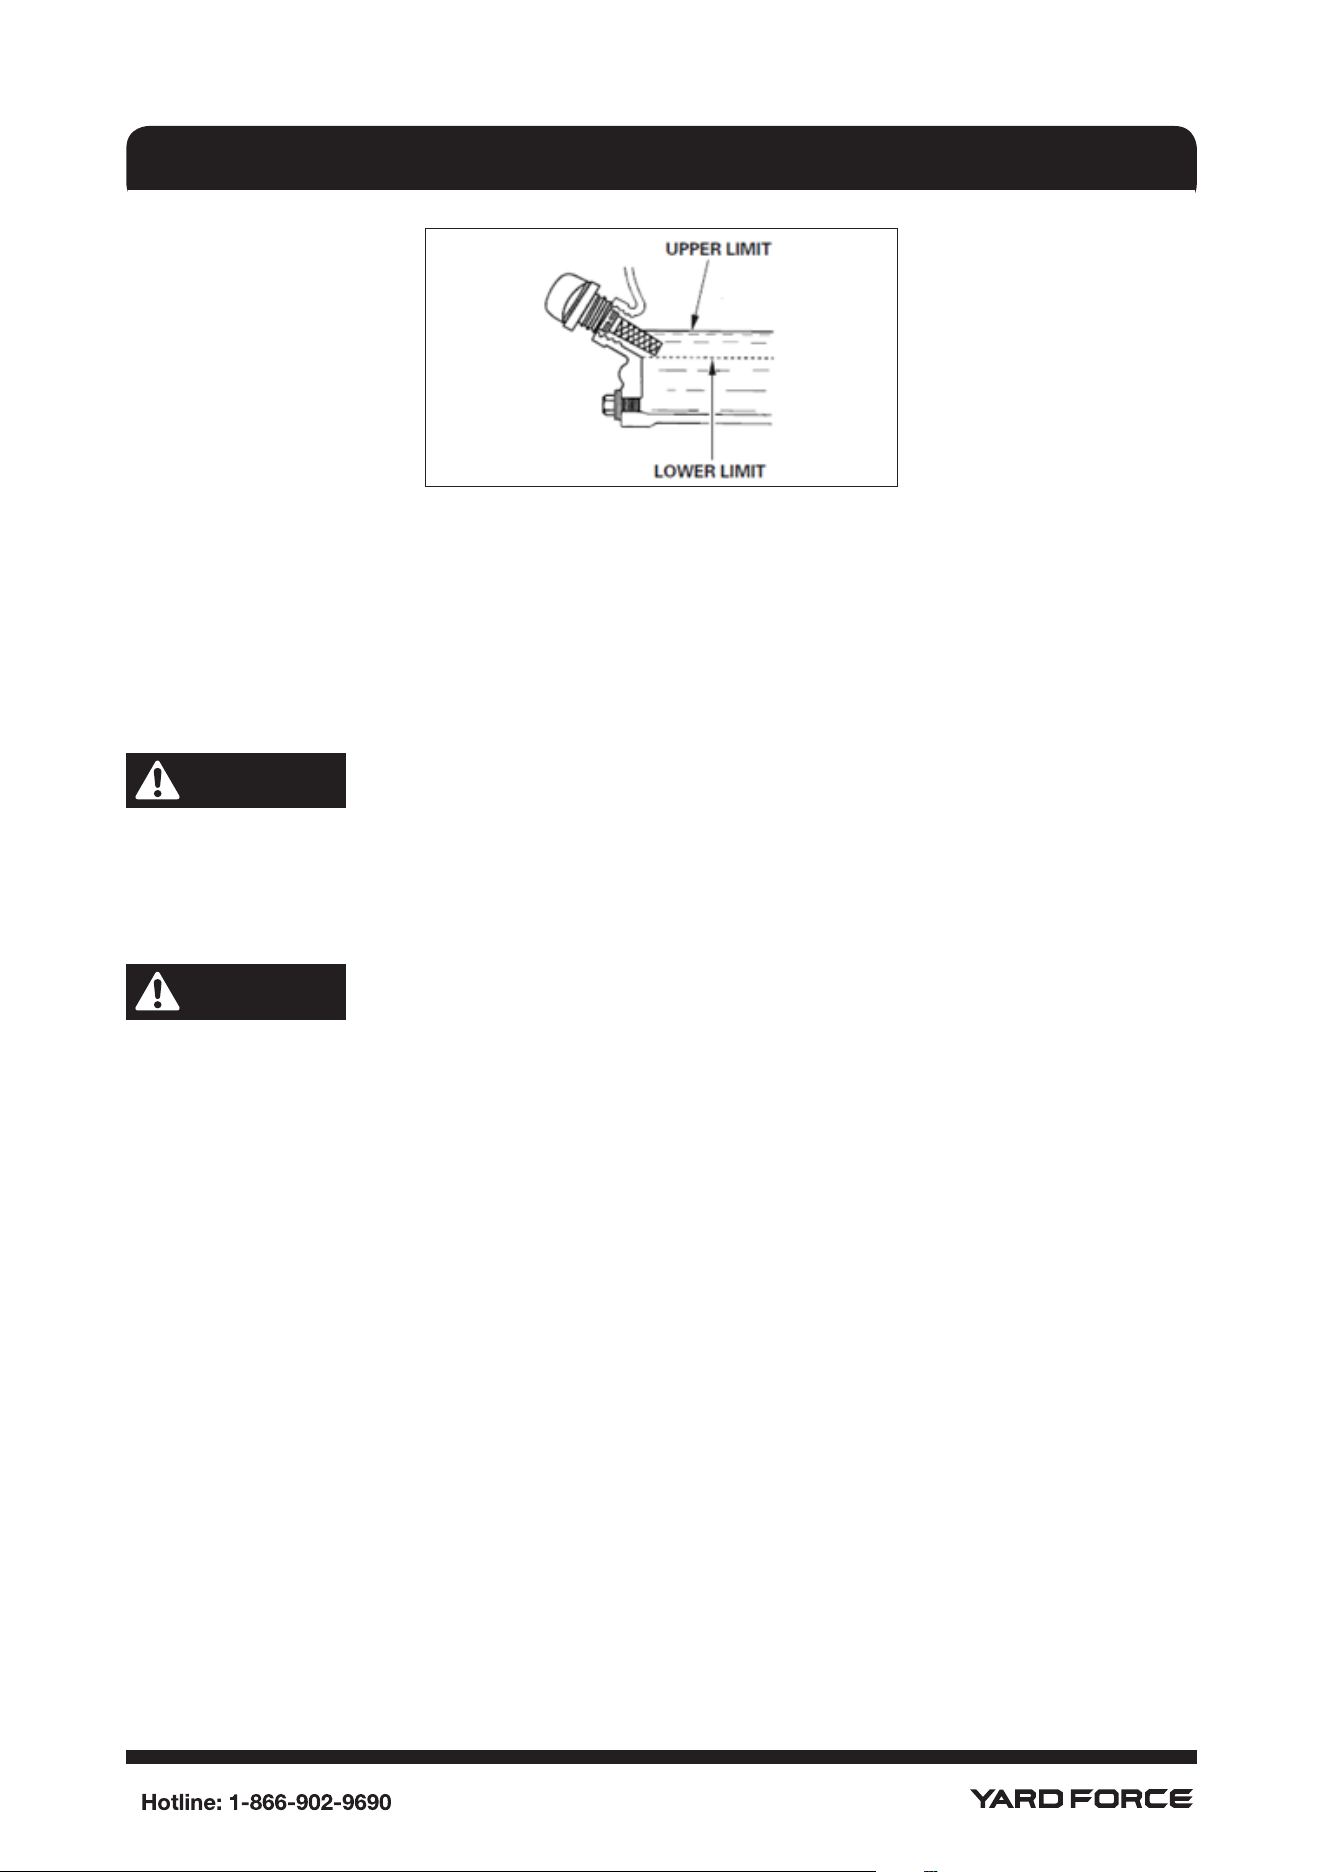
Check the engine oil level with the engine stopped and the pressure washer on a level surface.
• Remove the oil ller dipstick and wipe oil from it with a clean cloth.
• Insert the dipstick into the oil ller neck, and do not screw it in.
• Then remove the dipstick and check the oil level. The oil level must be between the Min. and
Max. marks on the dipstick. If near the lower level, ll to the upper level with the recommended
oil (SAE 10W-30 or equivalent).
Do not overll. Wipe away any spilt oil.
• Before using for the rst time, please add engine oil.
19
OPERATION
2. Filling with engine fuel
Fuel must meet these requirements:
• Clean, fresh, unleaded gasoline
• A minimum of 87 octane/ 87 AKI (91 RON)
• Gasoline with up to 10% ethanol (gasohol) is acceptable.
WARNING
Refuel in a well-ventilated area with the engine stopped Do not smoke or allow ames or sparks in
the area where the engine is refueled or where gas is stored.
Avoid repeated or prolonged contact with skin or inhala- tion of vapour.
CAUTION
Gas is highly ammable and extreme caution must be taken when handling or working with it.
Keep out of reach of children.
• Clean the area around the fuel ller cap before removing the cap. Check the fuel level.
• Rell the tank if the fuel level is low.
• Always use clean, fresh unleaded petrol and purchase fuel in quantities that can be used within
30 days.
• Nevor mix oil wih gas.
• To allow for expansion, carefully refuel and avoid overlling or spillage. There should be no fuel
in the ller neck.
• Clean up any overow or splashes of gas before starting the engine.
• Tighten the ller cap after lling, nger tight only.
20
OPERATION
WARNING
Fuel and its vapors are extremely ammable and explosive which could death
or serious injure.
WHEN ADDING FUEL
• Turn pressure washer engine OFF and let it cool at least 2 minutes before removing fuel cap.
Loosen cap slowly to relieve pressure in tank.
• Fill fuel tank outdoors.
• DO NOT-overll tank. Allow space for fuel expansion.
• If fuel spills, wait until it evaporates before starting engine.
• Keep fuel away from sparks, open ames, pilot lights, heat, and other ignition sources.
• Check fuel lines, tank, cap and ttings frequently for cracks or leaks. Replace if necessary.
• DO NOT light a cigarette or smoke.
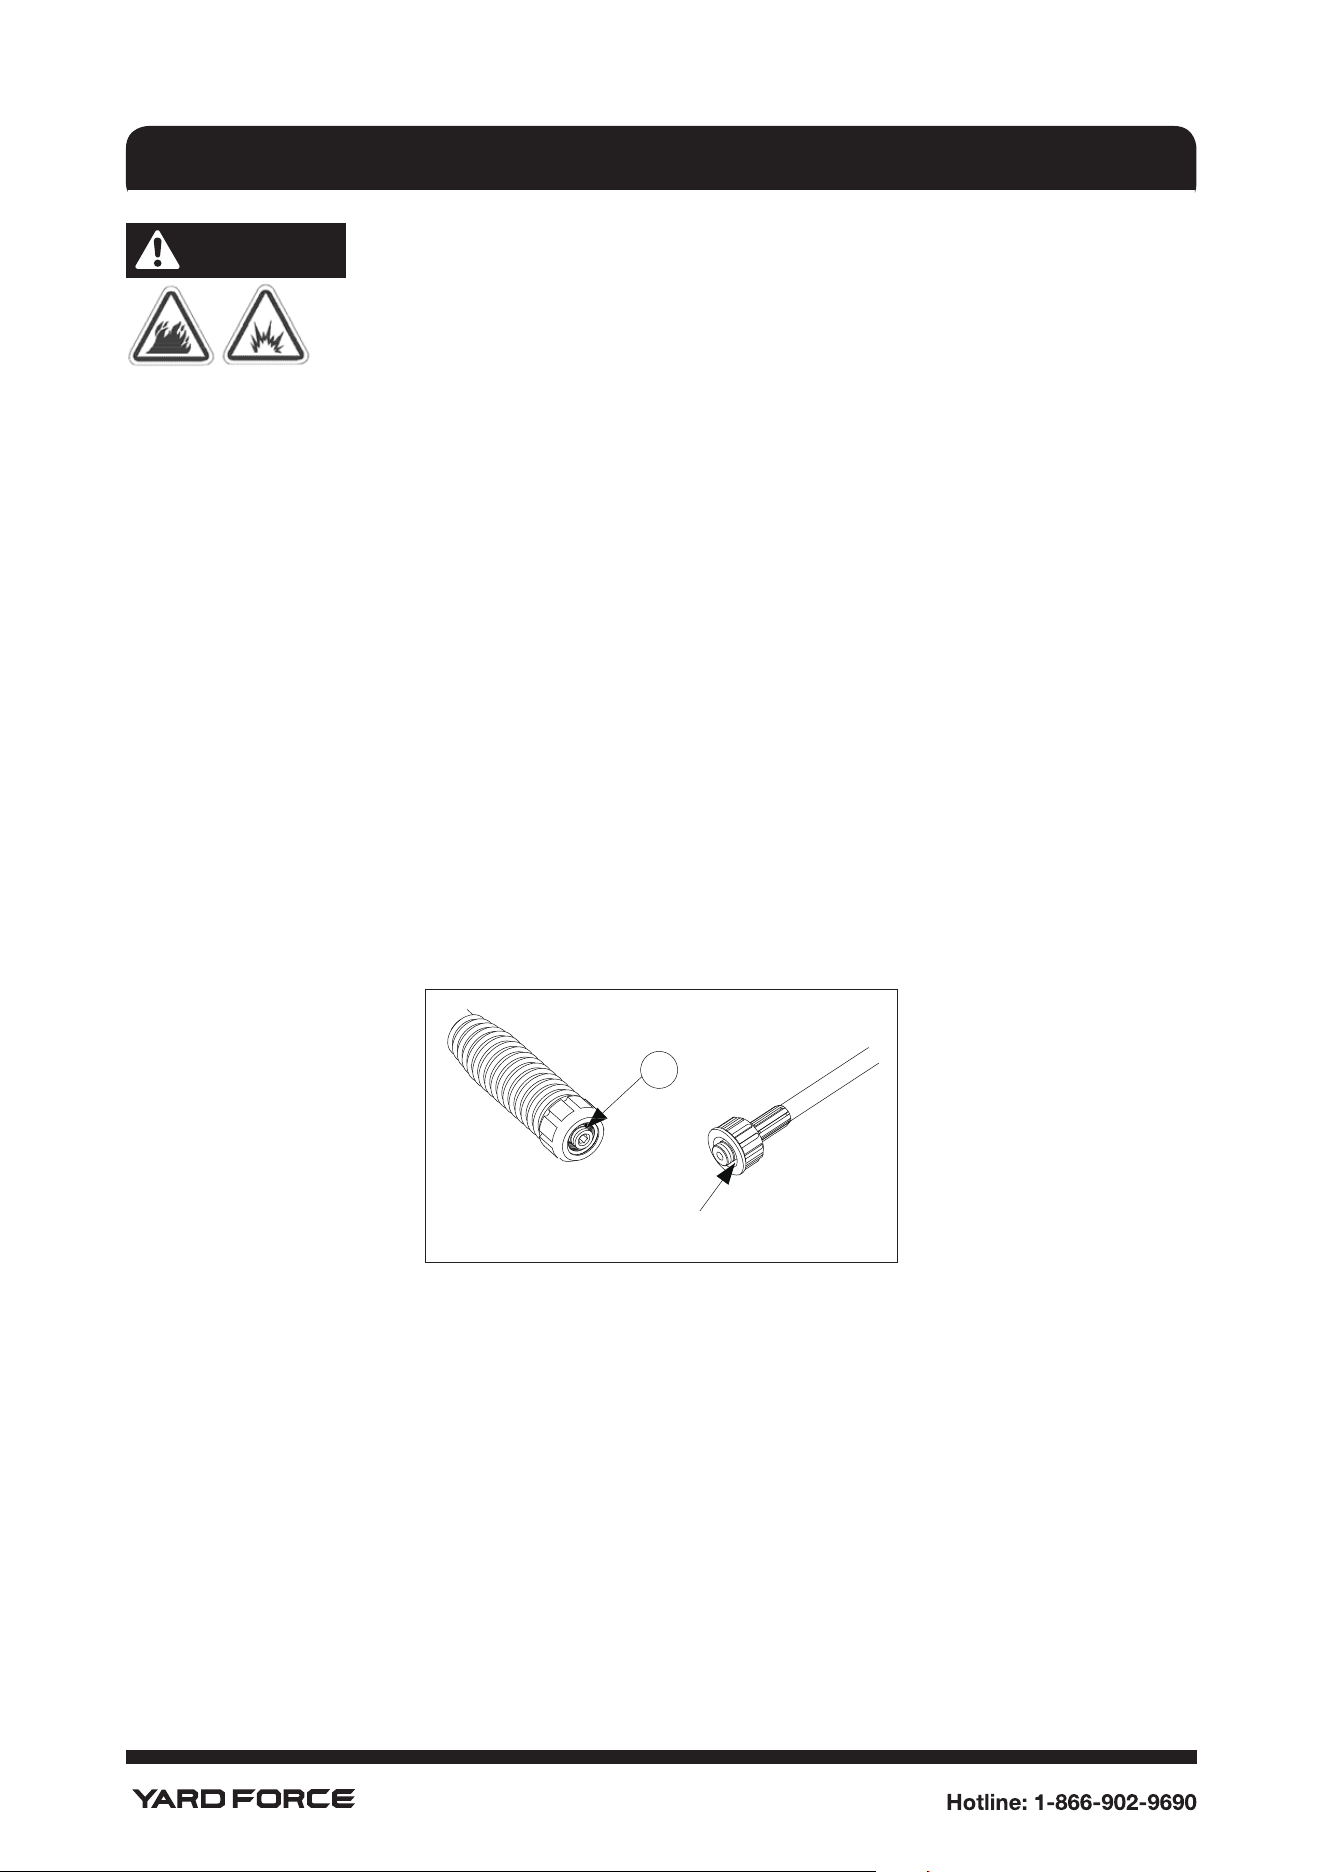
3. Lubricate O-Rings On High Pressure Hose
Lubrication of o-rings is extremely important for installation and operation. The use of lubricant
(petroleum or synthetic grease) during assembly helps seat o-rings properly and provides and
improved seal. It also helps protect the o-rings from damage by abrasion, pinching or cutting and
extends the life of the o-rings.
NOTICE: ALWAYS apply a small amount of lubricant on o-rings prior to assembling the garden
hose to the high pressure hose (C), spray gun (D).
D
C
Lubricate all connections shown above,following these instructions:
• Inspect and clean connecting surfaces prior to lubrication and assembly.
• Use lubricants sparingly during assembly; a light lm is all that is required.
• Use a small brush or cotton swab to apply grease directly to o-rings where they are not
accessible.
21
OPERATION
HOW TO USE YOUR PRESSURE WASHER
If you have any problems operating your pressure washer, please call the Yard Force helpline at
1-866-902-9690.
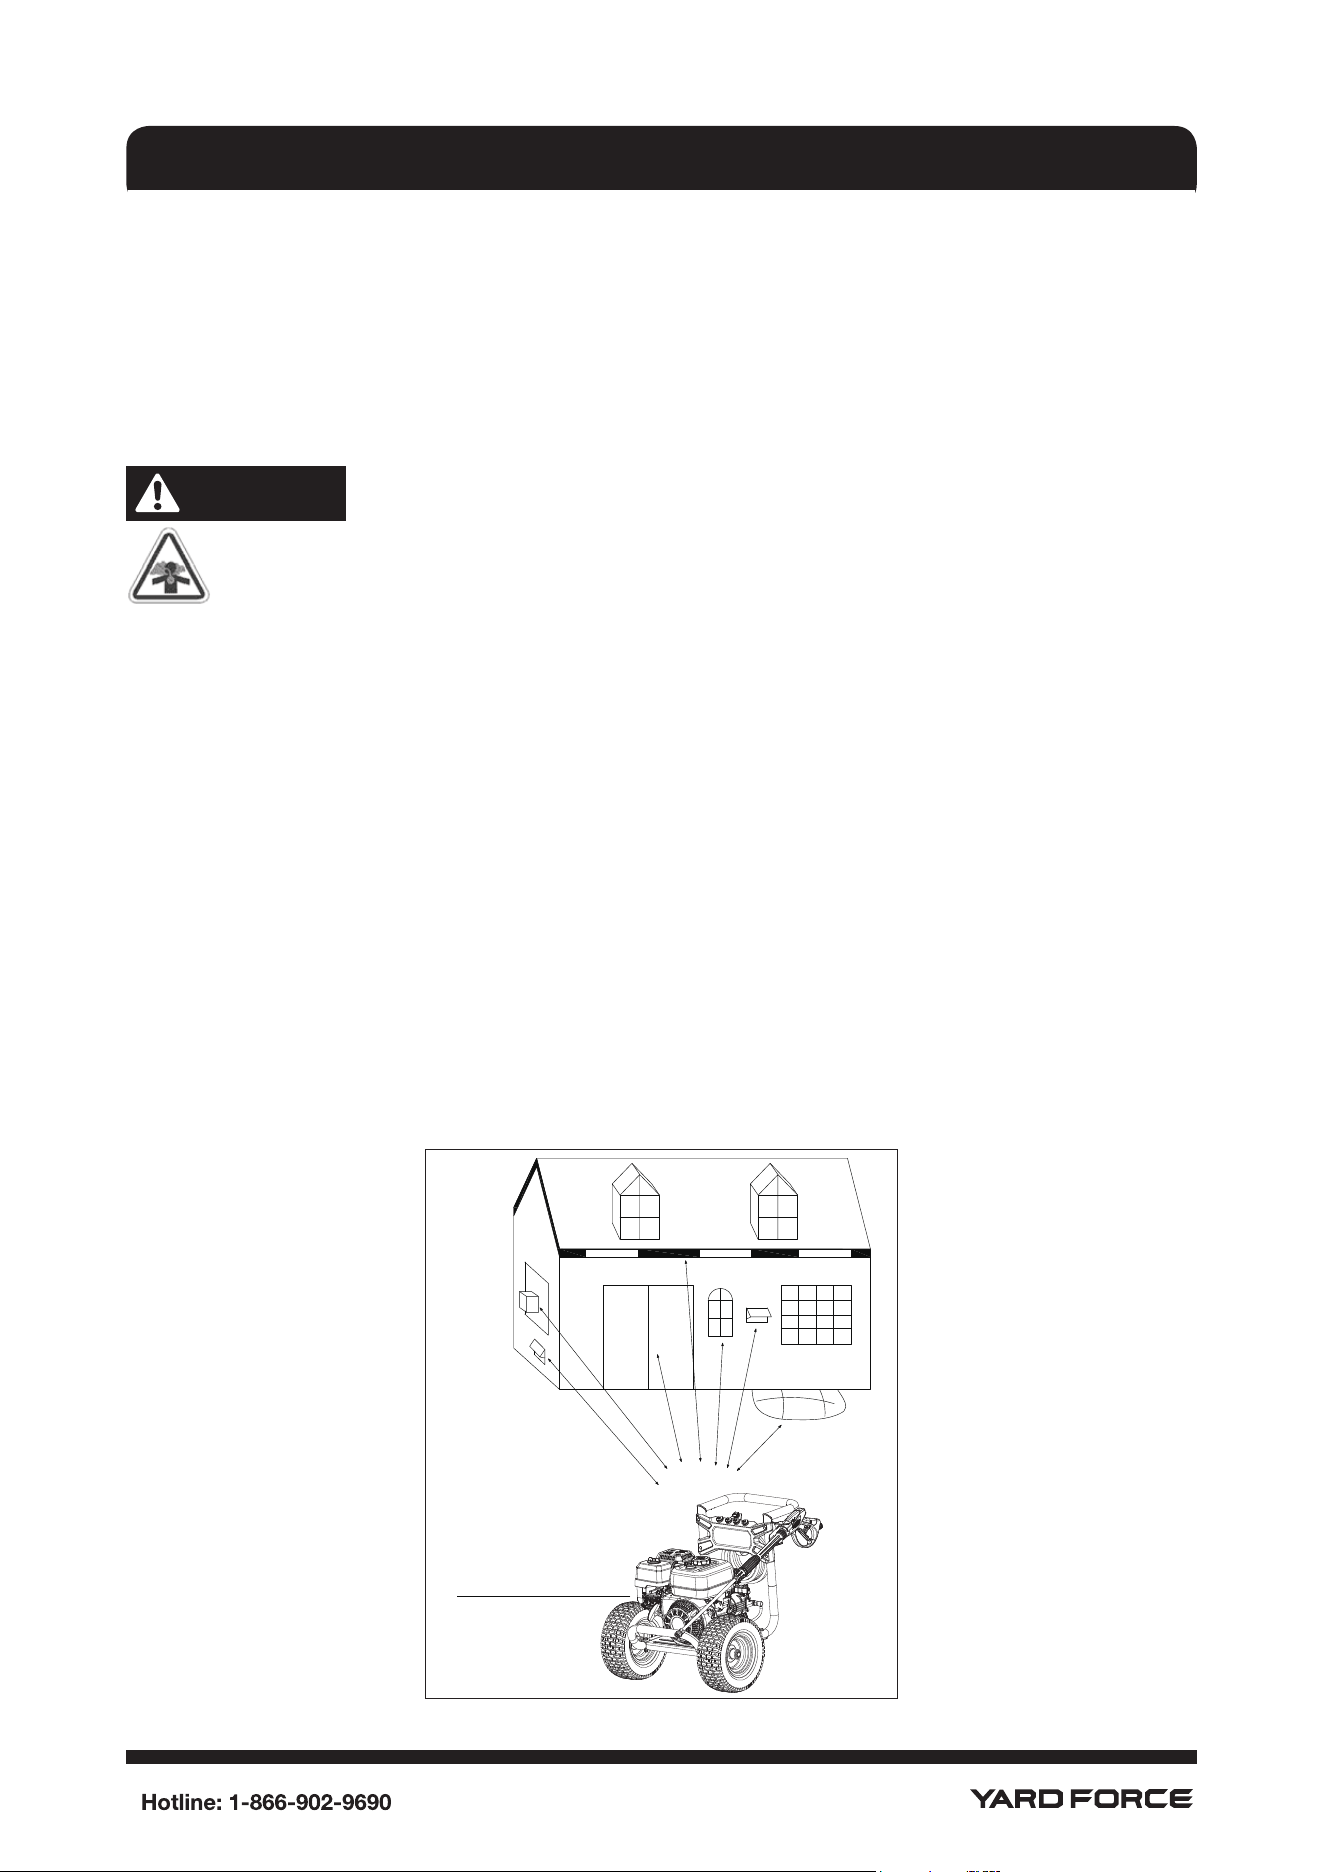
Pressure Washer Location
Carbon Monoxide Poisoning
WARNING
POISONOUS GAS HAZARD.
Engine exhaust contains carbon monoxide, a poisonous gas that could kill you in
minutes.
You CANNOT smell it, see it, or taste it, Even if you do not smell exhaust fumes, you
could still be exposed to carbon monoxide gas.
• Operate this product ONLY outside far away from windows, doors and vents to reduce the risk
of carbon monoxide gas from accumulating and potentially being drawn towards occupied
spaces.
• Install battery-operated carbon monoxide alarms or plug-in carbon monoxide alarms with
battery back-up according to the manufacturer's instructions. Smoke alarms cannot detect
carbon monoxide gas.
• DO NOT run this product inside homes, garages, basements, crawlspaces, sheds, or other
partially enclosed spaces even if using fans or opening doors and windows for ventilation.
Carbon monoxide can quickly build up in these spaces and can linger for hours, even after this
product has shut off.
• ALWAYS place this product downwind and point the engine exhaust away from occupied
spaces.
lf you start to feel sick, dizzy, or weak while using this product,shut it off and get to fresh air
RIGHT AWAY. See a doctor. You may have carbon monoxide poisoning.
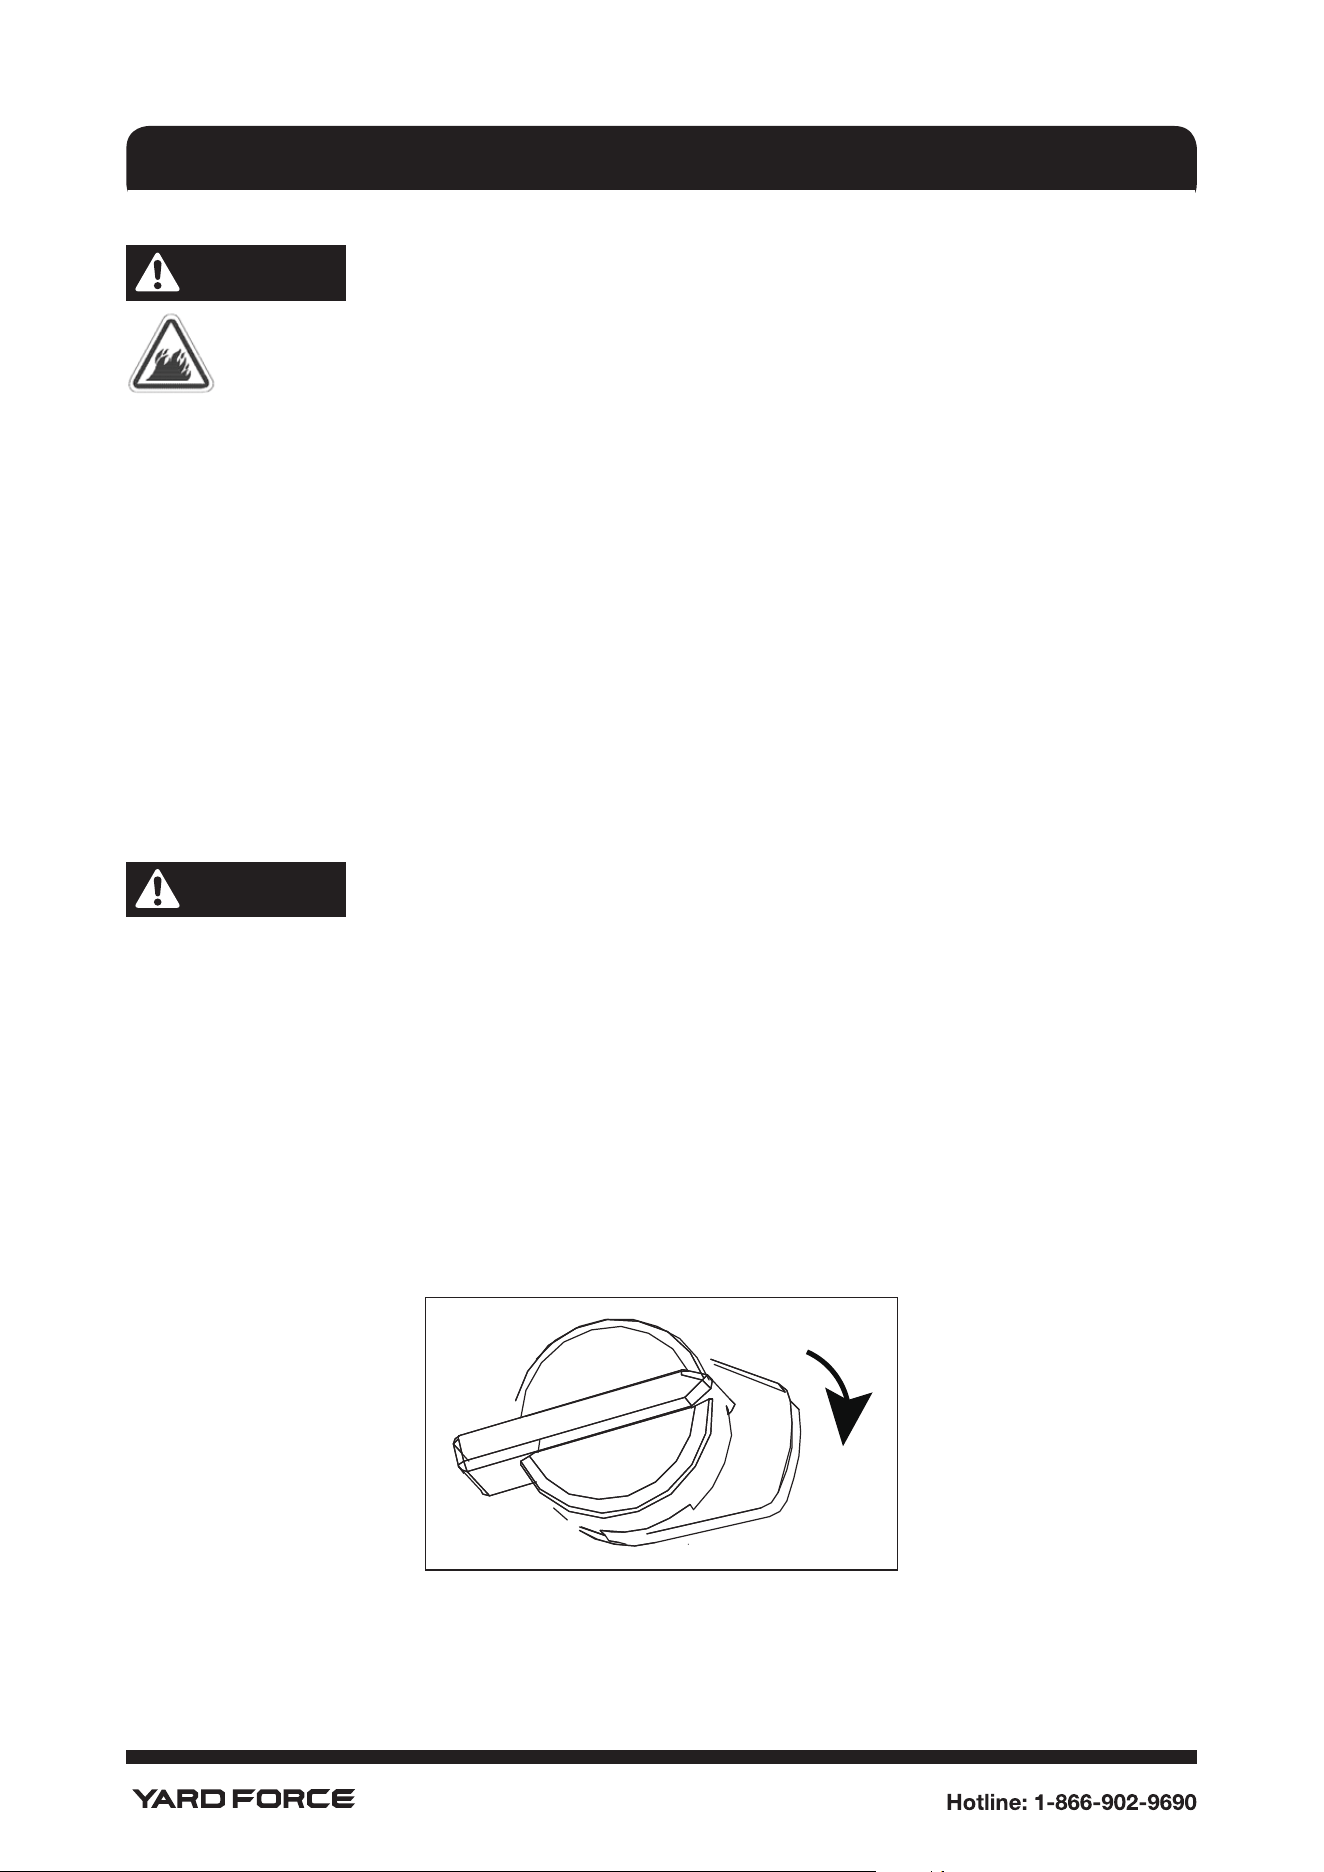
Exhaust port pointed away
from occupied spaces
22
OPERATION
Risk of Fire Clearances
WARNING
Exhaust heat/gases could ignite combustibles, structures or damage fuel tank causing a
re, resulting in death or serious injury.
• Keep at least 5 ft. (1.5 m) clearance on all sides of pressure washer in cluding overhead.
To Start Your Pressure Washer
To start your engine-powered pressure washer for the rst time, follow these instructions step-by-
step. This starting information also applies whenever you start the engine after you have let the
pressure washer sit idle for at least a day.
1. Place pressure washer outside near an water source capable of supplying water at a ow rate
greater than 3.7 gallons per minute and no less than 20 PSl at pressure washer end of garden
hose.
2. Check that high pressure hose is tightly connected to spray gun and pump. See “Assembly” for
illustrations.
3. Make sure unit is in a level position.
4. Connect garden hose to water inlet on pressure washer pump.
CAUTION
Do Not run the pump without the water supply connected and turned on.
Damage to pressure washer resulting from failure to follow this instruction will void warranty.
5. Turn ON the water, point the spray gun at a safe direction, release the trigger lock, then
squeeze trigger 30 seconds to purge the pump system of air and impurities.
6. Attach the spray wand to the spray gun. Tighten by hand.
7. Choose the quick-connect nozzle you want to use, pull back on collar of spray wand , insert
the nozzle and release collar. Tug on the nozzle to make sure it is securely in place. See
"Assembly" . More information please see “How to Use Quick-Connect Nozzles” section.
8. Engage the trigger lock on the spray gun.
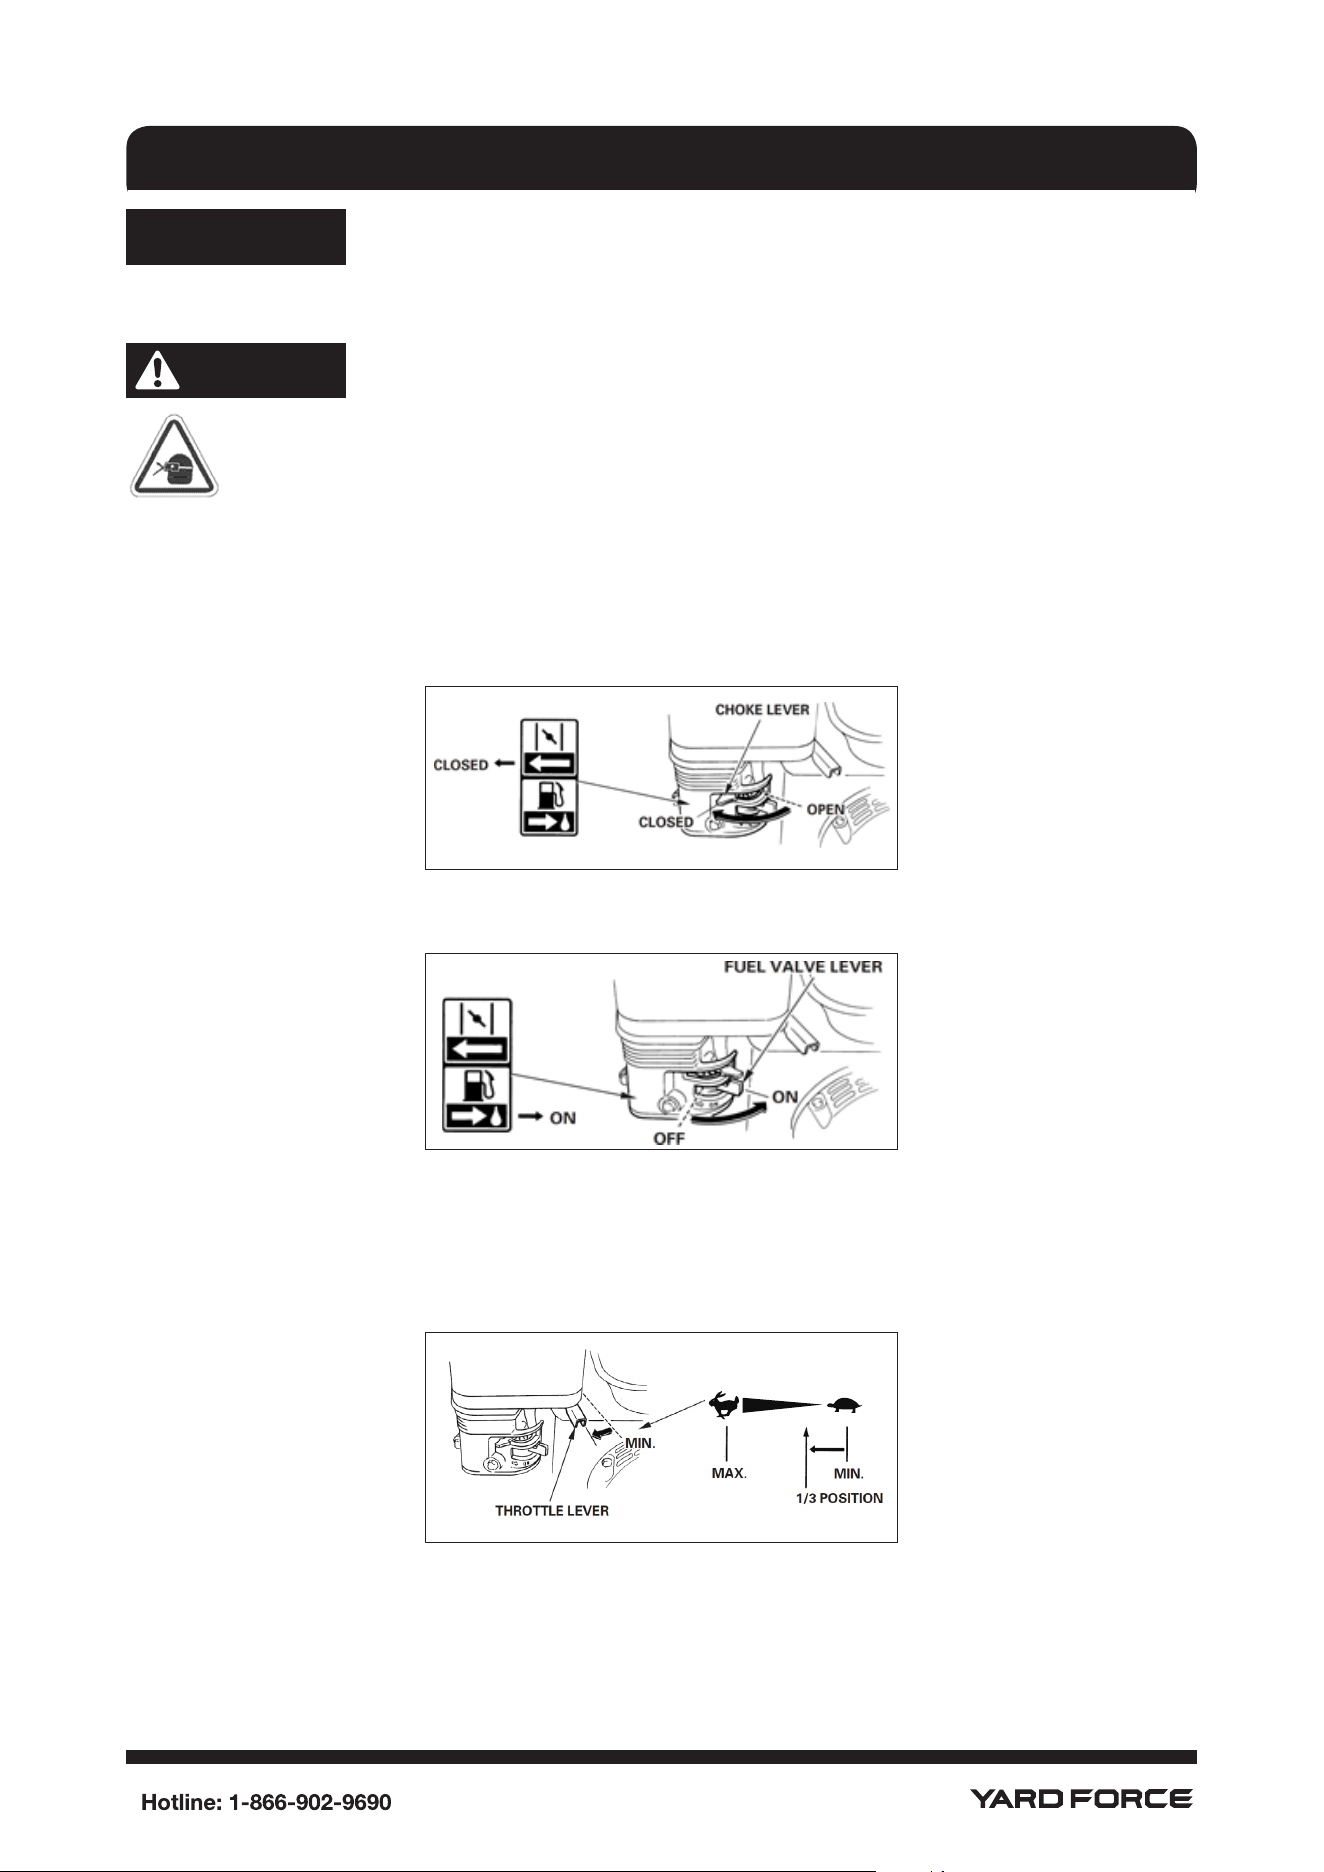
9. Push engine rocker switch to ON position.
OFF
ON
23
OPERATION
NOTICE
Before starting the pressure washer, be sure you are wearing safety goggles as described below.
WARNING
Risk of eye injury.
Spray could splash back or propel objects resulting in serious injury.
• Always wear indirect vented (chemical splash) safety goggles marked to comply with ANSI
Z87.1 when using or in vicinity of this equipment.
• NEVER substitute safety glasses or dry-condition goggles for indirect vented safety goggles.
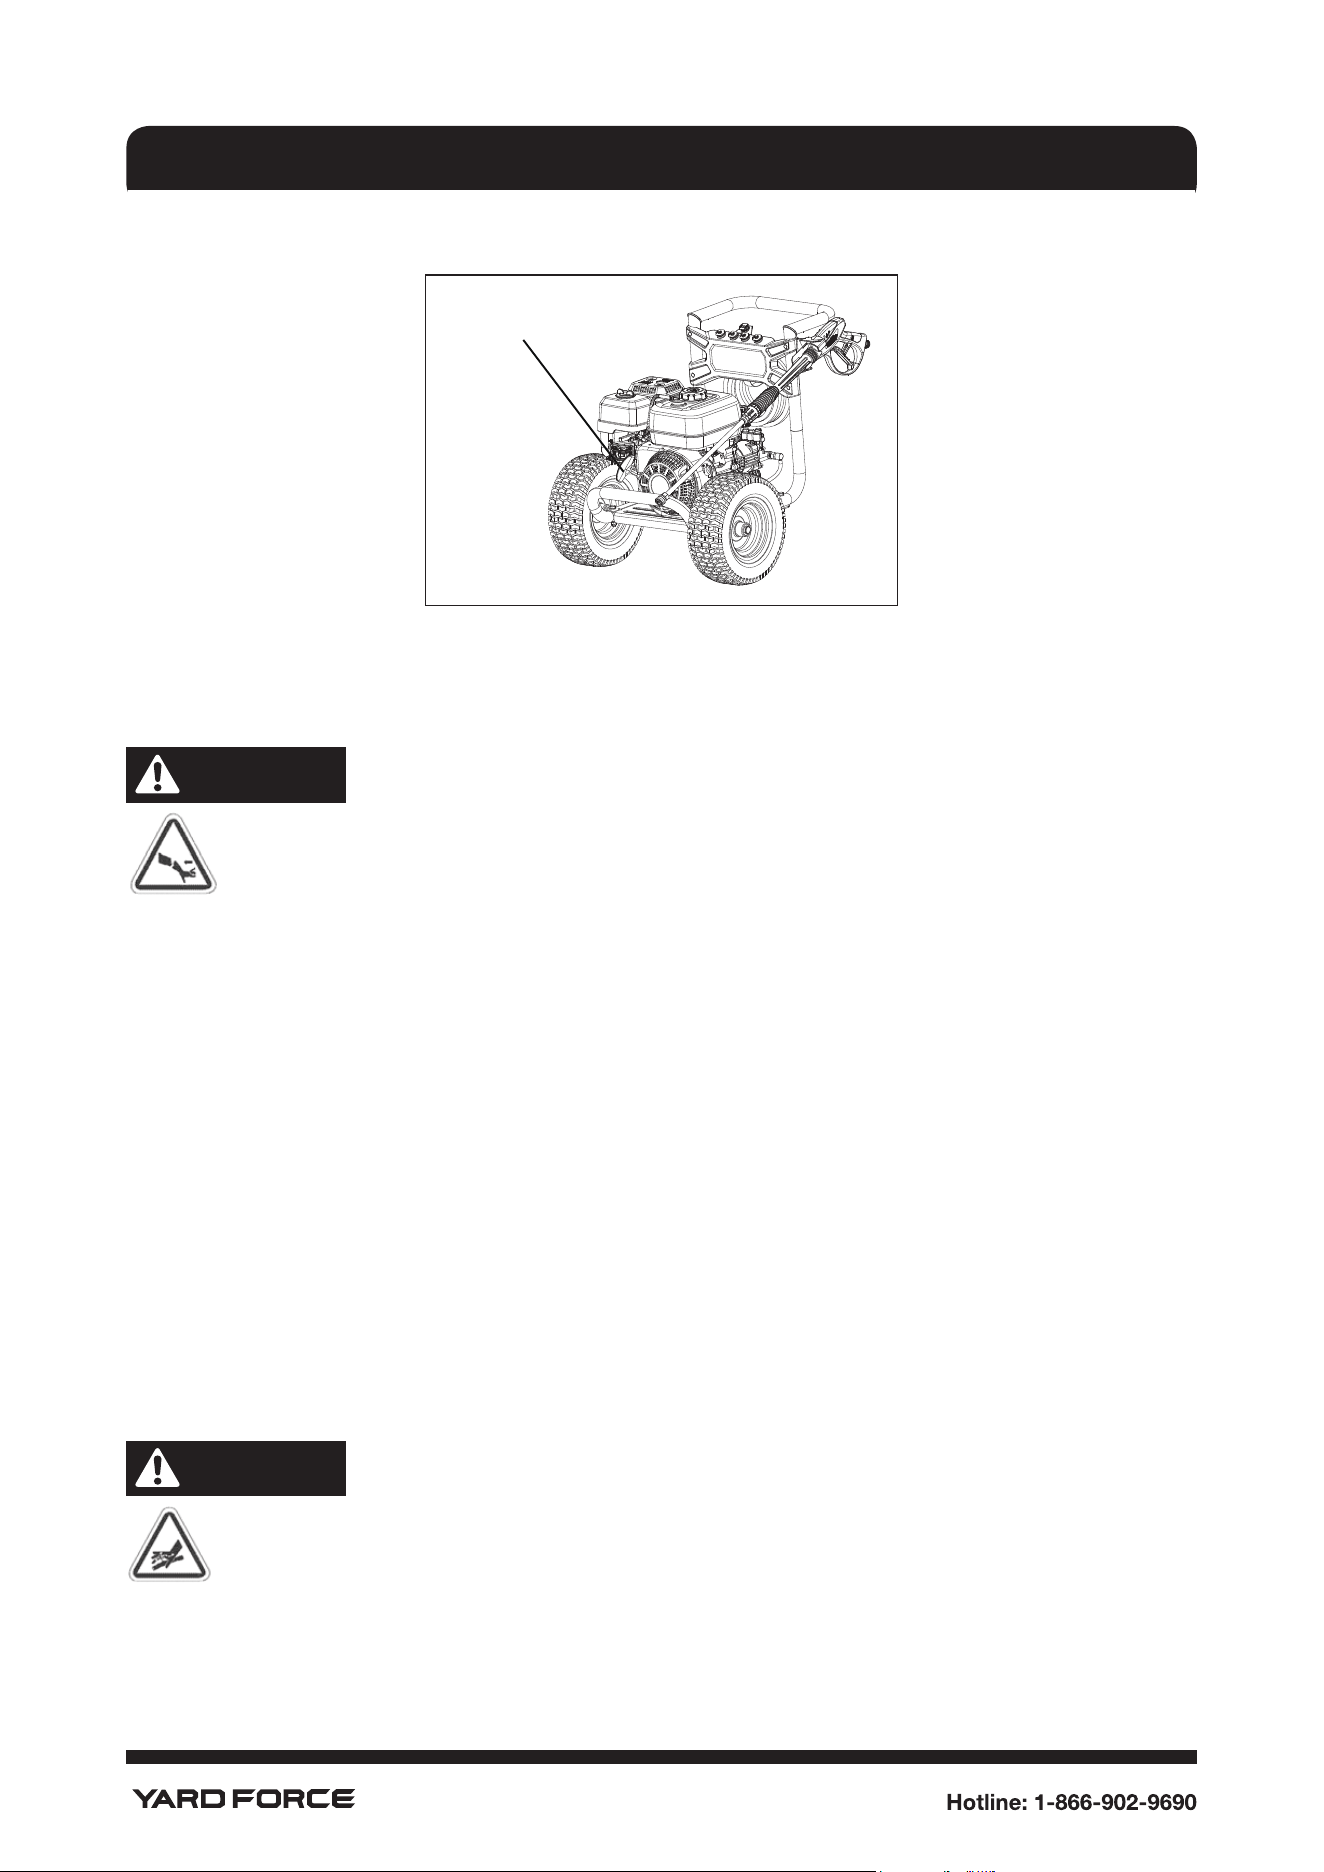
10. To start a cold engine, move the choke lever to "CLOSED" position
11. Move the fuel valve lever to "ON" position (Lever in right position).
NOTE: For a warm engine, be sure the CHOKE lever is in the "ON" position.
12. Move the throttle lever away from the MIN. position (symbol tortoise), about 1/3 of the way
toward the MAX. position (symbol rabbit).
24
OPERATION
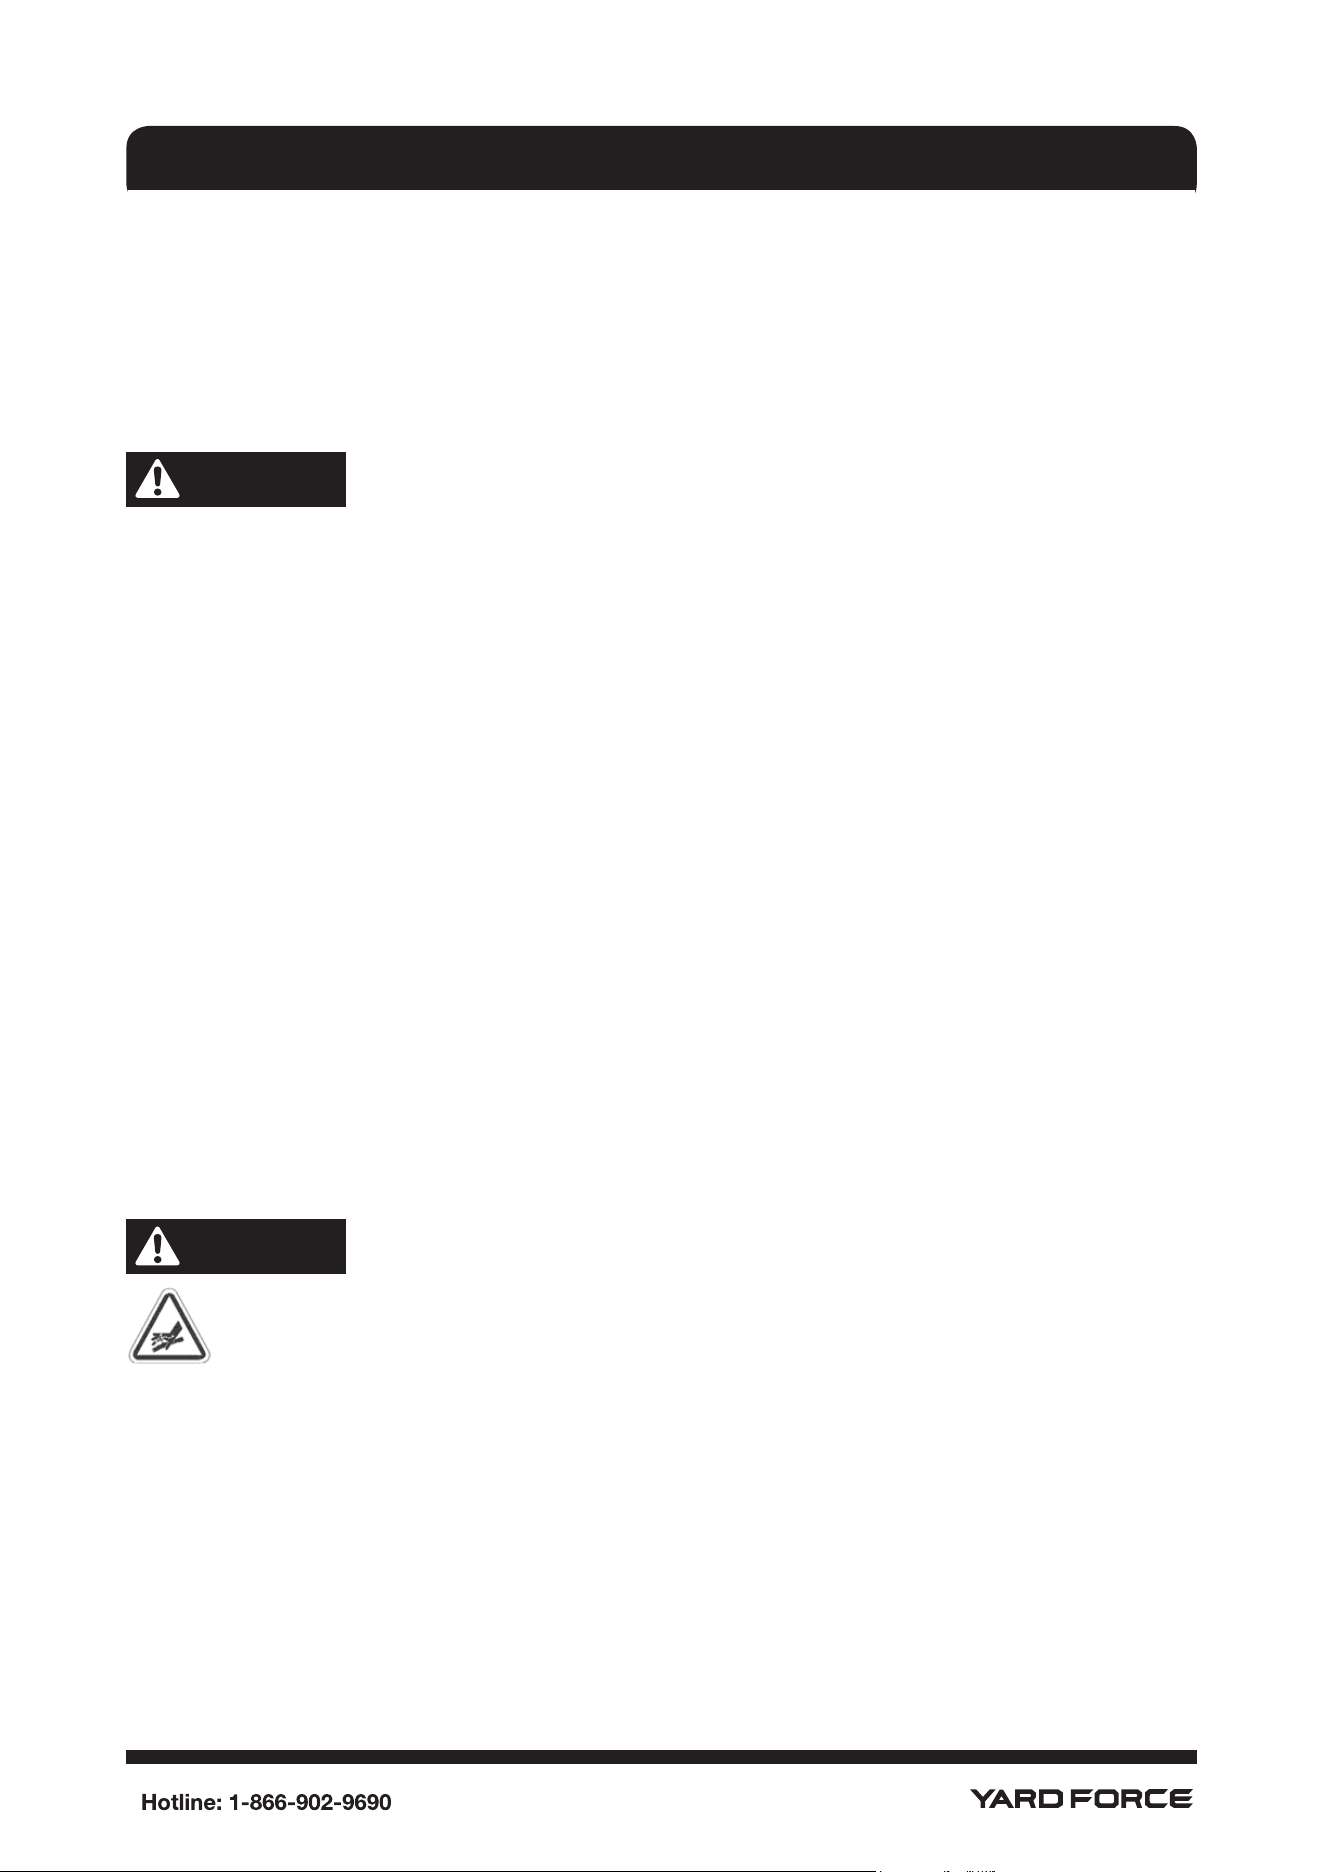
13. When starting engine, grasp starter grip handle and pull slowly until you feel some resistance.
Then pull rapidly to start engine.
Pull Recoil Starter
14. Return the starter grip handle slowly. Do Not let rope "snap back" against starter.
WARNING
Starter cord kickback (rapid retraction) will pull hand and arm toward engine faster than
you can let go which could cause broken bones, fractures, bruises, or sprains resulting
in serious injury.
• NEVER pull starter cord without rst relieving spray gun pressure.
• When starting engine, pull cord slowly until resistance is felt and then pull rapidly to avoid
kickback.
• After each starting attempt, where engine fails to run, always point spray gun at safety
direction, release the grey trigger lock, and squeeze spray gun trigger to release high pressure.
• Firmly grasp spray gun with both hands when using high pressure spray to avoid injury when
spray gun kicks back.
15. When cold engine starts, slowly move choke lever to the "ON" position.
16. If engine fails to start after six pulls, move choke lever to the “ON” position, and then try again.
Move the throttle lever to the MAX. position.
17. Point spray gun at a safety direction, release the trigger lock, and squeeze the trigger to start
your washing work.
NOTE: If the recoil starter is hard to pull, it may be necessary to squeeze the gun trigger to relieve
internal pump pressure.
WARNING
The high pressure stream of water that this pressure washer produces could cut through
skin and its underlying tissues, resulting in serious injury and possible amputation.
Spray gun traps high water pressure, even when engine is stopped and water is
disconnected, which could result in serious injury.
• DO NOT allow CHILDREN to operate pressure washer.
• Keep high pressure hose connected to pump and spray gun while system is pressurized.
25
OPERATION
• NEVER aim spray gun at people, animals, or plants.
• DO NOT secure spray gun in open position.
• DO NOT leave spray gun unattended while machine is running.
• NEVER use a spray gun which does not have a trigger lock or trigger guard in place and in
working order.
• Always be certain spray gun, nozzles and accessories are correctly attached.
WARNING
Exhaust heat/gases could ignite combustibles, stru ctures or damage fuel tank causing a re,
resulting in death or serious injury.
Contact with mufer area could cause burns resulting in serious injury.
• DO NOT touch hot parts and AVOID hot exhaust gases.
• Allow equipment to cool before touching.
• Keep at least 5 ft. (1.5 m) of clearance on all sides of pressure washer including
overhead.
• Replacement parts must be the same and installed in the same position as the original
parts.
How to Stop Your Pressure Washer
1. Release spray gun trigger and set lock.
2. Move the throttle lever to MIN. position.
3. Push engine rocker switch to OFF position.
4. Slide the fuel valve to OFF position.
5. Turn off the water supply.
6. ALWAYS point spray gun at a safety direction, release the grey trigger lock, and squeeze the
trigger to release retained high water pressure.
7. Allow the engine to cool completely before handling and storage.
WARNING
The high pressure stream of water that this pressure washer produces could cut through
skin and its underlying tissues, resulting in serious injury and possible amputation.
Spray gun traps high water pressure, even when engine is stopped and water is
disconnected, which could result in serious injury.
• Every time when you stop engine, ALWAYS point spray gun at safety direction, release the grey
trigger lock, and squeeze spray gun trigger to release high pressure.
NOTE: A small amount of water will squirt out when you release the pressure.
26
OPERATION
How To Use Quick-Connect Nozzles
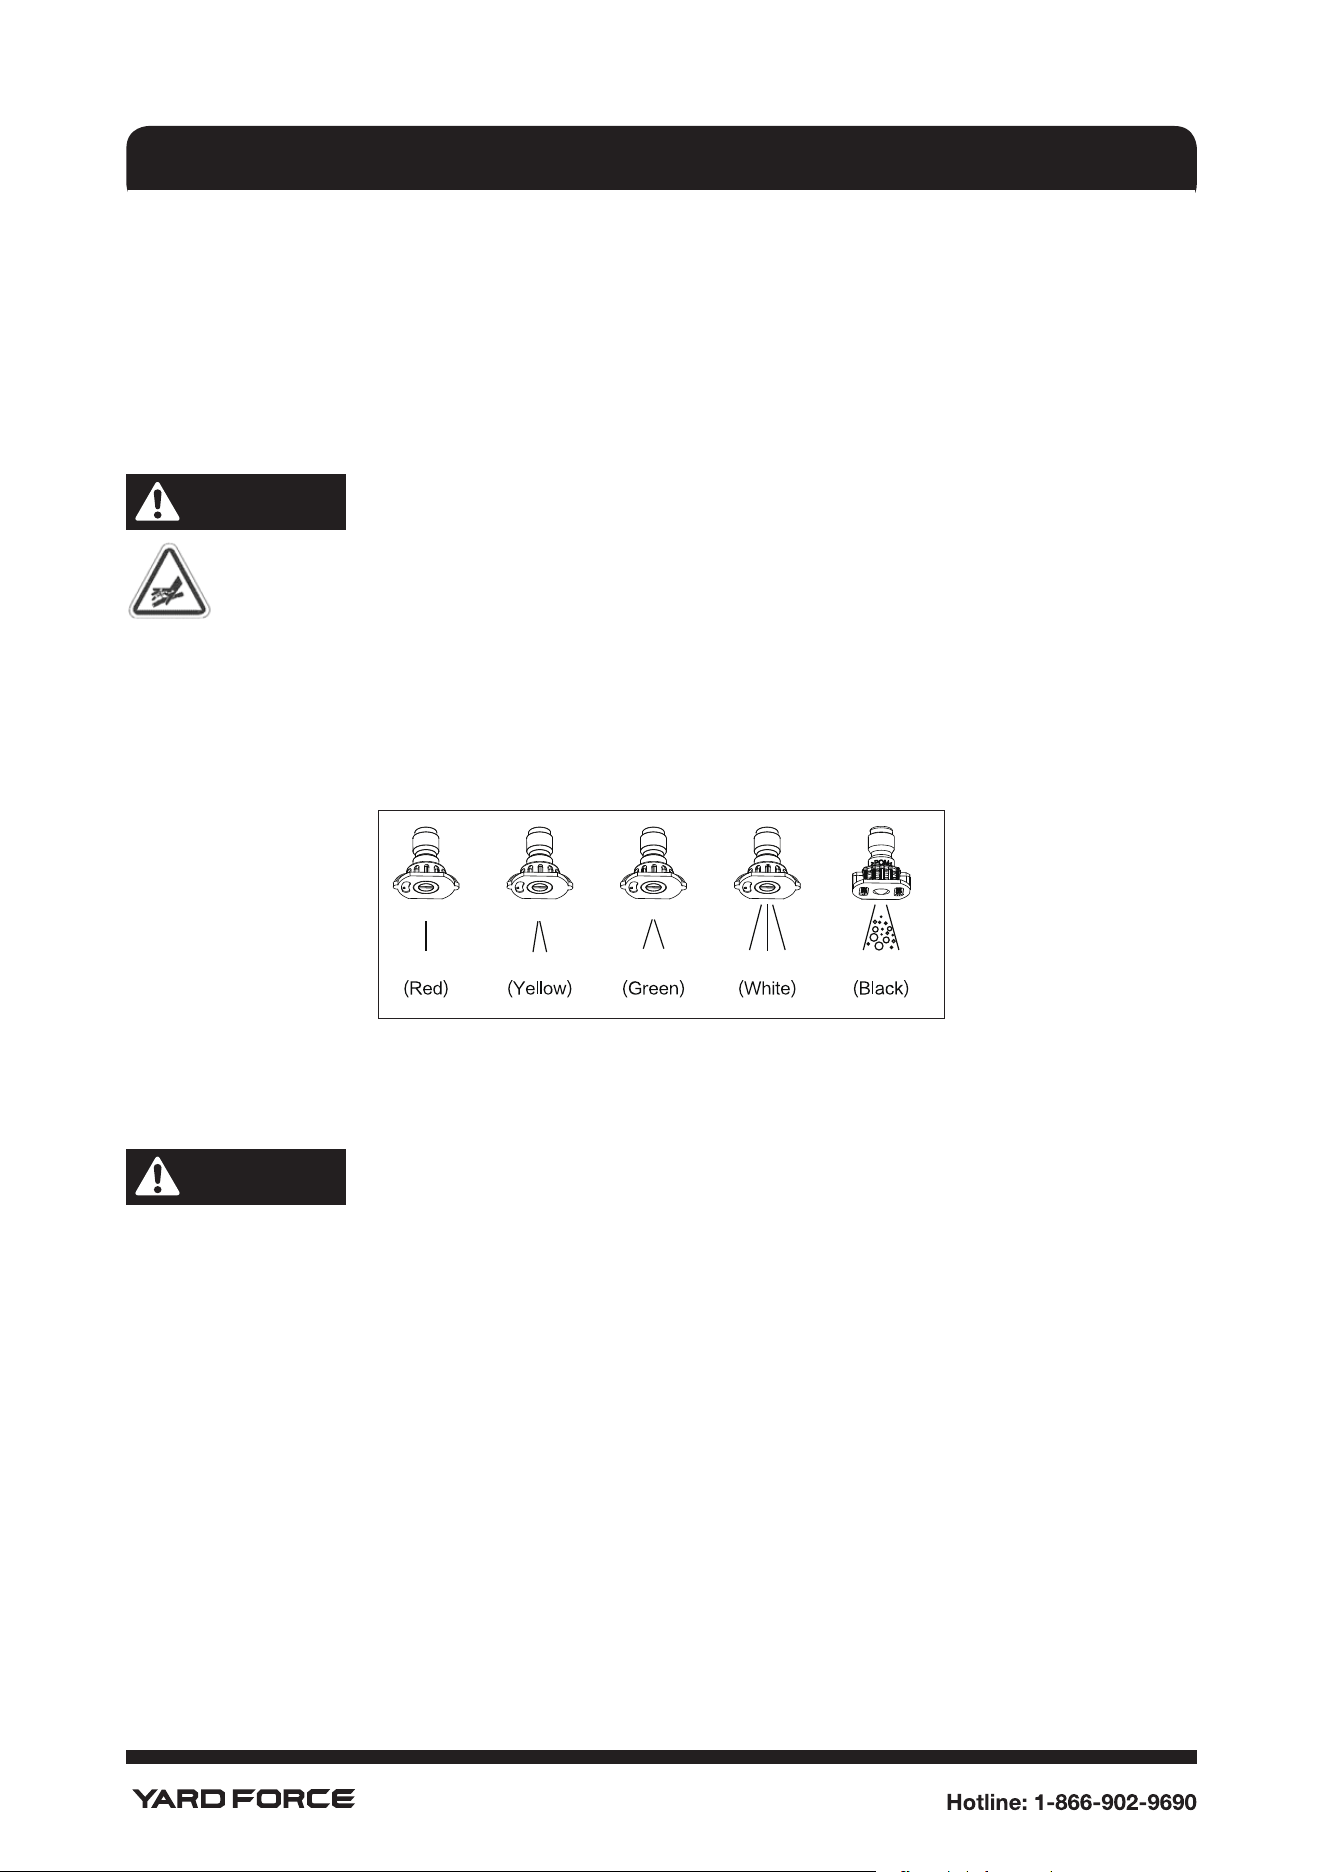
The quick-connect on the spray wand allows you to switch between the 5 different quick-connect
nozzles included with this pressure washer. Nozzles can be changed while the pressure washer is
running once the spray gun trigger is locked. The nozzles vary the spray pattern as shown.
Follow these instructions to change nozzles:
1. Pull back collar on spray wand and pull current nozzle out. Store nozzles in holders on the
accessory bracket attached to the handle.
WARNING
The high pressure stream of water that this equipment produces could cut through skin
and its underlying tissues, resulting in serious injury and possible amputation.
• NEVER change nozzles without the trigger locked on the spray gun.
• DO NOT twist nozzles while spraying.
2. Select desired nozzle.
0° 15°
25°
40° Soap
The spray nozzles are in different colors, below are somesuggestion for different purposes.
• For cleaning of hard surfaces like cement, metal, brick, etc. use the red 0° nozzle.
CAUTION!
This nozzle generates a very powerful stream that will damage softer materials including wood,
plastic and textile. NEVER use this nozzle to clean any part of any vehicle.
• For general rinsing, ideal for most all purpose cleaning such as home siding, brick patios, wood
decks, driveways and sidewalks, garage oors, etc., select yellow 25° nozzle .
• For standard cleaning for most applications, such as sidewalks, lawn furniture, select the green
15° nozzle.
• For delicate rinse, for gentle cleaning of cars trucks, boats, RV's, patio furniture, lawn
equipment, etc., select white 40° nozzle.
• To apply detergent, applies project specic cleaners to help break down stubborn dirt and
grime on a variety of surfaces, select black soap nozzle.
3. Pull back on collar, insert new nozzle and release collar. Tug on nozzle to make sure it is
securely in place.
27
OPERATION
Cleaning Suggestions
• For most effective cleaning, keep nozzle from 8 to 24 inches (20 to 61 cm) away from cleaning
surface.
• If you get nozzle too close, especially using a high pressure nozzle, you may damage surface
being cleaned.
• Do Not get closer than 6 inches (15 cm) when cleaning tires.
Applying Detergent
To apply detergent, follow these steps:
1. Review “How To Use Quick-Connect Nozzles”.
2. Prepare detergent solution as required by the detergent instructions.
3. Place the ltered end of the detergent tube into a container of detergent.
WARNING
Chemical Burn Hazard.
Chemicals could cause burns resulting in death or serious injury.
• DO NOT use bleach or any caustic liquid with pressure washer.
• Use ONLY pressure washer safe detergents/soaps.
4. Make sure black detergent nozzle is installed.
NOTICE
Detergent cannot be applied with any high pressure nozzles (White, Yellow or Green).
5. Make sure the garden hose is connected to the water inlet. Check that the high pressure hose
is connected to the spray gun and the pump. Turn on water.
6. Start the engine following instructions “How to Start Your Pressure Washer”.
NOTICE
You must attach all hoses before you start the engine
Starting the engine without all the hoses connected and without the water turned on could
damage the pump.
• Damage to pressure washer resulting from failure to follow this instruction will void warranty.
7. Apply detergent as directed by the detergent manufacturer.
8. After using soap, place the ltered end of the soap hose into a container of clean water
and use pressure washer drawing clean water through the hose and pump until the system
is thoroughly rinsed. If soap or other chemicals remain in the pump, the pump could be
damaged. Pump damage from soap or chemical residue is not covered under warranty.
28
OPERATION
Pressure Washer Rinsing
WARNING
Be extremely careful if you use the pressure washer from a ladder, scaffolding or any
other relatively unstable location. Pressure in a running washer builds as you climb.
When you press the trigger, the recoil from the initial spray could cause you to fall. The
high pressure spray could also cause you to fall if you are too close to the cleaning
surface.
For Rinsing:
1. Remove the black detergent nozzle, and select the nozzles with high pressure following
instructions “How. To Use Quick-Connect Nozzles", squeeze the spray gun trigger and wait for
the detergent to clear.
WARNING
Kickback from spray gun could cause you to fall resulting in death or serious injury.
• Operate pressure washer from a stable surface.
• Be extremely careful if you must use the pressure washer from a ladder, scaffolding, or any
other similar location.
• Firmly grasp spray gun with both hands when using high pressure spray to avoid injury when
spray gun kicks back.
2. Keep the spray gun a safe distance from the area you plan to spray.
3. Apply a high pressure spray to a small area, then check the surface for damage. If no damage
is found, it is okay to continue cleaning.
4. Start at the top of the area to be rinsed, working down with same overlapping strokes as you
used for washing and applying detergent.
Adjusting Pressure
1. To lower the pressure, turn the pressure regulator knob clockwise to the desired pressure.
2. To return the pressure to the factory setting, turn the pressure regulator knob counter clockwise
until it stops.
29
MAINTENANCE
OWNER'S RESPONSIBILITIES
Follow the hourly or calendar intervals, whichever occurs rst. More frequent service is required
when operating in adverse conditions noted below.
First 5 Hours
Change oil
Every 8 Hours or Daily
Check/clean water inlet screen
Check high pressure hose for damage
Check detergent siphoning hose for damage
Check spray gun and assembly for leaks
Clean debris
Check engine oil level
Clean area around mufer and controls
Clean air intake grille
Every 25 Hours or Annually
Clean air lter
Clean pre-lter, if equipped
Every 50 Hours or Yearly
Check engine oil
Clean engine air cleaner
lnspect mufer and spark arrester
Every 150 Hours or Yearly
Replace engine air cleaner
Yearly
Replace spark plug
Replace air lter
Replace pre-lter, if equipped
Service fuel system
Clean cooling system
1. Clean air lter if clogged. Replace if perforated or torn.
2. Service air lter more often under dirty or dusty conditions.
General Recommendations
Regular maintenance will improve the performance and extend the life of the pressure washer.
See any Yard Force or other qualied service dealer for service.
The pressure washer warranty does not cover items that have been subjected to operator abuse
or negligence. To receive full value from the warranty, the operator must maintain pressure washer
as instructed in this manual including proper storage as detailed in “Storage”.
Some adjustments will need to be made periodically to properly maintain your pressure washer.
All service and adjustments should be made at least once each season. A new spark plug and
clean air lter assure proper fuel-air mixture and help your engine run better and, last longer.
Follow the requirements in the “Maintenance Schedule” chart above.
30
MAINTENANCE
NOTICE
Once a year you should clean or replace the spark plug and replace the air lter. A new spark plug
and clean air lter assure proper fuel-air mixture and help your engine run better and last longer.
Pump Oil
DO NOT attempt any oil maintenance on this pump.
The pump is fabricated and sealed from the factory, requiring no additional maintenance for the
life of the pump.
Emission Control
Maintenance, replacement, or repair of the emissions control devices and systems may be
performed by any non-road engine repair establishment or individual. However, to obtain service
without voiding the warranty, the work must be performed by a manufacturer authorized service
center.
Before Each Use
1. Check engine oil level.
2. Clean debris.
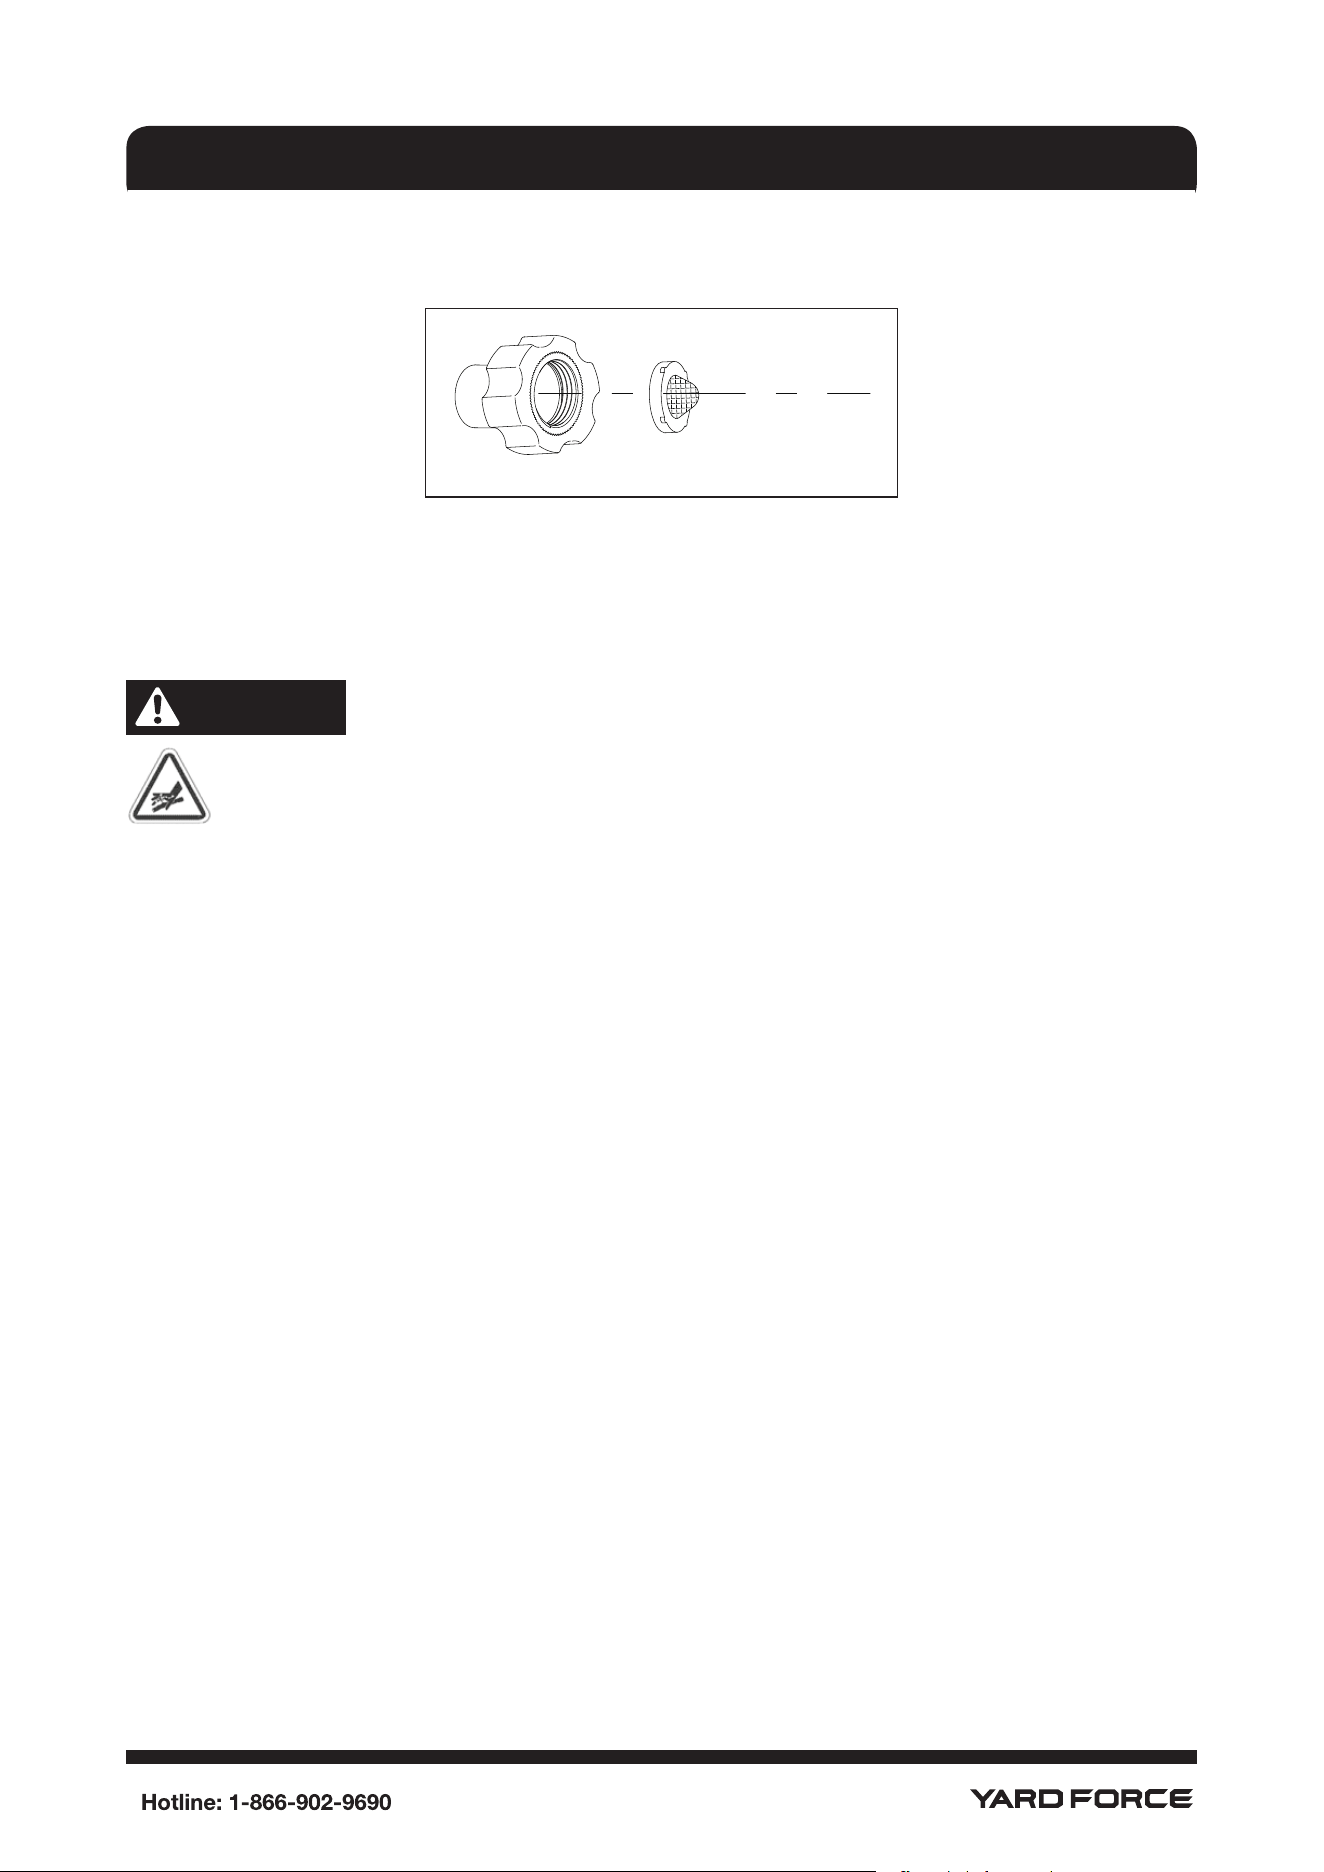
3. Check water inlet screen for damage.
4. Check high pressure hose for leaks.
5. Check chemical lters for damage.
6. Check spray gun, spray wand and nozzle assembly for leaks.
7. Purge pump of air and contaminants.
PRESSURE WASHER MAINTENANCE
Clean Debris
Daily or before use, clean accumulated debris from pressure washer. Keep linkage, spring and
controls clean. Keep area around and behind mufer free from any combustible debris. Inspect
cooling air ns and openings on the pressure washer. These openings must be kept clean and
unobstructed.
Pressure washer parts should be kept clean to reduce the risk of overheating and ignition of
accumulated debris.
• After the pressure washer has cooled, use a damp cloth to wipe exterior surfaces clean.
NOTICE
Improper treatment of pressure washer could damage it and shorten its life.
• DO NOT insert any objects through cooling slots.
• Use a soft bristle brush to loosen caked on dirt, oil, etc..
• Use a vacuum cleaner to pick up loose dirt and debris.
31
MAINTENANCE
Check and Clean Inlet Screen
Examine garden hose inlet screen. Clean if it is clogged or replace if it is torn.
Check High Pressure Hose
High pressure hoses can develop leaks from wear, kinking, or abuse. Inspect hose before each
use. Check for cuts, leaks, abrasions, bulging of cover, or damage or movement of couplings. If
any of these conditions exist, replace hose immediately. Or call at help or new purchase.
WARNING
The high pressure stream of water that this pressure washer produces could cut through
skin and its underlying tissues, resulting in serious injury and possible amputation.
• Never repair a high pressure hose. Replace it.
• Any replacement hose MUST equal or exceed the maximum pressure rating of your pressure
washer.
Check Detergent Siphoning Tube
Examine the detergent tube and clean if clogged. One end of the tube should t tightly on the
lter, the other end will t tightly on the pump. Examine the tube for leaks or tears.
Replace detergent tank or tube if either is damaged. Or call at 1-866-902-9690 for help or new
purchase.
Check Spray Gun, Spray Wand and Nozzles
Examine hose connection to spray gun connected with spray wand and make sure it is secure.
Test trigger by pressing it and make sure it springs back into place when you release it. Engage
trigger lock in UP position and test trigger. You should not be able to squeeze the trigger. Replace
spray gun immediately if it fails any of these tests.
Purge Pump of Air and Contaminants
To remove air from the pump, follow these steps:
• Set up the pressure washer as described in the "Assembly" section and connect the water
supply then turn the hose on.
• Squeeze the trigger on the gun and hold until a steady stream of water appears.
To remove contaminants from the pump, follow these steps:
• Set up the pressure washer as described in the "Assembly" section and connect water supply
then turn on the hose.
• Remove the nozzle from the spray wand.
32
MAINTENANCE
• Start the engine according to instructions in "How To Use Your Pressure Washer" section.
• When the water supply is steady and constant, the contaminants are purged. Engage the
trigger lock and install the nozzle.
Nozzle Maintenance
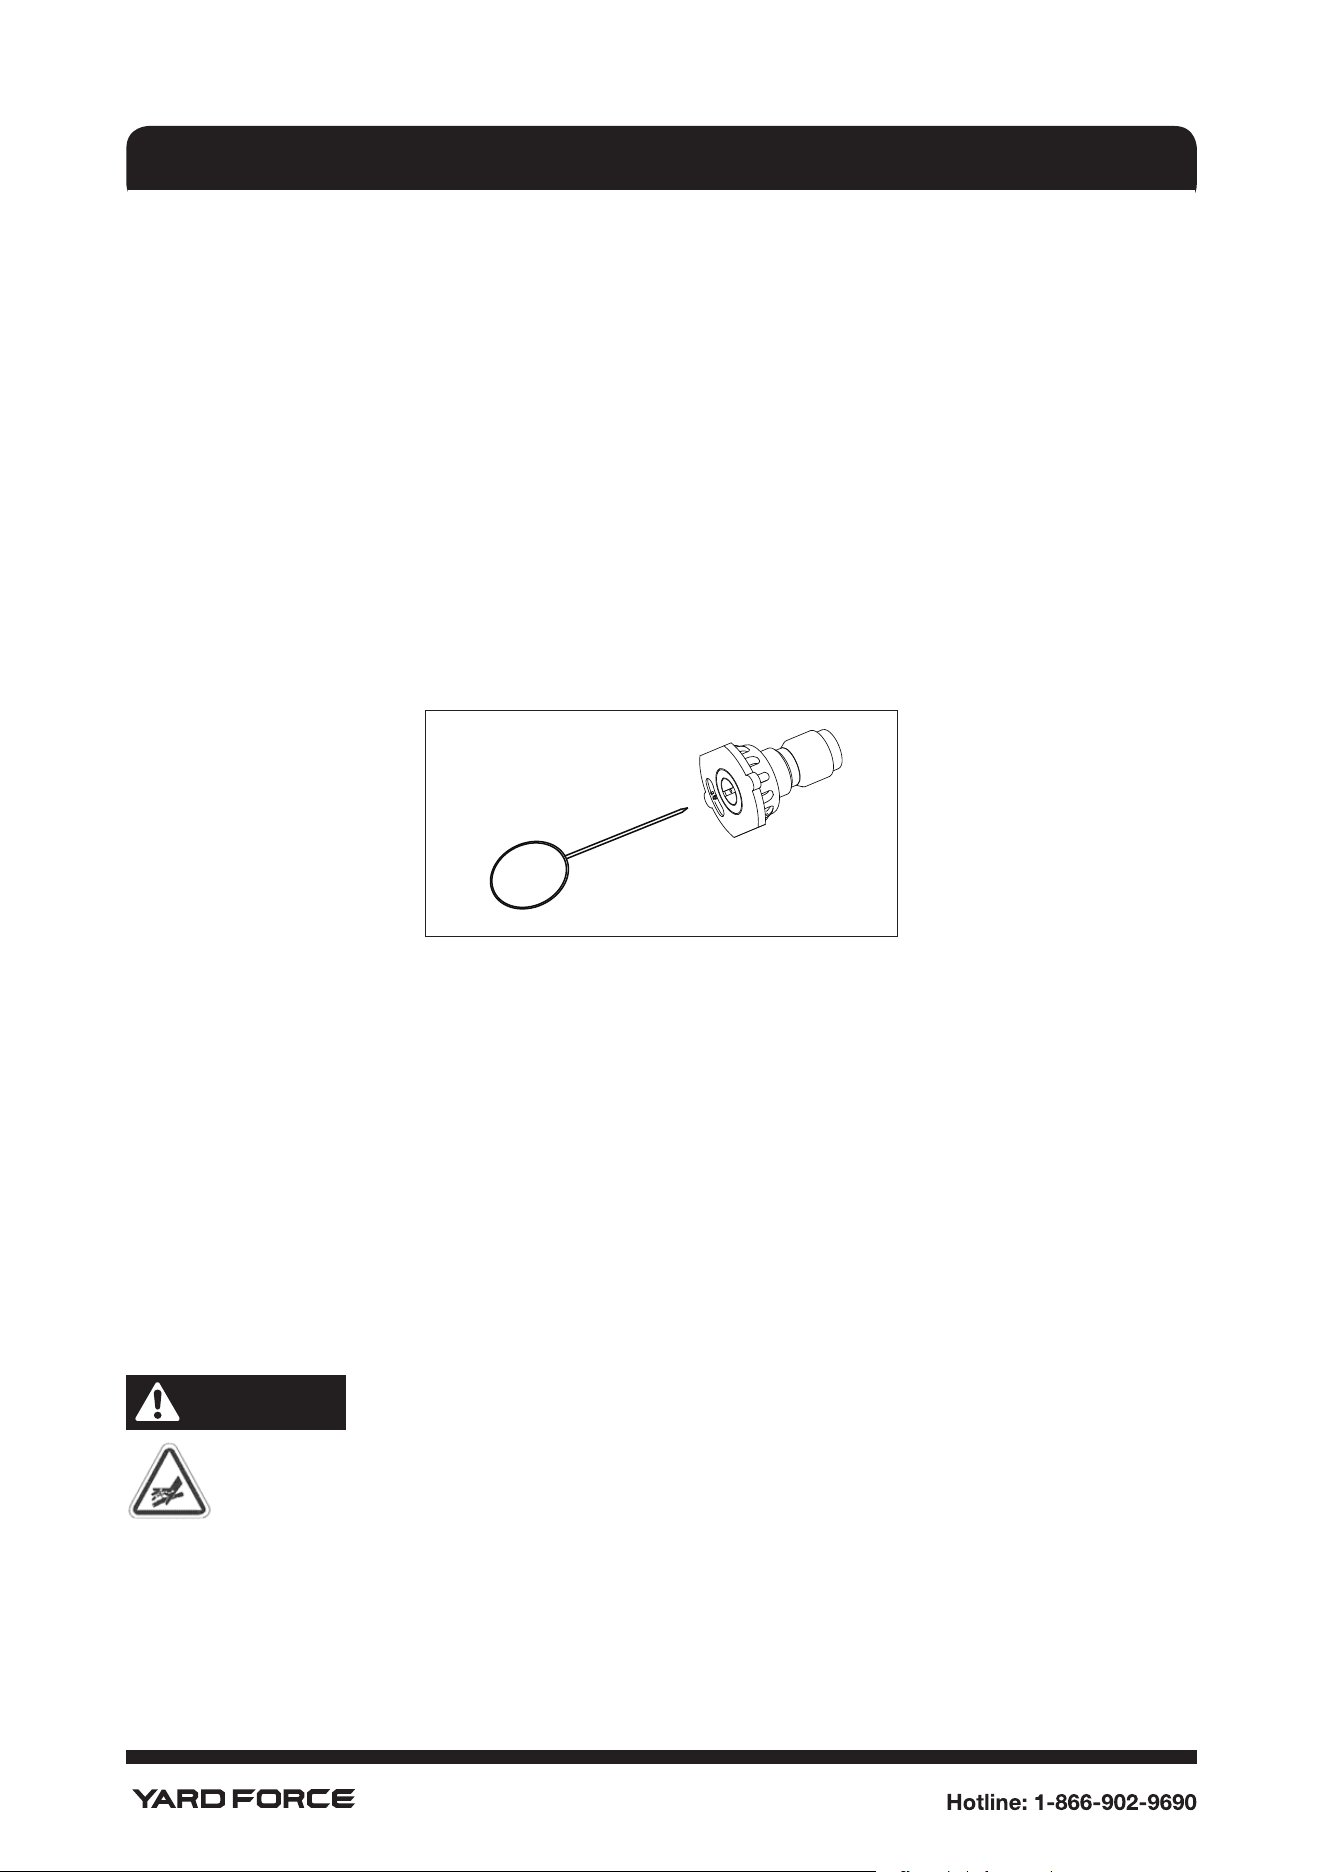
A pulsing sensation felt while squeezing the spray gun trigger may be caused by excessive pump
pressure. The principal cause of excessive pump pressure is a nozzle clogged or restricted with
foreign materials, such as dirt, etc. To correct the problem, immediately clean the nozzle by
needle provided with your pressure washer and follow these instructions:
1. Shut off (O) the engine and turn off the water supply.
2. ALWAYS point spray gun at a safe direction, release trigger lock and squeeze spray gun trigger
to release retained high water pressure.
3. After pressure is released, remove the nozzle from the end of the spray wand.
4. Use the needle to free any foreign material clogging or restricting the nozzle.
5. Using a garden hose, remove additional debris by back ushing water through the nozzle.
6. Reinstall the nozzle to the wand with spray gun.
7. Make sure garden hose is connected to water inlet. Check that high pressure hose is
connected to spray gun and pump. Turn on water.
8. Start engine following instructions “How to Start Your Pressure Washer”.
9. Test if the nozzle is cleaned.
O-Ring Maintenance
Through the normal operation of your pressure washer, o-rings keep the connections of the hoses
and spray gun tight and leak-free. They may become worn or damaged with use.
If you need to nd replacement o-rings, call the Yard Force help line 1-866-902-9690.
WARNING
The high pressure stream of water that this pressure washer produces could cut through
skin and its underlying tissues, resulting in serious injury and possible amputation.
• NEVER repair leaking connections with sealant of any kind. replace o-ring or seal.
ENGINE MAINTENANCE
33
MAINTENANCE
WARNING
Unintentional sparking could cause re or electric shock resulting in death or
serious injury.
WHEN ADJUSTING OR MAKING REPAIRSTOYOUR PRESSUREWASHER
Disconnect the spark plug wire from the spark plug and place the wire where it cannot contact
spark plug.
WHEN TESTING FOR ENGINE SPARK
• Use approved spark plug tester.
• DO NOT check for spark with spark plug removed.
Oil
Oil Recommendations
We recommend the use of certied oil for best performance. Other high-quality detergent oils are
acceptable if classied for service SF, SG, SH, SJ or higher. DO NOT use special additives.
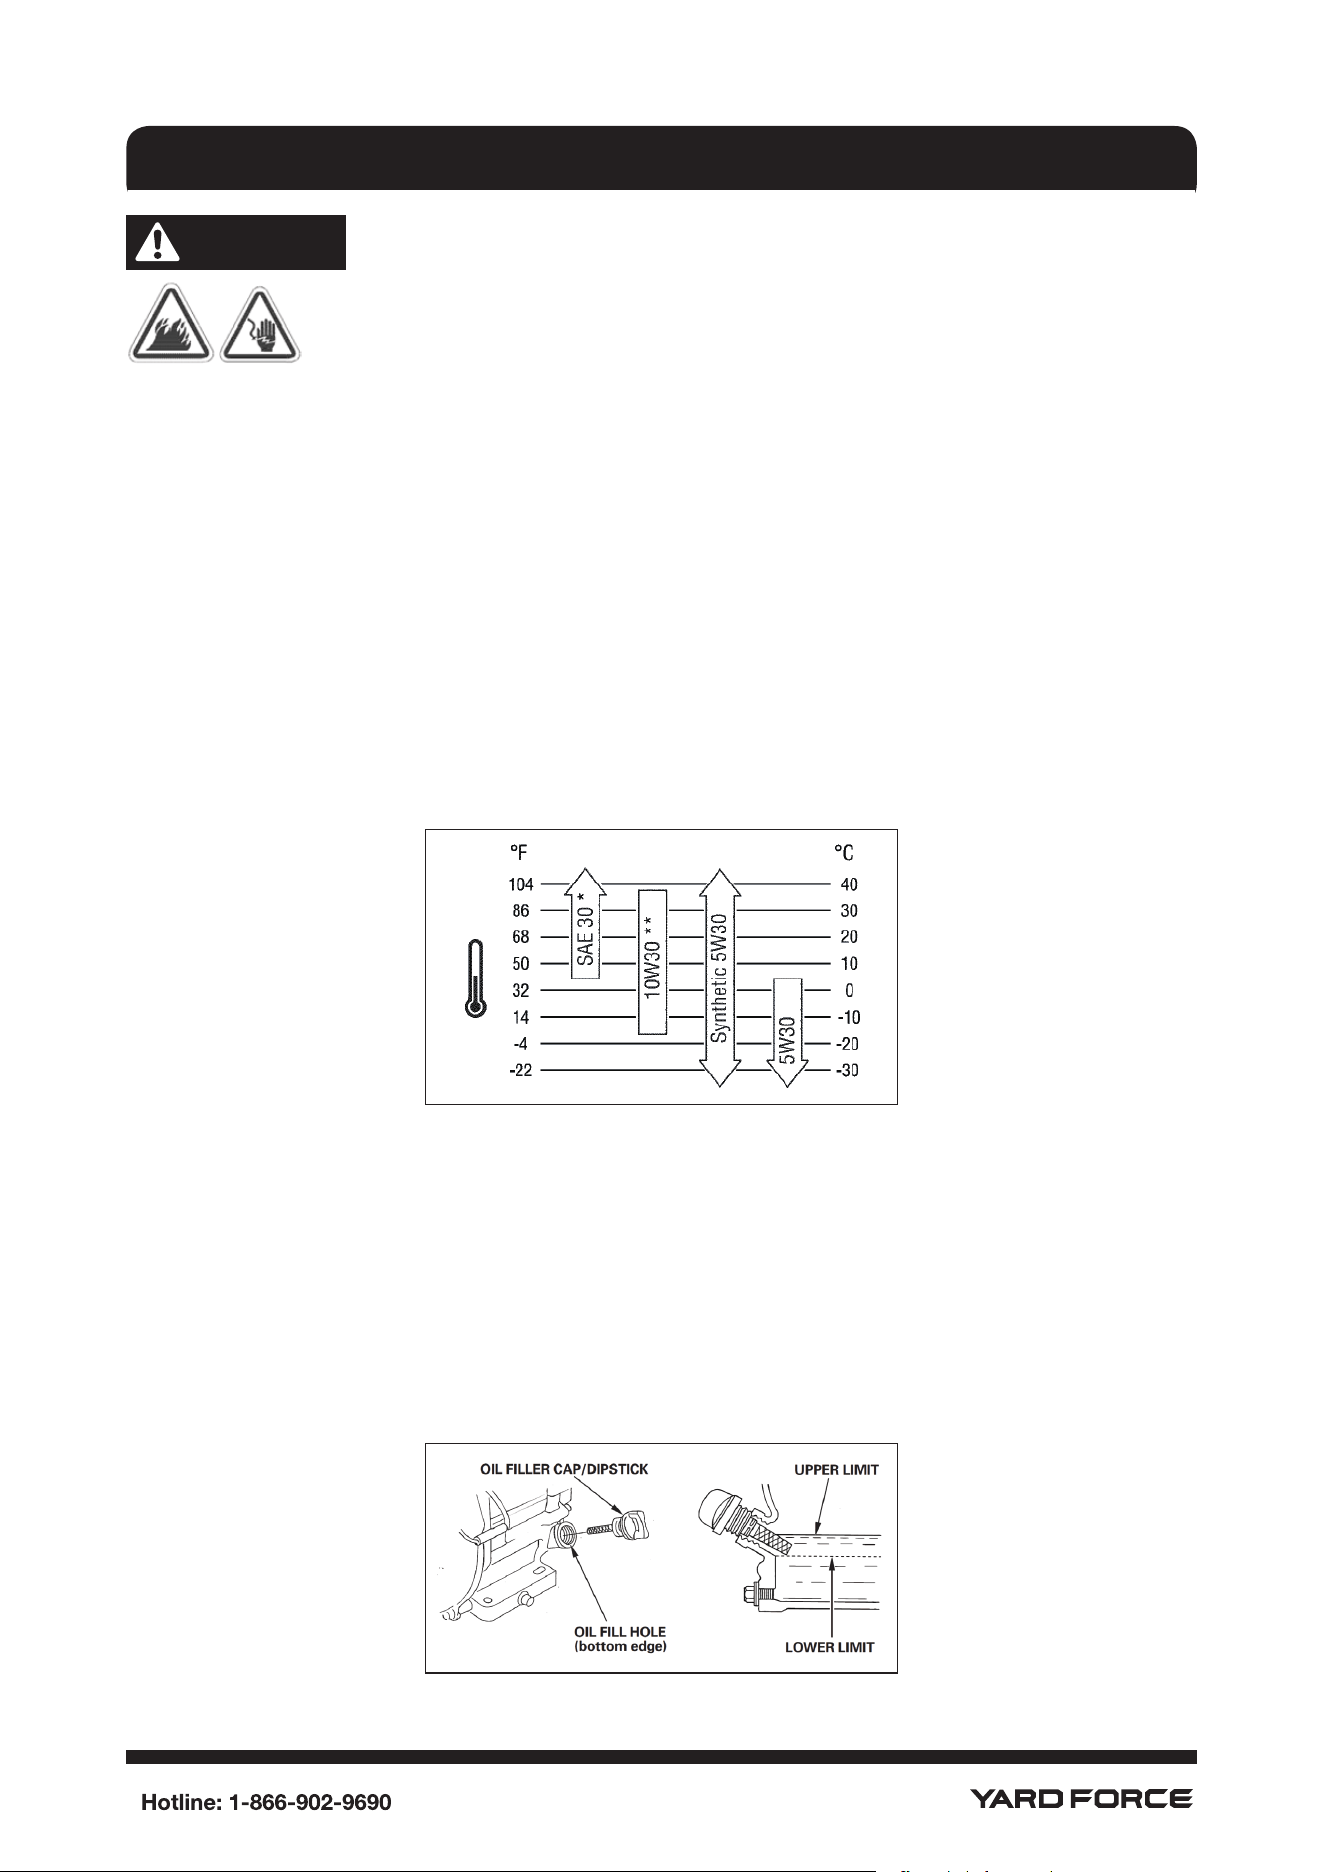
Outdoor temperatures determine the proper oil viscosity for the engine. Use the chart to select the
best viscosity for the outdoor temperature range expected.
• Below 40°F(4°C) the use of SAE 30 will result in hard starting.
• Above 80°F (27°C) the use of 10w30 may cause increased oil consumption. Check oil level
more frequently.
Checking Oil Level
1. Make sure pressure washer is on a level surface.
2. Remove oil dipstick and wipe dipstick with clean cloth. Replace and tighten dipstick. Remove
and check oil level.
3. Verify oil is at FULL mark(top hole) on dipstick. Replace and tighten dipstick.
34
MAINTENANCE
Changing Oil.
Drain the used oil when the engine is warm.Warm oil drains quickly and completely.
1. Place a suitable container below the engine to catch the used oil, then remove the oil ller cap/
dipstick, oil drain plug and washer.
2. Allow the used oil to drain completely, then reinstall the oil drain plug and new washer, and
tighten the oil drain plug securely.
Please dispose of used motor oil in a responsible manner. We suggest you take used oil in a
sealed container to your local recycling center or service station for reclamation. Do not throw
it in the trash, pour it on the ground, or down a drain.
3. With the engine in a level position, ll to the upper limit mark (bottom edge of the oil ll hole) on
the dipstick with the recommended oil .
Service Air Cleaner
Your engine will not run properly and may be damaged if you run it with a dirty air cleaner. Service
more often if operating under dirty or dusty conditions. Replacements are available at your local
Yard Force service center.
To service the air cleaner, follow these steps:
WARNING
Never run the engine without the air lter element installed:
1. With engine off, loosen the fastener that holds the cover.
2. Open the cover and remove the lter.
3. To loosen debris, gently tap the lter on a hard surface. If the lter is excessively dirty, replace
with a new lter.
4. Install the lter.
5. Install the cover tabs into the slots.
6. Close the cover and secure with the fastener.
Service Spark Plug
Changing the spark plug will help your engine to start easier and run better. Disconnect spark plug
wire from spark plug and keep wire away from spark plug while servicing engine.
1. Clean area around spark plug.
2. Remove and inspect spark plug.
3. Replace spark plug if electrodes are pitted, burned or porcelain is cracked.
4. For replacement use the standard resistor spark plug.
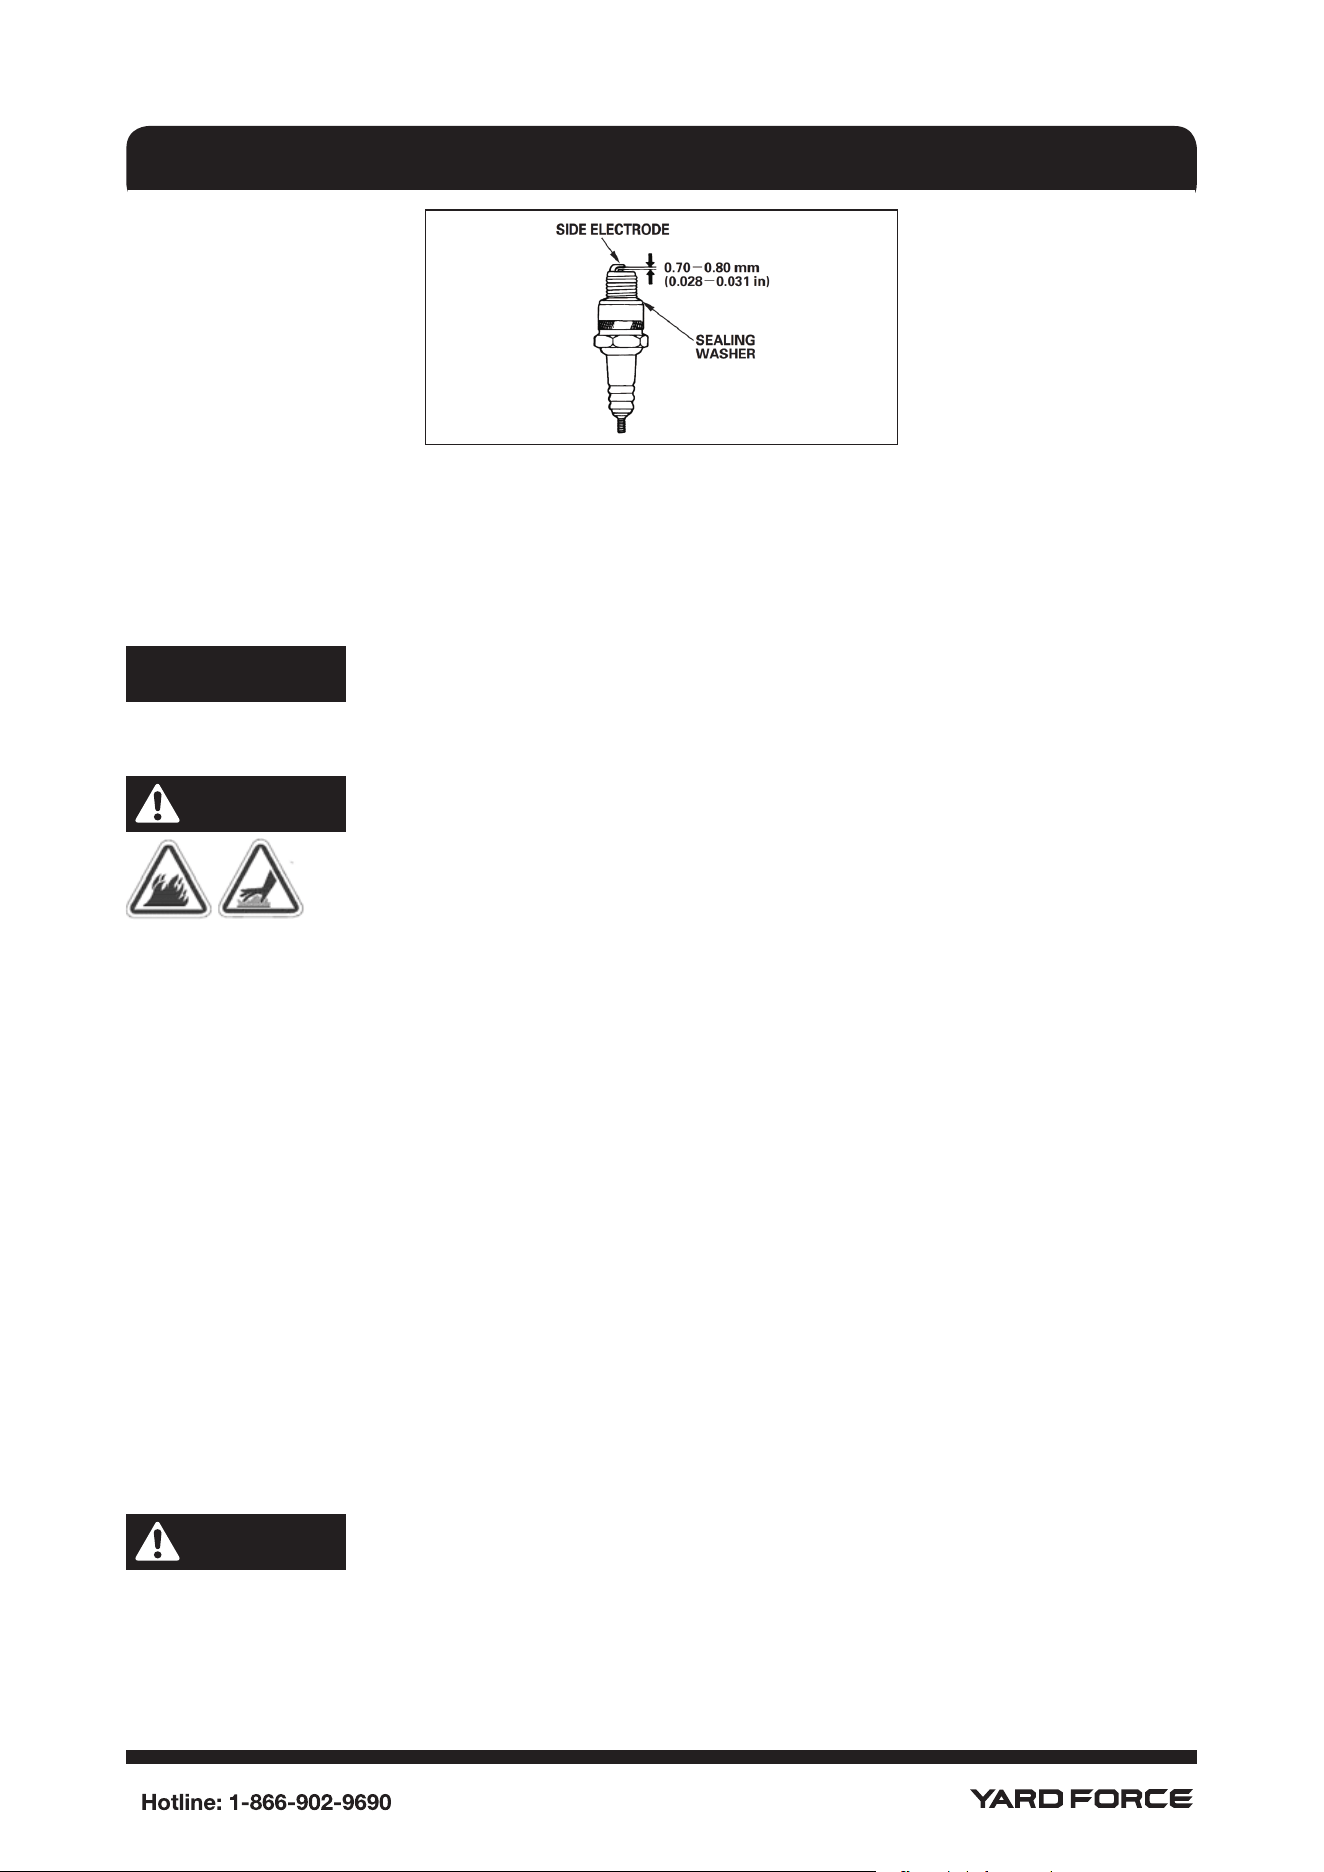
5. Check electrode gap with wire feeler gauge and set gap at 0.70-0.80mm(0.028-0.031in), if
necessary.
6. Install spark plug, tighten securely.
NOTE: If you need help to nd replacement spark plugs, call the Yard Force help line 1-866-902-
9690.
35
MAINTENANCE
lnspect Muffler and Spark Arrester
lnspect the mufer for cracks, corrosion, or other damage
Remove the spark arrester if equipped, and inspect for damage or carbon blockage. If
replacement parts are required, make sure to use only original equipment replacement parts.
NOTICE
If you need help to nd replacement spark arrester, call the Yard Force help line 1-866-902-9690.
WARNING
Exhaust heat/gases could ignite combustibles, structures or damage fuel tank
causing a fire, resulting in death or serious injury.
Contact with muffler area could cause burns resulting in serious injury.
• DO NOT touch hot parts and AVOID hot exhaust gases.
• Allow equipment to cool before touching,
• Keep at least 5 ft. (1.5 m) of clearance on all sides of pressure washer including overhead.
• Replacement parts must be the same and installed in the same position as the original parts.
Air Cooling System
Over time debris may accumulate in cylinder cooling fins and cannot be observed without partial
engine disassembly. For this reason, we recommend you have a qualified Yard Force service
dealer clean the cooling system per recommended intervals (see Maintenance Schedule). It is just
as important to keep top of engine free from debris. See “Clean Debris”.
Carburetor Adjustment
The carburetor is equipped with a non-adjustable idle mixture valve. Top speed has been set at
the factory. If adjustment is required, see an authorized service dealer.
CAUTION!
Excessively high operating speeds could result in minor injury.
Excessively low speeds impose a heavy load.
36
MAINTENANCE
• DO NOT tamper with governor spring, links or other parts to increase engine speed. Pressure
washer supplies correct rated pressure and flow when running at governed speed.
• DO NOT modify pressure washer in any way.
After Each Use
Water should not remain in pressure washer for long periods of time. Sediments or minerals can
deposit on pump parts and "freeze" pump action. Follow these procedures after every use:
1. Shut OFF engine, turn off water supply, point gun at a safe direction, release trigger lock and
squeeze trigger of spray gun to relieve trapped pressure and let engine cool.
WARNING
The high pressure stream of water that pressure washer produces could cut through skin
and its underlying tissues, resulting in serious injury and possible amputation.
Spray gun traps high water pressure, even when engine is stopped and water is
disconnected, which could result in serious injury.
Keep high pressure hose connected to pump and spray gun while system is pressurized.
ALWAYS point spray gun in safe direction, release trigger lock and squeeze trigger of spray gun
to release high pressure, every time you stop engine.
2. Disconnect hose from spray gun. Drain water from hose, gun, and wand.
3. Flush detergent inlet tube if used.
4. Store the spray gun, wand, nozzles
5. Store the pressure washer in a clean, dry area.
6. If storing for more than 30 days see “Long Term Storage” on next page.
WARNING
Fuel and its vapors are extremely flammable and explosive which could
cause burns, fire or explosion resulting in death or serious injury.
WHEN STORING FUELOR EQUIPMENTWITH FUEL IN TANK
• Store away from furnaces, stoves, water heaters, clothes dryers, or other appliances that have
pilot light or other ignition source because they could ignite fuel vapors.
37
WINTER STORAGE
CAUTION!
You must protect your pressure washer from freezing temperatures.
•
Failure to do so will permanently damage your pump and render your unit inoperable.
•
Freeze damage is not covered under warranty.
To protect the pressure washer from freezing temperatures:
1. Follow steps 1-6 in the previous section "After Each USE”.
2. Use pump saver, to treat pump. This prevents freeze damage and lubricates pistons and seals.
Follow directions on pump saver.
3. Store the pressure washer in a clean, dry area.
LONG TERM STORAGE
If you do not plan to use the pressure washer for more than 30 days, you must prepare the engine
and pump for long term storage.
It is important to prevent gum deposits from forming in essential fuel system parts such as the
carburetor, fuel lter, fuel hose or tank during storage. Also, experience indicates that alcohol-
blended fuels (called gasohol, ethanol or methanol) can attract moisture, which leads to separation
and formation of acids during storage. Acidic gas can damage the fuel system of an engine while
in storage.
Protect Fuel System
Fuel Additive:
Fuel can become stale when stored over 30 days.Stale fuel causes acid and gum deposits to form
in the fuel system or on essential carburetor parts. To keep fuel fresh, we recommend use the fuel
additive supplied by a qualied Yard Force service dealer.
There is no need to drain gasoline from the engine if a fuel stabilizer is added according to
instructions. Run the engine for 2 minutes to circulate the stabilizer throughout the fuel system
before storage.
If gasoline in the engine has not been treated with a fuel stabilizer, it must be drained into an
approved container. Run the engine until it stops from lack of fuel.
The use of a fuel stabilizer in the storage container is recommended to maintain freshness.
Change Oil
While engine is still warm, drain oil from crankcase. Rell with recommended grade. See
"Changing Oil" section.
Protect Pump
To protect the pump from damage caused by mineral deposits or freezing, use Pump Saver, to
treat pump. This prevents freeze damage and lubricates pistons and seals.
NOTE Pump Saver is available as an optional accessory. It is not included with the pressure
washer.
Contact your local Yard Force service center to purchase Pump Saver.
STORAGE
38
Other Storage Tips
1. DO NOT store fuel from one season to another unless it has been treated as described in
Protect Fuel System.
2. Replace fuel container if it starts to rust. Rust and/ or dirt in fuel can cause problems if it's used
with this pressure washer.
3. Cover unit with a suitable protective cover that does not retain moisture.
WARNING
Storage covers could cause a re resulting in death or serious injury.
•
DO NOT place a storage cover over a hot pressurewasher.
•
Let equipment cool for a sufcient time before placing any cover on the equipment.
4. Store pressure washer in a clean and dry area.
STORAGE
39
TROUBLESHOOTING
Problem Cause Correction
Pump has following problems.
No pressure, low pressure
1. Nozzle tip not attached.
2. Water inlet is blocked.
3. Inadequate water supply.
4. Inlet hose is kinked or leaking.
5. Clogged inlet hose strainer
6. Water supply is over 100°F.
7. High pressure hose is blocked
or leaks.
8. The engine RPM is not set to
HIGH
9. Nozzle is obstructed.
10.Damaged pump.
1. Attached required nozzle tip
2. Clear inlet.
3. Provide adequate water ow.
4. Straighten inlet hose, patch
leak.
5. Check and clean inlet hose
strainer.
6. Provide cooler water supply.
7. Clear blocks in outlet hose.
8. Set RPM (Throttle lever) to
HIGH position.
9. Clean nozzle.
10.Contact Yardforce service
facility.
No intake of detergent. 1. Detergent siphoning tube is
notconnected.
2. Chemical lter is clogged.
3. Dirty in-line lter.
4. Wrong nozzle.
5. Damaged detergent siphoning
tube.
6. Detergent is incorrect.
1. Connect detergent siphon
tube.
2. Clean or replace lter/
detergent siphoning tube.
3. Replace lter.
4. Use black nozzle when
applying detergent. Refer to the
instruction manual.
5. Replace detergent siphoning
tube.
6. Clear detergent from siphon
line and detergent intake valve.
Use only correct detergent
meant for pressure washers.
Engine sounds abnormal or
overloaded
1. Pressure is too high; 1. Contact Yardforce service
facility.
Engine doesn't start 1. The engine power switch is
OFF(O)position.
2. No fuel.
3. Dirty air cleaner.
4. Stale gasoline
5. Spark plug wire not connected
to spark plug.
6. Bad spark plug.
7. Low oil level.
8. Clogged carburetor.
9. Excess water pressure in
pump or hose.
10. Engine has lost compression.
1. Ensure the switch is in ON (l)
position
2. Fill the fuel tank with regular
gasoline.
3. Clean or replace air cleaner.
4. Drain gas tank; ll with fresh
fuel
5. Connect wire to spark plug.
6. Replace spark plug.
7. Fill crankcase to proper level.
8. Clean the carburetor.
9. Release water pressure by
squeezing trigger on gun.
10. Contact Yard Force service
facility.
Engine stops down during
operation.
Out of gasoline. Fill fuel tank.
Engine lacks power. Dirty air lter. Replace air lter.
Starter rope doesn't recoil Recoil mechanism is broken. Contact Yard Force service
facility.
40
YARD FORCE TWO YEAR LIMITED WARRANTY
Product Warranty
Please keep your original purchase receipt in a safe place as proof of purchase. Warranty coverage for
this product must be veried by the original purchase receipt. The warranty period begins on the day that
the product was purchased from an authorized retailer of Yard Force products. Warranty coverage only
applies to the original purchaser and is not transferrable. Warranty coverage is only provided on products
purchased and used in the USA and Puerto Rico from authorized Yard Force retailers. Products purchased
or used outside of the USA and Puerto Rico are not covered by this warranty.
(2) Two-Year Warranty – Pump and Engine
The YF3600-H has a 2-Year Limited Warranty from the date of purchase against manufacturer
defects for residential use only. Commercial use voids the warranty. This warranty does not cover accidental
damage, unreasonable use, normal wear and tear, neglect or non-compliance with the Operating,
Safety and Maintenance Instructions. All service, outside of normal maintenance as described in this
manual, must be done by an authorized service technician. Any unauthorized service or changes to the
original conguration of this product will void the warranty. All parts and accessories used on and with this
product must be manufactured/or and authorized by Merotec Inc.
(90) Ninety-Day Warranty – Accessories
The accessories included with the YF3600-H; including hose, pneumatic tires, trigger handle and wand,
and other similar parts are warranted against manufacturer defects for residential use only for a period of 90
days from date of purchase.
Warranty does not cover loss of use or other consequential damages arising from any of the above, nor
does it cover repairs made or attempted by unauthorized persons. This warranty is void if the product is
used for commercial, rental or industrial purposes. Certain parts, attachments and accessories are subject
to normal wear and tear and are excluded from the warranty.
Service and Warranty Claims Process
Contact the Yard Force Support Center toll-free at (866) 902-9690 Monday-Friday between 8:30 AM and
5:00 PM Eastern Time for service and warranty support.
Yard Force USA Service Support agents can help you troubleshoot problems over the phone to get you
back up and running as quickly as possible. In the situation where service or warranty inspection is needed,
please follow these steps:
1. Contact Yard Force USA at (866)902-9690 Monday-Friday between 8:30 AM and 5:00 PM Eastern
Time.
2. Send in proof-of-purchase and serial number (if applicable) to conrm warranty coverage.
3. lf service or a waranty evaluation is requested, Yard Force USA will provide an RGA number that should
be used in allcommunications with Yard Force USA and if necessary a list of local authorized service centers
to bring your pressure washer to for evaluation and repair.
4. All shipments to Yard Force USA must have an RGA number. Any shipmentreceived that does not have
an RGA numbeclearly marked on the outside of the box will be refused.
5. All shipments must be sent pre-paid, Yard Force USA does not pay for any shipping costs for service
or warranty evaluation. Yard Force USA is not responsible for any packages that are lost by carrier. We
recommend that shipments are made by a carrier that provides tracking and delivery conrmation.
For more information or to ask questions, please call toll-free (866) 902-9690 Monday-Friday between
8:30 AM and 5:00 PM Eastern Time.
SAVE THESE INSTRUCTIONS
WARRANTY
www.YardForceUSA.com
Scan Code to connect with Yard Force Support
Need Help?
Please do not return the product to your place of purchase yet. We’re here to help and take care
of all your needs.
Contact our customer service department for help with:
• Product assembly or use
• Missing or damaged parts
• Troubleshooting
• Replacement parts and accessories
You can submit a support request by scanning the QR code on this page, or by visiting:
www.YardForceUSA.com/contact-support
Register your product today to maintain warranty coverage and stay up to date with
information on the use, care, maintenance and service of your product.
Register online today at:
www.yardforceusa.com/product-registration
Merotec Inc.
3655 Kennesaw North Industrial Parkway
Kennesaw, GA 3014
4
Copyright © 2022 Merotec Inc.
Made in China at a SUMEC manufacturing facility.
Part Number: YF1516CS/YF015CS-H
2204
Merotec Inc.
3655 Kennesaw North Industrial Parkway
Kennesaw, GA 30144
Copyright © 2024 Merotec Inc.
Part Number: YF3600-HMAN-A
2312