
1
Content
1. Parts of the Camera ............................................................................... 3
2. Preparing for Use ................................................................................... 4
Installing the Battery ........................................................................... 4
Charging the Battery .......................................................................... 5
Inserting the Memory Card ................................................................. 6
Formatting the Memory Card ............................................................. 7
Setting the Language ......................................................................... 8
Setting the Date and Time .................................................................. 8
LCD Screen Display ........................................................................... 9
3. Using the Camera................................................................................. 14
Powering the Camera On and Off .................................................... 14
Changing the Record Mode ............................................................. 14
Shooting Still Photos ........................................................................ 15
Using the Self-timer .......................................................................... 15
Using the Flash ................................................................................ 16
Recording a Video Clip .................................................................... 17
Recording Audio ............................................................................... 18
4.Using the Menu in Record Mode ........................................................... 18

2
Menu in Capture Mode ..................................................................... 18
Menu in Video Mode ........................................................................ 23
Setup Menu ...................................................................................... 25
5. Playback ............................................................................................... 26
Playback Still Images ....................................................................... 26
Playback Movie Clips ....................................................................... 27
Playback Audio Files ........................................................................ 27
6. Making Connections ............................................................................. 29
Connecting the Camera to a PC ...................................................... 29
7. Software Installation ............................................................................. 31
8. Technical Specifications ....................................................................... 34
3
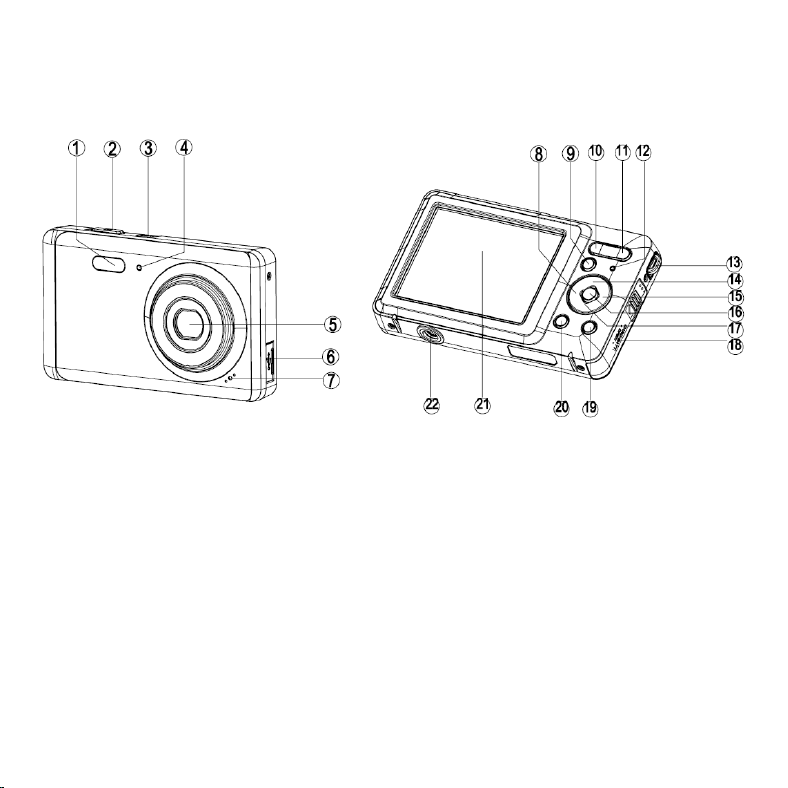
1. Parts of the Camera
1: Flash
2: Shutter button
3: Power button
4: Self-timer indicator light
5: Lens
6: USB jack
7: Microphone
8: Left/self-timer button
9: Playback button
10: Zoom out button
11: Zoom in button
12: Status indicator light
13: Hand strap
14: Up/Display button
15: Right / Flash button
16: OK button
4
17: Down/Mode button
18: Battery /SD card cover
19: Delete Button
20: Menu button
21: TFT monitor screen
22: Tripod socket
2. Preparing for Use
Installing the Battery
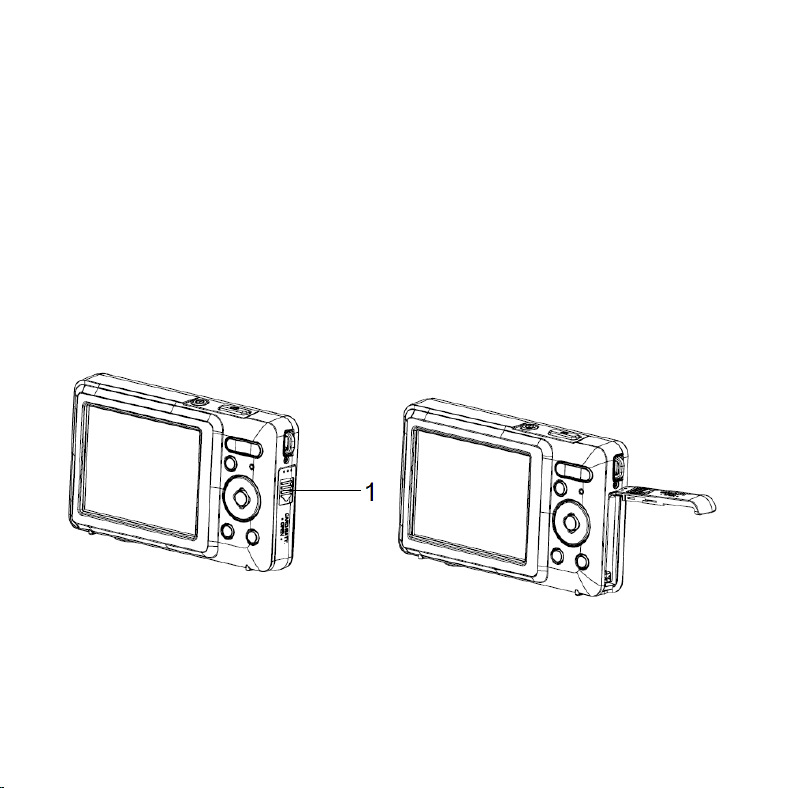
1. Push the lock button (1) down to open the battery cover.
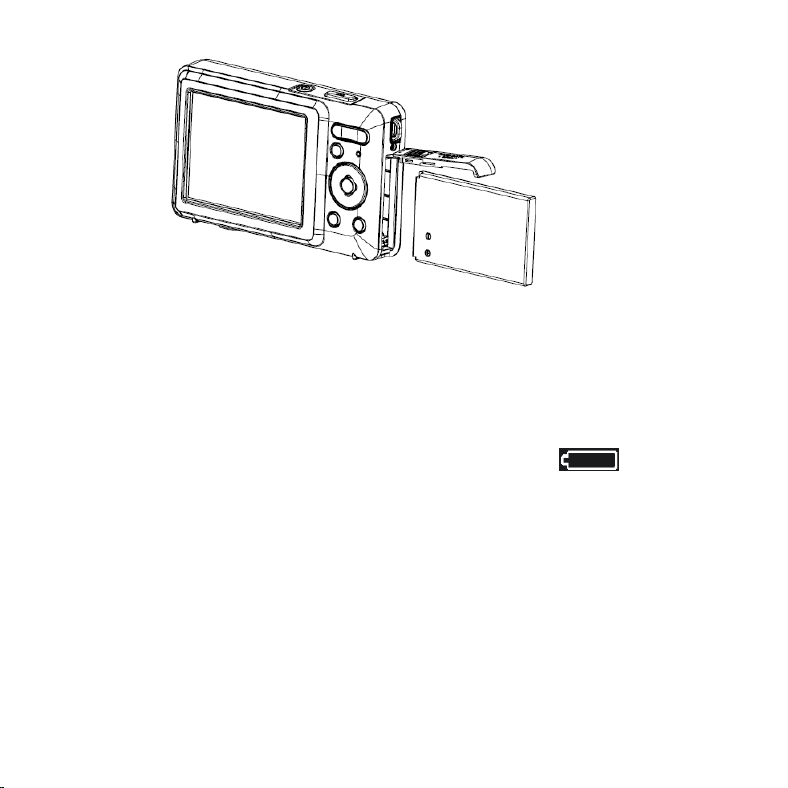
2. Insert the battery with the positive (+) and negative (-) poles matching
the directions indicated inside the battery compartment.
5
3. After the battery is properly installed, replace the battery cover until a
click is heard.
Charging the Battery
Please charge the battery when the indicator shows the icon.
1. Power the camera off.
2. Connect the camera to the computer or AC adaptor with the USB cable.
3. Charging begins when the charge indicator LED turns GREEN. The
charge indicator light turns OFF when charging is completed.
4. Disconnect the camera.
6
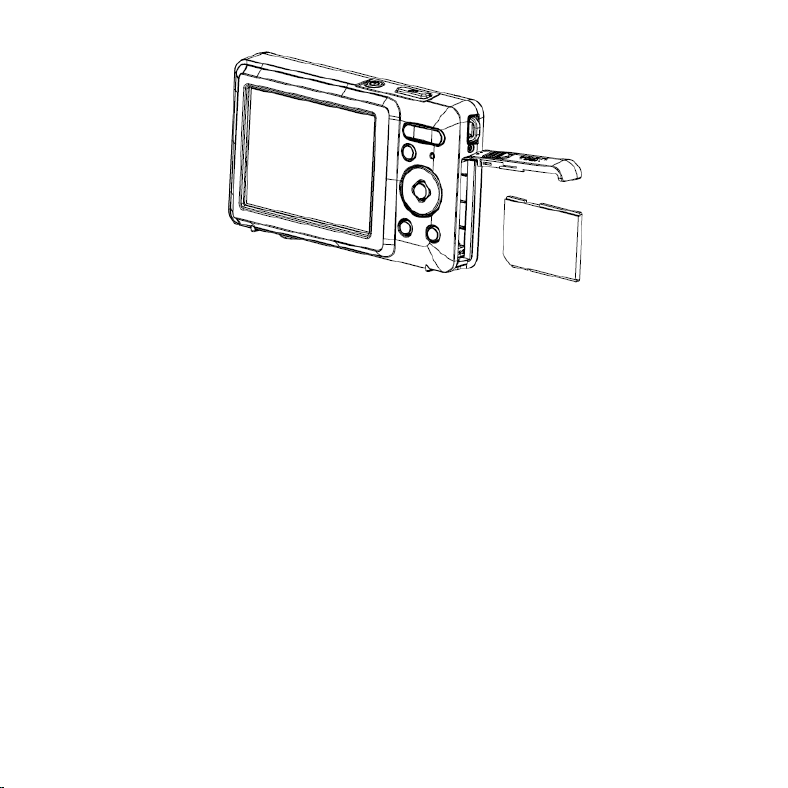
Inserting the Memory Card
1. Power the camera off.
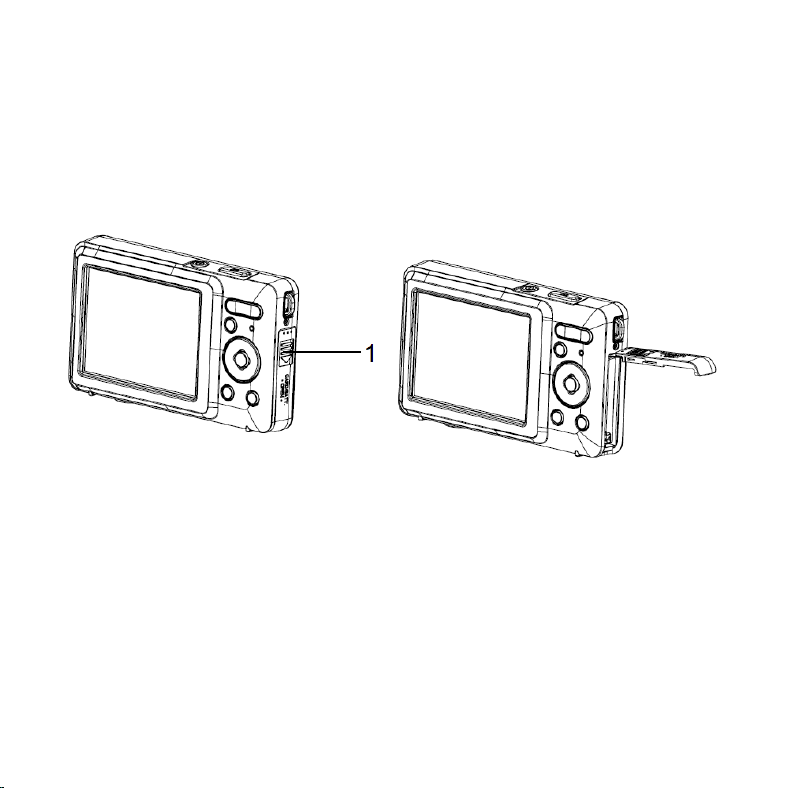
2. Push the lock button (1) down to open the battery cover. You will then
see the SD card slot.
3. Insert the memory card into the card slot with the label facing the LCD
screen. Confirm is it being inserted in the right direction before inserting the
memory card.
7
• To remove the memory card, open the battery cover first and then press
the edge of the card gently. The card will pop out.
Formatting the Memory Card
It is important to format the memory card when using your camera for the
first time. All data will be deleted including protected files. Be sure to
download any needed files to your computer before formatting.
1. Power the camera on, and set the digital camera to the Setup Menu.
2. Press the Up/Display or Down/Mode button to select [Format] then
press the OK button to launch the submenu.
3. Press the Up/Display or Down/Mode button to select the item and then
press the OK button to launch the format submenu.

8
4. Press the Up/Display or Down/Mode button to select the item [Yes] and
then press the OK button to erase all data.
Setting the Language
When using your camera for the first time after purchasing it, be sure to
choose a language and set the date & time before initial use.
1. Power the camera on, and set the digital camera to the Setup Menu..
2. Press the Up/Display or Down/Mode button to select [Language] then
press the OK button to launch the submenu.
3. Press the Up/Display or Down/Mode button to select the desired
language and then press the OK button to confirm the setting.
Setting the Date and Time
1. Power the camera on and press the MENU button to display the menu.
2. Press the Left or Right button to select [Capture Setting] Menu.
9
3. Press the Up or Down button to select [Date] then press the OK button
to launch the submenu.
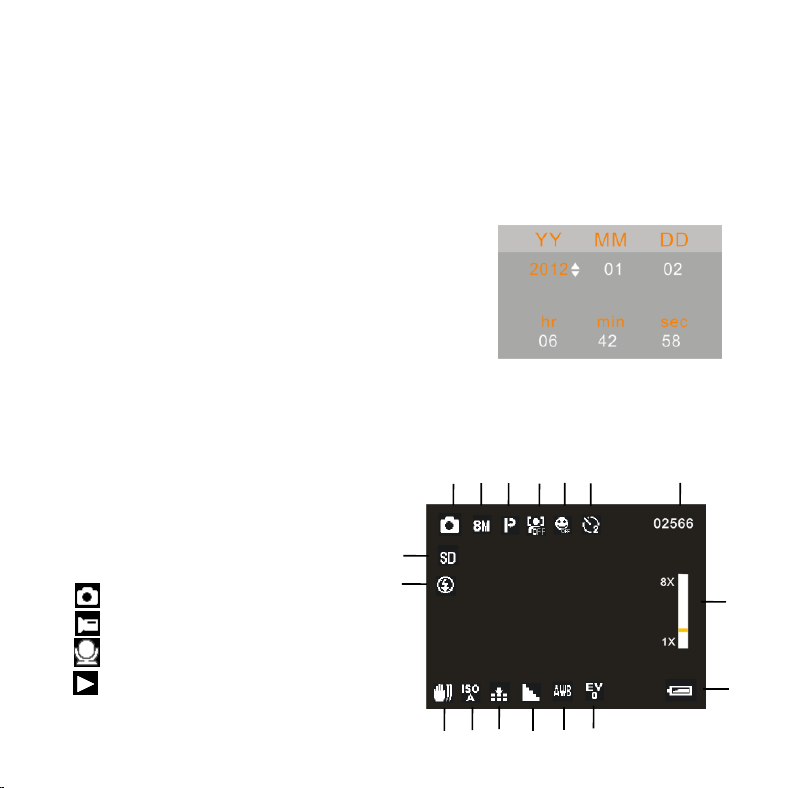
4. Press the Up or Down button to select [Set Date] then press the OK
button to launch
the dialog box.
5. Press the Up or Down button to change the
highlighted value. Press the Left or Right
button to move the cursor
between settings.
6. Press the OK button to confirm the settings.
Note: The date and time can be only added to still images by setting the
function [Date] in Capture Setting menu.
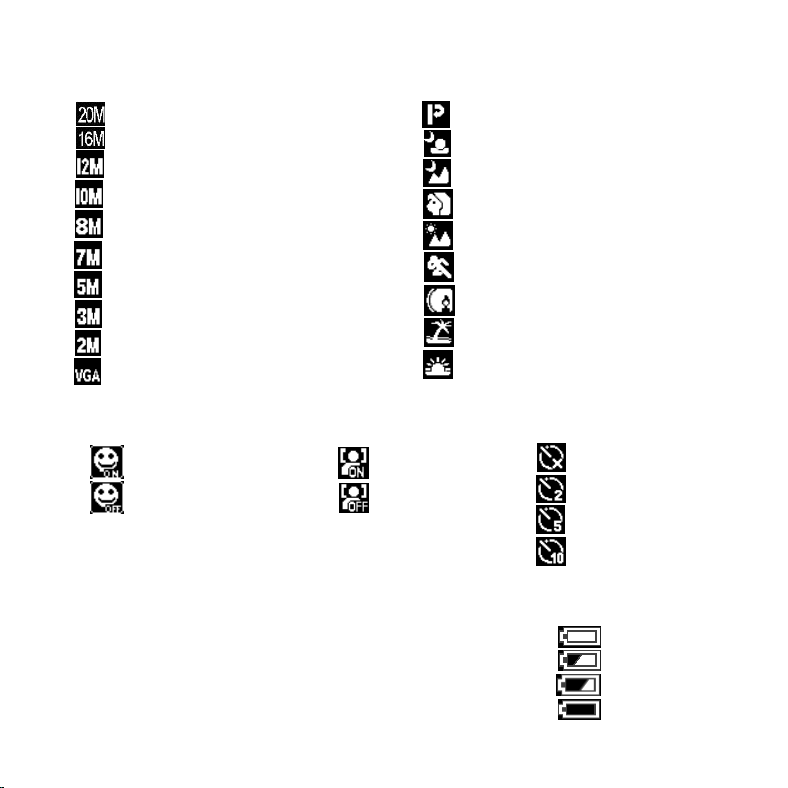
LCD Screen Display
1. Camera Mode
Still Image Capture
Video recording
Audio recording
Playback
9
7
8
4
5
3
2
15
13
12
1
11
10
14
6
16
17
10
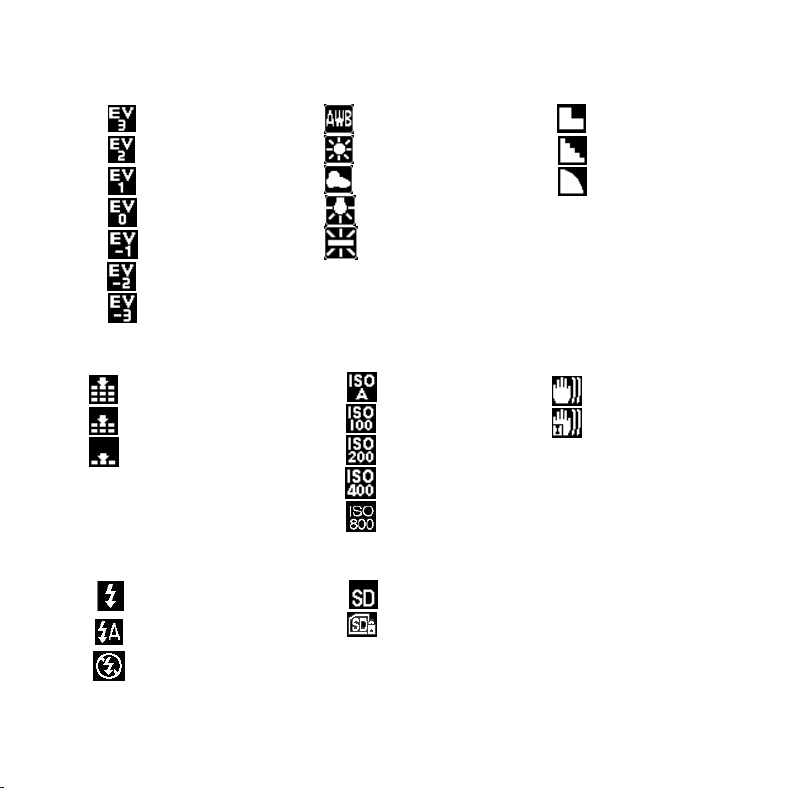
2. Image Resolution 3. Scene Mode
4. Face Detection 5. Smile Capture 6. Self-Timer
7. Number of pictures
Remaining on SD
Card
8. Zoom Value Level
On
Off
On
Off
Auto
Night Portrait
Night Scenery
Portrait
Scenery
Sport
Party
Beach
High Sensitivity
Off
2 Seconds
5 Seconds
10 Seconds
9. Battery Power Level
Full
Medium
Low
None
5200x3900
4608x3456
4000x3000
3648x2736
3264x2448
3072X2304
2592x1944
2048x1536
1600x1200
640x480
11
10. Exposure 11. White Balance 12. Sharpness
13. Image Quality 14. ISO 15. Anti-Shake
16. Flash Mode 17. SD Card inserted
+3
+2
+1
0
-1
-2
-3
Super Fine
Fine
Normal
Auto
Daylight
Cloudy
Incandescent
Fluorescent
Sharp
Normal
Soft
On
Off
Always On
Auto
Off
No protect status
Protect status
Auto
100
200
400
800
12
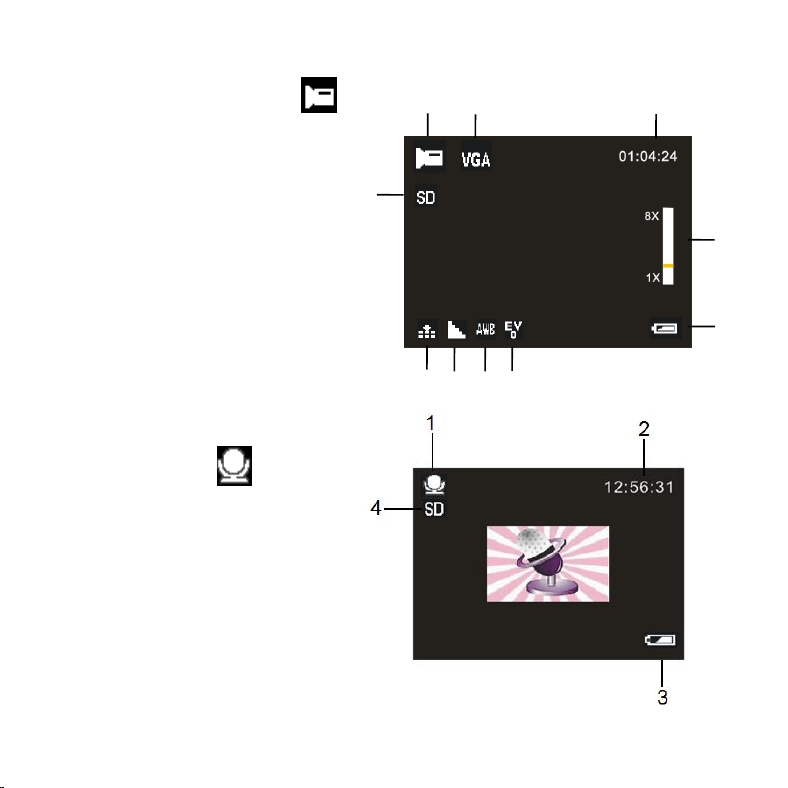
Video Record Mode [ ]
1. Video record icon
2. Video Resolution
3. Recording time available
4. Zoom value level
5. Battery power level
6. Exposure
7. White Balance
8. Sharpness
9. Image quality
10. SD Card inserted
Audio Mode [ ]
1. Audio recording icon
2. Audio recording time available
3. Battery power level
4. SD Card inserted
1
2
3
5
6
4
7
8
9
10
13
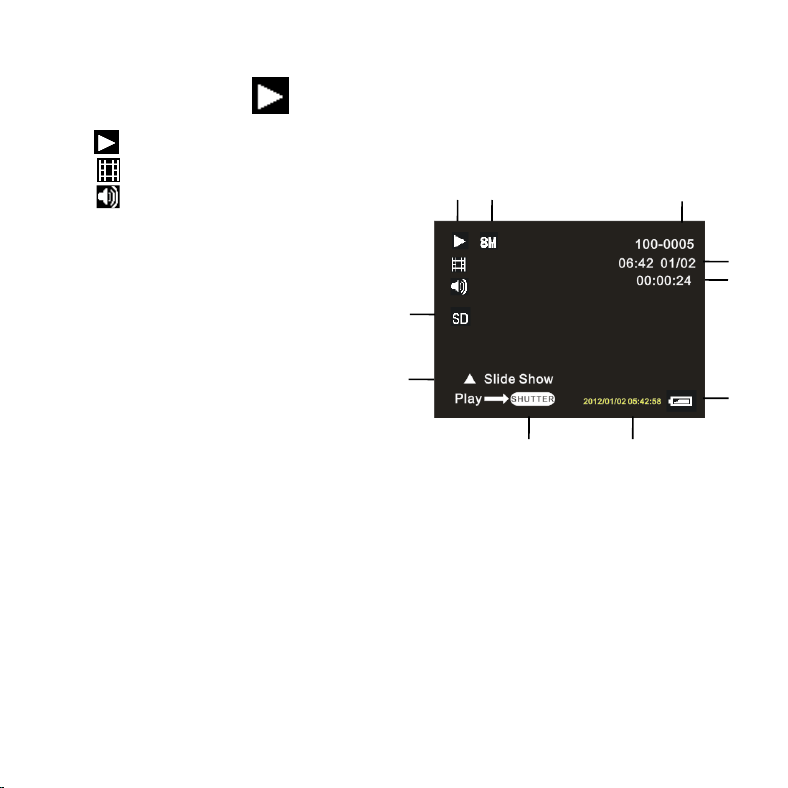
Playback Mode [ ]
1. Playback still image icon
Playback movie clips icon
Playback audio recording icon
2. Image/Video size
3. File number on SD card/
Current Image Number#/
Video#/Audio#
4. Date Imprint
5. Video recording time
6. Battery power level
7. Date stamp (Only still Image mode)
8. Press the SHUTTER button to playback video file
9. Press the UP button to automatically play slide show.
10. SD Card inserted
1
2
3
4
5
6
7
8
9
10
14
3. Using the Camera
Powering the Camera On and Off
Press the POWER button to power the camera on and press it again to
power the camera off.
To conserve battery power, you can change the power-off time by setting
the [Auto Power Off] function in the Setup menu.
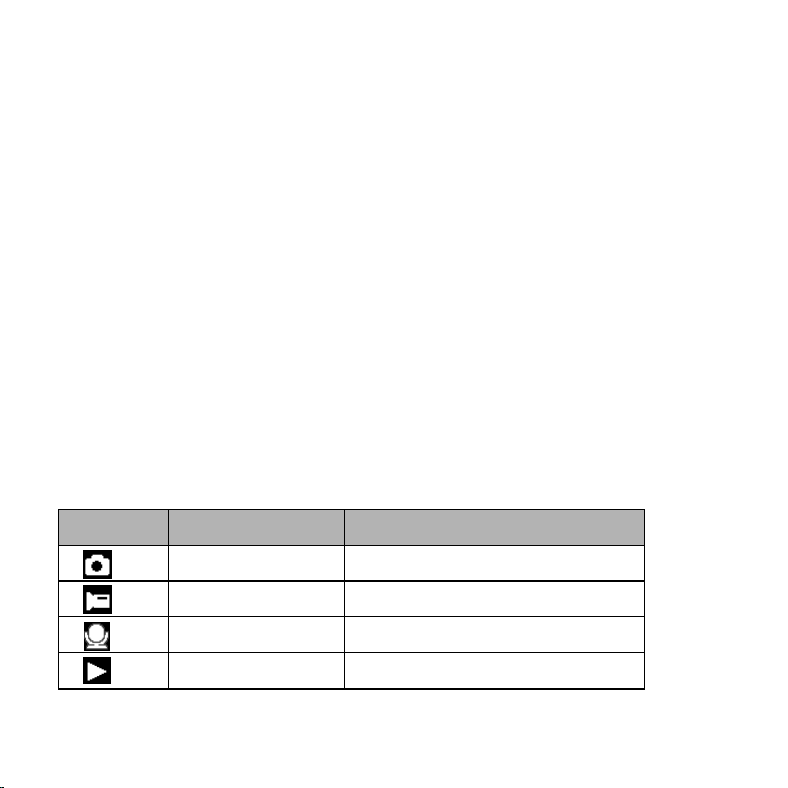
Change the Recording Mode
There are three modes for use.
1. Press the POWER button to power the camera on.
2. Press the Down/Mode button to change the mode. Each time the
Down/Mode button is pressed the mode icon is changed.
Display
Title
Description
Capture mode
For taking still photos.
Video mode
For recording movie clips.
Audio mode
For recording audio files.
Playback mode
For previewing record files.

15
Note:
You can only switch the camera to playback mode by using the PLAYBACK
button. Press the PLAYBACK button to set the camera to playback mode
and press it again to exit back to recording.
Shooting Still Photos
1. Power the camera on and set the camera to default capture mode, the
icon appears on the LCD screen.
2. Zooming:
Press the T or W button to zoom in or zoom out the screen. the value
of magnification level appears on the LCD monitor.
3. Hold the digital camera steady and then press the SHUTTER button
completely to shoot a photo.
Using the Self-Timer
Use the self-timer to set a delay from the time the shutter button is pressed
to the time the image is captured.
1. Power the camera on and set the digital camera to the Capture mode.
2. Press the LEFT/SELF-TIMER button to change the self-timer mode.
16
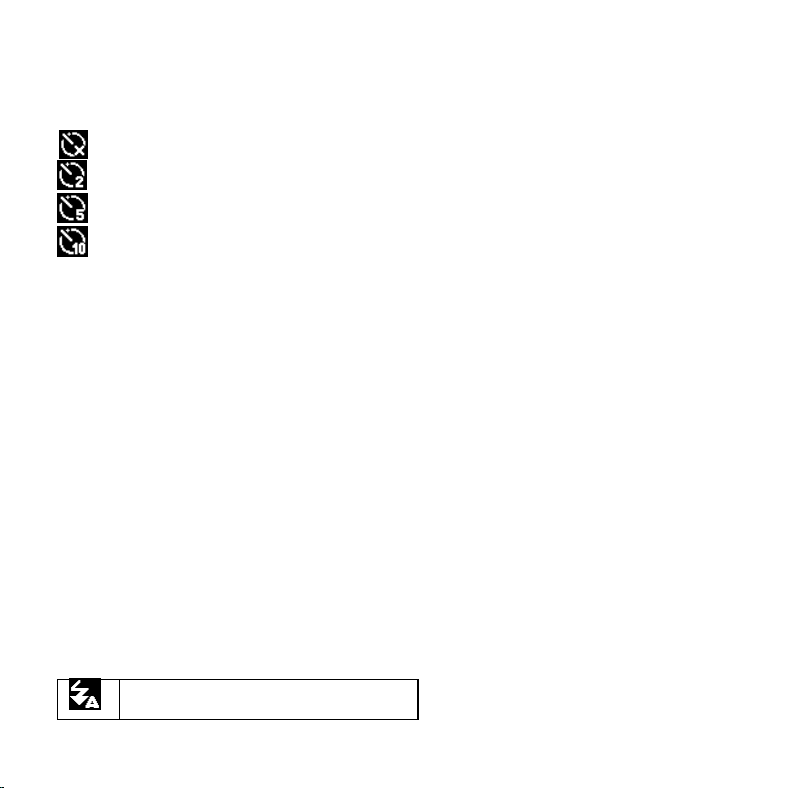
Each time the LEFT/SELF-TIMER button is pressed, the self-timer icon
changes.
Off: Don’t use self-timer.
2 Seconds: The shutter release will delay for 2 seconds.
5 Seconds: The shutter release will delay for 5 seconds.
10 Seconds: The shutter release will delay for 10 seconds.
3. Press the SHUTTER button to take a picture.
4. After Self-timer begins, the self-timer LED will flash. One second per
Flash until count down is completed.
Using the Flash
The flash is not only for taking pictures when there is insufficient light, but
also for when the subject is in shade or with backlight conditions. Pressing
the RIGHT/FLASH button cycles your camera through the various flash
modes. The flash will not activate during continuous shooting or movie
recording.
1. Set the digital camera to a Capture mode (photo or video).
2. Press the RIGHT/FLASH button to change the flash mode.
Each time the flash button is pressed, the flash icon changes.
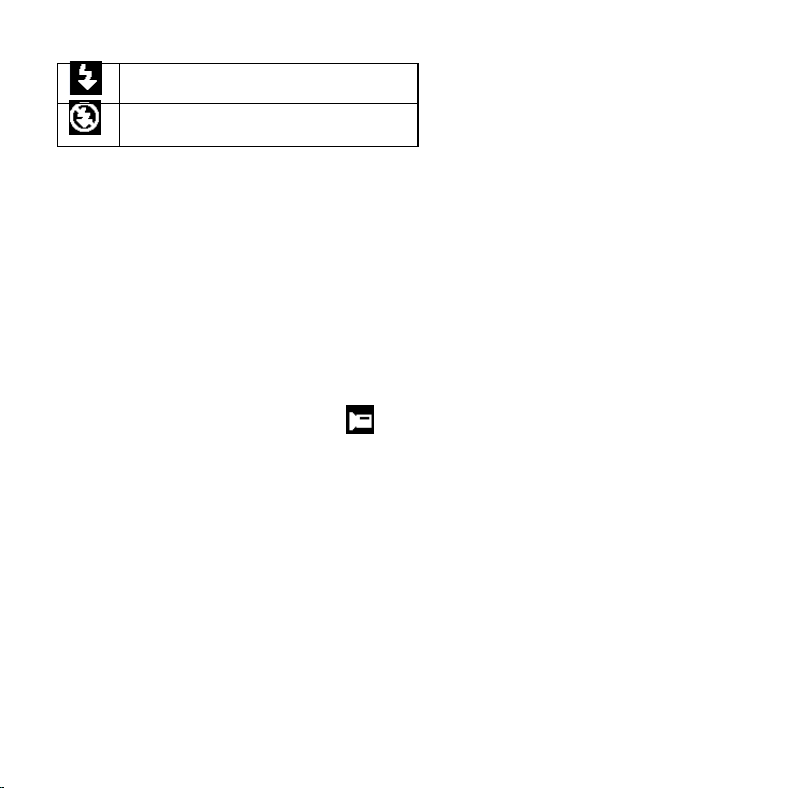
Auto: Automatically turn on/of
17
Flash on: Force on the flash
Flash off: Force off the flash
3. Press the SHUTTER button to shoot a photo.
Note:
When the battery power level is low, the flash strobe will not activate.
Pressing the RIGHT/FLASH button, a message displays “Low battery” on to
inform you that the flash strobe will not fire.
Recording a Video Clip
1. Power the camera on and press the DOWN/MODE button to set the
digital camera to video record mode.
2. Zooming:
Press the T or W button to zoom in or zoom out the screen. The value of
magnification level appears on the LCD monitor.
3. Press the SHUTTER button to start recording.
4. Press the SHUTTER again to end recording. If the memory is full the
video camera will stop recording automatically.
• The upper portion of the LCD monitor displays the recorded time.
• Do not remove the card when video recording, Or, it may cause the digital
camera can not work normally.

18
Recording Audio
1. Turn on the camcorder and set the camera to audio record mode ( ).
2. Press the SHUTTER button to start recording.
3. Press the SHUTTER button again to end the recording. If the memory is
full the camera will stop recording automatically.
4.Using the Menu in Record Mode
When a menu is displayed, the UP, DOWN, OK button are to be used to
confirm a desired setting.
Menu in Capture Mode
1. Power the camera on and set it to capture mode.
2. Press the MENU button to display the menu, and press the LEFT or
RIGHT buttons to select the desired menu.
3. Press the UP or DOWN buttons to select an item.
4. Press the OK button to enter the submenu.
5. Use the UP or DOWN buttons to select the desired item.
6. Press the OK button to confirm the setting and close the menu.
19
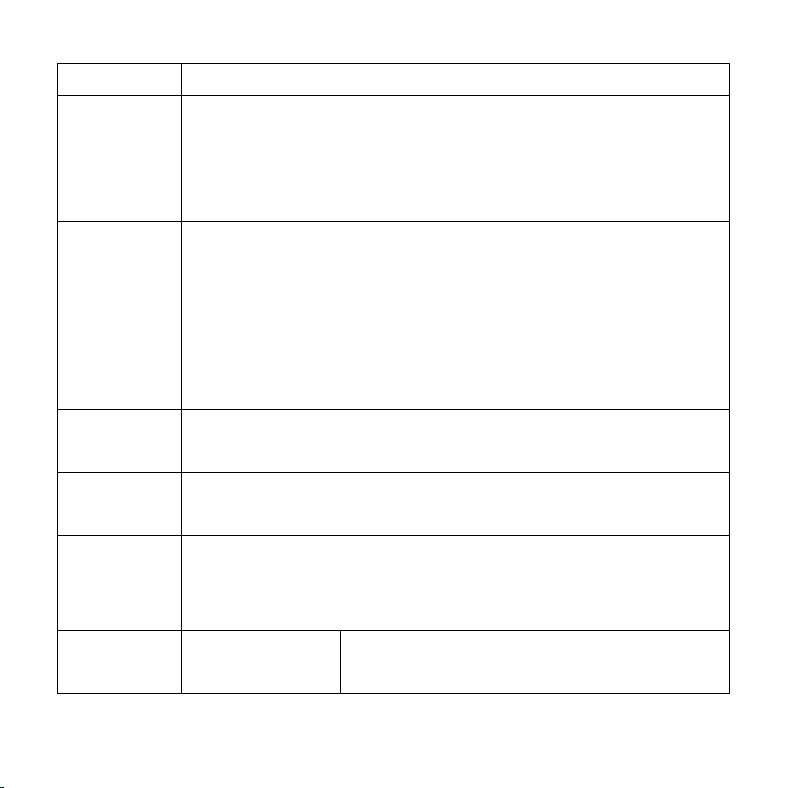
Menu item
Function
Mode
You can select a scene mode according to the image
you wish to capture. There are 9 available modes.
[Auto]/[Night Portrait]/[Night Scenery]/[Portrait]/[Scenery]
[Sport]/[Party]/[Beach]/[High Sensitivity].
Image
Size
There are 9 available options for selection:
[20M]: 5200x3900; [16M]: 4608x3456;
[12M]: 4000x3000; [10M]: 3648x2736;
[8M]: 3264x2448; [7M]: 3072x2304;
[5M]: 2592x1944; [3M]: 2048x1536;
[2M]: 1600x1200; [VGA]: 640x480;
Anti-Shake
Use the function to avoid a shaking when shooting photos.
There are 2 options for selection. [On]/[Off].
Face
Detection
Use this function to detect faces when taking pictures.
There are 2 options for selection. [On]/[Off].
Smile
Capture
Setting smile capture to on, Face Detection will be
automatically enabled. Once it detects smile, the camera
will automatically shoot a photo. [On]/[Off]
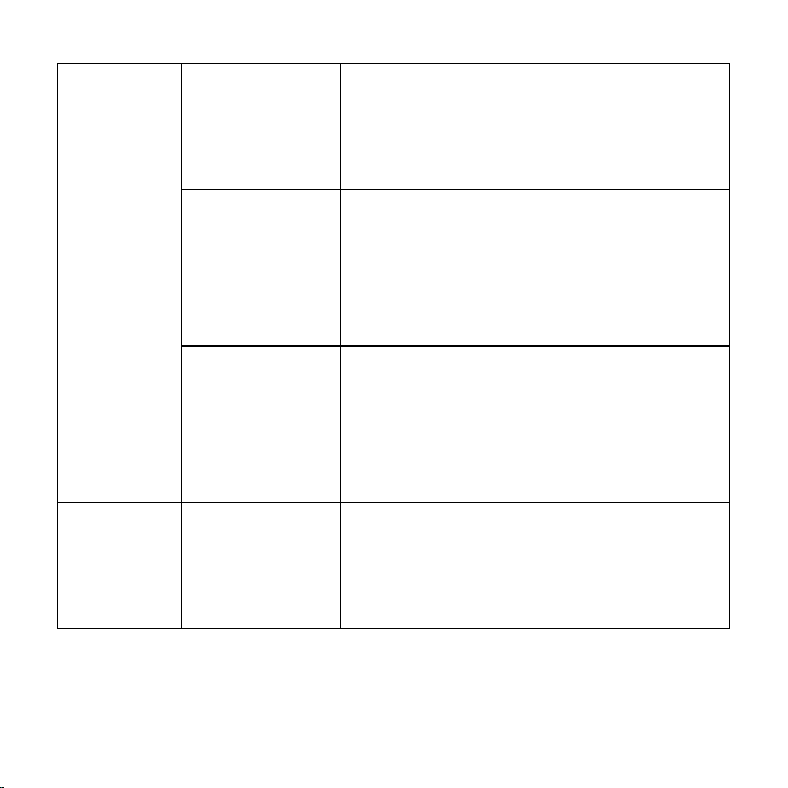
Shooting
Use this function to take 6 pictures
continuously.
20
Multi-Snapshot
[On]: Press the shutter button once to
take six pictures continuously.
[Off]: Press the shutter button once to
take one picture at a time.
Panorama
Use this function to shoot an entire
surrounding area. Shooting the
directional position at 180 degrees
horizontally and 90 degrees vertically.
[Off]/[Up]/[Right]
Self-Timer
Use the self-timer to set a delay from the
time the shutter button is pressed to the
time the image is shot.
[Off]/[2 Seconds]/[5 Seconds]/
[10 Seconds]
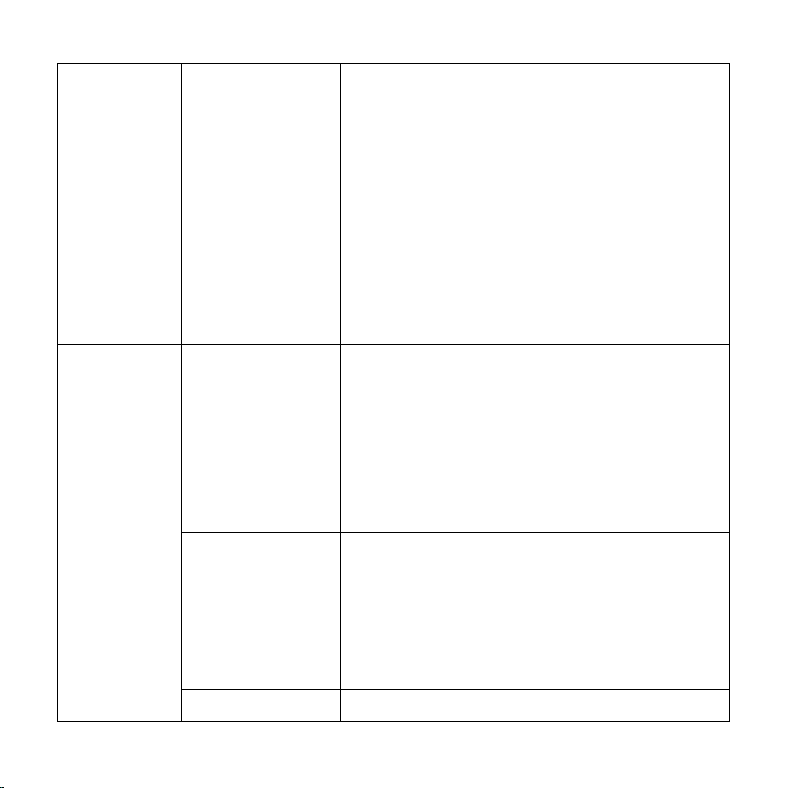
Capture
Setting
ISO
The ISO menu allows you to set the level
of sensitivity that your camera has to light
in the surrounding environment.
[Auto]/[100]/[200]/[400]/[800].
21
Date
This function can be used to add a date
or time to your pictures as you take them.
There are 3 options for selection:
[On]: Add the date & time to
printed images.
[Off]: Do not add the recording date &
time to printed images.
[Set Date]: Allows you to set the date
and time for the digital camera.
Image
Setting
Exposure
Set the exposure value manually to
compensate for unusual lighting
conditions such as indirect indoor
lighting, dark backgrounds, and strong
backlighting. The exposure value range
is –3 to +3.
White Balance
Adjust the white balance to suit different
lighting sources. There are 5 options for
selection:
[Auto]/[Daylight]/[Cloudy]/[Incandescent]/
[Fluorescent]
Frequency
Light Frequency should be set to either
22
60Hz or 50Hz depending on your region.
[50HZ]/[60HZ]
Image Quality
Select a lower image quality to decrease
the image size in order to capture more
images on your SD card. There are 3
options for selection:
[Super Fine]/[Fine]/[Normal]
Sharpness
You can set the level of sharpness in the
photos taken with your camera. The
sharpness level dictates if the edges of
objects in the image are more or less
distinct. [Sharp]/[Normal]/[Soft]
Effect
Set the color effect to add a color tone to
the picture.
[Normal]/[B&W]/[Sepia]/[Red]/[Green]/
[Blue]/[Sunset]/[Warm]/[Cool]/
[Over Exposure]/[IR]/[Binary]/[Vivid]/
[Undertone]/[Dog Eye]/[Aibao]/[Gothic]/
[Japan Style]/[LOMO]/[Negative]
Saturation
Sets the image’s saturation.
[High]/[Normal]/[Low]
23
Menu in Video Mode
1. In video record mode, press the MENU button to display the menu.
and press the LEFT or RIGHT buttons to select the desired menu.
2. Press the UP or DOWN buttons to select an item.
3. Press the OK button to enter the submenu.
4. Use the UP or DOWN buttons to select the desired selection.
5. Press the OK button to confirm the setting and exit the menu.
Menu item
Function
Size
Select a higher recording size for better resolution. There
are 4 options for selection:
FHD:1920x1080 HD; HD:1280x720 HD; D1:720x480;
VGA: 640x480; QVGA: 320x240
Image
Setting
Exposure
Set the exposure value manually to
compensate for unusual lighting
conditions such as indirect indoor
lighting, dark backgrounds, and strong
backlighting. The exposure value range
is –3 to +3.
White
Balance
Adjust the white balance to suit different
lighting sources. There are 5 options for
24
selection:
[Auto]/[Daylight]/[Cloudy]/[Incandescent]/
[Fluorescent]
Frequency
Light Frequency should be set to either
60Hz or 50Hz depending on your region.
[50HZ]/[60HZ]
Image
Quality
Select a lower image quality to decrease
the image size in order to capture more
images. There are three options for choice:
[Super Fine]/[Fine]/[Normal]
Sharpness
You can set the level of sharpness in the
images taken with your camera. The
sharpness level dictates if the edges of
objects in the image are more or less
distinct. [Sharp]/[Normal]/[Soft]
Effect
Set the color effect to add a color tone to the
picture.
[Normal]/[B&W]/[Sepia]/[Red]/[Green]/[Blue]/
[Sunset]/[Warm]/[Cool]/[Over Exposure]/[IR]/
[Binary]/[Vivid]/[Undertone]/[Dog Eye]/
[Aibao]/[Gothic]/[Japan Style]/[LOMO]/
25
[Negative].
Saturation
Sets the image’s saturation.
[High]/[Normal]/[Low]
Setup Menu
You can set the system items in the setup menu.
1. Power the camera on and press the MENU button to display the menu.
2. Press the LEFT or RIGHT buttons to select [Setup] Menu.
3. Press the UP or DOWN buttons to select an item.
4. Press the OK button to enter the submenu.
5. Press the UP or DOWN buttons to select the desired item.
6. Press the OK button to confirm the setting and exit the menu.
Menu item
Function
Auto Power
Off
To conserve power, the camera powers off
automatically after a period of time. There are 7
options for selection: [Off]/[1Minute]/[2 Minutes]/[3
Minutes]/[4 Minutes]/[5 Minutes]/[10 Minutes]
Sound Effect
Sets the operation sound effects on or off.
Language
Select a language for the Display menu and interface
LCD
Sets the LCD screen's brightness.
26
Brightness
[Dark]/[Normal]/[Bright]
Default
Setting
To reset the entire menu and button operation settings
to factory default settings.
Format
To erase all data stored on the memory card if you are
using a memory card, or all data stored in the internal
memory if there is no card inserted. All data will be
deleted including protected files. Be sure to download
any needed files to your computer before formatting.
5. Playback
Playback Still Image
1. Press the PLAYBACK button to enter playback mode.
The latest recorded file appears on the LCD screen. If there are no
images stored, a message [No File Exist] is displayed.
2. Press the LEFT or RIGHT buttons to preview the previous or next image.
3. Press the UP button to play slide show.
4. Zooming:
Press the T or W button to zoom in or zoom out the image. When the
picture is enlarged press the UP, DOWN, LEFT, RIGHT button to browse

27
the details of the image.
5. Press the OK button to resume the normal mode.
Playback Movie Clips
1. Press the PLAYBACK button to enter playback
2. Press the LEFT or RIGHT buttons to select the movie clips you want to
playback.
3. Press the SHUTTER button to start playing and press it again to pause,
press UP button to end the playing.
Playback Audio Files
1. Press the PLAYBACK button to enter playback.
2. Press the LEFT or RIGHT buttons to select the audio file you want to
Playback.
3. Press the SHUTTER button to start playing, press the OK button to
pause and press it again to continue, press the SHUTTER button again to
end the playing.
Viewing Thumbnails
Press the W button in playback mode to view the file as a thumbnail. Use
the LEFT/RIGHT/ UP/DOWN buttons to select a file. Press the OK
28
button to view the file in full screen.
Menu in Playback Mode
1. In playback mode press the MENU button and press the LEFT or RIGHT
buttons to select the desired menu.
2. Press the UP or DOWN buttons to select an item.
3. Press the OK button to enter the submenu.
4. Press the UP or DOWN buttons to select the desired item.
5. Press the OK button to confirm the setting and close the menu.
Menu item
Function
Rotate
Use this function to rotate the images.
[90
o
]: Rotate the image 90 degrees clockwise.
[180
o
]: Rotate the image 180 degrees clockwise.
[270
o
]: Rotate the image 270 degrees clockwise.
[Cancel]: Cancel image rotation.
Protect
Use this function to protect files from being deleted by
accident.
[Lock This]: Lock the current file.
[Unlock This]: Unlock the current file.
[Lock All]: Lock all files.
[Unlock All]: Unlock all files.

29
Delete
Use this function to delete a single file or all files.
[This Image]: Delete current singe file.
[All]: Delete all files except locked files.
[Cancel]: No delete the file.
Crop Image
Use this function to crop an image.
[Crop]: Use the UP/DOWN/LEFT/RIGHT/
Zoom In/Zoom Out buttons to select a select a range,
and then press the OK button to crop the selected
range, at last press it again to save the cropped image.
[Cancel]: No crop the image.
PictBridge
Use this function to print a picture without a computer.
Make sure you have a printer which supports
PictBridge function and then connect it to the camera
via the USB cable. [PictBridge]/[Cancel]
6. Making Connections
Connecting Your Camera to a PC
There are two ways to download files from the camera's internal memory or
memory card to a computer:
30
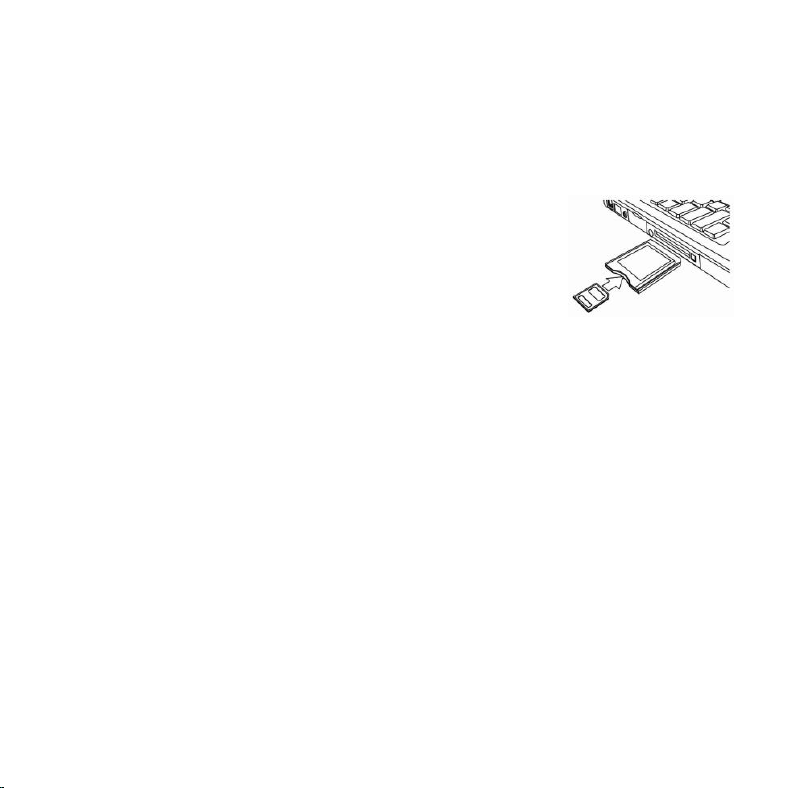
• By inserting the memory card into a card reader
• By connecting the camera to a computer using the supplied USB cable.
Using a Card Reader
1. Eject the memory card from the digital camera and
insert it into a card reader that is connected to a
computer.
2. Open [My Computer] or [Windows Explorer] and
double-click the removable disk icon that represents the
memory card.
3. Copy images from the card into a directory of your choice on the
computer’s hard disk.
Connecting the Camera to a PC with the USB Cable
1. Connect the supplied USB cable to the computer's USB port and turn on
the digital camera. “MSDC” appears on the screen when
connection to the computer has been successfully completed.
2. Open [My Computer] or [Windows Explorer]. A "Removable Disk"
appears in the drive list. Double-click the "Removable Disk" icon to view
its contents. Files stored on the camera are located in the folder named
"DCIM".
31
3. Copy the photos or files to your computer.
Note: To enter PC CAM mode, at first you have to hold and press the
shutter button for a few seconds, then connect the camcorder to the
computer with the supplied USB cable. An icon "PC CAM" will appear on
the screen. If not, please continue to press the shutter button and press the
power button as well. An icon "PC CAM" appears on the screen.
7. Software Installation
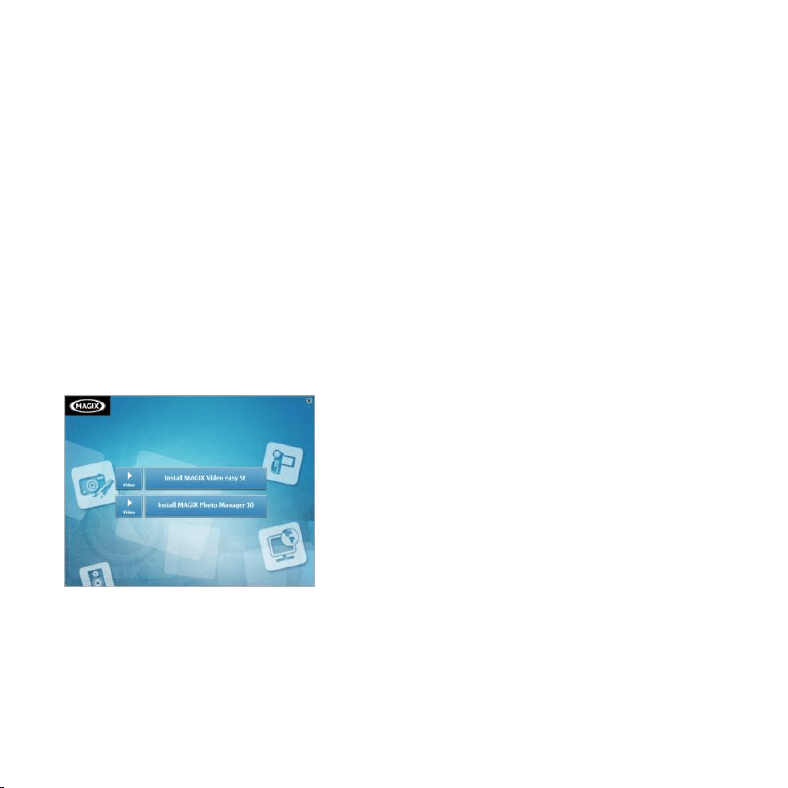
Insert the CD into your CD-ROM drive. The autorun menu appears:
The following software listed below will be seen on the menu of the bundled
software CD on your computer screen:
• Install MAGIX Video easy SE- Installs software for editing video clips.
• Install MAGIX Photo Manager 10 - Installs software for editing pictures.

32
Click the items in the autorun menu to install the software.
If the autorun menu does not appear automatically, open the CD-ROM in
[My Computer] or [Windows Explorer] and then double-click the file named
[start.exe] to start the program. You can also click [Run] in the Windows
Startup menu, enter "D:\start.exe" (where D is your CD-ROM drive letter) in
the text box, and click [OK].
Notes:
1.Open MAGIX Video easy SE or MAGIX Photo Manager 10, you have to
register the software at first, then use program without any time limit.
2. Don’t forget to install the QuickTime Player during installing the MAGIX
Video easy SE.
3. MAGIX Video easy SE and MAGIX Photo Manager 10 only include
Windows XP and Windows Vista, Windows 7 platforms.
System requirements for Magix Video Easy SE:
► Intel® Pentium 4 or AMD® Athlon® 1 GHz and higher
► 512 MB RAM
► 400 MB free hard disk memory and a DVD drive for program
installation
► Graphics card with a screen resolution of at least 1024 x 768

33
► Sound card
Supported devices:
► Video, TV, or graphics cards with video input.
Magix Photo Manager 10:
System Requirements (minimum configuration)
► Microsoft® Windows® XP I Vista® I 7. PC with Intel® Pentium® or
AMD® Athlon® 700 MHz or higher
► 256 MB RAM, 120 MB hard disk space for program files
► SVGA graphics card with min. 4 MB RAM, (min. resolution
1024 x 600, 16-bit high-color)
► Microsoft® compatible mouse.
34
8. Technical Specifications
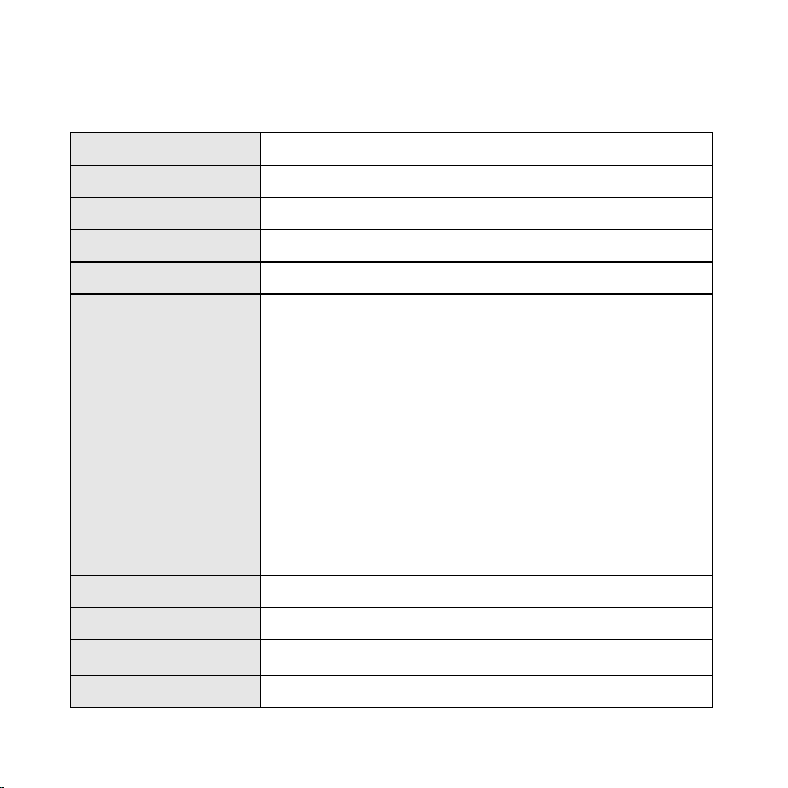
Image Sensor
8.0Mega Pixels CMOS
Display
3.0" TFT Color LCD
Aperture
F 2.8,f=5.3mm
Shutter Control
Electronic Shutter
Shutter Speed
Shutter: 1/2~1/2000 sec.
Resolution
Still Image:
[20M]: 5200x3900; [16M]: 4608x3456;
[12M]: 4000x3000; [10M]: 3648x2736;
[8M]: 3264x2448; [7M]: 3072x2304;
[5M]: 2592x1944; [3M]: 2048x1536;
[2M]: 1600x1200; [VGA]: 640x480;
Video:
FHD:1920x1080 HD; HD:1280x720 HD;
D1:720x480; VGA: 640x480; QVGA: 320x240
Sensitivity
Auto/100/200/400/800
White Balance
Auto/Daylight/Cloudy/Incandescent/Fluorescent
Exposure
+3.0 EV ~ -3.0 EV in 1.0EV increment
Effect
Normal, B&W, Sepia, Red, Green, Blue, Sunset,
35
Warm, Cool, Over Exposure, IR, Binary, Vivid,
Undertone, Dog Eye, Aibao, Gothic, Japan
Style, LOMO, Negative.
Mode
Auto, Night Portrait, Night Scenery, Portrait,
Scenery, Sport, Party, Beach, High Sensitivity
Continuous Shot
3 Frames (per shot)
Self-Timer
2 /5 /10 seconds
Storage
SD , MMC, Support SDHC
Power Supply
Lithium-Ion Battery
PC Interface
Mini USB 2.0 (Hi-Speed)
Supported O/S
Windows 7 and later
Dimension
100.0x59.8x18.4 (mm)
Weight
Camera Body w/o battery: Approx. 75g
If you’re having difficulties with your camera, or would like further assistance,
please call our toll-free technical support hotline at 800-441-1100. Please be sure
to have your camera handy when calling.