1
INSTRUCTION MANUAL
G80
'Ultimate' All Weather
Pistol Grip Grease Guns
SPECIFICATIONS
All weather grease gun, designed espe-
cially for ease of use in very cold weather
conditions
Venturi Mechanism coupled with a large
grease inlet helps retain prime
Built tough
Robust grease gun barrel 0.049” (1.2 mm)
thick, heavy duty follower spring, CNC
machined grease gun head machined
to very close tolerances that ensures
perfect ts, large rolled threads for fast &
easy re-loading
Double lipped rubber follower for use
with 14 oz. (400 gms) grease cartridge /
bulk, without any changeover
Heavy Duty plunger spring design keeps
grease compressed, free of air pockets
Drop resistant Pistol Grip design
Unique Adjustable Stroke Mechanism
that switches between high volume &
high pressure applications with ease
High volume for faster greasing and high
pressure for use in cold weather
Works with all grease types NLGI
1, 2 & 3
Develops
Upto 7,000 PSI / 480 BAR
G80
Cartridge Size 400 GMS
Handle Style Adjustable Pistol Handle
Maximum Pressure 7,000 PSI (480 Bar)
Delivers 0.90 gm/stroke
Grease Filling Option Cartridge Fill, Bulk Fill, Transfer Pump
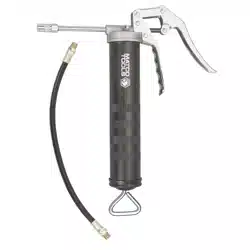
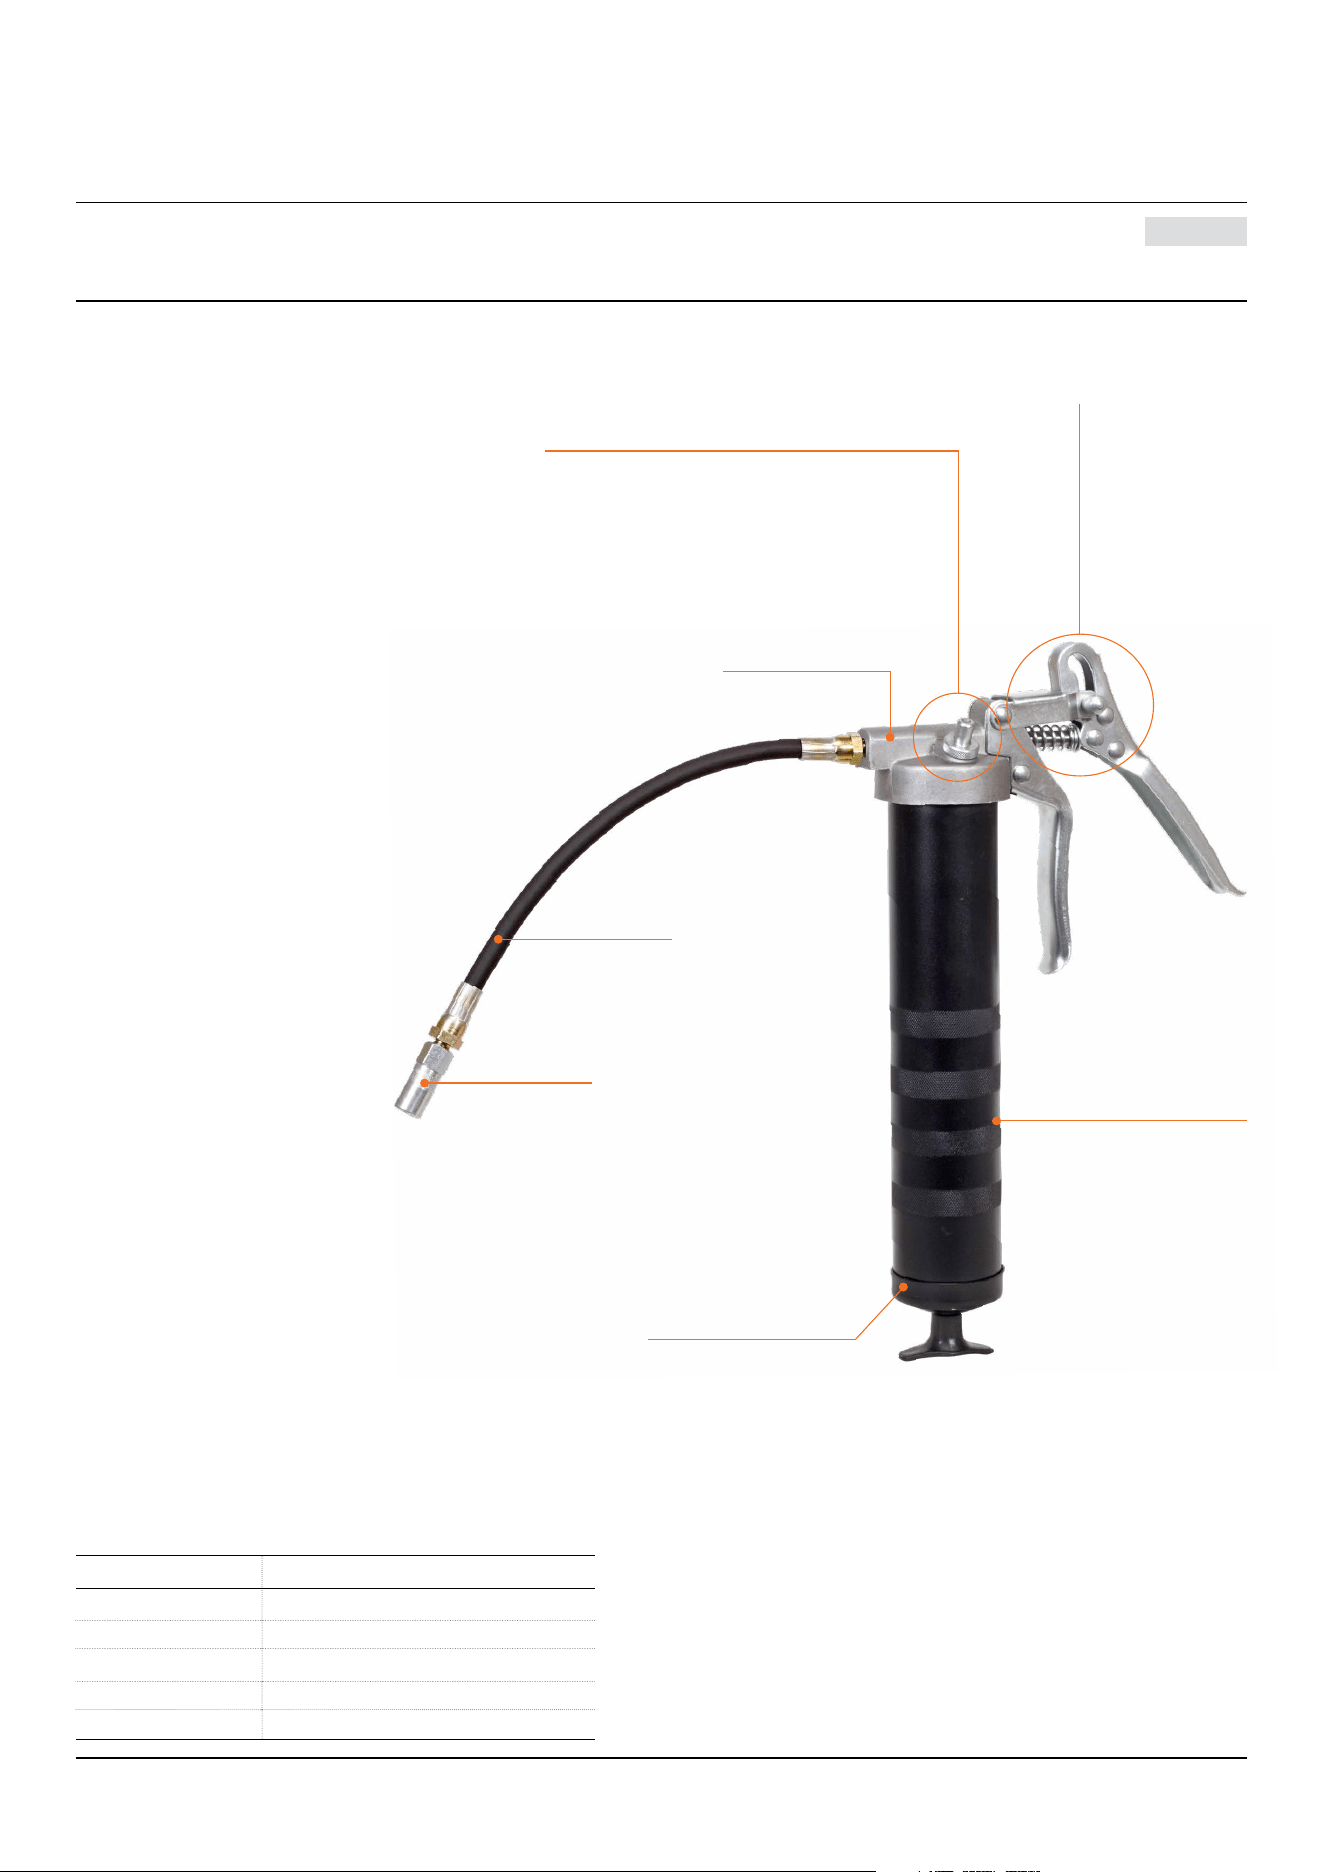
Pistol Handle
with Adjustable
Setting For Hi Pres-
sure or Hi Volume
Application
Coupler
Flexible Hose
Barrel
End Cap
Aluminum Head
Head incorporates a unique
bulk loader, which doubles as
an Air Bleeder
2
TO EXPEL AIR POCKETS
THREE WAYS TO LOAD YOUR GREASE GUN
CARTRIDGE LOADING SUCTION FILL TRANSFER FILL
Remove the gun head by rotating it in anticlockwise direction. Wipe the grease gun’s bulk loader valve free of
grease and possible debris.
Activate the transfer pump until a small amount of
grease comes out. This step will minimize transfer-
ring any trapped air.
Pull the Plunger Rod Handle all the way back. Insert the open end of the barrel about 2” into the
grease container.
Connect the Bulk Loader cum Air Release Valve
tightly on the grease gun to the loader adapter on
the transfer pump line.
Remove the plastic cap from the cartridge
and insert the open end of the cartridge
into the grease gun barrel until the rim of
the pull-tab end meets the rim of the barrel.
Now remove the pull-tab seal. Screw back the
grease gun head tightly onto the barrel.
Slowly pull the plunger rod handle to draw in grease
into the empty barrel while pushing the barrel deep-
er into the grease until the plunger rod is completely
extended.
The grease gun barrel should now be lled with
grease. The outside surface may have a lot of grease
stuck to it and should be wiped clean for safety.
Shake the grease gun barrel to allow the grease to
settle down. Screw back the grease gun head tightly
onto the barrel.
Start operating the transfer pump, keeping your
hand on the grease gun, lightly pushing it down
onto the transfer pump.
Once the gun barrel is lled, pumping
would get very hard. Stop now & disconnect the
Bulk Loader cum Air Release Valve from the transfer
pump line.
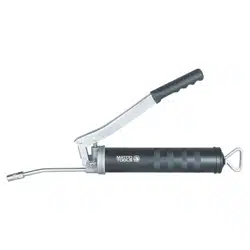
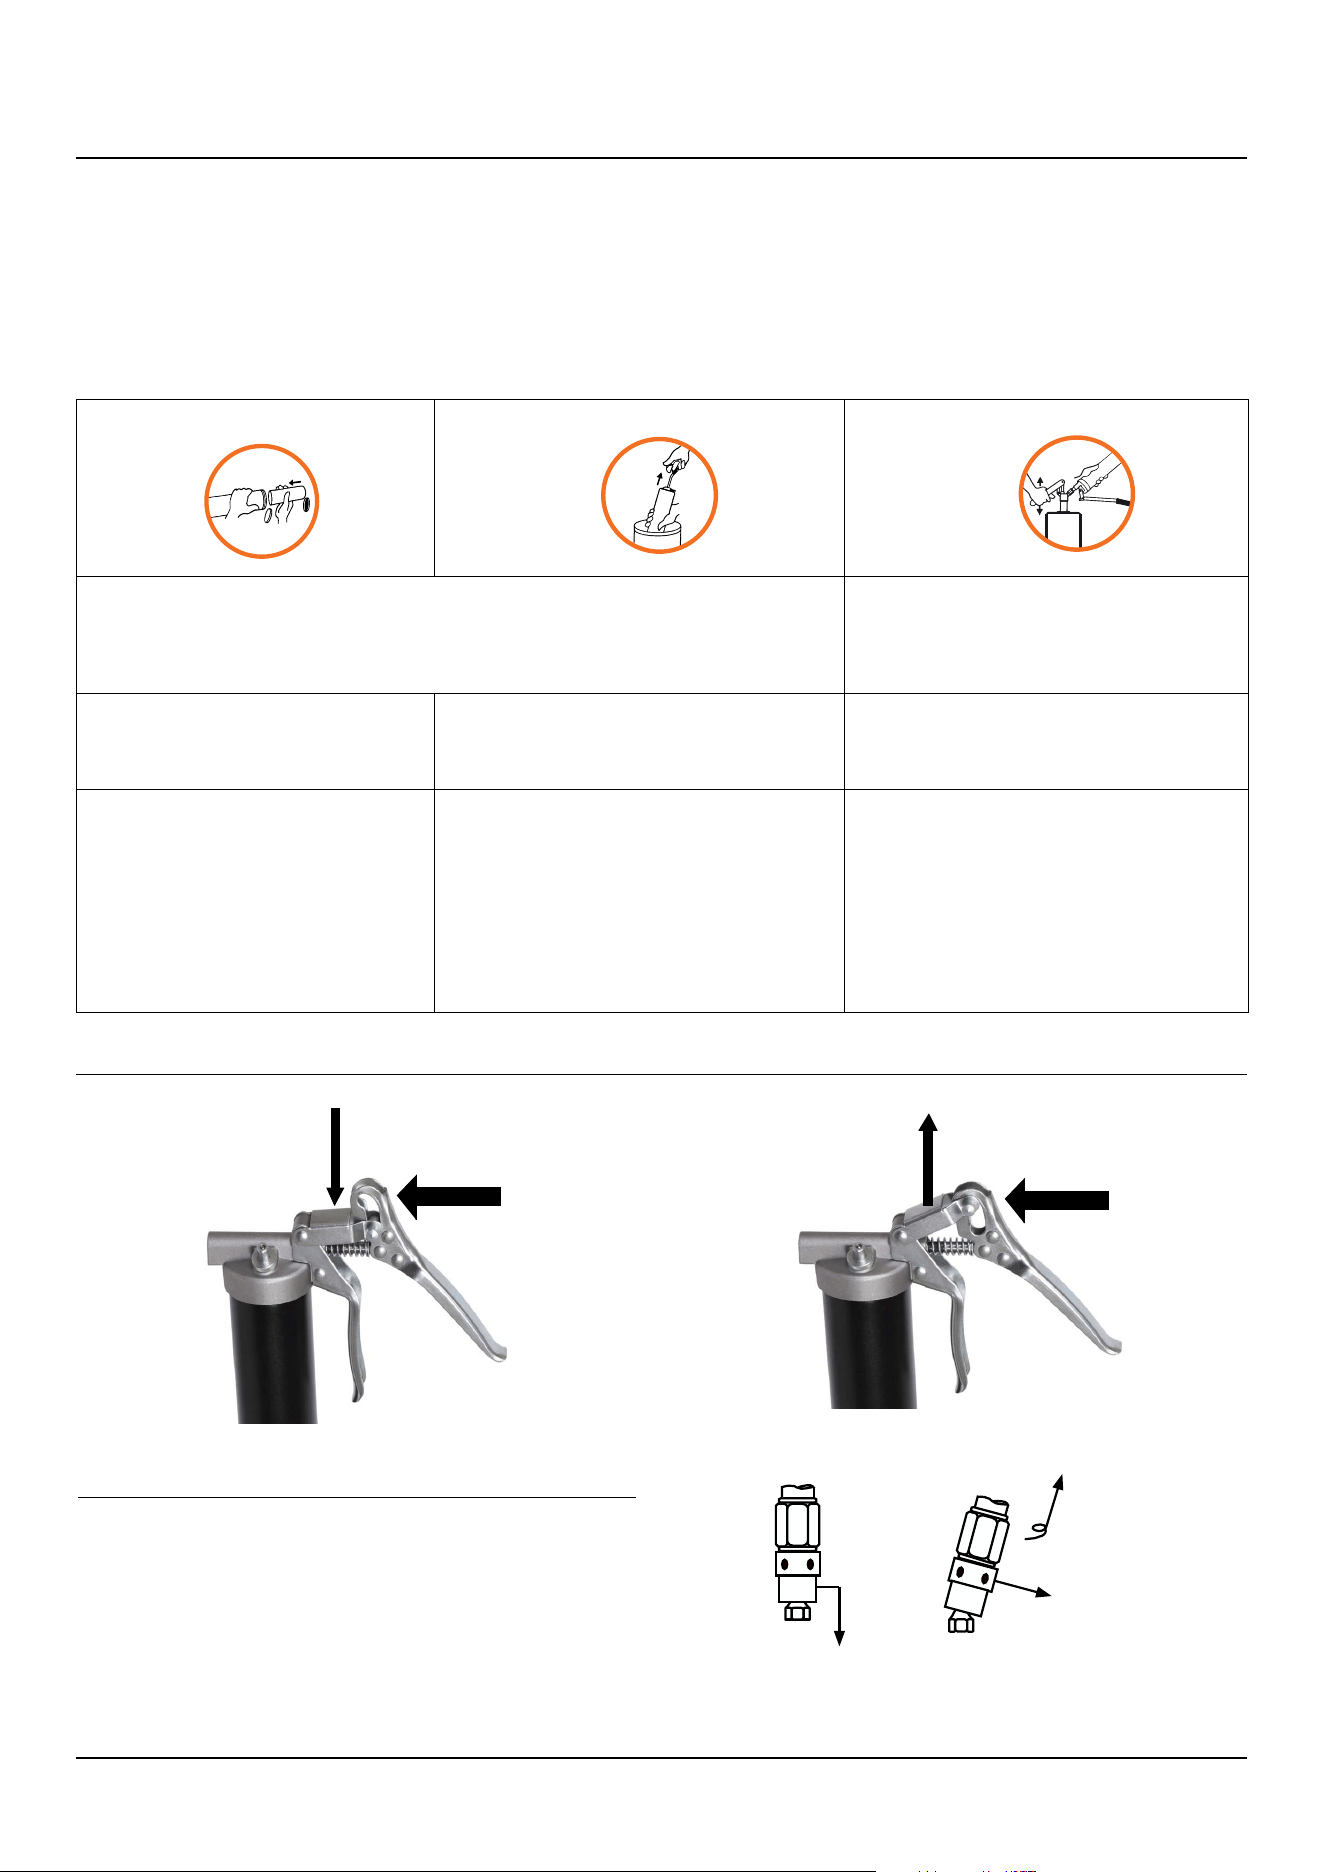
ADJUSTING THE PISTOL HANDLE
Lower the adjustment lever
PUSH
HI PRESSURE SETTING
for use in cold weather
Lift the adjustment lever
HI VOLUME SETTING
for faster greasing
PUSH
Push the pistol
lever inwards
to release lock
• Unscrew the unique bulk loader by two turns.
• Move Plunger rod back & forth to force out any trapped air.
• Expel force on grease using plunger handle till grease oozes out of head & bulk loader valve.
• Tight the unique bulk loader
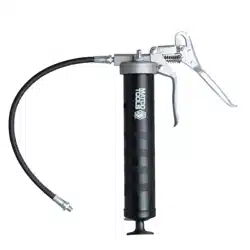
GREASING A GREASE FITTING / GREASE NIPPLE
• The grease coupler provided at the end of the grease gun extension
has a jaw type construction. The coupler jaws will snap on to a grease
tting and maintain a tight t.
• When connecting the coupler to the grease tting, press the coupler
straight onto the grease tting to form a snug t. Start operating the
grease gun with the coupler as square to the grease tting as possible.
• Once greasing is done, slightly tilt the coupler, twist and pull back. The
tilt and twist action will allow easy removal of the coupler from the
grease tting.
To engage,
push straight on
To remove,
Tilt, Twist
& Pull
3
Grease gun and extension should be kept clean and checked for damage before each use.
MAINTENANCE
EXPLODED VIEW
Problem Possible Cause Corrective Action
Grease gun pumps little or no grease
Air is trapped in grease Prime the grease gun as detailed in the section,
THREE WAYS TO LOAD YOUR GREASE GUN
Blocked hose Remove the hose and operate the grease gun. If the
gun dispenses grease then the gun is ne and you
need to either clean the extension or replace it
Grease too thick or cold Store grease gun and grease away from extreme cold
or use thinner grease
Excessive grease leaks out from the back side of the
grease gun around the plunger rod
Rubber follower is damaged Replace the grease gun
Grease leaks from the connection between the
grease gun head & the extension or between exten-
sion & coupler
Loose connection Tighten the connection using Teon or any other
Thread Sealant
TROUBLESHOOTING
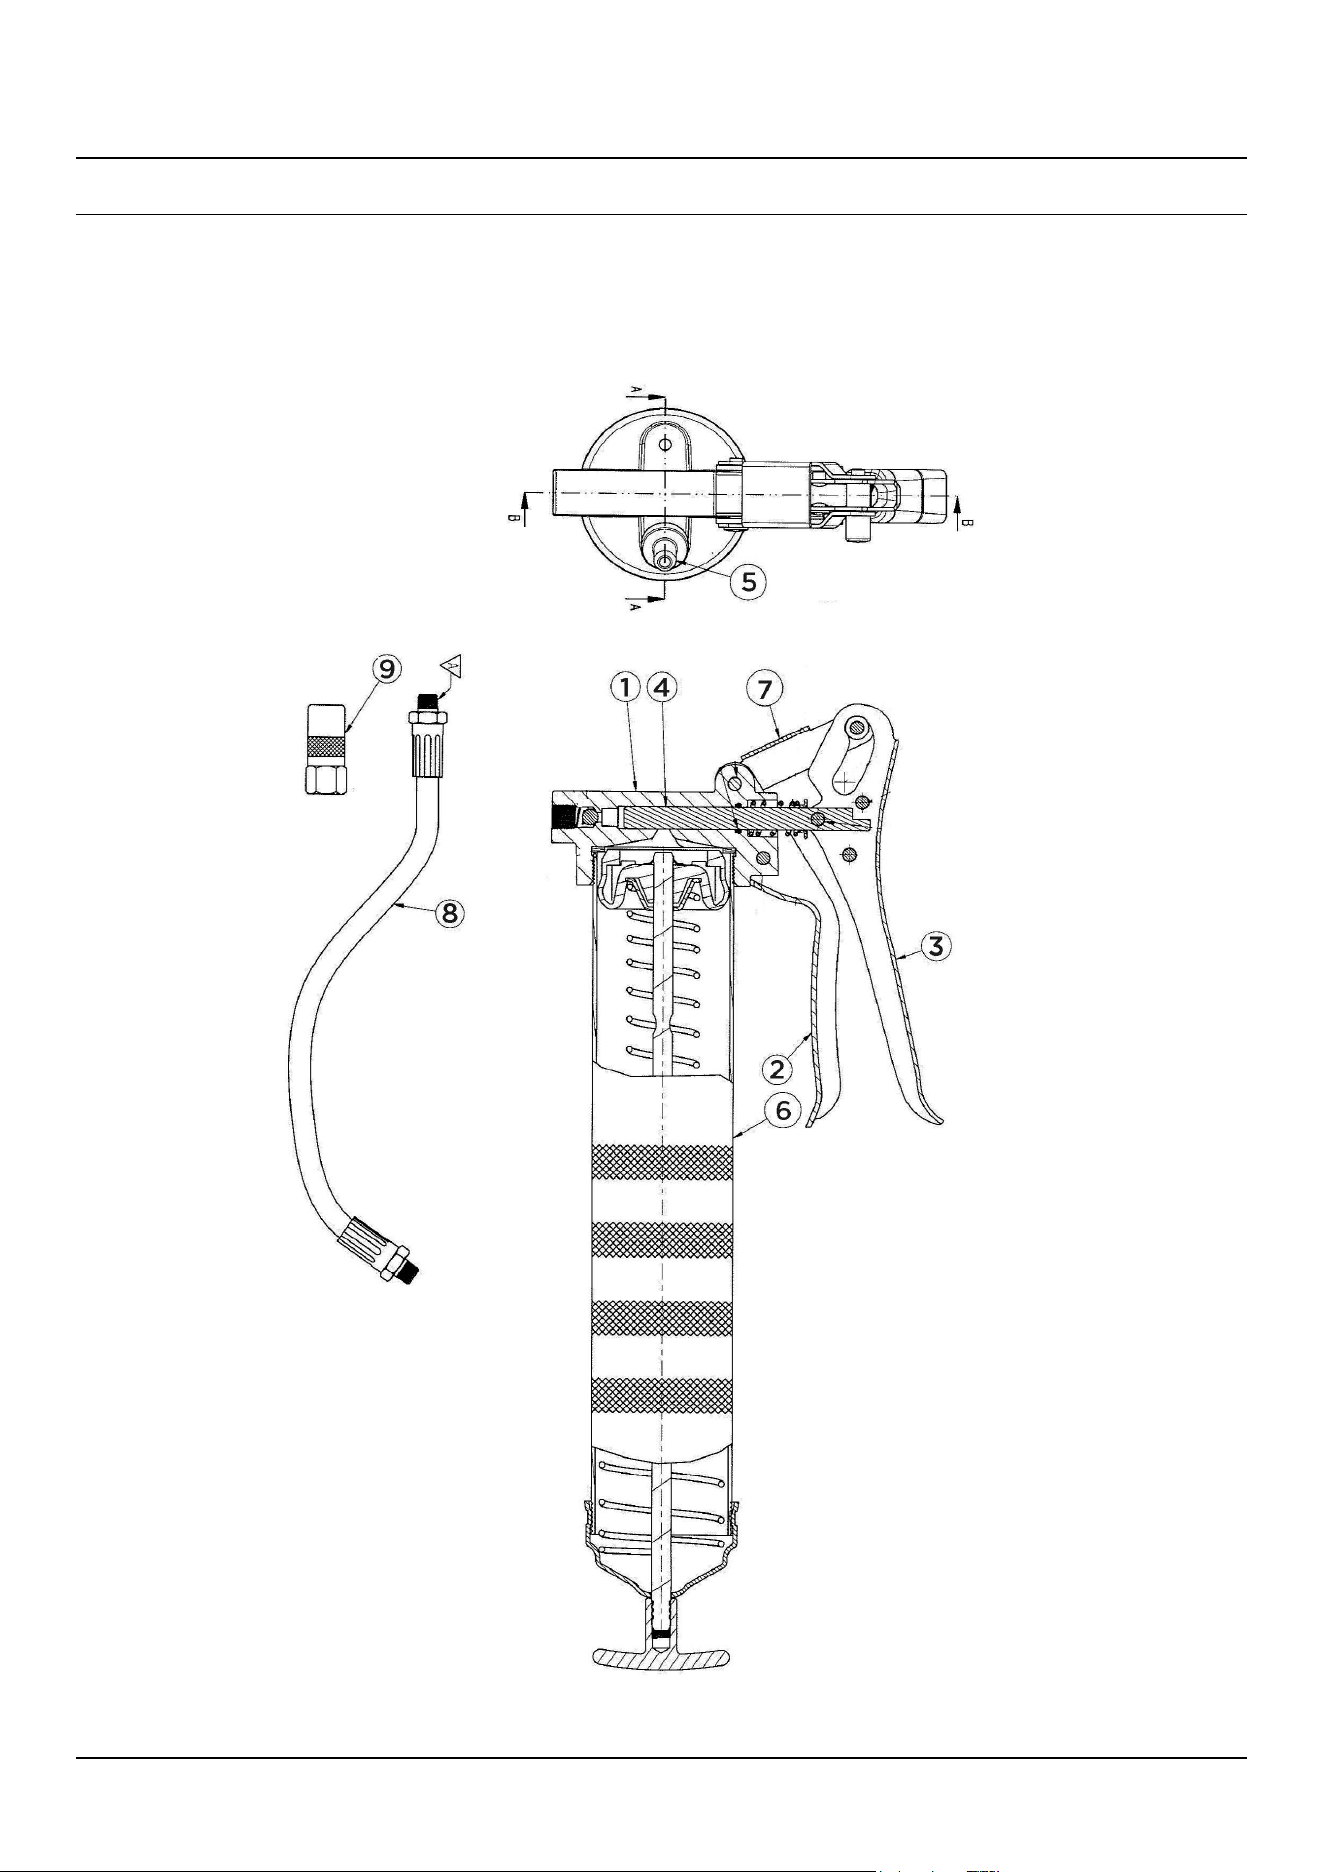
PART LIST
Sl. No. Art. No. Part Name Qty
1. HD/G70/B Head (Machined) 1
2. HND/FX/G70 Fix Handle 1
3. HND/MOV/G80 Movable Handle 1
4. PST/G85 Piston 1
5. SA/BLV/KF75 Bulk Loader Valve 1
6. SA/BRL/G50/BL Barrel Assy. 1
7. UC/G85 U-Clip 1
8. SA/GHC/HP-12/B Grease Hose 1
9. SA/HC/14/4/B Hyd. Coupler 1