User Manual
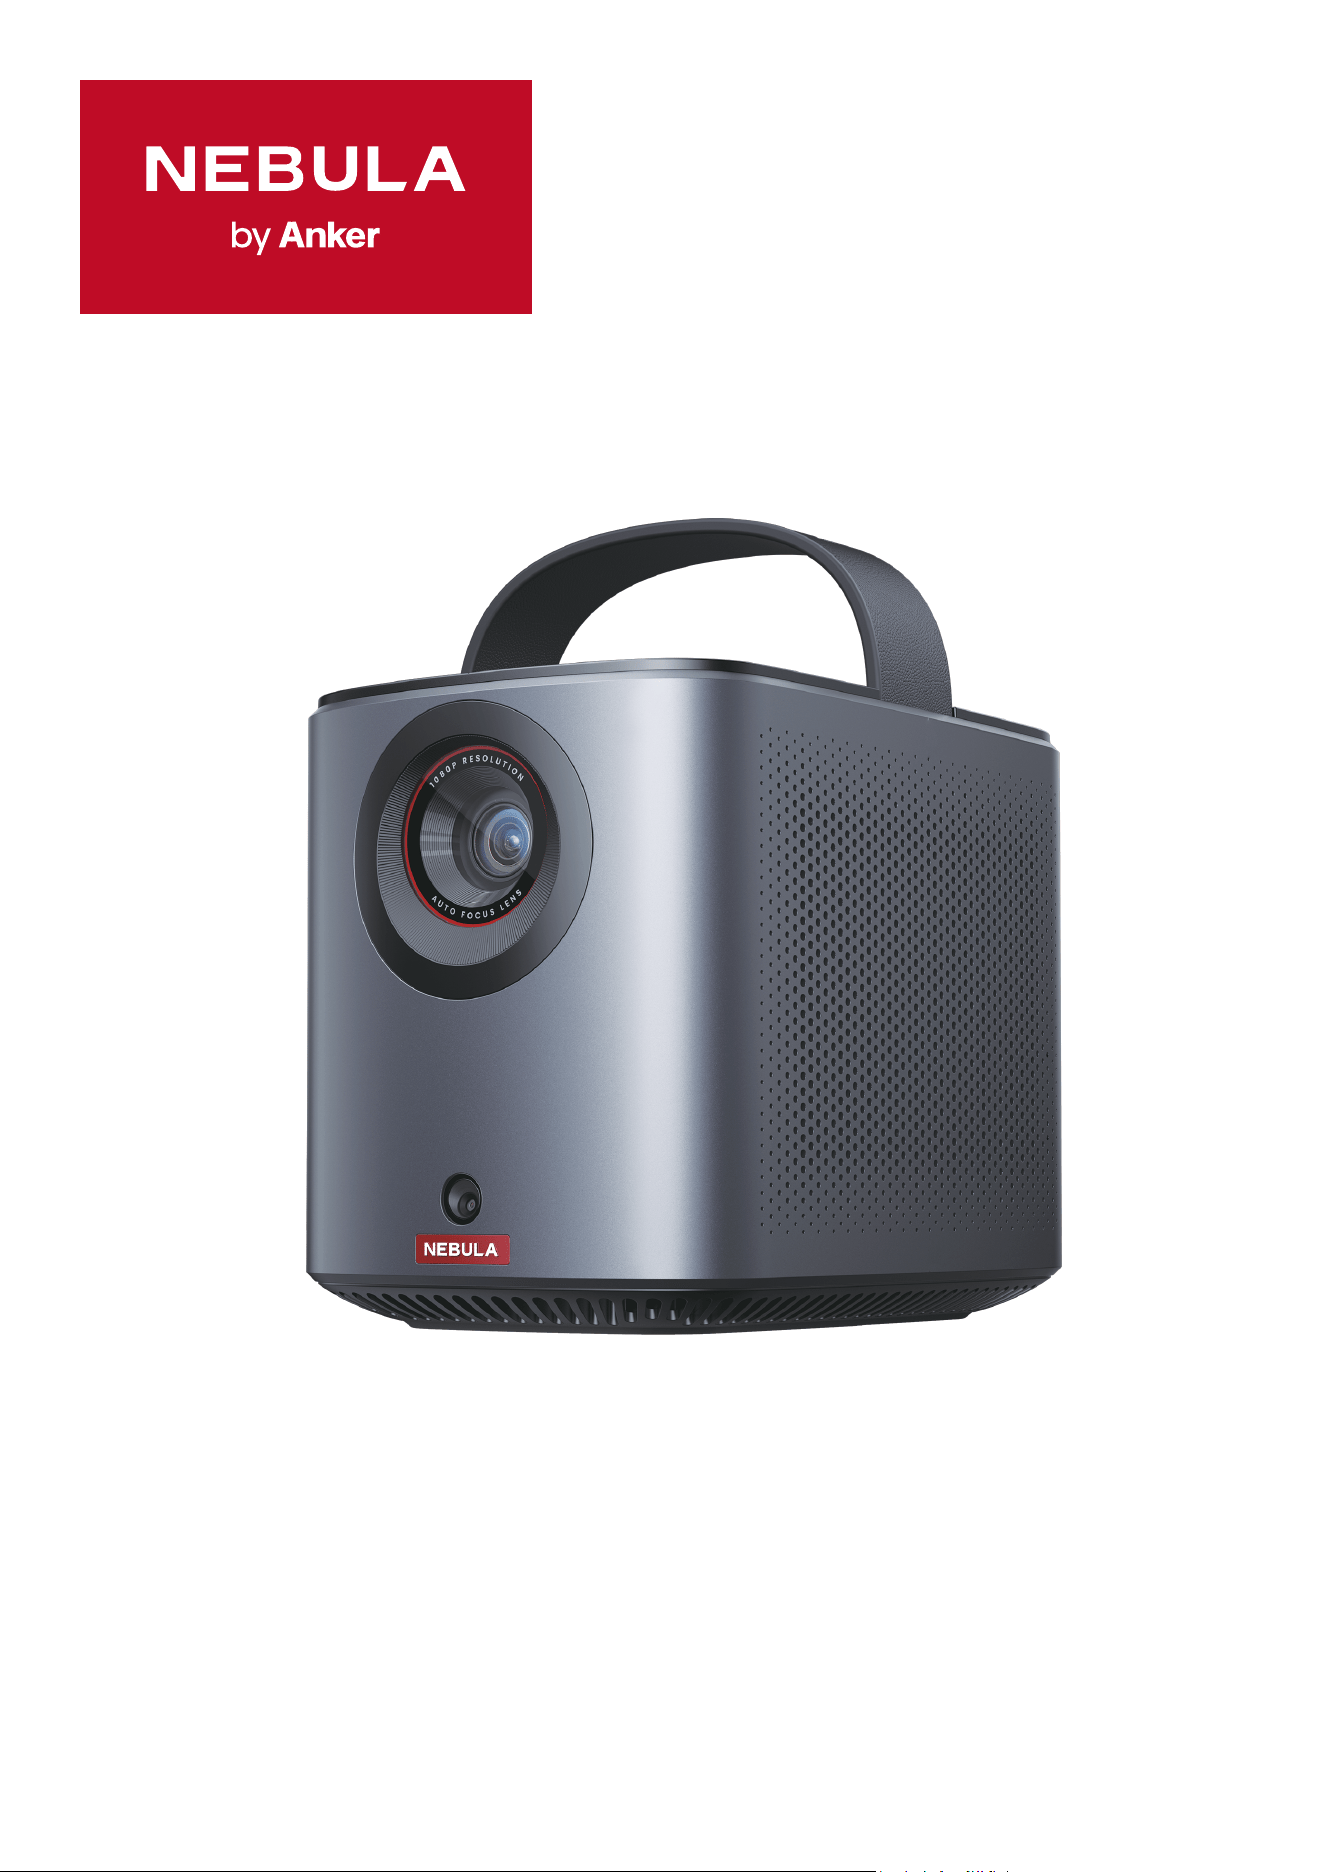
Nebula Mars3 Air

EN
01
01
Important Safety Instructions
Read all instructions before you use this product. Do not make any changes or create settings that are not described in this
user guide. If physical injury, loss of data, or damage is caused by failure to follow instructions, the warranty does not apply.
Setup
• Do not use the product in any way other than described herein in order to avoid personal injury or property damage.
• Do not place this product on soft surfaces such as tablecloths or carpets, otherwise, the product could be a fire hazard.
• Do not place this product in areas susceptible to excessive dust and dirt or near any appliance generating a strong magnetic
field.
• To prevent overheating, do not block or clog the ventilation openings.
• Never place this product in a confined space. Always leave enough space around this product for ventilation.
• Do not use the product in an environment where the temperature is too high or too low. Never expose the product to strong
sunshine or wet environments.
• When this product is running for a long period of time, the surface may become hot. If this occurs, shut it down immediately
and unplug the adapter. Resume operation after the product has cooled down.
• Always handle this product with care. Avoid touching the lens.
• Do not allow children to handle the product without supervision.
• Do not place heavy or sharp objects on this product.
• To avoid electric shock, do not disassemble the product.
• Avoid extreme vibrations as they may damage the internal components.
• Please ensure you use only the adapter offered by the manufacturer. Using an unauthorized adapter may be dangerous and
violate the Terms of Use and product warranty.
• Users should comply with the laws and regulations of the corresponding countries and regions where the equipment is
located (used), abide by professional ethics, pay attention to safety obligations, and strictly prohibit the use of our products
or equipment for any illegal purposes. Our company will not be responsible for any violators' legal liability under any
circumstances.
• Possibly hazardous optical radiation emitted from this product may be harmful to the eyes. Do not stare at operating beam.
Hearing Safety
• To prevent hearing damage, do not listen for extended periods at high volume. Set the volume to a safe level.
Charging
• The adapter is for indoor use only.
• For pluggable equipment, the socket outlet shall be easily accessible.
• Due to the enclosure material, the product must only be connected to a USB 2.0 or higher.
• It is recommended to charge the product in an environment with a temperature that ranges from 5
℃
~25
℃
/ 41°F~77°F.
• When supplying power, place the device in an environment with a normal room temperature and good ventilation.
Battery
• The remote control contains batteries, which are a choking hazard. Keep the remote control out of the reach of children.
• Remove the batteries when the remote control has not been used for a long period of time.
• Replace the remote control batteries only with the same or an equivalent type.
• Batteries contain chemical substances and they should be disposed of properly.
• Charge this device regularly. Do not store this device with a completely discharged battery.
Warning
• Replacing a battery with an incorrect type may defeat safeguards and create danger;
• Disposal of the battery/device in a fire or a hot oven or other source of significant heat, or mechanically crushing, or cutting
of the battery/device, may result in an explosion;
• Leaving the battery/device in an extremely hot environment may result in an explosion or leakage of flammable liquids or
gases;
• The battery/device subjected to extremely low air pressure may result in an explosion or leakage of flammable liquids or
gases.
Cleaning
• Use a soft, lint-free cloth. Never use liquid, gaseous, or easily flammable cleansers to clean.
• Do not use any liquid cleaning agents to clean the lens to avoid damaging the film coating on the lens.
• Wipe surfaces gently. Be careful that you do not scratch the surface.
• Use lens cleaning paper to clean the lens.
Repairs
• Do not make any repairs to this product yourself.
• Improper maintenance can result in injuries or product damage.
• Refer all servicing to qualified service personnel.
EN
02
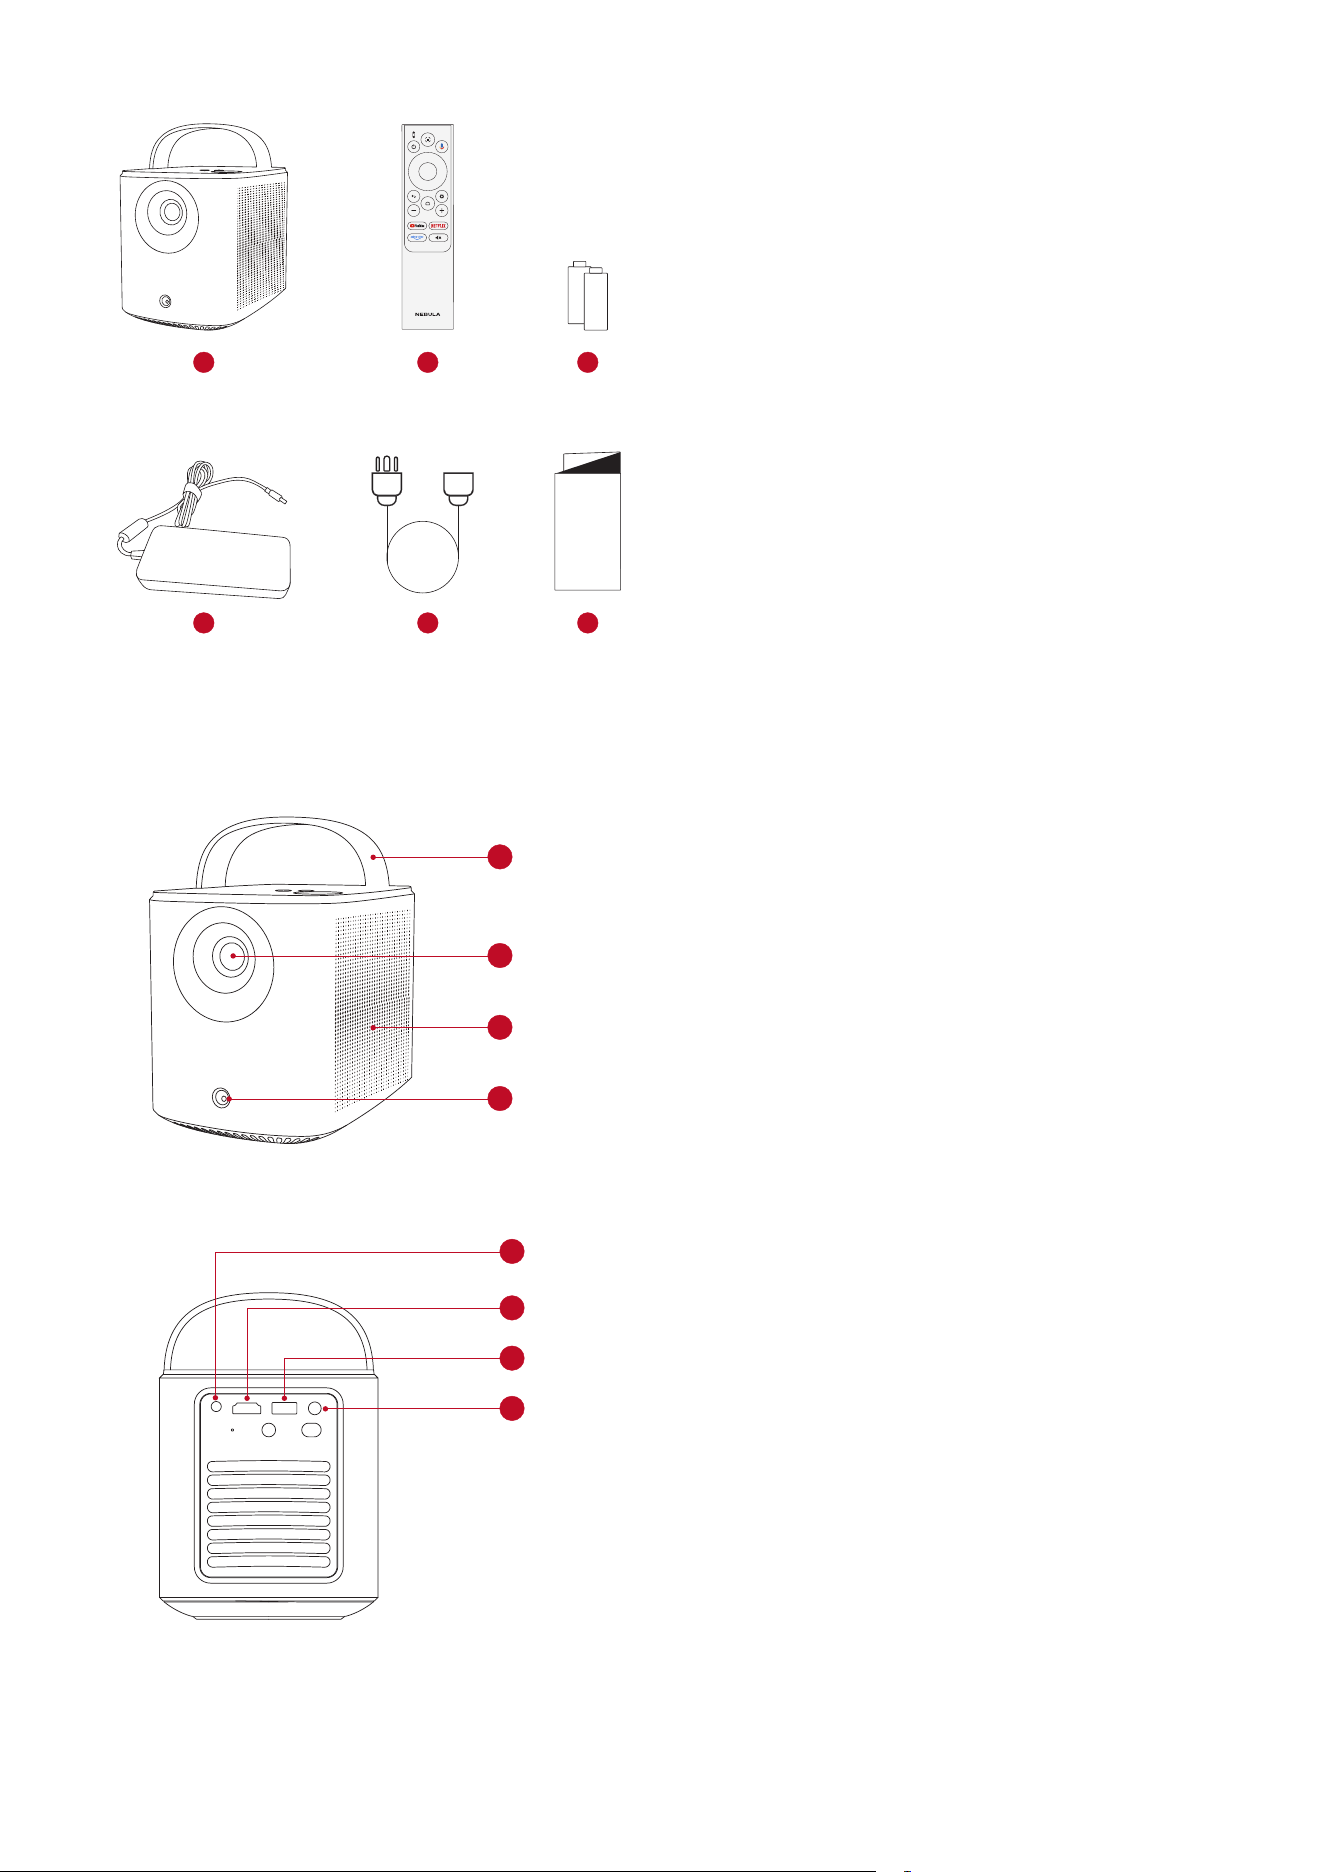
What's Included
❶
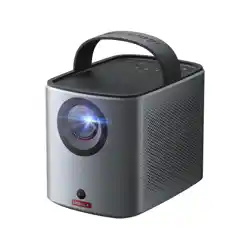
Nebula Mars 3 Air
❶
Remote Control
❶
AAA Battery × 2
❶
Power Adapter
❶
Power Cord
Note: The plug type varies by region.
❶
Quick Start Guide
1 2 3
4 5 6
QSG
At a Glance
1. Projector
Front View
❶
Handle
❶
Lens
❶
Speaker
❶
Sensor (for autofocus and auto keystone correction)
1
3
2
4
Rear View
1
2
3
4
2
3
4
1
5
❶
AUX-OUT port
•Connect to an external sound output device
❶
HDMI port
•Connect to a playback device via HDMI output
❶
USB-A port
•Connect to a USB drive
❶
DC-IN port
•Connect to power supply
EN
03
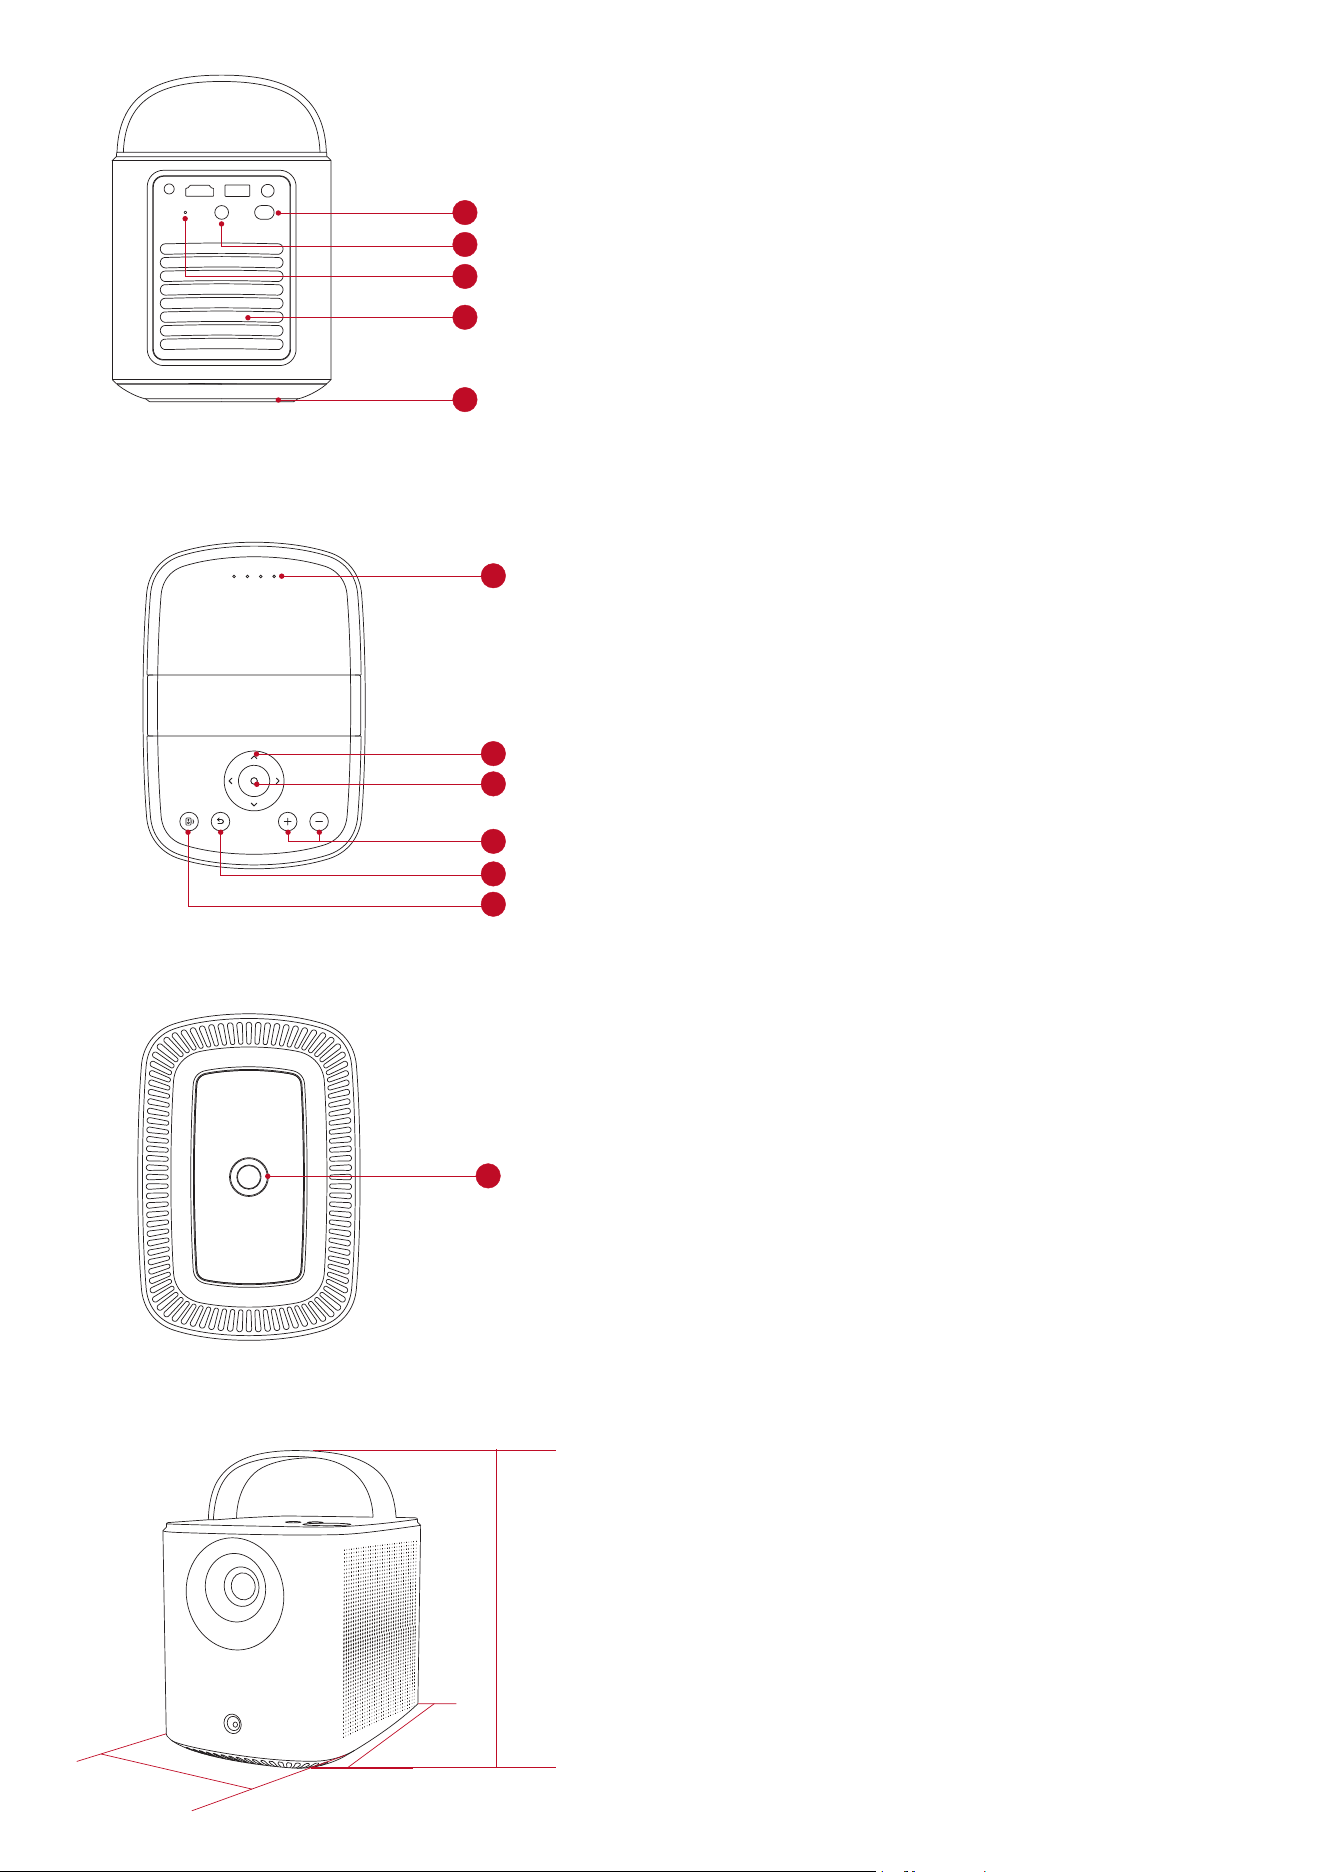
1
2
3
4
2
3
4
1
5
❶
Power button
•Press for 3 seconds to turn on the projector or access the power-off menu
❶
Infrared receiver
❶
Reset button
•Press to reset your projector
❶
Air ventilation (outlet)
❶
Air ventilation (inlet)
Top View
❶
Battery status LED
❶
Navigation button
❶
Confirmation button
❶
Volume up / down buttons
❶
Return button
❶
Bluetooth speaker button
•Press to enter or exit Bluetooth speaker mode
1
2
3
5
6
4
Bottom View
❶
Tripod socket
1
Dimensions
178 (L) × 122 (W) × 133 (H) mm / 7 (L) × 4.8 (W) × 5.2 (H) in
122 mm
178 mm
133 mm
EN
04
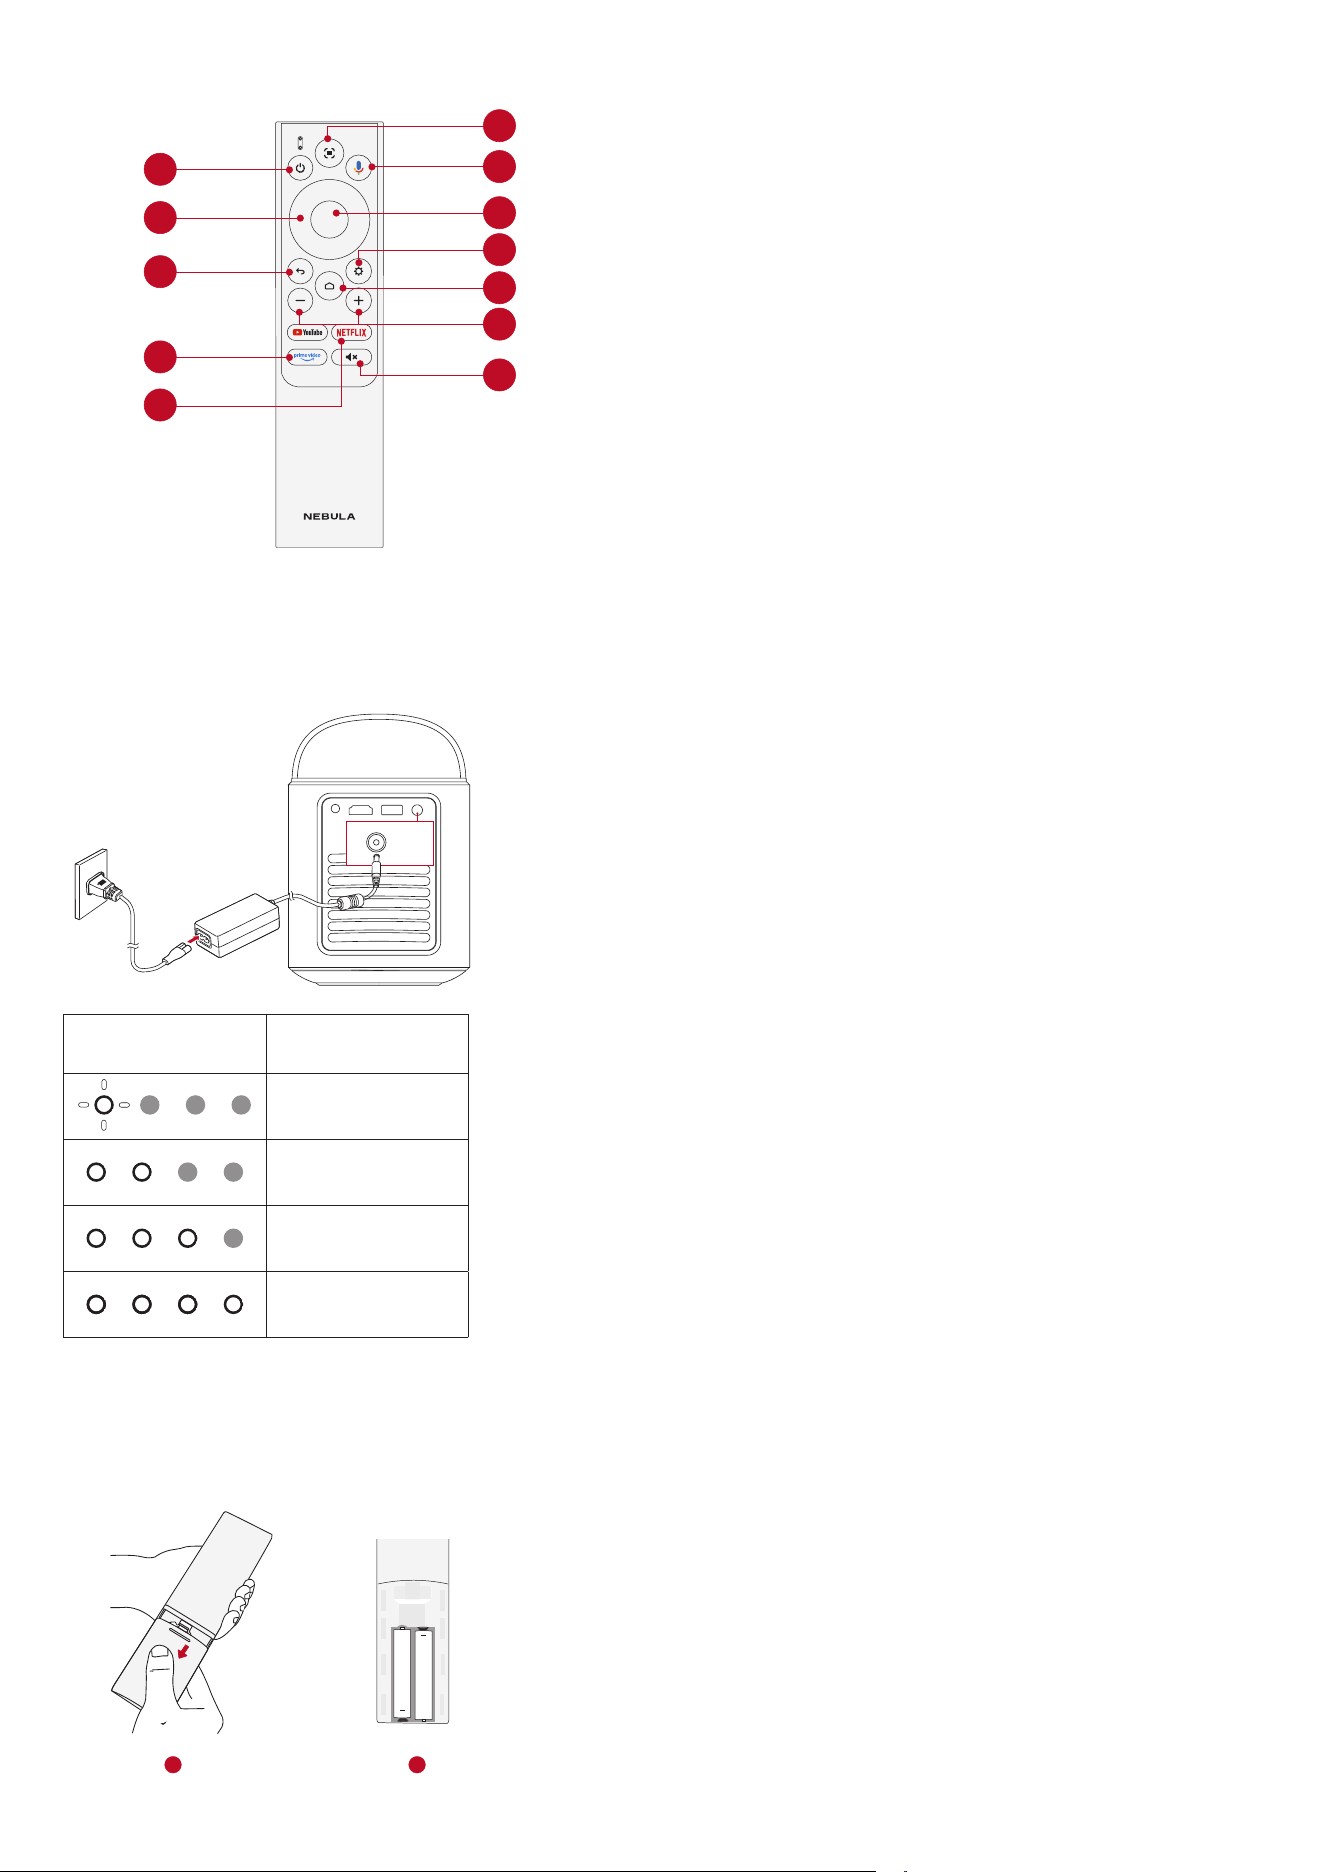
2. Remote Control
1
2
3
4
5
7
8
11
10
9
6
12
❶
Power on / off
❶
Navigation
❶
Return to the previous menu
❶
Open Prime Video
❶
Open Netflix
❶
Volume up / down
❶
Access the home menu
❶
Access more options
❶
Pause / resume / confirm selection
❶
Activate the Google Assistant
❶
Adjust focus
Remote Control: Google TV RCU
Model: D0442
Charging Your Projector
Before using it for the first time, fully charge the built-in battery using the provided adapter and power cord. When being
charged, the battery status LED will light up.
DC-IN
Battery Status LED
Battery Level
<
25%
25% - 50%
50% - 75%
75% - 100%
Getting Started
1. Prepare the Remote
①
Slide to open the battery compartment.
②
Insert new batteries matching the polarity (+/-) and close the battery compartment.
+
+
1 2
③
For first-time use, follow the on-screen instructions to pair the remote with your projector.
EN
05
T
The distance between the remote and the projector should not exceed 10 m / 33 ft
.
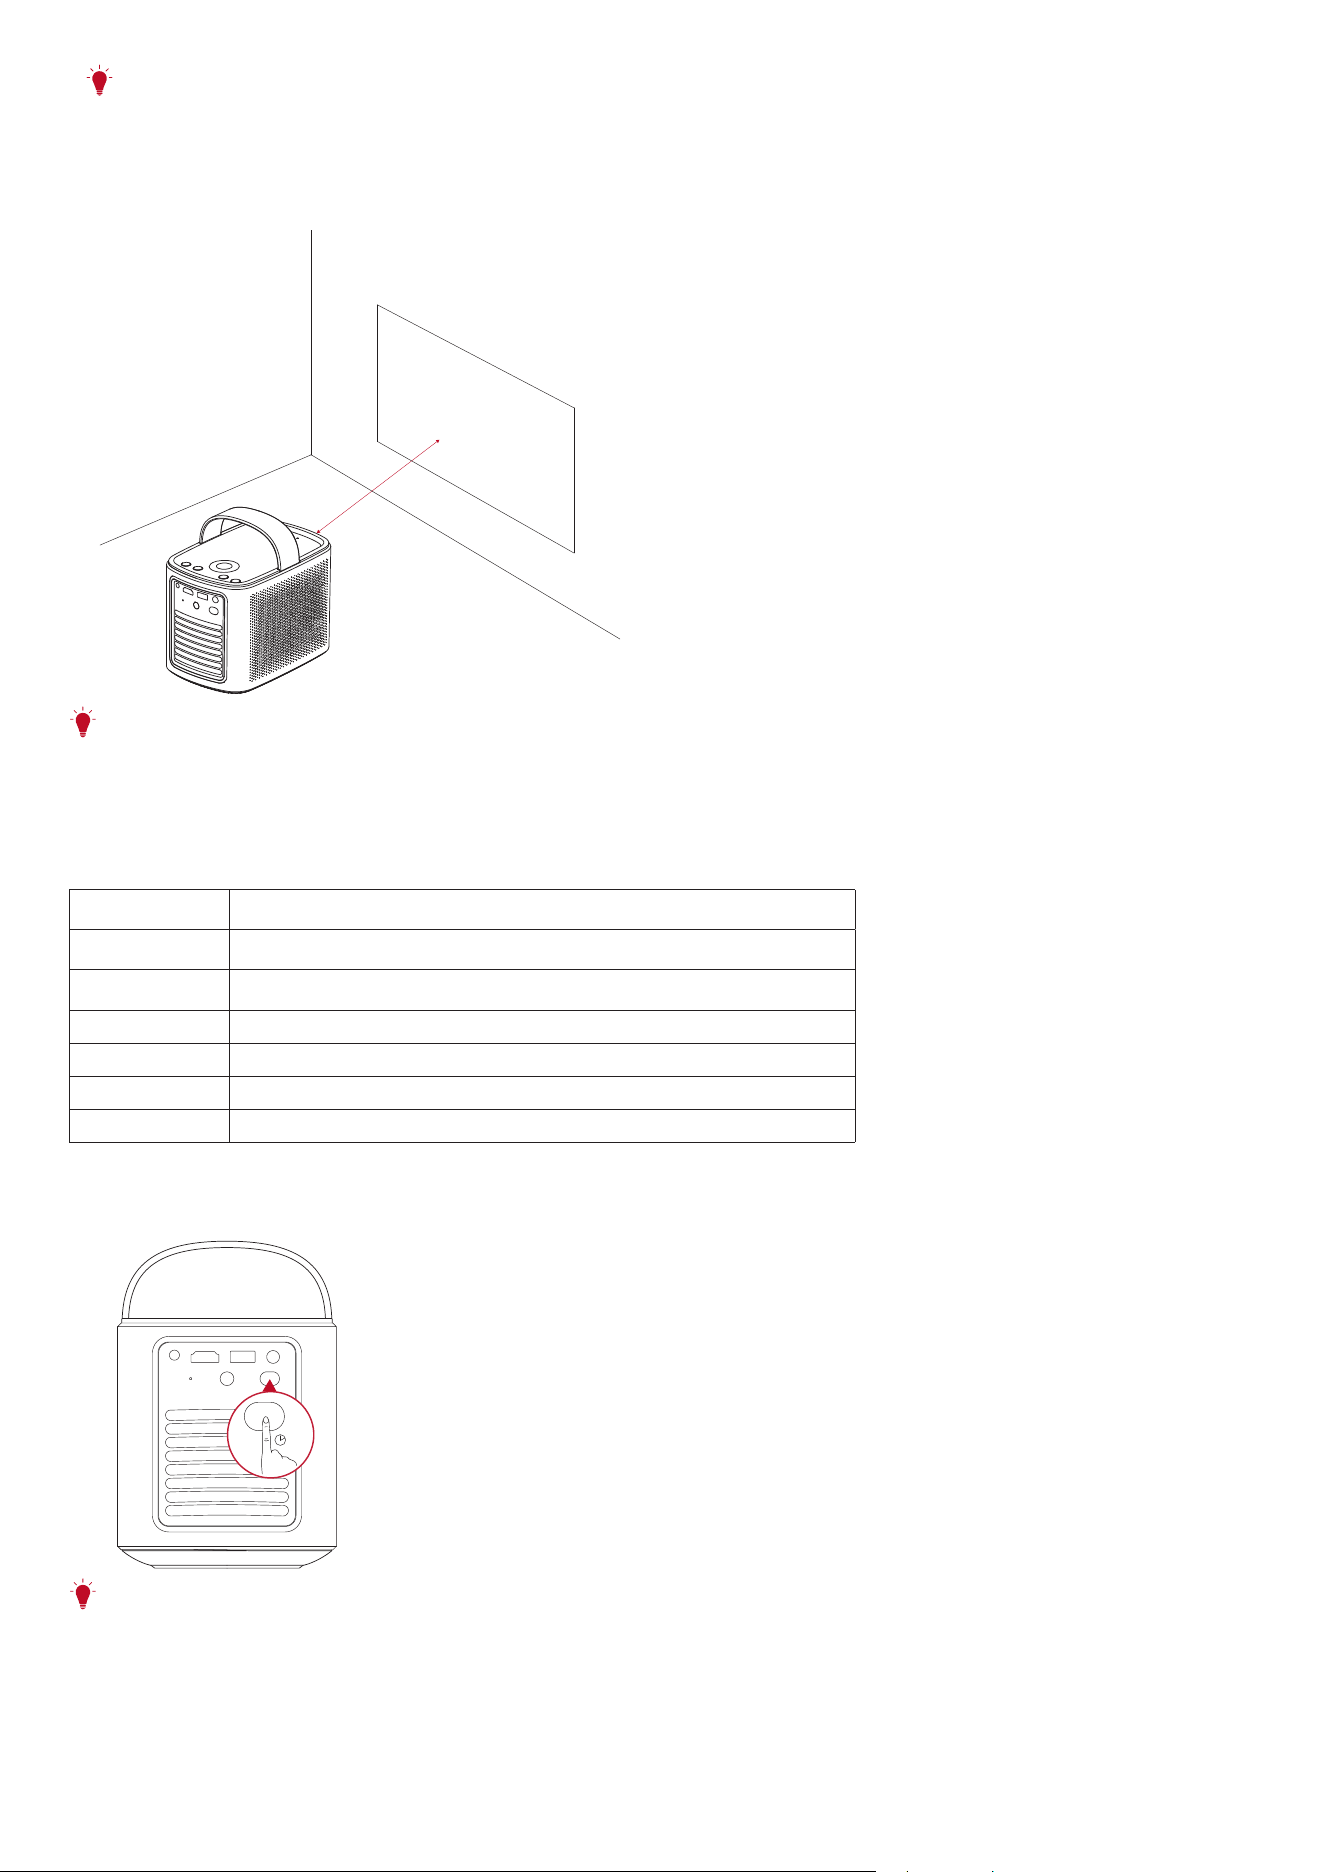
2. Position Your Projector
Place the projector on a stable, flat surface in front of the projection surface. For the best results, the projection surface
should be white and flat.
0.8-4.0 m
2.62-13.12 ft
T
• It is unnecessary to tilt the projector towards the projection surface. You can correct the projection image with the built-
in autofocus and auto-keystone correction.
• The distance between the projector and the projection surface determines the projection image size. For the best result,
position the projector 0.8-4.0 m / 2.62-13.12 ft away from the projection surface to get a screen size of 30-150 inches.
Screen Size
Distance Between Projector Lens and Screen
30 inches 0.8 m / 2.62 ft
50 inches 1.33 m / 4.36 ft
80 inches 2.1 m / 6.89 ft
100 inches 2.65 m / 8.69 ft
120 inches 3.2 m / 10.5 ft
150 inches 4.0 m /13.12 ft
3. Power On / Off
Press the power button for 3 seconds to turn on the projector or access the power-off menu.
3s
T
• You can also press the power button on the remote for 3 seconds to access the power-off menu.
• When powered on, press the power button on the remote to switch to standby mode.
• I n H D M I Source Mode, the projector will switch to standby mode after 10 minutes of button inactivity or when no signal is detected.
• When standby mode lasts for 30 minutes, the projector will automatically power off.
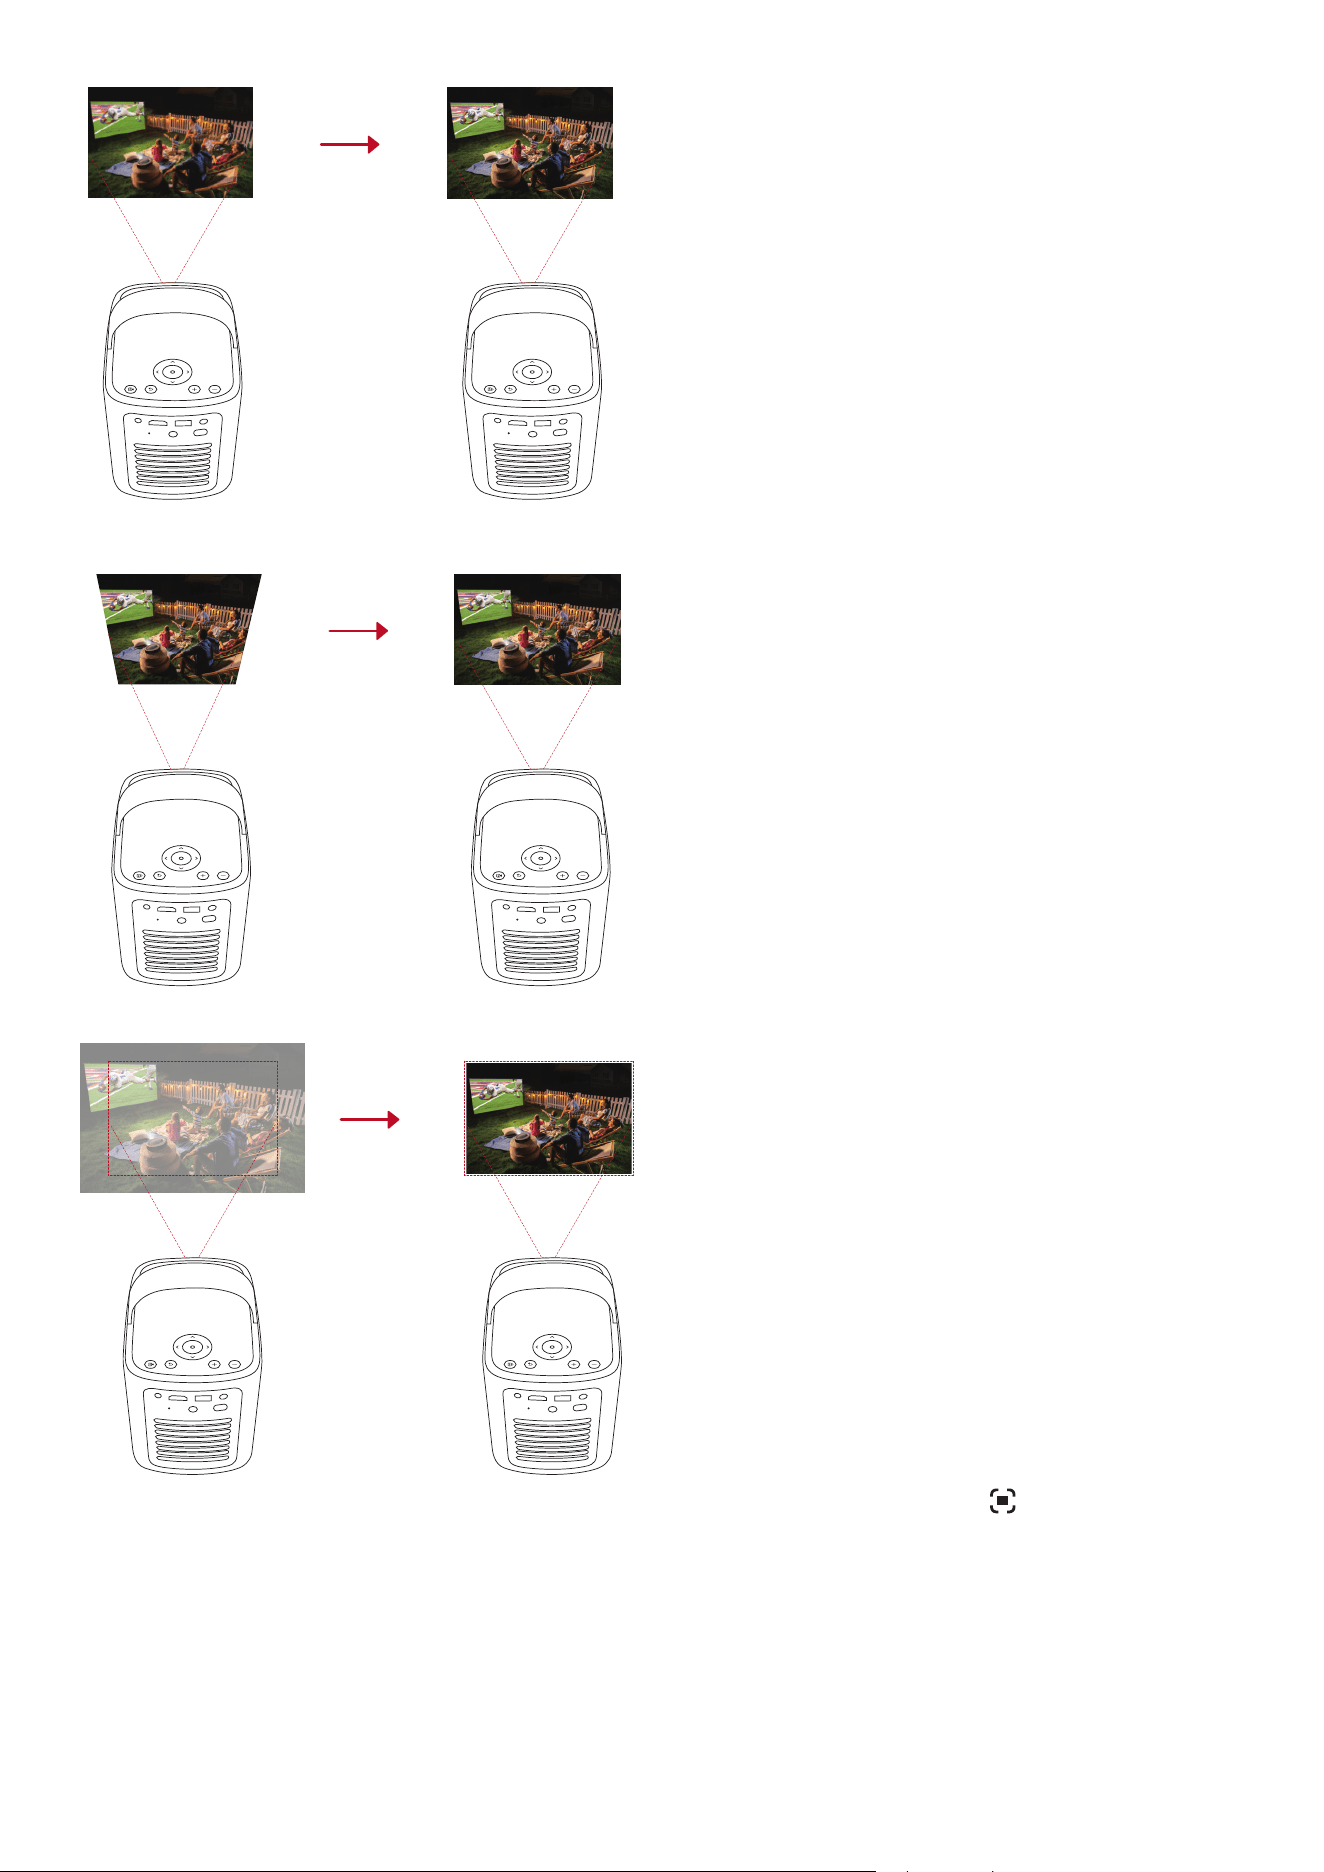
4. Auto Image Correction
Auto image correction includes autofocus, auto keystone correction, and auto screen fit.
EN
06
• Autofocus keeps your image looking as sharp as possible.
• Auto keystone correction transforms skewed images into a 16:9 rectangle.
• Auto screen fit automatically adjusts the screen size to your space.
Autofocus and auto keystone correction can be enabled by powering on the projector, by pressing on the remote, or by
slightly moving the projector.
To set your auto image correction preferences, go to [Settings]
>
[Projector]
>
[Image Correction].
5. Setup
When using the projector for the first time, follow the on-screen display (OSD) instructions to complete the basic setup.
• Pair the remote with your projector
• Select your language
• Set up your TV with your Android phone
• Connect to Wi-Fi
• Sign in with your Google account
EN
07
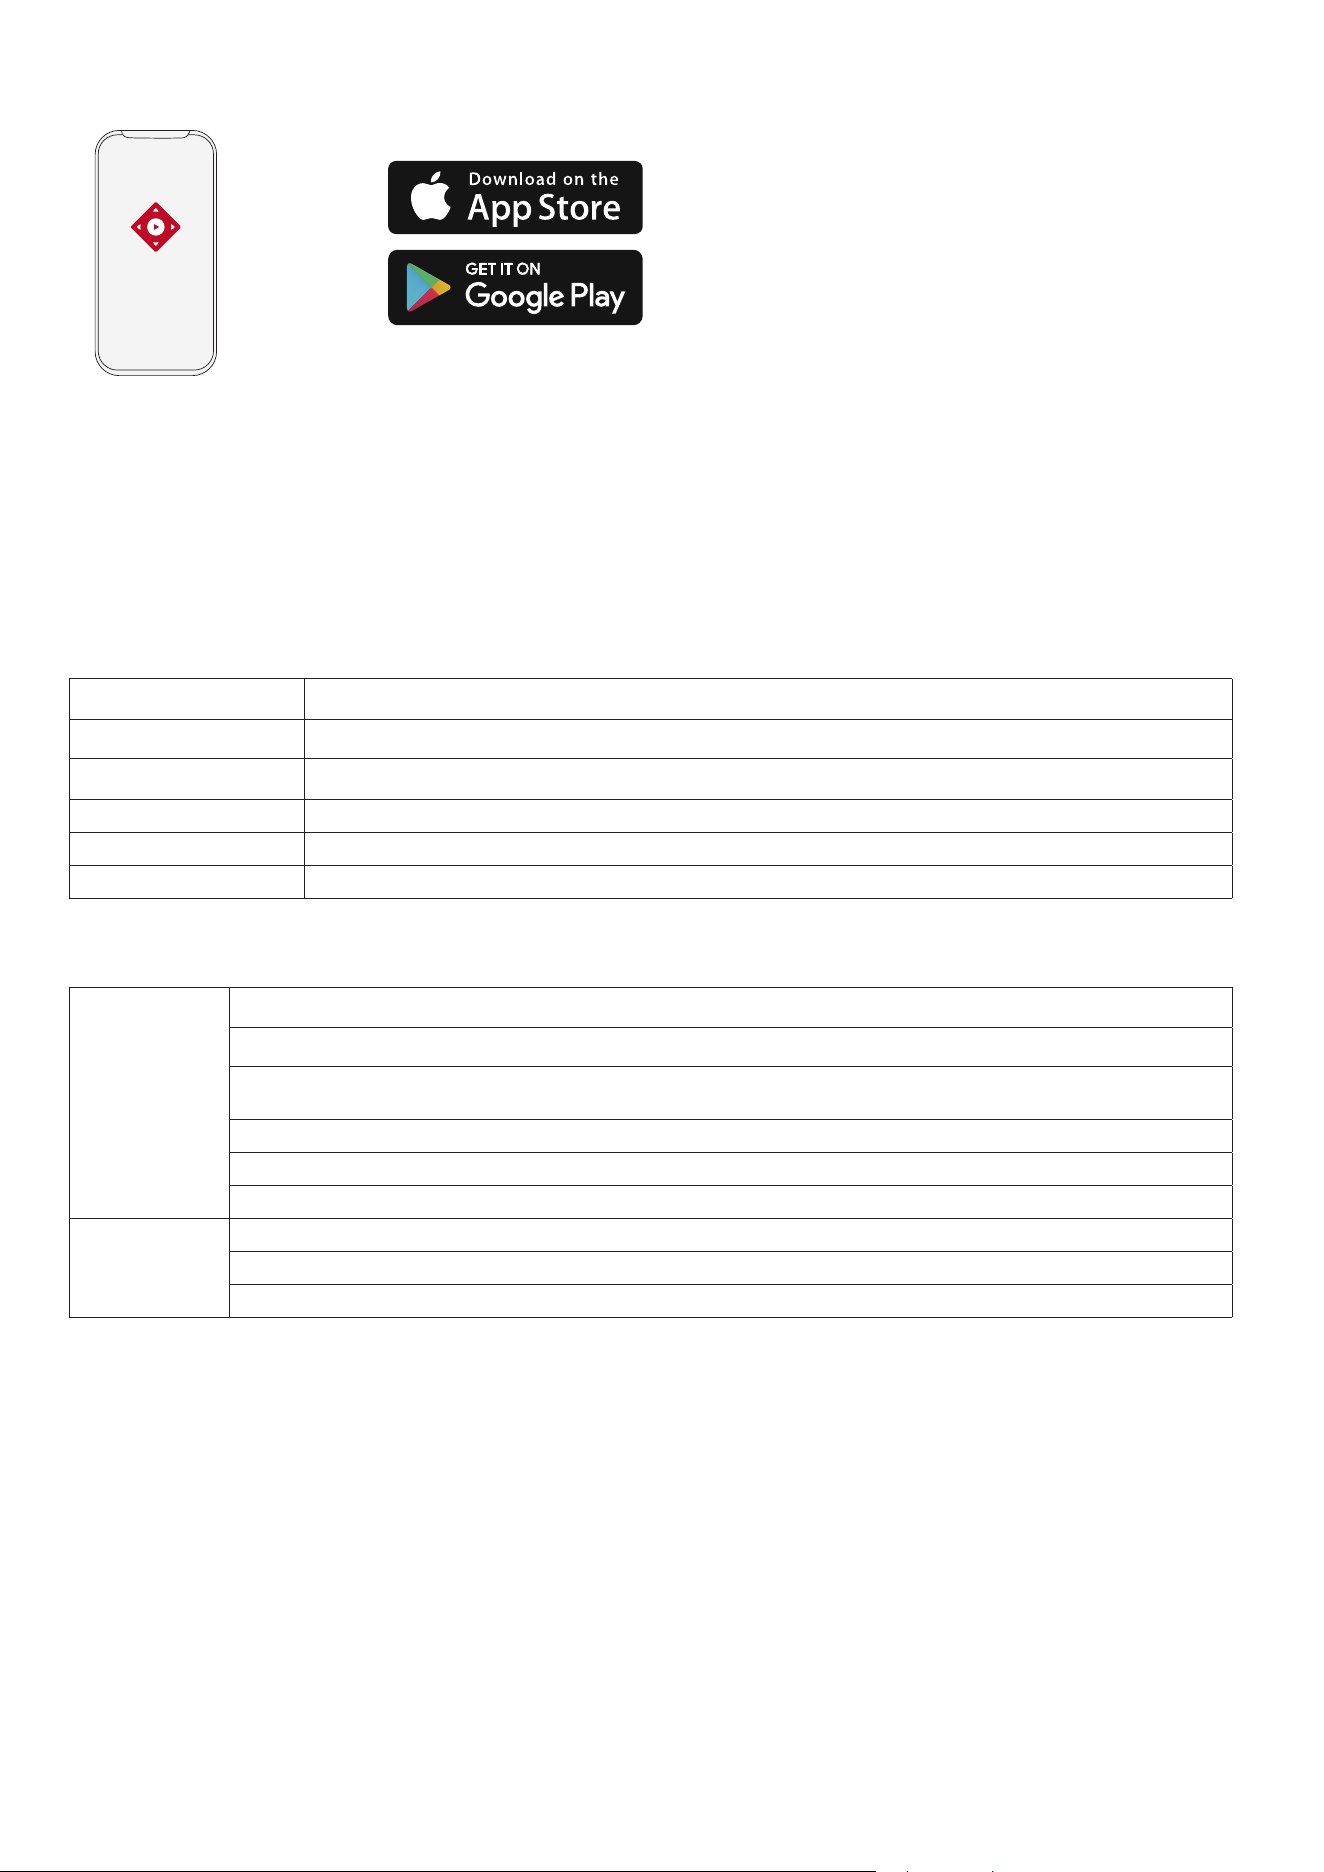
Nebula Connect App
To easily control the projector, we recommend you download the Nebula Connect app.
1. Download the Nebula Connect app from the App Store (iOS devices) or Google Play (Android devices).
2. Enable Bluetooth on your smartphone.
3. Open the Nebula Connect app and select [Mars 3 Air XXXXXX] as the device to be connected.
4. Follow the on-screen instructions to complete the connection setup.
Settings
Go through the setup process when you power on the projector for the first time.
1. Channels & Inputs
On the home screen, select [Settings]
>
[Projector]
>
[Inputs].
HDMI
Select an HDMI playback device as the input source.
HDMI Control
Allow the Google TV to control your HDMI playback device.
Device Auto Power Off
Power off the HDMI playback device through the Google TV.
TV Auto Power On
Power on the Google TV through the HDMI playback device.
Auto Source Switching
Instantly switches to the new source signal when connected to an active device.
CEC Device List
Check Consumer Electronic Control (CEC) devices.
2. Projector
On the home screen, select [Settings]
>
[Projector].
Image
Correction
Auto Keystone Correction Settings: Trigger auto keystone correction by remote, at startup, or after movement.
Auto Screen Fit: Enable or disable auto screen fit.
Auto Obstacle Avoidance: Automatically detects obstacles on the wall during keystone correction to adjust to
the appropriate screen.
Perform Manual Keystone Correction: Manually perform keystone correction by adjusting each corner.
One-Click Image Correction: Automatically adjust the image size to your surface.
Zoom: Zoom in or out of the projection image from 50% to 100%.
Focus Settings
Auto Focus at Startup: Automatically adjust the focus when the projector powers on.
Auto Focus After Movement: Automatically adjust the focus when you move the projector.
Manual Focus Correction: Enable manual focus correction.
EN
08
Advanced
Settings
Clear Cache: Clear all the cached data stored on the projector.
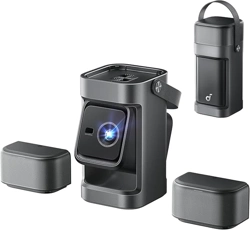
Projector Mode: Select projector placement.
•Auto: Automatically detects whether the projector is inverted and automatically switches to an
appropriate projector mode.
•Front: The device is located in front of the projection surface.
•Front Ceiling: The device is hanging from the ceiling in an upside-down position. The image is rotated by
180 degrees.
•Rear: The device is located behind the projection surface.
•Rear Ceiling: The device is hanging from the ceiling in an upside-down position behind the projection
surface. The image is rotated by 180 degrees and horizontally mirrored.
Motion Settings: Set a sensitivity level to trigger autofocus and auto keystone correction.
DNS Server Setting: Set your preferred DNS server for the projector.
Keystone Calibration: Recalibrate the projector if keystone correction doesn't work properly.
Smart Solutions: Turn on / off auto-alerts when the projector detects an issue.
•Projection Angle Alert: Shows an alert when the maximum projection angle is reached.
•Fine Tuning Popup: Shows a prompt to access fine-tuning after auto keystone correction.
•Nebula Smart Popup: Shows a prompt when the projector status changes.
3. Display & Sound
On the home screen, select [Settings]
>
[Display & Sound].
Picture
Brightness: Adjust brightness based on your environment.
• Standard: Sets the display brightness to the highest level by default. You can also adjust the brightness
manually.
• Eco: Lowers the display brightness to extend playtime.
• Auto: Switches to standard mode when being charged, and to eco mode when disconnected from the
power supply.
Picture Mode: The projector comes with several predefined picture modes so that you can choose one to
suit your environment and input source.
• Standard: Keeps natural-looking colors with a balance of warm and cool tones.
• Movie: Provides the best colors for watching movies.
• Conference: Increases the brightness but effects the color reproduction.
• Custom: Manually set the contrast, saturation, sharpness, color temperature, wall color, and gamma, or
reset the values.
Expert Settings: Customize advanced settings to enhance image quality.
• DNR: Reduces digital noise on-screen.
• MPEG NR: Eliminates image noise when playing an MPEG-compressed video.
• DI Film Mode: Creates high-definition images encoded at 24 frames per second.
Sound
Sound Mode: The projector comes with several predefined sound modes so that you can choose one to
suit your environment and input source.
• Movie: Creates a surround-sound listening experience for watching movies.
• Music: Enhances the treble for listening to music.
• Outdoors: Increases volume for playing audio / video outdoors.
• Custom: Manually set audio settings such as balance, bass, and treble.
Turn on the Bluetooth Speaker Mode: Enable to use the projector as a Bluetooth speaker.
Speaker Delay: To synchronize the sound with the image, adjust the sound delay by 10 milliseconds for
each operation.
Expert Settings: Customize advanced settings to enhance audio quality.
• ARC: Allows TV to send audio backward to its source device via a single HDMI cable.
Audio Output Select a digital output mode and manually set the output delay.
4. Network & Internet
This projector can be connected to the Internet via a wireless (Wi-Fi) connection.
1. Press the Settings button (the cogwheel icon) on the remote control, and navigate to Settings > Network & Internet.
2. Use the navigation button on the projector to access Settings > Network & Internet.
3. Open Nebula Connect app on your device, and select your projector's model, then proceed to Settings > Network & Internet.
5. Apps
1. On the home screen, select [Settings] > [Apps].
2. Select an app and check the current version, open or force stop the app, check the storage used, clear data or cache,
uninstall the app, or enable or disable notifications and permissions.
6. System
On the home screen, select [Settings]
>
[System].
EN
09
Accessibility
Change the caption settings or enable accessibility service.
About
Check device information, update the system, reset the device, or rename the device.
Date & Time
Enable or disable automatic date and time, manually set date and time, select time zone, or set time format.
Language
Select an on-screen display language.
Keyboard
Check and manage keyboards.
Storage Check the device storage.
Ambient Mode Set your preferences to display photos, weather, and time on your Google TV.
Power & Energy
Change the auto-sleep settings, turn off the current display, or set auto power-off time when no signal is
available.
Cast
Choose to show notifications on all Android devices connected to your Wi-Fi and let them control media
casting to this device.
System Sound Turn on / off system sound notifications.
Restart Restart the system.
7. Others
On the home screen, select [Settings] to find more setting options.
Accounts & Sign-In
Sign in to make the most of Google TV.
Privacy
Customize your privacy preferences.
Remotes & Accessories
Search for accessories for pairing.
Help & Feedback
Leave your feedback on the projector or share any other ideas.
Using Your Projector
1. Select an App
Once connected to a wireless network, you can access online services, enjoy movies, music, pictures, and browse online. You
can download more apps from Google Play.
①
Press to access the home screen.
②
Select [Apps]
>
[Search for apps and games].
2. Voice Assistant
After setup, press the Google Assistant button on the remote, you can speak to the Google Assistant and request your
commands.
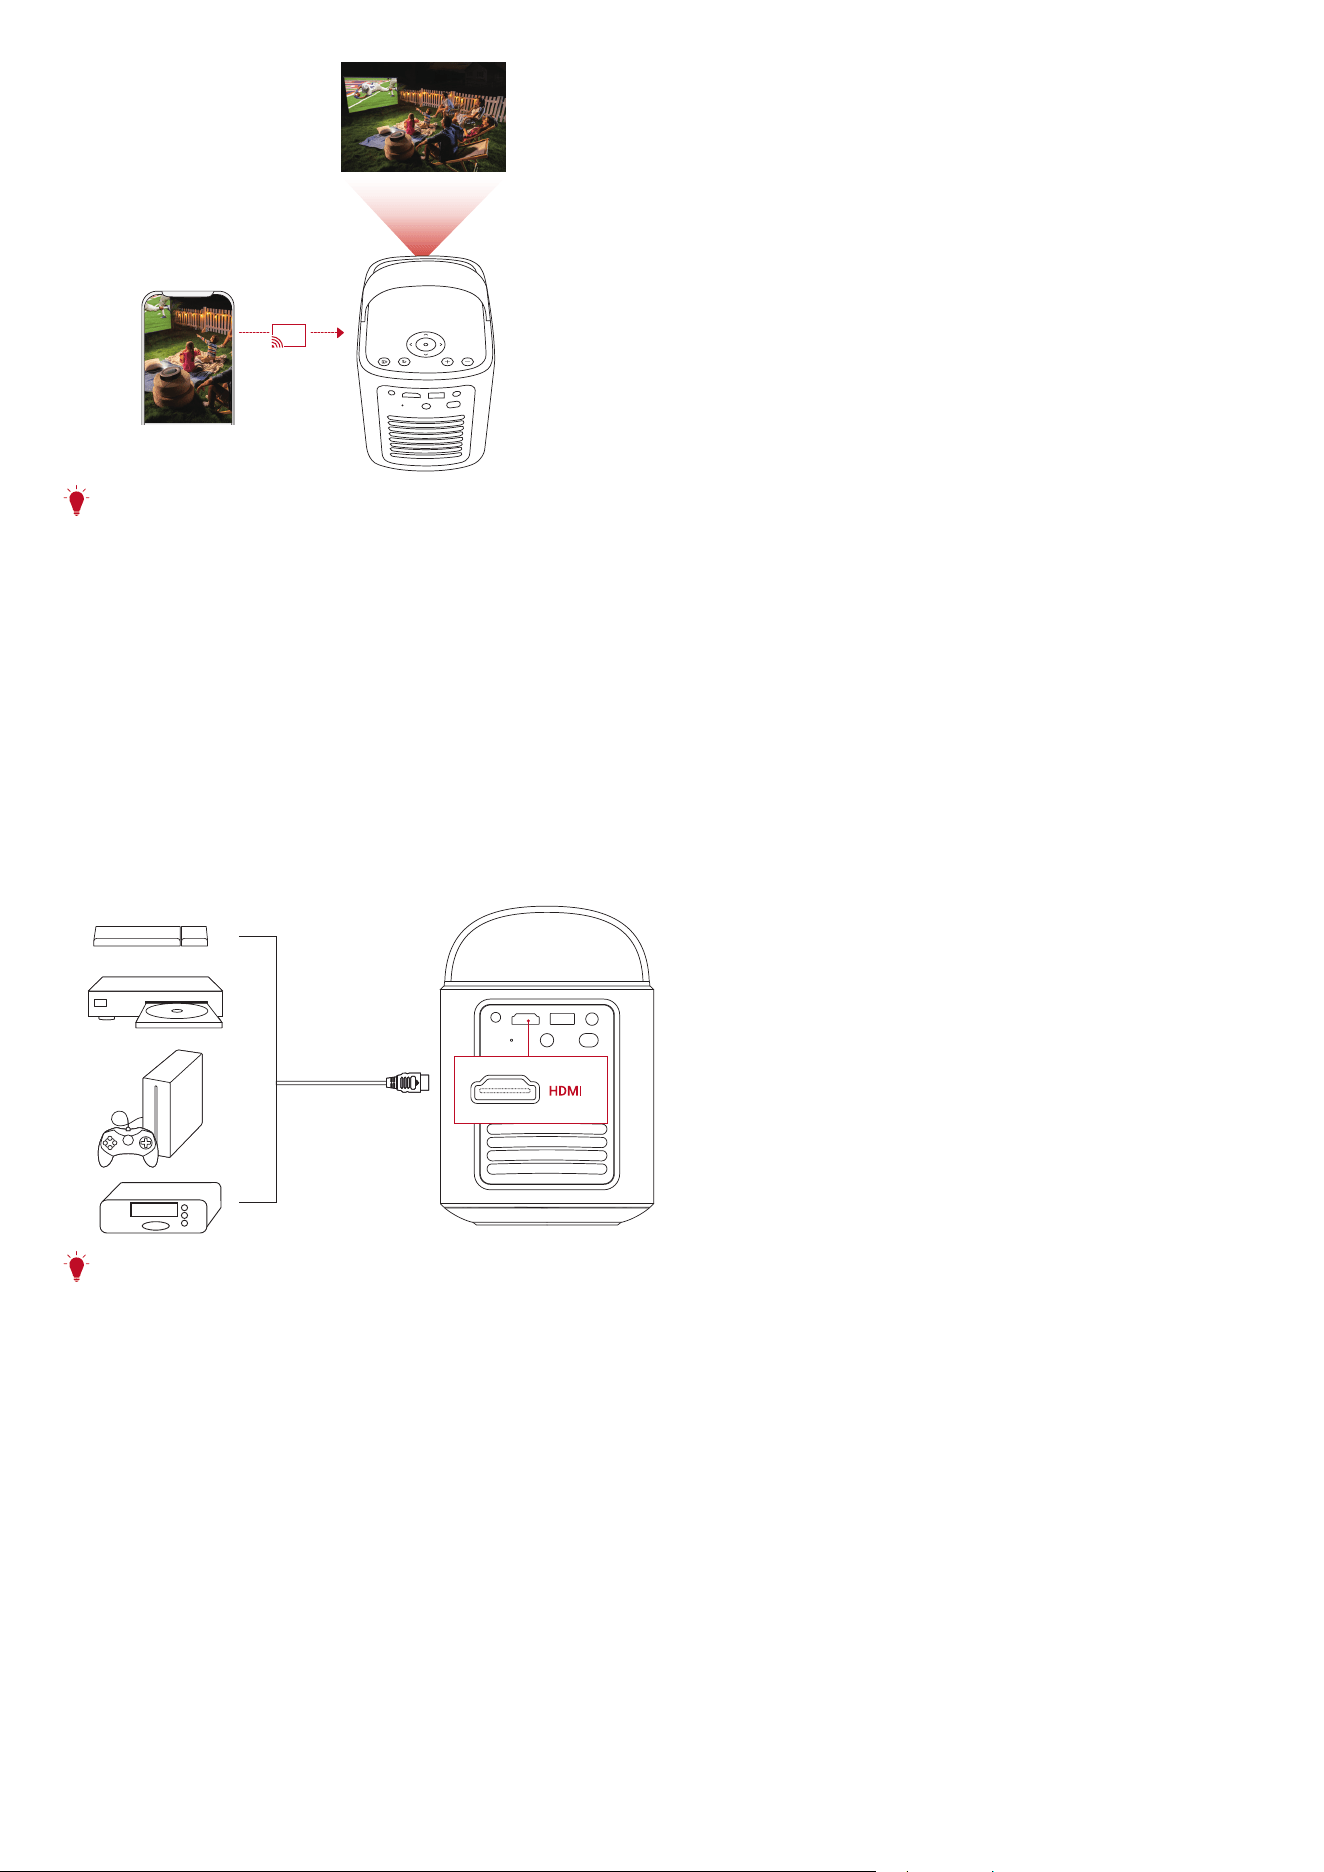
3. Wireless Casting
You can wirelessly cast movies, games, music, and the entire screen from your iOS, macOS, Android, or Windows device to
Nebula Mars 3 Air.
T
Make sure Nebula Mars 3 Air and your device are connected to the same wireless network. The network can be a Wi-Fi
network or your phone's hotspot.
3.1 Cast In-App Content
You can cast content from apps that support Chromecast, such as YouTube and Prime Video.
①
Connect your device and projector to the same wireless network.
②
Open the streaming app on your device.
③
Play a video clip and tap the cast icon on the video screen.
④
Select D2325 to connect. The projector will mirror the video screen on your device.
EN
10
T
Certain content cannot be cast on Nebula Mars 3 Air due to copyright restrictions. You can stream the content via the same
app installed on your projector.
3.2 Cast Device Screen
You can cast the entire screen from your device to the projector.
①
Connect your device and projector to the same wireless network.
②
Install the Nebula Cast app on your projector.
③
Open Nebula Cast and follow the on-screen instructions to complete the process.
4. Play from HDMI Playback Devices
The projector can be connected to various HDMI playback devices such as a TV box, TV stick, DVD player, set-top box (STB),
gaming console, or other devices.
①
Connect the projector to an HDMI playback device with an HDMI cable (not included).
②
Select [Settings]
>
[Channels & Inputs]
>
[Inputs]
>
[HDMI].
T
The projector will automatically start HDMI playback once connected to an HDMI playback device for the first time.
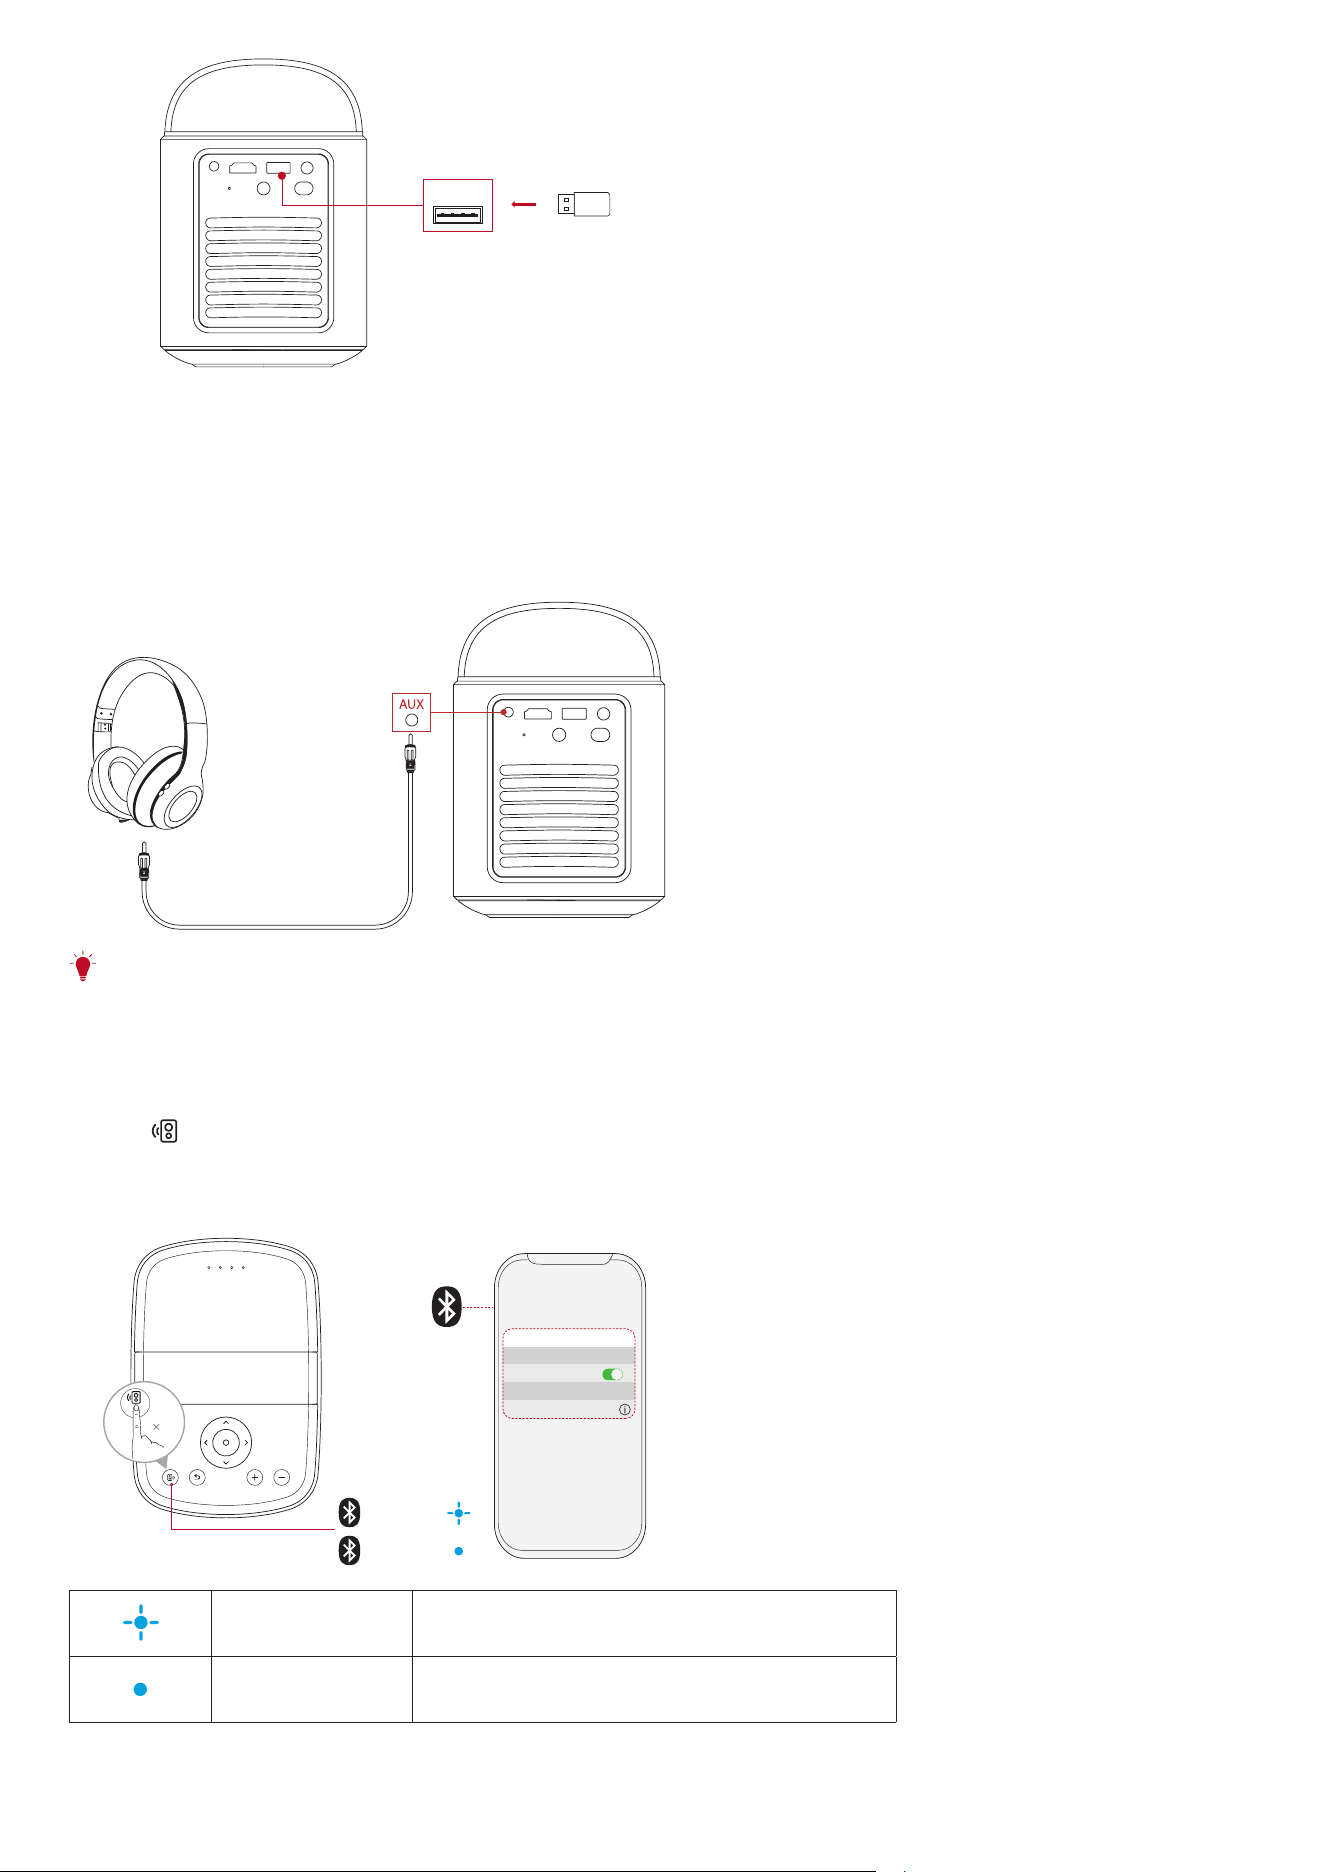
5. Play from a USB Drive
With this projector, you can enjoy music, video, and pictures, or install apps that are stored on a USB 2.0 drive.
①
Download the File Commander app from Google Play.
②
Insert a USB-A drive into the USB port.
③
Select music, videos, or photos from the USB drive that you want to play and press the confirmation button on the remote.
Press again to stop playback.
EN
11
USB-A
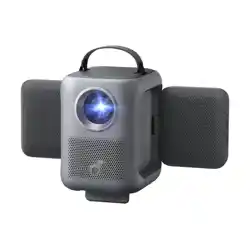
6. Play Through External Sound Devices
This projector can also be connected to external sound output devices, including headphones and speakers; when connected
to external speakers, the built-in speaker system is disabled.
①
Use a 3.5 mm audio cable or an adapter (not provided) to connect your headphones or external speakers.
②
Connect the other end of the cable to the AUX port on this projector.
• You will hear audio from your headphones or external speakers.
T
Before connecting headphones and putting them on, turn down the volume to avoid hurting your ears.
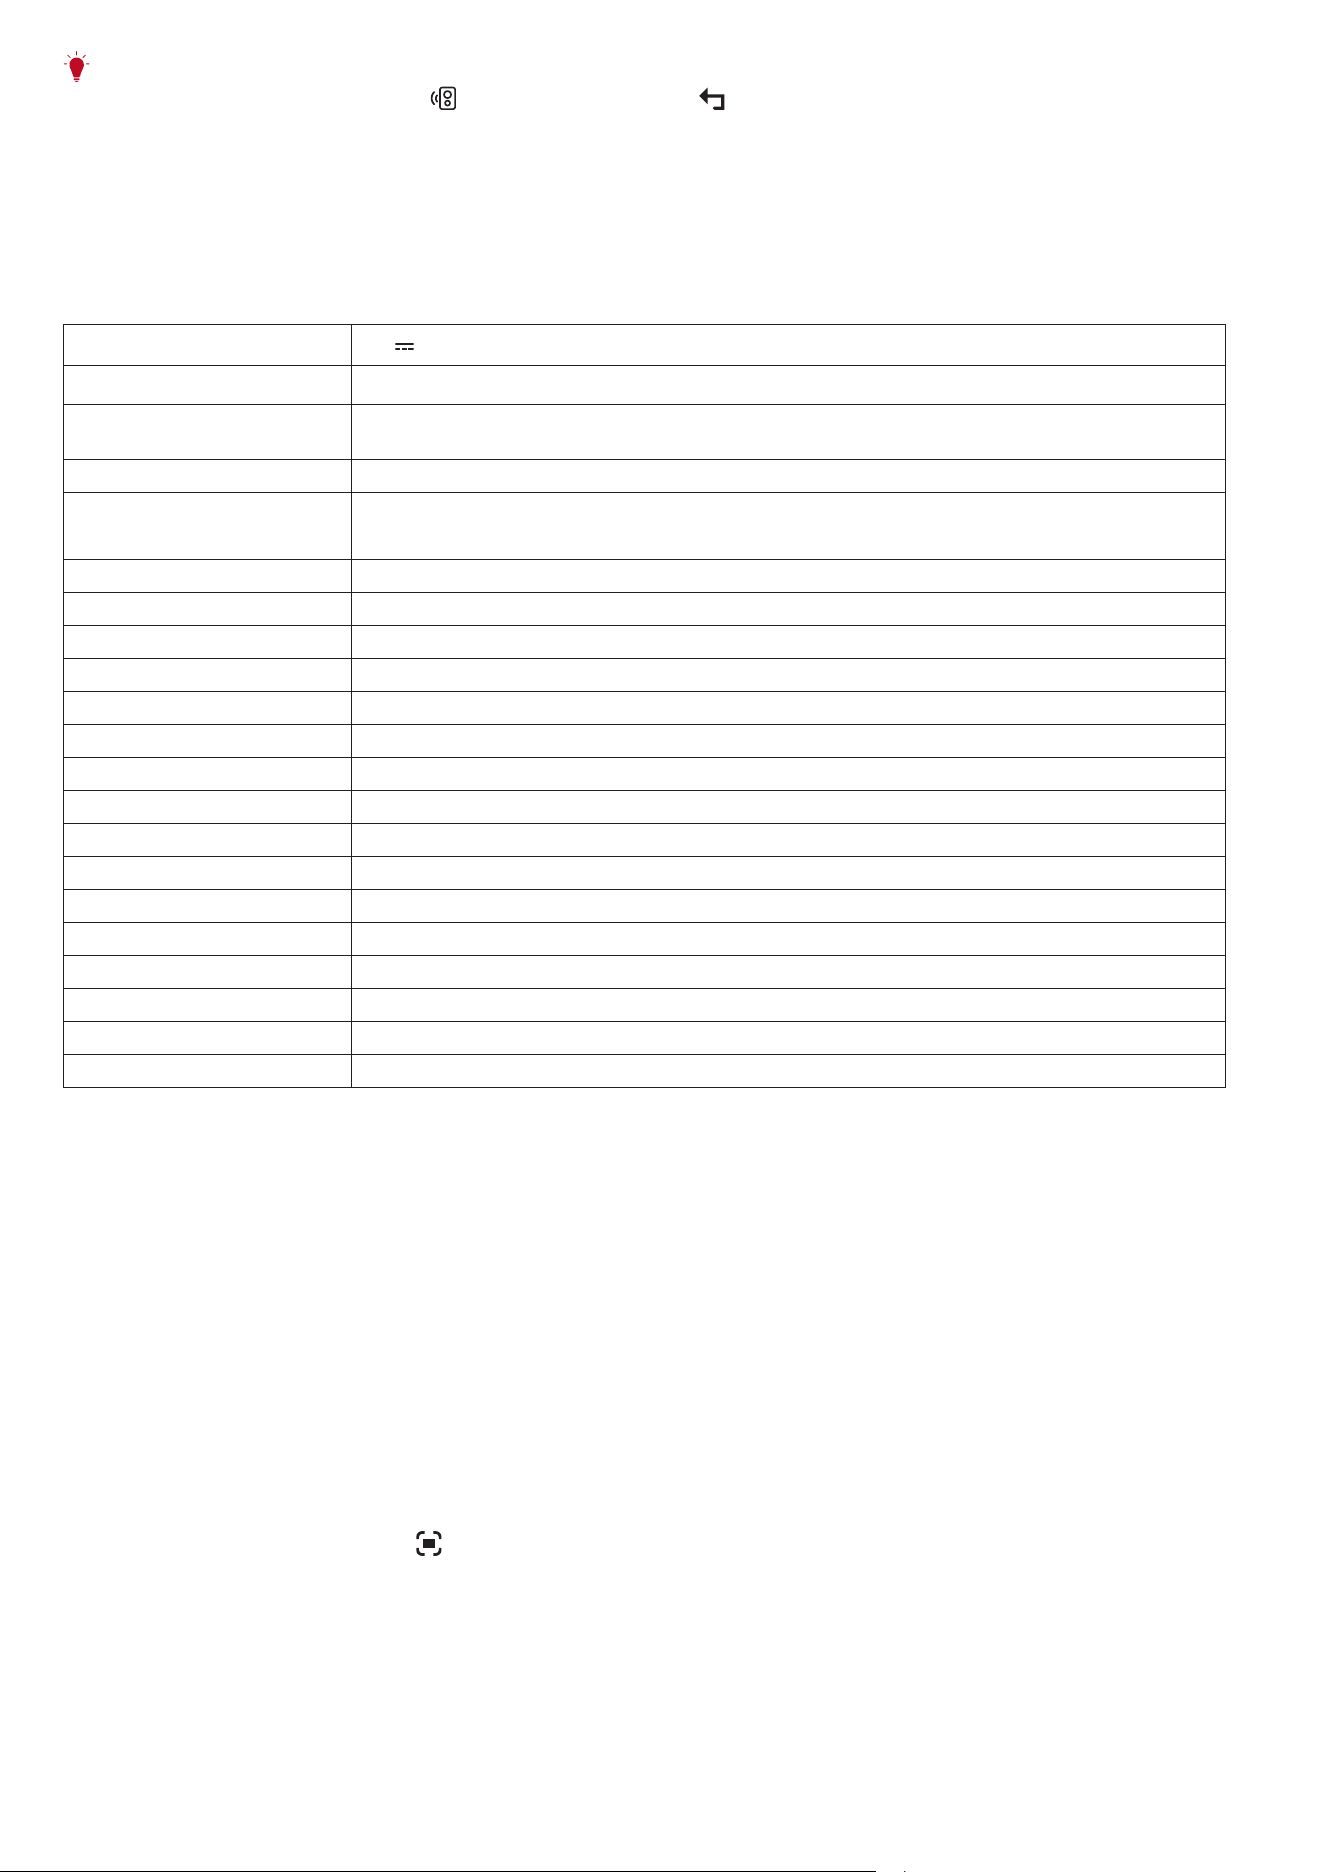
7. Bluetooth Speaker Mode
You can use this projector as a standalone Bluetooth speaker.
①
To switch to Bluetooth speaker mode, you have two options:
A: Press on the projector.
B: On the home screen, select [Settings] > [Display & Sound]
>
[Turn on the Bluetooth Speaker Mode].
②
Enable Bluetooth on your smartphone and select Nebula Mars 3 Air to connect.
Pairing
Connected
< Settings Bluetooth
Nebula Mars 3 Air
Bluetooth
Connected
DEVICE
1
Flashing blue
Ready to pair / Bluetooth pairing
Steady blue
Bluetooth connected
EN
12
T
To exit Bluetooth speaker mode, press on the projector or press on the remote.
Firmware Update
To fully enhance your experience with this projector with the latest features, you are recommended to update the firmware
from time to time. You will be informed once a new firmware version is detected.
Specifications
Specifications are subject to change without notice.
Input
19V 4.74A
Power Consumption
90W
Standby Power
Consumption
< 1W
Resolution
1920×1080p
Compatible Resolutions
480p (60 Hz), 576p (50 Hz), 720p (30 Hz), 720p (50 Hz), 720p (60 Hz), 1080p (24 Hz),
1080p (30 Hz), 1080p (50 Hz), 1080p (60 Hz)
Contrast Ratio 400:1
Aspect Ratio 16:9
Screen Size 30" to 150"
Throw Ratio 1.2:1
Throw Distance 0.8-4.0 m / 2.62-13.12 ft
Light Source LED
Focus Auto
Keystone Correction Auto
Speaker Output Power 2×8W max
Noise 28 dB at 25
℃
(77
℉
)
Wi-Fi Wi-Fi 2.4 GHz/5.0 GHz 802.11 a/b/g/n/ac
Bluetooth Version 5.1
Bluetooth Range 25 m / 82 ft
USB Format FAT, FAT32, NTFS
Operating Temperature 0
℃
~35
℃
/ 32
℉
~95
℉
Remote Control Batteries AAA × 2
Troubleshooting
①
Fails to Power On
• The projector may be out of power. Charge the projector for 15-30 minutes and see if the battery status LED lights up.
②
Cannot Charge
• Use the included adapter and power cord to charge the projector.
• Try a different adapter (at least 90W) and power cord.
③
Cannot Connect to a Wi-Fi Network
• Place your projector within 16 ft / 5 m of the router and reconnect.
• Set your router to 2.4 GHz or 5 GHz and retry.
• Restart your projector and router and retry.
• Try a different Wi-Fi network or your phone's hotspot.
④
Blurry Image
• Slightly move the projector or press on the remote to start autofocus.
• To manually adjust the focus, go to [Settings] > [Projector] > [Focus Settings] > [Manual Focus Correction], and use the
navigation buttons on the remote.
• Adjust the projection angle and direction as well as the height of the projector if necessary.
⑤
Distorted Image
• Update the firmware to the latest version. You will be informed once a new firmware version is detected.

EN
13
• Go to [Settings] > [Projector] > [Image Correction] > [Perform Manual Keystone Correction].
• Move the projector left or right, or alter the tilt if necessary.
⑥
No HDMI Signal
• Use a different HDMI cable.
• Connect your projector with another HDMI playback device.
• Connect the HDMI playback device to your TV with an HDMI cable to check if the device or cable are working.
• Adjust the HDMI playback device's output resolution / frequency to be the same as the projector's.
⑦
How to Control Netflix with Mouse Mode
• Install Nebula Connect on your phone and connect with Nebula Mars 3 Air. Select Mouse mode. Use one finger to move and
click, or two fingers to scroll.
⑧
How to Play Videos without Wi-Fi
• Download videos to a USB drive in FAT32 format. For the following steps, see Play from a USB Drive.
Trademarks
The Bluetooth® word mark and logos are registered trademarks owned by the Bluetooth SIG, Inc. and any use of such marks
by Anker Innovations Limited is under license. Other trademarks and trade names are those of their respective owners.
HDMI, the HDMI logo, and High-Definition Multimedia Interface are trademarks or registered trademarks of HDMI Licensing
LLC in the United States and other countries.
Manufactured under license from Dolby Laboratories. Dolby, Dolby Audio, and the double-D symbol are trademarks of Dolby
Laboratories Licensing Corporation.
Warranty
30-Day Money-Back Guarantee for Any Reason
You may return your undamaged product and packaging within 30 days of purchase to receive a FULL REFUND for any
reason. If the reason for the return isn't quality-related, the customer must pay for the return shipping.
12-Month Warranty for Quality-Related Issues
Nebula's products are warrantied to be free from material and workmanship defects for 12 months from the date of purchase.
Within this period, Nebula will provide a replacement and cover any return shipping costs for products that fail in normal use.
Please note: Any provided shipping labels must be used within 20 days from the date they're issued by Nebula Support.
Default Open Ports: Wi-Fi (2.4 GHz / 5 GHz)
Port Description:
1. Upon initial power-on or after a reset, if no Wi-Fi information has been configured, the device will begin scanning for
available SSIDs.
2. In normal operating mode, the device will automatically connect to the previously saved router SSID and password.
3. To change the Wi-Fi configuration, you can go to Settings > WiFi, or follow the instructions in the manual to reset and
reconfigure the network connection.