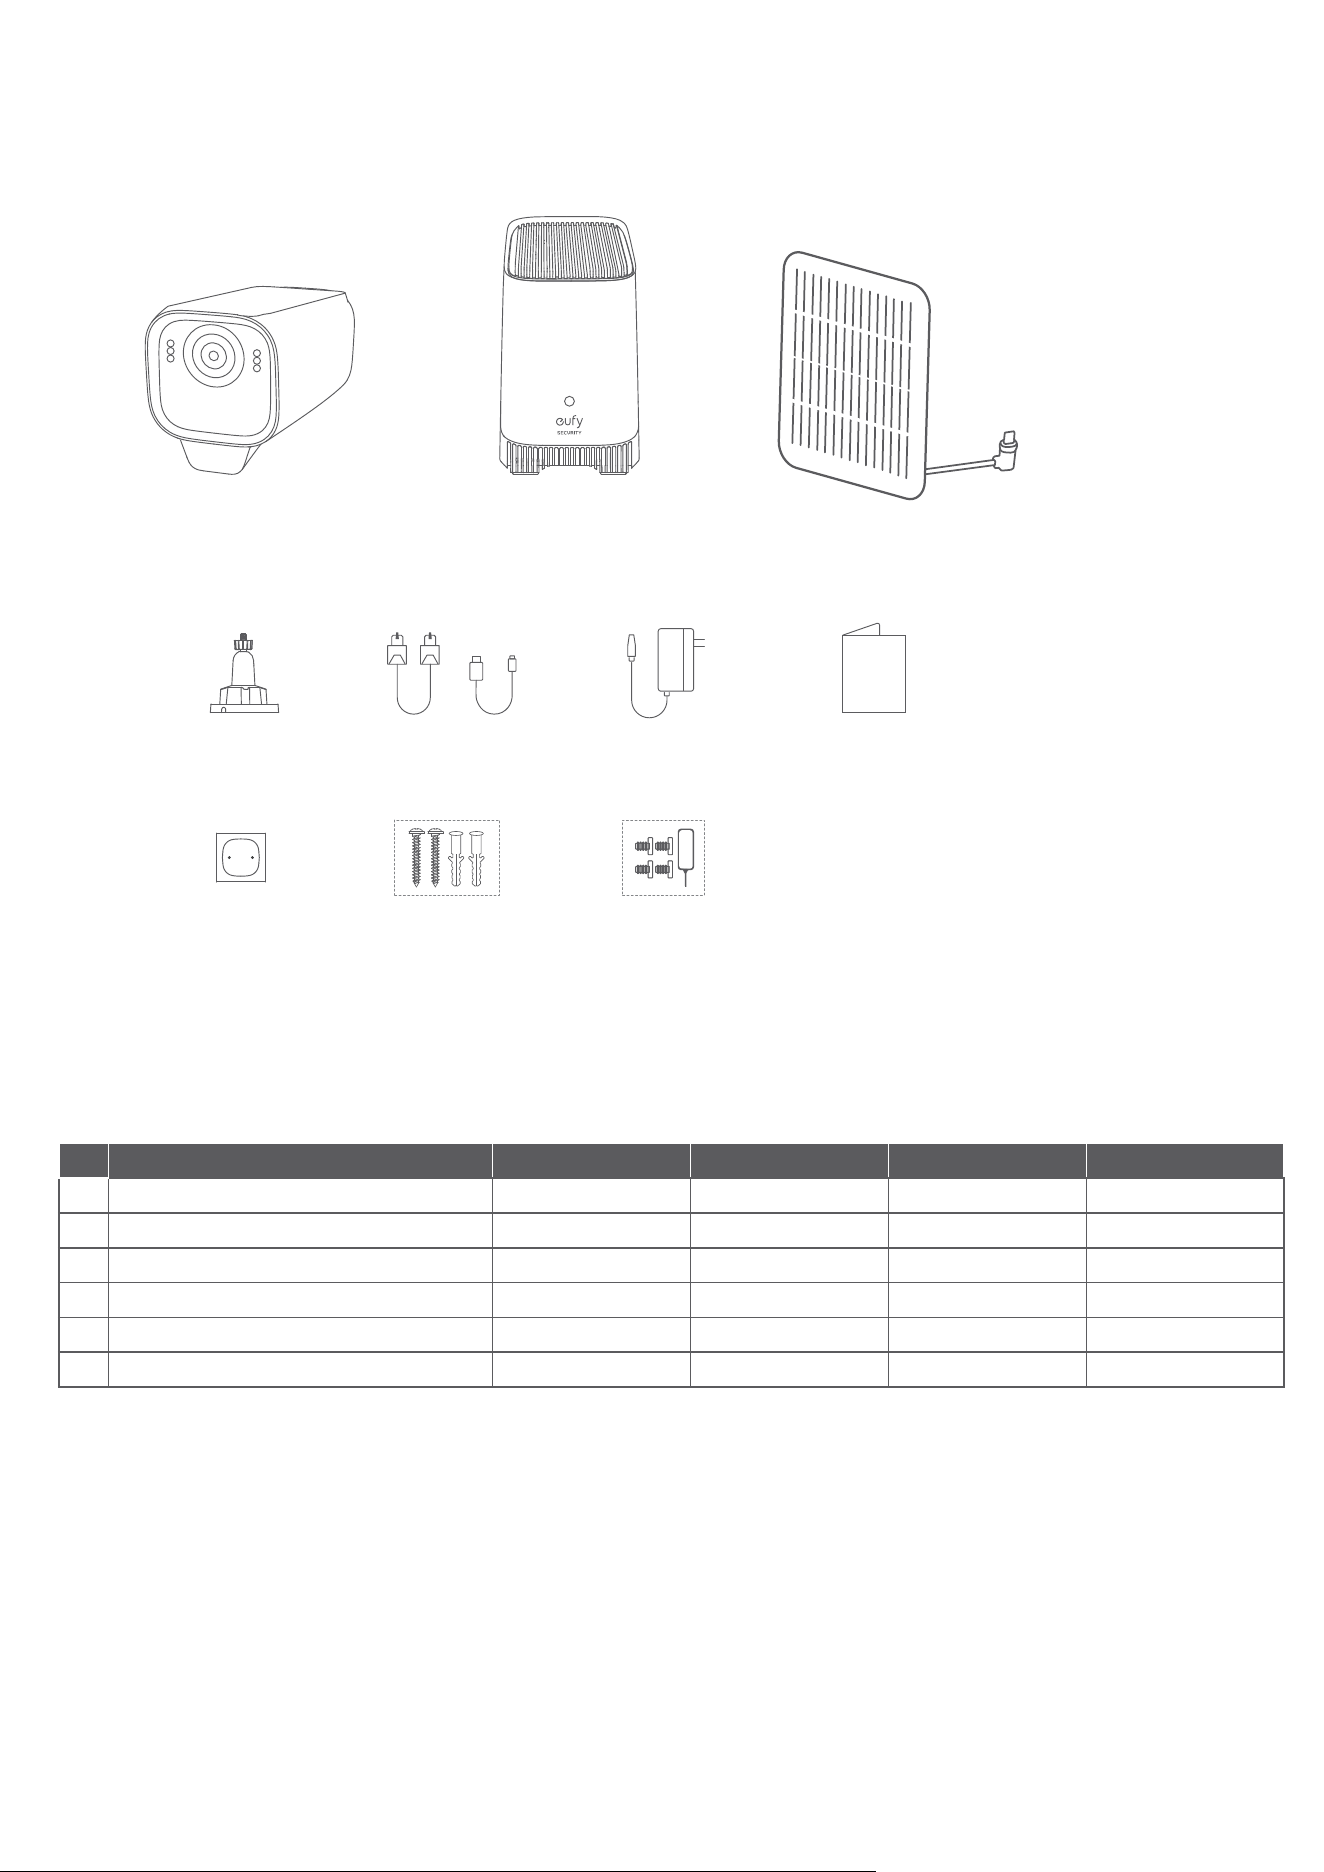
What's in the Box
Make sure everything is included.
Anything missing?
Please contact support@eufy.com
❶
❷
❸
❼
QSG
❹❻❺
❽❾
❿
#
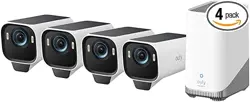
Items Add-On 2-Cam Kit 3-Cam Kit 4-Cam Kit
❶
Camera 1 2 3 4
❸
Backup Solar Panel(s) 0 1 1 2
❹
Mounting Brackets 1 3 4 6
❽
Positioning Stickers 2 3 4 6
❾
Screw Packs 2 3 4 6
❿
Hard Drive Screws & Reset Needle 0 1 1 1
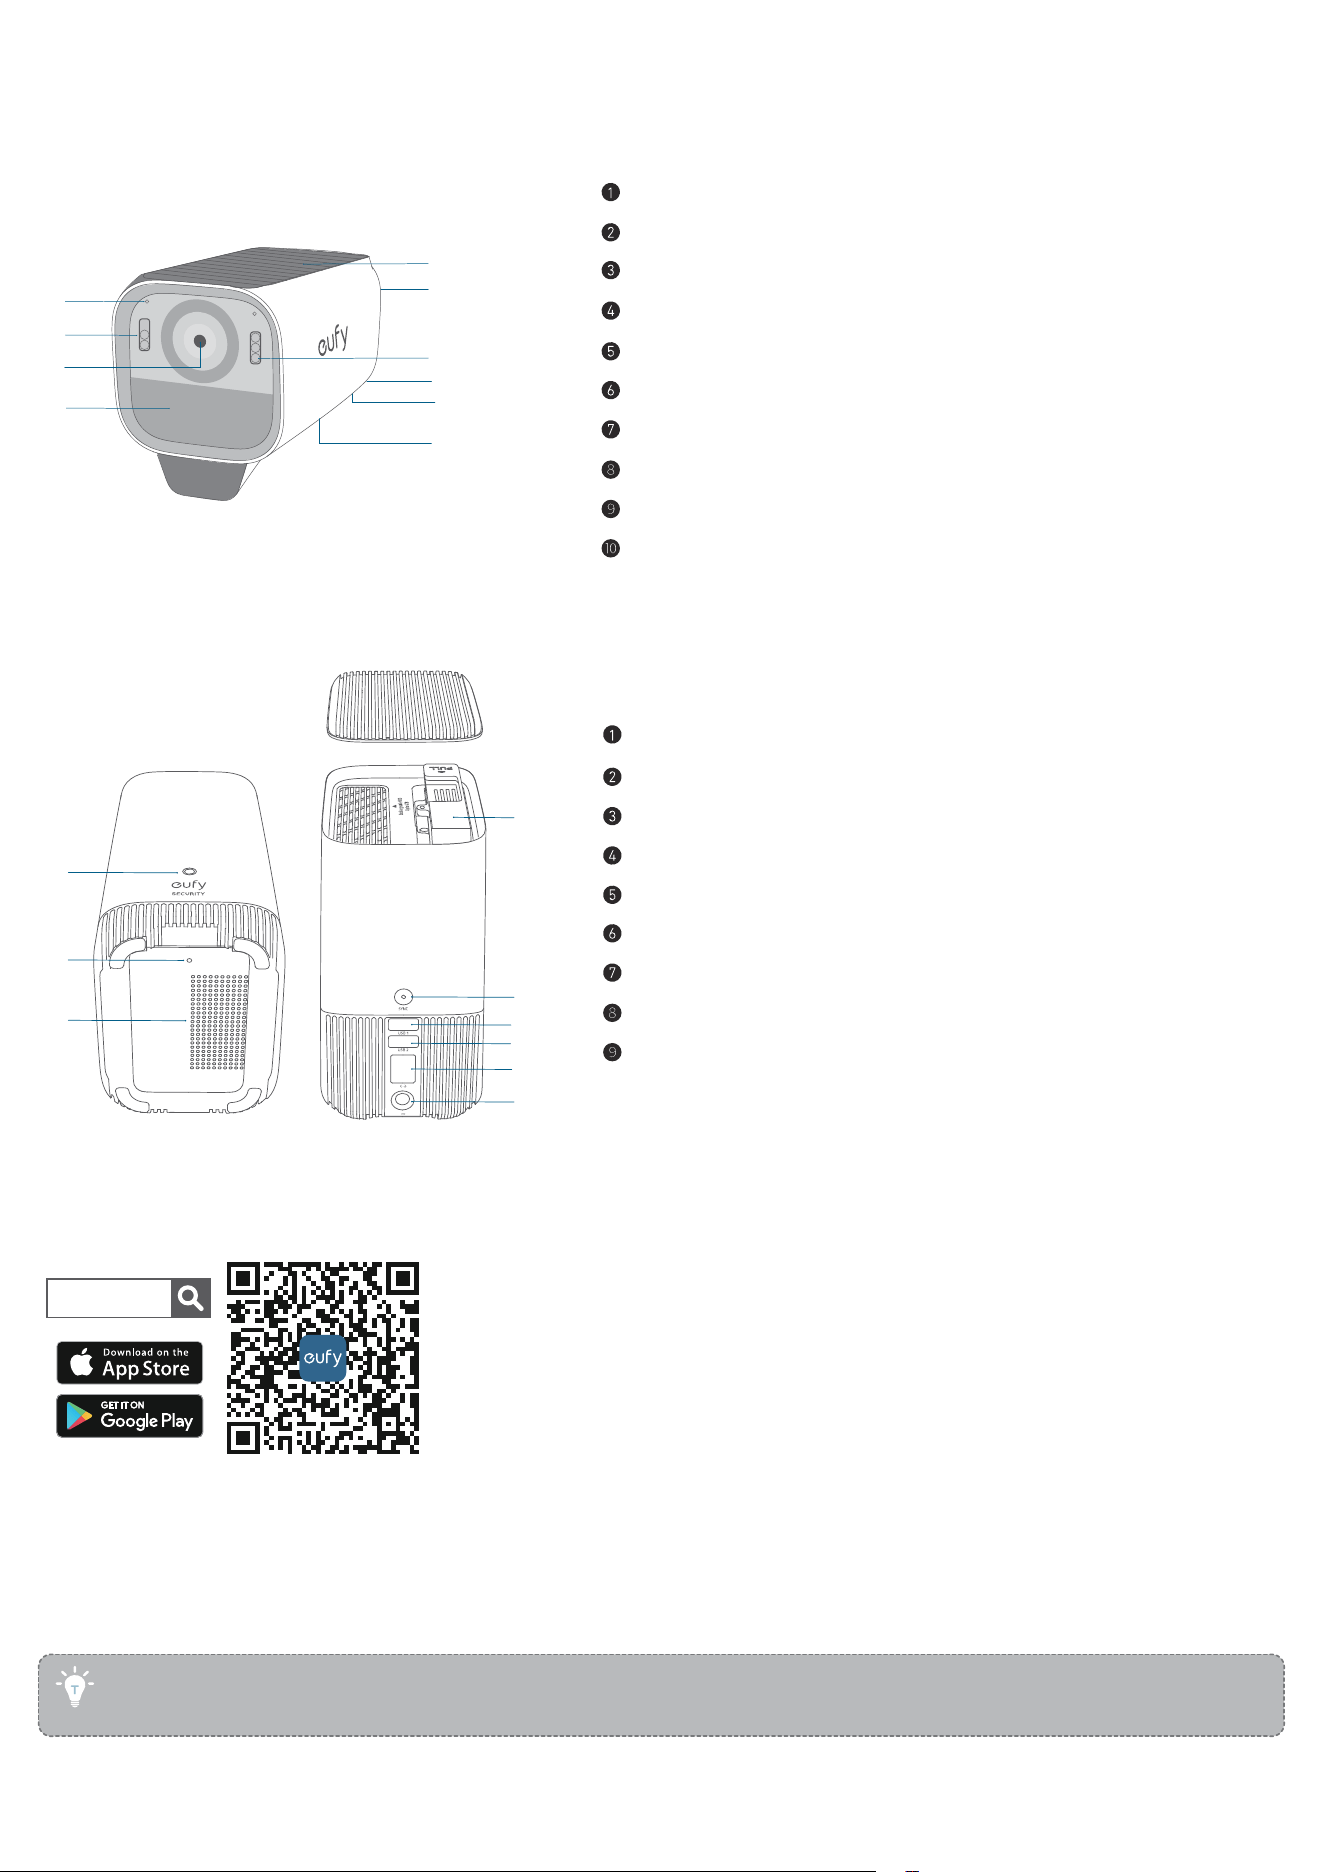
At a Glance
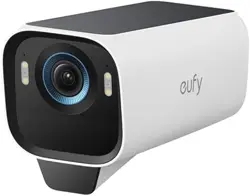
eufyCam S3 Pro (T8612)
①
④
⑤
⑥
⑩
⑦
⑨
⑧
②
③
Spotlight
Camera Lens
Motion Sensor
LED Indicator
Microphone
Built-in Solar Panel
Speaker
SYNC Button
USB-C Charging Port
Mounting Hole
HomeBase S380 (T8030)
①
④
⑤
⑥
⑦
⑧
⑨
②
③
Status LED
Reset Hole
Speaker
Hard Drive Bracket
SYNC / ALARM OFF Button
USB Port 1 (Output Power: 5V/2.4A; for Charing eufyCam)
USB Port 2 (for Data)
Ethernet Port
DC Power Port
Getting Started with the App
1. Scan the QR code below or search for "eufy Security" to download.
eufy Security
2. Log in or create a new account.
3. Follow in-app instructions to add the HomeBase.
• Turn on the HomeBase and connect it to your router.
• Wait about 1 minute for the LED to turn blue.
• Use the included Ethernet cable to connect to your home Wi-Fi router.
• Use the included power adapter (12V/2A) to power on the HomeBase.
• To improve the wireless range of HomeBase, place it on a table or shelf 3-5 feet (1-1.5 m) high and as far away
from the wall as possible.
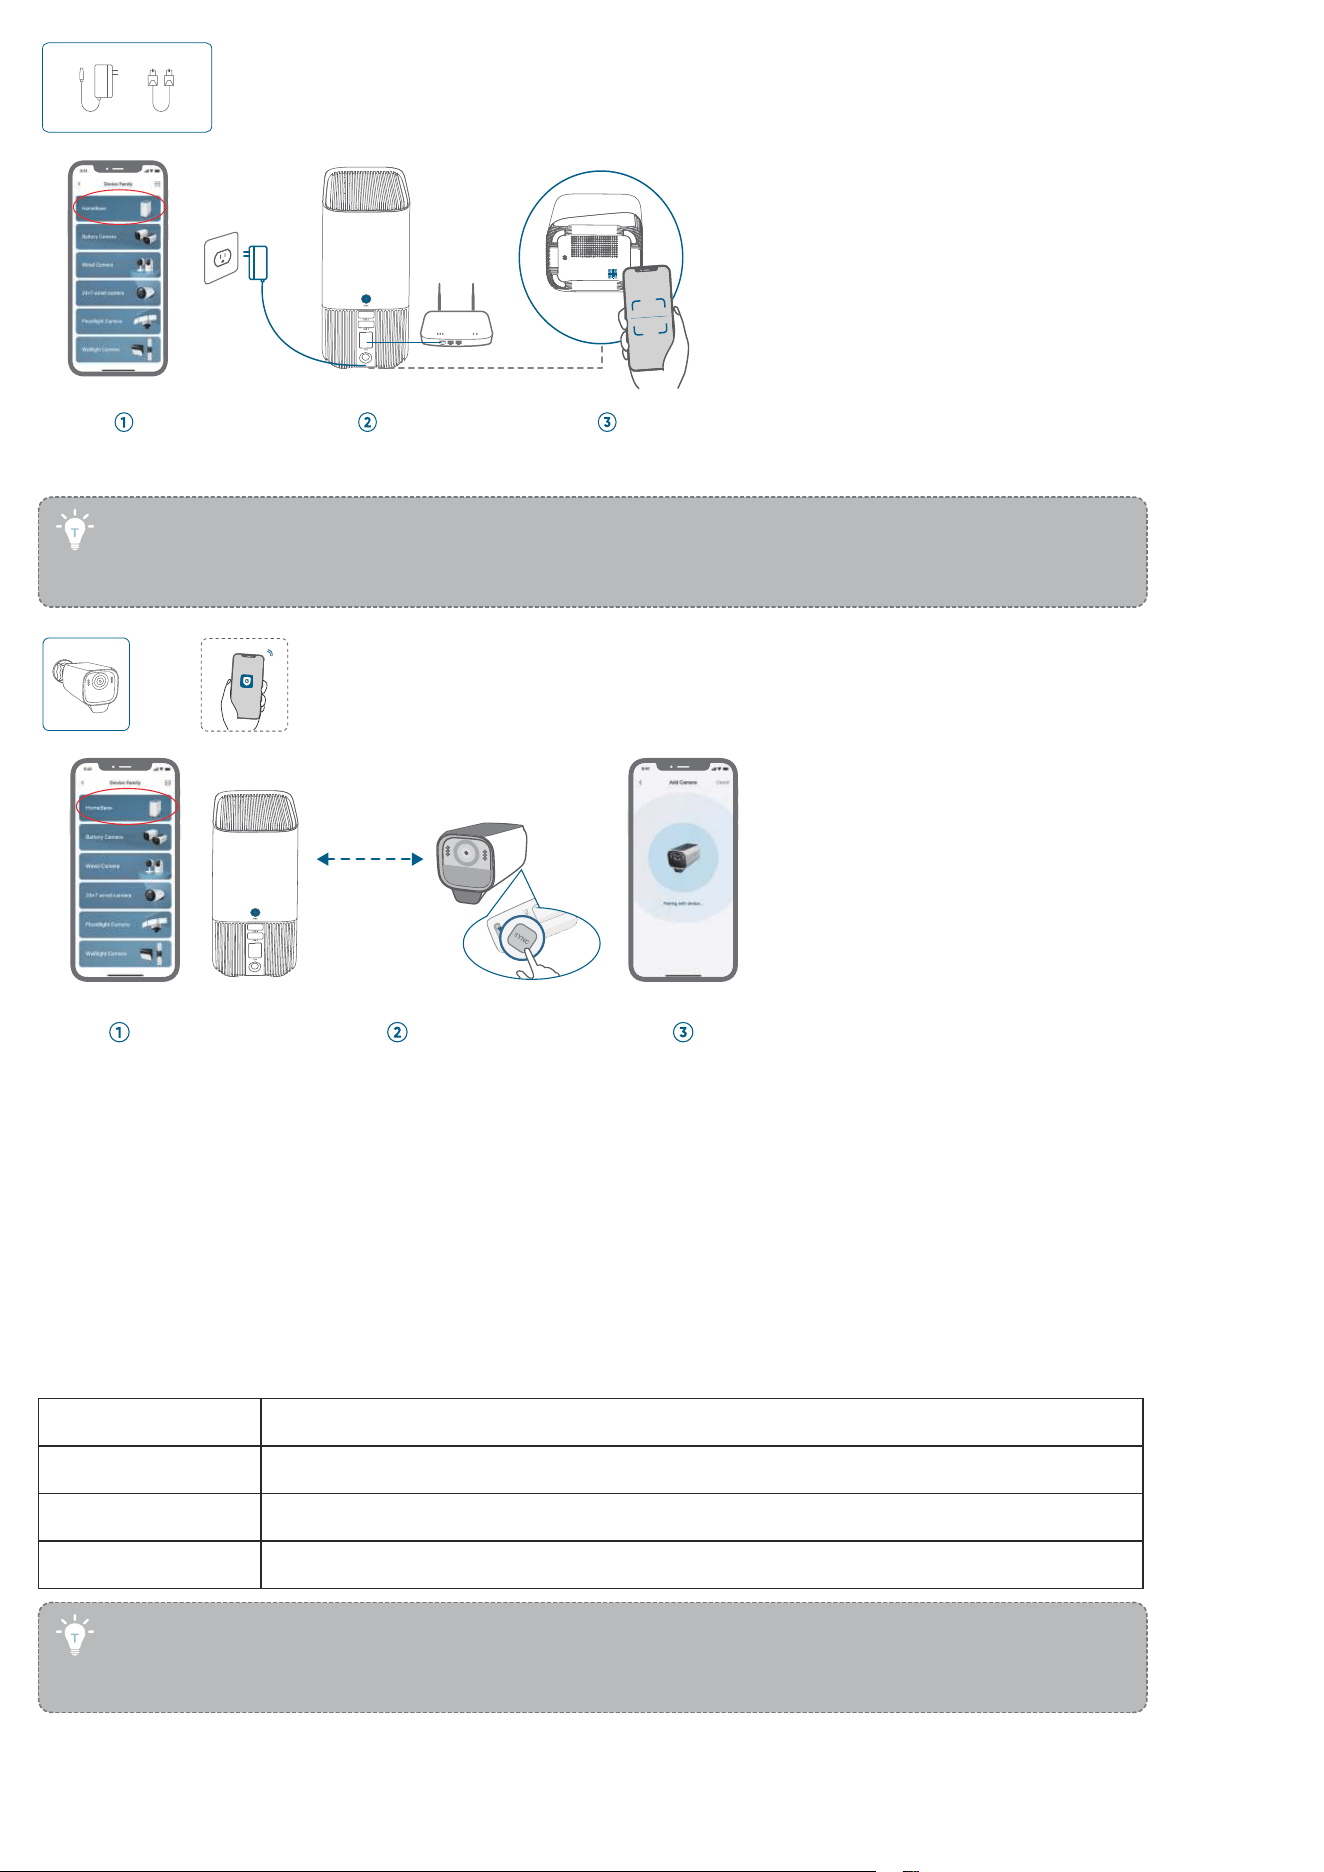
4. Follow in-app instructions to add eufyCam S3 Pro and then sync them with the HomeBase.
• Up to 16 eufyCams can be synchronized with the HomeBase.
• Keep the maximum distance of 1 meter between HomeBase and eufyCam when synchronizing.
• Upgrade the firmware if a new version is detected and the popup prompts you to do so.
< 3.3 ft (1 m)
2s
5. Complete other settings or skip for later setup.
• Motion Detection
• Face Management
• Video/Audio Settings
Preparing
Expand HomeBase Storage (Optional)
HomeBase S380 comes with 16 GB of storage for saving video recordings and allows you to add an additional hard drive to
expand the space. Your hard drive must meet the following requirements:
Type Hard disk drive (HDD) or solid state drive (SSD) that uses the SATA interface
Size 2.5 inch
Capacity Unlimited
Recommended Western Digital, Seagate, SAMSUNG, Kingston, PNY, Crucial, SanDisk
• The HomeBase must be powered o when you install or remove a hard drive.
• Transfer all the data in your hard drive to a secure location before adding it to the HomeBase.
• A new hard drive must be initialized through the eufy Security app to work with the HomeBase.
1. Push down the top lid to remove it.
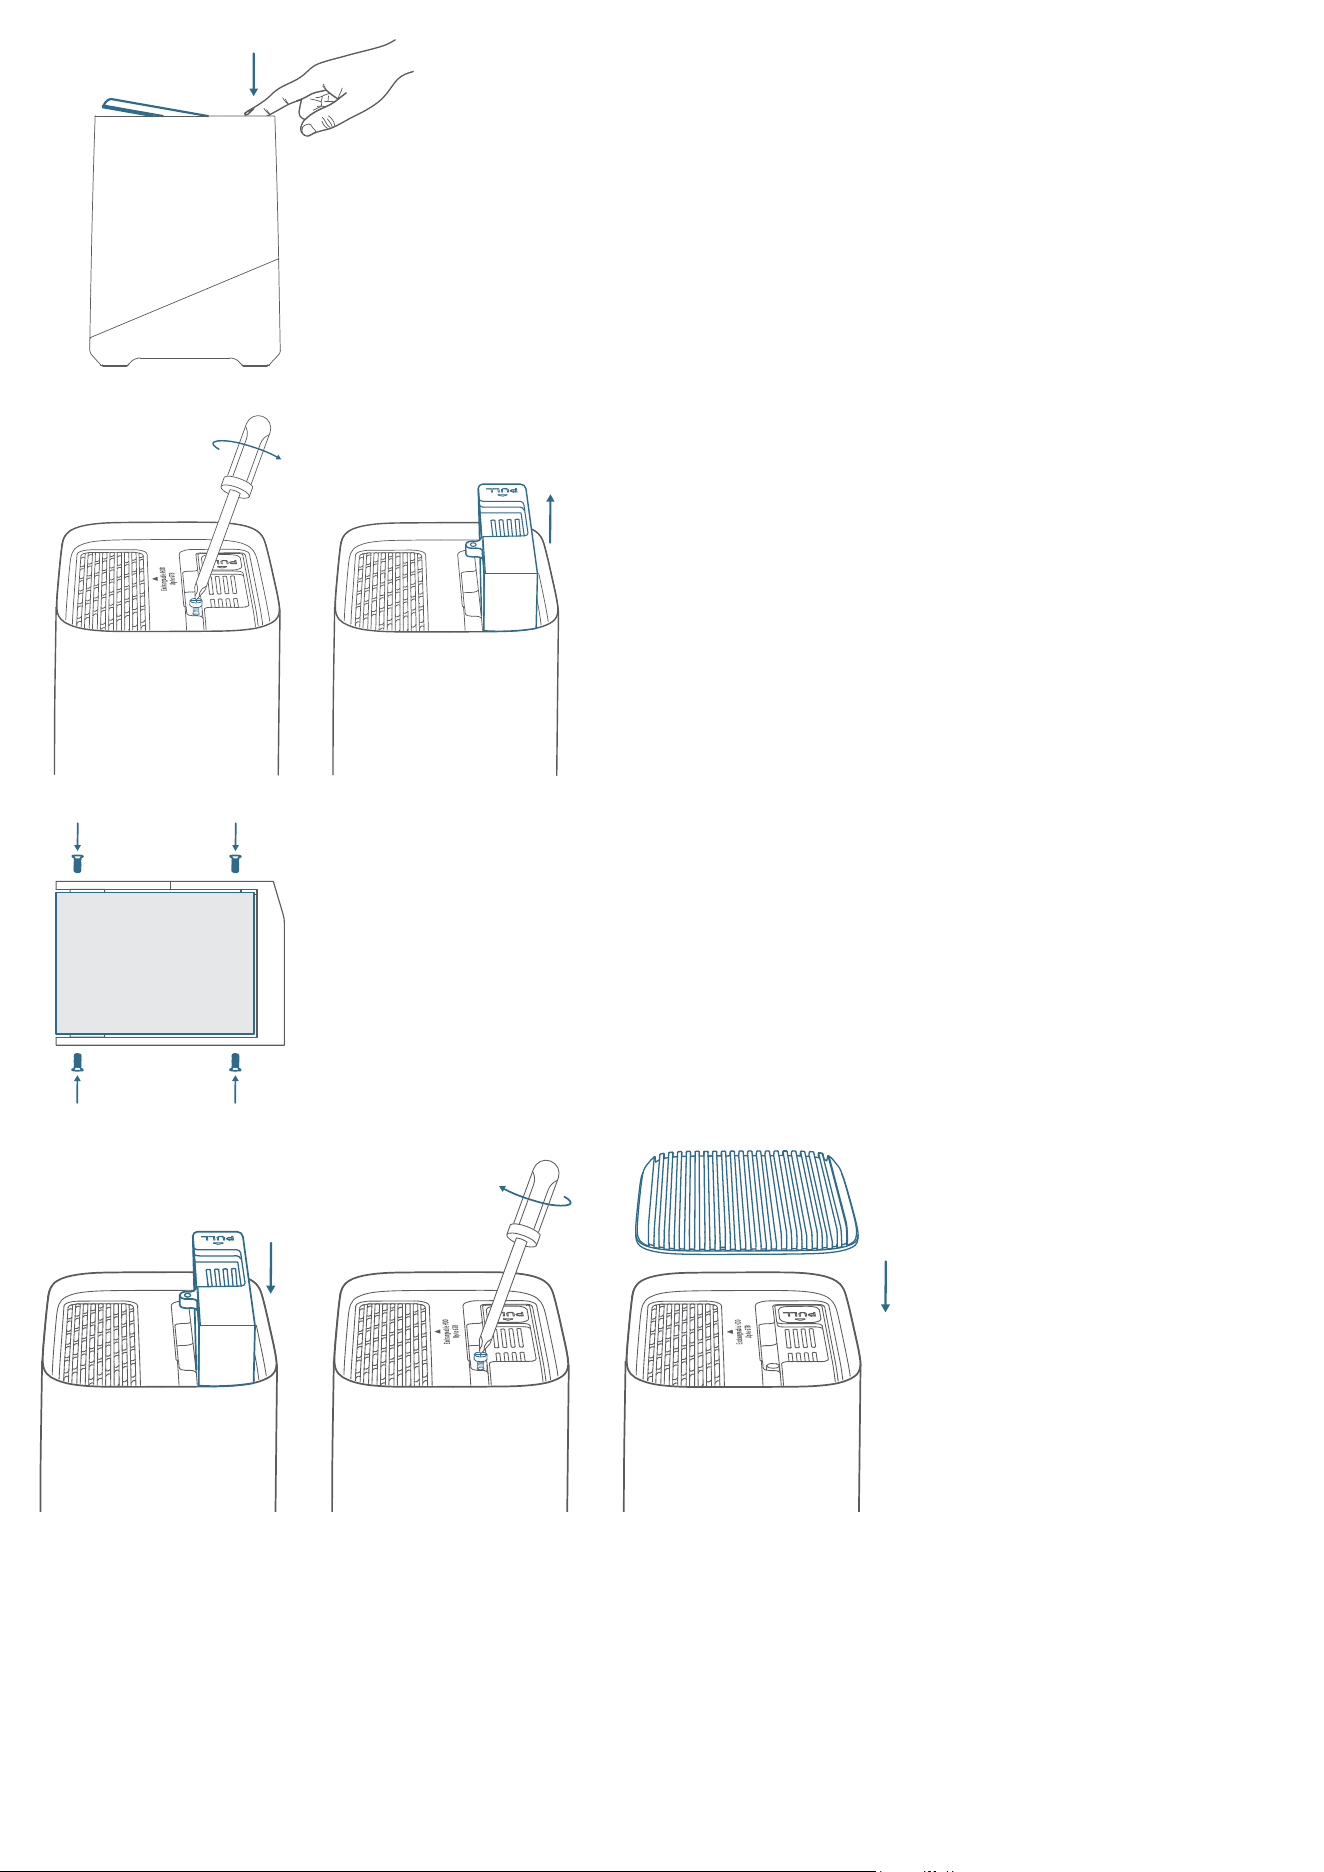
2. Loosen the screw, then take out the hard drive bracket.
3. Fix your hard drive to the bracket with the provided screws.
HARD DRIVE
4. Insert and screw the bracket back to the HomeBase, then put the top lid back into place.
Fully Charge the Cameras before Mounting
Fully charge the cameras (to 100% battery level) before installing them outdoors.
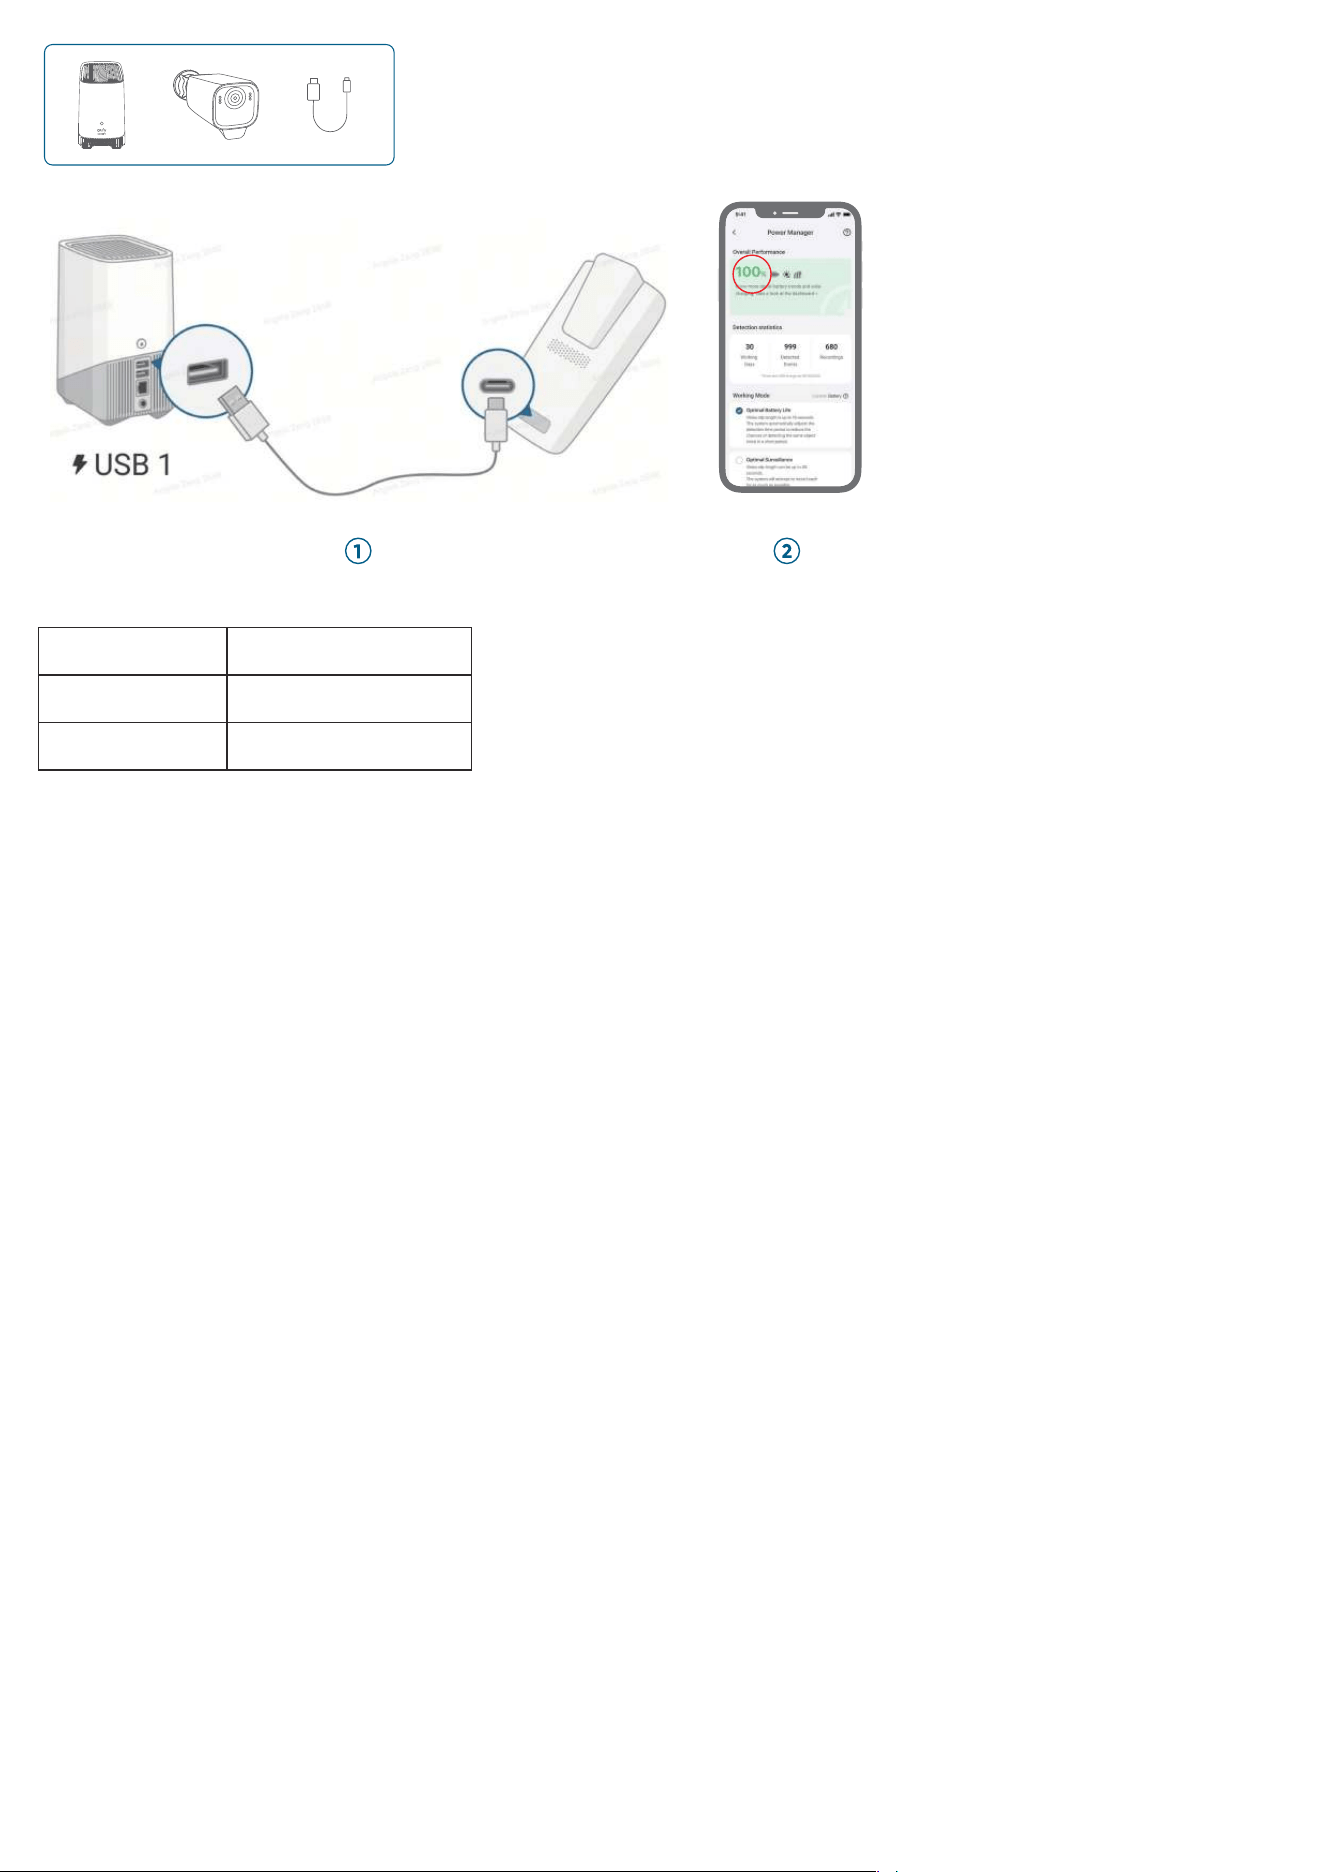
LED Indicator Description
Blue In Charging
O Fully Charged
Mounting Guide
1
.
Choose a Location
Your eufyCam includes a built-in solar panel and a backup solar panel that converts sunlight into electrical energy and
keeps your eufyCam charged every day.
• The charging eciency fluctuates according to the intensity of the sunlight.
• Don't worry when the battery level goes down. It happens when there isn't enough sunlight or the camera is consuming
more power than usual. You don't need to charge the camera with a cable until a low battery alarm goes o.
For eufyCam
Choose a location where you can get the desired view.
Best location recommended:
• Height of 2-3 m
• Field of View of 12 m
• 100% of the built-in solar panel area receives sunlight
• Fully exposed to direct sunlight for at least 1.5 hours per day
• Strong Wi-Fi signal
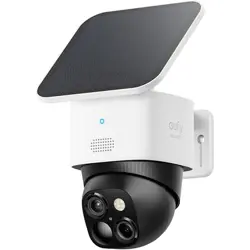
For Backup Solar Panel
Best location recommended:
• 100% of the built-in solar panel area receives sunlight
• Fully exposed to direct sunlight for at least 1.5 hours per day
2-3 M
1
4
12 M
2
2
.
Install the Mounting Bracket
Position & Drill Holes
16/64" (6mm)
1. Drill holes
2. Insert anchors
(skip for wooden wall)
Install Mounting Base
1. Take it apart
2. Install the base
3
.
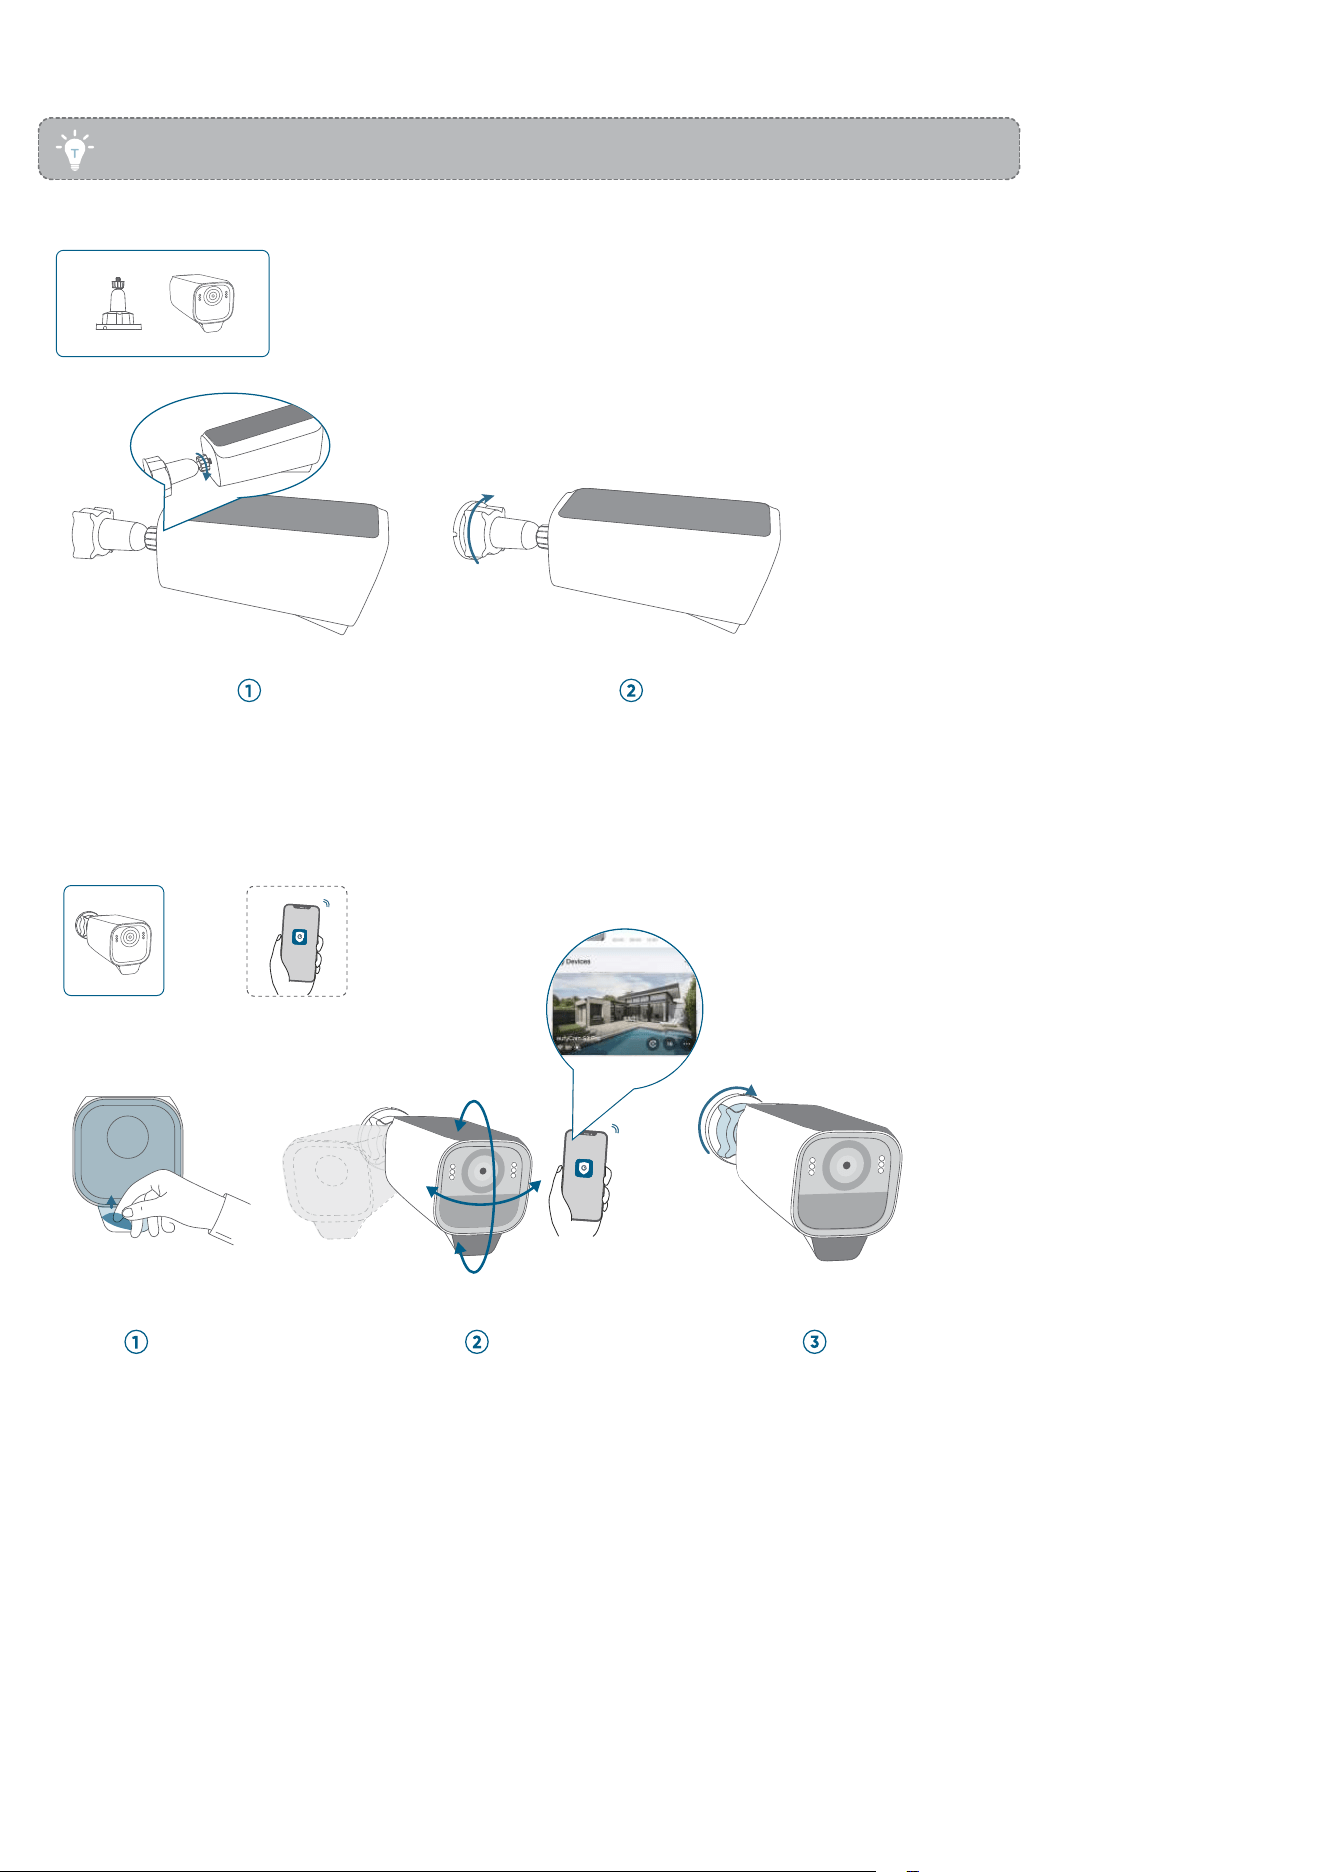
Mount the Camera
• Make sure the USB-C charging port is securely protected by the waterproof cover.
Mount the Camera
1. Mount the camera
2. Tighten the small knob
Adjust the Camera Field of View
1. Remove the protective film
2. Get an optimal angle when viewing the live stream in the app
3. Tighten the large knob
4
.
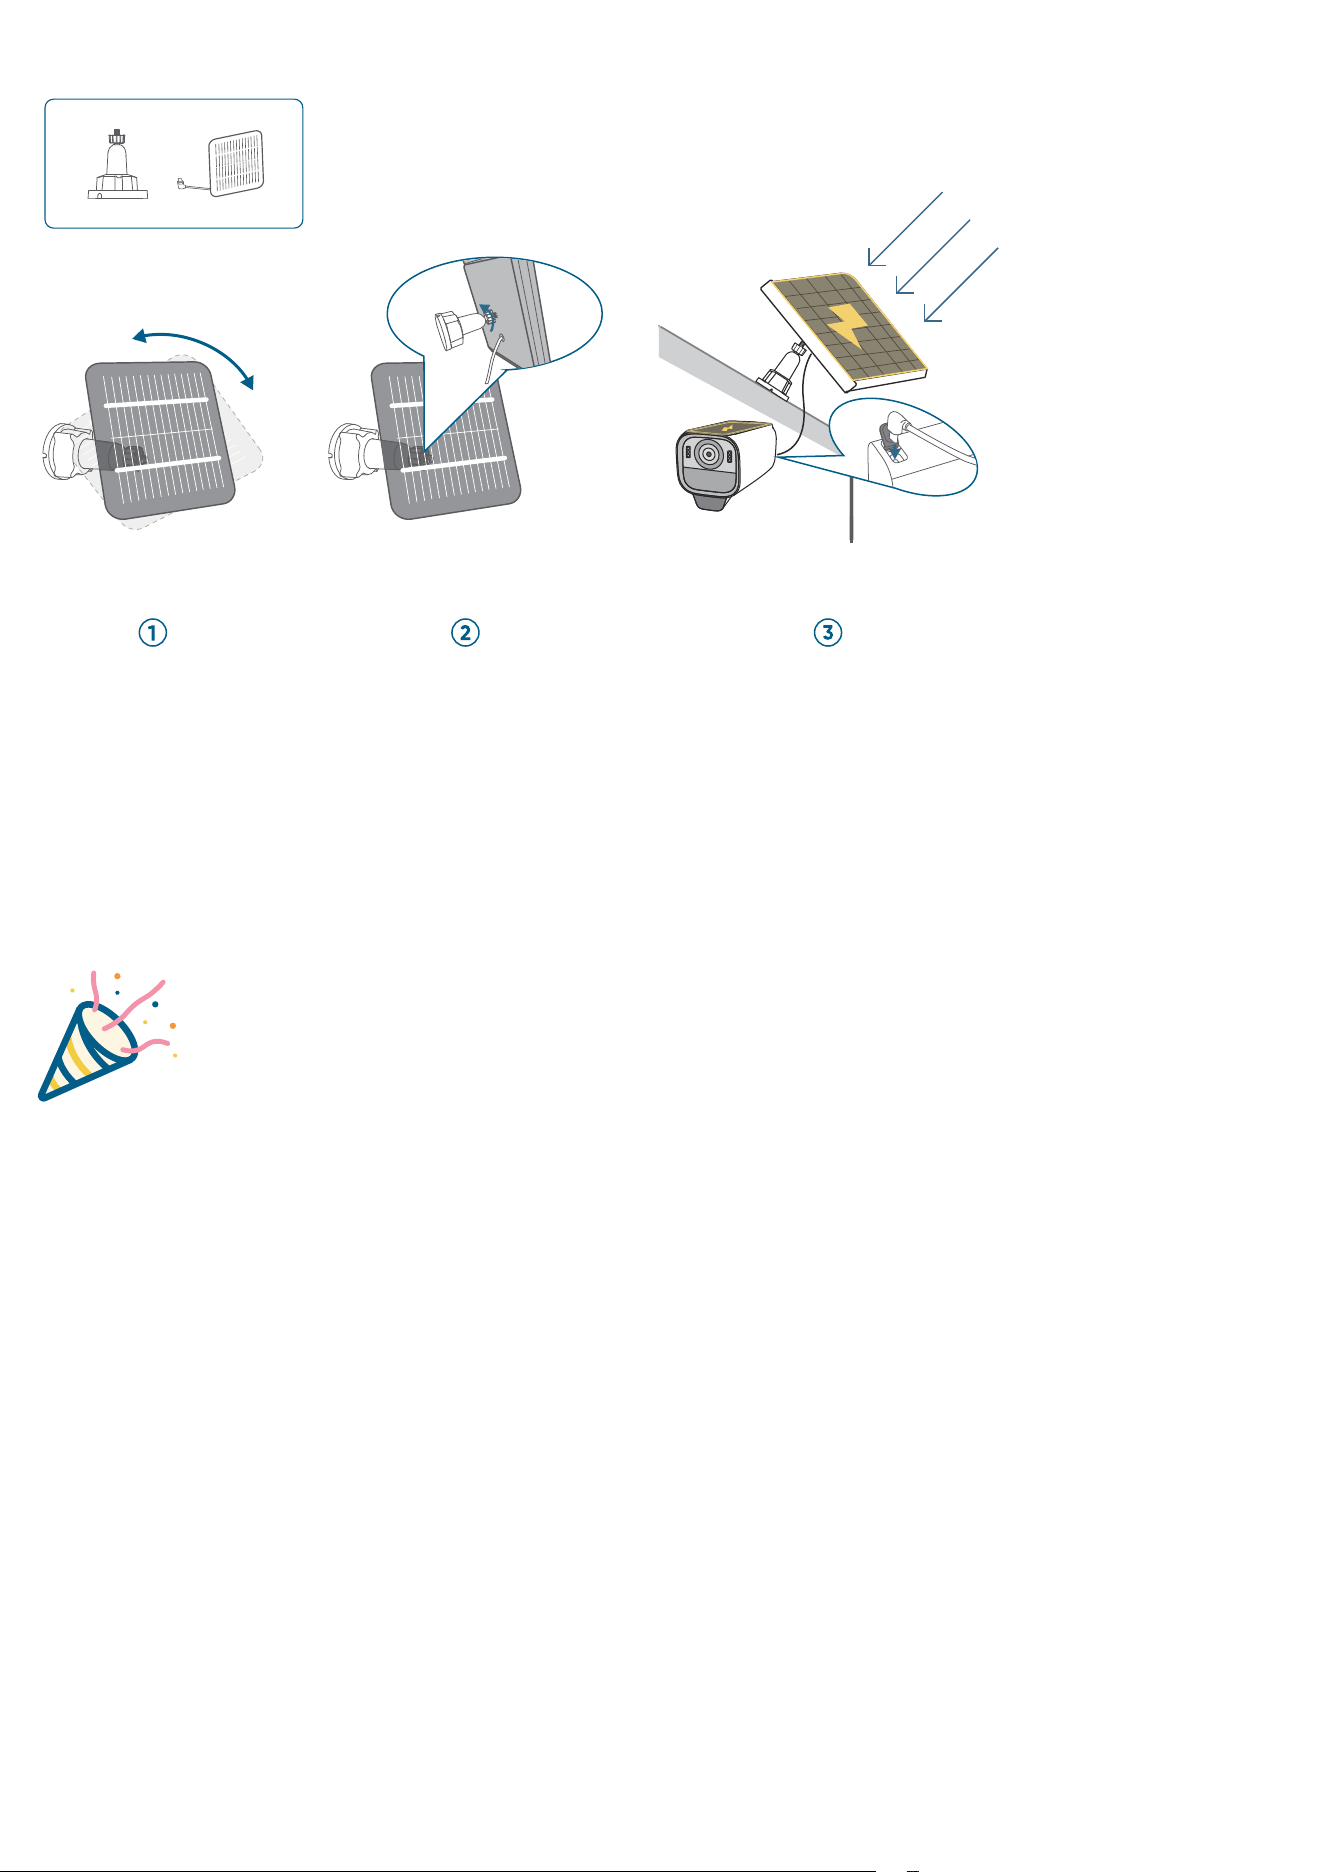
Mount the Backup Solar Panel
1. Mount the solar panel
2. Tighten the small knob
3. Connect and adjust
Congratulations!
Now you're all set to use your eufyCam!
Please explore more in the eufy Security app.