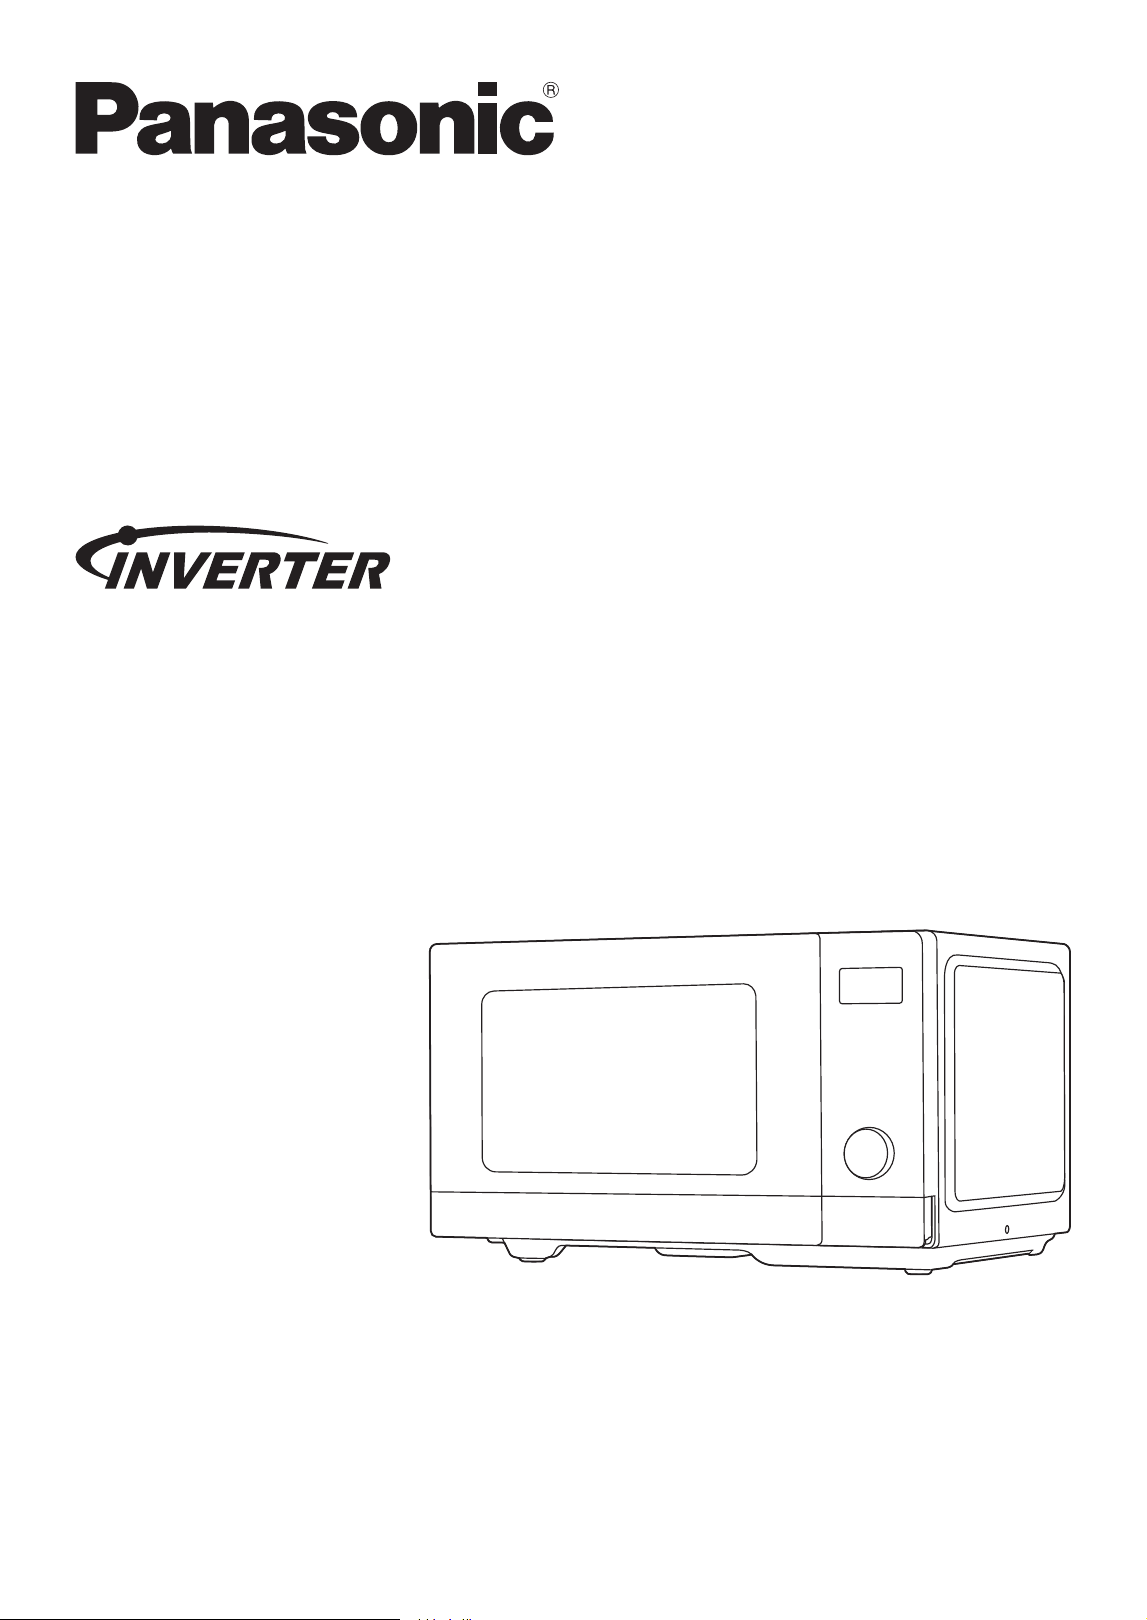
Operating Instructions
Microwave Oven
Household Use Only
Please read these instructions carefully before using this product,
and save this manual for future use.
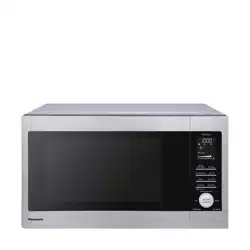
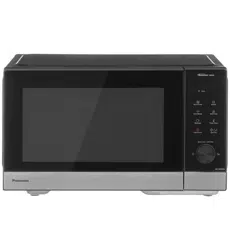
Model No.
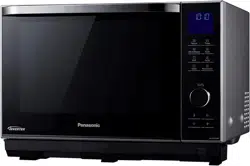
NN-SD38QS

We are glad you have chosen to purchase a PANASONIC microwave oven. Before operating this oven, please
read these instructions carefully and completely, and keep them for further reference.
If you have only used a microwave oven for reheating and defrosting, with Panasonic’s Inverter Technology you
can be reassured of excellent results when cooking a variety of foods, as the ‘soft’ penetration of microwave
energy to the centre of food helps prevent over cooking on edges and surfaces. Foods can now be gently
simmered without the concern of boil over.
After reading the introductory chapter, we are sure you will be able to master the basic techniques and thereby
develop a firm understanding of your new oven. This book includes recipes from starters to desserts. After trying
our recipes be sure to adapt your favourite recipes to microwave methods.
Start experimenting now, and enjoy the first class results you will achieve by using your new microwave oven.
The serial number of this product may be found on
the back side of the oven. You should note the model
number and serial number of this oven in the space
provided and retain this book as a permanent record
of your purchase for future reference.
MODEL NUMBER _______________________
SERIAL NUMBER _______________________
DATE OF PURCHASE ____________________
Panasonic Australia Pty Ltd
1 Innovation Road
Macquarie Park
NSW 2113
Panasonic NZ Ltd
Customer Care Centre
18 Sir Woolf Fisher Drive
Highbrook, Auckland
Private Bag 14911
Panmure, Auckland
Phone: (09) 272 0178
Fax: (09) 272 0129

– 3 –
Table of Contents
Before Operation
Important Safety Instructions .......................................................................................................6-7
Installation and General Instructions ...........................................................................................7-9
Microwaves and How They Work ...................................................................................................9
Cookware and Utensils Guide ......................................................................................................10
Feature Diagram ..........................................................................................................................11
Control Panel ................................................................................................................................ 12
Ingredient Conversion Chart ........................................................................................................22
Operation and Hints
Quick Guide to Operation ............................................................................................................4-5
Let's Start To Use Your Oven .......................................................................................................13
To Use Child Safety Lock .............................................................................................................13
To Set Clock .................................................................................................................................14
Dial Features ................................................................................................................................14
Microwave Cooking and Defrosting ..............................................................................................15
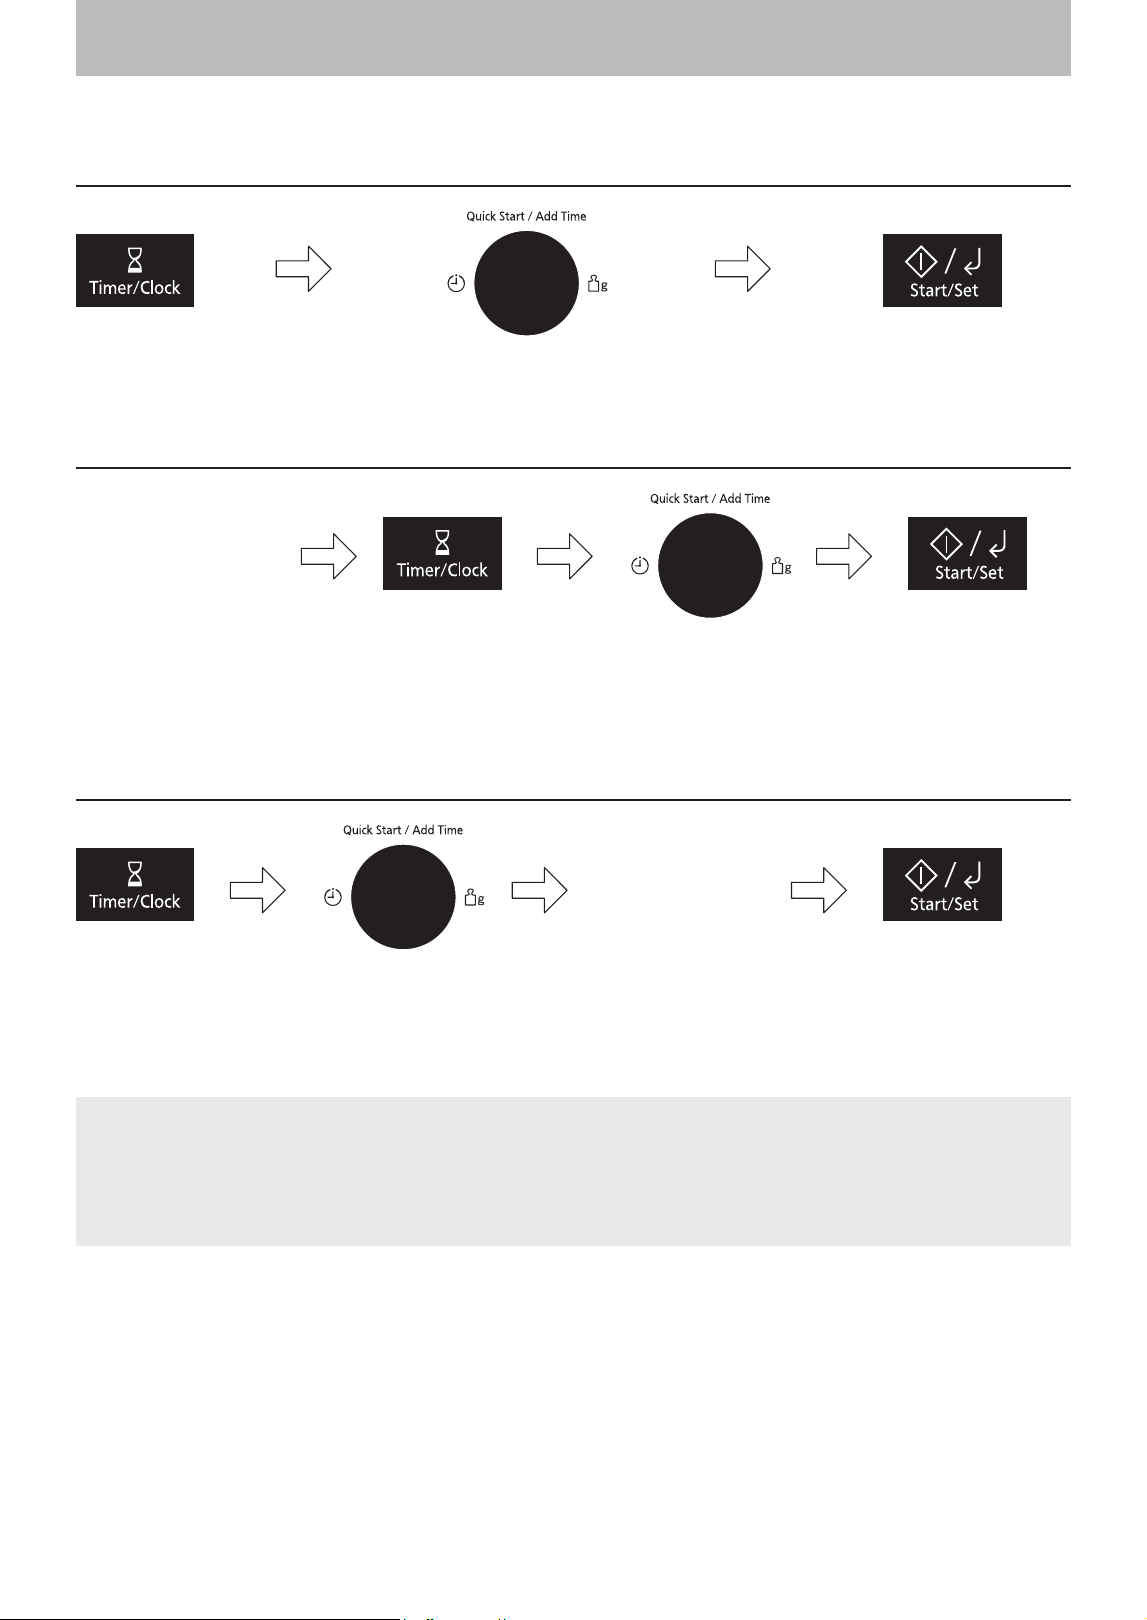
Quick Start Function .....................................................................................................................16
Using the Add Time Function .......................................................................................................16
Using the Beverage Function .......................................................................................................17
Auto Defrost ............................................................................................................................17-18
Auto Reheat/Cook ...................................................................................................................19-21
Multi-stage Cooking ...................................................................................................................... 22
To Use Timer ................................................................................................................................23
Defrosting Chart ...........................................................................................................................24
Reheating Chart ...........................................................................................................................25
Cooking Chart ..............................................................................................................................26
Cooking Guide
Microwave Recipe Techniques ................................................................................................27-29
Basic Recipes ............................................................................................................................... 30
Soups and Snacks ..................................................................................................................31-32
Fish and Shellfish ....................................................................................................................33-34
Poultry .....................................................................................................................................35-36
Main Fare Meats .....................................................................................................................37-39
Vegetable Varieties ..................................................................................................................40-43
Rice, Pasta and Cereal ...........................................................................................................44-45
Desserts .......................................................................................................................................46
Maintenance
Before Requesting Service ...........................................................................................................47
Care of Your Microwave Oven ......................................................................................................48
Using the Aqua Clean Programme ...............................................................................................49
Technical Specifications ...............................................................................................................49
Panasonic Warranty ................................................................................................................50-51
– 4 –
Quick Guide to Operation
Feature How to Operate
To Set/Cancel
Child Safety Lock
(
page 13)
To set:
Press 3 times
To cancel:
Press 3 times
To Set Clock
(
page 14)
Press twice Press onceset hours
Press onceset minutes
To Cook/Reheat/
Defrost on Micro
Power by Time
Setting
(
page 15)
Press once Press onceSelect power level
Press onceset cooking time
To Use "Auto
Defrost/Reheat/
Cook" Pad
(
pages 17-19)
or or
Press once Select desired menu number
Press oncePress once Select desired weight
– 5 –
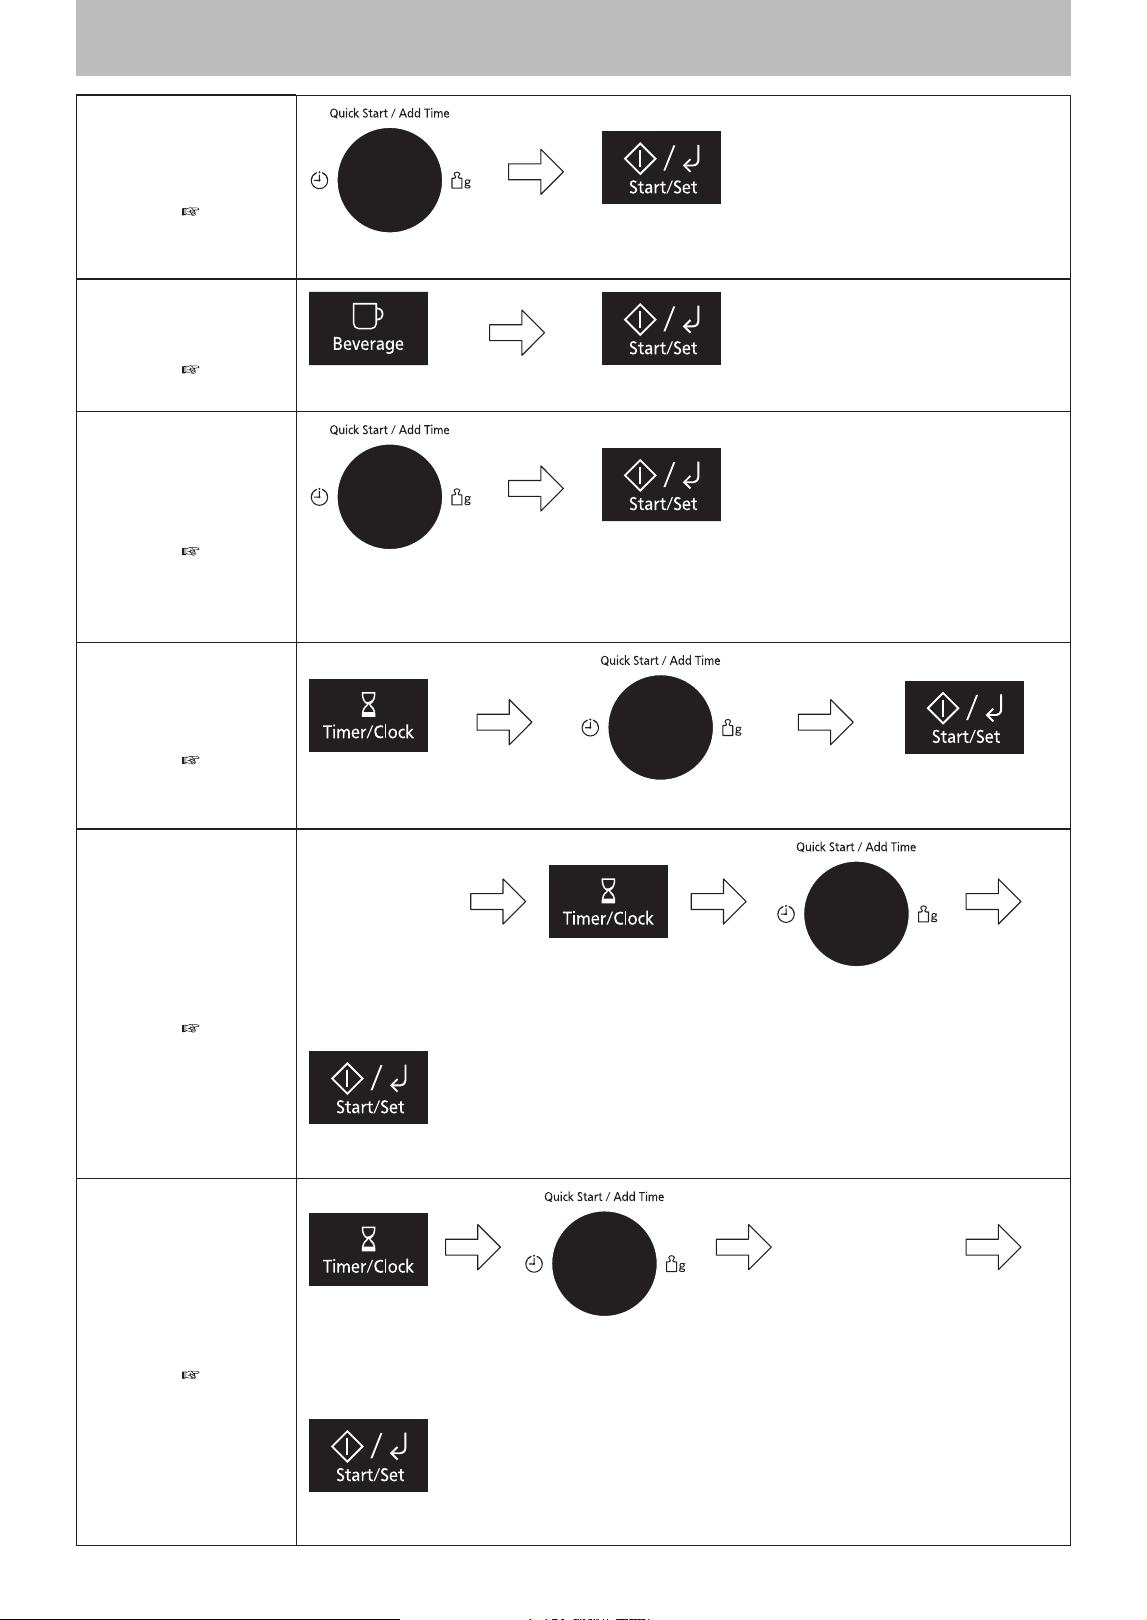
Quick Guide to Operation
(continued)
To Use the Quick
Start Function
(
page 16)
Press onceSet cooking time
To Use "Beverage"
Pad
(
page 17)
Select desired amount
Press once
To Use the Add Time
Function
(
page 16)
Press onceAfter cooking, turn dial
to select Add Time
Function
To Use as a Kitchen
Timer
(
page 23)
Set the kitchen timePress once Press once
To Set Standing
Time
(
page 23)
Set the desired
cooking
programme
Press once
Press once
Set the standing time
To Set Delay Start
(
page 23)
Set the delay time
Set the desired
cooking
programme
Press once
Press once

– 6 –
Important Safety Instructions
READ CAREFULLY AND KEEP FOR FUTURE REFERENCE
Precautions To Be Taken When
Using Microwave Ovens For
Heating Foodstuffs
INSPECTION FOR DAMAGE:
A microwave oven should only be used if an inspection
confirms all of the following conditions:
1. The door fits squarely and securely and opens and
closes smoothly.
2. The door hinges are in good condition.
3. The metal plates of a metal seal on the door are
neither buckled nor deformed.
4. The door seals are neither covered with food nor
have large burn marks.
PRECAUTIONS:
Microwave radiation from microwave ovens can cause
harmful effects if the following precautions are not
taken:
1. Never tamper with or deactivate the interlocking
devices on the door.
2. Never poke an object, particularly a metallic object,
through a grille or between the door and the oven
while the oven is operating.
3. Never place saucepans, unopened cans or other
heavy metallic objects in the oven.
4. Do not let other metallic articles, e.g. fast food foil
containers, touch the side of the oven.
5. Clean the oven cavity, the door and the seals with
water and a mild detergent at regular intervals.
Never use any form of abrasive cleaner that may
scratch or scour surfaces around the door.
6. Always use the oven with the trays or cookware
recommended by the manufacturer.
7. Never operate the oven without a load (i.e. an
absorbing material such as food or water) in the
oven cavity unless specifically allowed in the
manufacturer’s literature.
8. When the oven is not being used, do not store any
objects other than oven accessories inside the
oven in case it is accidentally turned on.
9. Do not place sealed containers in the microwave
oven. Baby bottles fitted with a screw cap or a teat
are considered to be sealed containers.
10. This appliance is not intended for use by persons
(including children) with reduced physical, sensory
or mental capabilities, or lack of experience
and knowledge, unless they have been given
supervision or instruction concerning use of the
appliance by a person responsible for their safety.
11. Children should be supervised to ensure that they
do not play with the appliance.
12. It is hazardous for anyone other than a competent
person to carry out any service or repair operation
that involves the removal of a cover which gives
protection against exposure to microwave energy.
13. The surfaces are liable to get hot during use.
Important Instructions
WARNING—To reduce the risk of burns, electric shock,
fire, injury to persons or excessive microwave energy:
1. Read all instructions before using the microwave oven.
2. Some products such as whole eggs and sealed
containers - (for example, closed glass jars and
sealed baby bottles with teat) - may explode and
should not be heated in the microwave oven.
3. Use this microwave oven only for its intended use
as described in this manual.
4. As with any appliance, close supervision is
necessary when used by children.
5. Do not operate this microwave oven, if it is not working
properly, or if it has been damaged or dropped.
6. Do not store or use this appliance outdoors.
7. Do not immerse cord or plug in water.
8. Keep cord away from heated surfaces.
9. Do not let cord hang over edge of table or counter.
10. To reduce the risk of fire in the oven cavity:
(a) Do not overcook food. Carefully attend
microwave oven if paper, plastic, or other
combustible materials are placed inside the
oven to facilitate cooking.
(b) Heating therapeutic wheat bags is not
recommended. If heating, do not leave
unattended and follow manufacturers’
instructions carefully.
(c) Remove wire twist-ties from bags before
placing bag in oven.
(d) If materials inside the oven should ignite,
keep oven door closed, turn oven off at the
wall switch, or shut off power at the fuse or
circuit breaker panel.
(e) Never leave microwave unattended while
cooking or reheating.
11. Do not remove outer panel from oven.
12. Appliances are not intended to be operated by
means of an external timer or separate remote-
control system.
13. The oven should be cleaned regularly and any
food deposits removed.
14. Failure to maintain the oven in a clean condition
could lead to deterioration of the surface that
could adversely affect the life of the appliance and
possibly result in a hazardous situation.
15. A steam cleaner is not to be used for cleaning.
16. The oven lamp must be replaced by a service
technician trained by the manufacturer. Do not
attempt to remove the outer casing from the oven.
Circuits
Your microwave oven should be operated on a
separate 10 A circuit from other appliances. Failure to
do this may cause the power board fuse to blow, and/
or food to cook slower. Do not insert higher value fuse
in the power board.

– 7 –
Important Safety Instructions
(continued)
Operation Voltage
The voltage has to be the same as specified on the
label on the oven. If a higher voltage than specified is
used, it may cause a fire or other damages.
Earthing Instructions
This microwave oven must be earthed. In the event
of an electrical short circuit, earthing reduces the risk
of electric shock by providing an escape wire for the
electric current. This microwave oven is equipped with
a cord having an earthing wire with an earthing plug.
The plug must be plugged into an outlet that is
properly installed and earthed.
Fan Motor Operation after Cooking
After using this oven the fan may rotate to cool the
electric components. This is perfectly normal, and
you can take out the food from the oven while the fan
operates.
WARNING—Improper use of the earthing plug can
result in a risk of electric shock.
WE CERTIFY THAT THIS MICROWAVE OVEN
HAS BEEN INSPECTED AND COMPLIES WITH
THE REQUIREMENTS OF REGULATION 3,
SUBCLAUSE(2), OF THE MICROWAVE OVENS
REGULATIONS 1982.
(This statement applicable only to New Zealand.)
WARNING
a) The door seals and door seal areas should be
cleaned with a damp cloth. The appliance should
be inspected for damage to the door seals and
door seal areas and if these areas are damaged
the appliance should not be operated until it has
been repaired by a qualified service technician
trained by the manufacturer.
b) If the door or door seals are damaged, the oven
must not be operated until it has been repaired by
a competent person.
c) It is hazardous for anyone other than a competent
person to carry out any service or repair operation
that involves the removal of a cover which gives
protection against exposure to microwave energy.
d) If the supply cord is damaged, it must be replaced
by the manufacturer, its service agent or similarly
qualified persons in order to avoid a hazard.
e) Before use, the user should check that whether
the utensils are suitable for use in microwave
ovens.
f) Liquids and other foods must not be heated in
sealed containers since they are liable to explode.
g) Only allow children to use the oven without
supervision when adequate instructions have
been given so that the child is able to use the
oven in a safe way and understands the hazards
of improper use.
Installation and General Instructions
General Use
1. In order to maintain high quality, do not operate
the oven when empty. The microwave energy will
reflect continuously throughout the oven if no food
or water is present to absorb energy. This can lead
to damage to the microwave oven including arcing
within the oven cavity.
2. If smoke is observed, press the Stop/Cancel Pad
and leave door closed in order to stifle any flames.
Disconnect the power cord, and/or shut off power
at the fuse or circuit breaker panel.
3. Do not dry clothes, newspapers or other materials
in oven. They may catch on fire.
4. Do not use recycled paper products, unless the
paper product is labelled as safe for microwave
oven use. Recycled paper products may contain
impurities which may cause sparks and/or fires
when used.
5. Do not use newspapers or paper bags for cooking.
6. Do not hit or strike the Control Panel. Damage to
controls may occur.
7. POT HOLDERS may be needed as heat from food
is transferred to the cooking container and from
the container to the Glass Tray. The GlassTray can
be very hot after removing the cooking container
from the oven.
8. Do not store flammable materials next to, on top
of, or in the oven. It could be a fire hazard.
9. Do not cook food directly on Glass Tray unless
indicated in recipes. (Food should be placed in a
suitable cooking utensil.)
10. DO NOT use this oven to heat chemicals or other
non-food products. DO NOT clean this oven with
any product that is labelled as containing corrosive
chemicals. The heating of corrosive chemicals in this
oven may cause microwave radiation leaks.
11. If Glass Tray is hot, allow to cool before cleaning
or placing in water.
12. During cooking, some steam will condense inside
and/or on the oven door. This is normal and safe.
Steam will disappear after the oven cools down.

– 8 –
Installation and General Instructions
(continued)
Placement of Oven
1. The oven must be placed on a flat, stable surface,
more than 85 cm above the floor. For correct
operation, the oven must have sufficient air flow. Allow
more than 15 cm of space on the top of the oven,
10 cm at the back, and 5 cm on both sides. If one
side of the oven is placed ush to wall, the other
side or top must not be blocked. Do not remove
feet. Do not place in cabinet that restricts airow.
(a) Do not block air vents. If they are blocked
during operation, the oven may be overheated
and damaged. When using any cloth over
the oven, the air intake and exhaust should
not be blocked. Also allow sufficient space on
back and both sides of the oven.
(b) Do not place oven near a hot or damp surface
such as a gas stove, electric range or sink
etc.
(c) Do not operate oven when room humidity is
too high.
2. This appliance is intended to be used in household
and similar applications such as:
• staff kitchen areas in shops, offices and other
working environments;
• farm houses;
• by clients in hotels, motels and other residential
environments;
• bed and breakfast type environments.
3. The appliance must not be placed in a cabinet.
4. When this oven is installed, it should be easy to
isolate the appliance from the electricity supply by
pulling out the plug or operating a circuit breaker.
Accessories
The oven comes equipped with a variety of
accessories. Always follow the directions given for use
of the accessories.
Glass Tray
1. Do not operate the oven without the roller ring and
the glass tray in place.
2. Never use another type of glass tray than the one
specially designed for this oven.
3. If the glass tray is hot, let it cool before cleaning or
placing in water.
4. The glass tray can turn in either direction.
5. If the food or cooking vessel on the glass tray
touches the oven walls and stops the tray rotating,
the tray will automatically rotate in the opposite
direction. This is normal.
6. Do not cook foods directly on the glass tray
unless indicated in recipes. Always place food in a
microwave safe dish.
7. While cooking by microwave the turntable may
vibrate. This will not affect cooking performance.
Roller Ring
1. Do not remove the roller ring from the oven cavity
floor.
2. The roller ring and the oven cavity floor should be
cleaned frequently to prevent noise and build-up of
remaining food.
3. The roller ring must always be used for cooking
together with the glass tray.
4. If you accidentally remove the roller ring, place the
roller ring gently into the hole in the centre of the
oven and locate it on the spindle beneath.
Flat processing is applied on the spindle to firmly
hold the roller ring during operation.
Food
1. Do not use your oven for home canning or the
heating of any closed jar. Pressure will build
up and the jar may explode. In addition, the
microwave oven cannot maintain the food at the
correct canning temperature. Improperly canned
food may spoil and be dangerous to consume.
2. Do not attempt to deep fat fry in your microwave
oven.
3. Eggs in their shell and whole hard-boiled eggs
should not be heated in microwave ovens since
they may explode, even after microwave heating
has ended.
4. Potatoes, apples, egg yolks, chicken wings, whole
squash and sausages are examples of foods with
nonporous skins. This type of food must be pierced
before cooking, to prevent bursting.
5. When heating liquids, e.g. soup, sauces and
beverages, in your microwave oven, overheating
the liquid beyond boiling point can occur without
evidence of bubbling. This could result in a sudden
boil over of hot liquid. To prevent this possibility the
following steps should be taken:
(a) Avoid using straight-sided containers with
narrow necks.
(b) Do not overheat.
(c) Stir the liquid before placing the container in
the oven and halfway through cooking time.
(d) After heating, allow to stand in the oven for
a short time, stirring again before carefully
removing the container.
13. Do not leave the microwave unattended while
reheating or cooking food in disposable containers
made of plastic, paper or other combustible
materials, as these types of containers can ignite if
overheated.
14. The microwave oven is intended for heating food
and beverages. Drying of food or clothing and
heating of warming pads, slippers, sponges, damp
cloth and similar may lead to risk of injury, ignition
or fire.
15. Metallic containers for food and beverages are not
allowed during microwave cooking.
16. Only use utensils that are suitable for use in
microwave ovens.

– 9 –
Installation and General Instructions
(continued)
(e) Microwave heating of beverages can result
in delayed eruptive boiling, therefore care
should be taken when handling the container.
6. DO NOT USE A CONVENTIONAL MEAT
THERMOMETER IN THE MICROWAVE OVEN.
To check the degree of cooking of roasts and
poultry use a MICROWAVE THERMOMETER.
Alternatively, a conventional meat thermometer
may be used after the food is removed from the
oven. If undercooked, return meat or poultry to
the oven and cook for a few more minutes at
the recommended power level. It is important
to ensure that meat and poultry are thoroughly
cooked.
7. COOKING TIMES given in the Cooking Guide
section are APPROXIMATE. Factors that may
affect cooking time are preferred degree of
moisture content, starting temperature, altitude,
volume, size, shape of food and utensils used. As
you become familiar with the oven, you will be able
to adjust for these factors.
8. It is better to UNDERCOOK RATHER THAN
OVERCOOK foods. If food is undercooked, it can
always be returned to the oven for further cooking.
If food is overcooked, nothing can be done. Always
start with minimum cooking times recommended.
9. Extreme care should be taken when cooking
popcorn in a microwave oven. Cook for minimum
time as recommended by manufacturer. Use
the directions suitable for the wattage of your
microwave oven. NEVER leave oven unattended
when popping popcorn.
10. When heating food in plastic or paper containers,
keep an eye on the oven due to the possibility of
ignition.
11. The contents of feeding bottles and baby food jars
shall be stirred or shaken and the temperature
checked before consumption, in order to avoid
burns.
Important
If the recommended cooking time is exceeded, the
food will be spoiled and in extreme circumstances
could catch fire and possibly damage the interior of
the oven.
Microwaves and How They Work
Microwaves are a form of high frequency radio waves
similar to those used by a radio, including AM, FM and
CB. They are similar to a television where the radio
waves are converted to a picture on the screen. However,
microwaves are much shorter than radio waves;
approximately twelve centimetres wave length. Electricity
is converted into microwave energy by the magnetron
tube (which is the heart of the microwave oven).
From the magnetron tube, microwave energy is
transmitted to the oven cavity through a small plastic
covered piece. The microwaves are converted to heat
in the food. The microwaves enter from the outside
of the food and travel through the food losing half of
their power every two to three centimetres. Continued
cooking to the centre occurs by conduction.
Although pacemakers used to be affected by
microwaves (as well as by other radio waves), they
are now shielded and are not bothered by these
interferences. This allows people with pacemakers
to sit calmly by their radio or television and cook with
microwave ovens.
When microwaves come in contact with a substance,
any one or combination of three things may occur.
They can be:
1. REFLECTED
2. TRANSMITTED
3. ABSORBED
Reflection:
Metal substances REFLECT microwave energy and
because there is no absorption, there is no heating.
This is why the oven interior is either stainless steel or
epoxy-coated steel. This ensures that the microwaves
are kept inside the cavity and evenly distributed
throughout the food with the help of the Glass Tray.
Transmission:
Such substances as paper, glass and plastic
TRANSMIT microwave energy and do not become
hot except from food. Because these substances do
not reflect or absorb microwave energy, they are ideal
materials for microwave cooking containers.
Absorption:
Food contains moisture and will ABSORB microwave
energy, which causes the moisture molecules within
the food to vibrate at an incredible rate (2,450,000,000
times per second). Friction, created by the vibration,
produces heat energy which is conducted throughout
the food.

– 10 –
Cookware and Utensils Guide
It is important to use the correct container when
cooking in a microwave oven. The following will help
you make the right selection.
Metallic containers for food and beverages are not
allowed during microwave cooking.
How to Test a Container for Safe
Microwave Oven Use
TO TEST A CONTAINER FOR SAFE MICROWAVE
OVEN USE: Fill a 1-cup glass measure with cool
water and place it in the microwave oven alongside
the empty container to be tested; heat one (1) minute
at 1000 W. If the container is microwave ovensafe
(transparent to microwave energy), the container
should remain comfortably cool, the water in glass
measure should be hot. If the container is hot, it has
absorbed some microwave energy and should NOT be
used. This test cannot be used for plastic containers.
Paper Products and Freezer Wrap
Waxed paper, paper plates, cups and napkins should not
be used for heating or cooking food. Freezer wrap should
not be used as it is not heat resistant and may melt.
Paper towel, greaseproof paper and bake paper may be
safely used for short periods of time for covering or lining.
Glass, Ceramic and China
Heat-Resistant glass cookware is invaluable in
microwave cooking. Many of these items are readily
available in most homes: glass jugs, mixing bowls, loaf
dishes, covered casseroles, oblong baking dishes, pie
plates and round or square cake dishes. Examples of
this type of cookware are Pyrex® and Corningware®.
Dinnerware can be used for microwave heating.
Many brands of dinnerware are microwave safe.
Check the care information for reference to microwave
use for dinnerware and serving pieces. If dinnerware
is marked ovenproof, it frequently is safe to use in
the microwave oven. However, to be sure, check by
conducting microwave dish test previously mentioned.
Several types of glassware and dinnerware are not
recommended for use in the microwave oven. Do not
use dishes with metallic trim or containers with metallic
parts. Do not use cups or mugs with glued on handles,
as they may fall off with continued heating. Do not use
delicate glassware. Although the glassware may be
transparent to microwave energy the heat from the
food may cause the glassware to crack.
Plastics
Plastic dishes, cups and some freezer containers
should be used with care in a microwave oven.
Choose plastic containers carefully, as some plastic
containers may become soft, melt and may scorch.
The majority of plastic dishes, even those designed
for use in the microwave oven, are not suitable for
cooking foods with high fat or sugar content, or for
lengthy cooking times. Most microwave plastic dishes
should not be used for longer than 3 to 5 minutes
on 1000 W. These dishes, although not suitable for
extended cooking, may be used successfully for
defrosting or for use on lower power levels.
Cooking Bags designed to withstand boiling, freezing,
or conventional heating are microwave safe. Prepare
bags according to manufacturer’s directions. When
cooking by microwave, DO NOT use wire twist-ties
to close bag. They can act as an antenna and cause
arcing (sparks).
DO NOT COOK IN PLASTIC FOOD STORAGE BAGS.
Plastic Wrap such as GLAD WRAP® can be used
to cover dishes in most recipes. Over an extended
heating time, some disfiguration of the wrap may
occur. When removing plastic wrap “covers”, as well
as any glass lid, be careful to remove it away from you
to avoid steam burns.
Loosen plastic but let dish stand, covered.
Jars and Bottles
Jars and bottles can be used to warm food to serving
temperature, if the lid is removed first. Cooking should
not be done in these containers since most are not
heat resistant and during extended heating times, heat
from food would cause cracking or breaking.
Metal
Metallic cookware or utensils, or those with metallic
trim, should NOT be used in the microwave. Since
microwave energy is reflected by metal, foods in
metallic containers will not cook evenly. There is also
a possibility of “arcing”.
Foil lined containers, either cardboard or plastic,
should NOT be used in the microwave oven as arcing
could occur.
Metallic twist-ties, either paper or plastic coated,
should NOT be used in the microwave oven. Frozen
dinner trays can be used in the microwave, if the
container is no deeper than 2 cm and is filled with
food. Metallic skewers can not be used in microwave
ovens as arcing may occur. Wooden skewers are
readily available and give the same result.
Shells: Scalloped baking shells are best used during
reheating and for short periods of cooking time only.
Thermometers are available for use in microwave
ovens. DO NOT USE CONVENTIONAL MERCURY
TYPE CANDY OR MEAT THERMOMETERS in food
while cooking in the microwave oven.
Straw, Wicker and Wood
Straw and wicker baskets may be used in the
microwave oven for short periods of time to warm
rolls or bread. Large wooden utensils, such as bowls
or cutting boards should NOT be used for prolonged
heating as the microwave energy may cause the wood
to become dry and brittle.
4
– 11 –
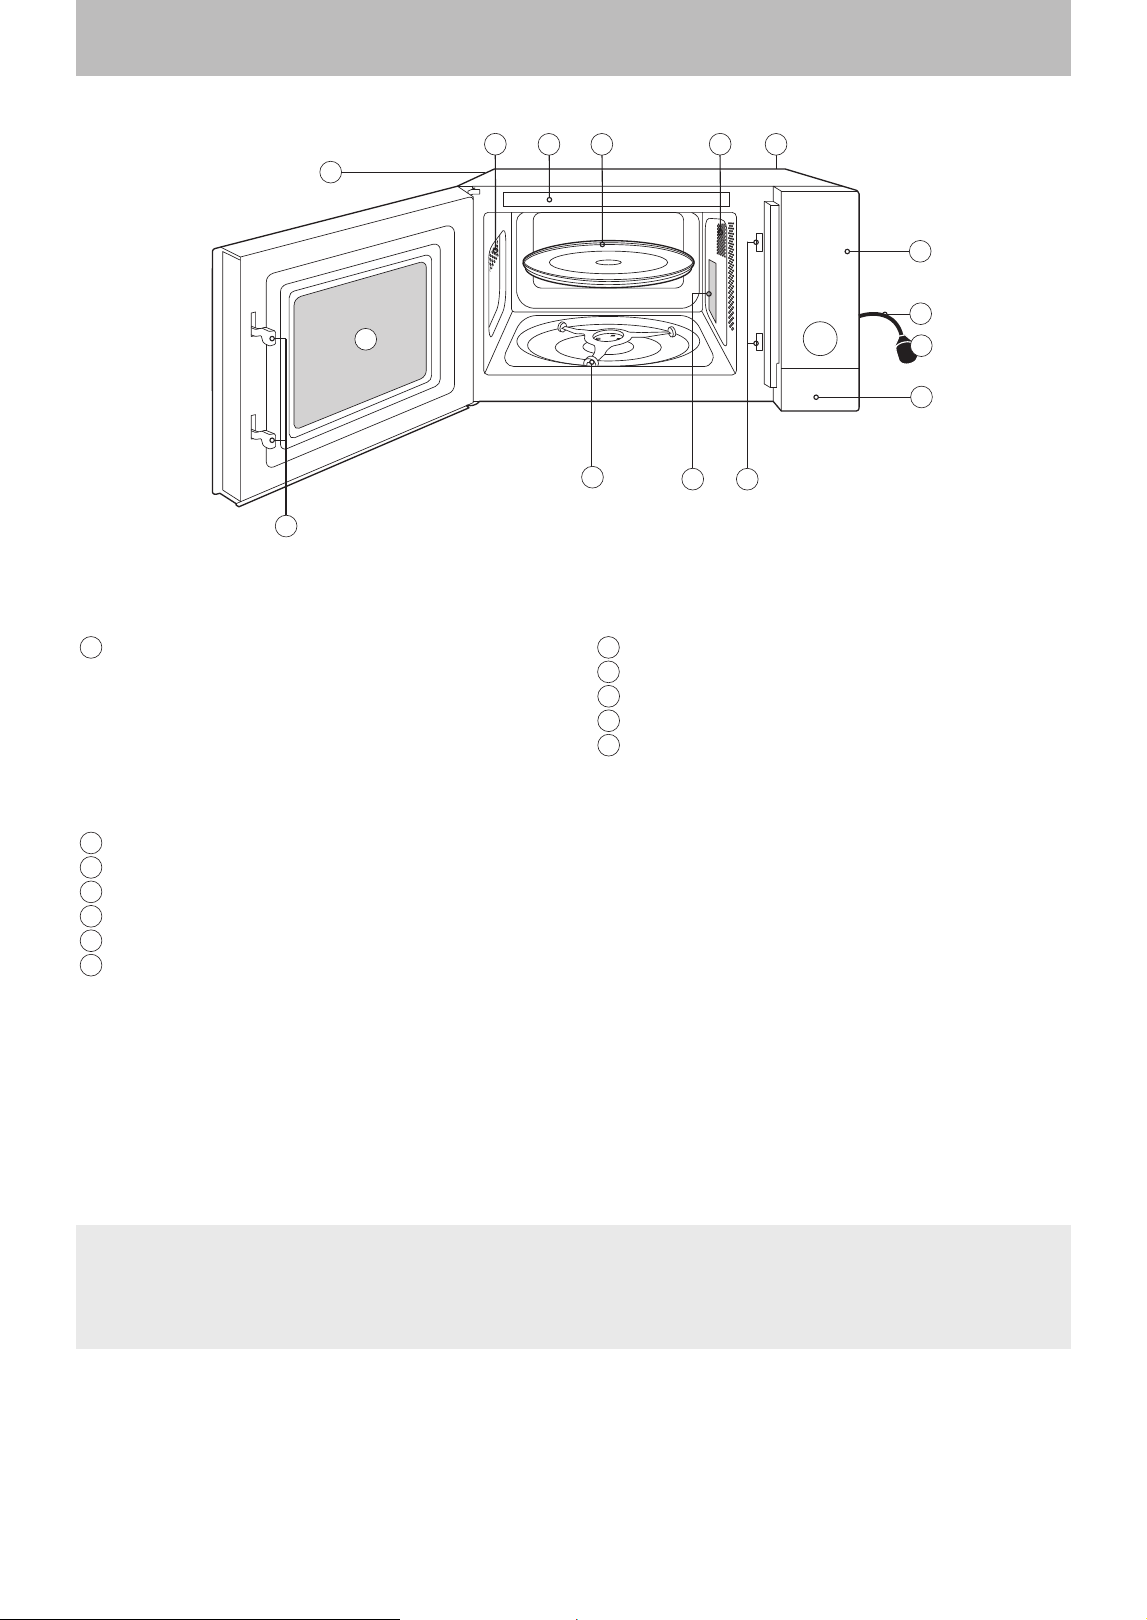
Feature Diagram
1
Door release
Push to open the door. Opening the door during
cooking will stop the cooking process without
cancelling the programme. Cook resumes as
soon as the door is closed and Start/Set Pad is
pressed. It is quite safe to open the door at any
time during a cooking programme and there is no
risk of Microwave exposure.
2
Oven Window
3
Door Safety Lock System
4
Oven Air Vent
5
Microwave feed guide (do not remove)
6
External oven air vents
7
Control Panel
8
Power Supply Cord
9
Plug
10
Glass Tray
11
Roller Ring
12
Menu Label
Notes
1. The above illustration is for reference only.
2. The Glass Tray is the only accessory with this oven. All other cooking utensils mentioned in this manual
must be purchased separately.
1
11
2
7
1012 6
8
6
9
3
5 3
4
Identification label is attached on the oven.
– 12 –
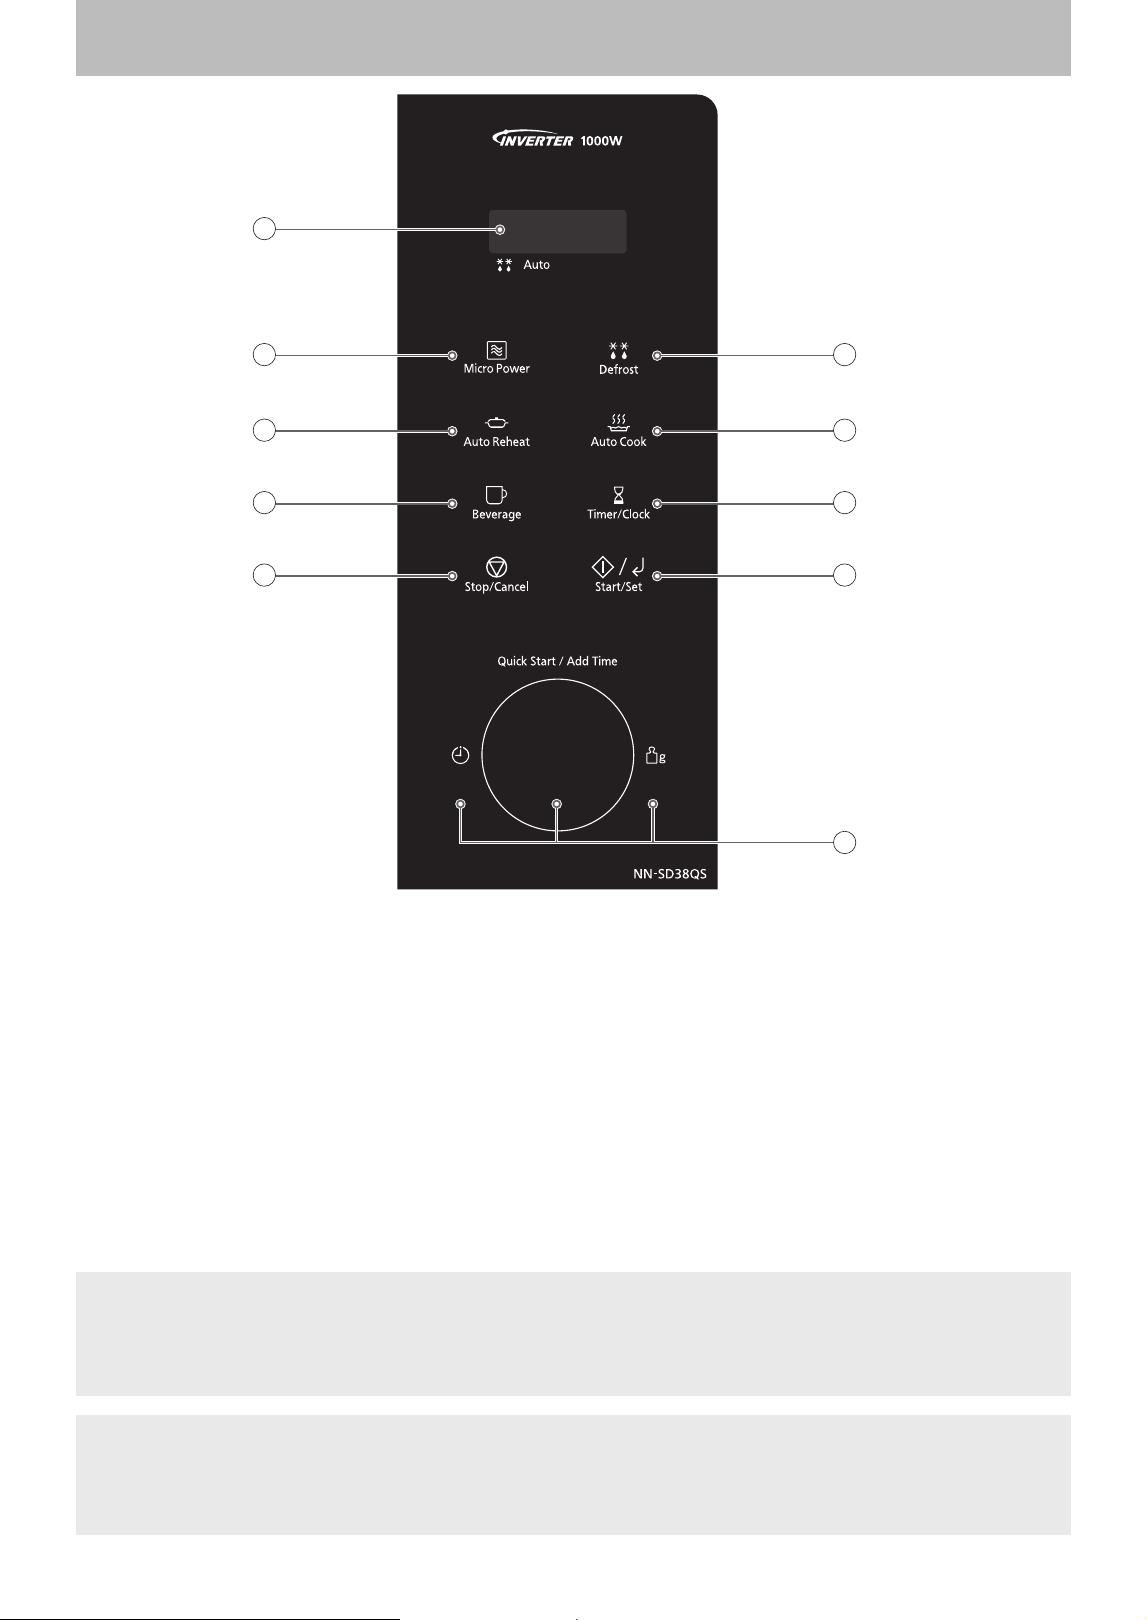
Control Panel
1. Display Window
2. Micro Power Pad (Pg.13, 15)
3. Auto Defrost Pad (Pg.17, 18)
4. Auto Reheat Pad (Pg.19)
5. Auto Cook Pad (Pg.19)
6. Beverage Pad (Pg.17)
7. Timer/Clock Pad (Pg.14, 23)
8. Dial (Pg.14)
Enter time or weight of food by turning the dial.
Use the dial for the Quick Start and Add Time
function. (page 16)
9. Stop/Cancel Pad
Before cooking: One tap clears all your
instructions.
During cooking: One tap temporarily stops the
cooking process. Another tap cancels all your
instructions and dot or time of day appears in the
Display Window.
10. Start/Set Pad
One tap allows oven to begin functioning. If door
is opened or Stop/Cancel Pad is pressed once
during oven operation, Start/Set Pad must again
be pressed to restart oven.
Press to confirm setting after you select the
microwave level or Auto programme number.
Notes
1. If an operation is set and Start/Set Pad is not pressed, after 6 minutes, the oven will automatically cancel
the operation. The display will revert back to clock or dot mode.
2. Place the oven with the display window no higher than eye level for optimal viewing experience.
Beep Sound
When a pad is pressed correctly, a beep sound will be heard. If a pad is pressed and no beep is heard, the unit
does not or cannot accept the instruction. The oven will beep twice between programmed stages. At the end of
any complete programme, the oven will beep five times.
1
2 3
5
7
10
4
6
9
8
– 13 –
To Use Child Safety Lock
To set:
This feature allows you to prevent operation of the oven by a young child; however, the door will open.
This feature can be set when dot or time of day is displayed.
To set or cancel child safety lock, Start/Set Pad or Stop/Cancel Pad must be pressed 3 times within 10 seconds.
Press Start/Set three times.
Dot or time of day will disappear.
Actual time will not be lost.
"Child" appears in the display window.
Press Stop/Cancel three times.
Dot or time of day will reappear in
the display window.
To cancel:
Let's Start To Use Your Oven!
1
Plug in.
After plugging in, “ ” will appears in the display window, then you can start to operate.
2
Open Door.
Open the door and place container with food in a dish on Glass Tray in the oven. Then close the door.
3
Select Power Level.
eg. 800 W (Med High)
Press Micro Power. Press Start/Set.Turn the dial.
(see page 15 for Micro Power chart)
4
Set Time.
e.g. 30 minutes
Set as 30 minutes by using the dial.
5
Press .
The time in the display will count down.

– 14 –
Dial Features
TIME CHOICE
● Turning the dial clockwise to increase the cooking time and turning the dial anti-
clockwise to decrease the cooking time.
● Use the dial for the Quick Start and the Add Time Function. (page 16)
Note:
● This dial can be used during manual cooking. This feature allows you to
increase or decrease the cooking time in 10 seconds increments (up to 10
minutes).
WEIGHT CHOICE
Turning the dial clockwise to increase the weight and turning the dial anti-clockwise
to decrease the weight setting.
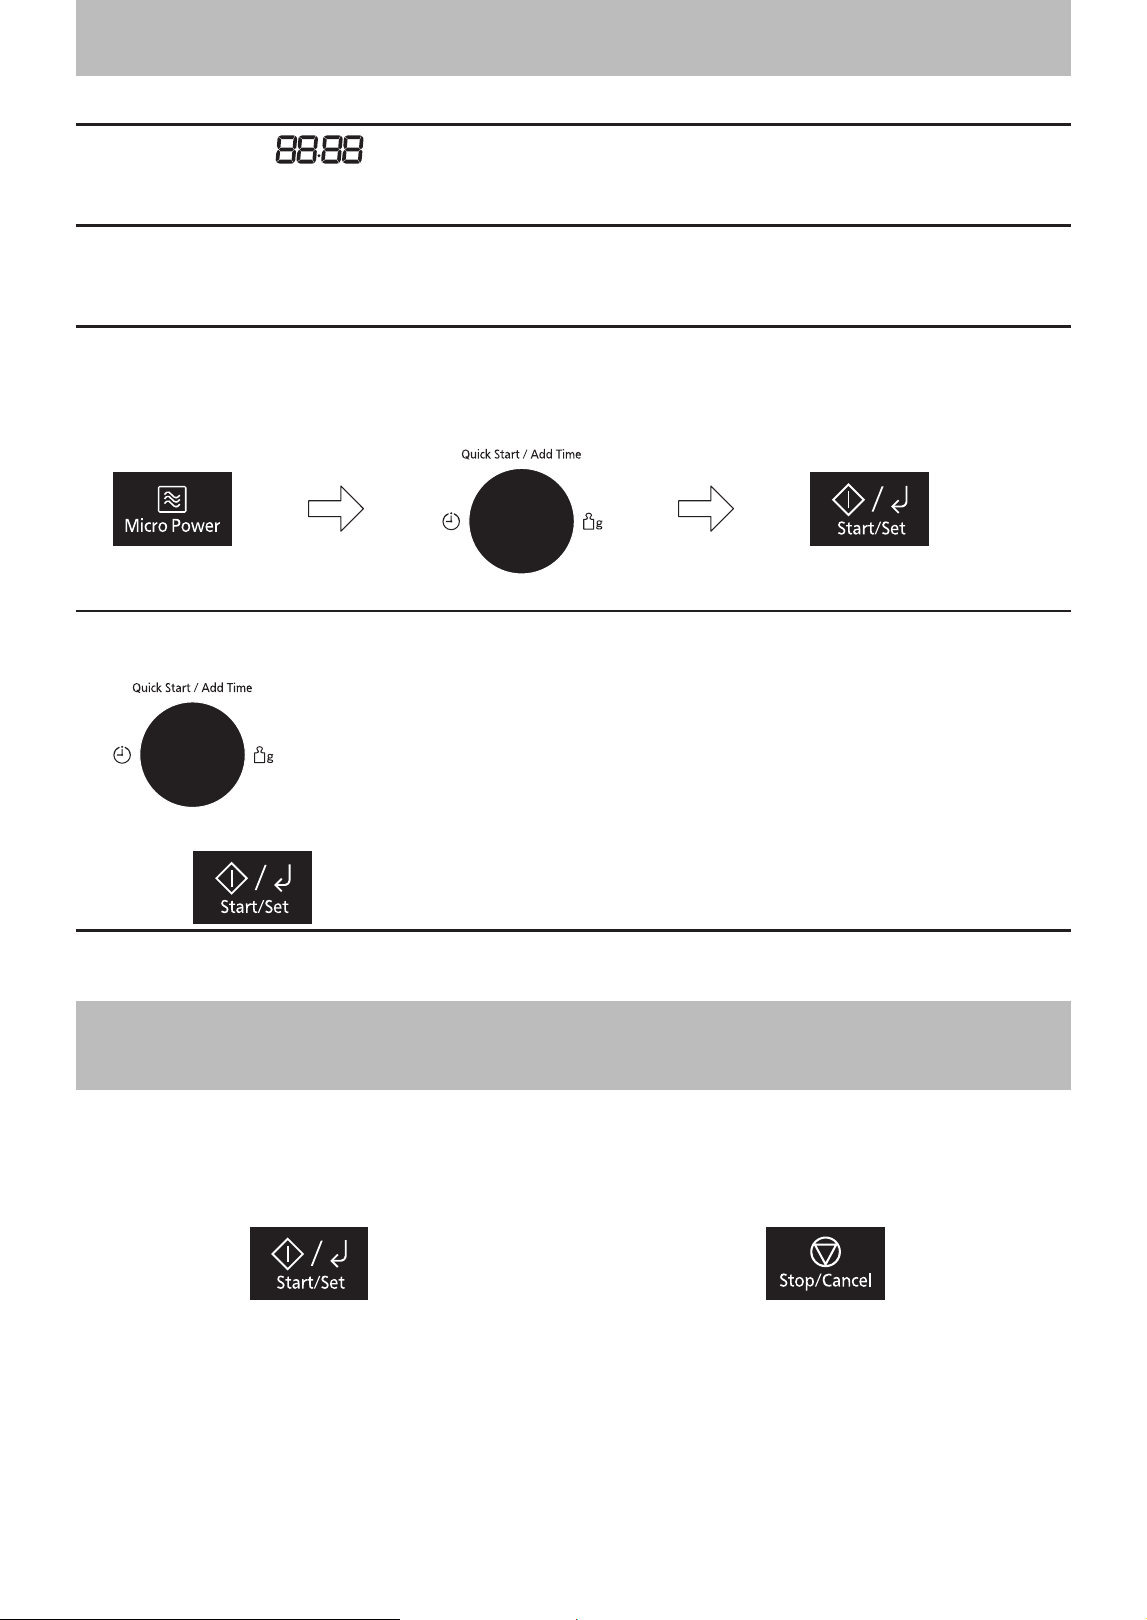
To Set Clock
When the oven is first plugged in “ ” appears in the display window.
Press Timer/Clock twice.
Hours starts to blink.
Turn the dial to set hours. Press Start/Set.
Minute starts to blink.
Turn the dial to set
minutes.
Press Start/Set.
Time of day is now locked into the
display.
Notes
1. To reset time of day, repeat the whole step above.
2. The clock will keep the time of day as long as oven is plugged in and electricity is supplied.
3. Clock is a 12-hour display.
– 15 –
The glass tray must always be in position when using the oven.
Press Micro Power.
The wattage appears
in the display.
Turn the dial to select the desired
power level.
(You can also press Micro Power
repeatedly to select the power level.)
Press Start/Set to
confirm the setting.
Turn the dial to set
the cooking time.
Press Start/Set.
The time in the display will count down.
Power Level Maximum Time Example Of Use
1000 W (High) 30 minutes
Boil water. Cook fresh fruits, vegetables, rice, pasta, noodles,
preserved fruit and candies. Heat milk.
800 W (Med High)
95 minutes
Cook fish and seafood, meat, poultry, and eggs.
600 W (Medium) Cook cakes, stew food.
440 W (Low) Cook tough meat, stew soup.
300 W (Simmer) Simmer, stew. Melt butter and chocolate. Soften butter.
160 W (Defrost) Defrost meat, poultry or seafood.
100 W (Warm) Keep food warm and soften ice cream.
Notes
1. After the operation is finished, “Add” is displayed for about 1 minute on the display. While displaying, you
can use Add Time function, refer to page 16. To cancel Add Time function, press any pad when “Add” is
displayed.
2. For multi-stage cooking refer to page 22.
3. Stand time can be programmed after microwave power and time setting. Refer to using the timer page 23.
4. You can change the cooking time during cooking if required. Turn the dial to increase or decrease the
cooking time. Time can be increased/decreased in 10 seconds increments, up to 10 minutes.
5. Do not use metallic containers on microwave mode.
6. Always check the food during defrosting by opening the door then restarting. It is not necessary to cover
food during defrosting. To ensure an even result, stir, turn or separate several times during defrosting. For
large joints and poultry, turn halfway through defrosting.
Refer to defrosting chart on page 24 for defrosting times.
7. When the microwave oven is operated at 1000 W (High) microwave power for long time, the microwave
oven automatically adjust the power to protect the components of the microwave oven.
Microwave Cooking and Defrosting

– 16 –
This feature allows you to add cooking time at the end of previous cooking.
2. Press Start/Set.
Time will be added.
The time in the display window will
count down.
1. After cooking, turn the dial to select Add
Time Function.
Maximum cooking time:
1000 W microwave power : 30 minutes
Other microwave powers : 95 minutes
Notes
1. After the operation is finished, “Add” is displayed for about 1 minute on the display. While displaying, you
can use Add Time function again.
2. Add Time function will be cancelled, if you do not perform any operation for 1 minute after cooking, or if you
press any pad when “Add” is displayed.
3. This function is only available for Microwave and it is not available for Auto programmes.
4. The Add Time function can be used after the multi-stage cooking.
The power level is the same as the last stage. This function will not operate if the last stage was standing
time.
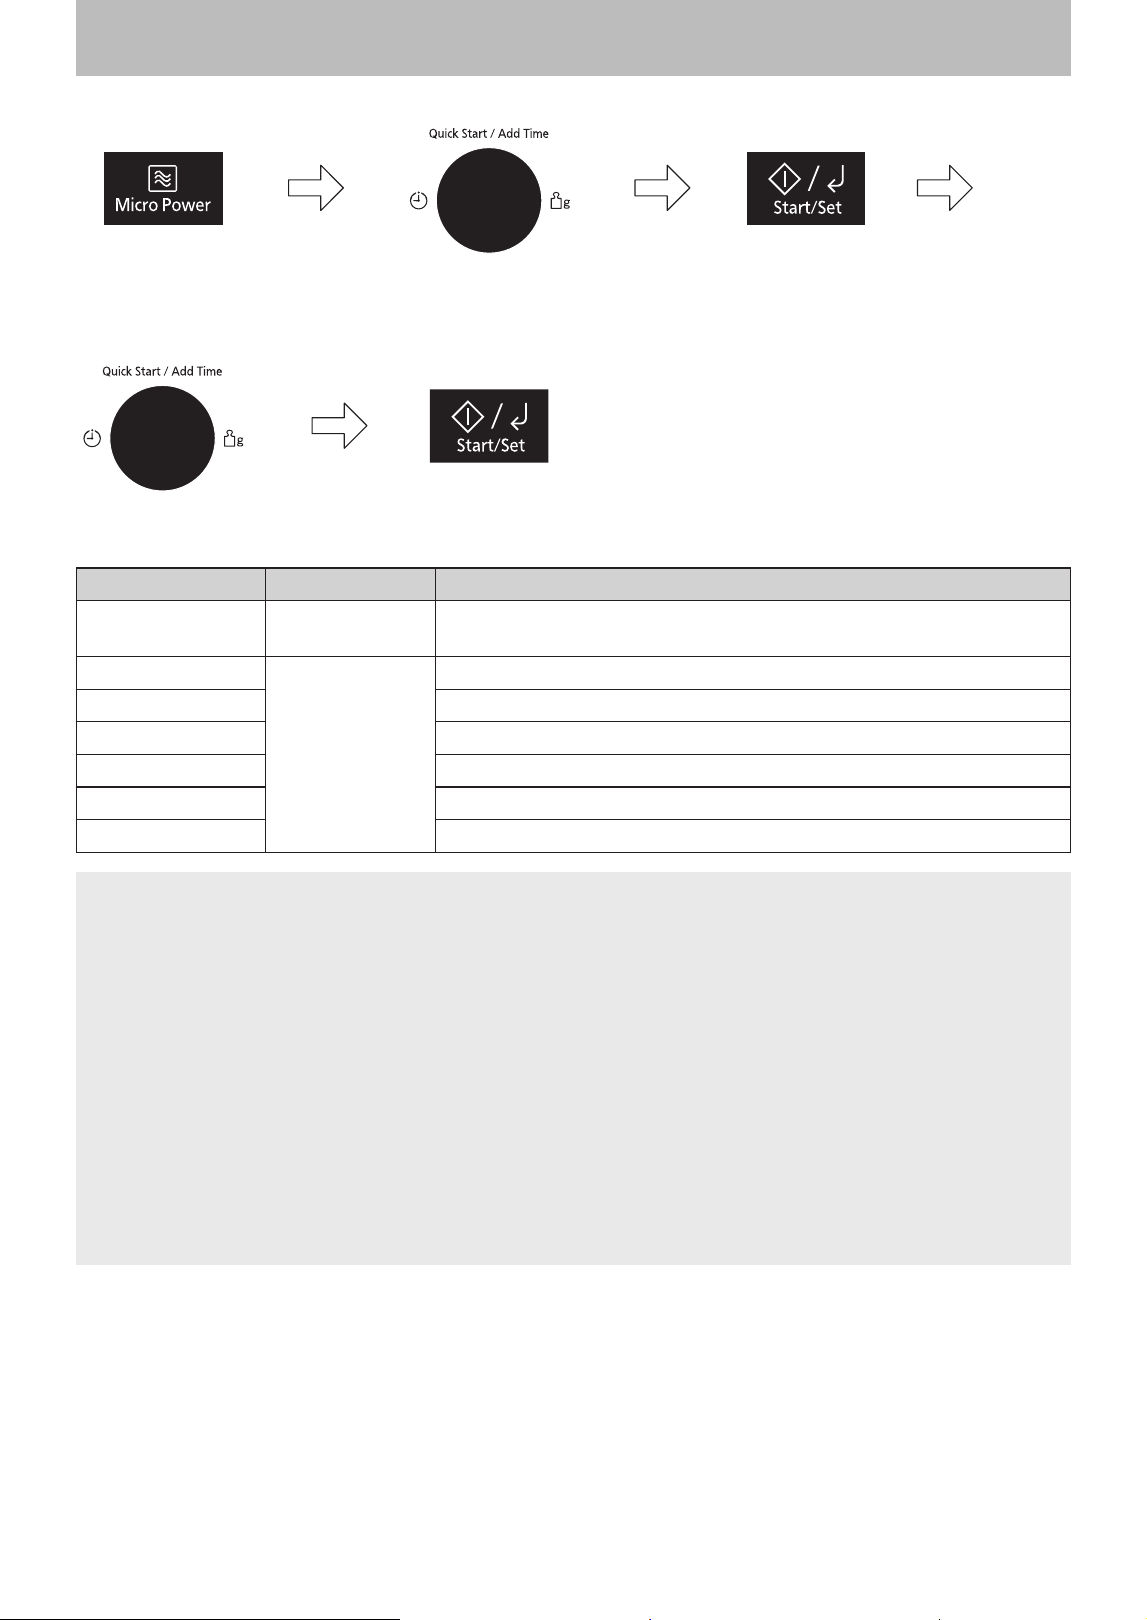
Quick Start Function
Using the Add Time Function
This function allows you to quickly start the 1000 W microwave programme.
Turn the dial to set the cooking time.
Microwave power level is automatically
set to 1000 W.
Press Start/Set.
The 1000 W microwave power
programme will start and the time in the
display will count down.
Notes
1. Maximum cooking time for the Quick Start function is 30 minutes.
2. You can use the Quick Start function to set the first stage of multi-stage cooking. Set the second or third
stage after turning the dial. See page 22 for the multi-stage cooking.

– 17 –
This feature allows you to reheat beverage (e.g. tea, coffee, and milk) without setting power and time.
Press Beverage to select the
desired amount of beverage.
(After pressing Beverage, you
can also use the dial to select the
desired amount of beverage.)
The number of the cups appears in
the display.
Press Start/Set.
The cooking programme
will start and the time in the
display will count down.
Press Cup
once 1 cup (250 ml)
twice 2 cups (500 ml)
Notes
1. Use a microwave safe cup/bowl.
2. Heated liquids can erupt if not mixed with air. Do not heat beverage in your microwave oven without stirring
before and halfway through heating.
3. Care must be exercised not to overheat liquids when reheating beverages. Start reheating from room
temperature or refrigerator temperature. Overheating will cause an increased risk of scalding, or water eruption.
Using the Beverage Function
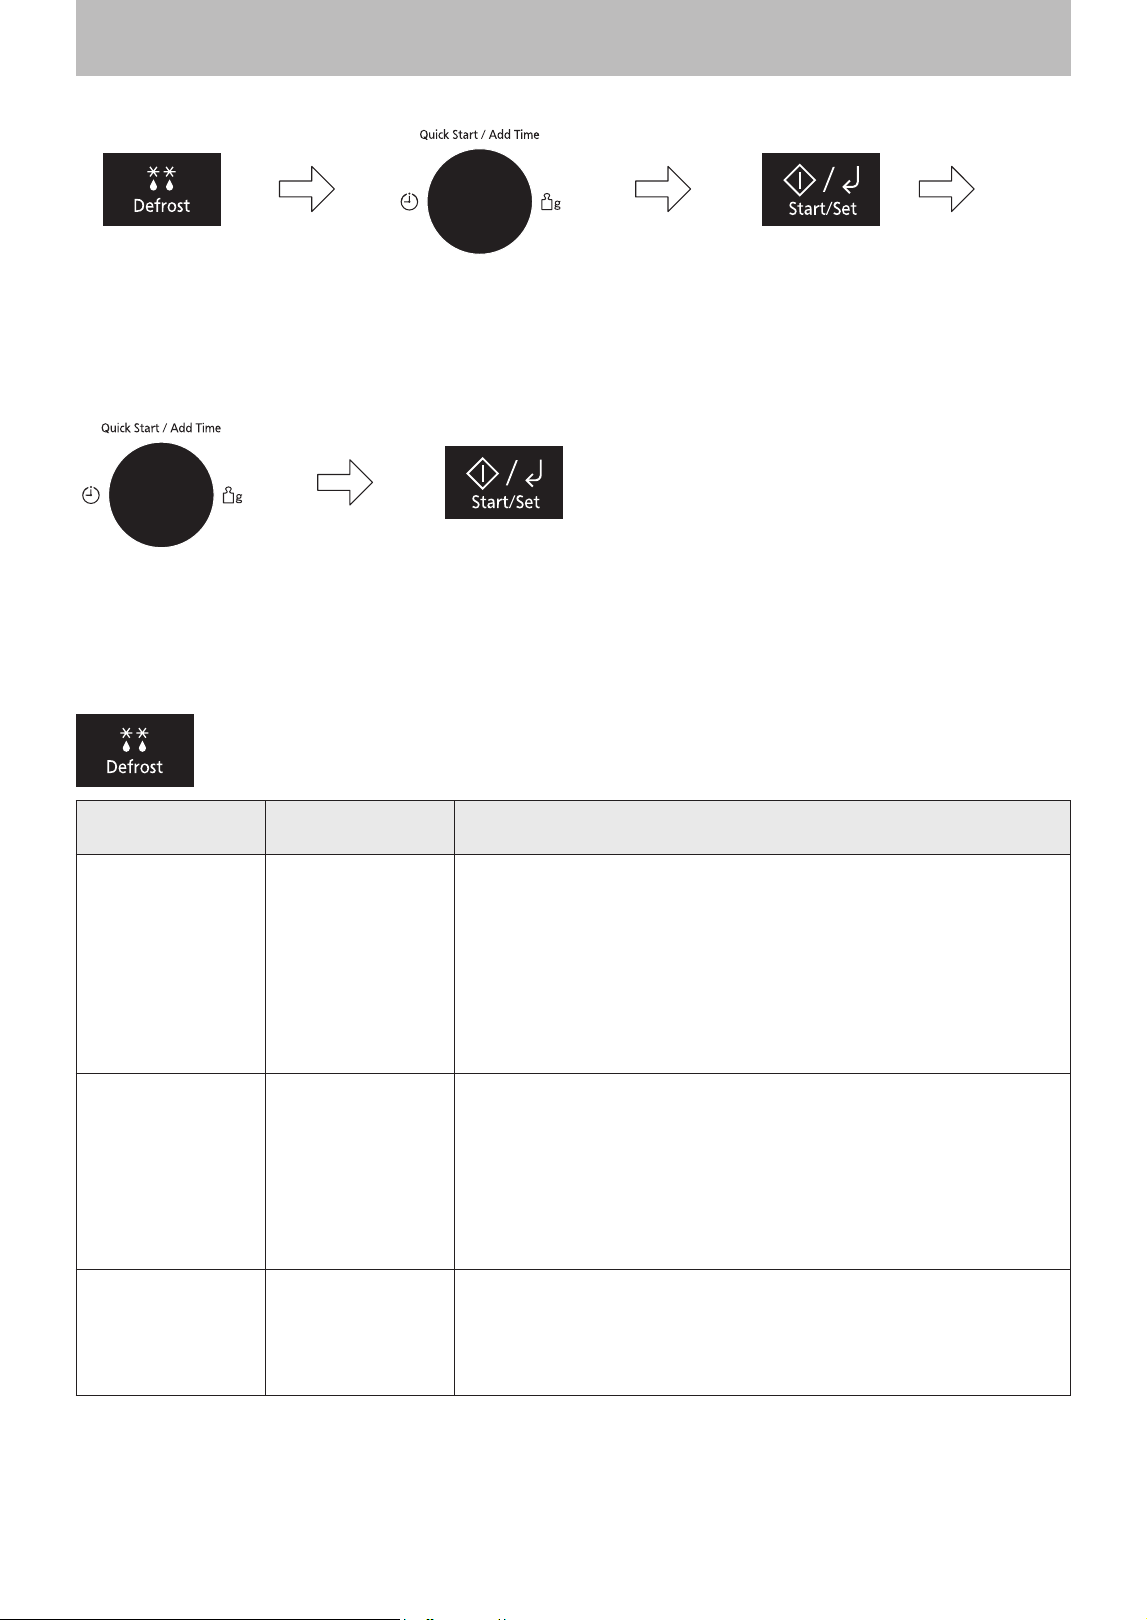
This feature allows you to defrost minced meat, chops, chicken portions, meat joints and bread. Press
Auto Defrost, select the correct defrost category and then enter in the weight of the food in grams (see
page 18).
Food should be placed in a suitable dish, whole chickens and joints of meat should be on an upturned saucer or
on a microwave safe plate. Chops, chicken portions and slices of bread should be placed in a single layer. It is
not necessary to cover the food.
During the programme the oven will beep to remind you to check the food. It is essential that you turn and stir the food
frequently. On hearing the first beep you should turn. On the second beep you should turn the food or break it up.
1st Beep
Turn
2nd Beep
Turn or break up
Notes
1. Check food during defrosting. Food vary in their defrosting speed.
2. It is not necessary to cover the food.
3. Always turn or stir the food especially when the oven “beeps”.
4. Minced meat/chops/chicken portions should be broken up or separated as soon as possible and placed in a single layer.
5. Allow standing time so that the centre of the food thaws out (minimum 1-2 hours for joints of meat and whole chickens).
Auto Defrost
– 18 –
Auto Defrost
(continued)
With this feature you can defrost frozen food according to the weight.
Press Auto Defrost.
Auto programme number
appears in the display.
Select the desired Auto defrost
Programme by turning the dial.
( You can also press Auto Defrost
repeatedly to select the Auto
defrost Programme.)
Set the weight of the frozen
food by turning the dial.
The wight counts up/down in
10
g
increments.
Press Start/Set to
confirm the setting.
Press Start/Set.
Remember to stir or turn the food
during defrosting.
Category Min/Max Weight Suitable Food
1. Bread 100-800
g
For small items which are required for immediate use, they may feel
warm straight after defrosting. Press Auto Defrost, select programme
1 using the dial, then press Start/Set. Enter weight using dial, then
press Start/Set. Turn at beeps. Loaves can also be defrosted on this
programme but these will require standing time to allow the centre
to thaw out. Standing time can be shortened if slices are separated
and buns and loaves cut in half. This programme is not suitable for
cream cakes or desserts e.g. cheesecake. See “Defrosting charts”
on page 24 for standing time.
2. Meat Items 150-1000
g
Not suitable for sausages, which can be defrosted manually using
defrost power and time. Press Auto Defrost, select programme 2
using the dial, then press Start/Set. Enter weight using dial, then
press Start/Set. Turn at beeps. Chops and chicken portions should
be arranged in a single layer. It is necessary for mince to be broken
up frequently during defrosting and this is best carried out in a large
shallow dish. See “Defrosting charts” on page 24 for standing
time.
3. Meat Joints 400-2000
g
For defrosting a big piece of meat, whole chicken, meat joints. Press
Auto Defrost, select programme 3 using the dial, then press Start/
Set. Enter weight using the dial, then press Start/Set. Turn at beeps.
Standing time of at least 1 hour should be allowed for joints after
defrosting. See “Defrosting charts” on page 24 for standing time.
– 19 –
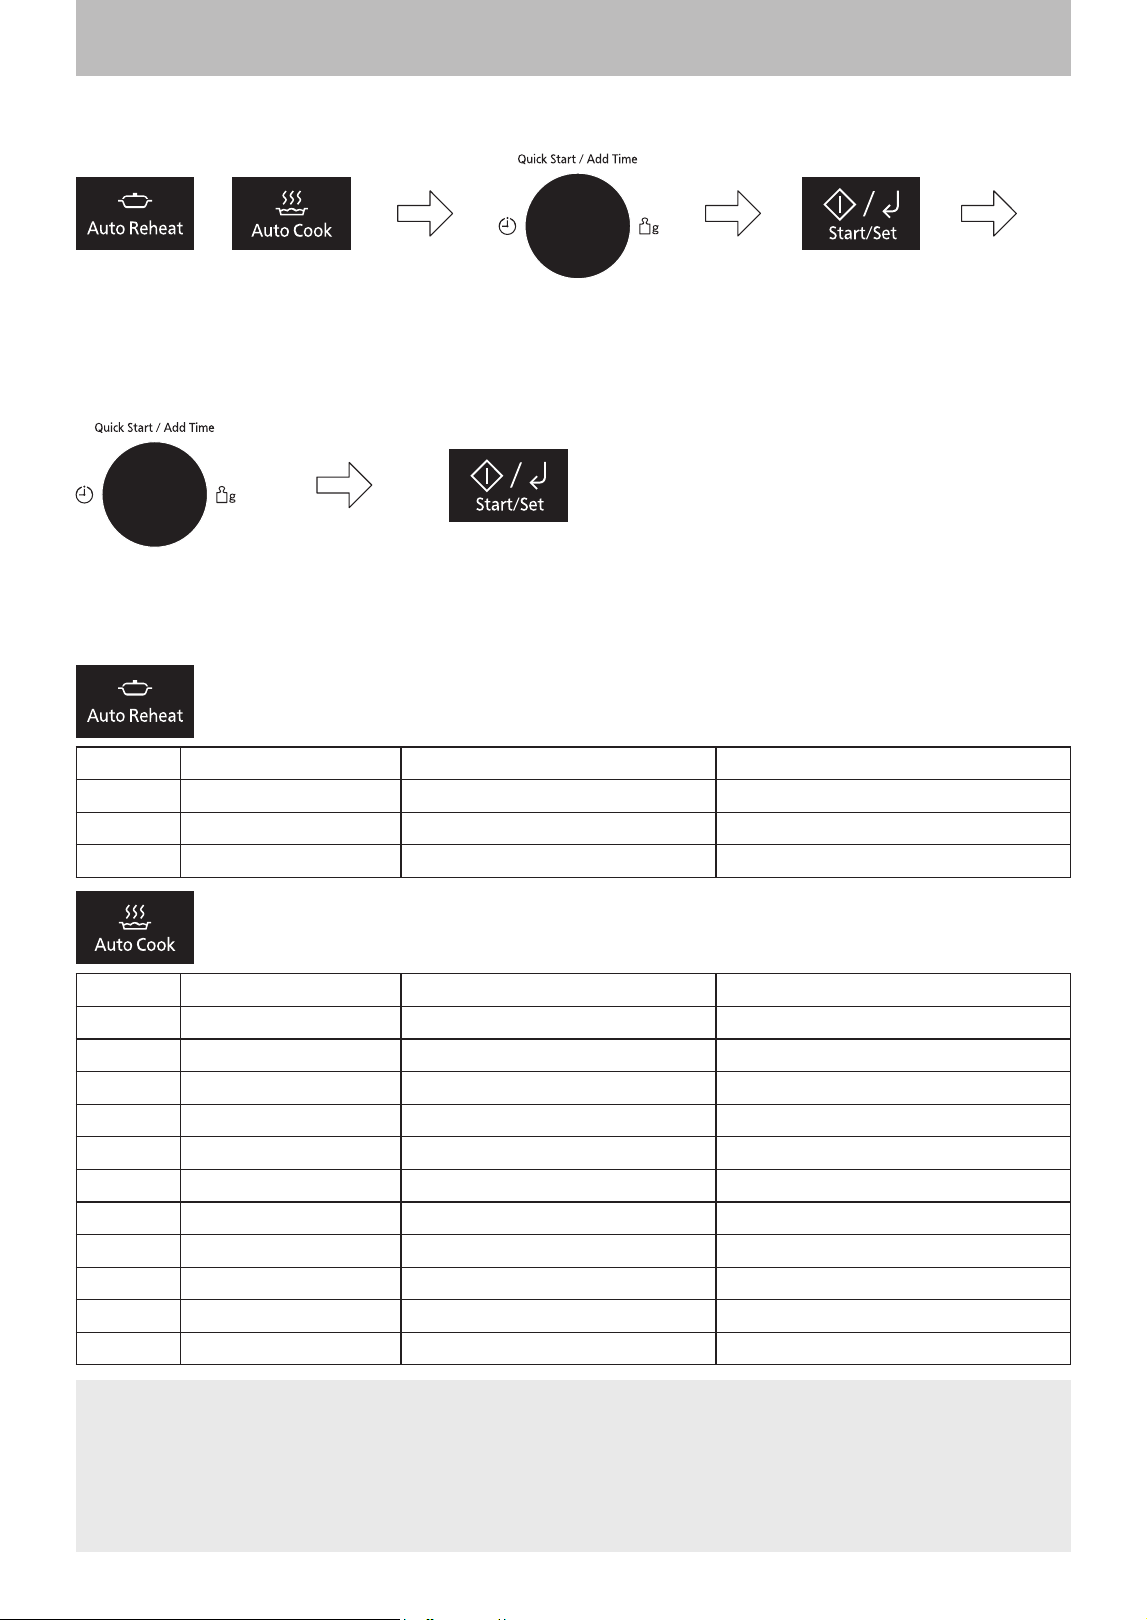
Auto Reheat/Cook
This feature allows you to cook/melt/soften foods without selecting times and Power Level. Only set desired
menu number and Weight, the oven will cook/melt/soften your food automatically.
Press Auto Reheat or Auto Cook.
Auto programme number appears
in the display.
Select the desired Auto menu
Programme by turning the dial.
( You can also press Auto Reheat
or Auto Cook repeatedly to select
the Auto menu Programme.)
Set the weight of the food by
turning the dial.
The wight counts up/down in
10
g
increments.
Press Start/Set to
confirm the setting.
Press Start/Set.
or
Menu No. Category Min/Max Weight Recommended containers
4 Chilled Soup 150-600
g
microwave safe cup or bowl
5 Chilled Meal 200-800
g
microwave safe dish with plastic wrap
6 Frozen Meal 200-500
g
microwave safe dish with plastic wrap
Menu No. Category Min/Max Weight Recommended containers
7 Fresh Vegetables 200-800
g
casserole with lid
8 Fresh Fish 200-800
g
microwave safe dish with plastic wrap
9 Jacket Potatoes 200-1400
g
casserole with lid
10 Casserole Rice 100-300
g
casserole with lid
11 Pasta 150-400
g
casserole
12 Fresh Chicken Pieces 200-800
g
casserole with lid
13 Melt Butter 50-300
g
microwave safe dish with plastic wrap
14 Soften Cream Cheese 50-300
g
microwave safe bowl or dish
15 Soften Ice Cream 300-1200
g
—
16 Melt Chocolate 50-300
g
microwave safe dish
17 Aqua Clean — —
Notes
1. The Auto weight programmes must only be used for foods described.
2. Only cook foods within the weight ranges described.
3. Always weigh the food rather than relying on the package information.
4. Most foods benefit from a standing time, after cooking with an Auto Reheat/Cook Programme, to allow heat
to continue conducting to the centre.

– 20 –
4. Chilled Soup
It is suitable for reheating soup at refrigerator
temperature (5-7 °C). Put soup into microwave safe
cup. Cook without cover. Stir at beep sounds. Stir
before serving.
5. Chilled Meal
Suitable for casseroles, plated dinners, stews,
pasta dishes (except lasagne), and canned food. All
foods must be pre-cooked and reheated from room
temperature or refrigerator temperature. Do not reheat
bread or pastry products; raw; uncooked or frozen
foods; or beverages on this setting. Foods weighting
less than 200
g
and more than 800
g
should be
reheated by Micro Power and Time only.
Foods should be placed in a suitable size microwave
safe bowl and completely covered with plastic wrap.
Add 1-4 tbsp of water for desired. Stir at beep sounds.
At the end of the cooking time, stir and let stand for 3
to 5 minutes.
6. Frozen Meal
To reheat a frozen precooked meal or casserole; All
foods must be pre-cooked and frozen (-18 °C); Cover
with pierced cling film or a lid. Stir at beeps and cut the
blocks into pieces. Stir again at end of the programme
and allow a few minutes standing time. Check
temperature and cook further minutes if necessary
before eating. This programme is not suitable for
portionable frozen foods.
7. Fresh Vegetables
Suitable for cooking a variety of fresh vegetables. All
vegetables should be trimmed or prepared and cut
into even size pieces. Place prepared vegetables into
a suitable size microwave-safe casserole and add 2-4
tbsp of water for desired. Cover with a well fitting lid.
Stir at beep sounds. At the end of the cooking time, let it
covered and stand for 3 to 5 minutes.
8. Fresh Fish
Suitable for cooking whole fish and fish fillets. Select
fish suitable for microwave cooking and place in
a single layer in a shallow microwave safe dish,
with skin-side down. Add 1-3 tbsp (15-45 ml) water
or stock. Overlap thin edges of fillets to prevent
overcooking. If stuffing whole fish with seasoning,
cooking time may need to be extended.
Cover dish with
plastic wrap. Allow large amounts of fish to stand for 3 to 5
minutes after cooking before serving.
9. Jacket Potatoes
For cooking baked potatoes. Choose medium sized
potatoes 200-250
g
each for best results. Wash and
dry potatoes and prick with a fork several times. Place
directly on glass tray around outer edge. After cooking
wrap in aluminium foil and stand for 5 minutes.
10. Casserole Rice
For cooking rice for savoury dishes not rice
puddings (Thai, Basmati, Jasmine, Surinam,
Arborio or Mediterranean rice).
Rinse the rice thoroughly before cooking. Use a
suitable sized microwave safe casserole. Allow at
least ½ depth of volume for evaporation to prevent
boiling over. Add 2 times boiling water to rice. Add salt
if desired. Cover with a lid or pierced cling film. Stir at
the beeps. Allow to stand for 5 minutes after cooking.
This setting is not suitable for cooking brown rice.
11. Pasta
Suitable for cooking a variety of dried pastas.Place
them into a suitable sized microwave safe casserole
with hot tap water. Allow at least ½ depth of volume
for evaporation to prevent boiling over. Add a little oil if
desired. Use the following as a guide:
Dried Pasta
Recommended
Hot tap Water
Dish Size
150
g
4 cups 3 litre
250
g
5 cups 3 litre
400
g
6 cups 3 litre
(It may be necessary to adjust the amount of water to
your personal preference.)
Only cover with lid at stage 1. Do not cook in plastic
containers unless suitable for high temperature
cooking. Stir after beep sounds. Allow pasta to stand
for 5 minutes after cooking if required then drain.
For best results on Auto Reheat/Cook, follow these recommendations:
Auto Reheat/Cook
(continued)

– 21 –
Auto Reheat/Cook
(continued)
12. Fresh Chicken Pieces
It is suitable for cooking chicken pieces such as wings,
drumsticks, thighs, half breasts etc. Chicken pieces
should be thawed completely. Pierce the chicken
pieces well with fork before cooking. Place prepared
chicken pieces in a suitable size microwave safe
casserole. Cover with well fitting lid. Stir after beep
sounds.
Chicken Pieces Recommended Oil
200 g 3 tsp. oil
400 g 4 tsp. oil
600 g 5 tsp. oil
800 g 6 tsp. oil
13. Melt Butter
Remove wrapper, cut butter into 2 tbsp cube, and
place into a microwave safe dish. Melt with lid or
plastic wrap. Stir after cooking.
14. Soften Cream Cheese
Remove wrapper and place in a microwave safe bowl/
dish. Soften without cover.
15. Soften Ice Cream
Soften slightly without lid.
16. Melt Chocolate
Remove wrapper and place chocolate into a
microwave safe dish. Cook without cover. After
heating, stir until completely melted.
Note: Chocolate holds its shape even when softened.
17. Aqua Clean
Cleaning programme. Refer to page 49.
Note
If food needs more time cooking or weight exceeds
range, cook using 300 W for melting and softening.
– 22 –
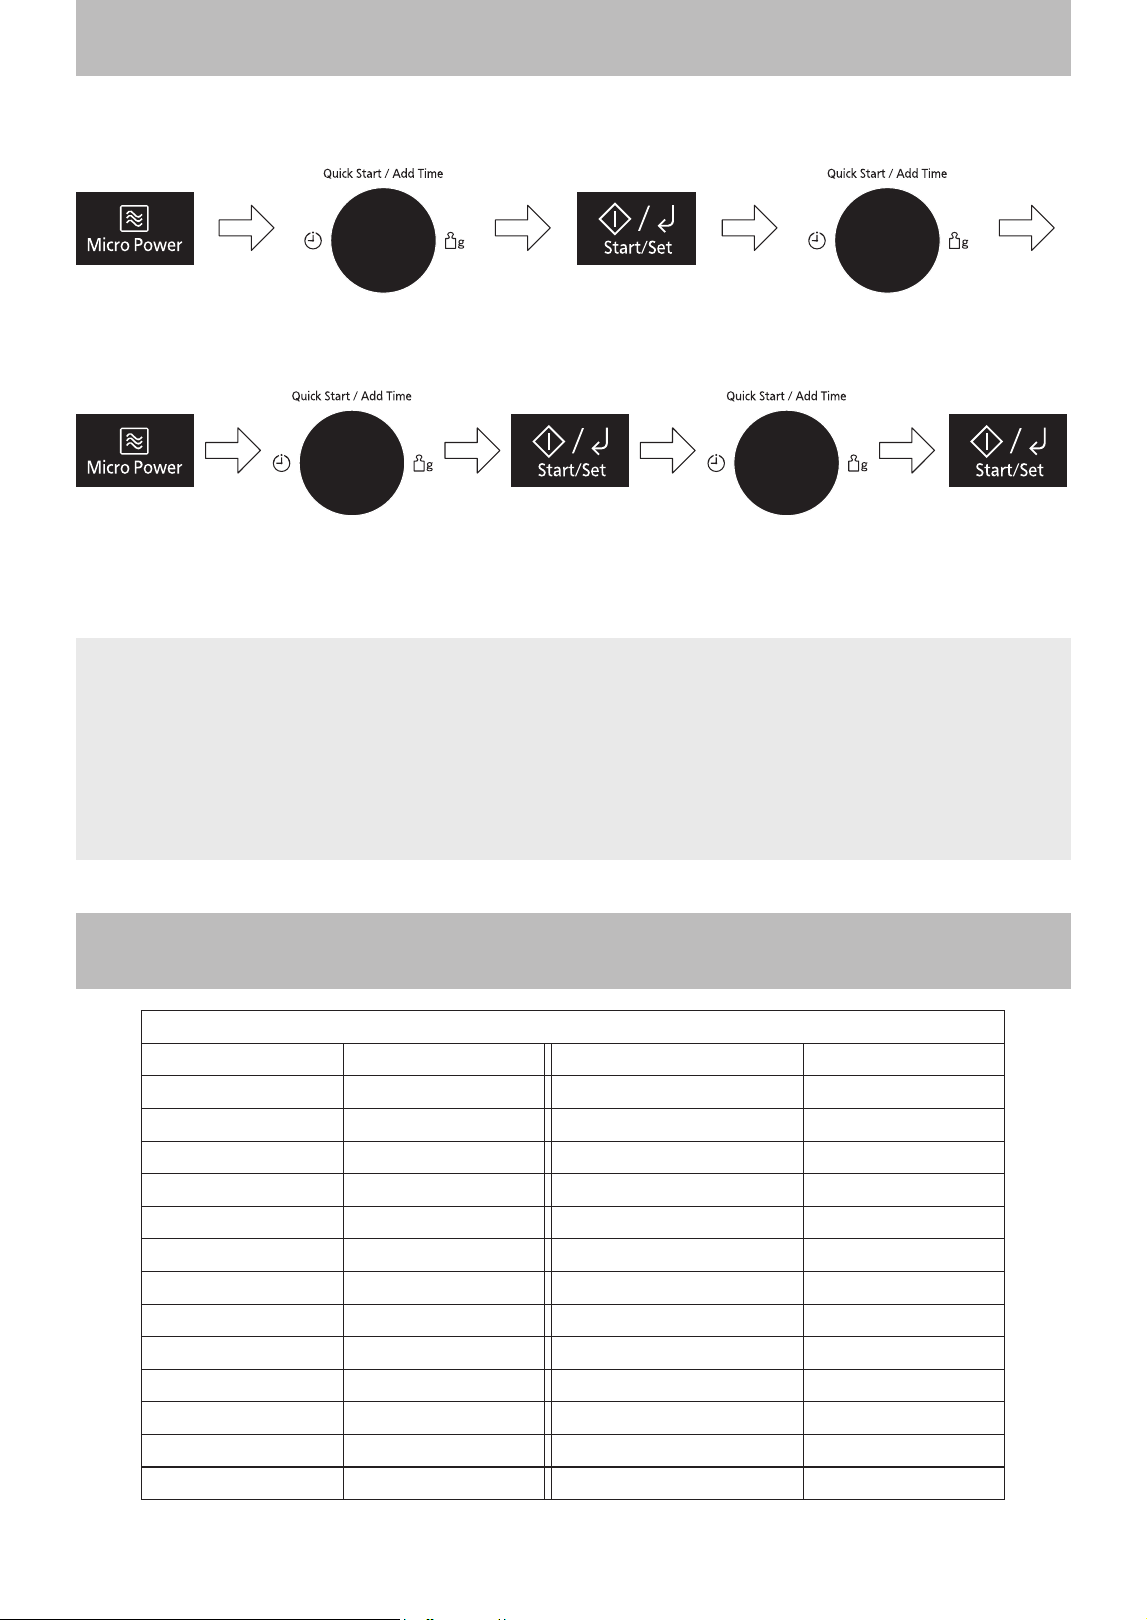
Multi-stage Cooking
INGREDIENT CONVERSION CHART
INGREDIENT CONVERSION CHART
1
⁄
4
cup 60 ml
1
⁄
4
teaspoon 1 ml
1
⁄
3
cup 85 ml
1
⁄
2
teaspoon 2 ml
1
⁄
2
cup 125 ml 1 teaspoon 5 ml
2
⁄
3
cup 165 ml 2 teaspoons 10 ml
3
⁄
4
cup 190 ml 3 teaspoons 15 ml
1 cup 250 ml 1 tablespoon 20 ml
1
1
⁄
4
cups 310 ml 1
1
⁄
2
tbs 30 ml
1
1
⁄
2
cups 375 ml 2 tbs 40 ml
2 cups 500 ml 3 tbs 60 ml
3 cup 750 ml 4 tablespoons 80 ml
3
1
⁄
2
cups 875 ml
4 cups 1 litre
6 cups 1.5 litre
8 cups 2 litre
All recipes are tested using standard measurement that appear in the above chart.
2 or 3 Stage Cooking
Example: To defrost for 2 minutes and cook food on 800 W microwave power for 3 minutes.
Press Micro
Power.
Select the 160 W
microwave power by
turning the dial.
Set the cooking time to
2 minutes by turning
the dial.
Press Start/Set
to confirm the
setting.
Press Micro
Power.
Select the 800 W
microwave power
by turning the dial.
Set the cooking
time to 3 minutes
by turning the dial.
Press Start/
Set to confirm
the setting.
Press Start/Set.
The time in the
display will count
down.
Notes
1. For 3 stage cooking, enter another cooking programme before pressing Start/Set at the end.
2. During operation, pressing Stop/Cancel once will stop the operation.
Pressing Start/Set will re-start the programmed operation. Pressing Stop/Cancel twice will stop and clear
the programmed operation.
3. Auto programmes cannot be used with multi-stage cooking.
4. When operating, 2 beeps will sound between each stage, and 5 beeps will sound after all stages have finished.
5. 1000 W (High) microwave power can be set only once in multi-stage cooking.
– 23 –
To Use Timer
This feature allows you to use the oven as a kitchen timer. It can be also a standing time after cooking is
completed or to programme a delay start.
To Use as a Kitchen Timer.
Press once. Set desired amount of time by
turning the dial.
(up to 95 minutes)
Press Start/Set.
Time will count down
without oven operating.
To Set Standing Time.
Set desired amount of
time by turning the dial.
(up to 95 minutes)
Press Start/Set.
Cooking will start. After
cooking, standing time
will count down without
oven operating.
Press once.
Set the desired
cooking programme.
To Set Delay Start.
Press Start/Set.
Delayed time will
count down without
oven operating. Then
cooking will start.
Set the desired
cooking programme.
Set desired amount of time by
turning the dial.
(up to 95 minutes)
Press once.
Notes
1. If oven door is opened during the Standing Time, Delay Start or Kitchen Timer, the time in the Display
Window will continue to count down.
2. Delay Start and Standing Time cannot be programmed together with Auto Defrost and Auto Menus.
3. Multi-stage cooking can be programmed including delay start cooking or stand time.

– 24 –
The times given below are a guideline only. Always check the progress of the food by opening the oven
door and then re-starting. For larger quantities adjust times accordingly. Food should not be covered
during defrosting.
Food Weight/Quantity Time & Mode Method
Beef/Lamb/Joint (1)(3) 450 g (1 lb) 160 W 9-11 min. standing 30 min.
Steaks (1)(3) 2 pcs 250 g
160 W 4 min. 30 sec. -
5 min. 30 sec.
standing 3 min.
Minced beef (1)(3) 450 g (1 lb) 160 W 9-10 min. standing 5 min.
Stewing steak (1)(3) 450 g (1 lb) 160 W 9-11 min. standing 10 min.
Whole chicken (1)(3) 450 g (1 lb) 160 W 8-10 min. standing 10 min.
Chicken portions (1)(3) 450 g (1 lb) 160 W 9-11 min. standing 5 min.
Whole fish (1)(3) 450 g (1 lb) 160 W 9-11 min. standing 5 min.
Fish fillets (2)(3) 450 g (1 lb) 160 W 8-10 min. standing 5 min.
Prawns (2)(3) 450 g (1 lb) 160 W 7-9 min. standing 5 min.
Fruits, soft (1) 250 g 160 W 5-6 min. standing 2 min.
Margarine (3) 250 g 160 W 1-2 min. standing 2 min.
Cheese (3) 450 g (1 lb) 160 W 5-6 min. standing 2 min.
Plated meals homemade
adult size (2)
350 g 160 W 7-8 min. standing 3-5 min.
Cooked Fruit (2) 540 g 160 W 7-8 min. standing 3-5 min.
Cooked meat (2) 520 g 160 W 9-11 min. standing 3-5 min.
Quiche (3) 1 pc 65 g 160 W 4-5 min. standing 2 min.
Casseroles (1) 750 g 1000 W 6-7 min. standing 3-5 min.
Bread rolls (1) 1 pc 85 g 1000 W 20-30 sec. standing 5 min.
Pastry puff (1) (3) 1 roll 375 g
160 W 5 min. - 5 min. 30
sec.
Stand time 20 min. in
refrig erator
Pastry shortcrust (1) (3) 1 roll 500 g 160 W 7-8 min.
Stand time 20 min. in
refrig erator
Pizza dough (1) (3) 1 ball 240 g
160 W 4 min. 30 sec. - 5
min.
standing 10 min.
Fruit tarte (3) 470 g 160 W 6-7 min. standing 5 min.
Cheese cake (3) 600 g 160 W 5-6 min. standing 5 min.
Fruit pie (3) 500 g 160 W 9-11 min. standing 5 min.
Meat pie (3) 300 g 160 W 7-9 min. standing 3 min.
(1) Turn or stir at half time.
(2) Separate and turn several times.
(3) Remove packaging and place on a heat resistant plate.
Defrosting Chart

– 25 –
The times given in the charts below are a guideline only, and will vary depending on starting temperature,
dish size etc.
Food
Weight/
Quantity
Time & Mode Method
Drinks-Coffee-Milk
Coffee 1 mug 250 ml 1000 W 1 min - 1 min. 30 sec.
Stir before, and after
reheating.
Coffee 2 mugs 500 ml
1000 W 2 min. 30 sec.-
3 min 30 sec.
Milk 1 mug 250 ml
1000 W 1 min 20 sec.-
1 min 30 sec.
Breads
Croissants
2 pcs 200 g 1000 W 10-20 sec.
Place on microwave safe
plate on Glass Tray. Do not
cover. Turn at half time.
4 pcs 400 g 1000 W 20-30 sec.
Rolls
1 pc 1000 W 10-20 sec.
4 pcs 1000 W 20-30 sec.
Naan bread 225 g 1000 W 30-40 sec.
Pitta bread 2 pcs 1000 W 20-30 sec.
Plated meals-Homemade
Vegetables (cooked)
300 g 1000 W 2 min.
Cover. Stir at half time.
700 g 1000 W 5 min.-5 min. 30 sec.
Potato puree 500 g 1000 W 3-4 min.
Rice, quinoa, couscous 300 g 1000 W 2 min.-2 min. 20 sec.
Babyfood 120 g 600 W 30-40 sec.
Canned Food
Baked beans 225 g 1000 W 1 min 30 sec.-2 min.
Place in a microwave safe
bowl on Glass Tray. Cover.
Stir halfway.
Spaghetti in tomato sauce 200 g 1000 W 1 min 30 sec.
Cream of tomato soup 400 g 1000 W 2 min. 30 sec.
Chicken soup 425 g 1000 W 3 min. 30 sec.
Pastry Products
Quiche 400 g 1000 W 2-3 min. Place on microwave safe
plate on Glass Tray. Do not
cover.
Samosas/spring rolls 4 pcs 240 g 1000 W 1-1 min 30 sec.
Purchased Convenience Foods
Cottage pie (chilled) 450 g 1000 W 5-6 min.
Place on microwave safe
plate on Glass Tray. Do not
cover.
Lasagne (chilled) 400 g 1000 W 7-8 min.
Sausage rolls 250 g 600 W 3-5 min.
Reheating Chart

– 26 –
Food Weight/Quantity Time & Mode Method
Beans & Pulses-should be pre-soaked (except lentils)
Chick peas 225 g
1000 W 8 min. then
440 W 35-45 min.
Use 600 ml (1 pt) boiling
water in a large bowl.
Cover. Stir halfway.
Lentils 225 g 440 W 35-40 min.
Red kidney beans 225 g
1000 W 15 min. then 440
W 35-45 min.
Fruit-Peel, slice, chop into even sized pieces. Place in shallow microwave safe dish.
Apples, Rhubarb, stewed 450 g 1000 W 5-7 min. Add 30 ml (2 tbsp.) of
water. Only half fill dish.
Cover. Stir halfway.
Plums-stewed 450 g 1000 W 8-10 min.
Lamb/Beef-from raw-Caution: Hot Fat! Remove dish with care.
Chops 450 g (1 lb)
800 W 4-5 min. then
600 W 2 min 30 sec. -
3 min 30 sec.
Place on heatproof plate.
Turn halfway.
Cutlets 450 g (1 lb) 600 W 10-12 min.
Pasta-Place in a large 3 litre (6 pints) microwave safe bowl
Macaroni 225 g 1000 W 13-15 min. Use 1 litre (1¾ pints)
boiling water. Cover. Stir
halfway.
Spaghetti, Tagliatellie 225 g 1000 W 11-12 min.
Pizza-Fresh chilled- N.B. Remove all packaging. Pizza will have a soft base.
Thin & Crispy 300 g 1000 W 2-3 min. Place on heatproof plate
on Glass Tray. Do not
cover.
Deep pan 450 g 1000 W 4-6 min.
Fish & Shellfish
Whole fish 350 g 600 W 7-8 min.
Place on heatproof dish.
Turn or stir halfway.
Sea scallops 450 g 600 W 8-10 min.
Green prawns 250 g 600 W 4-5 min.
Sausages-from raw-Caution: Hot Fat! Remove dish with care.
Thick 4 pcs 240 g 1000 W 2-3 min.
Place on microwave safe
plate on Glass Tray. Cover.
Turn halfway.
Thin 4 pcs 120 g
1000 W 1 min 30 sec.-
2 min. 30 sec.
Note
Always check that food is piping hot after reheating in the microwave. If unsure, return to oven. Foods will still
require a stand time, especially if they cannot be stirred. The denser the food the longer the stand time.
Cooking Chart

– 27 –
Microwave Recipe Techniques
Microwaves penetrate the surface of the food to a
depth of about two to three centimetres and then
the heat is gradually conducted in a random pattern.
Some parts of food matter cook faster than others.
Special microwave techniques are used to promote
fast and even cooking. Some of these techniques
are similar to those used in conventional cooking, but
because microwaves produce heat very quickly the
following techniques are extremely important. It’s a
must for you to be familiar with the following tips.
Food Characteristics
Size and Quantity
Small portions cook faster than large portions. As
you increase the quantity of food you put into the
microwave oven, you must also increase your cooking
time. The microwave oven has the same power
regardless of quantity; thus the power is divided
between more items and so it takes longer to cook.
As a general guide, if you double the quantity of food
suggested in the recipe, add half the time suggested
again.
Liquid Content
Low moisture foods take a shorter time to cook than
foods with a lot of moisture.
Shape
Uniform sizes cook more evenly. To compensate for
irregular shapes, place thin pieces towards the centre
of the dish and thicker pieces towards the outer edge
of the dish.
Bone and Fat
Bones conduct heat and cause the meat next to
them to be heated more quickly. Large amounts of fat
absorb microwave energy and the meat next to these
areas may overcook.
Starting Temperature
Food which has been sitting at room temperature
takes less time to cook than refrigerated or frozen
food.
Density and Composition
Porous, airy foods (cakes and breads) take less
time to cook than heavy compacted foods (meat and
vegetables). Recipes high in fat and sugar content
cook more quickly.
Techniques for Preparation
Timing
A range of cooking times is given in each recipe for
two reasons. First, to allow for the uncontrollable
differences in food shapes, starting temperatures and
personal preferences. Secondly, these allow for the
differences in electrical voltage input which changes
during peak load periods. Always remember that it is
easier to add time to undercooked food. Once the food
is overcooked, nothing can be done. For each recipe,
an approximate cooking time is given.
Stirring
Stirring is often necessary during microwave cooking.
We have noted when stirring is helpful in the recipes.
Always bring the outside edges towards the centre
and the centre portions to the outside.
Rearranging or Turning
Some foods should be turned in the container during
cooking. For example, because of the different
thicknesses in the breast and back sections of poultry,
it is a good idea to turn poultry over once to ensure
more even cooking.
Rearranging or turning over uneven shaped food in
the dish should be done as suggested to ensure a
satisfactory result. Rearrange small items such as
chicken pieces, prawns, hamburger patties, steak or
chops. Rearrange pieces from the centre to the edge
of the dish.
Cooking in Layers
Cooking in layers is not always successful as it takes
twice as long to cook a single layer and cooking may
be uneven. You can successfully reheat two dinner
plates of food at one time but remember to increase
the reheating time and use a microwave warming
rack.
Piercing of Foods
Pierce the skin or membrane of foods when cooked
whole in the microwave oven. This allows steam to
escape. If the skin has not been pierced, food may
burst.
Cured Meats
Cured meats may overcook in some areas due to the
high concentration of salts used in the curing process.
So take care when cooking different brands of bacon
as cooking times may vary slightly.

– 28 –
Microwave Recipe Techniques
(continued)
Covering
Covering food minimizes the microwave cooking time.
Because microwave cooking is done with time and not
direct heat, the rate of evaporation cannot be easily
controlled. However, this can be corrected by using
different materials to cover dishes. Plastic wrap is the
best substitute for a lid as it creates a tighter seal and
so it retains more heat and steam. Wax paper and
paper towels hold the heat in but not the steam. These
materials also prevent splattering. Use a paper towel,
wax paper or no cover when steam is not needed for
tenderising.
Browning
Meats and poultry, when cooked longer than 10 to 15
minutes, will brown from their own fat. Foods cooked
for shorter periods of time can be aided with the help
of a browning sauce, worcestershire sauce or soy
sauce. Simply brush one of these sauces over meat
or poultry before cooking. Baked goods do not need
long cooking time and therefore, do not brown. When
cakes or cupcakes are iced, no one will notice the
visual difference. For cakes or cupcakes, brown sugar
can be used in the recipe in place of caster sugar or
the surface can be sprinkled with dark spices before
baking.
Standing Time
The moisture molecules continue to vibrate in the food
when the microwave oven has turned itself off. After
all, the molecules were vibrating at 2,450,000,000
times per second during cooking. So cooking
continues even after the food is no longer being
exposed to the microwaves whether in or outside your
microwave oven.
Standing time refers to the time it takes (after the
microwave time is completed) to allow the interior of
the food to finish cooking.
The amount of standing time varies with the size
and density of the food. In meat cookery, the internal
temperature will rise between 5°C and 10°C if allowed
to stand covered for ten to fifteen minutes. Rice and
vegetables need shorter standing time, but this time
is necessary to allow foods to complete cooking in the
centre without overcooking on the edges.
The power level used in microwave cooking also
determines the standing time. For example, when
using a lower power level the standing time is shorter
because of a lower concentration of heat in the food.
Foods should always be kept covered while standing
in order to retain the heat. If a longer standing time is
required (while you cook another food to serve with
the first, for instance), cover with aluminum foil.
Converting Your Favourite Conventional
Recipes for Microwave Cooking
When adapting conventional recipes for microwave
cooking, times are reduced considerably.
For example, a chicken which takes 1 hour to cook in
a moderate oven will take 20 to 30 minutes on 600 W
in your microwave oven.
Use similar microwave recipes to help you adapt
conventional recipes. Remember, it is always best to
undercook a recipe and then add an extra minute or
two to finish it off.
Here are some other tips that may help:
• Reduce liquids in a conventional recipe by one half
to two thirds, e.g. 1 cup (250 ml) should be reduced
to
1
⁄
2
cup (125 ml).
• Add more thickening such as flour or cornflour to
sauces and gravies if you do not reduce the liquid.
• Reduce seasonings slightly in a recipe where
ingredients do not have time to simmer by
microwave.
• Do not salt meats, poultry or vegetables before
cooking; otherwise, they will toughen and dry out.
• If one ingredient takes longer to cook than the
others, precook it in the microwave oven first.
Onion, celery and potato are examples.
• When cooking meat or vegetables, omit any oil or
fat that would have been used for browning in a
conventional recipe.
• Reduce leavening agents for cakes by one quarter
and increase liquids by one quarter.
• Biscuits require a stiff dough. Increase flour by about
20 percent. Substitute brown sugar for white sugar
and use biscuit recipes that have dark spices or
require icing. Because of the short cooking time,
biscuits don’t have to brown. Chill dough for half an
hour before baking. This produces a crisper biscuit.
Bake biscuits on a Glass Tray lined with greaseproof
paper.
• Since microwaves penetrate foods about two
centimetres from the top, bottom and sides, mixtures
in round shapes and rings cook more evenly.
Corners receive more energy and may overcook.
• Items with a lot of water, such as rice and pasta,
cook in about the same time as they would on
a conventional stove. (Refer to Rice and Pasta
chapter.)
Select recipes that convert easily to microwave
cooking such as casseroles, stews, baked chicken,
fish and vegetable dishes. The results from foods such
as grilled meats, cooked souffles or two-crust pies
could be less than satisfactory. Never attempt to deep
fry in your microwave oven.

– 29 –
Microwave Recipe Techniques
(continued)
Menu Planning for Microwave Cooking
How to Keep Everything Hot at The Same Time
Plan your meals so that the food will not all need last
minute cooking or attention at the same time. The
special features of microwave cookery make it easy
to serve meals with everything piping hot. Cooking of
some foods may be interrupted while you start others,
without harming the nutritional value or flavour of
either.
A recipe which requires standing time can be
microwaved first and another food cooked while it
stands. Dishes prepared in advance can be reheated
briefly before serving.
It does take some experience and time to cook with
confidence. Microwaves are fast so you will have to do
some experimenting. You might find you will use your
conventional range in conjunction with your microwave
oven. For example, while cooking the roast in the
microwave oven, you can be cooking the vegetables
and gravy on the range top. This can also be done the
other way around. Prepare your meals as follows.
1. Firstly, cook the most dense item (roast or
casserole). Drain and retain meat juice from joints
then cover with foil.
2. Cook the potatoes, rice or pasta.
3. Cover with foil for standing.
4. Cook greens and other vegetables.
5. Cover with foil for standing.
6. Cook the gravy with the retained meat juices, stock
and thickening.
7. Carve the roast and serve the vegetables and
gravy.
While you are learning to plan meals, you may get a
bit behind time. Don’t worry. Dinner servings may be
suitably reheated on 800 W, for 1 to 2 minutes per
serving.
If you prefer not to use foil, cover food with saucepan
lids. A metal lid will retain the heat for at least 15
minutes.
Meanwhile, how can you cook all the vegetables at
the same time? Simply place potatoes and pumpkin in
one dish and less dense vegetables such as broccoli,
cabbage, cauliflower, beans and peas in another.
Sprinkle greens with water. Cover with a lid or plastic
wrap. Cook on 1000 W for approximately 6 to 8
minutes for a serving for four people. Remember, if
you increase the quantity of vegetables, increase the
cooking time. Fresh and frozen vegetables can be
mixed on a vegetable platter, but remember the latter
are not as dense as fresh vegetables, as they have
been blanched before freezing.
If vegetables are cut to a similar size, they can be
cooked in separate ramekins or small dishes at the
same time.
Increasing & Decreasing Recipes
Increasing
• To increase a recipe from 4 to 6 servings, increase
each ingredient listed by half.
• To increase a recipe from 4 to 8 servings, double
each ingredient listed.
• For larger quantities of a recipe, a large dish should
be used. Make sure that the dish is deep enough to
prevent the recipe from boiling over during cooking.
• Make sure to cover, stir or rearrange food as directed
in the recipe and always check the food during
cooking.
• Increase standing times by 5 minutes per 500
g
.
• Use the same Power Level recommended in the
original recipe.
• Increase the cooking times by:
1
⁄
3
of original cooking
time for 6 servings; and an extra
1
⁄
2
of original
cooking time for 8 servings.
Decreasing
• To decrease a recipe from 4 to 2 servings, decrease
each ingredient listed by half.
• For small quantities, a small dish should be used.
Make sure that the dish is large enough to prevent
the recipe from boiling over during cooking.
• Use the same Power Level recommended in the
original recipe.
• Decrease the cooking times by
1
⁄
2
to
2
⁄
3
of the original
cooking time.
Cooking for One
• To decrease a recipe from 4 to 1 serving, quarter
each ingredient listed.
• A smaller dish should be used, making sure that the
dish is still large enough to prevent the recipe from
boiling over.
• Use the same Power Level recommended in the
original recipe.
• Quarter the original cooking times, then add extra
time, if needed.
• Make sure to cover, stir or rearrange food as directed
in original recipe and always check the food during
cooking.
Converting Recipes from Other Sources
When the recipe is written with a wattage different than
your oven, adjust the cooking time by approximately
10% per 100 watts, e.g. 10 minutes would be adjusted
by 1 minute. Alternately, adjust the power level by
one level. If your wattage is higher than the recipe:
(1) Adjust time downward or (2) Adjust power level
downward. If your wattage is lower than the recipe:
(1) adjust time upward or (2) adjust power level
upward (when possible).

– 30 –
Basic Recipes
G
RANOLA
C
EREAL
Makes: approximately 4 cups
Ingredients:
2 cups oats
2
⁄
3
cup chopped nuts
1
⁄
3
cup wheat germ
1
⁄
4
cup brown sugar
1
⁄
4
cup honey
1 teaspoon vanilla essence
1
⁄
3
cup raisins
1
⁄
3
cup coconut
Method:
1. Place oats in 3-litre casserole dish, cook on
1000 W for 1 to 2 minutes, stirring twice.
2. Add nuts, wheat germ, and brown sugar. Stir in
honey and vanilla. Cook on 1000 W for 2 to 4
minutes, stirring twice during cooking.
3. Add raisins, coconut and allow to cool. Stir to a
crumble texture. Store in an airtight container.
T
OMATO AND
O
NION
Serves 4
Ingredients:
approx. 3 tomatoes, thinly sliced
1 onion, thinly sliced
1
⁄
2
teaspoon basil
salt and pepper to taste
Method:
1. Place all ingredients into 2-litre casserole dish.
2. Cook, covered, on 1000 W for 5 to 7 minutes.
Serve with barbequed steak or grilled meat.
S
CRAMBLED
E
GGS
Serves: 2
Ingredients:
4 x 61
g
eggs
4 tablespoons milk
pinch of salt
Method:
1. In a 2-litre casserole dish, beat eggs lightly
with whisk. Add milk and salt. Whisk until well
combined. Cover dish with plastic wrap and cook
on 600 W for 2 minutes.
2. Stir eggs and cook for further 1
1
⁄
2
to 2 minutes.
Stand, covered, for 1 minute before serving.
HINT:
TO COOK BACON RASHERS:
Place bacon between 2 sheets of paper towel on a
pie plate and cook on 1000 W for 2 to 3 minutes.
HINT:
TO COOK PAPPADUMS:
Place on paper towel lined microwave safe plate.
Cook on 1000 W for 10 to 20 seconds for each
pappadum, turning halfway through cooking. Allow
to stand 1 minute before serving.
L
EMON
LI
ME
C
ORDIAL
Makes:approximately 800 ml of undiluted cordial
Ingredients:
5 large lemons
3 limes
2 cups sugar
1 cup water
1 teaspoon citric acid
Method:
Squeeze juice from lemons and limes. Place in a 2 litre
casserole dish with the remaining ingredients. Cook
on 1000 W for 8 to 10 minutes. Stir every 2 minutes
during this cooking time to dissolve sugar. Cook on
1000 W for 15 to 20 minutes, or until the mixture has
become a syrupy consistency. Set aside to cool. Pour
into bottles and seal. Store in the refrigerator and
serve with cold water, soda or mineral water and fresh
mint leaves if desired.
G
RAVY
Makes: 2 cups (500 ml)
Ingredients:
2 tablespoons dripping or pan juice
1 small onion, finely chopped
2 tablespoons flour
1 tablespoon tomato paste
1
1
⁄
2
cups beef stock, divided
salt and pepper
Method:
1. Place dripping or pan juices and onion in a 1-litre
jug. Cook on 1000 W for 2 to 3 minutes.
2. Add flour, tomato paste and half of the beef stock.
Stir well. Cook on 1000 W for 2 minutes. Add
remaining stock.
3. Stir well and cook on 1000 W for a further 2
minutes. Season with salt and pepper. Serve with
the meat of your choice.
B
ASIC
W
HITE
S
AUCE
Makes: 1 cup
Ingredients:
2 tablespoons butter
2 tablespoons flour
salt and white pepper
1
1
⁄
4
cups milk
Method:
1. Place butter in a 4-cup jug. Cook on 1000 W for 30
to 40 seconds.
2. Stir in flour, salt and pepper. Gradually add milk,
stirring until smooth.
3. Cook on 1000 W for 3 to 4 minutes, stirring twice.
Tip: For cheese sauce, stir in
1
⁄
2
cup grated cheese
once sauce has thickened.
HINT:
TO DRY FRESH BREADCRUMBS:
Place 1 cup (250 ml) of breadcrumbs on the base of
plate and heat on 1000 W for 2 to 3 minutes, stirring
once during heating.

– 31 –
Soups and Snacks
C
HICKEN AND
P
RAWN
L
AKSA
Serves: 2
Ingredients:
Soup:
1 tablespoon laksa paste
200 ml coconut milk
500 ml chicken stock
1
⁄
2
tablespoon soy sauce
fresh ground black pepper
Laksa:
125 g
rice noodles
4 cups boiling water
1
⁄
2
bunch coriander, leaves chopped
2 small red chillies, seeds removed
and finely chopped
1
⁄
4
cup bean sprouts
2 lime wedges
1
⁄
2
tablespoon peanut oil
200
g
cooked chicken tenderloins, sliced
6 green king prawns, peeled
Method:
Soup:
Place the laska paste, coconut milk, stock, soy sauce
and pepper into a 2-litre dish and cook covered on
1000 W for 8 to 10 minutes.
Laksa:
Place the noodles and water in a 3-litre casserole dish.
Cover and cook on 1000 W for 2 to 3 minutes, stirring
halfway through. Drain well and divide between 2
deep bowls. Place the coriander, chillies, bean sprouts
and lime on top. Place the peanut oil and prawns in
a 500 ml dish and cook on 600 W for 3 to 4 minutes,
stirring halfway through. Add the chicken and prawns
to each individual bowl and set aside.
To serve:
Heat soup on 1000 W for 1 min. - 1 min. 30 sec. Pour the
hot soup over the ingredients in the 2 bowls and serve.
Z
UCCHINI
S
LICE
Serves: 2 to 3
Ingredients:
2 rashers bacon, diced
1
⁄
2
onion, diced
1 cup grated zucchini
1 cup grated carrot
1
⁄
2
cup grated tasty cheese
1
⁄
2
cup self raising flour
3 eggs, lightly beaten
60 ml vegetable oil
1
⁄
2
tablespoon fresh chopped parsley
salt and pepper
Method:
Lightly grease a 20 cm square microwave safe dish.
Place bacon and onion in a 1.5-litre casserole dish
and cook on 1000 W for 2 to 3 minutes. Allow to cool
slightly. Stir in zucchini, carrot and cheese and flour. In
a 1-litre bowl whisk together eggs, oil and parsley. Add
to bacon mixture season with salt and pepper and stir
until combined. Pour into prepared dish. Cook on
600 W for 30 to 35 minutes.
N
ACHOS
S
UPREME
Serves: 4 to 6
Ingredients:
500
g
topside mince
35
g
packet taco seasoning mix
1
⁄
3
cup tomato paste
1 teaspoon Mexican chilli powder
310
g
red kidney beans, mashed in liquid
180
g
packet corn chips
1 avocado
1
⁄
2
cup sour cream
1
⁄
2
cup grated cheese
paprika
Method:
Place meat in a 2-litre casserole dish. Cover and cook
on
1000 W for 6 to 8 minutes, stirring halfway through. Mix
with fork, breaking up any large pieces of meat. Add taco
mix, tomato paste, chilli powder and kidney beans. Cook
on 600 W for further 10 minutes, stirring halfway through
cooking. Place corn chips in a microwave suitable
serving dish. Pile meat sauce in the centre. In a small
bowl, mash avocado and mix in sour cream. Spoon this
mixture over meat sauce and top with grated cheese.
Sprinkle with paprika. Heat on 600 W for 3 to 4 minutes.
N
UTS AND
B
OLTS
Serves: 6 to 8
Ingredients:
80
g
butter
2 teaspoons curry powder
2 tablespoons worcestershire sauce
1
⁄
2
teaspoon salt
1
⁄
4
teaspoon garlic powder
100
g
packet mixed rice crackers
100
g
fried noodles
200
g
salted peanuts
125
g
packet pretzel sticks
1
⁄
2
cup Nutri-Grain
Method:
Place butter, curry, worcestershire sauce, salt and
garlic powder in a 3-litre casserole dish. Cook on
1000 W for 2 to 3 minutes. Add remaining ingredients,
mix well and cook on 1000 W for 4 to 5 minutes. Stir
twice through cooking. Allow to cool. Place in a bowl
and serve with drinks. Store in an airtight container
once cool.

– 32 –
Soups and Snacks
(continued)
P
UMPKIN
S
OUP
Serves: 4
Ingredients:
1
kg
pumpkin diced
1 onion, diced
2 cups chicken stock
1 teaspoon curry powder
pepper
Method:
Place pumpkin and onion in a 3-litre casserole dish.
Cover and cook on 1000 W for 12 to 14 minutes. Add
chicken stock, curry powder and pepper. Cook on
1000 W for 10 minutes. Cool slightly. Purée pumpkin
and liquid in blender or food processor. Pour into
individual serving dishes and garnish with chives.
S
HORT AND
L
ONG
S
OUP
Serves: 2
Ingredients:
100
g
fresh singapore noodles
6 (100
g
) frozen mini dim sims
2 green onions, sliced
500 ml chicken stock
1
⁄
2
teaspoon crushed garlic
1
⁄
4
teaspoon chopped ginger
1 tablespoon soy sauce
1
⁄
2
chicken breast, cooked and sliced
2 baby bok choy, quartered
1
⁄
2
cup bean sprouts
1 tablespoon dried onion (optional)
Method:
Place all ingredients except bok choy and bean
sprouts in a 2 litre casserole dish and cook on 1000 W
for 8 to 10 minutes. Add bok choy and cook on
1000 W for 3 to 4 minutes. Serve in individual bowls
topped with bean sprouts and onion.
HINT:
To cook 1 chicken breast. Place onto a dinner plate.
Cover and cook on 600 W for 4 to 5 minutes.
P
EA AND
H
AM
S
OUP
Serves: 3
Ingredients:
1
1
⁄
4
cups green split peas
425 g
smoked ham hock
1
⁄
2
medium onion, chopped
1
⁄
2
tablespoon fresh thyme leaves
1
⁄
2
bay leaf
3 cups chicken stock
1
⁄
4
cup frozen peas
Method:
Wash split peas and place in a 1.5-litre capacity bowl
with 500 ml of water. Cover and allow soaking for 8
hours or overnight. Remove rind from ham hock and
discard. Cut meat away from the bone and roughly
chop. Reserve bone. Drain peas and place into a
3- litre casserole dish. Add ham bone, chopped ham,
onion, thyme, bay leaf and chicken stock. Cook
uncovered on 1000 W for 10 minutes. Reduce power
to 600 W and cook for 10-15 minutes. Skim top of
soup and cook on 600 W for a further 30-40 minutes.
Remove ham bone and bay leaf and stir in frozen
peas. Cook on 600 W for 5-10 minutes. Blend half
the soup and return to the bowl, stirring through the
remaining soup. Serve hot with crusty bread.
Tip:
Substitute 250
g
bacon bones and 125
g
of diced
bacon rashers for the ham hock.
Do not add salt when cooking lentils or pulses, as they
will toughen. Add salt after cooking if desired.
P
OTATO AND
L
EEK
S
OUP
Serves: 2 to 3
Ingredients:
400
g
potatoes, peeled and diced
3
⁄
4
cup thinly sliced leeks
1 teaspoon fresh thyme
pepper
1 cup chicken stock
75 ml cream
Method:
Place potatoes, leeks, thyme and pepper in 2-litre
casserole dish. Cover and cook on 1000 W for 8-10
minutes. Stir in chicken stock. Cover and cook on
1000 W for 14 to 16 minutes. Purée soup mixture. Stir
in cream and serve hot or cold in individual bowls.

– 33 –
Fish and Shellfish
Directions for Cooking Fish and Shellfish by Micro Power
Clean fish before starting the recipe. Arrange fish
in a single layer, do not overlap edges. Prawns and
scallops should be placed in a single layer.
Cover dish with plastic wrap. Cook on the power level
and for the minimum time recommended in the chart
below. Halfway through cooking rearrange or stir
prawns or scallops.
Cooking Fish and Shellfish by Micro Power
FISH OR SHELLFISH AMOUNT POWER
APPROX. COOKING TIME
(in minutes)
Fish Fillets 500
g
600 W 6 to 8
Scallops (sea) 500
g
600 W 6 to 8
Green Prawns medium size
(shelled and cleaned)
500
g
600 W 6 to 8
Whole Fish
(stuffed or unstuffed)
500
g
to 800
g
600 W 8 to 10
L
EMON
P
EPPER
F
ISH
Serves: 2
Ingredients:
300
g
fish fillets
1
⁄
4
cup lemon juice
1 teaspoon black pepper
Method:
1. Place fish fillets, lemon juice and black pepper in a
2-litre casserole dish.
2. Cover with plastic wrap and cook on 600 W for 4 to
6 minutes.
3. Let stand for 3 minutes before serving.
S
WEET
S
CALLOP
S
TIR
F
RY
Serves: 2 to 4
Ingredients:
1 tablespoon oil
1 onion, quartered
1
⁄
2
teaspoon crushed garlic
1
⁄
2
red capsicum sliced
2 sticks celery sliced
2 tablespoons sliced water chestnuts
100
g
snow peas
1 tablespoon honey
1 tablespoon sweet chilli sauce
1 tablespoon chopped coriander
500
g
scallops
Method:
1. Place oil, onion and garlic into a 2-litre dish. Cook
on 1000 W for 1-2 minutes.
2. Add remaining ingredients and cook on 1000 W for
5-7 minutes, stir halfway through cooking.
3. Serve immediately.
G
ARLIC &
C
HILLI
P
RAWNS
Serves: 2 to 3
Ingredients:
500
g
medium uncooked king prawns
1
⁄
2
small red onion, thinly sliced
20
g
butter
1
1
⁄
2
garlic cloves, crushed
1 fresh bird’s eye chillies,
deseeded & finely chopped
1
⁄
4
small red capsicum, finely sliced
50
g
snow peas, trimmed
1
⁄
2
tablespoon lemon juice
40 ml thickened cream
1 tablespoon coriander leaves, chopped
Cooked jasmine rice, to serve
Method:
Peel and de-vein prawns leaving tails in tact, set
aside. Place onion, butter, garlic and chilli into a 2 litre
casserole dish. Cook on 1000 W for 1 to 2 minutes,
stir halfway through cooking. Add prawns and mix
to combine. Cook on 800 W for 3 minutes. Stir in
capsicum and snow peas, cover and cook on
800 W for a further 3 minutes. Stir through lemon
juice, cream and coriander, season and cook on 1000
W for 1 minute. Serve immediately with cooked rice.

– 34 –
Fish and Shellfish
(continued)
S
PICED
W
HOLE
B
REAM
Serves: 2
Ingredients:
2 x 400
g
whole bream
1 clove garlic
3 stalks coriander
1 red birds eye chilli
1 tablespoon freshly chopped ginger
1 tablespoon lime juice
2 teaspoons fish sauce
2 teaspoons brown sugar
2 green onions, sliced
Method:
Clean and scale fish, set aside. Process remaining
ingredients in a food processor to form a paste. Rub
the spice paste into the fish and place them in a
microwave safe dish. Cook on 600 W for 12 to 15
minutes.
S
ALMON
M
ORNAY
Serves: 4
Ingredients:
40
g
butter
1 onion, diced
1
⁄
4
cup flour
1 tablespoon chopped fresh parsley
pepper
1
⁄
2
teaspoon prepared mustard
1
1
⁄
2
cups milk
440
g
can salmon and liquid
1
⁄
2
cup fresh bread crumbs
1
⁄
3
cup grated cheese
Method:
Place butter and onion in a 4-cup jug. Cook on
1000 W for 1 minute. Add flour and cook on
1000 W for 1 minute. Add parsley, pepper, mustard
and gradually blend in milk. Cook on 1000 W for 2
to 3 minutes, stir halfway through cooking. Lightly
mix through salmon and liquid into sauce. Pour into
serving dish and top with bread crumbs and cheese.
Cook for further 4 to 5 minutes on 1000 W.
G
ARLIC
P
RAWNS
Serves: 2
Ingredients:
60
g
butter
2 clove garlic, crushed
1 tablespoon lemon juice
1 tablespoon chopped parsley
500
g
peeled green prawns
Method:
Place butter and garlic in a 2-litre dish and cook on 1000
W for 30 to 50 seconds. Add lemon juice, parsley and
prawns, cover with plastic wrap, cook on 600 W for 6
to 8 minutes, stirring halfway through cooking. Serve in
individual ramekins.
S
ALMON
S
TEAKS WITH
L
IME
B
UTTER
Serves: 4
Ingredients:
30
g
butter
1 clove garlic, crushed
1 teaspoon grated fresh ginger
1 teaspoon grated lime rind
2 tablespoons lime juice
1
⁄
2
teaspoon sugar
500
g
salmon, steaks
Method:
Place butter, garlic, ginger, lime rind, juice and sugar
in a shallow dish. Cook on 800 W for 1 to 2 minutes.
Stir halfway through cooking. Add salmon steaks and
coat with sauce. Cover and cook on 600 W for 8 to10
minutes. Stand for 2 to 3 minutes before serving.
O
YSTER
S
OUP
Serves: 4 to 6
Ingredients:
30
g
butter
2 tablespoons flour
2 cups chicken stock
1
⁄
2
cup cream
20 bottled oysters, drained
salt and white pepper
snipped chives to garnish
Method:
Place butter in 2-litre casserole dish and cook on
1000 W for 1 minute. Add flour, stir well and cook on
1000 W for 30 seconds. Gradually add stock, stirring
continuously. Cook on 1000 W for 5 to 7 minutes,
stirring halfway through cooking. Add cream, oysters,
salt and pepper. Cook on 800 W for 1 to 2 minutes.
Spoon into individual dishes and garnish with chives.
S
EAFOOD
M
ARINARA
Serves: 4
Ingredients:
750
g
Marinara mix
2 tablespoons butter
1 clove garlic, crushed
2 tomatoes, peeled and chopped
1 tablespoon tomato paste
1
⁄
4
cup white wine
1
⁄
4
cup fresh basil leaves, chopped
pepper
Method:
Place marinara mix into a 2-litre casserole dish. Set
aside. Place butter and garlic in 1-litre casserole dish.
Cook on 800 W for 1 minute. Add remaining ingredients
(except seafood), to dish and cook on 1000 W for
5 minutes. Purée tomato mixture in blender or food
processor and pour over seafood. Cook on 800 W for 7
to 9 minutes, stir halfway through cooking. Stand for 5
minutes. Serve with salad and pasta.

– 35 –
Poultry
Cooking Whole Poultry by Micro Power
Season as desired, but salt after cooking. Browning
sauce mixed with equal parts of butter will enhance
the appearance.
Poultry may be stuffed or unstuffed. Tie legs together
with cotton string. Place on a microwave rack set in a
rectangular dish. Place poultry breastside down: turn
over halfway through cooking. Cover with wax paper
to prevent splattering.
If the poultry is not cooked enough, return it to
the oven and cook a few more minutes at the
recommended power level.
DO NOT USE A CONVENTIONAL MEAT
THERMOMETER IN THE MICROWAVE OVEN.
Let stand, covered with foil, 10 to 15 minutes after
cooking. Standing time allows the temperature to
equalize throughout the food and finishes the cooking
process.
If a large amount of juice accumulates in the bottom
of the baking dish, occasionally drain it. If desired,
reserve juices for making gravy.
Less-tender birds should be cooked in liquid such as
soup or broth. Use
1
⁄
4
cup per 500
g
of poultry.
Use an oven cooking bag or a covered casserole.
Select a covered casserole deep enough so that bird
does not touch the lid.
If an oven cooking bag is used, prepare according to
package directions. Do not use wire twist-ties to close
bag. Use only nylon tie, a piece of cotton string, or a
strip cut from the open end of the bag. Make six 2 cm
slits on top of bag.
Cooking Poultry Pieces by Micro Power
Cover with wax paper or paper towel. Use the chart
below to determine recommended minimum cooking
times.
Arrange pieces skin-side down and evenly spread in a
shallow dish.
Turn or rearrange halfway through cooking.
Multiply the weight of the poultry by the minimum
recommended minutes per 500
g
. Programme Micro
Power and Time.
After cooking, check the internal temperature of
the bird with a microwave or conventional meat
thermometer inserted into the muscle. Check
temperature in both muscles. The thermometer
should not touch bone. If it does, the reading could
be inaccurate. A thermometer cannot be accurately
inserted into a small bird. To check desired cooking of
a small bird, juices should be clear and the drumsticks
should readily move up and down after standing time.
Cooking Poultry by Micro Power
POULTRY POWER
TEMPERATURE
AFTER COOKING
APPROX. COOKING TIME
(minutes per 500
g
)
Chickens 600 W 87°C 10 to 15
Chicken (pieces) 600 W 87°C 8 to 10
Turkey 600 W 87°C 12 to 17
Duck 600 W 87°C 10 to 15

– 36 –
Poultry
(continued)
C
HICKEN
S
AN
C
HOY
B
AU
Serves: 4
Ingredients:
10 dried chinese mushrooms
2 teaspoons sesame oil
1 clove garlic, chopped
500
g
minced chicken
10 water chestnuts, finely chopped
227
g
bamboo shoots, chopped
1 tablespoon soy sauce
2 teaspoons oyster sauce
2 tablespoons sherry
1 small iceberg lettuce
Method:
1. Cover mushrooms with boiling water, stand for 30
minutes. Drain, remove stems and chop finely.
2. Place oil and garlic in a 2.5-litre casserole dish,
cook on 1000 W for 50-60 seconds.
3. Add chicken and cook on 600 W for 10-12 minutes.
Add remaining ingredients except lettuce and cook
on 600 W for 6-8 minutes.
4. Separate lettuce leaves, place tablespoons of
mixture into each lettuce leaf. Serve immediately.
T
HAI
R
ED
C
HICKEN
C
URRY
Serves: 4
Ingredients:
1 onion, chopped
2 tablespoons red curry paste
500
g
chicken fillets, chopped
2 cups finely sliced vegetables
1 cup coconut milk
Method:
1. Place onion and curry paste in 3-litre casserole
dish. Cook on 1000 W for 3 to 4 minutes.
2. Add chicken and combine. Cook on 600 W for 8 to
10 minutes, stirring once during cooking.
3. Add vegetables and coconut milk. Stir well. Cover
and cook on 1000 W for 4 minutes. Serve with
Jasmine rice.
C
HICKEN AND
A
SPARAGUS
R
ISOTTO
Serves: 4
Ingredients:
300
g
fresh asparagus, chopped
2 tablespoons olive oil
1
1
⁄
2
cups arborio rice
1 clove garlic, crushed
4 cups boiling chicken stock
2 cups coarsely chopped cooked chicken
1
⁄
4
cup grated fresh parmesan cheese
1
⁄
4
cup cream
ground black pepper
1 tablespoon chopped parsley
extra coarsely grated parmesan cheese
Method:
Place asparagus into microwave safe dish and cook
on 1000 W for 1 to 2 minutes.Set aside. Place oil,
rice and garlic in 3-litre casserole dish. Cook covered
on 1000 W for 1 to 2 minutes. Add 2 cups of boiling
chicken stock, cook on 1000 W for 5 minutes. Stir
twice during cooking. Add remaining chicken stock and
cook on 1000 W for another 5 minutes. Add remaining
ingredients along with asparagus and stir into risotto.
Cook covered on 1000 W for 2 minutes. Stand for 5
minutes. Serve topped with extra parmesan and black
pepper.
G
REEN
P
EPPERCORN
C
HICKEN
Serves: 4
Ingredients:
4 small single chicken breast fillets
2 tablespoons green peppercorns
1 tablespoon seeded mustard
1 teaspoon chicken stock powder
2 tablespoons lemon juice
1
⁄
2
cup cream
Method:
1. Slice chicken fillets. Place chicken in a 2-litre
casserole dish and cook on 600 W 8-10 minutes.
Stir halfway through cooking.
2. Mix together remaining ingredients. Add to chicken,
stir well. Cook on 1000 W for 2 to 3 minutes. Serve
sauce over chicken.
C
HICKEN
C
ACCIATORE
Serves: 4
Ingredients:
440
g
can tomatoes
1
⁄
4
cup tomato paste
1 teaspoon minced garlic
1 onion, diced
2 teaspoons dried oregano
1
kg
chicken drumsticks
Method:
1. Place all ingredients in a 3-litre casserole dish. Stir
until combined. Cover and cook on 600 W for 15 to
18 minutes.
2. Turn chicken and stir. Cook on 600 W for 15 to 18
minutes.

– 37 –
Main Fare Meats
For best results, select roasts that are uniform in
shape.
Place meat on a microwave rack in a suitable dish.
Beef rib roast should be placed cut-side down. Other
bone-in roasts should be placed fat-side down.
Boneless roasts should be placed fat-side up. Halfway
through cooking, turn roasts. One third of the way
through cooking, remove ham from oven and cut off
skin. Turn fat side up. If desired, glaze last 10 to 20
minutes of cooking. Loosely cover baking dish with
wax paper or paper towel to prevent splatter. If a large
amount of juice accumulates in the bottom of the
dish, drain occasionally. If desired, reserve for making
gravy. Multiply the weight of the roast by the minimum
recommended times per 500
g
. Programme Micro
Power and Time.
Cooking Tender Cuts of Meat by Micro Power
Directions for Cooking Less-Tender Cuts of Meat by Microwave
Meat Chart for Microwave Cooking
After heating, check temperature using a meat
thermometer. The thermometer should not touch
bone or fat. If it does, the reading could be inaccurate.
Lower temperatures are found in the centre of the
roast and in the muscle close to a large bone, such
as a pork loin centre rib roast. If the temperatures are
low, return meat to the oven and cook a few more
minutes at the recommended power level. DO NOT
USE A CONVENTIONAL MEAT THERMOMETER IN
THE MICROWAVE OVEN. Let stand, covered with
foil, 10 to 15 minutes. During standing time the internal
temperature equalises and the temperature rises 5°C
to 10°C.
Less-tender cuts of meat such as pot roasts should
be cooked in liquid. Use
1
⁄
2
to 2 cups of soup, broth,
etc. per 500
g
of meat. Use an oven cooking bag or
covered casserole when cooking less-tender cuts
of meat. Select a covered casserole deep enough
so that the meat does not touch the lid. If an oven
cooking bag is used, prepare the bag according to
package directions. Do not use wire or metallic twist-
ties. Use the nylon tie provided, otherwise, use a
piece of cotton string or a strip cut from the open end
of the bag. Make six 2 cm slits in top of bag to allow
steam to escape. Multiply the weight of the roast by
the minimum recommended minutes per 500
g
as
suggested in the chart below. Programme Power and
Time. Turn meat over halfway through cooking. Meat
should be tender when cooked.
MEAT POWER
APPROX. COOKING TIME
(minutes per 500
g
)
Beef
Roasts Medium
Rare
Medium
Well
Pot Roast
800 W
800 W
800 W
300 W
10 to 12
12 to 14
14 to 16
25 to 30
Pork
Leg of Pork
Loin of Pork
Ham Canned (fully
cooked)
800 W
800 W
800 W
11 to 13
11 to 13
4 to 5
Lamb
Medium
Well
800 W
800 W
8 to 10
12 to 14

– 38 –
Main Fare Meats
(continued)
C
HILLI
B
EEF
Serves: 4
Ingredients:
500
g
minced beef
1 onion, diced
1 clove garlic, crushed
35
g
packet chilli seasoning mix
410
g
can tomato puree
420
g
can kidney beans, drained
Method:
1. Place all ingredients in a 3-litre casserole dish.
Mix well. Cook on 800 W for 20-25 minutes. Stir
halfway through cooking.
2. Serve in taco shells or in tortillas with salad and
cheese.
C
HINESE
B
EEF AND
V
EGETABLES
Serves: 4
Ingredients:
400
g
rump steak, sliced
1 teaspoon chopped ginger
1 clove garlic, crushed
1 tablespoon soy sauce
2 tablespoons Hoi Sin sauce
1
⁄
4
cup beef stock
2 cups sliced vegetables
Method:
1. Place steak, ginger and garlic in a 3-litre casserole
dish. Cook on 1000 W for 1-2 minutes.
2. In a 1 cup jug combine sauces with stock. Add to
meat mixture. Cook on 1000 W for 2-3 minutes.
3. Add vegetables and cook on 1000 W for 4-5
minutes, stirring halfway through cooking.
4. Let stand for 5 minutes before serving with rice or
noodles.
B
EEF
S
TROGANOFF
Serves: 4
Ingredients:
1 onion, sliced
500
g
rump steak sliced into ribbons
2 tablespoons tomato sauce
2 tablespoons worcestershire sauce
1 beef stock cube
1
⁄
3
cup sour cream
200
g
sliced mushrooms
Method:
1. Place all ingredients (except sour cream and
mushrooms) in 3-litre casserole dish. Stir until
combined.
2. Cook on 800 W for 10 to 12 minutes, stirring once
during cooking. Add sour cream and mushrooms.
3. Stir and cook on 600 W for 4 to 5 minutes.
S
PAGHETTI
M
EAT
S
AUCE
Serves: 4
Ingredients:
500
g
minced beef
1 onion, diced
1 clove garlic, crushed
420
g
can tomatoes
1
⁄
2
cup tomato paste
2 tablespoons chopped basil
Method:
1. Combine all ingredients in a 3-litre casserole dish.
Cook on 1000 W for 7-8 minutes, stir.
2. Cook on 600 W for 20-24 minutes. Stirring halfway
through cooking.
3. Serve over hot spaghetti.
F
RENCH
O
NION
B
EEF
C
ASSEROLE
Serves: 4
Ingredients:
1 onion, diced
1 teaspoon mixed dried herbs
200
g
diced potatoes
500
g
chuck steak, cubed
20
g
french onion soup mix
1
⁄
3
cup tomato puree
2 cups beef stock
Method:
1. Place onion and herbs in a 3-litre casserole dish.
Cook on 1000 W for 1-2 minutes.
2. Add remaining ingredients, stir until combined.
Cover and cook on 1000 W for 10 minutes.
3. Stir and cook on 600 W for 20-25 minutes, stirring
once during cooking.
4. Let stand 5 minutes before serving.
T
HAI
B
EEF
C
URRY
Serves: 2 to 3
Ingredients:
1
⁄
2
onion, thinly sliced
1 tablespoon Thai green curry paste
250
g
thinly sliced lean beef
1
⁄
4
red capsicum, thinly sliced
1
⁄
2
carrot, thinly sliced
1
⁄
2
zucchini, sliced
100
g
broccoli, broken into flowerets
1
⁄
2
cup coconut milk
1
⁄
2
tablespoon soy sauce
1
⁄
2
tablespoon lemon juice
1 tablespoon shredded fresh basil
1
⁄
4
cup roasted unsalted peanuts
Method:
Place the onion and curry paste into a 2-litre casserole
dish. Cook on 1000 W for 1 to 2 minutes. Add the
beef and cook on 1000 W for 3 to 4 minutes, stirring
halfway through cooking. Add the vegetables and
coconut milk and cook on 1000 W for 4 to 6 minutes.
Mix in the soy sauce, lemon juice and basil and serve
sprinkled with peanuts.

– 39 –
Main Fare Meats
(continued)
M
USSAMAN
B
EEF
C
URRY
Serves: 4
Ingredients:
500
g
round steak diced
1
⁄
3
cup mussaman curry paste
400
g
potato diced
250 ml coconut milk
250 ml beef stock
1 tablespoon brown sugar
Method:
Place steak, curry paste and potato in a 3-litre
casserole dish cook on 1000 W for 6 minutes. Add
coconut milk, beef stock and brown sugar, stir, cook
on 100 W for 40 minutes. Stir once during cooking
serve with jasmine rice.
L
AMB
P
ILAF
Serves: 4
Ingredients:
1 tablespoon oil
1 large onion, sliced
600
g
lean lamb, diced
400
g
can tomato pieces
2 teaspoons garam masala
1 teaspoon dried thyme
1 cup long grain rice
600 ml hot chicken stock
150
g
natural yoghurt
freshly ground black pepper
Method:
Place the oil and onion in a 3 litre casserole dish.
Cover and cook on 1000 W for 2 to 3 minutes. Add
lamb, tomato pieces, garam masala, and thyme.
Cover and cook on 800 W for 10 minutes. Stir. Cook
on 800 W for a further 10 minutes. Add the rice and
chicken stock and cook covered on 440 W for a further
30 minutes or until the rice is tender. Stir in yoghurt,
season with pepper and serve.
C
ORNED
B
EEF
Serves: 2 to 3
Ingredients:
750 to 850
g
corned silverside
1
⁄
2
tablespoon brown sugar
1
⁄
2
tablespoon white vinegar
1
⁄
2
onion, cut in half
2 cloves
3 peppercorns
1
⁄
2
bay leaf
2
1
⁄
2
cups water
Method:
Rinse corned silverside under cold running water to
remove excess salt. Place corned silverside in 3-litre
casserole dish. Add remaining ingredients. Cover and
cook on 1000 W for 6 to 8 minutes. Turn meat, cover and
cook on 100 W for 1 to 1
1
⁄
3
hours. Stand corned silverside
in cooking liquid for 10 minutes before carving.
Note: Depending on the size and shape of the silverside,
it may require a further 10 to 15 minutes on 100 W.
G
INGERED
P
ORK
S
TIR
F
RY
Serves: 4
Ingredients:
500
g
sliced lean pork
1
⁄
4
cup teriyaki sauce
1 tablespoon honey
2 teaspoons minced ginger
2 teaspoons cornflour
1 onion, sliced
300
g
sugar snap peas, trimmed
1 zucchini, sliced
1
⁄
2
red capsicum, sliced
2 green onions, sliced
1
⁄
2
cup bean sprouts
1 tablespoon toasted sesame seeds
Method:
Place pork, teriyaki sauce, honey, ginger and cornflour in a
2-litre casserole dish. Cover and marinate in the refrigerator
for 2 hours. Place onion in a 3 litre dish. Cook on
1000 W for 1 to 2 minutes. Add marinated pork and sauces
and cook on 800 W for 3 to 4 minutes. Add peas, zucchini,
capsicum, green onions and bean sprouts. Cook on 1000
W for 3 to 4 minutes. Sprinkle with sesame seeds and serve
with noodles.
L
AMB
K
ORMA
Serves: 4
Ingredients:
1 onion, diced
500
g
lamb, cubed
1
⁄
3
cup korma curry paste
2 cups carrots sliced
250 ml tomato puree
250 ml beef stock
2 tablespoons natural yoghurt
Method:
Place onion, lamb, curry paste and carrot in a 3-litre
casserole dish. Cook on 1000 W for 6 minutes. Add
tomato puree and beef stock and stir, cook on 600 W
for 35-38 minutes, stirring once during cooking. Stir in
yoghurt and serve with basmati rice.
B
EEF
B
OURGUIGNONNE
Serves: 4 to 6
Ingredients:
750
g
diced chuck steak
4 rashers bacon, diced
6 pickling, onions
2 teaspoons minced garlic
1
⁄
4
cup red wine
410 ml tomato puree
1
⁄
2
cup beef stock
1 teaspoon minced chilli
1 teaspoon dried tarragon
250
g
button mushrooms, halved
Method:
Place all ingredients except mushroom in a 3-litre
casserole dish, stir until combined. Cover and cook on
600 W for 14 to 16 minutes.Stir and cook on 100 W
for 28 to 30 minutes. Stir and add mushrooms halfway
through cooking.

– 40 –
Vegetable Varieties
Directions for Cooking Vegetables
F
RESH
V
EGETABLES BY
M
ICRO
P
OWER
Place vegetables in a casserole dish. Add 2 to 3
tablespoons of water per 500
g
of vegetables. Add salt
to water or add after cooking. Do not place salt directly
on vegetables. Cover dish with glass lid or plastic
wrap.
Cook on 1000 W according to time recommended in
charts. Halfway through cooking, stir, turn vegetables
over or rearrange.
Vegetables that are to be cooked whole and unpeeled,
need to be pierced to allow steam to escape. Place
vegetables on a paper towel lined dinner plate. Allow
to stand, covered, according to the time indicated in
the charts.
F
ROZEN
V
EGETABLES BY
M
ICRO
P
OWER
Remove vegetables from package and place in an
appropriate sized container. Vegetables frozen in a
pouch should be placed on a dish and the top pierced.
Cook on 1000 W according to directions given in
chart. Vegetables should be cooked covered with a lid
or plastic wrap.
Halfway through cooking, stir, turn vegetables over or
rearrange. Stir after cooking. Allow to stand for 2 to 3
minutes before serving.
D
RIED
B
EANS OR
P
EAS BY
M
ICRO
P
OWER
Place hot tap water in 3-litre casserole dish. Bring hot
water to the boil on 1000 W for 10 to 12 minutes. Add
beans and 2 tablespoons oil to water. Cook according
to directions in chart. Stir. Allow to stand, covered, for
15 to 20 minutes.
Note: Beans such as red kidney beans and lima
beans should be soaked overnight before cooking.
250
g
of dried beans equals about 3 cups cooked
beans. Use in place of canned beans.
Cooking Frozen Vegetables by Micro Power
VEGETABLE QUANTITY COOKING PROCEDURE
APPROX.
COOKING TIME
(in minutes) on 1000 W
Beans 250
g
Cook in covered 2-litre casserole dish. 4 to 6
Broad Beans 250
g
Cook in covered 2-litre casserole dish. 5 to 7
Broccoli (spears) 350
g
Cook in covered 2-litre casserole dish. 5 to 7
Brussels Sprouts 250
g
Cook in covered 2-litre casserole dish. 5 to 7
Carrots (baby) 250
g
Cook in covered 2-litre casserole dish. 6 to 8
Cauliflower 500
g
Cook in covered 2-litre casserole dish. 6 to 8
Corn (
1
⁄
2
cob)
Corn (cobs)
125
g
250
g
Cook in covered 2-litre casserole dish.
Cook in covered 2-litre casserole dish.
3 to 4
5 to 7
Mixed Vegetables 250
g
Cook in covered 2-litre casserole dish. 5 to 7
Peas 250
g
Cook in covered 2-litre casserole dish. 4 to 6
Spinach 250
g
Cook in covered 2-litre casserole dish. 4 to 6
Cooking Dried Beans and Peas by Micro Power
ITEM CONTAINER
AMOUNT OF
HOT WATER
APPROX. TIME TO
BOIL HOT WATER on
1000 W (in minutes)
COVERED
TO COOK BEANS
on 600 W
(in minutes)
COVERED
Lentils (200
g
) 3-litre casserole dish 1.5 litres 10 to 12 15 to 20
Soup Mix (200
g
) 3-litre casserole dish 1.5 litres 10 to 12 15 to 20
Split Peas or
Lentils (200
g
)
3-litre casserole dish 1.5 litres 10 to 12 20 to 25
Beans (200
g
)
Soaked overnight
3-litre casserole dish 1.5 litres 10 to 12 25 to 30

– 41 –
Vegetable Varieties
(continued)
Cooking Fresh Vegetables by Micro Power
Vegetables should be covered and cooked on 1000 W for best results. Weights given are trimmed weights.
VEGETABLE QUANTITY COOKING PROCEDURE
APPROX.
COOKING
TIME
(in minutes)
on 1000 W
Asparagus 250
g
Covered dish with
1
⁄
4
cup water 4 to 6
Beans (finely sliced) 250
g
Covered dish with
1
⁄
4
cup water 4 to 5
Beetroot 4 whole
(1
kg
)
Covered with 1 cup water in 3.5-litre dish.
Stand after cooking - 5 min..
13 to 17
Broccoli 500
g
Covered dish with
1
⁄
4
cup water. 6 to 8
Brussels Sprouts 250
g
Covered dish with
1
⁄
4
cup water. 5 to 7
Cabbage 500
g
Shredded, with
1
⁄
4
cup water in covered dish. 6 to 8
Carrots 4 (sliced finely)
250
g
With
1
⁄
4
cup water in covered dish. 5 to 6
Cauliflower 500
g
With
1
⁄
4
cup water in covered dish. 6 to 8
Celery
6 stalks (400
g
)
cut in 1 cm
pieces
With
1
⁄
4
cup water in covered dish. 5 to 7
Corn 2 cobs (500
g
)
4 cobs (1
kg
)
Brush with melted butter and cook in covered dish. 4 to 6
8 to 10
Eggplant 1 (500
g
) Dice with
1
⁄
4
cup water in covered dish. 5 to 7
Mushrooms 250
g
(sliced) Cook with 2 tablespoons butter in covered dish. 3 to 4
Onions 3 (200
g
) Cut in quarters with
1
⁄
4
cup water in covered dish. 4 to 6
Peas 250
g
Shell peas and place with
1
⁄
4
cup water in covered
dish.
3 to 5
Potatoes-Mashed
-Jacket
500
g
3 Med
Peeled and quartered with
1
⁄
4
cup water. Covered.
Cook uncovered on paper towel lined plate.
6 to 8
7 to 9
Pumpkin 500
g
Peeled and cut into uniform pieces with
1
⁄
4
cup water
in covered dish.
8 to 10
Spinach/Silver Beef 250
g
Remove stem, cut leaves into small pieces.
Cook with
1
⁄
4
cup water in covered dish.
3 to 5
Sweet Potato 500
g
In serving size pieces with 2 tablespoons butter in
covered dish.
6 to 8
Turnips 500
g
Peeled and sliced finely with
1
⁄
4
cup water in covered
dish.
6 to 8
Tomatoes 2 (300
g
) Sliced and cooked covered. 2 to 4
Zucchini 500
g
Cut in 2 cm pieces in covered dish. 5 to 7

– 42 –
Vegetable Varieties
(continued)
C
AULIFLOWER IN
W
HITE
S
AUCE
Serves: 4
Ingredients:
500
g
cauliflower flowerets
2 tablespoons water
2 tablespoons butter
2 tablespoons flour
1 cup milk
1
⁄
2
cup grated tasty cheese
Method:
1. Place cauliflower and water in a shallow casserole
dish. Cover and cook on 1000 W for 6-8 minutes.
2. Place butter in a 4 cup jug. Cook on 1000 W for
1-2 minutes, stir in flour and cook on 1000 W for
1 minute. Add milk gradually, stirring well and
cook on 1000 W for 2-3 minutes. Stirring halfway
through cooking.
3. Drain cauliflower, pour over sauce and sprinkle
with cheese. Cook on 800 W for 2-3 minutes.
P
ARMESAN
A
SPARAGUS
Serves: 2 to 4
Ingredients:
1 bunch of asparagus spears
2 tablespoons water
1 tablespoon butter
1 clove garlic, crushed
1 tablespoon grated Parmesan cheese
Method:
Place asparagus and water in a 2-litre casserole dish.
Cover and cook on 1000 W for 1 to 2 minutes. Drain.
Place butter and garlic in a small dish and cook on
1000 W for 1 minute. Add drained asparagus and mix
lightly. Cook on 1000 W for a further 1 minute. Sprinkle
Parmesan cheese over asparagus. Serve.
Tip:
When placing asparagus in dish, place half the tips
one way and half the tips in the opposite direction for
more even cooking.
O
RIENTAL
V
EGETABLES
Serves: 4 to 6
Ingredients:
1 tablespoon oil
1 cup celery, sliced diagonally
1 large onion, cut into petals
1 green capsicum,
cut into 2.5 cm pieces
1 red capsicum,
cut into 2.5 cm pieces
1 cup sliced mushrooms
1 tablespoon Hoisin sauce
2 teaspoons soy sauce
Method:
1. Place oil and vegetables in a 2-litre casserole
dish. Stir well. Cook on 1000 W for 3 to 4 minutes,
stirring halfway through cooking.
2. Mix sauces together in 1-cup glass jug and cook
3. on 1000 W for 1 minute. Pour over hot vegetables
and mix well.
P
OTATO
C
ASSEROLE
Serves: 4
Ingredients:
750
g
peeled and sliced potatoes
1 cup sour cream
1
⁄
4
cup milk
3 green onions sliced
2 bacon rashers, chopped
1
⁄
2
cup grated cheese
Method:
1. Layer potatoes in a 2-litre casserole dish. Pour
over combined sour cream and milk. Cook on
1000 W for 15-18 minutes.
2. Top with spring onions, bacon and cheese. Cook
on 1000 W for 5 minutes.
V
EGETABLE
C
URRY
Serves: 4
Ingredients:
1 onion sliced
2 tablespoons green curry paste
3 cups sliced vegetables
1 can (440
g
) chick peas, drained
1 cup coconut milk
1 tablespoon lemon juice
1 tablespoon soy sauce
1
⁄
2
cup chopped nuts
Method:
1. Place onion and curry paste in a 3-litre casserole
dish, cover with lid. Cook on 1000 W for 3-4
minutes.
2. Add remaining ingredients except nuts and stir.
Cook on 1000 W for 12-14 minutes. Stirring
halfway through cooking. Sprinkle with chopped
nuts and serve.

– 43 –
Vegetable Varieties
(continued)
S
TUFFED
T
OMATOES
Serves: 2
Ingredients:
2 (large) tomatoes
1
⁄
4
cup fresh breadcrumbs
1
⁄
2
cup grated cheese
4 green onions, finely sliced
1 tablespoon finely chopped parsley
salt and pepper
1
⁄
4
cup extra grated cheese
Method:
1. Cut tops off tomatoes. Scoop out pulp of tomato
with a teaspoon. Mix pulp with remaining
ingredients, except extra cheese.
2. Spoon mixture back into tomato shells. Sprinkle
tomatoes with extra cheese.
3. Place tomatoes in 2-litre casserole dish and cook
on 1000 W for 2 to 3 minutes. Serve.
Tip: To cook 4 stuffed tomatoes, cook on 1000 W for 6
to 8 minutes.
V
EGETABLE
F
RITTATA
Serves: 4 to 6
Ingredients:
400
g
potatoes, thinly sliced
1
⁄
2
red capsicum, sliced into strips
1
⁄
2
green capsicum, sliced into strips
1 tomato, diced
2 tablespoons fresh basil, chopped
4 eggs
1
⁄
3
cup sour cream
1
⁄
2
teaspoon cracked black pepper
1
⁄
2
cup grated tasty cheese
Method:
Place potatoes in a 20 cm square pyrex® dish. Cook
on 1000 W for 5 to 7 minutes. Arrange capsicum in a
circular pattern on top of potato sprinkle with tomato
and basil. Beat together eggs and sour cream in a
jug. Pour over vegetables. Cook on 800 W for 3 to 5
minutes. Sprinkle with pepper and cheese and cook
on 1000 W for 7 to 9 minutes.
C
REAMED
S
PINACH
Serves: 4
Ingredients:
1 bunch spinach, roughly chopped
4 green onions, finely chopped
1 clove garlic, crushed
2 tablespoons sour cream
salt and pepper
Method:
Cook washed spinach leaves, green onions and garlic
in a covered 3-litre casserole dish on 1000 W for 5 to 7
minutes. Drain well by squeezing between two dinner
plates. Stir through sour cream. Season to taste. Cook
on 1000 W for 1 to 2 minutes. Serve.
A
RDENNIS
S
TYLE
P
OTATOES
Serves: 4
Ingredients:
4 medium sized potatoes
100
g
ham, finely diced
3 tablespoons snipped chives
50
g
butter
1
⁄
2
cup grated Cheddar cheese
ground black pepper
Method:
Scrub potatoes, wash and pat dry with paper towel.
Prick skins and place on a dinner plate. Cook on
1000 W for 6 to 8 minutes.
Allow to cool slightly. Cut tops off potatoes and scoop
out pulp from centre, leaving 1 to 2 cm in shell. Mash
pulp and combine with remaining ingredients. Spoon
filling back into potato shells. Place potatoes in 2-litre
casserole dish. Cook on 1000 W for 2 to 3 minutes.
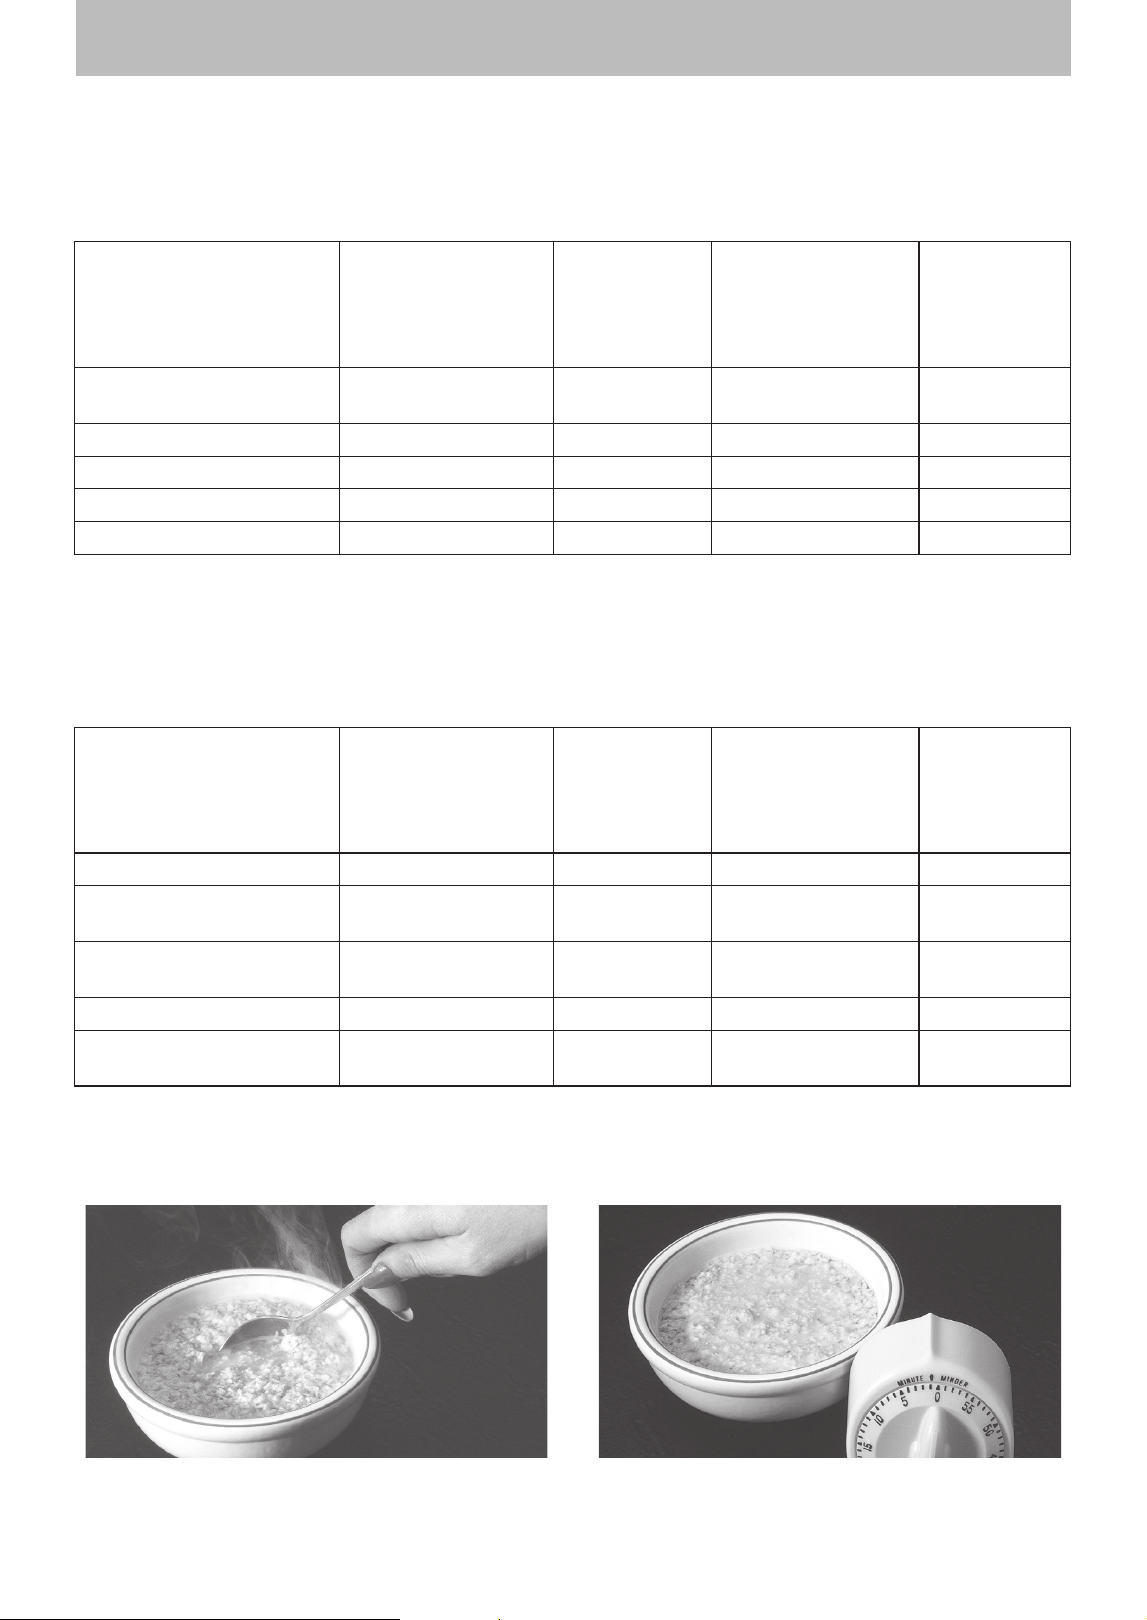
– 44 –
Rice, Pasta and Cereal
Cooking Rice and Other Grains by Micro Power
Cooking Pasta by Micro Power
Follow directions in chart for recommended dish
size, amounts of water and cooking time. Add grain
to water. Add salt and butter according to package
directions. Cook on 1000 W for time recommended
Follow directions in chart for recommended dish size,
amount of water and cooking time. Boil water, with
1 teaspoon salt and 1 tablespoon oil. Add pasta and
cook for time recommended in chart. Cook on 1000 W.
in chart. Allow to stand, covered, before serving. For
special rice, substitute beef or chicken stock for water.
Add cooked onion, mushrooms or crumbled bacon
before serving.
Test pasta for desired cooking before adding more
time. Slightly undercook pasta that will be heated
again in casserole. Stir and let stand, uncovered, 5
minutes.
ITEM CONTAINER
AMOUNT
OF
WATER
APPROX. TIME
TO COOK GRAIN
on 1000 W
UNCOVERED
(in minutes)
STANDING
TIME
(in minutes)
RICE
Quick Cook Brown (1 cup)
2-litre casserole dish
1
1
⁄
3
cups
10
5
Brown (1 cup) 3-litre casserole dish 3 cups 25 to 30 10
Long Grain (1 cup) 2-litre casserole dish 2 cups 12 to 14 5
Short Grain (1 cup) 2-litre casserole dish 2 cups 12 to 14 5
Jasmine (1 cup) 2-litre casserole dish 2 cups 12 to 14 5
ITEM CONTAINER
AMOUNT
OF
BOILING
WATER
APPROX. TIME
TO COOK PASTA
on 1000 W
UNCOVERED
(in minutes)
STANDING
TIME
(in minutes)
Dried Fettuccine (250
g
) 3-litre casserole dish 6 cups 12 to 14 5
Elbow Macaroni, shells,
etc. (250
g
)
3-litre casserole dish 4 cups 14 to 16 5
Fresh Spaghetti,
Fettuccine (375
g
)
3-litre casserole dish 6 cups 12 to 14 5
Dried Spaghetti (250
g
) 3-litre casserole dish 4 cups 12 to 14 5
Fresh Tortellini, Ravioli
(250
g
)
3-litre casserole dish 4 cups 10 to 12 5
Drain pasta after standing.
Cooking Hot Cereal by Micro Power
Combine
1
⁄
4
cup of quick cooking oats, pinch salt and
2
⁄
3
cups hot tap water in a breakfast bowl.
Cook on 1000 W for 2 to 3 minutes, stirring halfway
through cooking.
Let stand, 5 to 10 minutes, before serving. Top as
desired with sugar or spices.

– 45 –
Rice, Pasta and Cereal
(continued)
B
ACON AND
O
NION
T
ORTELLINI
Serves: 4
Ingredients:
600
g
fresh tortellini
6 cups boiling water
1 onion, diced
1 clove garlic, crushed
3 rashers bacon, chopped
300 ml cream
1 tablespoon parmesan cheese
1 teaspoon chicken stock powder
2 tablespoons chopped parsley
ground black pepper
Parmesan cheese, extra
Method:
1. Place pasta and water in a 3-litre casserole dish.
Cook on 1000 W for 10-14 minutes. Stand covered
for 2 minutes. Drain.
2. Place onion, garlic and bacon in a 2-litre casserole
dish and cook on 1000 W for 5 minutes. Add
cream, cheese, stock powder and parsley stir until
combined.
3. Add pasta and cook on 1000 W for 2-3 minutes.
Serve sprinkled with pepper and extra parmesan
cheese.
P
ESTO
F
ETTUCCINE
Serves: 4
Ingredients:
250
g
dried fettuccine
6 cups boiling water
2 cloves garlic, crushed
1 cup basil leaves
1 tablespoon pinenuts
1
⁄
2
cup parmesan cheese
1 cup olive oil
Method:
1. Place pasta and water in a 3-litre casserole dish.
Cook on 1000 W for 14-16 minutes. Allow to stand
for 5 minutes then drain.
2. Place remaining ingredients except oil in a food
processor. Slowly add oil in a fine stream while
processing.
3. Stir sauce through pasta and serve.
C
REAMY
B
ACON
S
AUCE
Makes: Approximately 300 ml
Ingredients:
1 onion, chopped
3 bacon rashers, chopped
1 teaspoon minced garlic
300 ml cream
1
⁄
4
cup Parmesan cheese
pepper
2 tablespoons chopped fresh parsley
Method:
Place onion, bacon and garlic in a 2-litre casserole
dish. Cook on 1000 W for 4 to 5 minutes. Add cream,
Parmesan cheese, pepper, parsley. Mix well. Cook
on 1000 W for 3 to 4 minutes. Serve with cooked
Fettuccine.
M
ACARONI AND
C
HEESE
Serves: 4 to 6
Ingredients:
40
g
butter
1 onion, finely chopped
2 tablespoons flour
2 cups milk
1 cup grated tasty cheese
6 cups cooked macaroni, drained well
1
⁄
2
cup extra grated tasty cheese
paprika
Method:
Place butter and onion in a 2-litre casserole dish and
cook on 1000 W for 3 to 5 minutes. Add flour, mix well
and cook on 1000 W for 1 minute. Blend in milk and cook
on 1000 W for 4 to 5 minutes, stirring halfway through
cooking. Add cheese to sauce and season. Place
macaroni and sauce in a 3-litre casserole dish. Mix well.
1. Top with extra cheese and sprinkle with paprika.
Cook on 1000 W for 6 to 8 minutes.
S
TIR
F
RIED
R
ICE
Serves: 4
Ingredients:
1 tablespoon vegetable oil
1 clove garlic, crushed
1 teaspoon ginger
1 small carrot, finely chopped
1 stick celery, sliced
1
⁄
2
red capsicum, diced
6 to 8 medium mushrooms, sliced
2 eggs
4 green onions, chopped
black pepper
1 small can prawns (optional)
1-2 tablespoons soy sauce
2 cups cooked rice
Method:
1. Place oil, garlic and ginger in 2-litre casserole dish
and cook on 1000 W for 1 to 2 minutes. Add carrot,
celery and capsicum. Cook a further 2-3 minutes
on 1000 W.
2. Break eggs into small dish, add pepper to taste,
mix well and cook on 600 W for 2 to 3 minutes.
Slice into thin strips.
3. Add eggs plus all remaining ingredients to
vegetable mixture. Stir well and cook on 1000 W
for 3 to 5 minutes to heat thoroughly. Serve.

– 46 –
Desserts
B
UTTERSCOTCH
P
UDDING
Serves: 4 to 6
Ingredients:
400
g
sweetened condensed milk
30
g
butter
1 teaspoon vanilla essence
1
⁄
2
cup milk
3
⁄
4
cup self raising flour, sifted
1 cup brown sugar
1
⁄
2
cup hot tap water
Method:
1. Place condensed milk in 2-litre casserole dish.
Cook on 600 W for 6 to 7 minutes, stirring twice
during cooking.
2. Stir in butter, vanilla essence and milk. Stir until
butter is melted. Cool slightly.
3. Add milk mixture to sifted flour. Mix well. Pour
mixture into 2-litre casserole dish.
4. Sprinkle top with brown sugar and gently pour hot
tap water over mixture. Cook on 1000 W for 6 to 8
minutes.
A
PRICOT AND
R
ASPBERRY
C
RISP
Serves: 4 to 6
Ingredients:
850
g
can apricots, drained
400
g
frozen raspberries
1 cup plain flour
1
⁄
2
cup brown sugar
1 teaspoon cinnamon
1 cup pecans, chopped
1 cup shredded coconut
2 cups toasted muesli
125
g
butter
Method:
1. Place apricots and raspberries in the base of 2-litre
casserole dish. Place remaining ingredients (except
butter) in a mixing bowl.
2. Melt butter in 2-cup jug on 1000 W for 40 to
50 seconds. Combine melted butter with dry
ingredients and mix well.
3. Crumble mixture over top of fruit. Cook on 1000 W
for 10 to 12 minutes.
P
EAR
C
USTARD
Serves: 6
Ingredients:
825
g
pear halves, drained
2 tablespoons plain flour
1
⁄
3
cup caster sugar
3 eggs
1 teaspoon vanilla essence
1 cup milk
1 teaspoon cinnamon
Method:
1. Grease 20 cm square pyrex® dish. Place pear
halves in dish. Set aside. Place flour, sugar, eggs
and vanilla essence in bowl. Whisk until combined.
2. Whisk in milk and pour mixture over pears.
Sprinkle with cinnamon. Cover dish with plastic
wrap and cook on 1000 W for 8 to 10 minutes.
F
IGS IN
R
IESLING AND
H
ONEY
Serves 4
Ingredients:
8 firm figs
1
1
⁄
2
cups Riesling wine
80 ml honey
1 teaspoon lemon juice
1 teaspoon grated lemon rind
2 tablespoons chopped pistachio nuts
Method:
Wash and stem the figs place into a 2 litre casserole
dish Combine Riesling, and honey and pour over figs.
Cook on 600 W for 6 to 8 minutes.Remove figs from
syrup, set aside. Add lemon juice and rind to syrup
and cook on 1000 W for 3 to 4 minutes or until slightly
reduced. Pour syrup over figs and allow to cool. Serve
with ice cream or cream and sprinkle with pistachio
nuts.
C
HOCOLATE
B
ROWNIES
Makes: 1 x 20 cm square slice pan
Ingredients:
125
g
butter
200
g
chocolate
1 cup caster sugar
1 teaspoon vanilla essence
2 eggs
1 cup plain flour
Method:
1. Grease and line 20 cm square pyrex® dish. Set
aside. Melt butter and chocolate in 2-litre dish on
1000 W for 2 minutes.
2. Stir in sugar, vanilla essence, eggs and flour.
Spread into prepared dish.
3. Cook on 600 W for 8 to 10 minutes. Refrigerate
until cold. Cut into squares.

– 47 –
ALL THESE THINGS ARE NORMAL
The oven causes
interference with my TV.
Some radio, TV, Wi-Fi, cordless telephone, baby monitor, blue tooth or other
wireless equipment interference might occur when you cook with the micro-
wave oven. This interference is similar to the interference caused by small
appliances such as mixers, vacuums, hair dryers, etc. It does not indicate a
problem with your oven.
The oven lights dim. When cooking with a power other than 1000 W, the oven must cycle to
obtain the 100 W levels. The oven light will dim and clicking noises can be
heard when the oven cycles.
Steam accumulates
on the oven door and warm
air comes from the oven
vents.
During cooking, steam and warm air are given off from the food. Most of the
steam and warm air are removed from the oven by the air which circulates
in the oven cavity. However, some steam will condense on cooler surfaces
such as the oven door. This is normal.
I accidentally ran my
microwave oven without
any food in it.
Running the oven empty for a short time will not damage the oven. However,
we do not recommend this.
PROBLEM POSSIBLE CAUSE REMEDY
Oven will not turn on.
The oven is not plugged in
securely.
Remove plug from outlet, wait
10 seconds and re-insert.
Circuit breaker or fuse is tripped
or blown.
Contact the specified service center.
There is a problem with the
outlet.
Plug another appliance into the outlet
to check if the outlet is working.
Oven will not start
cooking.
The door is not closed
completely.
Close the oven door securely.
Start/Set Pad was not pressed
after programming.
Press Start/Set Pad.
Another programme has already
been entered into the oven.
Press Stop/Cancel Pad to cancel the
previous programme and programme
again.
The programme has not been
entered correctly.
Programme again according to the
Operating Instructions.
Stop/Cancel Pad has been
pressed accidentally.
Programme oven again.
When the oven is turning
on, there is noise coming
from Glass Tray.
The roller ring and oven bottom
are dirty.
Clean these parts according to care
of your oven (See next page).
The "Child" appears in the
display window.
The Child Safety Lock was
activated by pressing Start/Set
Pad 3 times.
Deactivate Lock by pressing Stop/
Cancel Pad 3 times.
If it seems there is a problem with the oven, contact an authorized Service Center.
Before Requesting Service
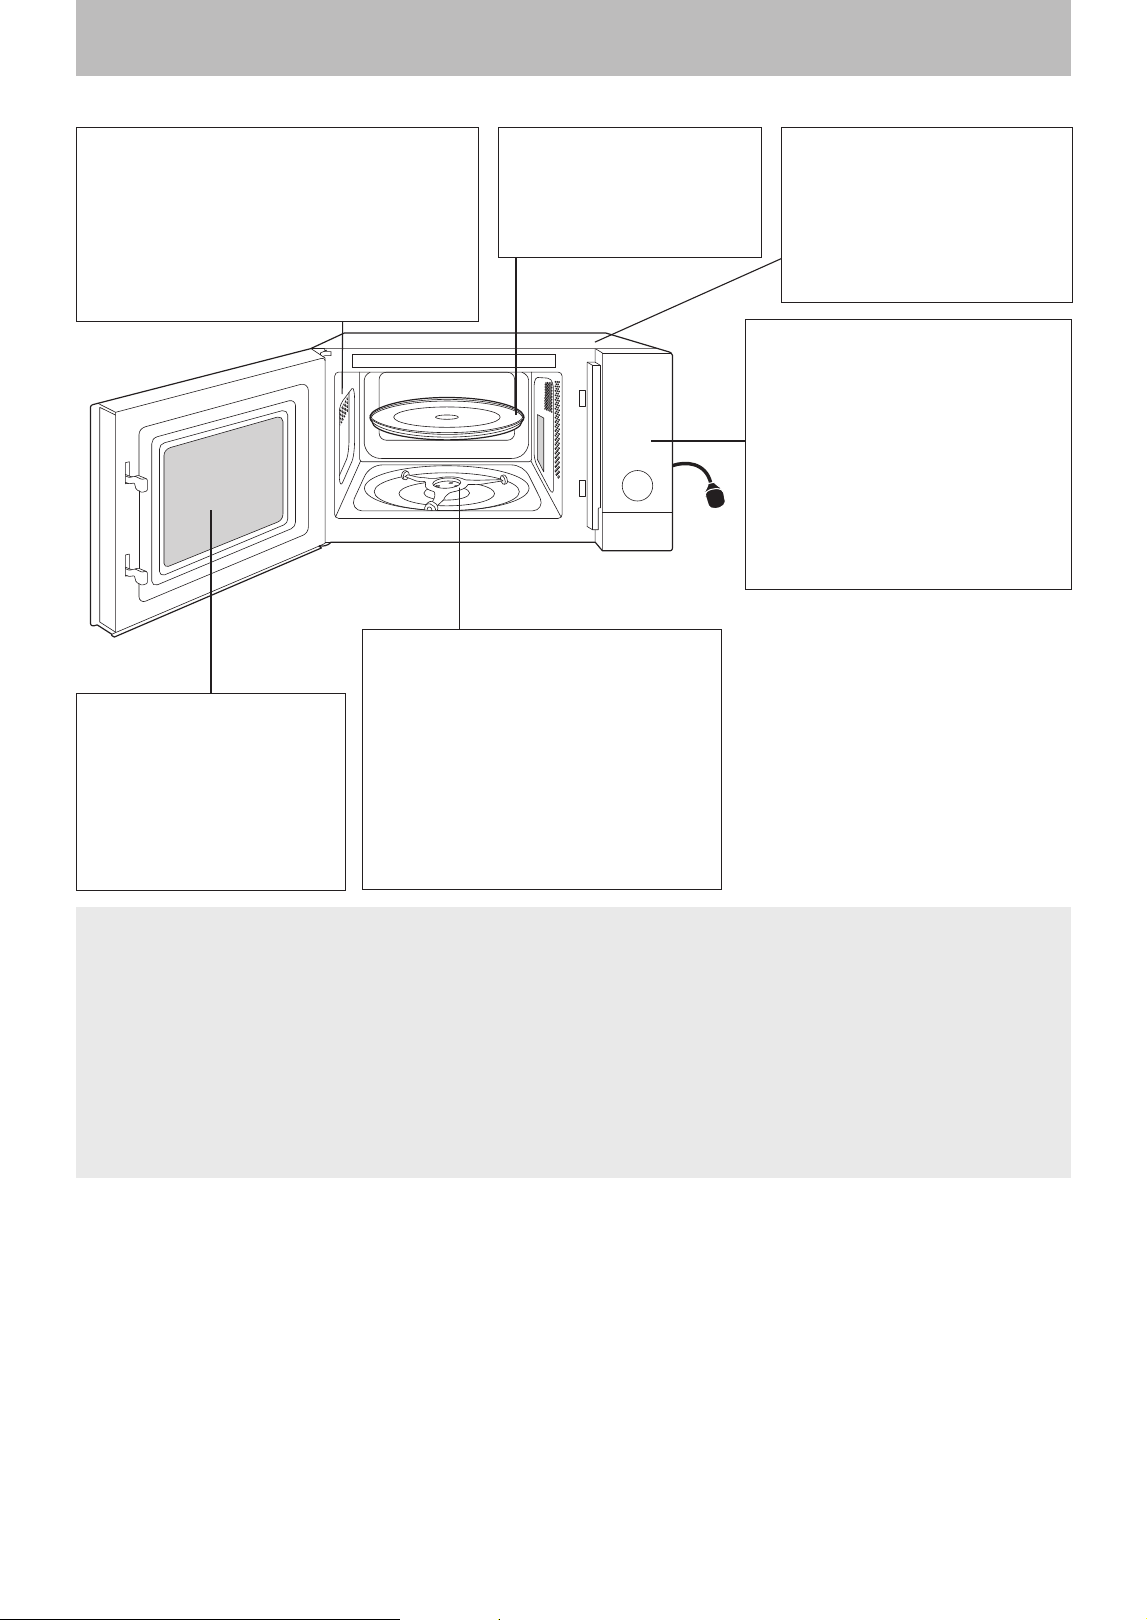
– 48 –
Care of your Microwave Oven
Turn the oven off and remove the power plug from the wall socket before cleaning.
The outside oven surfaces
should be cleaned with a
damp cloth. To prevent
damage to the operating parts
inside the oven, water should
not be allowed to seep into
the ventilation openings.
It is occasionally necessary
to remove the Glass Tray
for cleaning. Wash the tray
in warm sudsy water or in a
dishwasher.
Keep the inside of the oven clean. When food
splatters or spilled liquids adhere to oven walls,
wipe with a damp cloth. Mild detergent may be
used if the oven gets very dirty. The use of harsh
detergent or abrasives is not recommended.
Avoid cleaning the microwave feed guide area
situated on the right hand side of the cavity wall.
Do not use commercial oven cleaners.
Do not allow the Control Panel to
become wet. Clean with a soft,
damp cloth. Do not use
detergents, abrasives or spray-on
cleaners on the Control Panel.
When cleaning the Control Panel,
leave the oven door open to
prevent the oven from
accidentally turning on. After
cleaning press Stop/Cancel pad
to clear display window.
If steam accumulates inside
or around the outside of the
oven door, wipe with a soft
cloth. This may occur when
the oven is operated under
high humidity conditions and
in no way indicates
malfunction of the oven.
The roller ring and oven cavity floor
should be cleaned regularly to avoid
excessive noise. Simply wipe the
roller ring and the oven cavity floor
with mild detergent and hot water
then dry with a clean cloth. Cooking
vapors collect during repeated use
but in no way affect the bottom
surface or roller ring wheels. Do not
remove the roller ring from the oven
cavity floor for cleaning.
Notes
1. The oven should be cleaned regularly and any food deposits removed.
2. When it becomes necessary to replace the oven light, please consult a dealer to have it replaced.
3. Do not use harsh abrasive cleaners or sharp metal scrapers to clean the oven door glass, since they can
scratch the surface, which may result in shattering of the glass.
4. Keep air vents clean at all times. Check that no dust or other material is blocking any of the air vents. If air
vents become blocked this could cause overheating which would affect the operation of the oven and
possibly result in a hazardous situation.
5. This oven should only be serviced by qualified personnel. For maintenance and repair of the oven contact
the nearest authorised dealer.
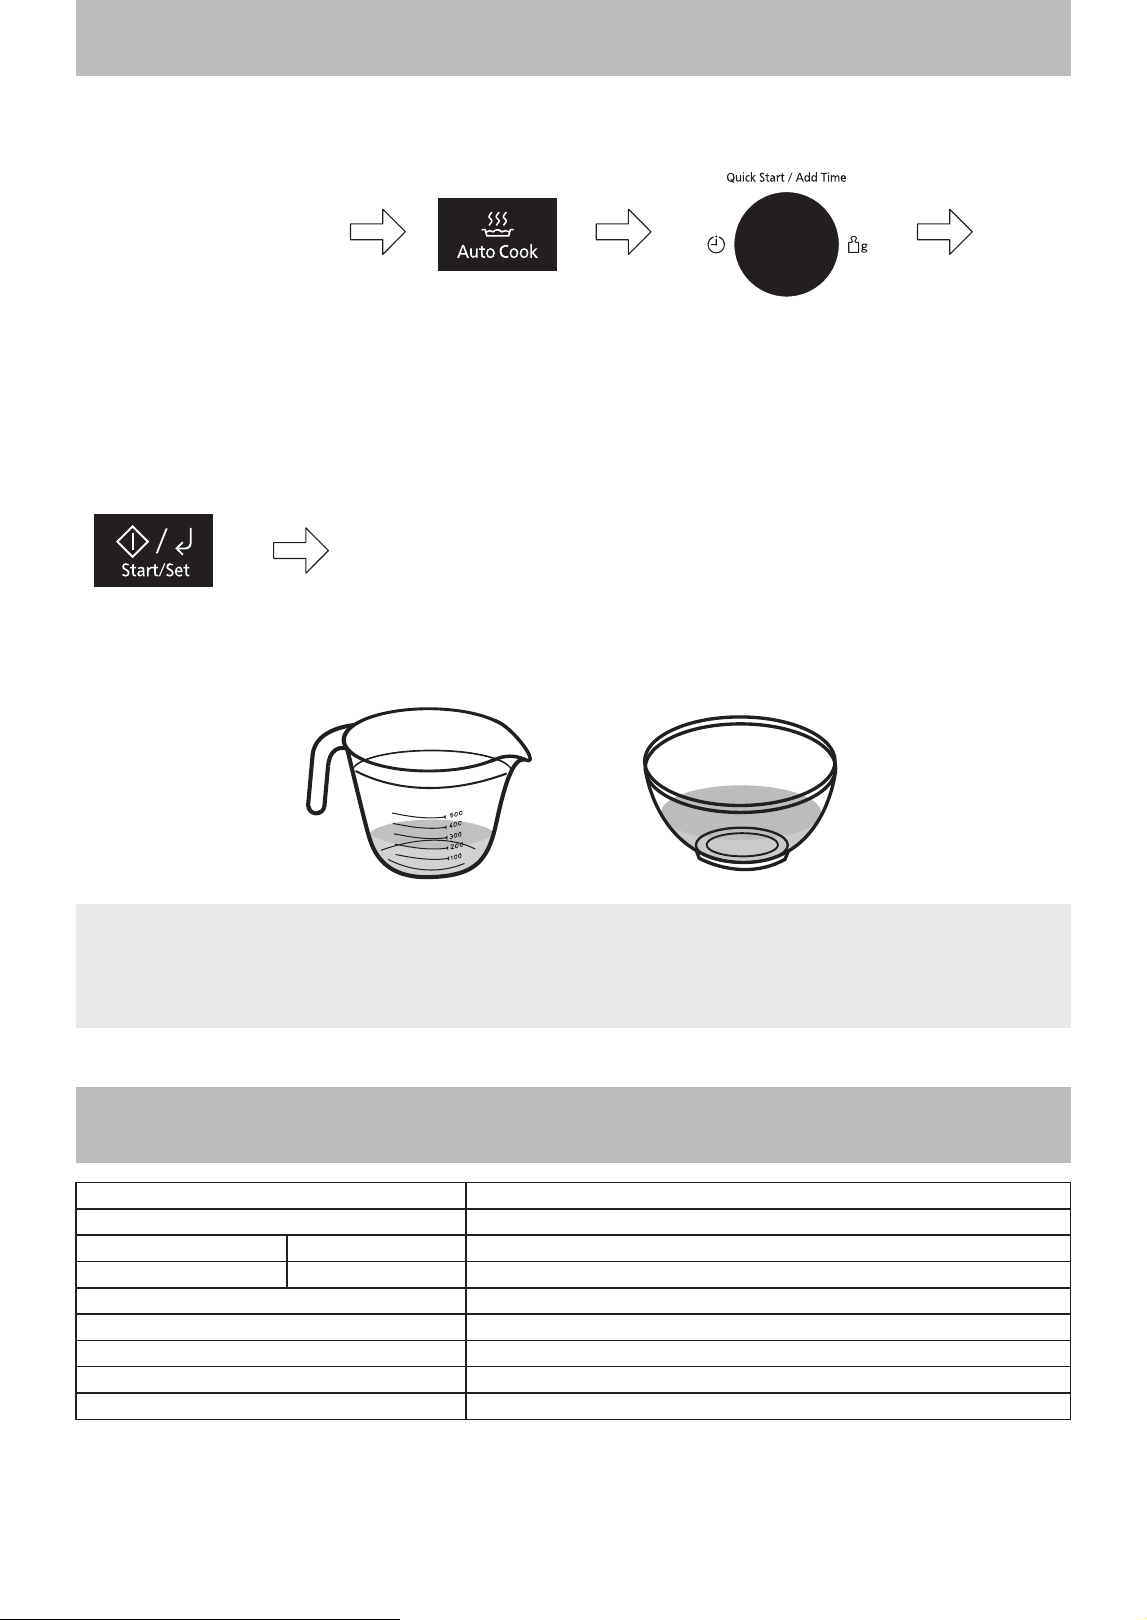
– 49 –
Technical Specifications
Power Supply: 230-240 V
50 Hz
Operating Frequency: 2450 MHz
Power Consumption: Maximum 1550 W
Output Power: Microwave 1000 W (IEC-60705)
Outside Dimensions: 495 mm (W) x 378 mm (D) x 292 mm (H)
Oven Cavity Dimensions: 330 mm (W) x 347 mm (D) x 251 mm (H)
Overall Cavity Volume: 29 L
Glass Tray Diameter: 288 mm
Net Weight: 10 k
g
• Weight and Dimensions shown are approximate.
• Specifications subject to change without notice.
• As for the voltage requirement, the production month, country and serial number, please refer to the
identification plate on the microwave oven.
Using the Aqua Clean Programme
This Programme is to clean the cavity and remove any food odour from the microwave oven.
Place 200 ml tap water
with 1 tbsp lemon juice in
a microwaveable container
(e.g. Pyrex
®
jug or bowl).
Use a jug or bowl of at
least 500 ml volume.
Press Auto Cook. Select the Auto menu
Programme 17 by turning
the dial.
( You can also press Auto
Cook repeatedly to select
Programme 17.)
Press Start/Set.
The programme
runs for 20 minutes.
Five beeps sound at the completion
of the programme. Open the oven
door and wipe the cavity and door
area with a soft cloth.
Or
Notes
1. Do not remove the glass tray and roller ring during this Programme.
2. To clean the glass tray and roller ring, refer to page 48.
3. Repeat the above procedure as required.

– 50 –
Panasonic Warranty
(for Australia)
Panasonic Warranty
Small Kitchen Appliances 12 Month Warranty from Date of Purchase (“Warranty Period”)
Microwave Oven, Rice Cooker, Bread Maker, Benchtop Oven and Stick Blenders
1. This warranty does not exclude, restrict or modify in any way other rights and remedies under the law which relates to the product,
including any non-excludable statutory guarantees in Australia.
2. Subject to the conditions of this warranty and during the Warranty Period, Panasonic or its Authorised Service Centre will perform
the necessary service on the product without charge for parts or labour, if in the opinion of Panasonic, the product is found to be
faulty within the Warranty Period.
3. This warranty only applies to Panasonic products purchased in Australia and sold by Panasonic Australia or its Authorised
Distributors or Dealers and only where the products are used and serviced within Australia or its territories. Warranty cover only
applies to service carried out by a Panasonic Authorised Service Centre and only if valid proof of purchase is presented when
warranty service is requested.
4. This warranty only applies if the product has been used in accordance with the manufacturer’s recommendations (as noted in the
Operating Instructions) under normal use and reasonable care (in the opinion of Panasonic). The warranty covers normal
domestic use only and does not cover damage, malfunction or failure resulting from:
(a) misuse, abuse, neglect, accidental damage or modifications;
(b) infestation by insects or vermin;
(c) incorrect installation, assembly, improper voltage, or mains supply problems;
(d) natural disaster or acts of God (e.g. lightening, flood, fire, earthquakes etc);
(e) rust or damage caused by exposure to abnormally corrosive conditions;
(f) an accessory, component or other equipment not supplied by Panasonic Australia;
(g) improper maintenance by the customer (refer to the maintenance section of the Operating Instructions) which includes but is
not limited to the failure to undertake the following actions:
(i) regular cleaning; and
(ii) where filters are included, regular cleaning and replacement of filters where necessary.
(h) incorrect operation of the product; and
(i) where no actual fault of the product is determined to have occurred, during a customer-initiated service call, and where the
perceived problem is explained within the Operating Instructions (including the troubleshooting section) warranty service is
not applicable
5. This warranty does not cover the following items unless the fault or defect existed at the time of purchase:
(a) Cabinet or Casing Parts (b) Noise or vibration that is considered normal
(c) User replaceable Batteries (d) Kneader mounting shaft unit and heads, blades and other accessories
(e) Microwave Oven cook plates
6. You will be responsible for costs associated with making the warranty claim where there are costs associated with
shipping or handling or travelling outside of the area normally serviced by Panasonic or any repair agent authorised by Panasonic.
7. To the extent permitted by law and subject to your non-excludable statutory rights and guarantees, Panasonic excludes all
warranties and liabilities (other than those contained in this warranty) including any liability for loss or damage whether
direct or indirect arising from your purchase, use or non-use of the product.
8. In addition to your rights under this warranty, Panasonic products come with consumer guarantees that cannot be
excluded under the Australian Consumer Law. You are entitled to a replacement or refund for a major failure and
compensation for any reasonably foreseeable loss or damage. You are also entitled to have the product repaired or
replaced if the product fails to be of an acceptable quality and the failure does not amount to a major failure.
9. To claim warranty service, when required, you should:
Contact Panasonic’s Customer Care Centre on 132 600 for Authorised Service Centre information
Send or take the product to a Panasonic Authorised Service Centre together with your purchase receipt as a proof of purchase
date.
THIS WARRANTY CARD AND THE PURCHASE DOCKET (OR SIMILAR PROOF OF PURCHASE)
SHOULD BE RETAINED BY THE CUSTOMER AT ALL TIMES
If you require assistance regarding warranty conditions or any other enquiries, please visit the Panasonic
Australia website
www.panasonic.com.au or contact by phone on 132 600
If phoning in, please ens
ure you ha
v
e
your operating instructions available.
Panasonic Australia Pty. Limited
ACN 001 592 187 ABN 83 001 592 187
1 Innovation Road, Macquarie Park NSW 2113
www.panasonic.com.au
PRO-031-F01 Issue: 2.0 09.12.2021
– 51 –
Panasonic Warranty
(for New Zealand)

PN:
F0924-0
Printed in China
Panasonic Corporation
Website: https://www.panasonic.com
© Panasonic Corporation 2024