
1
MU-SEVEN-G-8K
Professional Audio/Video Testing Device for HDMI 2.1, ARC/eARC, Latency &
Calibration An Approved Test Device for Dolby Audio ™

INTRODUCTION .................................................................................. 6
FEATURES .......................................................................................... 6
IN THE BOX ....................................................................................... 6
FREE PC SOFTWARE ............................................................................. 6
FRONT PANEL OVERVIEW ...................................................................... 8
A - DISPLAY ....................................................................................... 8
B - AUDIO/VIDEO OUTPUT INFO BAR ....................................................... 9
C - KEYPAD ....................................................................................... 9
AUDIO SIGNAL OUTPUT INDICATOR LIGHTS .............................................. 9
EARC, ARC, HDCP, AND HPD SIGNAL OUTPUT INDICATOR LIGHTS ................... 9
VIDEO SIGNAL/FORMAT OUTPUT INDICATOR LIGHTS .................................. 10
PS-1/PS-2 ......................................................................................... 10
SC-1/SC-2 ......................................................................................... 10
NAVIGATION SHORTCUT BUTTONS .......................................................... 10
MEDIA CONTROLS .............................................................................. 11
MENU NAVIGATION ............................................................................. 11
CONNECTIONS ................................................................................... 12
AV SYNC SENSORS .............................................................................. 12
HDMI PORTS ..................................................................................... 12
CONNECTIONS CONT. .......................................................................... 13
AUDIO INPUT .................................................................................... 13
AUDIO OUTPUTS ................................................................................ 13
CONTROL ......................................................................................... 13
POWER ............................................................................................ 14
NAVIGATION TUTORIAL ....................................................................... 14
FRONT PANEL: SHORTCUT BUTTONS ...................................................... 18
PRESET BUTTONS ............................................................................... 26
TO SAVE A PRESET (PS-1/PS-2): ............................................................ 26
SHORTCUT BUTTONS ........................................................................... 27
2

3
TO SAVE A SHORTCUT (SC-1/SC-2): ....................................................... 27
VIDEO GENERATOR ............................................................................. 28
TIMING & RESOLUTION: ...........................................................................28
PATTERN SELECT: ............................................................................. 28
FPGA: ............................................................................................. 29
ISF PATTERNS: .................................................................................. 29
DVS HDR PATTERNS: ........................................................................... 29
UHD SDR PATTERNS: ........................................................................... 30
DOLBY VISION: .................................................................................. 30
HD PATTERNS: ................................................................................... 31
PVA PATTERNS (UHD): ......................................................................... 31
SPEARS & MUNSIL (FHD): .................................................................... 32
USER PATTERN (STILLS): ..................................................................... 32
IRE WINDOW: .................................................................................... 32
SHORTCUTS: ..................................................................................... 33
COLOR SPACE: ................................................................................... 33
BT2020 SETTING: ............................................................................... 33
COLOR DEPTH: .................................................................................. 34
HDCP SETUP: .................................................................................... 34
HDMI/DVI SETUP: .............................................................................. 34
HDR: ............................................................................................... 35
VIDEO TEST: ..................................................................................... 35
AUDIO GENERATOR: ............................................................................ 36
PCM AUDIO: ...................................................................................... 36
PCM AUDIO SAMPLING RATE: ................................................................ 36
PCM AUDIO BIT DEPTH: ....................................................................... 37
PCM AUDIO SINEWAVE TONE: ............................................................... 37
PCM AUDIO AUDIO VOLUME: ................................................................. 37
AUDIO CHANNEL /SPEAKER CONFIGURATION: ........................................... 38

4
DOLBY AUDIO GENERATOR: .................................................................. 39
DOLBY DIGITAL: ................................................................................ 39
DOLBY DIGITAL PLUS: ......................................................................... 39
DOLBY MAT: ...................................................................................... 40
DOLBY MAT (DOLBY TRUEHD): .............................................................. 40
MY STREAMS: .................................................................................... 41
EXT. ANALOG L/R INPUT: ..................................................................... 41
DTS AUDIO GENERATOR: ...................................................................... 41
DTS-HD HIGH RESOLUTION: ................................................................. 42
DTS-X: ............................................................................................. 43
DTS EXPRESS: ................................................................................... 43
MY STREAMS: .................................................................................... 43
AUDIO TESTS: ................................................................................... 44
SOURCE-SPEAKER TEST: ...................................................................... 44
SYNC & LATENCY TESTS: ...................................................................... 46
VIDEO SETTINGS: ............................................................................... 46
DOLBY VISION SETTINGS: .................................................................... 47
AUDIO STREAM START ADJUST: ............................................................. 47
AV SENSOR FUNCTIONALITY TEST: ......................................................... 47
ARM AV LATENCY: ............................................................................... 48
ARM ARC LATENCY: ............................................................................. 50
ARM EARC LATENCY: ........................................................................... 51
EDID, EARC CDS: ............................................................................... 52
SINK DEVICE EDID INFO: ..................................................................... 52
EARC/ARC AUDIO INFO: ....................................................................... 53
ARC HPD CTL: ................................................................................... 53
EARC PHYSICAL HPD CTL: .................................................................... 53
HDMI +5V POWER CTL: ....................................................................... 54
EARC TX LATENCY: ............................................................................. 54

5
EARC RX LATENCY: ............................................................................. 54
SYSTEM SETUP: ................................................................................. 55
IP MANAGEMENT: ............................................................................... 55
ARC/EARC OUT SETUP: ........................................................................ 55
VITALS: ........................................................................................... 56
FAN CONTROL: .................................................................................. 56
RESET ALL SETTINGS: ......................................................................... 57
UPDATING FIRMWARE .......................................................................... 58
FCC INTERFERENCE AND COMPLIANCE STATEMENT .................................... 58
FCC WARNING ................................................................................... 58
CAUTION .......................................................................................... 58
WARRANTY AND GETTING HELP ............................................................. 59
OBTAINING THE WARRANTY SERVICE ...................................................... 60
DISCLAIMER OF WARRANTY .................................................................. 61
GETTING HELP ................................................................................... 62
LEGAL NOTICES ................................................................................. 62

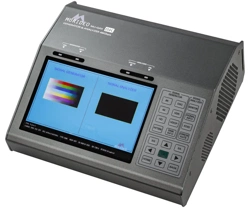
Introduction
The SEVEN Generator is the next generation in HDMI test and measurement equipment from Murideo.
An approved test device for Dolby Vision™ and Dolby Audio™, the SEVEN hosts an unmatched suite of
audio and video tests. This device is the GO-TO tool for the video device, display, or repeater manufac-
turer as well as the consummate video professional.
The impressive video capabilities of the SEVEN include native 10/12 Bit BT2020 video output with over
1000 patterns, including HDR, SDR, Dolby Vision, and HLG. Test patterns are generated from FPGA or
raw YUV les for a truly native experience and include video playback. The SEVEN includes the full suite
of patterns from Diversied Video Solutions and other patterns and videos from Bill Wetzel, ISF, PVA,
Portrait Displays, and Spears & Munsil. This device is the ideal solution for display calibration and evalu-
ation. The test suite allows the user to construct a test signal with any video format and any audio for-
mat, then execute a test based on your own parameters and allows for reporting. The device has 1.5TB
of storage, with reservations for up to 3 minutes of 4K60 4:4:4 video playback so the user can quickly
load patterns using the USB 3.0 interface. The SEVEN is also capable of 120 frame video playback.
The impeccable performance in video generation is just the beginning. As a test device approved by
Dolby Laboratories, Inc., SEVEN was designed with advanced audio testing capabilities, including A/V
Sync (Lip Sync), Audio Latency, and Dolby Audio. This approved test device for Dolby Audio contains all
current Dolby Audio streams, including; Dolby Digital, Dolby Digital Plus (w/Dolby Atmos), Dolby MAT
(Dolby Atmos), and Dolby True HD (w/ Dolby Atmos). The Audio Suite of tests is available in HDMI Tx,
ARC Tx, and eARC Tx. With additional features like tone generation, frequency sweeps, AV Sync mea-
surements, audio latency measurements, this is an audio swiss army knife. The built-in photo-diode
sensor and microphone allow you to get real-time sync and latency measurements from HDMI and ARC/
eARC.
In the Box
· SEVEN Generator
· Hard Case
· Mini XLR Microphone
· Optical Sensor
· USB cable
· Mini Tripod
· Power Supply (12V/5A Locking Barrel Type)
6
Features
· Complete HDMI 2.0 Support (All Revisions)
· 600 Mcsc - 2160P @60 4:4:4 Maximum Resolution
· 40Gbps FRL HDMI 2.1 Support
· 4K BT2020 (WCG) 10/12 Bit Support (Native)
· Dolby Vision, HDR 10, HLG, SDR
· HDCP 2.3 Support
· ARC/eARC Tx and Rx
· 1080P 120Hz patterns and video playback
· ISF Labs Certied
· Control - Front Panel/PC Software/WebUI
· Haptic Front Keypad
· API (Application Programming Interface) Available
upon request
· Reference Source / Auto-Control for third party display
calibration software
· 7” 1080P Display
· Custom Test Pattern, Video Clip, and Audio Stream
Uploader PC Software
· USB 3.0 for fast uploads
· Reservation for up to 3 minutes of full 4K video
· Native YUV/RGB File upload and playback
Free PC Software
· PC Control Software
· Device Log
· Protocol Analyzer
· User Audio Uploader
· User Video Uploader
Available for download at www.murideo.com
Price - $0.00 !!!
NOTE: This document contains many technical terms and acronyms. If you are unsure of what these
mean we have a full GLOSSARY of Audio Video terms with denitions available at www.murideo.com

7
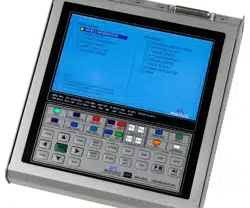
Specications

FRONT PANEL OVERVIEW
A - Display
The SEVEN-G includes a High Resoltution 1080P Full Color Display.
8

B - Audio/Video Output Info Bar
The AUDIO / VIDEO OUTPUT INFO BAR includes all pertinent video and audio output information includ-
ing resolution, timing, color space, color depth, PQ, audio format, sample rates, data size (bit depth),
audio frequency, and audio channel count.
9
C - Keypad
Audio Signal Output Indicator Lights
These lights indicate which audio format is currently
being generated by the SEVEN-G-8K.
In the example to the right, PCM audio is currently
selected as the audio output.
eARC, ARC, HDCP, and HPD Signal Output Indicator Lights
ARC/eARC lights indicate if an ARC/eARC is enabled on the SEVEN-G-8K
and the connected device under test.
· OFF - Disabled
· ON - Enabled on the SEVEN-G-8K and connected device under test
· FLASHING - Enabled on the SEVEN-G-8K but not on connected de-
vice under test
10
Video Signal/Format Output Indicator Lights
These lights indicate which version of HDR is currently selected. All
o indicates an SDR Video signal (no HDR).
PS-1/PS-2
Preset Shortcut Buttons
For more information see Page 23.
SC-1/SC-2
Shortcut Buttons
For more information see Page 24.
Navigation Shortcut Buttons
Use these buttons to quickly jump to your favorite/commonly used menus/settings.
For more information see Pages 14-21.
HDCP Light indicates if HDCP is enabled on the SEVEN-G-8K.
HPD Light indicates if a Hot Plug is detected with a device connected to
the HDMI OUTPUT of the SEVEN-G-8K

11
Media Controls
RUN/STOP Button
Use this button to pause/continue video clips.
MUTE Button
Use this button to MUTE/UNMUTE the AUDIO OUTPUT of the SEVEN-G-8K.
Menu Navigation
UP/DOWN/LEFT/RIGHT Buttons
These buttons are used to navigate through menus.
OK Buttons
Press this button after you have highlighted your menu item to conrm your selection.

Connections
12
AV SYNC SENSORS
Visual Probe - connect the included light sensor for video or
audio/video latency tests. After connecting the sensor to the
SEVEN-G-8K, place the sensor in the middle of the display.
The sensor can also be attached to a tripod if you are using
it to test video or audio/video latency of a 2 piece projec-
tion system.
Microphone - This mini-XLR connection is where you
connect the included microphone for audio or audio/
video latency tests. After connecting the microphone to
the SEVEN-G-8K, place the microphone as close to the
display’s speaker (or a speaker in the audio system) as
possible.
NOTE: We have found extension cables that work with the visual probe and microphone. These can be
used in applications where the included cables are too short. If you would like a recommendation on ex-
tension cables, feel free to email us at [email protected]
HDMI PORTS
HDMI OUTPUT - Using a known good HDMI cable, connect
the SEVEN-G-8K to the device you’d like to test.
HDMI INPUT - Using a known good HDMI cable, connect the
SEVEN-G-8k to the source you’d like to test.

CONTROL
The SEVEN-G-8K has multiple connections
for control. These can be used to control the
SEVEN-G-8K remotely, for FW updates, or for
uploading custom test patterns, audio les, or
video clips. The connections are:
· IP Control - Use an Ethernet cable to connect the SEVEN-G-8k to a network to access the Web UI.
NOTE: For this to work properly your PC must be on the same network as the SEVEN-G-8K. The
default IP address is 192.168.1.239, but can be changed in the System Setup menu if needed.
· RS-232 Control - Use a DB9 cable to connect the SEVEN-G-8K to a PC. You can now remotely
control the SEVEN-G-8K via RS-232 protocol. This can also be used to access and use any of the
included SEVEN-G-8K software packages.
· Serial Link - Use a 3-pin terminal to connect the SEVEN-G-8K to a PC. You can now remotely
13
Connections Cont.
Audio INPUT
2 CH. LINE LEVEL EXT. AUDIO INPUT - Use this 3.5mm
input to connect an external audio source to the SEVEN-G-
8K. This can be used if you have audio test tones or perhaps
music clips from another device.
Audio OUTPUTS
Extracted S/PDIF Audio OUTPUT - Connect the SEVEN-G-8K to
an external audio preamp, amplier, AVR, or any other device
that has an audio input. Use this to test/conrm audio signals.
NOTE: This is only used to pass the extracted audio from the
HDMI stream. These cannot be used as a “stand alone” audio
output from the SEVEN-G-8K. There are 2 connections:
· TOSLINK
· Digital Coax
14
Navigation Tutorial
If this is your rst time using the SEVEN-G-8K take a few moments to learn how to navigate through the
SEVEN-G-8K’s menu system. In this example we are going to select a DVS HDR Evaluation test pattern,
then a Chroma Sub 500 test pattern.
POWER
· 12V/3A - Here is where you connect the SEVEN-G-8K’s power supply.
NOTE: Only use the included power supply.
· POWER SWITCH - This a simple ON/OFF switch to power the SEVEN-G-
8K o (down position) or ON (up position).
control the SEVEN-G-8K via RS-232 protocol. This can also be used to access and use any of the
included SEVEN-G-8K software packages.
· USB 3.0 - Use a USB cable to connect the SEVEN-G-8K to a PC. . You can now remotely control
the SEVEN-G-8K via RS-232 protocol. This can also be used to access and use any of the included
SEVEN-G-8K software packages.
NOTE: You MUST use the USB connection for uploading custom test patterns, audio les, or video clips.
If loading FW you can use whichever control connection is most convenient to you.
UP
DOWN
LEFT RIGHT
OK

15
1. Verify that your SEVEN-G-8K is Powered OFF.
2. Connect a high-performance HDMI cable to your SEVEN-G-8K’s “HDMI OUTPUT” port to an “HDMI IN-
PUT” of an HDR10 compatible display.
3. Power Up the SEVEN-G-8K using the On/O switch.
4. Starting from the MAIN MENU screen (this is the default menu when you power on, or you can press
the HOME shortcut button to get to the MAIN MENU). Use the UP/DOWN ARROW buttons and high-
light the “VIDEO GENERATOR” menu.
5. Press the GREEN “OK” button.
6. Looking at the right side of the screen, notice that the “TIMING & RESOLUTION” OPTION is now high-
lighted in ORANGE.
7. Press the “ARROW DOWN” button to highlight “PATTERN SELECT”.
8. Press the GREEN “OK” button.
9. Looking at the left side of the screen, notice new sub-menu selections under the “VIDEO GENERATOR”
/ “PATTERN SELECT” menu tree.
10. Arrow Down and highlight the “DVS HDR PATTERNS” menu item.
16
11. Press the GREEN “OK” button.
12. On the right side of the screen, notice that the “CLIPPING & COLOR” OPTION is now highlighted in
ORANGE.
13. Arrow Down and highlight the “EVALUATION” OPTION.
14. Press the GREEN “OK” button.
15. Press the “RIGHT ARROW” button until the “City Sunset” test pattern is highlighted in BLACK, then
press the GREEN “OK” button to select. The “City Sunset” test pattern should now be visible on the
display that you have your SEVEN-G-8K plugged into.
17
16. Use the navigation arrow buttons to highlight the “Chroma Sub 500” pattern in BLACK.
17. Press the GREEN “OK” button to select.
18. Select any other patterns you might like to look at. When you are nished exploring, press the
“BACK” button several times OR press the “HOME” button to jump back to the “MAIN MENU” screen.

18
Front Panel: Shortcut Buttons
The following pages cover the SEVEN-G-8K’s shortcut buttons.
HOME
Pressing the “HOME” button will jump to the SEVEN-G-8K’s Main Menu.
Note: This is the default menu when the SEVEN-G-8K is powered on.
19
VIDEO
Pressing the “VIDEO” button will jump to the Video Generator menu. Here you can select and change the
output settings. See Pages 24-30 for more details.
VIDEO TESTS
Pressing the “VIDEO TESTS” button will jump to the Video Tests menu. See Page 31 for more details.

20
AUDIO
Pressing the “AUDIO” button will jump to the Audio Generator menu. See Page 32-34 for more details.
AUDIO TESTS
Pressing the “AUDIO TESTS” button will jump to the Audio Tests menu. See Page 32-39 for more details.

21
PATTERN
Pressing the “PATTERN” button will jump to the FPGA Pattern select menu. See Page 24-28 for more
details.
For a detailed list of the available test patterns and a description of each, visit
w

22
HDR
Pressing the “HDR” button will jump to the HDR menu.
See Page 31 for more details.
EDID
Pressing the “EDID” shortcut button jump to the EDID, eARC, CDS menu. See Page 48 for more details.

23
HDCP
Pressing the HDCP shortcut button will jump to the HDCP Setup menu. See Page 30 for more details.
SETUP
Pressing the Setup shortcut button will jump to the System Setup menu. See Page 51 for more details.

24
MY RES
Pressing the My Res shortcut button will jump to the My Resolutions menu. In order to save a specic
resolution/timing, rst choose a resolution/timing from the TIMING & RESOLUTION menu. For example:
· Select (for example7680x4320@30Hz)
· Press and hold the OK button for 3 seconds
· This jumps to the CHANGE MY RESOLUTION menu
· Use the UP/DOWN arrows to select a slot (1-14)
· Press the OK button to set/conrm
NOTE: For detailed instructions see the “Using Shortcuts” user guide located at www.murideo.com

25
ARC / eARC
Pressing the ARC/eARC shortcut button will jump to the ARC/eARC Output setup menu. See Page 51 for
more details.
CDS
Pressing the CDS shortcut button will jump to the ARC/eARC Audio Information menu. See Page 49 for
more details.

26
Preset Buttons
There are 2 programmable preset buttons. Use these to quickly select your favorite output parameters.
These include:
· Resolution
· Timing
· HDCP Version
· Color Space
· CD (Color Bit Depth)
· Color Gamut
· Audio Format
· Audio Sampling Rate
· Audio Bit Depth
· Channel Conguration
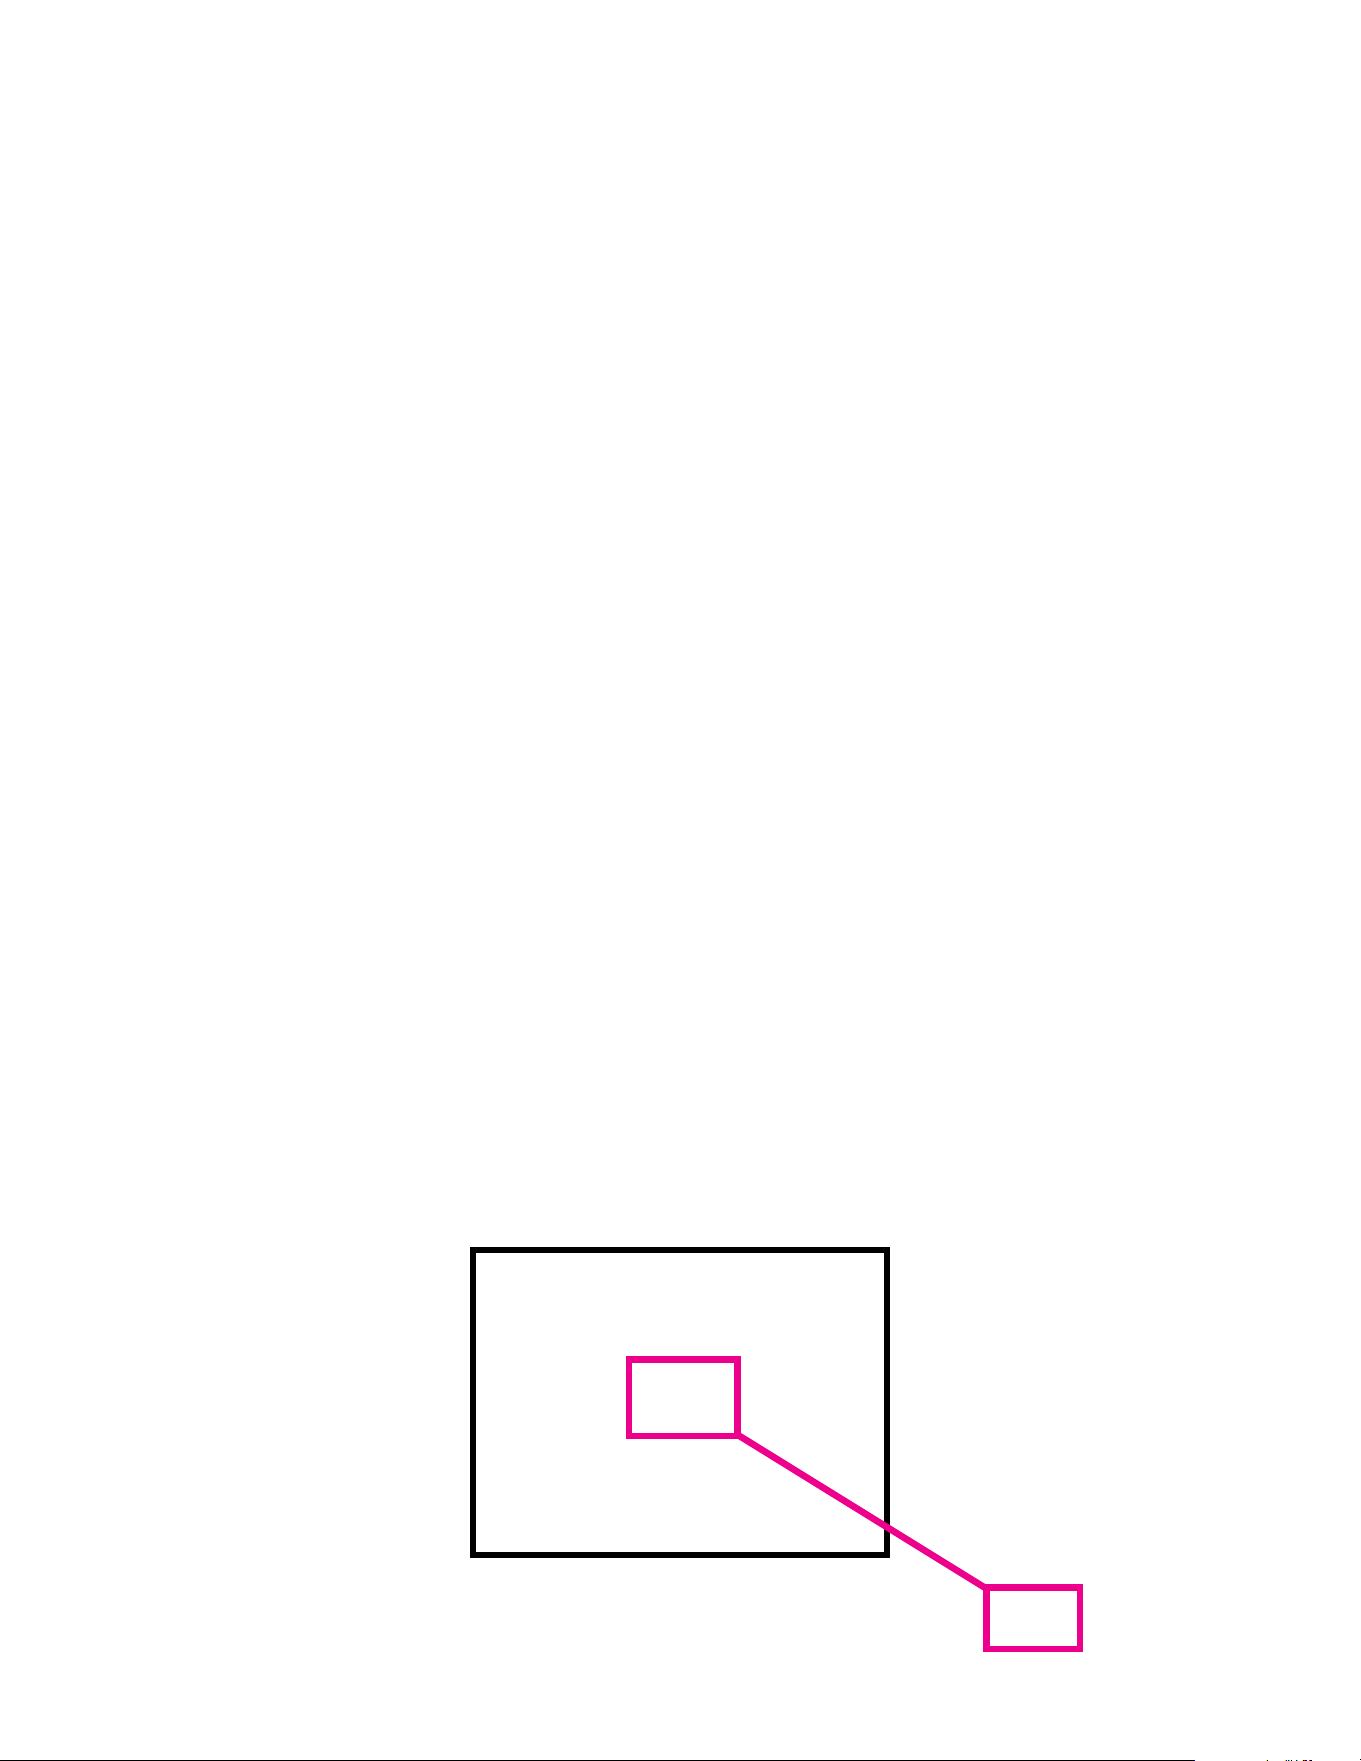
NOTE: All parameters you have choosen will be displayed in the Audio Video Output Info Bar (see image
below).
To save a Preset (PS-1/PS-2):
· Select your desired Audio and Video Output parameters
· Press and hold PS-1/PS-2 button for approximately 3 seconds
· The Keypad lights of the SEVEN-G-8K will all ash once conrming that the preset has been saved
NOTE: Your custom programed presets will be lost upon a “FACTORY RESET” or after a Firmware Update.
NOTE: For detailed instructions see the “Using Shortcuts” user guide located at www.murideo.com

27
Shortcut Buttons
There are 2 programmable shortcut buttons (SC-1/SC-2). Use these to quickly navigate to your favorite
menu.
To save a Shortcut (SC-1/SC-2):
· Navigate to the Menu you would like to save as a shortcut
· Press and hold SC-1/SC-2 button for approximately 3 seconds
· The Keypad lights of the SEVEN-G-8K will all ash once conrming that the shortcut has been
saved
NOTE: Your custom programed shortcuts will be lost upon a “FACTORY RESET” or after a Firmware Up-
date.
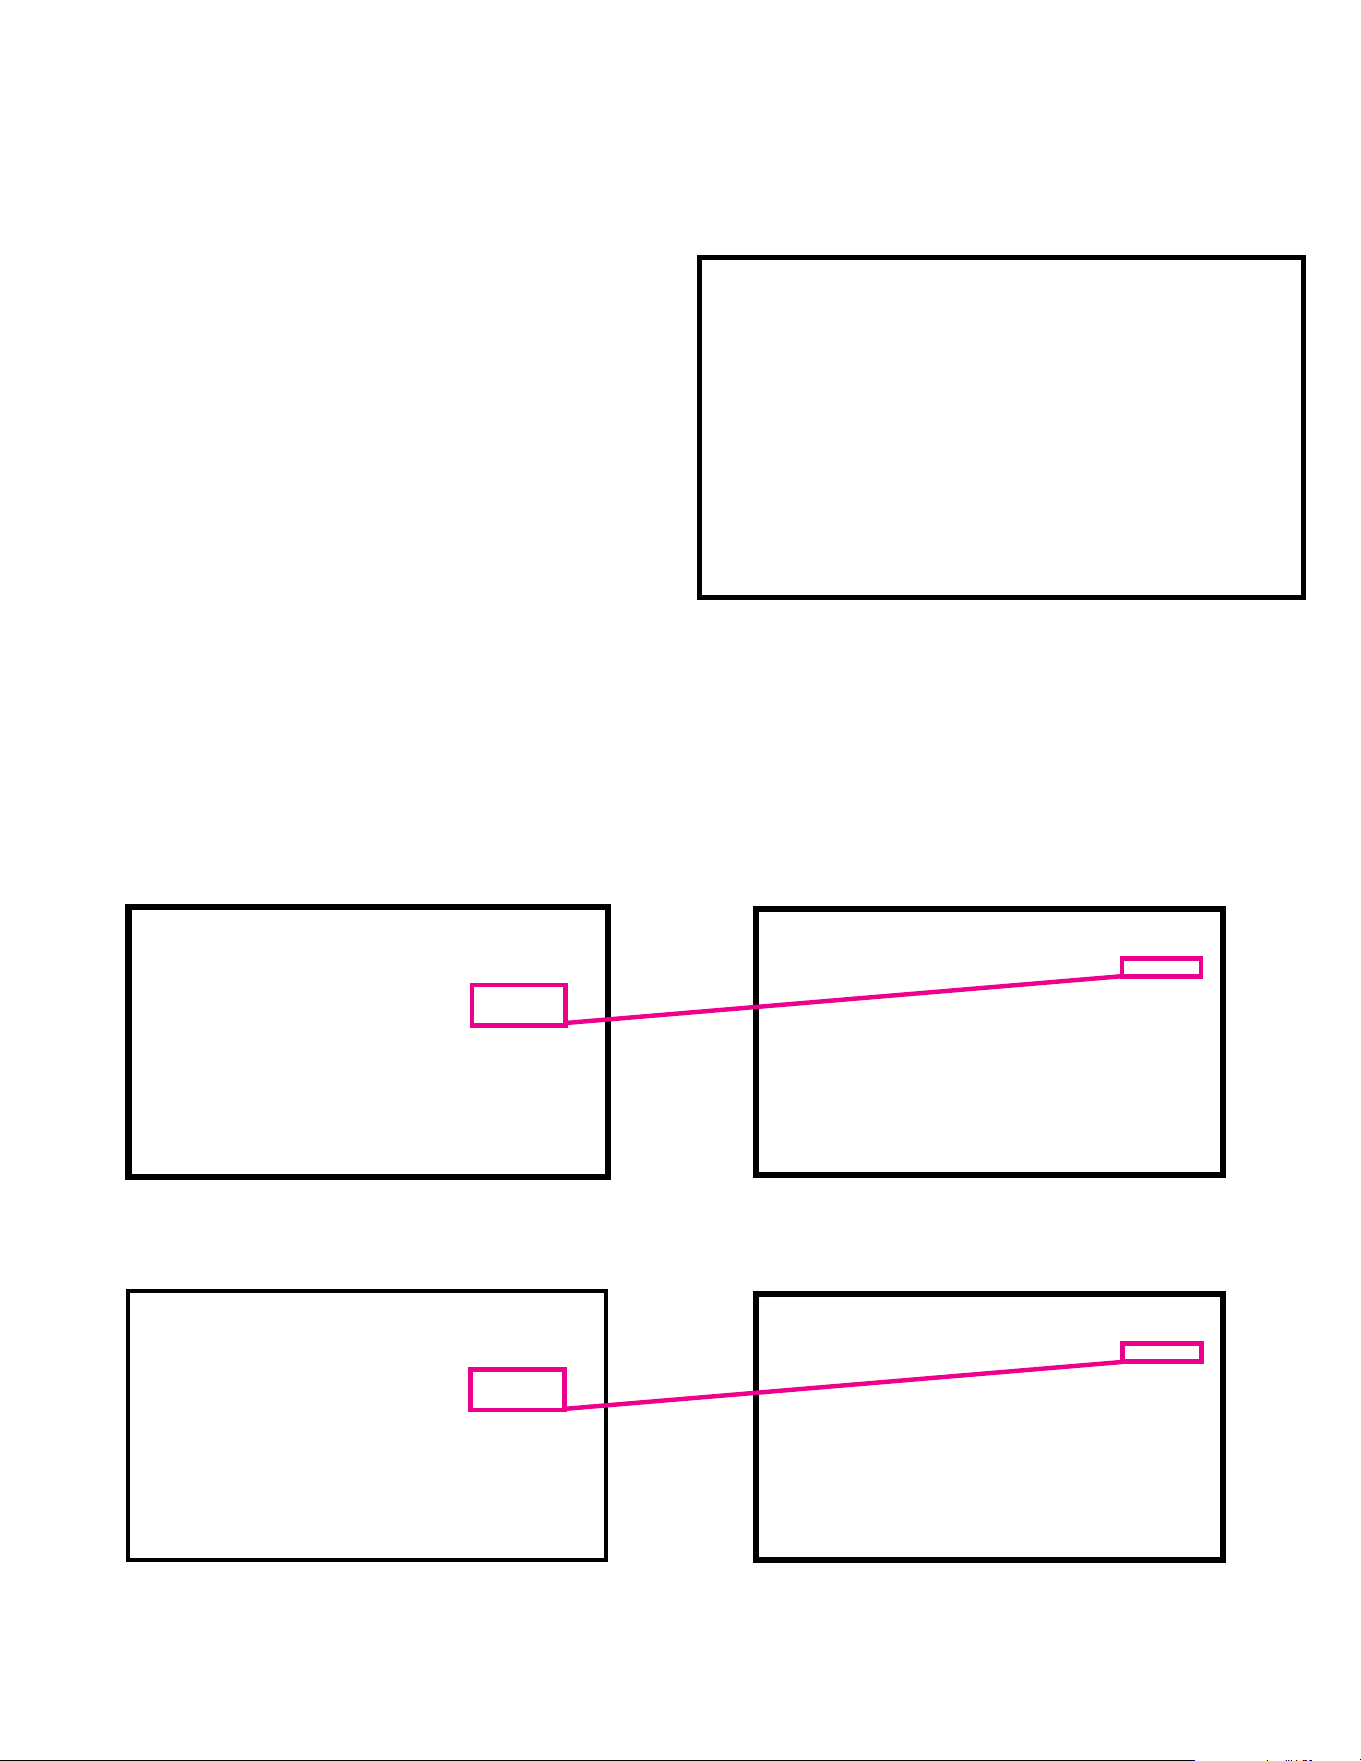
Example: You use the ARC-LATENCY MEASUREMENT menu on a regular basis. In order to navigate to
this test you would have to normally press approximately 12 buttons. Since you have this menu saved as
a shortcut your 12 button presses are now just ONE!
28
Video Generator
This is the Video Generator menu. This is where you can choose the parameters of the generated video
signal. It contains the following options:
· TIMING & RESOLUTION
· PATTERN SELECT
· COLOR SPACE
· BT 2020 SETTINGS
· COLOR DEPTH
· HDCP SETUP
· HDMI / DVI SETUP
· HDR
TIMING & RESOLUTION:
Use this page to select the resolution and frame rate of the generated video signal. It contains the follow-
ing options
· 8K
· UHD
· 4K-DCI
· 2K-DCI
· HD
· SD
· VESA
· 3D
· CUSTOM
· AUTO READ EDID
PATTERN SELECT:
Select from over 500 high-quality stand-alone pat-
terns. However, the pattern choices are virtually un-
limited when using the FPGA processor in addition to
patterns generated with IRE and APL (Average Picture
Level).
For a complete list of patterns and their descriptions
visit www.murideo.com/test-pattern-library
29
FPGA:
FPGA (Field Programmable Gate Array) patterns are generated “on-the-y”. This means you can select/
change any video parameter that is neccesarry for your specc needs.
NOTE: If you change any parameters of any patterns that are not in the FPGA menu (example ISF, DVS,
UHD/SDR, Dolby Vision, HD Patterns, PVA Patterns, SPE Patterns, Spears and Munsil) these will always be
output in their native format.
ISF PATTERNS:
HD - Native 1920x1080@60Hz RGB Full (0-255)
UHD - Native 3840x2160@60Hz RGB Full (0-255)
ISF Patterns are designed by the Imaging Science
Foundation. https://imagingscience.com/
DVS HDR PATTERNS:
DVS Patterns include “real world” images along with technical test patterns which are available in HDR10,
Dolby Vision, and HLG.
https://diversiedvideosolutions.com/
Native Timing for the 3 options.
HDR10 - 3840x2160@24Hz YC 4:4:4
DV - 3840x2160@24Hz YC 4:2:2
HLG - 3840x2160@24Hz YC 4:4:4
This menu contains the following options:
· CLIPPING & COLOR (HDR10)
· EVALUATION (HDR10)
· GEOMETRY & CONVERGENCE (HDR10)
· RAMPS, GRADIENTS, ZONE PLATES (HDR10)
· RESOLUTION, ANSI, PLACEMENT (HDR10)
30
UHD SDR PATTERNS:
Native 3840x2160@60Hz RGB Full (0-255).
· Clipping & Gamma
· Color Bars & Noise
· Color Checker
· Geometry & Resolution
· Ramps
Dolby Vision:
They are labeled FHD (1080p) and UHD (4k).
FHD - Native 1920x1080@60Hz RGB Full (0-255)
UHD - Native 3840x2160@60Hz RGB Full (0-255)
· CLIPPING & COLOR (DV)
· EVALUATION (DV)
· RAMPS, GRADIENTS, ZONE PLATES (DV)
· RESOLUTIONS, ANSI, PLACEMENT (DV)
· CLIPPING & COLOR (HLG)
· EVALUATION (HLG)
· RAMPS, GRADIENTS, ZONE PLATES (HLG)
· RESOLUTION, ANSI, PLACEMENT (HLG)
31
HD PATTERNS:
These test patterns are native 1080p@60Hz RGB (0-255)
PVA PATTERNS (UHD):
These patterns were developed by the Professional
Video Alliance.
https://professionalvideoalliance.com/
These patterns are native 3840x2160@60Hz YC 4:2:2.
Each pattern has two versions:
· BT709
· BT2020
SPE PATTERNS (UHD):
These patterns were developed by SPE (Sony Pictures
Entertainment). There are two images, each one in
multiple formats.
These patterns are native 3840x2160@60Hz, but they
do vary in colorspace, chroma sub sampling, and SDR/
HDR.
NOTE: Be sure to choose the correct version for your specic application. Verify the version by looking
closely at the name of the test pattern or by looking at the AUDIO VIDEO INFO bar.
32
SPEARS & MUNSIL (FHD):
These test patterns are native 1920x1080 YC 4:2:2,
but they do vary in frame rate. To add, some are 1080i
while others are 1080P
Spears & Munsil Pattern Selection includes Bias, Fram-
ing, “Sara on a Hammock”, Motion Video, Color, Tint,
Jaggies, and 1080i (interlaced) Motion.
NOTE: Be sure to choose the correct version for your
specic application. Verify the version by looking close-
ly at the name of the test pattern or by looking at the AUDIO VIDEO INFO bar.
USER PATTERN (STILLS):
This is where you would access any custom test patterns that you have uploaded.
This menu contains 4 options:
· USER DEFINED PATTERNS (x6 slots available)
· USER FHD PATTERNS (x54 slots available)
· USER UHD HDR PATTERNS (x54 slots available)
· USER UHD SDR PATTERNS (x54 slots available)
IRE WINDOW:
Allows you to create a custom IRE window. You may
adjust the window size (using the UP/DOWN arrow
buttons) and the IRE level (using the LEFT/RIGHT
arrow buttons).
NOTE: This IRE Window (pattern) is gererated by the
FPGA. This means any output parameters that you
choose will be retained. You can verify by looking at
Audio Video Output Info Bar.
NOTE: To upload custom test patterns use the USER
VIDEO UPLOADER PC software which can be downloaded from www.murideo.com
33
SHORTCUTS:
You can save up to 14 of your favorite test patterns as shortcuts for easy access. To save a test pattern
as a shortcut choose the pattern then press and hold the OK button for 3 seconds. This will bring up the
CHANGE PATTERN SHORTCUT Menu.
For detailed instructionsv see the “Using Shortcuts” user guide located at www.murideo.com
COLOR SPACE:
Select the desired color space of the Output Signal.
These options are generated from the FPGA.
NOTE: This will only aect the FPGA Patterns and the
custom IRE window tool.
BT2020 SETTING:
Enable or Disable BT2020 for the FPGA Generator.
NOTE: If BT2020 is Disabled, the default color gamut
will be BT 709
34
COLOR DEPTH:
Change the Color Depth for any of the FPGA Patterns.
· 8 Bit
· 10 Bit
· 12 Bit
· 16 Bit
HDCP SETUP:
Set the encryption type for the HDMI Output of the SEVEN-G-8K.
· HDCP OFF
· HDCP 1.4
· HDCP 2.3 (this includes 2.2)
· HDCP AUTO (according to the EDID of the connect-
ed device)
HDMI/DVI SETUP:
Use this page to set the TX (Output).
· DVI - Sets the output to DVI (RGB 4:4:4)
· HDMI - Sets the output to HDMI (YUV)
· AUTO - Based on the EDID of the connected device
NOTE: This will only aect the FPGA Patterns and the
custom IRE window tool.
35
HDR:
Change the HDR Metadata for any of the FPGA Pat-
terns.
Note: You can view the HDR Metadata down to the
HEX code using the PC Control Software available for
download at www.murideo.com
VIDEO TEST:
Playback pre-loaded video les les from Spicey Pixels
and SPE (Sony Pictures Entertainment), or any of your
own that you have uploaded using the User Video
Uploader free PC software.
Note: Visit www.murideo.com to download the free
User Video Uploder PC Software. There are 19 pre-
loaded video test clips, or you can load TWO of cus-
tom video test clips (.MOV or multiple .YUV frames)
36
PCM AUDIO:
PCM Audio contains the following options:
· Audio Sampling Rate
· Audio Bit Depth
· Sinewave Tone
· Audio Volume
· Audio Channel Conguration
PCM AUDIO SAMPLING RATE:
PCM Audio Sampling Rate contains the following options (in Kilohertz/KHz):
· 32K
· 44.1K
· 48K
· 88K
· 96K
· 176K
· 192K
AUDIO GENERATOR:
Use this menu to select the format of the generated au-
dio signal.
· PCM
· Dolby Audio
· External L/R
· DTS
NOTE: These settings apply for both the HDMI TX (Output) and RX (Input, ARC and
eARC) - You must enable ARC/eARC from the system setup menu. You may also
need to enable ARC/eARC inside the connected device under test. Once detected, the
ARC/eARC light will illuminate.
37
PCM AUDIO SINEWAVE TONE:
Here you can customize the frequency of the PCM Audio Sinewave tone. There are 14 options available.
· 100Hz
· 200Hz
· 300Hz
· 400Hz
· 500Hz
· 600Hz
· 700Hz
· 800Hz
· 900Hz
· 1KHz
· 2KHz
· 3KHZ
· 4KHz
· 5KHz
PCM AUDIO AUDIO VOLUME:
Adjust the volume of the generator Audio output.
NOTE: This volume adjustment aects all audio gen-
erated by the SEVEN-G-8K.
PCM AUDIO BIT DEPTH:
PCM Audio contains the following options for Bit Depth.
· 16Bit
· 20Bit
· 24Bit
38
AUDIO CHANNEL /SPEAKER CONFIGURATION:
Use this page to select between various multichannel audio samples starting with 2 CH Stereo with OP-
TIONS up to 7.1CH.

39
DOLBY AUDIO GENERATOR:
There are 5 options under the Dolby Audio Generator. These options in-
clude:
· Dolby Digital
· Dolby Digital Plus
· Dolby MAT
· Dolby MAT (Dolby TrueHD)
· My Streams
DOLBY DIGITAL:
There are 6 options under the Dolby Digital. These options include:
· Dolby Digital - 32KHz 2.0Ch
· Dolby Digital - 32KHz 5.1Ch
· Dolby Digital - 44.1KHz 2.0Ch
· Dolby Digital - 44.1KHz 5.1Ch
· Dolby Digital - 48KHz 2.0Ch
· Dolby Digital - 48KHz 5.1Ch
DOLBY DIGITAL PLUS:
There are 4 options under the Dolby Digital Plus. These options include:
· Dolby Digital Plus- 48KHz - 2.0Ch
· Dolby Digital Plus- 48KHz - 5.1Ch
· Dolby Digital Plus- 48KHz - 7.1Ch
· Dolby Digital Plus (object audio) 48KHz - Dolby Atmos

40
DOLBY MAT:
There are 8 options under Dolby Digital Plus. These
options include:
· Dolby MAT (PCM) - 44.1KHz - 2.0Ch
· Dolby MAT (PCM) - 44.1KHz - 5.1Ch
· Dolby MAT (PCM) - 44.1KHz - 7.1Ch
· Dolby MAT (PCM) - 48KHz - 2.0 Ch
· Dolby MAT (PCM) - 48KHz - 5.1Ch
· Dolby MAT (PCM) - 48KHz - 7.1Ch
· Dolby MAT (PCM object audio) - 44.1KHz - Dolby Atmos
· Dolby MAT (PCM object audio) - 48KHz - Dolby Atmos
DOLBY MAT (Dolby TrueHD):
There are 9 options under Dolby MAT (Dolby TrueHD). These options include:
· Dolby MAT (Dolby TrueHD) - 48KHz - 2.0Ch
· Dolby MAT (Dolby TrueHD) - 48KHz - 5.1Ch
· Dolby MAT (Dolby TrueHD) - 48KHz - 7.1Ch
· Dolby MAT (Dolby TrueHD) - 96KHz - 2.0Ch
· Dolby MAT (Dolby TrueHD) - 96KHz - 5.1Ch
· Dolby MAT (Dolby TrueHD) - 96KHz - 7.1Ch
· Dolby MAT (Dolby TrueHD) - 192KHz - 2.0Ch
· Dolby MAT (Dolby TrueHD) - 192KHz - 5.1Ch
· Dolby MAT (Dolby TrueHD) Object Based - 48KHz Dolby Atmos
41
MY STREAMS:
Use this page to select one of the 6 custom uploaded
Dolby audio streams.
NOTE: The Audio Uploader Software with instructions
are available at www.murideo.com
EXT. ANALOG L/R INPUT:
If using an external audio source via the 3.5mm Ext.
Audio Input, use this menu to switch from internal
audio generator to the ext. audio source.
Note: 2 Ch PCM audio only.
DTS AUDIO GENERATOR:
There are 6 options under DTS Audio Generator. These options include:
· DTS Digital Surround
· DTS-HD High Resolution
· DTS-HD Master Audio
· DTS:X
· DTS Express
· MY STREAMS
42
DTS DIGITAL SURROUND:
There are 5 options under DTS Digital Surround.
These options include:
· DTS Digital Surround - 48KHz - 2.0Ch
· DTS Digital Surround - 48KHz - 5.1Ch
· DTS Digital Surround - 48KHz - 6.1Ch
· DTS Digital Surround - 44.1KHz - 5.1Ch
· DTS Digtal Surround - 96KHz - 5.1Ch
DTS-HD High Resolution:
There are 4 options under DTS Digital Surround. These options include:
· DTS-HD HRA - 48KHz - 5.1Ch
· DTS HD HRA - 48KHz - 7.1Ch
· DTS HD HRA - 96KHz - 7.1Ch
· DTS HD HRA - 88.2KHz - 7.1Ch
DTS-HD Master Audio:
There are 4 options under DTS-HD High Resoluktions . These options include:
· DTS-HD MA - 48KHz - 5.1Ch
· DTS HD MA - 48KHz - 7.1Ch
· DTS HD MA - 196KHz - 2.0Ch
· DTS HD HRA - 196KHz - 7.1Ch
43
DTS-X:
There are 5 options under DTS-X. These options include:
· DTS:X - 48KHz - 7.1.4Ch
· DTS:X - 48KHz - 5.1.4Ch
· DTS:X Master Audio - 48KHz - 7.1.4Ch
· DTS:X Master Audio - 96KHz - 7.1.4Ch
· DTS:X(32 Objects)
DTS Express:
There is 1 option under DTS Express:
· DTS Low Bit Rate - 48KHz - 5.1Ch
MY STREAMS:
Use this page to select one of the 6 custom uploaded
DTS audio streams.
NOTE: The Audio Uploader Software with instructions
are available at www.murideo.com

44
AUDIO TESTS:
There are 2 options under the Audio Tests menu. These options include:
· SOURCE SPEAKER TEST (multiple options available. See below)
· SYNC & LATENCY TEST (this test is designed to be used with the included Visual Light Sensor and
Mini XLR Microphone)
SOURCE-SPEAKER TEST:
There are 3 options under Source-Speaker Test. These include:
· SPEAKER ALLOCATION - Audio condence test used to ensure speaker outputs (from AVR or Audio
Amplier) are connected to the correct Channels/Speakers.
· WHITE NOISE - Audio condence test used to ensure system/speakers are performing as expected
· SWEEP AUDIO - Audio condence test. Starting with a low frequency (20Hz) and building to a
high frequency (20KHz) these test tones can be used to measure room acoustics with a micro-
phone. Or this can be used to ensure speaker are operating as expected.
· NOTE: If using the SEVEN-G-8K’s front panel controls, you will hear the test tone through every
speaker in the system. If using the PC Control Software you can choose single specic channels or
any combination of Channels. See examples on next page.

45
· FL (Front Left Channel Selected)
· FR (Front Right Channel Selected)
· FL (Front Left Channel Selected)
· FR (Front Right Channel Selected)
· FC (Front Center Channel Selected)
· FL (Front Left Channel Selected)
· FR (Front Right Channel Selected)
· BL (Back Left Channel Selected)
· BR (Back Right Channel Selected)
46
SYNC & LATENCY TESTS:
There are 7 options under the SYNC & LATENCY TEST. These options include:
· Video Settings
· Dolby Vision Settings
· Audio Stream Start adjust
· AV Sensors Funcional Test
· ARM AV Latency Test
· ARM eARC Latency Test
VIDEO SETTINGS:
Choose the Output Video Resolution for the AV SYNC & LATENCY tests.
The resolutions options available are:
· 3840 x 2160 30Hz
· 3840 x 2160 29.97Hz
· 3840 x 2160 25Hz
· 3840 x 2160 24Hz
· 3840 x 2160 60Hz
· 3840 x 2160 59.94Hz
· 3840 x 2160 50Hz
· 1080P 30Hz
· 1080P 29.97Hz
· 1080P 25Hz
· 1080P 24Hz
· 1080P 60Hz
· 1080P 59.94Hz
· 1080P 50Hz
· 1920 x 1080 120Hz
· 1920 x 1080 119.88Hz
Note: More details on each of the above options are described below.
47
DOLBY VISION SETTINGS:
This menu contains 3 options for Dolby Vision:
· DOLBY VISION OFF
· DOLBY VISION SINK - LED
· DOLBY VISION SOURCE - LED
AUDIO STREAM START ADJUST:
This menu allows you to adjust the audio phase ahead
of the video in ms (milliseconds).
NOTE: This can be adjusted from -500ms to 500ms in
increments of 1ms.
48
ARM AV LATENCY:
Choose the desired audio format that you will use for the selected AV latency test.
· PCM - 48KHz - 2.0 Ch
· Dolby Digital - 48KHz - 2.0 Ch
· Dolby Digital Plus - 48KHz - 2.0 Ch
· Dolby Digital Plus - 48KHz Dolby Atmos
· Dolby MAT (PCM) - 48KHz - 2.Ch
· Dolby MAT (PCM) - 48KHz - Dolby Atmos
· Dolby MAT (TrueHD) - 48KHz - 2.0 Ch
· Dolby MAT (TrueHD) - 48KHz - Dolby Atmos
· MY STREAM FOR AV LATENCY 1
· MY STREAM FOR AV LATENCY 2
With the Microphone and Visual sensor connected to the SEVEN-G-8K and placed appropriately (visual
probe centered on the display and microphone placed as close as possible to the speaker under test),
press the green OK button to initiate the Audio Video Latency Test (note this test runs for 120 seconds
and will restart each time you press the OK button).
Stream Start Adjust - This shows you in ms (milliseconds) the delay time you set
using the Audio Stream Start Adjust (Pg.41). Once you run the initial test (with
no adjustment) you can now use that data to delay the audio so it in sync with the
video. The goal for this test is to have ZERO delay, meaning that the audio and video
signals are arriving at the same time.
Audio Latency - This shows you (in milliseconds) the delay time of the audio being
sent versus being measured.
Video Latency - This shows you (in milliseconds) the delay time of the video being sent versus being mea-
sured.
AV-Sync Results - This shows the test results (in milliseconds) of the delay time between the audio and
video signal.
NOTE: Use the data from the AV-Sync Results (example: audio arrived 139ms before video) to calibrate
the audio delay in the Audio Stream Start Adjust menu (pg. 41).
AV-Latency & AV Sync Measurement Menu
Audio Stream Start Adjust Menu
49
50
With the Microphone connected to the SEVEN-G-8K and placed as close as possible to the speaker under
test, press the green OK button to initiate the ARC Audio Latency Test (note this test runs for 120 sec-
onds and will restart each time you press the OK button).
ARM ARC LATENCY:
Choose the desired audio format that you will use for the selected ARC latency test.
· PCM - 48KHz - 2.0 Ch
· Dolby Digital - 48KHz - 2.0 Ch
· Dolby Digital Plus - 48KHz Dolby Atmos
· MY STREAM FOR ARC 1
· MY STREAM FOR ARC 2
AV-Latency & AV Sync Measurement Menu
Audio Stream Start Adjust Menu

51
ARM eARC LATENCY:
Choose the desired audio format that you will use for the selected eARC (enhanced Audio Return Chan-
nel) latency test.
· PCM - 48KHz - 2.0 Ch
· Dolby Digital - 48KHz - 2.0 Ch
· Dolby Digital Plus - 48KHz - 2.0 Ch
· Dolby Digital Plus - 48KHz - Dolby Atmos
· Dolby MAT (PCM) - 48KHz - Dolby Atmos
· Dolby MAT (PCM) - 48KHz - 2.0 Ch
· Dolby MAT (TrueHD) - 48KHz 2.0 Ch
· Dolby MAT (TrueHD) - 48KHz - Dolby Atmos
· MY STREAMS FOR eARC 1
· MY STREAMS FOR eARC 2
With the Microphone connected to the SEVEN-G-8K and placed as close as possible to the speaker under
test, press the green OK button to initiate the eARC Audio Latency Test (note this test runs for 120 sec-
onds and will restart each time you press the OK button).
AV-Latency & AV Sync Measurement Menu

52
EDID, eARC CDS:
This menu contains HDMI protocol analysis/control functions. This menu contains the following options:
· SINK DEVICE EDID INFO
· eARC/ARC AUDIO INFO
· ARC HPD CTL
· eARC PHYSICAL HPD CTL
· eARC HPD bit CTL
· HDMI +5V POWER CTL
· eARC TX LATENCY
· eARC RX LATENCY
SINK DEVICE EDID INFO:
This menu displays the SINK device’s EDID information in Human Readable Format. To see the EDID in
HEX form please use the PC Control Software (available for download at www.murideo.com).
NOTE: The SEVEN-G-8K can read up to 4 E-EDID blocks.
NOTE: In order to test ARC/eARC, you must do the following:
· Enable ARC/eARC (located under the SYSTEM SETUP menu pg. 49) inside the SEVEN-G-8K
· Enable ARC/eARC inside the device you are testing (display, AVR, etc.)

53
eARC/ARC AUDIO INFO:
Displays the CDS (Capabilities Data Structure). This
infomation also relates to eARC/ARC and contains the
following:
· SADs - (Short Audio Descriptor)
· Speaker Allocation
· Audio Stream layout Block
ARC HPD CTL:
ARC HPD CTL (Hot Plug Detect Control). This will
allow you to turn ON or OFF the +5V HDMI power
output. This menu contains the following:
· ASSERT HPD = ON
· DEASSERT HPD = OFF
eARC PHYSICAL HPD CTL:
eARC Physical HPD CTL (Hot Plug Control).
This menu contains the following:
· ASSERT HPD = ON
· DEASSERT HPD = OFF
NOTE: Use this to trigger an HPE (Hot Plug Event) without physically disconnecting/reconnecting the
HDMI cable.
NOTE: Use this to trigger an HPE (Hot Plug Event) on the ARC/eARC (HDMI INPUT) without physically
disconnecting/reconnecting the HDMI cable.
54
HDMI +5V POWER CTL:
Activate or disable the +5V HDMI power output.
This contains the following options:
· SET HDMI TX +5V ON
· SET HDMI TX +5V OFF
eARC TX LATENCY:
Use this test to read the latency value (in milliseconds) for the eARC RX. This is performed using the
HDMI RX (INPUT) on the SEVEN-G-8K.
VERIFY THIS>>>>>>>>
eARC RX LATENCY:
Use this test to read the latency value (in milliseconds) for the eARC TX. This is performed using the
HDMI TX (OUTPUT) on the SEVEN-G-8k.
VERIFY THIS >>>>>>>>
NOTE: Use this to trigger an HPE (Hot Plug Event) without physically disconnecting/reconnecting the
HDMI cable.
55
SYSTEM SETUP:
This menu contains general device setup and managment for the SEVEN-G-8k. This contains the follow-
ing options:
· IP MANAGEMENT
· ARC/eARC OUT SETUP
· FAN CONTORL
· VITALS
· RESET ALL SETTINGS
IP MANAGEMENT:
This menu contains network information for the SEVEN-G-8k. Here you can manually set the device’s IP
address or you can Enable DHCP to allow your network controller to assign the settings. This menu con-
tains the following options:
· DHCP ON / DCHP OFF
· HOST IP
· ROUTER IP
· IP MASK
· MAC ADDRESS
ARC/eARC OUT SETUP:
This menu contains the following options:
· DISABLE ARC/eARC
· ENABLE eARC
· ENABLE ARC
VITALS:
This menu contains vital information for the SEVEN-G-8K. This includes:
· Firmware Version
· Main Chip Temperature
FAN CONTROL:
Use this menu to adjust the fan speed. There are 4
settings to choose from:
· OFF (see note below)
· LOW SPEED
· MIDDLE SPEED (Default)
· HIGH SPEED
56
NOTE: For the latest Firmware and instructions on how to load, visit www.murideo.com
NOTE: You may consider turning the fan OFF in situations where audio measurements
are critical. It is not recommended to leave the fan OFF for an extended period of
time while using the SEVEN-G-8K.
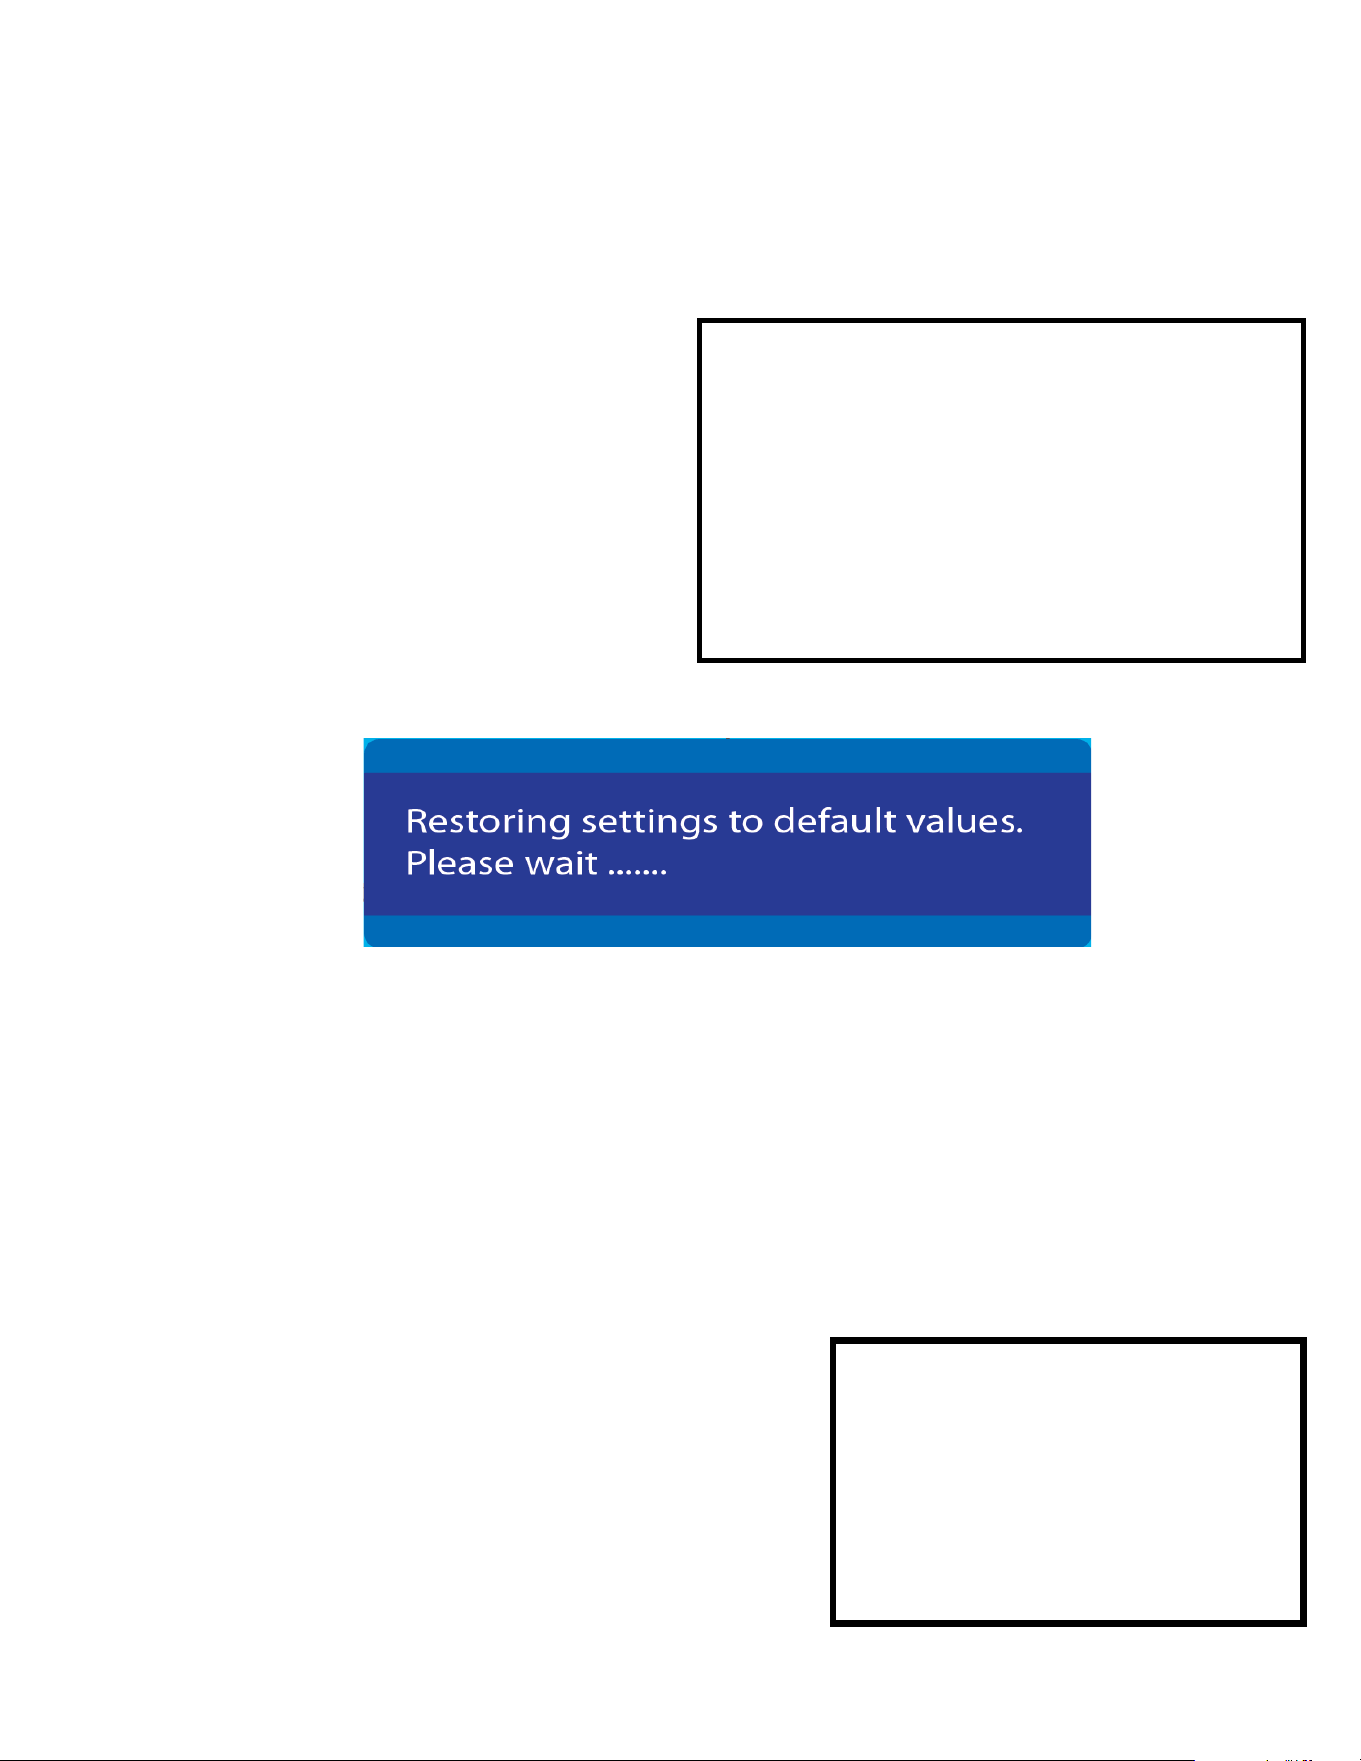
RESET ALL SETTINGS:
Use this menu to reset the SEVEN-G-8K to the factory default settings. Upon reseting, the SEVEN-G-8K
will set
· Resolution - 1920 x 1080 P
· Pattern - Color Bar 75%
· Audio - PCM 48KHz - 2.0 Ch
57
NOTE: Resetting to factory defaults will NOT delete/remove your custom uploaded
patterns/videos clips/audio streams.
NOTE: Resetting to factory defaults WILL reset the PRESET and SHORTCUT buttons
back to their default state.
PS-1/PS-2 Defaults
100% COLOR BARS Pattern
1920x1080@60Hz RGB Full (0-255)
PCM AUDIO <Rate:48K Size:16Bit FREQ. :1KHz AMP. :-0dB
Channel: 2CH>
SC-1/SC-2 Defaults back to the HOME Menu

Updating Firmware
Field rmware updates are available via USB port. Firmware updates, when available will be posted on
the Murideo.com we site, along with instructions.
FCC Interference and Compliance Statement
This device complies with part 15 of the FCC Rules.
Operation is subject to the following two conditions:
1. This device may not cause harmful interference, including interference that my cause undesired
operation.
2. This device must accept any interference received, including interference that my cause undesired
operation.
FCC WARNING
This equipment has been tested and found to comply with the limits for a Class B digital device, pursuant
to Part 15 of the FCC Rules. These limits are designed to provide reasonable protection against harmful
interference in a residential installation. This equipment generates, uses, and can radiate radio frequency
energy and, if not installed and used in accordance with the instructions, may cause harmful interference
to radio communications. However, there is no guarantee that interference will not occur in a particular
installation. If this equipment does cause harmful interference to radio or television reception, which can
be determined by turning the equipment o and on, the user is encouraged to try to correct the interfer-
ence by one or more of the following measures:
· Reorient or relocate the receiving antenna.
· Increase the separation between the equipment and the receiver.
· Connecd the equipment into an outlet dierent from that to which the receiver is connected.
· Consult the dealer or an experienced radio/TV technician for help.
Caution
To comply with the limits for an FCC Class B computing device, always use the shielded signal cord sup-
plied with this unit. The Federal Communications Commission warns that changes or modications of
the unit not expressly approved by the party responsible for compliance could void the user’s authority to
operate the equipment.
CE mark for Class B ITE (Following European standard EN55022/1998;
EN61000-3-2/1995; EN61000-3-3/1995, EN55024/1998, EN60950-1/2001)
Radio Frequency Interference Statement Warning: This is a Class B product. In a domestic env-
iornment, this product may cuase radio interference in which case the user may be required to take ade-
quate measures.
58

Warranty and Getting Help
AVPro Global Holdings (DBA MURIDEO) oers a 2 year international limited warranty for its Murideo prod-
ucts. Any product rst sold to you is guaranteed to be free from defects in both components and work-
manship under regular uses. The warranty period commences on the date the item ships. Attention: Your
invoice with the date of purchase, model number and serial number of the product is your proof of the
date of purchase. The International Limited Warranty is applicable and shall be honored in every country
where MURIDEO or its Authorized Service Providers oer warranty service subject to the terms and condi-
tions provided in this International Limited Warranty Statement. Products included in this warranty:
· Murideo SEVEN Generator
· Murideo SIX G Generator
· Murideo SIX A Analyzer
· Murideo Fox & Hound Testing and Troubleshooting Kit
· Murideo 4K HDMI Test Monitor
During the warranty period, the defective hardware of Murideo products will be either repaired or re-
placed, with new or like new products, at the discretion of Murideo. This International Limited Warranty
covers the costs of service parts and labor required to restore your product to fully functional condition.
MURIDEO will, at its discretion, repair or replace any defective products or parts thereof covered by this
International Limited warranty with refurbished parts of the product that are equivalent to new or like new
products in both functionality and performance. A product or part that is repaired or replaced under this
International Limited Warranty shall be covered for the remainder of the original warranty period applying
to the product or part, or for 90-days, whichever expires last. All exchanged parts and products under this
International Limited Warranty will become the property of MURIDEO.
59

Obtaining the Warranty Service
Warranty service or Returned Merchandise Authorization (RMA) under this International Limited Warranty
will be honored only if claims are made within the warranty period. For notications to MURIDEO or prod-
ucts outside the warranty period, the process will be the same, but charges may apply. Contact details
may be obtained on MURIDEO website https://www.murideo.com/
Customers are requested to perform the following actions before claiming MURIDEO product as defective:
(a) Owner must notify MURIDEO, during the warranty period, in writing of alleged defect, and allow MU-
RIDEO a reasonable opportunity to inspect the allegedly defective product;
(b) No Product may be returned without MURIDEO’s consent, The MURIDEO RMA# must accompany
all returns, and all returns must be delivered to MURIDEO within the warranty period;
(c) Owner may, then at its own expense, return the allegedly defective Product, freight pre-paid and in
the original packaging, accompanied by a brief statement explaining the alleged defect to MURIDEO;
(d) If MURIDEO determines that any returned Product is not defective, or if MURIDEO determines that
the defect is not covered by the warranty, MURIDEO will return the Product to the Owner at Owner’s ex-
pense, freight collect, and Owner agrees to pay MURIDEO’s reasonable cost of handling and testing;
(e) Upon determining that a returned product is defective, to receive warranty service Owner will
need to present the invoice showing the original purchase transaction. If shipping the product, Owner will
need to package it carefully and send it, transportation prepaid by a traceable, insured method, to the
MURIDEO Service Center. Package the product using adequate padding material to prevent damage in
transit. The original container is ideal for this purpose. Include the RMA #, your name, return shipping ad-
dress, email address and telephone number where you may be reached during business hours, inside the
shipping package with the unit. Any replacement unit will be warranted under these Terms and Conditions
for the remainder of the original warranty period or ninety (90) days whichever is longer.
Refer to user manual available for download on our website http://www.murideo.com/ for important tips
on how to operate and troubleshoot the product.
60

· Damage caused by act of nature, such as re, ood, wind, earthquake, lightning, etc.
· Damage or incompatibility caused by failure to perform a proper installation or to provide an appro-
priate operational environment for the product, including but not limited to unstable wired/wireless
network connection and phone lines, bad grounding, external electro-magnetic elds, direct sun-
light, high humidity and vibration.
· Damage caused by impact with other objects, dropping, falls, spilled liquids, or submersion in liq-
uids.
· Damage caused by unauthorized repair or disassembling of the product.
· Damage caused by any other abuse, misuse, mishandling, or misapplication.
· Damage caused by third party peripherals (including but not limited to visible damages on mother-
board or other electronic parts of the product such as burn spots after electric discharge, melting,
fusing, splitting, etc.)
· Any unauthorized software or modication of built-in software not approved by MURIDEO.
· The serial number of the product (or serial number stickers of its parts) has been modied, re-
moved, blurred or damaged.
· Defects caused by transportation, handling or customer abuse.
Disclaimer of Warranty
THIS WARRANTY IS EXPRESSED IN LIEU OF ALL OTHER WARRANTIES, EXPRESSED OR IMPLIED, IN-
CLUDING THE IMPLIED WARRANTY OF MERCHANTABILITY, THE IMPLIED WARRANTY OF FITNESS FOR
APARTICULAR PURPOSE AND OF ALL OTHER OBLIGATIONS OR LIABILITIES ON MURIDEO’S PART, AND
ITNEITHER ASSUMES NOR AUTHORIZES ANY OTHER PARTY TO ASSUME FOR MURIDEO ANY OTH-
ERLIABILITIES. THE FOREGOING CONSTITUTES THE BUYER’S SOLE AND EXCLUSIVE REMEDY FOR
THEFURNISHING OF DEFECTIVE OR NONCONFORMING PRODUCTS AND MURIDEO WILL NOT IN ANY
EVENT BELIABLE FOR COST OF SUBSTITUTE OR REPLACEMENT, COST OF FACILITIES OR SERVICE,
DOWNTIMECOSTS, LOSS OF PROFITS, REVENUES OR GOODWILL, RELIANCE DAMAGES, LOSS OF DATA,
LOSS OFUSE IF OR DAMAGE TO ANY ASSOCIATED EQUIPMENT, OR ANY OTHER INDIRECT, INCIDENTAL,
SPECIAL,OR CONSEQUENTIAL DAMAGES BY REASON OF THE FACT THAT SUCH PRODUCTS WILL HAVE
BEENDETERMINED TO BE DEFECTIVE OR NONCONFORMING. THE RIGHTS AND OBLIGATIONS OF THE
PARTIES UNDER THIS AGREEMENT SHALL NOT BE GOVERENED BY THE PROVISIONSOF THE 1980 U.S.
CONVENTION ON CONTRACTS FOR THE INTERNATIONAL SALE OF GOODS OR THE UNITED NATION-
SCONVENTION ON THE LIMITATION PERIOD IN THE INTERNATIONAL SALE OF GOODS, AS AMENDED
(COLLECTIVELY, THE“CONVENTIONS”); RATHER, THE RIGHTS AND OBLIGATIONS OF THE PARTIES
SHALL BE GOVERNED BY THE LAWS OF THE STATE of SOUTH DAKOTA, INCLUDING ITS PROVISIONS OF
THE UNIFORM COMMERCIAL CODE, AS APPLICABLE. FOR THE AVOIDANCE OF DOUBT, THE CONVEN-
TIONS ARE HEREBY EXCLUDED.
This Limited Warranty gives you specic legal rights. You may also have other rights that may vary from
state to state or from country to country. You are advised to consult applicable state or country laws for
full determination of your rights. Some jurisdictions do not allow the exclusion or limitation of special, inci-
dental or consequential damages, or limitations on how longa warranty lasts, so the above exclusion and
limitations may not apply to everyone.
61

Getting Help
For service and support, contact your local dealer.
To nd your dealer or to contact MURIDEO support, go to: https://support.murideo.com/
Or call
+1-605-330-8491 for worldwide technical support
Legal notices
MURIDEO® Logos are trademarks or registered trademarks of AVPro Global Holdings, Inc. in the United
States or other countries. ISF® and the ISF logo are trademarks or registered trademarks of, and are
used under license from, Imaging Science Foundation, LLC. in the United States or other countries.
All other trademarks and registered trademarks are the property of their respective owners in the United
States or other countries. The absence of a trademark symbol does not constitute a waiver of Silicon Im-
age’s trademarks or other intellectual property rights with regard to a product name, logo or slogan.
62