BC0253-2
Know Batteries Better
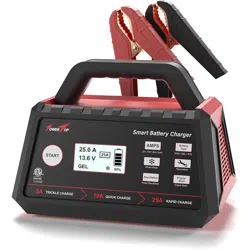
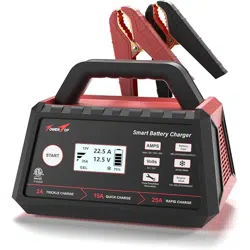
Smart Battery Charger
6V/12V 2A/15A/25A AUTOMATIC

Thank you for purchasing TowerTop Smart Battery Charger. Please save
these instructions for future use. If any issues arise during product use,
just feel free to contact us via [email protected]
WELCOME
ABOUT TowerTop SMART CHARGER
This battery charger is used for 12V lithium (LiFePO4) and DEEP CYCLE
batteries and 6V 12V lead-acid batteries including STD, AGM, GEL and
CALCIUM. With intelligent 8 charging stages and multiple assist functions,
it will smartly identify, charge, repair, and maintain your batteries.
Fully-automatic features, manual selections, prior-setting memory, auto-stop
when 100% charged, and auto-awake to pulse compensate after voltage
drops enrich your pleasant charging experience.
WARNINGS
PLEASE READ CAREFULLY AND UNDERSTAND ALL SAFETY INFORMATION BEFORE
USING THIS PRODUCT. Failure to follow these safety instructions may lead to Electrical
Shock, Explosion, and Fire, which can result in property damage, serious injury, and
even death.
Electrical Shock - The battery charger is an electrical device that may shock and cause
serious injury. Do not use the charger if the power cords are damaged. Do not submerge
in water or get wet.
Explosion - Do not attempt to charge any frozen, damaged, incompatible batteries. Never
try to charge lithium batteries with high-voltage shock. Apply the charger only to batteries
with recommended voltage.
Fire - Use the product in well-ventilated areas. Do not cover the product. Do not smoke or
use any source of electrical spark or fire when using the charger. Keep product away from
flammable materials.
Eye Injury - Wearing eye protection to use the charger is recommended. Batteries can
explode and cause flying debris. Battery acid can cause eye and skin irritation. If needed,
flush affected areas with running clean water and contact medical aid in time.
Explosive Gases - Batteries may generate explosive gases during normal battery operation.
Please follow all safety instructions and also those published by the battery manufacturer.
Review cautionary markings on these products and on the engine.
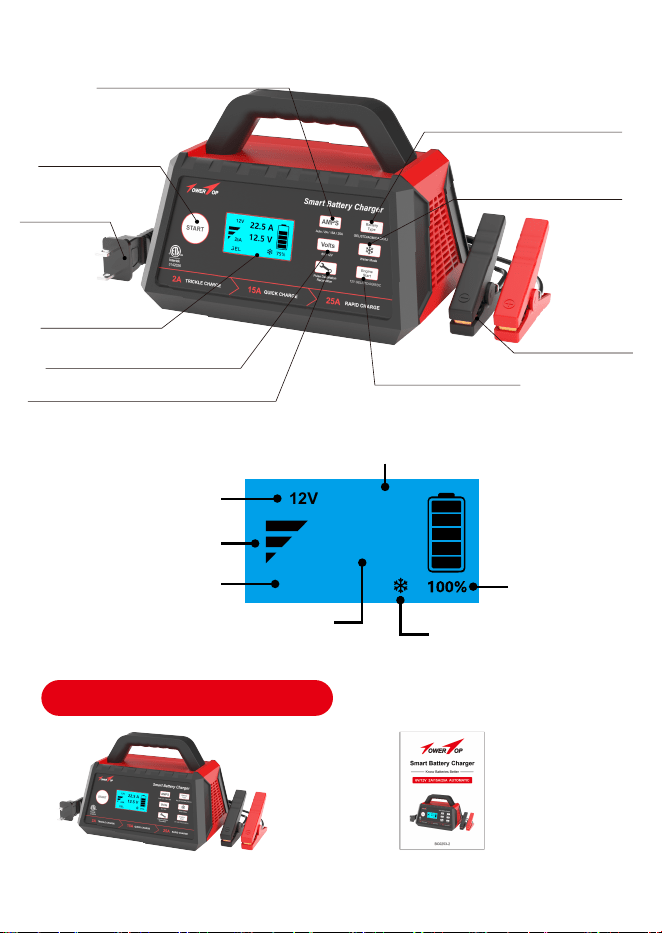
GEL
12V
25A
Selected Battery Voltage
Selected Charging Rate
Selected Battery Type
Winter Mode Charging
Battery Power
PACKAGE OVERVIEW
One TowerTop Smart Battery
Charger with Battery Clips
One Instruction Manual
LCD Display
Start/Pause
Charging Rate Selection
Battery Type Selection
Battery Voltage Selection
Winter Mode
Battery Desulfation/Recondition
Engine Start Aid
Battery Clips
120V AC Plug
Charging Current
Charging Voltage
00.1A
13.6V

MODE EXPLANATION
Standby Mode
Press the "START" button to pause and reset new
modes during charging. In standby mode, the
charger is not providing any power to the battery.
6V Mode
For 6V STD/AGM/GEL/CALCIUM batteries.
12V Mode
For 12V STD/AGM/GEL/DEEP CYCLE/CALCIUM/
LITHIUM(LiFePO4) batteries.
AUTO/2A/15A/25A
The optimum setting for automatic mode is “2A &
GEL”. Select a proper charging rate for manual
charging according to battery capacity (Ah/CCA).
Battery Type
Please ensure the selected charging modes right
match your battery type (Lead-acid or Lithium) and
battery voltage type (6V or 12V) to protect the
battery and the charger from damage during
charging.
Winter Mode
Add 0.2V to the initial charging voltage to improve
battery activity in cold situations. During all charging,
you can also press the "Winter Mode" button to see
the smart 8 charging stages.
Pulse Desulfation
Recondition
Adopt 15.8V to restore idled, deeply discharged, or
severely sulfated batteries. Not for lithium/calcium
batteries.
Engine Start
Help you emergently start your car in 100 seconds.
Only for 12V GEL/STD/AGM/DC batteries; Not for
all 6V batteries.

CHARGING TIMES
SPECIFICATIONS
Low Voltage Detection
Input
Output
Efficiency
Type of Batteries
Charging Progress
Working Temperature
Battery Chemistries
Battery Capacity
The size of the battery (Ah) and its depth of discharge (DOD) greatly affect
its charging time. The estimated charging time shown below is based on an
average discharge depth of 50% to a fully charged battery and is only for
reference purposes. Actual data may differ due to battery conditions and
temperature. The charger has “24H Overtime Charging Protection”.
Battery Size Approximate Time To Charge In Hours
Ah(Amp Hour) 2A 15A 25A
25 12.3 1.4 0.75
50 24.5 2.8 1.5
100
200
1000
500
5.7 3
11.3 6
28.3 15
30
1V
AC 120V/60Hz, 9A
DC 6V/12V, 2A/15A/25A/Automatic
85%
6V 12V
Smart 8 Stages
32°F/0°C ~ 104°F/40°C
Wet, Gel, MF, CA, EFB, AGM, Calcium, Lithium(LiFePO4)
Up to 1000Ah; Maintain All Battery Sizes

OPERATING INSTRUCTIONS
Automatic Charging
1. Connect the battery clips to the battery terminals. Red clip to the
positive terminal (+), and black clip to the negative terminal (-).
2. Plug the battery charger into the 120V AC outlet. Without any manual
selections, the smart charger will take about 30 seconds to automatically
identify and charge your battery with the optimal settings (2A & GEL).
NOTE: The battery charger has prior-setting memory function. If you have
already charged a battery before and have not reset new modes for a new
charging, it will automatically adopt your initial settings for the new charging.
Manual Charging
1. Connect the battery clips to the battery terminals. Red clip to the positive
terminal (+), and black clip to the negative terminal (-). Plug the battery
charger into the 120V AC outlet.
2. Select your desired charging rate, compatible battery and press "START"
button to start charging. All the data will be shown on the LCD screen.
Two Selectable Charging Types For Lithium Batteries
3. During the charging, you can press "Winter Mode" button to check the
smart 8 charging stages. It will automatically switch back to the main
interface in 5 seconds.
4. If you would like to reset the charger during the charging, first press
"START" button to pause charging, reset your desired modes, and then
press "START" button again to continue charging.
LI 14.4V LI 14.6V
LITHIUM IRON
PHOSPHATE BATTERY
Charging voltage: 14.6V
LITHIUM IRON
PHOSPHATE BATTERY
Charging voltage: 14.4V
NOTE: 1. Select the Prompt Interface. 2. Wait For 3 Seconds To The Main
Interface. 3. Press the "START" button to begin charging.
Lithium Battery - Option One Lithium Battery - Option Two
12V
25A
00.1A
14.3V
12V
25A
00.1A
14.3V
5. The battery power percentage on LCD display will be 100% once your
battery is fully charged. Then the charger will auto-stop charging in this
case.
6. Regarding a long-term connection and charging, the smart charger will
auto-restart to pulse maintain battery to 100% full again when it detects
voltage dropping. Auto-stop charging when it is 100% full again.
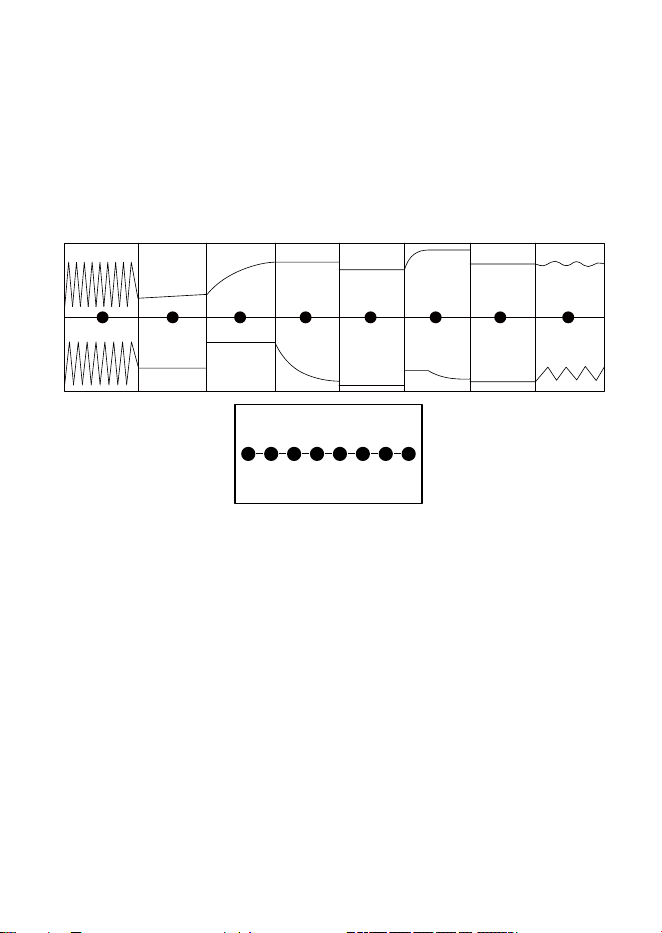
Smart 8-Stage Charging Program
8 CHARGING STAGES
For Lead-acid Batteries
1. Battery Desulfation - Adopt 15.8V pulse voltage for electrolytic removal
of sulfated crystals. Automatically skip when not needed.
2. Soft Start - A slow and steady buildup of the charging process that limits
the power input to protect your battery.
3. Bulk Charging - The main part of the whole charging process where the
battery power will reach about 80% full.
4. Absorption - Fully charge the battery by slowly reducing the charging
rate to allow your battery to absorb more power.
5. Battery Analysis - Auto-test the battery state after charging. Abnormal -
enter the repair stage; Normal - turn to the next stage.
6. Battery Recondition - Restore over-discharged batteries. After repair,
return to the "Bulk" stage. If it fails, an error will be reported.
7. Float Charging - Keep battery at 100% without overcharging or
damages; Leave smart charger 24/7 plugged without worry.
8. Pulse Maintenance - Auto-wake up and pulse compensate to 100% full
again when the voltage drops, with battery more durable.
1 2 3 4 5 6 7 8
Desulfation
VoltageCurrent
Soft Start Bulk Charging Absorption Analysis Recondition Float Charging Pulse Maintenance
1 2 3 4 5 6 7 8
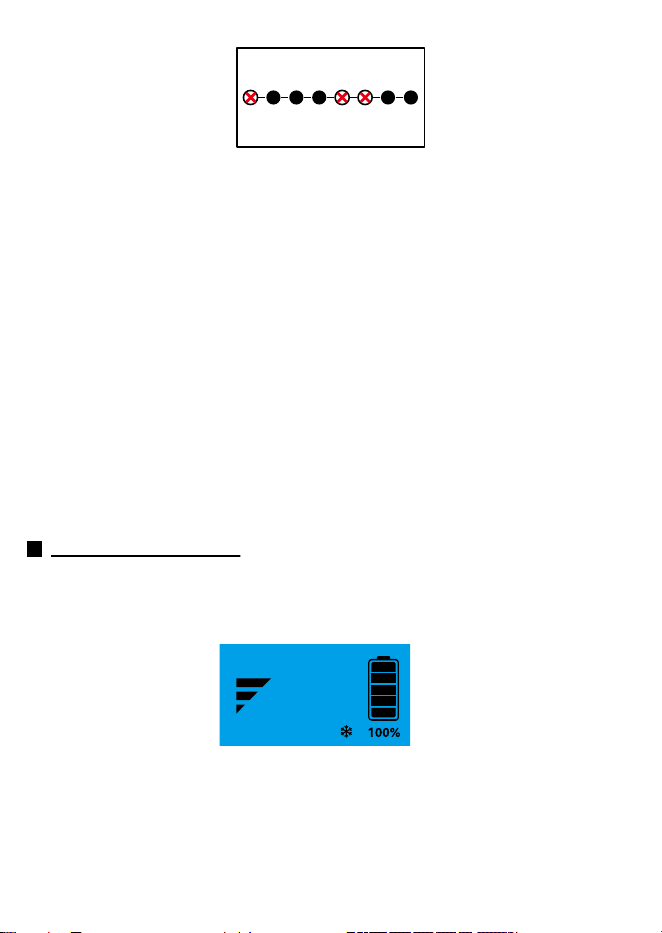
For Lithium/Calcium Batteries
IMPORTANT: “Desulfation”, “Recondition”, and “Engine Start/Jump Start”
functions are not applicable due to the lithium/calcium battery's
characteristics, for all these three functions adopt up to 15.8V high voltage
during use, which can damage lithium/calcium batteries and even cause the
batteries to explode.
1. Soft Start - A slow and steady buildup of the charging process that limits
the power input to protect your battery.
2. Bulk Charging - The main part of the whole charging process where the
battery power will reach about 80% full.
3. Absorption - Fully charge the battery by slowly reducing the charging rate
to allow your battery to absorb more power.
4. Float Charging - Keep battery at 100% without overcharging or damages;
Leave smart charger 24/7 plugged without worry.
5. Pulse Maintenance - Auto-wake up and pulse compensate to 100% full
again when the voltage drops, with battery more durable.
Winter Mode Charging
TowerTop smart battery charger, adding 0.2v more on the basis of the
initial charging voltage, better boosts your battery activity and charges more
thoroughly in low-temperature situations.
After connecting the battery charger to both your battery and the AC outlet,
press "AMPS" button to select your desired charging rate, press "Battery
Type" button to choose the compatible battery, then press "Snowflake
Symbol" to select winter mode charging, and press “START” button to start
charging. All the data will be shown on the LCD screen.
1 2 3 4 5 6 7 8
ONLY 5 CHARGING STAGES
GEL
12V
25A
00.1A
13.6V
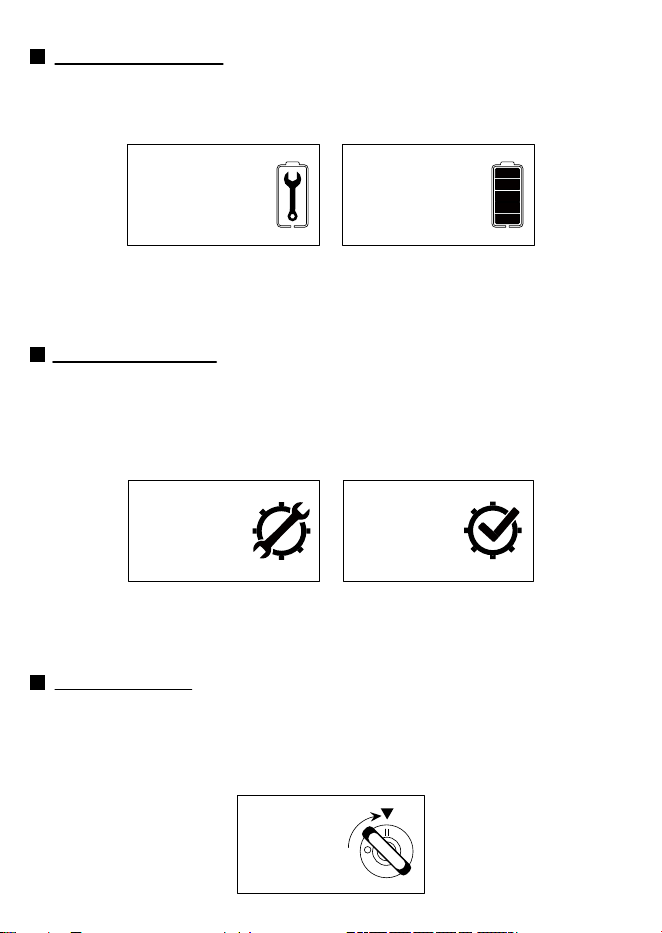
Battery Recondition (Not Applicable To Lithium/Calcium Batteries)
The "Recondition" function is for recovering idled or unused batteries that are
deeply discharged, thus helping the battery last longer. Battery repair time up
to 4 hours and "Battery Failure" will be reported if it fails to repair in 4 hours.
With the repair completed, you can directly press “START” button to start
charging. Or you just wait for about 5 seconds, the battery charger will
automatically switch to the charging status.
Engine Start Aid (Only For 12V GEL/STD/AGM/DC Batteries)
Engine start aid helps in activating your car battery with insufficient power to
emergently start your vehicle in 100 seconds. You need to grasp the prompt in
the picture below and start your car synchronously. If you miss this interface,
you may not be able to start normally.
BATTERY IN
REPAIR NOW
REPAIR
COMPLETED
Battery Desulfation (Not Applicable To Lithium/Calcium Batteries)
The smart battery charger will identify and restore severely-sulfated battery
terminals to rehabilitate the lost performance. Battery desulfation time up to
24 hours and "Battery Failure" will be reported if it fails after 24 hours. This
mode will automatically skip and switch to the next stage if your battery
does not need to be desulfated.
BATTERY IN
DESULFATION
NOW
DESULFATION
COMPLETED
With the desulfation completed, you can directly press “START” button to
start charging. Or you just wait for about 5 seconds, the battery charger
will automatically switch to the charging status.
PLEASE
START YOUR
ENGINE
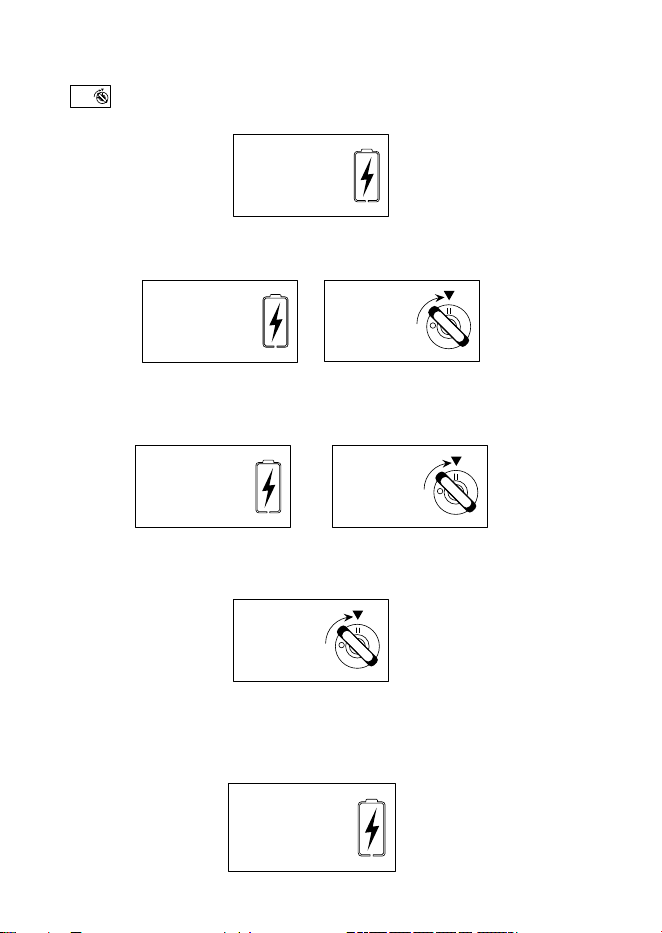
Operation Details:
1. Select your battery type, press “Engine Start” button, the LCD screen will
show and then press “START” button. LCD screen shows as follows. It
switches to the 100s-count-down interface. You need to wait.
2. In the 60-second interface, it will immediately show the prompt picture
below. Now you need to simultaneously start your car.
3. If you fail to start your car for the first time, you need to wait for the 30S
interface for a second attempt. Now you also need to seize the moment and
simultaneously start your car.
4. If you fail to start your car for the second time, you need to wait until the
count-down is over and show the prompt picture again for a third attempt.
If you fail to start your car in the three attempts above, the LCD display will
show as follows. This is the whole working cycle for the "Engine Start"
function. In this case, if you still want to have a try again, press “Engine Start”
and “START” buttons again, then repeat previous steps.
PLEASE
START YOUR
ENGINE
PLEASE
START YOUR
ENGINE
Engine Start
PLEASE
WAIT FOR
100 SECS
Engine Start
PLEASE
WAIT FOR
60 SECS
PLEASE
START YOUR
ENGINE
PLEASE
START YOUR
ENGINE
Engine Start
PLEASE
WAIT FOR
30 SECS
PLEASE
ENGINE START
BUTTON AGAIN
Engine Start

TROUBLESHOOTING
Failure Possible Cause Corrective Action
1. The desulfurization stage
exceeds 4h.
2. Abnormal battery charging in
soft start stage.
3. Charging timeout in constant
voltage phase(24H)
4. Timeout in the repair phase(4H)
5. Repair mode Repair timeout(4H)
6. Desulphurization mode
Desulphurization timeout(24H)
1. Selected charging rate is too
small for big-size battery;
2. The battery condition is not
good.
Clamps connected to wrong polarity
Please replace the
battery.
1. Select higher charging
rate and recharge;
2. Battery may be dead,
check the battery
condition. Replace
battery if needed
Correct the polarity to
the right connection.
The temperature of the charger is
too high or the internal temperature
sensor of the charger fails.
Make sure the vents are
unblocked. The charger
will recharge automati-
cally after cooling down.
If the charger has been
unable to restore
charging, the tempera-
ture sensor failure, by a
professional mainte-
nance personnel to check
Abnormal battery voltage.
Disconnect the AC
power supply of the
charger, let the battery
stand for a period of time
and then charge it again.
If the same error occurs
again, replace the battery
BATTERY
FAILURE
OVERTIME
CHARGING
REVERSE
POLARITY
OVER HEAT
PROTECTION
HIGH INPUT
VOLTAGE
PROTECTION

LIMITED WARRANTY
TowerTop brand series products are covered with a 30-day hassle-free return
and an 18-month replacement on Amazon (With no man-made damage). For
the defects reported during the warranty period, TowerTop will repair or
replace the defective parts or items after technical analysis and confirmation.
TowerTop shall not be liable for any incidental or consequential damages
arising from the disassembling, misuse, or modification of the device. Some
states do not allow limitations on how long an implied warranty lasts, so the
above limitations may not apply to you.
The limited warranty is void under the following conditions:
Notice: All information in this manual is based on the latest information
available at the time of publication and no warranty can be made for its
accuracy or completeness. TowerTop reserves the right to make changes
at any time without notice.
Abnormal charging current.
Disconnect the AC power
supply of the charger, let
the battery stand for a
period of time and then
charge it again. If the
same error occurs again,
replace the battery.
OVER
CURRENT
PROTECTION
Careless handling and violation of operation.
Misused, disassembled, altered, or repaired by unauthorized stores or
technicians.
3142026
Made in China