If you have any questions or comments, please contact us.
contact us. Pour toute question ou tout commentaire,
nous contacter. Si tiene dudas o comentarios, contáctenos.
AS:+1 [833] 688-5616
INSTRUCTION MANUAL
GUIDE D'UTILISATION
MANUAL DE INSTRUCTIONS
20V MAX
CSG2532
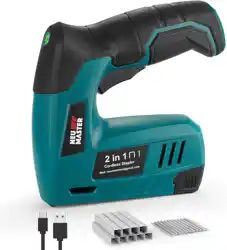
CORDLESS STAPLE GUN
20V MAX
Cordless Impact Driver
ALLOYMAN
GENERAL POWER TOOL SAFETY WARNINGS
WARNING!
All operators must read these instructions before
use. Failure to follow all instructions listed below
may result in electric shock, fire and/or serious
injury.
GENERAL SAFETY
SAVE THESE INSTRUCTIONS
1
WARNING! Children or persons whose physical,
sensory or mental capabilities would impede their
safe use, or unassisted, unsupervised persons
should not use this power tool. Children should be
supervised to ensure they do not play with the
equipment.
WARNING! Do not use this appliance without
reading this instruction manual.
WARNING! Do not use the appliance within range
of other people unless they are wearing protective
clothing.
WARNING! Do not block any openings, lint, dust
and anything that could cause injury.
Do not handle the power tool plug with wet or damp
hands.
Do not use power tool surfaces that could risk
releasing hazardous dust or liquids.
Before starting up your power tool, please check
it carefully for any defects. If you find any, do not
start up your power tool.
Caution - Take care to prevent slipping or falling.
On slippery surfaces, wear clothing that will pro-
tect your feet and stand better on slippery surfac-
es.
Stay alert - Watch what you are doing. Use com-
monsense. Do not operate the power tool when
you are tired, or under the influence of alcohol or
drugs.
Do not overreach - Keep proper footing and
balance at all times.
Prevent unintentional starting - Make sure the
switch is off before inserting batteries, picking up
or carrying the power tool. Do not put your fingers
on the switch when carrying the power tool.
Store idle tool indoors - When not in use, power
tool should be stored indoors in a transit place out
of the reach of children. Do not be exposed to
freezing temperatures.
When using an power tool, basic safety precau-
tions should always be followed to minimize the
risk of fire, electric shock, and personal injury.
1. Know your product - Know how to stop the power
tool quickly. Thoroughly familiarize yourself with
the controls.
2. Keep bystanders away - All visitors and pets.
should be kept a safe distance away from the
work area.
3. Use the right product - Do not use this power tool
for any except that for which it is intended.
4. Dress properly - Do not wear loose clothing or
jewelry. They can get caught in moving parts. Pro-
tective rubber gloves and non-slip footwear are
recommended when working outdoors.
RISK OF FIRE, ELECTRIC SHOCK AND PER-
SONALINJURY.THESE INCLUDE:
Risk of explosion - Do not spray flammable
liquids.
Remove the battery - Remove the battery front
compartment before performing any maintenance
task.
Do not let the battery or motor come into contact with
water.
In the event of an accident or breakdown, switch
off the immediately.
Check for damaged parts - Do not use the appli-
ance if any power tool of the appliance are dam-
aged.
Keep children away. To reduce the risk of injury,
close supervision is necessary when a power tool
is used near children. This power tool must not be
used by children or untrained personnel.
Use recommended accessories - Consult the
owner's manual for recommended accessories.
The use of improper accessories may cause risk
of injury.
Follow the maintenance instructions specified in
the manual.
WARNING! During cleaning, maintenance, or when
replacing parts, disconnect power tool from its
power source by removing the battery from the
compartment.
WARNING! Do not apply pressure to the power
tool as this may cause short circuits, personal
injury or damage to parts.

GENERAL POWER TOOL SAFETY WARNINGS
BATTERY CHARGER SAFETY
INSTRUCTIONS
We pay a great deal of attention to the design of
every battery pack to ensure that we supply batter-
ies that are safe, durable and have a high energy
density. The battery cells have a wide range of
safety devices. Each individual cell is initially format-
ELECTRICAL
SPECIFIC SAFETY WARNINGS FOR
CORDLESS POWER TOOL
If the battery charger cord is damaged, please
contact the ALLOYMAN after-sales department.
If charging the power tool in a damp location is
unavoidable, use a residual current device (RCD)
protected power supply. The using of an RCD
reduces the risk of electric shock.
Do not abuse the charging cord. Never use the
cord for carrying, pulling or unplugging the charger.
Never use the cord for carrying, pulling or unplug-
ging the charger.
Keep the cord away from heat, oil, sharp edges or
moving parts. Damaged or entangled cords
increase the risk of electric shock.
The battery charger is for indoor use only.
Do not charge the power tool in rain, or in wet
locations.
Hold the power tool by insulated gripping surfac-
es, when performing an operation where the
fastener may contact hidden wiring. Fasteners
contacting a "live" wire may make exposed metal
parts of the power tool" live and could give the
operator an electric shock.
Wear ear protectors during use. Exposure to
noise can cause hearing loss.
Wear safety goggles or other eye protection.Ham-
mering and drilling operations cause chips to fly.
Flying particles can cause permanent eye
damage.
Do not operate this tool for long periods of time.
Vibration caused by tool action may be harmful to
your hands and arms. Use gloves to provide extra
cushion and limit exposure by taking frequent rest
periods.
Accessories and tools get hot during operation.
Wear gloves when touching them.
ted and its electrical characteristics curves are
recorded. This data is then used exclusively to be
able to assemble the best possible battery packs.
Despite all the safety precautions, caution must
always be exercised when handling batteries.
The following points must be observed at all
times to ensure safe use.
Safe use can only be guaranteed if undamaged
cells are used.
Incorrect handling of the battery pack can cause
damage.
IMPORTANT! Analyses confirm that incorrect use
and poor care of high performance batteries are
the main factors responsible for personal and/or
product damage.
WARNINGS! Use only approved replacement bat-
teries; other batteries may damage the power tool
and cause it to malfunction, which can lead to
serious personal injury.
WARNINGS! Do not use a battery pack or appli-
ance that is damaged or modified. Damaged or
modified batteries may exhibit unpredictable
behaviour, resulting in malfunction, explosion or
risk of injury.
Donotmodifyorattempttorepair theappliance
orthebatterypackexceptasindicatedinthe
instructionsforuseandcare.
Have your battery pack serviced by a qualified
repair person using only identical replacements
parts. This will ensure that the safety of the bat-
tery pack is maintained.
Caution! To reduce the risk of injury, charge the
20V ION+ Lithium Ion Battery pack only in its
designated.
The 20V ION+ lithium Ion Charger. Other types of
chargers present risk of fire, personal injury and
damage. Do not wire a battery pack to a power
supply plug or car cigarette lighter. Such misuse
will permanently disable or damage the battery
pack.
Avoid dangerous environments. Does not charge
the battery pack in rain, snow or in damp or wet
locations.
Do not use the battery pack or charger in the
presence of explosive atmospheres (gaseous
fumes, dust or flammable materials) because
sparks may be generated when inserting or
2

GENERAL POWER TOOL SAFETY WARNINGS
removing the battery pack, which could lead to a
fire.
Charge in a well-ventilated area - Do not block the
charger vents. Keep them clear to allow for proper
ventilation.
Do not allow smoking or open flames near a
charging battery pack. Vented gases may
explode.
NOTE: The safe temperature range for the battery
is 41°F (5°C) to 105°F (40.5°C). Do not charge the
battery outside in freezing weather; charge it at
room temperature 59°F - 77°F (15°C - 25°C).
Maintain charger cord - When unplugging the
charger, pull the plug, not the cord, from the
receptacle to reduce the risk of damage to the
electrical plug and cord.
Never carry the charger by its cord or yank it by
the cord to disconnect it from the receptacle.
keep the cord away from heat, oil and sharp
edges. Make sure the cord will not be stepped on,
tripped over or subjected to damage or stress
when the charger is in use. Do not use the char-
ger with a damaged cord or plug. Replace a dam-
aged charger immediately.
Do not use an extension cord unless it is abso-
lutely necessary - Using the wrong, damaged or
improperly wired extension cord poses a risk of
fire and electric shock.
If an extension cord must be used, plug the char-
ger into a properly wired 16 gauge or larger
extension cord with the female plug matching the
male plug on the charger. Make sure that the
extension cord is in good electrical condition.
Use only recommended attachments - Use of an
attachment not recommended or sold by the bat-
tery charger or battery pack manufacturer may
result in risk of fire, electric shock or personal
injury.
Unplug charger when not in use - Make sure to
remove battery packs from unplugged chargers.
To reduce the risk of electric shock, always
unplug the charger before performing any clean-
ing or maintenance. Do not allow water to flow
into the charger. Use a Ground Fault Circuit Inter-
rupter (GFCl) to reduce shock hazards.
Do not burn or incinerate battery packs- Battery
packs may explode, causing personal injury or
damage.
Toxic fumes and materials are created when bat-
tery packs are burned.
Do not rush, drop or damage battery packs - Do
not use the battery pack or charger if they have
sustained a sharp blow, been dropped, run over
or have been damaged in any way (i.e.pierced
with a nail, hit with a hammer, stepped on, etc.).
Do not disassemble - Incorrect reassembly may
pose a serious risk of electric shock, fire or expo-
sure to toxic battery chemicals. If the battery or
charger are damaged, contact an authorized
service provider.
Battery chemicals cause serious burns- Never let
a damaged battery pack contact the skin, eyes or
mouth.
Under abusive conditions, liquid may be ejected
from the battery; avoid contact.
Liquid ejected from the battery may cause irrita-
tion or burns. If a damaged battery pack leaks
battery chemicals, use rubber or neoprene gloves
to safely dispose of it. If skin is exposed to bat-
tery fluids, wash the affected area with soap and
water and rinse with vinegar. If eyes are exposed
to battery chemicals, immediately flush with
water for 20 minutes and seek medical attention.
Remove and dispose of contaminated clothing.
Do not short circuit - A battery pack will short
circuit if a metal object makes a connection
between the positive and negative contacts on
the battery pack.
Do not place a battery pack near anything that
may cause a short circuit, such as paperclips,
coins, keys, screws, nails and other metallic
objects. A short-circuited battery pack poses a
risk of fire and severe personal injury.
Store your battery pack and charger in a cool, dry
place - Do not store the battery pack or charger
where temperatures may exceed 105° F (40.5° C),
such as in direct sunlight or inside a vehicle or
metal building during the summer.
3

SAFETY WARNINGS FOR STAPLE GUN
WARNING!
This device is not intended for use by persons
(including children) with reduced physical, sensory
or mental capabilities, or lack of experience and
knowledge, unless they have been given instruc-
tion on use of the device by a person responsible
for their safety or has super vision!
Always assume that the tool contains fasteners.
Care_x0002_less handling of the stapler can
result in unexpected firing of fasteners and per-
sonal injury.
Do not point the tool towards yourself or anyone
nearby. Unexpected triggering will discharge the
fastener causing an injury.
When fasteners become stuck in the tool, discon-
nect the tool from the power source. When
removing stuck fasteners, the stapler may acci-
dentally activate if plugged in.
NOTE : Some timbers (such as very dry hardwood)
may require shorter staples to fully drive in.
The tool is intended for indoor domestic use. This
tool may be used for fastening suitable card-
board,insulation material, textile, leather,wood
and similar non-brittle materials to a wooden
surface.This tool is not suitable for fastening wall
or ceiling panelling.
The tool is not intended for artisanal, commercial,
professional and /or industrial use.
Do not actuate the tool unless the tool is placed
firmly against the workpiece. If the tool is not in
contact with the workpiece the fastener may be
deflected away from you target.
Use caution when removing stuck fasteners. The
mechanism may be compressed and the fasten-
ers may be forcibly released.
Do not use this tool for fastening electrical cables.
It is not designed for electric cable installation and
may damage the insulation of electric cables
thereby causing electric shock or fire hazards.
When performing operations where cutting acces-
sories may come into contact with hidden wiring,
hold the power tool by the insulated gripping
surface. Cutting accessories contacting "live"
wires may make exposed metal parts of the
power tool "live" and potentially electrocute the
operator.
Aways use both hands to operate the tool. You
secondary hand should be used to press the back
of the tool firmly down onto the surface to be
fastened.
POWER TOOL USE
4
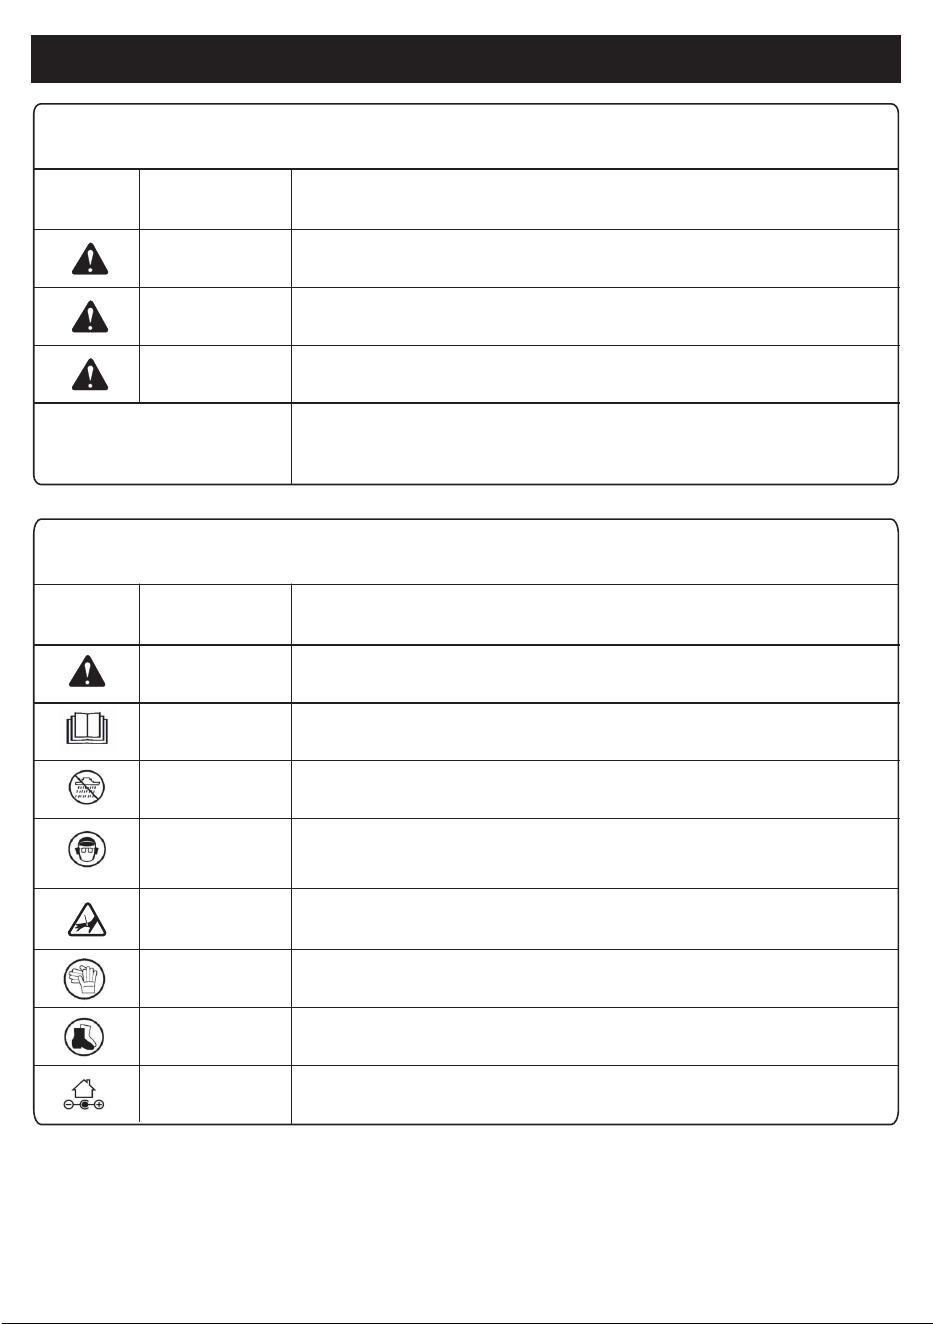
SYMBOLS
The following table depicts and describes safety symbols that may appear on this product. Read,
understand, and follow instructions on the power tool before attempting to assemble and operate.
This indicates a dangerous situation that, if not avoided, could result in
minor injury.
This indicates a hazardous situation which, if not avoided, could result in
serious injury.
This indicates a hazardous situation which, if not observed, will result in
death or serious injury.
(Without Safety Alert Symbol) Indicates information considered important,
but related to a potential injury (e.g. messages relating to property
damage).
SYMBOL SIGNAL
Caution
WARNING
DANGER
NOTICE:
MEANING
Some of the following symbols may be used in this product. Please study them and learn their mean-
ing. Proper interpretation of these symbols will allow you to operate the product better and safer.
Indicates a precaution, a warning, or danger。
Read, understand, and follow all instructions in the user manual (s)
before attempting to assemble and operate.
Do not expose the unit to rain or wet conditions, keep dry.
For protection against injury, wear ear defenders and safety goggles.
SYMBOL NAME
Safety Alert
Read The Operation
Manual (S)
Wet Conditions
Alert
Wear Eye
And Hearing
Protection
DESIGNATION/EXPLANATION
Keep hands and body away from tool discharge area.
Wear safety gloves during use to protect hands.
Only use battery charger indoors.
Wear non-slip footwear that will protect your feet and improve your
footing on slippery surfaces.
Keep Hands
Away
Wear Gloves
Wear Non-Slip
Shoes
Indoor Use Only
5

6
KNOW YOUR CORDLESS STAPLE GUN
Specifications
20V
30/MIN
5/8" - 1"
5/8" - 1-1/4"
Power Input
Impact Rates
1/4" 18 GA CROWN STAPLES
18 GA BRAD NAILS
1. Cartridge shaft
2. Safe tip
3. LED work lights
4. Adjusting knob
5. Trigger
6. LED work lights switch
7. Battery release button
8. Battery
9. Reload lever
COMPONENTS
1
2
3
5
4
9
6
7
8
ALLOYMAN
7
KNOW YOUR CORDLESS IMPACT WRENCH
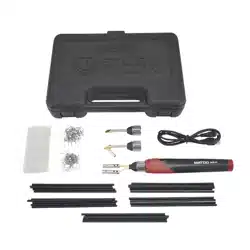
UNBOX
Carefully disassemble the power tool package and
check whether the accessories are complete.
Inspect the product carefully to make sure no break-
age or damage occurred during shipping. If you find
damaged or missing parts, please contact ALLOY-
MAN after the sales department.
NOTE: Do not discard the shipping carton and
packaging material until you are ready to use your
new power tool. The packaging is made of recycla-
ble materials. Properly dispose of these materials in
accordance with local regulations.
IMPORTANT! The equipment and packaging mate-
rial are not toys. Do not let children play with plas-
tics, foils, or small parts. These items can be swal-
lowed and cause poisoning or death.
WARNING! Do not insert the battery until assembly
is complete. Failure to comply could result in acci-
dental starting and possible serious personal injury.
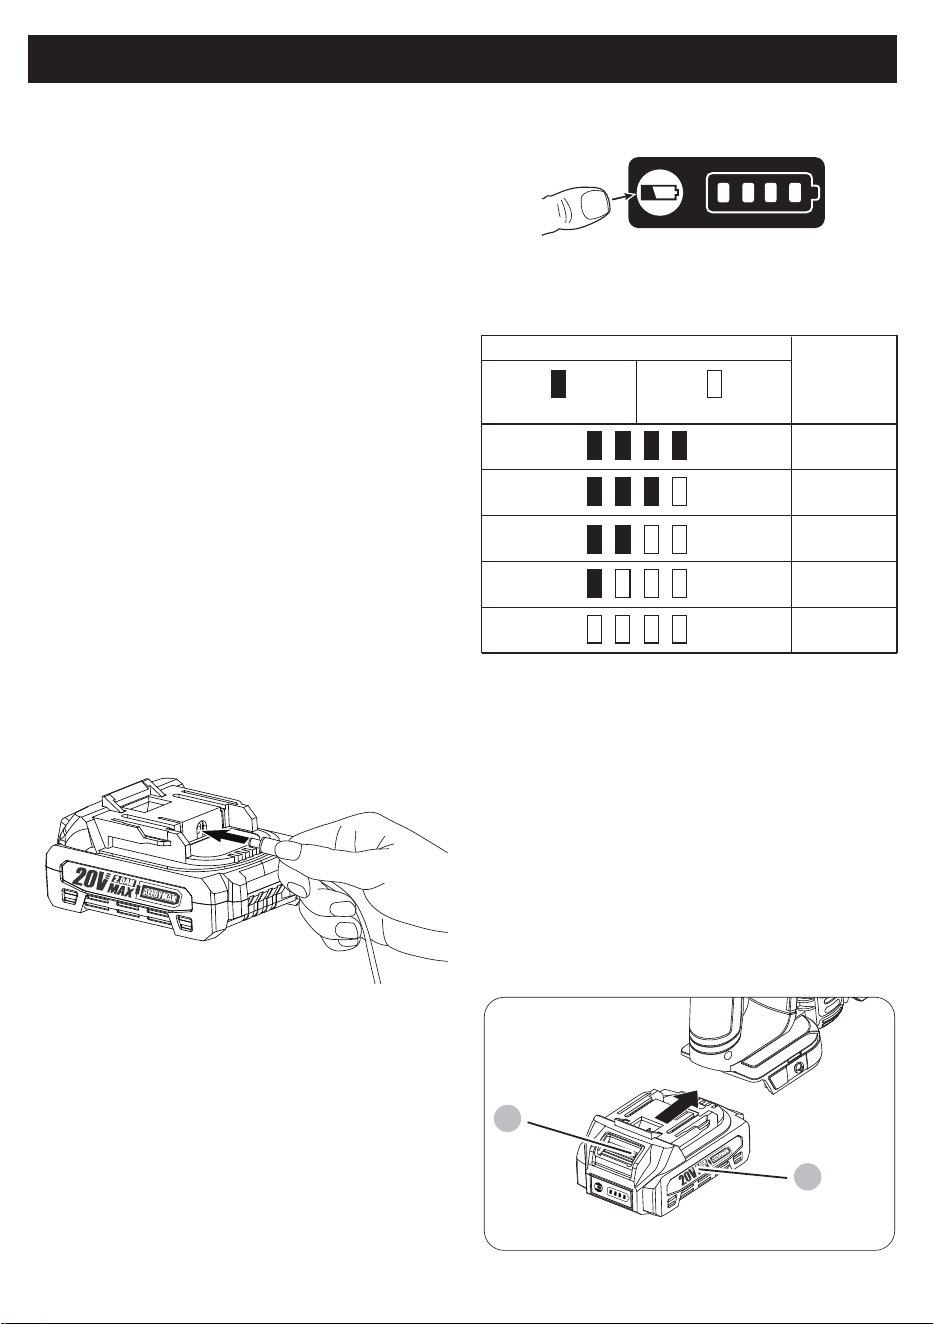
Indicator lamps
Lighted Off
75% to 100%
50% to 75%
25% to 50%
0% to 25%
Charge the
battery.
Remaining
capacity
BATTERY CHARGE LEVEL INDICATOR
Press the check button on the battery cartridge to
indicate the remaining battery capacity. The indica-
tor lamps light up for a few seconds:
NOTE: Depending on the conditions of use and the
ambient temperature, the indication may differ
slightly from the actual capacity.
INSTALLING OR REMOVING THE
BATTERY PACK
NOTE: Always turn off the tool before installing or
removing the battery pack.
NOTE: When installing or removing the battery box,
hold the tool and battery box firmly. Failure to hold
the tool and battery case securely may cause them
to slip from your hands, resulting in damage to the
tool and battery case and personal injury.
CHARGER OPERATION
Do not attempt to charge the battery pack with
any charger other than the one specified in this
manual. The charger and battery pack are specifi-
cally designed to work together.
CHARGING THE BATTERY
Check that the mains voltage is the same as that
marked on the rating plate of the battery charger.
Then plug the charger adapter into an appropriate
power outlet. Connect the charger plug into the
charge socket of the battery to start charging.
Align the charging head with the battery charging
port and insert it. The charger work light lights up
red, indicating that charging has started.
The green light lights up to indicate charging is
complete.
DANGER: Do not use conductive objects for
probing. May cause electric shock or electrocution.
KNOW YOUR CORDLESS STAPLE GUN
8
7
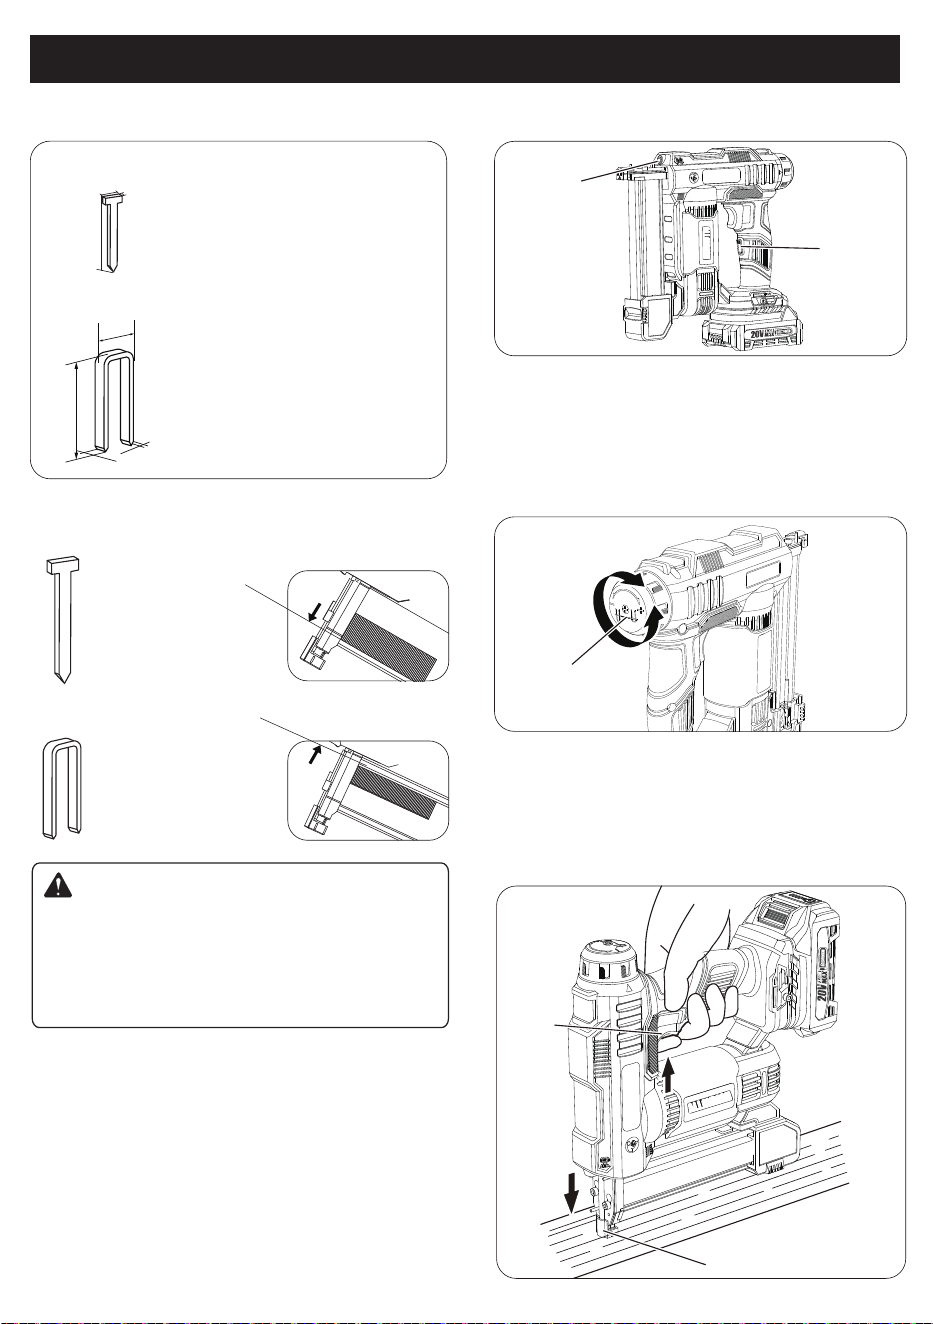
For nails : Place the nails at the top of the cartridge
shaft.
For staples : Place the staples at the bottom of the
cartridge shaft.
4. Slide the cartridge shaft (1) back until it clicks.
NAILS :
STAPLES :
WARNING!
Before loading the tacker, make sure to remove the
battery form the machine. Only load fasteners of
the same type and length. Do not load staples and
nails at the same time. Do not mix fasteners of
varying lengths.
8
KNOW YOUR CORDLESS STAPLE GUN
LOADING THE NAILS OR STAPLES
STAPLE AND NAIL MEASUREMENTS
USING THE WORK LIGHT
ADJUSTING IMPACT POWER
DRIVING STAPLES/NAILS
Press the LED work light switch (6) to turn on the
work light (3).
Increase impact: rotate the adjustment knob(4)-
clockwise.
1. Choose the correct nail or staple for the job.
2. Open de cartridge shaft (1) by slightly pressing
reload lever (9).
3. Pull the reload lever (9) to the left to open the
cartridge shaft (1).
C
B
A
A=5/8" - 1" (15-25mm)
A=5/8" - 1-1/4" (15-32mm)
B=5.7mm (+0.2
~
-0.2)
B=2.0mm (0
~
-0.1)
C=1.27mm (+0.02
~
-0.02)
C=1.25mm (+0.02
~
-0.02)
D=1.03mm (+0.01
~
-0.01)
The work light will be activated for 10 second
sand helps to improve visibility of the working
area.
Reduce impact: rotate the adjustment knob(4)
anti-clockwise.
2
5
3
6
4
ALLOYMAN
ALLOYMAN
C
B
A
D
1/4" 18 GA
CROWN STAPLES
UP
18 GA
BRAD NAILS
DOWN
WARNING!
The safety of the machine wil lbe lifted when
pressure is applied to the safety tip (2) on the
bottom of the machine,please make sure the
tacker mouth is in direct contact with the material.
9
KNOW YOUR CORDLESS STAPLE GUN
NOTE : TIf the staple / nail is driven too deep or too
shallow, adjust the impact power.
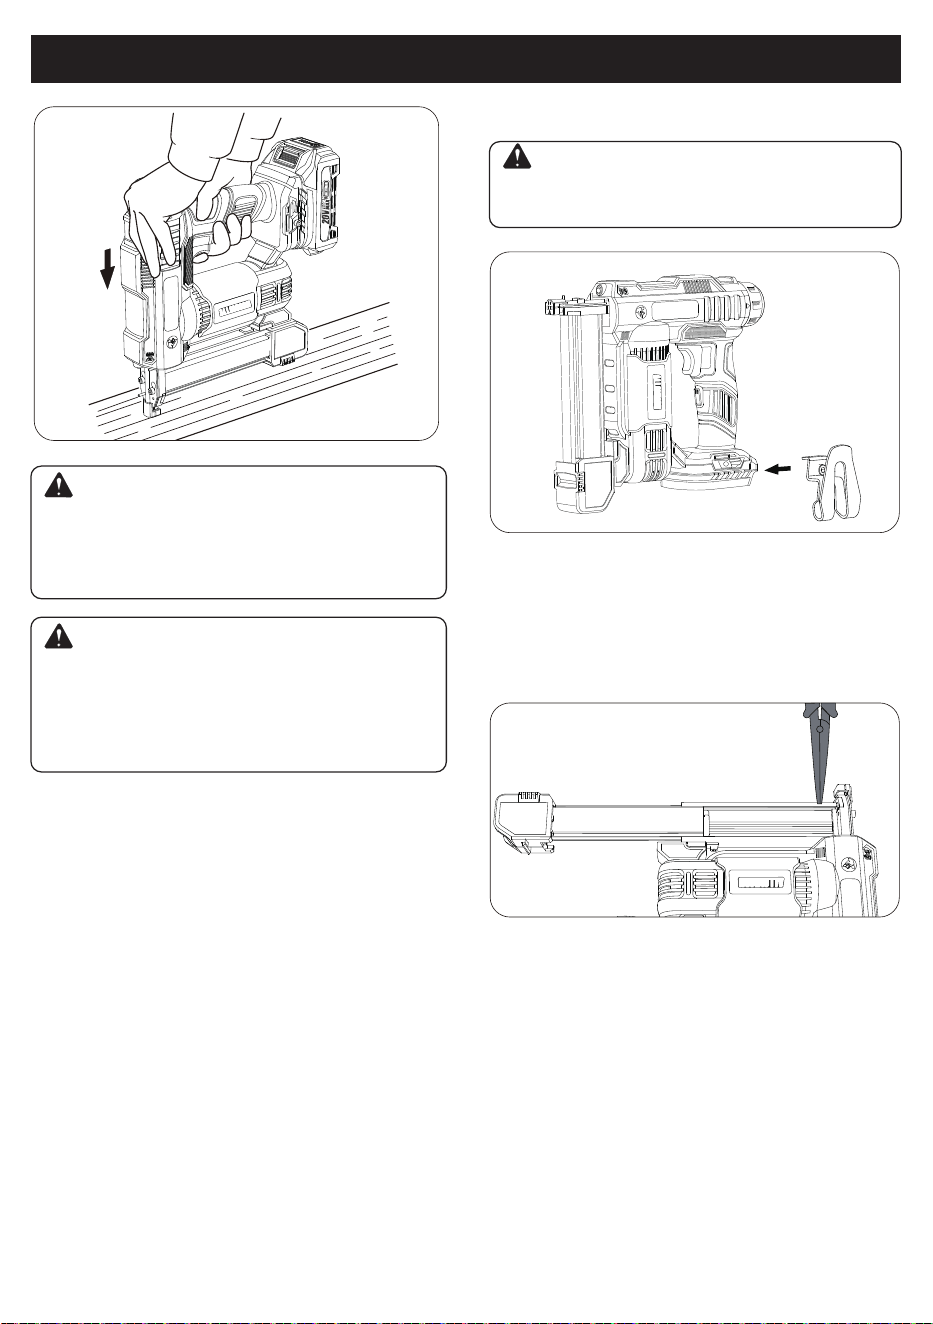
Place the safety tip (2) flat on the material to
befastened at the spot where the staple or nail
should be located.
1.
2.
3.
4.
Hold the front and rear part of the machine and
press the machine firmly against the material.
Press the work light switch to turn on the work
light, so that you can more accurately driving
staples / nails.
The machine is equipped with a belt hook for-
hanging the machine to your belt during use.
When delivered, the belt hook is assembled to
the machine. It can easily be removed by remov-
ing the screw on the hook and taking it off.
Pull the trigger (5) to drive the staple / nail, then
(3) release your finger from the trigger before
lifting the safety tip (2) from the material.
WARNING!
The tool may rebound and produce aloud sound
because of the impact it operates with. Adjust the
impact power accordingly and apply back
pressure to the machine to prevent incorrect
stapling or nailing.
WARNING!
Make sure that the machine is not live when
carrying out maintenance work on the motor.
ALLOYMAN
ALLOYMAN
ROMVING A JAMMED STAPLE
BELT HOOK
NOTE : If there is a jammed staple in the tool, you
must remove it before further use. Attempting to
drive a stape while the tool is jammed could
damage the mechanism.
1. Remove the battery pack.
2. Holde the tool upside, open de cartridge shaft,
and slide the magazine open.
3. Remove unused staples.
4. Remove the jammed staple with needle-nose
pliers.
ALLOYMAN

PRODUCT WARRANTY
WARRANTY REGULATIONS
Product Name/Model Number
Date of sale
User name
Tel
User address / postcode
Warranty records
IF YOU HAVE ANY PRODUCT QUESTIONS, YOU CAN CONTACT
US THROUGH THE QR CODE BELOW
1. Warranty period: under normal use conditions, the failure caused by the quality of the product within one year
from the date of purchase can be warranted.
3. lf the product needs warranty, please send it to us by yourself and provide warranty card/proof of purchase.
2. The following conditions occurring during the warranty period are not covered by the warranty and will be
repaired for a fee:
2.1 Damage caused by improper use, maintenance and storage.
2.2 Self-or non-factory dismantling and repair.
2.3 No warranty card or purchase invoice.
2.4 Product damage caused by force majeure.
2.5 Normal wear and tear parts need to be replaced.
2.6 Loss or damage caused by abnormal factors such as temperature/humidity in the en
vironment where the product is used.
2.7 Damage caused by failure to operate in accordance with regulations.