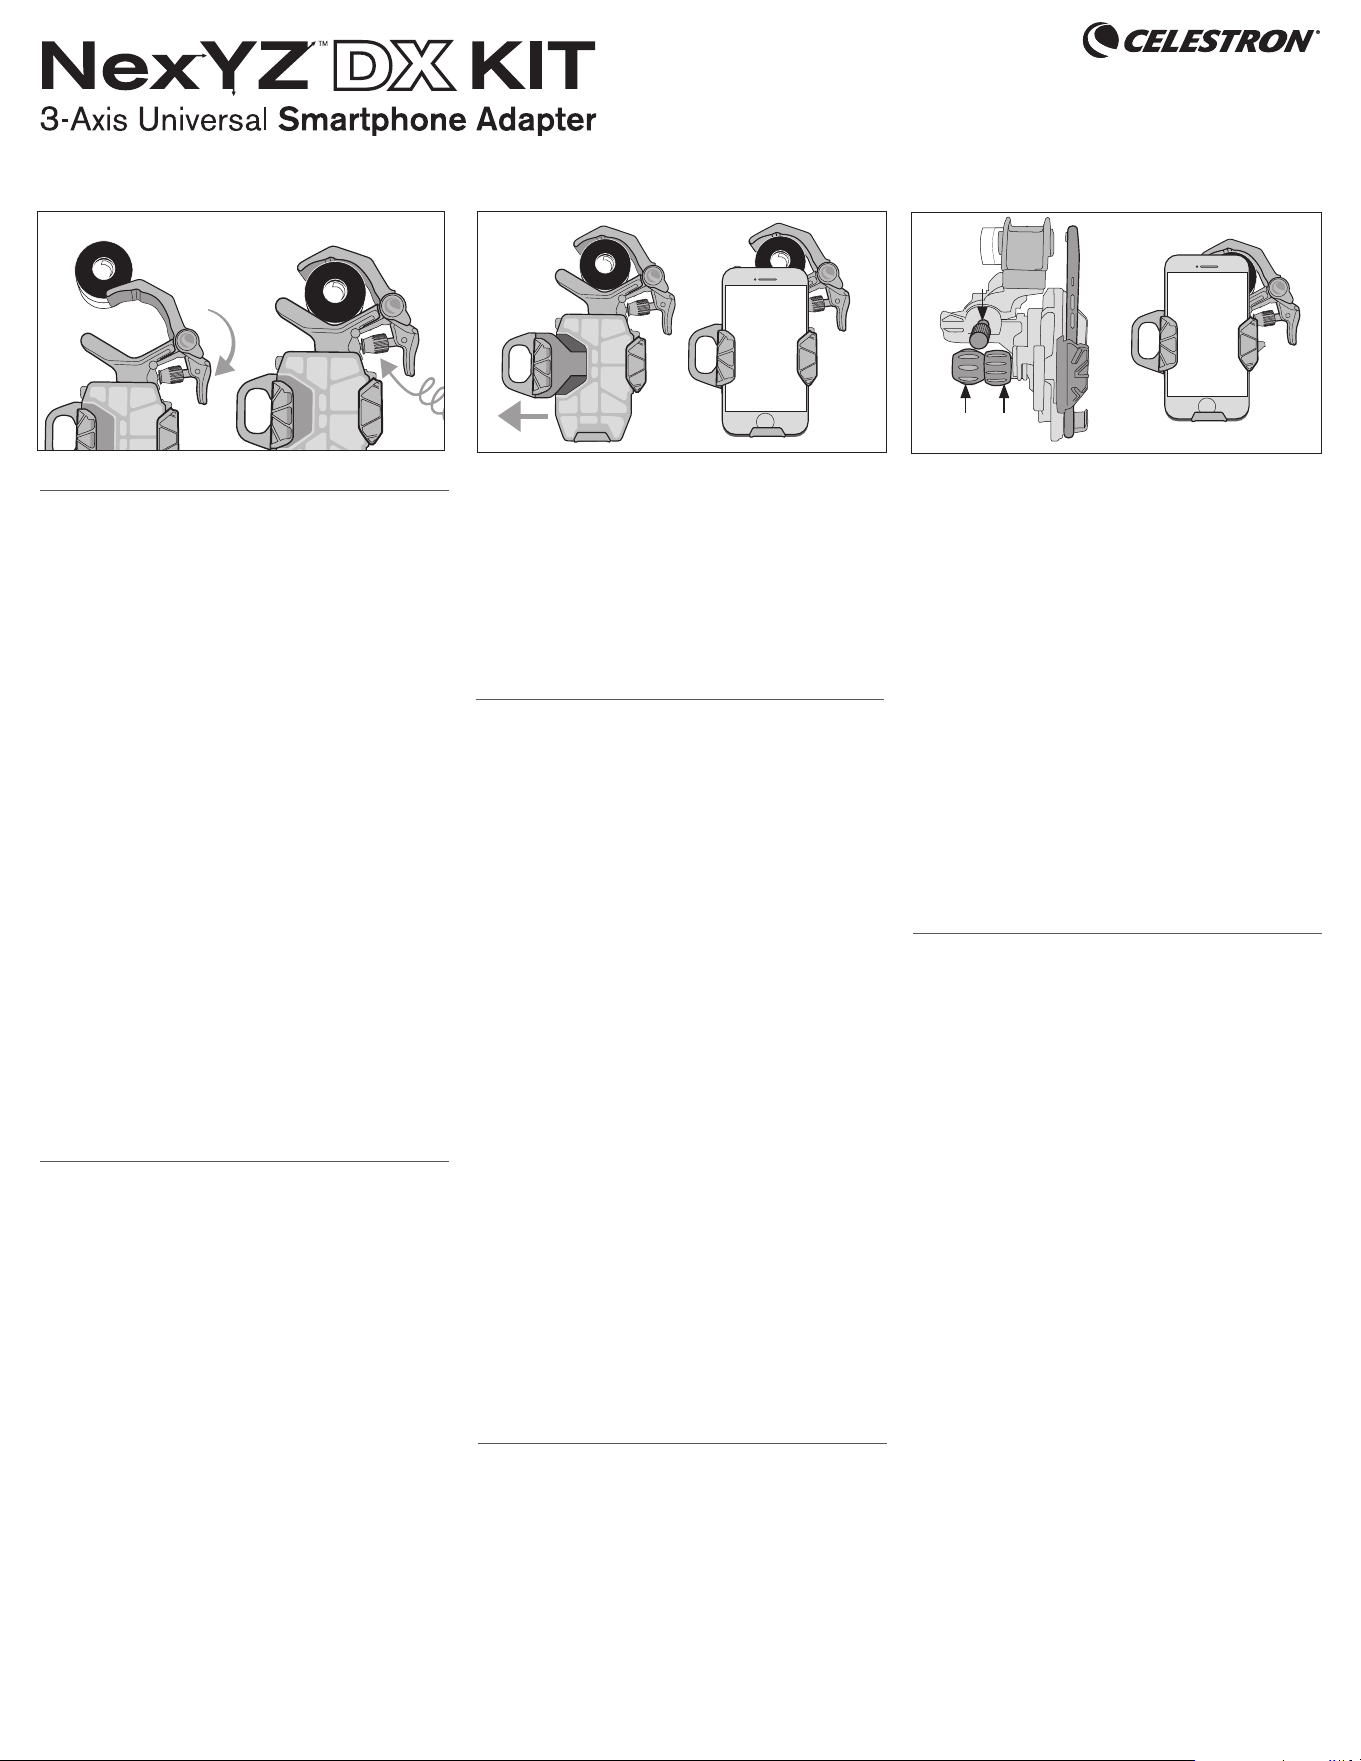
1. CONNECT THE ADAPTER
FOR TELESCOPES, BINOCULARS, AND SPOTTING
SCOPES
Squeeze the lever to open the clamp. Position the clamp
around the eyepiece and release. Tighten the safety lock.
FOR MICROSCOPES
Choose one of the two provided adapter rings that best
fits your microscope’s eyepiece and secure it in place. (You
may need to remove the eyepiece from the microscope to
install the ring.) Then, follow the instructions above.
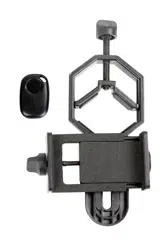
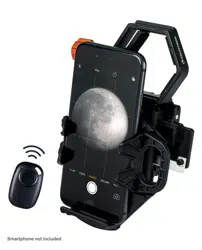
2. ATTACH YOUR PHONE
NexYZ works with regular phone cases, but you will need
to remove “folio-style” cases. Extend the slider. Place your
phone on the platform, making sure the bottom is touching
the rubber base. Release the slider. Your phone is now
secure and ready for imaging.
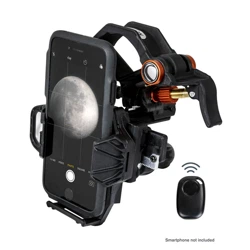
3. ALIGN AND SHOOT
Open your camera app. Position your phone over the
eyepiece using the X and Y axis knobs. Then, use the
Z axis knob to move closer or further away from the
eyepiece until you have achieved your desired framing.
Finally, adjust the focus using the focuser on your optics
and snap the image.
For more tips and tricks, visit celestron.com/NexYZ-tips
2. CONNEXION DE L’ADAPTATEUR
POUR LES TÉLESCOPES, JUMELLES ET
LONGUE-VUES
Tirez sur le levier pour ouvrir la pince. Positionnez la
pince autour de l’oculaire et relâchez. Serrez le verrou de
sécurité.
POUR LES MICROSCOPES
Choisissez un anneau d’adaptateur qui est le plus adapté
à l’oculaire de votre microscope et sécurisez-le.(Il peut
être nécessaire de retirer l’oculaire du microscope pour
y installer l’anneau). Suivez ensuite les instructions ci-
dessus.
2. FIXATION DE VOTRE TÉLÉPHONE
NexYZ est compatible avec les étuis classiques, mais il ne
peut pas fonctionner avec les étuis de type “portefeuille”,
retirez-le le cas échéant.Étendez la partie coulissante.
Positionnez votre téléphone sur la plateforme, en vous
assurant que la partie inférieure est en contact avec la
base de caoutchouc. Relâchez la partie coulissante.
Votre téléphone est maintenant solidement fixé et prêt à
la photographie.
3. ALIGNER ET CAPTURER
Ouvrez votre application d’appareil photo. Positionnez
votre téléphone sur l’oculaire à l’aide des molettes d’axe X
et Y. Utilisez ensuite la molette d’axe Z pour approcher ou
reculer l’appareil de l’oculaire, jusqu’à ce que le cadrage
vous convienne. Enfin, ajustez la molette de mise au point
de votre oculaire et capturez l’image.
Pour obtenir plus de conseils et d’astuces, consultez
celestron.com/NexYZ-tips
1. DEN ADAPTER ANSCHLIESSEN
FÜR TELESKOPE, FERNGLÄSER UND SPEKTIVE
Drücken Sie den Hebel, um die Klammer zu öffnen. Die
Klammer um das Okular anbringen und loslassen. Den
Sicherheitsverschluss festziehen.
FÜR MIKROSKOPE
Wählen Sie einen der beiden mitgelieferten Adapterringe,
die am besten zum Okular Ihres Mikroskops passen, und
befestigen ihn an Ort und Stelle. (Möglicherweise müssen
Sie das Okular abschrauben, um den Ring zu installieren.)
Folgen Sie dann den obigen Anweisungen.
2. IHR TELEFON BEFESTIGEN
NexYZ funktioniert mit normalen Handyetuis, Folio-Stil
Etuis müssen jedoch entfernt werden. Schieberegler
verlängern. Setzen Sie Ihr Telefon auf der Plattform ein
und vergewissern Sie sich, dass der untere Rand des
Telefons die Gummibasis berührt. Den Schieberegler
loslassen. Ihr Telefon ist jetzt sicher und zum Fotografieren
bereit.
3. AUSRICHTEN UND Fotografieren
Öffnen Sie Ihre Kamera App. Positionieren Sie Ihr Telefon
über den Knöpfen der X- und Y-Achsen über dem Okular.
Verwenden Sie dann den Z-Achsen-Knopf, um sich näher
oder weiter vom Okular weg zu bewegen, bis Sie den
gewünschten Rahmen erreicht haben. Passen Sie den
Fokus schließlich mithilfe des Fokussierers auf Ihrer Optik
an und fotografieren Sie das gewünschte Objekt.
Weitere Tipps und Tricks finden Sie unter celestron.com/
NexYZ-tips
1. COLLEGARE L’ADATTATORE
PER TELESCOPI, BINOCOLI E SPOTTING SCOPE
Stringere la leva per aprire il morsetto. Posizionare il
morsetto attorno all’oculare e rilasciare. Serrare il blocco
di sicurezza.
PER MICROSCOPI
Scegliere uno dei due anelli adattatori forniti che si
adattano meglio all’oculare del microscopio e fissarlo
in posizione. (Potrebbe essere necessario rimuovere
l’oculare dal microscopio per installare l’anello.) Quindi,
seguire le istruzioni di cui sopra.
2. FISSARE IL PROPRIO TELEFONO
NexYZ funziona con normali custodie telefoniche, ma è
necessario rimuovere le custodie “folio-style”. Estendere
il cursore. Posizionare il telefono sulla piattaforma,
assicurandoti che il fondo tocchi la base di gomma.
Rilasciare il cursore. Il telefono ora è sicuro e pronto per
l’imaging.
3. ALLINEARE E SCATTARE
Aprire l’app della fotocamera. Posizionare il telefono
sull’oculare usando le manopole degli assi X e Y. Quindi,
utilizzare la manopola dell’asse Z per avvicinarsi o
allontanarsi dall’oculare finché non si ottiene l’inquadratura
desiderata. Infine, regolare la messa a fuoco usando il
dispositivo di messa a fuoco sull’ottica e scattare.
Per ulteriori suggerimenti e trucchi, visitare celestron.com/
NexYZ-tipscelestron.com/NexYZ-tips
1. CONECTAR EL ADAPTADOR
PARA TELESCOPIOS, BINOCULARES Y CATALEJOS
Presione la palanca para abrir la fijación. Posicione la
fijación alrededor del ocular y suelte. Apriete el bloqueo
de seguridad.
PARA MICROSCOPIOS
Elija una de las dos arandelas adaptadores incluidas,
la que se adapte mejor al ocular de su microscopio, y
asegúrela en posición. (Puede que tenga que retirar
el ocular del microscopio para instalar la arandela). A
continuación, siga las instrucciones anteriores.
2. INSTALAR EL TELÉFONO
NexYZ funciona con fundas de teléfono normales,
pero tendrá que retirar las fundas con tapa. Extienda
el deslizador. Coloque el teléfono sobre la plataforma,
asegurándose de que la parte inferior esté en contacto
con la base de goma. Suelte el deslizador. Su teléfono
estará asegurado y listo para fotografiar.
3. ALINEAR Y DISPARAR
Abra la app de cámara. Posicione el teléfono sobre el
ocular usando los mandos de ejes X e Y. A continuación,
use el mando del eje Z para acercar o separar del ocular
hasta conseguir el encuadre deseado. Para terminar,
ajuste el foco con el enfoque de la óptica y capture la
imagen.
Para más recomendaciones y trucos, visite celestron.
com/NexYZ-tips
#81057
1
2
X
Z
Y
3
ENGLISH
USING YOUR
SMARTPHONE ADAPTER
FRANÇAIS
UTILISER VOTRE
ADAPTATEUR POUR TÉLÉPHONE INTELLIGENT
DEUTSCH
GEBRAUCH IHRES
SMARTPHONE-ADAPTERS
ITALIANO
UTILIZZO DELL
ADATTATORE PER SMARTPHONE
ESPAÑOL
USO DE SU
ADAPTADOR DE TELÉFONO
1
and Bluetooth
®
Shutter Release Remote
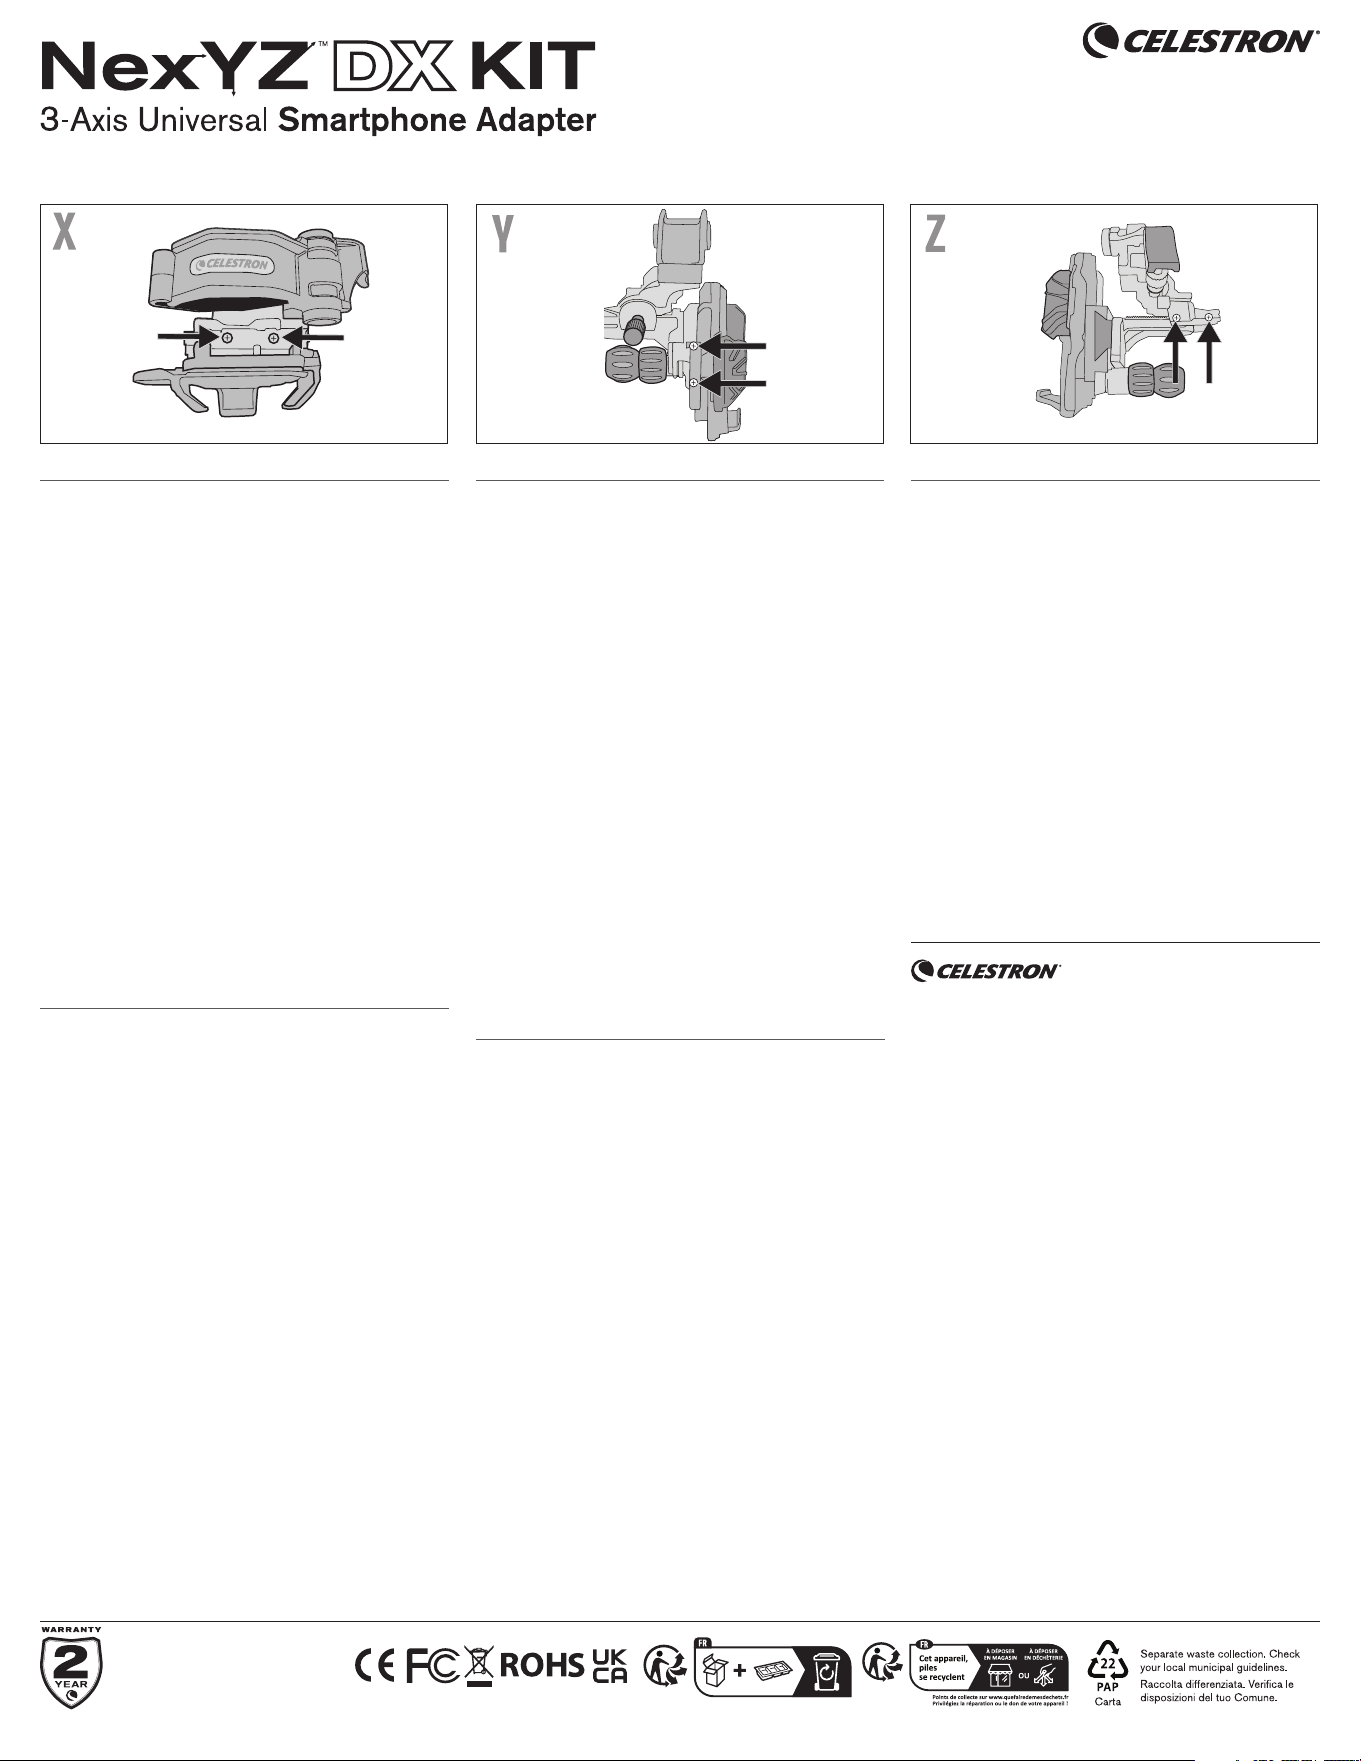
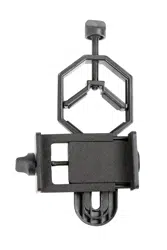
NEXYZ TENSION
ADJUSTMENT GUIDE
The tension of each axis can be easily adjusted using a small
Phillips screwdriver. Use the images above to locate the
adjusting screws. For each axis, only make small adjustments
to the set screws. Tightening them too much can make it
difficult to use the motion knobs.
X Axis
Adjust the Z axis until the phone platform is as far away
from the adapter as possible. Look down onto the NexYZ
in between the platform and adapter, there will be two set
screws for tension adjustment in the X axis.
Y Axis
On the platform there is a handle to pull the slider to install
your phone. Underneath the handle will be two set screws for
tension adjustment in the Y axis.
Z Axis
Directly on the opposite side of the Z axis motion knob are
the set screws for tension adjustment in the Z Axis. This
adjustment is very useful for heavy smartphones.
GUIDE D’AJUSTEMENT
DE TENSION NEXYZ
La tension de chaque axe peut être aisément ajustée à l’aide
d’un petit tournevis cruciforme. Utilisez les images ci-dessus
pour vous aider à repérer les vis de réglage. Pour chaque axe,
effectuez seulement des ajustements par petits incréments
sur les vis de réglage. Les serrer trop fort peut rendre
l’utilisation des molettes d’orientation difficile.
Axe X
Ajustez l’axe Z jusqu’à ce que la plateforme de téléphone se
trouve aussi écartée que possible de l’adaptateur. Regardez
dans le NexYZ, entre la plateforme et l’adaptateur. Vous y
verrez deux vis de réglage pour l’ajustement de tension de
l’axe X.
Axe Y
Vous trouverez sur la plateforme une poignée pour tirer le
glissoir de réception de votre téléphone. Les deux vis de
réglage pour l’ajustement de tension de l’axe Y se trouvent
sous cette poignée.
Axe Z
Directement sur le côté opposé de la molette d’orientation
de l’axe Z, se trouvent les vis de réglage pour l’ajustement de
tension de l’axe Z. Cet ajustement est spécialement utile pour
l’utilisation des téléphones intelligents lourds.
NEXYZ LEITFADEN FÜR
WIDERSTANDS-ANPASSUNG
Der Widerstand jeder Achse kann mit einem kleinen Kreuzschlitz-
Schraubendreher leicht eingestellt werden. Die Stellschrauben
finden Sie in den gegenüberliegenden Abbildungen. Machen Sie
für jede Achse nur kleine Anpassungen an den Stellschrauben.
Wenn Sie sie zu stark anziehen, kann die Bewegung der
Drehknöpfe behindert werden.
X-Achse
Stellen Sie die Z-Achse so ein, dass sich die Telefonplattform
so weit wie möglich vom Adapter entfernt befindet. Blicken
Sie von oben auf den NexYZ. Zwischen Plattform und
Adapter befinden sich zwei Stellschrauben für die Einstellung
des Widerstands auf der X-Achse.
Y-Achse
Auf der Plattform befindet sich ein Griff, um den Schieber
für die Installation des Telefons zu ziehen. Unterhalb
des Griffs befinden sich zwei Stellschrauben für die
Widerstandseinstellung auf der Y-Achse.
Z-Achse Direkt auf der gegenüberliegenden Seite des
Drehknopfs der Z-Achse befinden sich die Stellschrauben
zur Anpassung des Widerstands auf der Z-Achse. Diese
Anpassung ist für schwere Smartphones sehr nützlich.
GUIDA ALLA REGOLAZIONE
DELLA TENSIONE PER NEXYZ
La tensione di ciascun asse può essere facilmente regolata
utilizzando un piccolo cacciavite a croce. Utilizzare le
immagini per localizzare le viti di regolazione. Per ciascun
asse, effettuare esclusivamente piccole regolazioni alle viti di
regolazione. Serrarle in modo eccessivo può rendere difficile
utilizzare le manopole di movimento.
Asse X
Regolare l’asse Z fino a quando la piattaforma del telefono è il
più lontano possibile dall’adattatore. Guardare verso il basso
al NexYZ tra la piattaforma e l’adattatore dove sono presenti
due viti di regolazione per la regolazione della tensione
dell’asse X.
Asse Y
Sulla piattaforma è presente una manopola per tirare il
dispositivo di scorrimento e installare il telefono. Sotto
la manopola sono presenti due viti di regolazione per la
regolazione della tensione nell’asse Y.
Asse Z
Direttamente dal lato opposto della manopola di
movimento dell’asse Z si trovano le viti di regolazione
per la regolazione della tensione dell’asse Z. Questa
regolazione è molto utile per gli smartphone più pesanti.
GUÍA DE AJUSTE DE
TENSIÓN NEXYZ
La tensión de cada eje puede ajustarse fácilmente con un
pequeño destornillador Phillips. Use las imágenes para
localizar los tornillos de ajuste. Para cada eje, realice
solamente pequeños ajustes en los tornillos. Apretarlos en
exceso puede dificultar usar los mandos de movimiento.
Eje X
Ajuste el eje Z hasta que la plataforma del teléfono esté lo
más alejada posible del adaptador. Mire al NexYZ entre la
plataforma y el adaptador, verá dos tornillos para ajustar la
tensión en el eje X.
Eje Y
En la plataforma dispone de un mango para tirar del deslizador
para instalar su teléfono. Bajo el mango se encuentran dos
tornillos para ajustar la tensión en el eje Y.
Eje Z
Directamente opuestos al mando de movimiento del eje Z se
encuentran los tornillos de ajuste de tensión en el eje Z. Este
ajuste es muy útil para teléfonos pesados.
2
ENGLISH
FRANÇAIS
DEUTSCH
ITALIANO
ESPAÑOL
#81057
©2024 Celestron. Celestron and Symbol are trademarks of Celestron, LLC. • All rights
reserved. • Celestron.com • US: Celestron, 2835 Columbia Street, Torrance, CA 90503 USA
UK: Celestron Global Ltd., Unit 2 Transigo, Gables Way, Thatcham RG19 4JZ, United Kingdom
Product design and specifications are subject to change without prior notification.
This product is designed and intended for use by those 14 years of age and older.
Made in China | 09-24
©2024 Celestron. Celestron et le Symbol sont des marques déposées de Celestron, LLC. •
Tous droits réservés • Celestron.com • US: Celestron.com • 2835 Columbia Street, Torrance,
CA 90503 USA • UK: Celestron Global Ltd., Unit 2 Transigo, Gables Way, Thatcham RG19 4JZ,
Royaume-Uni • Le design et les spécifications du produit sont sujettes à modification sans
préavis. Ce produit est conçu et prévu pour être utilisé par des personnes âgées de 14 ans et
plus • Fabriqué en Chine | 09- 24
©2024 Celestron. Celestron und Symbol sind Warenzeichen von Celestron, LLC. Alle Rechte
vorbehalten. Celestron.com | USA: Celestron, 2835 Columbia Street, Torrance, CA 90503 USA
| UK: Celestron Global Ltd., Einheit 2 Transigo, Gables Way, Thatcham RG19 4JZ, Vereinigtes
Königreich | Produktdesign und technische Daten können ohne vorherige Ankündigung
geändert werden. Dieses Produkt ist für Personen ab 14 Jahren konzipiert und vorgesehen.|
Hergestellt in China | 09-24
©2024 Celestron. Celetron e Symbol sono marchi di Celestron, LLC. • Tutti i diritti riservati. •
Celestron.com • Stati Uniti: Celestron, 2835 Columbia Street, Torrance, CA 90503 Stati Uniti .
• Regno Unito: Celestron Global Ltd., Unit 2 Transigo, Gables Way, Thatcham RG18 4JZ Regno
Unito. • Il design del prodotto e le specifiche sono soggetti a modifiche senza previa notifica.
Questo prodotto è progettato per essere utilizzato da persone di età pari o superiore ai 14 anni.
• Prodotto in Cina | 09-24
©2024 Celestron. Celestron y su símbolo son marcas comerciales de Celestron, LLC. •
Todos los derechos reservados. • Celestron.com • EE.UU.: Celestron, 2835 Columbia Street,
Torrance, CA 90503 EE.UU • GB: Celestron Global Ltd., Unit 2 Transigo, Gables Way, Thatcham
RG19 4JZ, Reino Unido • El diseño y las especificaciones del producto están sujetos a cambios
sin notificación previa. Este producto ha sido diseñado y está pensado para ser usado por
personas de 14 años o más de edad. • Fabricado en China • 09-24
and Bluetooth
®
Shutter Release Remote
celestron.com/pages/warranty