
Technical Support and E-Warranty Certificate www.vevor.com/support
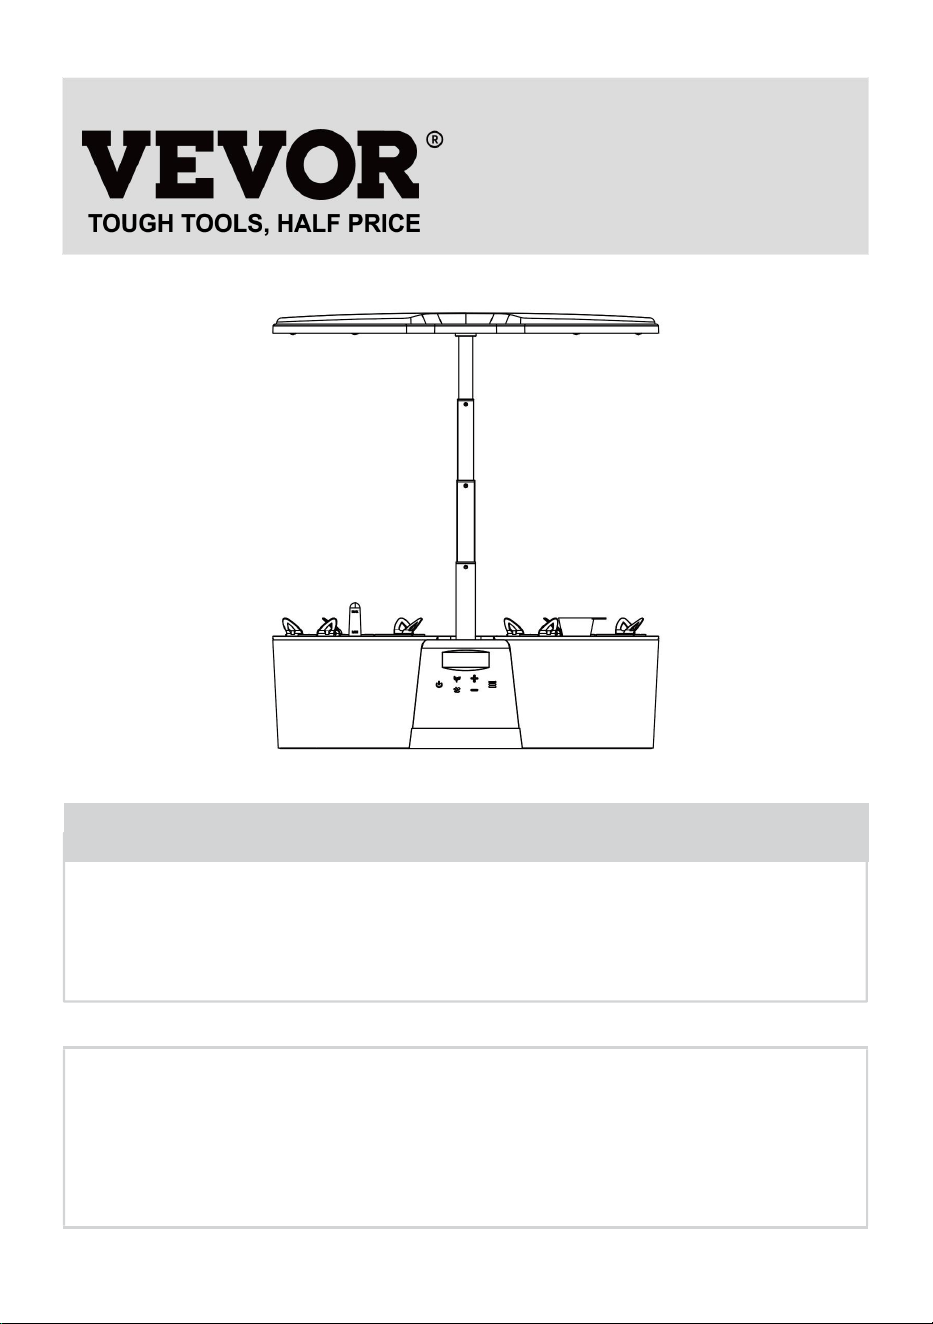
HYDROPONIC GROW KIT
USER MANUAL
We continue to be committed to provide you tools with competitive price.
"Save Half", "Half Price" or any other similar expressions used by us only represents an
estimate of savings you might benefit from buying certain tools with us compared to the major
top brands and does not necessarily mean to cover all categories of tools offered by us. You
are kindly reminded to verify carefully when you are placing an order with us if you are
actually saving half in comparison with the top major brands.
1
Model: S12C
Have product questions? Need technical support? Please feel free to
contact us:
Technical Support and E-Warranty Certificate
www.vevor.com/support
NEED HELP? CONTACT US!
This is the original instruction, please read all manual instructions
carefully before operating. VEVOR reserves a clear interpretation of our
user manual. The appearance of the product shall be subject to the
product you received. Please forgive us that we won't inform you again if
there are any technology or software updates on our product.
HYDROPONIC GROW KIT

2
Warning-To reduce the risk of injury, user must read instructions manual
carefully.
WARNING:
Please read this manual carefully before using the product.
Notes before Installation, Failure to follow all instructions listed
below may result in electric shock, fire and/or serious injury.
1. Non-professional technicians, please do not repair or modify this
product without authorization. Contact a qualified electrician for
installation.
2. Please turn off the power and follow proper procedures before
installation to avoid improper operation and risk of electric shock.
3. To ensure the lifetime of the product, please do not use it in a place
with a strong acid mist.
4. Please check whether the voltage marked on the luminaire is
consistent with the input voltage to be connected, so as to avoid the
risk of electric shock and not damage the luminaire.
5. Make sure to install it at a flat place without vibration, no swing,
and no fire hazard.

3
6. If the supply cord is damaged, it must be replaced by the
manufacturer, its service agent or similarly qualified persons in order
to avoid a hazard.
7. DO NOT use with extension cord near water or wherever water may
accumulate.
8. This appliance can be used by children aged 8 years and above and
persons with reduced physical, sensory or mental capabilities or lack
of experience and knowledge if they have been given supervision or
instruction concerning use of the appliance in a safe way and
understand the hazards involved. Children shall not play with the
appliance. Cleaning and user maintenance shall not be made by
children without supervision.
9. The luminaire shall be positioned in such a way that prolonged
gazing at the luminaire is not permitted
SAVE THESE INSTRUCTIONS

4
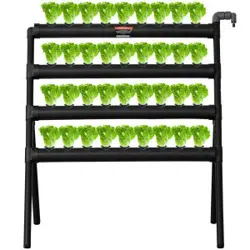
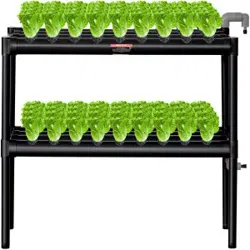
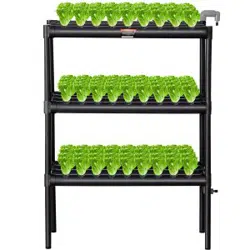
SPECIFICATIONS
Model
S12C
Product Size
435×190×500mm
Color
Black
Input Vol
24Vd.c.
Input Amp
1.5A
Tank capacity
4.2L
Number of planted plants
12
Before using the product, please read the instructions carefully and
keep them properly.
Note:
Please ensure that children are always supervised by an adult when
using this product. After adding water, make sure your hands are dry
before plugging the adapter into a power source. The machine
requires water in the tank and a 12V DC power supply to operate.
To prevent any damage to the machine, ensure that no electrical
components are directly exposed to water. If any water splashes onto
or spills onto any electrical components, thoroughly dry all related
parts.
5
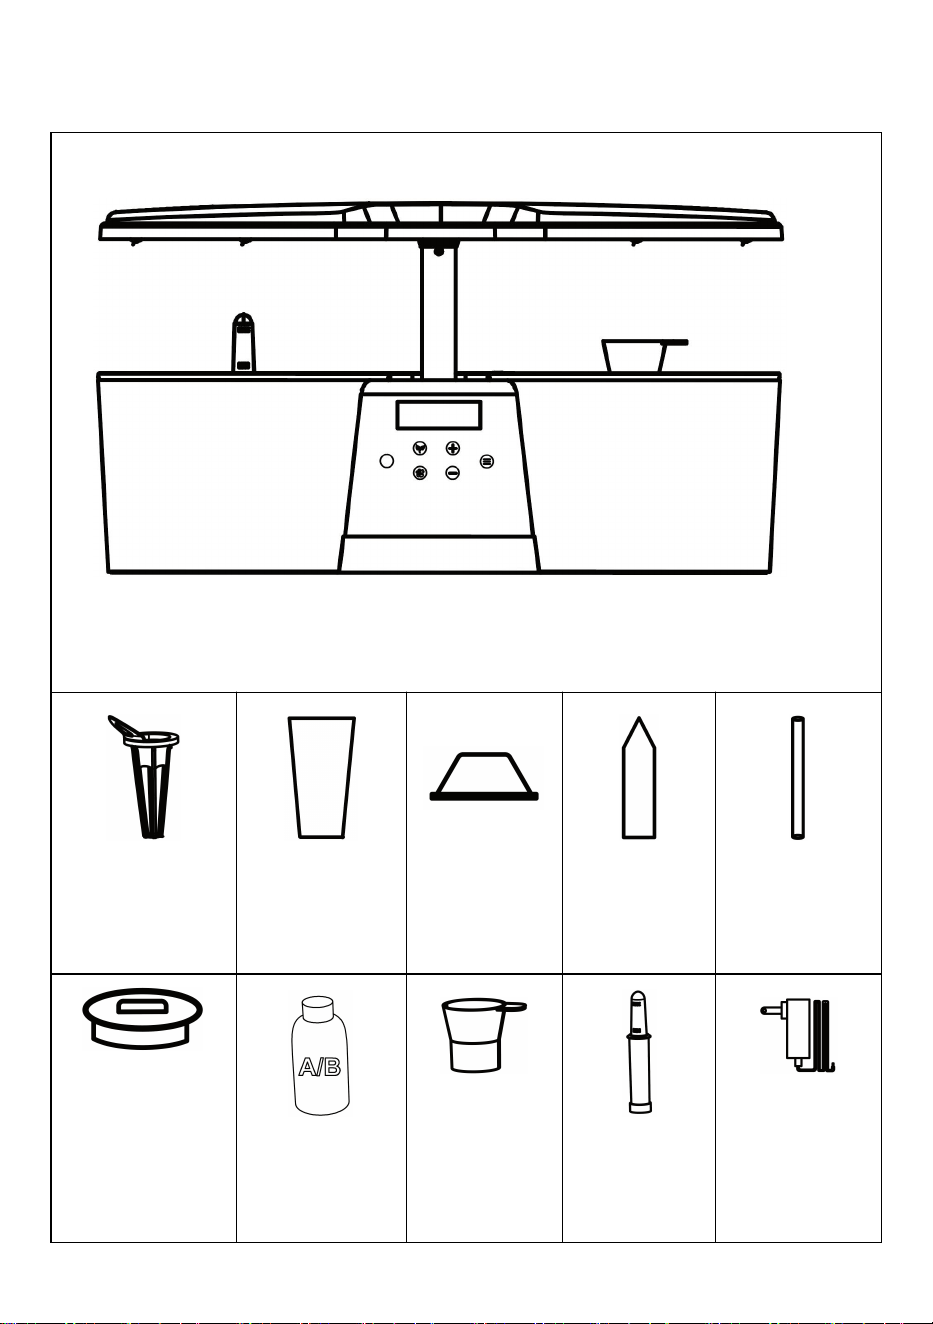
COMPONENTS
×1
Planting Machine
×13
×15
×13
×12
×4
Planting Basket
Planting
Sponge
Circular
Seedling Lid
Identification
labels
Support bar
×6
×1
×1
×1
×1
Top cover
A&B Nutrient
Solution
Filling funnel
Water Level
Indicator
Adaptor
6
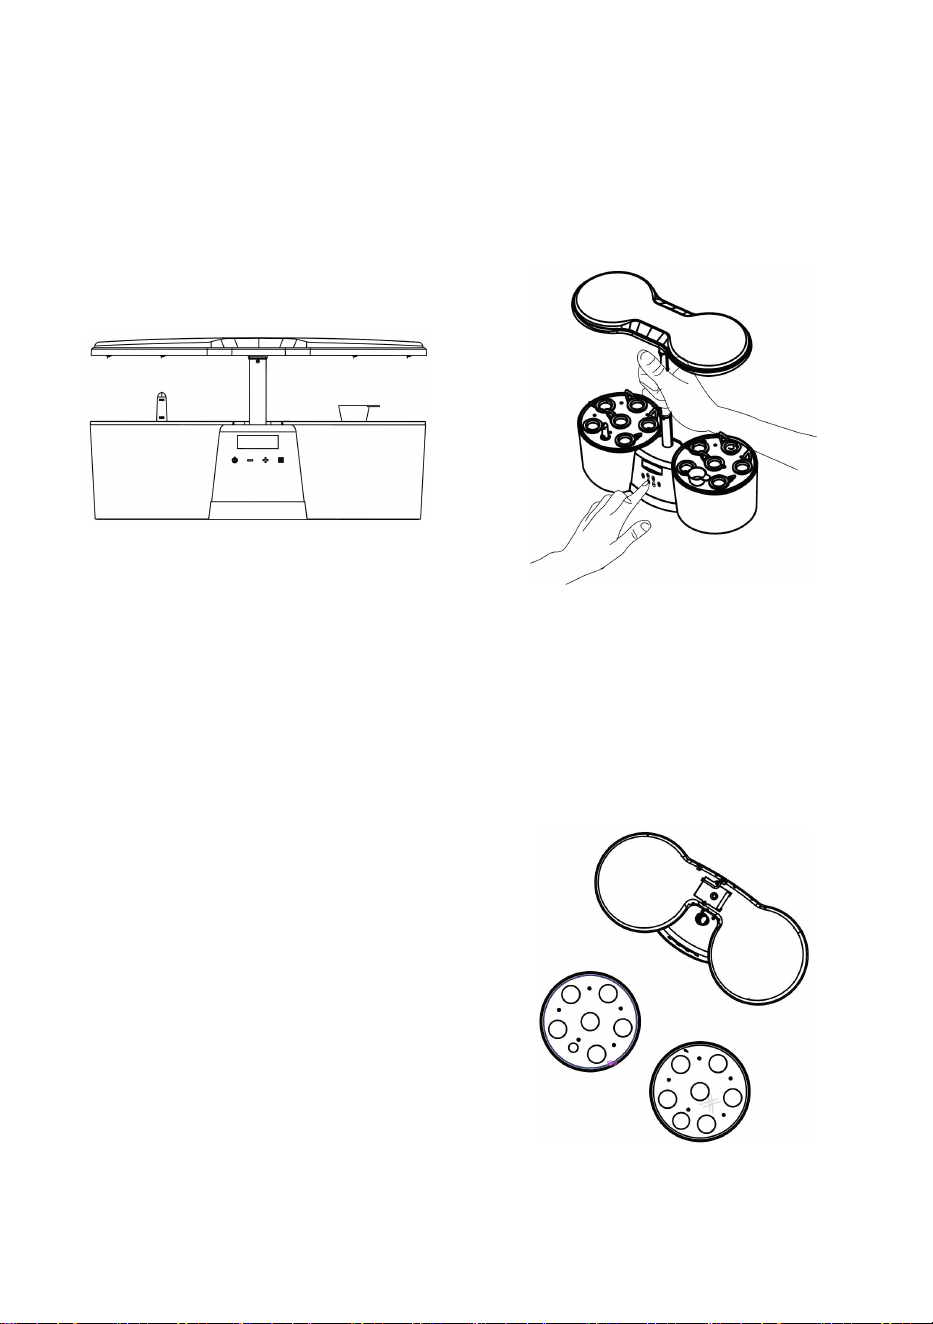
Unboxing guide:
1. Remove the machine from the packaging box. As shown in the figure below, pull up the
extendable pole of the lamp surface.
Note: Lift the extendable pole with one hand and hold the water tank with the other
hand to prevent lifting the entire device.
2. Remove the water tank lid and take
out the accessories from the water tank,
such as adapter, planting basket,
planting sponge, etc.
7
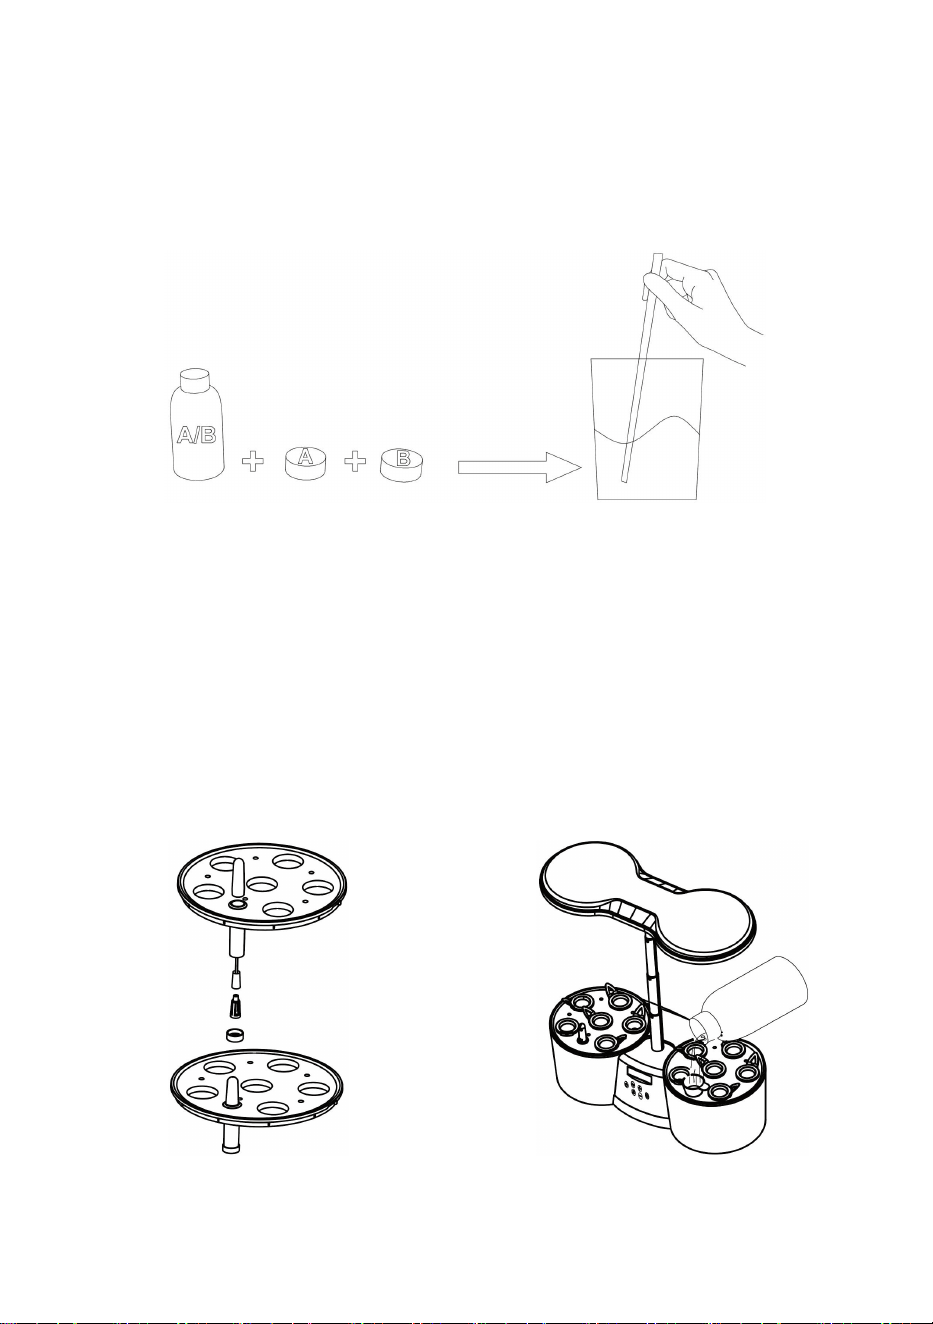
How to plant:
1. Prepare nutrient solution. Follow the instruction on the 2 bottles of the nutrients
in the accessories box.
2.Install water level indicator andfilling
funnel.
3. Add water through the water injection
port, and make sure the water level indicator
does not exceed the maximum line.
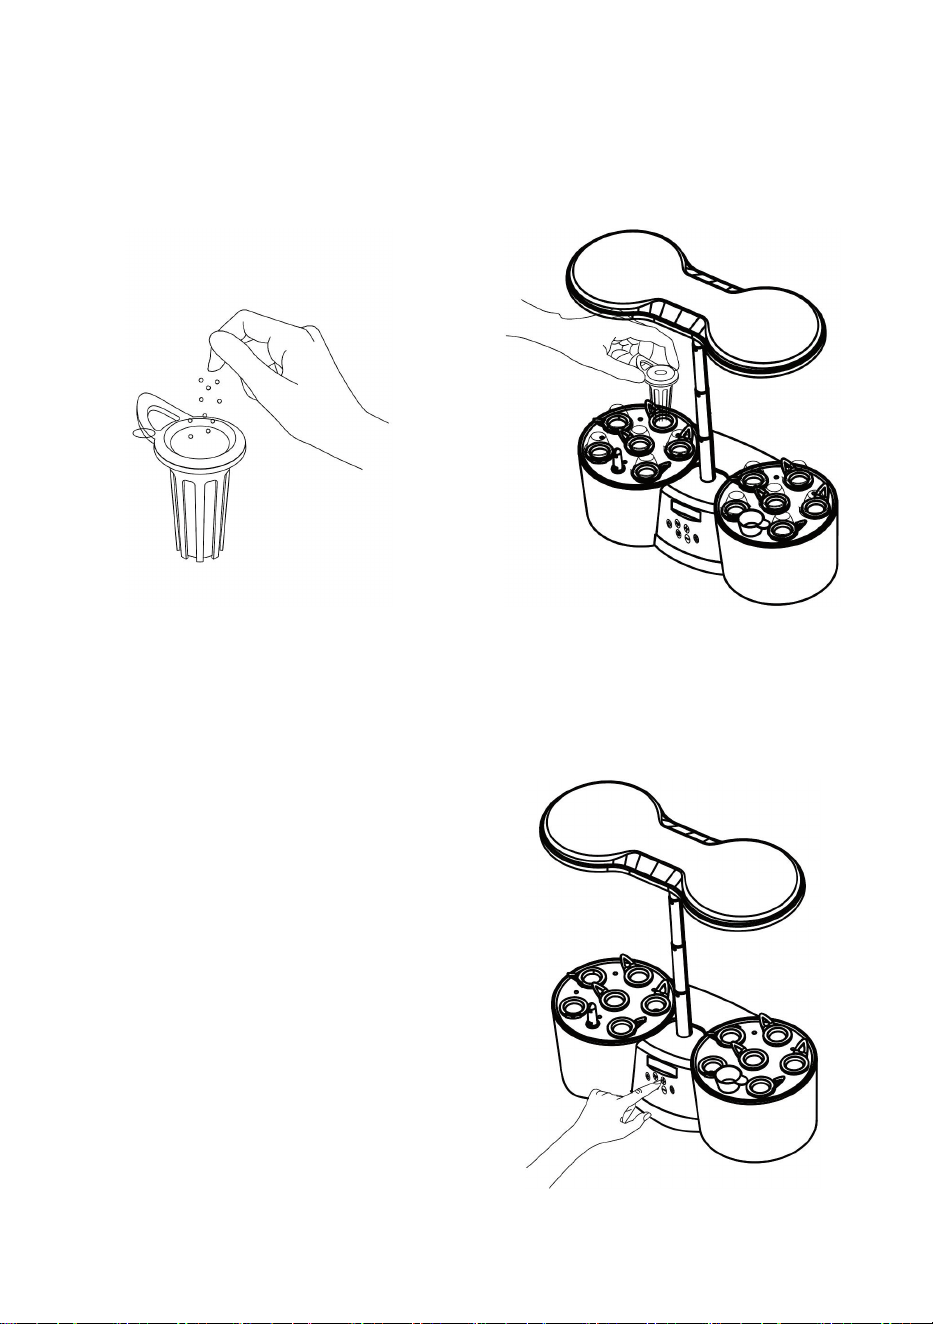
8
4. Install the planting basket and planting sponge. (soak the sponge in water for 5
minutes) Then put the seeds in it. (To ensure normal germination, it is recommended
to soak the seeds in warm water for about 1 hour before sowing them in the planting
sponge.) Then, put the basket into the water tank lid.
5. Insert the adapter, then press the power button, the light will turn on, and the machine will
start working. It will automatically turn on for 12 hours and off for 12 hours. This cycle setting
only occurs when the cycle function is turned on.
Note 1: Make sure your hands are dry
before inserting the adapter.
Note 2: Light is not needed before the
seeds germinate, please turn on the light
after the seeds have germinated.
9
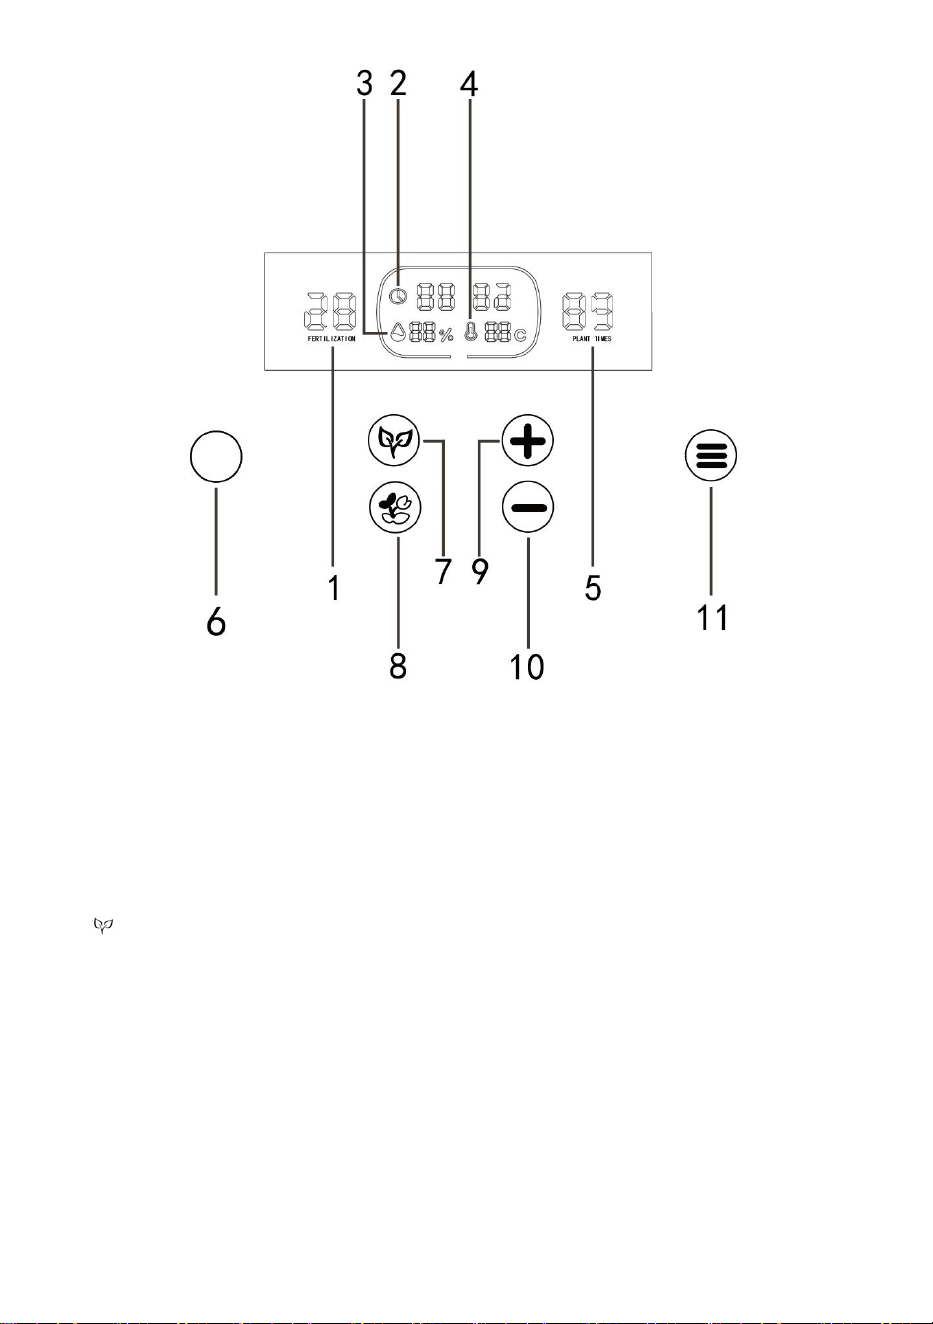
1. Fertilization: shows how many days are left to fertilize.
2. Time: Adjustable, just adjust the planting time you want.
3. Humidity: Sensor Intelligent Display.
4. Temperature: Sensor Intelligent Display.
5. Plant Times: Change the growing days.
6. Power: 12hrs on and 12hrs off cycle automatically.
7. " " : The light will be 8 hours on/16 hours off.
8. The light will 14hours on/10hours off.
9. "+": Adjust the planting time, growing days and fertilization days.
10. "-": Adjust the planting time, growing days and fertilization days.
11. Menu: Tap the button, you can switch to the planting time, growing days or fertilization
days.
Long press the button for five seconds, you can reset the growing days and fertilization
days, and the time remains the same.
Made In China