Model:HY01
01
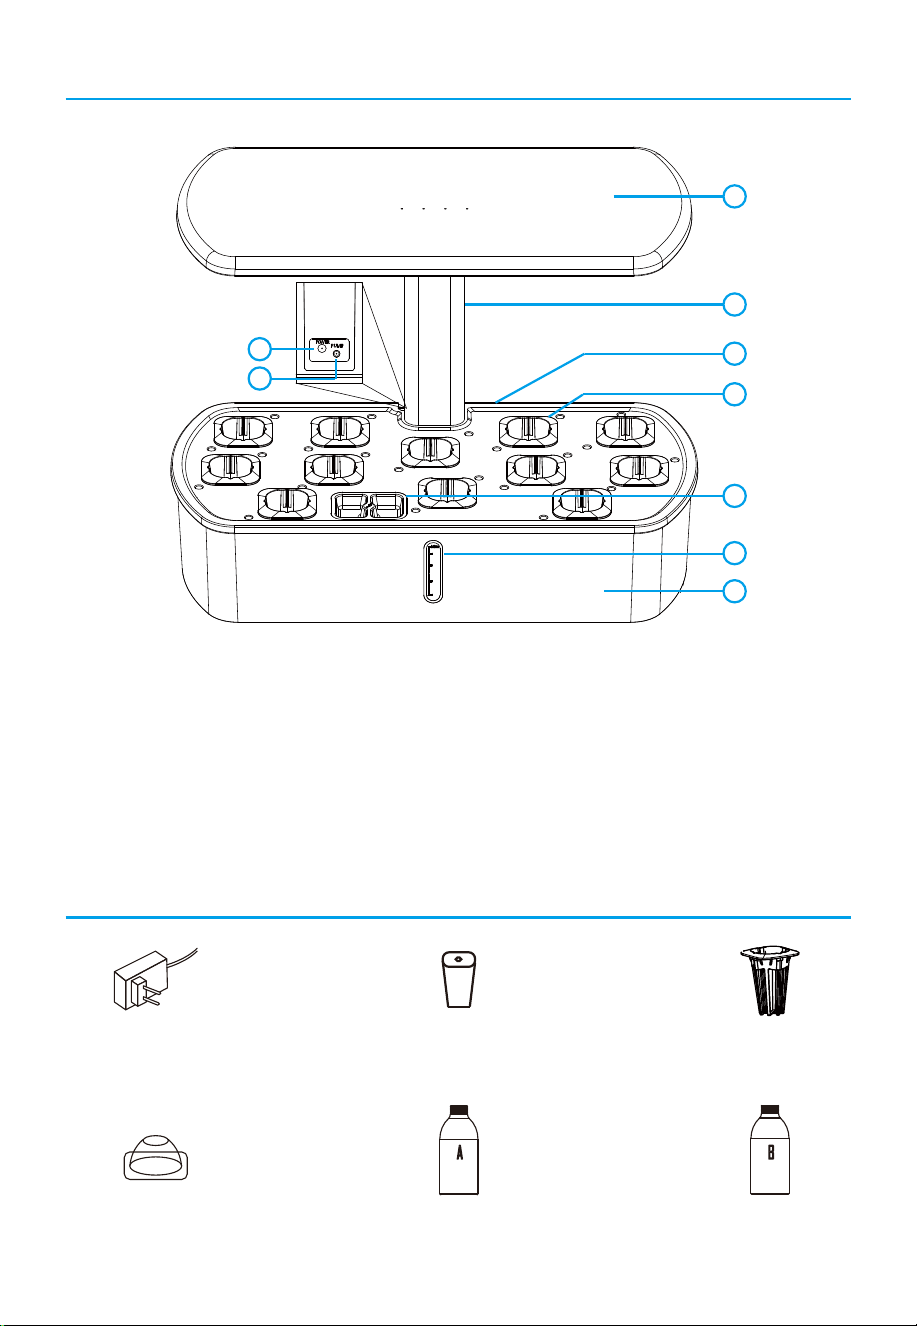
What’s in the Box
Accessories
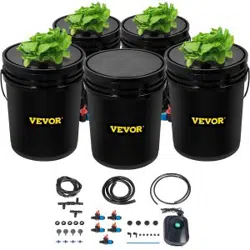
1
2
3
4
5
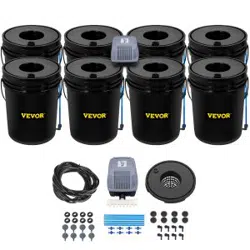
8
9
6
7
1.5L
2.0L
3.0L
1. Light panel 2. Extendable rod 3. Growing tray
4. Basket containers 5. Filling nozzle cap 6. Water indicator
7. Water tank 8. Power jack 9. Pump jack
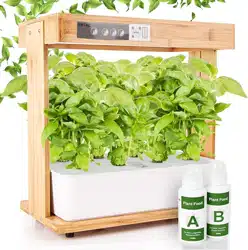
Power Adapter * 1 Sponge * 12 Basket * 12
Grow Dome * 12 Plant Food A * 1 Plant Food B * 1
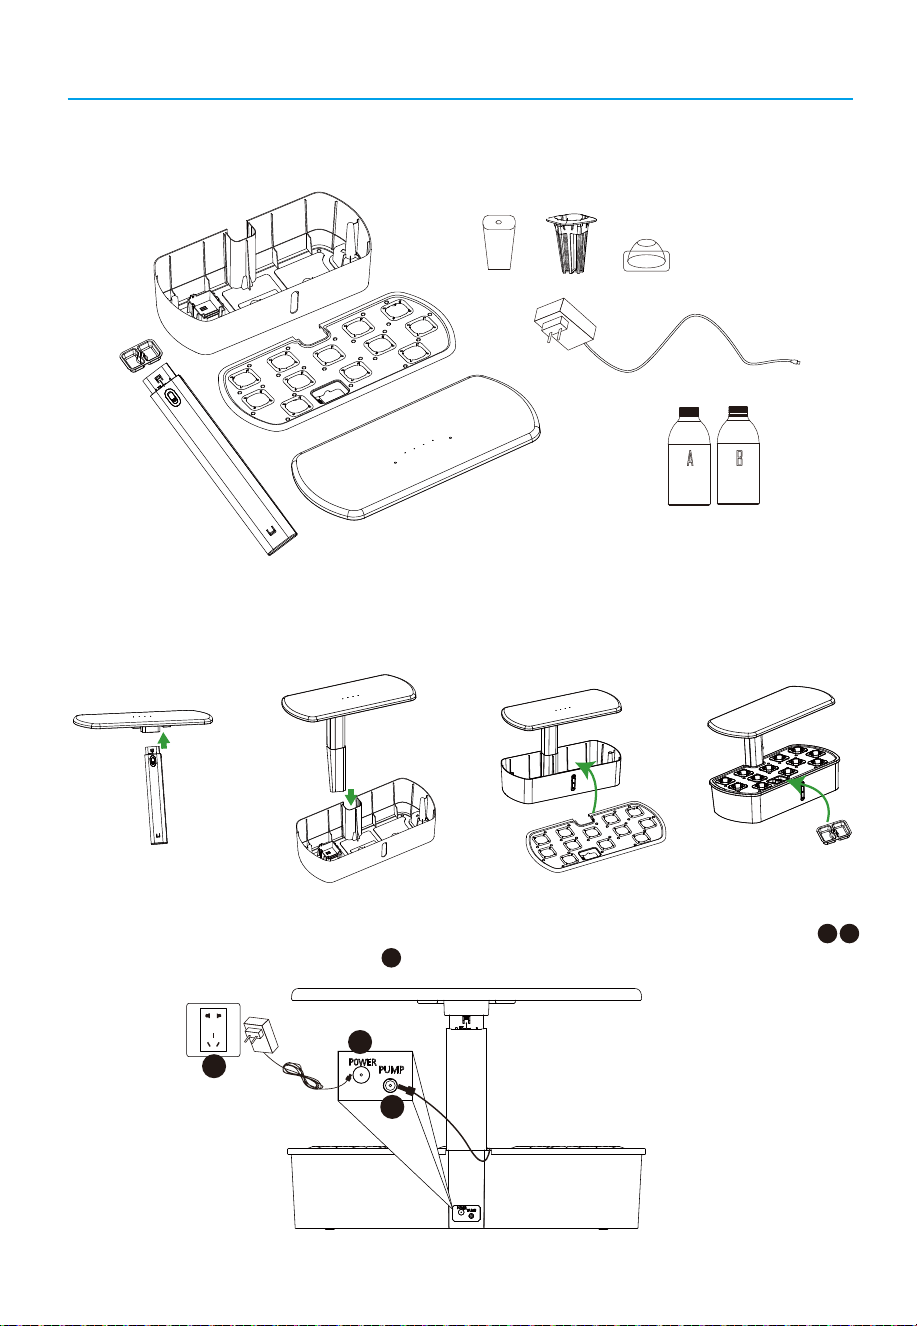
Easy Set Up
02
1. Take out the machine from the box. Remove the packing and the growing tray, take out all
the accessories from the water tank.
2. Install the extendable rod to light panel (Step 1)and water tank(Step 2), place the growing
tray on the top of water tank (step 3), last put the filling nozzle cap (Step 4).
3. Insert the power cord of the water pump into the DC jack on the back of the water tank
and then plug inthe power adapter .
Step 1:
Step 2:
Step 3: Step 4:
A B
C
A
B
C
03
Easy Set Up
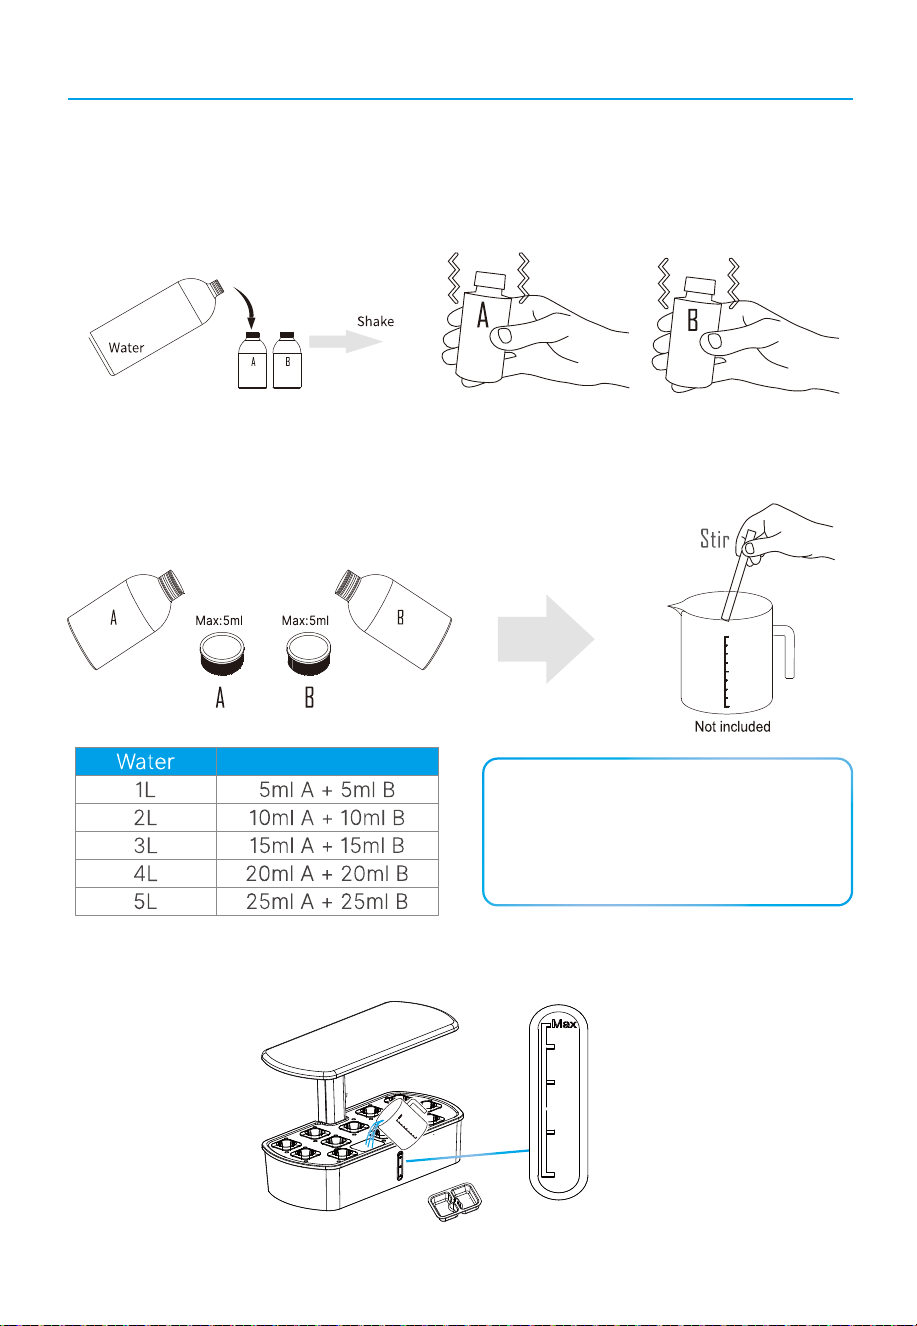
4. Prepare your plant food
4.1 Fill the bottle of plant food A and plant food B with water. Keep shaking both bottles until the
plant food have completely dissolved. Each 5ml of mixed plant food solution A and B should be
combined with 1 liter water.
4.2 Use the cap of the plant food as a measure, pour a cap of plant food A into a jug and dissolve
with 5ml of water. Then add the mixed plant food solution into 1 liter of water and stir until complete-
ly dissolved. Repeat the step with plant food B.
Plant Food
NOTE:
The unopened plant food can be stored
for 2 years in a cool dry place. If you
dissolved the plant food, it can be
preserved for 5 months.
5. Pour the well-mixed solution into water tank (lt is recommended that the initial water
addition should not exceed to 3.3 liters).
1.5L
2.0L
3.0L
04
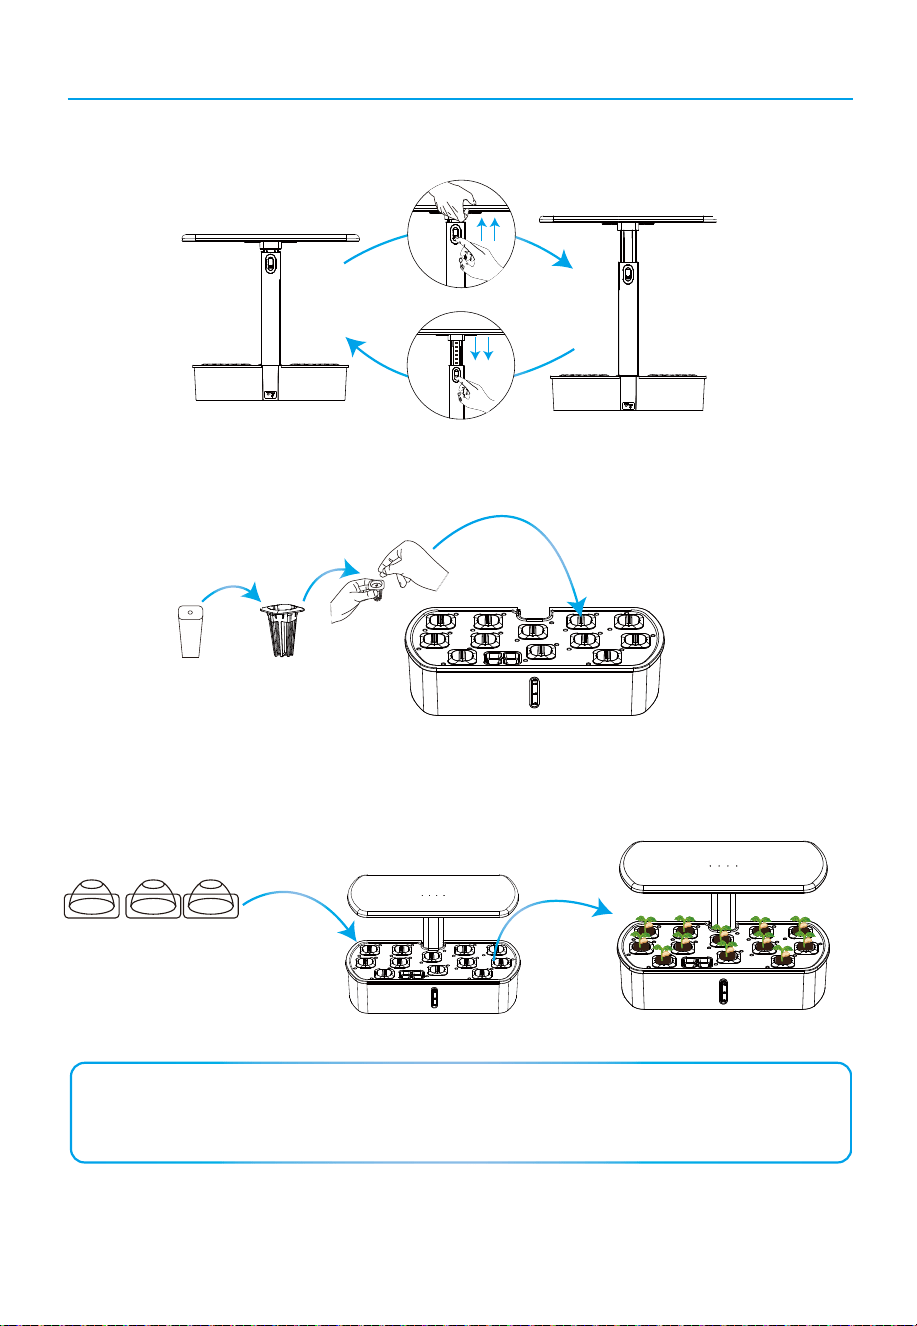
Easy Set Up
6. Push the button to adjust the height of the lamp to up or down.
7. Put the sponges into the white baskets and then insert them into the pods of the growing
tray, 2-3 seeds in each sponge are the best. If the seeds do not germinate, please replace
them with a new batch of seeds.
8. Cover the domes to wait for germination. Turn on the lights and adjust the height of the
light panel to the lower position when germinating.
PUSH
NOTE:
For better results, please soak the seeds for 1 hour before putting into the plant pods.
Make sure the plant is placed inside the plant pod, not on the surface of the pod.
05
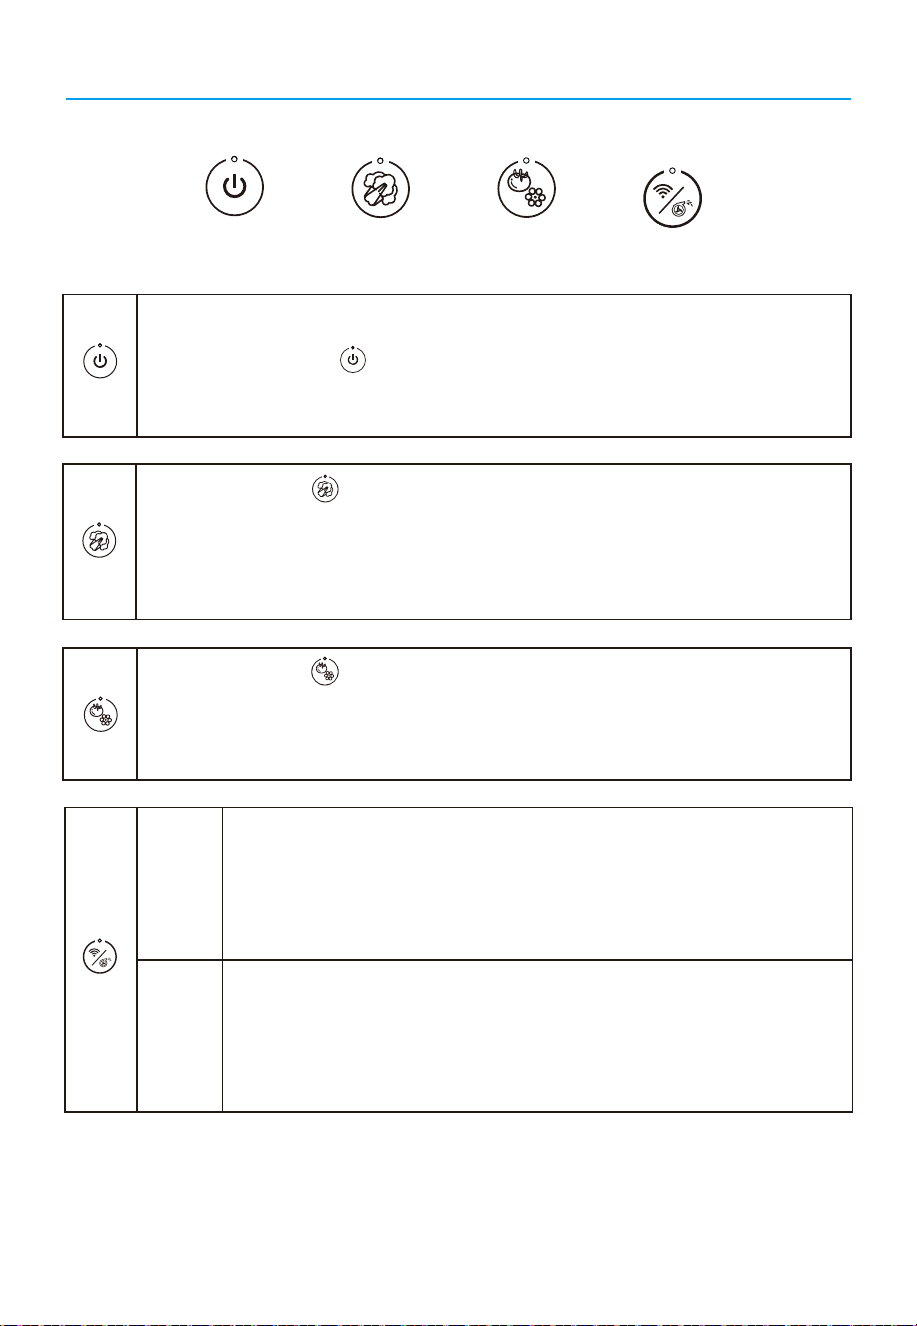
Function & Control Description
When you press the Veg button, the light (red, blude and white LED) will turn on,
and the indicator of this button during the working period. The automatic on and off,
work on a 24-hours cycle. When you choose the Veg mode, the hydroponic growing
system will light on for 16 hours, enter sleeping mode for 8 hours. After that, the
hydroponic growing system will automatically light on at the same time the next day.
After you plug in the product, there will be a long "Di" sound and the power button will
flash slowly. Press the Power button, all of the LED Light beads will turn on and
the machine will enter the Veg mode automatically.
When you press the Flower button, the light (red and white LED) will turn on and
the indicator of this button will be on during the working period. When you choose the
flower mode, the hydroponic growing system will light on for 16 hours, enter sleeping
mode for 8 hours, and then repeats this working cycle.
In the standby mode, long press for 3 seconds, the device will make a
long"Di" sound,indicationg that the wi-fi is be connected mode,meanwhile
or at the same time,you can scan this device on Smart Life app by your
phone ; if found and connected to APP, this device will “beep beep”twice; if
no found or connected to APP, this device will be no “beep”sound,you
need long press again for connection.
If you press the pump button once, the indicator will flash and immediately
enter a 12-hour sleeping mode. After the sleeping mode is complete, the
pump will enter the working cycle of 30 minutes on and 30 minutes off
again.When the pump is worked, press once will trun off the pump and if the
pump is unworked that press once will trun on the pump.
wi-fi
Pump
wi-fi
Flower
Veg
Power
Pump
wi-fi
Pump
Flower
Veg
Power
06
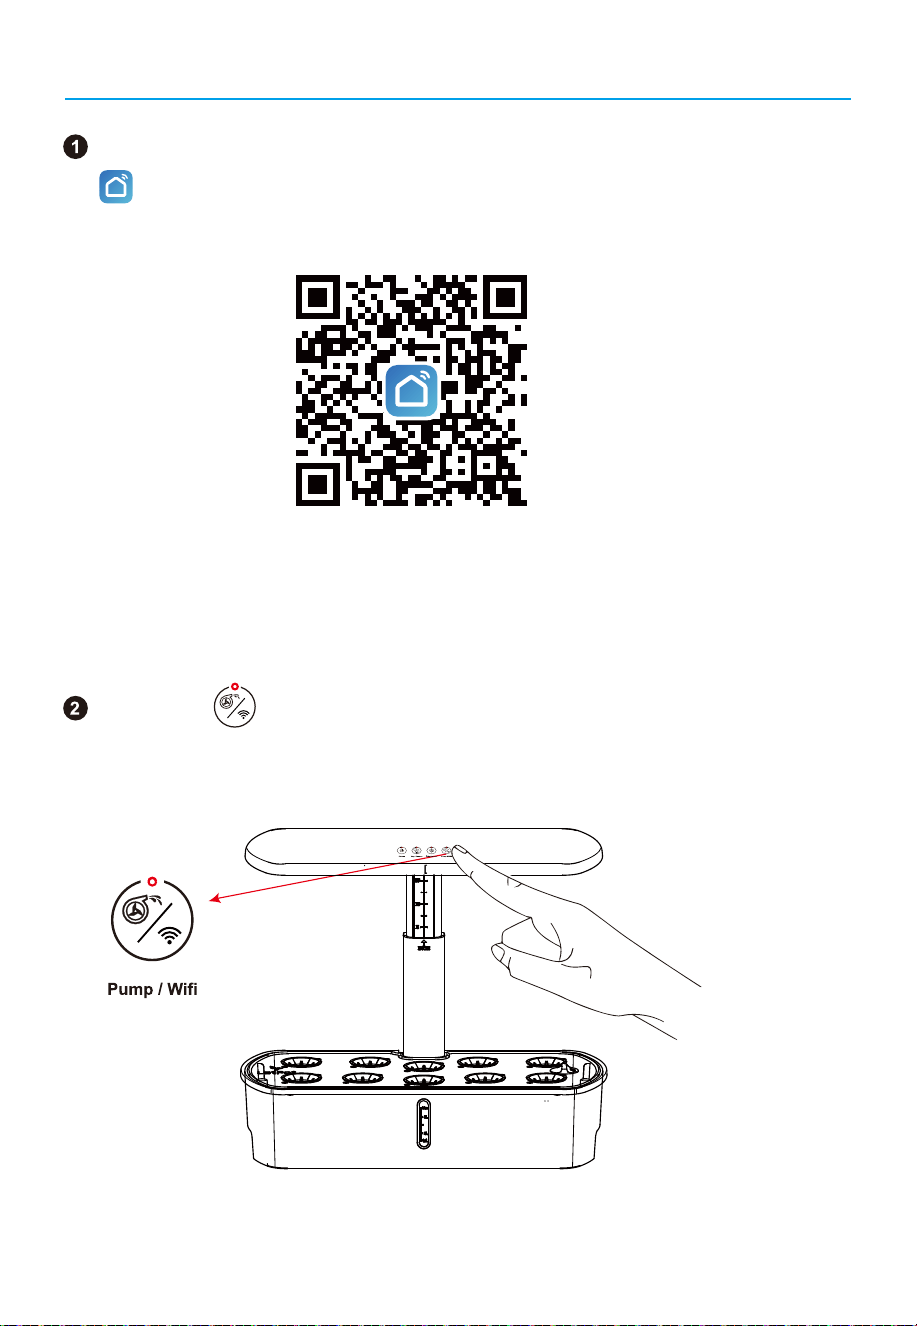
How to find and install Smart Life app
You can scan this QR code or APP STROE for installing "Smart Life"
APP
to mobile device.
Long press button for 3 seconds , the device will make a long
beepsound and come to"scan mode" for Wi-Fi connection.
(NOTE: This is a public platform, it will not record any customer's private
information.)
07
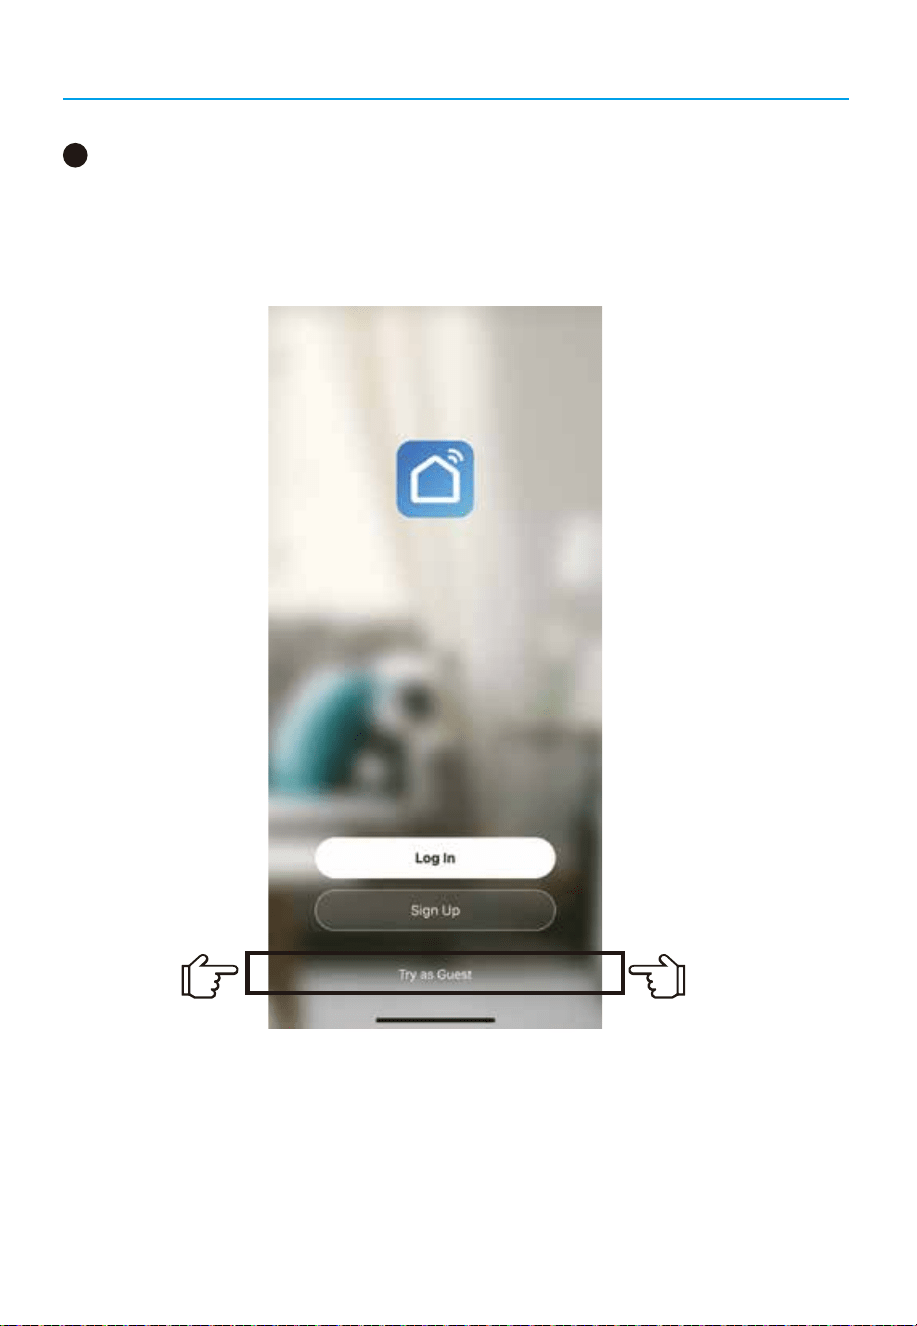
How to find and install Smart Life app
After downloading the “Smart Life” APP, open the App software and select the
Visitor Experience Mode;
Step 1:
3
08
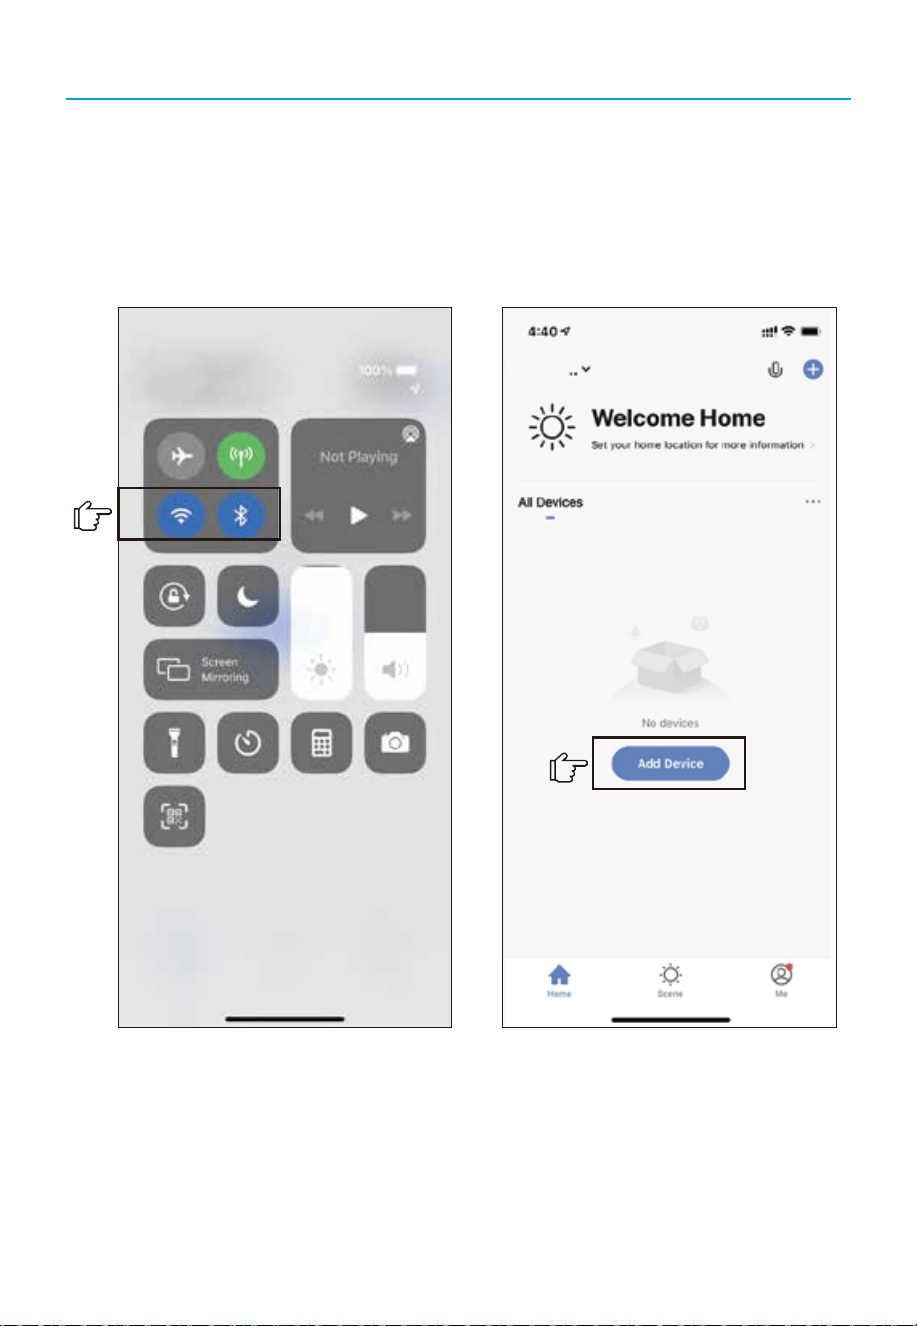
How to find and install Smart Life app
You need to turn on the Bluetooth/Wifi; The purpose of turning on the
Bluetooth is: Making the hydroponics growing system and App connect faster;
Step 2:
Home
1. Turn on the Bluetooth/Wifi 2.Search for equipment
09
How to find and install Smart Life app
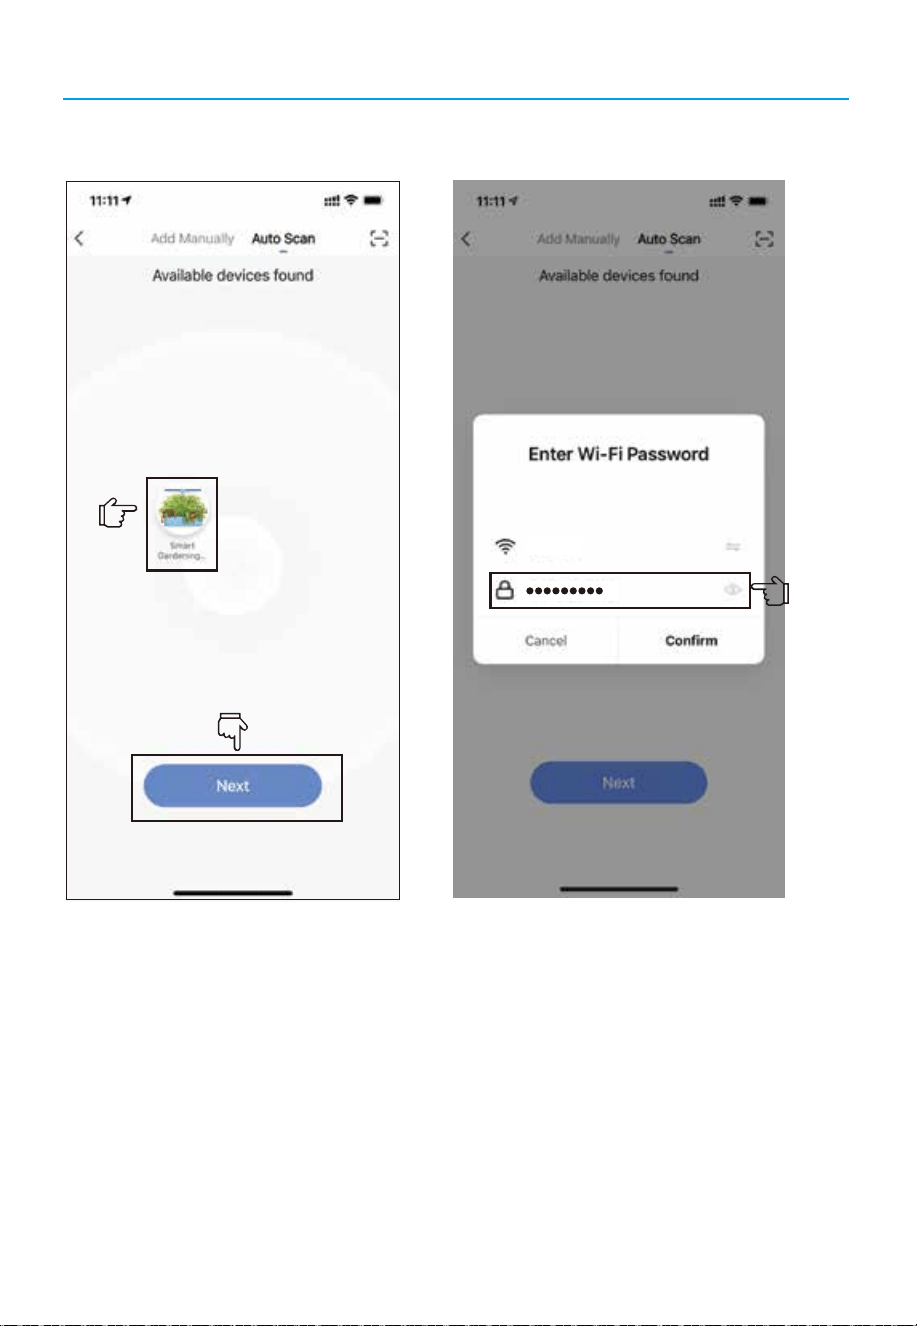
Step 3: Add device Step 4: Enter your wifi password
S-51******274
10
How to find and install Smart Life app
(Warm Tips: Place your router, mobile phone, and device as close as possible.
After receiving the package of hydroponics, put the hydroponics machine and
cell phone and router in the closer distance, so that the faster to connect with
the app successfully.)
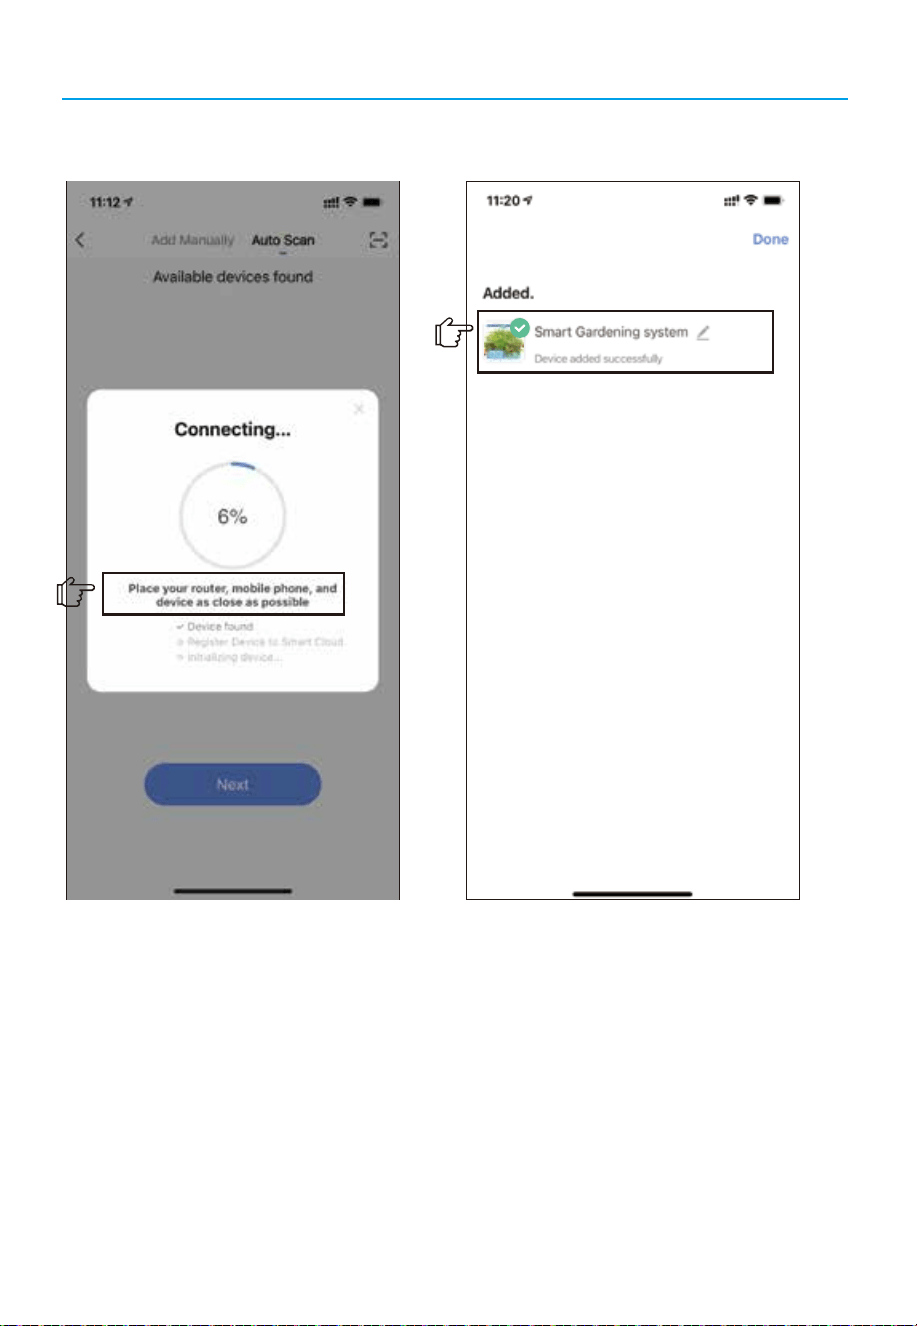
Step 5: Connecting. Step 6: Connection successful
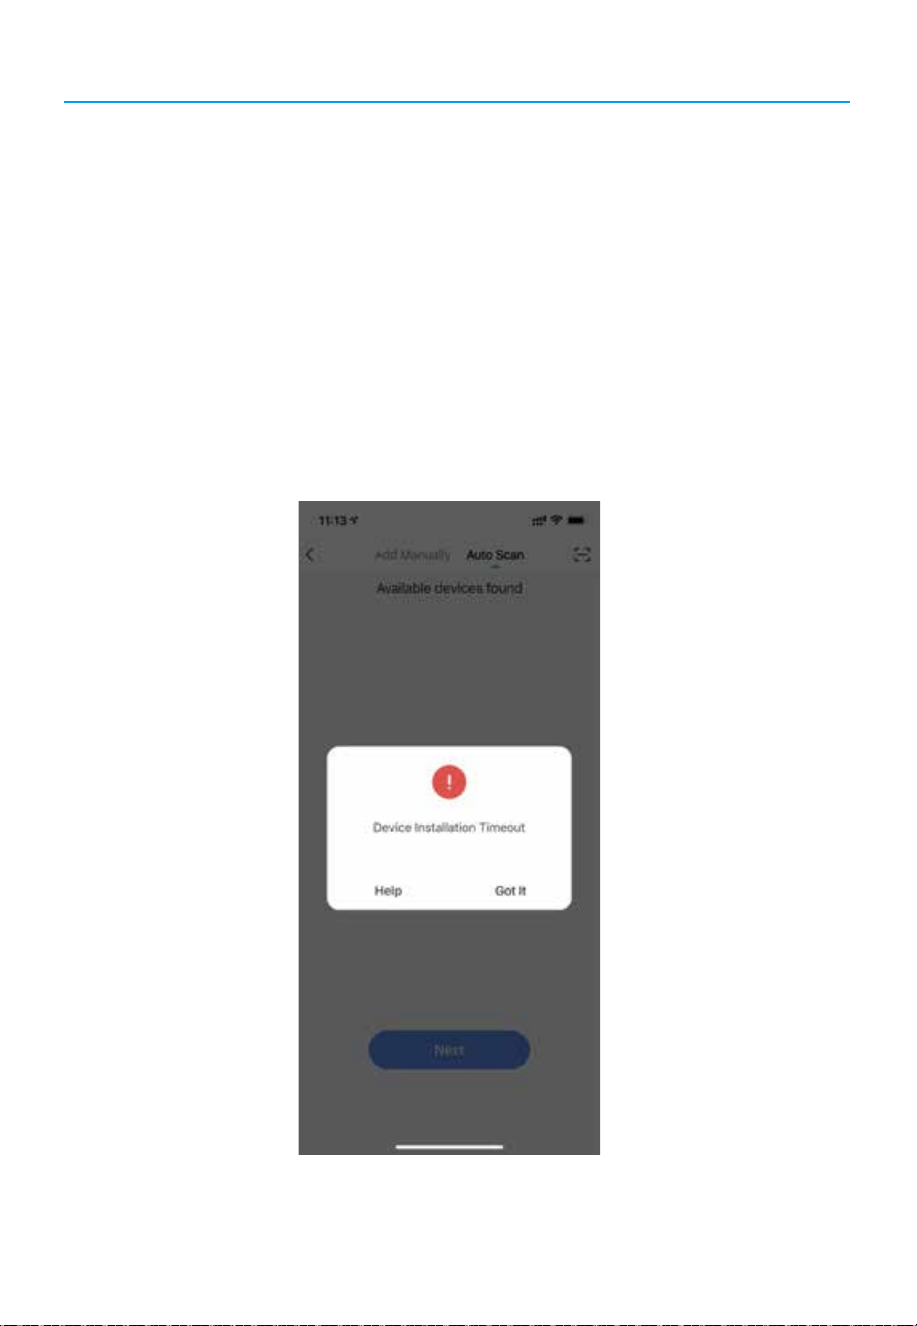
The whole connection process only will take about 30~60s; if it exceeds this time period, it means
that the WIFI signal may be weak;
Tips: Weak Signal Means:
1: The distance between the cell phone and the WIFI router is too far.
2: The distance between the hydroponics system and the router is too far;
3: The Home WIFI network is very poor;
NOTE: The Best Way is:
Place the hydroponics system next to the router, after successful connection, put the hydroponics
system back to the original position, the cell phone Smar Life APP can control the hydroponics
system from far away;
11
Linking Notes!!!
12
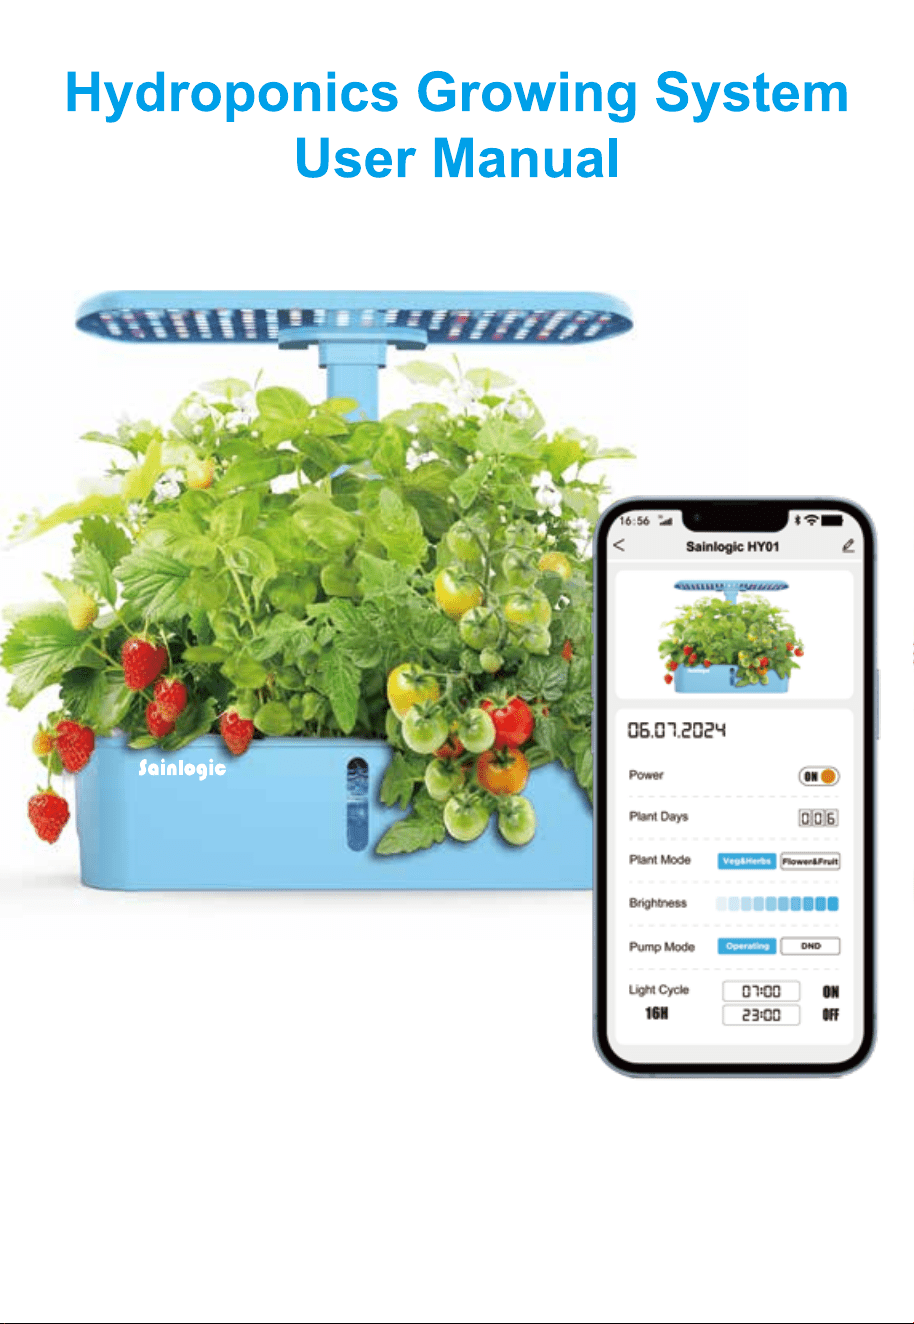
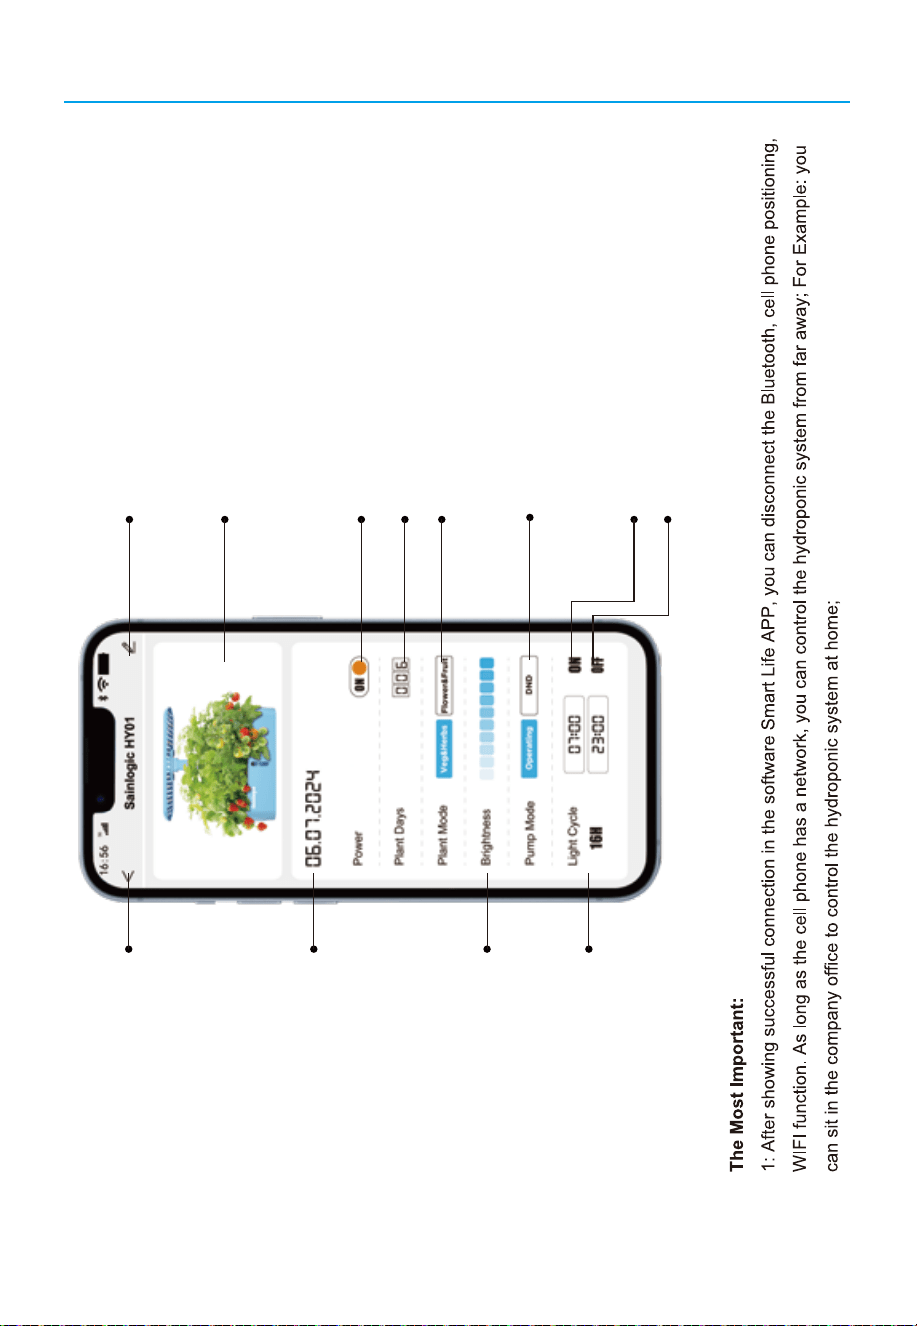
Function introduction
Smart garden's name
Smart garden's photo
ON/OFF switch
Total grow days(recorded automatically
)
Plant mode switch button,both are 16h on/ 8h off
Pump mode switch button:
Operating:30 min on/ 30 min off
DND (Do not disturb) 12h off
Light start time
Light finish time
Current Date
Adjusting Brightness
Cycle ON/OFF time for lighting,
Automatically calculated
according to the setting time
Edit the name via this buttom
{
{
Set up by user and will
be different lighting cycle
13
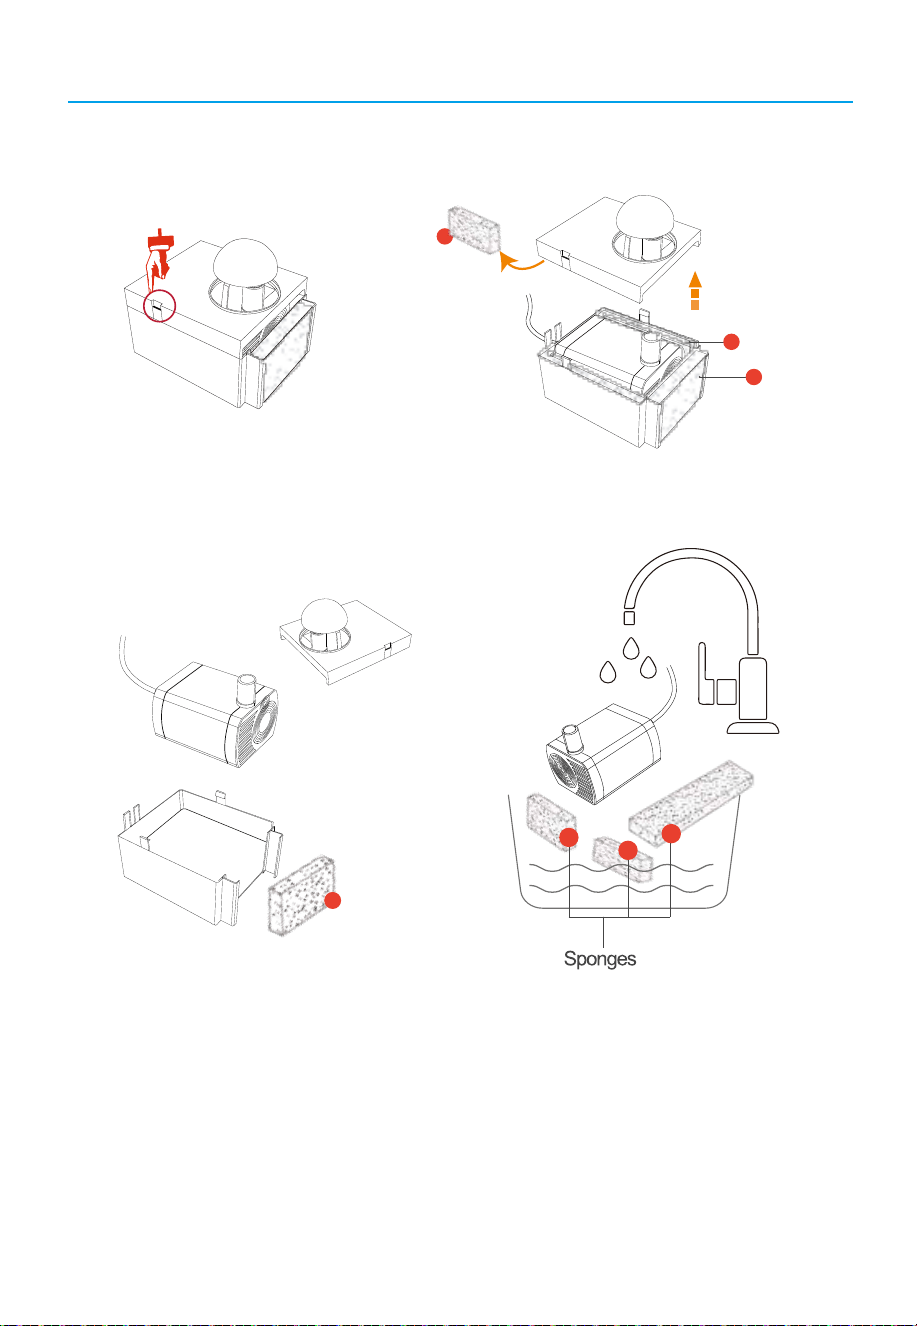
How to clear a water pump
1.Gently unhook the small latch of the water pump and open thecover above the pump.
1
2
3
2.Take out the sponge and the water pump body, and rinsethem thoroughly with clean water.
2
1
2
3
Note 1:Do not use any detergent as they can disruptthe nutrient balance
Note 2:Be sure do not to lose the sponge inside the water pump:
Reason 1.Prevent plant roots or other debris from entering the water pump.
Reason 2.Reduce the noise when the water pump is working.

14
FAQ
1. Why do only a few of the plants grow and once grown, they quickly wither?
a. The seeds you purchase make a diff erence. For best results, purchase seeds from reliable
manufacturers and avoid purchasing seeds that are not suitable for water hydroponic devices.
b. Ensure you are using the correct proportion of nutrient solution to water, LED
light distance from the plants and temperature as stated in the user guide.
2. Does it kill the plant to remove it from a sponge (if I want to move it to a pot, for example)?
Normally, it won't,you'd better wait until it's vigorous to improve survival rates.
3. Why the LED light can not be turned on?
Push or re-insert the rod down into the bottom until you hear a "Beep" sound, and then press the
"POWER" button, the light will be on.
4. How to clean the water pump?
Step 1. Turn the power off
Step 2. Remove the extendable rod and the top cover of the water tank.
Step 3. Take out the sponge in front of the water pump and rinse it with water.
Any washing liquid will harm the nutrition balance.
(if it is very dirty, please rinse the water pump all together)
Step 4. Install those back and restart the machine.
5.If you are unable to successfully connect to the WiFi,please check the following issues:
A. Ensure that you have entered the correct WiFi password.Check if the password entered in the
input field is accurate, including letter case password length, etc.
B. Consult your router service provider to determine if your networkcombines both 5GHz and
2.4GHz freauencies.If it does. ask them to split your WiFi into two separate SSIDs with different
passwords. This will ensure that the device connects to the 2.4GHz WiFi.
C. Place your router, mobile phone, and device as close as possible.
Sainlogic High Tech Innovation Co.,LTD
10342 Cypress Lakes Dr,
Jacksonville, FL 32256
United State
Manufacturer:
Website: www.sainlogic.com
Email: [email protected]
Skype: +15087580493 (Mon-Sat:10 a.m. - 2 p.m. EST)
Contact us:
FCC IDENTIFIER:2A52HIGS-36
Made in China