58.03.001.0705 Item No. : F751W
@ReolinkTech https://reolink.com
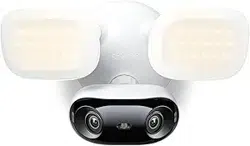
Elite Floodlight WiFi
Operational Instructions
English01 English 02
Please read these important safety instructions carefully before use.
1. Local Legal Compliance:
Adhere to your local laws and regulations for electrical installation. In
regions outside of North America, installation and wiring must be
performed by a licensed electrician. Be sure to follow all relevant codes
and standards during camera installation.
2. Electrical Warning:
Before installation, disconnect the power at the breaker or fuse box.
Always be careful when handling wires.
3. Fire Hazard Warning:
Avoid installing the camera near flammable materials. Do not use it in
extreme temperatures or high humidity. Do not expose it to direct
sunlight.
4. Installation Requirement:
Ensure the floodlight camera is installed on a wall-mounted, UL-certified
junction box for safety and compliance.
Contents
01
02
03
04
05
06
07
08
09
10
Important Safety Instructions
01
Important Safety Instructions··············································02
What's in the Box ···························································04
Device Overview ···························································05
Set up the Camera·························································06
Installation Preparation ····················································09
Install the Camera · · · · · · · · · · · · · · · · · · · · · · · · · · · · · · · · · · · · · · · · · · · · · · · · · · · · · · · · · · 10
Troubleshooting·····························································18
Specifications ·······························································19
Legal Disclaimer ····························································19
Notification of Compliance ················································20
English03 English 04
Precautions for Use
1. Replace only with the same or equivalent type of accessories recommended
by Reolink.
2. Do not use the device in an environment that exceeds the recommended
temperature range.
3. Do not use the device in an environment that exceeds the recommended
humidity range.
4. Do not attempt to disassemble, repair, or alter the device by yourself.
5. Always follow the local safety laws and regulations when using the device.
6. The device contains (or comes with) small components, small plastic
elements, and other small parts that may cause choking hazards. Keep
the device and its accessories out of reach of children. Consult a physician
immediately if small parts are swallowed.
7. The device contains (or comes with) cables or cords that may cause
strangulation hazards. Keep the device and its accessories out of reach of
children.
8. The light source of this luminaire is not replaceable; when the light source
reaches its end of life the whole luminaire shall be replaced.
9. Terminal block not included. Installation must be performed by a qualified
person.
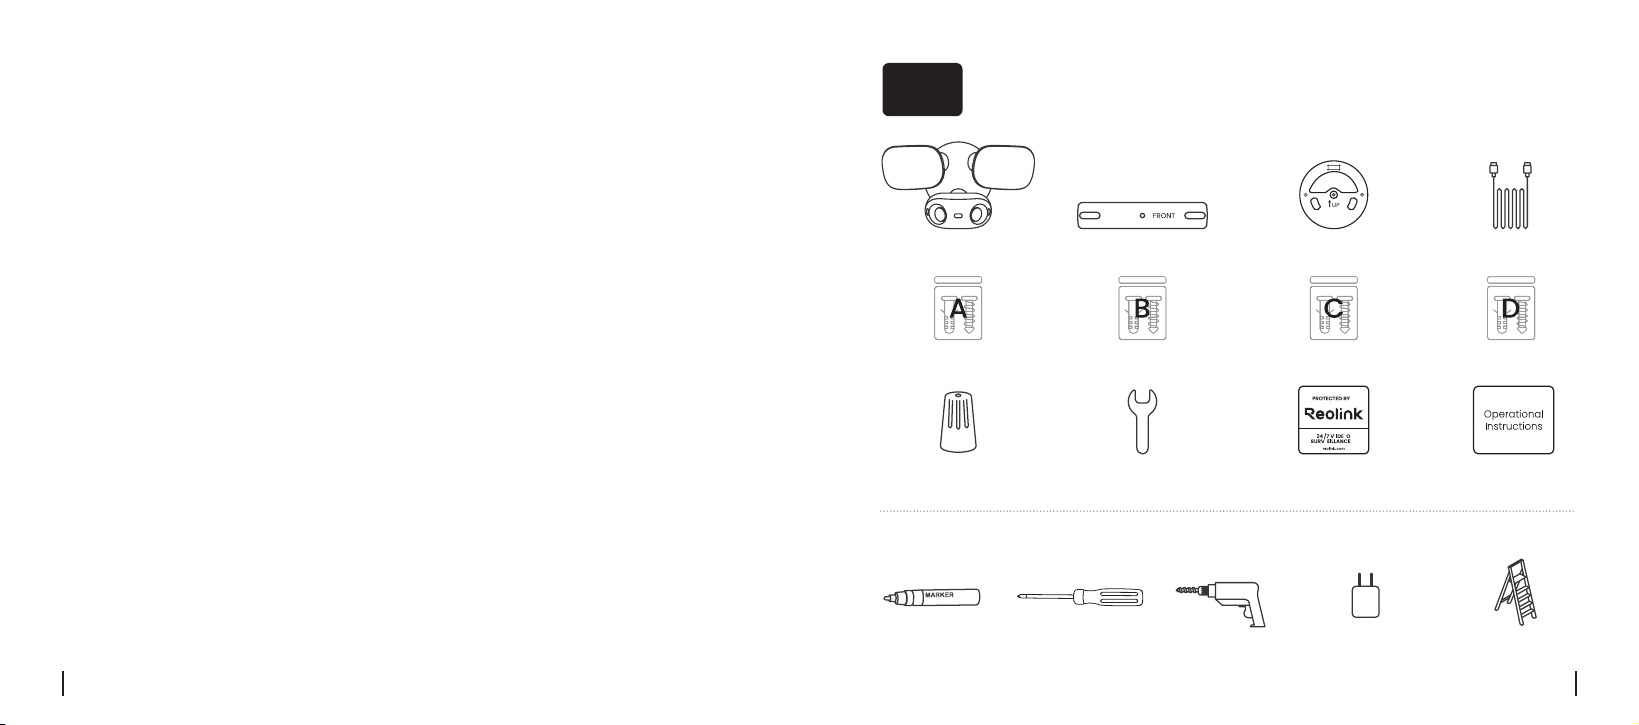
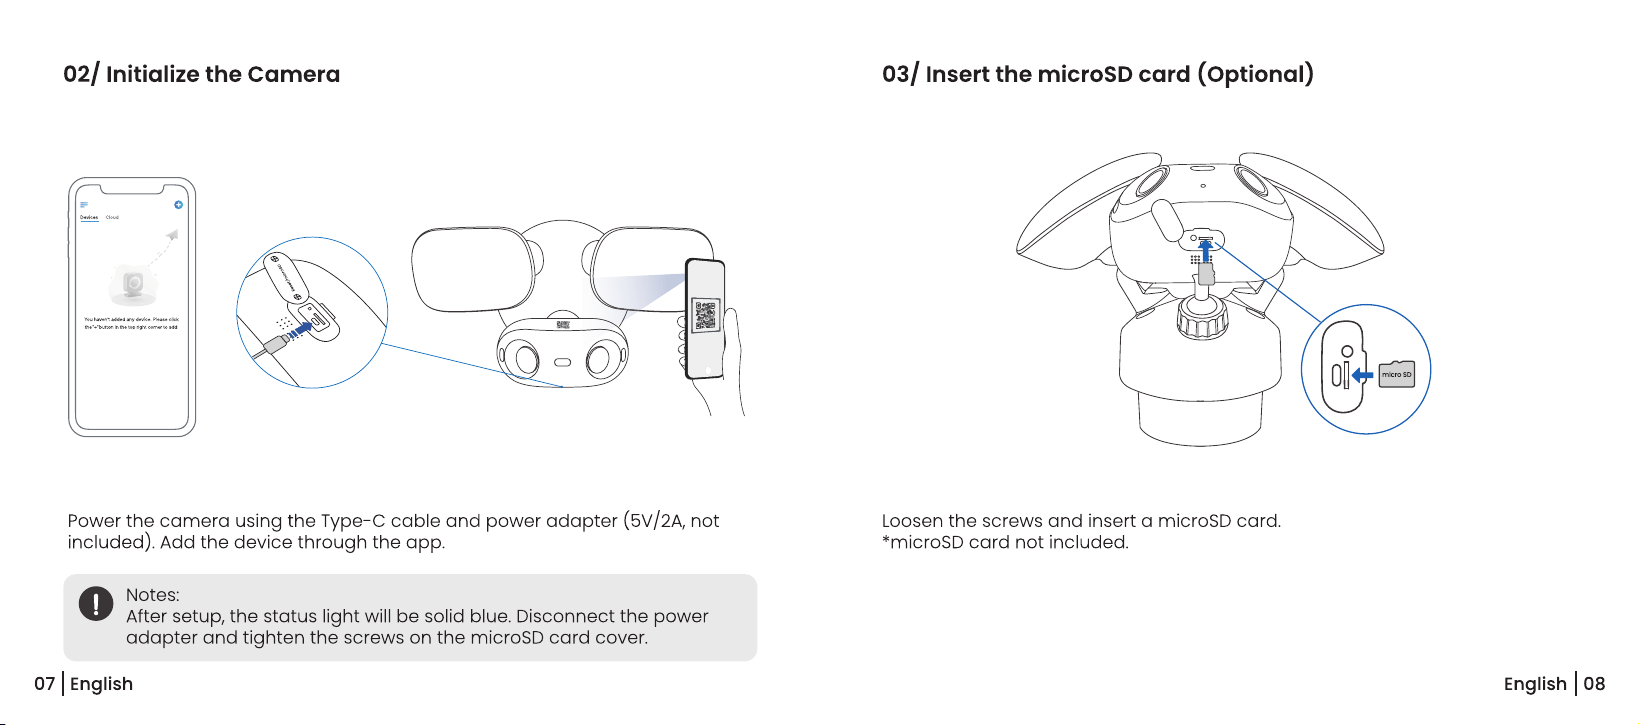
Wha
t's in the Box
02
Camera Mounting Bar Mounting Bracket
Screw Pack B Screw Pack CScrew Pack A
Type-C Cable
Wire Nut
Screw Pack D
Wrench Surveillance
Sticker
Operational
Instructions
Drill
Screwdriver Ladder
(If Necessary)
5V/2V
USB Adapter
Marker
Needed Tools
*Not Included
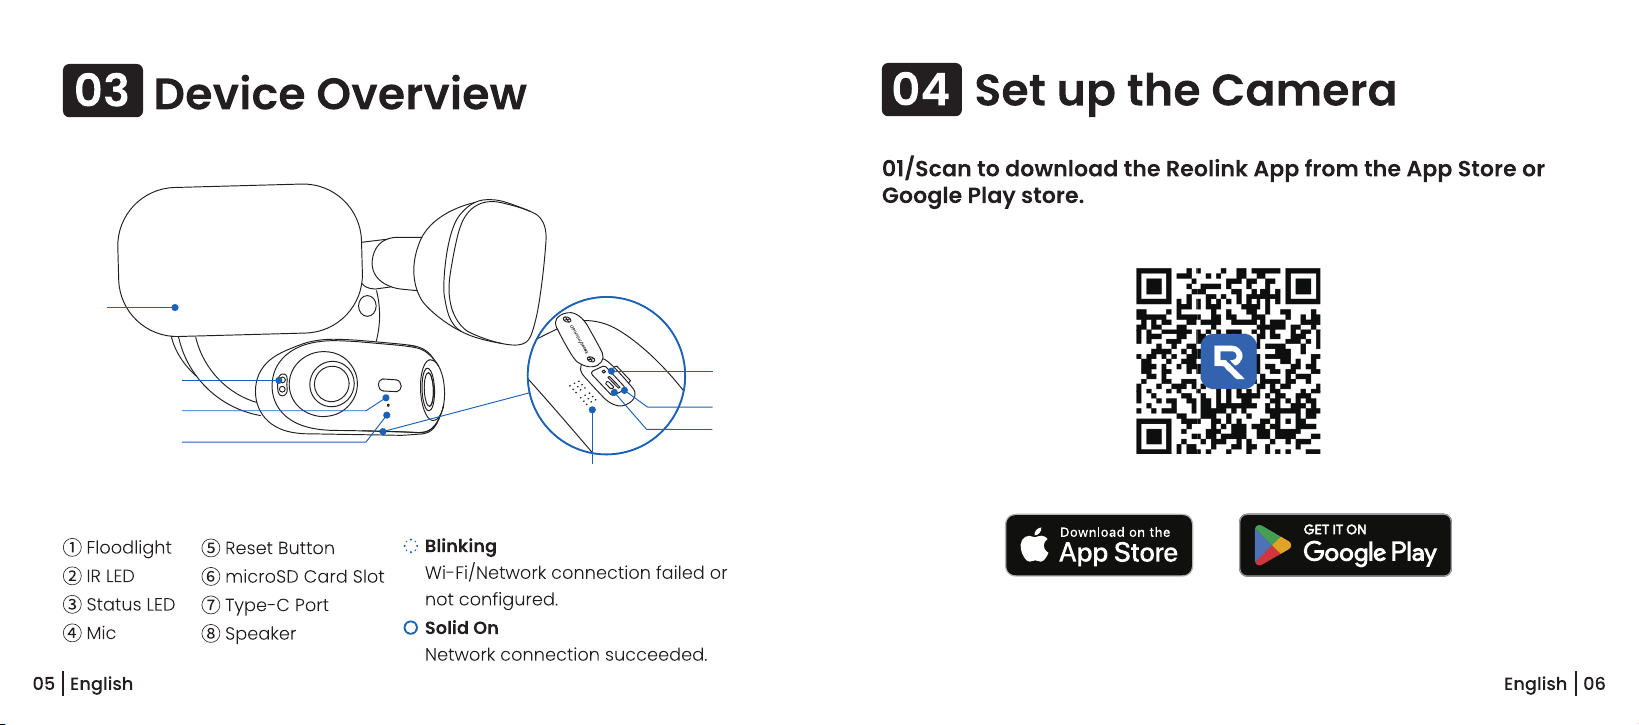
❶
❺
❷
❹
❸
❻
❼
❽
English09 English 10
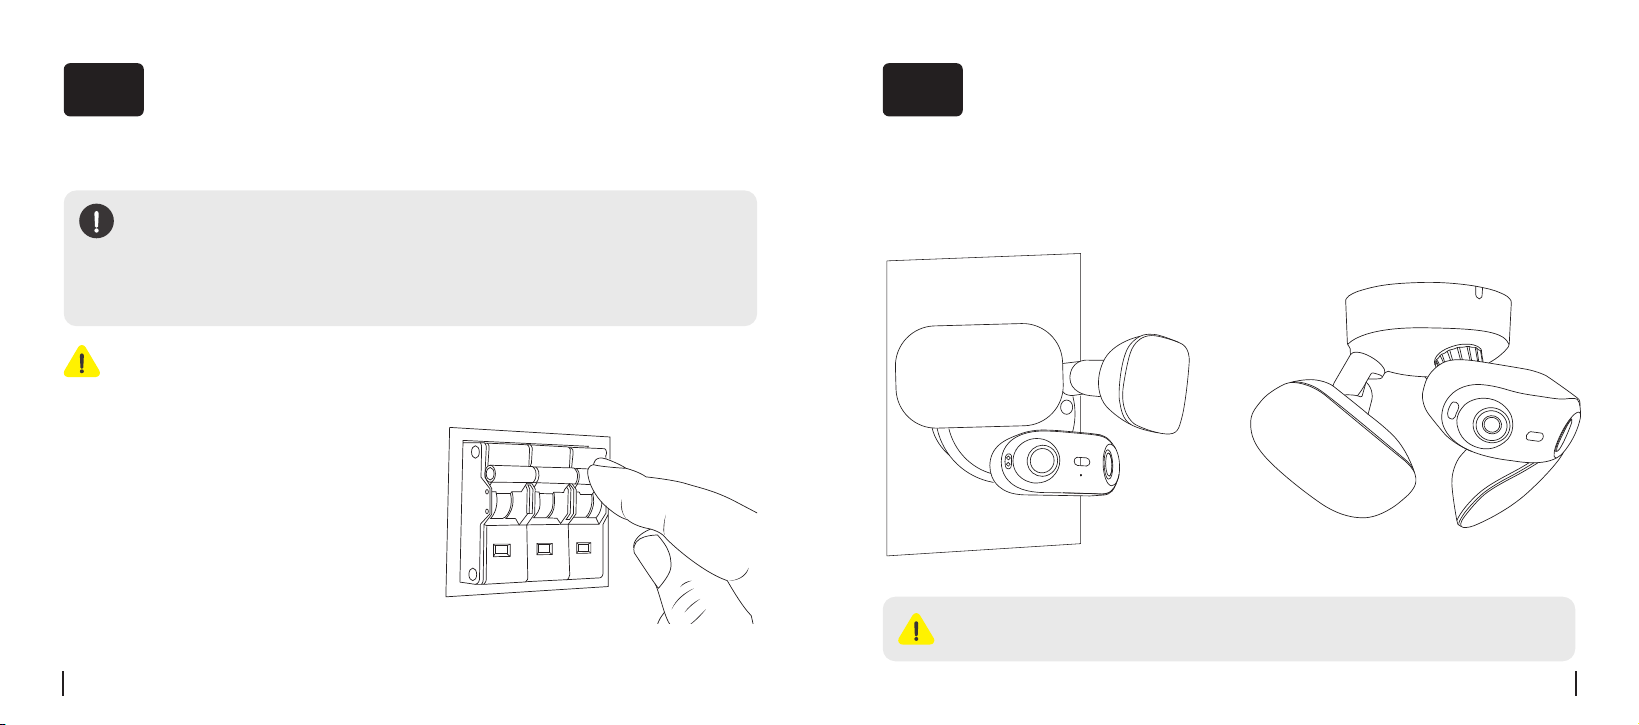
Shut Off Power Supply at the Circuit Breaker
Installation Preparation
05
Notes:
Check local laws and regulations before installation.
If you're outside North America, installation and wiring must be
performed by a licensed electrician. Be sure to follow all relevant
codes and standards during installation.
WARNING: Risk of Electrical Shock
• During installation, you'll be handling
electrical wires. If you're unsure of the
location of the circuit breaker or fuse box,
or how to turn off power to the floodlight
Circuit Breaker, we recommend hiring a
licensed electrician.
• Turn off the circuit during installation.
• Do not use a dimmer switch or timer
with this product.
• Ensure the power supply is within
100–240V AC, 50/60 Hz.
06
Install the Camera
01/ Installation Tips
• Wall Mounting • Eave Mounting
Notes:
Use the drill carefully and follow safety guidelines.
English11 English 12
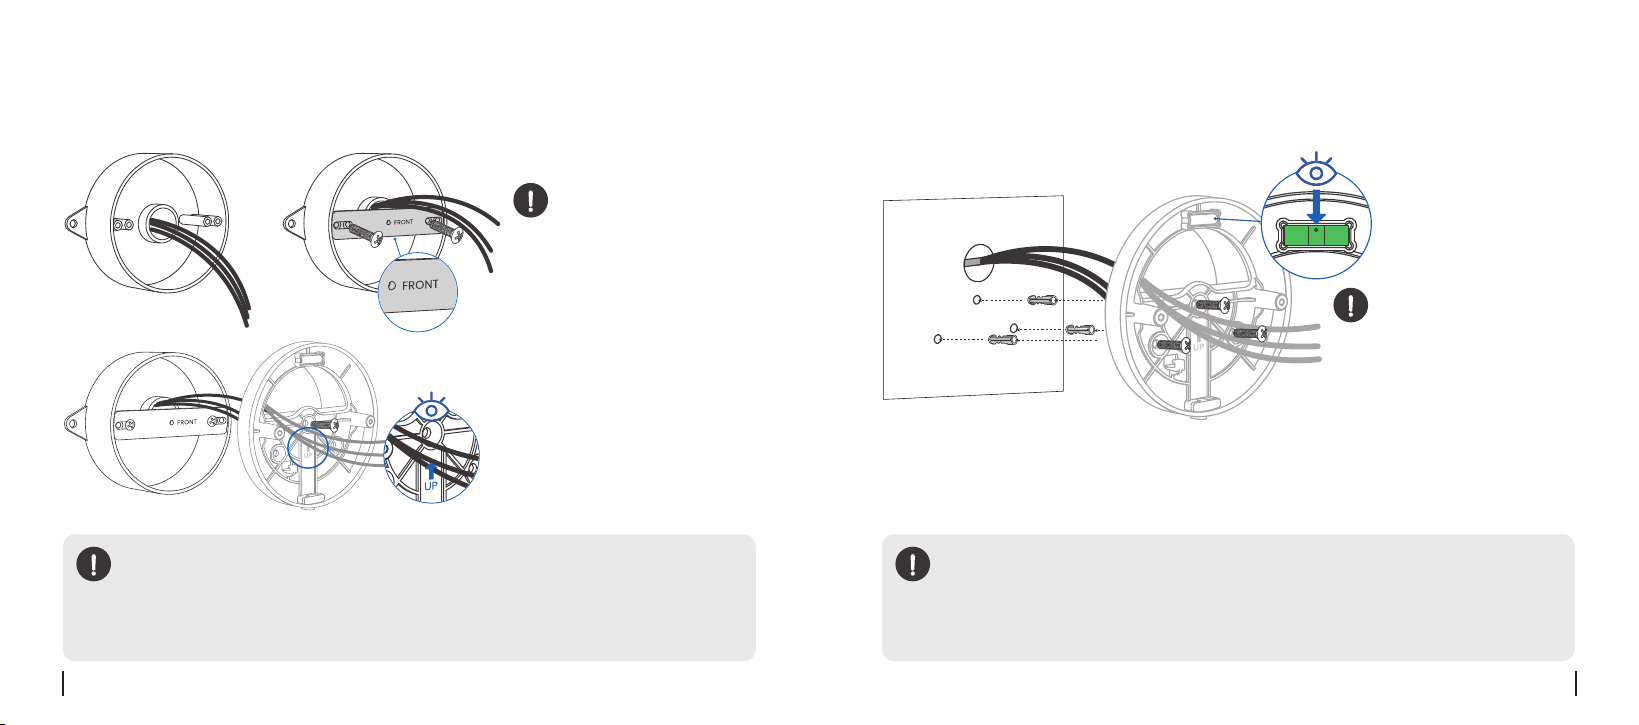
02/ Secure the Mounting Bracket
• Option 1: Install the Camera on an Existing Junction Box
Use the screws from
Screw Pack A to attach
the mounting bar to the
junction box. Ensure the
wires inside the junction
box pass through the
mounting bracket, and use
the screws from Pack B to
secure the bracket.
Notes:
Make sure the "FRONT" text
is facing outward.
Notes:
• If mounting vertically on the wall, the arrow on the bracket should
point upward.
• If mounting under an eave, the arrow should point toward your
house.
Notes:
• If mounting vertically on the wall, the arrow on the bracket should
point upward.
• If mounting under an eave, the arrow should point toward your
house.
• Option 2: Install the Camera Directly on a Wall
Notes:
Adjust the bracket to
ensure the bubble in the
level is centered.
Mark three spots for the mounting bracket. Drill holes according to the spots
and insert the anchors. Carefully pull the wire out of the wall and pass it
through the bracket. Use the screws from Pack C to secure the bracket.
English13 English 14
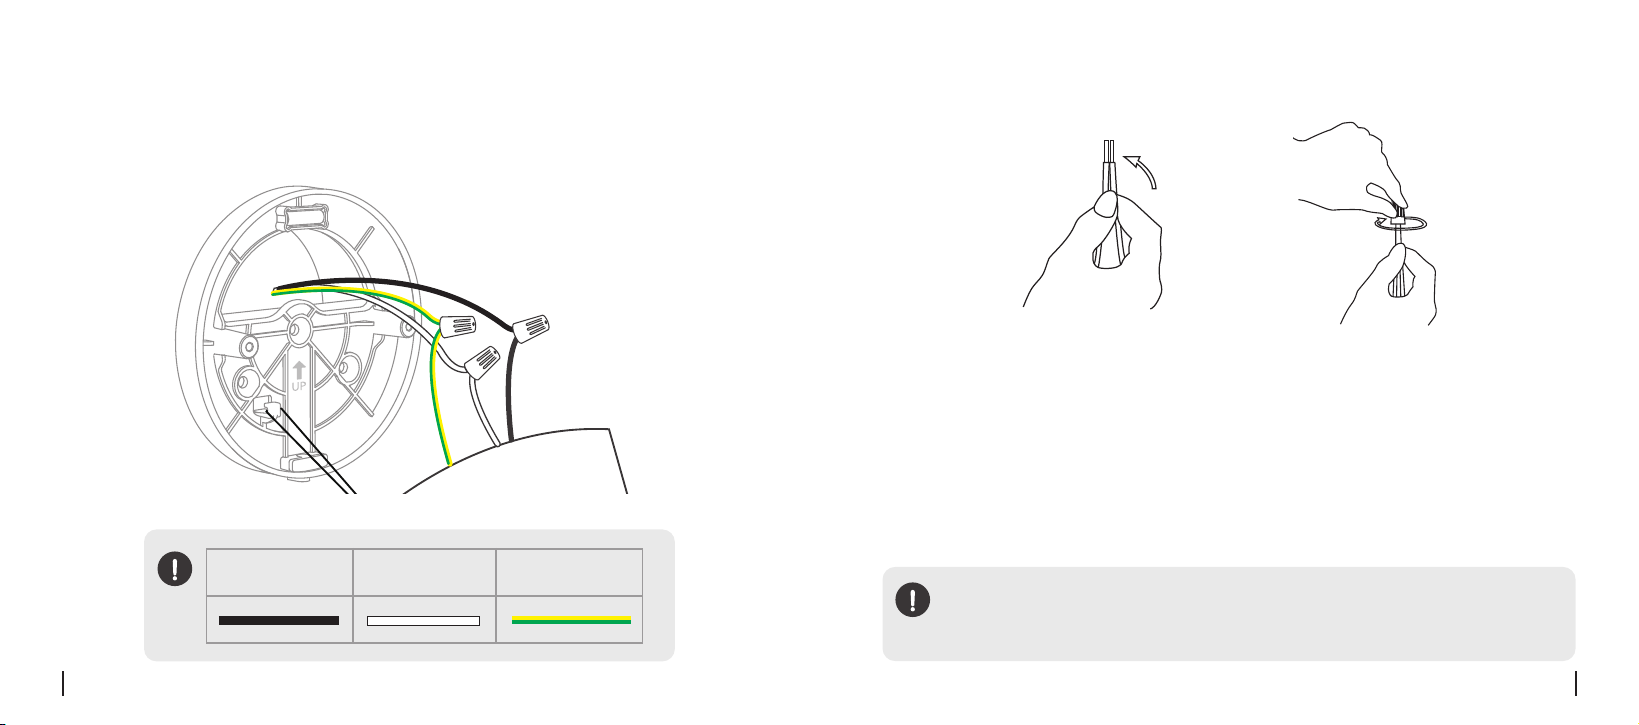
03/ Connect Wires
Hang the camera on the bracket.
Connect the live wire (black), neutral wire (white), and earth wire (yellow-green)
from the junction box to the matching wires on the camera.
Cover the wires with the wire nuts and twist them about five turns. Gently pull
the nuts to make sure the connection is secure.
Live Wire Neutral Wire Earth Wire
IMPORTANT NOTICE:
Avoid crossover connections. If you're unsure or can't identify the wires,
consult an electrician for safety.
Hold the wires
together.
Twist the wire nut
5-10 times.
English15 English 16
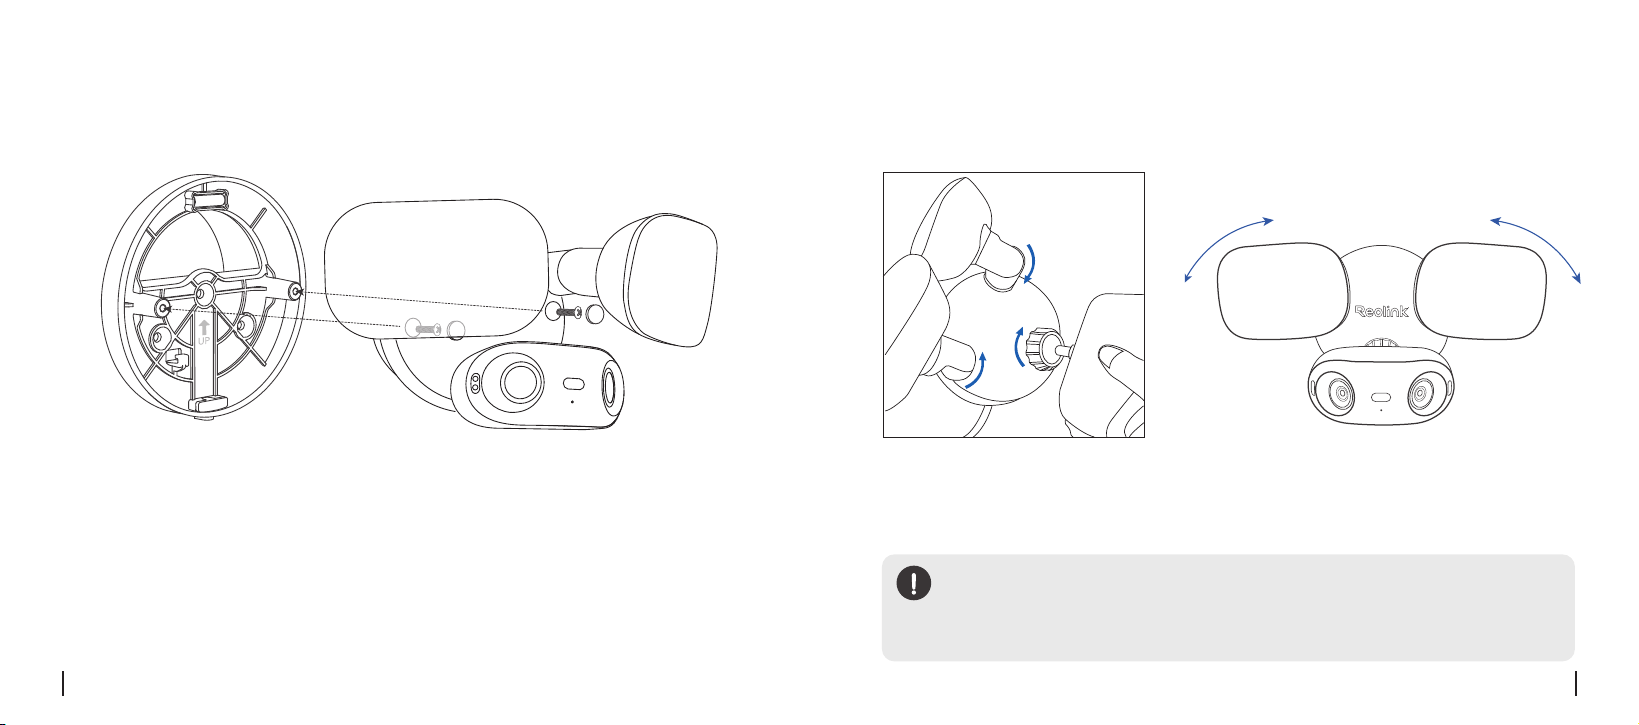
04/ Secure the Camera
05/ Adjust the Angle
Secure the camera to the bracket by inserting the screws from Pack D into the
holes, then insert the silicone plug.
Notes:
1. Use the wrench to tighten or loosen the camera knob if needed.
2. Avoid repeatedly twisting the camera in one direction to prevent
internal wire damage.
Adjust the movable joint of the camera.
English17 English 18
07
Troubleshooting
lf the camera failed to connect to Wi-Fi during setup, please try:
Please ensure your have entered the correct Wi-Fi password.
Put your camera close to your router to ensure a strong Wi-Fi signal.
• Change the encryption method of the WiFi network to WPA2-PSK/WPA-
PSK(safer encryption)on your router interface.
• Change your Wi-Fi SSlD or password and make sure that SSiD is within 3l
characters and password is within 64 characters.
• Set your password using only the characters on the keyboard lf these steps
don't work, contact Reolink Support at. https://supportreolink.com/.
Wi-Fi Connection Failed During initial setup
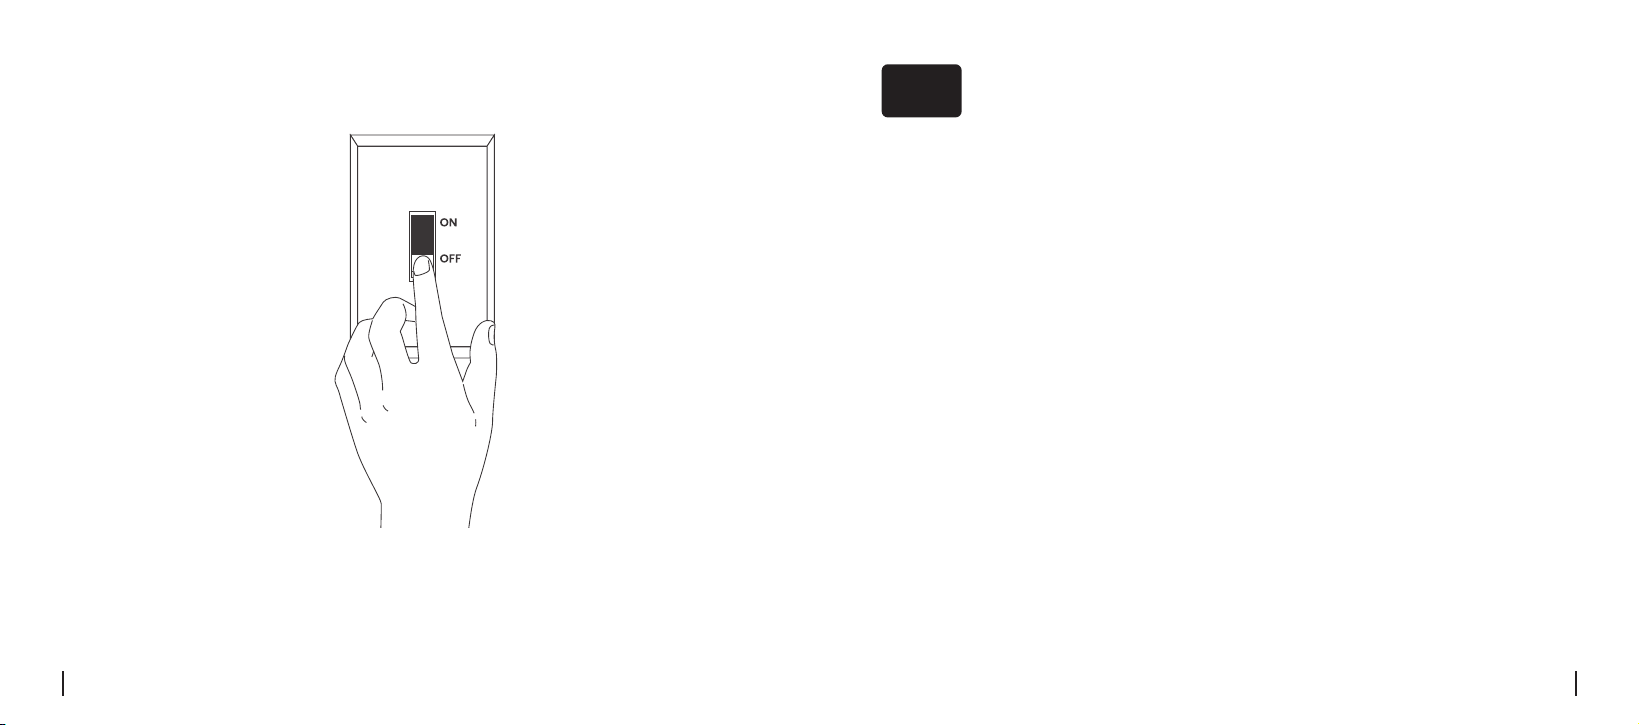
06/ Turn on the Circuit Breaker
Wait for the indicator light to turn solid blue.

English19 English 20
Specifications
Operating Temperature: -10 °C to +55°C (14°F to 131°F)
Operating Humidity: 10% to 90%
Dimensions: 174 mm × 184 mm × 295 mm
Weight: 1.3 kg
For additional specifications, please visit https://reolink.com/.
08
09
Legal Disclaimer
To the maximum extent permitted by applicable law, this document and the product described, with
its hardware, software, firmware, and services, are delivered on an "as-is" and "as-available" basis, with
all faults and without warranty of any kind. Reolink disclaims all warranties, express or implied, including
but not limited to, warranties of merchantability, satisfactory quality, fitness for a particular purpose,
accuracy, and non-infringement of third-party rights. In no event will Reolink, its directors, officers,
employees, or agents be liable to you for any special, consequential, incidental or indirect damages,
including but not limited to damages for loss of business profits, business interruption, or loss of data
or documentation, in connection with the use of this product, even if Reolink has been advised of the
possibility of such damages.
To the extent permitted by applicable law, your use of the Reolink products and services is at your sole
risk and you assume all risks associated with internet access. Reolink does not take any responsibilities
for abnormal operation, privacy leakage or other damages resulting from cyber attacks, hacker attacks,
virus inspections, or other internet security risks. However, Reolink will provide timely technical support if
required.
Notification of Compliance
10
The laws and regulations related to this product vary by jurisdiction. Please check all relevant laws
and regulations in your jurisdiction before using this product to ensure that your use conforms to the
applicable law and regulation. During the use of the product, you must comply with relevant local laws
and regulations. Reolink is not responsible for any illegal or improper use and its consequences. Reolink
is not liable in the event that this product is used with illegitimate purposes, such as third-party rights
infringement, medical treatment, safety equipment, or other situations where the product failure could
lead to death or personal injury, or for weapons of mass destruction, chemical and biological weapons,
nuclear explosion, and any unsafe nuclear energy uses or anti-humanity purposes. In the event of any
conflicts between this manual and the applicable law, the latter prevails.
FCC Statement
This device complies with Part 15 of the FCC Rules. Operation is subject to the following two conditions:
(1) This device may not cause harmful interference, and
(2) This device must accept any interference received, including interference that may cause undesired operation.
Changes or modifications not expressly approved by the party responsible for compliance could void the user's
authority to operate the equipment.
This equipment has been tested and found to comply with the limits for a Class B digital device, pursuant to Part 15 of
the FCC Rules. These limits are designed to provide reasonable protection against harmful interference in a residential
installation. This equipment generates uses and can radiate radio frequency energy and, if not installed and used
in accordance with the instructions, may cause harmful interference to radio communications. However, there is no
guarantee that interference will not occur in a particular installation. If this equipment does cause harmful interference
to radio or television reception, which can be determined by turning the equipment off and on, the user is encouraged to
try to correct the interference by one or more of the following measures:
• Reorient or relocate the receiving antenna.
• Increase the separation between the equipment and receiver.
• Connect the equipment into an outlet on a circuit different from that to which the receiver is connected.
• Consult the dealer or an experienced radio/TV technician for help.
English21 English 22
FCC Radiation Exposure statement
This equipment complies with FCC radiation exposure limits set forth for an uncontrolled environment. This
equipment should be installed and operated with minimum distance 20cm between the radiator & your body.
ISED Statement
This device complies with Industry Canada licence-exempt RSS standard(s). Operation is subject to the following
two conditions:
(1) this device may not cause interference, and
(2) this device must accept any interference, including interference that may cause undesired operation of the
device.
This equipment should be installed and operated with a minumum distance of 20 cm between the radiator and
your body.
Le présent appareil est conforme aux CNR d'Industrie Canada applicables aux appareils radio exempts de licence.
L'exploitation est autorisée aux deux conditions suivantes :
(1) l'appareil ne doit pas produire de brouillage, et
(2) l'utilisateur de l'appareil doit accepter tout brouillage radioélectrique subi, même si le brouillage est susceptible
d'en compromettre le fonctionnement.
Cet équipement doit être installé et utilisé avec une distance minimale de 20 cm entre la source de rayonnement
et votre corps.
MODIFICATION:
Any changes or modifications not expressly approved by the grantee of this device could void the
user's authority to operate the device.
MODIFICATION:
les changements ou modifications non expressément approuvés par le fournisseur de licence de
l'appareil sont susceptibles d'annuler l'autorisation accordée à l'utilisateur de se servir de l'équipement.
This Class B digital apparatus complies with Canadian ICES-003.
Cet appareil numérique de la classe B est conforme à la norme NMB-003 du Canada.
Operation of 5150-5350 MHz is restricted to indoor use only.
Le fonctionnement de 5150-5350 MHz est limité à une utilisation en intérieur uniquement.
SIMPLIFIED EU AND UK DECLARATION OF CONFORMITY
Hereby, REOLINK INNOVATION LIMITED declares that the radio equipment type [refer to the cover of the Operational
Instructions] is in compliance with Directive 2014/53/EU.The full text of the EU and UK declaration of conformity is
available at the following internet address: https://support.reolink.com/hc/en-us/articles/36788378727065/
RF exposure information: The Maximum Permissible Exposure (MPE) level has been calculated based on a distance
of 20cm between the device and the human body. To maintain compliance with RF exposure requirement, use
product that maintain a 20cm distance between the device and human body.
WiFi Operating Frequency
OPERATING FREQUENCY:
2402~2480MHz RF Power:≤10dBm(EIRP)
2412~2472MHz RF Power:≤20dBm(EIRP)
5150~5250MHz RF Power:≤23dBm(EIRP)
5250~5350MHz RF Power:≤23dBm(EIRP)
5470~5725MHz RF Power:≤23dBm(EIRP)
5725~5875MHz RF Power:≤14dBm(EIRP)
The functions of Wireless Access Systems including Radio Local Area Networks (WAS/RLANs) within the
band 5150-5350 MHz for this device are restricted to indoor use only within all European Union countries
(BE/BG/CZ/DK/DE/EE/IE/EL/ES/FR/HR/IT/CY/LV/LT/LU/HU/MT/NL/AT/PL/PT/RO/SI/SK/FI/SE/TR/NO/CH/IS/LI/
UK(NI))
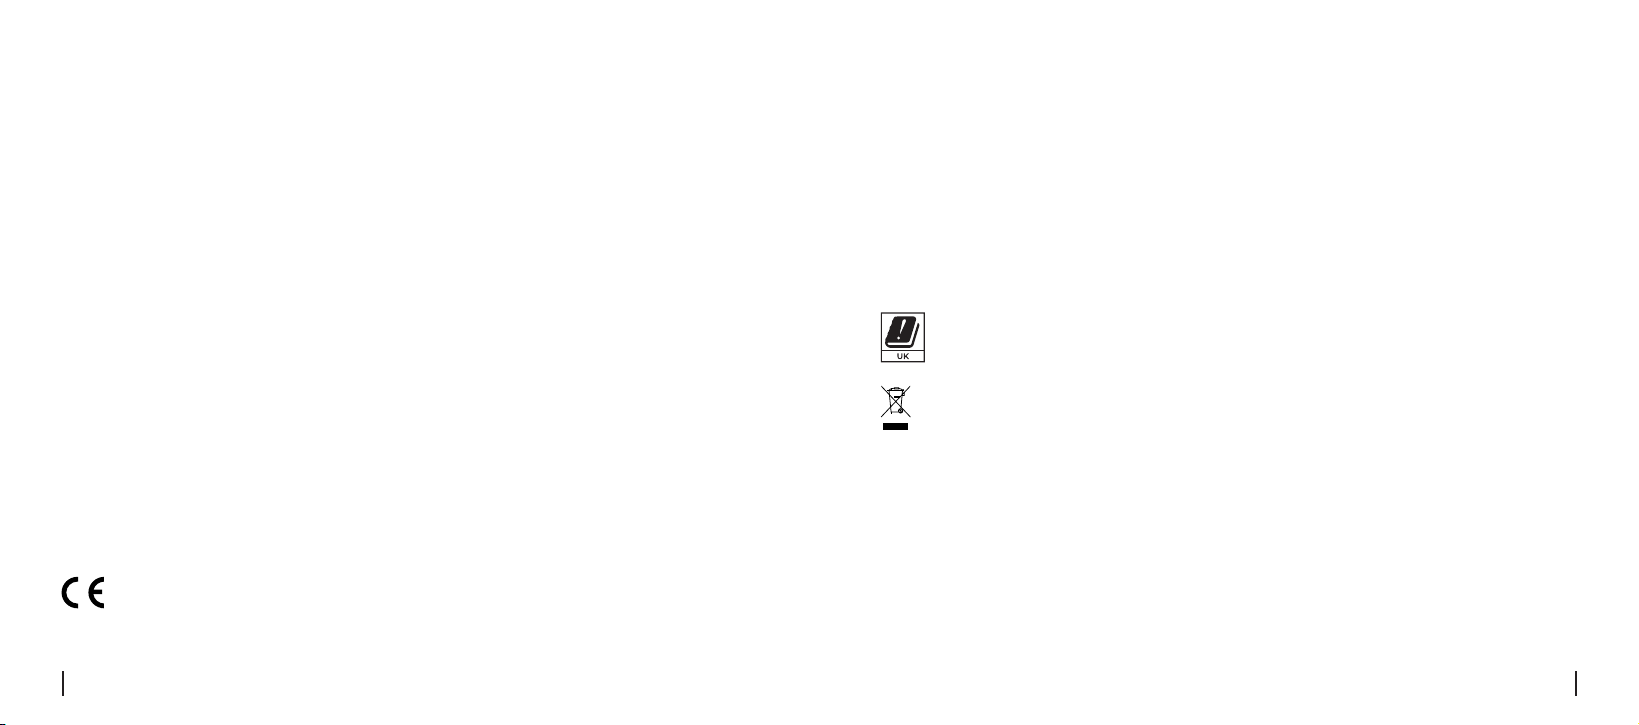
Correct Disposal of This Product
This marking indicates that this product should not be disposed with other household wastes throughout the EU.
To prevent possible harm to the environment or human health from uncontrolled waste disposal, recycle it
responsibly to promote the sustainable reuse of material resources. To return your used device, please use the
return and collection systems or contact the retailer where the product was purchased. They can take this product
for environmentally safe recycling.
Limited Warranty
This product comes with a 2-year limited warranty that is valid only if purchased from Reolink Official Store or a
Reolink authorized reseller. Learn more: https://reolink.com/warranty-and-return/.
NOTE:
We hope that you enjoy the new purchase. But if you are not satisfied with the product and plan to return,
we strongly suggest that you reset the camera to factory default settings and take out the inserted SD card before
returning.

English23 English 24
Terms and Privacy
Use of the product is subject to your agreement to the Terms of Service and Privacy Policy at reolink.com
Technical Support
If you need any technical help, please visit our official support site and contact our support team before returning
the products, https://support.reolink.com.
Terms of Service
By using the Product Software that is embedded on the Reolink product, you agree to the terms&conditions
between you and Reolink. Learn more: https://reolink.com/terms-conditions/
Trademarks Acknowledgement
"Reolink" and other Reolink's trademarks and logos are the properties of Reolink. Other trademarks and logos
mentioned are the properties of their respective owners.
REOLINK TECHNOLOGY PTE. LTD.
31 KAKI BUKIT ROAD 3, #06-02, TECHLINK, SINGAPORE 417818