

METAL SHRINKER & STRETCHER TOOL FOR
SHEET FABRICATION WITH 1” THROAT
MODEL NO: MW20
Thank you for purchasing a Sealey product. Manufactured to a high standard, this product will, if used according to these instructions,
and properly maintained, give you years of trouble free performance.
IMPORTANT: PLEASE READ THESE INSTRUCTIONS CAREFULLY. NOTE THE SAFE OPERATIONAL REQUIREMENTS, WARNINGS & CAUTIONS. USE
THE PRODUCT CORRECTLY AND WITH CARE FOR THE PURPOSE FOR WHICH IT IS INTENDED. FAILURE TO DO SO MAY CAUSE DAMAGE AND/OR
PERSONAL INJURY AND WILL INVALIDATE THE WARRANTY. KEEP THESE INSTRUCTIONS SAFE FOR FUTURE USE.
1. SAFETY
9 Retain this manual for future reference. Read all of the manual before using the tool.
1.1. GENERAL SAFETY
WARNING! When using tool, basic safety precautions should always be followed to reduce the risk of personal injury and damage.
9 Keep work area clean. Cluttered areas invite injuries.
9 Observe work area conditions. DO NOT use machines or power tools in damp or wet locations. DO NOT expose to rain.
9 Keep work area well lit.
9 Keep children away. Children must never be allowed in the work area.
9 Store idle equipment. When not in use, tools must be stored in a dry location to inhibit rust. Always lock up tools and keep out of reach
of children.
8 DO NOT force tool. It will do the job better and more safely at the rate for which it was intended.
8 DO NOT use inappropriate attachments in an attempt to exceed the tool capacity.
9 Use the right tool for the job. DO NOT attempt to force a small tool or attachment to do the work of a larger industrial tool.
8 DO NOT modify this tool and do not use this tool for a purpose for which it was not intended.
9 Dress properly. DO NOT wear loose clothing or jewellery as they can be caught in moving parts.
9 Protective clothes and non-skid footwear are recommended when working.
9 Wear restrictive hair covering to contain long hair.
9 Useeyeprotection.Alwayswearapprovedimpactsafetygoggles.Wearafullfaceshieldifyouareproducingmetallings.Wearan
approved dust mask or respirator when working around metal, wood, and chemical dusts and mists.
8 DO NOT overreach. Keep proper footing and balance at all times.
9 Keephandsandngersclearofthejawswhenoperating.
9 Maintain tools with care. Keep tools clean for better and safer performance. For your safety, service and maintenance should be
performedregularlybyaqualiedtechnician.
9 Follow instructions for lubricating and changing accessories. The handle must be kept clean, dry, and free from oil and grease at all
` times.
9 Remove adjusting keys and wrenches. Check that keys and adjusting wrenches are removed from the tool or machine work surface
before use.
9 Stay alert. Watch what you are doing, use common sense. DO NOT operate any tool when you are tired.
9 Check for damaged parts. Before using tool, any part that appears damaged should be carefully checked to determine that it will
operate properly and perform its intended function. Check for alignment and binding of moving parts; any broken parts or mounting
xtures;andanyotherconditionthatmayaectproperoperation.Anypartthatisdamagedshouldbeproperlyrepairedorreplacedby
aqualiedtechnician.
9 Replacement parts and accessories. When servicing, use only identical replacement parts. Use of any other parts will void the
warranty. Only use accessories intended for use with this tool.
8 DO NOT operatetoolifundertheinuenceofalcoholordrugs.Readwarninglabelsiftakingprescriptionmedicinetodetermineif
yourjudgmentorreexesareimpairedwhiletakingdrugs.Ifthereisanydoubt,donotoperatethetool.
9 Workpiece may be sharp. After bending or cutting workpieces use caution. Be aware of sharp edges or metal debris of metal that may
be created. Use heavy duty gloves when handling the workpiece.
WARNING! The warnings, cautions, and instructions discussed in this instruction manual cannot cover all possible conditions and
situations that may occur. It must be understood by the operator that common sense and caution are factors which cannot be built into
this product, but must be supplied by the operator.
2. INTRODUCTION
Fabricate and repair panels with ease, shaping metal using both shrinking and stretching jaws. Create smooth radius curves in sheet metal
without the need for cutting, welding, heating, or hammering. Shrinker contracts sheet metal for inside curves, while the stretcher expands sheet
metal for outside curves, forming curves to a radius as small as 76mm/3’’. Hand-operated press with 45:1 leverage and a 356mm/14’’ handle,
allowing for easy operation. Constructed with mild steel capacity of 1.2mm/18 gauge and aluminium capacity of 1.6mm/16 gauge, featuring jaw
clearance of 3.2mm/1/8 inch and a throat of 25.4mm/1 inch.
3. SPECIFICATION
Model No: ....................................................................MW20
Throat: ......................................................................25.4mm
Refer to
instruction
manual
Wear protective
gloves
Wear eye
protection
MW20 Issue:2 23/09/24
Original Language Version
© Jack Sealey Limited
Capacity:
Mild Steel: .............................................................. 18 gauge
Aluminium: ............................................................. 16 gauge
4. PREPARATION
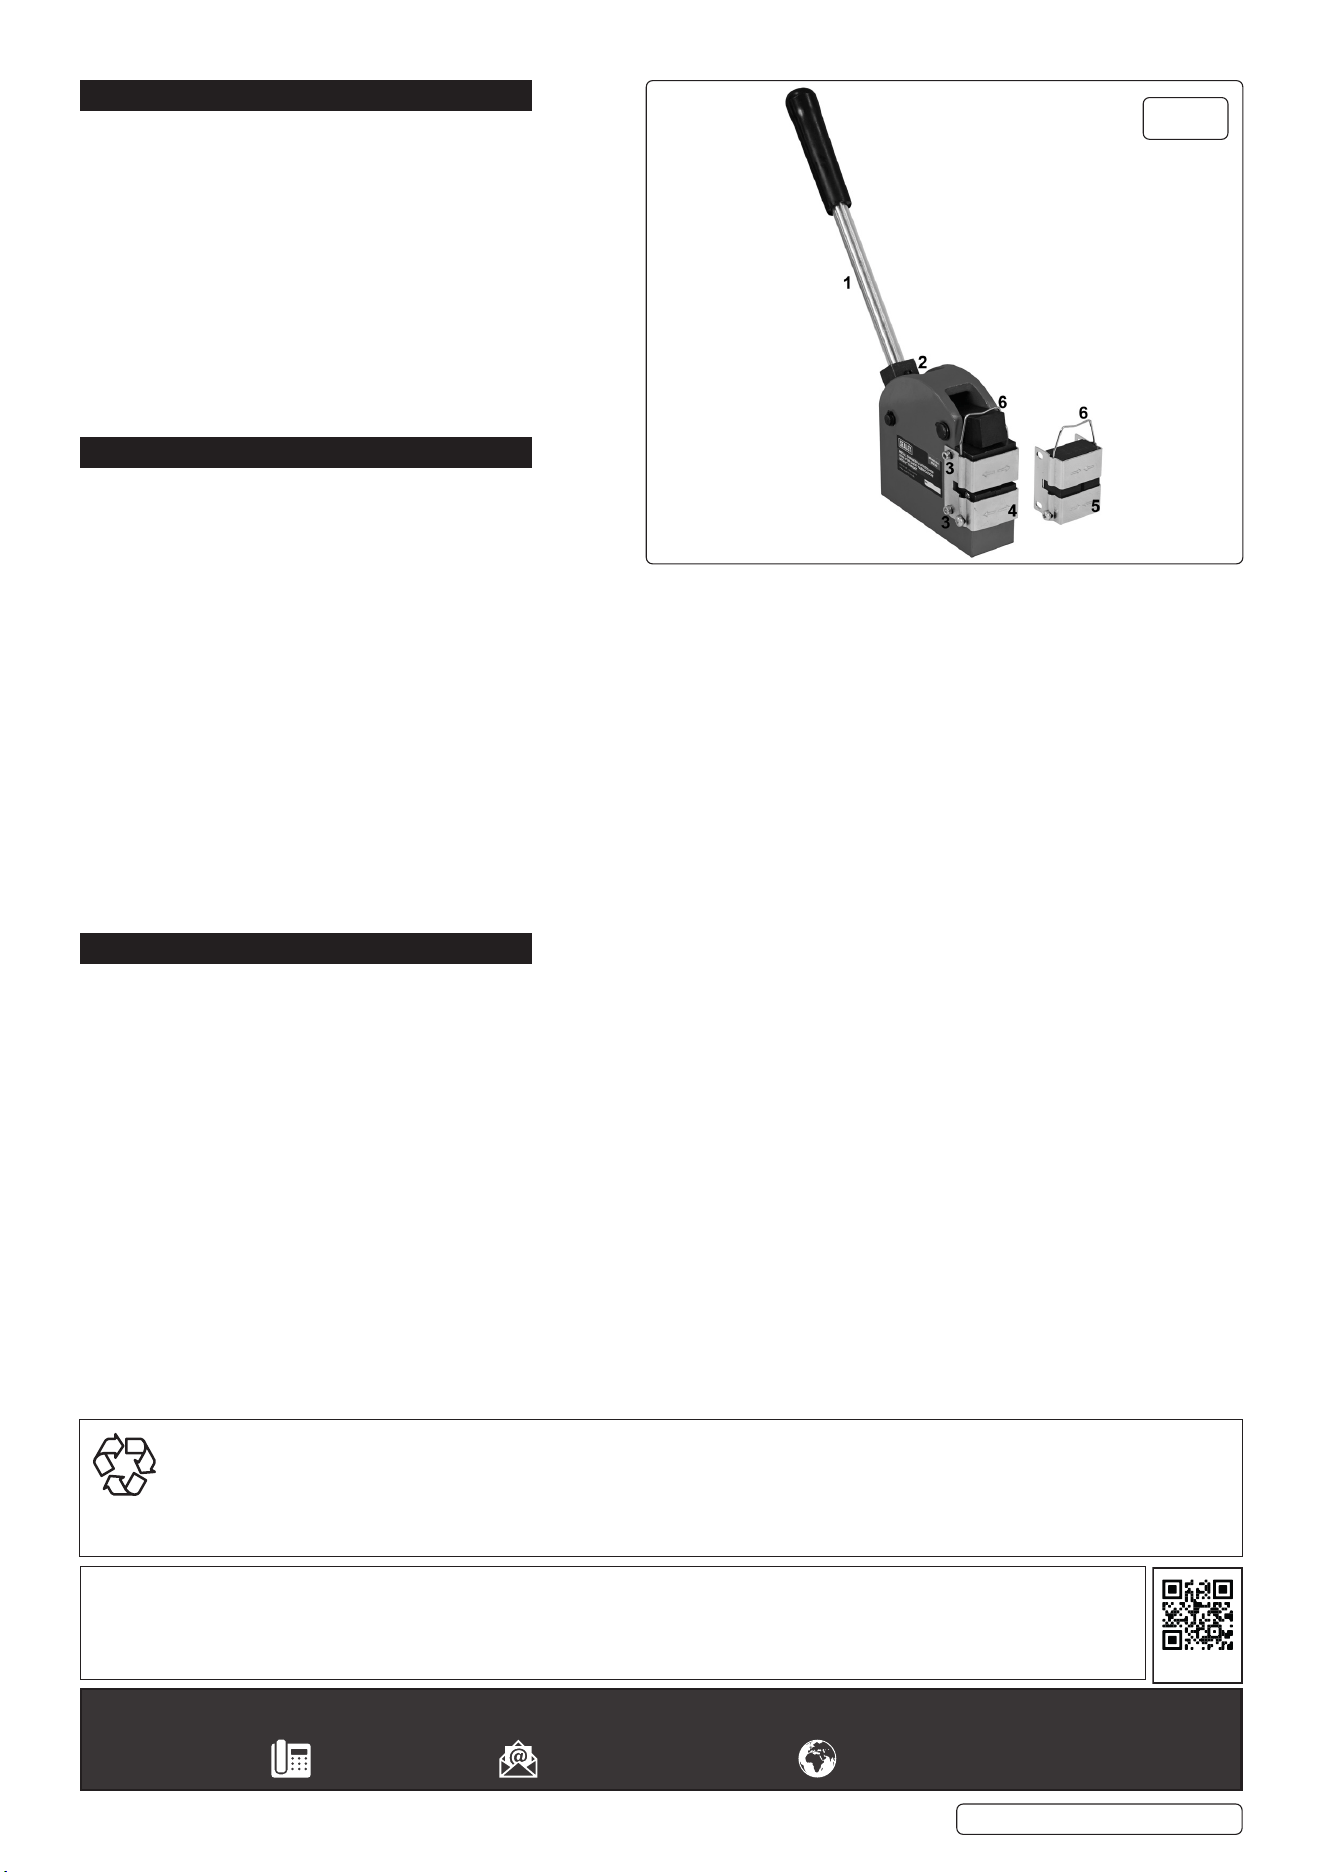
Refer to Parts List as well as g.1
4.1. Secure tool to a workbench using pre-drilled M10 holes
underneath.
4.2. Tool may also be clamped into a vice.
4.3. The more rigid the tool is mounted, the easier it will be to
use.
4.4. Handle: Insert into socket and secure with the smaller grub
screw (2).
4.5. Select STRETCHER (4) or SHRINKER (5) jaw assemblies.
4.6. Change by removing hex head screws x4 (3) fold hook (6)
forward and gently pull assembly outwards.
Be careful not to lose the spring between the jaws in the
shrinker jaws.
5. OPERATION
5.1. Before fabricating on the shrinker & stretcher, bend the
metal to be formed 90° on a sheet metal brake, creating a
maximumangedepththatisnogreaterthan25.4mm/1”.
5.2. Make a template out of cardboard or a short piece of wire.
Atemplateiscriticaltoachieveagoodtwithminimallleruse.
5.3. Worktheleadingedgerst.Thisbreaksdownthemaximumresistanceandpermitseasyandaccurateworkingthereafter.
5.4. For best results and maximum forming power, insert metal only halfway into the jaws.
5.5. The bunching or pocketing that typically occurs when shrinking can be quickly hammered out.
5.6. Control the pressure exerted on the handle or the foot pedal while forming the metal.
5.7. Move the metal back and forth until the desired radius is obtained.
5.8. Thejawsofthetoolsare“toothed”tobettergripthemetal.Theseteethleaveslightmarkings,dependingonthehardnessofthemetal,
which can be removed with an abrasive cloth or wheel.
5.9. Compound curves can be made by working the piece on alternating sides.
5.10. CAUTIONARY TIPS
To avoid cuts and ease handling, wear gloves during all forming operations.
Avoid pressuring the jaws together accidentally.
To avoid dulling the teeth, NEVER press without a separator between the jaws.
Remove handle when not in use.
Always insert a piece of metal or other material divider between the jaws when not in use.
6. MAINTENANCE
Numbers below refer to Parts List
6.1. CLEAN THE JAWS AFTER EVERY USE.
6.1.1. Blowing out with an air hose doesn’t do a thorough enough job.
Vacuuminghelpstogetthellingsout.Thebestwaytomaintainthemetalformeristodisassemblethejawsandcleanasfollows:
6.1.2. Loosen the screws to remove the jaw assembly.
6.1.3. Remove the jaws and V-block as a single unit. Be careful, don’t lose the spring between the shrinker jaws.
6.1.4. Remove the suspension springs in the shrinker assembly (23#).
NOTE: There is a small jaw opposite a large jaw, top and bottom.
6.1.5. Cleanthejawswithcleaninguidandabrush.Donotuseawirewheel.Alwaysbrushinthesamedirectionastheteeth.
6.1.6. Clean the V-blocks (10#, 13#,17#,20#).
6.1.7. Lubricate the surface between the jaws and V-blocks.
6.1.8. Reassemble and replace jaw assemblies. Check that the large jaw is placed opposite the small jaw.
6.1.9. When not in use for extended periods of time, lightly oil the jaws to prevent corrosion. Always insert a piece of metal or other material
divider between the jaws when not in use.
fig.
1
Original Language Version
© Jack Sealey Limited
Sealey Group, Kempson Way, Suffolk Business Park, Bury St Edmunds, Suffolk. IP32 7AR
01284 757500 sales@sealey.co.uk www.sealey.co.uk
ENVIRONMENT PROTECTION
Recycle unwanted materials instead of disposing of them as waste. All tools, accessories and packaging should be sorted, taken to
a recycling centre and disposed of in a manner which is compatible with the environment. When the product becomes completely
unserviceable and requires disposal, drain any fluids (if applicable) into approved containers and dispose of the product and fluids
according to local regulations.
Note: It is our policy to continually improve products and as such we reserve the right to alter data, specifications and component parts
without prior notice.
Important: No Liability is accepted for incorrect use of this product.
Warranty: Guarantee is 12 months from purchase date, proof of which is required for any claim.
REGISTER YOUR
PURCHASE HERE
MW20 Issue:2 23/09/24
