Your Assure Alert is intended to notify you of movement in multiple locations throughout your home, apartment, office or other interior space. The Window & Door
Transmitters (Figure 1) can be used on up to three individual doors or windows, and the Motion Sensing Transmitters (Figure 2) can be used in two rooms. Each
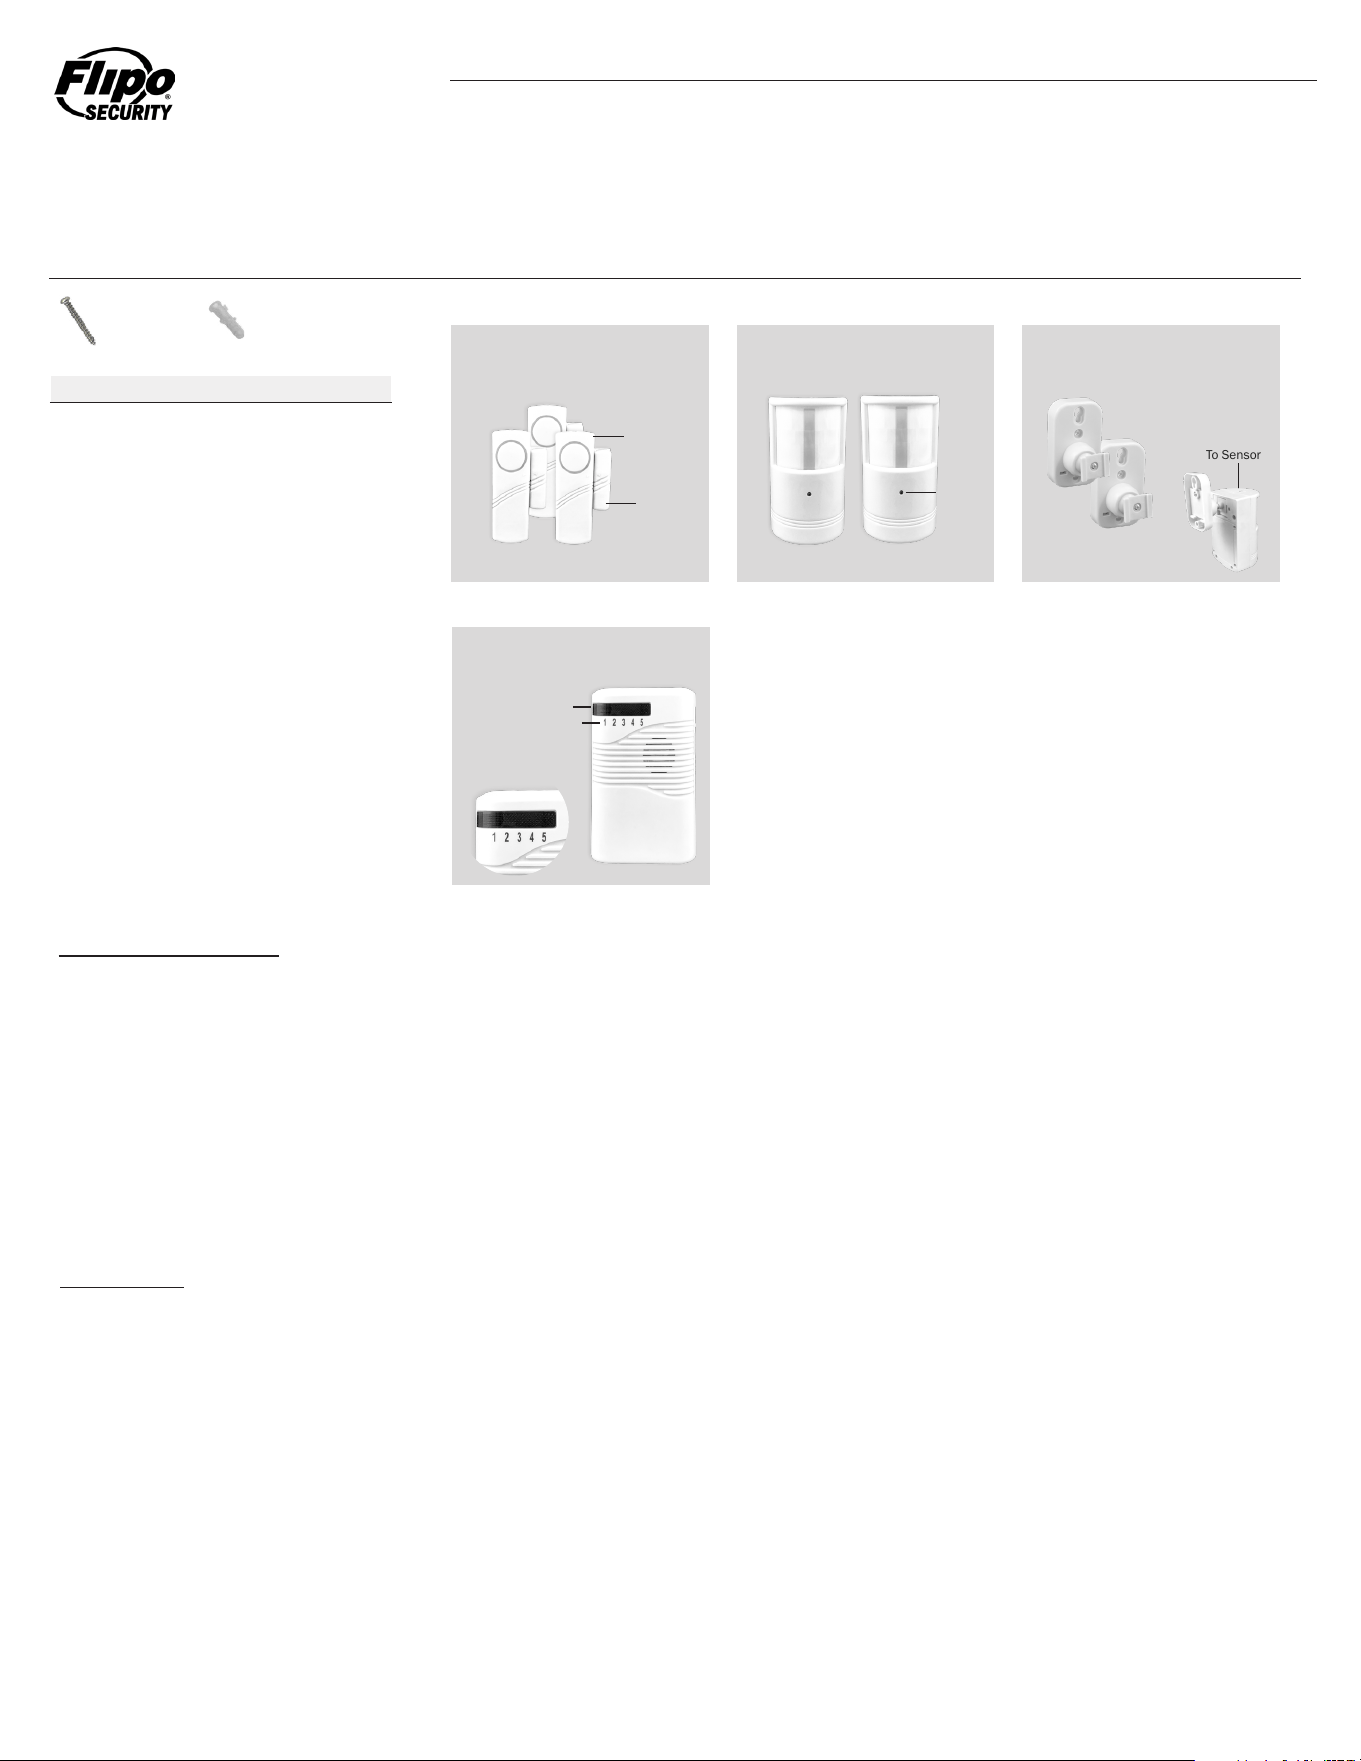
individual transmitter correlates to a zone on your receiver (Figure 4).
EXAMPLE: If Motion Sensing PIR Transmitter 4 is installed in your living room, your living room is Zone 4.
NOTE: All units are pre-paired out of the box in the following sequence and are labeled accordingly.
Receiver Zone 1: Door & Window Transmitter 1
Receiver Zone 2: Door & Window Transmitter 2
Receiver Zone 3: Door & Window Transmitter 3
Receiver Zone 4: Motion Sensing Transmitter 4
Receiver Zone 5: Motion Sensing Transmitter 5
All units are pre-paired, you will only need to install the sensors in your desired locations. When triggered, the relevant sensor will send a signal to the wireless receiver.
When triggered, the wireless receiver will emit a beeping sound and the relevant zone’s LED will ash on the receiver informing you which zone the alert is coming from.
Refer to Figure 4 for reference.
NOTE: Only one zone can send an alert at a time - simultaneous alerts will not appear on your LED screen. Once the alert has ended, a second alert in another zone
can be triggered.
NOTE: Do not mix old and new batteries or different battery types. Batteries are not included with the receiver or transmitters.
To ensure the longest possible battery life, use alkaline batteries. Although the batteries should have an extended life, the product will only function properly with
batteries that have not been drained. Always install new batteries and test each sensor, battery, and transmitter regularly to ensure the batteries are functioning
properly.
5 Channel Receiver: Remove the battery cover on the rear of the unit. Insert three C sized batteries according to the polarity chart located in the battery compartment.
Motion Sensing Transmitter: Remove the four screws holding the battery cover in place and remove the battery cover. Insert three AA sized batteries according to the
polarity chart located in the battery compartment. Replace the battery cover and four screws holding it in place. Repeat steps to install batteries in the second motion
sensing transmitter.
Door & Window Transmitter: Slide off and remove the battery cover located on the front of each unit. Insert two AAA sized batteries according to the polarity chart located
in the battery compartment. Replace the battery cover. Repeat steps to install batteries in the second and third door & window transmitter.
To replace batteries, simply follow the steps above to remove the old batteries and install new.
The Assure Alert Wireless Security Alert System is pre-paired, out of the box security system that can instantly protect multiple zones, rooms, and entry
points in a home, apartment, ofce, or other enclosed living space.
OPERATION:
BATTERY INSTALLATION
ASSURE ALERT
Wireless Security Alert System
Screws
Dry Wall Anchors
5 Channel Receiver
Door & Window Transmitters
Magnetic Sensors
Motion Sensing Transmitters
Motion Sensor Brackets
5
5
1
3
3
2
2
Quantity
Door & Window Transmitter
Figure 1
Figure 2
Figure 3
Figure 4
Magnetic
Sensor
Indicator
Light
Zone Indicator Lights
Zone Numbers
Main Unit
Bracket
Attached
To Sensor
Motion Sensing Transmitter
5 Channel Receiver
Motion Sensor
Mounting Brackets
Part
Parts List
Screw
Dry Wall Anchor

Distributed by Flipo Group Limited La Salle, IL • ipo.com
Questions or Comments? Call: (815) 223-9942 • Email: info@ipo.com • Fax: (815) 223-9266
MADE IN CHINA
Flipo Group
613 First Street
La Salle, IL 61301
FLIPO GROUP warrants to the original purchaser, when used in North America only, that this product shall be free of defects in material and workmanship. This warranty
applies within 30 days of the original purchase with normal home use. This warranty does not apply for commercial use of this product. Use outside of North America is
not covered by this warranty.
During the warranty period, we will at our option, repair or replace this product without charge, which shall be the consumer’s sole remedy. ALL RETURNS must be
accompanied by a Return Authorization Number, which is issued by the Customer Service Department of Flipo Group. Please contact Customer Service BEFORE returning
any item. Once you have obtained a Return Authorization Number, the product must be returned with a clear copy of the proof of purchase, showing place and date of
purchase, postage and insurance prepaid to:
This warranty does not cover installation, adjustments in the home, nor damage due to accidents, misuse, abuse, re or other acts of God, incorrect line voltage, damage
to other equipment caused by improper installation, unauthorized or improper modication. This warranty gives you specic legal rights and you may also have other
rights that vary from state to state.
30 DAYS LIMITED WARRANTY:
1. NEVER disassemble or other wise alter or change the product.
2. Failure to insert batteries in the correct polarity, as indicated in the battery compartment, may shorten the life of the batteries, cause batteries to leak or
damage the product.
3. Do not mix old and new batteries.
4. For best results, use alkaline batteries.
5. Do not mix Alkaline, Standard (Carbon-Zinc) or Rechargeable (Nickel Cadmium) or (Nickel Metal Hydride) batteries.
6. Do not dispose of batteries in re.
7. Batteries should be recycled or disposed of as per manufacturer’s recommendations.
8. WARNING! THIS ITEM IS FOR INDOOR USE ONLY!
BATTERIES NOT INCLUDED
FCC INFORMATION
This device complies with part 15 of the FCC Rules. Operation is subject to the following two conditions: (1) This device may not cause harmful interference, and (2)
this device must accept any interference received, including interference that may cause undesired operation.
CAUTION
5 Channel Receiver:
The wireless receiver is intended for indoor use only. Due to its portable nature, it can be moved around and re-located as needed. As long as the receiver is within
100 feet of all sensors the kit will function as intended. A screw and dry wall anchor, (if needed), are included to mount your sensor. Simply install the screw and then
slide the receiver’s eyelet over the screw head.
The receiver can be activated/turned off using the slide switch located on the right side of the receiver. The receiver also has a HIGH and LOW volume setting that can
be adjusted using the same switch. When activated, the beeping sound will continue for approximately 60 seconds unless the receiver is turned off.
IMPORTANT: Only ONE Assure Alert Kit can be used per location; combining kits will cause your Assure Alert to malfunction.
Motion Sensing Transmitter:
The motion sensing transmitters are suitable for indoor use. Each motion sensing transmitter comes with a mounting bracket. Use the included screws and dry wall
anchors, (if necessary), to attach the bracket to a at surface such as a wall. Once installed, slide the bracket into the rear of the sensor. (Figure 3) Always ensure you
install the sensors at least 5 feet from the ground to guarantee detection. Your motion sensors will be ON and ACTIVE once batteries have been installed. It is also
recommended to install the sensors out of arms reach to prevent tampering. The bracket’s swivel arm can be used to ne tune the positioning of the motion sensor. A
red LED on the front of the motion sensor will illuminate and ash when activated by motion. (Figure 3)
IMPORTANT: The motion sensor is ALWAYS on - if you do not want it to work, the wireless receiver must be turned off.
Note: Dogs, cats and other pets will trigger your motion sensors. To prevent this from occurring, position the motion sensor at an angle that picks up movement higher
than 5 feet from the ground. You may have to experiment with positioning the sensor to prevent this type of alert.
Door & Window Transmitter:
The door & window transmitters are for indoor use only and can be installed on both windows and doors. When the door/window is open and the contact is broken
between the main unit and magnetic sensor (Figure 1), the transmitter will trigger an alert to the receiver. Use the adhesive tape located on the back of the door &
window transmitters main units and magnetic sensors to install both parts of the transmitter on your desired entry point. Place the main unit of the door and window
transmitter on the door or window and the magnetic sensor on the frame. The transmitters main unit and magnetic sensor should be aligned so the arrows on each
are pointing directly at each other when your door or window is closed. After deciding where the alarm should be placed, remove the protective tape on the rear of the
adhesive and stick both components in place. Ensure the magnetic sensor is not more than 3/8 inch from the transmitters body. Once placed, turn the switch located
on the side of the transmitters main unit to the ON position.
WARNING: Metal doors, walls, and interior wall framing may interfere with transmission signal strength. If this occurs, you may need to move your transmitters and/or
receiver to other locations without interference or nearer to each other.
INSTALLATION:
