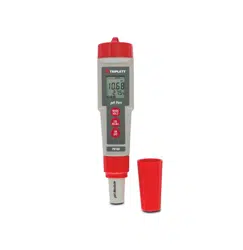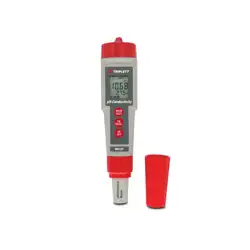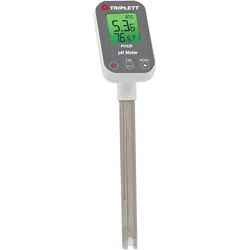

PH325
Long Tube Stem pH Meter
INTRODUCTION
Congratulations on your purchase of
this long tube pH pen. Please read the
manual completely before using this pen.
Filing and keeping the manual for future
reference. Recommended to soak the
electrode for at least 30 minutes before
using to clear up the lazy effect.
Features:
IP65 Waterproof housing.
Dual display with ATC.
Data hold to freeze readings.
Compact size, easy to fit in pocket.
Low battery indicator.
Auto power off.
C/F unit switchable.
Power by 2pcs CR2032 batteries.
Multi points calibration.
One touch only for calibration.
MATERIAL SUPPLIED
This package contains:
The meter x 1
CR2032 button battery x 2
Operation manual
Plain box
POWER SUPPLY
The meter is powered by 2 pcs CR2032
batteries. To check the battery when:
1. First time use
2.
3.
1
The battery symbol appears on LCD
The meter can not power on

To install the batteries:
1. Turn off the meter.
2.
3. Replace the old batteries with two new
button cells CR2032.
Loose the battery cover in clockwise
direction by coin (DON'T discard the
black O-ring!)
4. Make sure the batteries are in place
and the polarity is correct.
5. Put back the battery cover and
turn it
in counter-clockwise direction to lock
1. Please re-calibrate the meters after
changing batteries.
NOTE:
2
2. Remove battery from instruments
that you do not plan to use for a
month or more. Do not leave battery
in instrument.

LCD DISPLAY
-The 1st display shows the measured pH
reading.
-The 2nd display shows the temp.
-
Auto Temp. Compensation
- =Data hold
Cal=Calibration mode
-ATC=
KEYPAD
OPERATION
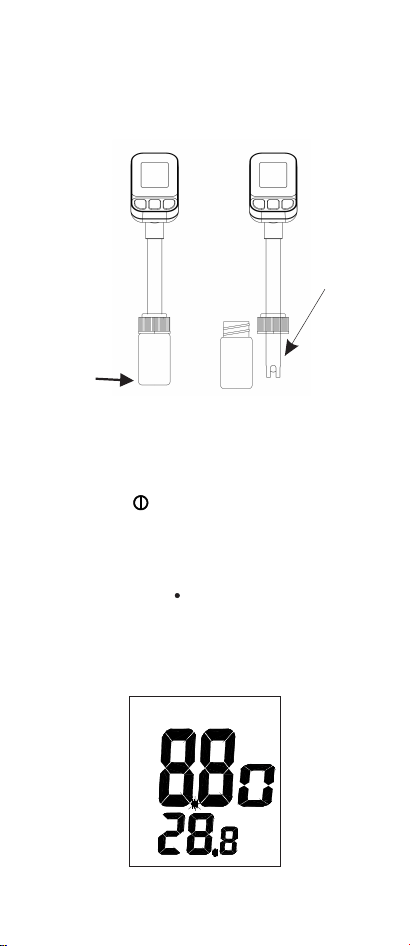
1. Remove the probe storage bottle from
meter to expose the electrode out. It is
normal if you find white crystals are
present on the cap or electrode
assembly.
3
CAL
H
ATC
F
C
O
O
H
4
2. Dip the electrode into the test solution.
Press " " to power on the meter
and stir it to get a stable reading.
3. A small dot " " is flashing while the
meter is in measurement mode. The
LCD not only shows the measured pH
value but also displays the temperature.
WARNING: For pH meters, please
always make the bottle is filled with
storage buffer to keep the electrode
wet and in a good storage condition.
ATC
C
O
Rotate
the storage bottle
in counter-clockwise direction and then pull out
the bottle completely to expose the electrode.
Electrode
" "
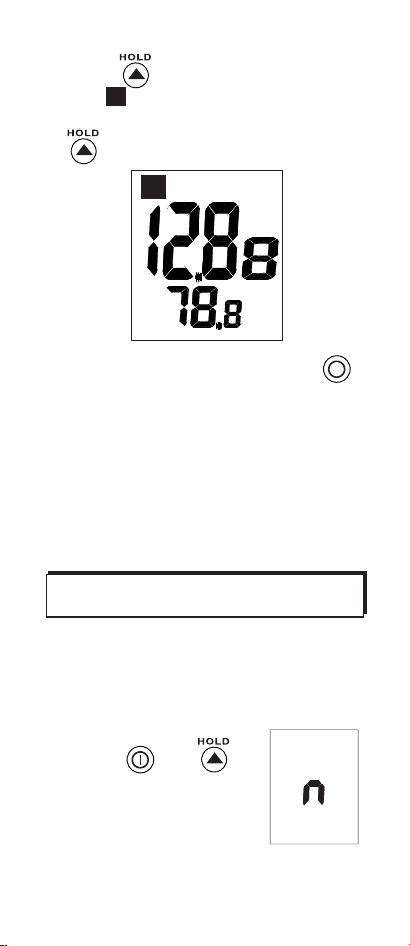
4.Press to freeze current readings.
The " " icon will appear on the LCD
and the small dot will not flash . Press
" " again to release the hold mode.
5. Turn off the meter by pressing " "
button.
5
7.Please see page 7 for the calibration
procedures.
6.Once finishing the measurement, clean
the electrode, put back the bottle, store
o
the meter under the 0~50 C.
This meter will shut off automatically 20
minutes of inactivity. For operating longer
time, you can disable the sleep mode.
To disable the auto power off:
AUTO POWER OFF
(SLEEP FUNCTION)
Before power on,
" "
pressing " " +
keys simultaneously until a
"n" appeared on the screen
and then release keys to
return to normal mode.
H
H
ATC
F
O

The pH pen is capable of measuring with
Automatic Temperature Compensation.
In above models, "ATC" will show in the
middle top of the LCD.
AUTOMATIC TEMPERATURE
COMPENSATION (ATC) &
TEMP. UNIT SETTING
o o
To select the temp. unit ( C or F), turn off
the meter first. When the meter is off, press
" " and " " at the same time until
the C or F appears on the LCD. Press
" " to s elect the preferred unit and then
press " " to save. " " will appear on
the LCD for one sec and then go back to
normal.
Temp. Unit Setting
6
Note: The disable sleep mode will be
invalid after every power off.
o
C
Calibration is necessary and should be
done regularly, recommended everyday
if the meter is used often. The unique
calibration design of the meter features
automatic buffer recognition to avoid errors.
CALIBRATION MODE (CAL)
7
1. Power on the meter.
2. Place the electrode into a buffer solution
(4,7or10), pH7 should be calibrated first
and then 4 or 10 pH for better accuracy
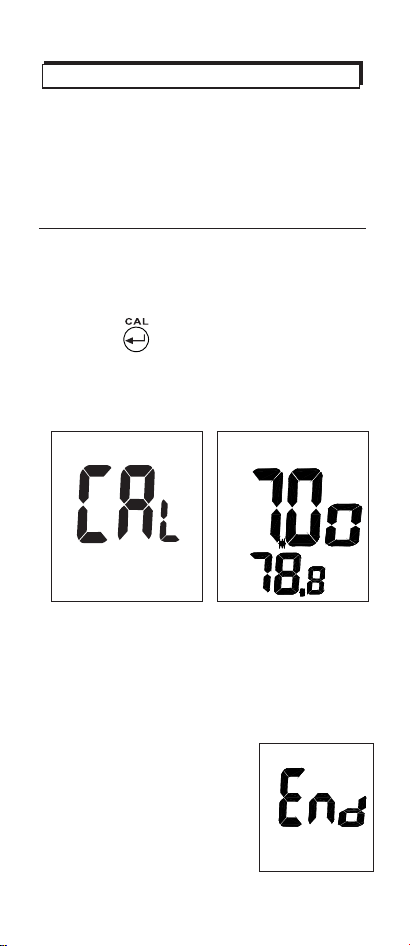
3. Press " " to enter pH calibration
mode. The icon "CAL” will appear on the
LCD for one second and then pH value
(4,7 or 10) will be displayed on the LCD.
Calibration
4. If probe or buffer is in error:
If the buffer is incorrectly used or the
probe is damaged or the probe can not
detect buffer in below voltage range, the
meter will escape calibration mode
automatically after 10 seconds.
Text "End" will appear on
the LCD in one second
and then will go back to
normal status.
CAL
ATC
F
O

8
PH 4.00 : 97mV..... 250mV
PH 7.00 : - 60mV..... 60mV
PH10.00 : - 250mV..... -97mV
Acceptable voltage range of each point:
5. If the probe recognizes the buffer:
If the probe successfully recognizes the
buffer, the buffer pH value (4 or 7 or 10)
will appear on the display in 2 seconds.
If the calibration buffer is not 4,7,10 but
another value, such as 7.01, just
press " " to change the value.
7. To save the calibration value:
When the electrode reads a stable value
and user stops pressing any keys, the
meter will automatically save the value
and then escape the calibration mode.
6. The adjustable cal. point range for 4.0
pH is from 3.50 to 4.50. For 7.0 pH is
from 6.50 to 7.50. For 10.0 pH is from
9.50 to 10.50
CAL
ATC
F
O

9. Repeat above steps until the 3 point
calibration are finished.
9
8. Rinse the probe with de-ionized water
or a rinse solution (tap water...) after
each measurement to last the meter's
life.
Always rinse the pH electrode in
de-ionized water or rinse solution
(tap water......) before next use.
Never touch or rub glass bulb in order
to last pH electrode life.
Please always keep the pH glass bulb
wet by using the storage bottle to protect
and store the electrode.
MAINTENANCE
Make sure the electrode is clean.
Between measurements, rinse the
electrode with deionised water. If
the eletrode has been exposed to
a solvent immiscible with water,
clean it with a solvent miscible with
water e.g. ethanol or acetone and
rinse carefully with water.
Store the electrode carefully.
Power on but no display
TROUBLESHOOTING
1) Make sure the time of pressing
power key is more than 100 mS.
2) Check the battery are in place and
make good contact and correct
polarity.
3) Replace with new batteries and try
again.
4) Move away the batteries for one
minute and then put back again.
10
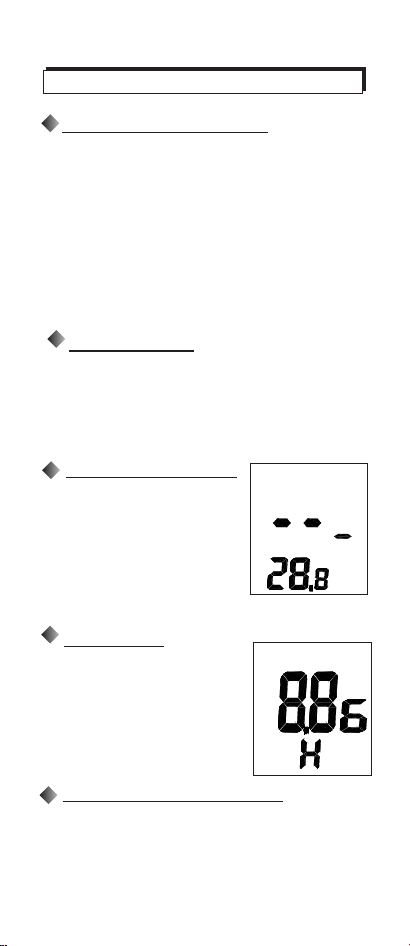
Out of pH range, too
acidic/or too alkaline.
"H." Or "L."
Out of temp. range,
too cold/or too hot.
Slow response
Clean probe by immersing the electrode
in tap water for 10-15 minutes, then
rinse thoroughly with distilled water
or use a general purpose electrode
cleaner.
It is normal when the electrode is
not immersed in the water but
exposed in air.
pH value fluctuate quickly
LCD display “ - - - “
ATC
C
O
ATC
C
O
SPECIFICATION
11
Model
pH range
pH accuracy
pH resolution
Temp. Sensor
Operating temp.
Operating RH%
Storage temp.
Storage RH%
Meter Dimension
Weight
Standard Package
Battery
o
-10~50 C
Humidity < 80%
Humidity < 90%
187.4(L)x40(W)x58.4(H)mm
115g
CR2032 x 2pcs
Meter/Battery/Manual/Paper box
LCD size
Sensor life time
>6 months (with good )maintenance
29(H)x22.5(W)mm
Body Material
Reference
Junction
Electrolyte
Tip Shape
Probe Diameter
Probe Length
Application
Laboratory general purpose
8620
0.00~14.00
+/-0.1
Ceramic
Spheric
+/-0.01
Built-in
12 mm
130mm
PC
o
0~50 C
Single,Ag/AgCl
Gel,3.3M KCL
Battery Life: >100 hrs continuous use