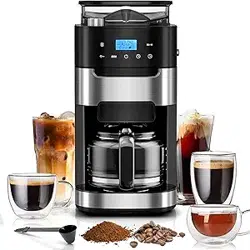

COFFEE MAKER
INSTRUCTION MANUAL
ITEM NO.: CM3751S
MODEL NO.: CM9451-UL
Thank you for purchasing this product! If you have questions about the
product such as missing parts,damaged products,product assembling
and operation etc., please contact us via Amazon Message or customer
service phone: 213-4467172 or 661-4358826.


1
IMPORTANT SAFEGUARDS
When using electrical appliance. Basic safety precautions should always
be followed including the following:
1. Read all instructions.
2. Make sure that your outlet voltage corresponds to the voltage stated on
the rating label of the coffee maker.
3. To protect against fire, electric shock and injury to person do not
immerse cord, plug, or in water or other liquid.
4. Close supervision is necessary when any appliance is used by or near
children.
5. Unplug from outlet when not in use and before cleaning. Allow to
cooling before putting on or taking off parts, and before cleaning the
appliance.
6. Do not operate any appliance with a damaged cord or plug or after the
appliance malfunctions, or has been damaged in any manner. Return
appliance to an authorized service facility for examination, repair or
adjustment.
7. The use of accessory not recommended by the appliance manufactur-
er may result in fire, electric shock or injury to persons.
8. Do not use outdoors.
9. Do not let cord hang over edge of table or counter, or touch hot surface.
10. Do not place on or near a hot gas or electric burner, or in a heated
oven.
11. Do not use appliance for other than intended use.
12. Do not clean container with cleansers, steel wool pads, or other abra-
sive material.
13. To disconnect, turn any control to “OFF”, remove plug from wall outlet.
Always hold the plug. But never pull the cord.
14. Scalding may occur if the cover is removed during the brewing cycles.
Be careful not to get burned by the steam.
15. Some parts of appliance are hot when operated, so do not touch with
hand. Use handles or knobs only.
16. Never leave the empty carafe on the warming plate otherwise the
carafe is liable to crack.
17. Never use the appliance if the carafe shows any signs of cracks or
carafe having a loose or weakened handle. Only use the carafe with this
appliance. Use carefully as the carafe is very fragile.
18. This appliance is not intended for used by persons (including children)
with reduced physical, sensory or mental capabilities, or lack of experi-
ence and knowledge, unless they have been given supervision or instruc-
tion concerning use of the appliances by a person responsible for their
safety.

2
19. Children should be supervised to ensure that they do not play with the
appliance.
20. Do not set a hot container on a hot or cold surface.
21. Do not let the coffee maker operate without water.
22. The container is designed for use with this appliance. It must never be
used on a range top.
23. Risk of Fire or Electric Shock. Do not remove this cover. No user service-
able parts inside. Repair should be done by authorized service personnel
only.
SAVE THESE INSTRUCTIONS
HOUSEHOLD USE ONLY
NOTES ON THE CORD PLUG
This appliance has a polarized plug, To reduce the risk of electric shock,
this plug is intended to fit into a polarized outlet only one way, If the plug
does not fit fully into the outlet, reverse the plug, if it still does not fit,
contact a qualified electrician, Do not attempt to modify the plug in any
way.
NOTES ON THE POWER CORD
a) A short power-supply cord (or detachable power-supply cord) is
provided to reduce risks resulting from becoming entangled in or tripping
over a longer cord.
b) Longer detachable power-supply cords or extension cords are avail-
able and may be used if care is exercised in their use.
c) If a long detachable power-supply cord or extension cord is used:
1) The marked electrical rating of the detachable power-supply cord or
extension cord should be at least as great as the electrical rating of the
appliance;
2) If the appliance is of the grounded type, the extension cord should be a
grounding type 3-wire cord;
3) The longer cord should be arranged so that it will not drape over the
counter top or table top where it can be pulled on by children or tripped
over.
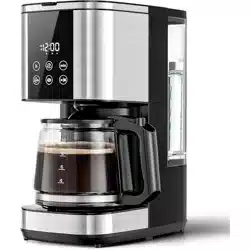
KNOW YOUR COFFEE MAKER
WARNING
RISK OF FIRE OR ELECTRIC SHOCK
DO NOT OPEN
WARNING: TO REDUCE THE RISK OF FIRE OR ELECTRIC SHOCK,
DO NOT REMOVE COVER (OR BACK)
NO USER-SERVICEABLE PARTS INSIDE
REPAIR SHOULD BE DONE BY AUTHORIZED SERVICE PERSONNEL ONLY
3
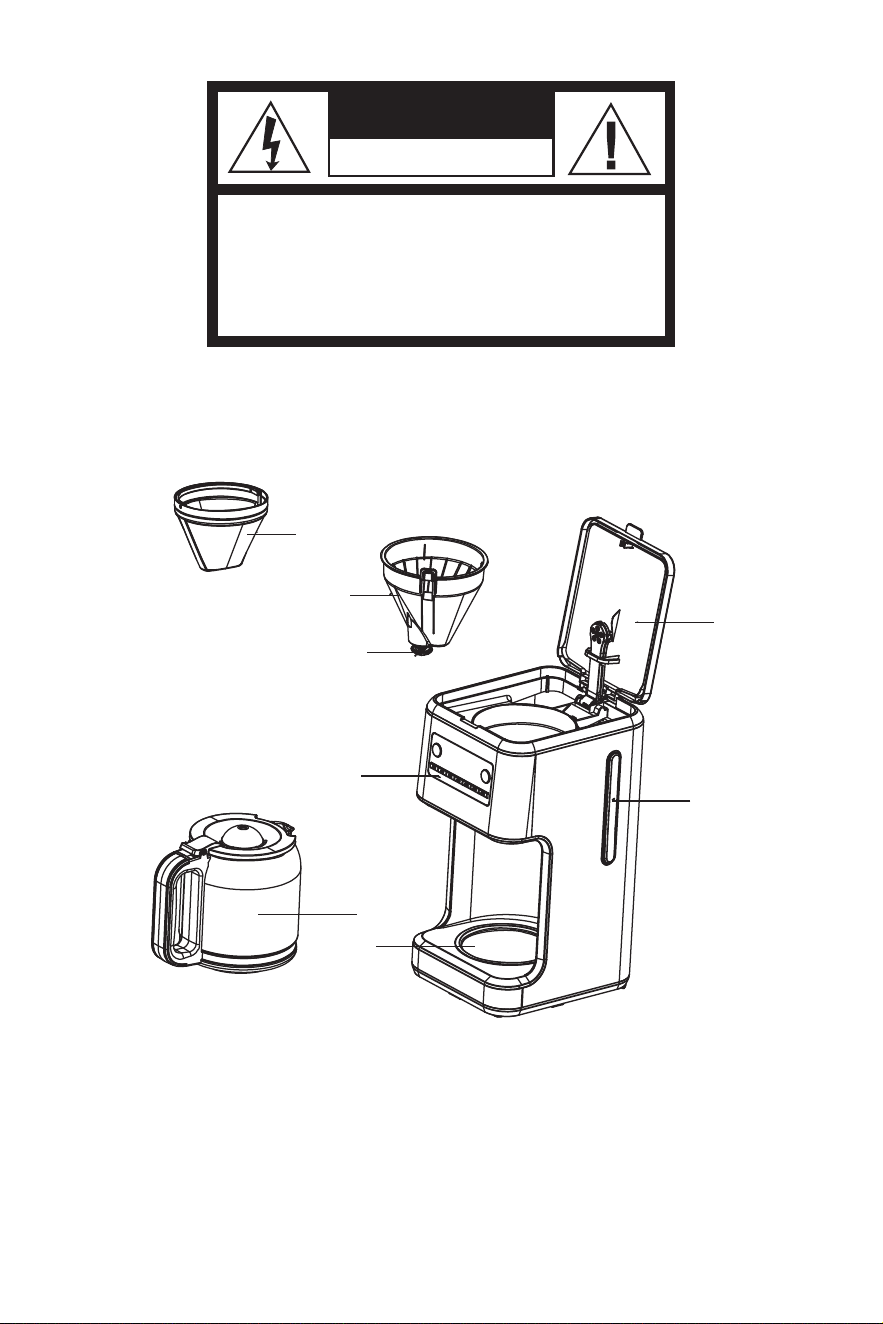
5
7
6
2
8
4
1
3
1. Top cover
2. Control panel
3.Water level gauge
4. Warming plate
5. Filter
6. Funnel
7. Anti-drip valve
8. Carafe
4
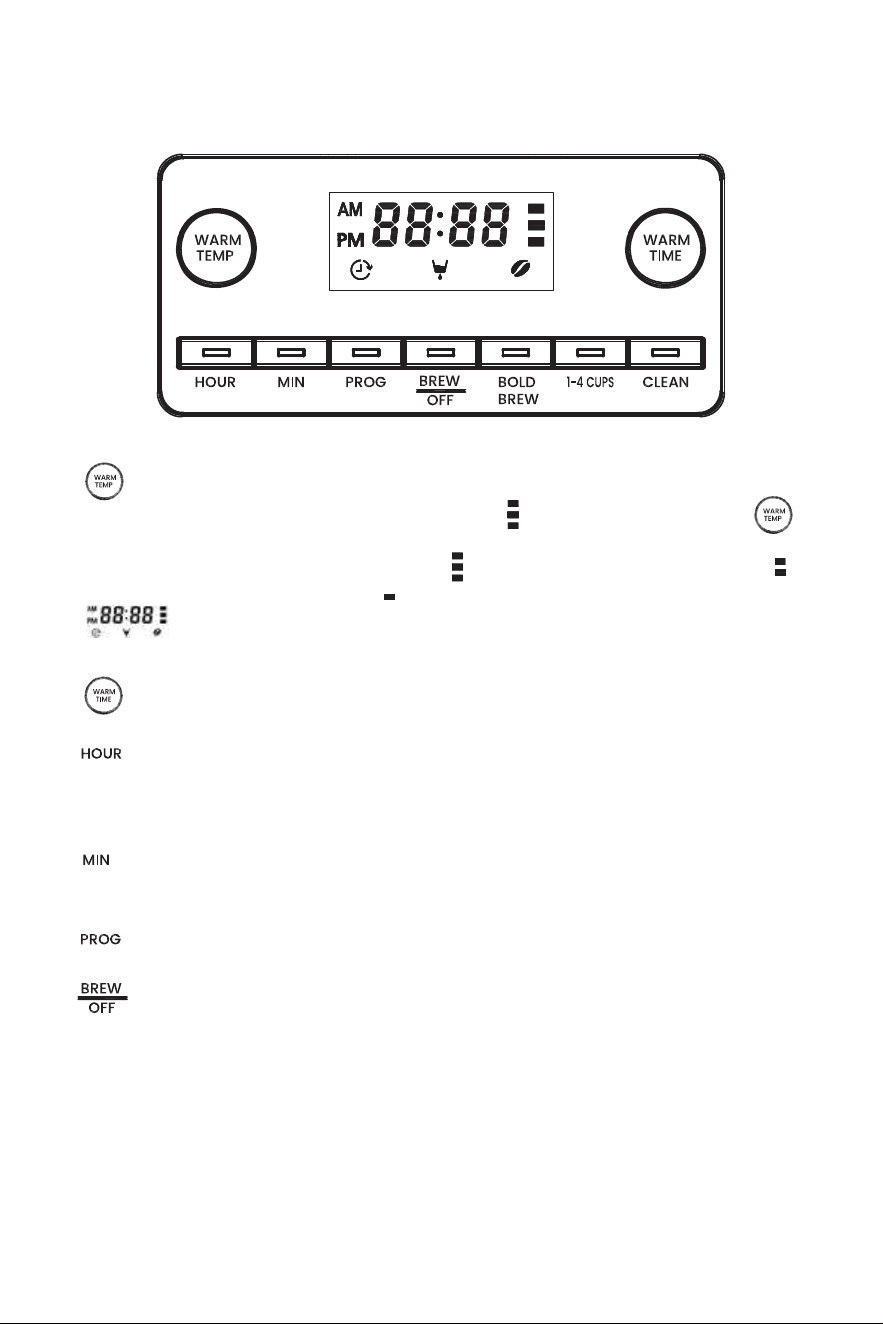
CONTROL PANEL
“ ” : This button is used for adjusting the warming temperature. The
default setting of warming temperature is “ ”. And you can press “ ”
to select your desired warming temperature. There are three warming
temperatures including High setting “ ” (≧176℉) , Medium setting “ ”
(167℉-176℉) and Low setting “ ” (158℉-167℉) for selection.
“ ”: It is the display for showing the icons for the corresponding
selected functions.
“ ”: This button is used for adjusting the warming time, which includes
1H, 2H, 3H and 4H.
“ ”: This button is used for adjusting the Hour of the time. One hour can
be increased after every press of the “HR” button. Hold and press the “HR”
button for 2 seconds to increase the hour fast.
“ ”: This button is used for adjusting the Minute of the time. One minute
can be increased after every press of the “MIN” button. Hold and press the
“MIN” button for 2 seconds to increase the minute fast.
“ ”: This button is used for setting the “Delay Brew” function.
“ ”: It is On/Off button. Press the On/Off button, the appliance enters
into the working status. Press the On/Off button again, the appliance
enters into the standby mode.
5
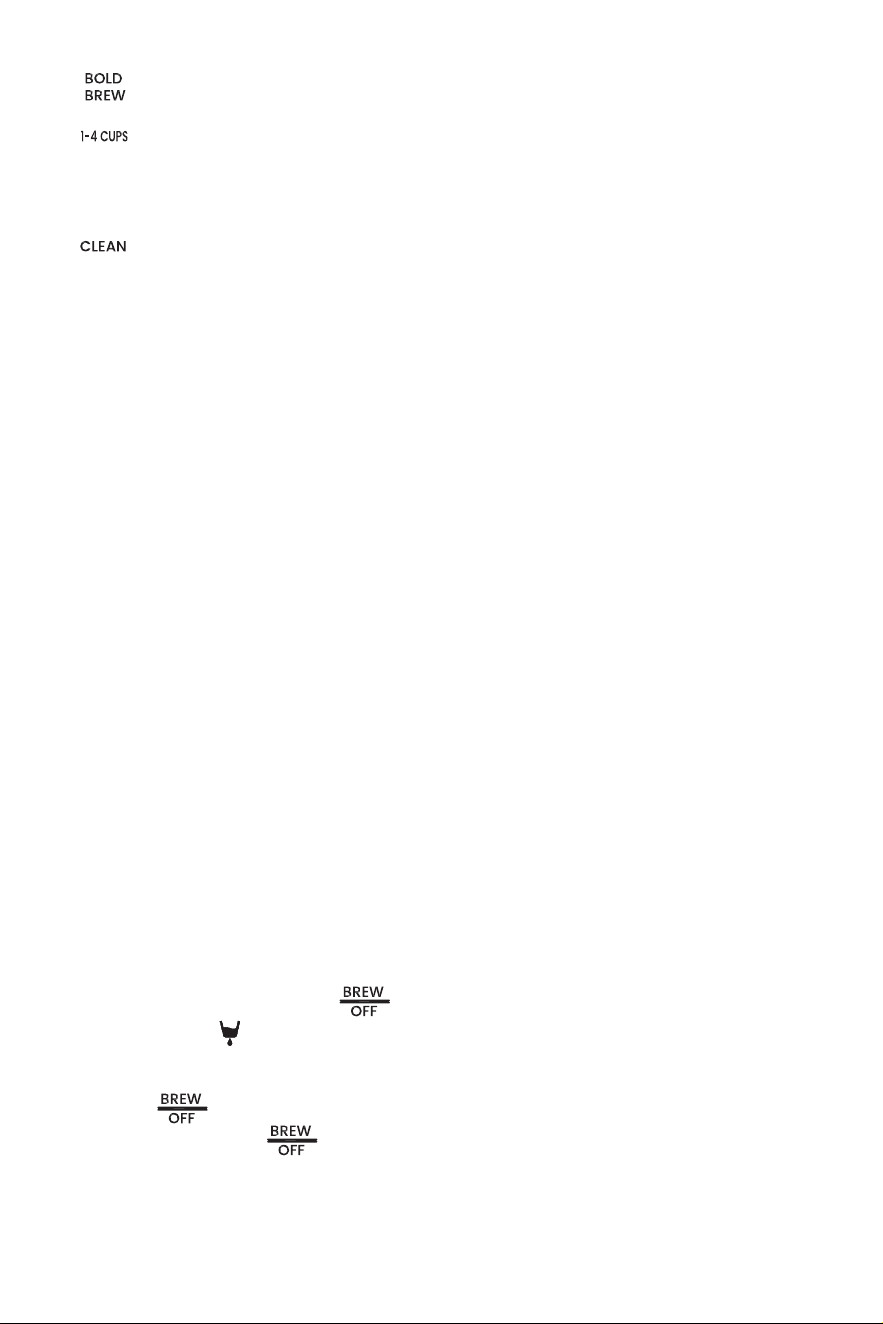
“ ”: This button is used for activating the “Bold Brew” function.
“ ”: This button is used to brew less than 5 cups of coffee, and the
appliance will adjust the brew process for maximum flavor extraction
under the “1-4 cups” mode.
“ ”: This button is used for activating the “Clean” function.
BEFORE USING THE APPLIANCE FOR THE
FIRST USE
Check that all accessories are complete and the appliance is not dam-
aged. Fill the water tank with water to the MAX level and brew water for
several times without ground coffee, then discard the water. Clean and
dry all detachable parts thoroughly according to the section “CLEANING
AND MAINTENANCE”.
USING YOUR COFFEE MAKER
1. Open the top cover and fill the water tank with drinking water. The water
level should not exceed the MAX level as indicated in the water tank.
2. Place the funnel into the funnel support, make sure it is assembled
correctly, otherwise the top cover cannot be closed. Place the filter in the
funnel.
3. Add ground coffee into the filter. Usually a cup of coffee needs a level
spoon of coffee powder, but you may adjust according to personal taste.
Close the top cover completely.
NOTE: The amount of coffee brewed will always be slightly less than the
amount of water poured in the water tank. This is due to the minimum
absorption of water by the coffee grounds.
4. Insert the carafe on the warming plate horizontally.
5. Insert the power plug into the outlet. The display will show “12:00 AM”, “12
00 AM” blink while “ : ” illuminates solidly, at that time, all the LED indicators
do not illuminate.
6. Press the On/Off button “ ” , its corresponding indicator illuminates
and the icon “ ” shown in the display illuminates, and the appliance
starts to work.
NOTE: The brewing process can be interrupted by pressing the On/Off
button “ ” at any time, and the appliance will continue brewing once
the On/Off button “ ” is pressed down again.
7. After the coffee-brewing is completed, remove the carafe and pour the
coffee for serving.

6
8. To make stronger coffee, simply press the “ ” button, its correspond-
ing indicator illuminates and the icon “ ” shown in the display illumi-
nates, then the appliance enters into the mode for making stronger
coffee. Press the On/Off button “ ” , its corresponding indicator
illuminates and the icon “ ” shown in the display illuminates, and the
appliance starts to work.
NOTE: The “Strong Brew” function can be only canceled within 5 seconds
after the “ ” button is pressed down.
9. If brewing fewer than 5 cups, simply press the “ ” button, its corre-
sponding indicator illuminates, and the appliance will adjust the brew
process for maximum flavor extraction under the “1-4 cups” mode. Press
the On/Off button “ ” , its corresponding indicator illuminates and the
icon “ ” shown in the display illuminates, and the appliance starts to
work.
NOTE: The “1-4 cups” function can be only canceled within 5 seconds after
the “ ” button is pressed down.
10. When the brewing process is completed, if you do not want to serve
immediately, keep the coffee maker be energized, and the coffee in the
carafe can be kept warm on the warming plate for 2 hours by default, and
the appliance will power off automatically after 2 hours if it has not been
manually disconnected at the end of brewing. And you can adjust the
warming time and warming temperature by following the operation
specified in the section of “CUSTOMIZING THE WARMING PLATE”. For an
optimum coffee taste, serve it just after brewing.
11. Always turn off the coffee maker and disconnect the power supply
when not use.
NOTE: Pay attention to pour the coffee out, otherwise you may be hurt as
the temperature of coffee just finished is high.
CUSTOMIZING THE WARMING PLATE
1. To adjust how long it stays warm, press the “ ” button to select the
desired warming time including 4 hours, 3 hours, 2 hours and 1 hour.
NOTE: The warming time can be adjusted when it does not exceed one
hour during the keep-warm process.
2. To adjust the temperature of the warming plate, press the “ ” button
to select the desired warming temperature including High, Medium or Low.

7
DELAY BREW
If you do not want the coffee maker to start working immediately, for
example now it is 8:10 AM, you hope that the coffee maker will automati-
cally start at 1:10 PM in the afternoon, firstly follow the operations of Step 1
to 5 above, then you can set the Delay Brew function as follows:
1. Press the “HR” and “MIN” buttons to set the current time, that is 8:10 AM.
NOTE: The time cycle is 12 hours.
2. Press “PROG” button once, the indicator of “PROG” button, the time and
the icon “ ” shown in the display blink.
3. Press the “HR” and “MIN” buttons to set the auto-start time, that is 1:10
PM.
4. After setting the auto-start time, press “PROG” button again, and the
appliance enters into the delay brew mode, at that time, the indicator of
“PROG” button and the display illuminate solidly.
5. When the auto-start time is reached, the appliance starts to work.
NOTE: The delay brew function can be canceled if “PROG” button is
pressed again during working.
CLEANING AND MAINTENANCE
CAUTION: Be sure to unplug this appliance before cleaning. To protect
against electrical shock, do not immerse cord, plug or the appliance into
water or liquid. After each use, always make sure the plug is removed
from wall outlet firstly.
1. Clean all detachable parts after each use in hot, sudsy water.
2. Wipe the product’s exterior surface with a soft, damp cloth to remove
stains.
3. Water droplets may buildup in the area above the funnel and drip onto
the product base during brewing. To control the dripping, wipe the area
with a clean, dry cloth after each use of the product.
4. Use a damp cloth to gently wipe the warming plate. Never use abrasive
cleaner to clean it.
5. Replace all parts and keep for next use.

Maintenance
Any other servicing should be performed by an authorized service repre-
sentative.
REMOVING MINERAL DEPOSITS
Minerals (calcium/limestone) found in water will leave deposits in your
coffee maker and can affect performance.
1. When it is time to perform descaling for the coffee maker, the “CLEAN”
button blinks and the display shows “CLEAN”.
2. Fill the water reservoir to capacity with a mixture of white vinegar and
water.
3. Put the carafe on the warming plate and ensure it is placed in position.
4. Press the “CLEAN” button once, the appliance enters into the descaling
procedure and starts to perform descaling, at that time, the indicator of
“CLEAN” button illuminates solidly.
5. Once the solution in the water tank is boiled away, the indicator of
“CLEAN” button extinguishes and the descaling is completed.
6. Refill the water tank with clean water and press the On/Off button to
rinse the machine. Repeat for at least 3 times.
HINTS FOR GREAT-TASTING COFFEE
1. A clean coffee maker is essential for making great-tasting coffee.
Regularly clean the coffee maker as specified in the section of “CLEANING
AND MAINTENANCE” . Always use fresh, cold water in the coffee maker.
2. Store unused coffee powder at a cool, dry place. After opening a
package of coffee powder, reseal it tightly and store it in a refrigerator to
maintain its freshness.
3. For an optimum coffee taste, buy whole coffee beans and finely grind
them just before brewing.
4. Do not reuse coffee powder since this will greatly reduce the coffee’
flavor. Reheating coffee is not recommended as coffee is at its peak flavor
immediately after brewing.
5. Clean the coffee maker when over-extraction causes oiliness. Small oil
droplets on the surface of brewed, black coffee are due to the extraction
of oil from the coffee powder.
6. Oiliness may occur more frequently if heavily roasted coffees are used.
8
Thank you for purchasing this product! If you have any questions about
the product, such as missing parts, damaged products, product
assembling, and operation, please contact us via Amazon Message or
customer service number: 213-4467172 or 661-4358826
IMPORTANT
Please call our customer service department for any consulting:
213-4467172
661-4358826
(8:30am - 5:30pm P.S.T.)
DATED PROOF OF PURCHASE IS REQUIRED FOR WARRANTY SERVICE.
AVIS
Veuillez appeler le service à la clientèle pour toutes questions au:
213-4467172
661-4358826
(8:30am - 5:30pm P.S.T.)
PREUVE D’ACHAT ORIGINALE REQUISE POUR SERVICE DE GARANTIE.
IMPORTANTE
Sólo hay que llamar nuestro departamento de servicio
al cliente en caso de tener preguntas o inquietudes:
213-4467172
661-4358826
(8:30am - 5:30pm P.S.T.)
SE REQUIERE PRUEBA DE COMPRA CON FECHA PARA SERVICIO BAJO
GARANTÍA.
Phone: 213-4467172 or 661-4358826

Mesures de protection importantes
Lors de l’utilisation d’appareils électriques. Les précautions
de sécurité de base devraient toujours
Être suivi, y compris ce qui suit:
1. Lire toutes les instructions.
2. Assurez-vous que votre tension de sortie correspond à la
tension indiquée sur
L’étiquette d’évaluation de la cafetière.
3. Pour se protéger contre le feu, la décharge électrique et la
blessure à la personne ne faites pas
Plongez le cordon, le bouchon, ou dans l’eau ou tout autre
liquide.
4. Une surveillance étroite est nécessaire lorsque tout
appareil est utilisé par ou à proximité
Les enfants.
5. Débranchez de la prise lorsqu’il n’est pas utilisé et
avant le nettoyage. Permettre à
Refroidissement avant de mettre ou enlever des pièces, et avant
de nettoyer le
Appareil électroménager.
6. N’utilisez aucun appareil avec un cordon ou une prise
endommagé ou après le
L’appareil fonctionne mal ou a été endommagé de quelque manière
que ce soit. retour
Appareil à une installation de service autorisée pour examen,
réparation ou
Ajustement.
7. L’utilisation d’accessoires non recommandés par le
fabricant de l’appareil de chauffage, de chauffage, de
chauffage, etc., peut entraîner un incendie, une décharge
électrique ou des blessures.
8. Ne pas utiliser à l’extérieur.
9. Ne laissez pas le cordon accrocher sur le bord de la table
ou du comptoir, ou touchez la surface chaude.
10. Ne pas placer sur ou à proximité d’un brûleur à gaz ou
électrique chaud, ou dans un chauffage
Four.
11. N’utilisez pas l’appareil pour un usage autre que prévu.
12. Ne nettoyez pas le récipient avec des nettoyants, des
tampons en laine d’acier, ou tout autre matériau abra.
13. Pour déconnecter, tournez n’importe quel contrôle à "OFF",
retirez la prise de la prise murale.
Tenez toujours la prise. Mais ne tirez jamais la corde.
14. L’ébouillante peut se produire si le couvercle est enlevé
pendant les cycles de brassage.
Attention à ne pas se brûler par la vapeur.
15. Certaines parties de l’appareil sont chaudes quand
actionné, ainsi ne touchez pas avec
Main. N’utilisez que des poignées ou des boutons.
16. Ne jamais laisser la carafe vide sur la plaque chauffante
sinon le
La carafe est susceptible de craquer.
17. Ne jamais utiliser l’appareil si la carafe montre des
signes de fissures ou
Carafe ayant une poignée lâche ou affaiblie. N’utilisez la
carafe qu’avec cette
Appareil électroménager. A utiliser avec précaution car la
carafe est très fragile.
18. Cet appareil n’est pas destiné à être utilisé par des
personnes (y compris des enfants)
Avec des capacités physiques, sensorielles ou mentales réduites,
ou un manque d’expérience et de connaissances, sauf s’ils ont
reçu une surveillance ou des instructions concernant l’
utilisation des appareils par une personne responsable de leur
La sécurité