EN
Owner's manual
THANK YOU FOR BUYING A HOTPOINT-ARISTON
PRODUCT
In order to receive a more complete assistance, please
register your product on www . register10 . eu
PLEASE SCAN THE QR CODE ON
YOUR APPLIANCE IN ORDER TO
REACH MORE INFORMATION
Before using the appliance carefully read the Safety
Instruction.
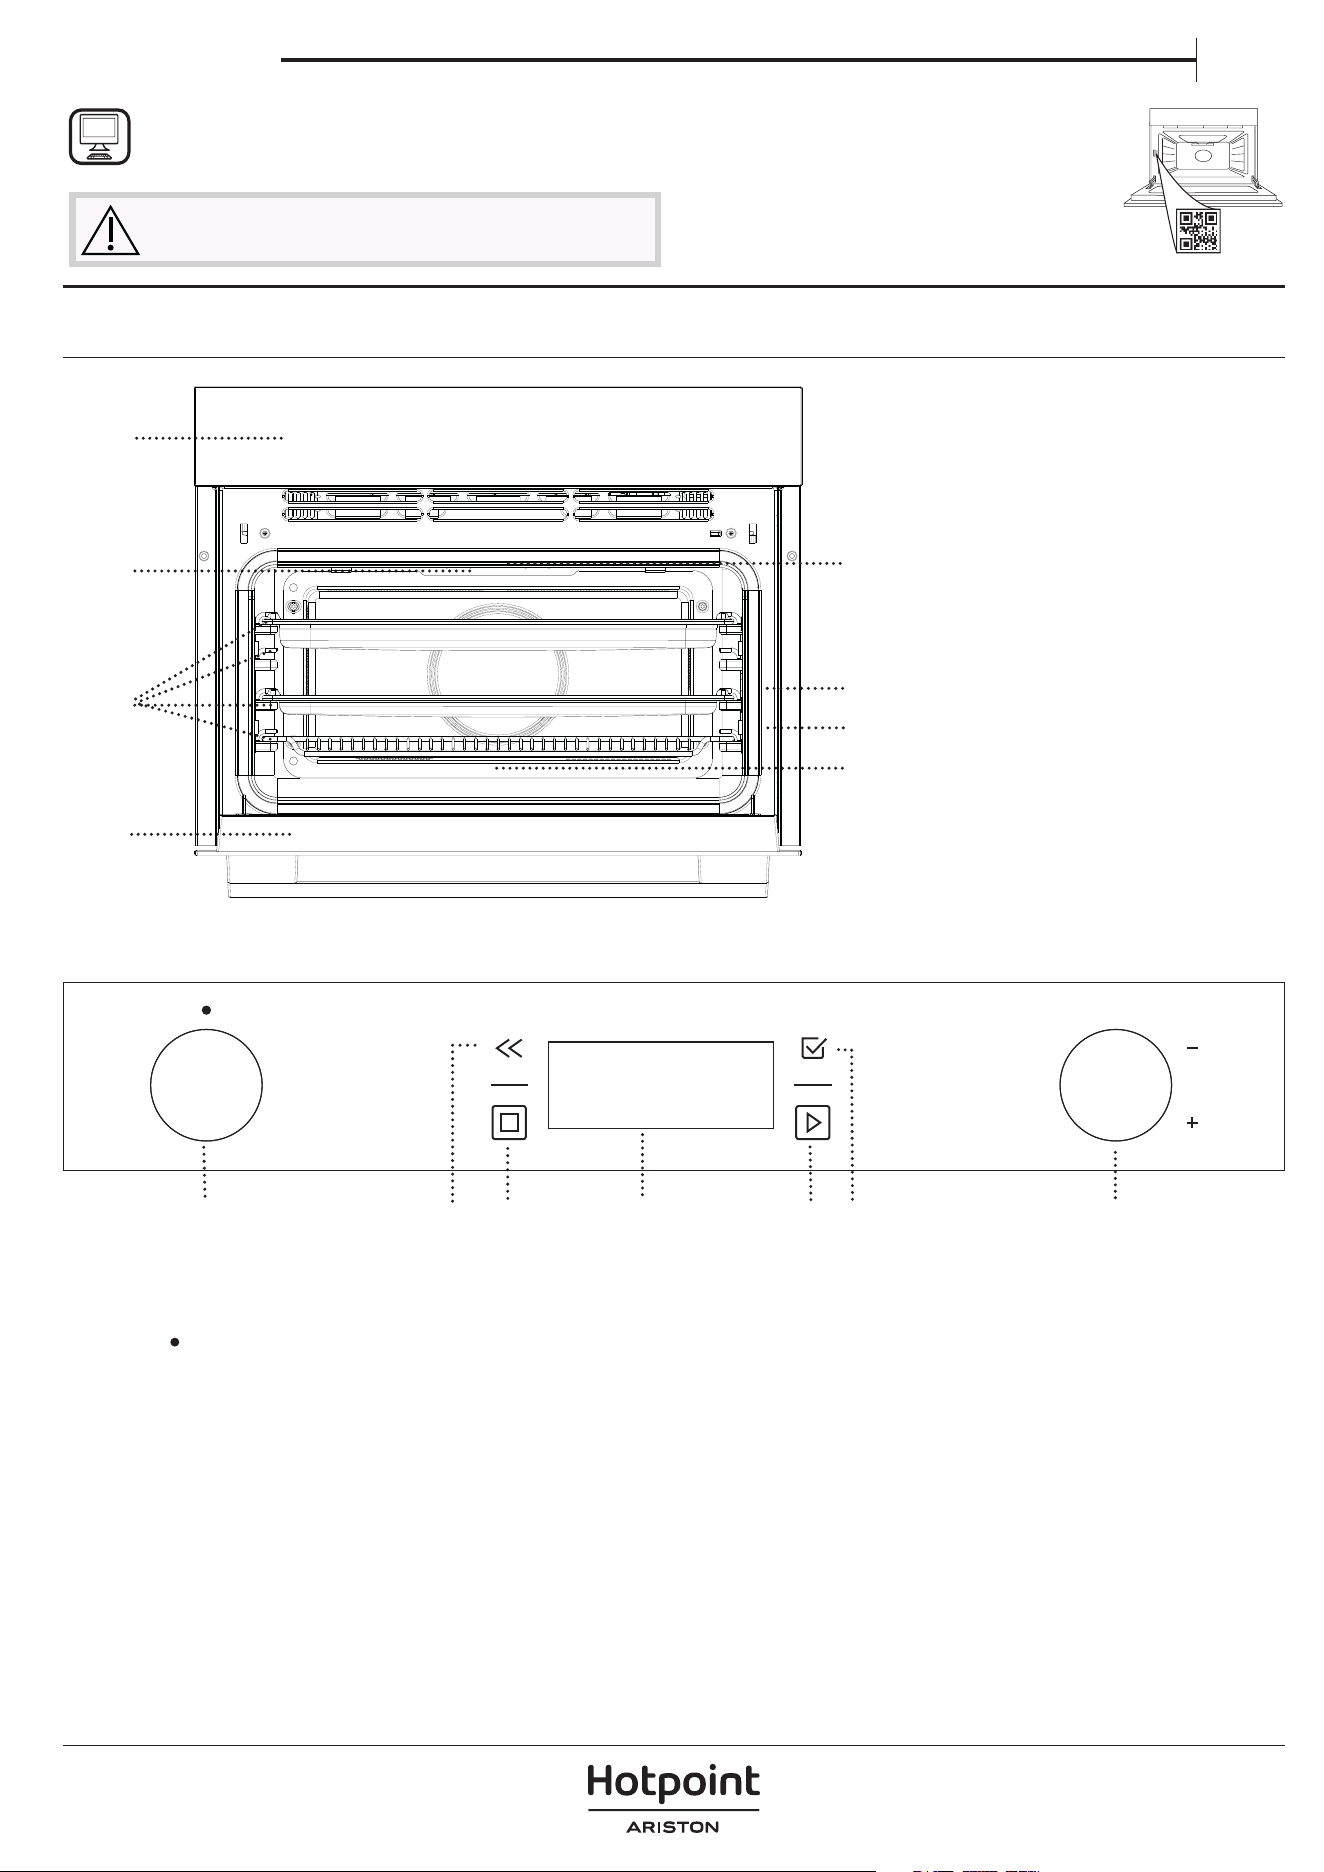
PRODUCT DESCRIPTION
1. Control panel
2. Ladder racks
(the level is indicated on the front
of the oven)
3. Door
4. Upper heating element/grill
5. Lamp
6. Meat probe insert point
(if present)
7. Identification plate
(do not remove)
8. Lower heating element
(not visible)
CONTROL PANEL DESCRIPTION
1
2
3
4
6
5 7
1. SELECTION KNOB
For switching the oven on by
selecting a function. Turn to the
position
to switch the oven off.
2. BACK
For returning to the previous
screen.
3. STOP
To pause a cooking cycle.
4. DISPLAY
5. START
For starting a function using the
specified or basic settings.
6. CONFIRM
For confirming a selected function
or a set value.
7. KNOB
1
4
7
8
5
2
3
6

ACCESSORIES
Before purchasing other accessories that are available
on the market, make sure that they are heat-resistant
and suitable for steaming.
Make sure that there is a gap of at least 30 mm
between the top of any container and the walls of the
cooking compartment in order to allow steam to ow
suciently.
Accessories during microwave function may raise in
temperature. It is recommended to use protection to
handle accessories at the end of the cycle.
WIRE SHELF BAKING TRAY CRISP PLATE
HANDLE FOR CRISP
PLATE
The wire shelf is suitable
for all cooking modes, also
in Microwave cooking.
When using microwaves
place the wire shelf always
on level 1 (the lower one).
You can place food directly
on the wire shelf or use it
to support baking trays
and tins or other oven-
ware resistant to heat and
microwaves.
The baking tray is suitable
for all cooking modes
except for “Microwave”
functions. Can be used
to cook all kind of foods
without container. Use it to
collects the cooking juices,
placing it below the wire
shelf.
Only for use with the
designated functions.
The Crisp plate must always
be placed in the center of
the wire shelf and can be
pre-heated when empty,
using the special function
for this purpose only.
Place the food directly on
the Crisp plate. Place the
silicone feet between the
bars of the wire shelf for
added stability.
Useful for removing the
hot Crisp plate from the
oven.
The number of accessories may vary depending on which model is purchased.
*Other accessories can be purchased separately from the After-sales Service.
INSERTING THE WIRE SHELF AND OTHER
ACCESSORIES
Insert the wire shelf onto the level you require by
holding it tilted slightly upwards and resting the
raised rear side (pointing upwards) down first.
Then slide it horizontally along the runners as far as
possible.
Other accessories, like the baking tray, are to be
inserted horizontally, letting them slide on the
runners.
Push the accessory all the way in, making sure that it
does not touch the appliance door.
REMOVING AND REFITTING THE LADDER RACKS
There are two ladder racks on both sides of the oven
cavity, anchored on two button-shaped supports. The
ladder racks are removable to make cleaning more
convenient.
1. To remove the ladder racks, firmly grip the
external part of the guide, and pull it upwards to
extract it from the frontal support while rotating on
the rear support, then slide out the whole part from
the cavity.
2. To reposition the ladder racks, slide the back part
onto the rear support. Then, once anchored, push the
assy down until the ladder rack is inserted into the
frontal support.
FUNCTIONS
MICROWAVE
Use microwave function only with food or beverages
inside to preserve the correct functionality of the
product.
Required accessories: wire shelf, microwave-safe and
heatproof container.
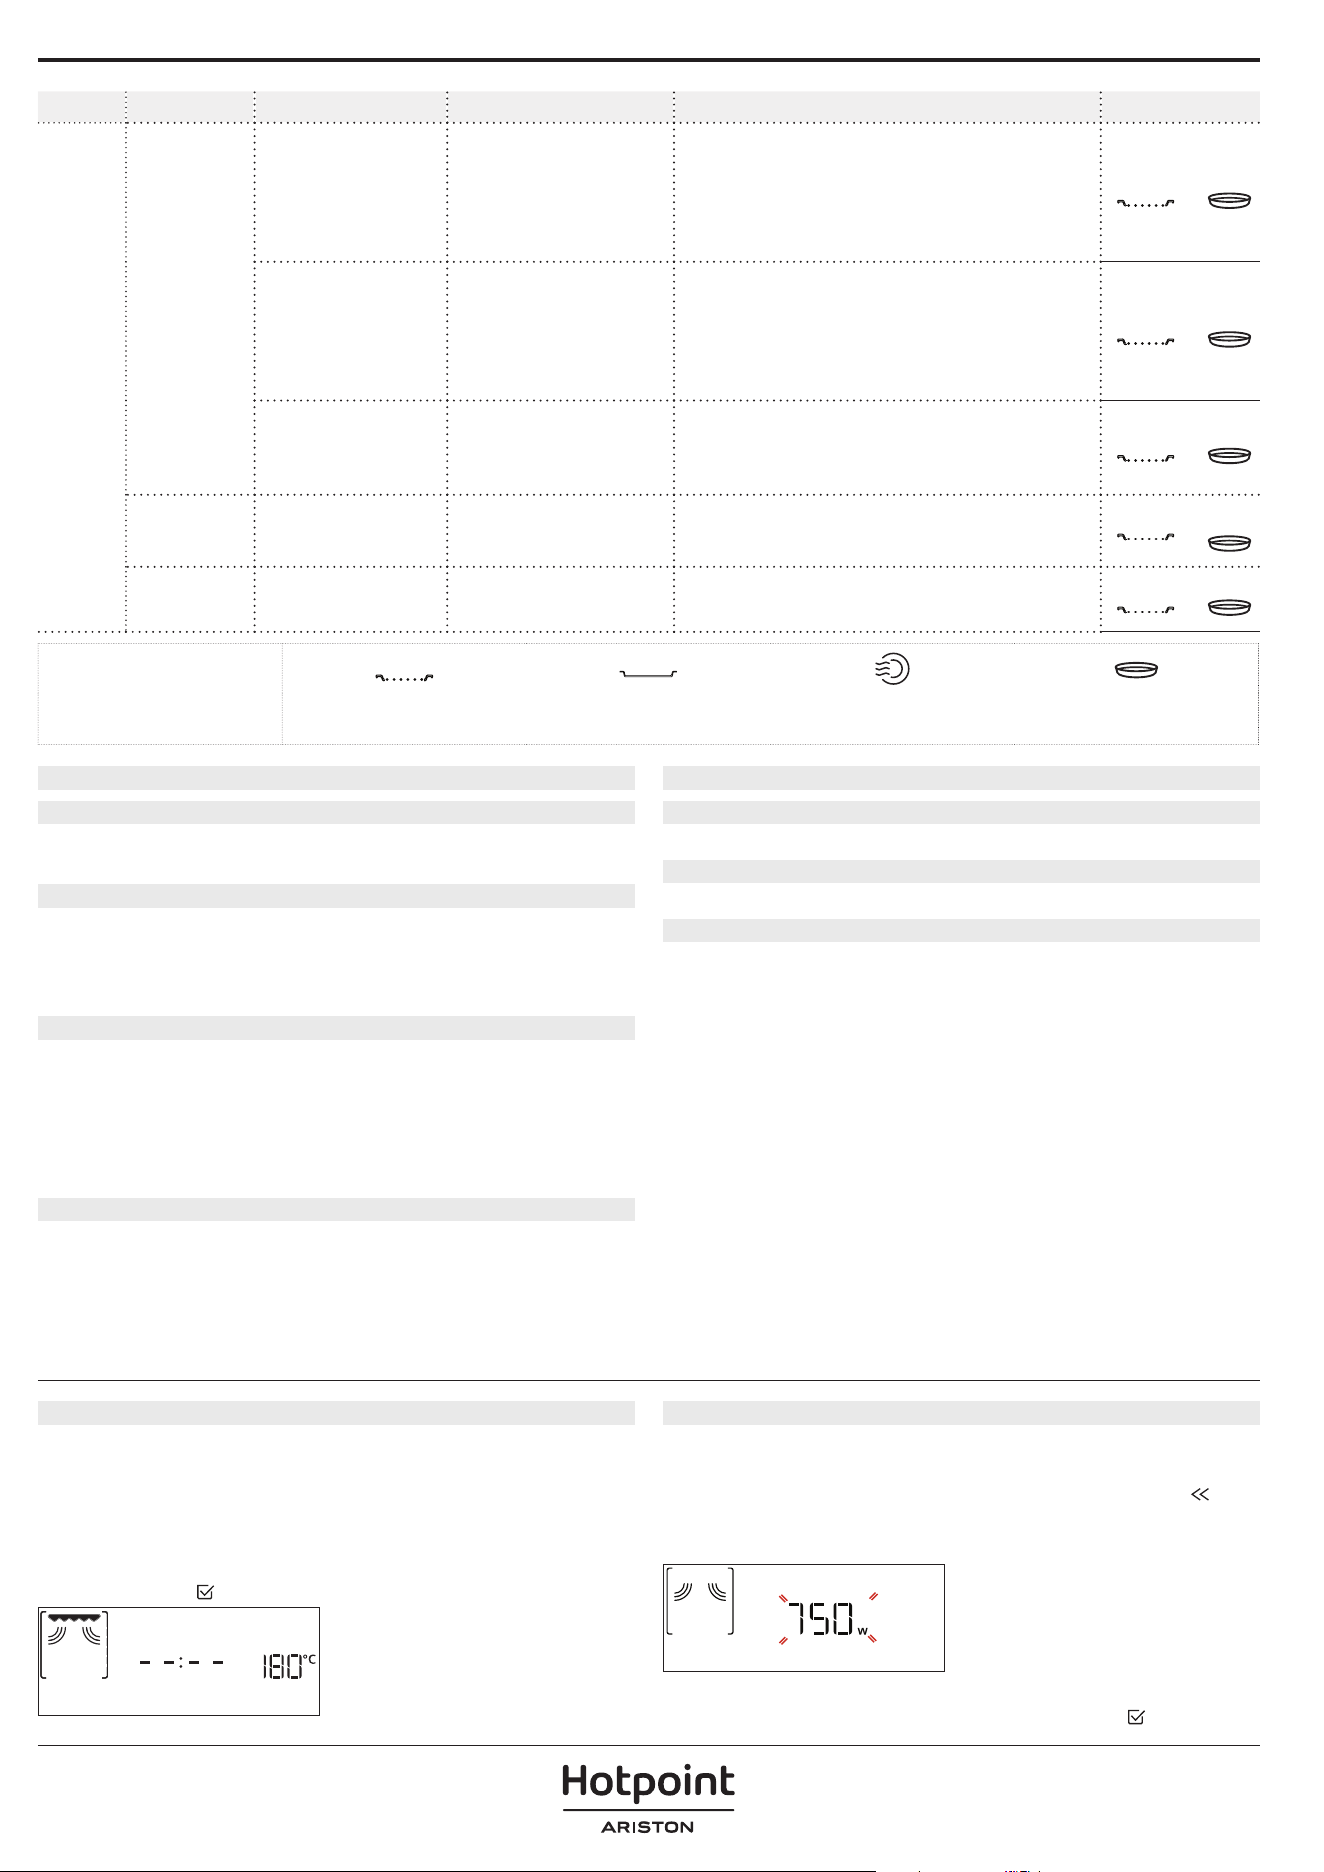
POWER (W) RECOMMENED FOR
950
Quickly reheating drinks or other foods with a high
water content. If the food contains egg or cream choose
a lower power.
750 Cooking vegetables.
600 Cooking meat, sh and dishes that cannot be stirred.
500
Cooking meaty sauces, or sauces containing cheese or
egg. Finishing o meat pies or pasta bakes.
350 Slow, gently cooking. Perfect for melting butter or chocolate.
160 Defrosting frozen foods or softening butter and cheese.
90 Softening ice cream.
ACTION FOOD POWER (W) DURATION (min)
Reheat 2 cups 950 1 - 2
Cook Sponge cake 750 5 - 6
Cook Egg custard 500 10 - 12
Cook Meat loaf 600 15 - 25
CRISP
For perfectly browning a dish, both on the top and
bottom of the food. This function must only be used
with the special Crisp plate.
Required accessories: wire shelf at level 1, Crisp plate, handle
for the Crisp plate
GRILL
For browning, grilling and gratins. We recommend
turning the food during cooking.
Recommended accessories: wire shelf
FOOD GRILL LEVEL DURATION (min)
Toast Hight 5 - 6
GRILL + MW
For quickly cooking and gratinating dishes, combining
the microwave and grill functions.
Required accessories: wire shelf at level 1, microwave-safe
and heatproof container.
CONVENTIONAL
For perfectly cooking and browning both on the top
and bottom any kind of dish on one shelf only. To
achieve best results this function have the preheating
phase: wait the end of preheat to insert the food.
Required accessories: baking tray or wire shelf and heatproof
container.
FOOD TEMP. (°C) DURATION (min)
Cupcake / Smallcakes 160 20 - 25
Cookies 165 15 - 20
CONVENTIONAL + MW
For preparing baked dishes more quickly by
combining the conventional oven and the microwave.
Required accessories: wire shelf at level 1, microwave-safe
and heatproof container.
FIRST TIME USE
1. SELECT THE LANGUAGE
You will need to set the language and the time
when you switch on the appliance for the first time:
“English” will show on the display.
English
Turn the adjustment knob to scroll through the list of
available languages and select the one you require.
Press
to confirm your selection.
Please note: The language can subsequently be changed by
selecting “LANGUAGE” in “SETTINGS” menu.
2. SET THE TIME
After selecting the language, you will need to set the
current time: The two digits for the hour will flash on
the display.
CLOCK
Turn the adjustment knob to set the current hour and
press
: The two digits for the minutes will flash
on the display. Turn the adjustment knob to set the
minutes and press
to confirm.
Please note: You may need to set the time again following
lengthy power outages. Select “CLOCK” in “SETTINGS” menu.
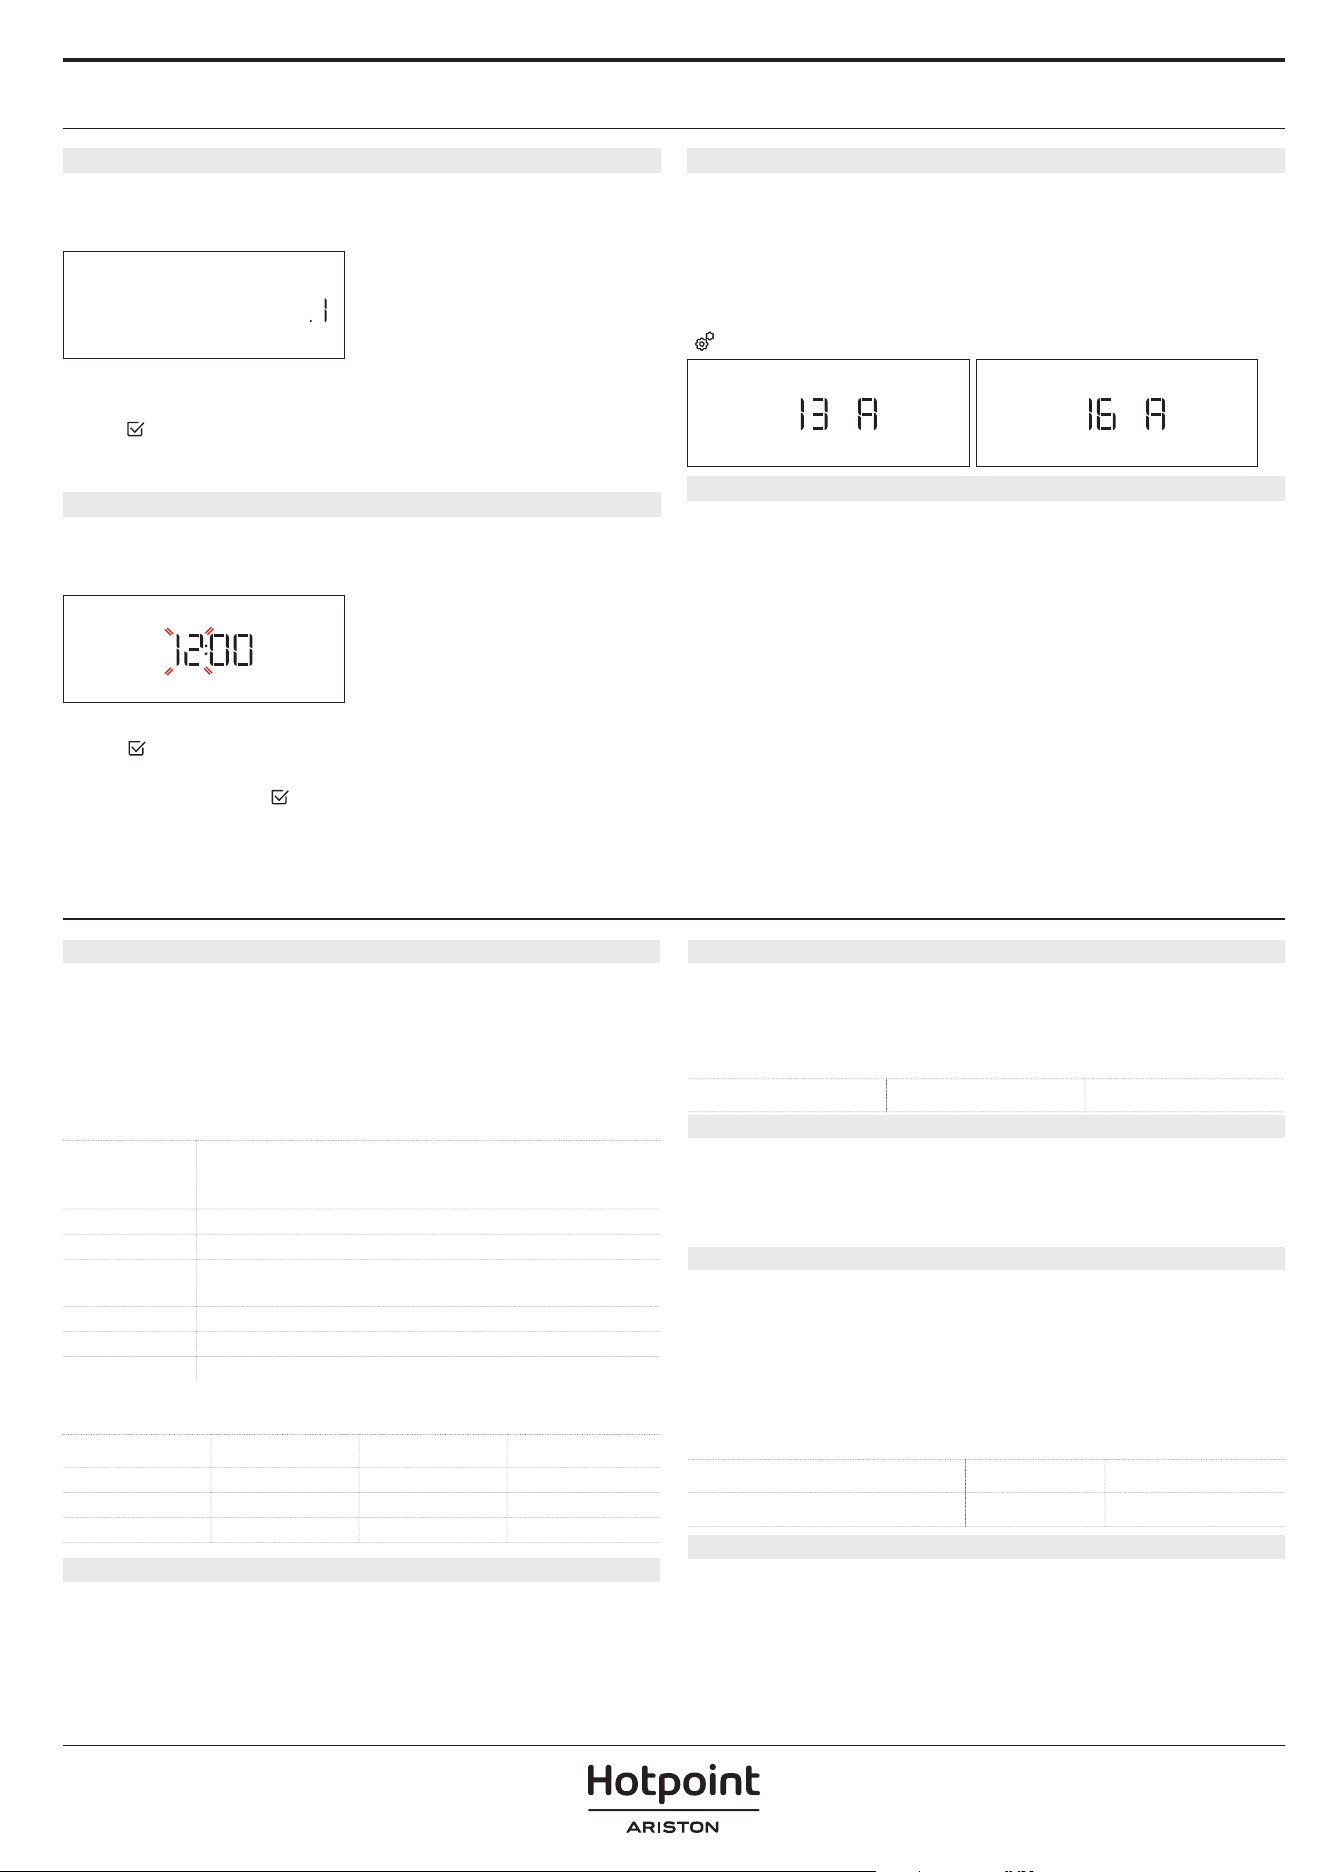
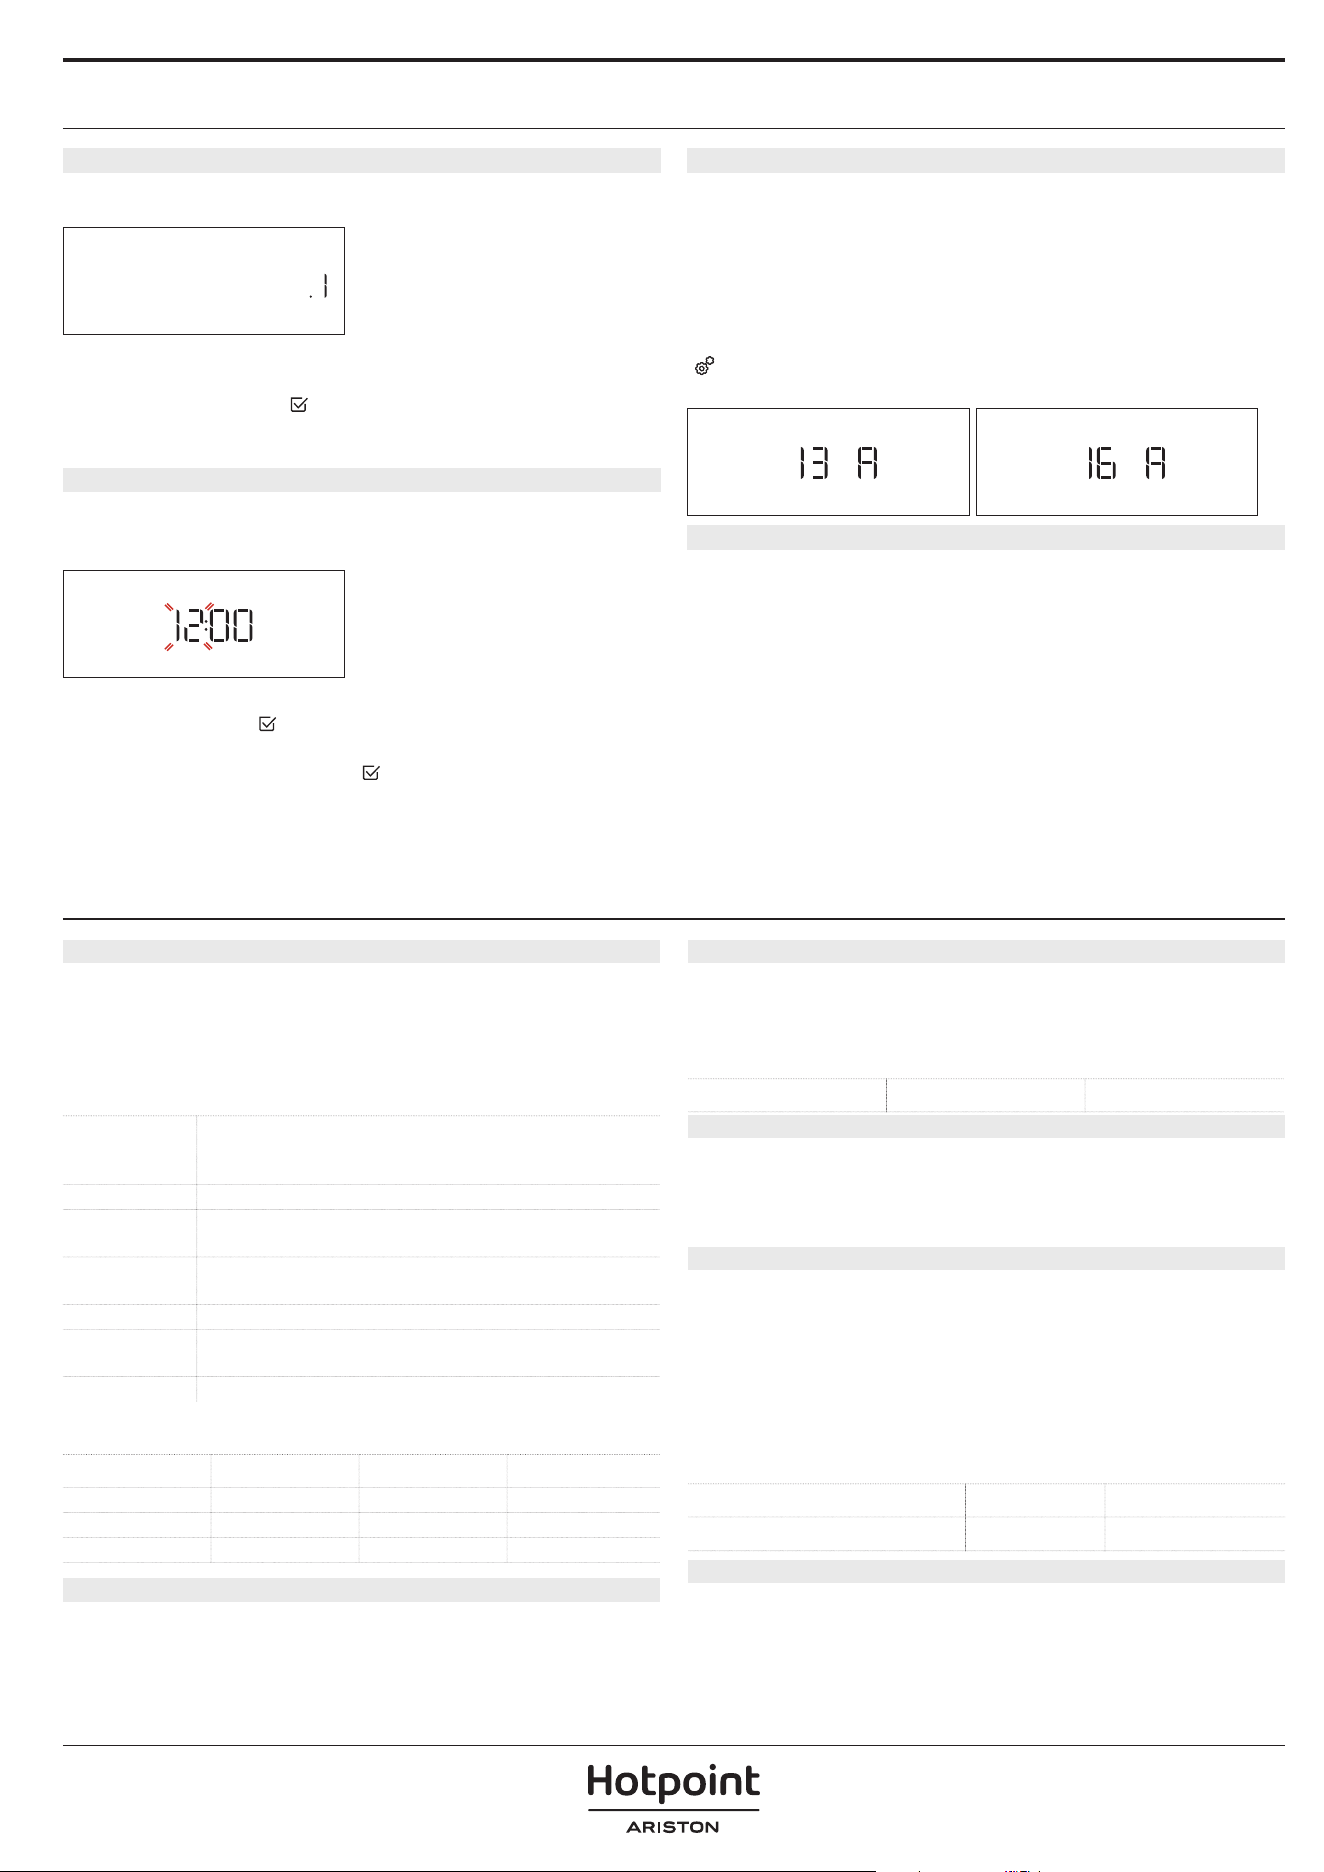
3. SET POWER CONSUMPTION
The oven is programmed to consume a level of
electrical power that is compatible with a domestic
network that has a rating of more than 3 kW (16 A): If
your household uses a lower power, you will need to
decrease this value (13 A). Select POWER in SETTINGS
menu avialable by selecting "SETTINGS" with left knob
and with right knob desired power setting.
1.Low
2.High
4. HEAT THE OVEN
A new oven may release odours that have been left
behind during manufacturing: this is completely
normal. Before starting to cook food, we therefore
recommend heating the oven with it empty in
order to remove any possible odours. Remove any
protective cardboard or transparent film from the
oven and remove any accessories from inside it.
Heat the oven to 200 °C for around one hour, ideally
using the “Fast preheat” function. Odors and smoke
are normal when the oven is used the first few times,
or when it is heavily soiled. Follow the instructions for
setting the function correctly.
Please note: It is advisable to air the room after using the
appliance for the rst time.

MY MENU FUNCTIONS
With the MY MENU Functions, simply select the type
and weight or the quantity of the food items to obtain
the best results.The oven will automatically calculate
the optimum settings and continue to change them
as cooking progresses. To use at best this function,
follow the indications on the relative cooking table.
Due to food variability, the cooking duration is set on
an average grade. We always recommend to check
the internal doneness of food and in case prolong
the cooking time to achieve proper doneness. Some
automatic cycles give the possibility of previously
setting a cooking level lower or higher than the default
(see the Doneness paragraph in the Daily Use section).
MY MENU DEFROST
For quickly defrosting various different types of food.
Always place the food in a container directly on the
wire shelf for best results, except for Crisp Bread
Defrost. At the end let the food stand for 5 minutes.
CRISP BREAD DEFROST
This exclusive function allows you to defrost
frozen bread. Combining both Defrost and Crisp
technologies, your bread will taste and feel as if
it were freshly baked. Use this function to quickly
defrost and heat frozen rolls, baguettes & croissants.
The Crisp Plate must be used in combination with this
function, directly placed on wire shelf.
FOOD WEIGHT
Timed Defrost -
Meat 100 g - 2.0 kg
Poultry 100 g - 3.0 kg
Fish 100 g - 2.0 kg
Crisp Bread
Defrost
50 - 800 g
MY MENU REHEAT
For reheating ready-made food that is either frozen
or at room temperature. The oven automatically
calculates the settings required to achieve the best
results in the shortest amount of time. Place food on
a microwave- safe and heatproof dinner plate or dish
directly on wire shelf at level 1.
Food
Weight/
portions/
pieces
Note
Plated Meal 250 - 800 g
Take out from packaging being careful to
remove any aluminium foil. At the end of
reheating process 1-2 minutes standing
time always improves the result.
Lasagna
[frozen]
400 g - 1.5 kg
Take out from packaging being careful to
remove any aluminium foil.
Soup 100 - 800 g Heat uncovered in a single container.
Water 100 - 500 g Heat uncovered in a single container.
MY MENU MELT & SOFT
For melting and softening food . The oven
automatically calculates the settings required to
achieve the best results in the shortest amount of
time. Place food on a microwave-safe and heatproof
container directly on the wire shelf at level 1.
Food
Weight/
portions/
pieces
Note
Butter Soften 100 - 500 g
Place the butter on a container directly on
the wire shelf for best results.
Ice Cream
Soften
100 - 500 g
If you put the ice cream container directly
in the oven, be sure that the container is
microwave safe.
Chocolate
Melting
100 - 500 g
Cut the chocolate in pieces for best results.
At the end stir the chocolate to complete
the melt process.
Cheese
Melting
100 - 500 g
Cut the cheese in pieces for best results. At
the end stir the cheese to complete the
melt process.
MY MENU COOK TABLE
For cooking several kind of dishes and foods and achieving optimal results in the easiest and quickest way. To
get the best from this function, follow the indications on the relative cooking table.
Menu Category Food Weight/portions/pieces Note Accessory
BAKED
PIZZA &
BREAD
Sandwich Loaf 400 g - 1 kg
Prepare dough according to your favorite recipe for
a light bread. Form into a loaf container before rise.
Use the oven's dedicated rise function.
1
+
Pizza 400 g - 1.2 kg
Prepare pizza dough according to your favorite
recipe. Leave it to rise using the oven's dedicated
function. Roll out the dough into a lightly greased
baking tray. Add topping as you prefer.
2
Pizza [frozen] 250 - 700 g
Take out from packaging being careful to remove
any aluminium foil.
1
+
CAKES &
PASTRIES
Muns 1 batch
Prepare a batter for 16-18 pieces according to your
favorite recipe and ll in paper moulds. Distribute
evenly on the baking tray.
2
Cookies 1 batch
Make a batch of 500g our, 200g salted butter, 200g
sugar, 2 egg. Flavor with fruit essence. Let cool
down. Stretch evenly the dough and shape as you
prefer. Lay the cookies on a baking tray.
2
Brownies 1 batch
Prepare according to your favorite recipe. Spread
batter on the baking pan covered with baking
paper.
1
+
EGGS &
SNACKS
Popcorn 90 - 100 g
Always place the bag directly on the wire shelf. Pop
only one bag at a time.
1
Scrambled Eggs 2 - 10 pieces
Prepare according to your favorite recipe into a
single container.
1
+
ROASTED & GRATIN
MEAT
Roast Beef 800 g - 1.7 kg
Brush with oil and rub with salt and pepper. Season
with garlic and herbs as you prefer. At the end of
cooking let rest for at least 15 minutes before
carving.
1
+
Roast Pork 800 g - 2.0 kg
Brush with oil and rub with salt and pepper. Season
with garlic and herbs as you prefer. At the end of
cooking let rest for at least 15 minutes before
carving.
1
+
Roast Chicken 800 g - 2.5 kg
Brush with oil and season as you prefer. Rub with
salt and pepper. Insert into the oven with the breast
side up.
1
+
FISH
Roasted Whole Fish 400 g - 1.5 kg Brush with oil and season as you prefer.
1
+
Fish Steak Roasted 200 - 800 g Brush with oil and season as you prefer.
1
+
VEGETABLES
Roasted Potatoes 300 g - 1.0 kg
Cut in pieces, season with oil, salt and avor with
herbs. Distribute evenly in the crisp plate. To get
perfect results, during cooking you will be asked to
stir food.
1
+
Stued Vegetables 600 g - 2.0 kg
Scoop out the vegetable and ll with a mixture of
the vegetable esh itself, minced meat and
shredded cheese. Season with garlic, salt and avor
with herbs as you prefer.
1
+
Potatoes Gratin 400 g - 1.5 kg
Slice and place into a large container. Season with
salt, pepper and pour over cream. Sprinkle cheese
on top.
1
+
ACCESSORIES
Wire shelf
Drip tray /
Baking tray
Heath and MW-proof container
Crisp
plate
Menu Category Food Weight/portions/pieces Note Accessory
FRIED
MEAT
Burger Patties 100 - 500 g
Lightly grease the crisp plate before preheating.The
crisp plate needs to be preheated before inserting
the food. The oven will notify you when it's time to
insert the food. To get perfect results, during cooking
you will be asked to turn food.
1
+
Bacon 50 - 400 g
The crisp plate needs to be preheated before
inserting the food. The oven will notify you when it's
time to insert the food. Distribute evenly in the crisp
plate after preheat. To get perfect results, during
cooking you will be asked to turn food.
1
+
Sausages & Wurstel 200 g - 1.0 kg
Distribute evenly on the crisp plate. Pierce the
sausages with a fork to prevent bursting. To get
perfect results, during cooking you will be asked to
turn food.
1
+
FISH Fish Fingers [frozen] 200 - 600 g
Distribute evenly in the crisp plate.To get perfect
results, during cooking you will be asked to turn
food.
1
+
VEGETABLES Potatoes Fried [frozen] 200 - 600 g Distribute evenly in the crisp plate.
1
+
ACCESSORIES
Wire shelf
Drip tray /
Baking tray
Heath and MW-proof container
Crisp
plate
SPECIAL FUNCTIONS
KEEP WARM
For keeping just-cooked food hot and crisp, including
meat, fried foods or cakes.
RISING
For optimal proving of sweet or savoury dough. To
maintain the quality of proving, do not activate the
function if the oven is still hot following a cooking cycle.
Required accessories: wire shelf and heatproof container.
ECO CYCLE
For cooking stuffed roasting joints and fillets of meat
on a single shelf. When this ECO function is in use,
the light will remain switched off during cooking.
To use the ECO cycle and therefore optimise power
consumption, the oven door should not be opened
until the food is completely cooked.
Required accessories: wire shelf with pan or baking tray.
DIAMOND CLEAN
The action of the steam released during this special
low-temperature cleaning cycle allows dirt and food
residues to be removed with ease. Pour 200 ml of
drinking water on the bottom of the oven and only
activate the function when the oven is cold.
OTHER FUNCTIONS
MINUTEMINDER
For keeping time without activating a function.
FAVORITES
For retrieving the list of 20 favorite functions.
SETTINGS
For adjusting the oven settings.
When “ECO” mode is active the brightness of the display will
be reduced to save energy and lamp switches o after 1
minute.
When “DEMO” is “On” all commands are active and menus
available but the oven doesn’t heat up. To deactivate this
mode, access “DEMO” from “SETTINGS” menu and select “O”.
By selecting “FACTORY RESET”, the product switches o and
then it returns to rst switch on. All settings will be deleted.
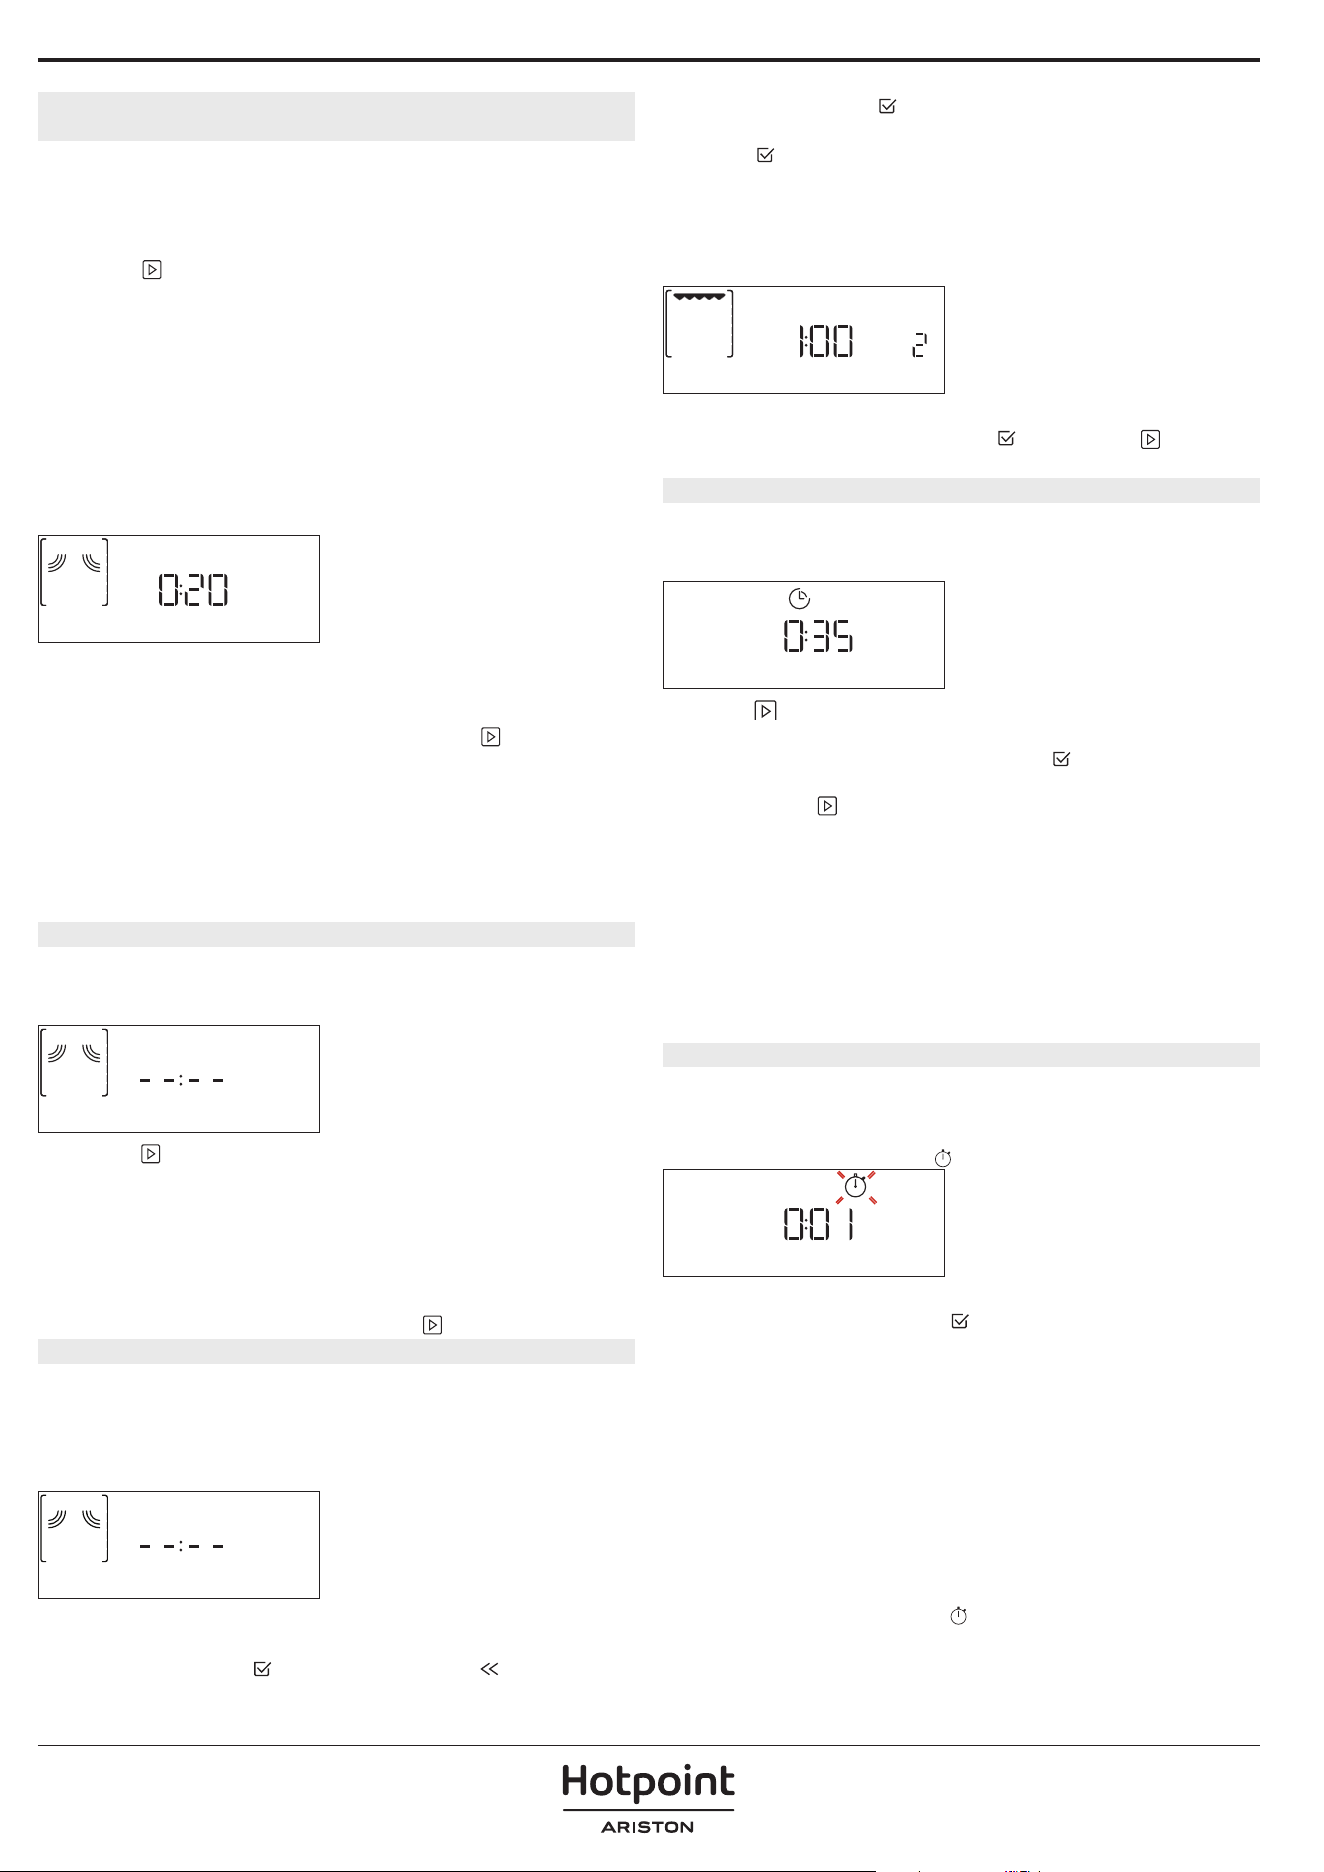
DAILY USE
1. SELECT A FUNCTION
Turn the selection knob to switch on the oven and
show the function you require on the display.
To select an item from a menu (the display will show
the first available item), turn the adjustment knob
until the item you require is shown.
The display will show the name of the function and its
basic settings: Press
to confirm.
GRILL+MW
2. SET THE FUNCTION
After having selected the function you require, you
can change its settings. The display will show the
settings that can be changed in sequence. Pressing
allows you to change the previous setting again.
POWER / TEMPERATURE / GRILL LEVEL
MW POWER
When the value flashes on the display, turn the
adjustment knob to change it, then press
to
confirm and continue with the settings that follow (if
possible).
In the same way, it is possible to set the grill level:
There are three defined power levels for grilling: 3
(high), 2 (mid), 1 (low).
DURATION
DURATION
When the icon flashes on the display, turn the
adjustment knob to set the cooking time you require
and then press
to confirm.
Please note: You can adjust the cooking time that has been
set during cooking by pressing : turn the adjustment knob
to amend it and then press to conrm.
In non-microwave functions you do not have to set
the cooking time if you want to manage cooking
manually (untimed): Press
or to confirm and
start the function. By selecting this mode, you cannot
program a delayed start.
END TIME (START DELAY)
Once you have set a cooking time you can delay
starting the function by programming its end time.
In microwave functions the end time is equal to the
duration.
The display shows the end time while the
icon
flashes.
END TIME
Turn the adjustment knob to set the time you want
cooking to end, then press
to confirm and activate
the function. Place the food in the oven and close the
door: The function will start automatically after the
period of time that has been calculated in order for
cooking to finish at the time you have set.
Please note: Programming a delayed cooking start time will
disable the oven preheating phase: The oven will reach the
temperature your require gradually, meaning that cooking
times will be slightly longer than expected.
During the waiting time, you can turn the adjustment
knob to amend the programmed end time or press
to change other settings.
MY MENU
These functions automatically select the best cooking
mode, power, temperature and duration for all the
dishes available.
2. MEAT
When required, simply indicate the characteristic of
food to obtain an optimal result.
WEIGHT / PORTIONS
KILOGRAMS
To set the function correctly, follow the indications on
the display, when prompted, and turn the adjustment
knob to set the required value then press
to
confirm.
Some MY MENU functions do not require quantity
inputs: thanks to a smart humidity sensor, the oven
can automatically adjust the cooking time to the food
amount.
DONENESS
In MY MENU functions it is possible to adjust the
doneness level.
DONENESS
When prompted, turn the adjustment knob to select
the desired level between Light/Low (-1) and Extra/
High (+1). Press
or to confirm and start the
function.
3. ACTIVATE THE FUNCTION
At any time, if the default values are those desired or
once you have applied the settings you require, press
to activate the function.
Every time the
is pressed again, the cooking
time will be increased by a further 30 seconds (5
minutes steps in functions which do not activate the
microwave).
During the delay phase, by pressing
the oven will
start immediately the function.
Please note: At any time you can stop the function that has
been activated by pressing .
If the oven is hot and the function requires a specific
maximum temperature, a message will be shown
on the display. Press
to return to previous screen
and select a different function or wait for a complete
cooling.
JET START
When the oven is switched off, press to activate
cooking with the microwave function set at full power
(900 W) for 30 seconds.
4. PREHEATING
Some functions require a preheating phase:
Once the function has started, the display indicates
that the preheating phase has been activated.
PREHEATING
Once this phase has finished, an audible signal will
sound and the display will indicate that the oven has
reached the set temperature, requiring food to be
added.
At this point, open the door, place the food in the
oven, close the door and start cooking by pressing
or .
Please note: Placing the food in the oven before preheating
has nished may have an adverse eect on the nal cooking
result.
Opening the door during the preheating phase will
stop pause it.
The cooking time does not include a preheating
phase. You can always change the temperature you
want the oven to reach by turning the adjustment
knob.
5. PAUSE COOKING / ADD, TURN OR CHECK ON FOOD
PAUSE
By opening the door, the cooking will be temporarily
paused through deactivating heating elements.
To resume the cooking, close the door and press
.
Please note: During MY MENU functions open the
door only when prompted.
ADD, TURN OR STIR FOOD
Some MY MENU Cook recipes will require the food to
be added after the preheating phase or ingredients
to be added to complete cooking. In the same way,
there will be prompts to turn or stir the food during
cooking.
TURN FOOD
An audible signal will sound and the display shows
the action to be done.
Open the door, do the action prompted by the
display and close the door, then press
to continue
cooking.
Please note: When turning or stirring is needed, after 2
minutes, even if no action is performed, the oven will resume
the cooking. The “ADD FOOD” phase last 2 minutes: if no
action is taken, the function will be ended.
6. END OF COOKING
An audible signal will sound and the display will
indicate that cooking is complete.
END
Press to continue cooking in manual mode
adding time in steps of 30 seconds (in microwave
functions) or 5 minutes (without microwave) or turn
the adjustment knob to extend the cooking time by
setting a new duration. In both cases, the cooking
parameters will be retained.
By pressing
the cooking starts again.
7. FAVORITES
To make the oven easier to use, it can save up to 20 of
your favorite functions.
Once cooking is complete the display will prompt you
to save the function in a number between 1 and 20
on your list of favorites.
ADD FAVORITE?
If you would like to save a function as a favorite and
store the current settings for future use, press
otherwise, to ignore the request press .
Once
has been pressed, turn the adjustment
knob to select the number position, then press
to
confirm.
Please note: If the memory is full or the number chosen
has already been taken, the oven will ask you to conrm
overwriting the previous function.
To call up the functions you have saved at a later time,
turn the selection knob on “FAVORITE”: The display
will show your list of favorite functions.
2. GRILL
Turn the adjustment knob to select the function,
confirm by pressing
, and then press to activate.
8. DIAMOND CLEAN FUNCTION
Turn the selection knob to Special Functions then
select “Diamond Clean” Function.
Diamond Clean
Press to activate the function: the display will
prompt you to carry out all actions needed to obtain
the best cleaning results: Follow the indications and
then press
when done. Once all the steps have
been completed, when required, press
to activate
the cleaning cycle.
Please note: It is recommended to do not open the oven
door during the cleaning cycle to avoid a loss of water vapor
that could get an adverse eect on the nal cleaning result.
An appropriate message will start flashing on the
display once the cycle has finished. Leave the oven to
cool and then wipe and dry the interior surfaces with
a cloth or sponge.
Once finished, remove the container, finish the
cleaning with the help of a smooth cloth and then dry
the oven cavity using a damp microfibre cloth.
9. MINUTEMINDER
When the oven is switched off, the display can be
used as a timer. To activate this function, make sure
that the oven is switched off and turn the adjustment
knob: The
icon will flash on the display.
MINUTEMINDER
Turn the adjustment knob to set the length of time
you require and then press
to activate the timer.
An audible signal will sound and the display will
indicate once the minuteminder has finished counting
down the selected time.
Please note: The minuteminder does not activate any of the
cooking cycles. Turn the adjustment knob to change the
time set on the timer.
Once the minuteminder has been activated, you can
also select and activate a function. Turn the selection
knob to select the function you require.
Once the function has started, the timer will continue
to count down independently without interfering
with the function itself.
During this phase, it isn’t possible to see the
minuteminder (only the
icon will be displayed), that
will continue counting down in background. To return
to the timer, wait for the function to complete or else
turn off the oven.
10. KEYLOCK
To lock the keypad, press and hold for at least five
seconds. Do this again to unlock the keypad.

KEYLOCK
Please note: This function can also be activated during
cooking. For safety reasons, the oven can be switched o at
any time.
ATTENTION!
• Observe these instructions when using the
microwave.
• If metal comes into contact with the cooking
compartment wall, sparks occur which can
damage the appliance or destroy the internal
glass of the door.
• Metal components, for example teaspoons
contained in glasses, must remain at a distance of
no less than 2 cm from the walls of the cooking
compartment and from the inside of the door.
Accessories placed directly on top of each other
generate sparks.
• Do not combine the grill with the dripping pan.
• Insert accessories only at their respective
heights. The universal drip tray or baking tray
are not suitable for microwave operation only.
Sparks could form and damage the cooking
compartment.
• Use the supplied grill as a support base.
The aluminum trays in the appliance can cause
sparks. The appliance is damaged due to the
formation of sparks.
• Do not use aluminum trays in the appliance.
Operating the appliance without food inside the
cooking compartment leads to an overload.
• Never start the microwave oven without first
placing the food in it. The only exception allowed
is that of a short test for dishes. When preparing
microwave popcorn at too high a power, the door
panel may crack due to overload.
• Never set the microwave power too high.
• Use a maximum of 600 watts.
• Always place the popcorn bag on a glass plate.

USEFUL TIPS
MICROWAVE COOKING TIPS
Microwaves only penetrate food to a certain depth, so
when cooking several items at the same time space
them out as much as possible to allow the maximum
surface area to be exposed to the microwaves.
Small pieces cook more quickly than large pieces: in
order to ensure uniform cooking, cut the food items
into pieces of equal size.
Most foods will continue to cook after microwave
has finished cooking it. Therefore, always allow for
standing time to complete the cooking.
Remove any twist ties from paper or plastic bags
before placing them in the oven for microwave
cooking.
Plastic film should be scored or perforated with a fork
in order to relieve the pressure and prevent bursting
due to the steam building up during the cooking
process.
LIQUIDS
Liquids may overheat beyond boiling point without
visibly bubbling. This could cause hot liquids to
suddenly boil over. To prevent this, avoid using
narrow-necked containers, stir the liquid before
placing the container in the microwave oven and
leave a teaspoon immersed in the container.
After heating, stir again before carefully removing the
container from the microwave oven.
FROZEN FOOD
For best results, we recommend defrosting directly on
the wire shelf. If needed, it is possible to use a light-
plastic container that is suitable for microwave.
Boiled foods, stews and meat-based sauces will
defrost better if stirred occasionally while defrosting.
Separate the food items once they begin to defrost:
the separated portions will defrost more quickly.
FOOD FOR INFANTS
When heating food or liquids in a baby food
container or a baby bottle, always stir and check the
temperature before serving. This will ensure that
the heat is evenly distributed and avoid the risk of
scalding or burns.
Ensure that the container lid or bottle teat are
removed before heating.
CAKES AND BREAD
For cakes and bread products we recommend using
the “Conventional” function.
Alternatively, to shorten the cooking times, select
“Conventional + MW”, with the microwave set to
a maximum power of 160 W in order to keep the
products soft and fragrant.
With the “Conventional” function use dark metal
cake tins and place them on the wire shelf supplied,
while with “Conventional + MW” use a microwave safe
container placed on wire shelf supplied.
MEAT AND FISH
To obtain perfect surface browning quickly while
keeping the inside of the meat or fish soft and
juicy, we recommend using functions combining
convection heating and microwave cooking.
In order to obtain the best possible cooking results,
set the microwave power level to the value of 160 W.

CLEANING AND MAINTENANCE
Make sure that the oven has cooled down before
carrying out any maintenance or cleaning.
Do not use steam cleaners.
Wear protective gloves.
Do not use wire wool, abrasive scourers or abrasive/
corrosive cleaning agents, as these could damage the
surfaces of the appliance.
The oven must be disconnected from the mains
before carrying out any kind of maintenance work.
EXTERIOR SURFACES
• Clean the surfaces with a damp microfibre cloth.
If they are very dirty, add a few drops of pH-neutral
detergent. Finish off with a dry cloth.
• Do not use corrosive or abrasive detergents. If
any of these products inadvertently comes into
contact with the surfaces of the appliance, clean
immediately with a damp microfibre cloth.
INTERIOR SURFACES
• After every use, leave the oven to cool and then
clean it, preferably while it is still warm, to remove
any deposits or stains caused by food residues To
dry any condensation that has formed as a result
of cooking foods with a high water content, let the
oven to cool completely and then wipe it with a
cloth or sponge.
• Activate the “Diamond Clean” function for
optimum cleaning of the internal surfaces.
• Clean the glass in the door with a suitable liquid
detergent.
ACCESSORIES
Soak the accessories in a washing-up liquid solution
after use, handling them with oven gloves if they
are still hot. Food residues can be removed using a
washing-up brush or a sponge.
The Crisp plate should be cleaned using water and
a mild detergent. For stubborn dirt, rub gently with
a cloth. Always leave the Crisp plate to cool down
before cleaning.
TROUBLESHOOTING
Problem Possible cause Solution
The oven is not
switching on.
Power cut.
Disconnection from the mains.
Check for the presence of mains electrical
power and whether the oven is connected
to the electricity supply.
Turn off the oven and restart it to see if the
fault persists.
The oven makes
noises, even when it is
switched off.
Cooling fan active.
Open the door or hold and wait until the
cooling process has finished.
The display shows the
letter “F” followed by a
number or a letter.
Software fault.
Contact the Call Center and state the
number following the letter “F”.
The oven does not
heat up.
When “DEMO” is “On” all commands
are active and menus available but the
oven doesn’t heat up.
DEMO appears on display every 60
seconds.
Access “DEMO” from “SETTINGS” and select
“Off ”.
Policies, standard documentation and additional product information can be found by:
• Using the QR code in your appliance
• Visiting our website docs . hotpoint . eu
• Alternatively, contact our After-sales Service (See phone number in the warranty booklet). When contacting our After-
sales Service, please state the codes provided on your product's identication plate.
400020014602

IT
Manuale d'uso
GRAZIE PER AVERE ACQUISTATO UN PRODOTTO
HOTPOINT‑ARISTON
Per ricevere un'assistenza più completa, registrare il
prodotto su www . register10 . eu
SCANSIONARE IL CODICE QR
SUL PROPRIO APPARECCHIO
PER OTTENERE MAGGIORI
INFORMAZIONI
Prima di utilizzare l'apparecchio leggere attentamente
le istruzioni di sicurezza.
DESCRIZIONE DEL PRODOTTO
1. Pannello comandi
2. Ripiani a scaletta
(il livello è indicato sulla parte
anteriore del forno)
3. Porta
4. Resistenza superiore / grill
5. Luce
6. Punto di inserimento della
sonda carne
(se in dotazione)
7. Targhetta matricola
(da non rimuovere)
8. Resistenza inferiore
(non visibile)
DESCRIZIONE DEL PANNELLO COMANDI
1
2
3
4
6
5 7
1. MANOPOLA DI SELEZIONE
Per accendere il forno
selezionando una funzione. Per
spegnere il forno, ruotare sulla
posizione
.
2. INDIETRO
Per tornare alla schermata
precedente.
3. STOP
Per sospendere il processo di
cottura.
4. DISPLAY
5. AVVIO
Per avviare una funzione
utilizzando le impostazioni
specificate o quelle di base.
6. CONFERMA
Per confermare la selezione di una
funzione o un valore impostato.
7. MANOPOLA
1
4
7
8
5
2
3
6
ACCESSORI
Prima di acquistare altri accessori disponibili sul
mercato, assicurarsi che siano resistenti al calore e
adatti alla cottura a vapore.
Assicurarsi che vi sia uno spazio di almeno 30
millimetri tra il bordo superiore di qualsiasi
contenitore e le pareti della cavità per consentire
suciente ausso di vapore.
Gli accessori durante la funzione microonde possono
subire un aumento di temperatura. Si raccomanda
di utilizzare una protezione per maneggiare gli
accessori alla ne del ciclo.
GRIGLIA TEGLIA PIATTO CRISP
IMPUGNATURA PER
PIATTO CRISP
La griglia metallica è
adatta a tutte le modalità
di cottura, anche a quella
a microonde. Quando
si utilizza il microonde,
posizionare la griglia
metallica sempre al
livello 1 (quello inferiore).
È possibile disporre gli
alimenti direttamente
sulla griglia oppure usarla
come sostegno per teglie,
stampi o altri recipienti di
cottura resistenti al calore
del forno e alle microonde.
La teglia è adatta a tutte
le modalità di cottura, ad
eccezione delle funzioni
"Microwave" (Microonde).
Può essere utilizzata per
cucinare tutti i tipi di
alimenti senza contenitore.
Utilizzarla per raccogliere
i succhi di cottura,
posizionandola sotto la
griglia metallica.
Da utilizzare solo con le
funzioni designate.
Il piatto Crisp deve essere
sempre appoggiato al
centro della griglia e può
essere preriscaldato a
vuoto, utilizzando solo la
speciale funzione dedicata.
Disporre gli alimenti
direttamente sul piatto
Crisp. Per una maggiore
stabilità, posizionare i
piedini in silicone tra le
barre della griglia metallica.
Utile per rimuovere il
piatto Crisp caldo dal
forno.
Il numero di accessori può variare a seconda del modello acquistato.
*È possibile acquistare separatamente altri accessori presso il Servizio Assistenza Tecnica.
INSERIRE LA GRIGLIA E GLI ALTRI ACCESSORI
Inserire la griglia tenendola leggermente inclinata
verso l'alto, appoggiando dapprima il lato posteriore
rialzato - orientato verso l'alto - sul livello desiderato.
In seguito, farla scivolare orizzontalmente sulle guide
fino a fine corsa.
Gli altri accessori, per esempio la teglia, vanno inseriti
orizzontalmente facendoli scivolare sulle guide.
Spingere l'accessorio fino in fondo, accertandosi che
non tocchi la porta dell'apparecchio.
SMONTAGGIO E RIMONTAGGIO DEI RIPIANI A SCALETTA
Su entrambi i lati della cavità del forno sono presenti
due guide a scaletta, ancorati a due supporti a forma
di bottone. Le guide a scaletta sono rimovibili per
rendere più comoda la pulizia.
1. Per rimuovere le guide a scaletta, afferrare
saldamente la parte esterna della guida e tirarla verso
l'alto per estrarla dal supporto frontale mentre si
ruota sul supporto posteriore, quindi sfilare l'intera
parte dalla cavità.
2. Per riposizionare le guide a scaletta, far scorrere la
parte posteriore sul supporto posteriore. Quindi, una
volta ancorato, spingere il gruppo verso il basso fino a
inserire le guide a scaletta nel supporto frontale.
FUNZIONI
MICROONDE
Utilizzare la funzione microonde solo con alimenti o bevande
all'interno, per preservare la corretta funzionalità del prodotto.
Accessori necessari: griglia metallica, contenitore adatto al
microonde e resistente al calore.
POTENZA (W) CONSIGLIATO PER
950
Riscaldamento rapido di bevande o altri alimenti ad alto
contenuto di acqua. Se l'alimento contiene uova o
panna, scegliere una potenza inferiore.
750 Cottura di verdure.
600
Cottura di carne, pesce e piatti che non possono essere
mescolati.
500
Cottura di sughi di carne, salse con formaggio o uova.
Finitura di sformati di carne o paste al forno..
350 Cotture lente e delicate. Per fondere burro o cioccolata.
160
Scongelare alimenti surgelati o ammorbidire burro e
formaggi.
90 Per ammorbidire i gelati.
AZIONE ALIMENTO POTENZA (W) DURATA (min)
Riscaldamento 2 tazze 950 1 - 2
Cottura Pan di spagna 750 5 - 6
Cottura Crema all'uovo 500 10 - 12
Cottura Polpettone 600 15 - 25
CRISP
Per ottenere una doratura perfetta sia sulla supercie
superiore che su quella inferiore del cibo. Questa funzione
deve essere usata solo con lo speciale piatto Crisp.
Accessori necessari: griglia metallica al livello 1, piatto Crisp,
maniglia per il piatto Crisp
GRILL
Per dorare, grigliare o gratinare le pietanze. Si
consiglia di girare gli alimenti durante la cottura.
Accessori consigliati: Griglia
ALIMENTO LIVELLO GRILL DURATA (min)
Pane tostato Alta 5 - 6
GRILL + MICROONDE
Per cuocere e gratinare rapidamente le pietanze
combinando le microonde con il grill.
Accessori necessari: griglia metallica al livello 1, contenitore
adatto al microonde e resistente al calore.
STATICO
Per cuocere e dorare perfettamente sia sopra sia
sotto qualsiasi tipo di pietanza su un solo ripiano. Per
ottenere risultati ottimali, questa funzione prevede
una fase di preriscaldamento: attendere la fine del
preriscaldamento per inserire gli alimenti.
Accessori necessari: teglia o griglia metallica e contenitore
resistente al calore.
ALIMENTO TEMP. (°C) DURATA (min)
Cupcake / Tortine 160 20 - 25
Biscotti 165 15 - 20
STATICO + MICROONDE
Permette di preparare le pietanze più velocemente
combinando la cottura statica con le microonde.
Accessori necessari: griglia metallica al livello 1, contenitore
adatto al microonde e resistente al calore.
PRIMO UTILIZZO
1. SELEZIONE DELLA LINGUA
Alla prima accensione, è necessario impostare lingua e
ora: Sul display compare "English".
Italiano
Ruotare la manopola di regolazione per scorrere la
lista delle lingue disponibili e selezionare quella
desiderata. Premere
per confermare la selezione.
Note: la lingua può essere modicata successivamente
scegliendo "LINGUA" dal menu “IMPOSTAZIONI”.
2. IMPOSTARE L'ORA
Dopo aver selezionato la lingua, sarà necessario
impostare l'ora corrente: sul display lampeggiano le
due cifre relative all'ora.
OROLOGIO
Ruotare la manopola di regolazione per impostare l’ora
corretta e premere
: sul display lampeggiano le due cifre
relative ai minuti. Ruotare la manopola di regolazione per
impostare i minuti e premere
per confermare.
Note: dopo una prolungata interruzione di corrente potrebbe
essere necessario impostare nuovamente l'ora. Selezionare
“OROLOGIO” nel menu “IMPOSTAZIONI”.
3. IMPOSTAZIONE DEL CONSUMO ELETTRICO
il forno è programmato per assorbire una potenza
elettrica compatibile con una rete domestica di
capacità superiore a 3 kW (16 A): nel caso si disponga
di una potenza inferiore, è necessario diminuire il
valore (13A). Selezionare POWER (POTENZA) nel menu
SETTINGS (IMPOSTAZIONI) accessibile selezionando
"SETTINGS" (IMPOSTAZIONI) con la manopola sinistra
e con la manopola destra l'impostazione di
potenza desiderata.
1.Basso
2.Alto
4. RISCALDAMENTO DEL FORNO
Un nuovo forno può rilasciare degli odori dovuti
alla lavorazione di fabbrica: questo è normale. Prima
di cucinare gli alimenti è dunque raccomandato
di riscaldare a vuoto il forno per rimuovere ogni
odore. Rimuovere protezioni di cartone o pellicole
trasparenti e togliere gli accessori dal forno.
Scaldare il forno a 200 °C per circa un'ora, utilizzando
preferibilmente la funzione “Prerisc Rapido”. Odori e
fumo sono normali quando il forno viene utilizzato
per le prime volte o quando è molto sporco. Seguire
le istruzioni per impostare correttamente la funzione.
Note: si consiglia di arieggiare il locale dopo il primo utilizzo
dell'apparecchio.

FUNZIONI MY MENU
Con le funzioni MY MENU è suciente selezionare
il tipo e il peso o la quantità degli alimenti per
ottenere un risultato ottimale. Il forno calcolerà
automaticamente le impostazioni ottimali e continuerà
a modicarle man mano che la cottura procede. Per
utilizzare al meglio questa funzione si raccomanda di
seguire le indicazioni della tabella di cottura. A causa
della variabilità degli alimenti, la durata della cottura
è impostata su un grado medio. Si consiglia sempre di
controllare il grado di cottura interno degli alimenti e,
nel caso, di prolungare il tempo di cottura per ottenere
la giusta cottura. Alcuni cicli automatici orono la
possibilità di impostare in anticipo un livello di cottura
inferiore o superiore a quello predenito (vedere il
paragrafo Densità nella sezione Uso quotidiano).
MY MENU DEFROST
Per scongelare rapidamente diversi tipi di alimenti.
Per ottenere risultati ottimali, collocare sempre gli
alimenti in un contenitore direttamente sulla griglia
metallica, ad eccezione nel caso dello scongelamento
del pane con Crisp. Al termine, lasciare riposare gli
alimenti per 5 minuti.
SCONGELAMENTO PANE CON CRISP
Questa funzione esclusiva è studiata in modo
specifico per lo scongelamento del pane. L'unione
tra la funzione di scongelamento e la tecnologia
Crisp consente di ottenere un pane freschissimo,
come appena sfornato. Questa funzione è ideale per
scongelare velocemente panini, baguette e croissant
surgelati. Il piatto Crisp deve essere utilizzato in
combinazione con questa funzione, posizionandolo
direttamente sulla griglia metallica.
ALIMENTO PESO
Scongelamento
programmato
-
Carne 100 g - 2,0 kg
Pollame 100 g - 3,0 kg
Pesce 100 g - 2,0 kg
Scongelamento
pane con crisp
50 - 800 g
MY MENU REHEAT
Per riscaldare cibi pronti, sia surgelati che
a temperatura ambiente. Il forno calcolerà
automaticamente i valori necessari per ottenere i
migliori risultati possibili nel minor tempo. Disporre
gli alimenti su un piatto o un recipiente adatto al
microonde e resistente al calore, direttamente sulla
griglia metallica al livello 1.
Alimenti
Peso /
Porzioni /
Pezzi
Note
Piatto pronto 250 - 800 g
Estrarre gli alimenti dalla confezione
rimuovendo le eventuali pellicole di
alluminio. Al termine del processo di
riscaldamento 1-2 minuti di tempo di attesa
migliorano sempre il risultato.
Lasagne
[surgelate]
400 g - 1,5 kg
Estrarre gli alimenti dalla confezione
rimuovendo le eventuali pellicole di
alluminio.
Zuppa 100 - 800 g
Riscaldare senza copertura in un unico
contenitore.
Acqua 100 - 500 g
Riscaldare senza copertura in un unico
contenitore.
MY MENU MELT & SOFT
Per sciogliere e ammorbidire gli alimenti. Il forno
calcolerà automaticamente i valori necessari per
ottenere i migliori risultati possibili nel minor
tempo. Disporre gli alimenti su un piatto o un
contenitore adatto al microonde e resistente al calore,
direttamente sulla griglia metallica al livello 1.
Alimenti
Peso /
Porzioni /
Pezzi
Note
Ammorbidire
il burro
100 - 500 g
Per ottenere risultati ottimali, posizionare il
burro su un contenitore direttamente sulla
griglia.
Ammorbidire
il gelato
100 - 500 g
Se si mette il contenitore del gelato
direttamente in forno, assicurarsi che il
contenitore sia adatto al microonde.
Sciogliere il
cioccolato
100 - 500 g
Per un risultato ottimale, tagliare il
cioccolato a pezzi. Alla ne mescolare il
cioccolato per completare il processo di
scioglimento.
Sciogliere il
formaggio
100 - 500 g
Per un risultato ottimale, tagliare il
formaggio a pezzi. Alla ne mescolare il
formaggio per completare il processo di
scioglimento.
TABELLA MY MENU COOK
Indicata per cuocere diversi tipi di piatti e alimenti e ottenere risultati ottimali nel modo più semplice e veloce.
Per utilizzare al meglio questa funzione si raccomanda di seguire le indicazioni della tabella di cottura.
Menu Categoria Alimenti Peso / Porzioni / Pezzi Note Accessori
COTTURA TRADIZ.
PIZZA & PANE
Pane per tramezzini 400 g - 1 kg
Preparare l'impasto con la ricetta preferita per
ottenere un pane leggero. Disporlo in uno stampo e
lasciarlo lievitare. Usare l’apposita funzione del forno.
1
+
Pizza 400 g - 1,2 kg
Preparare l'impasto per pizza secondo la propria
ricetta preferita. Far lievitare usando l’apposita
funzione del forno. Stendere la pasta su una teglia
leggermente unta. Aggiungere il condimento che si
preferisce.
2
Pizza [surgelata] 250 - 700 g
Estrarre gli alimenti dalla confezione rimuovendo le
eventuali pellicole di alluminio.
1
+
TORTE &
DOLCI
Mun 1 teglia
Preparare un impasto per 16-18 pezzi secondo la ricetta
preferita e distribuirlo nei pirottini. Distribuire
uniformemente sulla teglia.
2
Biscotti 1 teglia
Preparare l'impasto con 500 g di farina, 200 g di
burro salato, 200 g di zucchero e 2 uova.
Aromatizzare con essenza di frutta. Lasciar
rareddare. Stendere l'impasto a uno spessore
uniforme e tagliare con la forma preferita. Disporre i
biscotti su una teglia.
2
Brownie 1 teglia
Preparare secondo la ricetta preferita. Stendere
l'impasto sulla teglia precedentemente foderata con
carta da forno.
1
+
UOVA & SNACK
Popcorn 90 - 100 g
Disporre sempre il sacchetto direttamente sulla
griglia. Cuocere un solo sacchetto alla volta.
1
Uova strapazzate 2 - 10 pezzi
Preparare secondo la ricetta preferita in un unico
recipiente.
1
+
ARROSTI & GRATINATI
CARNE
Roast Beef 800 g - 1,7 kg
Spennellare con olio e cospargere di sale e pepe.
Condire con aglio e aromi a piacere. A ne cottura,
lasciar riposare per almeno 15 minuti prima di
servire.
1
+
Arrosto di maiale 800 g - 2,0 kg
Spennellare con olio e cospargere di sale e pepe.
Condire con aglio e aromi a piacere. A ne cottura,
lasciar riposare per almeno 15 minuti prima di
servire.
1
+
Pollo arrosto 800 g - 2,5 kg
Spennellare con olio e condire a piacere. Cospargere
di sale e pepe. Infornare con il petto verso l'alto.
1
+
PESCE
Pesce intero arrosto 400 g - 1,5 kg Spennellare con olio e condire a piacere.
1
+
Trancio di pesce
arrosto
200 - 800 g Spennellare con olio e condire a piacere.
1
+
VERDURE
Patate arrosto 300 g - 1,0 kg
Tagliare a pezzi, condire con olio, sale e aromi.
Distribuire uniformemente sul piatto crisp. Per
ottenere risultati perfetti, durante la cottura vi verrà
chiesto di mescolare gli alimenti.
1
+
Verdure ripiene 600 g - 2,0 kg
Scavare le verdure e preparare il ripieno con la polpa
risultante, carne macinata e formaggio grattugiato.
Condire a piacere con aglio, sale e aromi.
1
+
Patate al gratin 400 g - 1,5 kg
Aettare le patate e disporle in un recipiente largo.
Condire con sale, pepe e panna. Cospargere di
formaggio.
1
+
ACCESSORI
Griglia
Leccarda /
Teglia
Contenitore resistente al calore
e adatto al MW
Piatto
Crisp
Menu Categoria Alimenti Peso / Porzioni / Pezzi Note Accessori
FRITTURE
CARNE
Polpette di hamburger 100 - 500 g
Ungere leggermente il piatto crisp prima di
preriscaldarlo. Il piatto crisp deve essere preriscaldato
prima di inserire gli alimenti. Il forno vi avviserà quando
sarà il momento di inserire gli alimenti. Per ottenere
risultati perfetti, durante la cottura vi verrà chiesto di
girare gli alimenti.
1
+
Bacon 50 - 400 g
Il piatto crisp deve essere preriscaldato prima di inserire
gli alimenti. Il forno vi avviserà quando sarà il momento
di inserire gli alimenti. Distribuire uniformemente sul
piatto crisp dopo il preriscaldamento. Per ottenere
risultati perfetti, durante la cottura vi verrà chiesto di
girare gli alimenti.
1
+
Salsicce & wurstel 200 g - 1,0 kg
Distribuire in modo uniforme sul piatto crisp.
Punzecchiare le salsicce con una forchetta per evitare
che l'involucro si laceri. Per ottenere risultati perfetti,
durante la cottura vi verrà chiesto di girare gli alimenti.
1
+
PESCE
Bastoncini di pesce
[surgelati]
200 - 600 g
Distribuire uniformemente sul piatto crisp. Per ottenere
risultati perfetti, durante la cottura vi verrà chiesto di
girare gli alimenti.
1
+
VERDURE
Patatine fritte
[surgelate]
200 - 600 g Distribuire uniformemente sul piatto crisp.
1
+
ACCESSORI
Griglia
Leccarda /
Teglia
Contenitore resistente al calore
e adatto al MW
Piatto
Crisp
FUNZIONI SPECIALI
MANTENIMENTO IN CALDO
Per mantenere caldi e croccanti cibi appena cotti, come carne,
frittura o torte.
LIEVITAZIONE
Per ottenere una lievitazione ottimale di impasti dolci o salati.
Allo scopo di preservare la qualità della lievitazione, non attivare
la funzione se il forno è ancora caldo dopo un ciclo di cottura.
Accessori necessari: griglia metallica e contenitore resistente al calore.
CICLO ECO
Per cuocere arrosti ripieni e letti di carne in pezzi su un solo
ripiano. In questa funzione ECO la luce rimane spenta durante
la cottura. Per utilizzare il ciclo ECO e ottimizzare quindi i
consumi energetici, la porta forno non deve essere aperta no a
completamento della cottura del cibo.
Accessori necessari: griglia metallica con una teglia/leccarda.
DIAMOND CLEAN
L'azione del vapore rilasciato durante questo speciale ciclo di
pulizia a bassa temperatura permette di rimuovere facilmente
sporco e residui di cibo. Versare 200 ml di acqua potabile sul
fondo del forno, attivando la funzione a forno freddo.
ALTRE FUNZIONI
CONTA MINUTI
Per impostare il timer senza attivare una funzione.
PREFERITI
Per richiamare la lista delle 20 funzioni preferite.
IMPOSTAZIONI
Per regolare le impostazioni del forno.
Attivando la modalità “ECO”, la luminosità del display si riduce per
risparmiare energia e la luce si spegne dopo 1
minuto.
Se la modalità "DEMO" è impostata su "On", tutti i comandi sono
operativi e i menu sono disponibili ma il forno non viene riscaldato.
Per disattivare questa modalità, accedere a "DEMO" dal menu
"IMPOSTAZIONI" e scegliere "O".
Selezionando "RESET", l'apparecchio si spegne e vengono ripristinate
le impostazioni della prima accensione. Tutte le impostazioni
successive vengono cancellate.
USO QUOTIDIANO
1. SELEZIONARE UNA FUNZIONE
Ruotare la manopola di selezione per accendere il forno
e visualizzare sul display la funzione desiderata.
Per selezionare una funzione da un menu (il display
mostrerà la prima voce disponibile) ruotare la manopola
di regolazione no a visualizzare la voce desiderata.
Il display mostrerà l'icona della funzione e i valori di
base: premere
per confermare.
GRILL + MICROONDE
2. IMPOSTARE LA FUNZIONE
Dopo avere selezionato la funzione desiderata è possibile
modicarne le impostazioni. Il display mostra in sequenza
le impostazioni che è possibile modicare. Premendo
è
possibile modicare nuovamente l'impostazione precedente.
POTENZA / TEMPERATURA / LIVELLO GRILL
POTENZA MW
Quando il valore lampeggia sul display, ruotare la manopola
di regolazione per modicarlo, quindi premere
per
confermare e procedere con le impostazioni seguenti (per i
valori che è possibile modicare).
Usare la stessa procedura per impostare il livello grill: Sono
disponibili tre livelli di potenza per il grill: 3 (alto), 2 (medio),
1 (basso).
DURATA
DURATA
Quando l’icona lampeggia sul display, ruotare la
manopola di regolazione per impostare il tempo di cottura
desiderato, quindi premere
per confermare.
Note: durante la cottura, premendo è possibile regolare
il tempo impostato: ruotare la manopola di regolazione per
regolarlo e premere per confermare.
Nelle funzioni che non utilizzano le microonde è possibile
non impostare la durata e gestire manualmente il tempo
di cottura: Premere
o per confermare e avviare la
funzione. Selezionando questa modalità non è possibile
programmare un avvio ritardato.
ORA DI FINE (AVVIO RITARDATO)
Una volta impostato un tempo di cottura è possibile
posticipare l'avvio della funzione programmando l'ora di ne
cottura. Nelle funzioni di cottura a microonde questo tempo
equivale alla durata.
Il display mostra l'ora di ne mentre l'icona
lampeggia.
FINE COTTURA
Ruotare la manopola di regolazione per impostare l’ora di
ne cottura desiderata, quindi premere
per confermarla
e attivare la funzione. Posizionare gli alimenti nel forno e
chiudere la porta: la funzione si avvierà automaticamente
dopo un periodo di tempo calcolato per terminare la cottura
all'orario impostato.
Note: La programmazione dell'avvio ritardato di una cottura
disattiva la fase di preriscaldamento del forno: la temperatura
desiderata sarà raggiunta gradualmente, perciò i tempi di cottura
saranno leggermente più lunghi rispetto a quanto indicato nella
tabella di cottura.
Durante il tempo di attesa, è possibile ruotare la manopola
di regolazione per cambiare l’ora di ne programmata o
premere
per modicare altre impostazioni.
MY MENU
Queste funzioni selezionano automaticamente la modalità,
la potenza, la temperatura e la durata di cottura più adatte
per le varie pietanze.
2. CARNE
Alla richiesta, sarà suciente indicare le caratteristiche degli
alimenti per ottenere un risultato ottimale.
PESO / PORZIONI
CHILOGRAMMI
Per impostare questa funzione correttamente, seguire
le indicazioni che compaiono sul display, impostare i
valori desiderati ruotando la manopola di regolazione
e quindi premere
per confermare.
Alcune funzioni My Menu non richiedono di inserire la
quantità: grazie a un sensore di umidità intelligente,
il forno può regolare automaticamente il tempo di
cottura in base alla quantità di alimenti.
GRADO DI COTTURA
Nelle funzioni MY MENU è possibile regolare il grado
di cottura.
GRADO DI COTTURA
Alla richiesta, ruotare la manopola di regolazione per
selezionare il livello desiderato tra Leggero/Basso (-1)
e Extra/Alto (+1). Premere
o per confermare e
avviare la funzione.
3. AVVIARE LA FUNZIONE
Dopo avere confermato i valori predefiniti o avere
applicato le impostazioni preferite, premere
per
attivare la funzione prescelta.
Ad ogni pressione del tasto
, il tempo di cottura
viene aumentato di 30 secondi (o di 5 minuti per le
funzioni che non attivano le microonde).
Se è stato impostato un avvio ritardato, premendo
sarà possibile annullare il ritardo e avviare subito la
funzione programmata.
Note: la funzione avviata può essere interrotta in qualsiasi
momento premendo .
Se il forno è caldo e la funzione prevede una
determinata temperatura massima, sul display
compare un messaggio corrispondente. Premere
per tornare alla schermata precedente e scegliere
un'altra funzione, oppure attendere il completo
raffreddamento del forno.
JET START
A forno spento, premere per avviare la cottura
con la funzione a microonde impostata alla potenza
massima (900 W) per 30 secondi.
4. PRERISCALDAMENTO
Alcune funzioni richiedono una fase di
preriscaldamento:
una volta avviata la funzione, il display segnala che si
è attivata la fase di preriscaldamento.
PRERISCALDAMENTO
Al termine di questa fase, un segnale acustico e il
display indicheranno che il forno ha raggiunto la
temperatura impostata e comparirà la richiesta di
introdurre gli alimenti.
A questo punto aprire la porta, infornare gli alimenti,
chiudere la porta e avviare la cottura premendo
o .
Note: inserire gli alimenti nel forno prima della ne del
preriscaldamento può compromettere i risultati di cottura.
Aprendo la porta durante la fase di preriscaldamento,
questa si interrompe temporaneamente.
Il tempo di cottura non comprende la fase di
preriscaldamento. La temperatura finale del forno
può essere modificata ruotando la manopola di
regolazione.
5. METTERE IN PAUSA LA COTTURA / AGGIUNGERE,
GIRARE O CONTROLLARE IL CIBO
PAUSA
Aprendo la porta, le resistenze vengono disattivate e
la cottura viene temporaneamente interrotta.
Per riprendere la cottura, chiudere lo sportello e
premere
.
Note: durante le funzioni My Menu, aprire la porta
solo se richiesto.
AGGIUNGERE, MESCOLARE O GIRARE GLI
ALIMENTI
Alcune ricette My Menu Cook richiedono di introdurre
gli alimenti dopo la fase di preriscaldamento, o di
aggiungere altri ingredienti per completare la cottura.
In questi casi, sul display comparirà un messaggio con
la richiesta di girare o mescolare gli alimenti durante
la cottura.
GIRA ALIMENTO
Questa richiesta sarà segnalata da un segnale acustico
e da un messaggio corrispondente sul display.
Aprire la porta, eseguire l'operazione indicata
sul display, chiudere la porta e premere
per
continuare la cottura.
Note: se compare la richiesta di girare o mescolare gli
alimenti ma l'operazione richiesta non viene eseguita entro
2 minuti, il forno riprende automaticamente la cottura. La
richiesta di "AGG. ALIMENTO" viene mantenuta per 2 minuti:
se l'azione corrispondente non viene eseguita, la funzione
viene terminata.
6. FINE COTTURA
Allo scadere del tempo programmato, un segnale
acustico e il display indicheranno che la cottura è
terminata.
FINE COTTURA
Premere per continuare la cottura in modalità
manuale aumentando il tempo di 30 secondi alla
volta (nelle funzioni a microonde) o di 5 minuti alla
volta (senza microonde), oppure ruotare la manopola
di regolazione per prolungare il tempo di cottura
impostando una nuova durata. In entrambi i casi, i
parametri di cottura saranno mantenuti.
Per riprendere la cottura, premere
.
7. PREFERITI
Per una maggiore facilità d'uso, è possibile
memorizzare fino a 20 funzioni preferite.
Al termine della cottura, sul display compare un
messaggio che propone di salvare la funzione nella
lista dei preferiti con un numero da 1 a 20.
AGG. PREFERITO?
Se si desidera salvare la funzione tra i preferiti
e memorizzare le impostazioni correnti per usi
successivi premere
, oppure premere per
ignorare la richiesta.
Dopo avere premuto , ruotare la manopola di
regolazione per selezionare il numero di posizione, quindi
premere
per confermare.
Note: se la memoria è piena o la posizione è già occupata, viene
chiesto di confermare la sovrascrittura della funzione precedente.
Per richiamare in un momento successivo le funzioni già
salvate, ruotare la manopola di selezione su “PREFERITI”: il
display mostrerà la lista delle funzioni preferite.
2. GRILL
Ruotare la manopola di regolazione per selezionare la
funzione, confermarla premendo
e premere per
attivarla.
8. FUNZIONE DIAMOND CLEAN
Ruotare la manopola di selezione su Special Functions
(Funzioni speciali) , quindi selezionare la funzione "Diamond
Clean".
Diamond Clean
Premere per attivare la funzione: il display indicherà
le operazioni richieste per ottenere una pulizia ottimale:
seguire le indicazioni e quindi premere
. Una volta
eseguite tutte le operazioni preliminari, alla richiesta del
forno premere
per attivare il ciclo di pulizia.
Note: si raccomanda di non aprire la porta del forno durante il
ciclo di pulizia, perché la fuoriuscita del vapore potrebbe avere un
eetto negativo sul risultato nale.
A ciclo ultimato, il relativo messaggio di avviso lampeggia
sul display. Lasciar rareddare il forno, quindi pulire e
asciugare le superci interne con un panno o una spugna.
Al termine, rimuovere il recipiente, ultimare la pulizia con un
panno liscio e asciugare la cavità del forno con un panno di
microbra inumidito.
9. CONTA MINUTI
Quando il forno è spento, il display può essere utilizzato
come contaminuti. Per attivare la funzione, assicurarsi che
il forno sia spento e ruotare la manopola di regolazione: sul
display lampeggerà l'icona
.
CONTA MINUTI
Ruotare la manopola di regolazione per impostare la durata
desiderata e quindi premere
per attivare il timer.
Un segnale acustico e il display avviseranno che il conto alla
rovescia è terminato.
Note: il conta minuti non attiva nessun ciclo di cottura. Ruotare la
manopola di regolazione per modicare l'ora impostata sul timer.
Dopo avere attivato il conta minuti, è anche possibile
selezionare e attivare una funzione. Ruotare la manopola di
selezione per selezionare la funzione desiderata.
Una volta avviata la funzione, il timer continuerà
autonomamente il conto alla rovescia senza interferire sulla
funzione stessa.
Durante questa fase non sarà possibile vedere il contaminuti
(sarà visualizzata solo l'icona
), ma il conto alla rovescia
continuerà. Per tornare a visualizzare il timer, attendere il
termine della funzione o spegnere il forno.

10. BLOCCO TASTI
Per bloccare i tasti, tenere premuto per almeno
cinque secondi. Per disattivare, ripetere la stessa
procedura.
BLOCCO TASTI
Nota: questa funzione può essere attivata anche durante la
cottura. Per ragioni di sicurezza, è possibile spegnere il forno
in qualsiasi momento.
ATTENZIONE!
• Osservare queste istruzioni quando si usa il
microonde.
• Se il metallo entra in contatto con la parete
del vano di cottura, si producono scintille che
possono danneggiare l'apparecchio o distruggere
il vetro interno della porta.
• I componenti metallici, ad esempio i cucchiaini
contenuti nei bicchieri, devono rimanere a una
distanza non inferiore a 2 cm dalle pareti del vano
di cottura e dall'interno della porta. Gli accessori
posizionati direttamente l'uno sull'altro generano
scintille.
• Non combinare la griglia con la leccarda.
• Inserire gli accessori solo alle rispettive altezze. La
leccarda universale o la teglia non sono adatte al
solo funzionamento a microonde. Si potrebbero
formare scintille che potrebbero danneggiare il
vano di cottura.
• Utilizzare la griglia in dotazione come base di
appoggio.
Le vaschette di alluminio nell'apparecchio
possono provocare scintille. L'apparecchio è
danneggiato dalla formazione di scintille.
• Non utilizzare vaschette di alluminio
nell'apparecchio. Il funzionamento
dell'apparecchio senza alimenti all'interno del
vano di cottura provoca un sovraccarico.
• Mai avviare il forno a microonde senza aver prima
inserito gli alimenti. L'unica eccezione consentita
è quella di un breve test per i piatti. Quando si
preparano popcorn a microonde a una potenza
troppo elevata, il pannello della porta potrebbe
incrinarsi a causa del sovraccarico.
• Mai impostare la potenza del microonde ad un
livello troppo alto.
• Utilizzare un massimo di 600 watt.
• Posizionare sempre il sacchetto di popcorn su un
piatto di vetro.

CONSIGLI UTILI
CONSIGLI PER LA COTTURA A MICROONDE
Poiché le microonde penetrano negli alimenti solo
fino a una certa profondità, è consigliabile distribuirli
il più possibile in larghezza per esporre la massima
superficie alle microonde.
I pezzi piccoli cuociono più velocemente di quelli
grandi: per ottenere una cottura uniforme, tagliare gli
alimenti in pezzetti di uguale grandezza.
La maggior parte degli alimenti continua a cuocere
dopo che la cottura a microonde è terminata. Si
raccomanda perciò di prevedere sempre qualche
minuto di riposo al termine del ciclo di cottura.
Togliere i ferretti di chiusura dai sacchetti di plastica
o di carta prima di introdurli nel forno per la cottura a
microonde.
Forare o incidere le pellicole con una forchetta
per liberare la pressione ed evitare scoppi dovuti
all'accumulo di vapore durante la cottura.
LIQUIDI
I liquidi possono riscaldarsi oltre il punto di
ebollizione senza che si formino bollicine visibili.
Questo può causare l'improvviso traboccamento di
liquidi bollenti. Per questa ragione, si raccomanda
di evitare i recipienti a collo stretto, di mescolare il
liquido prima di introdurre il recipiente nel forno a
microonde e di lasciarvi immerso un cucchiaino.
Dopo il riscaldamento, mescolare nuovamente prima
di estrarre il recipiente dal microonde.
ALIMENTI SURGELATI
Per ottenere risultati ottimali, si raccomanda di
far scongelare gli alimenti direttamente sulla
griglia metallica. Se necessario, è possibile usare
un recipiente di plastica leggera resistente alle
microonde.
Gli alimenti lessati, gli stufati e i ragù di carne si
scongelano meglio se vengono mescolati di tanto
in tanto durante il processo. Separare gli alimenti
quando iniziano a scongelarsi: le porzioni separate si
scongelano più rapidamente.
ALIMENTI PER NEONATI
Quando si riscaldano alimenti o bevande per neonati
nei biberon, oppure in contenitori per omogeneizzati,
agitare e controllare sempre la temperatura
prima di servire. Questo permette di ottenere una
distribuzione più omogenea del calore e di evitare
scottature.
Togliere il coperchio del recipiente e la tettarella del
biberon prima di riscaldarli.
DOLCI E PANE
Per le torte e i prodotti da forno si consiglia di
utilizzare la funzione "Conventional" (Statico).
In alternativa, per abbreviare i tempi di cottura è
possibile selezionare "Conventional + MW"
(Statico + Microonde), impostando il microonde alla
potenza massima di 160 W per mantenere gli alimenti
morbidi e fragranti.
Con la funzione "Conventional" (Statico) utilizzare
tortiere di metallo scuro e posizionarle sul ripiano in
filo metallico in dotazione, mentre con
"Conventional + MW" (Statico + Microonde) utilizzare
un contenitore adatto al microonde posizionato sulla
griglia metallica in dotazione.
CARNE E PESCE
Per ottenere velocemente una doratura perfetta
di carne e pesce mantenendoli teneri all'interno,
si consiglia di utilizzare funzioni che combinano la
cottura ventilata e l'azione delle microonde.
Per ottenere risultati ottimali si raccomanda di
impostare la potenza delle microonde a 160 W.

PULIZIA E MANUTENZIONE
Assicurarsi che il forno si sia rareddato prima di
eettuare qualsiasi intervento di manutenzione o
pulizia.
Non utilizzare apparecchi a vapore.
Indossare guanti protettivi.
Non usare pagliette metalliche, panni abrasivi
e detergenti abrasivi o corrosivi che possano
danneggiare le superci.
Il forno deve essere scollegato dalla rete elettrica
prima di eettuare qualsiasi tipo di manutenzione.
SUPERFICI ESTERNE
• Pulire le superfici con un panno in microfibra
umido.
Se molto sporche, aggiungere qualche goccia
di detergente con pH neutro. Asciugare con un
panno.
• Non utilizzare detergenti corrosivi o abrasivi. Se
inavvertitamente uno di questi prodotti dovesse
venire a contatto con le superfici, pulire subito con
un panno in microfibra umido.
SUPERFICI INTERNE
• Dopo ogni uso, lasciare raffreddare il forno e
pulirlo preferibilmente quando è ancora tiepido
per rimuovere incrostazioni e macchie dovute a
residui di cibo; per asciugare la condensa dovuta
alla cottura di alimenti con un elevato contenuto
di acqua, usare a forno freddo un panno o una
spugna.
• Attivare la funzione "Diamond Clean" per una
pulizia ottimale delle superfici interne.
• Pulire i vetri della porta con detergenti liquidi
specifici.
ACCESSORI
Mettere a bagno gli accessori con detersivo per piatti
dopo l'uso, maneggiandoli con guanti da forno, se
ancora caldi. I residui di cibo possono essere rimossi
con una spazzola per piatti o con una spugna.
Il piatto Crisp deve essere pulito utilizzando acqua e
un detergente delicato. Per lo sporco ostinato,
strofinare delicatamente con
un panno. Lasciare sempre raffreddare il piatto Crisp
prima della pulizia.
RISOLUZIONE DEI PROBLEMI
Problema Possibile causa Soluzione
Il forno non si accende.
Interruzione di corrente elettrica.
Disconnessione dalla rete principale.
Verificare che ci sia tensione in rete e che
il forno sia collegato all'alimentazione
elettrica.
Spegnere e riaccendere il forno e verificare
se l'inconveniente persiste.
Il forno fa rumore
anche se spento.
Ventola di raffreddamento attiva.
Aprire la porta o tenere premuto e
attendere che il processo di raffreddamento
sia terminato.
Il display visualizza la
lettera "F" seguita da
un numero o da una
lettera.
Guasto software.
Contattare il Call Center e indicare il numero
che segue la lettera "F".
Il forno non si riscalda.
Se la modalità "DEMO" è impostata su
"On", tutti i comandi sono operativi e i
menu sono disponibili ma il forno non
viene riscaldato.
Sul display appare la scritta "DEMO"
ogni 60 secondi.
Accedere a "DEMO" dal menu
"IMPOSTAZIONI" e scegliere "Off".
Per le linee guida, la documentazione standard e altre informazioni sui prodotti:
• Utilizzare il codice QR sul proprio apparecchio
• Visitare il sito web docs . hotpoint . eu
• Oppure, contattare il Servizio Assistenza Tecnica (al numero di telefono riportato sul libretto di garanzia). Prima di
contattare il Servizio Assistenza Clienti, prepararsi a fornire i codici riportati sulla targhetta matricola del prodotto.
400020014602
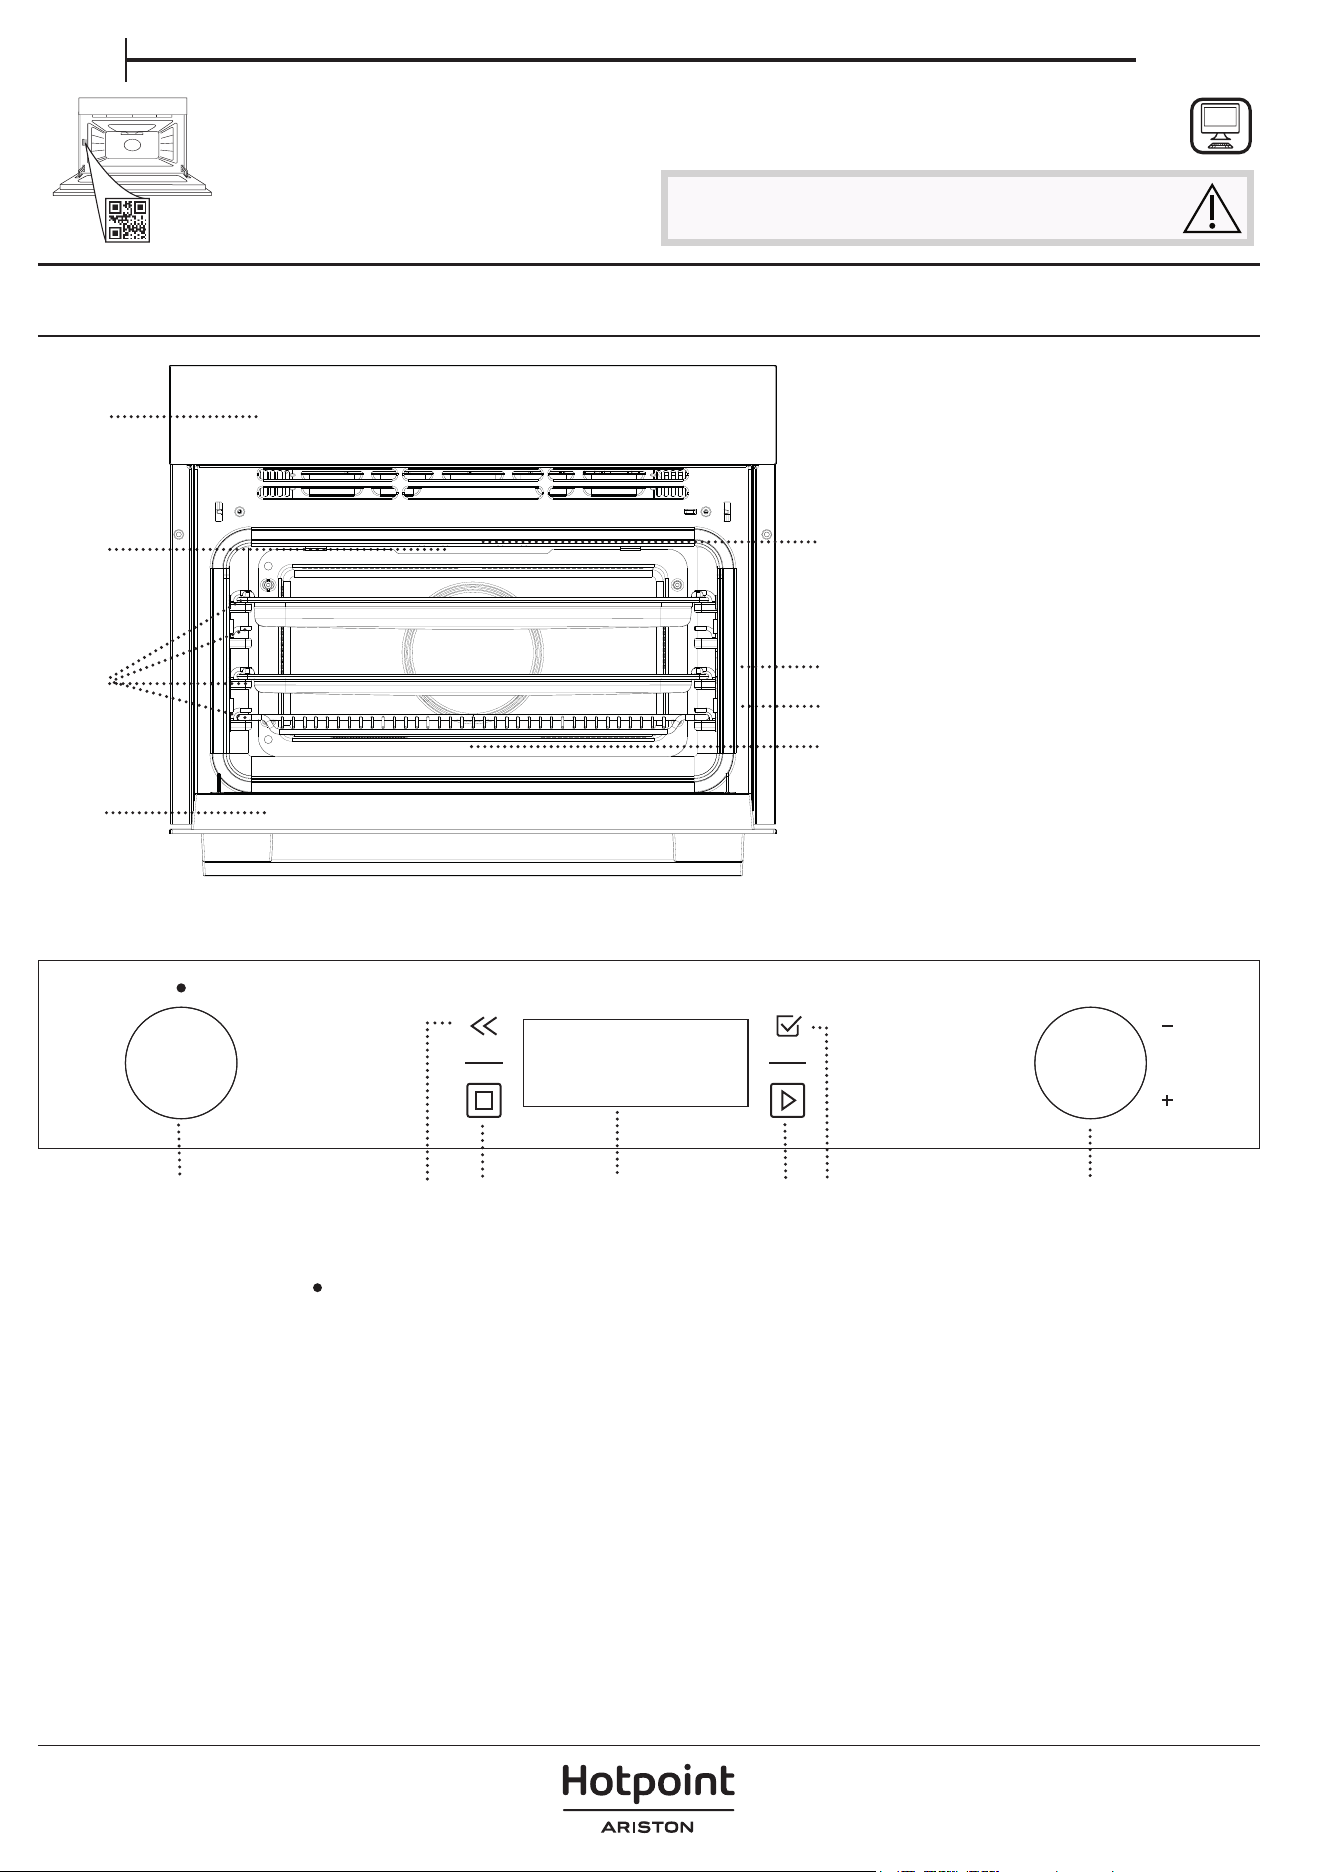
AR
كلاملا ليلد
HOTPOINT - ARISTON تاجتنم دحأ كئارش ىلع كركشن
كب صاخلا جتنملا ليجست ىجري ،ةيليصفتلا ةدعاسملا نم ديزم ىلع لوصحلل
www . register10 . eu ىلع
كزاهج ىلع ةعيرسلا ةباجتسا زمر حسم ىجر
ُ
ي
تامولعملا نم ديزم ىلع لوصحلا لجأ نم
.زاهجلا مادختسا لبق ةيانعب ةمسلا تاميلعت أرقاو
جتنملا حرش
.1مكحتلا ةحول
. ةيملسلا فوفرلا
نم يماما ءزجلاب هيلإ راش
ُ
م ىوتسملا(
)نرفلا
.بابلا
.ةياوشلا/يولعلا نيخستلا رصنع
.ةبمللا
. محللا حضن سايقم بيكرت ةطقن
)تدجو نإ(
. زييمتلا ةحول
)اهعلخت (
. يلفسلا نيخستلا رصنع
)يئرم ريغ(
مكحتلا ةحول فصو
1
. 1رايتخا حاتفم
ردأ .ةفيظو رايتخا قيرط نع نرفلا ليغشتل
.نرفلا فاقي
عضولا ىلإ
. عوجر
.ةقباسلا ةشاشلا ىلإ ةدوعلل
. فاقيإ
.اتقؤم يهطلا ةرود فاقي
. ضرعلا ةدحو
. ليغشتلا
ةددحملا تادادعا مادختساب ام ةفيظو ليغشتل
.ةيساسا وأ
. ديكأت
.ةميقلا طبضو ةفيظولا رايتخا ديكأتل
. حاتفملا
1
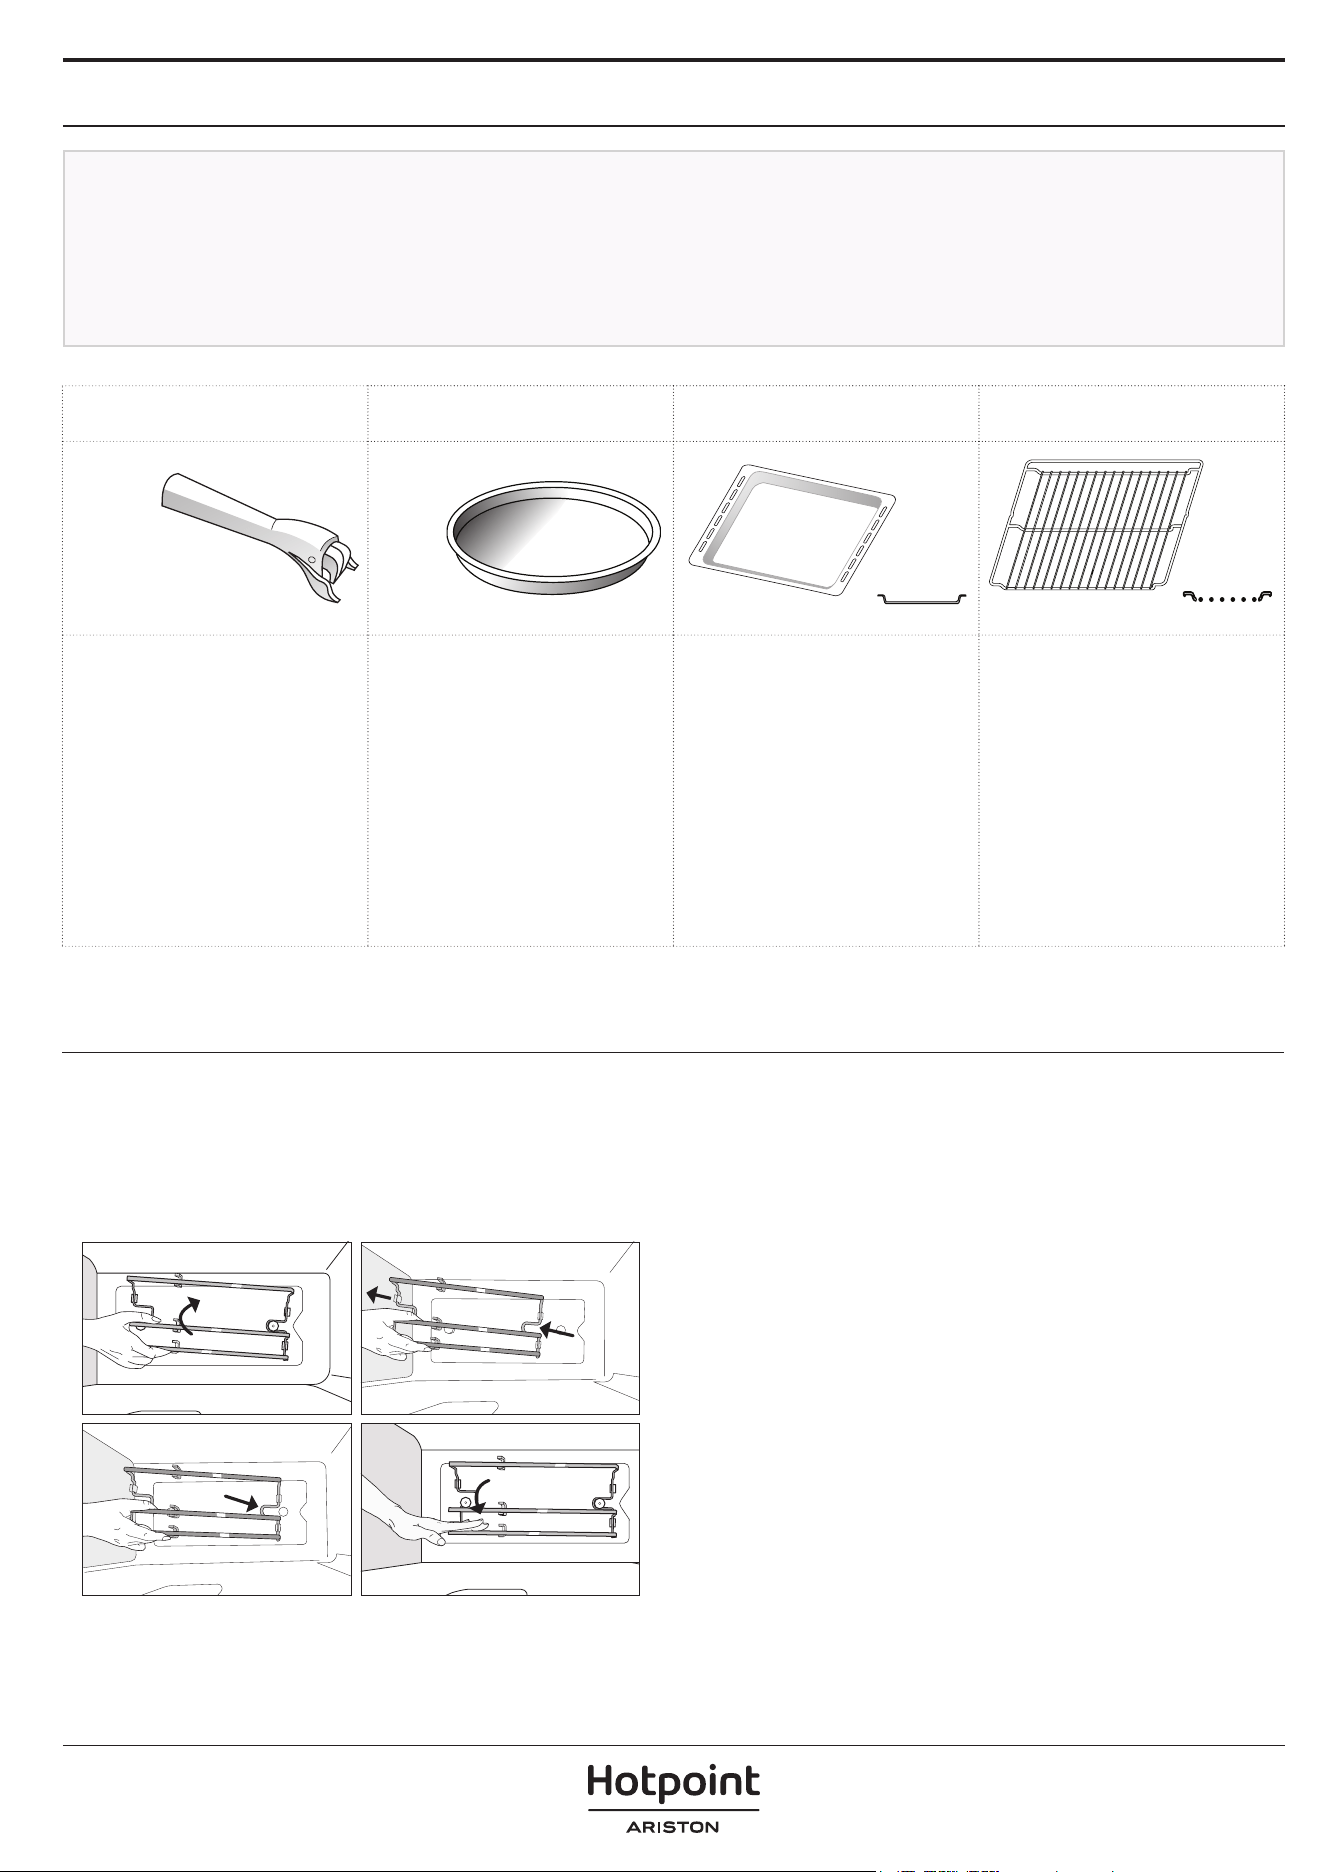
تاقحلملا
ةمواقم اهنوك نم ققحت ،قوسلا يف ةرفوتم ىرخأ تاجتنم ءارش لبق
.راخبلاب يهطلل ةبسانمو ةرارحلل
يولعلا بناجلا نيب لقا ىلع مم 0 اهرادقم ةوجف دوجو ىلع صرحا
.فاك لكشب راخبلا رورم ةحات يهطلا زيح ناردجو ءاعولل
ىصوي .فيووركيملا ةفيظو ءانثأ تاقحلملا ةرارح ةجرد عفترت دق
.ةرودلا ةياهن يف تاقحلملا عم لماعتلل ةيامحلا ةليسو مادختساب
يكلسلا فرلازيبخلا ةينيص
تاشمرقملا دادعإ ةينيص
CRISP
تاشمرقملا دادعإ ةينيص ضبقم
CRISP
عيمجل بسانم يكلسلا فرلا
يهطلا كلذ يف امب ،يهطلا عاضوأ
ةزهجأ مادختسا دنع .فيووركيملاب
يكلسلا فرلا عض ،فيووركيملا
ىوتسملا( 1 ىوتسملا ىلع ا
ً
مئاد
ماعطلا عضو كنكمي .)يلفسلا
وأ ةيكلسلا ةكبشلا ىلع ةرشابم
زيبخلا يناوصل ةماعدك اهمدختسا
نم اهريغ وأ كيكلا يناوص وأ
ةرارحلل ةمواقملا دقوملا يناوأ
.فيووركيملا تاجومو
عاضوأ عيمجل ةبسانم زبخلا ةينيص
فئاظو ءانثتساب يهطلا
اهمادختسا نكمي ."فيووركيملا"
نودب ةمعطا عاونأ عيمج يهطل
ريصع عيمجتل همدختسا .ةيواح
.يكلسلا فرلا لفسأ هيعض ،خبطلا
.ةددحملا فئاظولا عم طقف مادختسل
دادعإ حول عضو ا
ً
مئاد بجي
فصتنم يف Crisp تاشمرقملا
ا
ً
قبسم هنيخست نكميو يكلسلا فرلا
مادختساب كلذو ،ا
ً
غراف نوكي امدنع
.طقف ضرغلا اذهل ةصاخلا ةفيظولا
ةينيص ىلع ةرشابم ماعطلا عض
عض .Crisp تاشمرقملا دادعإ
فرلا نابضق نيب نوكيليسلا مادقأ
.تابثلا نم ديزمل يكلسلا
دادعإ ةينيص جارخ مدختسي
نم ةنخاسلا Crisp تاشمرقملا
.نرفلا
.هتيرتشا يذلا زارطلل اعبت تاقحلملا ددع فلتخي دق
.عيبلا دعب ام ةمدخ نم لصفنم لكشب ىرخا تاقحلملا ءارش نكمي*
ىرخا تاقحلملاو ةيكلسلا ةكبشلا لاخدإ
يف اهكسم قيرط نع بوغرملا ىوتسملا يف ةيكلسلا ةكبشلا لخدأ
)ىلع اهجوم( زرابلا يفلخلا بناجلا عض مث ىلع يلق لئام عضو
.
ً
وأ لفسا يف
.نكمم ردق دعبأ ىلإ نابضقلا دادتما ىلع اهكيرحتب مق مث
يقفأ لكشب ،زيبخلا ةينيص لثم ،ىرخا تاقحلملا لاخدإ بجي
.ةيليلدلا يراجملا ىلع اهكيرحتو
دكأتو ،لماكلاب لخادلا ىلإ قحلملا عفدا
.زاهجلا باب سملي هنأ
ةيملسلا ففرا بيكرتو ةلازإ
نيتماعد ىلع نيتبثم ،نرفلا فيوجت يبناج ىلع نييملس نيفر دجوي
رثكأ فيظنتلا لعجل ةلازل ةلباق ةيملسلا فوفرلا .رز لكش ىلع
.ةمءم
.1 ،ماكحإب ليلدلا نم يجراخلا ءزجلا كسمأ ،ةيملسلا فوفرلا ةلاز
ىلع ريودتلا ءانثأ ةيماما ةماعدلا نم هجارختس ىلع هبحسا مث
.فيوجتلا نم لماكلاب ءزجلا بحسا مث ،ةيفلخلا ةماعدلا
. ىلع يفلخلا ءزجلا كيرحتب مق ،ةيملسلا فوفرلا عضوم رييغتل
ىتح لفس ةرخؤملا عفدب مق ،تيبثتلا درجمب ،كلذ دعب .يفلخلا معدلا
.ةيماما ةماعدلا يف يملسلا فرلا لاخدإ متي
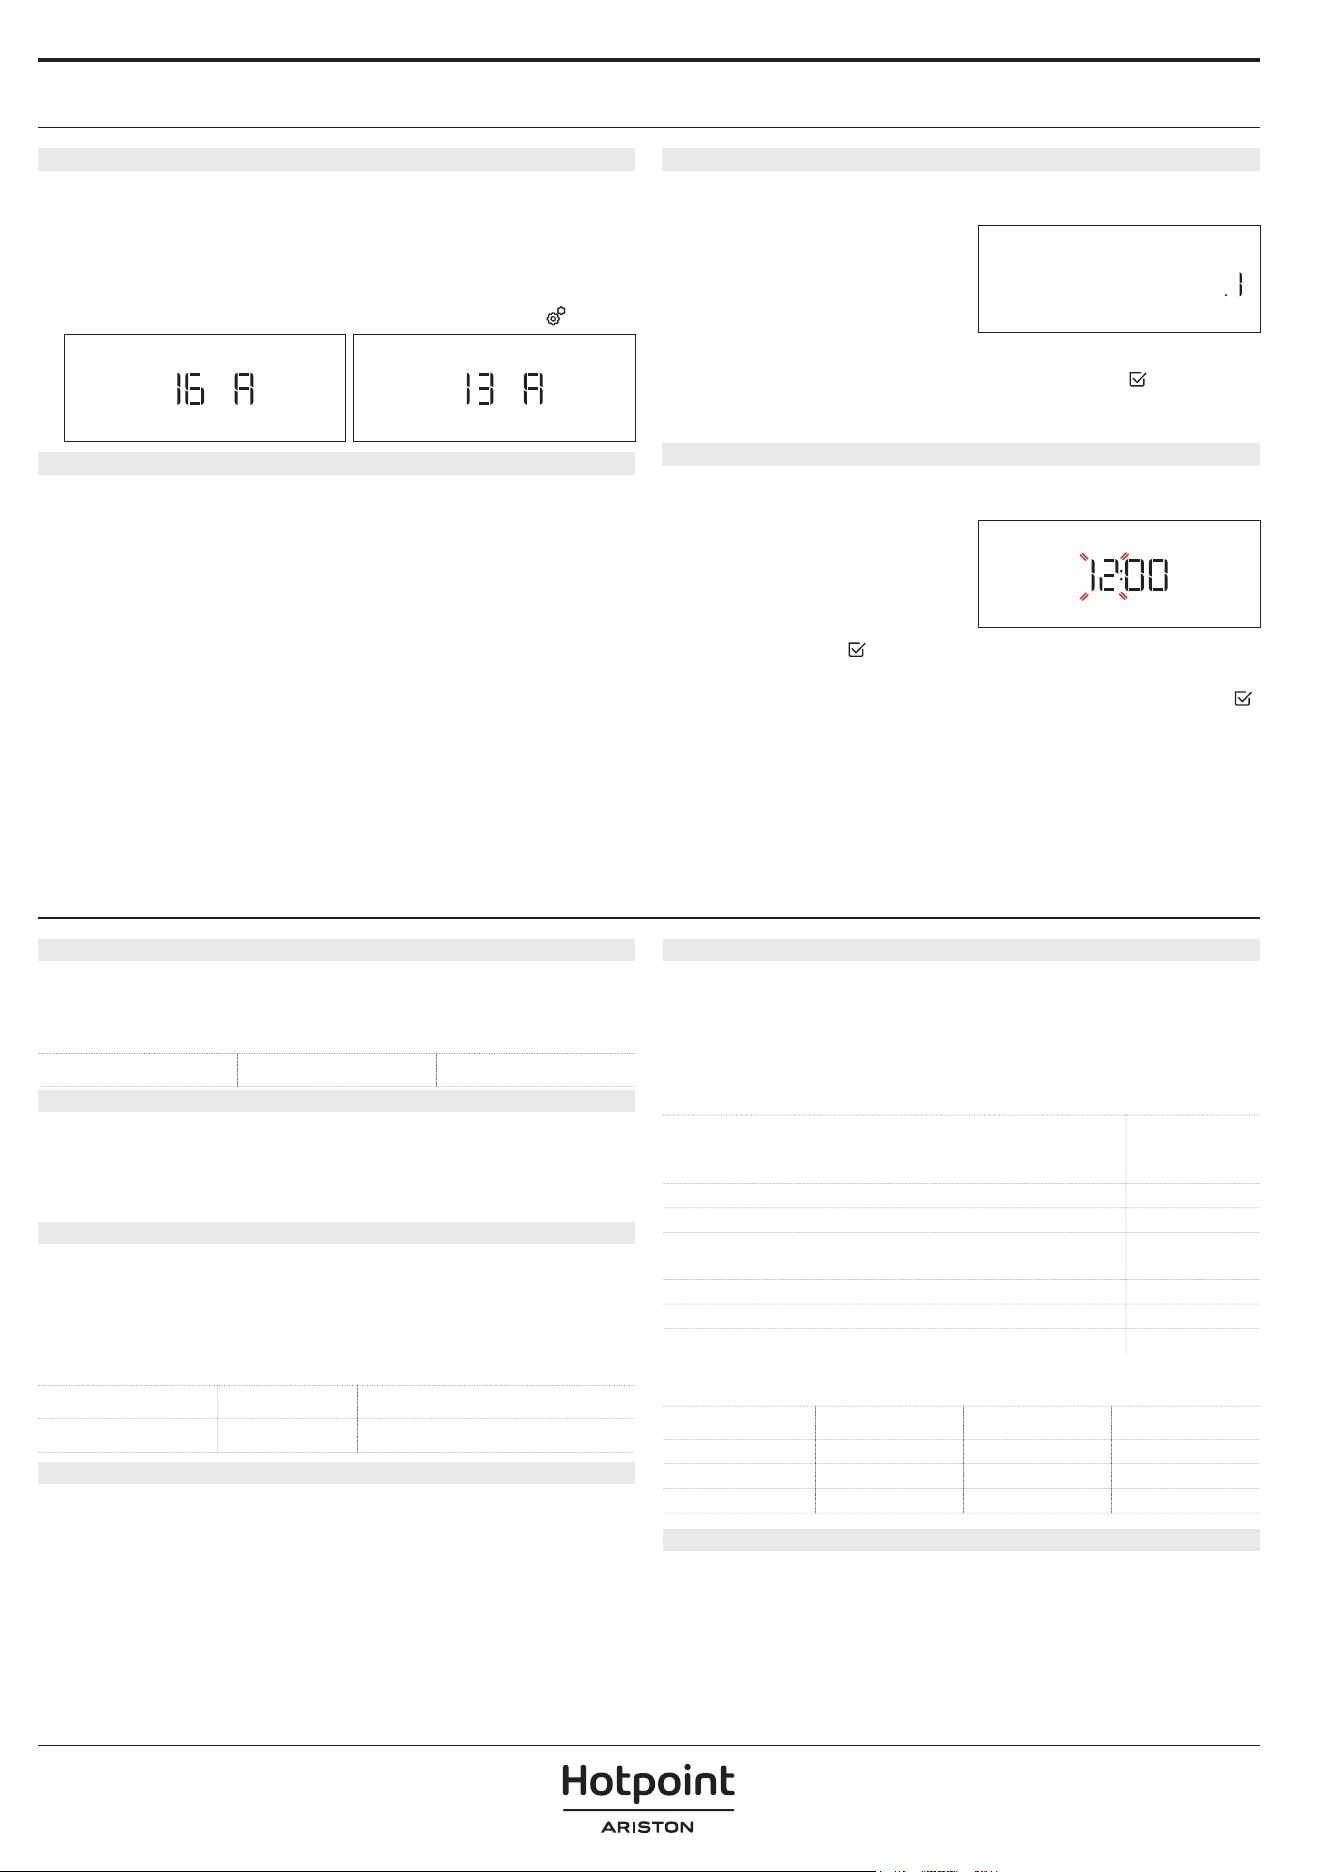
فئاظولا
فيووركيملا
لخادلاب تابورشملا وأ ةمعطا عم طقف فيووركيملا ةفيظو مدختسا
.جتنملل حيحصلا يفيظولا ءادا ىلع ظافحلل
فيووركيملا يف مادختسل ةنمآ ةيواح ،يكلس فر :ةبولطملا تاقحلملا
.ةرارحلل ةلزاعو
)طاو( ةردقلاـل هب ىصو
ُ
م
950
ءام ةبسن ىلع ةيوتحملا ةمعطاو تابورشملل عيرسلا نيخستلا ةداعإ
ىوتسم رايتخاب مقف ةدشق وأ ضيب ىلع لمتشي ماعطلا ناك اذإ .ةيلاع
.لقأ ةقاط
750.تاورضخلا يهط
600.اهبيلقت نكمي يتلا قابطاو كامساو موحللا يهط
500
مامت .ضيب وأ نبج ىلع يوتحملا صوصلا وأ ،موحللا صوص يهط
.نرفلا ةنوركعملاو موحللا رئاطف يهط
350.ةتوكيشلا وأ دبزلا رهصل يلاثم .قفرو ءطبب يهطلا
160.نبجلاو دبزلا نييلت ،ةدمجملا ةمعطا دمجت ةباذإ
90.ميرك سيا نييلت
مزلا ءارجاماعطلا)طاو( ةردقلا)ةقيقد( ةدملا
نيخستلا ةداعإبوك 29502 - 1
يهطلايجنفسا كعكلا7506 - 5
يهطلاضيبلا ةميرك50012 - 10
يهطلامحللا فيغر60025 – 15
CRISP تاشمرقملا دادعإ ةينيص
مادختسا بجي .لفسا وأ ىلعا نم ءاوس يلاثم لكشب ماعطلا ريمحتل
.طقف Crisp تاشمرقملا دادعإ ةينيص عم ةفيظولا هذه
تاشمرقملا دادعإ حول ،1 ىوتسملا يف يكلس فر :ةبولطملا تاقحلملا
Crisp تاشمرقملا دادعإ حول ضبقمو ،Crisp
ةياوشلا
.يهطلا ءانثأ ماعطلا بيلقتب يصون .ناتارغلا لمعو ءاوشلا،ريمحتلل
يكلسلا فرلا :اهب ىصوملا تاقحلملا
ماعطلايوشلا ىوتسم)ةقيقد( ةدملا
تسوتلايلاع6 - 5
فيووركيملا + ةياوشلا
فئاظو نيب جمدلا لخ نم ةعرسب اهريمحتو ةمعطا يهطل
.ةياوشلاو فيووركيملا
يف مادختسل ةنمآ ةيواح ،1 ىوتسملا يف يكلس فر :ةبولطملا تاقحلملا
.ةرارحلل ةلزاعو فيووركيملا
يديلقتلا نرفلا
لفساو ىلعا نم قابطا نم عون يأ ريمحتلو يلاثم لكشب يهطلل
ىلع ةفيظولا هذه يوتحت ،جئاتنلا لضفأ قيقحتل .طقف دحاو فر ىلع
.ماعطلا لاخد قبسملا نيخستلا ةياهن رظتنا :قبسملا نيخستلا ةلحرم
.ةرارحلل ةلزاع ةيواحو يكلس فر وأ زبخ ةينيص :ةبولطملا تاقحلملا
ماعطلا)م°( ةرارحلا ةجرد)ةقيقد( ةدملا
ريغص كعك / كيك بك16025 - 20
كعك16520 - 15
فيووركيملا + يديلقتلا نرفلا
يديلقتلا دقوملا نيب جمدلا لخ نم عرسأ لكشب ةيهطم قابطأ دادع
.فيووركيملاو
يف مادختسل ةنمآ ةيواح ،1 ىوتسملا يف يكلس فر :ةبولطملا تاقحلملا
.ةرارحلل ةلزاعو فيووركيملا
ةرم لو مادختسا
ةغللا رتخا .1
ىلع رهظت :ةرم لو زاهجلا ليغشت دنع تقولاو ةغللا طبض كمزلي
."English" ةملك ضرعلا ةدحو
.ةبولطملا ةغللا رايتخاو ةحاتملا تاغللا حفصتل
طبضلا حاتفم
ردأ
English
.كرايتخا ديكأتل ىلع طغضا
ةغللا" رايتخا لخ نم اضيأ قح تقو يف ةغللا رييغت نكمي :ةظحم ىجري
."تادادعا" ةمئاق يف
تقولا طبض .
يف تاعاسلا امقر ضموي :يلاحلا تقولا طبض كمزلي ،ةغللا رايتخا دعب
.ضرعلا ةدحو
امقر ضموي فوس :
طغضاو ةقدب ةعاسلا طبضل
طبضلا حاتفم
ردأ
CLOCK
طغضاو قئاقدلا طبضل
طبضلا حاتفم
ردأ .ضرعلا ةدحو يف قئاقدلا
.ديكأتلل
ةرتفل ءابرهكلا عاطقنا دعب ىرخأ ةرم تقولا طبضل جاتحت دق :ةظحم ىجري
.”تادادعا“ ةمئاق يف ”ةعاسلا“ رتخا .ةليوط
ةقاطلا كهتسا طبض .
ةكبش لدعم عم قفاوتي ةقاطلل كهتسا لدعمب لمعيل نرفلا ةجمرب تمت
دادما ناك اذإ :)ريبمأ 16( طاووليك 3 نع ديزيو ةيلزنملا رايتلا
.)ريبمأ 13( ةميقلا هذه ليلقت كيلعف ،كلذ نم لقأ لزنملا يف ةقاطلاب
ةحاتملا SETTINGS تادادعا ةمئاق POWER يف ةقاطلا رتخا
حاتفملا مادختساب "تادادعا" "SETTINGS" ديدحت قيرط نع
.بولطملا ةقاطلا دادعإ نميا حاتفملا مادختسابو
رسيا
2.High
1.Low
نرفلا نيخست .
:عينصتلا راثآ نع ةجتان ةبحتسم ريغ حئاور ديدجلا نرفلا نم ثعبني دق
نيخستب حصنن ماعطلا يهط يف ءدبلا لبق .امامت يعيبط رمأ اذهو
عطق عزنا .ةبحتسم ريغ حئاور ةيأ نم صلختلل لاخ وهو دقوملا
نرفلا نم ةفافشلا قئاقرلا وأ ىوقملا قرولا نم ةعونصملا ةيامحلا
.لخادلا نم تاقحلملا جرخأو
لضفأو ،ا
ً
بيرقت ةعاس ةدمل م° 200 ةجرد ىتح نرفلا نيخستب مق
.)عيرسلا ءامحا( "Fast preheat" ةفيظو مادختسا كلذل ةقيرط
تارملا يف نرفلا مادختسا دنع ا
ً
يعيبط ا
ً
رمأ ناخدلاو حئاورلا ربتعت
دادع تاميلعتلا عبتا .ةدشب ا
ً
خستم نوكي امدنع وأ ،ىلوا ةليلقلا
.حيحص لكشب ةفيظولا
.ةرم لو زاهجلا مادختسا دعب ةفرغلا ةيوهت لضفا نم :ةظحم ىجري

MY MENU FUNCTIONS فئاظو
داوملا ةيمك وأ نزوو عون ديدحت ىوس كيلع ام ،يتمئاق فئاظو عم
باسحب ا
ً
يئاقلت نرفلا موقيسو .جئاتنلا لضفأ ىلع لوصحلل ةيئاذغلا
قيقحتل .يهطلا ةيلمع مدقت عم اهرييغت يف رمتسيو ةيلاثملا تادادعا
لودج يف ةدوجوملا تاميلعتلا عبتا ،ةفيظولا هذه نم ةدافتسا ىصقأ
ةجرد ىلع يهطلا ةدم طبض متي ،ةمعطا عونتل ا
ً
رظن .ينعملا يهطلا
ةلاح يفو لخادلا نم ماعطلا جضن نم ققحتلاب ا
ً
مئاد حصنن .ةطسوتم
تارودلا ضعب حنمت .بسانم جضن ىلع لوصحلل يهطلا تقو ةلاطإ
ىوتسملا نم ىلعأ وأ لقأ يهط ىوتسم طبض ةيناكمإ ةيكيتاموتوا
.)يمويلا مادختسا مسق يف جضنلا ةرقف عجار( ا
ً
قبسم يضارتفا
MY MENU DEFROST ةفيظو
يف ا
ً
مئاد ماعطلا عض .ةعرسب ةمعطا نم ةفلتخم عاونأ دمجت ةباذ
ءانثتساب ،جئاتنلا لضفأ ىلع لوصحلل يكلسلا فرلا ىلع ةرشابم ةيواح
ةدمل أدهي ماعطلا عد ةياهنلا يف .Crisp شمرقملا زبخلا بيوذت ةيلمع
.قئاقد 5
CRISP BREAD DEFROST ةفيظو
نيب عمجلا .دمجملا زبخلا دمجت ةباذإ ةيرصحلا ةفيظولا هذه كل حيتت
هنأكو اذيذل اقاذم زبخلا بستكي فوس ،ةشمرقلاو دمجتلا ةباذإ تاينقت
فئافل نيخستو ةعرسب جلثلا ةباذ ةفيظولا هذه مدختسا .ا
ً
جزاط زوبخم
تاشمرقملا دادعإ حول مادختسا بجي .نوساوركلاو تيكابلا ،زبخلا
.يكلسلا فرلا ىلع ةرشابم هعضو بجيو ،ةفيظولا هذه عم Crisp
ماعطلانزولا
ةتقؤملا ةباذا-
موحلمجك 2.0- مج 100
نجاودلامجك 3.0 - مج 100
كامسأمجك 2.0 - مج 100
ةفيظو
CRISP BREAD DEFROST
مج 800 - 50
MY MENU REHEAT ةمئاق
ةرارح ةجرد يف وأ ةدرابلا وأ ةدمجملا ةزهاجلا تابجولا نيخست ةداع
قيقحتل ةمزلا تادادعا طبضب ايكيتاموتوأ نرفلا موقي ثيح .ةفرغلا
ءاشع قبط ىلع ماعطلا عض .ةينمز ةدم رصقأ يف ةنكمم جئاتن لضفأ
ىلع ةرشابم قبط وأ ةرارحلل مواقمو فيووركيملا يف مادختسل نمآ
.1 ىوتسملا دنع يكلسلا فرلا
ماعطلاعطقلا/تايمكلا/نزولاةظحم
قبط يف ةبجومج 800 - 250
نم يأ ةلازإب موقت نأ ةوبعلا نم هجارخإ ءانثأ رذحا
نيتقيقد وأ ةقيقد ةدمل راظتنا .موينمولا قئاقر
.نيخستلا ةداعإ ةيلمع ةياهن يف ةجيتنلا ن
سح
ُ
ي
]ةدمجم[ اينازمجك 1.5 - مج 400
نم يأ ةلازإب موقت نأ ةوبعلا نم هجارخإ ءانثأ رذحا
.موينمولا قئاقر
ءاسحمج 800 - 100.دحاو ءاعو يف ةيطغتلا مدع عم نيخست
ءاممج 500 - 100.دحاو ءاعو يف ةيطغتلا مدع عم نيخست
MY MENU MELT & SOFT ةفيظو
تادادعا طبضب ايكيتاموتوأ نرفلا موقي ثيح .ماعطلا نييلتو ةباذ
ماعطلا عض .ةينمز ةدم رصقأ يف ةنكمم جئاتن لضفأ قيقحتل ةمزلا
ةرشابم ةرارحلل ةلزاعو فيووركيملا يف مادختسل ةنمآ ةيواح يف
.1 ىوتسملا دنع يكلسلا فرلا ىلع
ماعطلا
/تايمكلا/نزولا
عطقلا
ةظحم
ةدبزلا نييلتمج 500 - 100
يكلسلا فرلا ىلع ةرشابم ءاعو يف ةدبزلا عض
.جئاتنلا لضفأ ىلع لوصحلل
ميرك سيا نييلتمج 500 - 100
دكأتف ،نرفلا يف ةرشابم ميرك سيا ءاعو تعضو اذإ
.فيووركيملا يف مادختسل نمآ ءاعولا نأ نم
ةتوكوشلا ةباذإمج 500 - 100
لضفأ ىلع لوصحلل عطق ىلإ ةتوكوشلا عيطقتب مق
ةيلمع لامك ةتوكوشلا كرح ،ةياهنلا يف .جئاتنلا
.نابوذلا
نبجلا ةباذإمج 500 - 100
.جئاتنلا لضفأ ىلع لوصحلل عطق ىلإ نبجلا عيطقتب مق
.نابوذلا ةيلمع لامك نبجلا كرح ،ةياهنلا يف
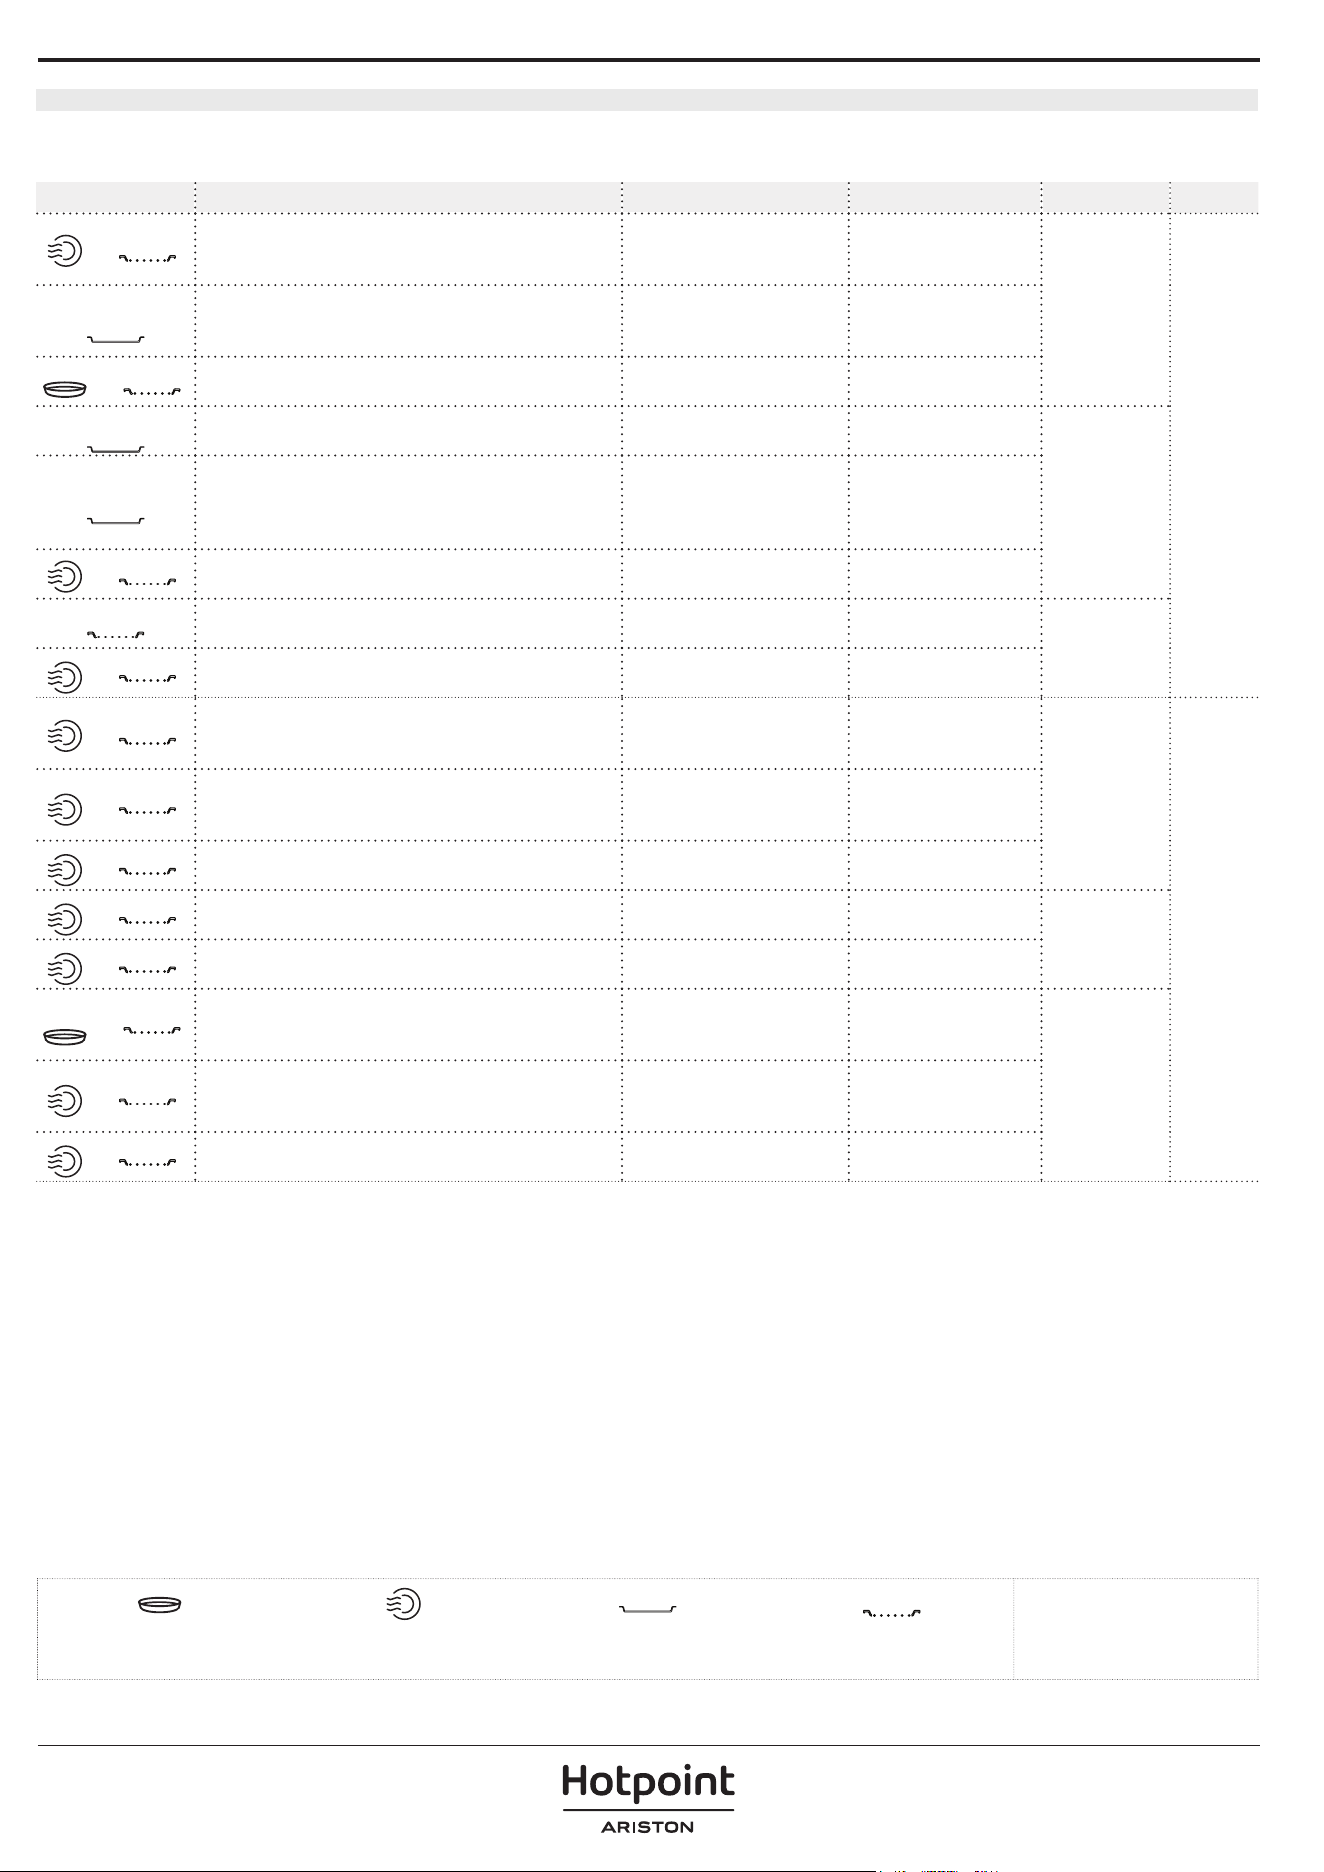
MY MENU COOK TABLE ةفيظو
تاميلعتلا عبتا ،ةفيظولا هذه نم ةدافتسا ىصقأ قيقحتل .ةقيرط لهسأو عرسأب ةيلاثملا جئاتنلا قيقحتو ةمعطاو قابطا نم ةفلتخم عاونأ يهطل
.ينعملا يهطلا لودج يف ةدوجوملا
ةمئاقلاةئفلاماعطلاعطقلا/تايمكلا/نزولاةظحمقحلملا
زوبخم
زبخو ازتيب
زبخلا رئاطشمجك 1 - مج 400
ىلع هليكشتب مق .فيفخ بلاقل ةلضفملا كتفصول اقفو ةنيجعلا رضح
يف ةراتخملا عفرلا ةفيظو مدختسا .عفتري نأ لبق بلاقلا ءاعو ةئيه
.نرفلا
+
1
ازتيبلامجك 1.2 - مج 400
مادختساب عفرتيل هكرتا .ةلضفملا كتفصول ا
ً
عبت ازتيبلا ةنيجع زهج
زيبخلا ةينيص لخاد ةنيجعلا درفا .نرفلا يف ةراتخملا ةفيظولا
.كتبغر بسح ةيولعلا ةقبطلا فضأ .تيزلا نم ليلقب ةنوهدملا
2
]ةدمجم[ ازتيبمج 700 - 250
قئاقر نم يأ ةلازإب موقت نأ ةوبعلا نم هجارخإ ءانثأ رذحا
.موينمولا
+
1
تانجعملاو كعكلا
نيفوملا كعكةعفد 1
ماو ةلضفملا كتفصول اعبت ةعطق 18-16 نم ةعومجم ريضحتب مق
.زيبخلا ةينيص يف يواستم لكشب اهعيزوتب مق .قرولا بلاوق اهب
2
كعكةعفد 1
200 ،ةحلمم ةدبز مج 200 ،قيقدلا نم مج 500 نم ةطلخ عنصا
مق .دربت اهعد .ةهكافلا ريبع ةهكن فضأ . نيتضيب ،ركسلا نم مج
كعكلا عض .بغرت امك هليكشتب مقو يواستم لكشب نيجعلا ديدمتب
.زيبخلا ةينيص ىلع
2
زينواربةعفد 1
زبخلا ةينيص ىلع ةنيجعلا درفا .ةلضفملا كتفصول اعبت زهج
.زبخلا قروب ةاطغملا
+
1
تابجولاو ضيبلا
ةفيفخلا
راشيفلامج 100 - 90
طقف ا
ً
دحاو ا
ً
سيك حتفا .ةرشابم يكلسلا فرلا ىلع ا
ً
مئاد ماعطلا عض
.ةرم لك يف
1
قوفخم ضيبعطق 10 - 2.ةلضفملا كتفصول اعبت دحاو ءاعو يف اهزيهجتب مق
+
1
نيتارجلاو تايوشملا
موحل
يوشم يرقب محلمجك 1.7- مج 800
باشعاو موثلاب لبت .لفلفلاو حلملاب كرفاو ةاشرفلاب اتيز نهدا
15 نع لقت ةدمل رظتنا ،يهطلا ةيلمع ةياهن دنع .ةبغرلا بسح
.عيطقتلا لبق ةقيقد
+
1
يوشم مسد محلمجك 2.0 - مج 800
باشعاو موثلاب لبت .لفلفلاو حلملاب كرفاو ةاشرفلاب اتيز نهدا
15 نع لقت ةدمل رظتنا ،يهطلا ةيلمع ةياهن دنع .ةبغرلا بسح
.عيطقتلا لبق ةقيقد
+
1
رمحملا جاجدلامجك 2.5 - مج 800
مق .لفلفلاو حلملاب اهكرفا .ةبغرلا بسح لبتو ةاشرفلاب اتيز نهدا
.ىلع ردصلاو نرفلا يف اهلاخدإب
+
1
كامسأ
يوشم لماك كمسمجك 1.5 - مج 400.ةبغرلا بسح لبتو ةاشرفلاب اتيز نهدا
+
1
يوشم كمس كيتسمج 800 - 200.ةبغرلا بسح لبتو ةاشرفلاب اتيز نهدا
+
1
تاورضخلا
ةيوشملا سطاطبلامجك 1.0 - مج 300
اهعيزوتب مق .باشعاب هكن
ُ
تو حلملاو تيزلاب لبت
ُ
تو عطق ىلإ عطق
ُ
ت
جئاتن ىلع لوصحلل .تاشمرقملا دادعإ ةينيص يف يواستم لكشب
.ماعطلا كيرحت يهطلا ءانثأ كنم بلط
ُ
يس ،ةيلاثم
+
1
وشحم راضخمجك 2.0 - مج 600
تاورضخلا مسج نم طيلخب اهئلماو تاورضخلا ىوتحم جرخا
موثلاب لبت .روشبملا نبجلاو مورفملا محللا ىلإ ةفاضاب اهسفن
.ةبغرلا بسح باشعاب اه
ّ
كنو حلملاو
+
1
سطاطبلا ناتارجمجك 1.5 - مج 400
لفلفلاو حلملاب لبت .ربكأ ءاعو يف هعضو يتابنلا رجربلا فص
.ةمقلا ىلع نبجلا ضعب رثنا .ةميركلا هقوف بكسأو
+
1
تاقحلملا
يكلسلا فرلا
/تارطقلا عيمجت ةينيص
زيبخلا ةينيص
طاواغيملاو ةرارحلل ةمواقم ةيواح
دادعإ ةينيص
Crisp تاشمرقملا
ةمئاقلاةئفلاماعطلاعطقلا/تايمكلا/نزولاةظحمقحلملا
يلقم
موحل
رجربلا رئاطفمج 500 - 100
نيخستلا لبق تيزلا نم ليلقب crisp تاشمرقملا دادعإ حول نهدا
لاخدإ لبق ا
ً
قبسم crisp تاشمرقملا دادعإ حول نيخست بجي .قبسملا
لوصحلل .ماعطلا لاخدإ تقو نيحي امدنع نرفلا كملع
ُ
يس .ماعطلا
.ماعطلا بيلقت يهطلا ءانثأ كنم بلط
ُ
يس ،ةيلاثم جئاتن ىلع
+
1
نوكابمج 400 - 50
.ماعطلا لاخدإ لبق ا
ً
قبسم crisp تاشمرقملا دادعإ حول نيخست بجي
لكشب اهعيزوتب مق .ماعطلا لاخدإ تقو نيحي امدنع نرفلا كملع
ُ
يس
لوصحلل .ءامحا دعب crisp تاشمرقملا دادعإ ةينيص يف يواستم
.ماعطلا بيلقت يهطلا ءانثأ كنم بلط
ُ
يس ،ةيلاثم جئاتن ىلع
+
1
ليتسروو قناقنلامجك 1.0 - مج 200
مق .crisp تاشمرقملا دادعإ ةينيص يف يواستم لكشب اهعيزوتب مق
ىلع لوصحلل .قفنا ثودح عنمل ةكوش مادختساب قجسلا زخب
.ماعطلا بيلقت يهطلا ءانثأ كنم بلط
ُ
يس ،ةيلاثم جئاتن
+
1
كامسأ]دمجملا[ كمسلا عباصأمج 600 - 200
.crisp تاشمرقملا دادعإ ةينيص يف يواستم لكشب اهعيزوتب مق
.ماعطلا بيلقت يهطلا ءانثأ كنم بلط
ُ
يس ،ةيلاثم جئاتن ىلع لوصحلل
+
1
تاورضخلا]ةدمجملا[ ةيلقملا سطاطبلامج 600 - 200.تاشمرقملا دادعإ ةينيص يف يواستم لكشب اهعيزوتب مق
+
1
تاقحلملا
يكلسلا فرلا
/تارطقلا عيمجت ةينيص
زيبخلا ةينيص
طاواغيملاو ةرارحلل ةمواقم ةيواح
دادعإ ةينيص
Crisp تاشمرقملا
ةصاخ فئاظو
KEEP WARM ةفيظو
كلذ يف امب ةشمرقمو ةنخاس ةلاح يف وتلل يهطملا ماعطلا ىلع ظافحلل
.كعكلا وأ ةرمحملا ةمعطا ،موحللا
RISING ةفيظو
،رمختلا ةدوج ىلع ظافحلل .يلاثم لكشب لبتملا وأ ولحلا نيجعلا ريمختل
.يهطلا ةرود دعب انخاس لازي نرفلا ناك اذإ ةفيظولا طيشنتب مقت
.ةرارحلل ةلزاع ةيواحو يكلس فر :ةبولطملا تاقحلملا
ECO CYCLE ةيداصتقا ةرودلا
دنع .دحاو فر ىلع محللا هيليفو ةوشحملا تسورلا محل عطق يهطل
ءانثأ ائفطنم ءوضلا ىقبي ،)ECO( ةيداصتقا ةفيظولا مادختسا
،ةقاطلا كهتسا نم دحلاو ةيداصتقا ةرودلا مادختسو .يهطلا
.امامت ماعطلا يهط نم ءاهتنا ىتح نرفلا باب حتف مدع ىلع صرحا
.زبخ ةينيص وأ ةقم عم يكلس فر :ةبولطملا تاقحلملا
DIAMOND CLEAN ةفيظو
ةجردب ةلماعلا ةصاخلا فيظنتلا ةرود ءانثأ ثعبنملا راخبلا حمسي
مق .ةلوهسب ةمعطا اياقبو تاخاستا ةلازإ ىلع ةضفخنم ةرارح
امنيب ةفيظولا ليعفتب مقو نرفلا عاق يف برشلا ءام نم لم 200 بكسب
.طقف دراب نرفلا
ىرخأ فئاظو
MINUTEMINDER ةفيظو
.ةفيظو يأ ليعفت نود تقولا سايقل
)تضفملا( FAVORITES
.كيدل ةلضفم فئاظو 20 نم ةمئاق ءاعدتس
تادادعا
.نرفلا تادادعإ ليدعتل
ريفوتل ضرعلا ةدحو عوطس ةجرد ضفخنتس "يداصتقا" عضولا ليعفت دنع
ةقيقد رورم دعب تابمللا ئفطنتو ةقاطلا
.ةدحاو
"ON" عضولا ىلع )ضارعتسا( "DEMO" ةقيرطلا نوكت امدنع
موقي نرفلا نكلو ةحاتملا مئاوقلاو رماوا عيمج ليعفت متي ،)لغشم(
نم )ضارعتسا( "DEMO" ىلإ لوخدلاب مق ،ةقيرطلا هذه ليعفتل .نيخستلاب
.)فاقيإ( "Off" رتخاو )تادادعا( "SETTINGS" ةمئاق
متي ،)عنصملا تادادعإ عاجرإ( "FACTORY RESET" رايتخا لخ نم
.تادادعا عيمج فذح متي .ىلوا هليغشت ةلاح ىلإ دوعيو جتنملا فاقيإ
يمويلا مادختسا
ةفيظو رايتخا .1
ىلع ةبوغرملا ةفيظولا ضرعو نرفلا ليغشتل رايتخا حاتفم ردأ
.ضرعلا ةدحو
ردأ ،)ضرعلا ةدحو يف حاتم دنب لوأ رهظي( ةمئاقلا دونب دحأ رايتخ
.بولطملا دنبلا رهظي نأ ىلإ طبضلا حاتفم
طغضا :ةيساسا اهتادادعإو ةفيظولا مسا ضرعلا ةدحو يف رهظيس
.ديكأتلل
ىلع
GRILL+MW
ةفيظولا طبض .
رهظي فوس .اهتادادعإ رييغت كنكمي ،ةبولطملا ةفيظولا رايتخا دعب
ىلع طغضلا .بيترتلاب اهرييغت نكمي يتلا تادادعا ضرعلا ةدحوب
.ىرخأ ةرم قباسلا طبضلا عضو رييغتب كل حمسي
ءاوشلا ىوتسم / ةرارحلا ةجرد / ةقاطلا
مث ،اهرييغتل طبضلا حاتفم ردأ ،ضرعلا ةدحو يف ةميقلا ضموت امدنع
MW POWER
.)تدجو نإ( ةيلاتلا تادادعا ةلصاومو ديكأتلل طغضا
تايوتسم ةثث كانه :ءاوشلا ىوتسم طبض نكمي ،هليعفت ةقيرط سفنب
.)ضفخنم( 1 ،)طسوتم( 2 ،)
ٍ
لاع( 3 :ءاوشلل ةددحم ةردق
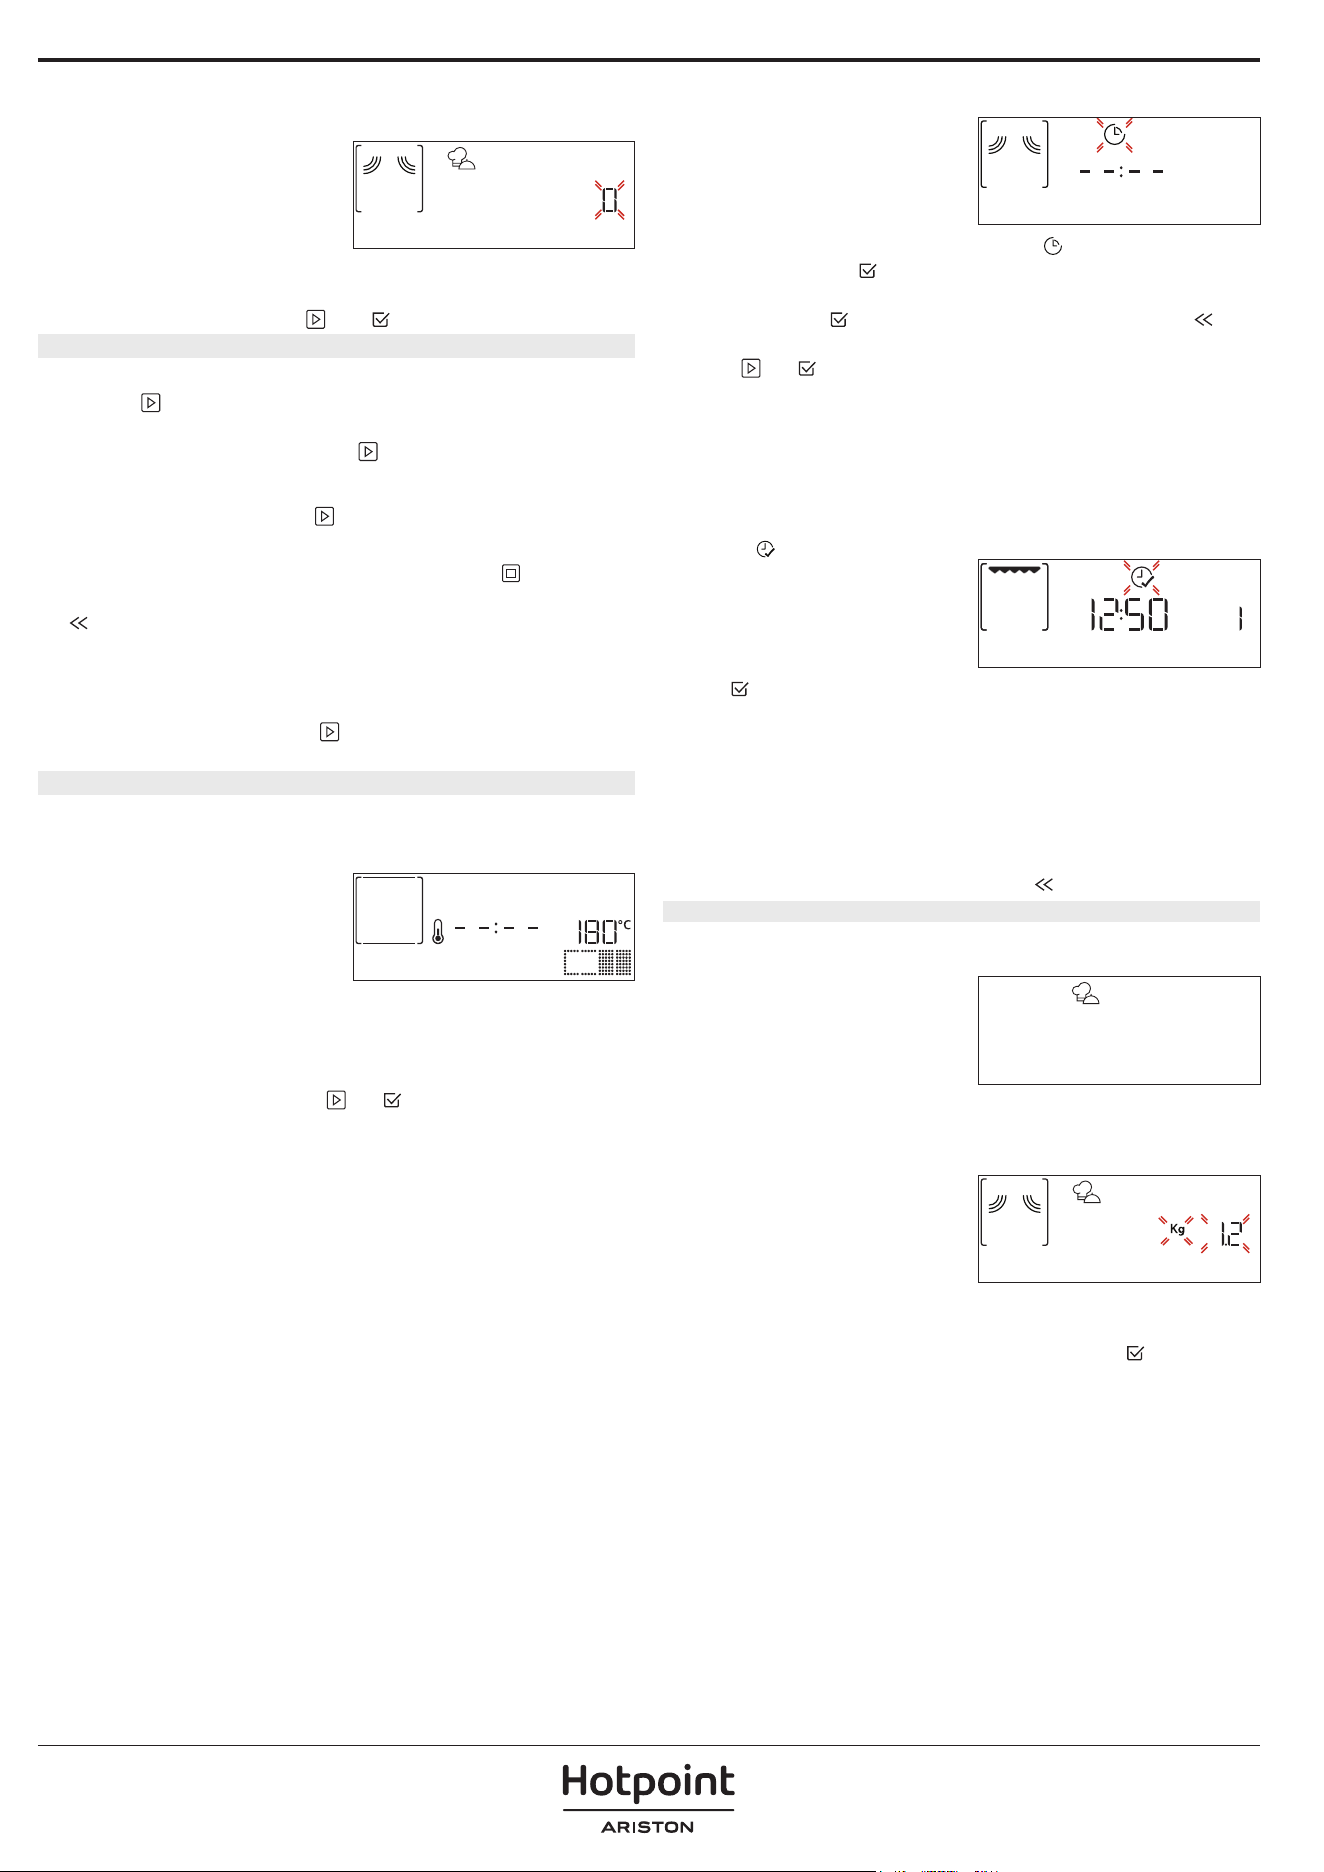
ةدملا
طبضلا حاتفم ةرادإب مق ،ضرعلا ةدحو يف ةنوقيا ضموت امدنع
DURATION
.ديكأتلل ىلع طغضا مث ةبولطملا يهطلا ةدم رايتخ
طغضلاب يهطلا ءانثأ اهطبض مت يتلا يهطلا ةدم رييغت كنكمي :ةظحم ىجري
.ديكأتلل ىلع طغضا مث اهليدعتل طبضلا حاتفم ردأ : ىلع
تدرأ اذإ يهطلا نمز طبض ىلإ فيووركيملا فئاظو ريغ عم جاتحت
ديكأتلل
وأ ىلع طغضا :)ددحم تقو نودب( ايودي يهطلا ةرادإ
ريخأت ةجمرب كنكمي ةقيرطلا هذه رايتخا لخ نم .ةفيظولا ليغشتو
.ليغشتلا ءدب
)ليغشتلا ءدب ريخأت( END TIME ءاهتنا تقو
لخ نم ةفيظولا ليغشت ءدب ريخأت نكمي يهطلا نمز طبض درجمب
نوكي ءاهتنا تقو فيووركيملا فئاظو يف .اهئاهتنا تقو ةجمرب
.يهطلا ةدمل ا
ً
يواسم
.
ةنوقيا ضموت امنيب ءاهتنا تقو ضرعلا ةدحوب رهظي
ديكأتل
ىلع طغضا مث يهطلا ءاهتنا تقو ديدحتل طبضلا حاتفم ردأ
END TIME
ليغشت أدبي :بابلا قلغأو نرفلا لخاد ماعطلا عض .ةفيظولا ليعفتو
يهطلا ءاهنإ لجأ نم ةبوسحملا ةدملا ءاهتنا دعب ايكيتاموتوأ ةفيظولا
.هطبضب تمق يذلا تقولا دنع
ءامحإ ةلحرم ليطعت ىلإ يدؤت ليغشتلا ءدب ريخأت ةجمرب :ةظحم ىجري
نأ ينعي اذهو ،ا
ً
يجيردت اهيلإ جاتحت يتلا ةرارحلا ةجرد ىلإ نرفلا لصي :نرفلا
.عقوتم وه امع
ً
يلق لوطت نأ نكمي يهطلا تاقوأ
ءاهتنا تقو ليدعتل طبضلا حاتفم ةرادإ كنكمي راظتنا ةرتف ءانثأ
.ىرخا تادادعا رييغتل
ىلع طغضا وأ جمربملا
MY MENU ةفيظو
لضفأو ،يهط ةقيرط لضفأ رايتخاب ا
ً
يكيتاموتوأ فئاظولا هذه موقت
.ةحاتملا قابطا عيمجل ةدمو ةرارح ةجردو ةردق
ةجيتن ىلع لوصحلل ماعطلا صئاصخ ىلإ ةراشاب مق ،موزللا دنع
2. MEAT
.ةيلاثم
تايمكلا / نزولا
ةدحو ىلع رهظت يتلا تاميلعتلا عبتا ،حيحص لكشب ةفيظولا طبضل
KILOGRAMS
مث ةبولطملا ةميقلا طبضل طبضلا حاتفم ردأ ،كنم بل
ُ
ط اذإو ،ضرعلا
.ديكأتلل
ىلع طغضا
رعشتسم لضفب :تخدملا ةيمك ديدحت بلطتت يتمئاق فئاظو ضعب
ماعطلا ةيمكل ىهطلا تقو طبض نرفلا عيطتسي ،يكذلا ةبوطرلا
.ايكيتاموتوأ
يهطلا ةجرد
.يتمئاق فئاظو لخ نم يهطلا ةجرد ىوتسم طبض نكمي
نيب بوغرملا ىوتسملا رايتخ طبضلا حاتفم ةرادإب مق ،كنم بل
ُ
ط اذإ
DONENESS
/يفاضإ( High/Extra و )1-( )ضفخنم/فيفخ( Low/Light
.ةفيظولا ليغشتو ديكأتلل
وأ ىلع طغضا .)1+( )عفترم
ةفيظولا ليعفت .
ةلاح يف وأ اهديرت يتلا ميقلا يه ةيسايقلا ميقلا تناك اذإ ،ةرم لك يف
ليعفتل
ىلع طغضلاب مق ،اهجاتحت يتلا تادادعا ذيفنتب كمايق
.ةفيظولا
ةيناث 30 رادقمب يهطلا تقو دادزي
ىلع اهيف طغضت ةرم لك يف
.)فيووركيملا ليعفتب موقت يتلا فئاظولا يف قئاقد 5 رادقمب(
ىلع ةفيظولا نرفلا أدبيس
ىلع طغضلاب ،ريخأتلا ةلحرم ءانثأ
.روفلا
قيرط نع اهليعفت مت يتلا ةفيظولا فاقيإ تقو يأ يف كنكمي :ةظحم ىجري
. ىلع طغضلا
ىوصق ةرارح ةجرد ىلإ جاتحت ةفيظولاو ،ا
ً
نخاس نرفلا ناك اذإ
ىلع طغضا .ضرعلا ةدحو ىلع ةلاسر كل رهظت فوس ،ةصاخ
لمتكي ىتح رظتنا وأ ةفلتخم ةفيظو رتخاو ةقباسلا ةشاشلا ىلإ ةدوعلل
.يهطلا
JET START ةفيظو
ةفيظو امنيب يهطلا ليعفتل ىلع طغضا ،نرفلا فقوتي امدنع
.ةيناث 30 ةدمل )طاو 900( ةلماكلا ةردقلا ىلع ةطوبضم فيووركيملا
)ءامحا( PREHEATING .
:قبسملا نيخستلا ةلحرم فئاظولا ضعب بلطتت
ةلحرم ليعفت ىلإ ضرعلا ةدحو ريشت ،ةفيظولا ليغشت ءدب درجمب
.ءامحا
ضرعلا ةدحو ريشتو ةيتوص ةراشإ ردصت ،ةلحرملا هذه ءاهتنا درجمب
PREHEATING
عضو بجي هنأو ،ةطوبضملا ةرارحلا ةجرد ىلإ نرفلا لوصو ىلإ
.ماعطلا
بابلا قلغأ مث نرفلا لخاد ماعطلا عضو بابلا حتفا ةظحللا هذه يفو
.
وأ ىلع طغضلاب يهطلا أدباو
هنع بترتي دق ،نرفلا ءامحإ نم ءاهتنا لبق ماعطلا عضو :ةظحم ىجري
.ةيئاهنلا يهطلا جئاتن ىلع ةئيس راثآ
.اتقؤم ةيلمعلا فقوت ىلإ يدؤي ءامحا ةيلمع ءانثأ بابلا حتف
ةجرد رييغت امئاد كنكمي .ءامحا ةلحرم ىلع يهطلا نمز لمتشي
.طبضلا حاتفم ريودت لخ نم اهيلإ نرفلا لوصو دارملا ةرارحلا
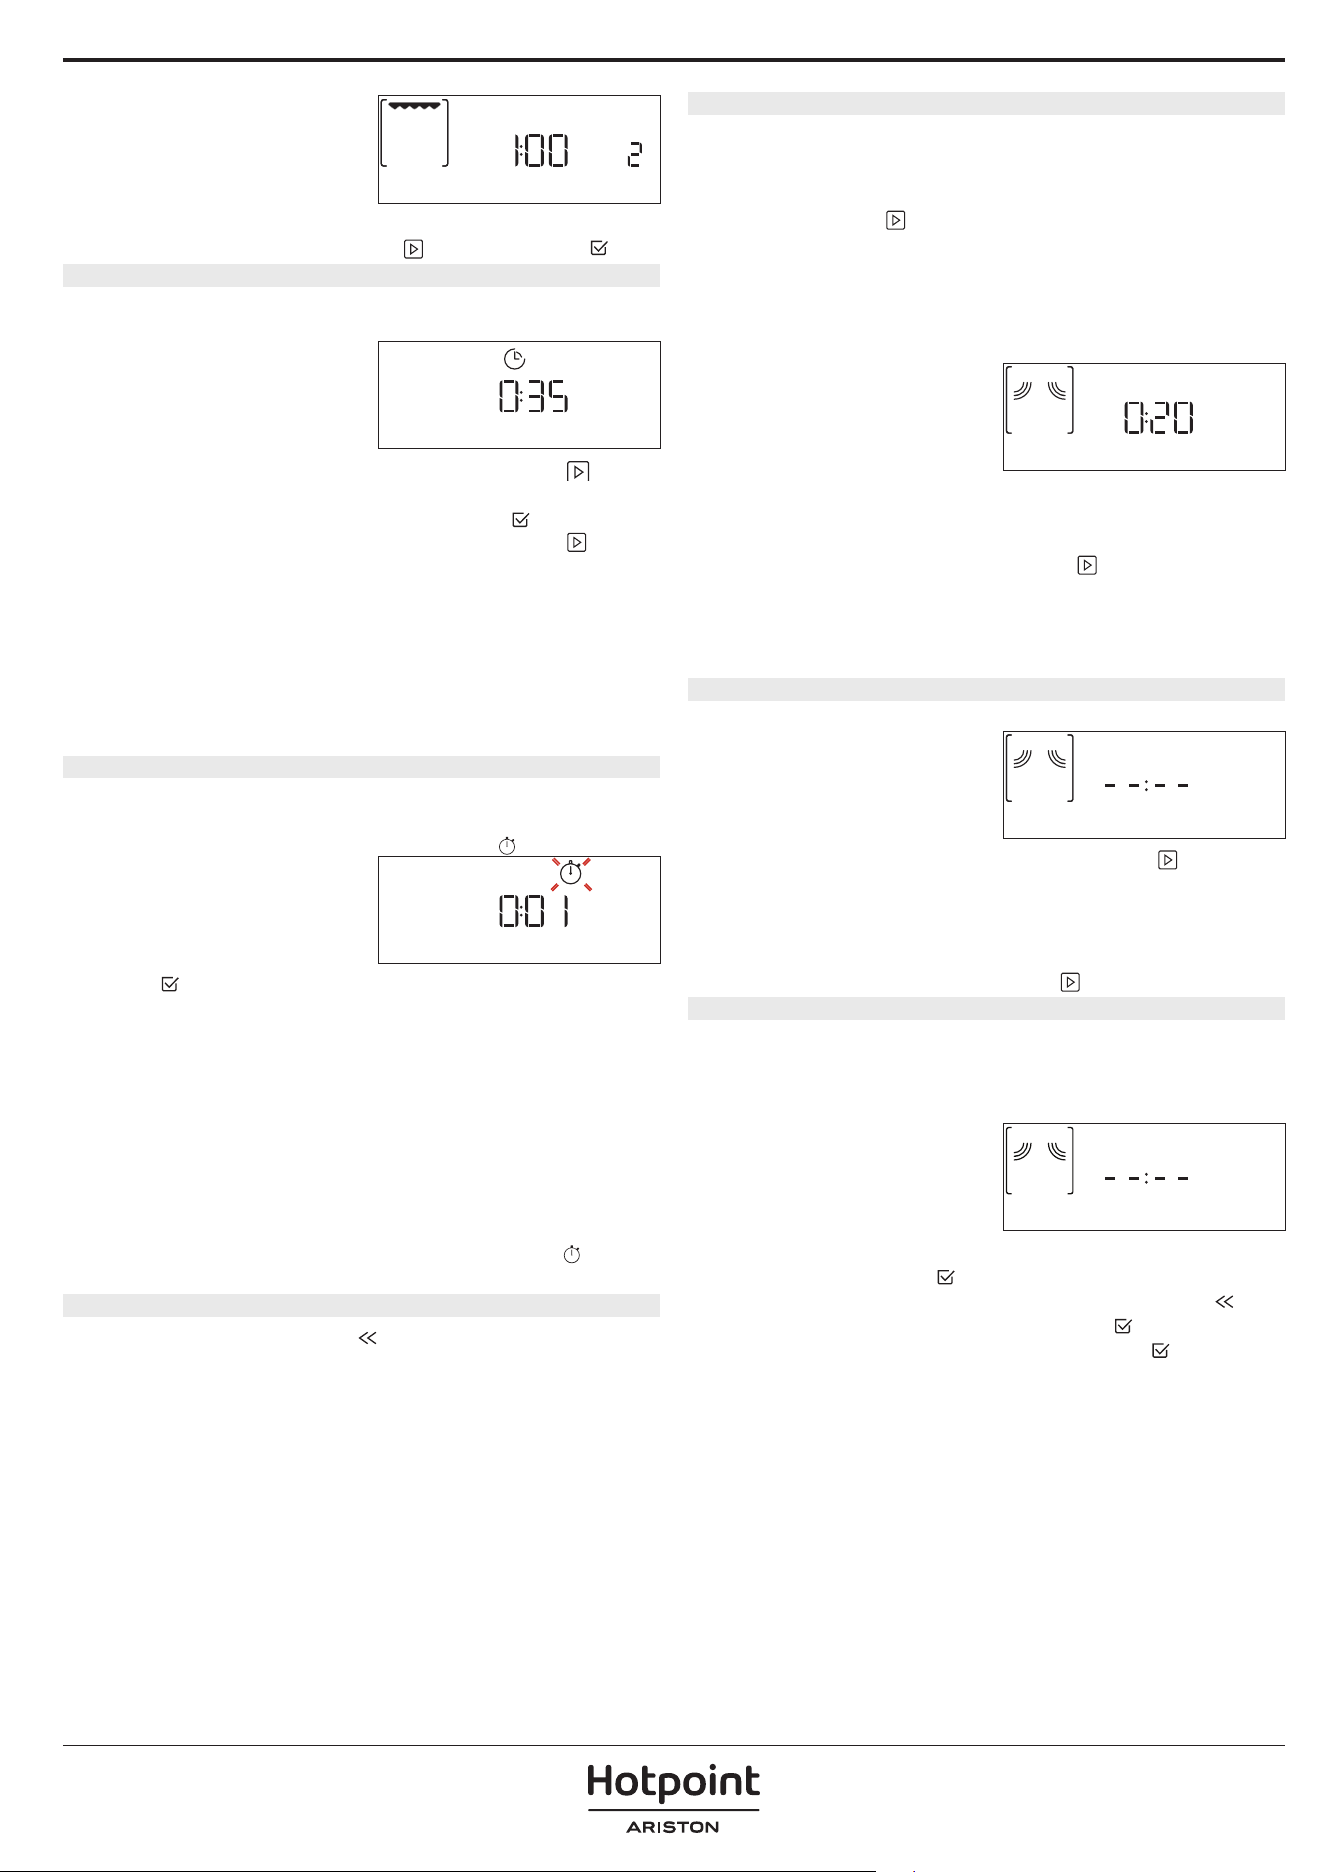
ماعطلا صحف وأ بيلقت وأ ماعط ةفاضإ/ يهطلل تقؤملا فاقيا .
تقؤملا فاقيا
ةيلاعف فاقيإ لخ نم ةتقؤم ةرتفل يهطلا فقوتي بابلا حتف دنع
.نيخستلا رصانع
.
ىلع طغضاو بابلا قلغأ ،يهطلا فانئتس
.بلطلا دنع بابلا حتفا يتمئاق فئاظو لخ :ةظحم ىجري
هبيلقت وأ هبلق وأ ماعطلا ةفاضإ
ةلحرم دعب ةمعطا ةفاضإ يتمئاقب يهطلا تافصو ضعب بلطتتس
فوس ةقيرطلا سفنب .يهطلا ةيلمع مامت تانوكملا ةفاضإ وأ ءامحا
.يهطلا ءانثأ هبيلقت وأ ماعطلا يلق كنم بلط
ُ
ي
مايقلا بولطملا ءارجا ضرعلا ةدحو ضرعتو ةيتوص ةراشإ ردصت
TURN FOOD
.هب
مث ،ضرعلا ةدحو ىلع كنم بل
ُ
ط يذلا ءارجاب مايقلل ،بابلا حتفا
.يهطلا ةلصاومل
ىلع طغضاو ،هقلغأ
نرفلا فنأتسي فوس ،هبيلقت وأ ماعطلا بلق كنم بل
ُ
ط اذإ :ةظحم ىجري
رمتست .ءارجإ يأب مايقلا متي مل نإو ىتح نيتقيقد رورم دعب يهطلا ةيلمع
يأ ذاختا متي مل اذإ :نيتقيقد ةدمل )ماعطلا ةفاضإ( "ADD FOOD" ةلحرم
.ةفيظولا ءاهنإ متي ءارجإ
يهطلا ءاهتنا .
.يهطلا لامتكا ىلإ ضرعلا ةدحو ريشتو ةيتوص ةراشإ ردصتسو
ىلع تقولا ةدايزو ةيوديلا ةقيرطلاب يهطلا ةلصاومل
ىلع طغضا
END
قئاقد 5 وأ )فيووركيملا فئاظو يف( ةيناث 30 اهنم لك رادقم لحارم
نع يهطلا نمز ةلاط طبضلا حاتفم ردأ وأ )فيووركيملا نودب(
ظافتحا متي فوس نيتلاحلا ك يف .ةديدج ةدم طبض قيرط
.يهطلا تارتمارابب
.ىرخأ ةرم يهطلا أدبي
ىلع طغضلا لخ نم
تضفملا .
20 ىلإ لصي ام ظفح كنكمي ،ةلوهس رثكأ زاهجلا لامعتسا لعجل
.كيدل ةلضفم فئاظو
مقرب ةفيظولا ظفح ضرعلا ةدحو ىلع كنم بلط
ُ
ي يهطلا ءاهتنا درجمب
.كتضفم ةمئاق يف 20 و 1 نيب
ةيلاحلا تادادعا نيزختو ،ةلضفمك ةفيظولا ظفح تدرأ اذإ
ADD FAVORITE?
طغضا بلطلا لهاجتل وأ ، ىلع طغضلاب مق ،دعب اميف اهمادختس
.
ىلع
مث ،مقرلا عضوم رايتخ طبضلا حاتفم ردأ
ىلع طغضلا دعب
.ديكأتلل
ىلع طغضا
هرايتخا قبس دق راتخملا مقرلا وأ ةئلتمم ةركاذلا تناك اذإ :ةظحم ىجري
.ةقباسلا ةفيظولا لادبتسا ديكأت نرفلا كنم بلطي فوس ،لعفلاب
حاتفم ردأ ،قح تقو يف اهظفحب تمق يتلا فئاظولا ءاعدتس
ةدحو كل ضرعت :)تضفملا( ”FAVORITE“ ىلع رايتخا
.ةلضفملا فئاظولاب ةحئ ضرعلا
طغضلا قيرط نع ديكأتلاب مقو ،ةفيظولا رايتخ طبضلا حاتفم ردأ
2. GRILL
.ليعفتلل ىلع طغضا مث ، ىلع
DIAMOND CLEAN ةفيظو .
،)ةصاخلا فئاظولا( Special Functions ىلإ رايتخا حاتفم ردأ
."Diamond Clean" ةفيظو ددح مث
عيمج ذيفنت كنم ضرعلا ةدحو بلطتس :ةفيظولا ليعفتل
طغضا
DIAMOND CLEAN ةةةةة
تاميلعتلا عبتا :فيظنت جئاتن لضفأ ىلع لوصحلل ةمزلا تاءارجا
،تاوطخلا عيمج نم ءاهتنا درجمب .ءاهتنا دنع
طغضلاب مق مث
.موزللا دنع فيظنتلا ةرود ليعفتل
طغضا
نادقف بنجتل فيظنتلا ةرود ءانثأ دقوملا باب حتف مدعب يصون :ةظحم ىجري
.ةيئاهنلا فيظنتلا ةجيتن ىلع ةئيس راثآ هنع بترتي دق يذلا ،ءاملا راخب
ءاهتنا درجمب ضرعلا ةدحو ىلع ضيمولا يف ةصاخ ةلاسر أدبتس
ةعطقب اهففجو ةيلخادلا حطسا حسما مث دربيل دقوملا كرتا .ةرودلا
.ةجنفسإ وأ شامق
ةناعتساب فيظنتلا ةيلمع ءاهنإب مقو ،ءاعولا جرخأ ،ءاهتنا دعب
شامق ةعطق مادختساب نرفلا فيوجت فيفجتب مقو ،ةمعان شامق ةعطقب
.ةللبم ةمعان
MINUTEMINDER ةفيظو .9
.يتاقيمك ضرعلا ةدحو مادختسا نكمي هنإف ،افقوتم نرفلا نوكي امدنع
:طبضلا حاتفم ردأ مث فقوتم نرفلا نأ دكأت ،ةفيظولا هذه ليعفتل
.ضرعلا ةدحو يف
ةنوقيا ضموت
ليعفتل
ىلع طغضا مث ةبوغرملا ةدملا طبضل طبضلا حاتفم ردأ
MINUTEMINDER
.يتاقيملا
يتاقيم ءاهتنا درجمب ضرعلا ةدحوب نايب رهظيو ةيتوص ةراشإ ردصت
.ةددحملا ةدملل يلزانتلا دعلا نم قئاقدلا
ةرادإب مق .يهطلا تارود نم ايأ ليعفتب قئاقدلا يتاقيم موقي :ةظحم ىجري
.يتاقيملاب ةطوبضملا ةدملا رييغتل طبضلا حاتفم
ردأ .اضيأ اهليعفتو ةفيظو رايتخا كنكمي ،قئاقدلا يتاقيم ليعفت روف
.اهيلإ جاتحت يتلا ةفيظولا رايتخ رايتخا حاتفم
لقتسم لكشب يلزانتلا دعلا يف يتاقيملا رمتسي ةفيظولا ليغشت درجمب
.اهسفن ةفيظولا عم لخادتلا نود
ضرع طقف متيس( قئاقدلا يتاقيم ةيؤر كنكمي ةلحرملا هذه لخ
.ةيفلخلا يف يلزانتلا دعلاب مايقلا يف رمتسيس ثيح ،)
ةنوقيا
.نرفلا فاقيإب مق وأ ةفيظولا لمتكت ىتح رظتنا ،تقؤملا ىلإ ةدوعلل
حيتافملا لفق .10
سمخ ةدمل ا
ً
طوغضم هب ظفتحاو ىلع طغضا ،حيتافملا ةحول لفقل
.حيتافملا ةحول لفق ءاغل ىرخأ ةرم كلذب مق .لقا ىلع يناوث

،ةمسلا يعاودل .يهطلا ءانثأ ةفيظولا هذه ليعفت اضيأ نكمي :ةظحم ىجري
KEYLOCK
.تقو يأ يف نرفلا فاقيإ نكمي
!هيبنت
•.فيووركيملا مادختسا دنع تاميلعتلا هذه عبتا
• نكمي ررش ثدحي ،يهطلا ةرجح رادجل ندعملا ةسمم ةلاح يف
.بابلل يلخادلا جاجزلا ريمدت وأ زاهجلا فلت ىلإ يدؤي نأ
• يف ةدوجوملا ياشلا قعم لثم ،ةيندعملا تانوكملا ىقبت نأ بجي
يهطلا ةرجح ناردج نم مس 2 نع لقت ةفاسم ىلع ،باوكا
اهضعب قوف ةرشابم ةعوضوملا تاقحلملا .بابلا لخاد نمو
.ةرارش دلوت ضعبلا
•.ريطقتلا ءاعوو ةياوشلا نيب عمجت
• طيقنتلا ةينيص .اهل ةصصخملا اهتاعافترا ىلع طقف تاقحلملا لخدأ
دق .طقف فيووركيملا ليغشتل ةبسانم تسيل زبخلا ةينيص وأ ةماعلا
.يهطلا ةرجح فلت ىلإ يدؤيو ررش لكشتي
• .معد ةدعاقك ةقفرملا ةياوشلا مدختسا
يف زاهجلا يف ةدوجوملا موينمولا يناوص ببستت نأ نكمي
.ررشلا نيوكتل ةجيتن زاهجلا فلت .ررش ثودح
• زاهجلا ليغشت يدؤي .زاهجلا يف موينمولا يناوص مدختست
.دئازلا ليمحتلا ىلإ يهطلا ةرجح لخاد ماعط دوجو نودب
• .
ً
وأ هيف ماعطلا عضو نود فيووركيملا نرف ليغشتب ا
ً
قلطم مقت
دنع .قابطل ريصقلا رابتخا وه هب حومسملا ديحولا ءانثتسا
ةحول ققشتت دق ،ا
ً
دج ةيلاع ةقاطب فيووركيملا يف راشفلا ريضحت
.دئازلا لمحلا ببسب بابلا
•.ا
ً
دج
ٍ
لاع ىوتسم ىلع فيووركيملا ةقاط طبضب ا
ً
دبأ مقت
•.طاو 600 ىصقأ دحب مدختسا
•.يجاجز قبط ىلع راشفلا سيك ا
ً
مئاد عض

ةديفم حئاصن
فيووركيملا نرف مادختساب يهطلا حئاصن
دنع كلذل ،نيعم قمع دنع إ ماعطلا فيووركيملا تاجوم قرتخت
حمستل ناكما ردق مهنيب دعاب تقولا سفن يف رصانع ةدع يهط
.فيووركيملا تاجومل ةنكمم ةيحطس ةقطنم ربكأ ضرعتب
يهط نامضل :ةريبكلا عطقلا نم عرسأ لكشب اهيهط متي ةريغصلا عطقلا
.مجحلا ةيواستم ءازجأ ىلإ ماعطلا عيطقتب مق ،سناجتم
نم فيووركيملا يهتني امدعب يهطلا ةلصاومل جاتحت ةمعطا مظعم
.يهطلا ةيلمع لمتكت ىتح رظتنا كلذل .اهيهط
يف اهعضو لبق كيتسبلا وأ قرولا سايكأ نم ةيكلسلا ةطبرا عزنا
.فيووركيملاب يهطلا ضرغل نرفلا
طغضلا سيفنتل ةكوش ةطساوب ةيكيتسبلا ةقاقرلا زخو وأ عطق يغبني
.يهطلا ةيلمع ءانثأ راخبلا مكارتل ارظن راجفنا عنمو
لئاوسلا
نود نايلغلا ةطقن زواجتي امب طرفم لكشب لئاوسلا نخست نأ نكمي
لئاوسلل ئجافملا ناروفلا يف كلذ ببستي دق .تاعاقف ةيأ روهظ
بيلقتب مق ،قنعلا ةقيض ةيعوا مدختسا ،اذه ثودح بنجتل .ةنخاسلا
ةريغص ةقعلم كرتاو فيووركيملا نرف يف ءاعولا عضو لبق لئاسلا
.ءاعولا يف ةرومغم
نرف نم ءاعولا جارخإ لبق ىرخأ ةرم بيلقتلاب مق ،نيخستلا دعب
.ةيانعب فيووركيملا
دمجملا ماعطلا
فرلا ىلع ةرشابم دمجتلا ةباذإب حصنن ،جئاتنلا لضفأ ىلع لوصحلل
فيفخلا كيتسبلا نم ءاعو مادختسا نكمي ،رما مزل اذإ .يكلسلا
.فيووركيملا نرفل بسانملا
لضفأ لكشب موحللا صوصو نجاوطلاو قولسملا ماعطلا دمجت بوذي
ماعطلا ءازجأ لصفا .دمجتلا ةباذإ ةرتف ءانثأ رخ نيح نم هبيلقت مت اذإ
.ةلصفنملا ءازجا يف عرسأ متت دمجتلا ةباذإ :دمجتلا ةباذإ أدبت امدنع
عضرلا ماعط
ةصاخلا ةجاجزلا وأ ماعطلا ءاعو يف لفطلا لئاوس وأ ماعط نيخست دنع
.ماعطلا ميدقت لبق ةرارحلا ةجرد نم ققحتلاو بيلقتلاب ا
ً
مئاد مق ،لفطلاب
رطخ يدافتو
ٍ
واستم لكشب ةرارحلا عيزوت نامض هنأش نم اذهو
.تاءاوتكا وأ قورحب ةباصا
.نيخستلا لبق ةجاجزلا ةملح وأ ءاعولا ءاطغ ةلازإ نم دكأت
زبخلاو كعكلا
."ةيديلقتلا" ةفيظولا مادختساب يصون ،زبخلا تاجتنمو كعكلل ةبسنلاب
عم ،"فيووركيملا + يديلقت" ددح ،يهطلا ةدم ريصقتل ،كلذ نم
ً
دبو
ظافحلا لجأ نم طاو 160 غلبت ىوصق ةقاط ىلع فيووركيملا طبض
.ةرطعو ةمعان تاجتنملا ىلع
اهعضو ةنكادلا ةيندعملا كعكلا بلاوق مدختسا ،"يديلقت" ةفيظولا عم
،"فيووركيملا + يديلقت" ةفيظولا عم امنيب ،قفرملا يكلسلا فرلا ىلع
فرلا ىلع ةعوضوم فيووركيملا يف مادختسل ةنمآ ةيواح مدختسا
.قفرملا يكلسلا
كامساو موحللا
محللا ةوارط ىلع ظافحلا عم ةعرسب رمحم حطس ىلع لوصحلل
نيخستلا نيب جمدت فئاظو مادختساب يصون ،لخادلا نم هتراصعو
.فيووركيملاب يهطلاو يرارحلا
ةردق ىوتسم طبضب مق ةنكمم يهط جئاتن لضفأ ىلع لوصحلل
.طاو 160 ةميقلا ىلع فيووركيملا

ةنايصلاو فيظنتلا
وأ ةنايصلاب ةقلعتم لامعأ ةيأب مايقلا لبق ا
ً
مامت دراب نرفلا نأ دكأت
.فيظنتلا
.راخبلاب فيظنت ةزهجأ ادبأ مدختست
ةيقاو تازافق دترا
اهن ،ةلاكأ/ةليزم تافظنم وأ ةطشاك قيحاسم ،ةيكلس فايلأ مدختست
.ررضلل زاهجلا حطسأ ضرعت دق
ةقلعتم لامعأ ةيأب مايقلا لبق ءابرهكلا ردصم نع نرفلا لصف بجي
.ةنايصلاب
ةيجراخلا حطسا
•.ةبطر فايلا ةقيقد شامق ةعطقب حطسا فيظنتب مق
فظنم نم تارطق عضب فضأف ،خاستا ةديدش حطسا تناك اذإ
.ةفاج شامق ةعطق مادختساب ةياهنلا يف اهففجو .ءاملا ىلإ دياحم
• هذه نم ي سمت ثدح اذإ .ةطشاك وأ ةلاكأ تافظنم مدختست
روفلا ىلع اهفيظنتب مق ،دصق نودب زاهجلا حطسأ عم تاجتنملا
.ةقيقدلا فايلا نم ةبطر ةعطقب
ةيلخادلا حطسا
• فيظنتلا لضف
ُ
ي ،هفيظنتب مق مث دربي نرفلا كرتا ،مادختسا لك دعب
.ةمعطا اياقب نع ةجتان عقب وأ بساور ةيأ ةلاز ،ئفاد وهو
مادختساب ةمعطا يهط ةجيتن هنيوكت مت ءاملل فثاكت يأ فيفجتلو
هحسمب مق مث امامت دربي ىتح نرفلا كرتا ،ءاملا نم ريبك ردق
.ةجنفسإ وأ شامق ةعطقب
• ةيلخادلا حطسا فيظنتل "Diamond Clean" ةفيظو ليعفتب مق
.يلاثم لكشب
•.مئم لئاس فظنم مادختساب بابلا جاجز فيظنتب مق
تاقحلملا
اهعم لماعتو ،مادختسا دعب قابطأ ليسغ فظنم يف تاقحلملا عقنا
ةمعطا اياقب ةلازإ نكمي .ةنخاس لازت تناك اذإ نرفلا تازافقب
.ةجنفسإ وأ ليسغ ةاشرف مادختساب
ءاملا مادختساب Crisp تاشمرقملا دادعإ ةينيص فيظنت بجي
ةعطقب فطلب اهكرفا ،ةدينعلا خاسول ةبسنلاب .لدتعم فظنمو
دربت Crisp تاشمرقملا دادعإ ةينيص ا
ً
مئاد كرتا .شامق
.فيظنتلا لبق
لاطعا يرحت ليلد
ةلكشملالمتحملا ببسلالحلا
.لمعي نرفلا
.يئابرهكلا رايتلا عاطقنا
.ةيئابرهكلا ةكبشلا نم لصفلا
يسيئرلا رايتلا ردصمب ةيئابرهك ةقاط دوجو نم ققحت
.ءابرهكلا ردصمب نرفلا ليصوت نمو
لطعلا ناك اذإ امم ققحتلل هليغشت دعأ مث ،نرفلا فقوأ
.امئاق لازي
هنأ مغر اجيجض ثدحي نرفلا
.فقوتم
.ةلاعف ديربتلا ةحورم.يهطلا ةيلمع يهتنت ىتح رظتناو بابلا حتفا
فرحلا ضرعت ضرعلا ةدحو
.فرحب وأ مقرب اعوبتم "F"
.زاهجلا تايجمربب للخ
يلي يذلا مقرلا ركذاو تاصتا زكرم عم لصاوت
."F" فرحلا
.نيخستلاب موقي دقوملا
)ضارعتسا( "DEMO" ةقيرطلا نوكت امدنع
عيمج ليعفت متي ،)لغشم( "ON" عضولا ىلع
موقي نرفلا نكلو ةحاتملا مئاوقلاو رماوا
.نيخستلاب
ضرعلا ةدحو ىلع )ضارعتسا( DEMO رهظت
.ةيناث 60 لك
نم )ضارعتسا عضو( "DEMO" ىلإ لوخدلاب مق
.)فاقيإ( "Off" رتخاو )تادادعا( "SETTINGS"
:لخ نم ةيفاضا جتنملا تامولعمو ةيسايقلا تادنتسملاو تاسايسلا ىلع روثعلا نكمي
•كزاهجب ةعيرسلا ةباجتسا دوك مادختسا
• docs . hotpoint . eu ينورتكلا انعقوم ةرايز
• ةحول ىلع ةروكذملا داوكا ركذ عيبلا دعب ام ةمدخب لاصتا دنع ىجري .)نامضلا بيتك يف فتاهلا مقر رظنا( ليدب لحك عيبلا دعب ام ةمدخل انزكرمب لاصتا وأ
.جتنملا زييمت
0000010
