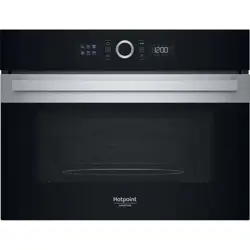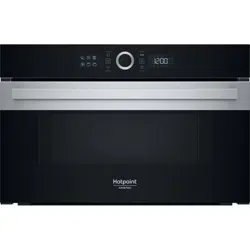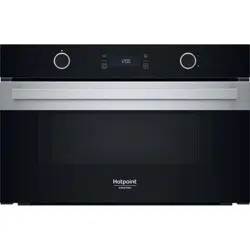
PRODUCT DESCRIPTION
1. Control panel
2. Identification plate
(do not remove)
3. Door
4. Upper heating element/grill
5. Light
6. Turntable
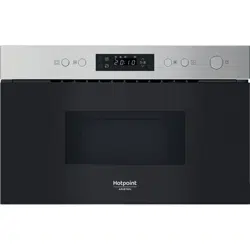
CONTROL PANEL DESCRIPTION
1
2 3 4 5 6 7
1. SELECTION KNOB
For switching the oven on by
selecting a function. Turn to the “0”
position to switch the oven off.
2. BACK
For returning to the previous screen.
During cooking, allows settings to
be changed.
3. STOP
For stopping the function that is
currently active at any time
4. DISPLAY
5. START
For immediately starting a function.
6. CONFIRM
For confirming a selected function
or a set value.
7. ADJUSTMENT KNOB
For scrolling through the menus and
applying or changing settings.
Please note: The knobs are retractable.
Press the knobs in the middle and they
pop up.
1
3
6
5
4
2
THANK YOU FOR BUYING A HOTPOINT-ARISTON
PRODUCT
In order to receive a more complete assistance, please
register your product on
www.register10.eu
Before using the appliance carefully read the Safety
Instruction.
PLEASE SCAN THE QR CODE ON
YOUR APPLIANCE IN ORDER TO
REACH MORE INFORMATION
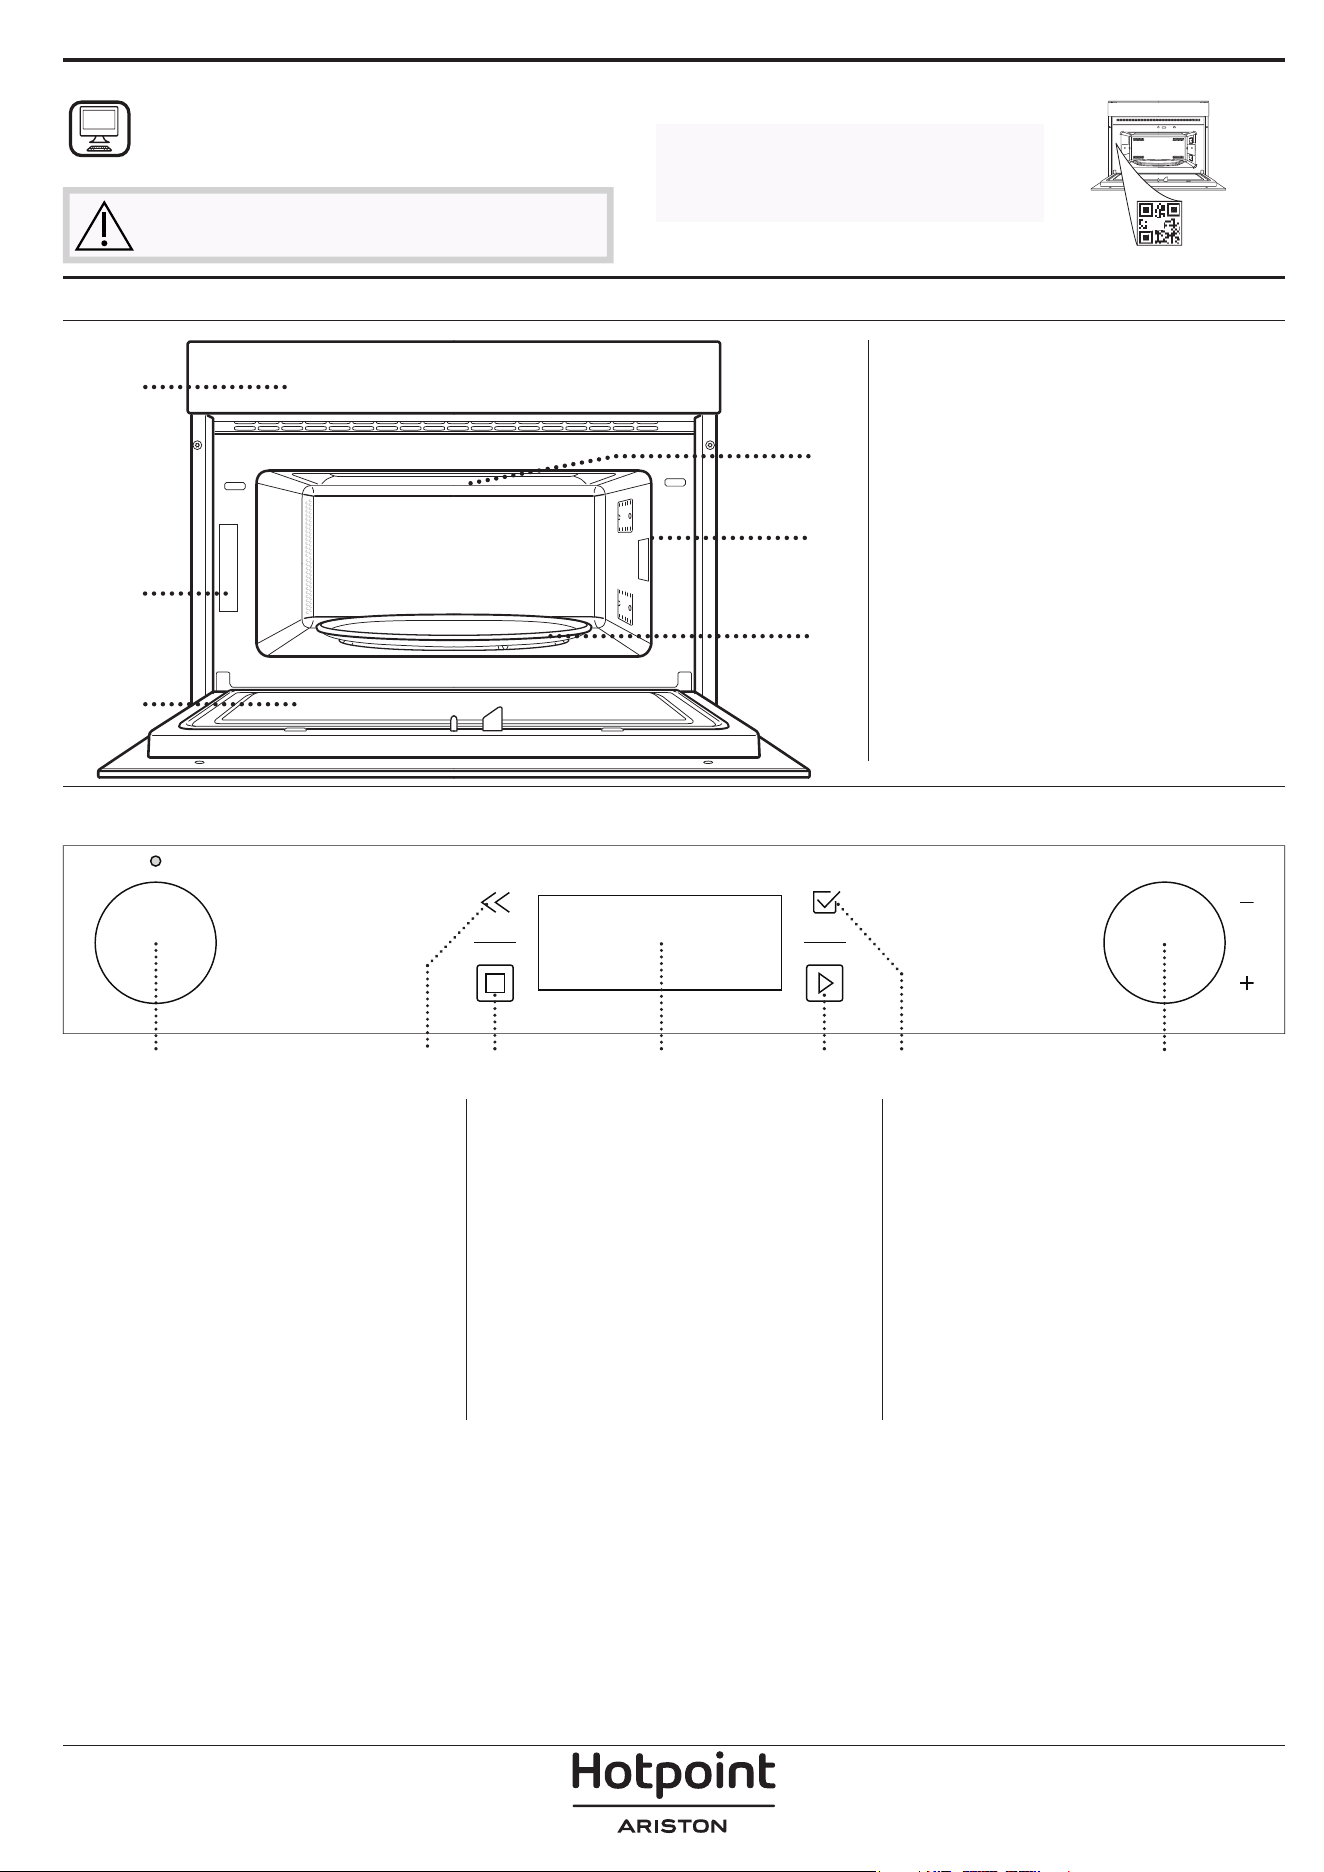
ACCESSORIES
TURNTABLE
Placed on its support, the glass
turntable can be used with all
cooking methods.
The turntable must always be used
as a base for other containers or accessories.
TURNTABLE SUPPORT
Only use the support for the glass
turntable.
Do not rest other accessories on the
support.
CRISP PLATE
Only for use with the designated
functions.
The Crisp plate must always be
placed in the centre of the glass
turntable and can be pre-heated
when empty, using the special function for this purpose
only. Place the food directly on the Crisp plate.
HANDLE FOR CRISP PLATE
Useful for removing the hot Crisp
plate from the oven.
WIRE RACK
This allows you to place food closer
to the grill, for perfectly browning
your dish.
Place the wire rack on the turntable,
making sure that it does not come
into contact with other surfaces.
STEAMER
3
2
1
To steam foods such as fish or
vegetables, place these in the
basket (2) and pour drinking
water (100 ml) into the bottom
of the steamer (3) to achieve
the right amount of steam.
To boil foods such as potatoes,
pasta, rice or cereals, place
these directly on the bottom of
the steamer (the basket is not
required) and add an appropriate amount of drinking
water for the amount you are cooking.
For best results, cover the steamer with the lid (1)
provided.
Always place the steamer on the glass turntable and
only use it with the appropriate cooking functions, or
with microwave function.
The steamer bottom has been designed also to be
used in combination with the special Hydro Self Clean
function.
The number and the type of accessories may vary depending
on which model is purchased.
Other accessories that are not supplied can be purchased
separately from the After-sales Service.
There are a number of accessories available on the
market. Before you buy, ensure they are suitable for
microwave use and resistant to oven temperatures.
Metallic containers for food or drink should never be
used during microwave cooking.
Always ensure that foods and accessories do not
come into contact with the inside walls of the oven.
Always ensure that the turntable is able to turn freely
before starting the oven. Take care not to unseat
the turntable whilst inserting or removing other
accessories.
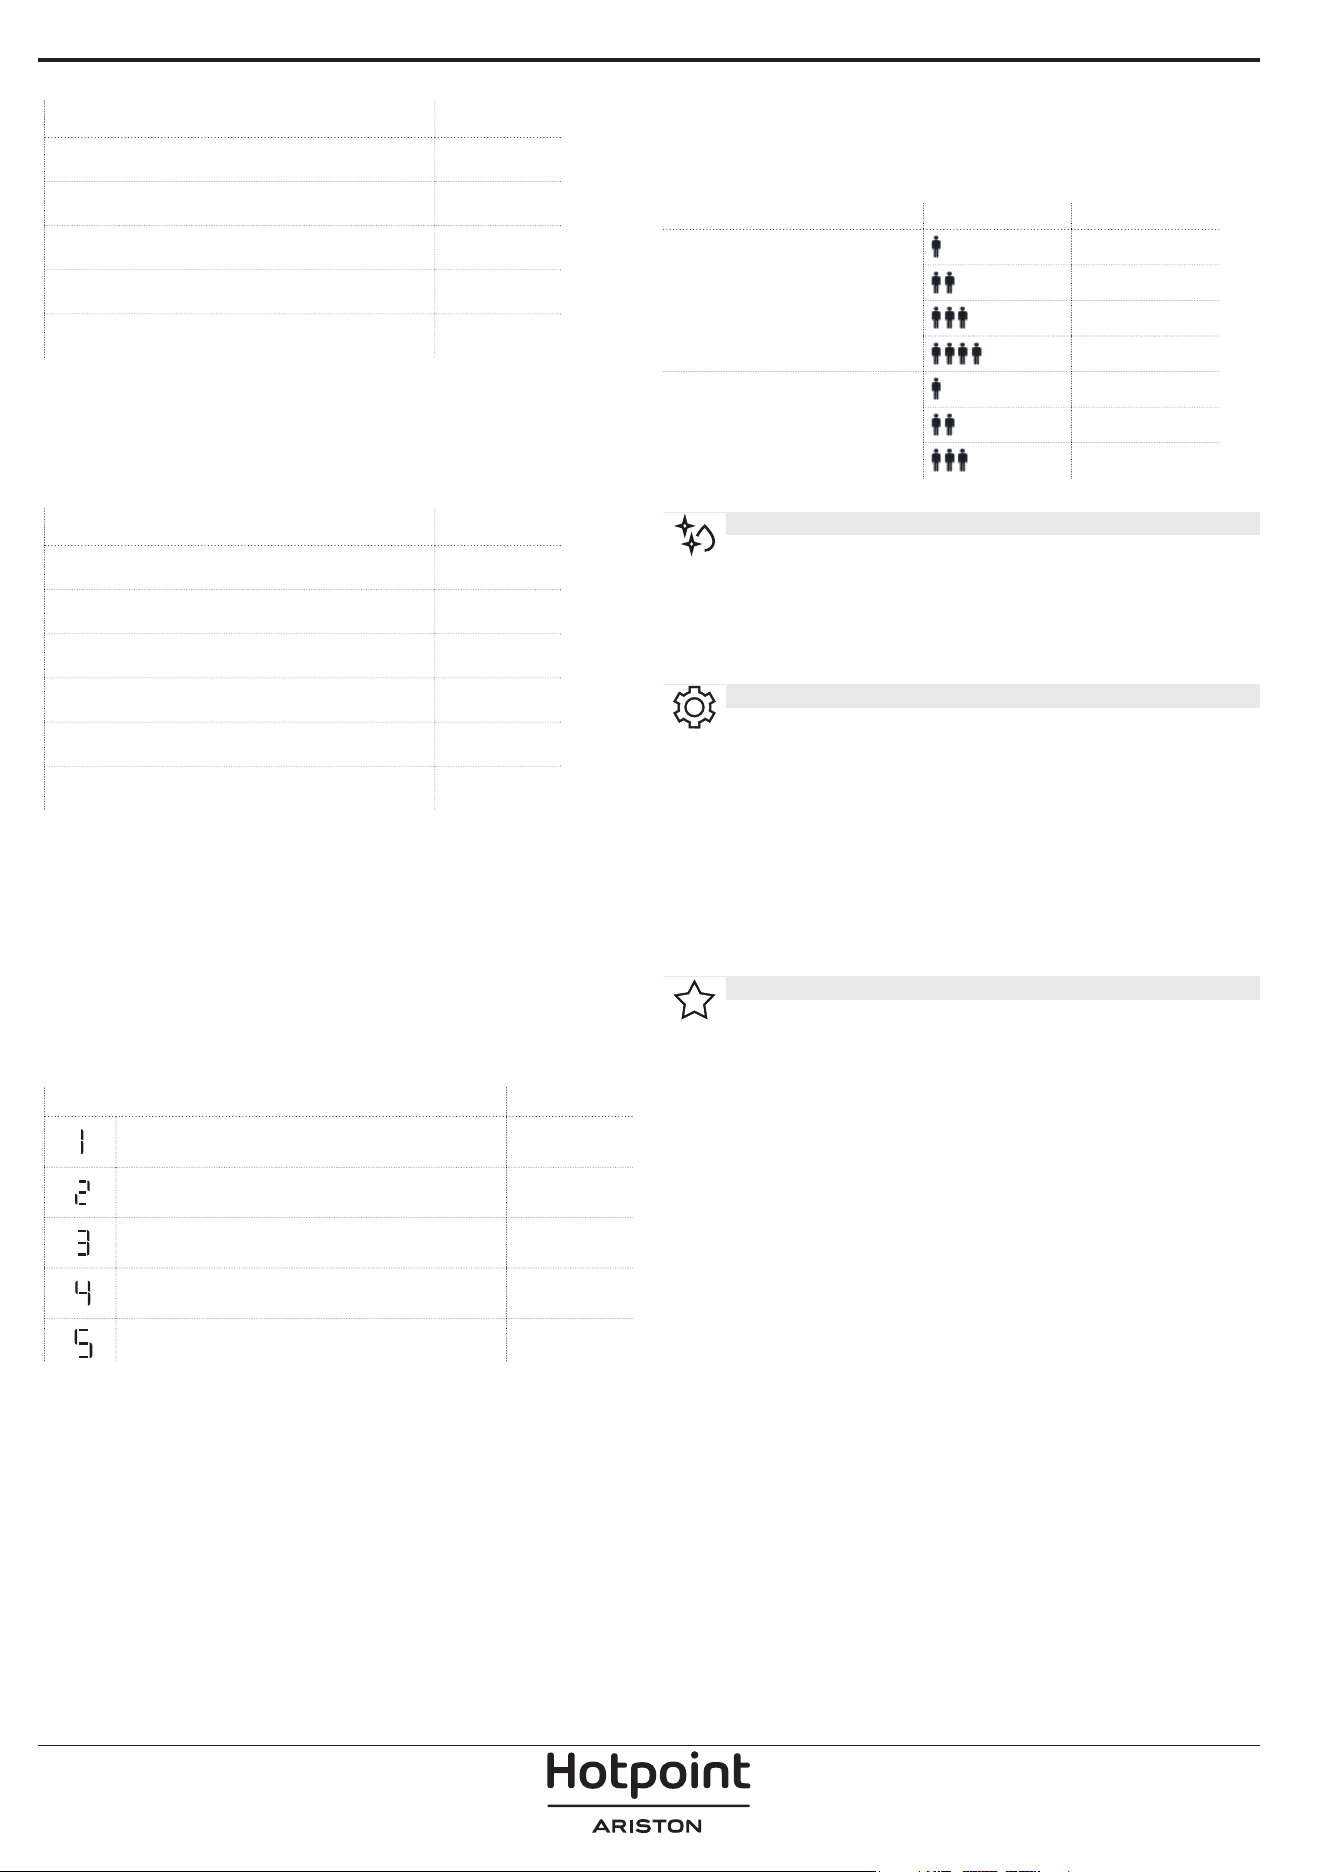
FUNCTIONS
MICROWAVE
For quickly cooking and reheating food or drinks.
POWER (W) RECOMMENDED FOR
1000
Quickly reheating drinks or other foods with a
high water content.
800 Cooking vegetables.
650 Cooking meat and sh.
500
Cooking meaty sauces, or sauces containing
cheese or egg. Finishing o meat pies or pasta
bakes.
350
Slow, gently cooking. Perfect for melting butter or
chocolate.
160
Defrosting frozen foods or softening butter and
cheese.
90 Softening ice cream.
ACTION FOOD POWER (W) DURATION (min.)
Reheat 2 cups 1000 1 - 2
Reheat
Mashed potatoes
(1 kg)
1000 9 - 11
Defrost Minced Meat (500 g) 160 13 - 14
Cook Sponge cake 800 6 - 7
Cook Egg custard 650 11 - 12
Cook Meat loaf 800 18 - 20
CRISP
For perfectly browning a dish, both on the top
and bottom of the food. This function must only be
used with the special Crisp plate.
FOOD DURATION (min.)
Leavened cake 7 - 10
Hamburger 8 - 10 *
* Turn food halfway through cooking.
Required accessories: Crisp plate, handle for the Crisp plate
GRILL
For browning, grilling and gratins. We recommend
turning the food during cooking.
FOOD DURATION (min.)
Toast 10 - 12
Prawns 18 - 22
Recommended accessories: Wire rack
GRILL+ MW
For quickly cooking and gratinating dishes,
combining the microwave and grill functions.
FOOD POWER (W) DURATION (min.)
Potatoes gratin 650 20 - 22
Roast chicken 650 40 - 45
Recommended accessories: Wire rack
DYNAMIC DEFROST
For quickly defrosting various different types of
food simply by specifying their weight. Food should be
placed directly on the glass turntable, except for Crisp
Bread Defrost. Turn the food when prompted.
CRISP BREAD DEFROST
This exclusive function allows you to defrost frozen
bread. Combining both Defrost and Crisp technologies,
your bread will taste and feel as if it were freshly baked.
Use this function to quickly defrost and heat frozen
rolls, baguettes & croissants. The Crisp Plate must be
used in combinaton with this function, directly placed
on wire shelf.
FOOD WEIGHT (g)
TIMED DEFROST -
MEAT 100 - 2000
POULTRY 100 - 2500
FISH 100 - 1500
CRISP BREAD DEFROST 50 - 500
DYNAMIC REHEAT
For reheating ready-made food that is either
frozen or at room temperature. The oven automatically
calculates the settings required to achieve the best
results in the shortest amount of time. Place food on a
microwave-safe and heatproof dinner plate or dish.
FOOD WEIGHT (g)
PLATED MEAL 250 - 500
FROZEN LASAGNA 250 - 500
SOUP 200 - 800
WATER 100 - 500
MY MENU
These functions automatically select the best
temperature and cooking method for all types of food.
CRISP
For quickly reheating and cooking frozen foods and
giving them a golden, crunchy top. Only use this
function with the crisp plate provided. Turn the food
when prompted.
FOOD WEIGHT (g)
PIZZA [FROZEN] 200 - 800
BURGER PATTIES 200 - 600
POTATOES FRIED [FROZEN] 200 - 500
CHICKEN NUGGETS [FROZEN] 100 - 500
FISH FINGERS [FROZEN] 100 - 500
Required accessories: Crisp plate, handle for crisp plate.
COOK
For cooking foods quickly and achieving optimal results.
Use a heatproof container suitable for microwave use.
FOOD WEIGHT (g)
ROAST CHICKEN 800 - 1500
POTATOES GRATIN 200 - 1000
STUFFED VEGETABLES 200 - 800
PORK RIBS 200 - 800
SCRAMBLED EGGS 100 - 500
POPCORN 90
STEAM
For steam-cooking foods such as vegetables or fish,
using the steamer provided. Distribute evenly the food
into the steamer basket and and pour drinking water
(100 ml) into the bottom of the steamer. The oven
automatically calculates the settings required to achieve
perfect results. During the initial part of the cooking,
microwaves generate steam, bringing the water add
into the bottom of the steamer to boil.
FOOD WEIGHT (g)
ROOTS VEGETABLES STEAMED 150 - 500
SOFT VEGETABLES STEAMED 150 - 500
VEGETABLES STEAMED [FROZEN] 150 - 500
FISH FILLETS STEAMED 150 - 500
POULTRY BREAST STEAMED 150 - 500
Required accessories: Steamer
RICE & PASTA
To quickly cook rice or pasta. This function must only be
used in combination with the steamer.
Set recommended cook time for rice or pasta accordingly.
FOOD PORTIONS WEIGHT (g)
RICE
100
200
300
400
PASTA
70
140
210
Required accessories: Steamer bottom and lid
HYDRO SELF CLEAN
The action of the steam released during this
special cleaning cycle allows dirt and food residues to
be removed with ease. Pour a cup of drinking water into
the supplied steamer bottom (3) only or on a microwave
proof container and activate the function.
SETTINGS
For adjusting the oven settings.
When “ECO” mode is active the brightness of the display will
be reduced to save energy and lamp switches o after 1
minute.
When “DEMO” is “On” all commands are active and menus
available but the oven doesn’t heat up. To deactivate this
mode, access “DEMO” from “SETTINGS” menu and select “O ”.
By selecting “FACTORY RESET”, the product switches o and
then it returns to rst switch on. All settings will be deleted.
FAVORITES
For retrieving the list of 10 favorite functions.
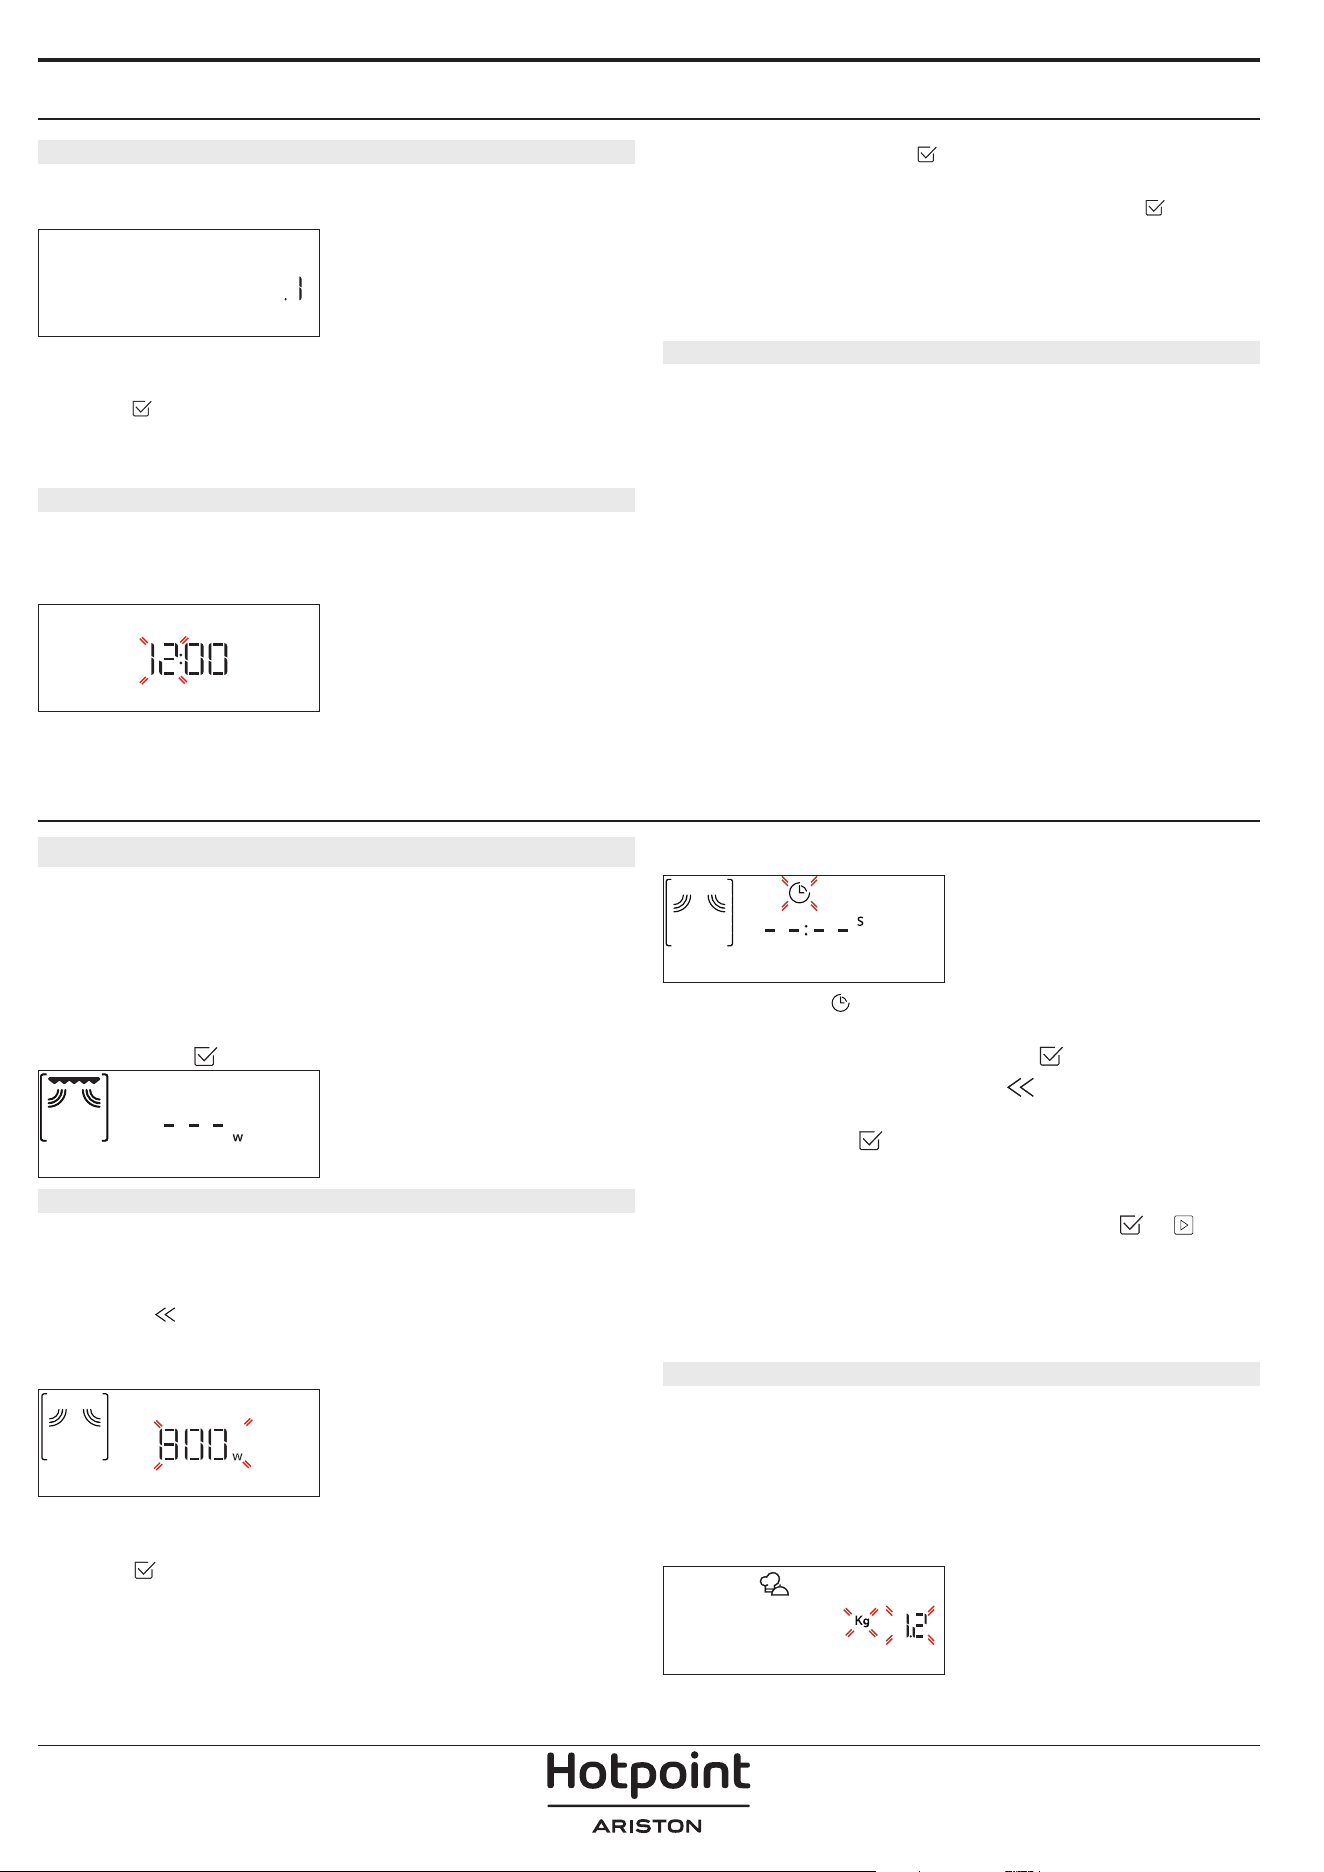
FIRST TIME USE
1. SELECT THE LANGUAGE
You will need to set the language and the time when
you switch on the appliance for the first time: “English”
will show on the display.
English
Turn the adjustment knob to scroll through the list of
available languages and select the one you require.
Press
to confirm your selection.
Please note: The language can subsequently be changed by
selecting “LANGUAGE” in “SETTINGS” menu.
2. SET THE TIME
After selecting the power, you will need to set the
current time: The two digits for the hour will flash on
the display.
CLOCK
Turn the adjustment knob to set the current hour and
press : The two digits for the minutes will flash on the
display. Turn the adjustment knob to set the minutes
and press
to confirm.
Please note: You may need to set the time again following
lengthy power outages. Select “CLOCK” in “SETTINGS” menu.
3. CLEAN THE OVEN
A new oven may release odours that have been left
behind during manufacturing: this is completely
normal. Before starting to cook food, we therefore
recommend cleaning the oven with it empty in order to
remove any possible odours.
Remove any protective cardboard or transparent film
from the oven and remove any accessories from inside
it.
Activate the “Hydro Self Clean” function. Follow the
instructions for setting the function correctly.
Please note: It is advisable to air the room after using the
appliance for the rst time.
DAILY USE
1. SELECT A FUNCTION
Turn the selection knob to switch on the oven and show
the function you require on the display.
To select an item from a menu (the display will show the
first available item), turn the adjustment knob until the
item you require is shown.
The display will show the name of the function and its
basic settings: Press
to confirm.
GRILL+MW
2. SET THE FUNCTION
After having selected the function you require, you can
change its settings. The display will show the settings
that can be changed in sequence. Pressing
allows
you to change the previous setting again.
POWER
MW POWER
When the value flashes on the display, turn the
adjustment knob to change it, then press
to confirm
and continue with the settings that follow (if possible).
DURATION
DURATION
When the icon flashes on the display, turn the
adjustment knob to set the cooking time you require
and then press
to confirm.
Please note: You can adjust the cooking time that has been
set during cooking by pressing
: turn the adjustment knob
to amend it and then press
to con rm.
In non-microwave functions you do not have to set the
cooking time if you want to manage cooking manually
(untimed): Press
or to confirm and start the
function.
By selecting this mode, you cannot program a delayed
start.
. MY MENU
These functions automatically select the best cooking
mode, power and duration for all the dishes available.
When required, simply indicate the characteristic of
food to obtain an optimal result.
WEIGHT / PORTIONS
KILOGRAMS
To set the function correctly, follow the indications on
the display, when prompted, and turn the adjustment
knob to set the required value then press
to confirm.
DONENESS
In My Menu functions it is possible to adjust the
doneness level.
DONENESS
When prompted, turn the adjustment knob to select the
desired level between Light/Low (-1) and Extra/High
(+1). Press
or to confirm and start the function.
3. ACTIVATE THE FUNCTION
At any time, if the default values are those desired or
once you have applied the settings you require, press
to activate the function.
Every time the
is pressed again, the cooking
time will be increased by a further 30 seconds (5
minutes steps In functions which do not activate the
microwave).
During the delay phase, by pressing the oven will
ask if you want to skip this phase, starting immediately
the function.
Please note: At any time you can stop the function that has
been activated by pressing .
JET START
When the oven is switched off, press
to activate
cooking with the microwave function set at full power
(1000 W) for 30 seconds.
4. PAUSE COOKING / TURN OR STIR FOOD
PAUSE
By opening the door, the cooking will be temporarily
paused through deactivating heating elements.
To resume the cooking, close the door and press
.
Please note: During “My menu” functions open the door only
when prompted.
TURN OR STIR FOOD
Some My menu recipes will require to turn or stir the
food during cooking.
TURN FOOD
An audible signal will sound and the display shows the
action to be done.
Open the door, do the action prompted by the display
and close the door, then press
to continue cooking.
Please note: When turning or stirring is needed, after 2
minutes, even if no action is performed, the oven will resume
the cooking.
5. END OF COOKING
An audible signal will sound and the display will
indicate that cooking is complete.
END
Press to continue cooking in manual mode adding
time in steps of 30 seconds (in microwave functions) or
5 minutes (without microwave) or turn the adjustment
knob to extend the cooking time by setting a new
duration. In both cases, the cooking parameters will be
retained.
By pressing
or the cooking starts again.
. FAVORITES
To make the oven easier to use, it can save up to 10 of
your favorite functions.
Once cooking is complete the display will prompt you
to save the function in a number between 1 and 10 on
your list of favorites.
ADD FAVORITE?
If you would like to save a function as a favorite and
store the current settings for future use, press
otherwise, to ignore the request press .
Once
has been pressed, turn the adjustment knob to
select the number position, then press
to confirm.
Please note: If the memory is full or the number chosen has
already been taken, the oven will ask you to con rm
overwriting the previous function.
To call up the functions you have saved at a later time,
turn the selection knob on “FAVORITE”: The display will
show your list of favorite functions.
2. Vegetables
Turn the adjustment knob to select the function, confirm
by pressing
, and then press to activate.
. HYDRO SELF CLEAN
Remove all accessories (with the exception of the glass
turntable) from the microwave oven before activating
the function.
Turn the selection knob to access the “Hydro Self Clean”
function.
Hydro Self Clean
Press to activate the cleaning function: the display
will prompt in sequence actions to be performed before
starting the cleaning. Press
anytime when done.
When required, pour a cup of drinking water into the
supplied steamer bottom or in a microwave resistant
container, then close the door.
After the last confirmation, press
to start the
cleaning cycle.
Once finished, remove the container, finish the cleaning
with the help of a smooth cloth and then dry the oven
cavity using a damp microfibre cloth.
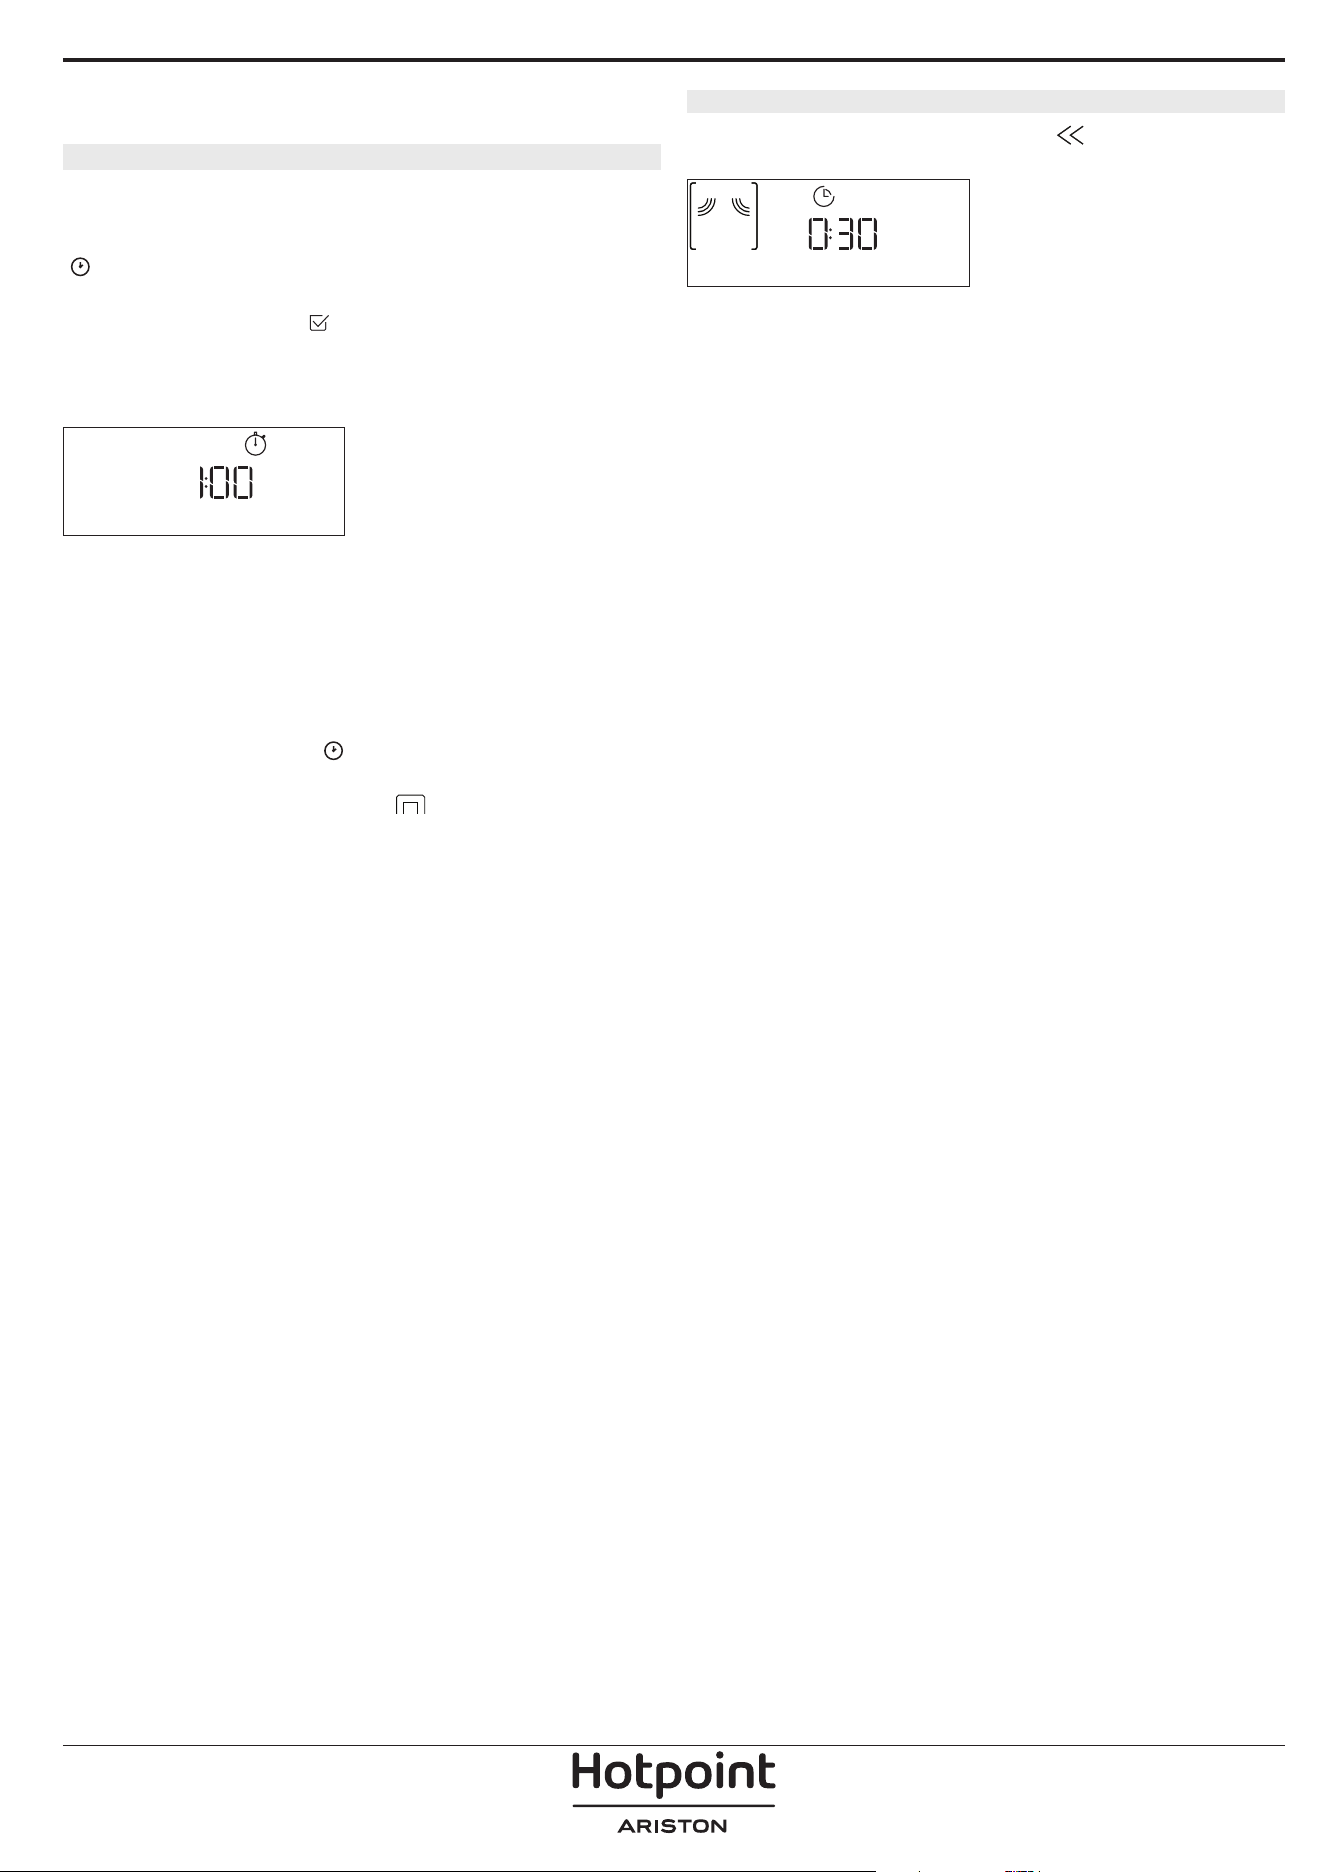
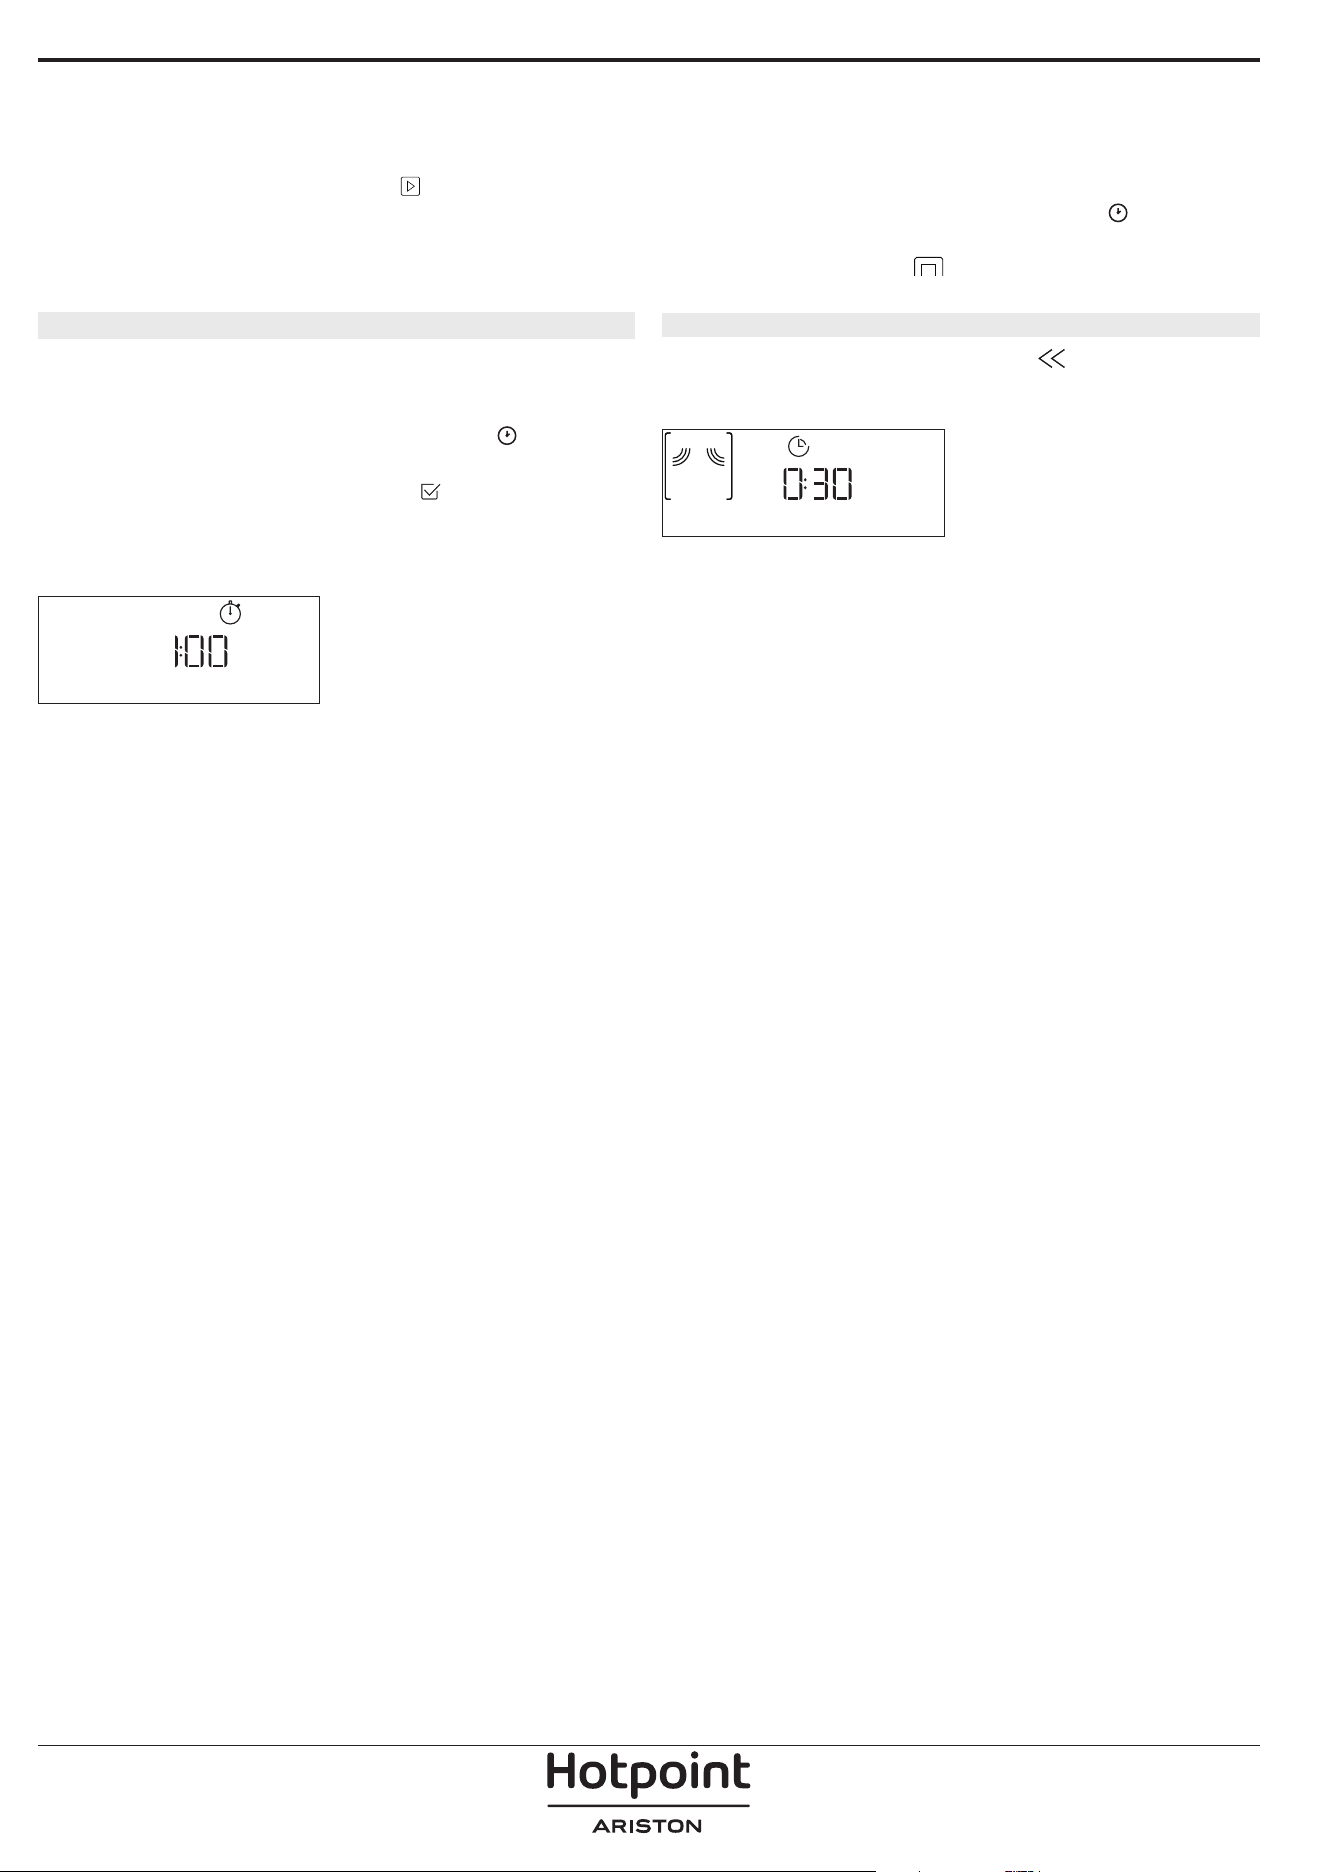
. MINUTEMINDER
When the oven is switched off, the display can be used
as a timer. To activate this function, make sure that the
oven is switched off and turn the adjustment knob: The
icon will flash on the display.
Turn the adjustment knob to set the length of time you
require and then press
to activate the timer.
An audible signal will sound and the display will
indicate once the minuteminder has finished counting
down the selected time.
MINUTE-MINDER
Once the minuteminder has been activated, you can
also select and activate a function. Turn the selection
knob to select the function you require.
Once the function has started, the timer will continue to
count down independently without interfering with the
function itself.
During this phase, it isn’t possible to see the
minuteminder (only the
icon will be displayed), that
will continue counting down in background. To retrieve
the minuteminder screen press
to stop the function
that is currently active.
. KEYLOCK
To lock the keypad, press and hold for at least five
seconds. Do this again to unlock the keypad.
KEYLOCK
Please note: This function can also be activated during
cooking. For safety reasons, the oven can be switched o at
any time.
FOOD FUNCTION POWER (W) TIME (MIN) ACCESSORIES
Sponge cake - 7 - 15
Fruit pie - 12 - 20
Cookies - 4 - 6
Savoury pies or Quiche Lorraine (1 - 1.2 kg) - 18 - 25
Ready-made meals (250 - 500 g) 800 4 - 7 -
Lasagna/pasta bake
350 - 500 15 - 25
Frozen lasagna (500 - 700 g) 500 - 800 14 - 20 -
Pizza (400 - 500 g)
- 10 - 12
Meat (chops, steaks) 500 10 - 15
Poultry (whole, 800 g - 1.5 kg) 350 - 500 30 - 45 *
Chicken llets or pieces 350 - 500 10 - 17
Roasts (800 g - 1.2 kg) 350 - 500 25 - 40 *
Sausages/kebabs - 20 - 40 *
Sausages/hamburgers - 6 - 16 *
**
Fish (slices or llets)
160 - 350 15 - 20 *
Whole sh (800 g - 1.2 kg) 160 - 350 20 - 30 *
Baked potatoes (600 g - 1 kg) 350 - 500 30 - 50 *
Potato wedges (500 g - 800 g) - 20 - 30
Baked apples
160 - 350 15 - 25
COOKING TABLE
* Turn the food halfway through cooking ** Preheat the crisp plate for 3 - 5 minutes
FUNCTIONS
Crisp Grill Microwave Grill + Microwave
ACCESSORIES
Wire rack Crisp plate

CLEANING
Make sure that the appliance has cooled down before
carrying out any maintenance or cleaning.
Never use steam cleaning equipment.
Do not use wire wool, abrasive scourers or abrasive/
corrosive cleaning agents, as these could damage the
surfaces of the appliance.
INTERIOR AND EXTERIOR SURFACES
• Clean the surfaces with a damp microfibre cloth.
If they are very dirty, add a few drops of pH-neutral
detergent. Finish off with a dry cloth.
• Clean the glass in the door with a suitable liquid
detergent.
• At regular intervals, or in case of spills, remove the
turntable and its support to clean the bottom of the
oven, removing all food residue.
• Activate the “Hydro Self Clean” function for an
optimum cleaning of the internal surfaces.
• The grill does not need to be cleaned as the intense
heat burns away any dirt. Use this function on a regular
basis.
ACCESSORIES
All accessories are dishwasher safe with the exception
of the Crisp plate.
The Crisp plate should be cleaned using water and a
mild detergent. For stubborn dirt, rub gently with a
cloth. Always leave the Crisp plate to cool down before
cleaning.
TROUBLESHOOTING
Problem Possible cause Solution
The oven is not working.
Power cut.
Disconnection from the mains.
Check for the presence of mains electrical power and
whether the oven is connected to the electricity supply.
Turn off the oven and restart it to see if the fault persists.
The oven makes noises, even when it is
switched off.
Cooling fan active.
Open the door or hold or wait until the cooling process has
finished.
“Err” is shown on the display Software fault.
Contact the Call Center and state the number following
“Err”.
Policies, standard documentation and additional product information can be found by:
• Using the QR on your product
• Visiting our website docs . hotpoint.eu
• Alternatively, contact our After-sales Service (See phone number in the warranty booklet). When contacting
our After-sales Service, please state the codes provided on your product's identi cation plate.
DESCRIZIONE DEL PRODOTTO
1. Pannello comandi
2. Targhetta matricola
(da non rimuovere)
3. Porta
4. Resistenza superiore / grill
5. Luce
6. Piatto rotante
DESCRIZIONE DEL PANNELLO COMANDI
1
2 3 4 5 6 7
1. MANOPOLA DI SELEZIONE
Per accendere il forno selezionando
una funzione. Per spegnere il forno,
ruotare sulla posizione “0”.
2. INDIETRO
Per tornare alla schermata
precedente.
Durante la cottura, permette di
modificare le impostazioni.
3. STOP
Per interrompere in qualsiasi
momento la funzione
correntemente attiva
4. DISPLAY
5. AVVIO
Per avviare immediatamente una
funzione.
6. CONFERMA
Per confermare la selezione di una
funzione o un valore impostato.
7. MANOPOLA DI REGOLAZIONE
Per scorrere i menu, impostare o
modificare i valori.
Note: Le manopole sono a scomparsa.
Fare pressione al centro delle stesse per
estrarle dalla loro sede.
1
3
6
5
4
2
GRAZIE PER AVERE ACQUISTATO UN PRODOTTO
HOTPOINT-ARISTON
Per ricevere un'assistenza più completa, registrare il
prodotto su
www.register10.eu
Prima di utilizzare l'apparecchio leggere
attentamente le istruzioni di sicurezza.
SCANSIONARE IL CODICE QR
SUL PROPRIO APPARECCHIO
PER OTTENERE MAGGIORI
INFORMAZIONI
ACCESSORI
PIATTO ROTANTE
Appoggiato sull’apposito supporto,
il piatto rotante in vetro può essere
utilizzato in tutte le modalità di
cottura.
Il piatto rotante va sempre usato come base per altri
contenitori o accessori.
SUPPORTO PER PIATTO ROTANTE
Utilizzare il supporto soltanto per il
piatto rotante in vetro.
Non appoggiare altri accessori sul
supporto.
PIATTO CRISP
Da utilizzare solo con le funzioni
designate.
Il piatto Crisp deve essere sempre
appoggiato al centro del piatto
rotante in vetro e può essere
preriscaldato a vuoto, utilizzando solo la speciale
funzione dedicata. Disporre gli alimenti direttamente
sul piatto Crisp.
IMPUGNATURA PER PIATTO CRISP
Utile per rimuovere il piatto Crisp
caldo dal forno.
GRIGLIA
Permette di avvicinare il cibo al grill,
assicurandone una piacevole
doratura.
Appoggiare la griglia sul piatto
rotante, evitando che venga a
contatto con altre superfici.
VAPORIERA
3
2
1
Per cuocere a vapore alimenti
come pesce o verdure,
appoggiarli sul cestello (2) e
versare acqua potabile (100ml)
sul fondo della vaporiera (3) per
ottenere una corretta quantità
di vapore.
Per lessare alimenti come
patate, pasta, riso o cereali,
disporli direttamente sul
fondo della vaporiera (non è necessario il cestello)
aggiungendo una quantità proporzionata di acqua
potabile.
Per ottenere un risultato ottimale si consiglia di
chiudere la vaporiera con l’apposito coperchio (1).
Appoggiare sempre la vaporiera sul piatto rotante in
vetro e usarla esclusivamente con le funzioni di cottura
dedicate o con le microonde.
Il fondo della vaporiera è studiato per essere usato
anche con la speciale funzione Auto idro-pulizia.
Il numero e il tipo di accessori possono variare a seconda del
modello acquistato.
Gli altri accessori non in dotazione possono essere acquistati
separatamente presso il Servizio Assistenza Tecnica.
In commercio sono disponibili diversi accessori.
Prima di acquistarli, accertarsi che siano idonei alla
cottura a microonde e in forno.
Contenitori metallici per cibi o bevande non vanno
mai usati durante una cottura a microonde.
Verificare che alimenti e accessori non tocchino le
pareti interne del forno.
Prima di avviare il forno, assicurarsi sempre che
il piatto rotante possa ruotare liberamente. Fare
attenzione a non spostare il piatto rotante dalla
sua sede mentre si inseriscono o rimuovono altri
accessori.
FUNZIONI
MICROONDE
Per cuocere e riscaldare rapidamente alimenti o
bevande.
POTENZA (W) CONSIGLIATA PER
1000
Riscaldamento rapido di bevande o altri alimenti
ad alto contenuto di acqua.
800 Cottura di verdure.
650 Cottura di carne e pesce.
500
Cottura di sughi di carne, salse con formaggio o
uova. Finitura di sformati di carne o paste al forno..
350
Cotture lente e delicate. Per fondere burro o
cioccolata.
160
Scongelare alimenti surgelati o ammorbidire
burro e formaggi.
90 Per ammorbidire i gelati.
AZIONE ALIMENTO
POTENZA
(W)
DURATA (min.)
Riscalda-
mento
2 tazze 1000 1 - 2
Riscalda-
mento
Puré di patate
(1 kg)
1000 9 - 11
Scongelare
Carne macinata (500
g)
160 13 - 14
Cottura Pan di spagna 800 6 - 7
Cottura Crema all’uovo 650 11 - 12
Cottura Polpettone 800 18 - 20
CRISP
Per ottenere una doratura perfetta sia sulla
superficie superiore che su quella inferiore del cibo.
Questa funzione deve essere usata solo con lo speciale
piatto Crisp.
ALIMENTO DURATA (min.)
Torte lievitate 7 - 10
Hamburger 8 - 10 *
* Girare il cibo a metà cottura.
Accessori necessari: piatto Crisp, impugnatura per piatto Crisp
GRILL
Per dorare, grigliare o gratinare le pietanze. Si
consiglia di girare gli alimenti durante la cottura.
ALIMENTO DURATA (min.)
Pane tostato 10 - 12
Gamberetti 18 - 22
Accessori consigliati: Griglia
GRILL + MICROONDE
Per cuocere e gratinare rapidamente le pietanze
combinando le microonde con il grill.
ALIMENTO
POTENZA
(W)
DURATA (min.)
Gratin di patate 650 20 - 22
Pollo arrosto 650 40 - 45
Accessori consigliati: Griglia
DYNAMIC DEFROST
Per scongelare rapidamente diverse categorie di
alimenti specificandone solamente il peso. Si consiglia
di disporre gli alimenti direttamente sul piatto rotante
in vetro, fatta eccezione per lo scongelamento del pane.
Quando richiesto, girare gli alimenti.
SCONGELAMENTO PANE CON CRISP
Questa funzione esclusiva è studiata in modo specifico
per lo scongelamento del pane. Combinando le
tecnologie Defrost e Crisp, il pane avrà il sapore e la
consistenza di quello appena sfornato. Utilizzare questa
funzione per scongelare e riscaldare rapidamente
panini, baguette e croissant surgelati. Il Piatto Crisp
deve essere utilizzato in combinazione con questa
funzione, posto direttamente sulla griglia.
ALIMENTO PESO (g)
SCONGELAMENTO PROGRAMMATO -
CARNE 100 - 2000
POLLAME 100 - 2500
PESCE 100 - 1500
SCONGELAMENTO PANE CON CRISP 50 - 500
DYNAMIC REHEAT
Per riscaldare cibi pronti, sia surgelati
che a temperatura ambiente. Il forno calcolerà
automaticamente i valori necessari per ottenere i migliori
risultati possibili nel minor tempo. Disporre il cibo su un
piatto piano resistente al calore e alle microonde.
ALIMENTO PESO (g)
PIATTO PRONTO 250 - 500
LASAGNE SURGELATE 250 - 500
MINESTRE 200 - 800
ACQUA 100 - 500
MY MENU
Queste funzioni selezionano automaticamente
la temperatura e la modalità di cottura ottimali per
qualsiasi tipo di alimento.
CRISP
Per riscaldare e cuocere rapidamente alimenti surgelati,
creando una superficie dorata e croccante. Usare la
funzione solo in combinazione con il piatto Crisp in
dotazione. Quando richiesto, girare gli alimenti.
ALIMENTO PESO (g)
PIZZA [SURGELATA] 200 - 800
POLPETTE DI HAMBURGER 200 - 600
PATATINE FRITTE [SURGELATE] 200 - 500
NUGGET DI POLLO [SURGELATI] 100 - 500
BASTONCINI DI PESCE [SURGELATI] 100 - 500
Accessori richiesti: piatto Crisp, impugnatura per piatto Crisp.
COTTURA
Per ottenere una rapida e ottimale cottura degli
alimenti. Utilizzare un contenitore resistente al calore e
adatto alla cottura a microonde.
ALIMENTO PESO (g)
POLLO ARROSTO 800 - 1500
GRATIN DI PATATE 200 - 1000
VERDURE RIPIENE 200 - 800
COSTOLETTE DI MAIALE 200 - 800
UOVA STRAPAZZATE 100 - 500
POPCORN 90
VAPORE
Per cuocere al vapore cibi come verdure o pesce,
utilizzando la vaporiera in dotazione. Distribuire gli
alimenti in modo uniforme nel cestello della vaporiera
e versare sul fondo 100 ml di acqua potabile. Il forno
calcola automaticamente le impostazioni richieste per
ottenere un risultato ottimale. Nella parte iniziale della
cottura le microonde generano vapore, portando a
ebollizione l'acqua presente sul fondo della vaporiera.
ALIMENTO PESO (g)
ORTAGGI A RADICE AL VAPORE 150 - 500
VERDURE TENERE AL VAPORE 150 - 500
VERDURE AL VAPORE [SURGELATE] 150 - 500
FILETTI DI PESCE AL VAPORE 150 - 500
PETTO DI POLLAME AL VAPORE 150 - 500
Accessori necessari: vaporiera
RISO E PASTA
Per cuocere velocemente riso o pasta. Questa funzione
deve essere usata solo con la vaporiera.
Impostare di conseguenza il tempo di cottura consigliato
per il riso o la pasta.
ALIMENTO PORZIONI PESO (g)
RISO
100
200
300
400
PASTA
70
140
210
Accessori richiesti: Fondo vaporiera e coperchio
AUTO IDRO-PULIZIA
L’azione del vapore rilasciato durante questo
speciale ciclo di pulizia permette di rimuovere
facilmente sporco e residui di cibo. Versare una tazza di
acqua potabile sul fondo della vaporiera in dotazione
(3) o in un recipiente resistente alle microonde e
attivare la funzione.
IMPOSTAZIONI
Per regolare le impostazioni del forno.
Attivando la modalità "ECO", la luminosità del display si riduce
e la luce si spegne dopo 1 minuto per risparmiare energia.
Se la modalità "DEMO" è impostata su "On", tutti i comandi
sono operativi e i menu sono disponibili ma il forno non viene
riscaldato. Per disattivare questa modalità, accedere a "DEMO"
dal menu "IMPOSTAZIONI" e scegliere "O ".
Selezionando "RESET", l'apparecchio si spegne e vengono
ripristinate le impostazioni della prima accensione. Tutte le
impostazioni successive vengono cancellate.
PREFERITI
Per richiamare la lista delle 10 funzioni preferite.
PRIMO UTILIZZO
1. SELEZIONE DELLA LINGUA
Alla prima accensione, è necessario impostare lingua e
ora: Sul display compare "English".
Italiano
Ruotare la manopola di regolazione per scorrere la lista
delle lingue disponibili e selezionare quella desiderata.
Premere
per confermare la selezione.
Note: la lingua può essere modi cata successivamente
scegliendo "LINGUA" dal menu “IMPOSTAZIONI”.
2. IMPOSTARE L'ORA
Dopo avere selezionato la potenza, è necessario
impostare l’ora: sul display lampeggiano le due cifre
relative all'ora.
OROLOGIO
Ruotare la manopola di regolazione per impostare
l’ora corretta e premere : sul display lampeggiano
le due cifre relative ai minuti. Ruotare la manopola di
regolazione per impostare i minuti e premere
per
confermare.
Note: dopo una prolungata interruzione di corrente potrebbe
essere necessario impostare nuovamente l'ora. Selezionare
“OROLOGIO” nel menu “IMPOSTAZIONI”.
3. PULIRE IL FORNO
Un nuovo forno può rilasciare degli odori dovuti alla
lavorazione di fabbrica: questo è normale. Prima di
iniziare la cottura, perciò, si raccomanda di pulire il
forno vuoto per eliminare il più possibile gli odori.
Rimuovere protezioni di cartone o pellicole trasparenti
e togliere gli accessori dal forno.
Attivare la funzione "Hydro Self Clean" (Auto
idro-pulizia). Seguire le istruzioni per impostare
correttamente la funzione.
Note: si consiglia di arieggiare il locale dopo il primo utilizzo
dell'apparecchio.
USO QUOTIDIANO
1. SELEZIONARE UNA FUNZIONE
Ruotare la manopola di selezione per accendere il forno
e visualizzare sul display la funzione desiderata.
Per selezionare una funzione da un menu (il display
mostrerà la prima voce disponibile) ruotare la manopola
di regolazione fino a visualizzare la voce desiderata.
Il display mostrerà l'icona della funzione e i valori di
base: premere
per confermare.
GRILL + MICROONDE
2. IMPOSTARE LA FUNZIONE
Dopo avere selezionato la funzione desiderata è
possibile modificarne le impostazioni. Il display mostra
in sequenza le impostazioni che è possibile modificare.
Premendo
è possibile modificare nuovamente
l'impostazione precedente.
POTENZA
POTENZA MW
Quando il valore lampeggia sul display, ruotare la
manopola di regolazione per modificarlo, quindi
premere
per confermare e procedere con le
impostazioni seguenti (per i valori che è possibile
modificare).
DURATA
DURATA
Quando l’icona lampeggia sul display, ruotare la
manopola di regolazione per impostare il tempo di
cottura desiderato, quindi premere
per confermare.
Note: durante la cottura, premendo
è possibile regolare il
tempo impostato: ruotare la manopola di regolazione per
regolarlo e premere
per confermare.
Nelle funzioni che non utilizzano le microonde
è possibile non impostare la durata e gestire
manualmente il tempo di cottura: Premere
o per
confermare e avviare la funzione.
Selezionando questa modalità non è possibile
programmare un avvio ritardato.
. MY MENU
Queste funzioni selezionano automaticamente la
modalità, la potenza e la durata di cottura più adatte
per le varie pietanze.
Alla richiesta, sarà sufficiente indicare le caratteristiche
degli alimenti per ottenere un risultato ottimale.
PESO / PORZIONI
CHILOGRAMMI
Per impostare questa funzione correttamente, seguire
le indicazioni che compaiono sul display, impostare i
valori desiderati ruotando la manopola di regolazione e
quindi premere
per confermare.
GRADO DI COTTURA
Nelle funzioni My Menu è possibile regolare il grado di
cottura.
GRADO DI COTTURA
Alla richiesta, ruotare la manopola di regolazione per
selezionare il livello desiderato tra Leggero/Basso (-1)
e Extra/Alto (+1). premere
o per confermare e
avviare la funzione.
3. AVVIARE LA FUNZIONE
Dopo avere confermato i valori predefiniti o avere
applicato le impostazioni preferite, premere
per
attivare la funzione prescelta.
Ad ogni pressione del tasto
, il tempo di cottura
viene aumentato di 30 secondi (o di 5 minuti per le
funzioni che non attivano le microonde).
Se è stato impostato un ritardo, premendo
sarà
possibile saltare questa fase per avviare subito la
funzione programmata.
Note: la funzione avviata può essere interrotta in qualsiasi
momento premendo .
JET START
A forno spento, premere
per avviare la cottura con la
funzione a microonde impostata alla potenza massima
(1000 W) per 30 secondi.
4. METTERE IN PAUSA LA COTTURA / GIRARE O
MESCOLARE GLI ALIMENTI
PAUSA
Aprendo la porta, le resistenze vengono disattivate e la
cottura viene temporaneamente interrotta.
Per riprendere la cottura, chiudere lo sportello e
premere
.
Note: Durante le funzioni “My Menu”, aprire la porta solo se
richiesto.
GIRARE O MESCOLARE IL CIBO
Alcune ricette de My menu richiedono di girare o
mescolare gli alimenti durante la cottura.
GIRA ALIMENTO
Questa richiesta sarà segnalata da un segnale acustico e
da un messaggio corrispondente sul display.
Aprire la porta, eseguire l'operazione indicata sul
display, chiudere la porta e premere
per continuare
la cottura.
Note: se compare la richiesta di girare o mescolare gli alimenti
ma l'operazione richiesta non viene eseguita entro 2 minuti, il
forno riprende automaticamente la cottura.
5. FINE COTTURA
Allo scadere del tempo programmato, un segnale
acustico e il display indicheranno che la cottura è
terminata.
FINE COTTURA
Premere per continuare la cottura in modalità
manuale aumentando il tempo di 30 secondi alla
volta (nelle funzioni a microonde) o di 5 minuti alla
volta (senza microonde), oppure ruotare la manopola
di regolazione per prolungare il tempo di cottura
impostando una nuova durata. In entrambi i casi, i
parametri di cottura saranno mantenuti.
Premere
o per riprendere la cottura.
. PREFERITI
Per una maggiore facilità d'uso, è possibile memorizzare
fino a 10 funzioni preferite.
Al termine della cottura, sul display compare un
messaggio che propone di salvare la funzione nella lista
dei preferiti con un numero da 1 a 10.
AGG. PREFERITO?
Se si desidera salvare la funzione tra i preferiti e
memorizzare le impostazioni correnti per usi successivi
premere
, oppure premere per ignorare la
richiesta.
Dopo avere premuto
, ruotare la manopola di
regolazione per selezionare il numero di posizione,
quindi premere
per confermare.
Note: se la memoria è piena o la posizione è già occupata,
viene chiesto di confermare la sovrascrittura della funzione
precedente.
Per richiamare in un momento successivo le funzioni già
salvate, ruotare la manopola di selezione su “PREFERITI”:
il display mostrerà la lista delle funzioni preferite.
2. Verdure
Ruotare la manopola di regolazione per selezionare la
funzione, confermarla premendo
e premere per
attivarla.
. AUTO IDRO-PULIZIA
Prima di attivare questa funzione si raccomanda di
rimuovere tutti gli accessori dal forno a microonde (ad
eccezione del piatto rotante in vetro).
Ruotare la manopola di selezione per accedere alla
funzione "Hydro Self Clean" (Auto idro-pulizia).
Auto idro-pulizia
Premere per attivare la funzione: il display mostrerà
in sequenza le operazioni da eseguire prima di
avviare la pulizia. Una volta completate le operazioni
preliminari, premere
.
Alla richiesta, versare una tazza d'acqua potabile sul
fondo della vaporiera in dotazione o in un recipiente
resistente alle microonde, quindi chiudere la porta.
Dopo l'ultima conferma, premere
per avviare il ciclo
di pulizia.
Al termine, rimuovere il recipiente, ultimare la pulizia
con un panno liscio e asciugare la cavità del forno con
un panno di microfibra inumidito.
. CONTA MINUTI
Quando il forno è spento, il display può essere utilizzato
come contaminuti. Per attivare la funzione, assicurarsi
che il forno sia spento e ruotare la manopola di
regolazione: sul display lampeggerà l'icona
.
Ruotare la manopola di regolazione per impostare la
durata desiderata e quindi premere
per attivare il
timer.
Un segnale acustico e il display avviseranno che il conto
alla rovescia è terminato.
CONTA MINUTI
Dopo avere attivato il conta minuti, è anche possibile
selezionare e attivare una funzione. Ruotare la
manopola di selezione per selezionare la funzione
desiderata.
Una volta avviata la funzione, il timer continuerà
autonomamente il conto alla rovescia senza interferire
sulla funzione stessa.
Durante questa fase non sarà possibile vedere il
contaminuti (sarà visualizzata solo l'icona
), ma il
conto alla rovescia continuerà. Per tornare a visualizzare
il contaminuti, premere
per interrompere la funzione
correntemente attiva.
. BLOCCO TASTI
Per bloccare i tasti, tenere premuto per almeno
cinque secondi. Per disattivare, ripetere la stessa
procedura.
BLOCCO TASTI
Nota: questa funzione può essere attivata anche durante la
cottura. Per ragioni di sicurezza, è possibile spegnere il forno
in qualsiasi momento.
ALIMENTO FUNZIONE POTENZA (W) TEMPO (MIN.) ACCESSORI
Pan di spagna - 7 - 15
Torta di frutta - 12 - 20
Biscotti - 4 - 6
Torte salate o Quiche lorraine (1 - 1,2 kg) - 18 - 25
Piatti pronti (250 - 500 g) 800 4 - 7 -
Lasagna / Pasta al forno
350 - 500 15 - 25
Lasagne surgelate (500 - 700 g) 500 - 800 14 - 20 -
Pizza (400 - 500 g)
- 10 - 12
Carne (braciole, bistecche) 500 10 - 15
Pollame (intero, 800 g - 1,5 kg) 350 - 500 30 - 45 *
Pezzi o letti di pollo 350 - 500 10 - 17
Arrosti (800 g - 1,2 kg) 350 - 500 25 - 40 *
Salsicce / Spiedini - 20 - 40 *
Salsicce / Hamburger - 6 - 16 *
**
Pesce (tranci o letti)
160 - 350 15 - 20 *
Pesce intero (800 g - 1,2 kg) 160 - 350 20 - 30 *
Patate al forno (600 g - 1 kg) 350 - 500 30 - 50 *
Patate a spicchi (500 g - 800 g) - 20 - 30
Mele cotte
160 - 350 15 - 25
TABELLA DI COTTURA
* Girare gli alimenti a metà cottura ** Preriscaldare il piatto crisp per 3 - 5 minuti
FUNZIONI
Crisp Grill Microonde Grill + Microonde
ACCESSORI
Griglia Piatto Crisp

PULIZIA
Attendere che l’apparecchio si sia raffreddato
prima di eseguire qualsiasi operazione di pulizia o
manutenzione.
Non usare in nessun caso pulitrici a getto di vapore.
Non usare pagliette metalliche, panni abrasivi
e detergenti abrasivi o corrosivi che possano
danneggiare le superfici.
SUPERFICI INTERNE ED ESTERNE
• Pulire le superfici con un panno in microfibra umido.
Se molto sporche, aggiungere qualche goccia di
detergente con pH neutro. Asciugare con un panno.
• Pulire il vetro della porta con detergenti liquidi
specifici.
• A intervalli regolari o in caso di tracimazioni, togliere
il piatto rotante e il suo supporto per pulire la base del
forno, rimuovendo tutti i residui di cibo.
• Attivare la funzione "Hydro Self Clean" (auto idro-
pulizia) per una pulizia ottimale delle superfici interne.
• Il grill non necessita di alcuna pulizia perché il calore
intenso brucia direttamente lo sporco: attivare la
funzione a intervalli regolari.
ACCESSORI
È possibile lavare in lavastoviglie tutti gli accessori ad
eccezione del piatto Crisp.
Il piatto Crisp deve essere pulito con acqua e un
detergente neutro. Per lo sporco più tenace, strofinare
delicatamente con un panno. Far raffreddare il piatto
Crisp prima di lavarlo.
RISOLUZIONE DEI PROBLEMI
Problema Possibile causa Soluzione
Il forno non funziona.
Interruzione di corrente elettrica.
Disconnessione dalla rete
principale.
Verificare che ci sia tensione in rete e che il forno sia
collegato all'alimentazione elettrica.
Spegnere e riaccendere il forno e verificare se
l'inconveniente persiste.
Il forno fa rumore anche se spento. Ventola di raffreddamento attiva.
Aprire la porta o attendere il completo raffreddamento del
forno.
Il display mostra “Err” Guasto software.
Contattare il più vicino Servizio Assistenza Tecnica e
specificare il numero che segue l'indicazione "ERR".
Per le linee guida, la documentazione standard e altre informazioni sui prodotti:
• Utilizzare il QR sul proprio prodotto
• Visitare il nostro sito web docs .hotpoint. eu
• Oppure, contattare il Servizio Assistenza Tecnica (al numero di telefono riportato sul libretto di garanzia).
Prima di contattare il Servizio Assistenza Clienti, prepararsi a fornire i codici riportati sulla targhetta matricola
del prodotto.
400020004627