OPTI-FRY SMART LOGIC AIR OVEN 8L
INSTRUCTION MANUAL
220-240V 1700W WHOF12KS
O
PTI-FRY SMART L
OG
I
C
AIR
O
VEN 8L

Figures and illustrations in this User Manual are provided for
3URGXFWGHVLJQDQGVSHFL´FDWLRQVPD\EHFKDQJHGZLWKRXWQRWLFH
UHIHUHQFHRQO\DQGPD\GLIIHUIURPDFWXDOSURGXFWDSSHDUDQFH
CONTENTS
Safety Instructions
Important Safety Instructions...............................................1-2
Electrical Requirements.............................................................3
Setup and Use
Installation Guide..........................................................................3
Parts and Features.......................................................................4
Opti-fry Operation........................................................................5
Troubleshooting................................................................9
Limited Warranty
.......................................................11-13
Smart Logic Technology............................................................6
Cleaning & Care..............................................................................
Cooking Guide................................................................................
7
8
Peace Of Mind Guarantee.....................................10
IMPORTANT SAFETY INSTRUCTIONS
WARNING
CAUTION
IMPORTANT SAFETY INSTRUCTIONS
DANGER - Immediate hazards
which WILL result in severe
personal injury or death.
DANGER WARNING CAUTION
WARNING - Hazards or unsafe
practices which COULD result in
severe personal injury or death.
CAUTION - Hazards or unsafe
practices which COULD result in
minor personal injury.
1. Read all instructions carefully before using your new Air Oven.
2. Always turn the power off at the power outlet before you insert or remove the
power plug. Remove by grasping the plug - do not pull on the cord.
3.
DANGER: Do not operate Air Oven if:
i) the cord or plug is split, melted or damaged.
ii) the Air Oven has malfunctioned.
iii) the Air Oven has been damaged in any manner.
If any of the above incidents occur, return your Air Oven to the nearest authorised
service center for examination, repair or adjustment.
4.
DANGER: Do not under any circumstances immerse the power cord, mains
plug or Air Oven body in water or any other liquid.
5.
WARNING: Use handle grip only as some surfaces may become warm whilst
the Air Oven is in use.
6.
WARNING: If the mains supply cord is damaged, it must be replaced by the
manufacturer, its service agent or a similarly TXDOL´HG person in order to avoid a
hazard.
7.
WARNING: Do not cover the Air Oven whilst in operation as the air inlet and
outlet vents must be kept clear.
8.
WARNING: Ensure bowl is cleaned regularly as build-up of oils and fats may
SRVHD´re hazard.
9.
WARNING: Exercise caution when removing the bowl from the air oven.
10.
WARNING: The internal panels of the appliance will become very hot during
and after operation. Do not touch.
11.
WARNING: Do not move Air Oven whilst there is food in the bowl as hot
liquids may have collected in the bowl and may leak out whilst moving.
12.
WARNING: Combustible materials such as paper, curtains, tablecloths, kitchen
towels etc. should not be placed near the Air Oven whilst in operation.
13.
WARNING: Do not place the Air Oven against a wall or against another
appliance. Leave at least 10cm free space on the back, sides and above the Air
Oven.
14.
WARNING: Exercise caution when removing the bowl as hot steam and air
will expel from the Air Oven.
15.
WARNING: Immediately unplug the Air Oven if you see any smoke coming
from the unit. Wait for the smoke to stop before removing the bowl and bowl
insert from the Air Oven.
16.
CAUTION: Close supervision is necessary when this appliance is used by or
near children.
© 2024 RVM Australia Pty Ltd. All Rights Reserved
1

IMPORTANT SAFETY INSTRUCTIONS
IMPORTANT SAFETY INSTRUCTIONS
17. CAUTION: Keep the Air Oven and its cord out of reach of children less than 8
years old.
18.
CAUTION: Wait for the Air Oven to cool before moving. Carry only by the
outer side panels.
19.
CAUTION: During operation, hot steam is released through the air vent
openings. Keep your hands and other body parts at a safe distance from the air
vent openings.
20.
CAUTION: Allow 30 minutes to cool down after cooking before handling or
cleaning.
21. This Air Oven is not intended to be operated by means of an external timer or
separate remote-control system.
22. Any appliance that has been dropped or damaged should not be used until
examined by an authorised service center.
23. Do not permit the mains supply cord or plug to touch hot objects or allow the
power cord to lay across the Air Oven.
24. This appliance is deemed for indoor use only.
25. Do not use harsh or abrasive cleaning agents. The outside surface may be
wiped clean with a soft, damp cloth and dried thoroughly. If necessary, a mild
dishwashing detergent may be applied to the cloth but not directly applied to the
Air Oven.
27.
28. Your Air Oven should not be unattended while in use.
30. Always use this Air Oven with a power outlet of the voltage (A.C. only) mark
ed
on the back of the Air Oven.
31. Do not use the Air Oven for any purpose other than its intended use.
32. Do not place your Air Oven on or near a hot gas µDPe, electric element, heated
oven or any hot surface.
33. Do not place the Air Oven on top of any other appliance.
34. Do not allow the power cord of this Air Oven to hang over the edge of a table or
bench top.
35. Keep liquids away from the Air Oven.
36. Do not place anything on top of the Air Oven.
37. Ensure the appliance in placed on a horizontal, even and stable surface.
26. This air oven is not intended for use by persons (including children) with reduced
physical, sensory or metal capabilities or lack of experience and knowledge
unless they have been given supervision or instruction concerning use of the
air oven in a safe way by the person responsible for their safety, and understand
the hazards involved.
This appliance is intended to be used in private households and not in applications
VXFKDVVWDIINLWFKHQDUHDVRI´FHVDQGRWKHUZRUNLQJHQYL
ronments; farm houses;
by guests in hotels, motels and other residential type environments; bed and
breakfast type environments.
29.
Children should not play with the Air Oven.
2

ELECTRICAL REQUIREMENTS
POWER SUPPLY CORD
1. Do not attempt to modify the power cord or plug in any way.
2. A short power supply cord is provided to reduce the risk of becoming entangled
or tripping over a longer cord.
3. If the power supply cord is too short, do not use an extension cord. Have a
TXDOL´HGHOHFWULFLDQRUVHUYLceman install an outlet near the appliance.
NOTE: Neither Westinghouse nor the retailer can accept any liability for damage
to the product or personal injury resulting due to failure to observe the electrical
connection procedures or instructions within this manual.
INSTALLATION GUIDE
1. Carefully unpack your Air Oven.
2. Carefully remove packaging around the Air Oven and power cord. Do not remove
warning labels.
3. Wash bowl and bowl insert before use.
DANGER: Do not under any circumstances immerse the Air Oven, mains cord or
mains plug in water or any other liquid.
NOTE: Westinghouse recommends the use of a residual current device (RCD) with
a tripping current that does not exceed 30mA in the electrical circuit supplying
power to all appliances.
© 2024 RVM Australia Pty Ltd. All Rights Reserved
3
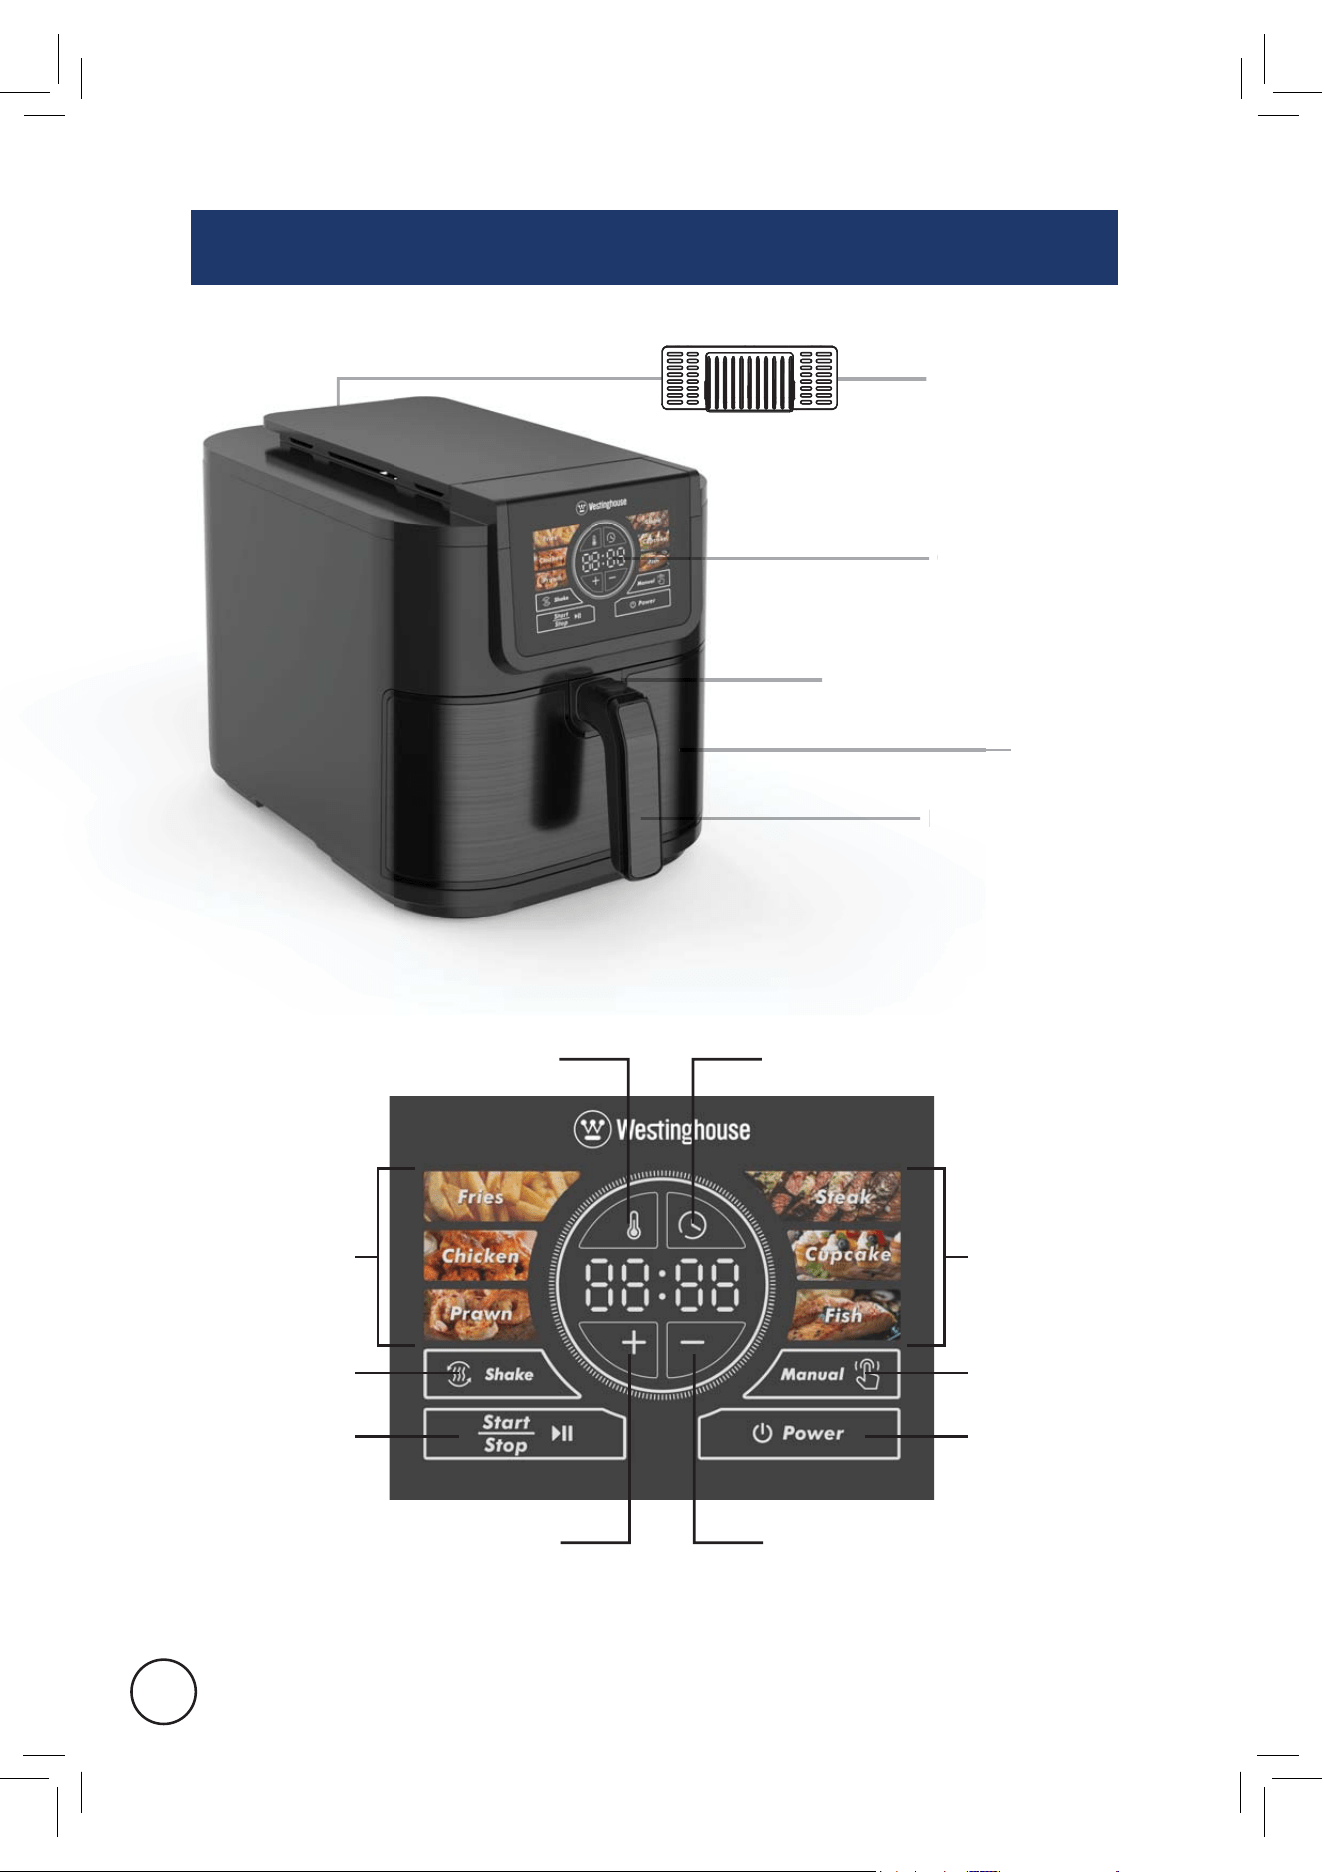
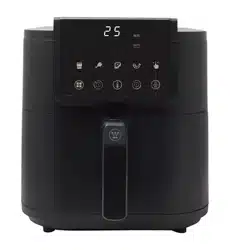
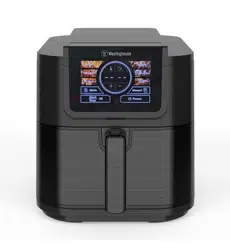
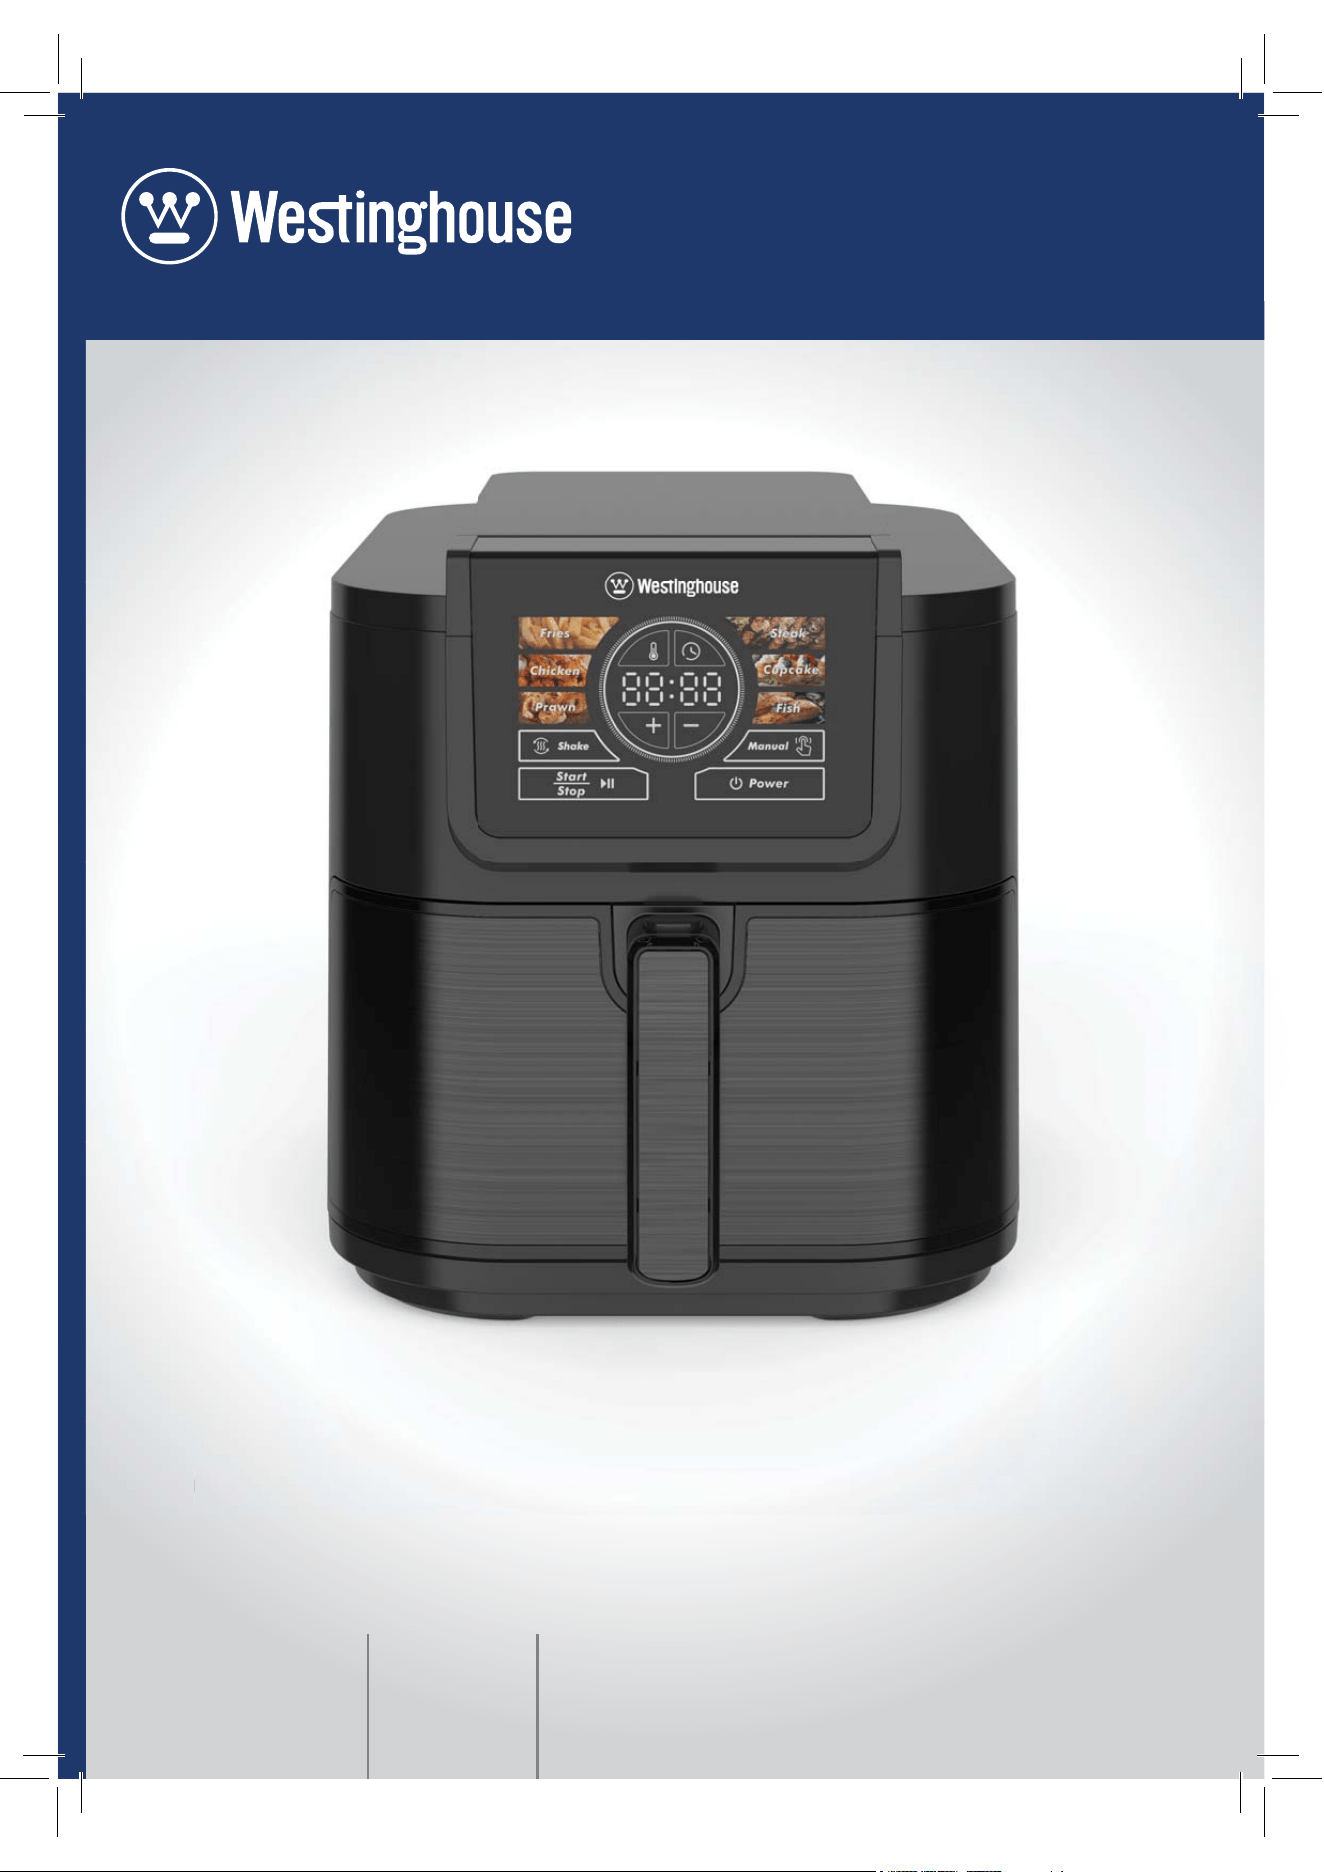
Control Panel
Basket
Basket Handle
Basket Release Button
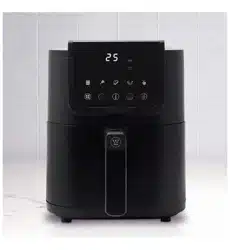
Rear Air Vent
PARTS AND FEATURES
Preset
Functions
Temperature
Key
Timer
Key
Preset
Functions
Minus
Key
Plus
Key
Manual
Key
Power
Key
Shake
Key
Start/
Stop Key
C
on
B
as
k
Bask
e
t R
e
l
ea
Re
ar
4
NOTE: When using the Smart Logic functions, the unit will take up to 3 minutes
to calculate the ideal cooking time for your food. To indicate this, the display ring
will spin during this period. Do not open the basket or turn the unit off whilst this
calculation is occurring to avoid delays.
OPTI-FRY OPERATION
Before ´Ust use, remove the basket and non-stick insert. Wash with hot water
and mild detergent, rinse with fresh water and dry thoroughly. Do not use abrasive
cleaning products or abrasive sponges when cleaning**
%HIRUHFRRNLQJIRRGIRUWKH´UVWWLPHZe recRPPHQG the unit cRPSOHte a 10
PLQXte cyFOH ZLWKRXW any food SrHVHQW
***
i) Ensure unit is unplugged from wall power outlet.
ii) Insert non-stick insert and basket back into the Air Oven after cleaning process.
iv) Push the power button to turn on the unit and push the Manual function and
vi) Once operation has been completed, your Air Oven is ready for use.
WARNING: Please exercise caution when removing the basket as it will be
very hot.
1.
down on the basket release button and pulling in an outward motion.
2.
3. Slide the basket back into the Air Oven.
4. 3UHVVWKHSRZHUNH\´UVWDQGWKHQSUHVVWKHGHVLUHGSUHVHWIXQFtion.
6.
Once the time cycle has been completed, remove the basket using the basket
handle and basket release button. Enjoy!
WARNING: Use caution removing the basket as hot steam and air will expel from
the Air Oven.
If you would like to use the Manual function, press the manual function and
Remove the basket from your Air Oven by gripping the basket handle, pushing
Place your ingredients into the basket.
adjust the temperature and timer by pressing either the temperature or
timer key and pressing the plus and minus keys to adjust them.
5. Press the start/stop key to begin the cycle.
If the shake function has been activated for this cycle, the unit will cease operation
and beep to alert the need to carefully remove the basket and shake the contents.
Once this has been done, return the basket to the main body carefully to resume
operation.
7.
© 2024 RVM Australia Pty Ltd. All Rights Reserved 5
adjust the temperature to 200 degrees. Set the timer to 20 minutes and
press the start/stop key to begin operation.

SMART LOGIC TECHNOLOGY
The Smart Logic Technology of this air fryer gauges the ambient temperature of
your food in the basket.
Based off the function you have chosen it will then calculate the time it will take to
cook your food to PERFECTION.
How does it know? Through hundreds of tests in the lab where samples were tried
again and again to ensure it came out right every time.
You still have the option to cook it the way you want to with the manual selection
6
function.

© 2024 RVM Australia Pty Ltd. All Rights Reserved 7
CLEANING & CARE
CAUTION: Allow 30 minutes to cool down after cooking before handling or
cleaning.
CLEANING:
1.
WARNING: Do not under any circumstances immerse the power cord, mains
plug or Air Oven body in water or any other liquid.
2. Ensure unit is unplugged from wall power switch before attempting to clean.
3. Do not use harsh or abrasive cleaning agents. The outside surface may be
wiped clean with a soft, damp cloth and dried thoroughly. If necessary, a mild
dishwashing detergent may be applied to the cloth but not directly applied to the
Air Oven.
4. Soaking the basket and drip tray in soapy water will assist in the removal of sticky
or tough to remove substances. Do not immerse the basket handle.
5. When washing, non-abrasive cloths and plastic bristle kitchen brushes may be
used to remove stubborn food particles from the basket and drip tray. Do not use
abrasive cloths and cleaning materials as they will damage the surface.
6. Do not place the basket or drip tray into a dishwasher. They are not dishwasher
safe.
7. Ensure all items are dried thoroughly after cleaning and placed back into the Air
Oven for storage.
8. Store in a dry place away from steam and humidity where possible.
NOTE: Failure to clean products regularly can be deemed as negligent handling
and any faults caused by fat/oil build up will not be covered by the Westinghouse
Small Appliances 12 Month Limited Warranty.
Scan this QR code for our intensive guide on cleaning
non-stick appliances.
This cooking guide is a guide only, ensure your food is entirely cooked
before consumption, as differences in size, shape and type can alter the
cooking requirements.
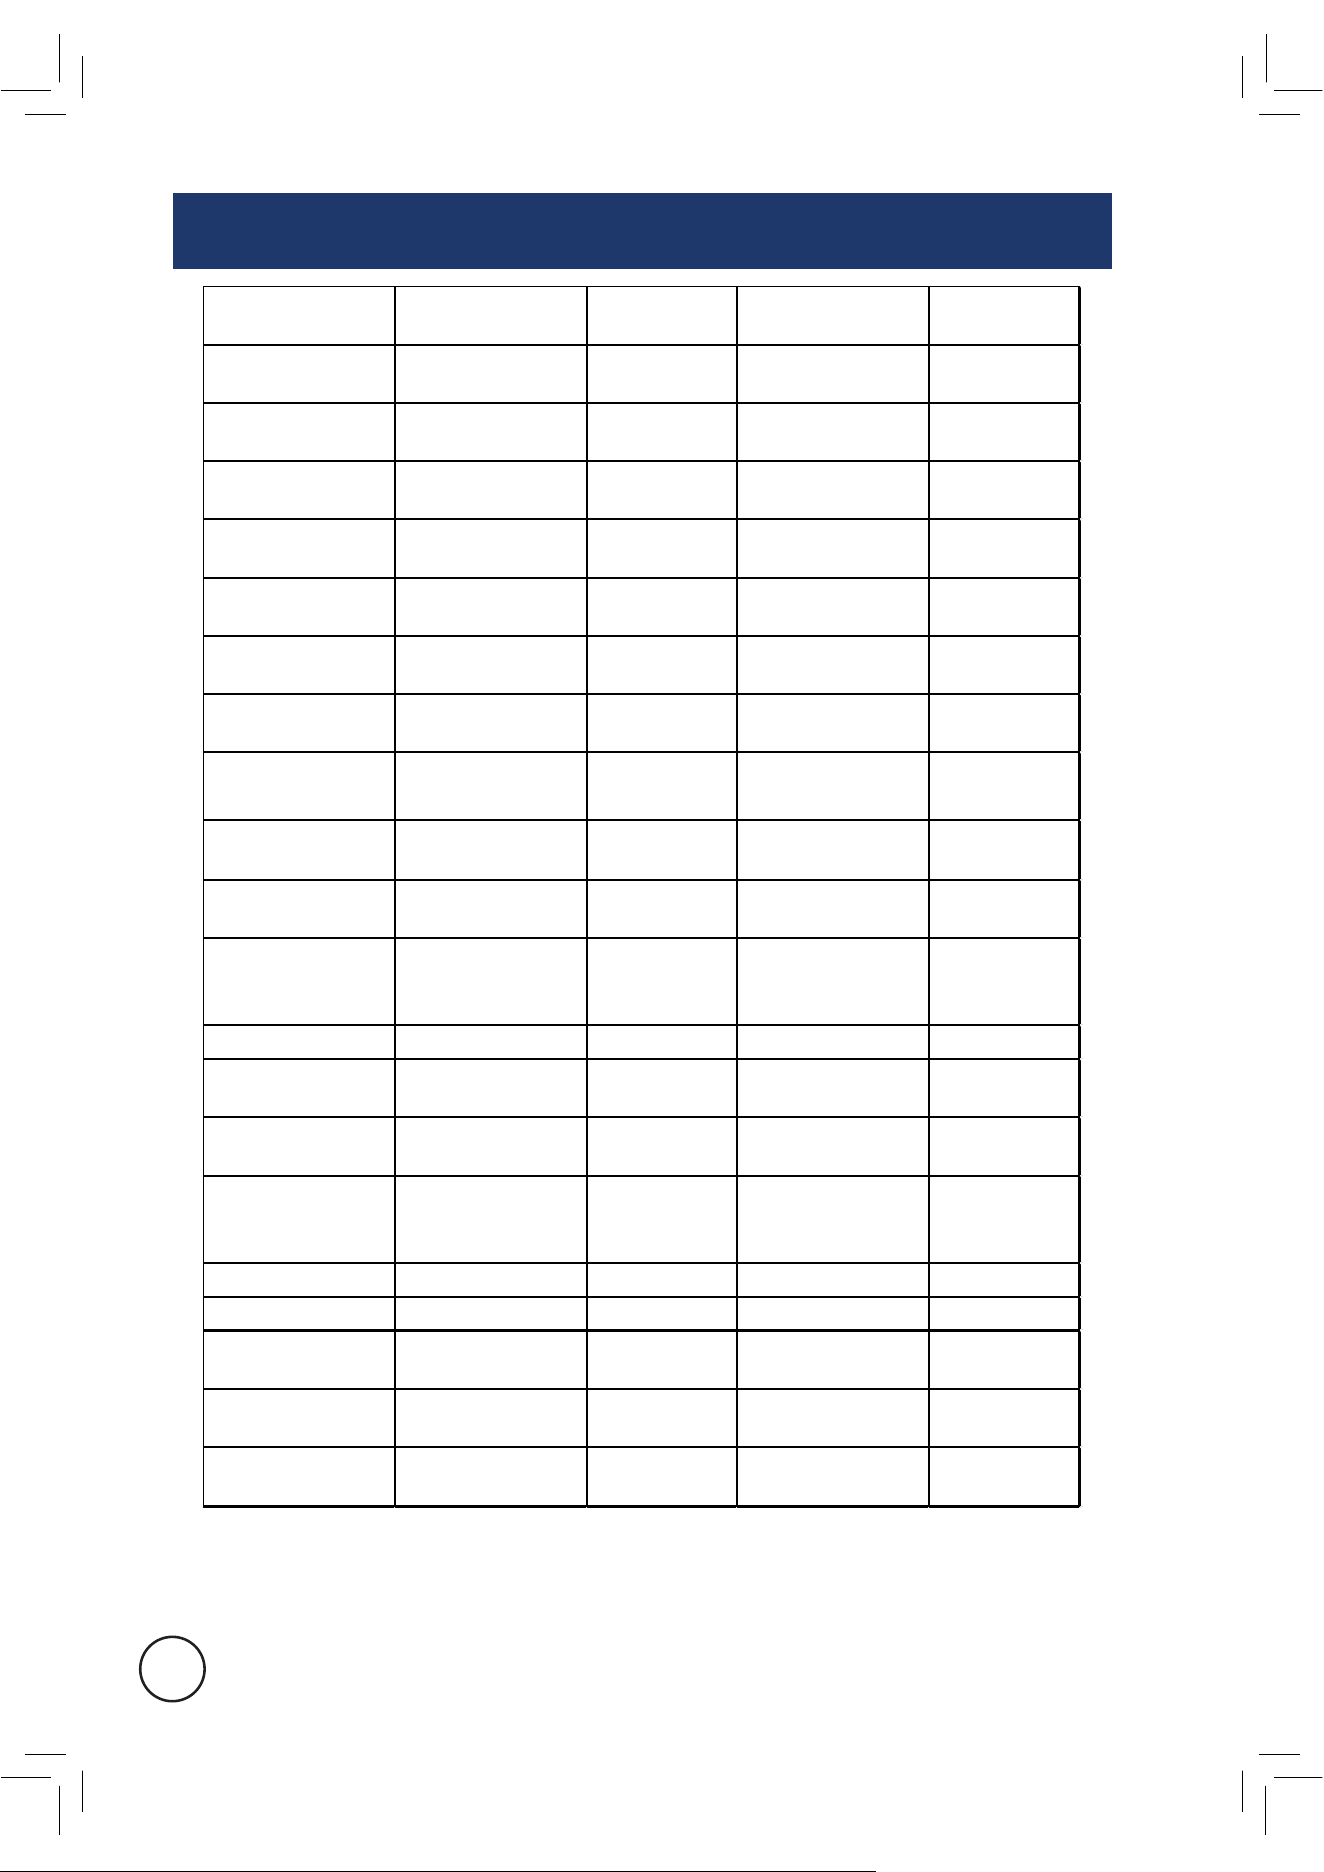
COOKING GUIDE
8
FOOD FUNCTION VOLUME TEMPERATURE
COOKING
TIME
Fries/Chips
Fries
(Smart Logic)
50-500g 200°C 18-20min
Frozen
Fries/Chips
Fries
(Smart Logic)
50-500g 200°C 20-22min
Chicken Breast
Chicken
(Smart Logic)
200-500g 180-200°C 20-25min
Chicken Wings
Chicken
(Smart Logic)
800g-1kg 180-200°C 20-25min
Chicken
Drumsticks
Chicken
(Smart Logic)
250g-1kg 180-200°C 20-25min
Prawns
Prawn
(Smart Logic)
200-300g 180°C 8-10min
Frozen Prawns
Prawn
(Smart Logic)
200-300g 180°C 10-12min
Steak
Steak
(Smart Logic)
150-300g 200°C 12-18min
Muf´ns
Cupcake
(Smart Logic)
320g
(
ൎ
40g/pc)
150°C 15-20min
Whole Fish
Fish
(Smart Logic)
300g 180-200°C 15-30min
Frozen Chicken
Nuggets
Chicken
(Smart Logic)
200g
180-200°C 10-12min
Whole Chicken Manual 2kg 180°C 70-80min
Fresh
Vegetables
Manual 600g 170°C 9-12min
Frozen
Spring Rolls
Manual 200-600g 200°C 12-20min
Meat Chops
(Bone
Removed)
Manual 200-800g 200°C 15-25min
Thin Sausages Manual 100-500g 200°C 11-17min
Roast Potatoes Manual
500g 180°C 25-35min
Frozen Onion
Rings
Manual 500g-800g 180°C 10-15min
Fresh Fish Fillet Manual 200-500g 180-200°C 8-12min
Frozen Fish
Fillets
Manual 200-500g 180-200°C 12-15min
ൎ
ൎ
ൎ
ൎ
ൎ

Air Oven does
not turn on.
TROUBLE
Air Oven is not
plugged in.
POSSIBLE CAUSE
Check that Air Oven is
plugged into a working
power outlet and turned on.
Air Oven does
not turn on.
Basket not inserted
properly.
Remove basket, check for obstructions
then re-insert basket. The Air Oven
will start automatically.
Food has not
cooked properly.
Too much in the basket.
Remove excess foods from basket
and try with smaller batches.
Food has not
cooked properly.
Temperature set too low
or timer not set for
correct amount of time.
Check temperature and times page
for temperature and time setting.
Set temperature and timer to
correct settings.
Food has cooked
unevenly
Turning / agitation
during the cooking
cycle not completed.
Food that lays across one another
(eg. Fries) need to be turned or
agitated during cooking cycle.
Interrupt cycle half way through cycle,
remove basket and turn / agitate foods.
Food is not crispy
when they come out
of the Air Oven.
Food was not oven
ready or were made to
be cooked in a
traditional deep fryer.
Use oven ready foods or lightly
brush some oil onto the food
prior to cooking. For best results,
mix ingredients with 1/2 tbsp. oil in
a mixing bowl prior to cooking.
Air fryer is calculating
cooking time required.
back into Air Oven.
Obstruction.
Remove basket from Air Oven,
check for obstructions and try again.
White smoke coming
from appliance.
Foods oily or greasy.
Very oily of greasy foods drip excessive
amounts of oil and fats onto the oil
catch tray which may heat up and
burn off. This is considered normal.
Ensure basket and non-stick insert is
cleaned after each use.
POSSIBLE REMEDY
TROUBLESHOOTING
Air fryer does not
heat.
Allow a few minutes for the Smart
Logic Technology to calculate the
cooking time of your food and the unit
will begin heating shortly.
%DVNHWZLOOQRW´t
© 2024 RVM Australia Pty Ltd. All Rights Reserved 9

PEACE OF MIND GUARANTEE
Our Westinghouse small appliances are backed by a 12 month guarantee as part of
our dedication to provide quality products for our customers. This means that if you
purchase a Westinghouse small appliance which has a manufacturer defect/fault, or
GRHVQRWPHHWWKHVHOOHUVVSHFL´FDWLRQVDVDUHVXOWRIDGHIHFt/fault, then the seller
will either repair or replace the unit, or refund the purchase price of the unit at their
own discretion. (refer to clause 4 of the Limited Warranty)
This does not apply to products which have been misused/abused, poorly
maintained or serviced, damaged due to negligent handling, accidentally damaged
or normal wear and tear. Ensure to follow all instructions within this instruction
manual, including the Cleaning & Care section for correct maintenance. (See page 7 )
Your warranty does not cover the following:
Freight costs incurred during a claim, consumables, loss, damage or
DFFHVVRULHVZKLFKUHTXLUHSHULRGLFUHSODFHPHQWE\QDWXUH´OWHrs, seals
etc.)
Damage caused by power surges, voltage supply issues, power dips or
usage of the incorrect voltage.
'DPDJHFDXVHGE\VHUYLFHRUPRGL´FDWLRQRIWKHXQLWZKLFKDUHQot
performed by authorised service centres or personnel.
Damage caused by the use of accessories, attachments, consumables,
parts or devices which are not produced for the product by Westinghouse
and it’s licensees.
Damage caused by exposure of the product to abnormally corrosive
conditions.
Usage of the product which are outside of the intended applications. (refer
to page 1-2)
If your warranty claim is accepted, the product may be replaced with a similar or
refurbished unit or repaired using refurbished parts. If your warranty claim is not
accepted, the seller will inform you and provide any further options which are
available in your situation. If the product is to be repaired or shipped as a result of
this, you will be responsible for the cost of repair and/or any freight charges incurred.
Damage caused by incorrect or improper operation and/or installation.
Damage caused by a failure to follow additional instructions.
For the most up-to-date manuals and FAQ’s, please visit the product page of your
appliance by scanning the QR code on your appliance’s cord label.
Products which have had the serial number and/or rating label removed.
How to claim under this warranty:
Carefully check the operating instructions, user manual and the terms of
this warranty;
Have the model and serial number of the appliance available;
Have the proof of purchase (e.g. receipt) available;
Return the unit to place of purchase;
If unable to return to the place of purchase, call our customer service centre
on 1300 883 109.
1.
2.
3.
4.
5.
10

&RQVXPHU/DZ7KHEHQH´WVWRWKH&RQVXPHUXQGHUWKLV:DUUDQW\DUHLQ
DGGLWLRQWRWKHULJKWVDQGUHPHGLHVRIWKHEX\HUXQGHUDQ\&RQVumer
*XDUDQWHHV7KH$XVWUDOLDQ&RQVXPHU/DZUHTXLUHVWKDWZHFRQ´UPWKDW
Our goods come with guarantees that cannot be excluded under the
Australian Consumer Law. You are entitled to a replacement or refund for
a major failure and for compensation for any other reasonably
foreseeable loss or damage. You are also entitled to have the goods
repaired or replaced if the goods fail to be of acceptable quality and the
failure does not amount to a major failure.
6XEMHFWWR&ODXVHWKH6HOOHUZDUUDQWVWKDW:HVWLQJKRXVHEUDQGHG
SURGXFWVZLOOEHIUHHRIPDQXIDFWXULQJGHIHFWVDQGZLOOSHUIRUPWRWKH
6HOOHUVVSHFL´FDWLRQVVXEMHFWWRWKHIROORZLQJFODXVHV
7KHEHQH´WRIWKLV:DUUDQW\H[WHQGVRQO\WRWKHRZQHURIWKHSURSHUW\LQ
ZKLFKWKH3URGXFWVPDQXIDFWXUHGRUVXSSOLHGE\WKH6HOOHUDUHLQVWDOOHG
DQGXVHGE\WKHRZQHUIRUWKHGXUDWLRQRIWKH:DUUDQW\3HULRGXQGHU
VWDQGDUGGRPHVWLFDSSOLFDWLRQV
7KH:DUUDQW\FRPPHQFHVRQWKHGDWHRIWKHSXUFKDVHRIWKHSURGXFWDQG
FRQWLQXHVIRUWKHEHQH´WRIWKH2ZQHUIRUWKH:DUUDQW\3HULRG,IZLWKLQ
WKH:DUUDQW\3HULRGDPDQXIDFWXULQJGHIHFWLVGLVFRYHUHGLQWKH3URGXFW
RUWKH3URGXFWIDLOVWRSHUIRUPWRWKH6HOOHUVVSHFL´FDWLRQVDVDUHVXOWRI
VRPHGHIHFWLQPDWHULDORUZRUNPDQVKLSLQWKH3URGXFWWKHQWKH6HOOHUZLOO
DWLWVRZQGLVFUHWLRQ
D5HSDLURUUHSODFHWKH3URGXFWDWWKHFRVWRIWKH6HOOHU*RRGVUHSDLUHG
RUUHSODFHGXQGHUWKLV:DUUDQW\ZLOOEHZDUUDQWHGIRUWKHUHPDLQLQJSHULRG
RIWKH:DUUDQW\Products presented for repair may be replaced by
refurbished products of the same type rather than being repaired.
Refurbished parts may be used to repair the products.
E5HIXQGWKHSXUFKDVHSULFHSDLGE\WKHFRQVXPHU
7KH:DUUDQW\GRHVQRWDSSO\WR3URGXFWWKDW
D+DVIDLOHGGXHWRH[FHVVLYHZHDUDQGWHDUEH\RQGZKDWLVFRQVLGHUHGWR
EHUHDVRQDEOH
E+DVEHHQPLVXVHGRUQHJOHFWHG
F+DVEHHQGDPDJHGDFFLGHQWDOO\RUE\DFWVRI*RGLQFOXGLQJ´UHDQG
µRRGLQJ
G+DVEHHQXVHGRURSHUDWHGFRQWUDU\WRRSHUDWLQJRUPDLQWHQDQFH
LQVWUXFWLRQV
H+DVEHHQGDPDJHGE\WKH&RQVXPHURUDWKLUGSDUW\DXWKRULVHGWRDFW
IRUWKHFRQVXPHULQWUDQVLWIURPWKH6HOOHUVVWRUHWRWKH&RQVXmer.
2.
3.
4.
5.
1RWKLQJLQWKLVZDUUDQW\DIIHFWVWKH&RQVXPHUVULJKWVXQGHUWKH$XVWUDOLDQ
© 2024 RVM $usWrDOLD3W\LWG$OO5LJKWVReserYHG
11

I+DVEHHQPRGL´HGDOWHUHGRUWDPSHUHGZLWKE\XQDXWKRUL]HGSHUVRQV
J'DPDJHFDXVHGE\LQVHFWVRUYHUPLQDQGFODLPVEDVHGRQWKHSUHVHQFHRI
LQVHFWVRUYHUPLQ
K+DVEHHQXVHGLQFRPPHUFLDOVLWXDWLRQVRUDSSOLFDWLRQV
,WDOVRH[FOXGHVEUHDNDEOHVVXFKDVJODVVDQGFHUDPLFLWHPVFRQVXPDEOH
LWHPVVXFKDVWKRVHWKDWUHTXLUHSHULRGLFUHSODFHPHQWDVSDUWRIWKHRUGLQDU\
XVHODFNRIFDUHRUPDLQWHQDQFHRIWKHSURGXFWRUDVGLUHFWHGE\WKH
LQVWUXFWLRQERRNOHWPLQRUFRVPHWLFLVVXHVLQFOXGLQJZLWKRXWOLPLWDWLRQSDLQW
DQGFRDWLQJVDQGQRUPDOZHDUDQGWHDUDQGGRHVQRWFRYHUWKHFRVWRI
FODLPLQJXQGHUWKHZDUUDQW\RUWUDQVSRUWLQJWKHJRRGVWRDQGIURPWKHSODFH
RISXUFKDVH
,QRUGHUWRPDNHDFODLPXQGHUWKH:DUUDQW\WKH2ZQHUPXVWZKHUHSRVVLEOH
UHWXUQWKHJRRGVWRWKH6HOOHUVVWRUHDWWKH2ZQHUVFRVW3URRIRISXUFKDVH
PXVWEHVXSSOLHGLQDOOFDVHV
7KHVHOOHUZLOOH[DPLQHDQ\UHWXUQHG3URGXFWVDQGLIWKH6HOOHUGHWHUPLQHVWKDW
WKHUHLVDQDSSDUHQWGHIHFWWKURXJKQRIDXOWRIWKH2ZQHUWKH6HOOHUZLOO
D0DNHQRWHRIWKH2ZQHUVFRQWDFWGHWDLOVLQFOXGLQJWKH2ZQHUVWHOHSKRQH
QXPEHUZKLFKWKHRZQHUFDQEHFRQWDFWHGGXULQJEXVLQHVVKRXUVSRVWDO
DGGUHVVDQGHPDLODGGUHVV
E0DNHQRWHRIWKHGHIHFWVUHSRUWHGE\WKH2ZQHU
F7DNHEDFNWKHGHIHFWLYHJRRGVIURPWKHRZQHUDQGGHWHUPLQHZLWKLQD
UHDVRQDEOHWLPHWKURXJKGLDORJXHZLWKWKH6HOOHUZKHWKHUWKHJRRGVDUH
GHIHFWLYH
G$GYLVHWKHRZQHUZLWKLQDUHDVRQDEOHWLPHIUDPHZKHWKHULWDFFHSWVRU
UHMHFWVWKH3URGXFWFODLP
H,IWKH6HOOHUDFFHSWVWKHUHWXUQRIWKH3URGXFWWKH6HOOHUPXVWDUUDQJHWR
KDYH
L7KH3URGXFWUHSDLUHGRU
LL5HSODFHWKHGDPDJHGRUIDXOW\3URGXFWRU
LLL5HIXQGWKHSXUFKDVHSULFH
1RWHWKDWUHSDLUVRUUHSODFHPHQWVPD\EHGRQHZLWKUHIXUELVKHGLWHPVRU
SDUWVRUUHSODFHGZLWKDVLPLODULWHP
7KH6HOOHUZLOOQRWDFFHSWDQ\UHWXUQHG3URGXFWZKLFKKDVQRWEeen
UHWXUQHGVWULFWO\LQDFFRUGDQFHZLWKWKLV:DUUDQW\
6.
7.
8.
12

For the purpose of this Warranty:
a.) Australian Consumer Law means the law as set out in Schedule 2 of the
Competition and Consumer Act 2010 (Cth).
b.) Consumer means the Purchaser of goods from the seller.
c.) Consumer means a Consumer as that term is set out in section 3 of the
Australian Consumer Law.
d.) Consumer Guarantees means the guarantees under the Australian
Consumer Law. e.) Implied terms means any guarantees, conditions,
warranties or other terms implied by any Australian Commonwealth, State
or Territory laws, (excluding the Australian Consumer Law) or the law of
any other jurisdiction.
f.) Owner has the meaning set out in clause 3.
g.) Warranty means this warranty.
h.) Product means the Product/s bought by the Owner from the Seller that
fall under this warranty.
i.) Warranty Period means:
i) In relation to Cast Iron Cookware: 3 Year Limited Warranty.
ii) In relation to Non-Stick Cookware: 3 Year Limited Warranty
iii) In relation to Cooking Utensils: 3 Year Limited Warranty
iv) In relation to Knives/Knife Block Sets: 3 Year Limited Warranty
v) In relation to Stainless Steel Cookware: 10 Year Limited Warranty
vi) In relation to Chopping boards: 1 Year Limited Warranty
vii) In relation to Small Appliances: 1 Year Limited Warranty
9.
13
© 2024 RVM Australia Pty Ltd. All Rights Reserved
12
CUSTOMER SERVICE - 1300 883 109
IMPORTED AND DISTRIBUTED BY RVM AUSTRALIA PTY LTD.
13 Merino Entrance, Cockburn Central, WA 6164
MADE IN CHINA
© 2024 RVM AUSTRALIA PTY LTD. ALL RIGHTS RESERVED.
and WESTINGHOUSE are trademarks of Westinghouse Electric Corporation.
Used under license by RVM Australia Pty Ltd. All Rights Reserved.