3
1
2
8h
2h
4h
ltem #1000000000
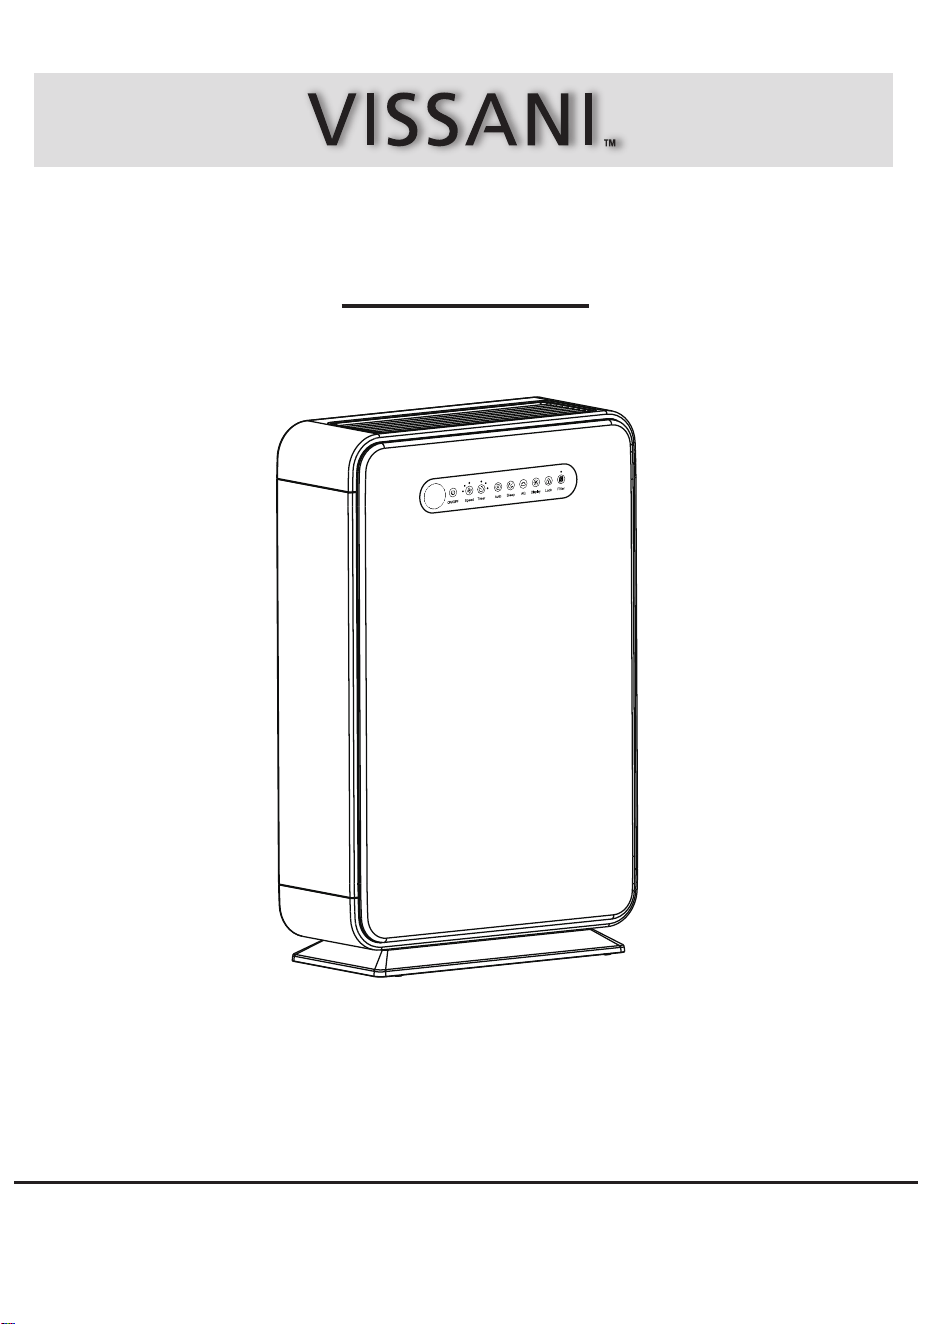
USE AND CARE GUIDE
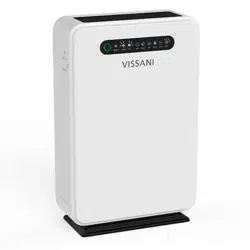
AIR PURIFIER
Model #VK-6006
We appreciate the trust and condence you have placed in Vissani through the purchase of this air purier. We strive to continually create quality products
designed to enhance your home . Visit us online to see our full line of products available for your home improvement needs.
Thank you for choosing Vissani!
Questions, problems, missing parts? Before returning to the store,
call Vissani Customer Service
8 a.m. – 7 p.m., EST, Monday-Friday, 9 a.m. – 6 p.m., EST, Saturday
1-855-847-7264
HOMEDEPOT.COM
THANK YOU

Table of Contents
Table Of Contents .........................................................2
Safety Information ........................................................ 2
Specications ......................................................................... 4
Pre-Operation ............................................................... 4
Operation ......................................................................
6
Care And Cleaning ....................................................... 8
Warranty ........................................................................ 3
Troubleshooting ............................................................11
What Is Not Covered ...............................................................
3
What Is Covered ......................................................................
3
Filter Replacement ...............................................................
10
Cleaning The Air Purier Body...............................................
8
Cleaning The Washable Pre-lter..........................................
9
Package Contents ...................................................................
4
Placing The Filters ................................................................
5
Safety Information
Only use your air purier as described in this manual.
Do not use without removing the plastic wrap from the lter. The air purier will not lter air and may overheat, causing
a re hazard.
Do not use your air purier outdoors. Keep your air purier away from water, and wet or damp areas. Never place in
water or liquid.
Do not use in excessively humid areas. Keep your air purier away from heat sources.
Do not use where combustible gases, vapors, metallic dust, aerosol (spray) products, or fumes from industrial oil are
present.
Keep 5ft/ 1.5 m away from where oxygen is being administered.
Children should be supervised to ensure that they do not play with the air purier.
Do not allow children to play with the plastic packaging. Immediately discard the plastic after unwrapping the lter.
Do not place anything into any opening on the air purier.
Children should be supervised to ensure they do not insert ngers or objects into the vent openings.
Do not sit or place heavy objects on the air purier.
Keep the inside of the air purier dry. To prevent moisture buildup, avoid placing in rooms with major temperature
changes.
Always unplug your air purier before servicing (such as changing the lter).
Do not use your air purier if it is damaged or not working correctly, or if the cord or plug is damaged. Do not try to
repair it yourself.
To reduce the risk of re or electric shock, do not use this air purier with any solid-state speed controls (such as a
dimmer switch).
Children should not clean or perform maintenance on the air purier without supervision.
This air purier is not to be used by persons (including children) with reduced physical, sensory, or mental capacities,
or lack of experience and knowledge, unless they have been given supervision or instruction concerning use of the
appliance by a person responsibile for their safety.
Keep the air purier near the outlet it is plugged into.
Never place the cord near any heat source.
Do not cover the cord with a rug, carpet, or other covering. Do not place the cord under furniture or appliances.
Place the cord where it will not be tripped over.
Keep the cord out of areas where people walk often.
This air purier is only to be used with the power supply adapter provided with the air purier.
If the power adapter cord is damaged, it must be replaced by our company or similarly qualied persons in order to
avoid an electric or re hazard.
This air purier's power adapter uses standard North American 120V 60Hz outlets. If using outside the US or Canada,
check for compatibility.
□
□
□
□
□
□
□
□
□
□
□
□
□
□
□
□
□
□
□
□
□
□
□
□
□
GENERAL SAFETY
POWER ADAPTER AND CORD
To reduce the risk of fire, electric shock, or other injury, follow all instructions and safety guidelines.
2

HOMEDEPOT.COM
Please contact 1-855-847-7264 for further assistance.
Warranty
3
All air freight and transportation costs are not covered by the warranty and must be borne by the customer.
In any case, the company or its authorized distributors will not grant any guarantee on time if it is beyond the control,
or any special or indirect damage occurs, the company or its authorized distributors will not be responsible for it.
In addition to the above-mentioned clear warranty provisions, the company is not required to assume other forms of
warranty responsibilities.
WHAT IS COVERED
Contact the Customer Service Team at 1-855-847-7264 or visit www.homedepot.com.
This product is warranted for one year from the date of purchase (12 months, 365 days). The warranty is limited to
defects in the materials of the product and manufacturing defects.
WHAT IS NOT COVERED
This product has exceeded the "12-month warranty".
Failure to provide valid purchase receipts; or altered valid purchase receipts without authorization; or the model and
serial numbers on the product in purchase receipt do not match the actual product.
The label or serial number of the product is damaged or has been tampered with, and the identity of this product
can't be proved effectively.
Due to unexpected factors, improper use or other human factors (including water ingress, moisture, fall down, user
operation errors, transportation, bumps, etc.) cause a defect or damage; failure or damage caused by natural
disasters and force majeure so on (such as earthquakes, res, etc.)
Disassembled, retted or repaired by user or an unauthorized third party.
Not following the instructions in this manual, or damage caused by not using the original parts of the product.
The purchaser has clearly been informed that the product is a disposed product, or samples that serve as
commercial listings, or products that have been subjected to performance overload tests.
Wear of any part, or damage to plastics and other accessories.
□
□
□
□
□
□
□
□
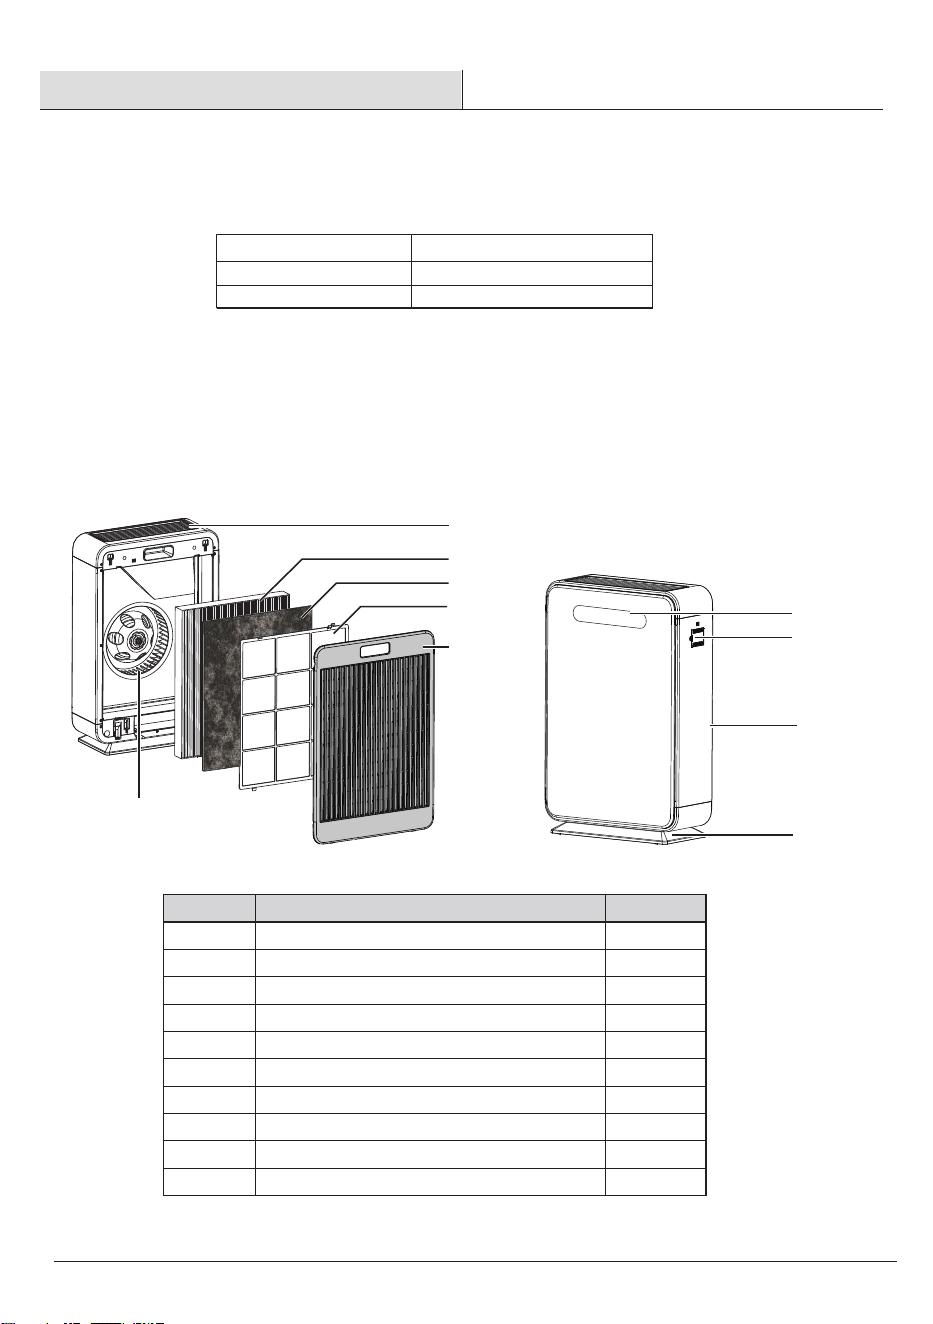
Pre-Operation
4
Description Quantity
Part
Air Outlet
HEPA Filter
Removable Pre-lter
Washable Pre-lter
Back Cov er
Wheel
Control Panel Cover
Dust Sens or Cover
A
B
C
D
E
F
G
H
1
1
1
1
1
1
1
1
Front Cover
I
1
Base
J
1
B
E
G
I
H
J
F
A
Power Supply
Brand
Rated Power
AC 120,60Hz
VISSANI
58W
SPECIFICATIONS
PACKAGE CONTENTS
C
D
5
Pre-Operation (continued)
HOMEDEPOT.COM
Please contact 1-855-847-7264 for further assistance.
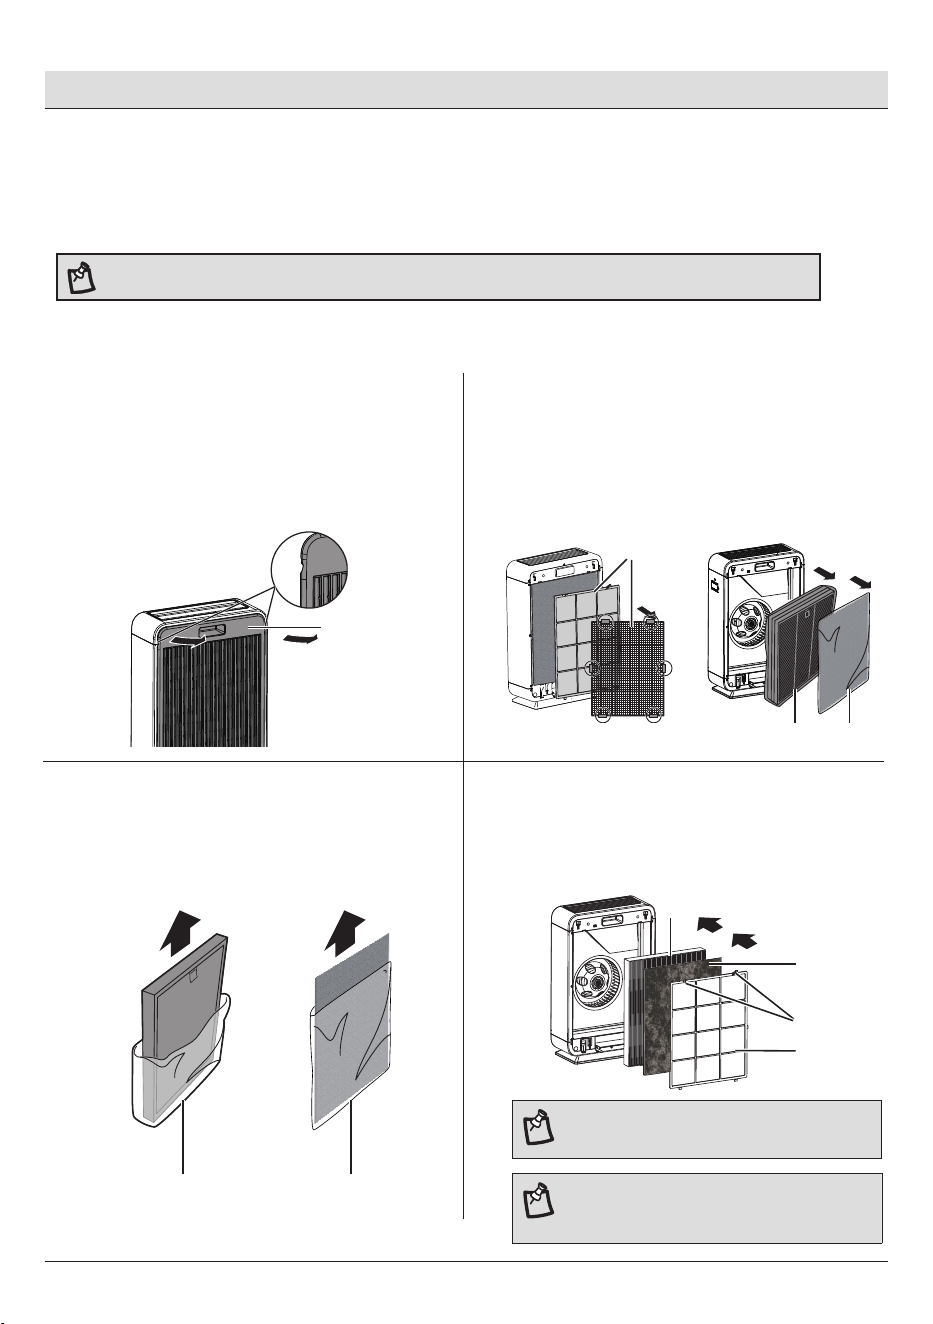
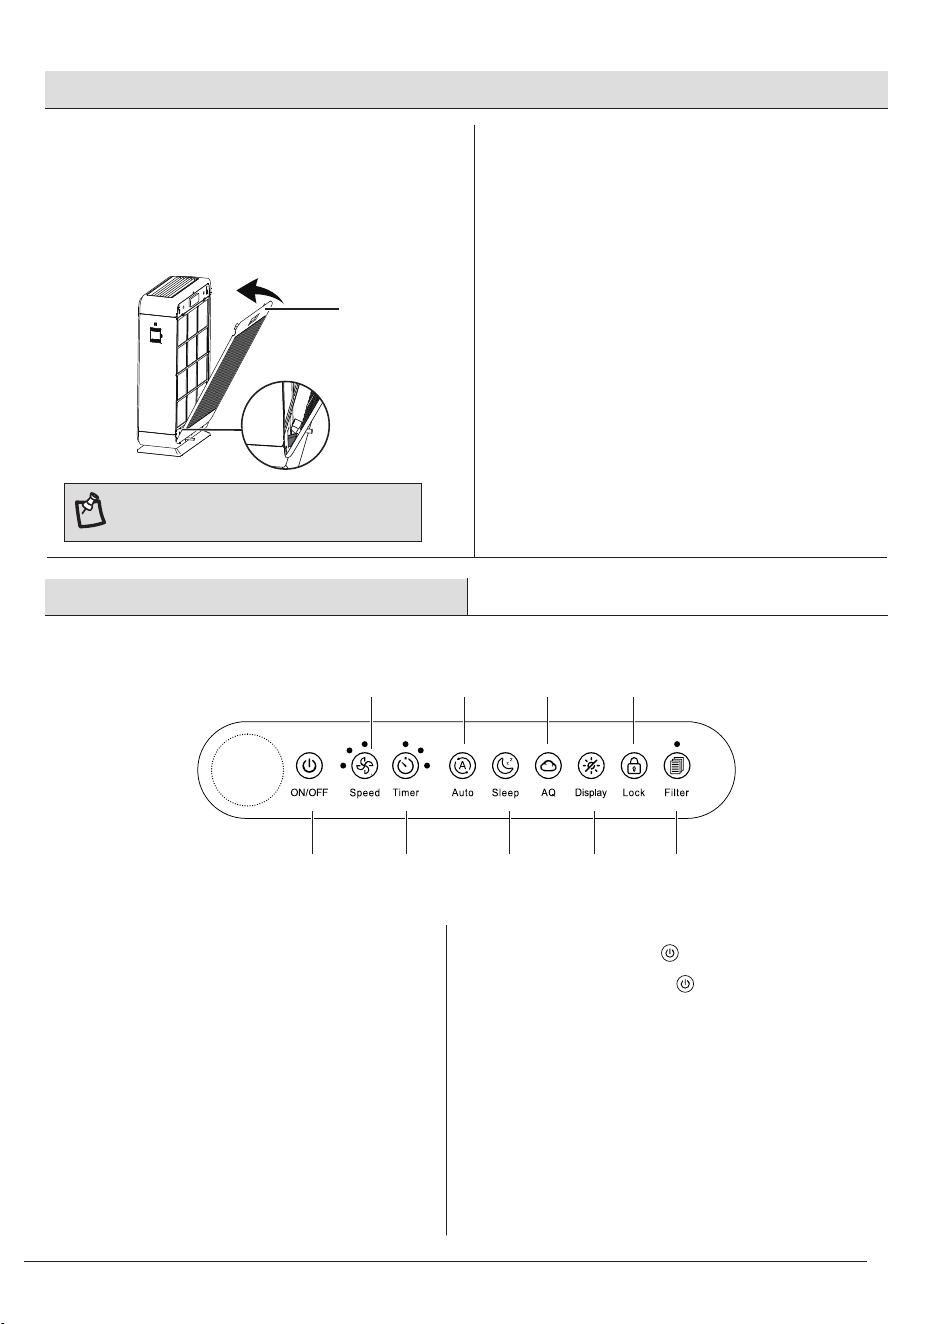
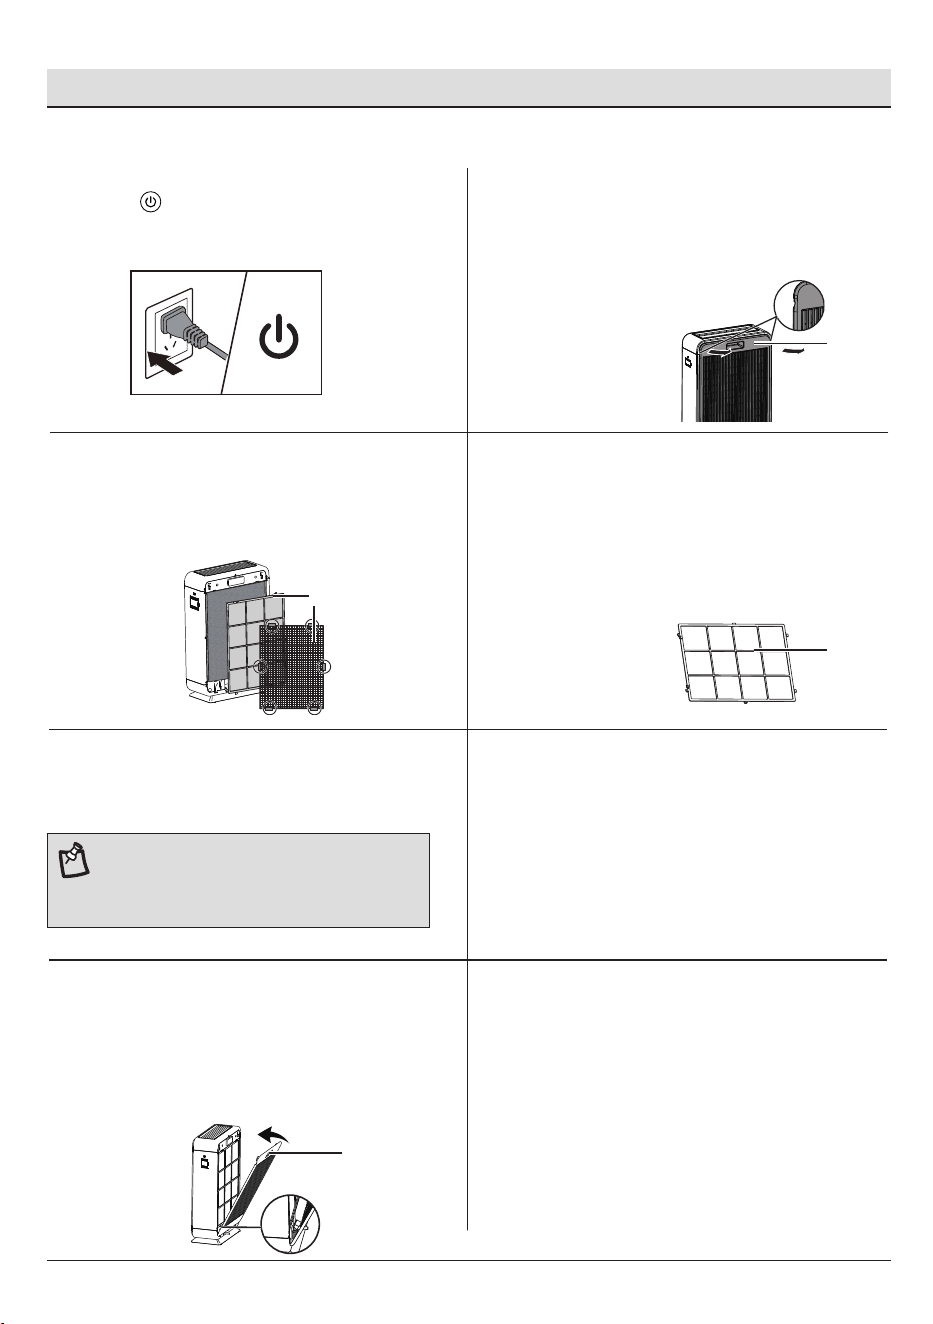
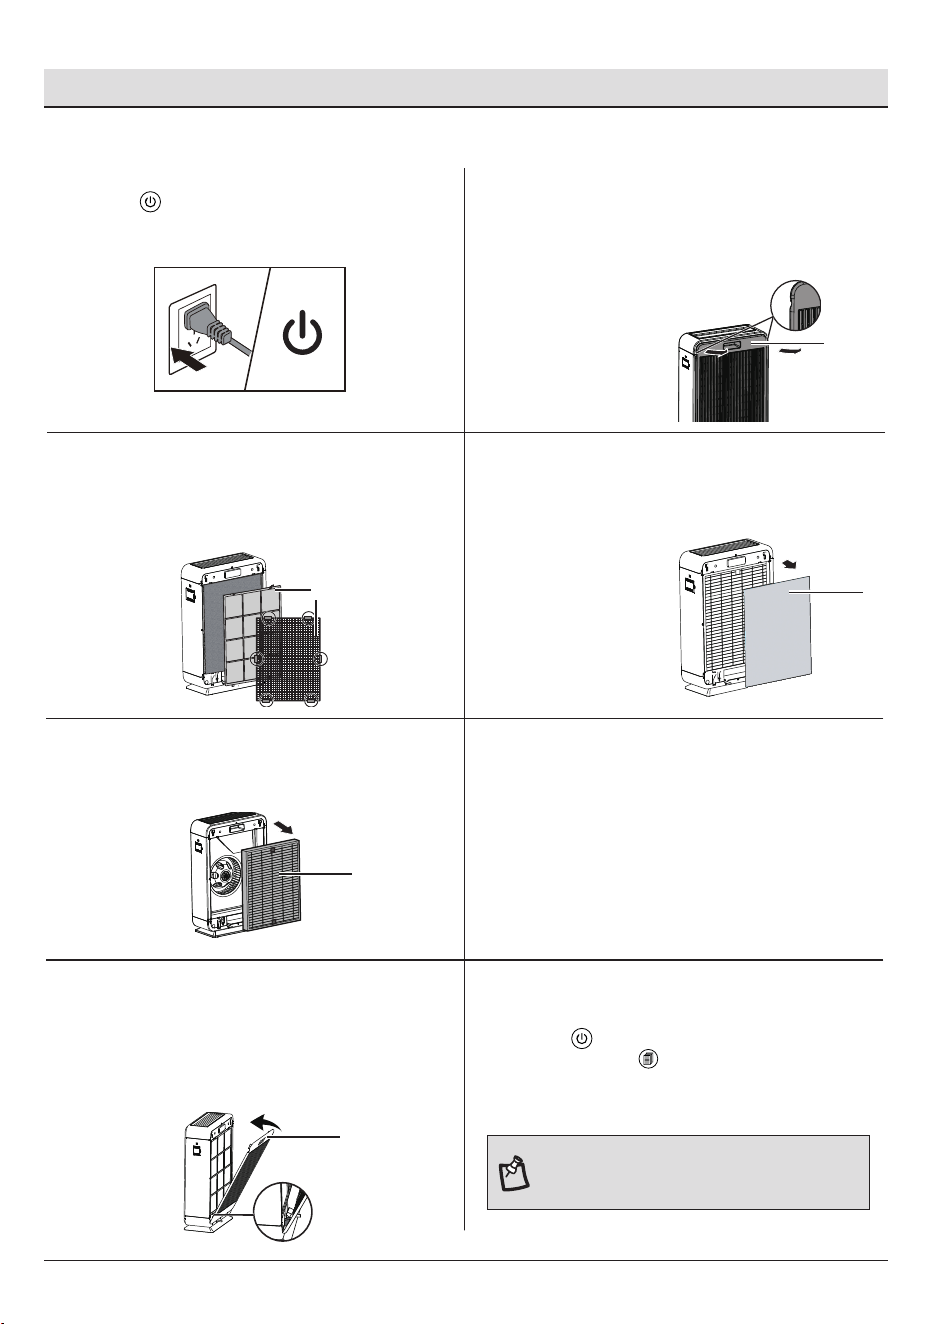
PLA C ING THE FILT E R S
The appliance comes with all lters tted inside, but you have to remove the pack aging of the
lters before y ou c an use the applianc e. Remove all lters , unpac k them and place them bac k into
the applianc e as des cribed below.
NOTE: Place the appliance agains t a wall for more stability when y ou
remove
the filters. Make sure you insert the filters in the correct position.
E
Projections
C
B
D
D
CB
CB
1
Removing The Back Cover
□
□
Place your ngers in the recesses on the top of the
back cover (E) and gently pull the top of the back
cover (E) towards you.
Lift the hooks at the bottom of the back cover (E)
out of the bottom of the appliance.
Removing All Filters
2
□
□
Remove the HEPA lter (B) and removeable
pre-lter (C) from the air purier body.
3
Removing The Packaging Material
□
Remove the plastic packaging from the HEPA lter
(B) and removable pre-lter (C).
4
Putting Backing All Filters
□ Put HEPA lter (B), removable pre-lter (C), and
washable pre-lter (D) back into the applianc e.
NOTE: Make sure that the side of the HEPA lter
with the tag is pointing towards you.
Gently press down projections at the top of the
washable pre-lter (D), and then grab them and
pull towards you.
NOTE: Make sure that the side of washable
pre-lter with the two projections is pointing
towards you.
3
1
2
8h
2h
4h
6
E
Pre-Operation (continued)
5
Reattaching The Back Cover
□
□
Insert the bottom hooks of the bac k cov er (E)
into the bottom of the appliance rs t.
Push the bac k c over (E) against the body of the
applianc e.
NOTE: Make sure that all hooks are
properly attached to the appliance.
Operation
ON/OFF
Speed
Timer Sleep
Lock
AQ
Display
Auto
Filt er Reset
Plug in the machine.
1
Turning On The Machine
□
Press the ON/OFF button to power on.
Press the ON/OFF button again to power off.
2
ON/OFF Button
□
□
7
HOMEDEPOT.COM
Please contact 1-855-847-7264 for further assistance.
Operation (continued)
3
Using AQ (Air Quality)
□
□
4
Resetting Filter
5
Adjusting Fan Speed
□
□
□
□
□
AQ button automatically lights up when the power
is on.
Press AQ button to turn the Air Quality Indicator
on or off.
Press to cycle through 3 fan speeds--Low,
Medium, High speed.
The corresponding indicator lights up based on fan
speed.
1-Low speed
2-Medium speed
3-High speed
□
□
When the lter icon light is red, the lter should be
checked.
To reset the lter lifetime, press and hold for 3
seconds. The will ash 3 times, and turn off.
6
Using Timer Button
□
□
Press to cycle through timer option– 2 hours, 4
hours, 8 hours, timer off.
When the timing ends, the appliance will automati-
cally power off and enter Standby mode.
7
Using Auto Mode
□
□
□
When power is on, press the Auto button once to
enter Auto mode.
In the Auto mode, the motor speed is automatically
adjusted according to the air quality.
When in Auto mode, press Auto mode button again
or press Speed or Sleep button to exit Auto mode.
8
Using Sleep Mode
□
Press to turn Sleep mode on or off.
9
Using Display Button
□
□
With the power on, press the display button once to
enter Rest mode. All indicators will turn off.
Press any button except ON/OFF and Display lightly
to wake up the corresponding indicator.
10
Using Child Lock
□
□
□
With the power on, press button once to turn on
Lock function, and Lock indicator will light up.
Press and hold Lock button for 3 seconds. The Lock
indicator will turn off, and the Lock function will be
off. All other buttons will still function.
This is especially useful to prevent children from
accidentally changing any setting.
3
1
2
3
1
2
8h
2h
4h
8h
2h
4h
8
A
Operation (continued)
□
□
□
□
□
□
□
11
Air Quality Indicator (AQ Indicator)
□
□
Air Quality Indicator is turns on automatically when
the purier power is on.
The AQ indicator blinks in green, yellow and red
colors in turn for a few seconds, and nally stays in
the corresponding color based on the current AQ.
Care and Cleaning
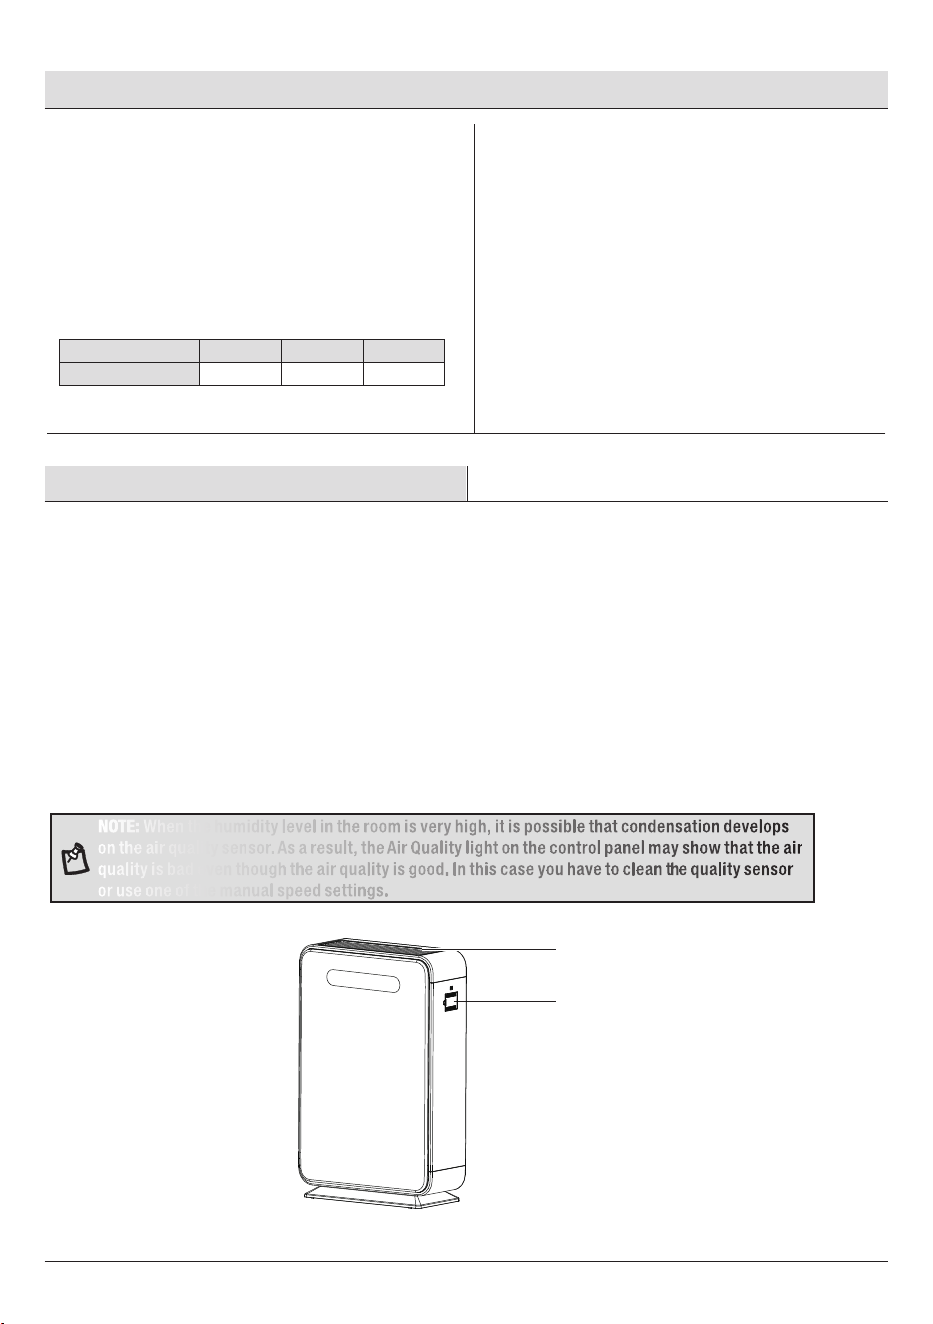
Air Quality Sensor
NOTE: When the humidity level in the room is very high, it is possible that condensation develops
on the air quality sensor. As a result, the Air Quality light on the control panel may show that the air
quality is bad even though the air quality is good. In this case you have to clean the quality sensor
or use one of the manual speed settings.
CLEANING THE AIR PURIFIER BODY
Always unplug the appliance before you clean it.
Never immerse the appliance in water or any other liquid.
Never use aggressive or ammable cleaning agents such as bleach or alcohol to clean any part of the
appliance.
Only the washable pre-lter is washable. All other lters are NOT washable.
AQ Indicator Color
AQ Level
Green Yellow Red
Good Fair Bad
Wipe away dust with a soft dry cloth from the body of the appliance.
Clean the back cover and the air outlet (A) with a soft dry cloth.
Clean the air quality sensor every 2 months with a soft brush for optimal functioning of the appliance.
Clean it more frequently if you use the appliance in a dusty environment.
Regularly clean the inside and outside of the body to prevent dust from collecting o
n the inside and outside.
9
HOMEDEPOT.COM
Please contact 1-855-847-7264 for further assistance.
Care and Cleaning (continued)
1
Switching Off The Appliance
4
Was hing The Washable Pre-lter
□
□
Wash the washable pre-lter (D) under a running
tap. If the washable pre-lter (D) is very dirty,
use a soft brus h to brush away the dust.
Alternativ ely, you can use a vacuum cleaner to
remove the dust from the washable pre-lter (D).
5
Drying The Washable Pre-lter
□
Air dry the washable pre-lter.
6
Putting The Pre-lter Back
□
Put the washable pre-lter bac k into the
applianc e. Attach all hook s properly to the
applianc e.
E
2
Removing The Back Cover
□
□
Place your ngers in the recesses on the top of the
back cover (E) and gently pull the top of the back
cover (E) towards you.
Lift the hooks at the bottom of the back cover (E)
out of the bottom of the appliance.
7
Reattaching The Back Cover
□
□
To reattach the bac k c over (E), insert the
bottom hooks into the bottom of the appliance.
Push the bac k c over (E) against the body of the
applianc e.
Removing The Washable Pre-lter
3
□
□
Gently press down projections at the top of the
washable pre-lter (D).
Grab them and pull towards you.
□
□
Press to switch off the appliance.
Remove the plug from the wall socket.
D
D
E
CLEANING THE WASHABLE PRE-FILTER
NOTE: Make sure that the pre-lter is
completely dry. If it is still wet, bacteria may
multiply in it and shorten the lifetime of the
pre-lter.
10
Care and Cleaning (continued)
□
□
Gently press down projections at the top of the
washable pre-lter (D).
Grab them and pull towards you.
1
Switching Off The Appliance
□
□
Press to switch off the appliance.
Remove the plug from the wall socket.
4
Removing The Removable Filter
□
□
Remove the removable lter (C).
Replace with a new removable lter.
5
Removing The HEPA Filter
□
□
Grab the HEPA lter (B)'s tag and pull it towards you.
Replace with a new HEPA lter.
6
Putting All Filters Back
□
Put all lters into the appliance, sequencing of
putting back lters refers to Packaging Contents in
page 3.
E
2
Removing The Back Cover
□
□
Place your ngers in the recesses on the top of the
back cover (E) and gently pull the top of the back
cover (E) towards you.
Lift the hooks at the bottom of the back cover (E)
out of the bottom of the appliance.
7
Reattaching The Back Cover
□
□
To reattach the bac k c over (E), insert the
bottom hooks into the bottom of the appliance
rs t. Push the back cover (E) against the body
of the appliance.
8
Resetting Filter Lifetime
□
□
□
Put the plug in the wall socket.
Press to switch on the appliance again.
Press and hold for 3 seconds. The light will turn
off, indicating that the reset is complete.
Removing The Washable Pre-lter
3
C
B
D
E
FILTER REPLACEMENT
NOTE: The lter light will continue to ash after
the lters are replaced. You must reset the lter
lifetime to turn the light off.
Troubleshooting
11
HOMEDEPOT.COM
Please contact 1-855-847-7264 for further assistance.
Problem Possible Cause Solution
Air purier does not
power on.
Unit is not plugged into an electrical outet.
Outlet is not working properly.
Connect the plug to a powered electrical outlet.
Try plugging the air purier into a different outlet.
Power button has not been pressed after
plugging in the air purier.
Press‘ ’once to turn on the air purier.
Power cord is damaged.
Air purier is defective or malfunctioning.
Immediately discontinue use and contact
customer support.
Air purier does not
respond to button
controls.
Air purier is not plugged into an outlet.
Connect the plug to a powered electrical outlet.
Air purier is defective or malfunctioning.
Immediately discontinue use and contact
customer support.
Air purier makes an
unusual noise while
operating.
Filter is dirty.
Replace the air lter as instructed in the
Filter Replacement section.
Filter does not t properly. Properly place lter as noted in the Pre-Operation
and Filter Replacement sections.
Foreign object inside the unit.
Immediately discontinue use and contact
customer support. DO NOT attempt to
open the air purier.
Filter packaging has not been removed.
Remove lter from packaging before use.
Signicantly reduced
airow.
Filter packaging has not been removed. Remove lter from packaging before use.
Fan speed is low. Press to adjust fan speed.
Filter needs to be replaced.
Replace the air lters as instructed in the
Filter Replacement section.
Not enough clearance on all sides of the
purier.
Ensure there is at least 38 cm (15 inches) of
clearance on all sides of the purier.
Poor air purication
quality.
Filter needs to be replaced.
Replace the air lters as instructed in the
Filter Replacement section.
Room is too large for the air purier's
applicable area.
Ensure the room is smaller than the applicable
area.
Air inlet or outlet is blocked.
Remove objects blocking air inlet or outlet.
Filter not properly placed in housing.
Properly place lters as noted in the Pre-Operation
and Filter Replacement sections.
Filter reset button is
still illuminated after
replacing the air lter.
The air purier has been reset incorrectly.
See the Filter Replacement section in
Care and Cleaning.
3
1
2
□ □ □
□
□
□
□
□
□
□
□
□
□
□
□
□
□
□
□
□
□
□
□
□
□
□
□
□
□
□
□
□
□
□
□
□
□
□
□
□
□
□
□
□
□
This chapter summarizes the most common problems you could encounter with the appliance. If you are unable to solve
the problem with the information below, contact the Customer Service Team at 1-855-847-7264.

Questions, problems, missing parts? Before returning to the store,
call Vissani Customer Service
8 a.m. – 7 p.m., EST, Monday-Friday, 9 a.m. – 6 p.m., EST, Saturday
1-855-847-7264
HOMEDEPOT.COM
Retain this manual for future use.
