We appreciate the trust and condence you have placed in Vissani through the purchase of this humidier.
We strive to continually create quality products designed to enhance your home. Visit us online to see our full
line of products available for your home improvement needs. Thank you for choosing Vissani!
THANK YOU
Questions, problems, missing parts? Before returning to the store,
call Vissani Customer Service
8 a.m. – 7 p.m., EST, Monday-Friday, 9 a.m. – 6 p.m., EST, Saturday
1-855-VISSANI (1-855-847-7264)
HOMEDEPOT.COM/VISSANI
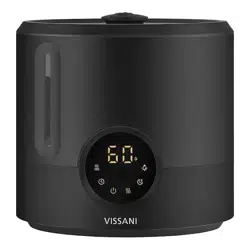
Sku #1012605078
Model #VK-8525A
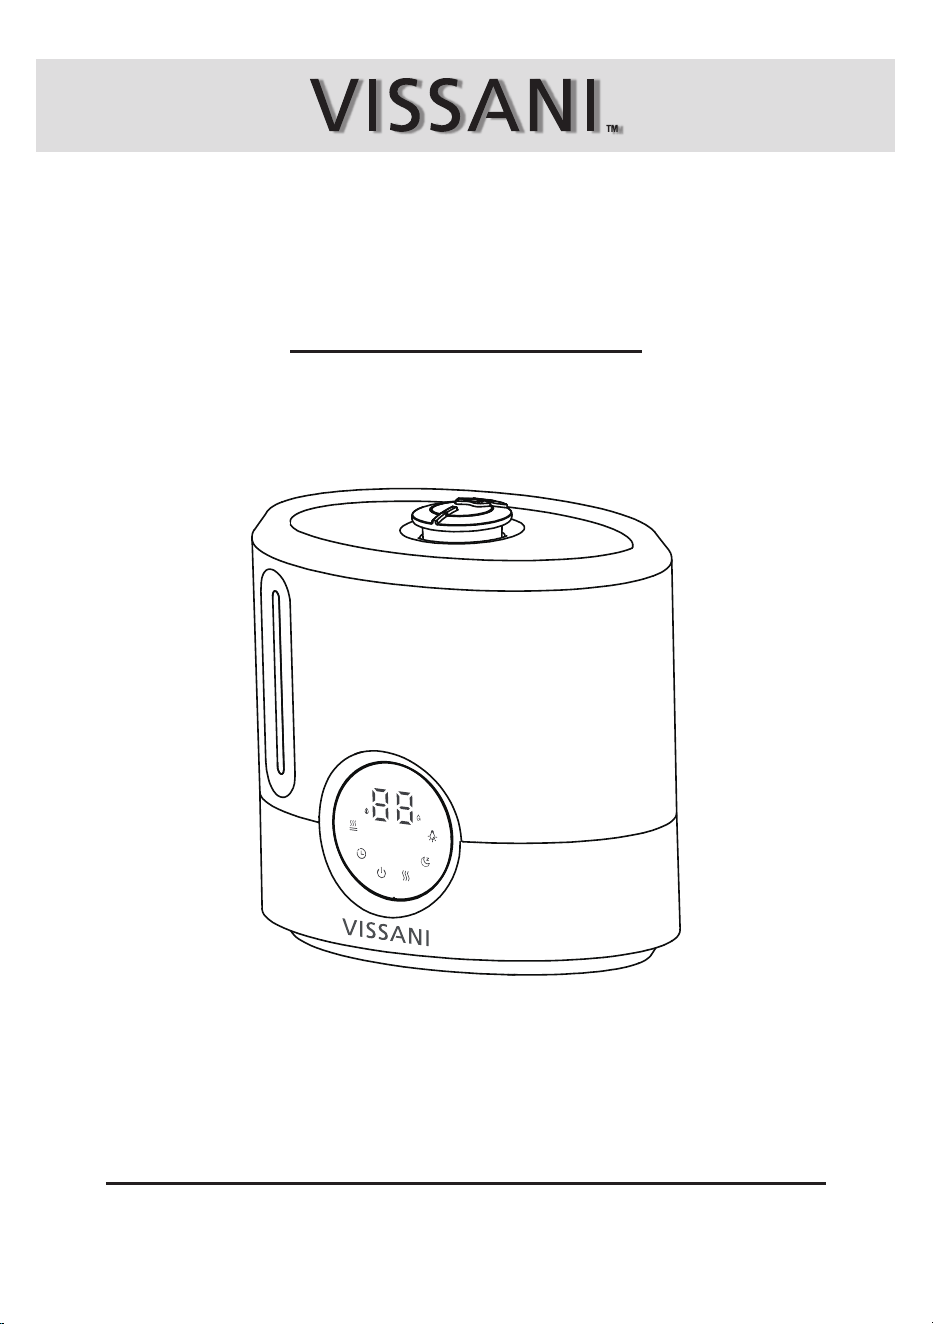
HUMIDIFIER
USER MANUAL

Table of Contents
Safety Information
2
Table of Contents ........................................................
Safety Information ......................................................
Warranty ......................................................................
Specifications .............................................................
Package Contents ......................................................
Parts Description ........................................................
Operation ...........................................................................
Care and Maintenance ......................................................
Trouble Shooting ...............................................................
Please use the humidier based on description in this manual.
Place the humidier and cord properly so that it will not be knocked over.
Do not place humidier near to big size furniture or in high-trafc areas.
Turn off humidier if do not use it. And disconnect from power by unplugging from the socket.
Do not use the humidier in wet environments.
Keep the humidier away from children.
Do not open the base or remove the water level sensor by self-servicing.
Always unplug your humidier before cleaning your humidier or detaching the water tank from the humidier base.
Please ensure humidier is placed on a at area for operation
Please ll the water tank with clean water and do not ll in with any other liquids.
Do not place the humidier near to res, such as stovetops, ovens or radiators.
Do not place the humidier directly on oors, carpets or rugs.
Do not replace components by items from third-party.
Do not cover the nozzle while the humidier is working otherwise it may damage the humidier.
Remove the water tank from the base before moving the humidier.
Do not immerse the humidier base, power cord or plug in water.
If the humidier is damaged or is not functioning properly, stop using it and contact Customer Service immediately
(see page 1).
Children should not clean or perform maintenance on the humidier without supervision. Supervise children when
they close to the humidier.
Children should be supervised to ensure that they do not frolic with the humidier.
This humidier should not to be used by persons (including children) with reduced physical, sensory or mental
capacities or lack of experience and knowledge, unless they have been given supervision or instruction concerning
the use of the appliance by a person responsible for the safety.
READ AND SAVE THESE INSTRUCTIONS
GENERAL SAFETY
Different types of batteries or new and used batteries are not to be mixed.
Do not mix alkaline, standard (carbon-zinc), or rechargeable batteries.
Alkaline batteries are recommended.Use only the specied voltage.
Insert batteries using the correct polarity. Always use, replace, and recharge (if applicable)batteries underadult
supervision.
Do not short-circuit the battery supply terminals.
Do not dispose of batteries in re, batteries may explode or leak.
Remove batteries before storing.
Exhausted batteries are to be removed from the appliance and safely disposed off.
BATTERY
Safety Information (continued)
3
HOMEDEPOT.COM/VISSANI
Please contact 1-855-VISSANI (1-855-847-7264) for further.
Warranty
All air freight and transportation costs are not covered by the warranty and must be undertaken by the customer.
In any case, the company or its authorized distributors will not grant any guarantee on time if it is beyond the control,
or any special or indirect damage occurs, the company or its authorized distributors will not be responsible for it.
In addition to the above-mentioned clear warranty provisions, the company is not required to assume other forms of
warranty responsibilities.
WHAT IS COVERED
Contact the Customer Service Team at 1-855-VISSANI (1-855-847-7264) or visit www.homedepot.com.
This product is warranted for one year from the date of purchase (12 months, 365 days). The warranty is limited to
defects in the materials of the product and manufacturing defects.
WHAT IS NOT COVERED
This product has exceeded the "12-month warranty".
Failure to provide valid purchase receipts; or altered valid purchase receipts without authorization; or the model and
serial numbers of the product in receipt do not match the actual product.
The label or serial number of the product is damaged or has been tampered, or the identity of this product cannot be
proved effectively.
Unexpected factors, improper use or other human factors (including water ingress, moisture, fall down, user
operation errors, transportation, bumps, etc.) caused a defect or damage; failure or damage caused by natural
disasters and force majeure and so on (such as earthquakes, res, etc.)
Disassembled, retted or repaired by user or an unauthorized third party.
Not following the instructions in this manual, or damage caused by not using the original parts of the product.
The purchaser has clearly been informed that the product is a disposed product, or samples that serve as
commercial listings, or products that have been subjected to performance overload tests.
Wear of any part, or damage to plastics and other accessories.
□
□
□
□
□
□
□
□
Not for commercial use. Householduse only.
Ensure that the plug ts properly into a polarized socket.
Do not handle the power cord or plug with wet hands. Keep the plug and power cord away from wet.
Vissani humidier has a polarized plug (pin that is wider than the others), which ts into a polarized socket only.
This is a safety-feature to reduce the risk of electric shock. If the plug does not t, please reverse the plug. Do
not bypass this safety-feature.
If the power cord is damaged please unplug it and contact Customer Service (see page 1).
Unplugging will disable remote control of the humidier.
Do not add essential oils, other treatment liquids, or water lters into the water tank or base chamber. This
will damage the humidier. Only add essential oils to the aroma pad.
WARNING:
Do not touch the heater after the warm mist
function is turned on, Doing so may burn your hand.
Caution: Risk of Leaks and Electric Shock
POWER CORD AND PLUG

Specications
4
Item Quantity
Humidier
Cleaning Brush
Remote controller
Aroma Pad
User Manual
1
1
1
3
1
SPECIFICATIONS
PACKAGE CONTENTS
Parts Description
Power Supply
Rated Power
Water Tank Capacity
Max Runtime
Noise Level
COVERAGE
Dimensions
Weight
AC120V, 60Hz
152W
2Gallon/ 7.6L
Up to 60 hours on low mist setting Note:The humidier may run
for a longer or shorter time depending on the environmental
humidity and temperature.
≤28dB
600 ft²/ 55.7㎡
12.7 in W x 8.4 in D x 12.3 in H/ 32.4 cm AN x 21.5 cm PR x 31.4 cm AL
5.1 lbs/ 2.3kg
A
B
C
D
E
F
G
H
I
J
K
L
M
N
O
P
Q
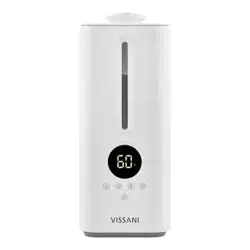
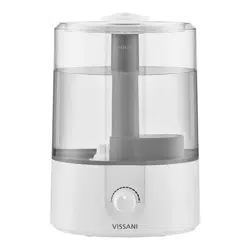
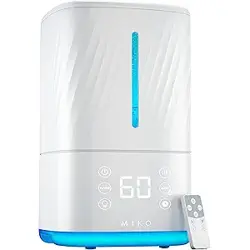
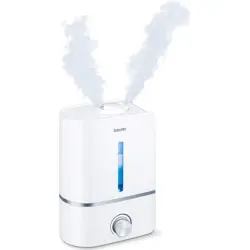
Mist Nozzle
Water Tank Cap
Water Tank
Water Level Indicator
Control Panel
Main Body
Water lter
Heater
Water Tank Light
Float
Aroma Box
Aroma Pad
Night Light
Power Cord
Noise Silencer
Cleaning Brush
Remote Controller

C
D
E
F
A
Specications (continued)
5
HOMEDEPOT.COM/VISSANI
Please contact 1-855-VISSANI (1-855-847-7264) for further.
B
G
P Q
J
K
H I
L
M
O
N
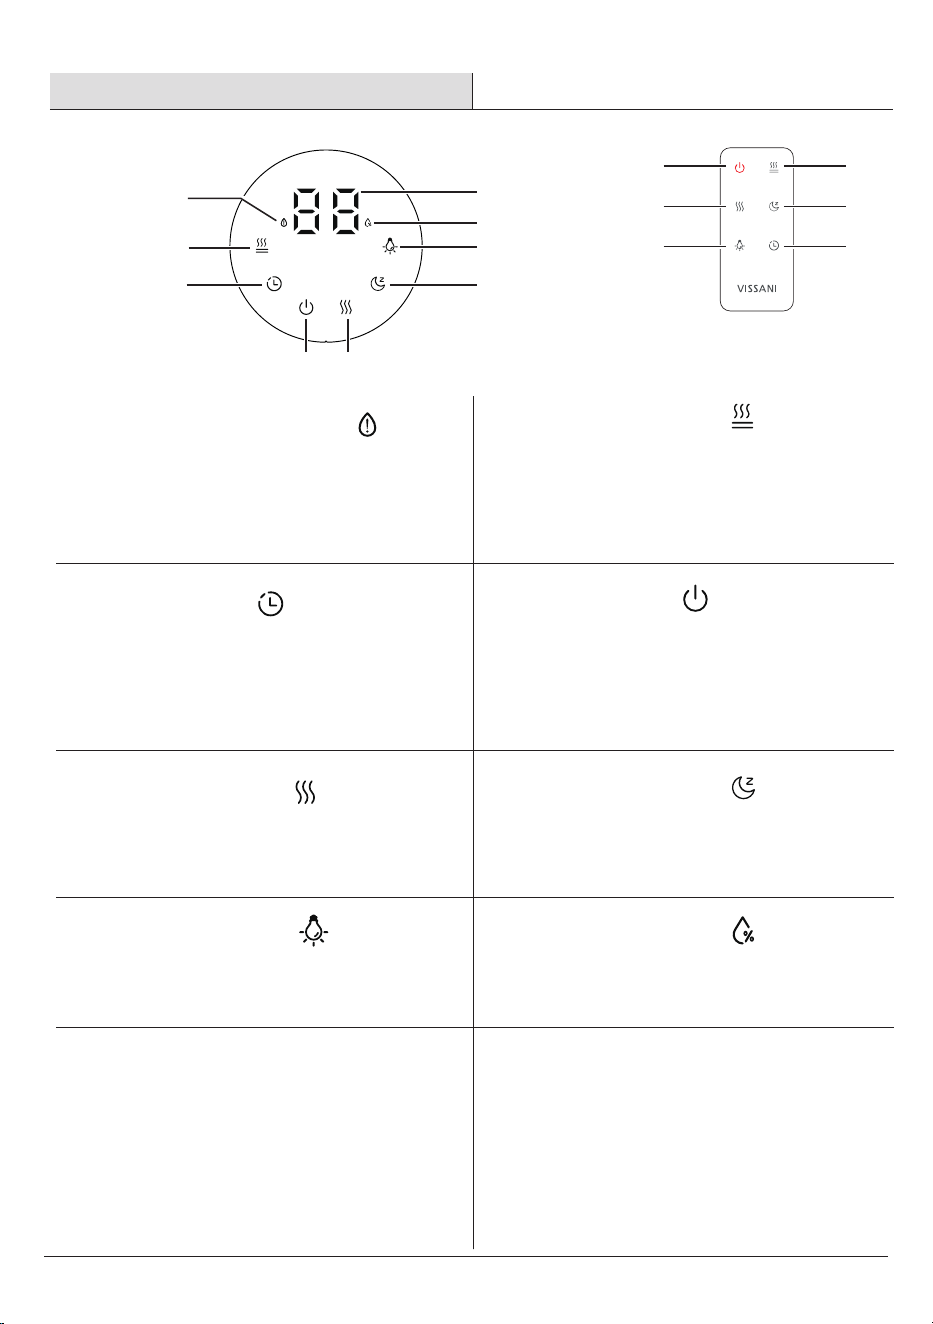
Operation
6
When the water tank lack of water ,the red
indicator ash for 30 minutes and then power off if
not adding wate
A
Lack of Water Indicator
□ □
Turn the water heater on/off
B
Warm Mist Button
Tap repeatedly to cycle through timer settings : 0 -
14 hours, adding 2 hours for each touch.
C
Timer Button
□ □
Tap to turn the humidier on/off .
D
Power Button
I
A
CONTROL PANEL INTRODUCTION REMOTE CONTROLLER INTRODUCTION
C
C
H
F
F
Function on remote control buttons are
same as the control panel.
D E
D
E
B
B
G
G
Tap repeatedly to cycle through mist level settings :
01 – 02 - 03 –AU (Auto Mode).
E
Mist Level Button
□ □
Tap to turn Sleep Mode on/off.
F
Sleep Mode Button
Tap repeatedly to cycle through the night light color
: red - green- blue - auto color change - off .
G
Night Light Button
□
Show mist level or the timer .
I
Digital display
□
□
When the digital display show the humidity
level , the humidity indicator is on.
H
Humidity Indicator
7
HOMEDEPOT.COM/VISSANI
Please contact 1-855-VISSANI (1-855-847-7264) for further.
Operation (continued)
GETTING STARTED
Filling &Refilling
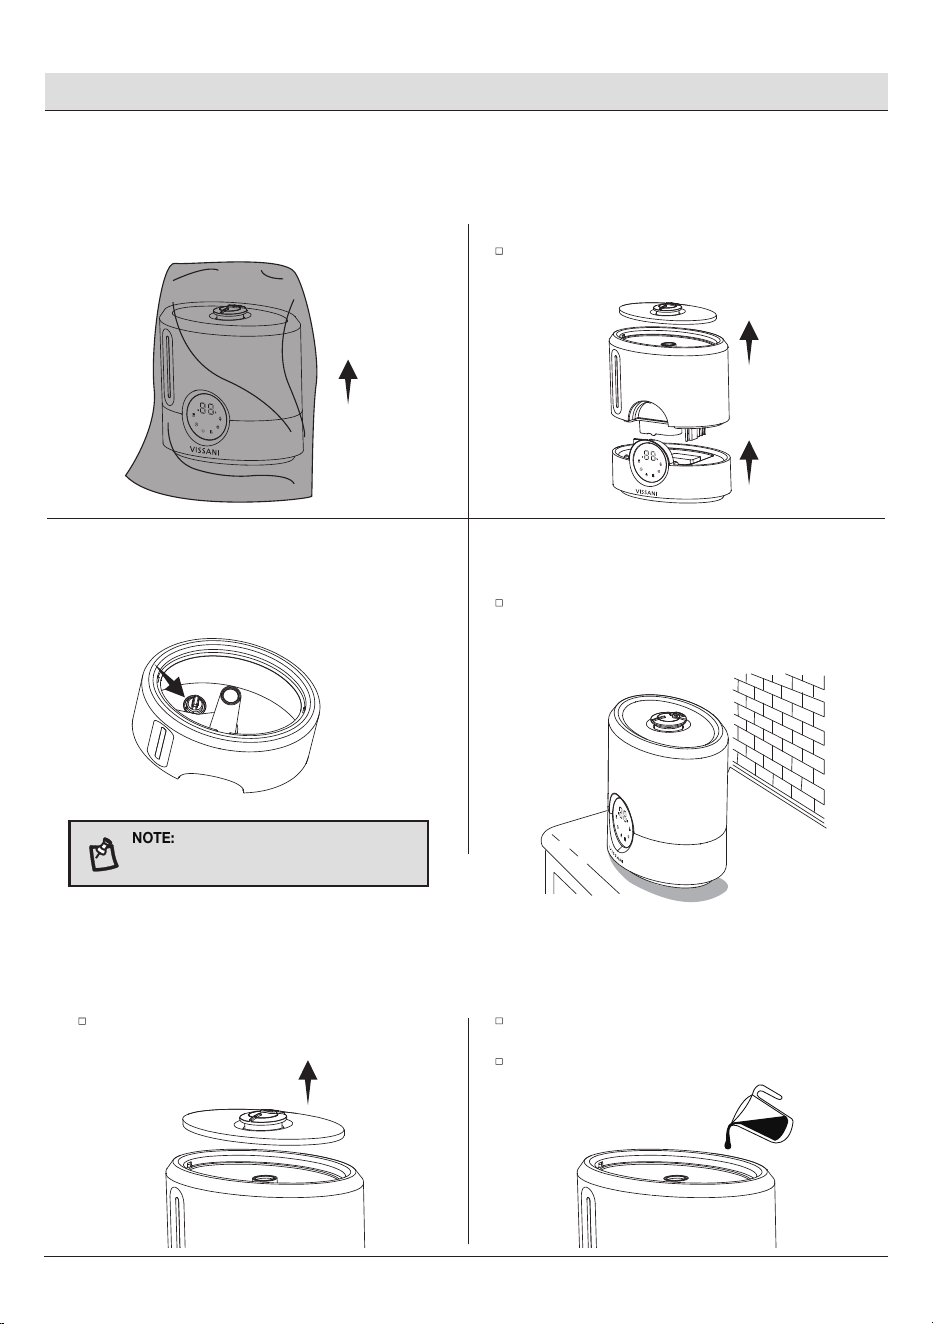
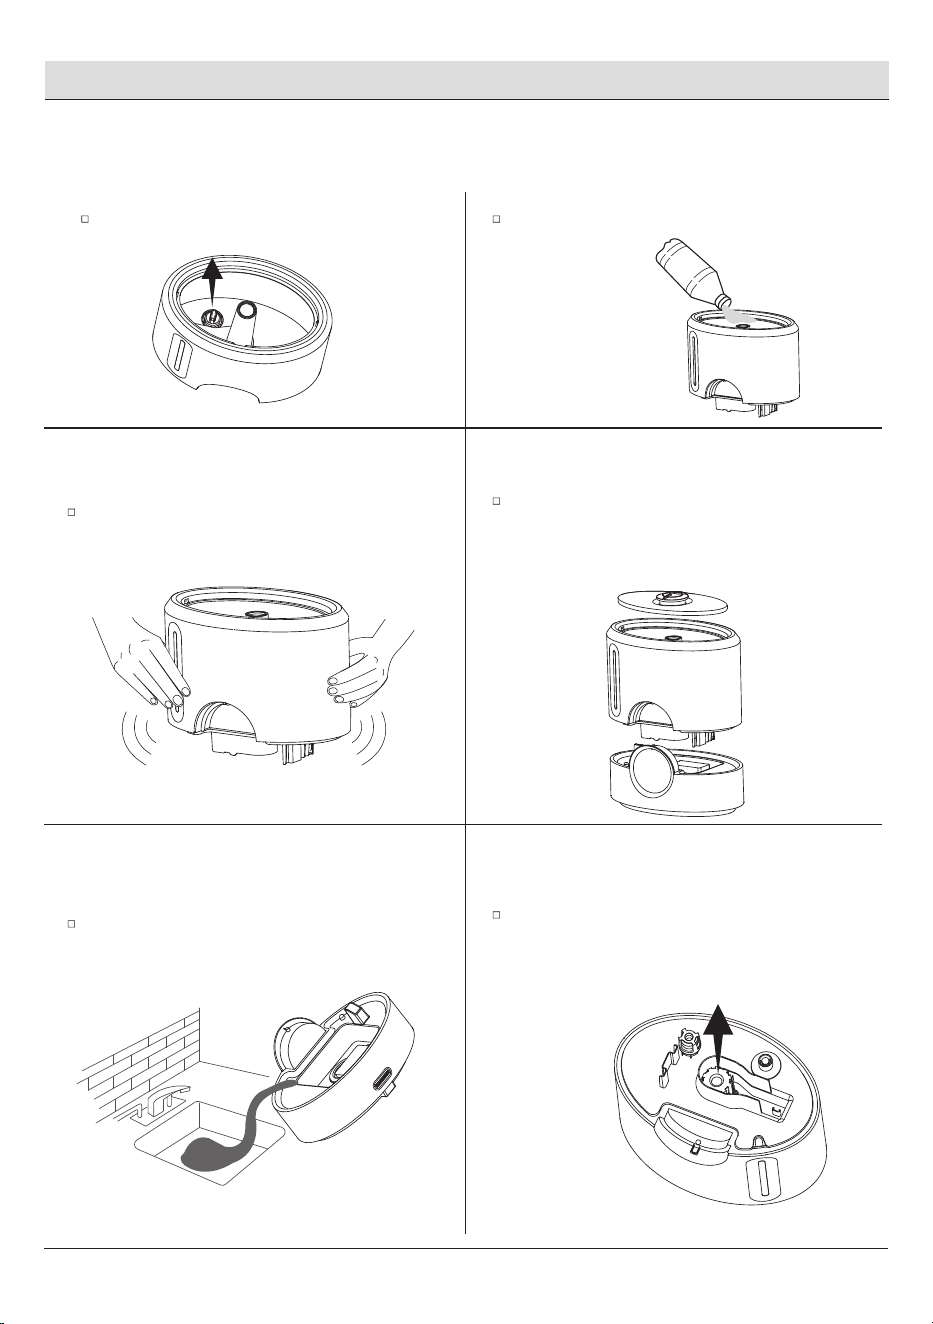
1 Remove all packaging
2 Remove all packaging
Take the water tank off the base and remove all
tape,including any tape on the oat.
1Open the tank cover
2 Fill water
Remove the tank from the base. Fill the tank with
room temperature water.
Do not ll with hot water.
Remove the water tank cover by holding the
nozzle and pulling upward.
3 Clean the water tank and water
tank cover before first use
4 Choose a flat location
Choose a stable,at location for the humidier at
least 12 inches /30 cm away from any walls.The
surface must be water-resistant.
Remember to make sure that the water
filter is in correct place. If not, rotate and push
the filter to secure it in right place
8
NOTE: We recommend using puried or
distilled water to ll the tank.
NOTE: Do not ll past the tank's max
waterline.
NOTE: Do not add water directly into the
base chamber.
NOTE: Do not add water through the mist
tube. Do not add essential oils into the
humidier.
NOTE: Only add essential oils to the aroma
pad.
NOTE: Do not use water treatment liquids
or third-party water lters in this humidier.
Operation (continued)
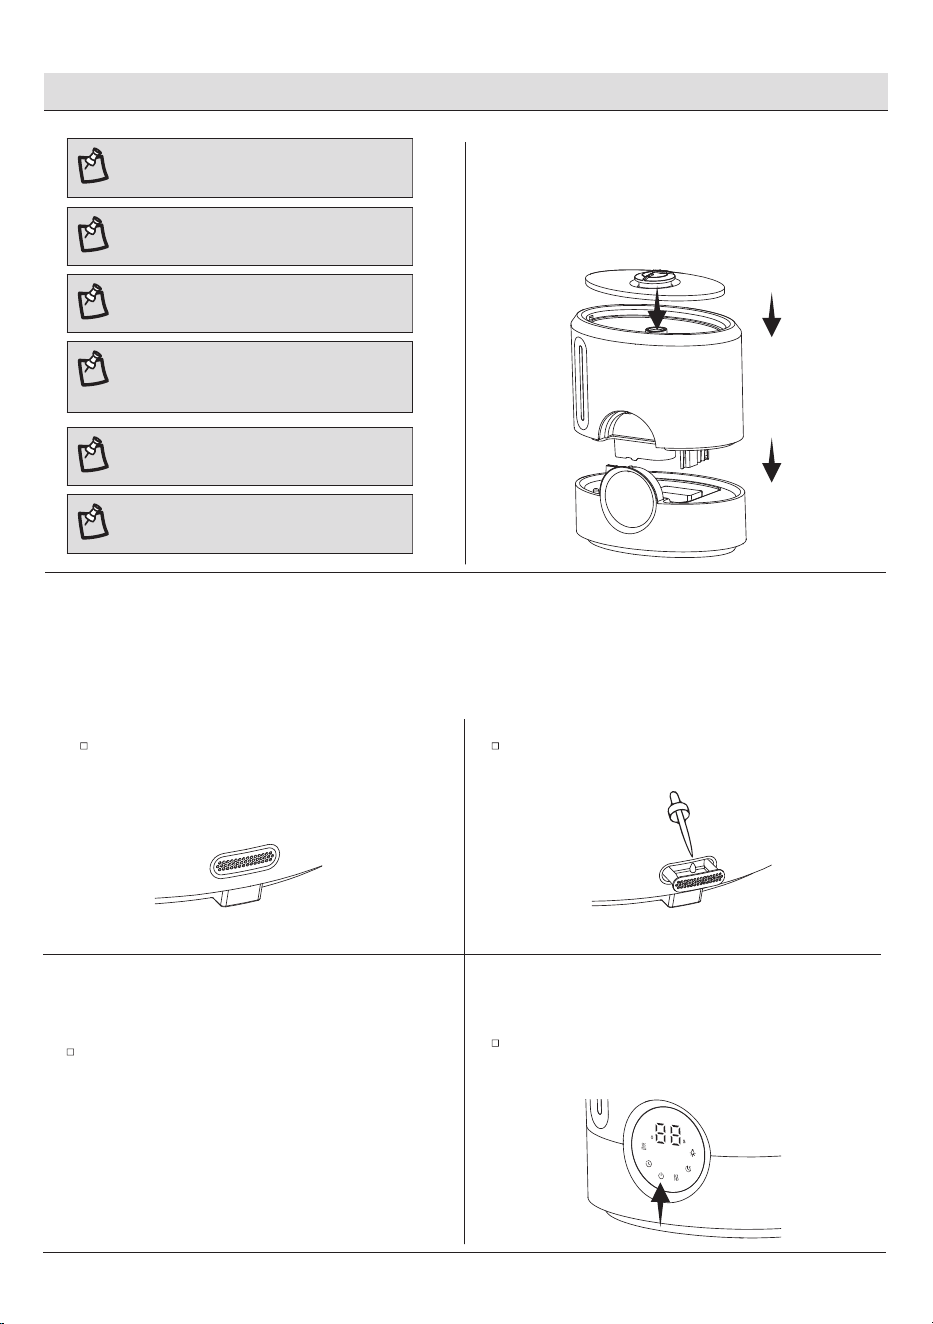
Put the water tank and the cover back on the
base.
3
Replace the tank
□
USING THE AROMA BOX
1Open the aroma box
2 Adding aroma
Put 8-10 drops of essential oil on the aroma pad.Push the aroma box at the back of the base and
pull it out.
3 Close the aroma box
4 Start the humidifier
Turn on the humidier. The humidier will automati-
cally diffuse aroma when used.
Place the aroma box into the humidier.
Your humidier can be used for aromatherapy
HOMEDEPOT.COM/VISSANI
Please contact 1-855-VISSANI (1-855-847-7264) for further.
Operation (continued)
Care &maintenance
9
NOTE: Do not add essential oils, water
treatment liquids or third-party water lters
into the water tank or base chamber. Only
add essential oils to the aroma pad.
NOTE: The aroma pads can be cleaned
and reused after diffusing essential oils.
NOTE: The aroma is intended to be light.
This humidier is not an aroma diffuser.
NOTE: Plug in the humidier. Tap Power
Button to turn your humidier on.
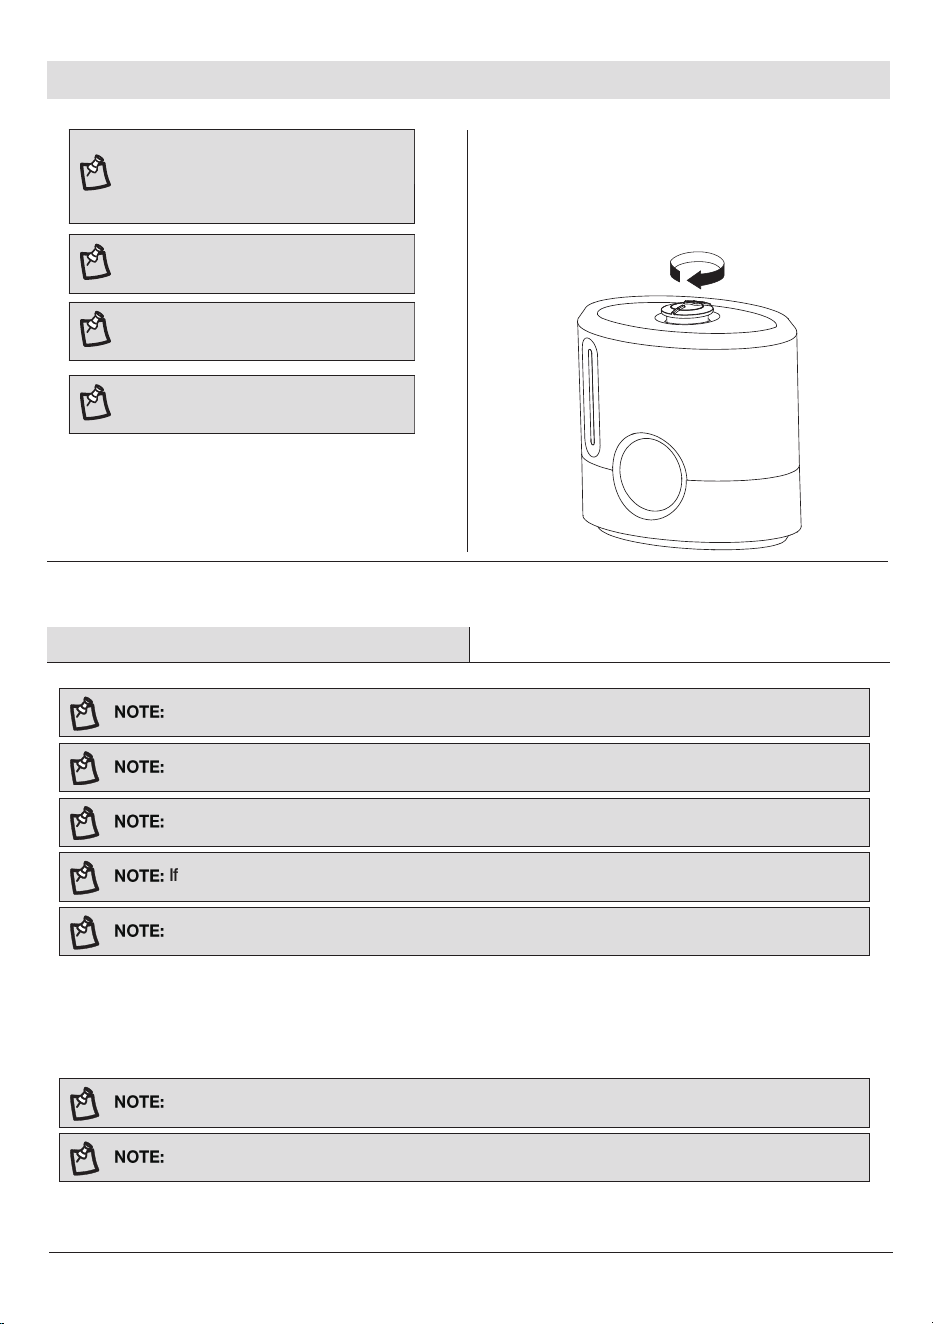
Mist should be away from walls, furniture,
bedding, and other appliances.
5
Rotate the nozzle
□
CLEANING
All maintenance should be done on a water-resistant surface, such as a kitchen counter
Change the water daily to avoid bacteria growth.
Use a tissue or cloth to clean the nozzle regularly.
If not using the humidier for 3 days or longer, do not leave water inside.
Clean and dry the humidier.
Never immerse the base in water or liquid. Do not place any part of the humidier in dishwasher.
Do not use detergents to clean the humidier.
Please clean water tank and base chamber every 3 days before storing it.
NOTE: When pouring out water, hold
down the oat to ensure that it does not fall
out of the base chamber.
Care &maintenance (continued)
10
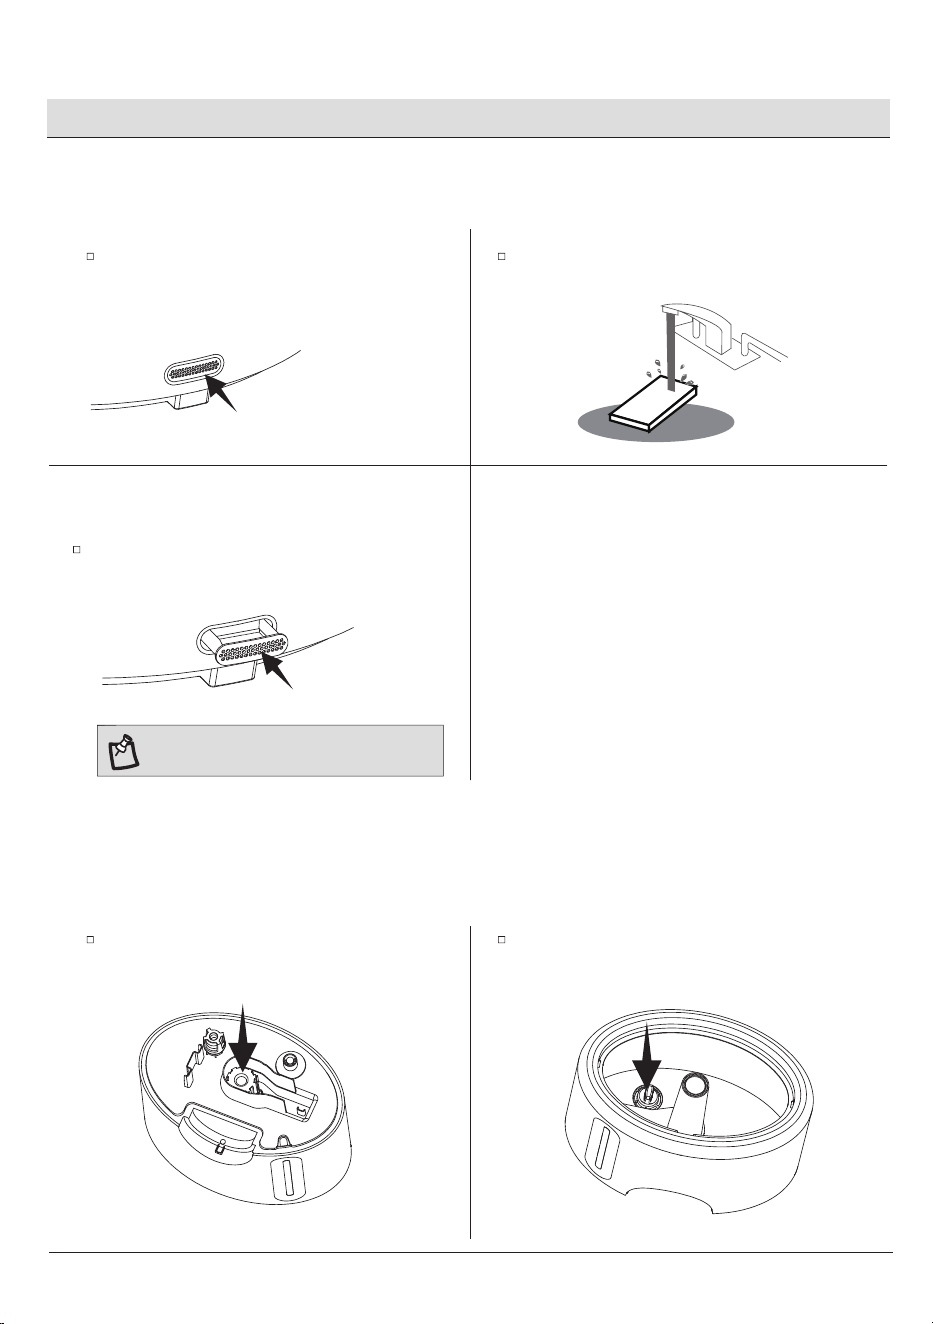
1 Turning off
2 Clean cover
Remove and rinse the water tank cover.Unplug the humidier
3 Clean the base
4 Remove the filter
Remove the water lter from the tank by lifting it out.
Remove the water tank from the base and
pour out any water from the tank and base
chamber.
5 Clean unit
6 Wipe and let dry
Dry all parts with a cloth. Make sure all parts are
completely dry before reassembling or storing
Rinse the tank, water lter, and base
chamber with room temperature water.
HOMEDEPOT.COM/VISSANI
Please contact 1-855-VISSANI (1-855-847-7264) for further.
11
Care &maintenance (continued)
TO DESCALE THE HUMIDIFIER:
1 Remove the filter
2 Pour in white vinegar
Fill the tank with 3 US cups /710 mL of distilled
white vinegar.
Remove the water lter from the tank by lifting
it out.
3Sloshing tank
4 Soaked scale
Place the tank on the base and soak for 15-20
minutes. Vinegar will drain into the base chamber,
and loosen scale (mineral buildup) in the tank and
base chamber (including the transducer and oat).
Put the tank cover back and swish the
vinegar around the tank.
5
Pour out the white vinegar
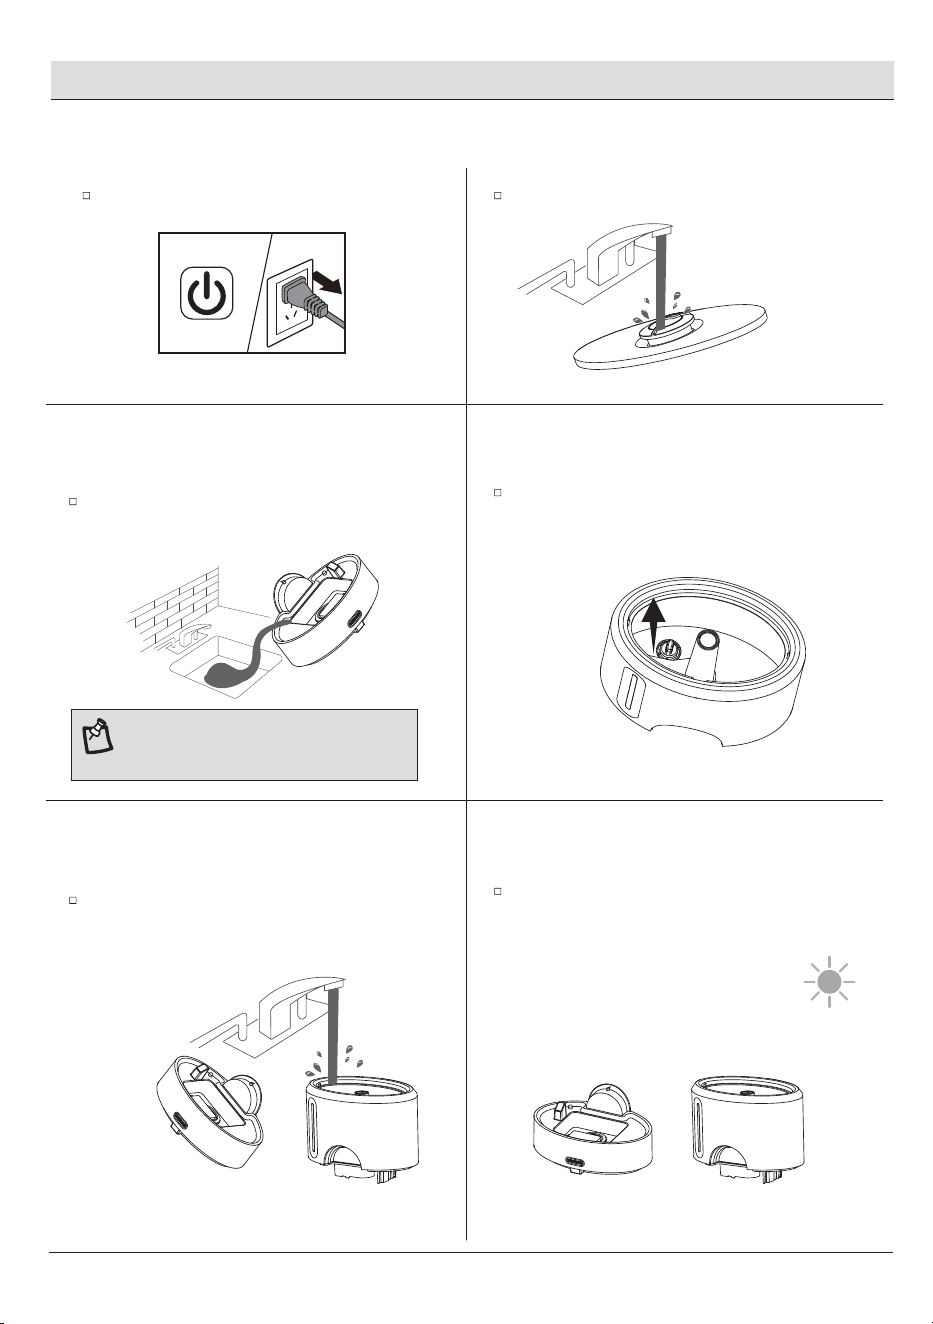
6 Remove the noise silencer
Flip the tank over and remove the noise silencer. To
remove the noise silencer, press the release tab and
gently pull away from the humidier.
Remove the tank, remove the tank cover,
and pour out vinegar.

12
Care &maintenance (continued)
7 Remove float
8 Soaking white vinegar
Place the oat, water lter, and noise silencer in
a small container.
Fill with enough vinegar to cover them. Soak for
15-20 minutes
Remove the oat from the base chamber by
pulling up the larger side of the oatand pulling
the shaft out from the oat brackets.
One side of the oat brackets is open
(U-shaped)to allow the shaft to be removed.
9Scale cleaning
10 Clean unit
Rinse all parts until vinegar smell is completely gone.
Use a soft cloth and the complimentary
cleaning brush to remove scale from all
parts.
11 Wipe and let dry
Dry all parts with a cloth. Make sure all parts are
completely dry before reassembling or storing
HOMEDEPOT.COM/VISSANI
Please contact 1-855-VISSANI (1-855-847-7264) for further.
NOTE: Do not pour liquid cleaners or
detergents into the aroma pad or box.
CLEANING THE AROMA PAD
REASSEMBLING
1 Remove the aroma box
2 Cleaning the aroma box
Remove the aroma pad and rinse under warm,
owing water.
Press the aroma box to release it from the base,
and pull it out.
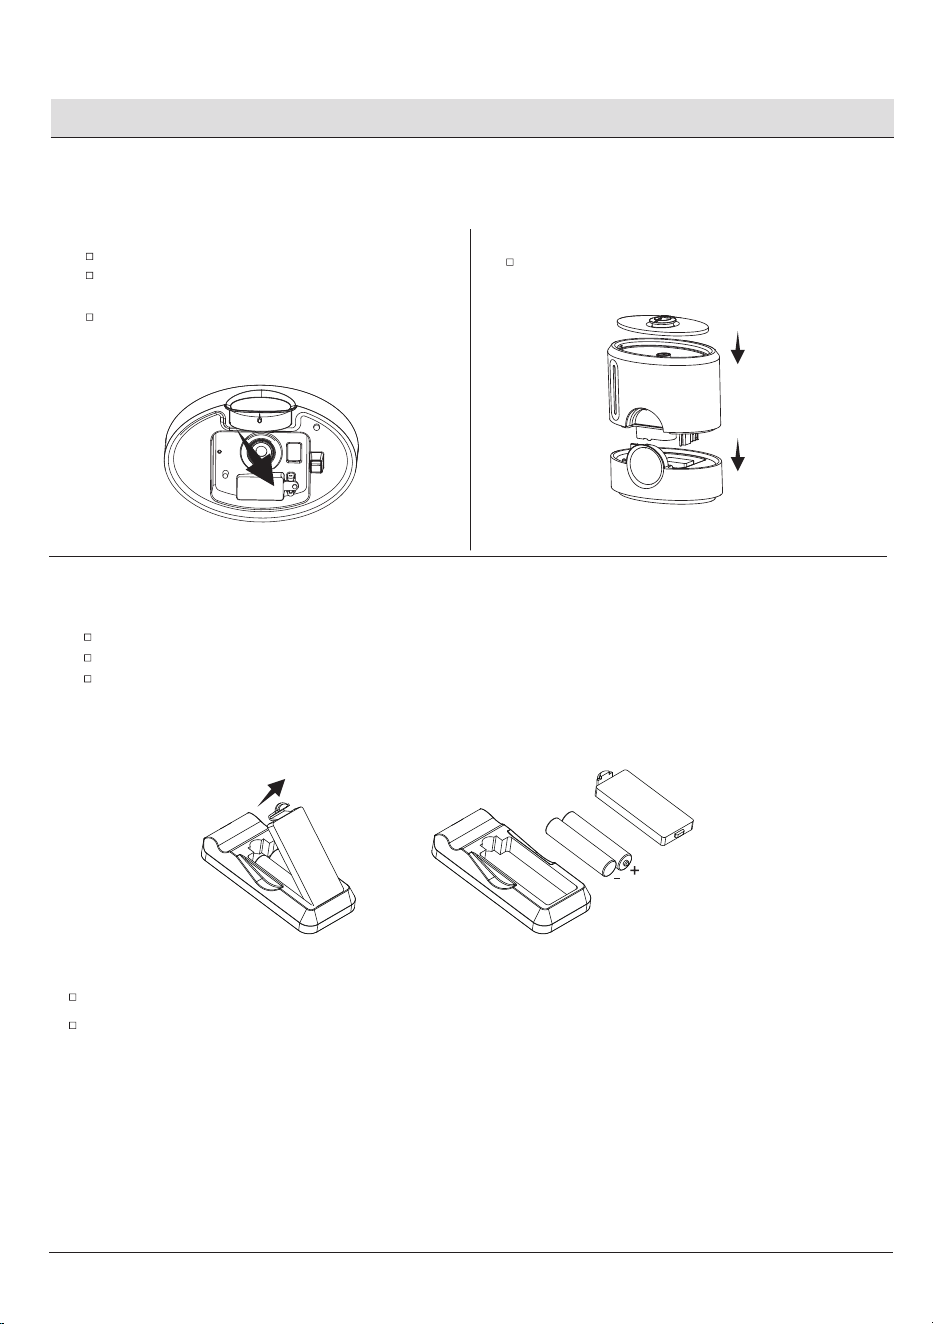
1 Put the noise silencer back
2 Put the water filter back
Place the water lter back into the tank and
press to secure it in place.
Flip the water tank over and place the noise
silencer back into the tank.
3Put back the aroma box
Dry with a clean cloth and place it back
into the aroma box.
Care &maintenance (continued)
13
Care &maintenance (continued)
14
3 Put the float back
Make sure the correct side of the oat is facing up.
Insert the smaller prong into the closed side of the
oat brackets.
Place the larger prong into the open (U-shaped)
side of the oat brackets.
4 Reinstall the main piece
Place the tank properly on the base and
place the tank cover on the water tank.
REPLACING THE REMOTE CONTROLLER BATTERY
Storing
Open the battery box cover and remove the old batteries .
Replace the new batteries (AAA) and cover it.
Note that the positive and negative terminals of the batteries should be aligned with the positive and
negative terminals of the remote control box,do not place in reverse.
Follow the cleaning instructions and allow all parts to dry completely before storing.
Store the humidier in a cool and dry position.
15
Troubleshooting
This chapter summarizes the most common problems you could encounter with the appliance. If you are unable to solve
the problem with the information below, contact the Customer Service Team at 1-855-VISSANI (1-855-847-7264).
Problem
Possible Cause
Humidier cannot
be turn on, or turn
off unexpectedly.
HOMEDEPOT.COM/VISSANI
Please contact 1-855-VISSANI (1-855-847-7264) for further.
Plug the humidier into a working socket and turn it on by tapping the power button.
Add puried or distilled water to the water tank.
Check whether the humidier is in Auto Mode. During. During Auto Mode settings, the
humidier may automatically turn off when the humidity level is above the target level.
Humidier produces
an unusual smell.
White dust appears
around the
humidier.
Humidier makes a
loud or unusual
noise.
Water leaks from the
humidier.
If the humidier is new, unplug and rinse all parts, then place in a cool and dry place for 12 hours.
Clean the water tank and base chamber.
Clean the humidier.
Make sure the water tank is properly in place.
Set mist level to a lower setting.
The humidier may be malfunctioning. Stop using the humidier and contact Customer Support.
Make sure the silicone sealing ring around the water outlet valve s secure.
Avoid running the humidier in a room with over 60%relative humidity.
Wipe any excess water on the top and bottom of the base.
Do not shake the humidier.
Make sure to place the humidier on a at area.
Check the water tank for leaks. If there are leaks, contact Customer Support.
If essential oils were placed on the aroma pad, rinse the pad under clean water and allow it to
dry.
We recommend using puried or distilled water to ll the humidier. Avoid using water with
high mineral content.
Condensation forms
around humidier or
windows.
Humidity may be too high. Turn down the mist level, turn off the humidier or open a door or
window of the room.
Empty the base chamber, Rell the water tank (not the base chamber) and place the water
tank properly onto the base.
Little or no mist
comes out
Water is consumed
unexpected quickly
Turn the mist level to a higher setting.
Fill the water tank.
Make sure the nozzle is not blocked or clogged.
Make sure the humidier is on a at surface.
There may be too much water in the base chamber, Empty the base chamber. Rell the water
tank (not the base chamber)and place the water tank properly onto the base.
Make sure the air inlet on the bottom of the base is not blocked .The humidier should not be
placed on carpet or other surfaces that may block the air inlet.
The water temperature may be too low. Turn the mist level to the highest setting and let the
humidier run for a while, then adjust to the desired setting.
lf the water tank or base was washed with detergent, rinse thoroughly with clean water to
remove any detergent.
Clean the water lter or replace it with a new one.
To request a new water lter, contact Customer Support.
The humidier uses up water based on the environmental temperature and humidity. If your
environment is cold and/or dry, the humidier will run out of water faster.
16
Troubleshooting (continued)
Lack of water
indicator is red.
Fill the water tank.
Place the water tank properly on the base.
Clean the water lter or replace it with a new one. To request a new water lter, contact
Customer Support.
Display shows an
incorrect
humidity
percentage.
The room may be larger than the humidier's effective range.
Moisture may have built up inside the humidity sensor. Turn off the
humidier and allow the sensor to get dry, Make sure the nozzle is facing away from the
sensor so that mist does not settle on the sensor.
Problem
Possible Cause
Mold grows inside
the humidier.
Clean the water tank and base chamber regularly.
Essential oil has
little or no smell.
Add more essential oil. For best results, use pure essential oil.
Problem Possible Cause Solution
HOMEDEPOT.COM/VISSANI
Please contact 1-855-VISSANI (1-855-847-7264) for further assistance.
17
HOMEDEPOT.COM/VISSANI
Please contact 1-855-VISSANI (1-855-847-7264) for further.

Questions, problems, missing parts? Before returning to the store,
call Vissani Customer Service
8 a.m. – 7 p.m., EST, Monday-Friday, 9 a.m. – 6 p.m., EST, Saturday
1-855-VISSANI (1-855-847-7264)
HOMEDEPOT.COM/VISSANI
Retain this manual for future use.