Instructions for In Line Double Flaring
1. Make sure tubing is cut off square and burrs removed.
2. Chamfer outside of tubing with either a file or grinding wheel.
3. Insert tubing through two sides of clamping base using included adapter as guide for proper length.
4. Alternate tightening the two cap screws of the clamping base to grip the tubing. Too loose a grip will
allow the tubing to push through.
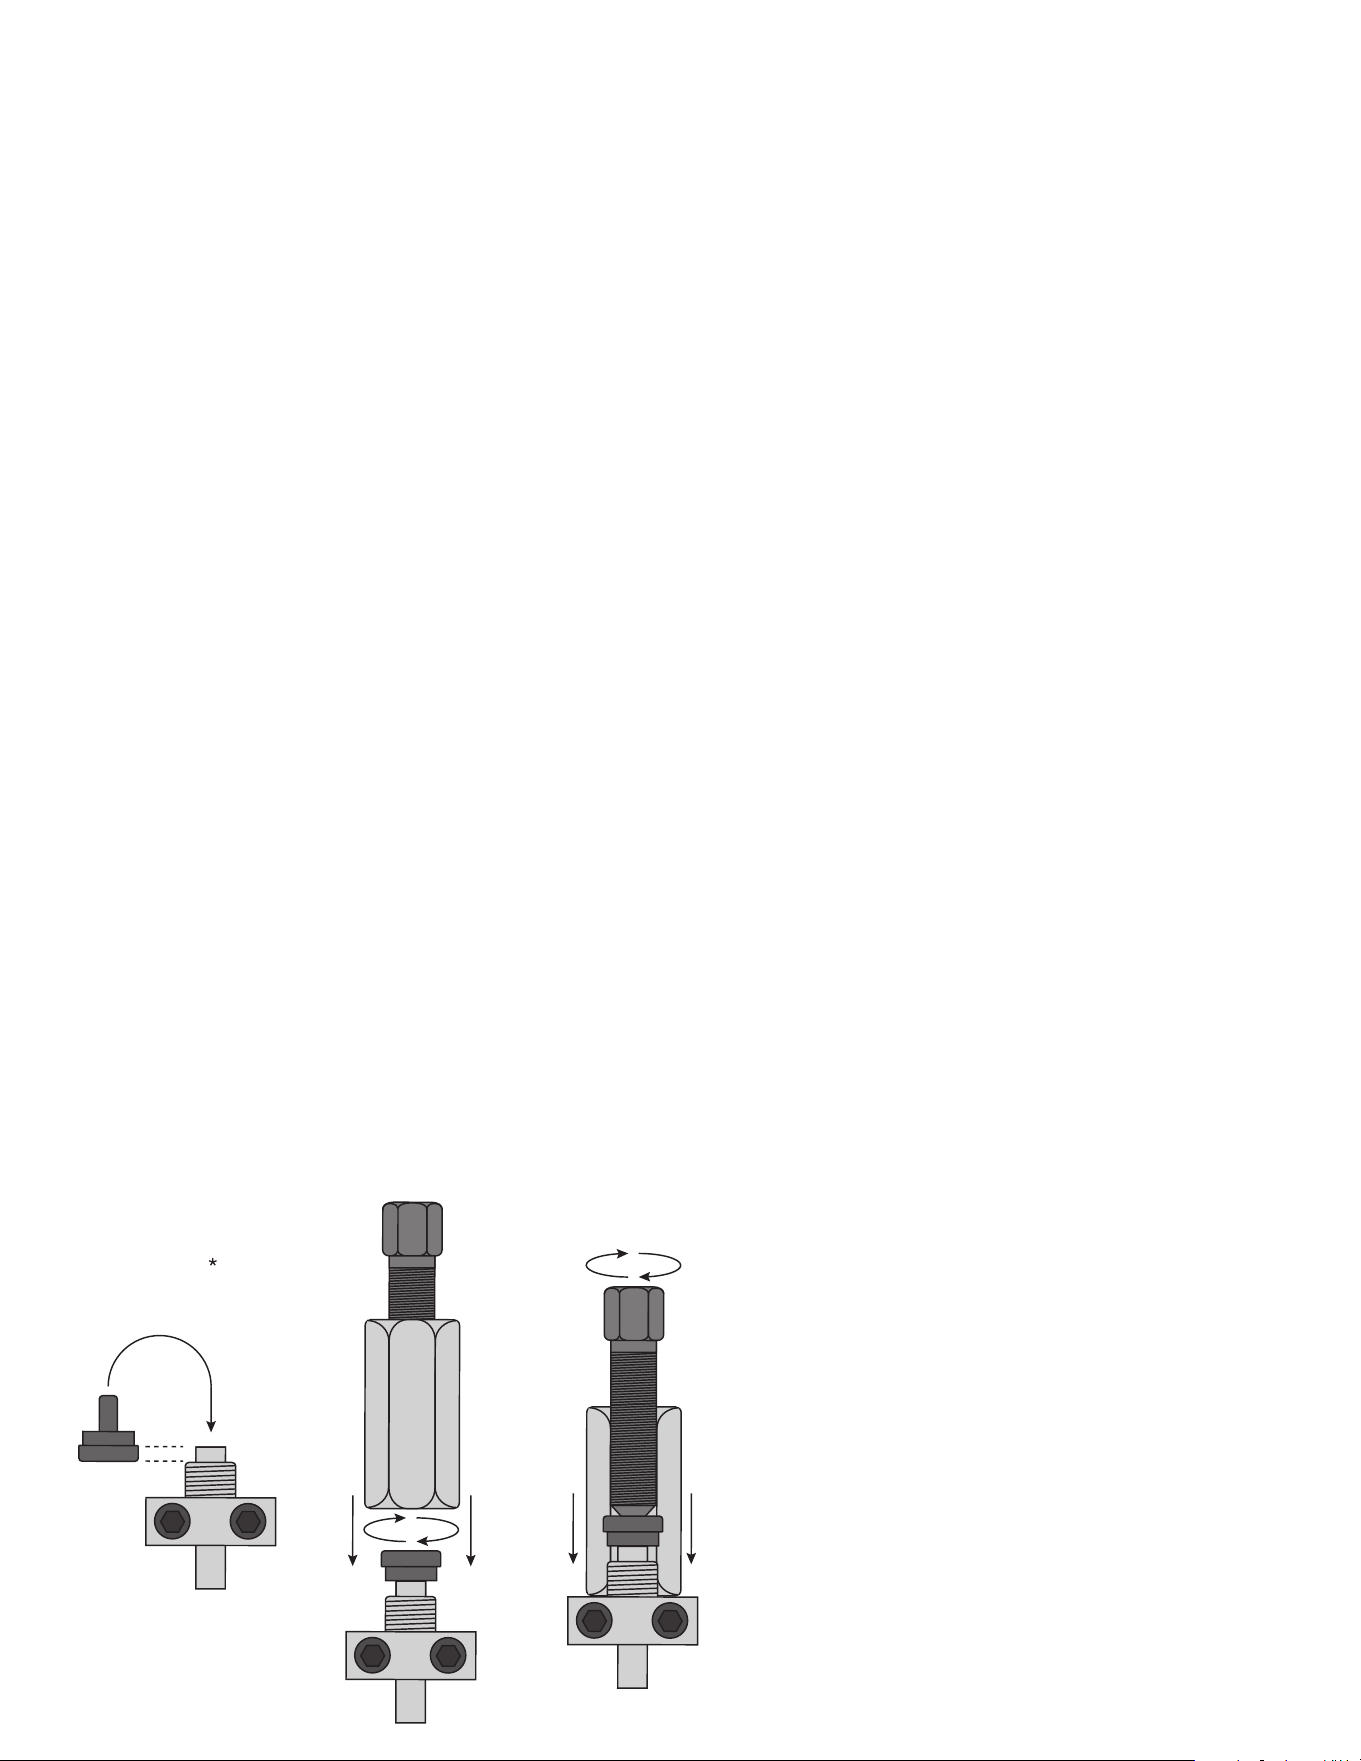
5. Insert stem of adapter into end of tubing. (See diagram 1) Place hex yoke over flaring adapter and hand
tighten on to clamping base. (Do not use wrench to tighten.) (See diagram 2)
6. Thread flaring screw into Hex yoke. Screw until tight and firm which will produce the first flare. This will
form a bell shape in tubing. (See diagram 3)
7. Un-thread screw until loose.
8. Un-thread Hex yoke completely and remove adapter. Check for proper bell shape.
9. Replace Hex yoke and tighten to base.
10. Thread screw into hex yoke again until completely tight. This should complete the double flare.
Instructions for In Line Bubble Flaring
NOTE: DO NOT use the adapters with with suffix “B” as a gauge.
1. Make sure tubing is cut off square and burrs removed.
2. Chamfer outside of tubing with either fIle or belt sander/grinding wheel.
3. Insert tubing through the two sides of the clamping base using included adapter as guide for proper
length. (See diagram 1) *DO NOT use the silver adapter corresponding to the “B” suffix. You will need to
use the black oxide standard adapter as a height gauge to achieve the accurate length for this process.
4. Alternate tightening the two cap screws of the clamping base to grip the tubing. Too loose a grip will
allow the tubing to push through.
5. Insert stem of adapter into end of tubing. (See diagram 1). Place hex yoke over flaring adapter and hand
tighten on to clamping base. (Do not use wrench to tighten). (See diagram 2)
6. Thread flaring screw into hex yoke. Screw until tight and firm which will produce the bubble flare. (See
diagram 3) The flare should look like a bell shape. DO NOT over-tighten as this may distort the flare.
7. Un-thread screw until loose. Remove hex yoke and adapter.
8. Un-tighten and remove the tubing, completing the bubble flare operation.
Diagram 1
Diagram 2
Diagram 3
*Height Gauges for Bubble Flaring
4.75B use 4.75mm
6B use 6mm
8B use 8mm