
Technical Support and E-Warranty Certificate www.vevor.com/support
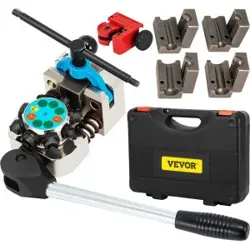
Brake Line Press
MODEL: LD-74500
We continue to be committed to provide you tools with competitive price.
"Save Half", "Half Price" or any other similar expressions used by us only represents an
estimate of savings you might benefit from buying certain tools with us compared to the major
top brands and does not necessarily mean to cover all categories of tools offered by us. You
are kindly reminded to verify carefully when you are placing an order with us if you are
actually saving half in comparison with the top major brands.
- 1 -
MODEL: LD-74500
Have product questions? Need technical support? Please feel free to
contact us:
Technical Support and E-Warranty Certificate
www.vevor.com/support
NEED HELP? CONTACT US!
This is the original instruction, please read all manual instructions
carefully before operating. VEVOR reserves a clear interpretation of our
user manual. The appearance of the product shall be subject to the
product you received. Please forgive us that we won't inform you again if
there are any technology or software updates on our product.
Brake line press

- 2 -
Warning-To reduce the risk of injury, user must read instructions
manual carefully.
SAFETY WARNINGS AND PRECAUTIONS
Thank you for using this product. In order to make sure that you can operate the
machine correctly, read this instruction carefully before operation and keep it
properly for future reference. Please be sure to read the precautions and safety
rules in this page to ensure your safe use. This manual will outline safety warnings
and precautions, operating, maintenance. The warnings and instructions reviewed
in this manual cannot cover all possible conditions and situations that may occur.
Caution and common sense are not built into this product, since we believe that
the uses will comply with these codes.
Please read ALL the instructions before using your machine.
1. Assemble needs to follow these instructions. Incorrect assembly can be a
hazard.
2. Do not assemble when tired or when under the influence of alcohol, drugs or
medication.
3. Weight and elastic and other product properties are only applicable to correctly
and completely assembled products.
4. Keep the assembly area clean and well-lit.
5. Keep bystanders out of the area during assembly.
6. This is a equipment, not a toy, it needs to be used under the guidance of a
professional. Do not allow children and pets to play alone or approach this item.
7. Use as intended only. Do not sit or stand on the product.
8. Inspect before every use. Do not use it if parts are loose or damaged.
9. Do not apply this unit to any other purposes than the indicated usage.
10. Do not use it for commercial purposes.
11. Do not clean it with any abrasive material.
12. Never leave it unattended while in use.
13. Pet urine and feces can damage the product, please keep away.
14. Do not place the product on or near hot air, electric burners or heaters.

- 3 -
WARNING:
15. Young children should be supervised to ensure that they do not play with the
product. Pets should stay away from the product.
Do not use outdoors in rainy and cloudy days, avoid lightning strikes and
falls. People or pets hanging on the product will cause injury or death.
Owner's Manual & Safety Instructions
Introduction:
Quickly create single,bubble or double flares on 5 different sizes of tubing. Great
for making perfect flares on brake lines, transmission cooler lines and fuel lines.
Works on steel, stainless steel, and soft metal tubing. Easy and quick operation
will save you time and money when creating brake lines on your project.
Safety:
Always wear eye protection when operating the Flaring Tool as oils, grease and
metal particles may be ejected while the tool is in operation.
Make sure that the Flaring Tool is clamped securely in a vise,keep hands and
fingers away from the mating tool faces.
Wear gloves while operating to avoid cuts from sharp metal edge
s.
Preparation&Tool Setup
Tubing Prep:
1. Cut the end of the tube square using a tubing cutter.
2. Chamfer the inside of the tube and remove any burrs. Clear any metal chips
from inside the tube.
3. Clean the outside of the tube before placing into the jaws and lubricate the end
of the cut tubing with an anti-seize compund.
4. Place appropriate fittings over the tube.
- 4 -
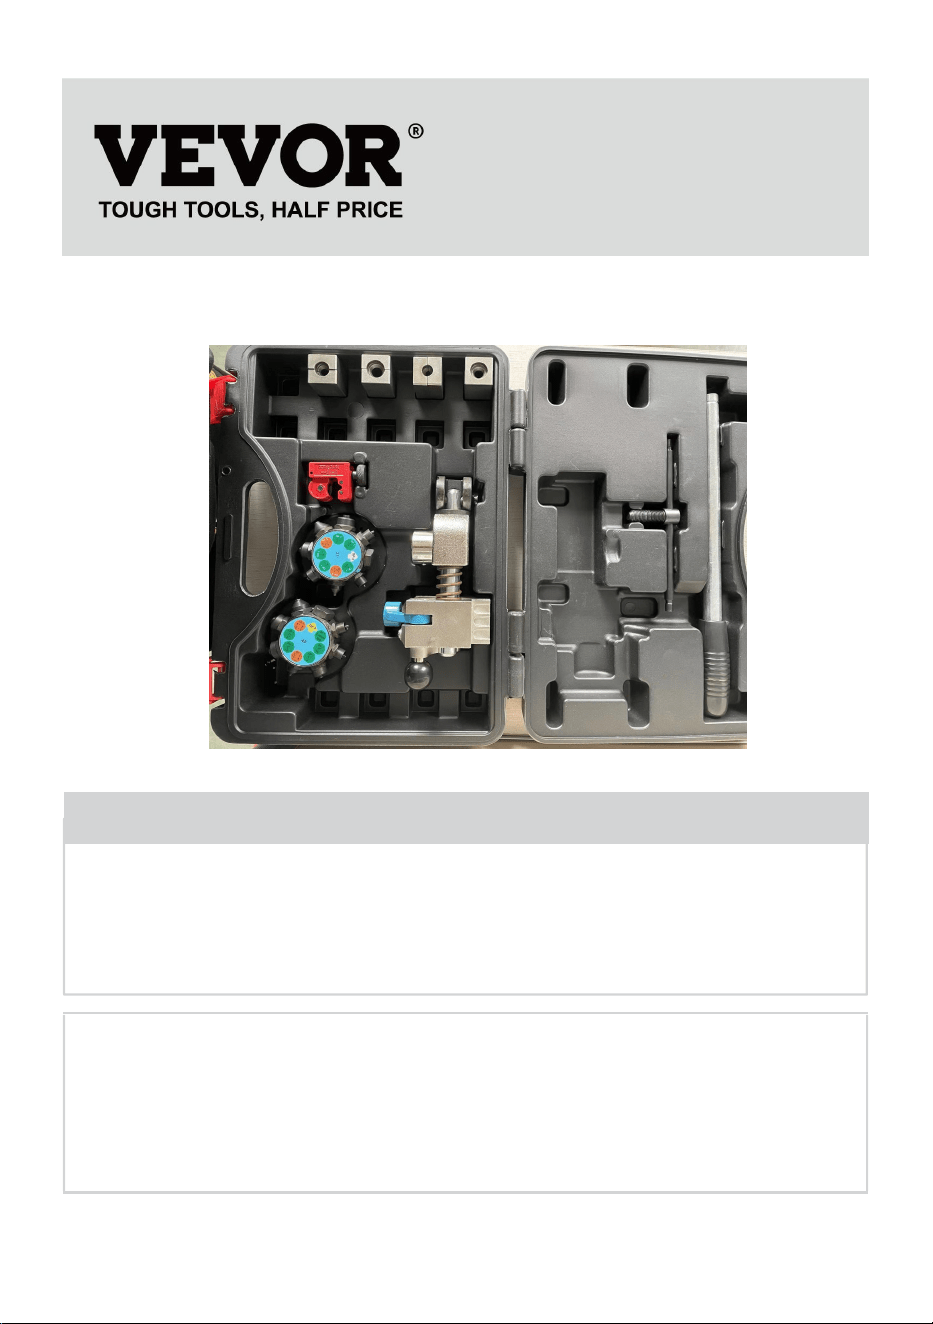
Tool Setup and Operation:
1. Place the base of the tool into a secure bench
mounted vise.
2. Place rotating die head onto round boss.
3. Place the long handle into the hole in the lever
base and make sure it fully seats.
4. Pull Clamp Pin (with black knob) out releasing
lamp.
5. Rotate clamp upward.
Operation:
6. Select the Split Die size that you need and
insert the dies into the rectangular recess in the
tool base with the beveled counterbore end
toward the Rotating.
Die Head and the back end firmly against the
step.
7. Place the tube between the die halves with
the tube end flush with the flared end of the Dies.
The Flat Faced OP.0 die is a gauge used to line
up the end of the tube flush with the Split
Dies.Rotate Die Head so that the flat faced die
OP.0 is facing the end of the tube. Move lever
inward toward body using the OP.0 die as a stop
gauge.The tube end must be flush with the end
of the die set to create a complete double flare.
- 5 -
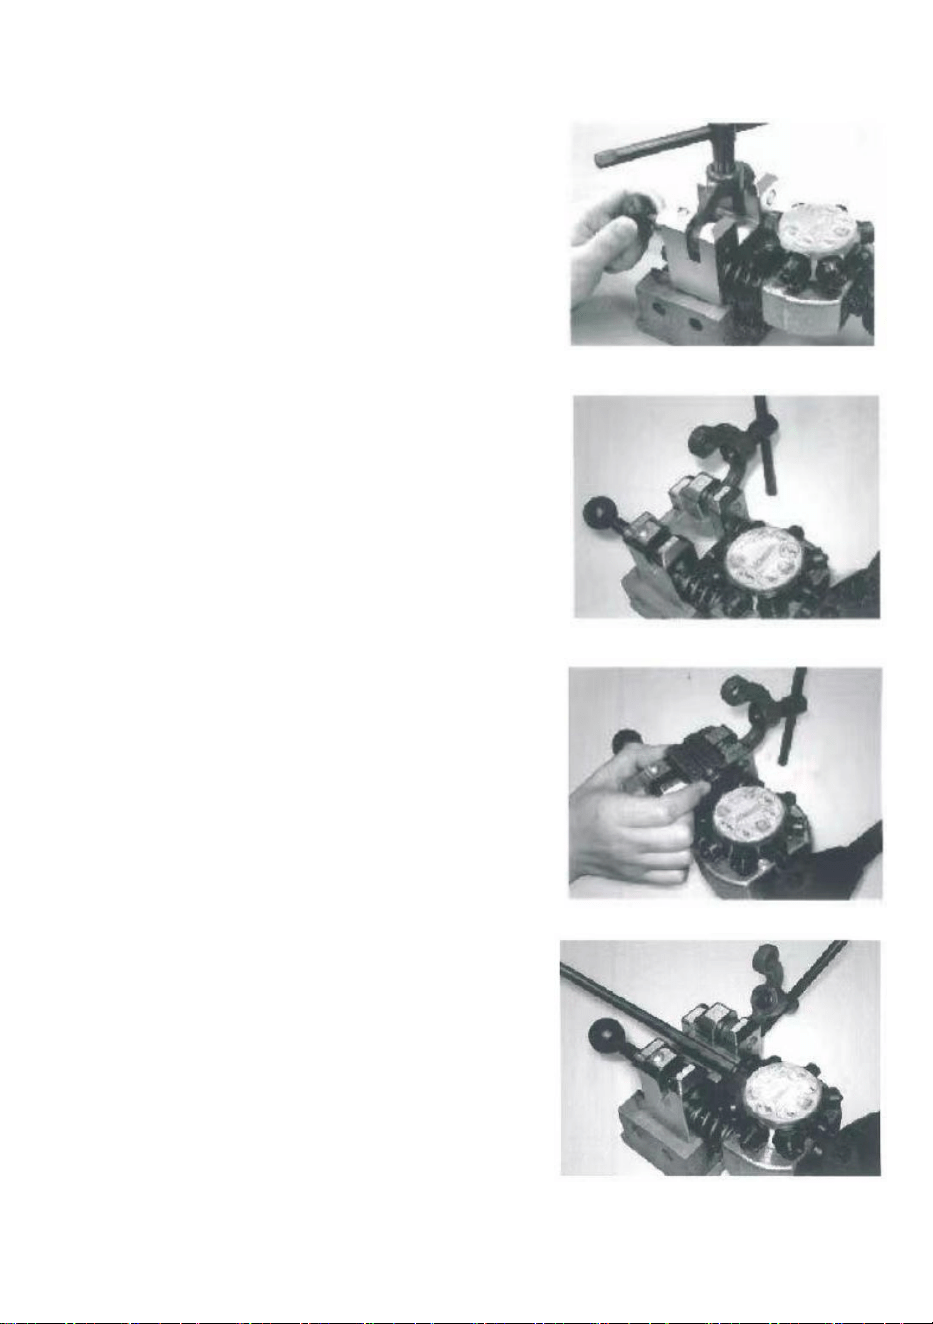
8. Rotate clamp back into place, push Clamp
Pin through holes and back into the tool until
the black knob seats againast the body of the
tool.
9. Tighten threaded retainer "T" -handle
screw in clamp securely against the die set.
10. Spin Rotating Die Head with the appropriate size OP.1 Flaring Die lined up
with the end of the tube.
11. Move lever against tool body exerting
sufficient effort to create flare, continuing
until it stops.
At this step,a bubble flare has been created.
To create a double flare, continue with the
following steps.
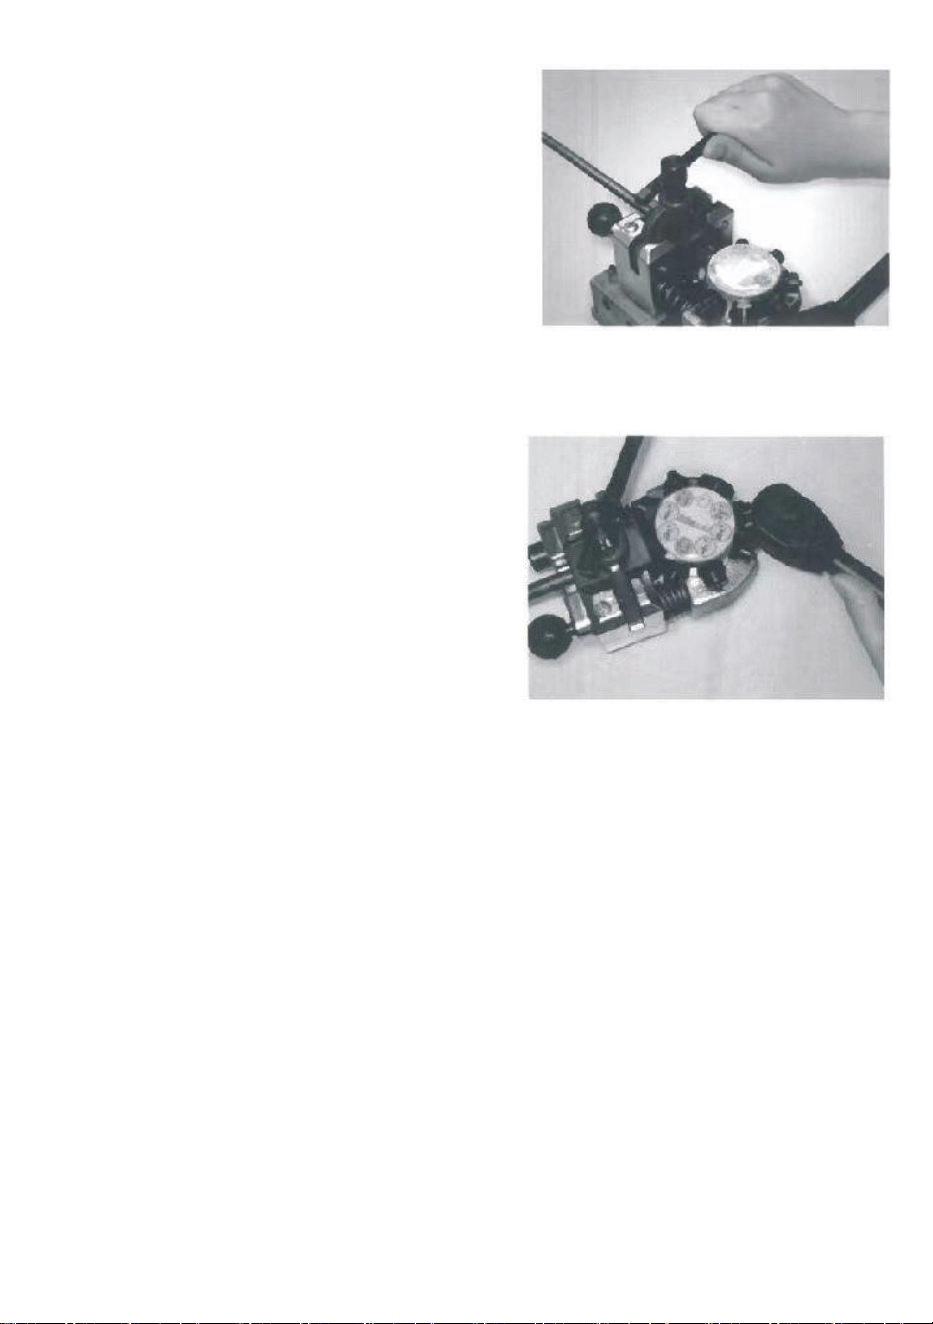
Operation(Double Flare):
12. Spin rotating die head with one of the two appropriate sized OP.2 Dies lined up
with the end of the tube.
13. Move lever against tool body exerting sufficient effort to create the inverted
portion of the double flare, continuing until it stops.
14. Loosen threaded retainer “T” handle screw, pull the clamp retaining pin then
remove the split dies.
15. Remove the finished flared tube from the dies. A slight tap may be required to
release the finished flared tube from the dies.

- 6 -
Address:Baoshanqu Shuangchenglu 803long 11hao 1602A-1609shi Shanghai
Imported to AUS: SIHAO PTY LTD, 1 ROKEVA STREETEASTWOOD NSW 2122
Australia
Imported to USA: Sanven Technology Ltd., Suite 250, 9166 Anaheim Place,
Rancho Cucamonga, CA 91730
REP
UK
Pooledas Group Ltd
Unit 5 Albert Edward House, The Pavilions
Preston, United Kingdom
REP
EC
SHUNSHUN GmbH
Römeräcker 9 Z2021, 76351
Linkenheim-Hochstetten, Germany
Made In China

