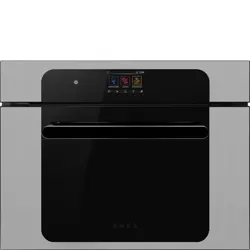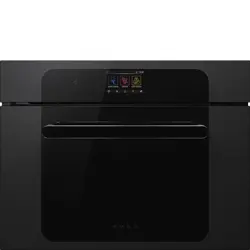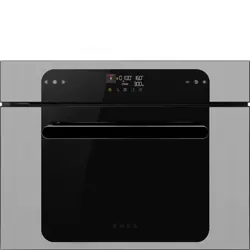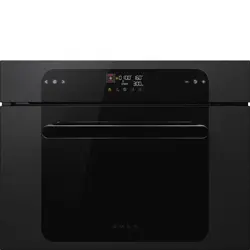

HMO60S11EB1
Microwave Oven
INSTALLATION GUIDE NZ AU


3
CONTENTS
Safety and warnings ................................................................................4
Prior to installation ..................................................................................9
After installation .....................................................................................9
Components required ........................................................................... 10
Product dimensions .............................................................................. 11
Cabinetry dimensions............................................................................ 12
Electrical considerations........................................................................ 13
Check cavity ......................................................................................... 14
Unpack product .................................................................................... 15
Remove shelves and accessories............................................................ 16
Fit and secure oven into cavity................................................................ 17
Fit turntable and racks ........................................................................... 18
Installer checklist .................................................................................. 19

4
SAFETY AND WARNINGS
WARNING!
Electrical Shock Hazard
Before carrying out any work on the electrical
section of the appliance, it must be disconnected
from the mains electricity supply.
Connection to a good ground wiring system must
only be made by a qualified electrician.
Failure to follow this advice may result in electrical
shock or death.
WARNING!
Fire Hazard
Do not use adapters, reducers or branching devices
to connect this appliance to the mains power
supply. Failure to follow this advice may result in
overheating, burning or fire.
WARNING!
Cut Hazard
Take care - some edges are sharp.
Failure to use caution could result in injury or cuts.
WARNING!
Electric Shock Hazard
Turn the oven off at the wall before replacing the
oven lamp.
• Failure to follow this advice may result in electrical
shock or death.

5
SAFETY AND WARNINGS
READ AND SAVE THIS GUIDE
IMPORTANT SAFETY INSTRUCTIONS!
To reduce the risk of fire, electrical shock, injury to persons or damage when using the oven, follow the
important safety instructions listed below. Read all the instructions before using the oven. Use the
oven only for its intended purpose as described in these instructions.
General
z
Be sure your appliance is properly installed and earthed by a qualified technician.
z
Isolating switch: make sure this oven is connected to a circuit which incorporates an isolating switch
providing full disconnection from the power supply.
z
The installation furniture and the adjacent ones must withstand temperatures of 90°C.
z
Household appliances are not intended to be played with by children.
z
Do not leave children alone. Children should not be left alone or unattended in the area where the
appliance is in use. They should never be allowed to sit or stand on any part of the appliance.
z
Only use utensils that are suitable for use in microwave ovens.
z
When heating food in plastic or paper containers, keep an eye on the oven due to the possibility of
ignition.
z
Children of less than 8 years old must be kept away from the appliance unless continuously
supervised.
z
This appliance can be used by children aged from 8 years and above, and persons with reduced
physical, sensory or mental capabilities or lack of experience and knowledge, if they have been given
supervision or instruction concerning the use of the appliance in a safe way and they understand the
hazards involved.
z
The contents of feeding bottles and baby food jars shall be stirred or shaken and the temperature
checked before consumption, in order to avoid burns.
z
Do not store things children might want above the oven. Children could be burned or injured while
climbing on the oven to retrieve items.
z
Cleaning and user maintenance shall not be done by children without supervision.
z
Always position shelves in the desired location while the oven is cool (before preheating). If a shelf
must be removed while the oven is hot, do not let the oven mitts or potholder contact hot heating
elements in the oven or the base of the oven.
z
Do not place heavy objects on the oven door.
z
Do not heat unopened food containers. They can build up pressure that may cause the container to
burst and result in injury.
z
Do not operate microwave oven while empty.
z
The cooking chamber must only be cooled with the door closed. Check that nothing is stuck on the
door of the appliance. Even if the door is only ajar, nearby cabinets can be damaged over time.
z
Do not rest or lean on the open door of the appliance and do not put dishware or accessories on it.
z
This appliance is intended to be used in household and similiar applications such as:
z
staff kitchen areas in shops, offices and other working environments;
z
farm houses;
z
by clients in hotels, motels and other residential environments;
z
bed and breakfast type environments.
z
Always keep oven vents unobstructed.
z
Do not use the oven if the door or the seals of the door are damaged. The oven may not be used until
it is repaired by a qualified service technician.
z
Do not operate your appliance by means of an external timer or separate remote control system.
z
CAUTION: Hot air can blow from the vent at the base of the oven as part of the oven’s cooling system.

6
SAFETY AND WARNINGS
Food and liquids
z
Leave food in the oven for as short a time as possible before and after cooking. This is to avoid
contamination by organisms which may cause food poisoning. Take particular care during warm
weather.
z
Eggs in their shells and whole hard-boiled eggs should not be heated in microwave ovens since they
may explode, even after microwave heating has ended.
z
Liquids, such as water, coffee or tea are able to be overheated beyond the boiling point without
z
appearing to be boiling. Visible bubbling or boiling when the container is removed from the microwave
oven is not always present. THIS COULD RESULT IN VERY HOT LIQUIDS SUDDENLY BOILING OVER
WHEN A SPOON OR OTHER UTENSIL IS INSERTED INTO THE LIQUID.
z
To avoid delayed boiling when heating liquids, always put a spoon in the container.
z
WARNING! Beverages containing spoons should be placed in the centre of the glass turntable. Metal
components must stay at least 2 cm from the walls of the oven and the inside of the door. Sparks
could damage the inside of the glass door.
z
WARNING: Liquids and other foods must not be heated in sealed containers since they are liable to
explode.
To reduce the risk of injury to persons:
z
Do not overheat the liquid.
z
Stir the liquid both before and halfway through heating it.
z
Do not use straight-sided containers with narrow necks. Use a wide-mouthed container.
z
After heating, allow the container to stand in the microwave oven for at least 20 seconds before
removing the container.
z
Use extreme care when inserting a spoon or other utensil into the container.
Dishware
z
Use only dishware approved for oven use. Follow the dishware manufacturer’s instructions.
z
Metallic containers for food and beverages are not allowed during microwave cooking. This
requirement is not applicable if the manufacturer specifies size and shape of metallic containers
suitable for microwave cooking.
z
Never use enamelled baking dishes in the microwave because it could cause a technical breakdown.
z
The flat grill must be removed when using the microwave and combined modes. Use it only with
traditional oven functions.
z
Testing dishware: never turn on the microwave oven before you have put in the food. The only
exception allowed is testing dishware.
z
Pots and pans: use plates and crockery that are microwave safe.
z
Packaging: never heat food covered in tin foil.

7
SAFETY AND WARNINGS
Fire
z
The microwave oven is intended for heating food and beverages. Drying of food or clothing and
heating of warming pads, slippers, sponges, damp cloth and similiar may lead to risk of injury, ignition
or fire.
z
To reduce the risk of fire in the microwave oven cavity:
z
Do not overcook food. Carefully attend appliance when paper, plastic or other combustible
materials are placed inside the microwave oven to facilitate cooking.
z
Remove wire twist-ties from paper or plastic bags before placing bag in microwave oven.
z
If materials inside the microwave oven should ignite, keep microwave oven door closed,
turn microwave oven off and disconnect the power cord or shut off power at the fuse or
circuit breaker panel.
z
Do not use the cavity for storage purposes. Do not leave paper products, cooking utensils or food
in the cavity when not in use.
z
If smoke is observed, switch off or unplug the appliance and keep the door closed in order to stifle any
flames.
z
Do not use water on grease fires. Smother the fire or flame or use a dry chemical or foam type
extinguisher.
z
Use only dry oven mitts or potholders. Moist or damp potholders on hot surfaces could result in burns
z
from steam. Do not let potholders touch hot areas or heating elements. Do not use a towel or a bulky
cloth for a potholder. It could catch fire.
z
Wear proper apparel. Do not wear loose fitting or hanging garments when using the appliance. They
could ignite or melt if they touch an element or hot surface and you could be burned.
Cooking
z
Arrange food carefully. Place thickest areas towards outside of dish.
z
Watch cooking time. Cook for the shortest amount of time indicated and add more as needed. Food
severely overcooked can smoke or ignite.
z
Cover foods while cooking. Check recipe or cookbook for suggestions: paper towels, wax paper,
microwave plastic wrap or a lid. Covers prevent spattering and help foods to cook evenly.
z
Shield with small flat pieces of aluminium foil any thin areas of meat or poultry to prevent overcooking
before dense, thick areas are cooked thoroughly.
z
Stir foods from outside to centre of dish once or twice during cooking, if possible.
z
Turn foods over once during microwaving to speed cooking of foods such as chicken and hamburgers.
Large items like roasts must be turned over at least once.
z
Rearrange foods such as meatballs halfway through cooking both from top to bottom and from the
centre of the dish to the outside.
z
Add standing time. Remove food from microwave oven and stir, if possible.
z
Cover for standing time which allows the food to finish cooking without overcooking.
z
Check for doneness. Look for signs indicating that cooking temperatures have been reached.
z
Doneness signs include:
z
Food steams throughout, not just at edge.
z
Centre bottom of dish is very hot to the touch.
z
Poultry thigh joints move easily.
z
Meat and poultry show no pinkness.
z
Fish is opaque and flakes easily with a fork

8
Maintenance
z
Do not repair or replace any part of the appliance unless specifically recommended in the manual. All
other servicing should be referred to a qualified technician.
z
Do not install or operate the appliance if it is damaged or not working properly. If you receive a
damaged product, contact your dealer or installer immediately.
z
WARNING: If the door or door seals are damaged, the oven must not be operated until it has been
repaired by a competent person.
z
WARNING: It is hazardous for anyone other than a competent person to carry out any service or repair
operation that involves the removal of a cover which gives protection against exposure to microwave
energy.
z
If the microwave oven is installed as a built-in, observe the following instructions:
z
Do not mount over a sink.
z
Do not store anything directly on top of the appliance surface when the appliance is in operation.
z
If the microwave oven light fails, consult a Haier authorised servicer.
Cleaning
z
The oven must be cleaned regularly and all food residues must be removed.
z
Failure to keep the oven clean could cause deterioration of the surfaces that could reduce the life of
the appliance and cause dangerous conditions. Do not clean the oven seal or use any oven-cleaning
products on it. It is essential for a good seal, which ensures that the oven operates efficiently. Care
should be taken not to rub, damage or move it.
z
Do not use oven cleaners, harsh/abrasive cleaning agents, waxes, or polishes. No commercial oven
cleaner, oven liner, or protective coating of any kind should be used in or around any part of the oven.
z
Do not use harsh/abrasive cleaners, scourers or sharp metal scrapers to clean the oven door glass
since they scratch the surface, which may result in the glass shattering.
z
Do not use steam cleaners to clean the appliance.
z
In addition, avoid using acid or alkaline substances (such as lemon, vinegar, salt, tomatoes, etc.). Avoid
using products containing chlorine, acids or abrasives, especially for cleaning painted parts.
z
Clean only the parts listed in this manual.
SAFETY AND WARNINGS

9
PRIOR TO INSTALLATION
AFTER INSTALLATION
Ensure that:
z
The material of the unit supporting the appliance is heat resistant or covered with a heat
resistant material.
z
The cavity ventilation has been set up correctly.
z
The countertop and oven cavity are square and level, and are the required dimensions.
z
The installation will comply with all clearance requirements and applicable standards and regulations.
z
The isolating switch will be easily accessible to the customer with the oven installed.
z
The cable may enter the cavity from the side, top or bottom, but top entry must be at the
rear of the cavity.
z
The oven connection socket (if tted) is outside the cavity if the oven is ush to the rear wall.
z
The oven will rest on a surface that can support its weight.
z
The height from the oor suits the customer.
z
You consult local building authorities and by-laws if in doubt regarding installation.
Some environmental factors and cooking habits can cause condensation in and around the
oven during use. To protect surrounding cabinetry from possible damage caused by frequent
or excessive condensation, we recommend moisture-proofing the oven cavity.
The manufacturer does not accept any responsibility for damage resulting from incorrect
installation.
z
The oven door can open fully without obstruction.
z
The power supply cable does not touch any hot metal parts.
z
The isolating switch is easily accessible to the customer with the oven installed.
z
You complete the ‘Final checklist’ at the end of the installation.
z
If, after following the instructions given, correct performance cannot be achieved, please contact your
nearest Authorised Service Center, Customer Service, or contact us through our local website listed at
the end of this document.

10
COMPONENTS REQUIRED
TOOLS
Not supplied
F Box cutter
F Phillips screwdriver
PARTS
Supplied and required
F 4x M4.2x25 screws
*Not required for single product installation.
11
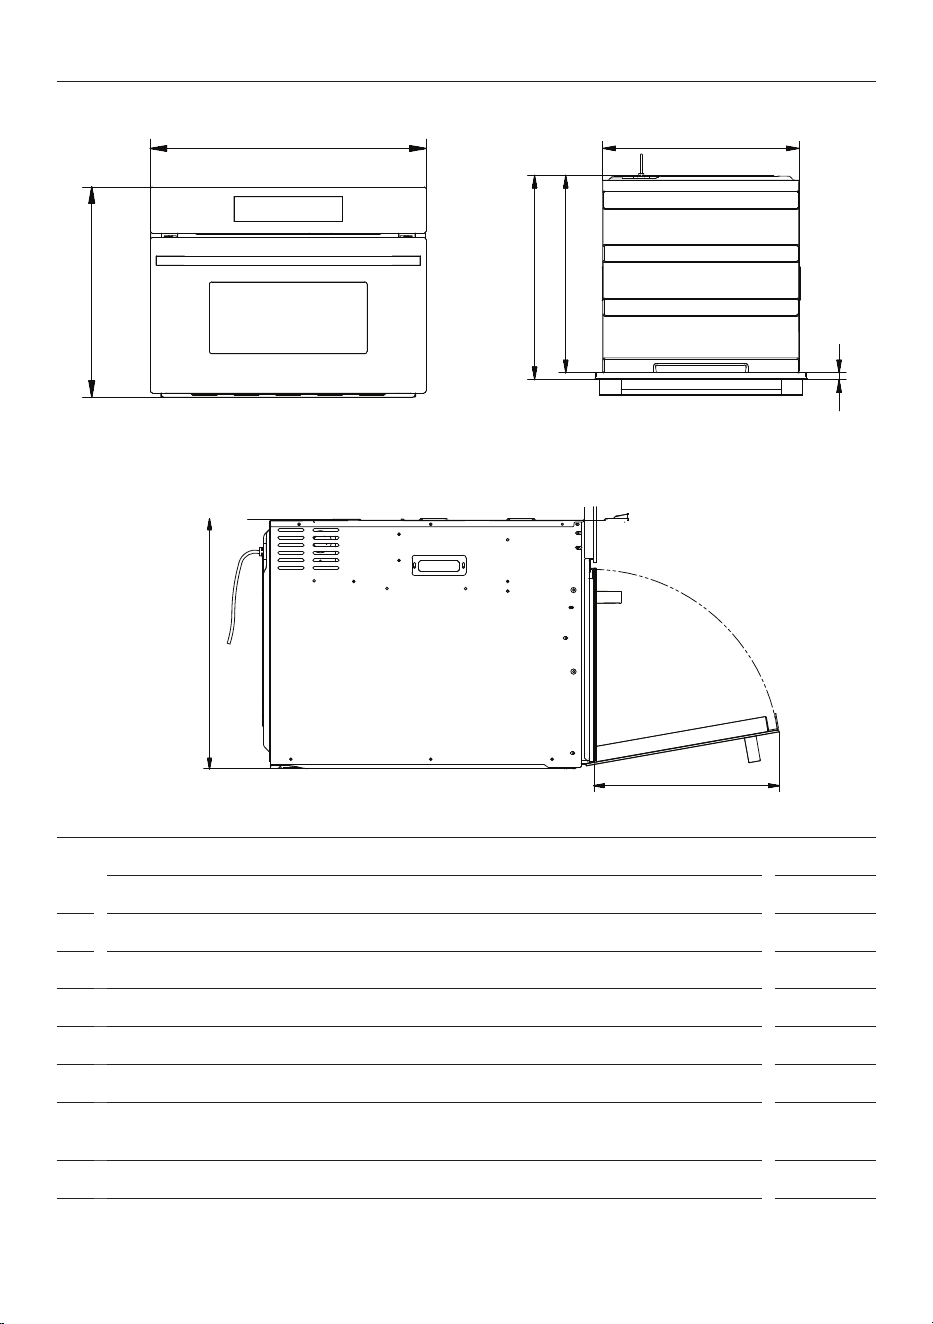
PRODUCT DIMENSIONS
mm
A
Overall height
455
B
Overall width
595
C
Overall depth
572
D
Height of chassis
429
E
Width of chassis
555
F
Depth of chassis
552
G
Depth of oven frame and control panel (distance between front of chassis and
front of oven door)
20
H
Depth of oven door when fully open (measured from front of control panel)
334
SIDE
FRONT TOP
a
d
h
b
c f
e
G
12
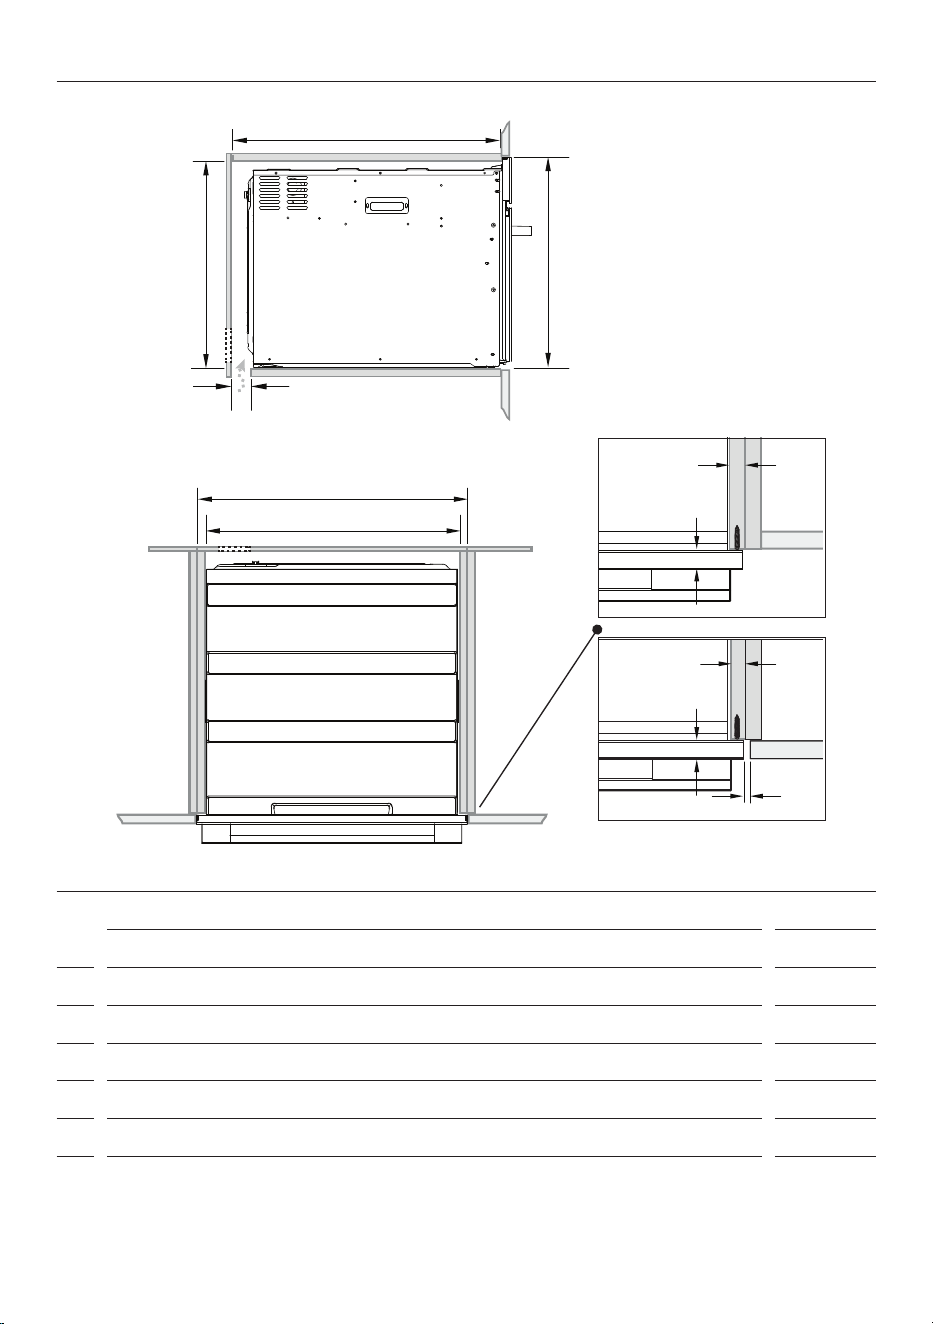
CABINETRY DIMENSIONS
PROUD INSTALL
SIDE
TOP
16–20mm
16–20mm
20mm
20mm
2mm
FLUSH INSTALL
Electrical supply
mm
A
Overall height of cabinetry
460
B
Minimum inside height of cavity
450
C
Overall width of cabinetry
600
D
Minimum inside width of cabinetry
560
E
Minimum inside depth of cabinetry
580
F
Ventilation air vent
40
Note: If installing a cooktop above the oven, ensure adequate clearance is provided for the cooktop as per the cooktop
manufacturer's instructions.
If installing the oven under a worktop, ensure the top rail has been removed to provide airflow around the product.
a
d
b
c
f
e
13
ELECTRICAL CONSIDERATIONS
WARNING! All electrical work must be carried out by a suitably qualified and authorised electrician. No
alterations or wilful changes in the electricity supply should be carried out.
z
The mains lead should be a minimum of 1.5 metres long.
z
Do not use an extension cord to connect your oven to the mains electricity supply. This appliance
must be earthed.
z
If you are unsure of how to install the oven, use an authorised agent to install the appliance to the
electricity source.
z
Before setting up your oven, check for any external visible damage. Do not install your oven
if it is damaged.
z
This appliance must be installed on a at surface.
z
Do not install the oven in an area that may be damp.
Electrical requirements
z
Rated voltage: AC220-240V
z
Rated frequency: 50Hz
z
Nominal power: 2850W
z
Microwave output: 900W
z
Microwave frequency: 2450MHz
Wiring connection
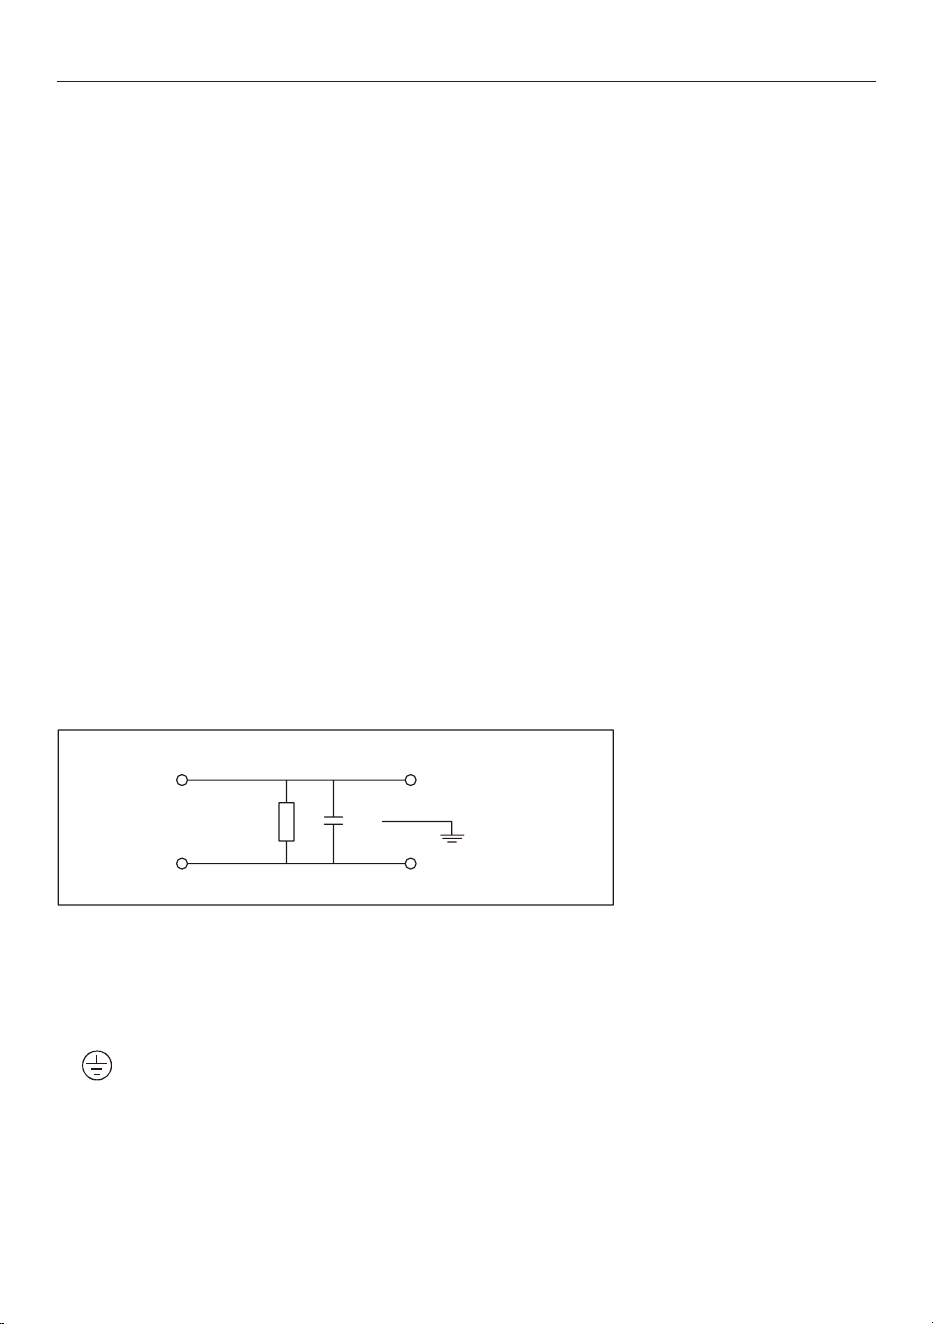
This appliance is supplied with a 3-core mains cable. The wires are in accordance with the following code:
Output LInput L
U3
U1
N4
L2
Output N
Input N
The wires in the mains lead are coloured in accordance with the following code:
z
L = LIVE coloured brown.
z
N = NEUTRAL coloured blue.
z
Beware of the correct N-connection!
z
EARTH coloured green and yellow.
14
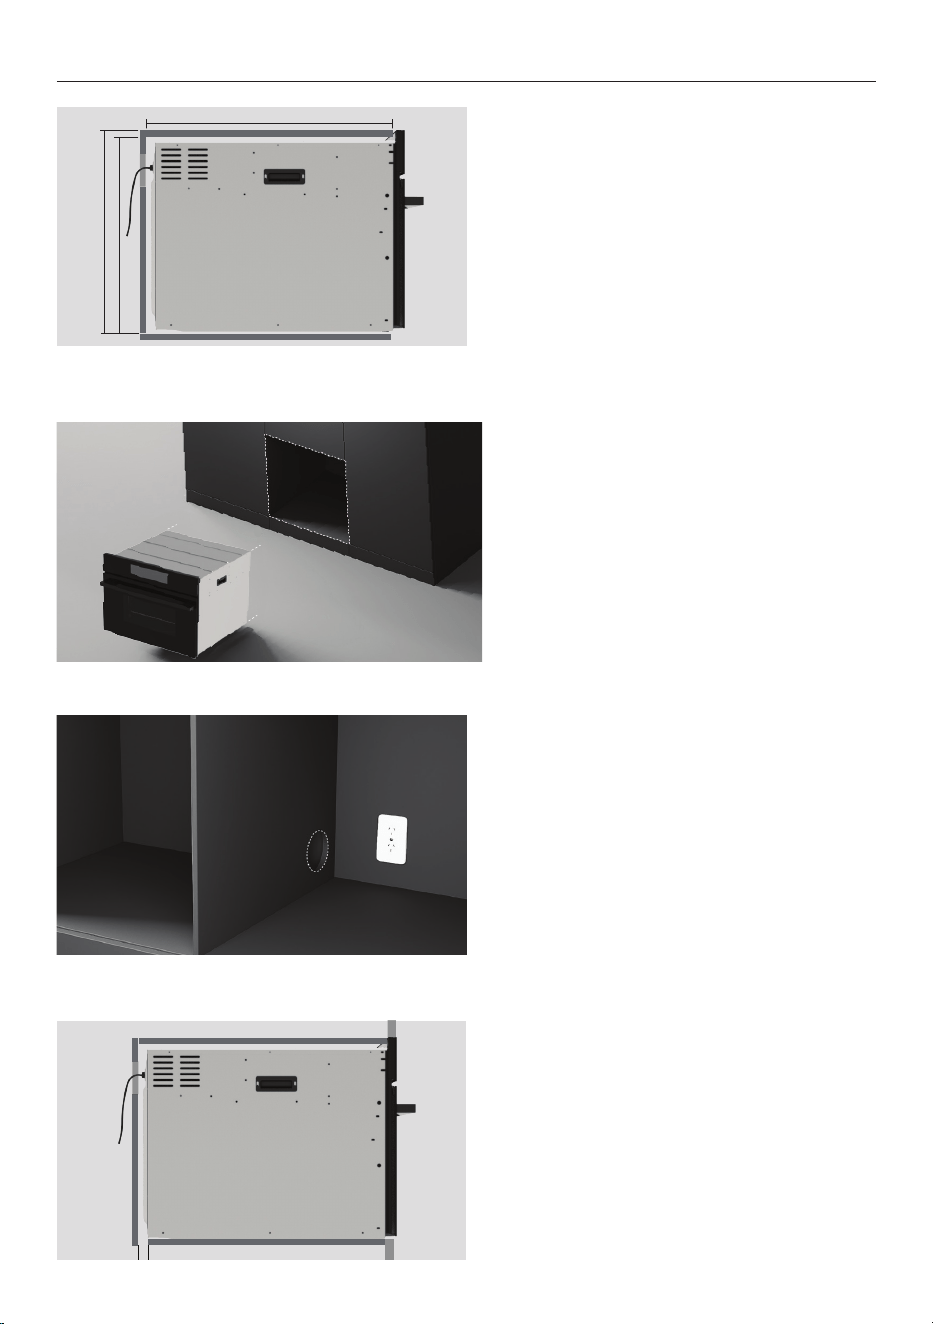
CHECK CAVITY
1. Measure cavity dimensions.
Ensure all minimum specifications
have been met.
3. Ensure service access complies
with local requirements.
4. Ensure cavity ventilation has been
set up correctly.
2. For dark cabinetry, ensure
clashing has been considered and
installed.
15
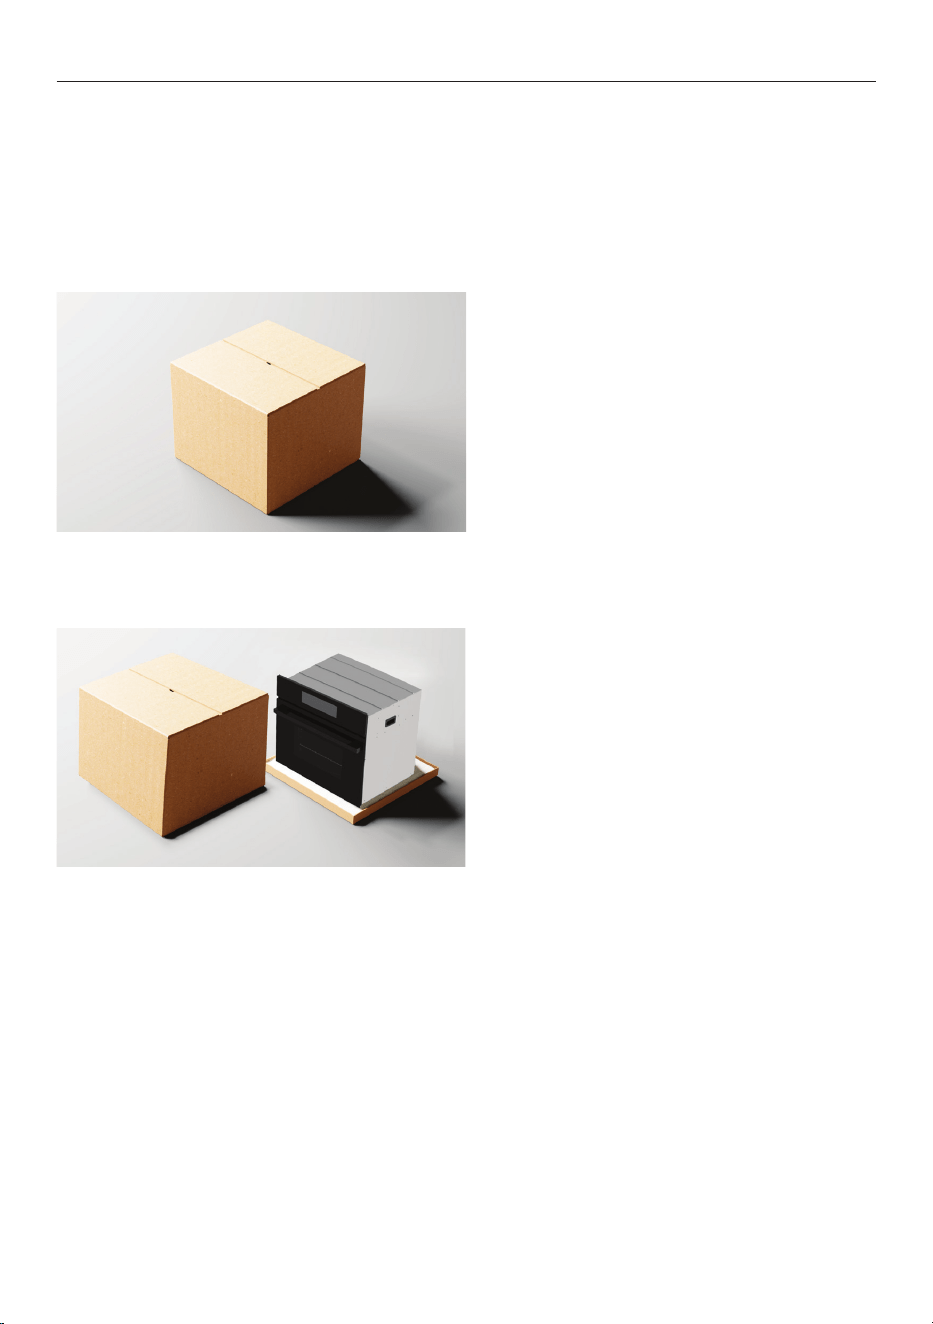
UNPACK PRODUCT
z
Do not lift or move the product using the door handle.
z
Keep all packing materials until the unit has been inspected.
z
Inspect the product to ensure there is no shipping damage. If any damage is detected contact
the dealer or retailer you brought the product from to report the damage.
z
Haier is not responsible for shipping damage.
1. Remove the carton sleeve and any
transit packaging.
2. Set aside any accessories.
16
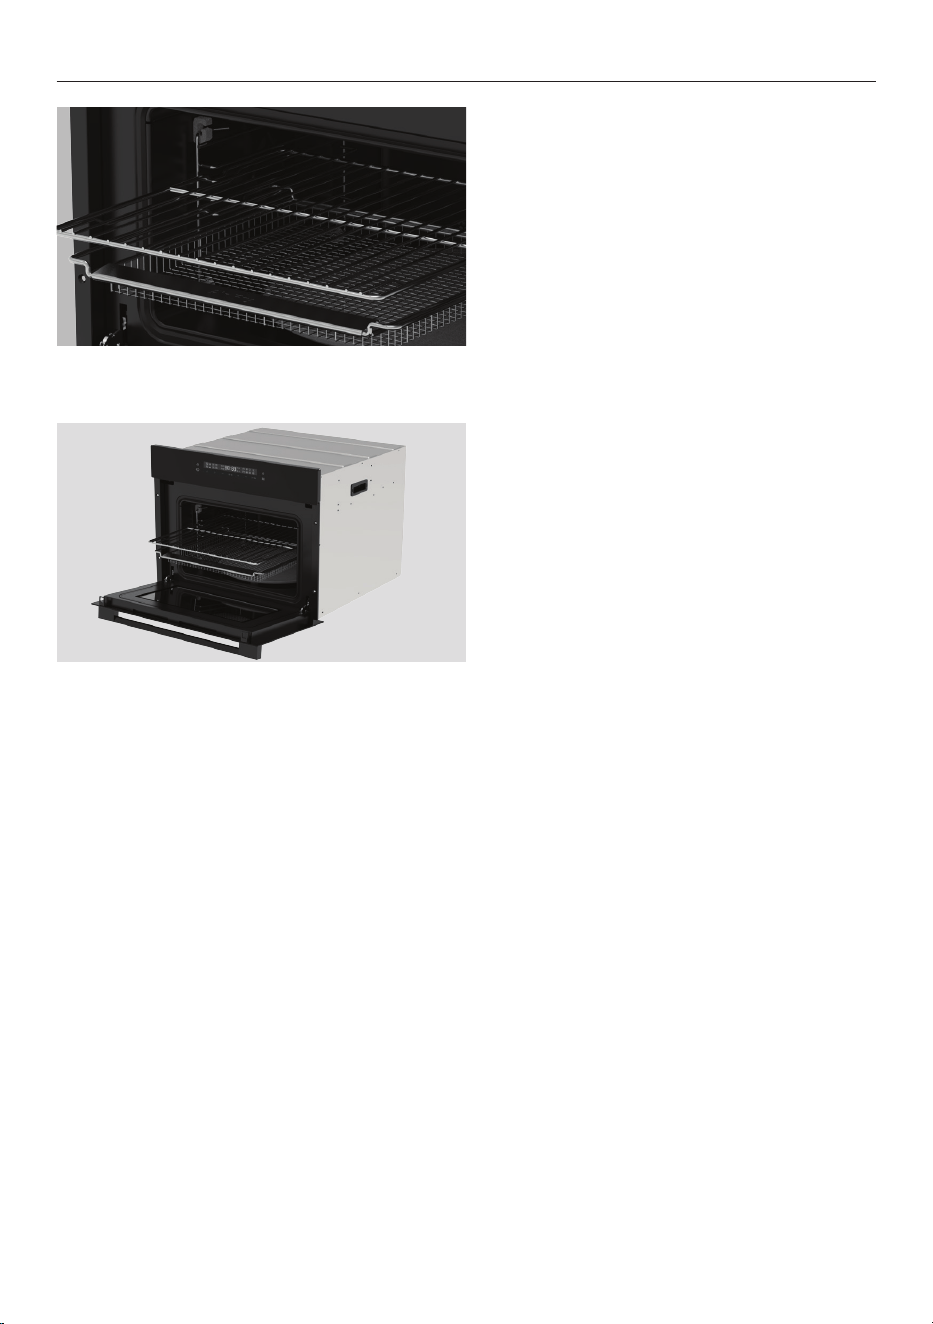
REMOVE SHELVES AND ACCESSORIES
1. Open the door and remove all
packaging holding the racks, side
racks and airfry tray in place.
2. Grip the racks at the front. Lift
upwards and pull out from the
microwave.
17
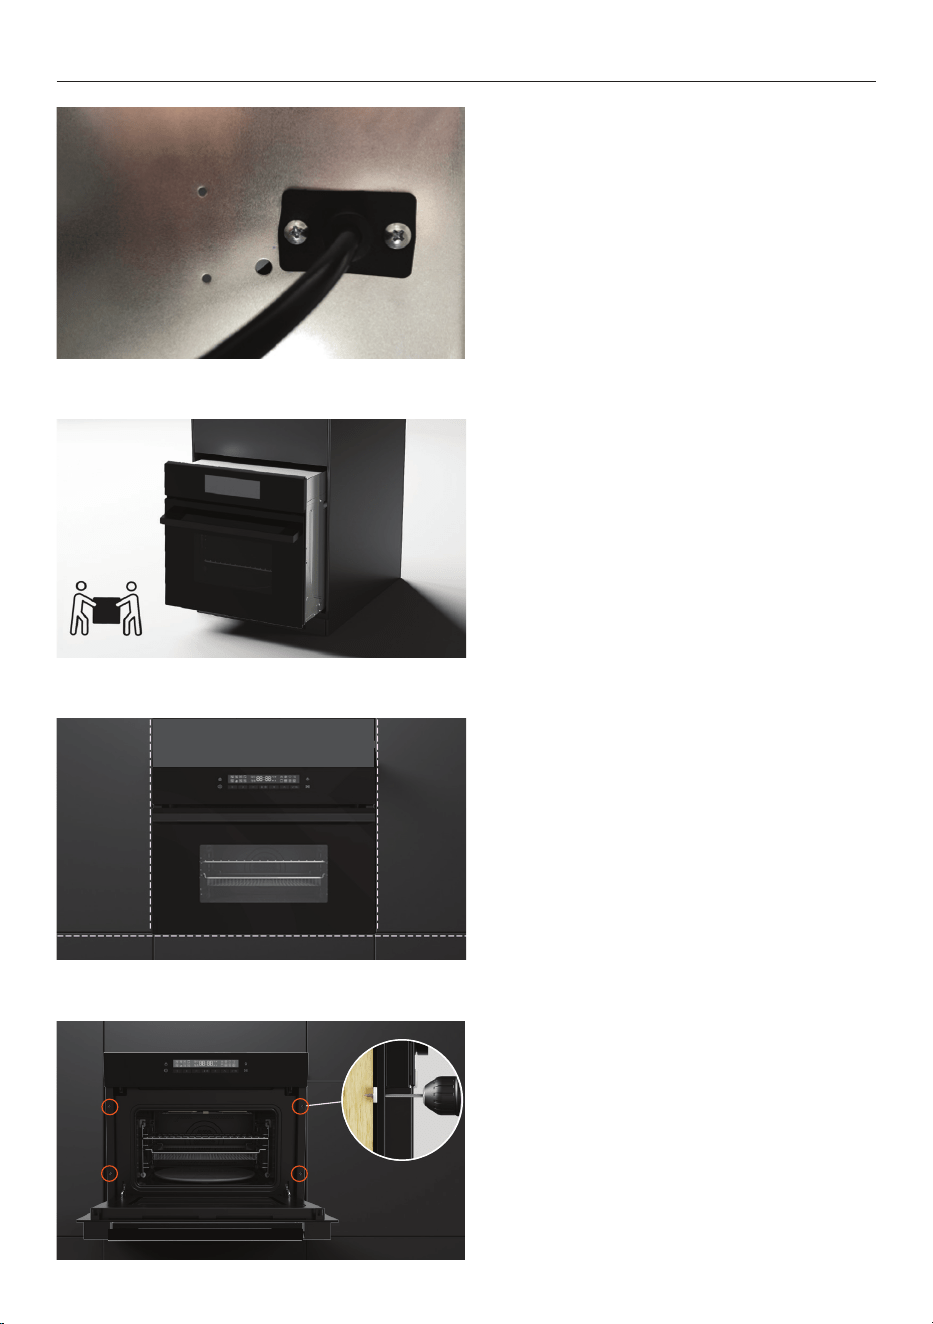
FIT AND SECURE OVEN INTO CAVITY
1. Connect the cable to the
microwave.
2. Lift product into cavity.
3. Centre the oven in the cavity
ensuring there is at least 10mm
between the oven and surrounding
cabinetry.
4. Secure oven to cavity using the 4
screws provided.
18
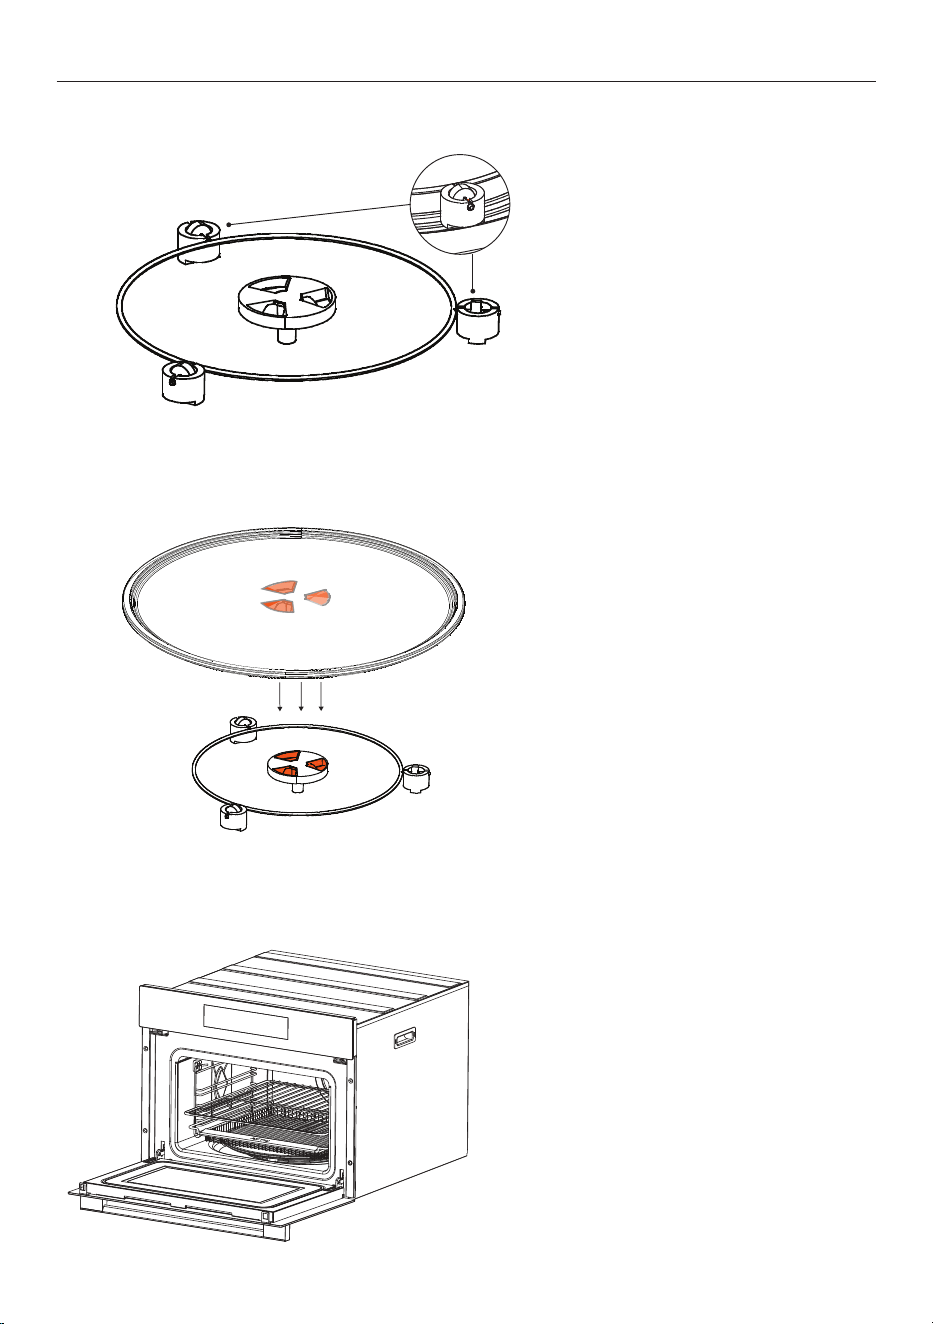
FIT TURNTABLE AND RACKS
1. Position the turntable wheel
guides correctly on the mechanism
so that the rollers are at the top.
2. Place the glass turntable plate
correctly onto the wheel guides.
3. Refit side racks, main racks and air
fry tray.

19
Complete and keep for safe reference:
Model
Serial no.
Purchase date
Purchaser
Dealer address
Installer’s name
Installer’s signature
Installation company
Installation date
INSTALLER CHECKLIST
To be completed by the installer
F Check all parts are installed correctly and are secure.
F Ensure all packaging, tape and rubberbands have been removed.
F Ensure all clearance gaps have been maintained.
F Ensure all electrical tests have been conducted in accordance with local regulations.