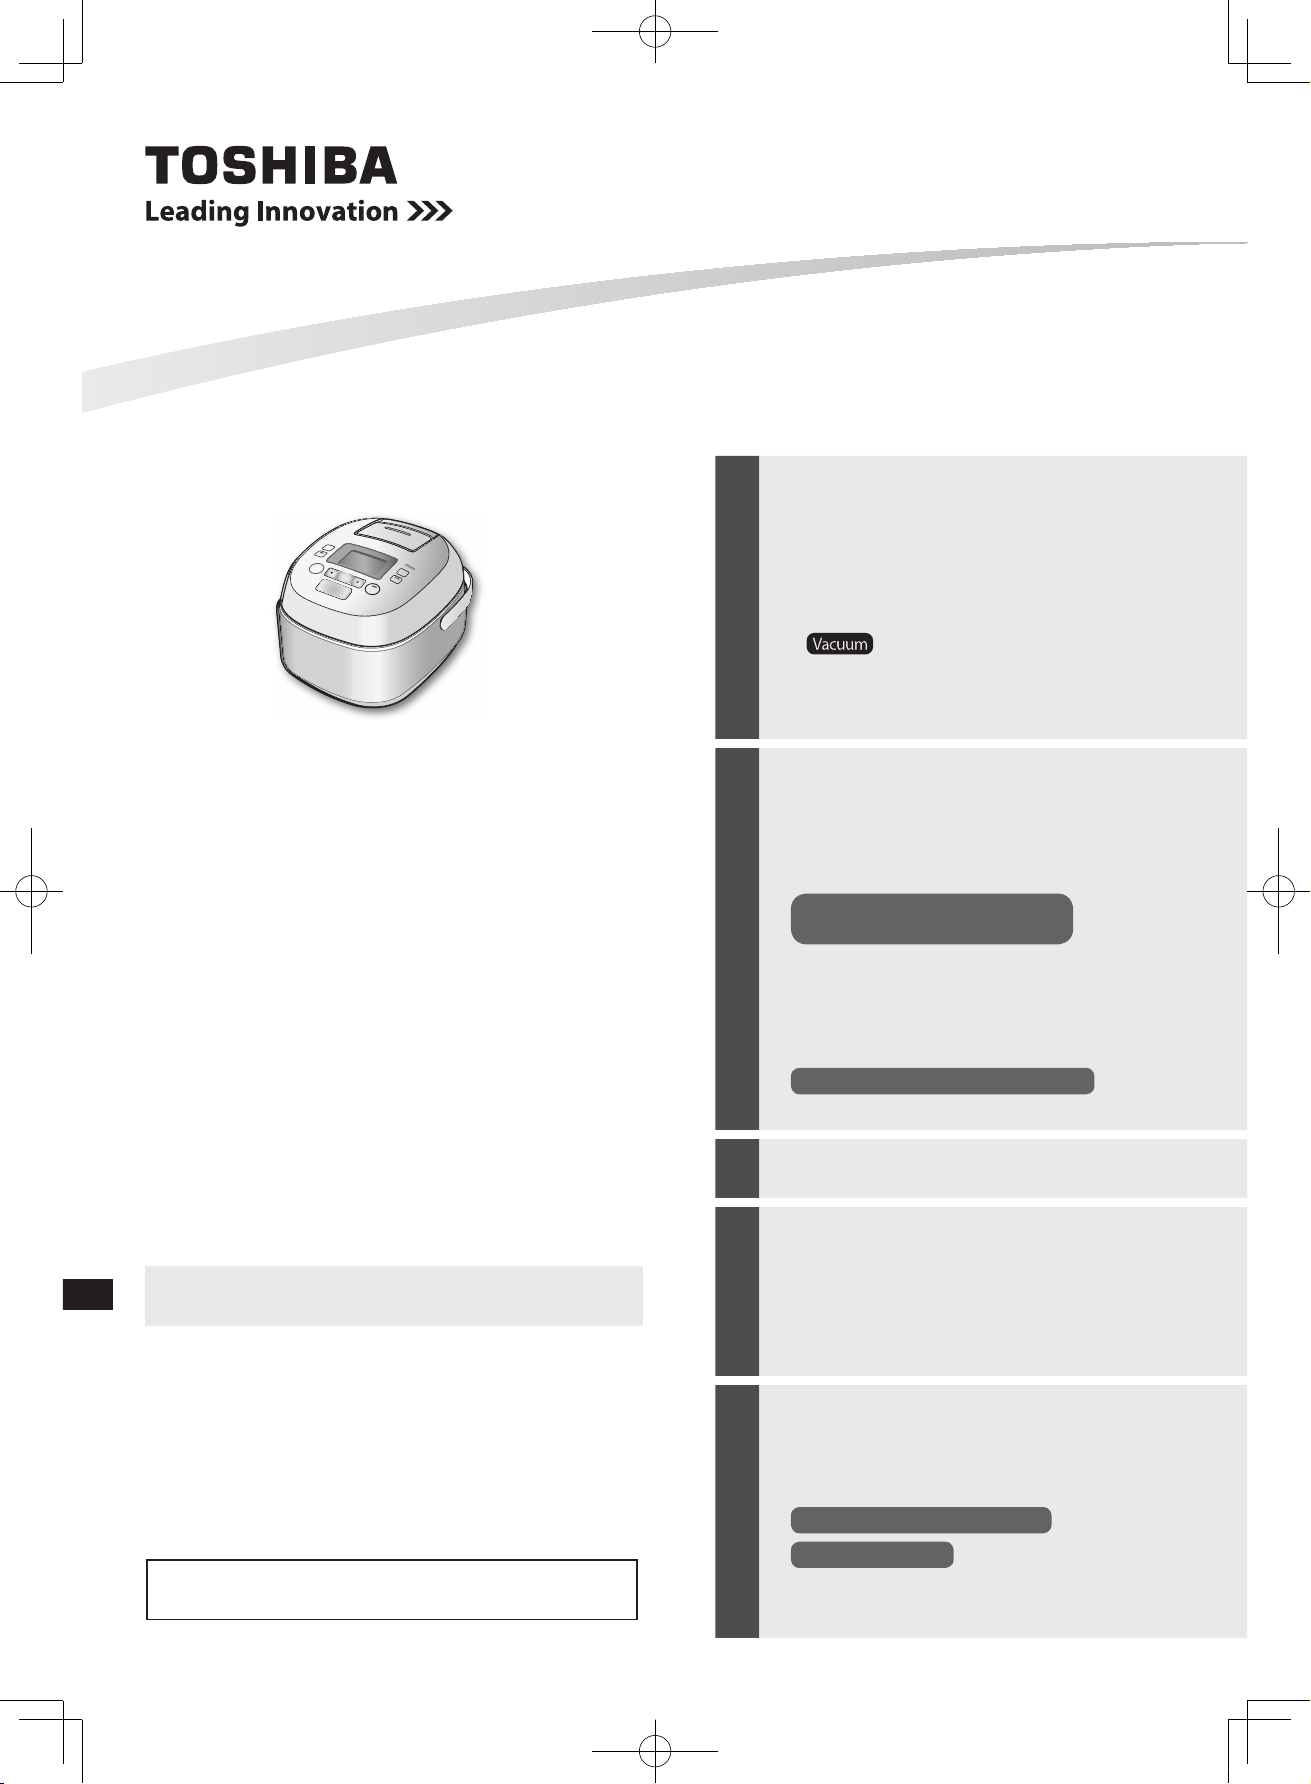
1.0 L type
Model No.
RC
-
DS10K
1.8 L type
Model No.
RC
-
DS18K
Vacuum & Pressure
IH
Rice Cooker
(for household use)
Instruction Manual
With recipes
Contents
Before use
Instructions for safety ………………… 2
Attention ……………………………… 7
Name of each part ……………………… 8
• Power cord connection ………………… 8
• Opening the outer lid ………………… 10
• Closing the outer lid ………………… 11
•
indication …………………… 11
• Cooking time display ………………… 11
• Attaching and removing the inner lid (filter)
and steam vent ……………………… 12
Cooking rice
How to cook rice
Checkup before cooking …………… 13
Basic procedure ……………………… 14
• Tips for cooking tasty rice …………… 15
Cooking courses ……………………… 16
Guide for amount of rice to be
cooked and cooking time
……… 16
• Setting the type of rice and cooking
course ………………………………… 17
Using different cooking courses …… 18
Setting the timer …………………… 20
Setting the clock to the current time
…… 21
Keep Warm mode (reheating rice) …… 22
Cleaning
Cleaning ……………………………… 24
• Cleaning by boiling …………………… 25
Mastering the cooker
Recipes ……………………………… 26
Cooking in <Steam>, <Cake> and
<Soup> courses ……………………… 29
• <Steam> ……………………………… 30
• <Cake> ………………………………… 32
• <Soup> ……………………………… 34
Troubleshooting
Sounds ……………………………… 35
Changing the settings ……………… 36
Troubleshooting ……………………… 37
Error display ………………………… 41
When a power failure occurs
………… 42
Lithium battery
……………………… 42
Specifications ………………………… 43
Repair service ………………………… 43
Thank you for purchasing this Toshiba Vacuum & Pressure IH
Rice Cooker.
•
Please use this rice cooker for household purposes only.
(It is not intended for commercial use.)
•
For proper and safe use, please read this Instruction
Manual carefully before use.
•
Please be sure to keep this Manual at hand for quick
reference in the future.
•
Please be sure to receive the warranty.
The interior of the pressure-type rice cooker develops a
high pressure. Improper use will cause a hazardous
situation. For proper and safe use, please read this
Instruction Manual carefully.
For 220 V AC only
Make sure that the rating of the electrical outlet is 220 V AC.
For proper and safe use of this rice cooker, please read
"Instructions for safety" and "Attention"
.
(Pages 2 to 7.)
RC-DS1018K_EN_0809.indd 45 2016/08/09 10:49:32
2
Instructions for safety
Please follow these instructions without fail
* The illustrations shown in the Instruction Manual may differ from the product you purchased.
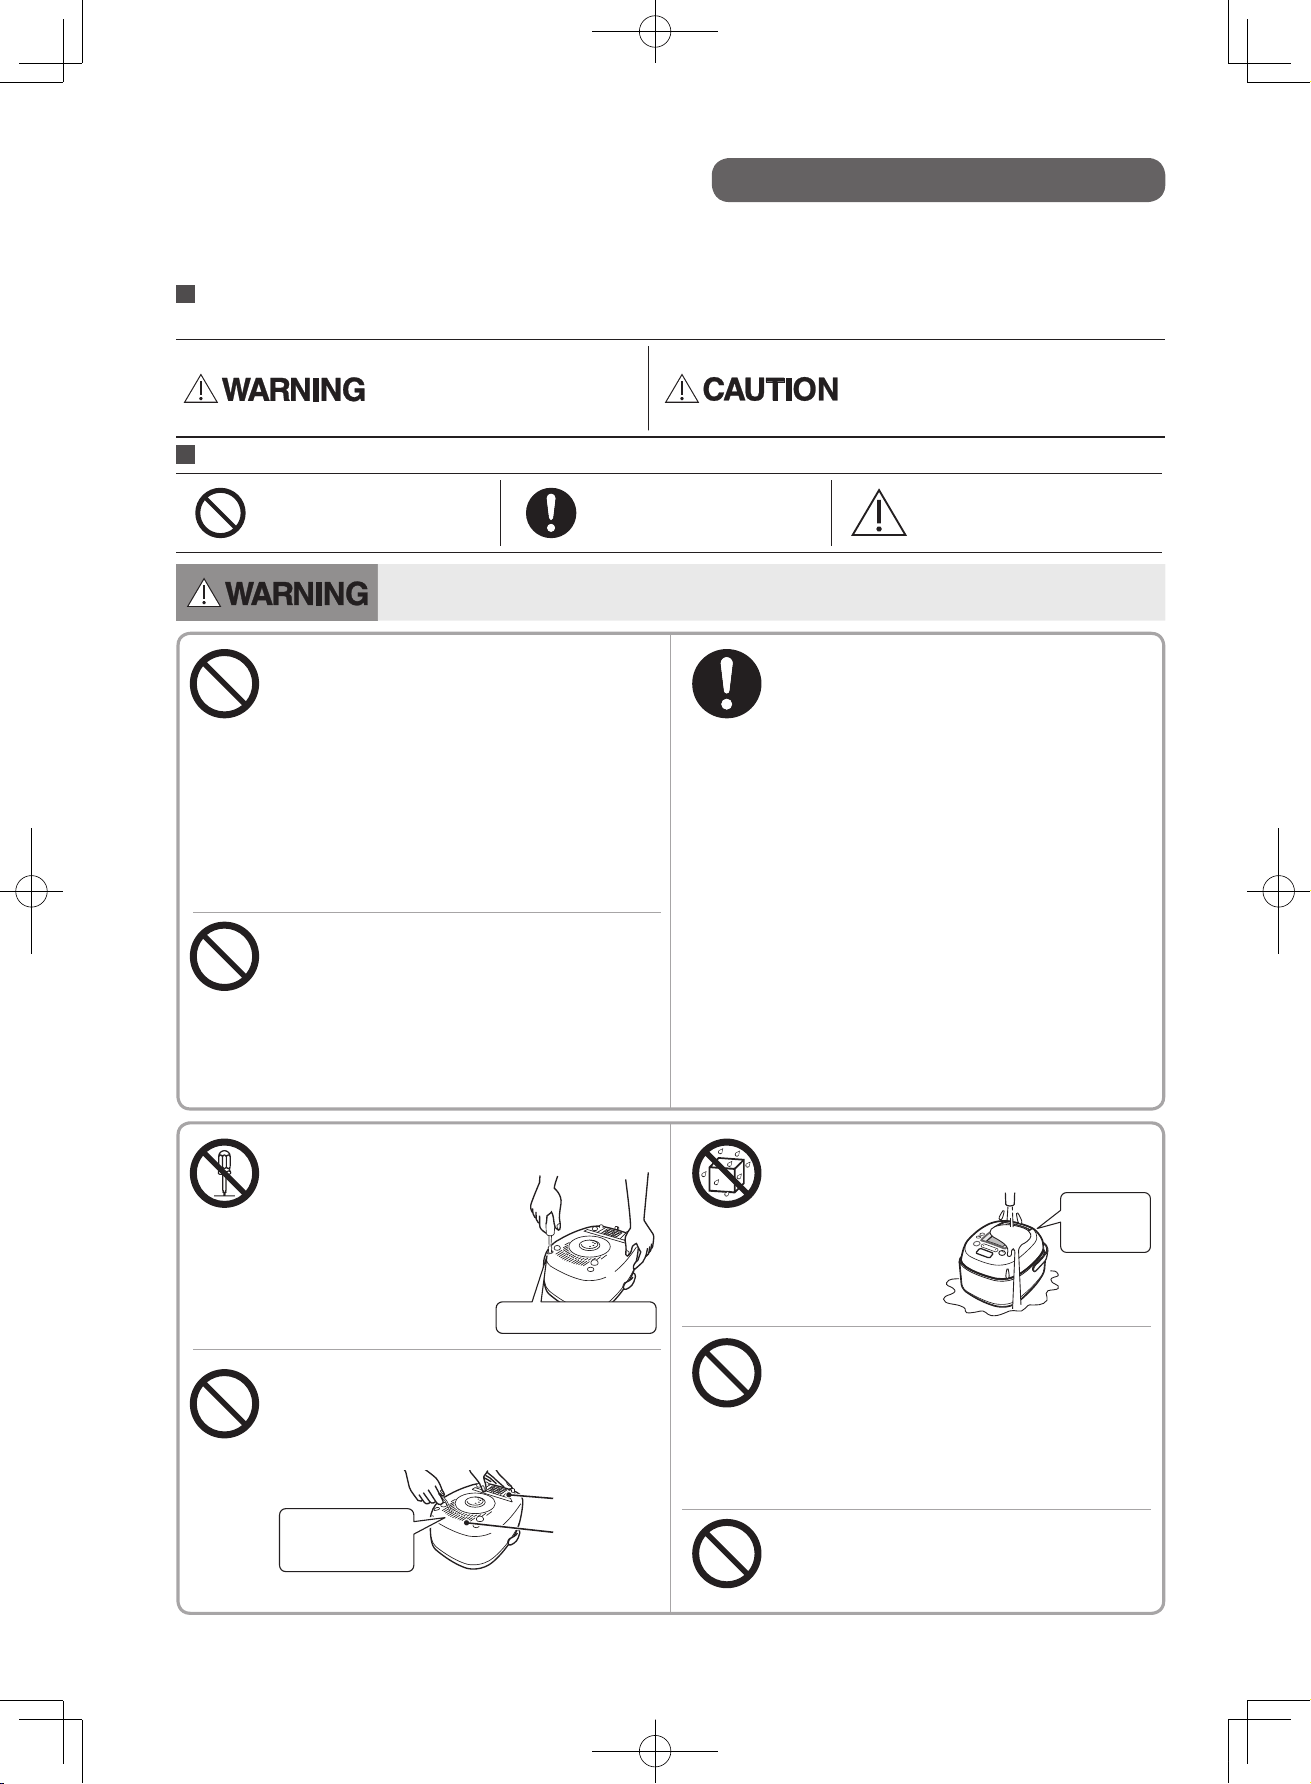
To avoid fire, burn, electric shock, electrical leak, short circuit, etc.
Hazards and damage caused by failure to observe instructions for using this product are classied according
to their degree, and are indicated by the following safety icons.
This indicates that incorrect
use may result in death or
severe injury to the user.
This indicates that incorrect use
may result in injury to the user or
property damage.
Instructions to be observed are indicated according to the following classications.
Shows things you are
prohibited from doing.
Shows instructions you
need to observe.
Shows notes you need to
pay attention to.
This product should not be used by
the following persons:
• Children;
• Those who have less physical, perceptual, or
intellectual ability; and
• Those who do not have sufficient experience
and knowledge (including babies and
children).
Please make sure to prevent babies and
children from playing with this product, and
put it out of the reach of babies and children.
Stop using the product if it malfunctions
or breaks.
Immediately unplug the power plug, and
contact the shop from which the product was
purchased.
Examples of malfunctions or breaks
• The power plug or cord becomes abnormally
hot.
• The main body smells like something
burning.
• The main body is partly cracked, loose or
rattling.
• The inner pot, outer lid or inner lid is
deformed or damaged.
• The bottom fan is not running during
cooking.
Do not use the product inappropriately
or for any other purpose than those
described in the instruction manual.
It may cause fire, burns, injury or electric shock.
Toshiba is not responsible for any harm that
may occur if the product is used inappropriately
or for any purpose not described in this manual.
Do not
disassemble.
Do not attempt to disassemble, repair
or modify the product.
For repairs, contact the
store from which the
product was purchased.
Do not
get wet.
Do not immerse the main body, the power
plug and the power cord in water; pour
water over them; or
wash them in water.
Do not let children use the cooker alone
or place the cooker in a location within
the reach of children.
In particular, keep a good eye on children
when rice is being cooked and directly
after it has cooked.
Do not put foreign objects into the
air inlet, air outlet or any gap.
Especially metal objects such as pins, wire, or
the like.
Do not open the outer lid of the product
and move or carry the product when it is
in operation.
Do not disassemble.
Air inlet
Do not insert
foreign objects.
Air outlet
Do not
get wet.
These instructions include important information for safe and correct usage in order to prevent damage to
people and property.
RC-DS1018K_EN_0809.indd 2 2016/08/09 10:48:56
3
To avoid fire, burn, electric shock, electrical leak, short circuit, etc.
Use the power plug, power cord and electrical outlet correctly.
Do not allow pins or dust to adhere to the
power plug (power supply side/main body
side).
Do not use if the power plug (power
supply side/main body side) or the
power cord is damaged and/or the power
plug does not fit into an electrical outlet.
Always replace the damaged power cord with
the specified one.
Do not use a power cord other than the
specified one.
Do not use the power cord for other appliances.
Do not damage the cord or bend it unreasonably,
pull, twist or bundle it during power distribution,
place it near hot parts of the appliance, place heavy
objects on it, interpose it between other devices, or
modify it.
Do not allow children to lick the power plug (power
supply side/main body side).
Make sure that children and infants do not lick the power
plug.
No wet
hands.
Do not plug or unplug the power plug (power supply side/main body side) with wet hands.
Ensure that your hands are dry before touching the plug.
Plug the product into a 220V AC outlet
with a rating of 10A or more. Do not
share the outlet with other appliances.
Sharing the outlet with another appliance may
cause a fire due to heat generation.
In case of using an extension cord, use
the one rated at 10A or more standalone.
Do not share it with other appliances.
Plug in the power plug (power supply
side / main body side) fully.
Regularly remove dust from the power
plug (power supply side/main body side).
If dust accumulates on the power plug and
becomes damp, this may cause insulation
failure and lead to a fire. Wipe off dust with a
dry cloth.
Make sure that the power cord is out of reach of children.
Do not allow the cord to dangle from a table or counter. If
the cord is pulled, the product may fall from the table or
counter and cause injury.
Be sure not to stumble or trip on the power cord when
the cooker is in use.
It may cause injury, or the cord may become damaged and
cause a fire or electric shock.
Use a properly earthed outlet.
The power plug of this product is designed to be used with
an earthed outlet. If the outlet is not properly earthed, it
may cause damage or electrical leaks.
Before use
RC-DS1018K_EN_0809.indd 3 2016/08/09 10:48:56
4
To prevent burns due to sudden opening of the outer lid
Do not select the <Quick> course for
cooking mixed rice.
As rice is cooked on high heat when the <Quick>
course is selected, ingredients may easily get
stuck to the inner lid.
Do not put things that may block the
steam vent (filter, pressure regulating
part, safety valve, and check valve) in the
pot.
Examples of things that must not be put in
the pot:
• Sheet-shaped ingredients such as greens,
tomato skin, beans, etc.;
• Oven sheet, aluminum foil, plastic wrap, and
scum removing sheet; and
• Foods in a plastic bag to be heated in the
pot.
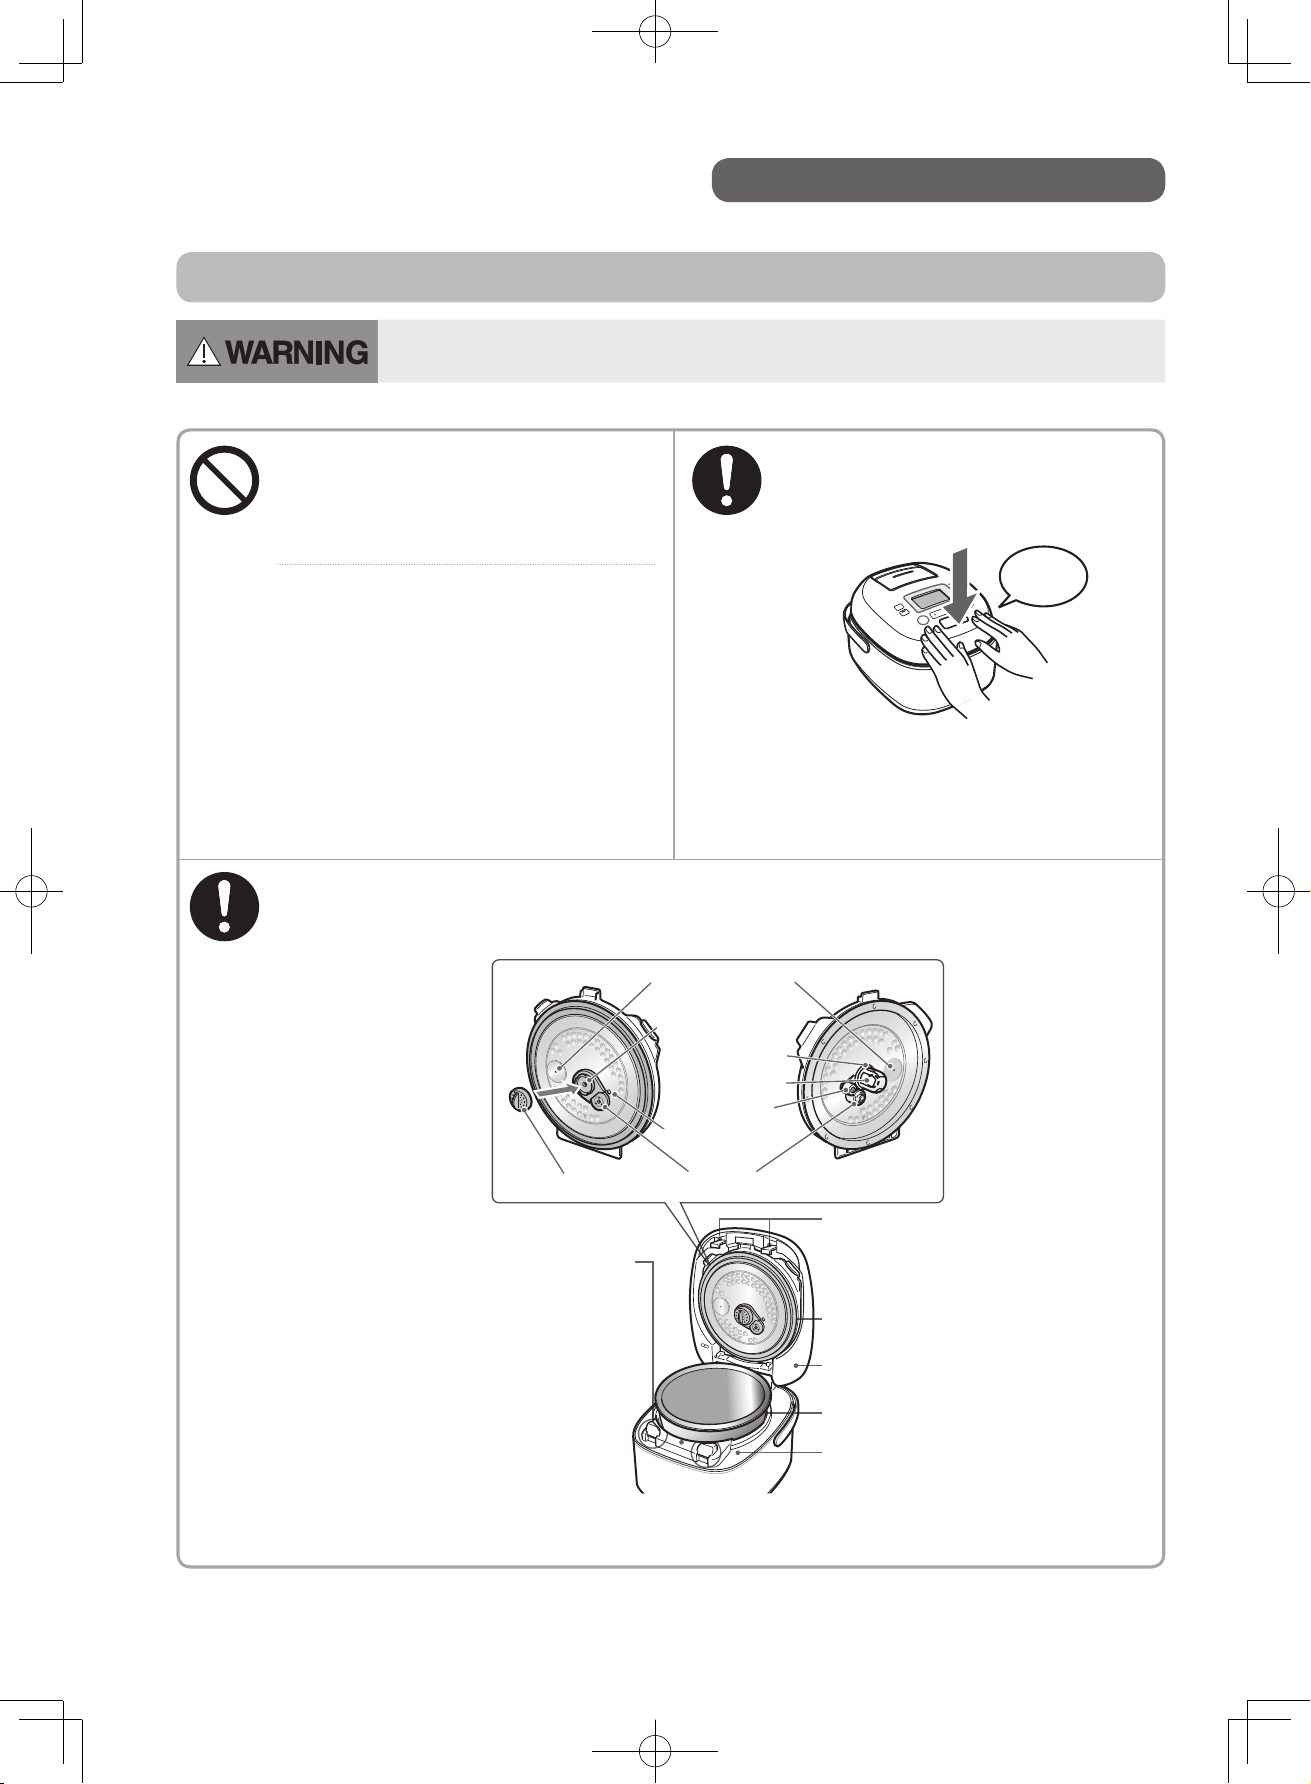
Ensure to close the outer lid until it
clicks.
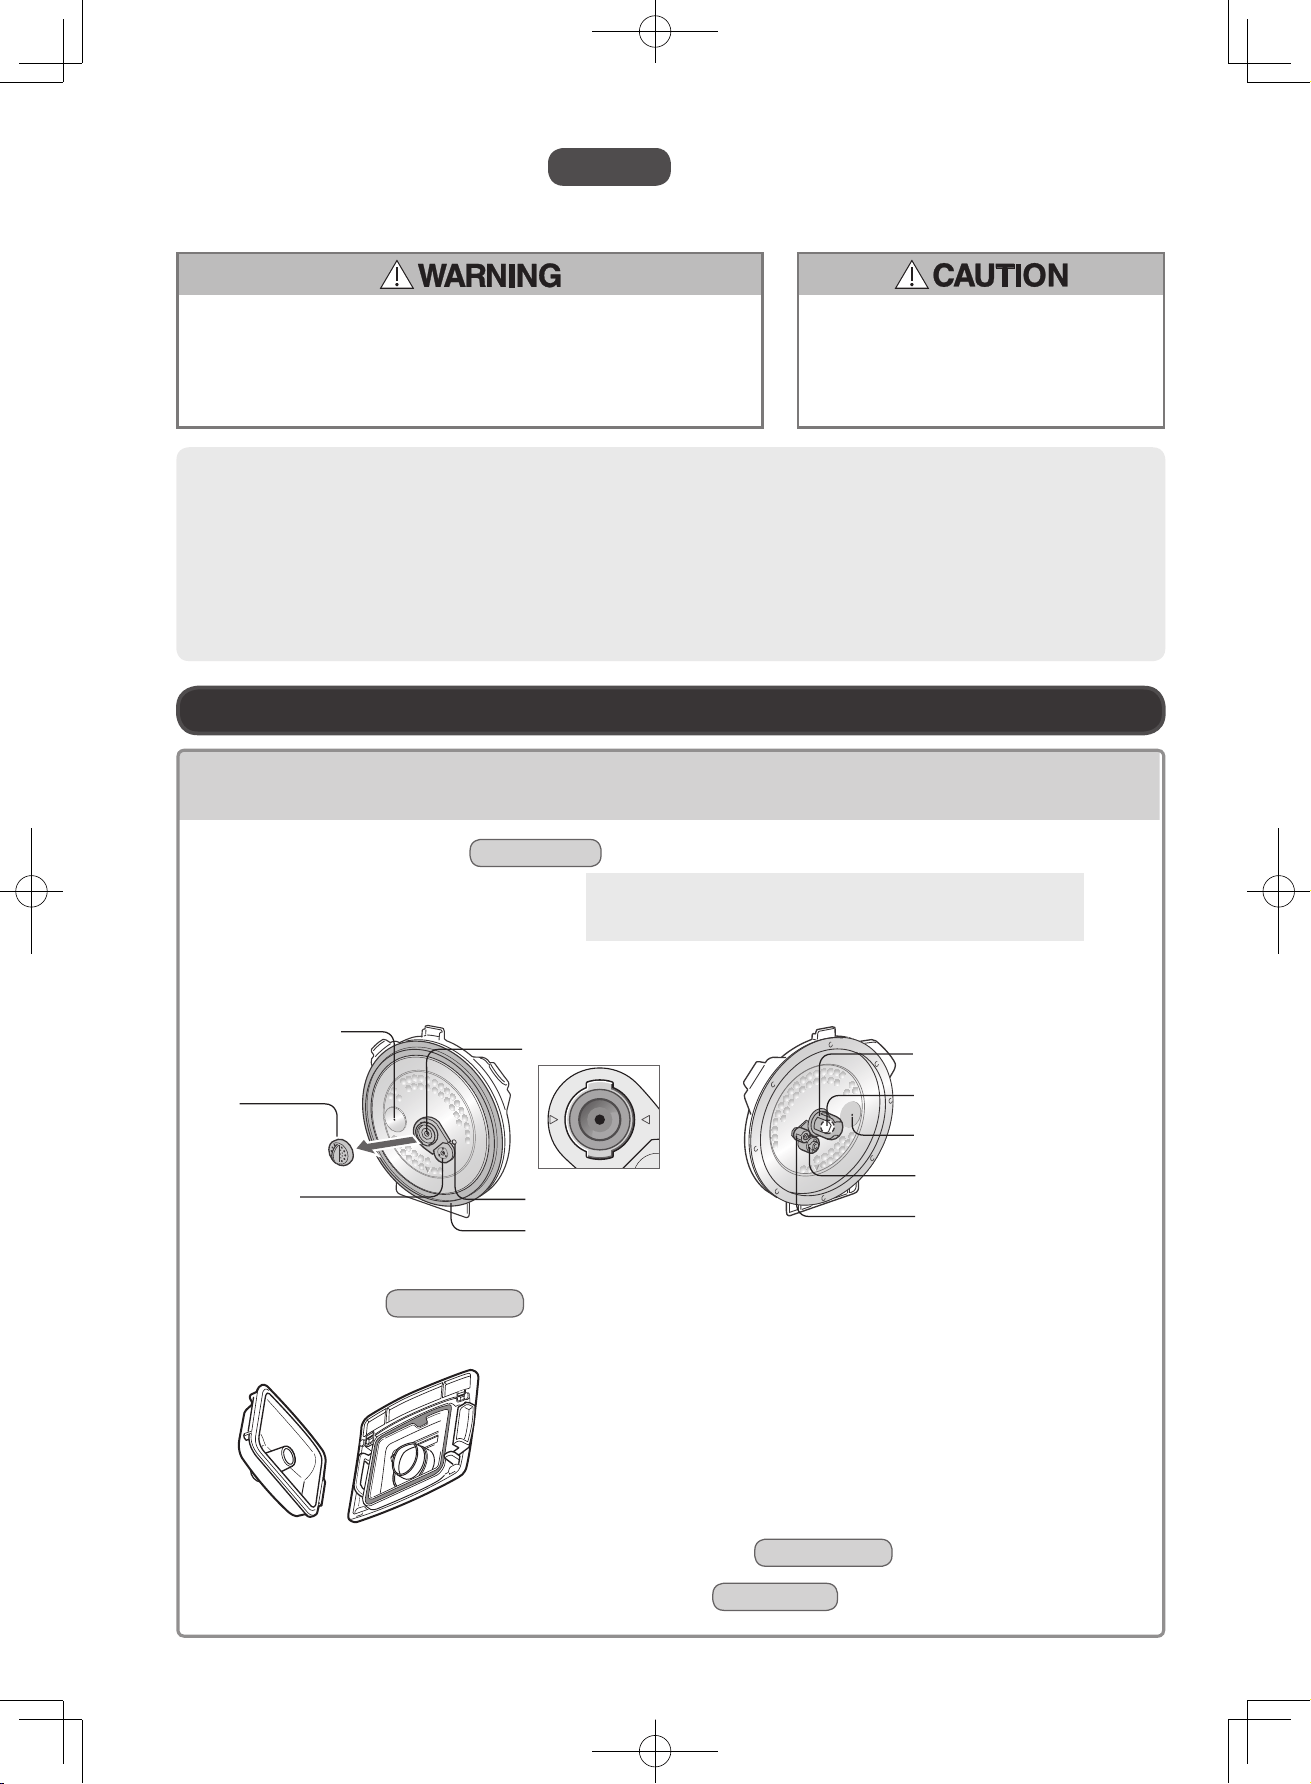
Check if the safety valve works and there is no foreign object, and attach the filter before cooking.
* See page 13 for how to check.
The cooker develops a high pressure during cooking.
Improper use may cause a hazardous situation.
Be sure to observe the following precautions when using this pressure-type rice cooker.
Center of outer lid front
Click
Vacuum air inlet
Pressure
regulating hole
Pressure control ball
Check valve hole
Inner lid packing
Filter
Rim of the inner pot
Pressure
regulating part
Check valve
Safety valve
Inner side of the outer lid
Clamp parts
Frame
Clamp receiving parts
* You may not be able to
open the outer lid if rice
grains are stuck to the
clamp receiving parts and
hardened.
Instructions for safety
Please follow these instructions without fail
RC-DS1018K_EN_0809.indd 4 2016/08/09 10:48:57
5
To prevent burns caused by ejection from inside the cooker
To prevent burns caused by hot steam
To prevent burns caused by boiling over
The cooker develops a high pressure during cooking.
Improper use may cause a hazardous situation.
Do not open the lid while the
indication is lighting or flashing.
To open the outer lid by pressing the OFF key
while the cooker is in the Cook mode, or when
a power failure has occurred, make sure that
the
indication is off.
Do not forcibly press down the open
button when you cannot physically press
it down to open the outer lid.
Leave the cooker for a while until the main
body has cooled down and the pressure inside
is reduced.
If you need to open the outer lid during
cooking, follow the procedure for
opening the outer lid during cooking on
page 10.
Make sure that no people are nearby.
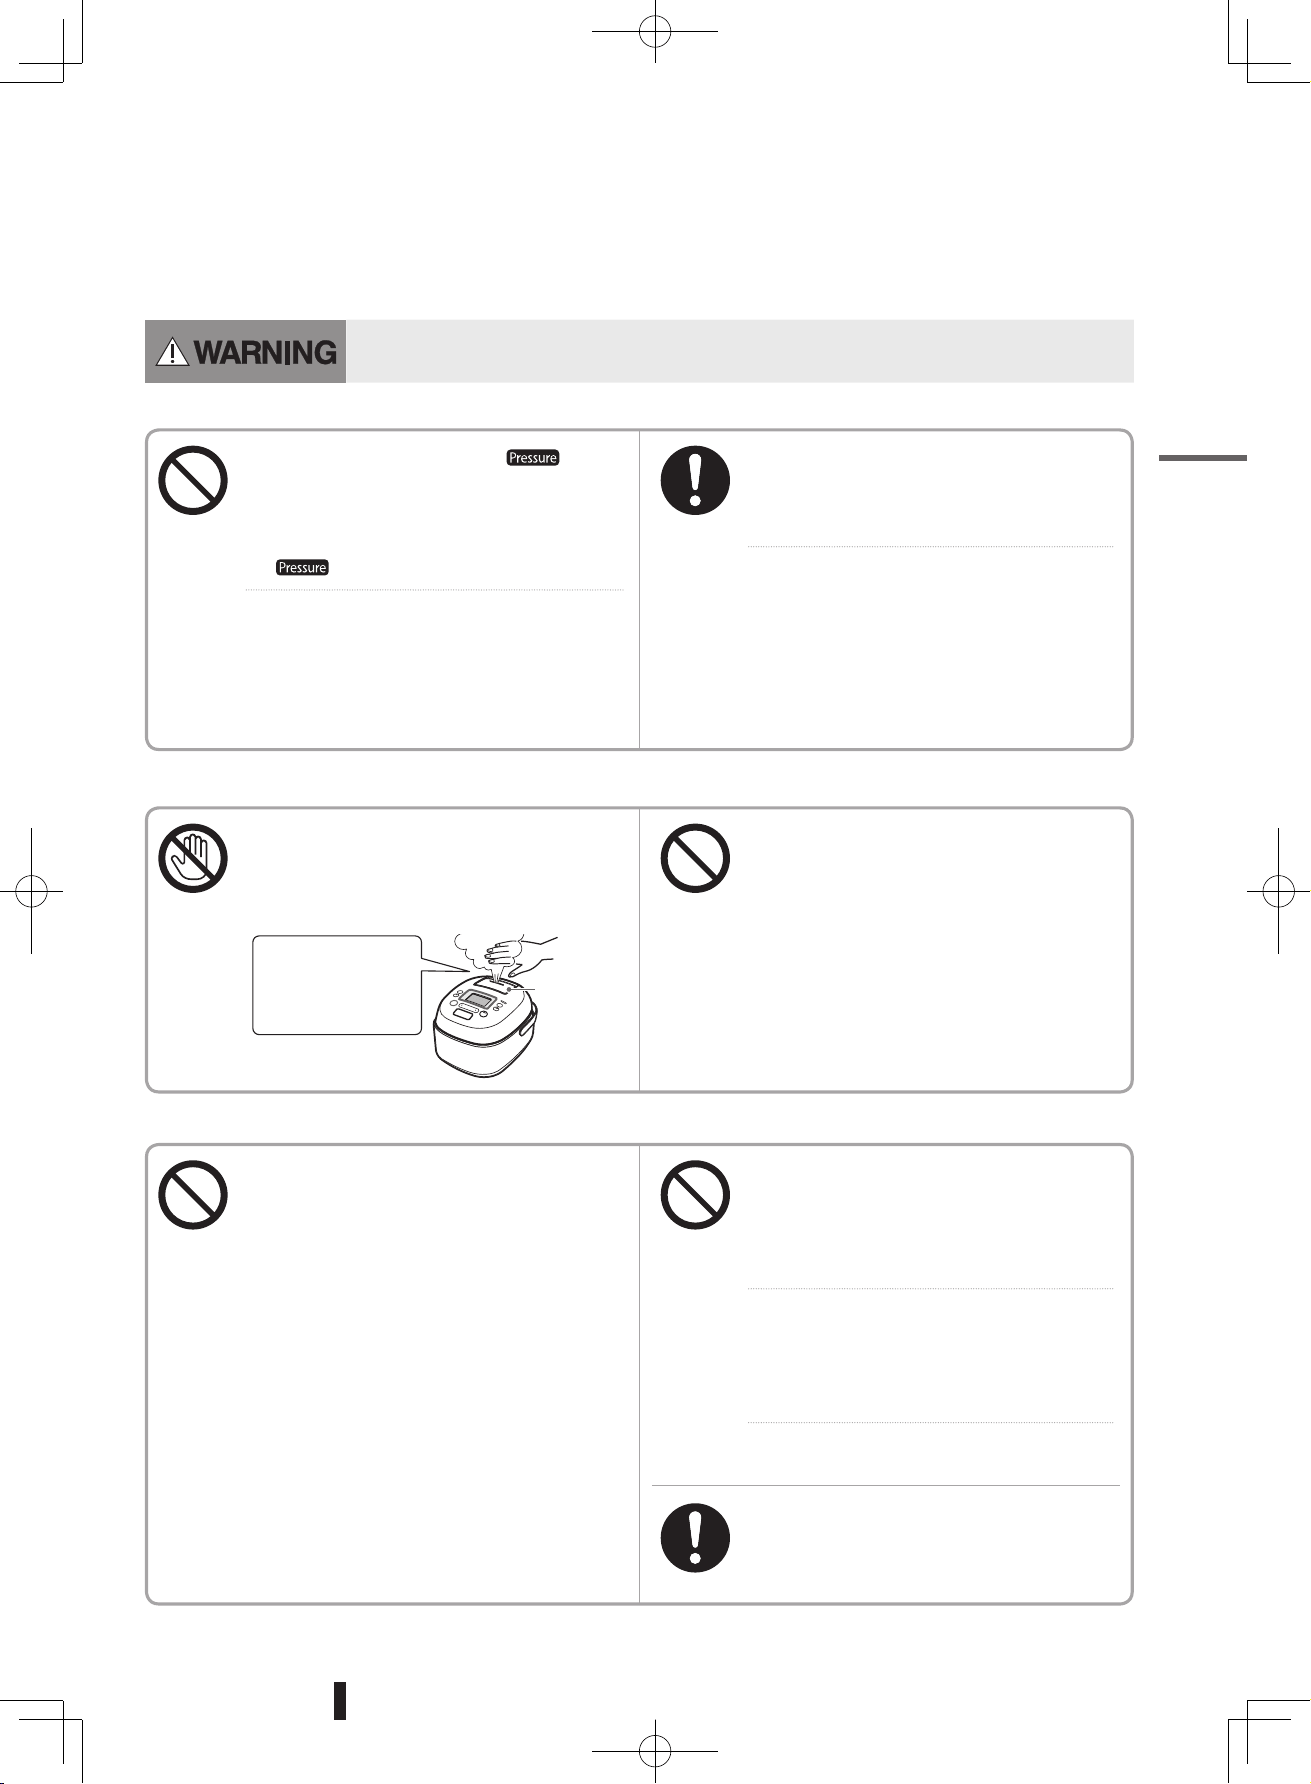
Do not
touch.
The steam vent is extremely hot.
Do not put your hands above or move
your face near the steam vent.
In particular, keep the cooker out of the reach
of babies or children.
Do not shake or carry the cooker while
cooking.
Do not use the product for any other
purpose than those described in the
instruction manual.
Examples of foods that should not be used
in the cooker:
• Foods that expand after cooking such as fish
pastes, steamed beans and noodles
;
• Foods using baking soda, etc. that may
suddenly foam up
;
• Thick foods such as curry and stews
;
• Foods using a large amount of oil
;
• Foods that can easily boil over, e.g. beans,
jam, etc.; and
• Heating of foods in a plastic bag with the rice
cooker.
Since congee, brown rice, multi-grain rice
and soup is high in water content, ensure
to use the dedicated cooking courses (not
<Quick> course, and so on).
Use the <Congee> course for congee.
Do not increase the amount of water too
much.
The allowable additional amount of water is
up to 2 mm over the regular water level scale
as a guide.
Do not add water exceeding the MAX
water level on the inner pot for cooking.
Attach the steam vent securely.
Steam vent
Extremely hot
steam and droplets
come out of the
steam vent.
Before use
RC-DS1018K_EN_0809.indd 5 2016/08/09 10:48:57
6
To prevent an injury, burn, electric shock, electrical leak, fire and
property damage.
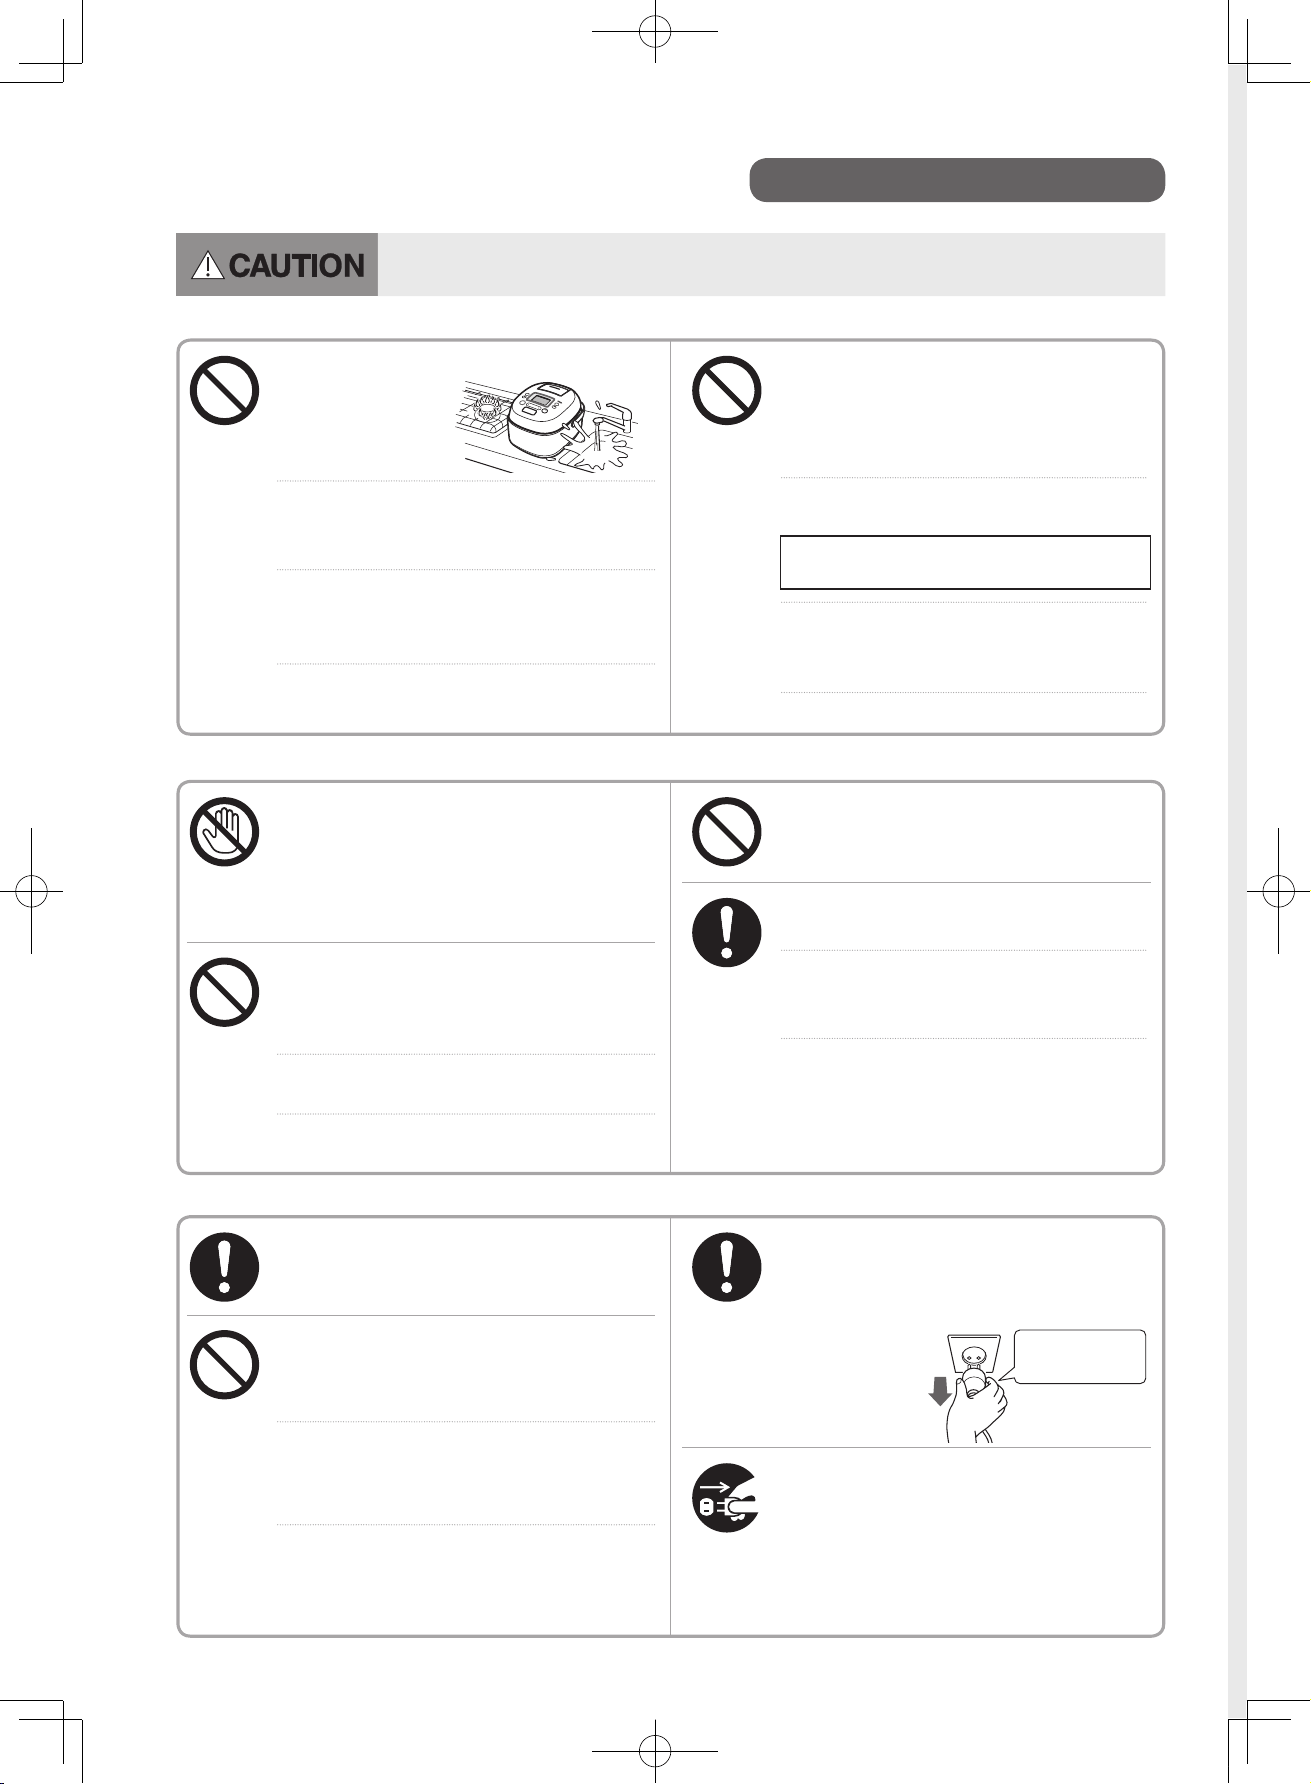
A place exposed to water or close to fire.
Be careful with the
accessories as well.
An unstable place or on a mat which
easily catches fire.
It may cause burns, injury or fire.
A place where the air inlet/ outlet will be
blocked.
On paper, fabric, carpet, plastic bags, etc.
On aluminum foil or an electric carpet.
Aluminum foils, etc. may be heated.
A place near walls and furniture.
When using in a kitchen shelf, make sure that
steam does not stay inside the shelf.
It may cause damage to walls or furniture,
resulting in discoloration and/or deformation.
On a sliding table with insufficient load
strength.
Use the table with load strength of 15 kg or more for
the 1.0 L type, and 20 kg or more for the 1.8 L type.
A place where the outer lid cannot be
fully opened.
It may cause burns or damage.
A place near curtains that are not heatproof.
Do not use at any of the following places
Do not
touch.
Do not touch the hot parts (the inner lid,
inner pot, steam vent, heating plate,
frame, etc.) during use and for a while
after use.
Take care not to touch the inner pot, etc. when
loosening rice after it has cooked.
Do not use the cooker while the inner
pot is empty.
It may cause damage, overheating or malfunction.
Use a dry cloth or mitten to remove the
inner pot when it is still hot.
Before cleaning the cooker, unplug the power
plug and wait until the cooker has cooled.
Hot water may have accumulated in the steam vent.
Watch out for steam coming out of the
cooker and hot water droplets falling
from the inner lid when opening the
outer lid after cooking.
Do not touch the open button when
carrying the main body.
Do not hold the rice cooker by the outer lid
when carrying it.
Do not shake the appliance while holding
the handle.
Do not raise the handle while rice is being
cooked.
To prevent injuries and burns
Instructions for safety
Please follow these instructions without fail
For safe use of the product
If you use a heart pacemaker, consult a
doctor before using this product.
The operation of this product may affect pacemakers.
Hold the power plug (power supply side/
main body side) when unplugging it from
the electrical outlet or the main body.
It may cause an electric shock or catch fire due
to a short circuit.
Do not use a deformed inner pot or an
unspecified one.
It may cause burns or injury due to overheating
or abnormal behavior.
Do not apply steam to the power plug
and other electrical appliances.
Be especially careful when placing the product
on a kitchen shelf, etc.
Do not use the cooker if there are any small
metallic objects or aluminum foils, etc. in it.
Aluminum foils, etc. become extremely hot.
Pull out the
power plug.
Unplug the power plug (power supply
side) from an electrical outlet when the
product is not in use.
Otherwise the insulation may deteriorate and
result in an electric shock or fire due to an
electrical leak.
Hold the plug.
Do not pull the cord.
RC-DS1018K_EN_0809.indd 6 2016/08/09 10:48:58
7
Attention
Please follow these instructions to prevent product failure and malfunction.
Do not place the cooker in any place exposed to
direct sunlight, or spattering of oil or the like.
It may cause discoloration or deformation.
Do not place objects susceptible to magnets near
the cooker.
The memory on objects such as cash cards, smart cards,
etc. may be erased.
Noise may be generated on appliances such as TVs, radios
and telephones.
Do not use the cooker outdoors.
Keep the main body and its surrounding area clean.
Otherwise, dust or insects will enter the main body
through its air inlet/ outlet which maintains the function
of the cooker, resulting in damage.
Location to place and surrounding environment
Do not put the inner pot on a gas cooking stove or induction heating cooker, or in a microwave oven or
other similar appliance.
It may cause deformation or discoloration, resulting in damage.
Do not drop the inner pot or hit it against hard objects.
It may cause scratches/deformation of the outer surface.
To avoid scratching or peeling-off of “fluorine resin coating” on the inner surface of the inner pot, do not
use the inner pot in any of the ways below.
Avoid scratching and be careful with salt, acid and detergent.
• Do not put dishes in the inner pot and use it as a
washing-up bowl.
• Do not use a scrubbing brush, or dishwasher/dryer for
cleaning it.
• Do not use cleanser, bleach, etc.
(Use neutral detergent for kitchen use.)
• Do not keep mixed rice and soup warm.
(Clean the pot immediately after using seasonings.)
• Do not use vinegar.
• Do not rub the inner pot with the rice scoop.
Do not hit the inner pot with a sieve.
• Do not use a metal ladle or mixer, etc.
The surface of the “fluorine resin coating” may become uneven color with use. This does not affect the cooking, keep warm
performance and hygienic quality. Also, fluorine resin is harmless even when ingested. You can use it without any problem.
* Even when the coated outer surface of the inner pot is scratched, you can use the cooker to cook rice and keep it warm
without any problems.
When using the inner pot for washing rice, place a cloth, etc. under the inner pot, so that the bottom of its outer surface
will not be easily scratched.
Handling the inner pot
Using the cooker
Do not use the cooker when foreign objects or
water droplets are attached.
Otherwise, you may not be able to cook tasty rice or close
the outer lid, the vacuum function may not work, or the
outer lid may be deformed or damaged.
* For checking, see page 13.
• If there are foreign objects stuck in any part of the inner
lid, inner lid packing, inner pot rim, vacuum air inlet,
vacuum air outlet, clamp receiving parts or clamp parts,
the cooker will not create a vacuum.
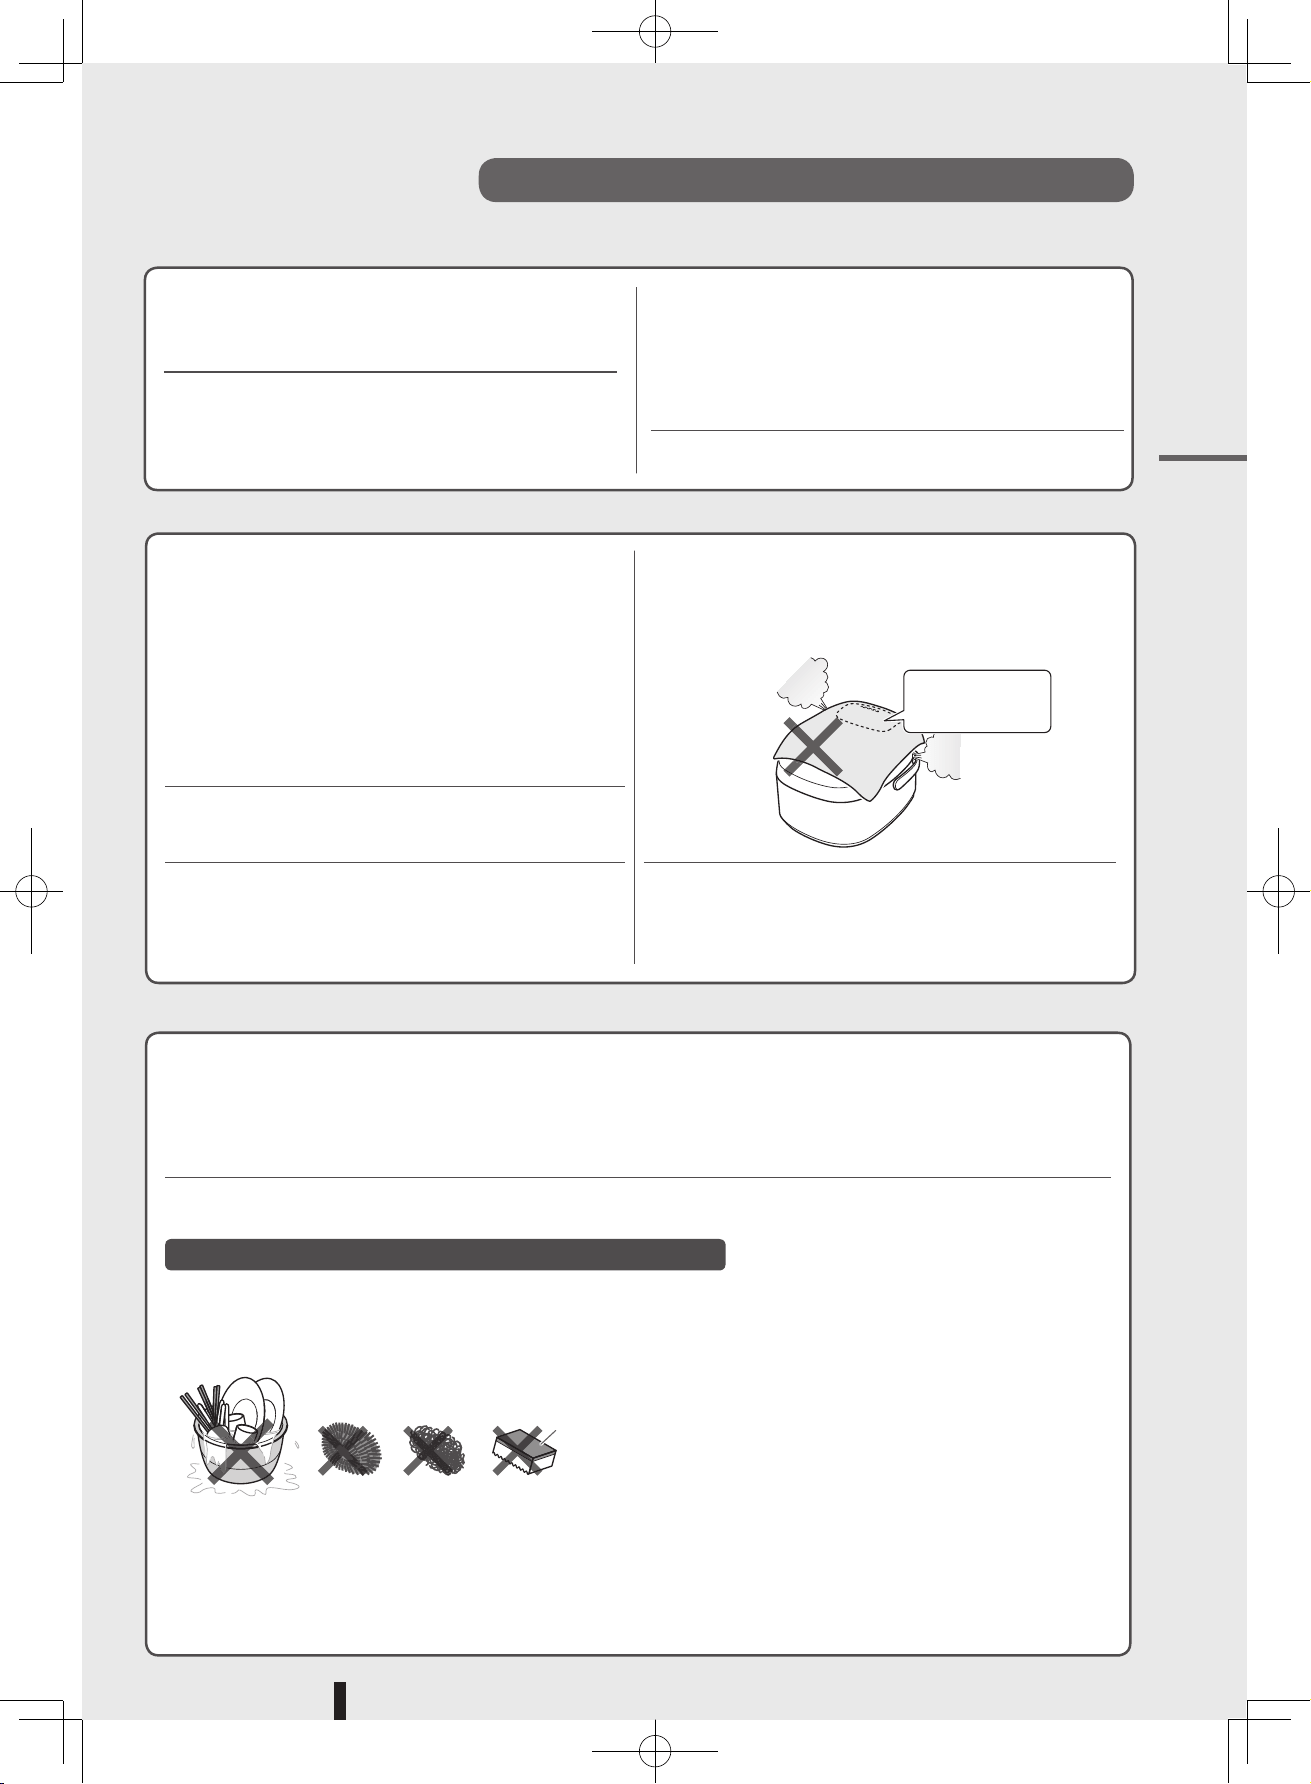
Do not cover the outer lid, especially the steam
vent, with a dishcloth, towel, etc.
Steam may become trapped causing deformation,
discoloration or damage of the outer lid, steam vent or
operation panel.
Do not use the cooker on an induction heating cooker.
It may cause malfunctions.
Regularly check the air inlet / outlet on the bottom
of the main body, and remove any dust.
Stop using the product if it is dropped and a crack
or rattling is found.
Contact the store from where the product was purchased
in order to have it inspected or repaired.
Do not block
the steam vent.
Do not use
the polishing
surface
Scrubbing
brush Wire wool Nylon brush
Before use
RC-DS1018K_EN_0809.indd 7 2016/08/09 10:48:59
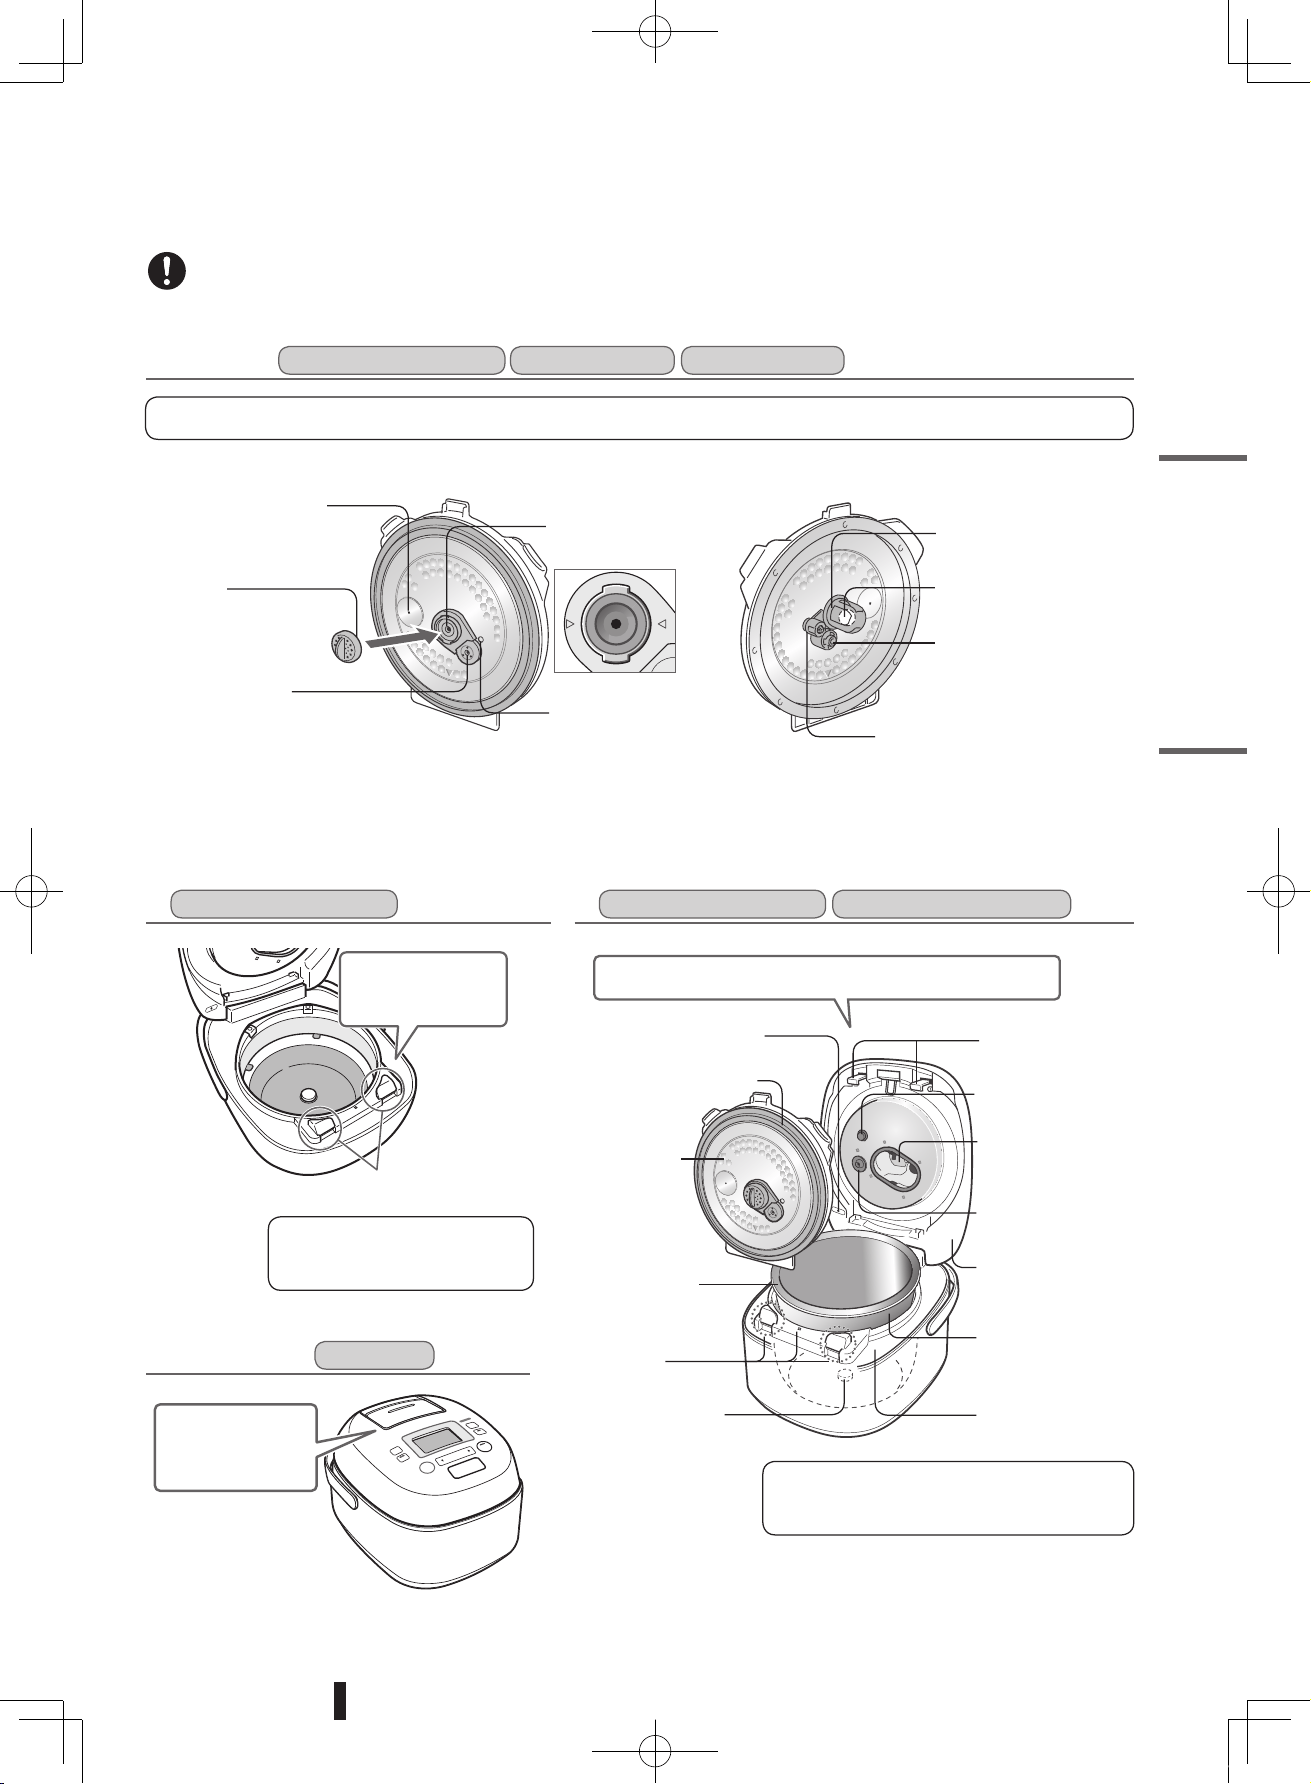
8
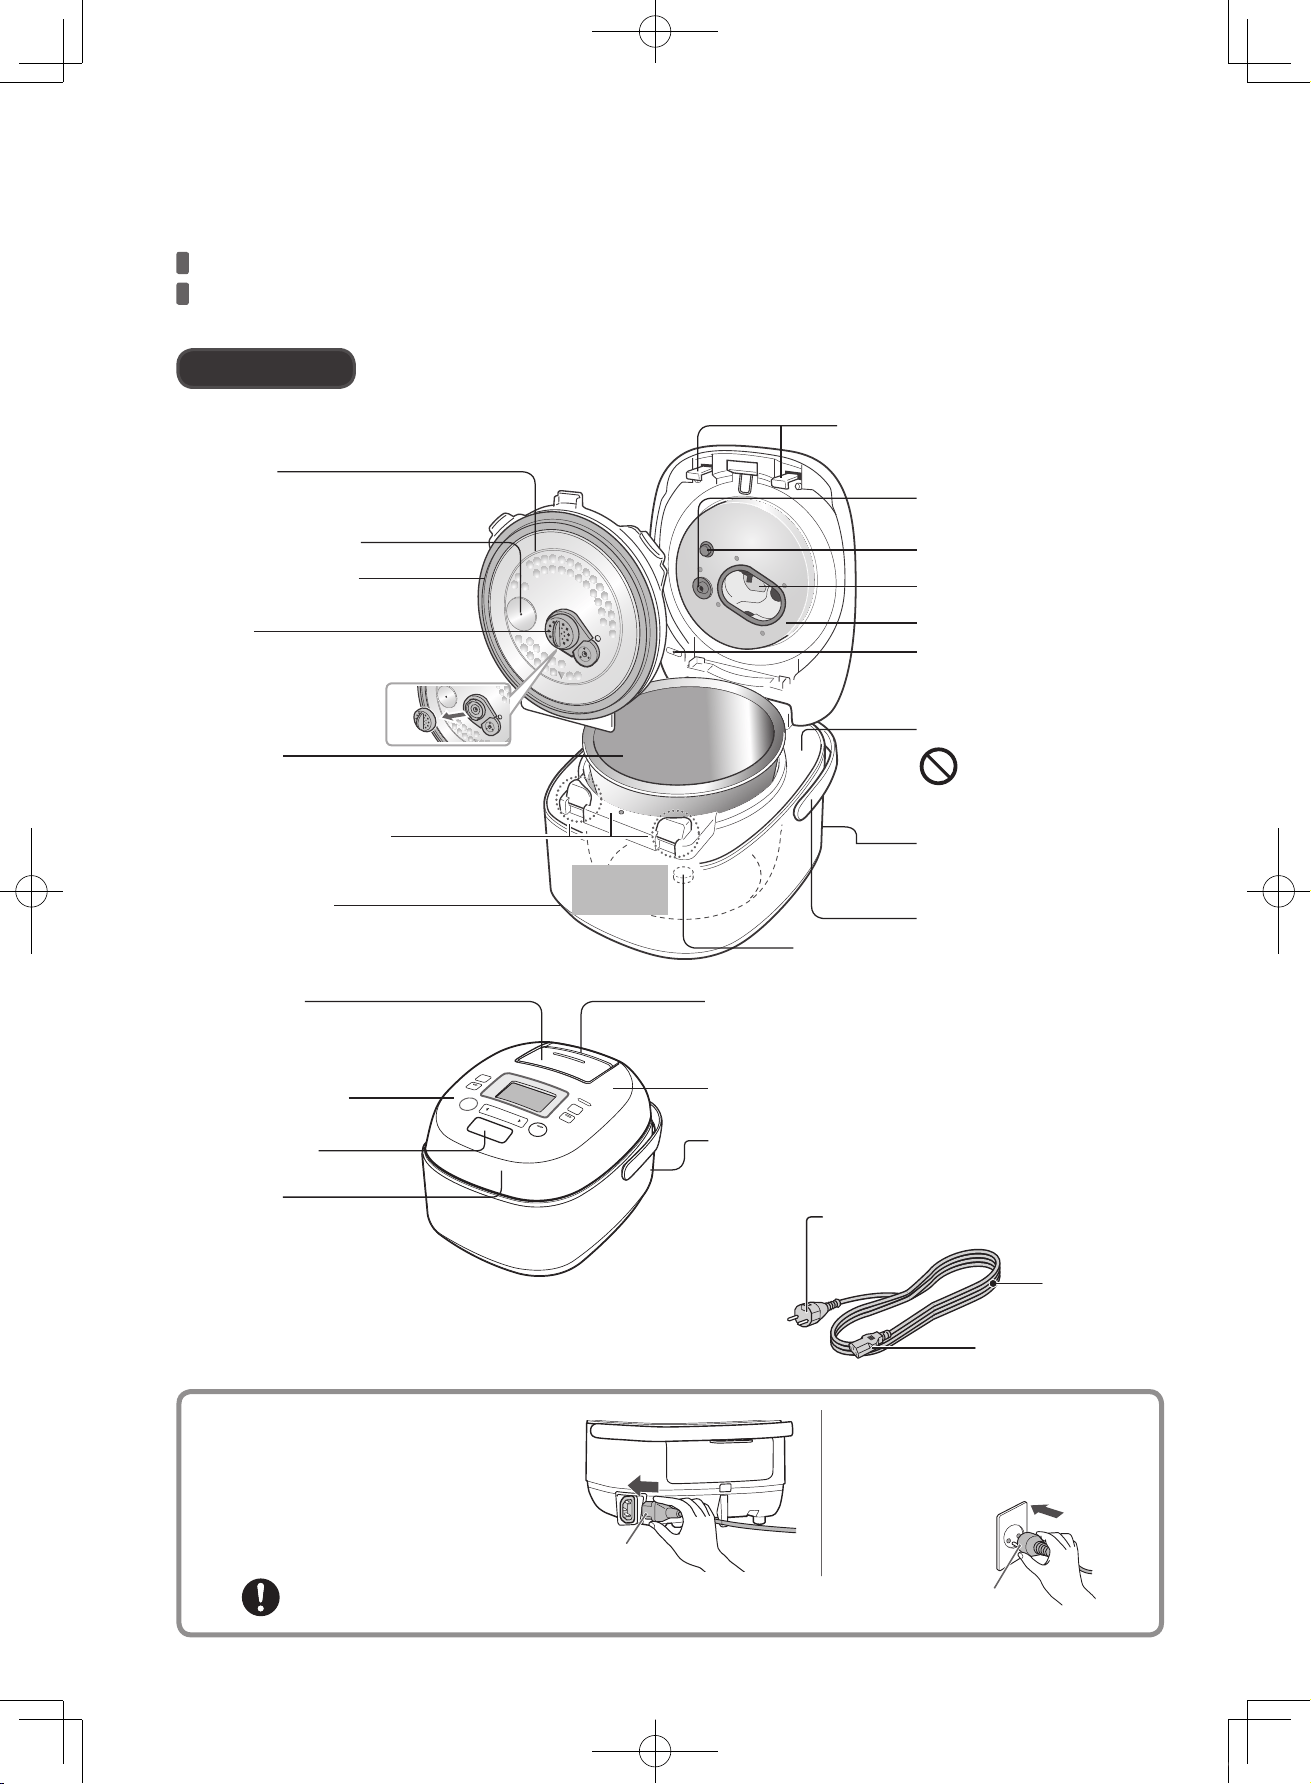
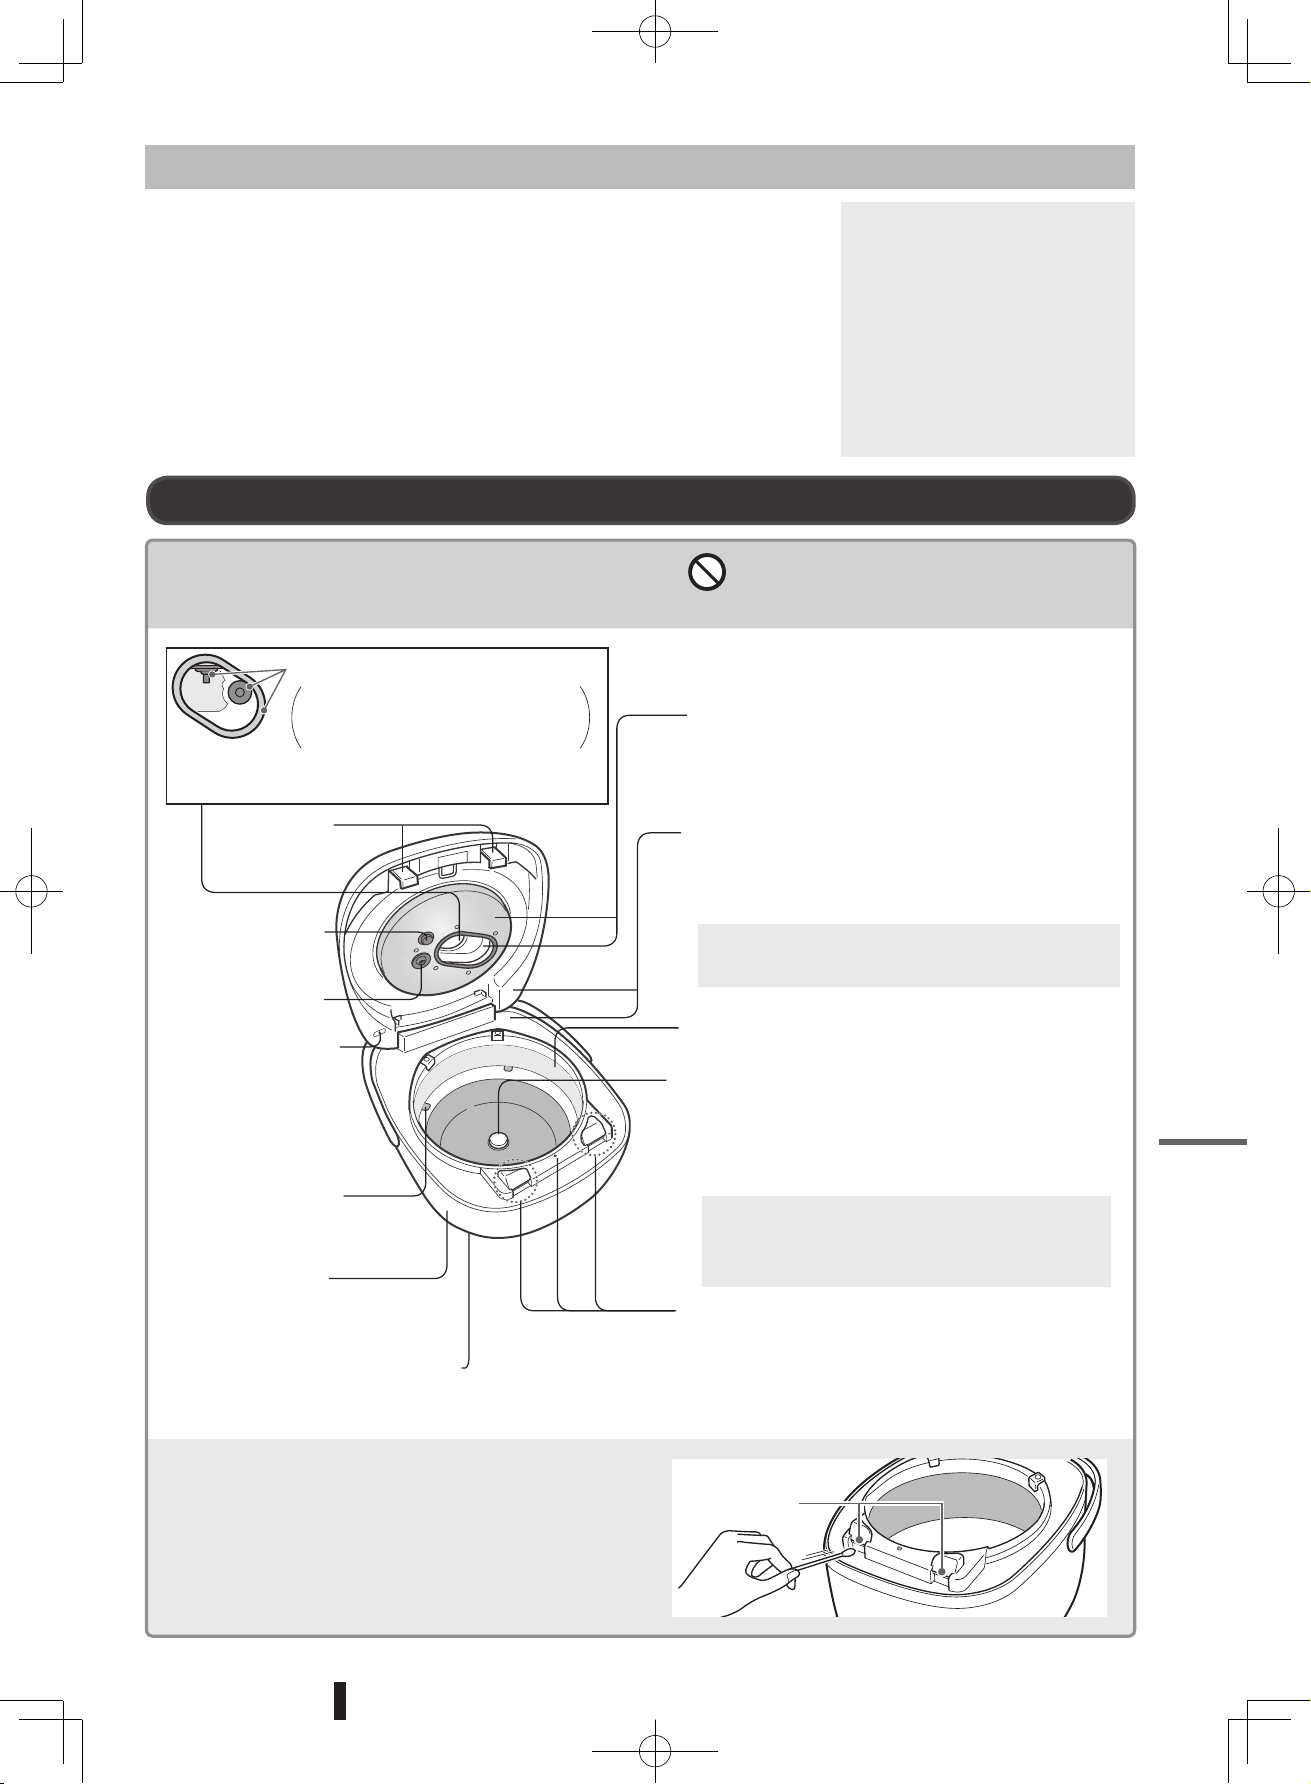
Name of each part
Main body
Attaching and removing the inner lid, lter and steam vent (See page 12.)
Wash the inner pot, inner lid, filter, steam vent and accessories before using the cooker for the first time.
The cooker may have a smell of plastic, etc. at the first use but the smell will decrease with use.
Inner pot
Inner surface: fluorine resin coating (See page 7.)
(diamond and titanium coating)
Filter
Prevents foreign objects from
becoming stuck.
(Remove and wash it
every time.)
Clamp receiving parts
(Remove foreign objects.)
Clamp parts
Handle
Model No. and ratings
(on the back)
Precautions for use
Temperature sensor
Air inlet / outlet
(bottom surface)
Inside the
rice cooker
Frame (metal)
Do not touch it, as it is
extremely hot during
and after cooking.
Inner lid packing
(Remove foreign objects.)
Lid temperature sensor
Vacuum air inlet
Vacuum air outlet
Vacuum air inlet
Heating plate
Steam pathway
Inner lid
(Remove and wash it every time.)
Steam vent
(Remove and wash it every time.)
Safety warning
Operation panel
Open button
Outer lid
Power cord connection
1
Insert the power plug (main body
side) into the plug insertion hole
in the back side of the main body.
2
Insert the power plug
(power supply side) into an
electrical outlet.
Insert the power plug into the hole completely.
Power cord
Power plug
(power supply side)
Cord
Power plug
(main body side)
Plug insertion hole
(in the back)
Power plug
(main body side)
Power plug
(power supply side)
Vacuum pump (built into the lid)
Produces sound when operating.
(See page 35.)
RC-DS1018K_EN_0809.indd 8 2016/08/09 10:49:00
9
There are a protrusions on the START and OFF keys, and Japanese braille markings near
the keys.
A lithium battery is included in the cooker to keep time and memorize the cooking courses.
The battery power is drained as the rice cooker is used. (For details, see page 42.)
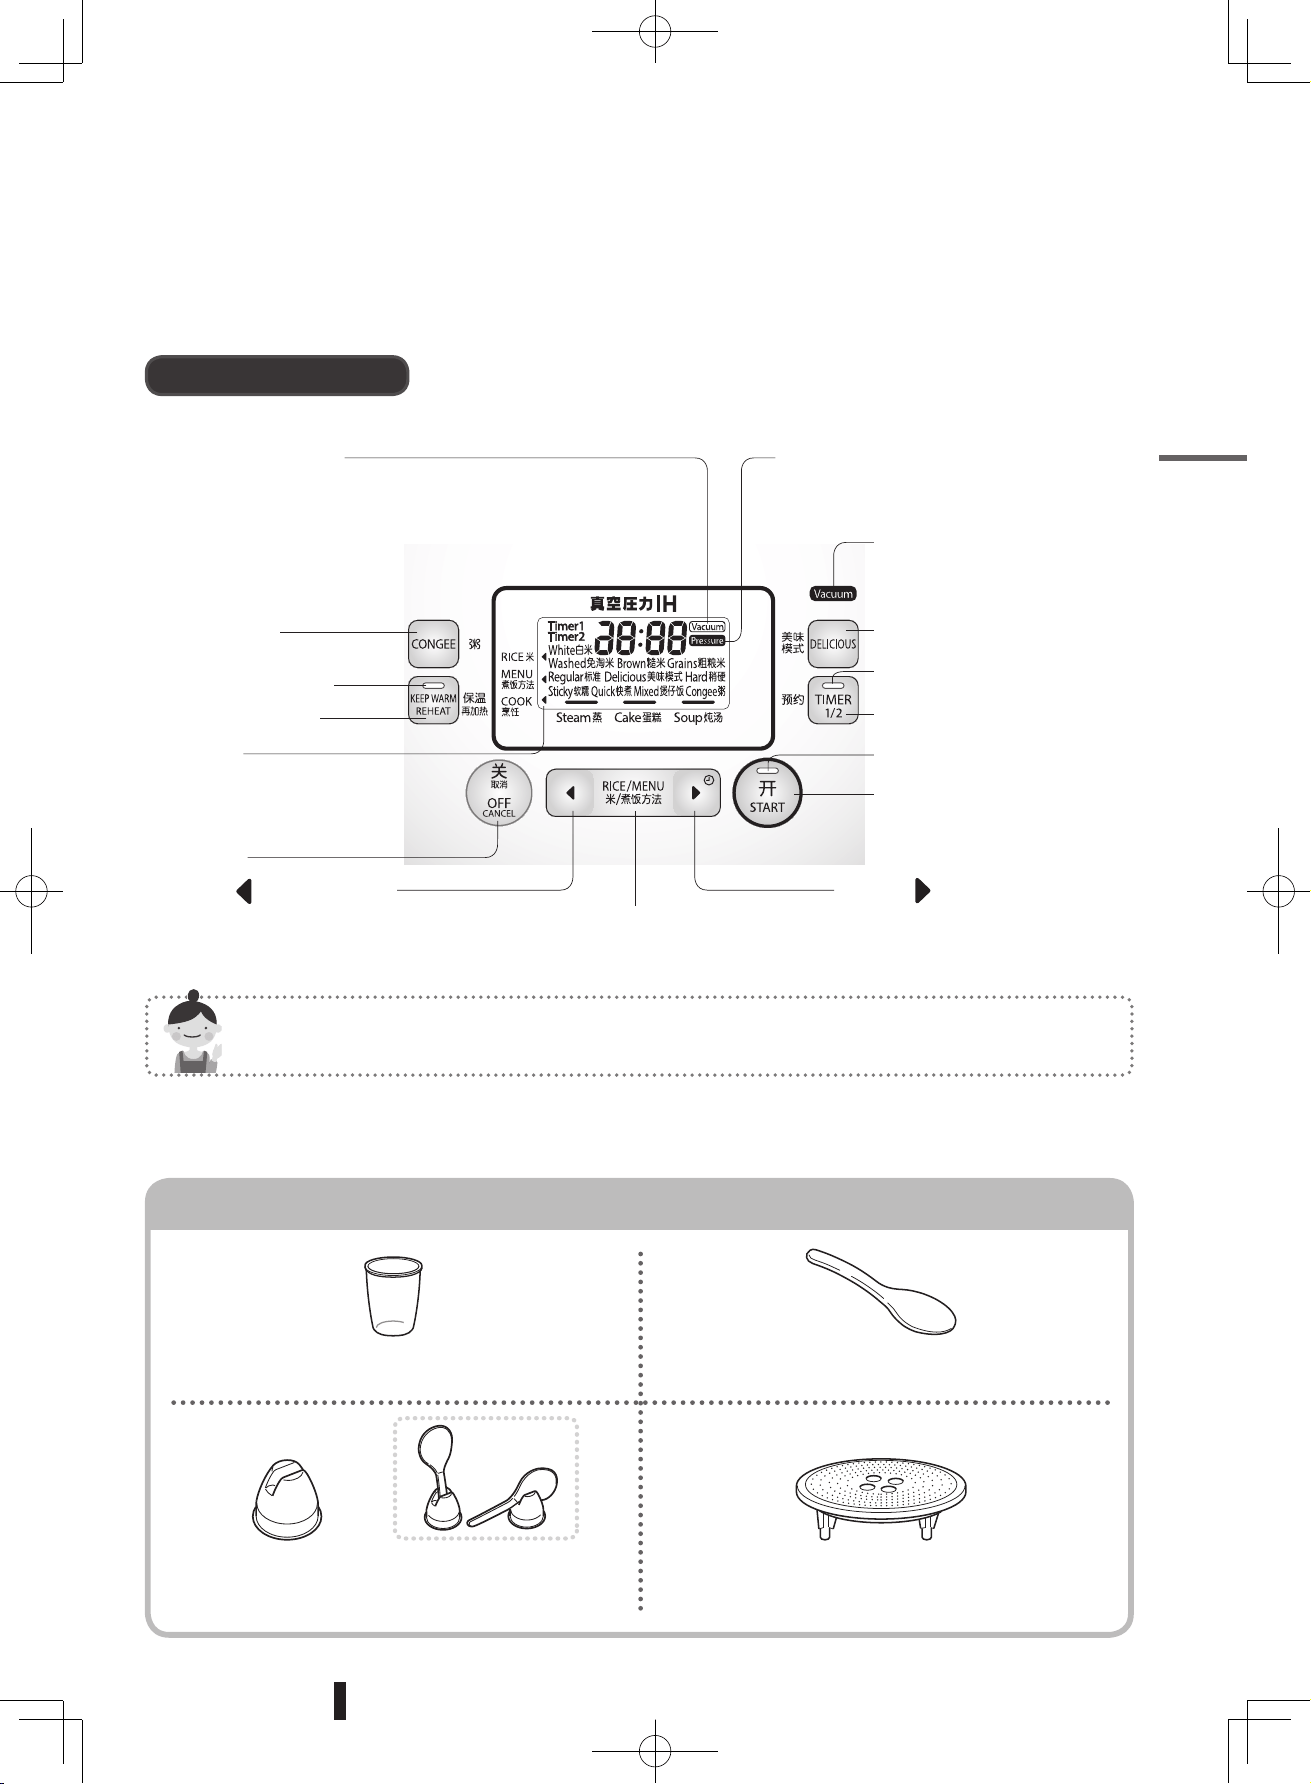
Timer
・
(Go forward) key
Also used for setting the clock
(See page 21.)
RICE / MENU key
START key
Vacuum indication
Lights when the vacuum pump is set to
operate in Keep Warm mode and when the
timer is set.
Vacuum lamp
Lights when the cooker has
created a vacuum. (See page 11.)
TIMER key
CONGEE key
(See page 17.)
Pressure indication
Lights when pressure starts to be applied,
and stays lit until the rice is cooked.
START lamp
DELICIOUS key
(See page 17.)
TIMER lamp
Display
(24 hour clock display)
Shows the state when all
indications are displayed.
KEEP WARM lamp
KEEP WARM key
OFF key
Timer
・
(Go back) key
Operation panel
Accessories
Measuring cup
(About 180 ml)
Rice scoop
Rice scoop holder
The rice scoop can be placed upright or on its side in the holder.
Steaming stand
Before use
RC-DS1018K_EN_0809.indd 9 2016/08/09 10:49:01
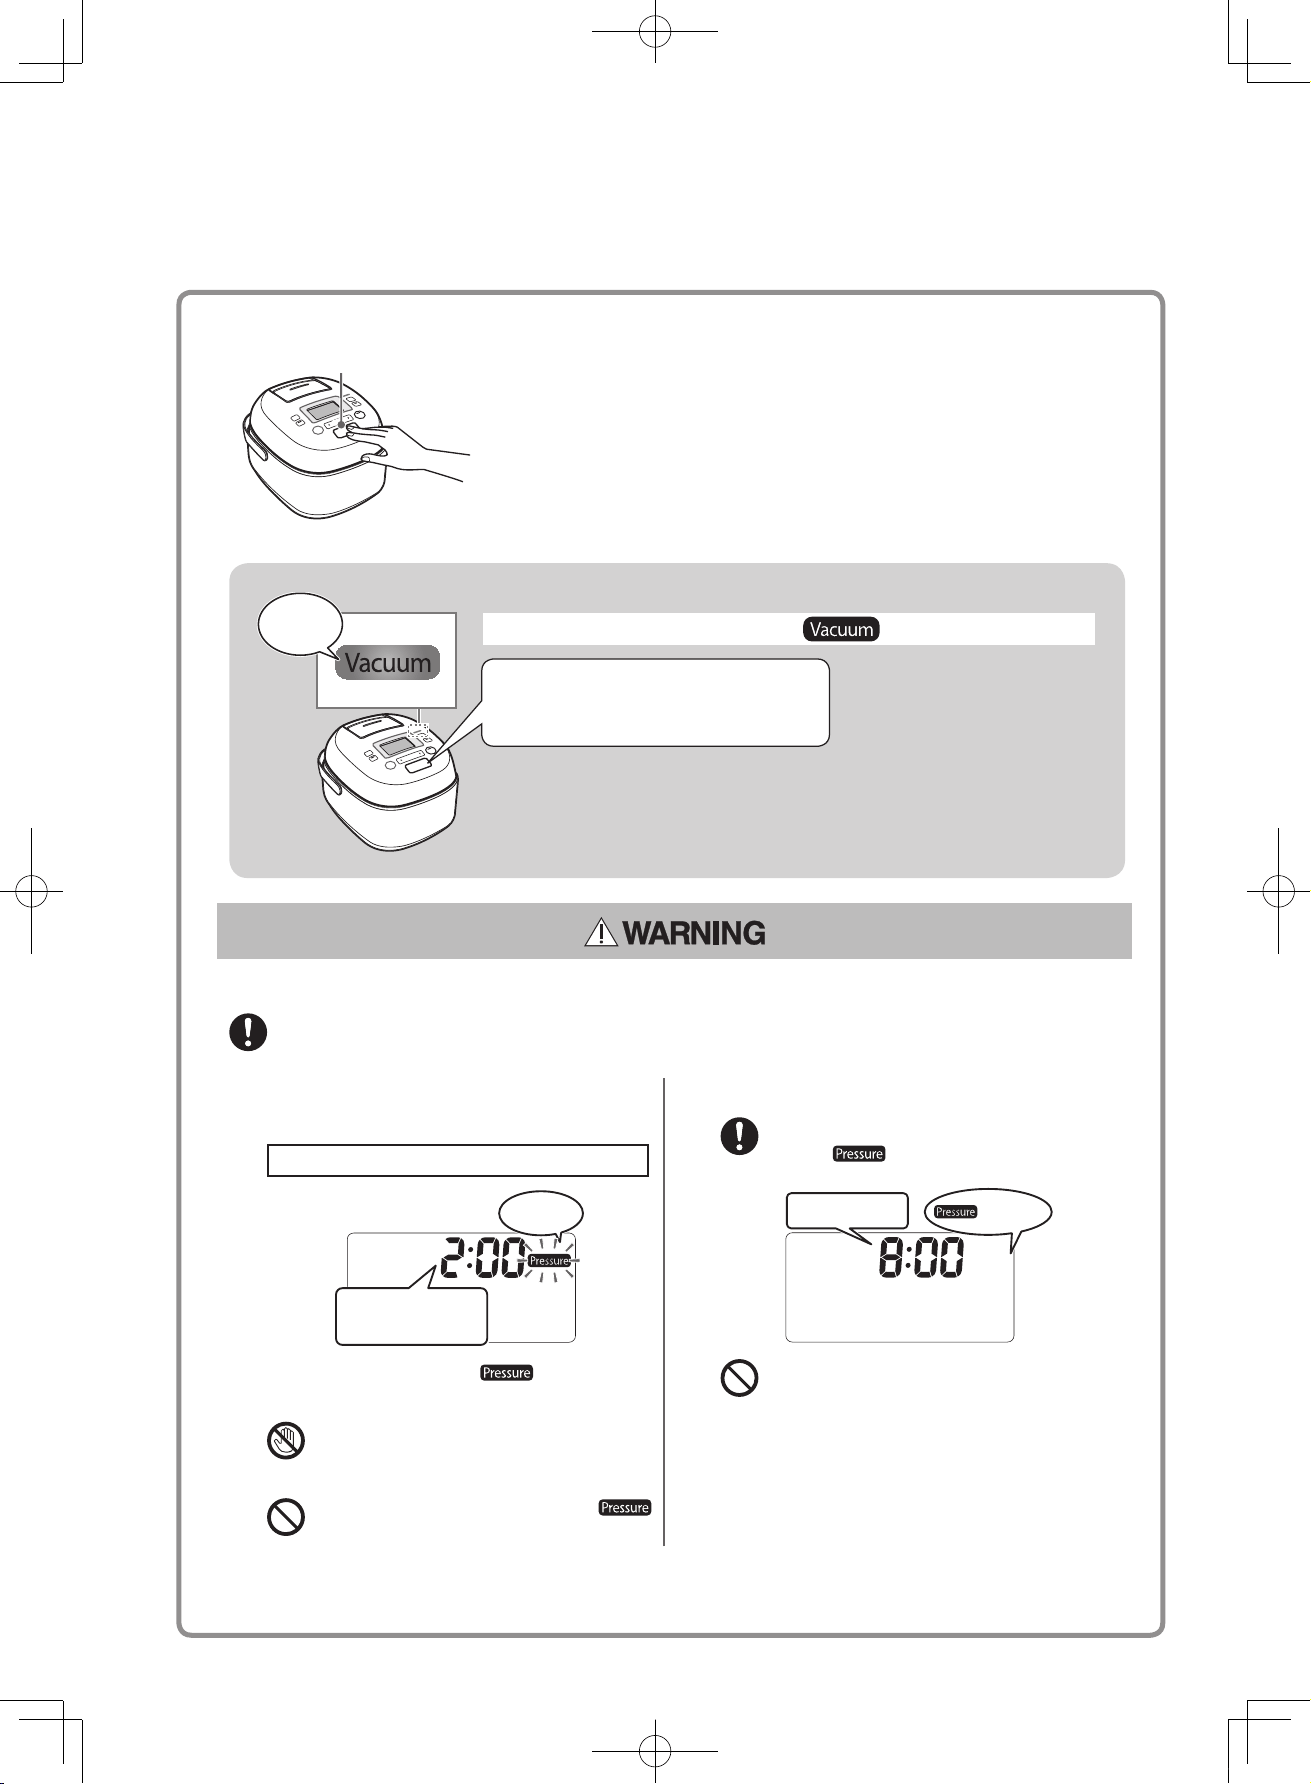
10
As the cooker creates a vacuum, the lid seals very efficiently, and
it may take some time to open the outer lid.
It takes longer to open when the main body is warm (e.g. when
keeping rice warm) than when it is cool.
--In the Keep Warm mode--
To open the outer lid while the indication is lighting
Vacuum is released with the first pressing of the open button,
and the second pressing opens the outer lid.
•
Depending on the way the open button is pressed (e.g. if it is pressed for a
while), the lid may open after it is pressed once. This is not a malfunction.
Opening the outer lid while cooking
It is not recommended, but if you need to open the outer lid while cooking, observe the
following procedure.
1
Press the OFF key to stop cooking. (The
cooker will beep consecutively several times.)
Wait for 2 minutes.
*
If you hear a long beep and is not displayed
when the OFF key is pressed, you can open the lid.
Do not put your hands and face near the
steam vent. Hot steam suddenly comes
out of the steam vent.
Do not open the lid while the
indication is lighting or flashing.
2
When the buzzer sounds, open the outer lid.
Before opening the outer lid, make sure
that the
indication is off.
If the open button is too heavy to press
down, do not forcibly press it. (See page
38 for how to open the lid.)
(
When you resume cooking, start the cooking procedure again from the start. However, rice may not be properly cooked.
)
Opening the outer lid
Press the open button
to open the lid.
Flashing
is unlit
Counts down
from 2:00
Current time
Lighting
Press the open button twice to
open the outer lid.
RC-DS1018K_EN_0809.indd 10 2016/08/09 10:49:02
11
• The outer lid cannot be closed when the inner lid is not attached.
Before closing the outer lid, make sure that there are no foreign
objects in the clamp receiving parts. (See page 13.)
Press down the outer lid until it clicks.
As the cooker creates a vacuum, the lid seals very efficiently and it
may be difficult to close the lid.
The outer lid is more difficult to close when the main body is warm (e.g.
when keeping rice warm) than when it is cool.
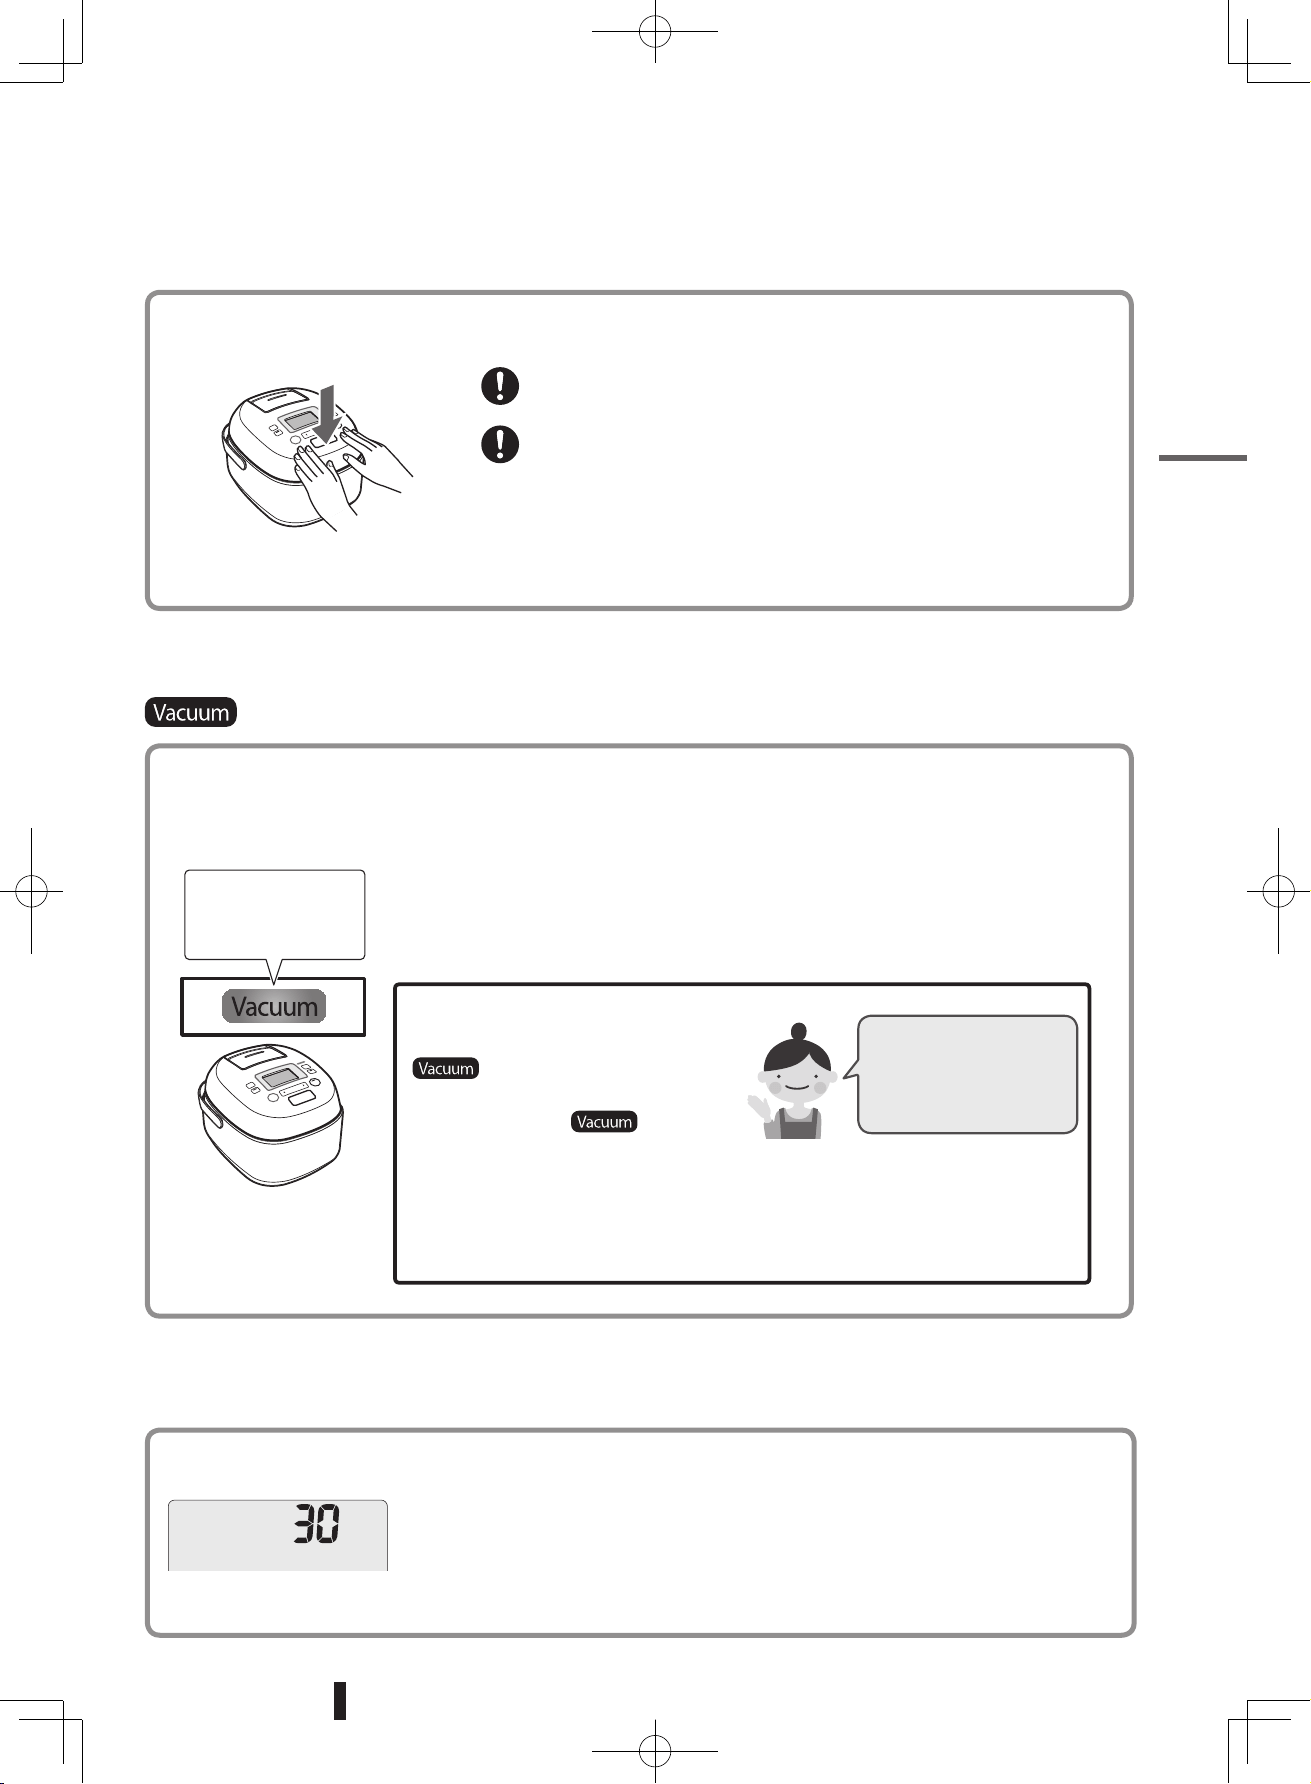
• When cooking starts* or preset cooking starts, the vacuum lamp flashes and lights
up, and the lamp turns off after a while.
• This lamp flashes when the vacuum pump is working.
(The lighting duration of the indication varies depending on the cooking course,
water temperature, timer setting, etc.)
*: The vacuum lamp may not flash and light up at the start of cooking while the
inside of the cooker or the inner lid is still warm.
• See page 22 for information about the Vacuum indication in the Keep Warm mode.
When the open button is pressed or
the outer lid is opened while the
indication lights up (in the
timer setting mode or in the Keep
Warm mode), the
indication
turns off.
• In the timer setting mode, rice will be cooked with no vacuum created any
more.
• In the Keep Warm mode, another vacuum will be created after approximately
30 minutes.
Even when the vacuum
is released, the timer
will continue / the rice
will still be kept warm.
indication
Closing the outer lid
The time until the completion of cooking
is displayed in increments of 5 minutes.
When steaming of rice starts, it is
displayed in increments of 1 minute.
In order to adjust the displayed
time, the clock may run fast or
stop until the cooker is in the
steaming stage.
Use the displayed time as a
guide.
Cooking time display
(time remaining display)
Press the front
center of the lid.
Lights when the
cooker has created
a vacuum
Before use
RC-DS1018K_EN_0809.indd 11 2016/08/09 10:49:03
12
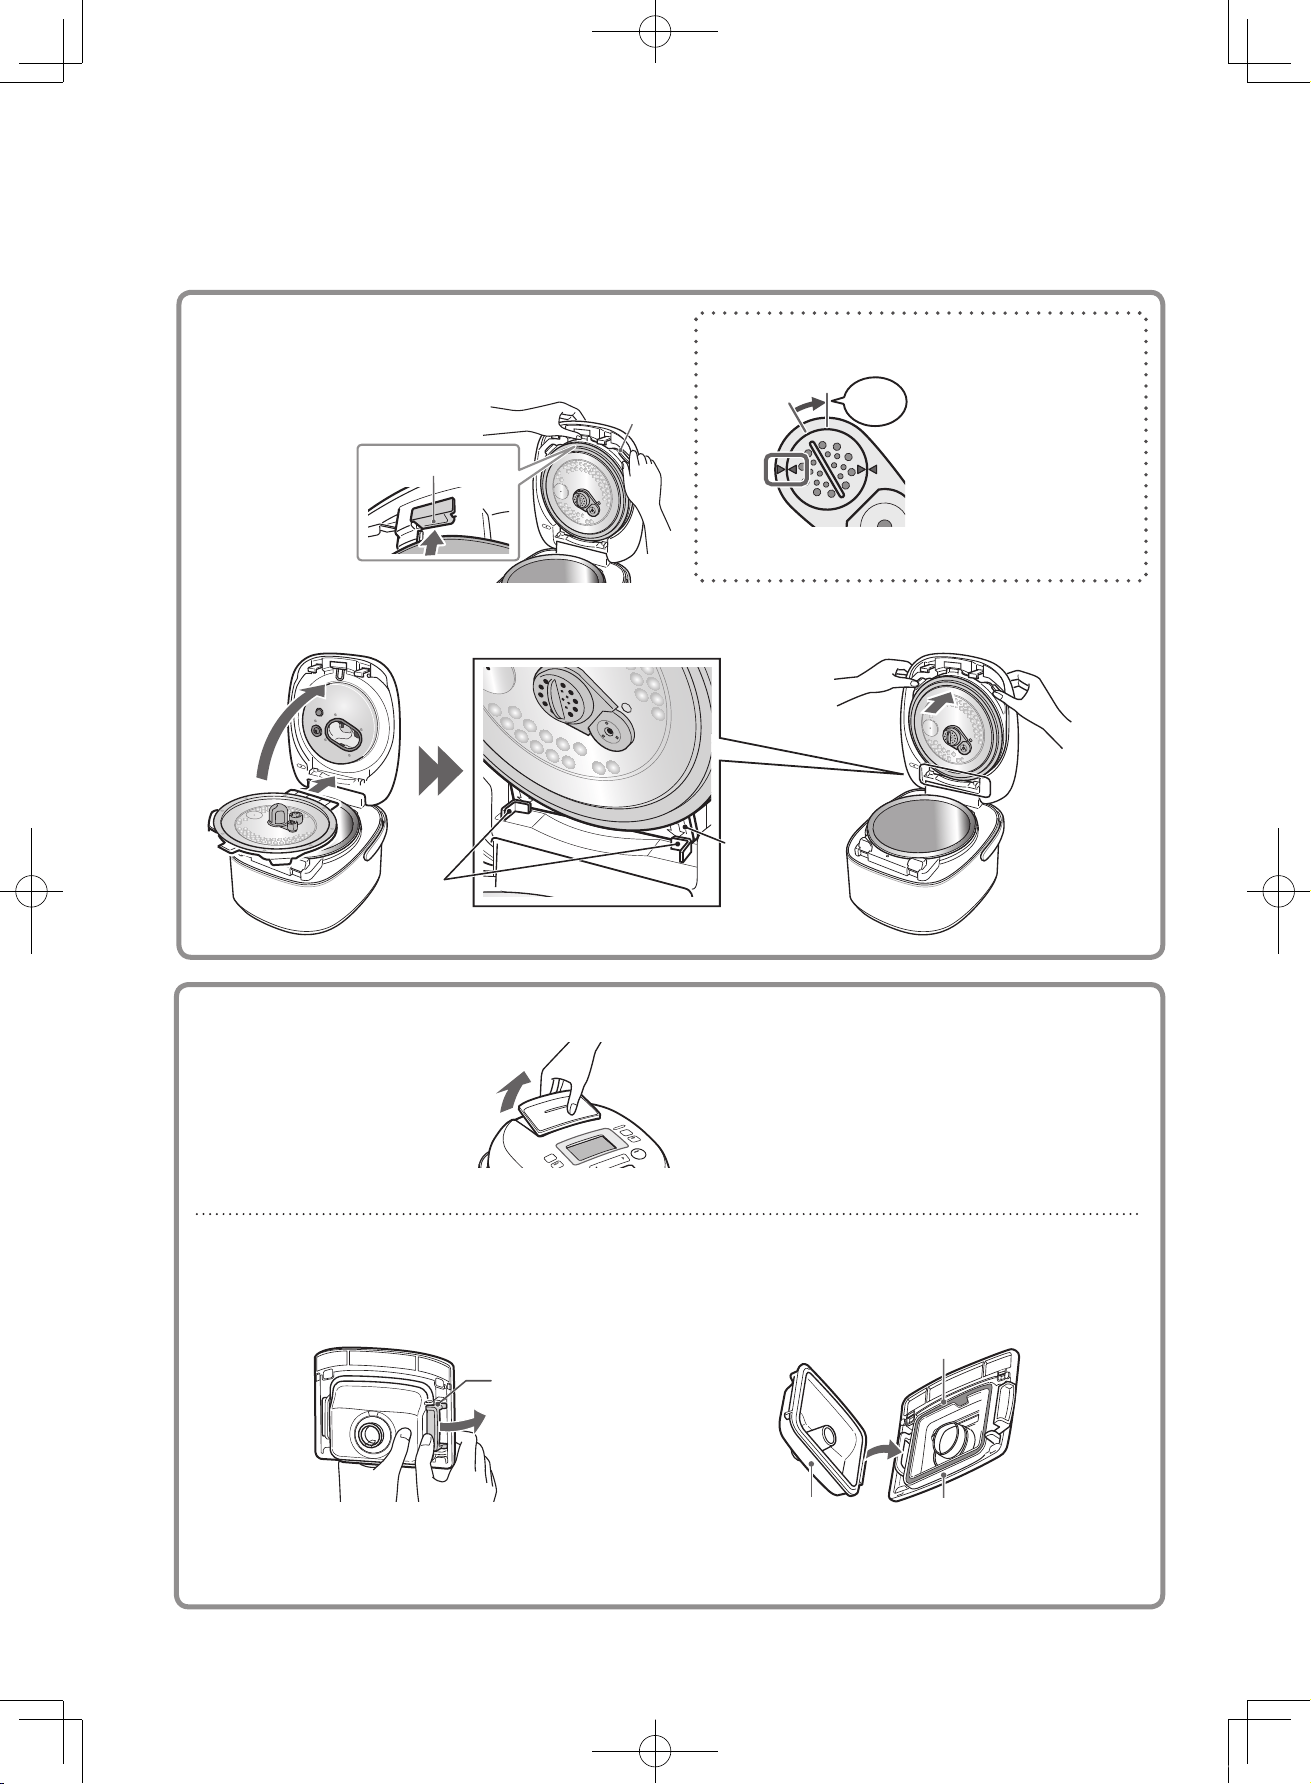
■ Removing the inner lid
Attaching the filter
Turn the knob of the
filter until it comes to
its vertical position.
* The filter may come off
while cooking unless
you completely turn it
until it clicks.
•
To detach the filter, turn it
in the opposite direction.
■ Attaching the inner lid
Attaching and removing the inner lid (filter) and steam vent
■ Removing the steam vent from the main body
Pull the steam vent upward
.
• Push in the steam vent to attach it.
■ Disassembling the steam vent ■ Assembling the steam vent
Unlock the lock with the case and the cap
held as shown.
Insert the projection on the case into the
hole in the cap and secure the lock firmly.
• If the steam vent packing seal in the inside of
the cap has come loose, press it into the groove.
Hold the knob with one hand, press the lock button
and pull the knob forward.
Lock button
Knob
Attach
Align the
marks
Projections
(2)
Lock
Steam vent packing seal
Cap
Case
①
Place the
inner lid
behind the
Projections.
②
Push the upper
side of the
inner lid until a
clicking sound
is heard.
Click
RC-DS1018K_EN_0809.indd 12 2016/08/09 10:49:04
13
Lid temperature
sensor
Steam pathway
(Packing)
Inner pot
Outer surface/
bottom
Clamp parts
Inner lid
Rim of the
inner pot
Inner lid packing
Clamp
receiving parts
Temperature
sensor
If there are foreign objects in any of the parts below, remove them with a bamboo skewer or toothpick.
Removing foreign objects
➡
page 25
When the temperature sensor is dirty
➡
page 25
How to cook rice
Checkup before cooking
Check the following items before starting to cook.
Remove any foreign objects or water droplets, if any.
■
Inner lid
Remove foreign objects
Check the valves
Attach the filter
■
Clamp receiving parts
Remove foreign objects
■
Steam vent
Attach
■
Temperature sensor and other parts
Remove foreign objects
Wipe away water droplets
Is the steam vent
attached ?
Pressure regulating
hole
Safety valve
Press it 2 or 3 times with
a cotton swab to check
that it moves smoothly.
Vacuum air inlet
(Check the rear side, too.)
Check valve hole
Filter
Attach the filter.
< Front side >
Pressure regulating
part
Pressure control ball
Safety valve
Area surrounding the
shaft and the spring
section.
Check valve
Press the shaft to check that
it moves smoothly.
< Back side >
Frame
Inner side of the
outer lid
Vacuum air inlet
(Packing)
Vacuum air outlet
Are there any foreign objects or water droplets ?
Clamp receiving parts
Are there any
foreign objects ?
Before use Cooking rice
RC-DS1018K_EN_0809.indd 13 2016/08/09 10:49:04
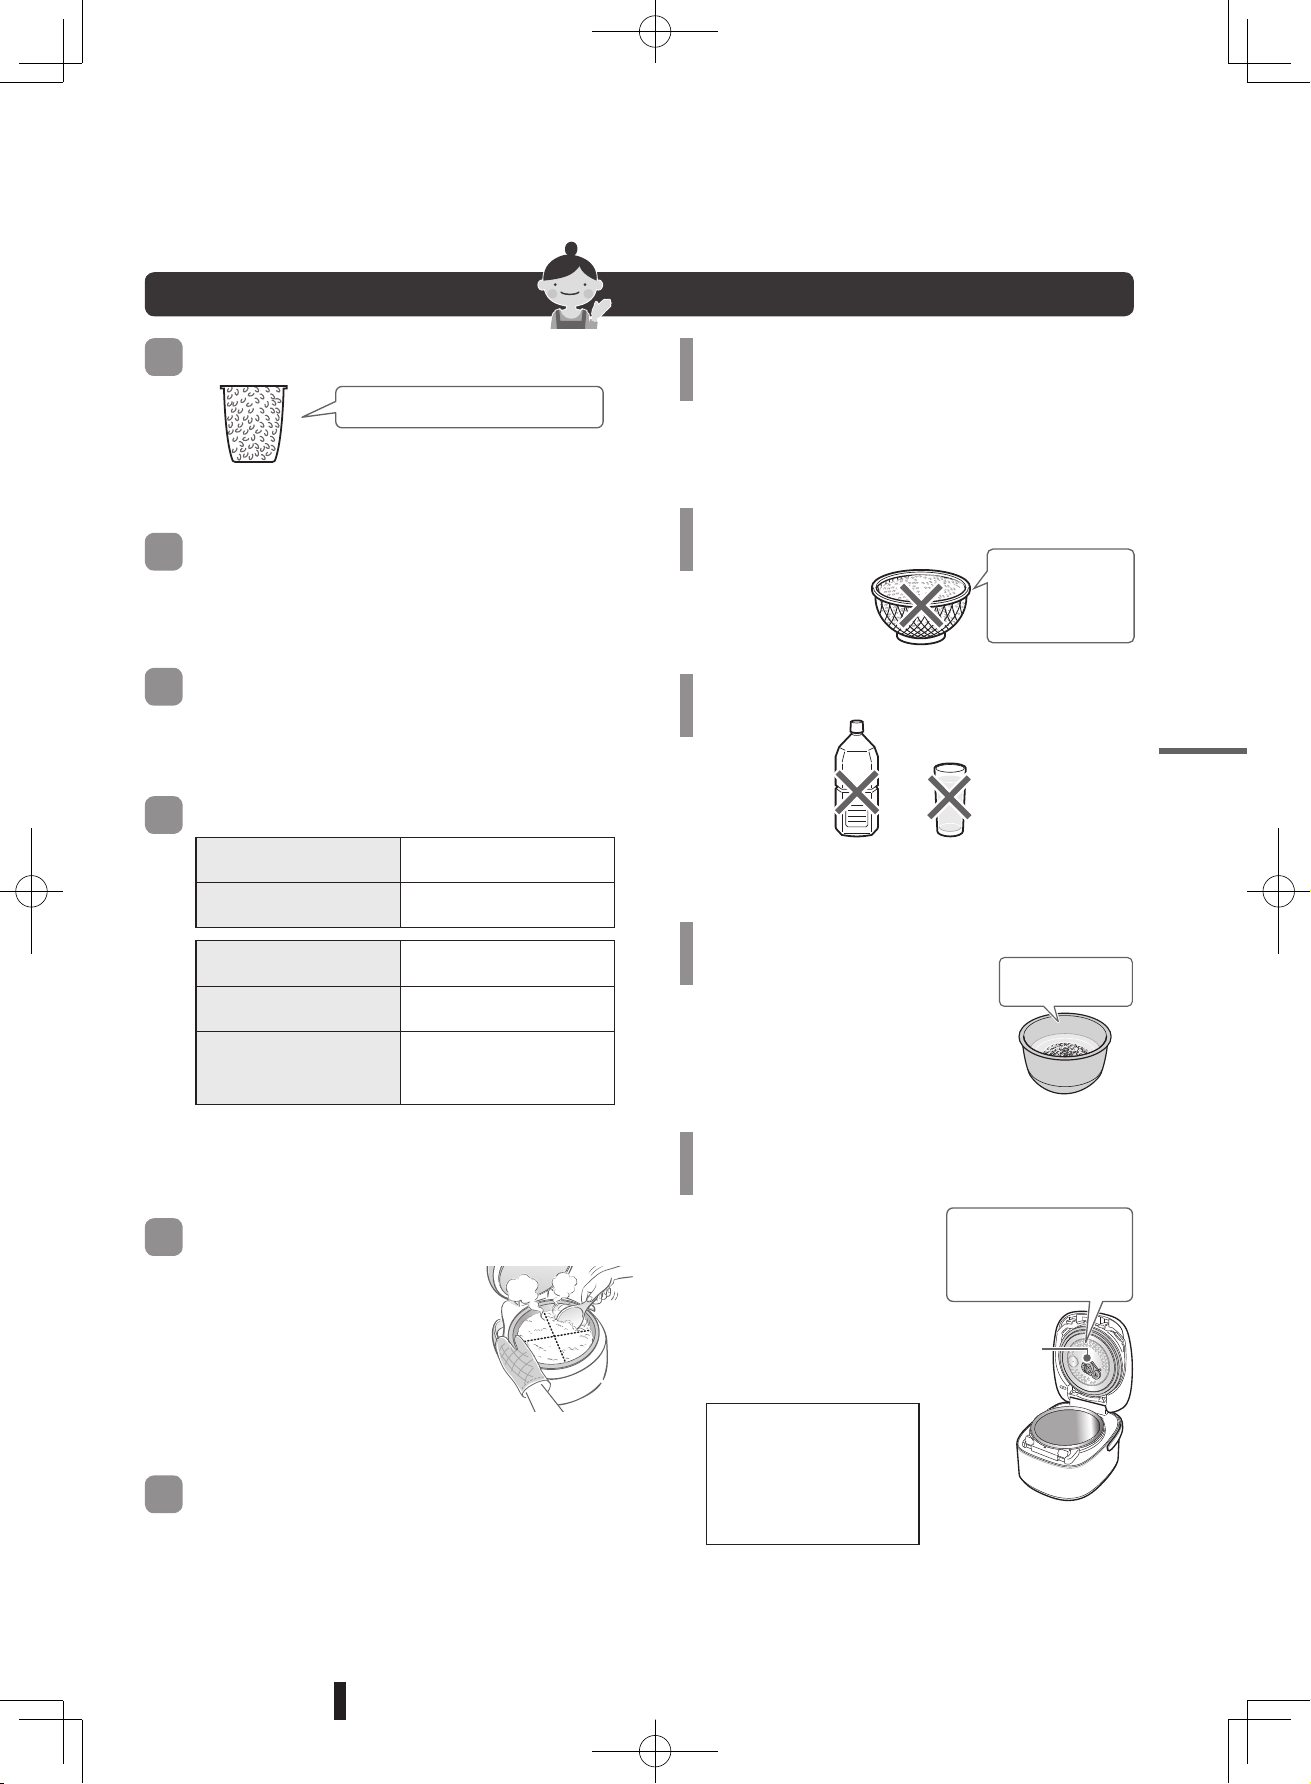
14
How to cook rice Basic procedure
Inspection before cooking rice (See page 13.)
▶
Power cord connection (See page 8.)
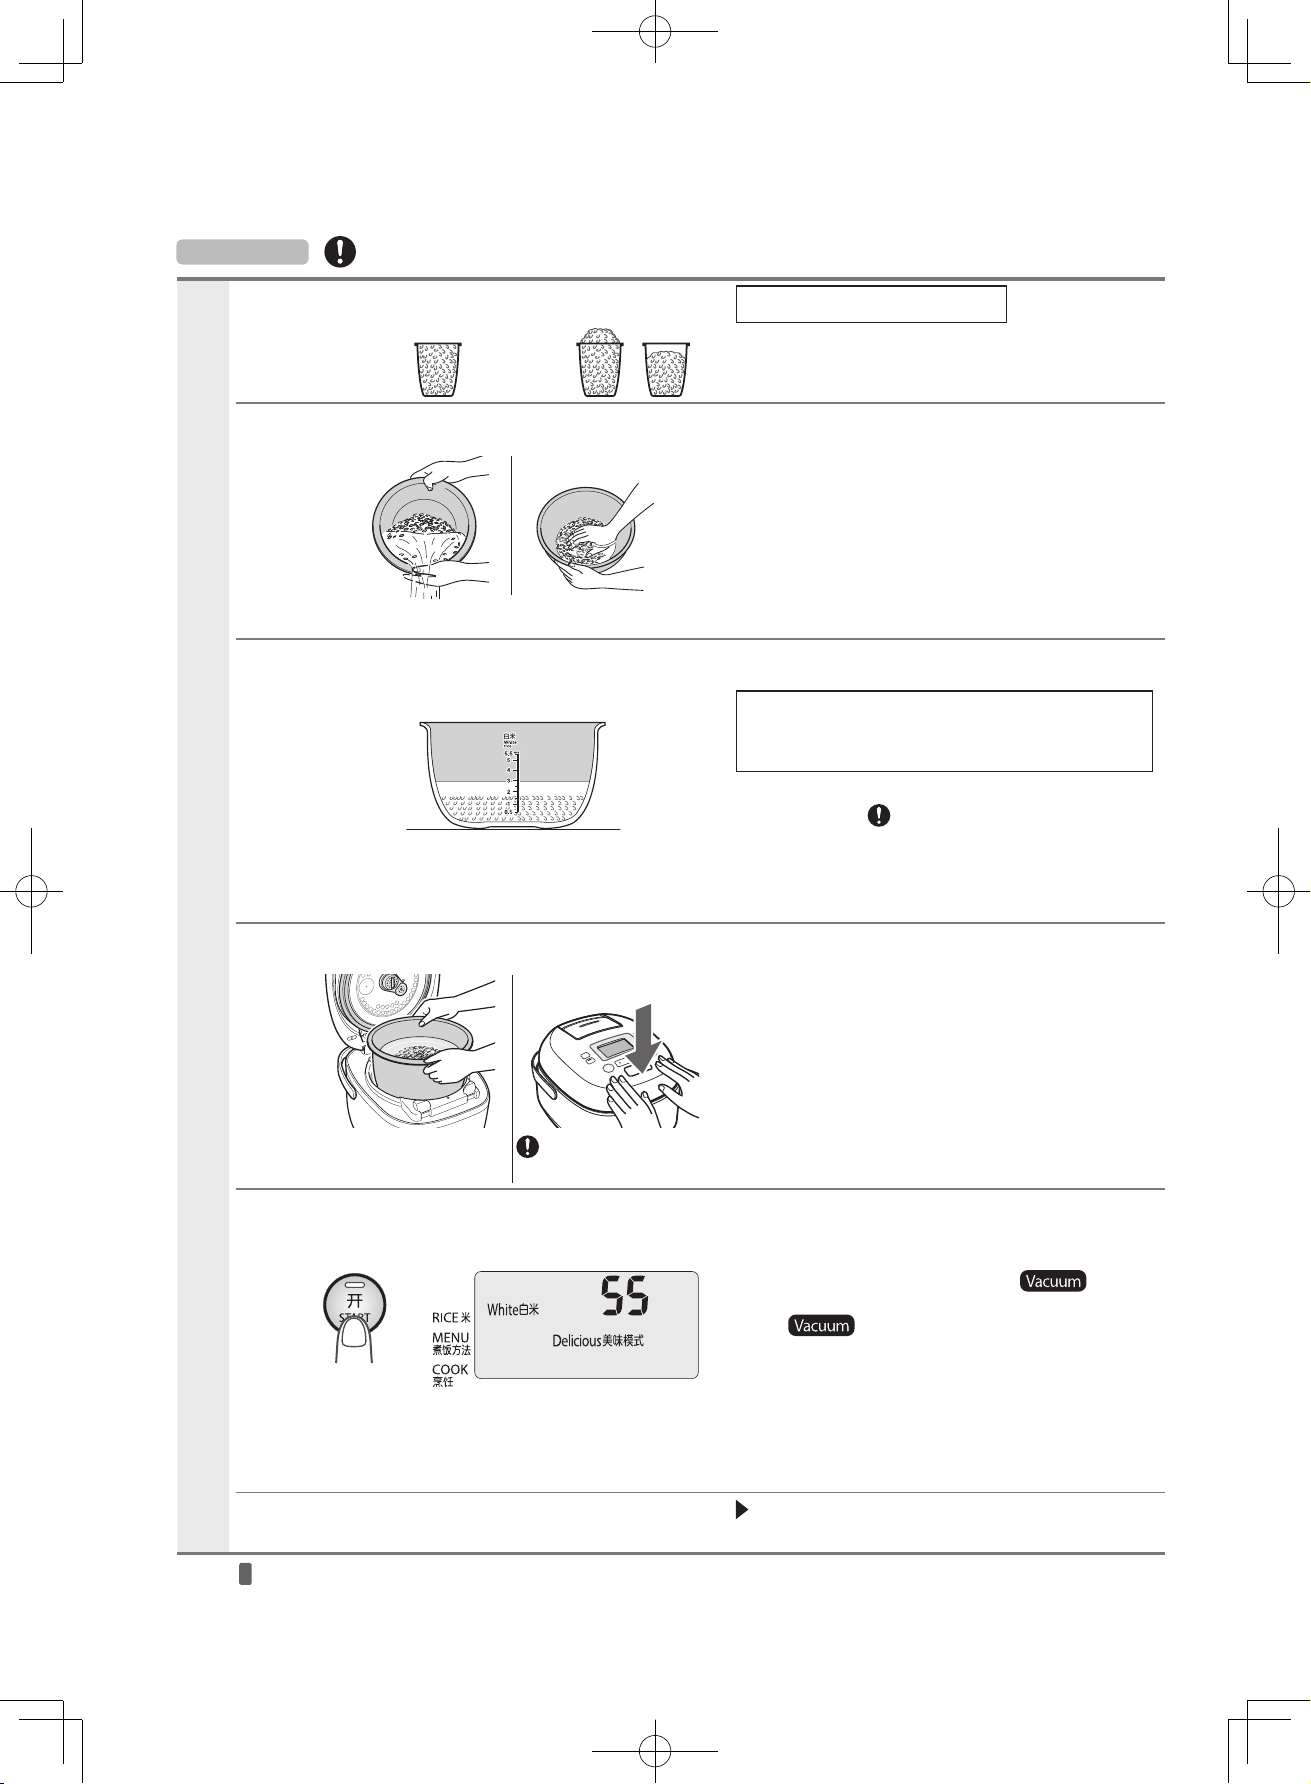
Preparation
Basic procedure
1
Measure rice in the measuring cup provided.
One level cup is about 180 ml.
•
There may be errors in measurement if a standard
measuring cup for cooking (200 ml) is used.
2
Wash the rice quickly, until water becomes clear.
You can wash rice in the inner pot.
①
First, add plenty of water, stir the rice in water
roughly and drain the water immediately.
②
Stir the rice in water and drain the water
several times until the water becomes clear.
• Do not use a metal whisk or the like when
washing the rice in the inner pot.
3
Adjust water. Select the water level scale on the inner pot according to the number of cups, and put water to the scale.
Level the rice, and place the inner pot on a
level surface.
Adjust the amount of water to the water level
scale for "White rice" when cooking white rice.
(For other water level scales, see page 16.)
• Adjust the amount of water according to your
preference. (
The permissible additional
amount of water is up to 2 mm above the water
level scale as a guide.)
•
Since soaking of rice is auto-started by pressing the
START key, there is no need to soak it before cooking.
4
Place the inner pot in the cooker and close the outer lid.
Wipe off any water droplets on
the outer surface of the inner pot.
Press the outer lid
until it clicks.
* Always press the START key after closing the
outer lid. (When you close the outer lid after
pressing the START key, the outer lid is not
securely closed and may be opened during
cooking.)
5
Select and check the cooking course before starting to cook.
Press the
START key.
The time until rice cooking is complete is
displayed. (The time is displayed in
increments of 5 minutes.)
Cooking will not start unless the inner pot is not placed correctly.
• The START lamp lights up and flashes
when the START key is pressed.
The
indication turns off when the
vacuum is released.
* The vacuum pump soon starts operating and
produces sound for a few minutes.
When the buzzer sounds, the rice is cooked.
The KEEP WARM lamp lights up.
After use, press the OFF key, and unplug the
power plug.
When you cook rice soon after stopping the Keep Warm mode or cook several batches of rice consecutively,
cool down the inside of the cooker and the inner lid before starting to cook rice.
(The rice may not be cooked well, and a vacuum may not be created when cooking starts.)
[ Good
example]
Press the center of the
lid front.
[ Bad
example]
♪
1 short beep
♪
3 short beeps,1 long beep
RC-DS1018K_EN_0809.indd 14 2016/08/09 10:49:06
15
Measure rice while leveling o
Measuring cup
provided
If you shake the measuring cup,
an excessive amount of rice will
be put in the cup.
Do not wash rice in hot water
Do not wash rice too long
Washing it in hot water or taking too long will
make it smell of bran.
Wash rice gently so as not to break it
To wash the rice, gently rub the rice grains against
one another with your hands. (Broken rice grains
can cause mushy rice.)
Adjust the amount of water as necessary
For harder rice
Put less water against the
scale.
For softer rice
Put more water against
the scale.
For freshly-harvested
rice
Put less water against the
scale.
For whole rice
Put the amount of water
on the scale.
For old rice
During the rainy
season and in summer
Put more water against
the scale.
Adjust the amount of water according to cases, as
it varies depending on the type and area where the
rice was harvested, and how it was stored.
Loosen rice immediately after it has
been cooked
While holding the inner pot with a
dry cloth or mitten, cut the whole
rice into four equal portions and
turn them over one by one to
loosen them.
By doing so, coagulation and
stickiness of the rice can be avoided.
Do not keep the rice warm too long
Instead of keeping rice warm for a long time or
keeping small volume of rice or mixed rice warm, it
is recoomended to wrap the rice in plastic wrap
and store it in the freezer.
Tips for cooking tasty rice
About rice
•
It is recommended to purchase rice which has been
polished as recently as possible in such volume
that you can eat up within two weeks to a month.
•
Store rice in a sealed container in a dark, cold place.
Do not leave rice in a sieve basket after
washing it
Avoid leaving rice
in a sieve basket
after washing it.
Water that is not appropriate for cooking
It causes drying out
or hardening of rice.
( )
It causes a yellow
discoloration or mushy rice.
(
)
Water temperature of 30°C or less
It is recommended to use cold
water when you cook rice by
setting the timer in hot weather.
A high water temperature
causes poorly-cooked rice
and/or bad odors.
(
)
Please clean the rice cooker as soon as it
has cooled after use
After washing the inner lid
and steam vent, wipe them
with a clean dishcloth to
remove water.
If the rice cooker is
left dirty, it can cause
bad odors.
Do not leave rice in
the pot after turning
off Keep Warm mode.
( It may cause a bad
odor.)
(
)
The rice grains
crack and
become mushy
when cooked.
Use cold water
in summer.
Ionized water
over pH 9
Hard mineral
water
Do not shake the measuring cup.
Remove and
wash the filter.
Wash the inner lid
and steam vent and
keep them clean.
Cooking rice
RC-DS1018K_EN_0809.indd 15 2016/08/09 10:49:07
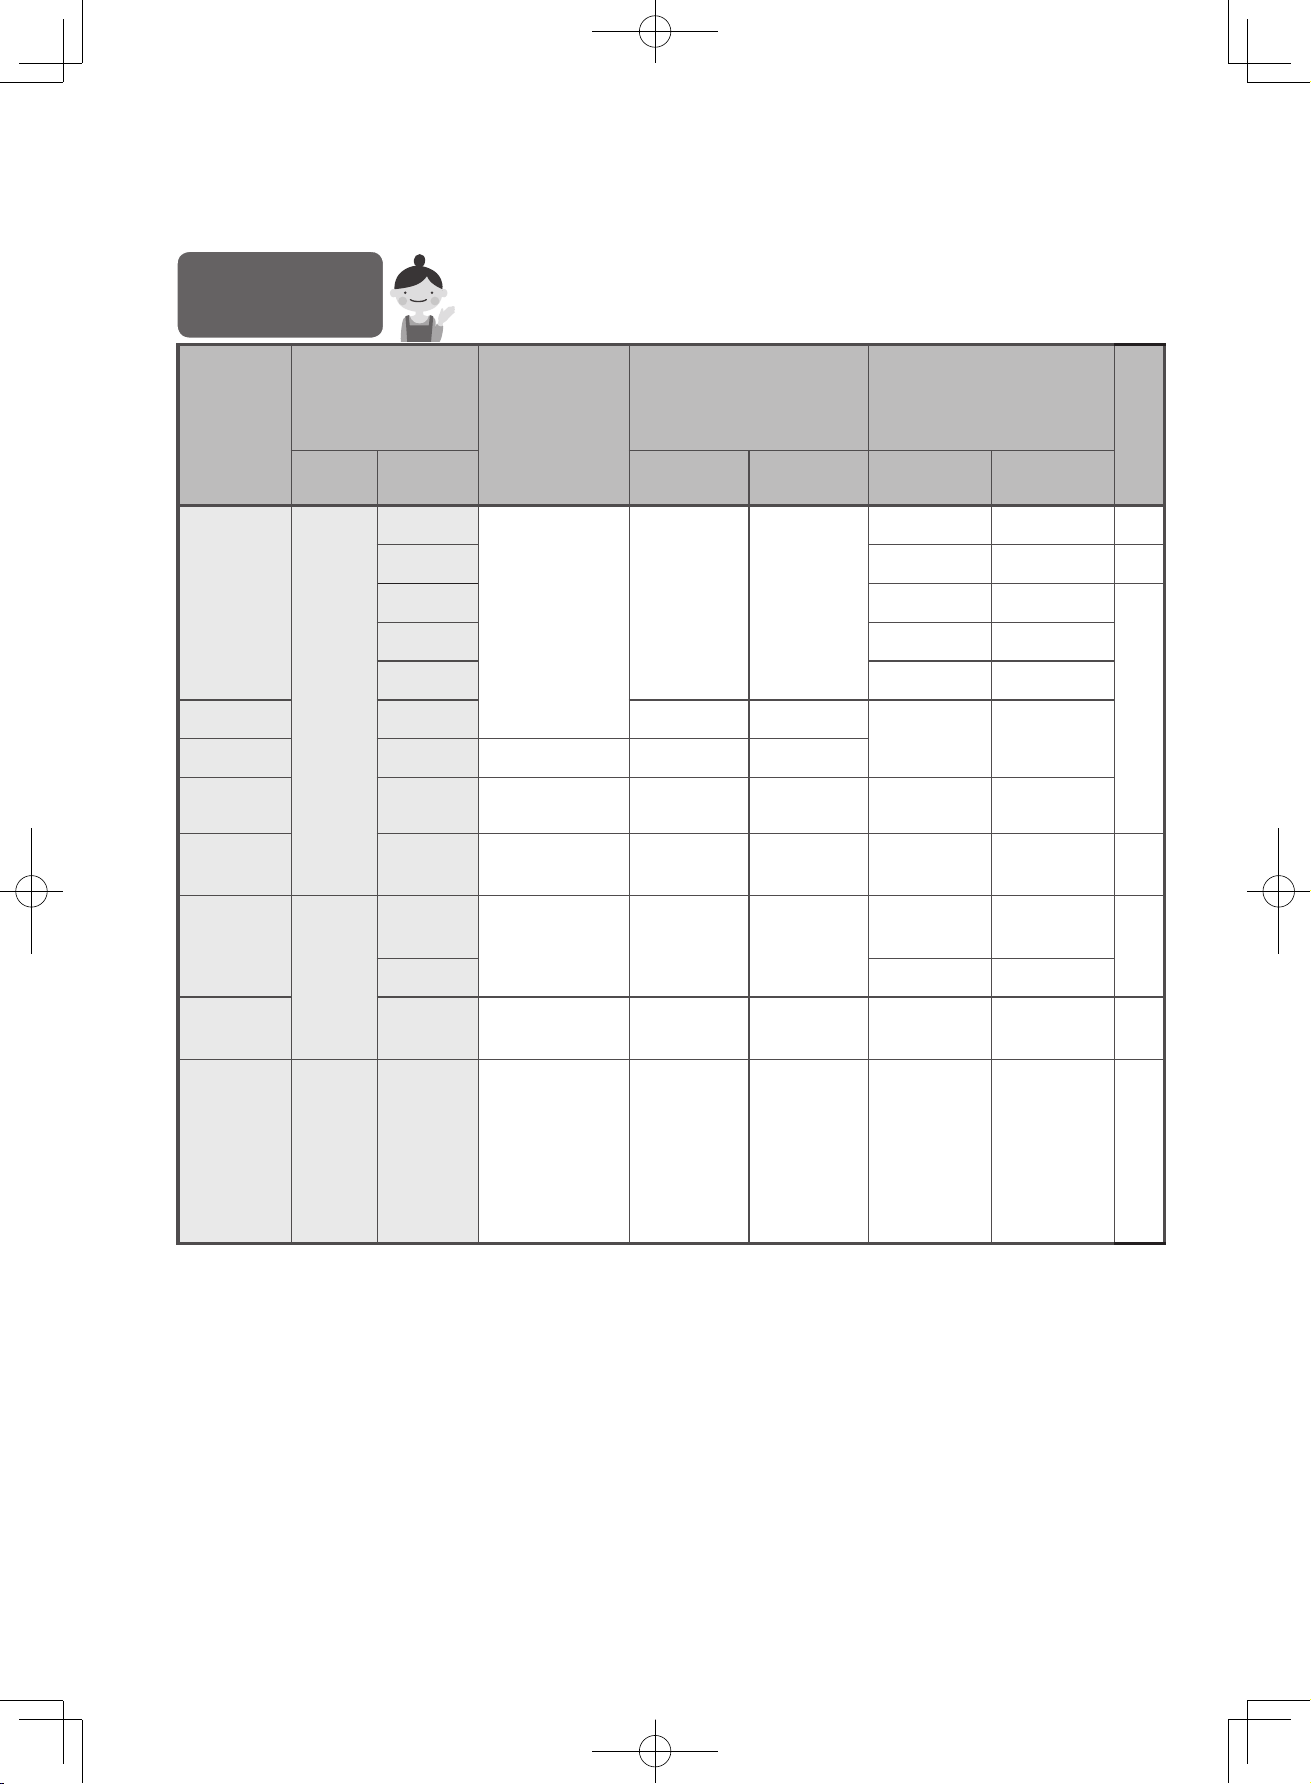
16
Cooking courses
Select the cooking course appropriate to your choice and water level scale
on the inner pot.
• Select your preferred cooking course for white or pre-washed rice. (See page 18.)
• See page 19 for "Tips for cooking rice".
★
: The minimum and maximum rice-cooking volumes differ from the respective water level scales on the inner pot.
* : For <Washed> rice, the cooking time is approximately 5 minutes longer. (The displayed cooking time is also 5
minutes longer.)
• Actual cooking time may vary by about 10 minutes depending on the volume of rice, water temperature, amount of
water, etc. Use the cooking time as a guide. (The cooking times are based on the following conditions: Voltage of
220V, a room temperature/water temperature of 23°C, and the standard amount of water.)
• When you want to cook softer congee, reduce the amount of rice or increase the amount of water. Be sure not to add
water exceeding the maximum water level scale for “Congee” on the inner pot.
To cook...
Course
Water level
scale
Cooking volume
Unit: Cups
( ) indicates the max. cooking
volume when adding
ingredients
Approximate cooking time
Unit: Minutes
The number in brackets is the
displayed cooking time
Pressure
Type of
rice
Cooking
course
1.0 L type 1.8 L type
1.0 L type 1.8 L type
Rice
White
or
Washed*
Delicious
White rice /
Pre-washed rice
0.5 to 5.5 1 to 10
50 to 60 (55) 55 to 70 (60) Yes
Hard 35 to 45 (40) 40 to 55 (45) —
Sticky 55 to 65 (60) 55 to 70 (65)
Yes
Quick 25 to 35 (30) 25 to 40 (30)
Regular 55 to 65 (60) 55 to 70 (65)
Mixed rice Mixed 1
★
to 4
★
2
★
to 6
★
40 to 50 (45) 45 to 60 (50)
Sweet rice Mixed Sweet rice 2 to 4 3 to 6
Sushi rice Regular Sushi rice 1 to 5.5 2 to 10 55 to 65 (60) 55 to 70 (65)
Congee Congee Congee
0.5 to 1 (0.5)
0.5 to 1.5 (1)
95 to 105
(100)
95 to 105
(100)
—
Brown rice
Brown
Delicious
Brown rice 1 to 4 (3) 1 to 8 (6)
100 to 110
(105)
100 to 115
(110)
Yes
Regular 65 to 75 (70) 65 to 80 (75)
Brown rice
congee
Congee Congee
0.5 to 1 (0.5)
0.5 to 1.5 (1)
110 to 120
(115)
110 to 120
(115)
Yes
Rice with
mixed grains
Germinated
brown rice
Partially
milled rice
Whole rice
Grains Regular
White rice /
Pre-washed rice
1
★
to 4
★
(3) 2
★
to 8
★
(5) 50 to 60 (55) 55 to 70 (60) Yes
Guide for amount
of rice to be cooked
and cooking time
White rice
Pre-washed rice
( )
RC-DS1018K_EN_0825.indd 16 2016/08/25 8:43:01
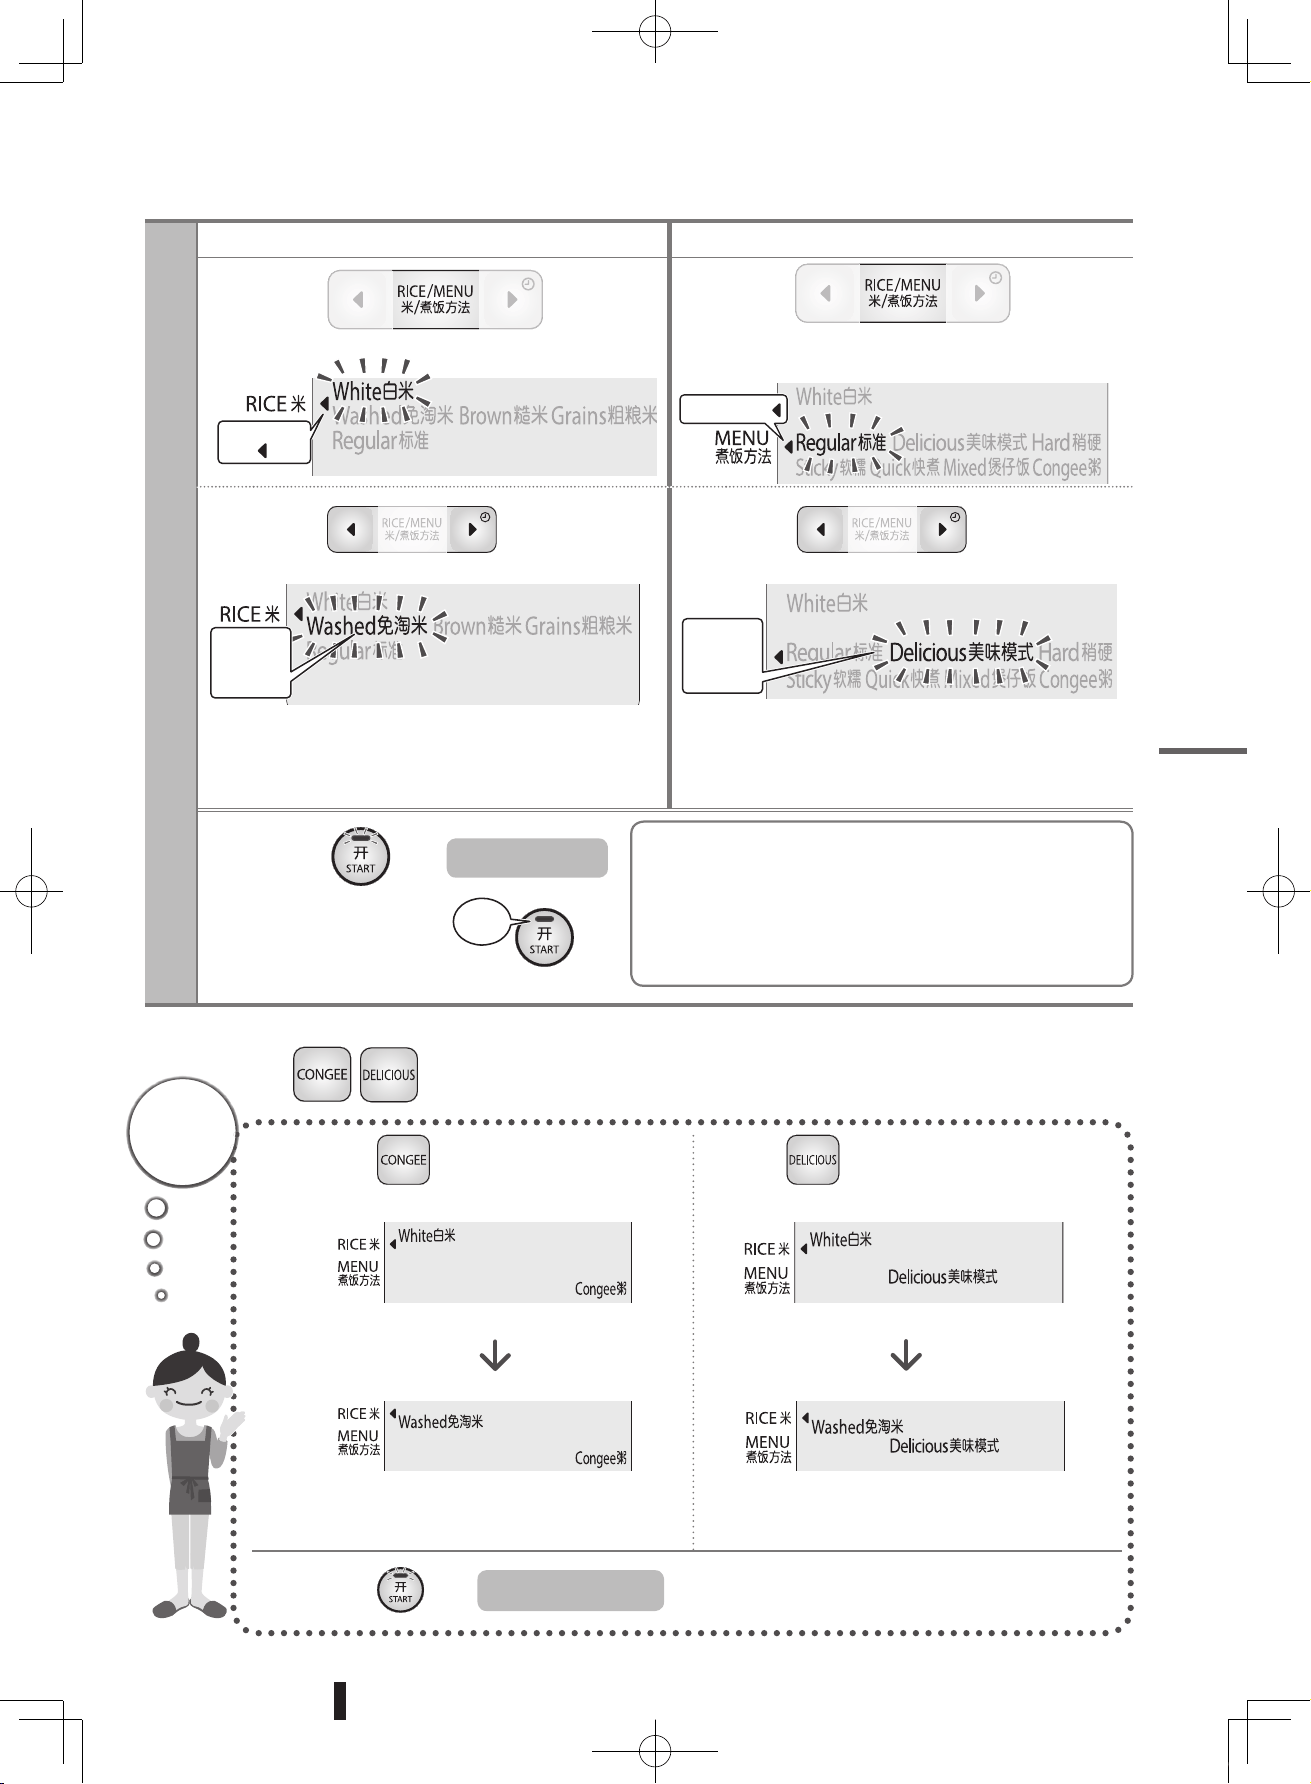
17
1
Press key. Press key.
Press once to select <Congee>.
• The memorized rice type will be selected.
Press again to change the rice type.
• Every time the CONGEE key is pressed, the
rice type changes between <White>,
<Washed> and <Brown>.
Press once to select <Delicious>.
• The memorized rice type will be selected.
Press again to change the rice type.
• Every time the DELICIOUS key is pressed, the
rice type changes between <White> and
<Washed>.
2
Press key.
Cooking starts
Use keys to easily select <Congee> and <Delicious>.
Operation
Select the type of rice Select the cooking course
1
Press key once.
1
Press key twice.
* Press once if you have already chosen the
type of rice.
2
Press keys to select.
2
Press keys to select.
• Check the cooking course by pressing the RICE/MENU
key.
* You can check the cooking course by pressing the
RICE / MENU key again. The selected type of rice
and cooking course will light up. (You may skip
this step.)
3
Press key.
Cooking starts
Quick
settings
♪
Setting the type of rice and cooking course
The cooker memorizes the settings for the following
cooking courses, so there is no need to set them each time.
• <White> and <Washed> : <Regular>, <Delicious>,
<Hard>, <Sticky>, <Quick> and <Congee> courses.
•
<Brown> : <Regular>, <Delicious> and <Congee> courses.
• <Grain> : <Regular> course.
Type of rice
The selected
type of rice
flashes
(Go back) (Go back)(Go forward) (Go forward)
The selected
cooking
courses flashes
Cooking course
♪
1 short beep
♪
2 beeps
Lights
♪
1 short beep
♪
3 short beeps,1 long beep
♪
1 short beep
♪
3 short beeps,1 long beep
• The START lamp lights up.
Cooking rice
RC-DS1018K_EN_0809.indd 17 2016/08/09 10:49:10
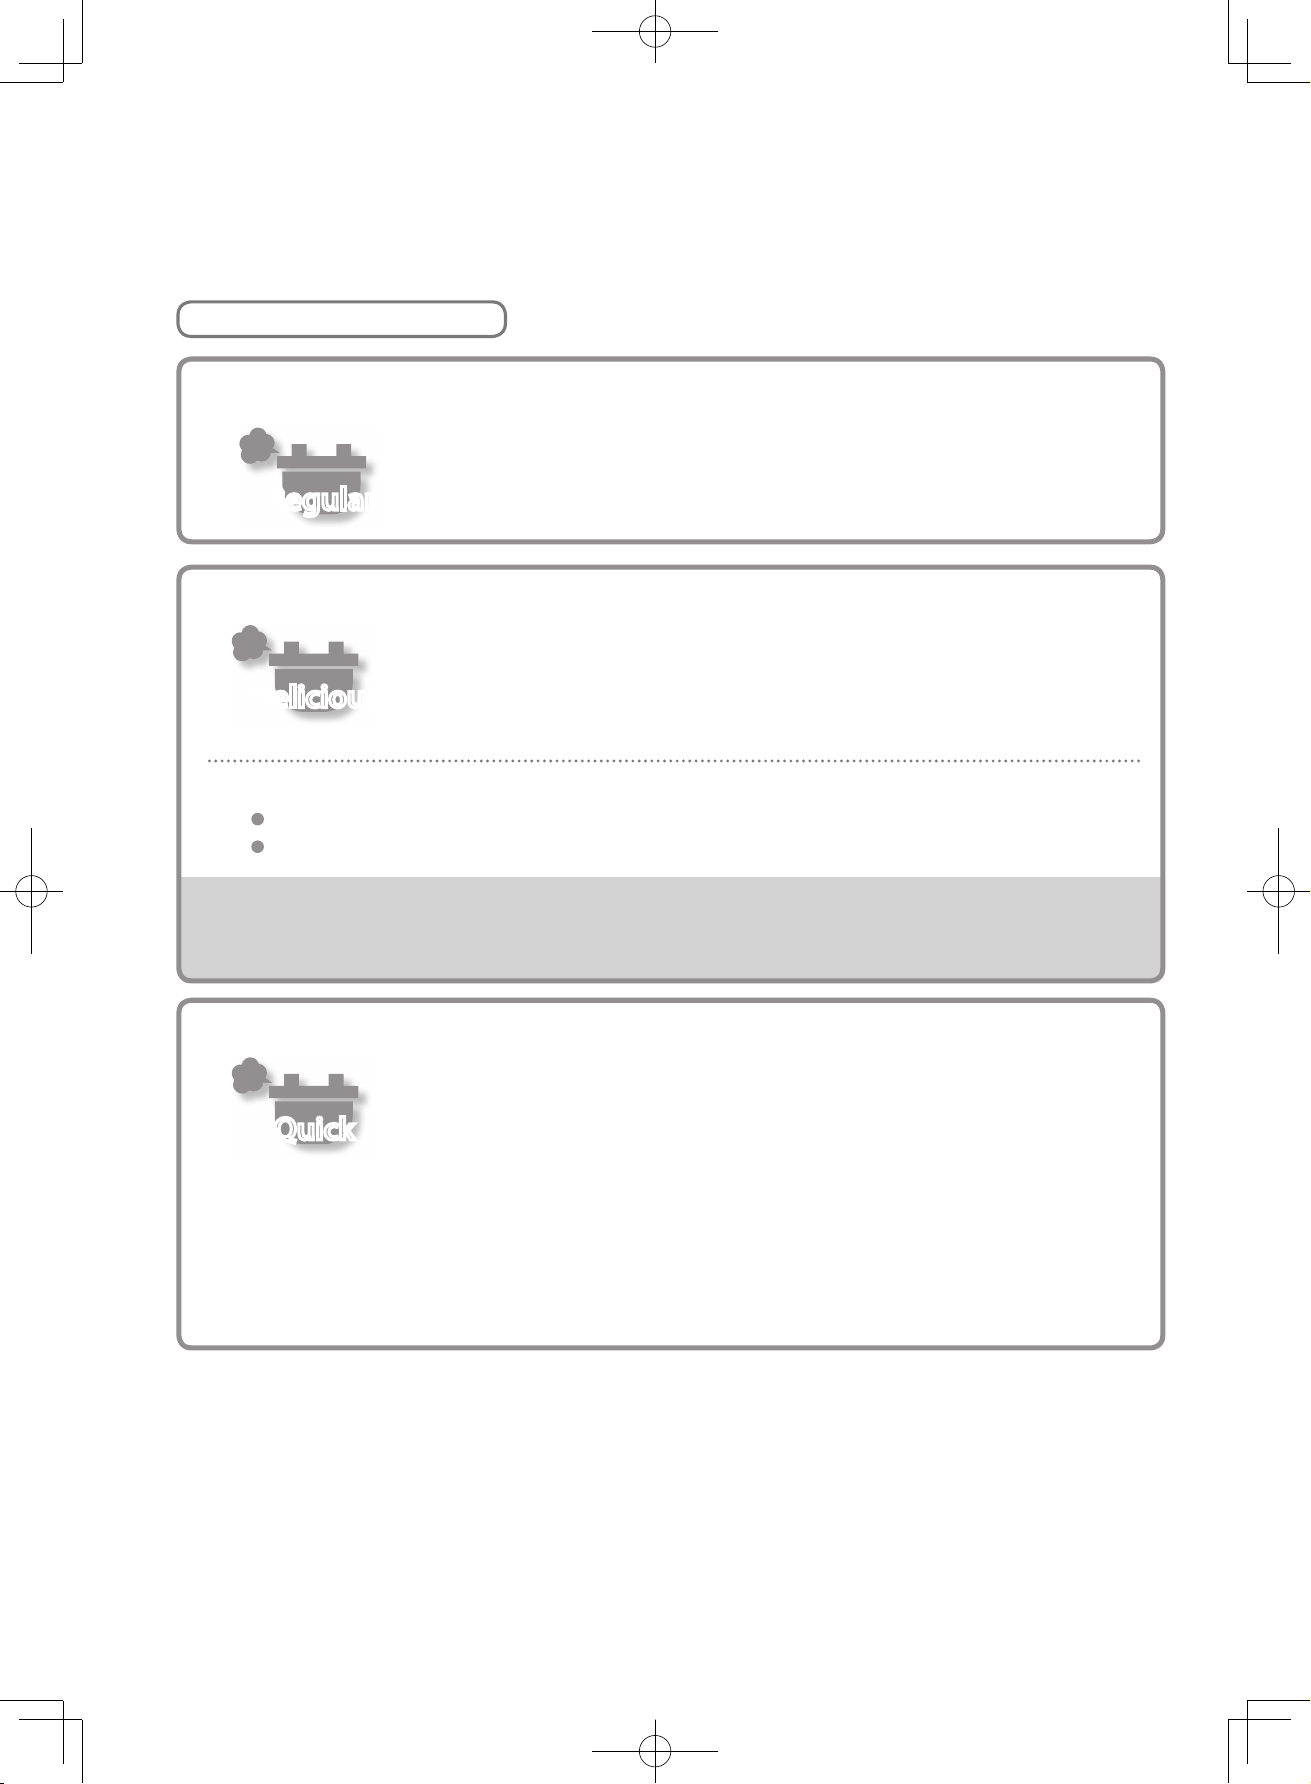
18
Using different cooking courses
For <White> or <Washed> rice
Select your preferred cooking course.
■ When you want the rice to taste really good
Delicious
The cooker cooks rice to bring out the intrinsic deliciousness of the rice.
After trying rice Delicious, try another course according to your prefferred hard or sticky rice texture.
Hard :
When you want the rice to be nice and firm.
Sticky :
When you want to eat sticky and soft rice.
When you cannot cook rice the way you like
If it is soft
→
Reduce water or select <Hard> for cooking.
If it is hard
→
Increase water or select the <Sticky> cooking course. Soak rice before cooking it.
■ If you are in a hurry and want the rice to be cooked soon
Quick
There is time to make the rest of the meal when the rice is cooking.
• Since this cooking course prioritizes cooking speed, rice may end up being a little bit hard, or slightly watery. To
prevent this, soak rice in water in advance, or steam it longer without opening the lid after the cooker has
entered the Keep Warm mode.
• The following kinds of rice cannot be cooked using <Quick> course.
Mixed rice / brown rice / congee / sweet rice / any other rice apart from white rice and pre-washed rice / Rice
with mixed grains
■ Regular cooking method
This is the default cooking course.
If it is not to your liking, try the Delicious, Hard or Sticky course.
Regular
RC-DS1018K_EN_0809.indd 18 2016/08/09 10:49:11
19
Cooking courses when other grains are mixed with the rice
When mixed with white rice
→
<Grains / Regular>
When mixed with brown rice
→
<Brown / Regular>
When mixed into white rice congee
→
<White / Congee>
When mixed into brown rice congee
→
<Brown / Congee>
Pre-washed rice
(Processed rice that does not require pre-washing)
•
When water is poured in, stir the rice from the bottom to mix the rice and water together. If the water becomes cloudy,
drain the water and wash it again 1 or 2 times. (This prevents the rice from cooking badly, scorching and boiling over.)
•
Add water according to the "Pre-Washed rice" water level scale, and select the <Washed> course
.
Mixed rice / sweet rice
➡
For cooking "Mixed rice with ingredients" and "Sweet rice with red beans" see pages 26 and 27.
• For tips on cooking these types of rice, see "When you add ingredients and seasonings" on page 26.
• When making sweet rice, if only sweet rice is used, the cooked rice becomes too soft, so add 1 cup of standard rice
to every 2 cups of sweet rice. When cooking only sweet rice, adjust water volume to slightly below the water level
scale of "Sweet rice".
Rice with mixed grains
• Use the <Grains / Regular> course.
Up to 3 cups (1.0 L type) / 5 cups (1.8 L type) can be cooked.
•
For the amount of mixed grains to be added to rice, follow the
instructions printed on the package of the mixed grains. (If
there are no instructions on the package, add the mixed grains
at about 10% of the amount of the white rice to be cooked.)
You may also cook pre-washed rice.
•
Wash white rice quickly until water becomes clear, add water
to the appropriate water level scale by the number of cups for
"White rice"; or by the number of cups for "Pre-washed rice"
for pre-washed rice.
• When cooking this type of rice the steam vent may become
dirty, so be sure to clean the inside of it.
If you are using grains that float in water, soak the rice
and grains for 2 to 3 hours, and only cook the rice when
the grains have sunk.
( Floating grains may block the steam vent, causing steam
leaks, or the deformation or damage of the cooker.)
Congee / brown rice congee
•
Use the <Congee> course.
• Add salt and other seasonings after the congee is cooked. (If seasonings are added from the beginning, the rice may not
be cooked well.)
•
Depending on the type of rice, the water temperature, and how the rice was washed, water droplets may come out of the steam vent.
• Congee cannot be made from cooked rice.
When making traditional Japanese congee that contains 7 herbs of spring, do not mix the greens from the
start. (The steam vent may become blocked, causing steam leaks, burns and damage.)
Boil the greens, and add them after the congee is cooked.
Brown rice
•
Use the <Brown / Delicious> or <Brown / Regular>
course.
•
<Brown> takes longer to cook than white rice. The
rice can be cooked immediately after it has been
washed.
• When cooking brown rice mixed with white rice,
soak the brown rice for 2 hours prior to cooking
and select the <White / Sticky> course.
Germinated brown rice
• Use the <Grains / Regular> course.
• It is recommended to cook germinated brown rice
with white rice in a ratio of 1 to 2. You may also
cook germinated rice only.
Tips for cooking rice
Try cooking rice, and then
adjust the amount of water.
See page 16 for "Cooking courses".
•
Since congee, brown rice, multi-grain rice and soup is
high in water content, ensure to use the dedicated
cooking courses (not <Quick> course, and so on).
(Otherwise, the cooker may boil over or you may get burned.)
•
Do not increase the amount of water too much.
( The allowable additional amount of water is up to 2 mm over
the regular water level scale as a guide.)
Partially milled rice
• Use the <Grains / Regular> course.
•
Wash partially milled rice thoroughly to remove its brans.
•
Depending on the rice milling degree, the milled brown
rice may be called differently; "30%-milled rice" (similar to
brown rice), and "70%-milled rice" (similar to white rice).
Cooking rice
RC-DS1018K_EN_0809.indd 19 2016/08/09 10:49:11
20
Setting the timer
When setting the timer, the vacuum pump and
other parts produce sounds. (See page 35.)
You can finish cooking rice at the timer set time.
As the cooker can memorize two time settings, you can use them in various ways, such as using Timer1 for
a breakfast, and Timer2 for an evening meal.
Preparation
Check to see that the current time is correct.
• If the current time is wrong,
cooking cannot be completed at
the preset time.
Wash rice and adjust the amount of water for
cooking. Put the inner pot into the cooker main
body and close the outer lid.
• The timer cannot be set when the
inner pot is not in the cooker.
Operation
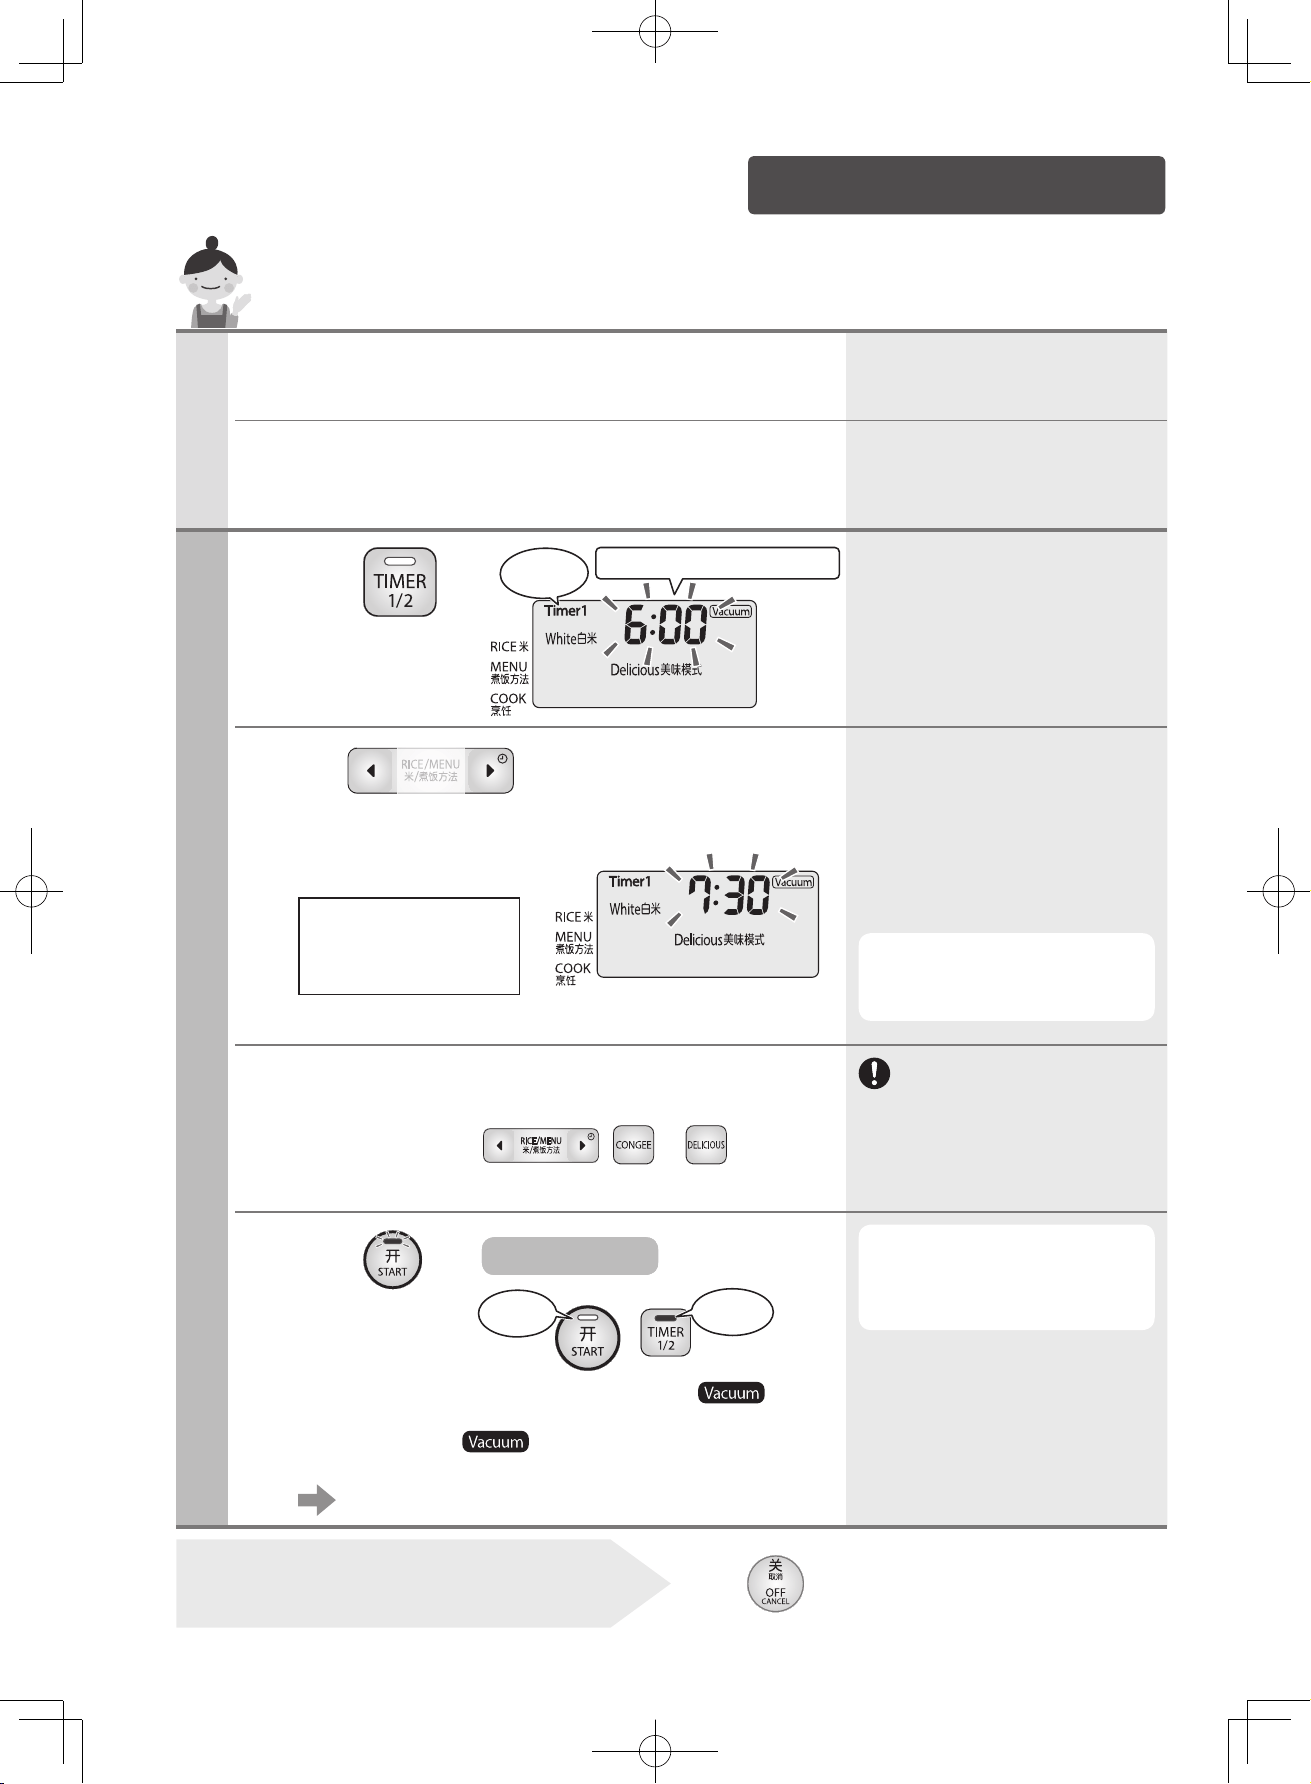
1
Press
key
to select Timer1
or Timer2.
•
The display changes between Timer1
and Timer2, each time the TIMER key
is pressed.
2
Use keys to set the time for the
completion of cooking.
24-hour clock display
7 AM ……… 7:00
7 PM ……… 19:00
Example: Completing cooking
at 7:30 a.m.
• The timer clock can be set in units
of 10 minutes.
• If you hold down the
Go back/Go
forward
keys, the time will change
quickly.
* For a timer setting that does not
exceed 2 hours, cooking starts
immediately.
The cooker memorizes the preset
time, so you can skip this step the
next time you want to set the timer.
3
Check the course.
• Set the cooking course for what you want to cook.
Set the course using
, or key.
(For details, see page 17.)
Make sure that you select an
appropriate cooking course for
brown rice, congee, and brown
rice congee.
Otherwise, the cooker may boil
over or you may get burned.
( )
4
Press
key.
The timer is set.
• The vacuum pump soon starts operating with flashing,
and produces a beep sound for a few minutes.
After a while, the
indication lights up, and then turns
off while the timer is set.
Cooking is completed at the preset time.
If the START key is not pressed,
the cooker will beep 4 times.
(
The key must be pressed to complete
the timer setting.
)
• When cooking starts, the START
lamp lights up. (The lamp stays lit
up until cooking is complete.)
• When cooking starts, the time to
the completion of cooking is
displayed. (For details, see page 11.)
To cancel the timer setting
If an error is made in the operation
Press
key.
Displayed
Lights
is unlit
Changes to the preset time
(Go back) (Go forward)
♪
1 short beep
♪
1 long beep, 2 short beeps
RC-DS1018K_EN_0809.indd 20 2016/08/09 10:49:13

21
When cooking rice with the timer set
■ "×" means the timer should not be used. (Otherwise, the rice may have poor quality or may spoil, or
the inner pot may corrode.)
White rice
Pre-washed
rice
Brown rice Congee
Brown rice
congee
Partially
milled rice
Mixed
grains
Mixed rice
Germinated
brown rice
○ ○ ○ ○ ○ ○ × × ×
■ Avoid setting the timer for longer than 14 hours (8 hours in summer).
Long hours of a timer setting causes fermentation of rice, resulting in bad smell.
Setting the clock to the current time
The time is displayed using a 24 hour clock. (Midnight: 0:00/Noon: 12:00)
1
Plug in the power plug, and press key for 2 seconds or longer.
Time on the display flashes.
2
Use keys to change
the time.
Hold down the key to change the clock
on fast feed, in units of 10 minutes.
• The clock cannot be set while cooking rice, keeping it warm or
preparing food, or when the timer is set.
• The cooker makes the following sounds during the setting of
the clock.
12 midnight ………
♪
a pattern of beeps
12 noon ……………
♪
the pattern of beeps is repeated twice
Every 10 minutes …
♪
1 long beep (
does not sound when the
time is being changed
quickly)
Every hour …………
♪
2 short beeps
3
Press key to complete the
clock setting.
The clock display stops flashing.
Note
• If the rice turns out slightly mushy, reduce the amount of water as you like.
• In case of cooking with the timer set, the rice on the inner bottum surface of the inner pot may become light brown
because the starch in the rice settles at the bottom of the pot. To avoid this, wash the rice well.
• The actual time for completing the cooking may be delayed by about 10 minutes when the room temperature or
water temperature is low, or when the amount of water in the pot is increased.
• See page 36 to stop the vacuum pump from making a sound while the timer is set.
(Go back) (Go forward)
When using the timer
To check the current time while the timer has been set
Press
key.
The current time is displayed
while the key is pressed down.
At the
same time
The cooker beeps to indicate the time until the rice will
be cooked.
♪
2 short beeps: Start and end signal
♪
A pattern of 3 beeps: 5 hours
♪
1 short beep: 1 hour
( Times under an hour are rounded up to an hour.)
Cooking rice
RC-DS1018K_EN_0809.indd 21 2016/08/09 10:49:13
22
Keep Warm mode
(reheating rice)
The vacuum pump produces sounds
when keeping rice warm. (See page 35.)
Opening the outer lid
➡
page 10
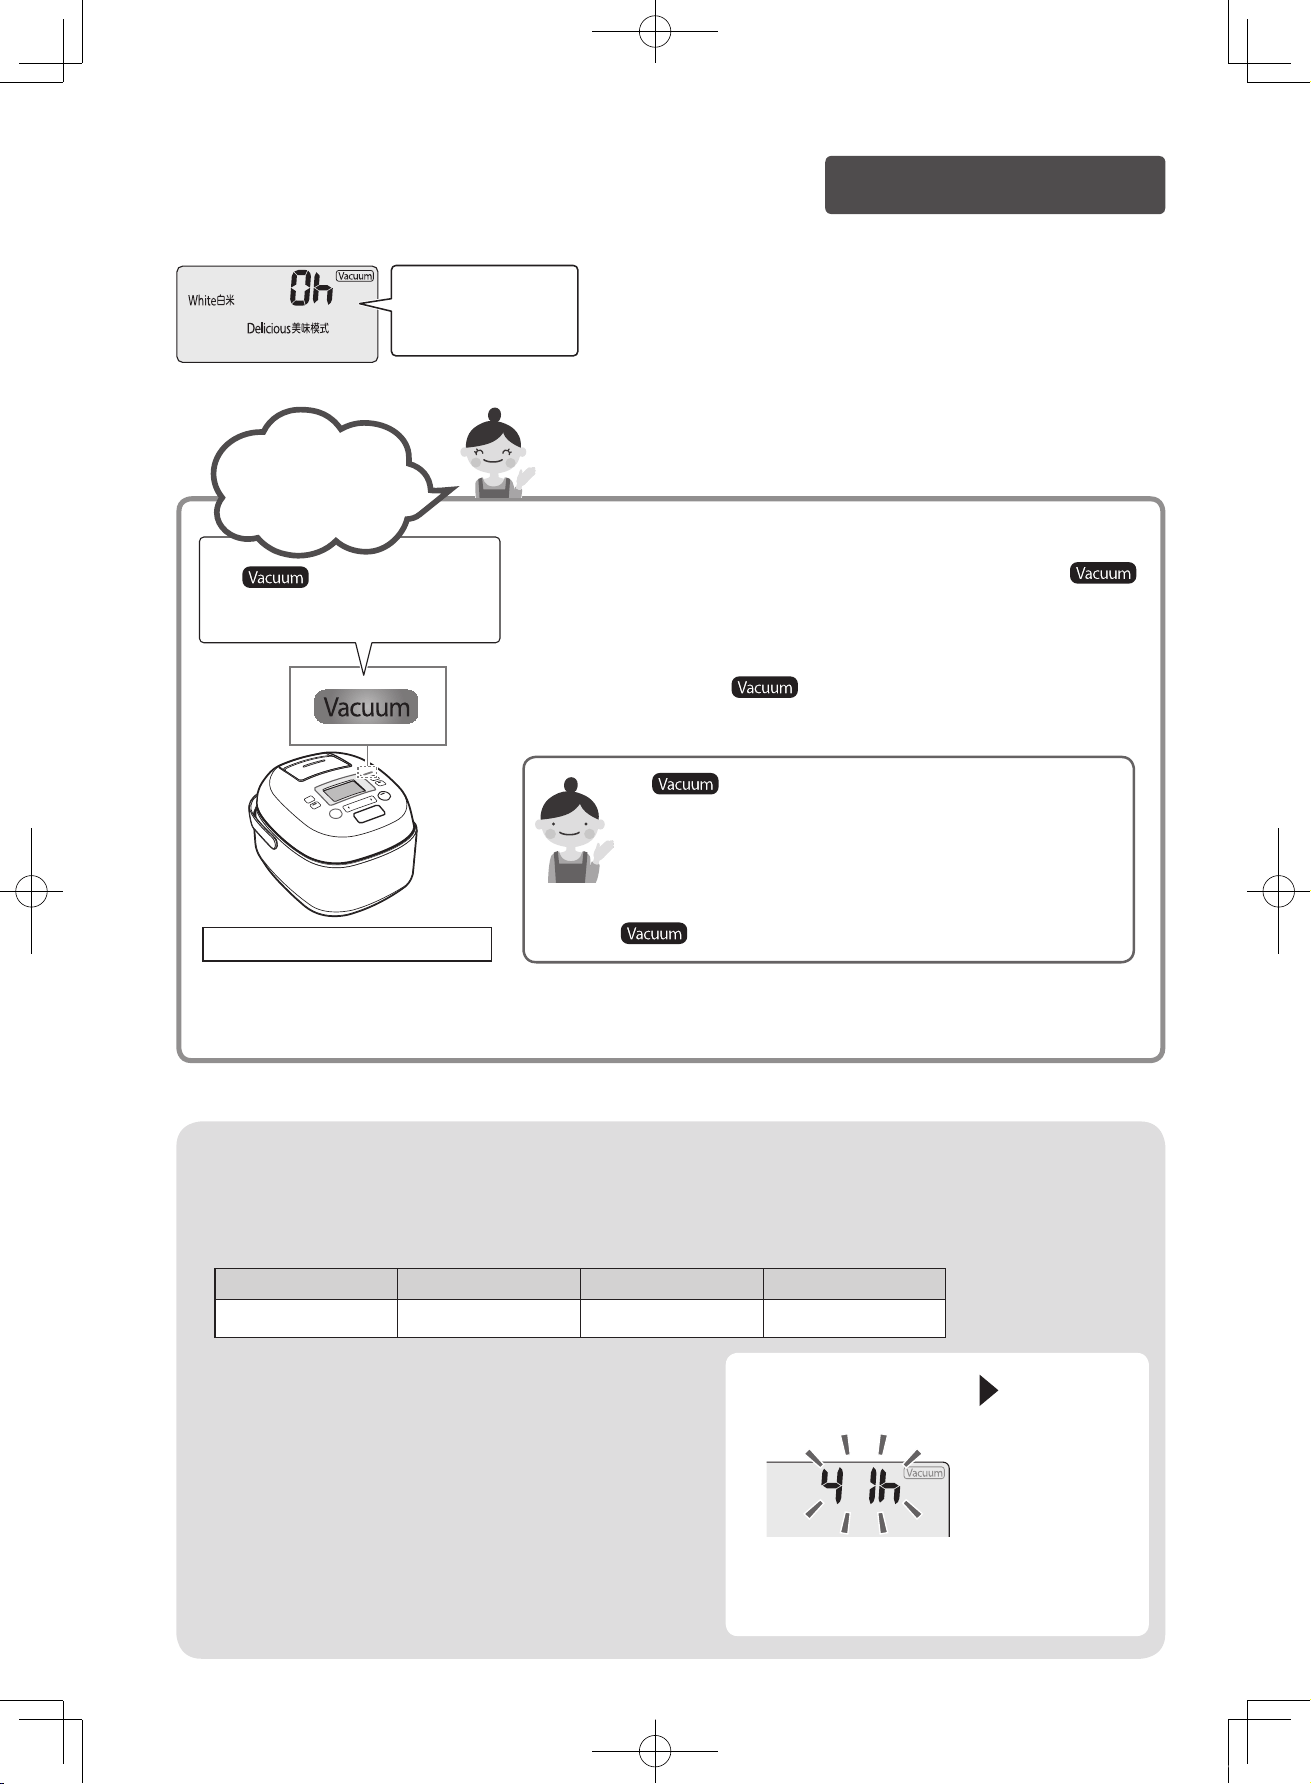
*: Usually it takes 1 to 3 hours, but the time varies depending on the
amount of rice and how well the rice has been loosened.
If there is a large volume of rice, and it is not loosened, the
indication may not light up for 5 hours.
When there is a small volume of rice, and it has been loosened, the
Vacuum indication may light up during the display of "0" hour.
• The vacuum pump operates regularly to maintain the vacuum. This
produces some sounds.
will flash.
• The cooker does not enter the vacuum state if the rice has been kept
warm for 41 hours or longer.
The indication does not light up in the following cases
• Within 1 to 3 hours after the completion of cooking
*.
• For 30 minutes after the outer lid has been opened in the
Keep Warm mode.
• When the rice has been kept warm for over 41 hours.
If the open button is accidentally pressed in the Keep Warm mode
and the
indication turns off, it will turn on in 30 minutes.
(
)
* Rice becomes discolored easily in the following cases:
When the amount of water was not sufficient for rice cooking; when rice was not washed sufficiently; when you
are keeping small volume of rice warm; and when the lid has been opened and closed many times.
The cooker preserves the flavor of the rice by creating a
vacuum in the inner pot.
When cooking is complete, the operation of the cooker switches to the Keep Warm mode automatically.
•
To keep the rice warm without spoiling its flavor, the cooker
controls the keep-warm temperature depending on the conditions.
• Press the OFF key to stop keeping rice warm.
(
The KEEP WARM lamp turns off and the current time is displayed.
)
• Removing the inner pot turns the cooker off automatically.
(The KEEP WARM lamp lights up.)
Do's and don'ts when keeping rice warm
■
Follow the guidelines at the time of keeping rice warm.
(Otherwise it can cause bad odors, dry rice, and discoloration.)
Do not use the Keep Warm mode for the courses marked with "
×
". (Otherwise it may cause deterioration of rice quality,
spoiling of the rice or corrosion of the inner pot.)
Rice with mixed grains, brown rice, partially milled rice, or whole rice can be kept warm. However, It is recommended to
eat it earlier than usual or store it in the freezer because keeping it warm could easily cause bad odors or discoloration.
Brown
・
Grains White
・
Washed Congee
Mixed
○
(up to 12 hours)
○
(up to 40 hours)
× ×
If the environment is harsh (cold climate or high ambient
temperature), eat the rice earlier than usual.
■
Do not leave the rice scoop in the inner pot
(this
may cause bad odors).
■
Do not use the Keep Warm mode with cold rice
(this may cause bad odors).
■
Do not turn the Keep Warm mode off while rice is
in the pot
(this may cause bad odors).
* When the rice smells bad or is mushy around the edge of the
pot (See page 38.)
The elapsed time for
keeping rice warm is
displayed in units of
1 hour.
The indication lights up in a
few hours* after cooking is complete,
and the cooker creates a vacuum.
When the time for keeping rice
warm exceeds the maximum
time, the display flashes.
Stop keeping
rice warm.
Press the OFF
key and remove
the rice.
The display flashes after 41 hours.
(A vacuum is not created.)
For <Brown> and <Grains> courses, it flashes
after 13 hours.
Keep Warm
with Vacuum
RC-DS1018K_EN_0809.indd 22 2016/08/09 10:49:14
23
In Keep Warm mode
To display the current time
Press
key.
The current time is displayed while the
key is pressed down.
Tips for
using the
Keep Warm
mode
• If you find that rice becomes mushy when it is kept warm, do not let rice adhere to the peripheral side
of the inner pot, then loosen the rice occasionally.
• If the rice will be kept warm for a long time or a small volume of rice or mixed rice has been cooked, it is
recommended to wrap the rice in plastic wrap and store it in the freezer.
To start the Keep Warm mode when the cooker is off
Operation
Press key to enter the Keep Warm
mode.
• The KEEP WARM lamp lights up.
Reheating rice that is being kept warm
Operation
Loosen the rice being kept warm, and close
the outer lid.
Press key to start reheating the rice (for 9 minutes).
The buzzer sounds when reheating is complete.
(The cooker goes back to the Keep Warm mode.)
• The KEEP WARM lamp flashes, and the time left
for reheating is displayed.
《
To stop reheating
》
Press the KEEP WARM key to return to the Keep
Warm mode.
• Do not operate the reheating as follows.
• Repeat reheating operation. (Causes drying out
or yellow discoloration.)
• Reheat cold rice. (Causes bad odor.)
• Putting too much rice in the pot may cause
insufficient reheating. (Do not allow the amount
of rice to exceed half of the pot as a guide.)
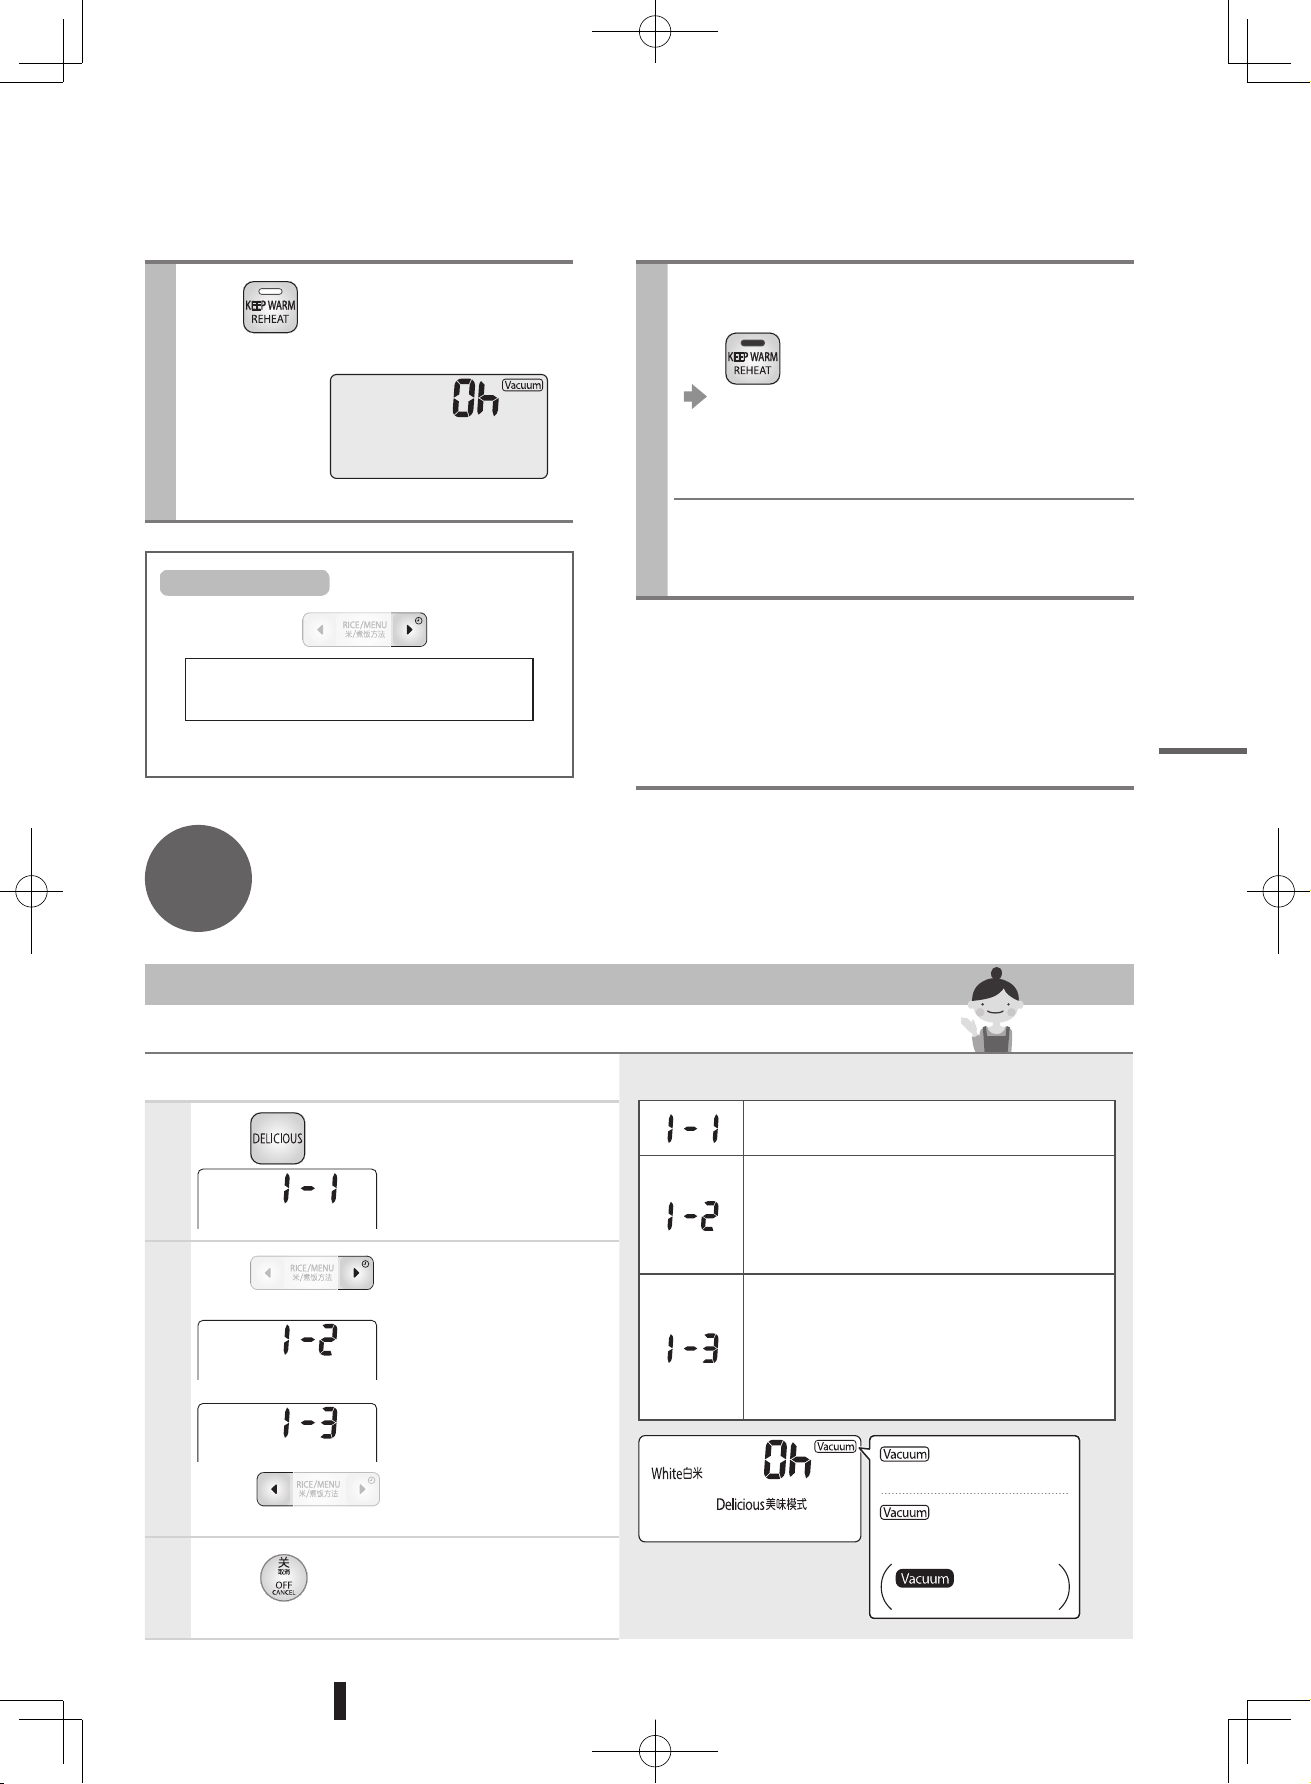
To stop the vacuum pump from making noise when keeping rice warm
Use the following procedure to change the settings for pump operation in the Keep Warm mode.
Plug in the power plug, and start operation with the power off.
Pump operation in the Keep Warm mode
Default setting when shipped
The interval between vacuum pump
operations is longer than the default setting.
• Do not keep rice warm for more than 32
hours when using this setting.
The vacuum pump does not operate in the
Keep Warm mode. (No vacuum is created
in the Keep Warm mode.)
• Do not keep rice warm for more than 24
hours when using this setting.
1
Press key for 5 seconds or longer.
Default setting when
shipped
2
Press key to change the setting.
The interval between
vacuum pump operations
becomes longer.
The vacuum pump does
not operate.
* Press key to go back through
the settings in order.
3
Press key to nish.
Returns to the clock display.
(Go back)
(Go forward)
is displayed for
"1-1" and "1-2"
is not displayed
while keeping rice
warm for "1-3"
does not
light up
Cooking rice
RC-DS1018K_EN_0809.indd 23 2016/08/09 10:49:16
24
Cleaning
Remove any foreign objects from every part of the inner
lid, clamp receiving parts and clamp parts.
Otherwise, the outer lid may open or steam may leak during
cooking, resulting in burns.
Before cleaning the cooker, unplug
the power plug and wait until the
cooker has cooled.
Otherwise, you may get burned.
Do not clean with the following items
(They will cause deformation, corrosion, discoloration, cracks and scratches.)
• Dishwasher / dryer
• Any other washing agent than neutral detergent for kitchen use
• Benzine, thinner, alcohol, cleanser or bleach
• Scrubbing brushes, melamine sponges, and other things that may
cause scratches
* As the steam vent cap is made of
aluminum, it may change color
when using dishwasher/dryer
detergent.
Remove and wash the following parts
(See page 12 for the instructions on how to remove and attach parts.)
Wash
with a sponge and neutral
detergent for kitchen use.
•
Wash soon after the parts are cooled. (Otherwise it may cause bad odors.)
• After cleaning, wipe dry with a clean, dry dishcloth.
■
Inner lid and lter
On each use
• Immerse dirty parts in lukewarm water
so that you may remove the dirt easily.
After cooking with seasonings, clean the inner lid early.
Otherwise, it may get rusty.
Remove foreign objects on each part shown in the figure below using a bamboo skewer or toothpick.
Safety valve
Vacuum air inlet
Pressure regulating part
Pressure control ball
Safety valve
Check valve
Check valve hole
Filter
Remove and
wash.
<Front side> <Back side>
Vacuum air inlet
■
Steam vent
On each use
Wash the inside of the steam vent, and wipe it dry.
• If the steam vent is dirty, the rice may develop bad odors or boil over.
• Steam condenses and leaves water droplets in the steam vent. If this
water is not wiped away, it may fall down when the outer lid is opened.
As water inside the steam vent is hot straight after use, wait until
the main body has cooled down before cleaning.
( )
■
Inner pot, rice scoop and steaming stand
On each use
■
Rice scoop holder and measuring cup
When dirty
Attention
Using the cooker without cleaning it may cause bad odors.
Always keep it clean.
Pressure regulating hole
Inner lid packing
Do not pull on it or scratch it. (It may tear.)
RC-DS1018K_EN_0809.indd 24 2016/08/09 10:49:17
25
Foreign objects, water droplets, and dirt on the main body
Cleaning by boiling (about once a week)
You can do this when you are worried about odors.
1
Put water in the inner pot and close the outer lid.
(Up to water level scale 1 for "White rice")
• Never put anything else
(detergent, etc.) in the inner
pot.
• Do not continuously repeat
cleaning by boiling.
• Some odors may not be
completely removed.
2
Select the <White / Regular> course and press the START key.
It takes about 75 minutes to reach the Keep Warm mode. (The actual time
will be longer than the displayed time.)
3
When the cooker enters the Keep Warm mode, press the OFF key.
Then, when the main body becomes cool enough, clean the inner
lid, steam vent, inner pot and other parts and dry them.
Wipe
with a clean, firmly-wrung cloth.
Do not immerse the main body, the power plug
and the power cord in water; pour water over
them; or wash them in water.
Lid temperature
sensor
Vacuum air inlet
Clamp parts
Vacuum air outlet
Wipe off any water
droplets on the frame.
If any rice grains, etc. have got stuck in the clamp
receiving parts, remove them with a cotton swab.
• If the outer lid is closed with rice grains, etc. in the
holes, the outer lid sometimes cannot be opened due
to congulation of the rice.
Outer surface of
the main body
Wipe with a firmly-wrung cloth.
Air inlet / outlet (bottom surface)
Clean regularly about once a month. To remove dust
and foreign objects, use a vacuum cleaner or the like.
Inner pot stopper
rubbers (4 positions)
These cannot be removed.
■
Heating plate / steam pathway /
vacuum air inlet
Wipe off water droplets in the steam pathway each
time. (Otherwise, they will cause bad odors.)
■
Inner side of the outer lid/frame
If the outer lid is closed with foreign objects stuck
to it, the outer lid will open during cooking,
resulting in burns or injuries.
Wipe off fluid on the frame or seasonings stuck to it.
(Contamination with seasonings may cause rust.)
■
Inside the rice cooker
■
Temperature sensor
■
Lid temperature sensor
Using the cooker when dirty will reduce
efficiency of heat transfer, resulting in poorly-
cooked rice.
When the temperature sensor is dirty
Lightly rub with a fine abrasive paper (about No.
600), and wipe off with a firmly-wrung cloth.
■
Clamp parts and clamp receiving parts
If the outer lid is closed with foreign objects stuck
to it, the outer lid will open during cooking,
resulting in burns or injuries.
Wipe the packing clean as well.
Foreign objects may cause bad
odors, or prevent the cooker from
creating a vacuum.
The packing cannot be removed.
Do not pull it hard.
Holes in the clamp
receiving parts
Cleaning
RC-DS1018K_EN_0809.indd 25 2016/08/09 10:49:17
26
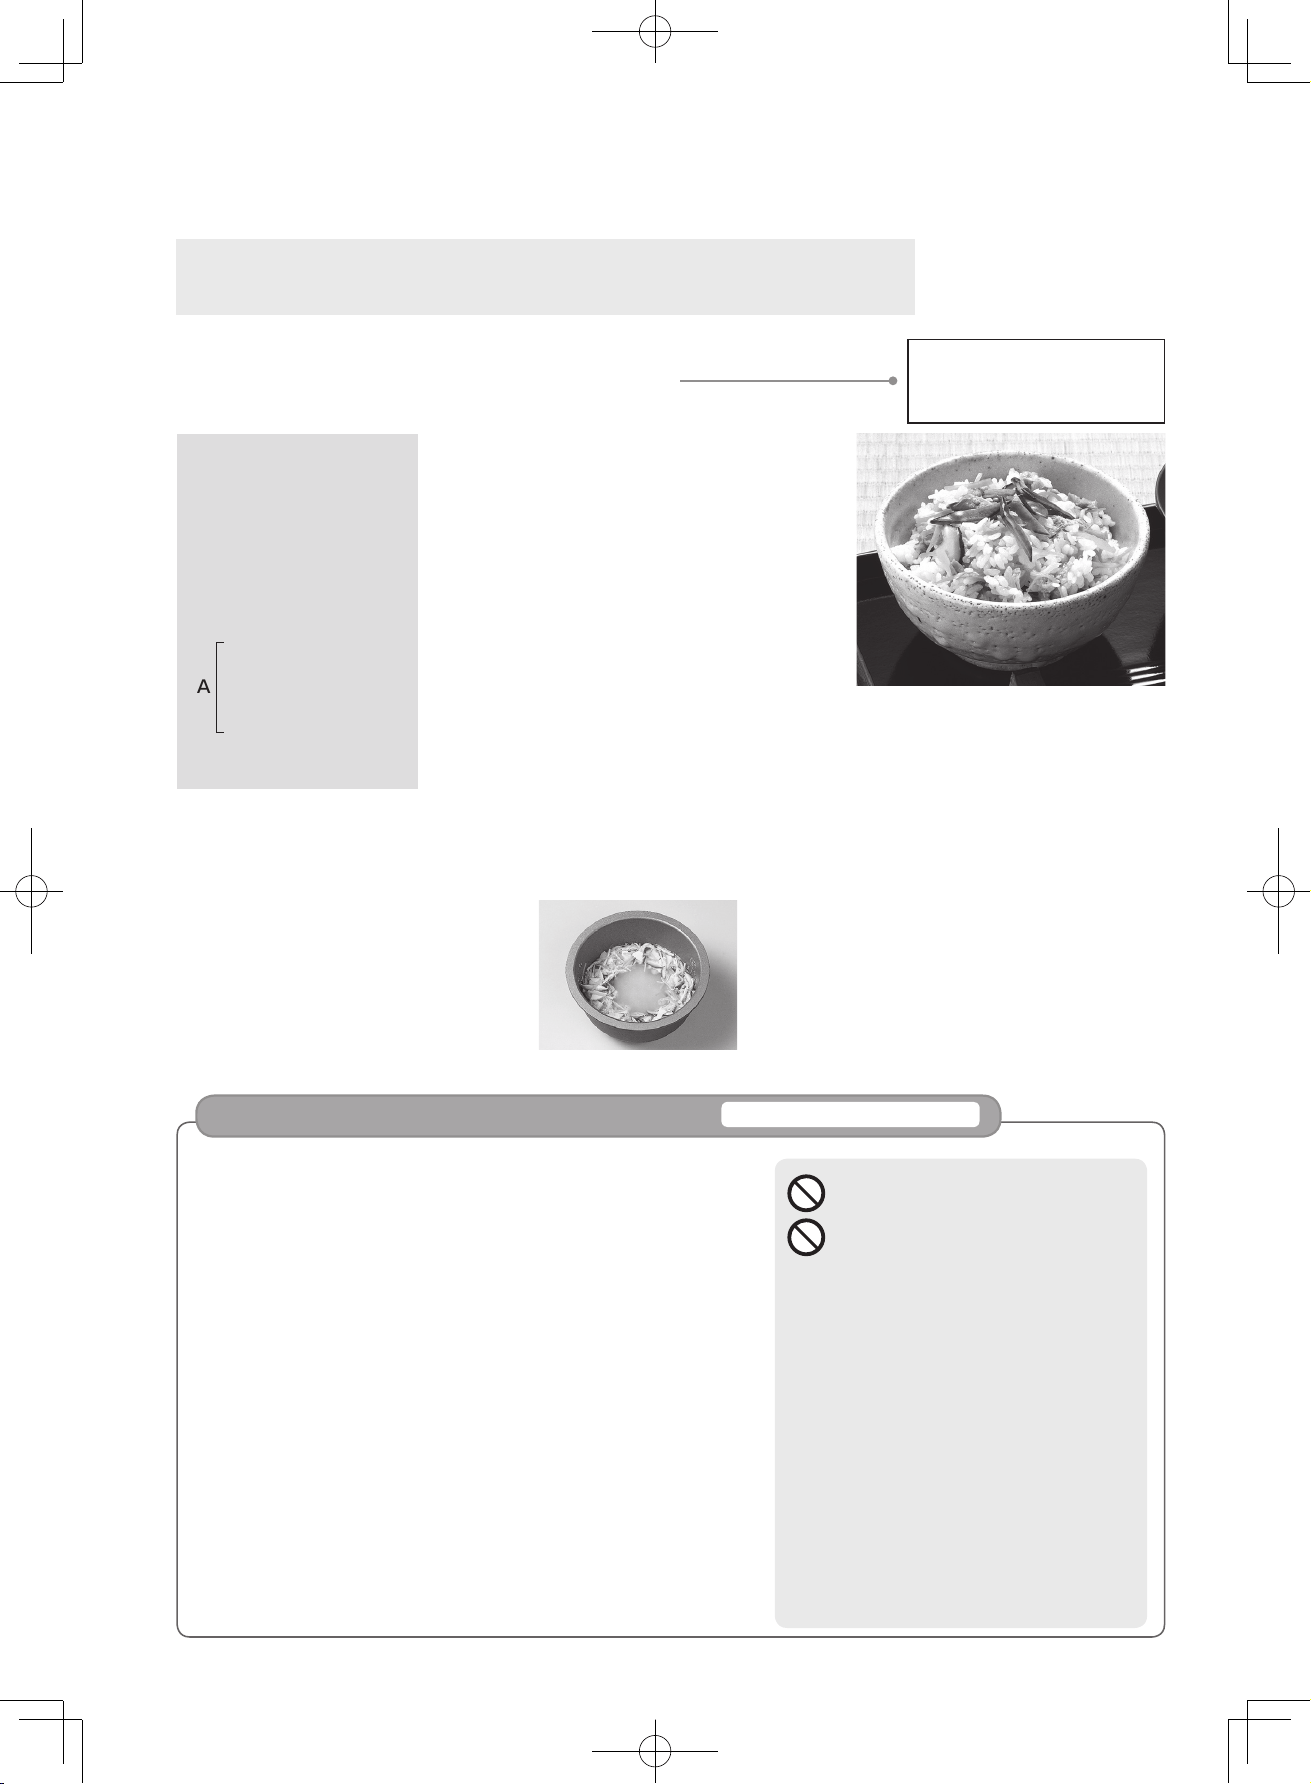
Recipes
• Use the measuring cup provided to measure the rice. (1 cup = about 180 ml)
• 1 tablespoon (tbsp) = 15 ml, 1 teaspoon (tsp) = 5 ml
Ingredients
(for four people)
White rice ………… 3 cups
Carrot ………………… 60 g
Boiled bamboo shoots
… 60 g
2 dried shiitake mushrooms
Chicken breast ……… 60 g
Fried tofu
…… 20 g (about
1
/2 piece)
Sake ………… 1 tbsp
Salt ………………1 tsp
Soy sauce …… 1 tbsp
Japanese soup powder
………………
1
/2 tsp
Water that the shiitake
mushrooms were soaked in
A
Mixed rice with ingredients
Mixed rice
Up to 4 cups for the 1.0 L type
Up to 6 cups for the 1.8 L type
1
Wash the rice quickly until water
becomes clear, and soak it in plenty
of water for 30 minutes.
2
Reconstitute the dried shiitake
mushrooms in water, and cut them
into thin strips. Pour boiling water on
the fried tofu and cut it into thin strips.
Cut the carrot into thin strips, the
boiled bamboo shoots into thin slices,
and the chicken into small pieces.
3
Drain the rice in a sieve basket, and
then put the rice in the inner pot.
Add A to the inner pot, add water
that the shiitake mushrooms were
soaked in and fresh water up to
water level scale 3 for "White rice",
and mix well.
4
Place the cut ingredients on the rice
in a ring shape and close the outer lid.
5
Select the <White / Mixed> course
and press the START key.
6
When the cooker enters the Keep
Warm mode, loosen the rice.
•
Observe the max. cooking volume. (See page 16.)
• After washing rice, soak it in water for about 30 minutes.
Soak sweet rice for about 1 hour, and brown rice for about 2
hours. (Adding seasonings makes it difficult for the rice to absorb
water.)
• After soaking rice, put it in a sieve basket to drain excessive
water. Do not leave the rice in the sieve basket. (The rice tends to
scorch when the starch in the rice has settled down.)
• Add seasonings, adjust the amount of water for cooking, and
then mix well from the bottom to the top.
• Then start the cooking immediately.
( Tasty rice cannot be cooked if it is left uncooked for a long time
because the seasonings settle down.)
•
Ingredients
...
Cut the ingredients into small pieces and do not mix with the rice.
Place them on the rice in a ring shape.
...
The amount of ingredients should be up to 70 g per
cup of rice. (up to 30 g of dried beans per cup of rice)
* White rice and pre-washed rice: <Mixed> course
Brown rice, germinated brown rice, rice with mix grains, congee:
Select each cooking course.
Do not use the <Quick> course.
Do not mix greens in from the start.
Boil the greens and add them after
the rice is cooked.
The steam vent may be blocked,
causing burns.
( )
• Do not use the Keep Warm mode or the
timer. (It may cause discoloration, spoiling
of the rice or corrosion of the inner pot.)
• Clean the inner lid early. (Otherwise, it
may get rusty.)
• If you use ingredients listed in
commercially available recipes, or if you
replace water with other liquid (e.g.
tomato juice, etc.), the cooked rice may
not turn out tasty.
When you add ingredients and seasonings
Tips for cooking mixed rice
RC-DS1018K_EN_0809.indd 26 2016/08/09 10:49:19
27
Ingredients (for four people)
Sweet rice ………… 2 cups
White rice
(non-glutinous rice)
… 1 cup
Cow-peas (or red beans)
……………………… 50 g
When using sweet rice only
Use less water.
• Wash quickly until the water
is clear, then let rest in a
sieve for approx. 30 minutes.
• Add the sweet rice and
cooled cow-pea broth to the
inner pot.
•
For three cups, add enough
water to water level scale 3 for
"Mixed". Then remove approx.
60 ml of water and stir.
(
Remove approx. 20 ml of water
for each cup of sweet rice.
)
1
Wash the rice quickly until water
becomes clear, and soak it in plenty
of water for 1 hour.
2
Put the cow-peas in cold water and
bring it to the boil. Drain the water
when it starts boiling. Add 600 ml of
fresh water, bring it to a boil and then
turn the heat to low. Simmer the cow-
peas until they are 80 to 90% cooked.
When the cow-peas are soft enough
to be pressed flat between fingers,
separate the peas from the broth and
leave them to cool down.
3
Drain the rice in a sieve basket, and
then put the rice in the inner pot.
Add the cooled pea broth to the pot
to water level scale 3 for "Sweet
rice" and mix well.
4
Place the boiled peas on the rice in
a ring shape and close the outer lid.
5
Select the <White / Mixed> course
and press the START key.
6
When the cooker enters the Keep
Warm mode, loosen the rice.
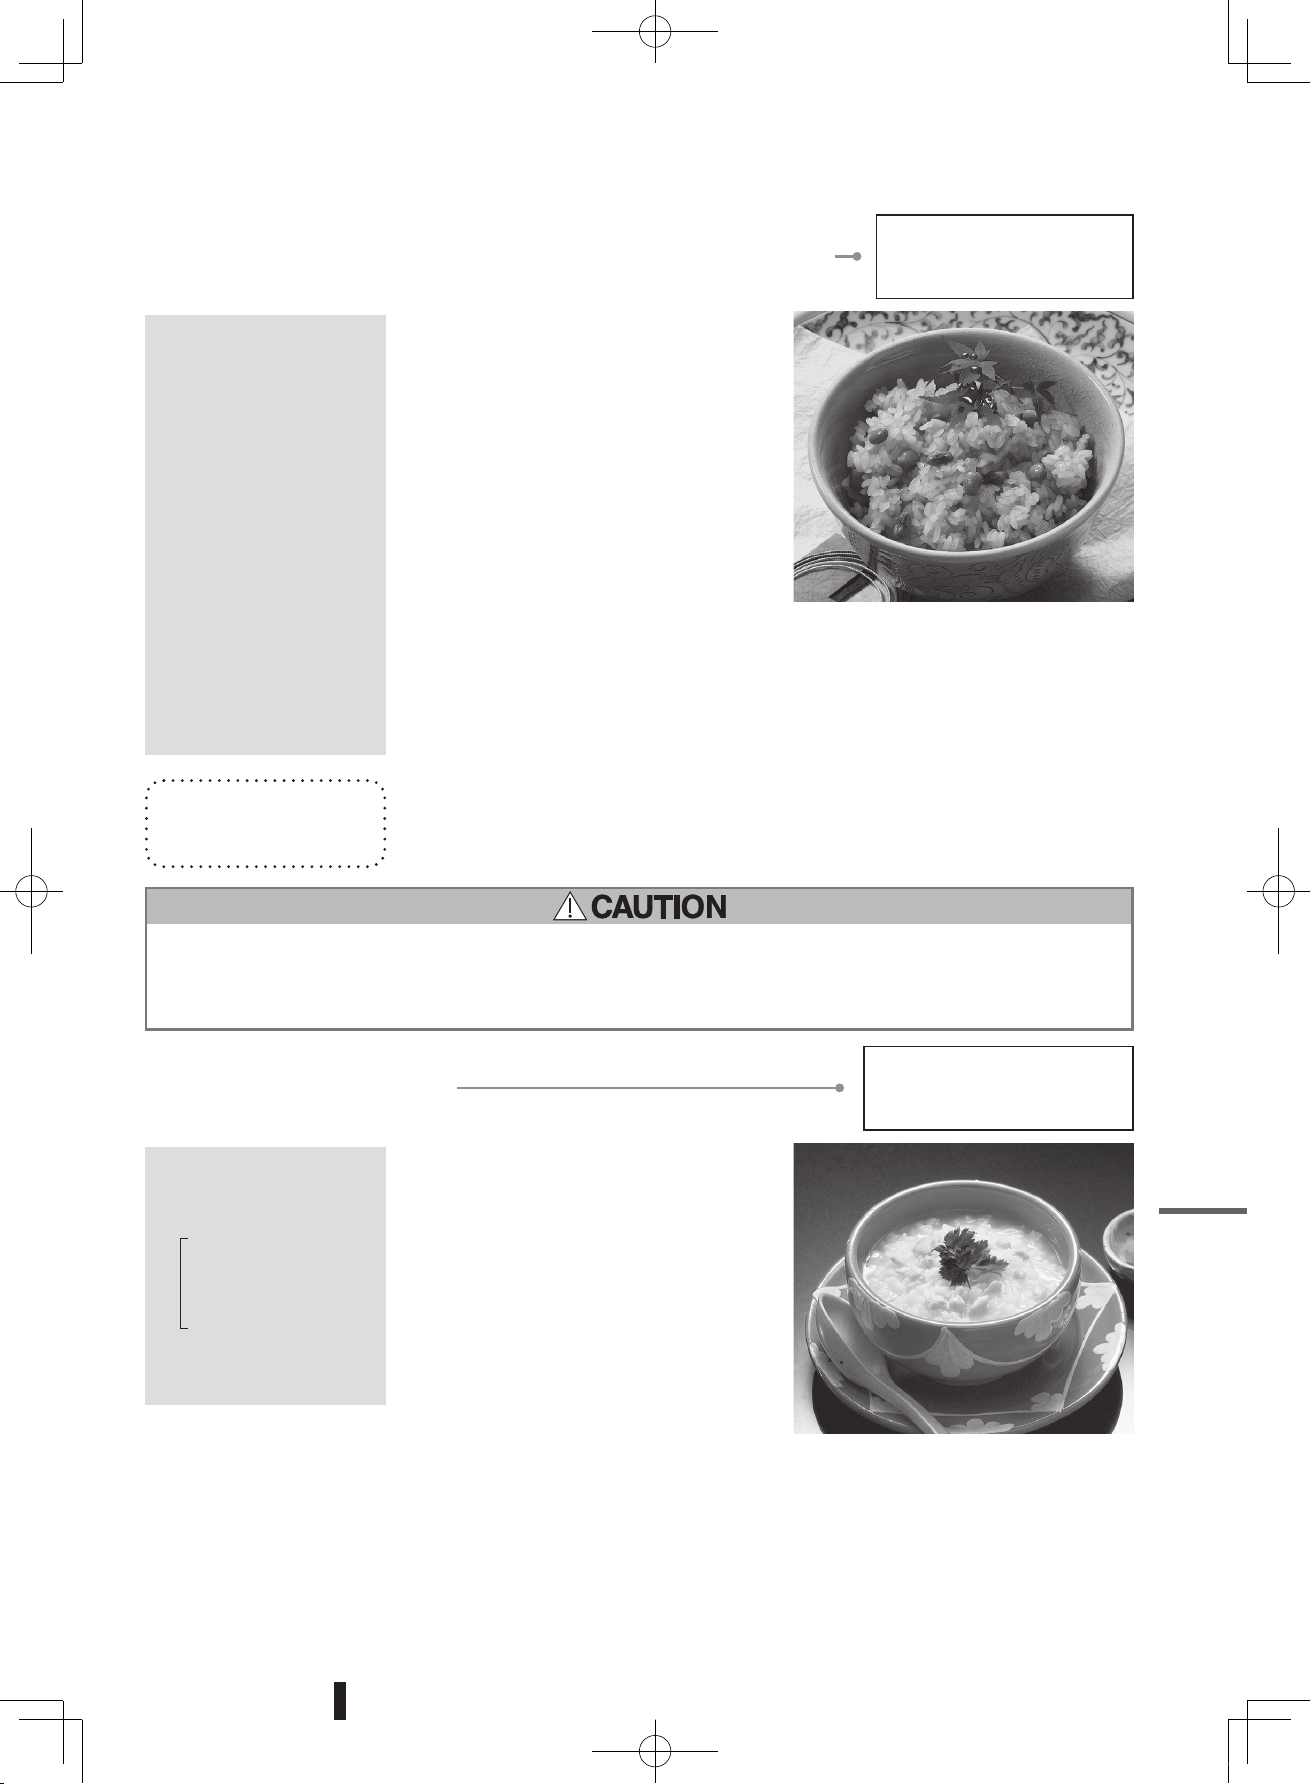
Sweet rice with red beans (Cooked sweet rice)
Sweet rice
Up to 4 cups for the 1.0 L type
Up to 6 cups for the 1.8 L type
Ingredients
(for four to five people)
White rice ………… 1 cup
Chicken breast
… 100 g
1 thumb of ginger
1 green onion
Sake ………… 1 tbsp
Water ……… 1000 ml
Salt …………………
1
/2 tsp
Mitsuba (honeywort)
……………… as required
1
Wash the chicken well and place it in
a pot with water, chopped green
onion, grated ginger and sake. Bring
the pot to a boil on a medium heat,
and remove the scum on the surface
to create broth. Pass it through a
sieve and leave to cool.
2
Cut the chicken from step 1 into 1 cm
cubes, and sprinkle them with salt.
3
Wash the rice quickly until water
becomes clear and drain it in a sieve
basket.
4
Put the rice from step 3 and the broth
from step 1 in the inner pot, and add
water up to water level scale 1 for
"Congee". Stir the mixture well.
5
Select the <White / Congee> course
and press the START key.
6
When the cooker enters the Keep
Warm mode, mix in the chicken from
step 2.
7
Serve the food, and add mitsuba
(honeywort - similar to flat leaf parsley)
to decorate if desired.
Chicken congee
Congee
Up to 1 cup for the 1.0 L type
Up to 1.5 cups for the 1.8 L type
Sweet rice with red beans
(Steamed sweet rice)
➡ See page 30.
Make sure that the water level does not exceed the maximum water level scale of "Congee" when
putting ingredients/seasonings/water in the pot.
(Putting too much in the pot may cause it to boil over, causing burns.)
Mastering the cooker
RC-DS1018K_EN_0809.indd 27 2016/08/09 10:49:20
28
Cooking Notes
• If the sweet vinegar dressing is mixed
when the rice is still hot, the rice can
absorb the sweet vinegar dressing
well.
• If you use a wooden sushi bowl, the
bowl will absorb the excess moisture
so the rice will not be glutinous.
•
If you use chilled seaweed stock instead
of water, the taste will be enhanced.
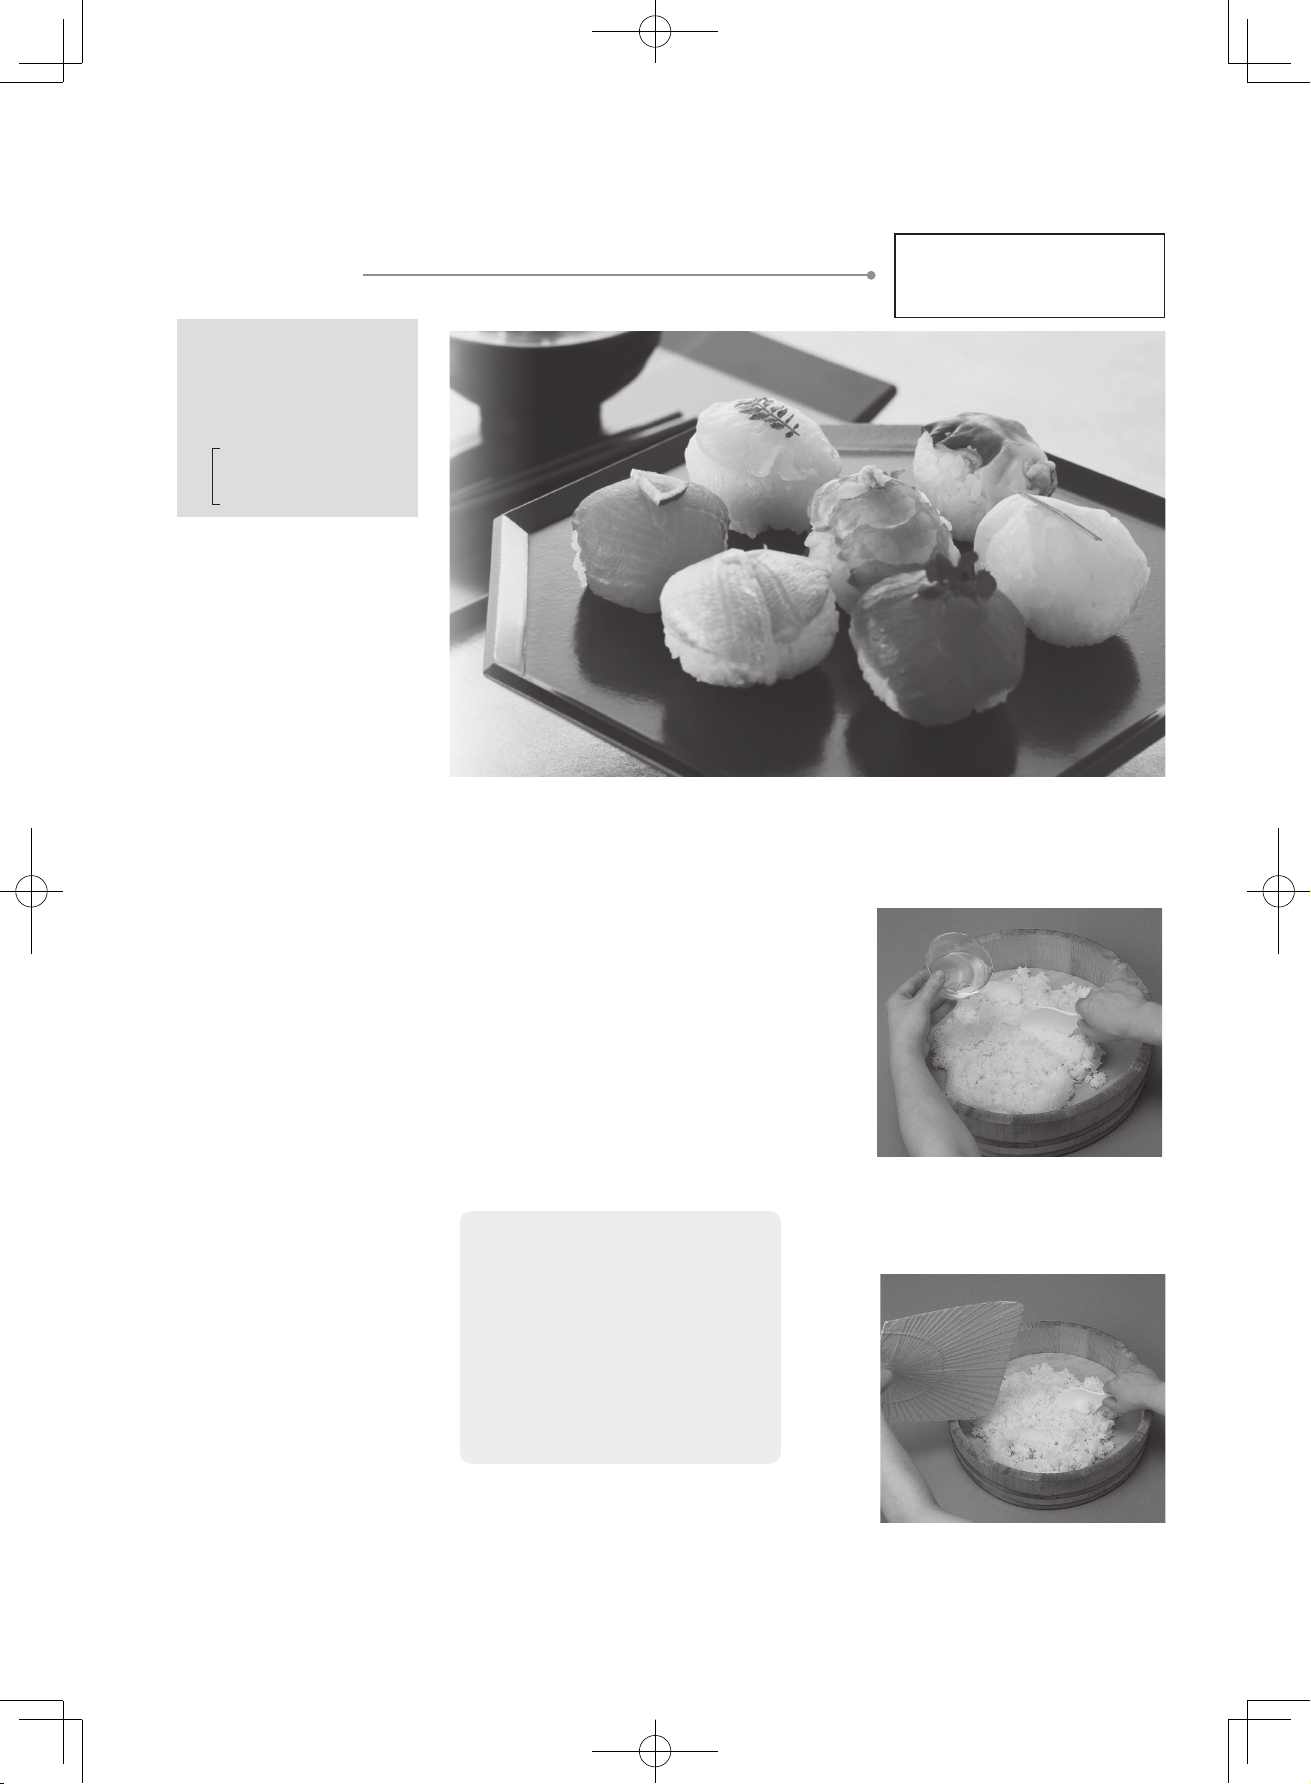
Sushi rice
Sushi rice
Up to 5.5 cups for the 1.0 L type
Up to 10 cups for the 1.8 L type
Ingredients
(for four people)
White rice ………… 3 cups
Sweet vinegar dressing
(mix beforehand)
Vinegar ……… 6 tbsp
Sugar ……… 2
1
/2 tbsp
Salt ………… 1
1
/2 tsp
1
Wash the rice quickly until water
becomes clear, add water to water
level scale 3 for Sushi rice, and close
the outer lid.
2
Select the <White / Regular> course
and press the START key.
3
Wipe a wooden sushi bowl with a
washcloth soaked in vinegar water,
and move the cooked rice in the
bowl.
Recipes
4
Sprinkle the sweet vinegar dressing
evenly onto the rice, and mix as though
you are cutting the rice.
Fan the rice while mixing to make it
glossier.
*
Do not mix in the sweet vinegar dressing
in the inner pot.
RC-DS1018K_EN_0809.indd 28 2016/08/09 10:49:21
29
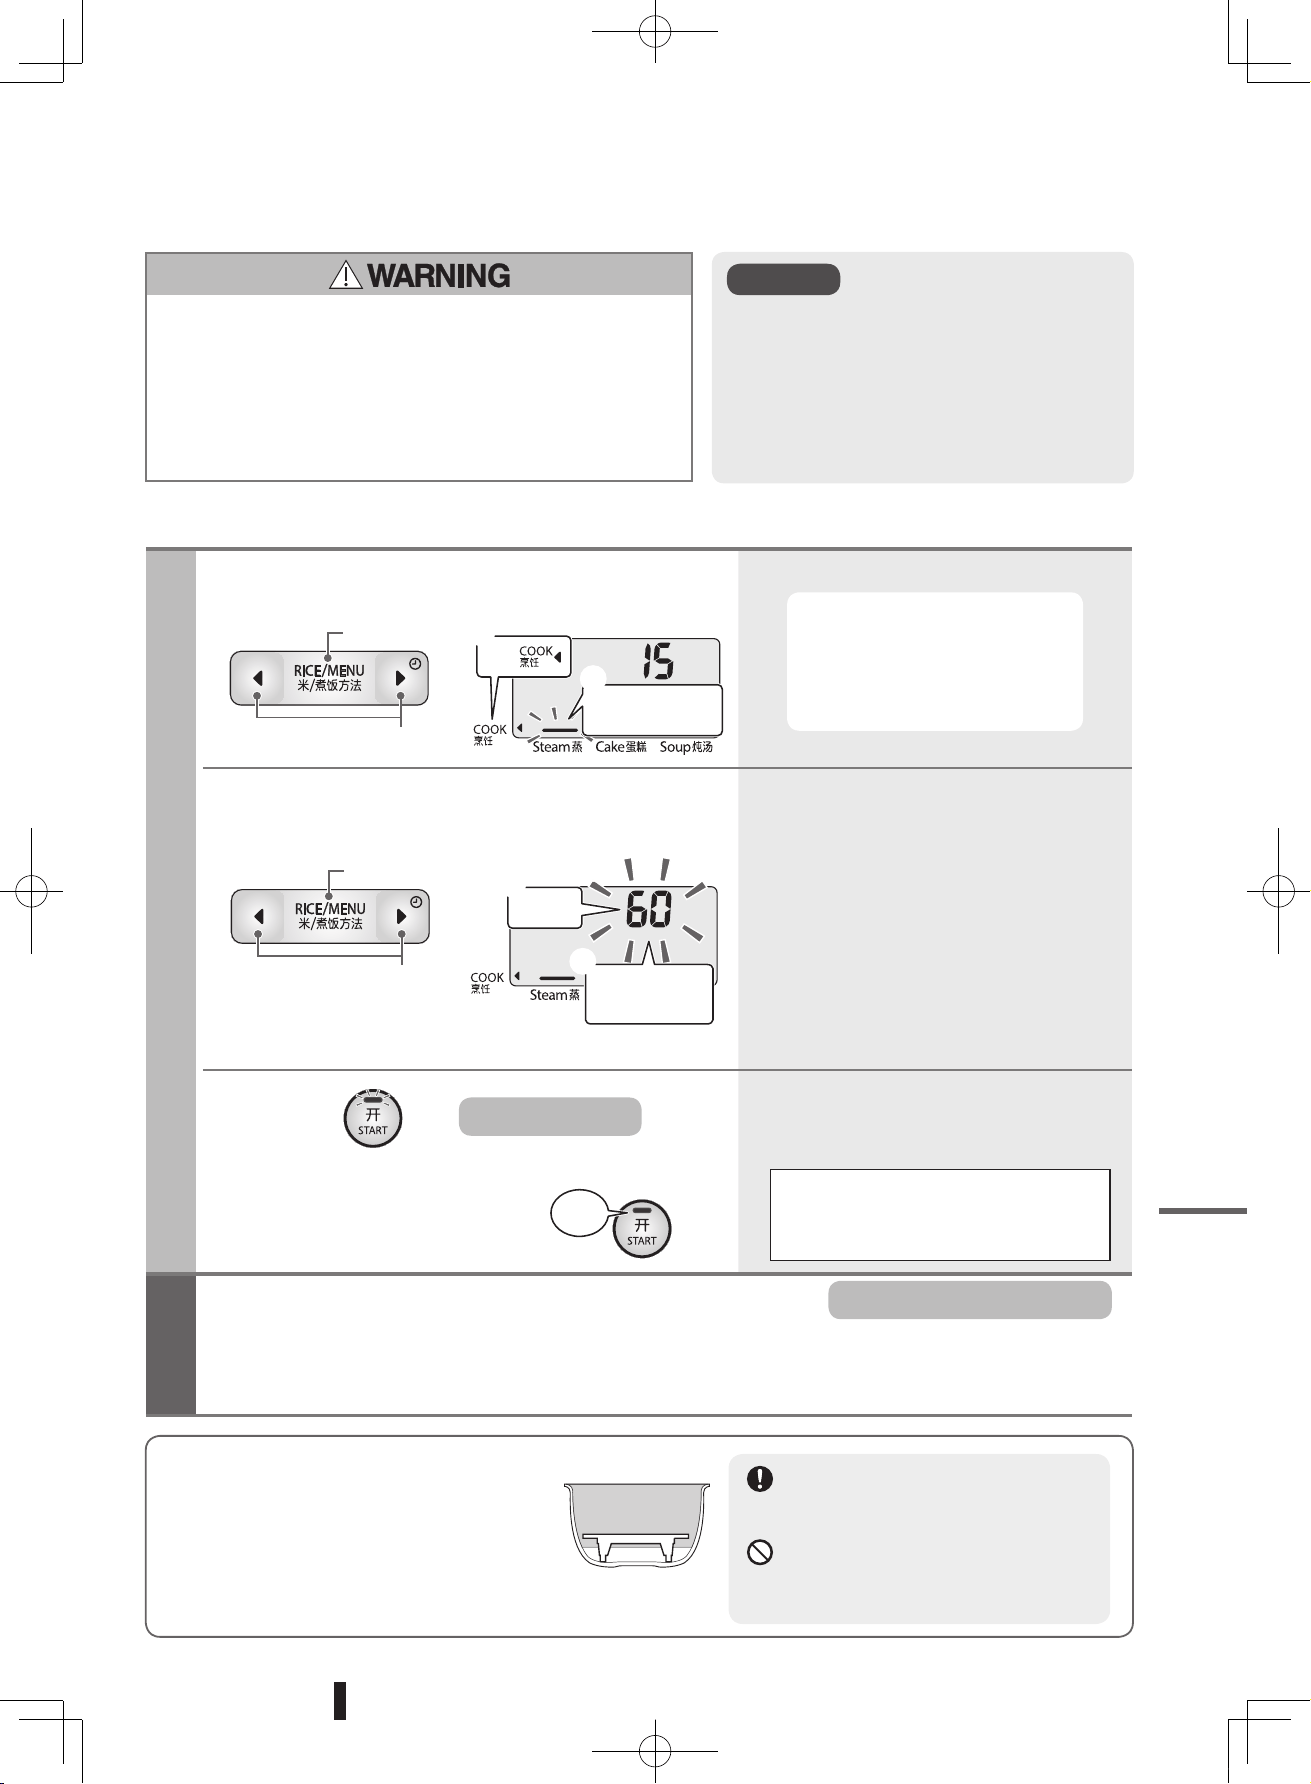
Cooking in <Steam>,<Cake> and <Soup> courses
Basic operation
Operation
1
Select the cooking course.
The food preparation courses
stay at a constant temperature
<Steam> ……Approx. 100°C
<Cake> ……
Approx. 115°C
<Soup> …… Approx. 90°C
2
Set the cooking time.
• The cooking time can be set in 1 minute
increments up to 60 minutes.
• Press and hold the go forward and go back
keys to change the time in 10 minute
increments.
3
Press key.
Start cooking
•
The actual cooking time may be longer than the
set time, as it includes the time for which the
temperature rises to the target temperature.
When the cooking temperature is
reached, the displayed time starts to go
down. (It is displayed in units of 1 minute.)
Completion
When the buzzer sounds, the cooking operation is nished.
Turns off automatically
• Since the inner pot is hot, use a dry cloth or mitten to remove it.
• Do not leave cooked food in the pot.
• As the cooker easily develops odors, always keep it clean. (See pages 24 and 25.)
Do not use ingredients or recipes other than
those on pages 30 to 34.
Steam or contents may come out of the cooker causing
burns, injury or malfunction.
In addition, the inner pot may corrode or produce bad
odors.
Note
• The timer cannot be used.
• Use the cooking time listed on pages 30 to 34
as a guide. Final cooked state may change
depending on the ingredients, room
temperature, etc.
• Use plastic or wooden cooking utensils (to
avoid damage to the inner pot).
(The cooker beeps once when it reaches 60 minutes.)
②
①
①
②
Make sure that the ingredients in the
inner pot do not block the steam
vent at the center of the inner lid.
Do not put plastic wrap, aluminum
foil or oven sheets into the inner pot
as they may easily float.
• Place ingredients to be steamed on the steaming stand, and
check that you can close the outer lid without a problem.
①
Add water to water level scale 2 for
“White rice“.
②
Place the steaming stand provided in the inner pot.
Preparation for steaming
①
Press 4 times
①
Press once
Set to
The selected
course flashes
Set the
cooking time
Flashes
♪
1 short beep
♪
2 beeps
②
Press to select
②
Press to select
(Go back)
(Go forward)
♪
1 short beep
♪
3 short beeps,1 long beep
Lights
Mastering the cooker
RC-DS1018K_EN_0809.indd 29 2016/08/09 10:49:22
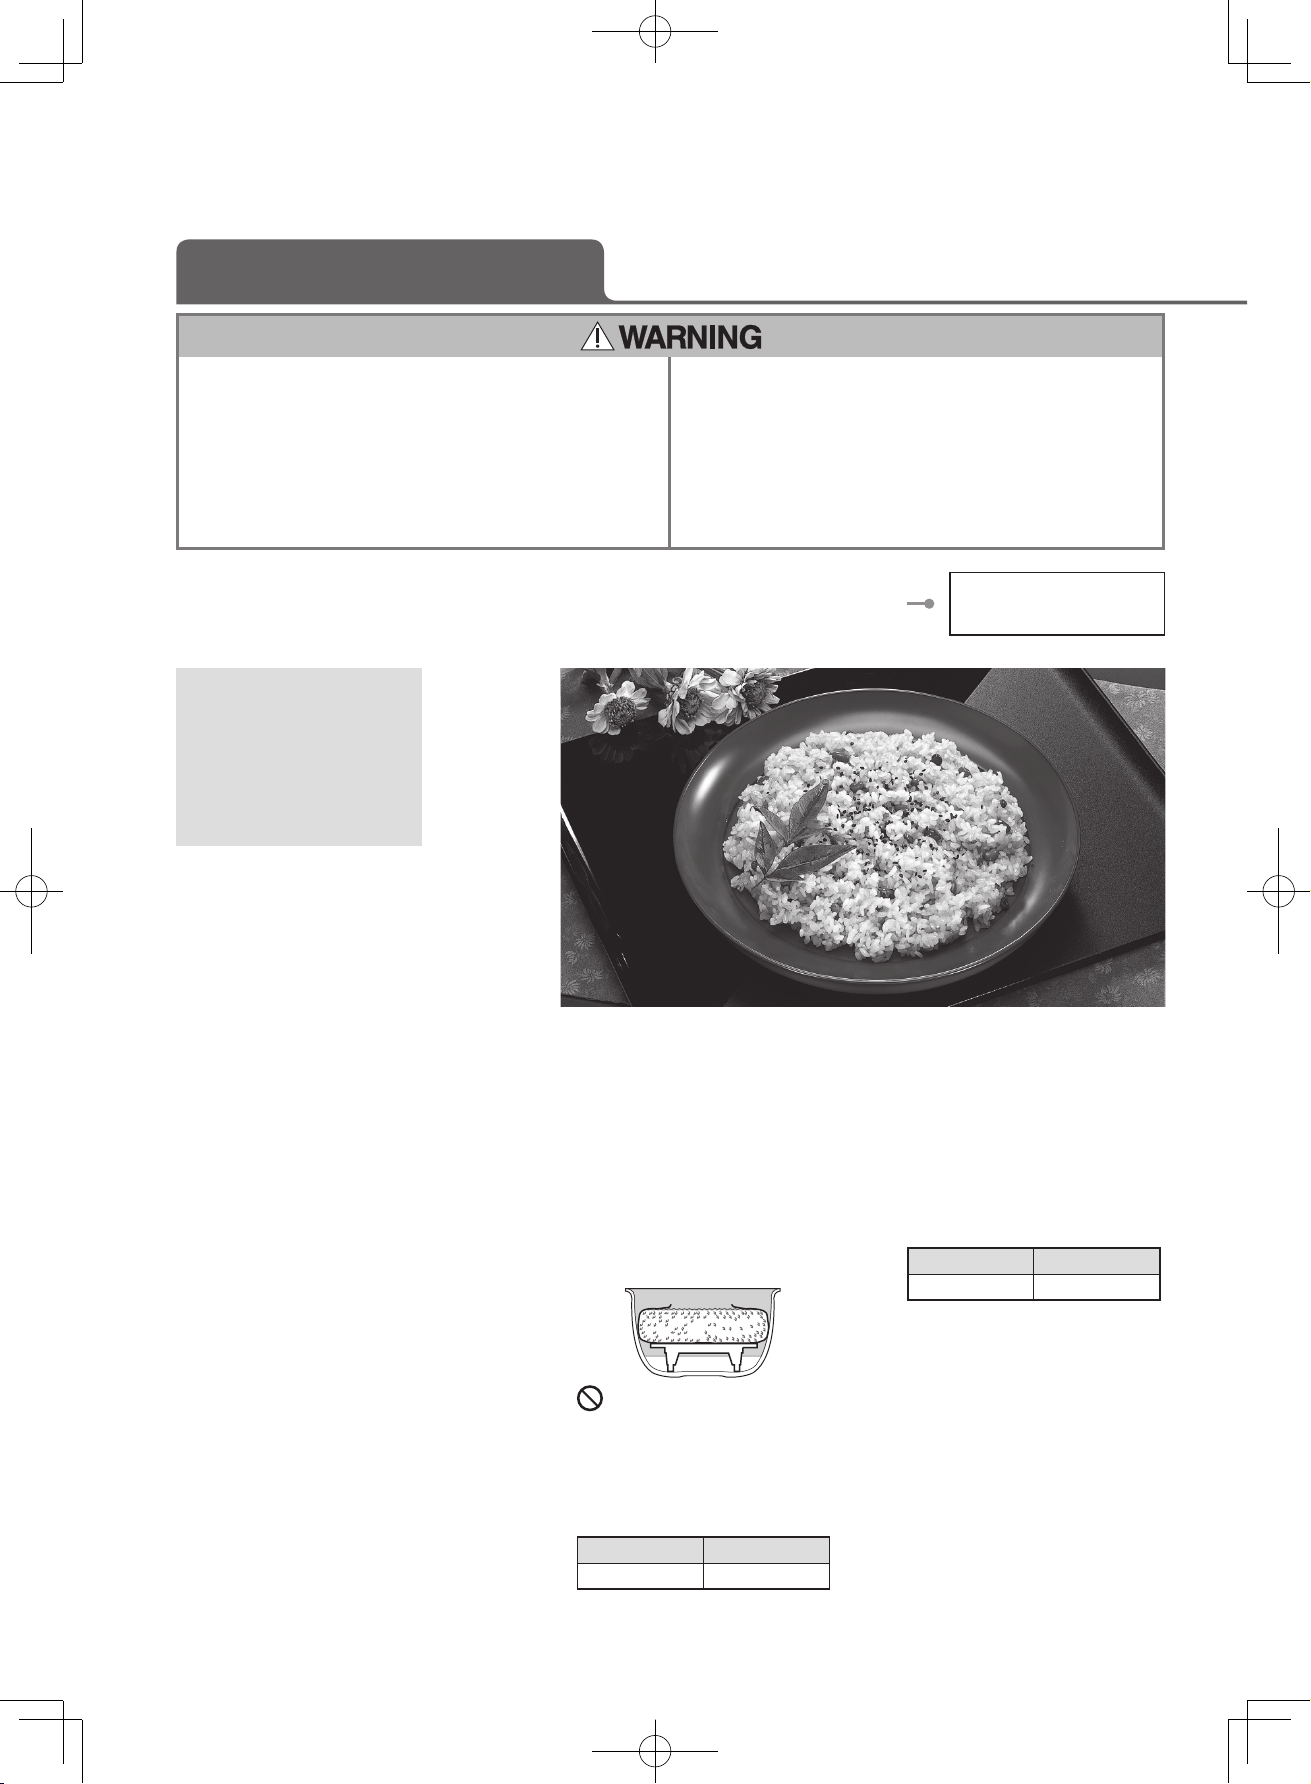
30
Cooking in <Steam>,<Cake> and <Soup> courses
Sweet rice with red beans (Steamed sweet rice)
Max. cooking volume
Up to 2 cups
Ingredients
Sweet rice ………… 2 cups
Cow-peas (or red beans)
……………………… 30 g
Water for sprinkling
…………………… 80 ml
(40 ml per cup of rice)
1
Parboil the cow-peas (see step 2 in
"Sweet rice with red beans
(Cooked sweet rice)" on page 27).
Separate the peas from the broth
and leave them to cool.
2
Wash the rice quickly until water
becomes clear, soak it in water
with the pea broth added for 2
hours, and then place it in a sieve
basket to drain the excessive
water. Keep the water used to
soak the rice for sprinkling.
3
Add water to the inner pot to
water level scale 2 for "White
rice", and place a steaming cloth
on the steaming stand provided
in the pot.
4
Place the rice from step 2 and the
peas from step 1 on the steaming
cloth, mix well, level off, and make
several dents on the rice surface.
Make a large hollow in the center
so that it does not touch the filter,
and close the lid.
* Make sure that the steaming
cloth does not stick out from the
outer lid.
Do not block the steam vent
at the center of the inner lid
with the steaming cloth.
5
Set the cooking course and cooking
time (page 29), and press the START
key.
Cooking course Cooking time
Steam 30 min.
6
When the buzzer sounds, sprinkle
half of the water evenly onto the
rice, mix the rice and close the
outer lid.
7
Set the cooking course and cooking
time (page 29), and press the START
key.
Cooking course Cooking time
Steam 10 min.
8
When the buzzer sounds, sprinkle
water once again and steam the
rice again.
(Repeat steps 6 and 7 again.)
9
When the buzzer sounds, move
the cooked rice to another
container and loosen it.
* If the cooked rice is hard, sprinkle
more water, mix the rice, and
steam it for about 10 minutes.
Steam
Do not block the steam vent filter,pressure
regulating part, safety valve, and check valve
in the inner lid with the ingredients in the
inner pot.
( Otherwise, the cooker may boil over or you may
get burned.)
Do not put plastic wrap, aluminum foil or oven
sheets in the inner pot as they may easily
float.
( Otherwise, the cooker may boil over or you may
get burned.)
RC-DS1018K_EN_0809.indd 30 2016/08/09 10:49:23
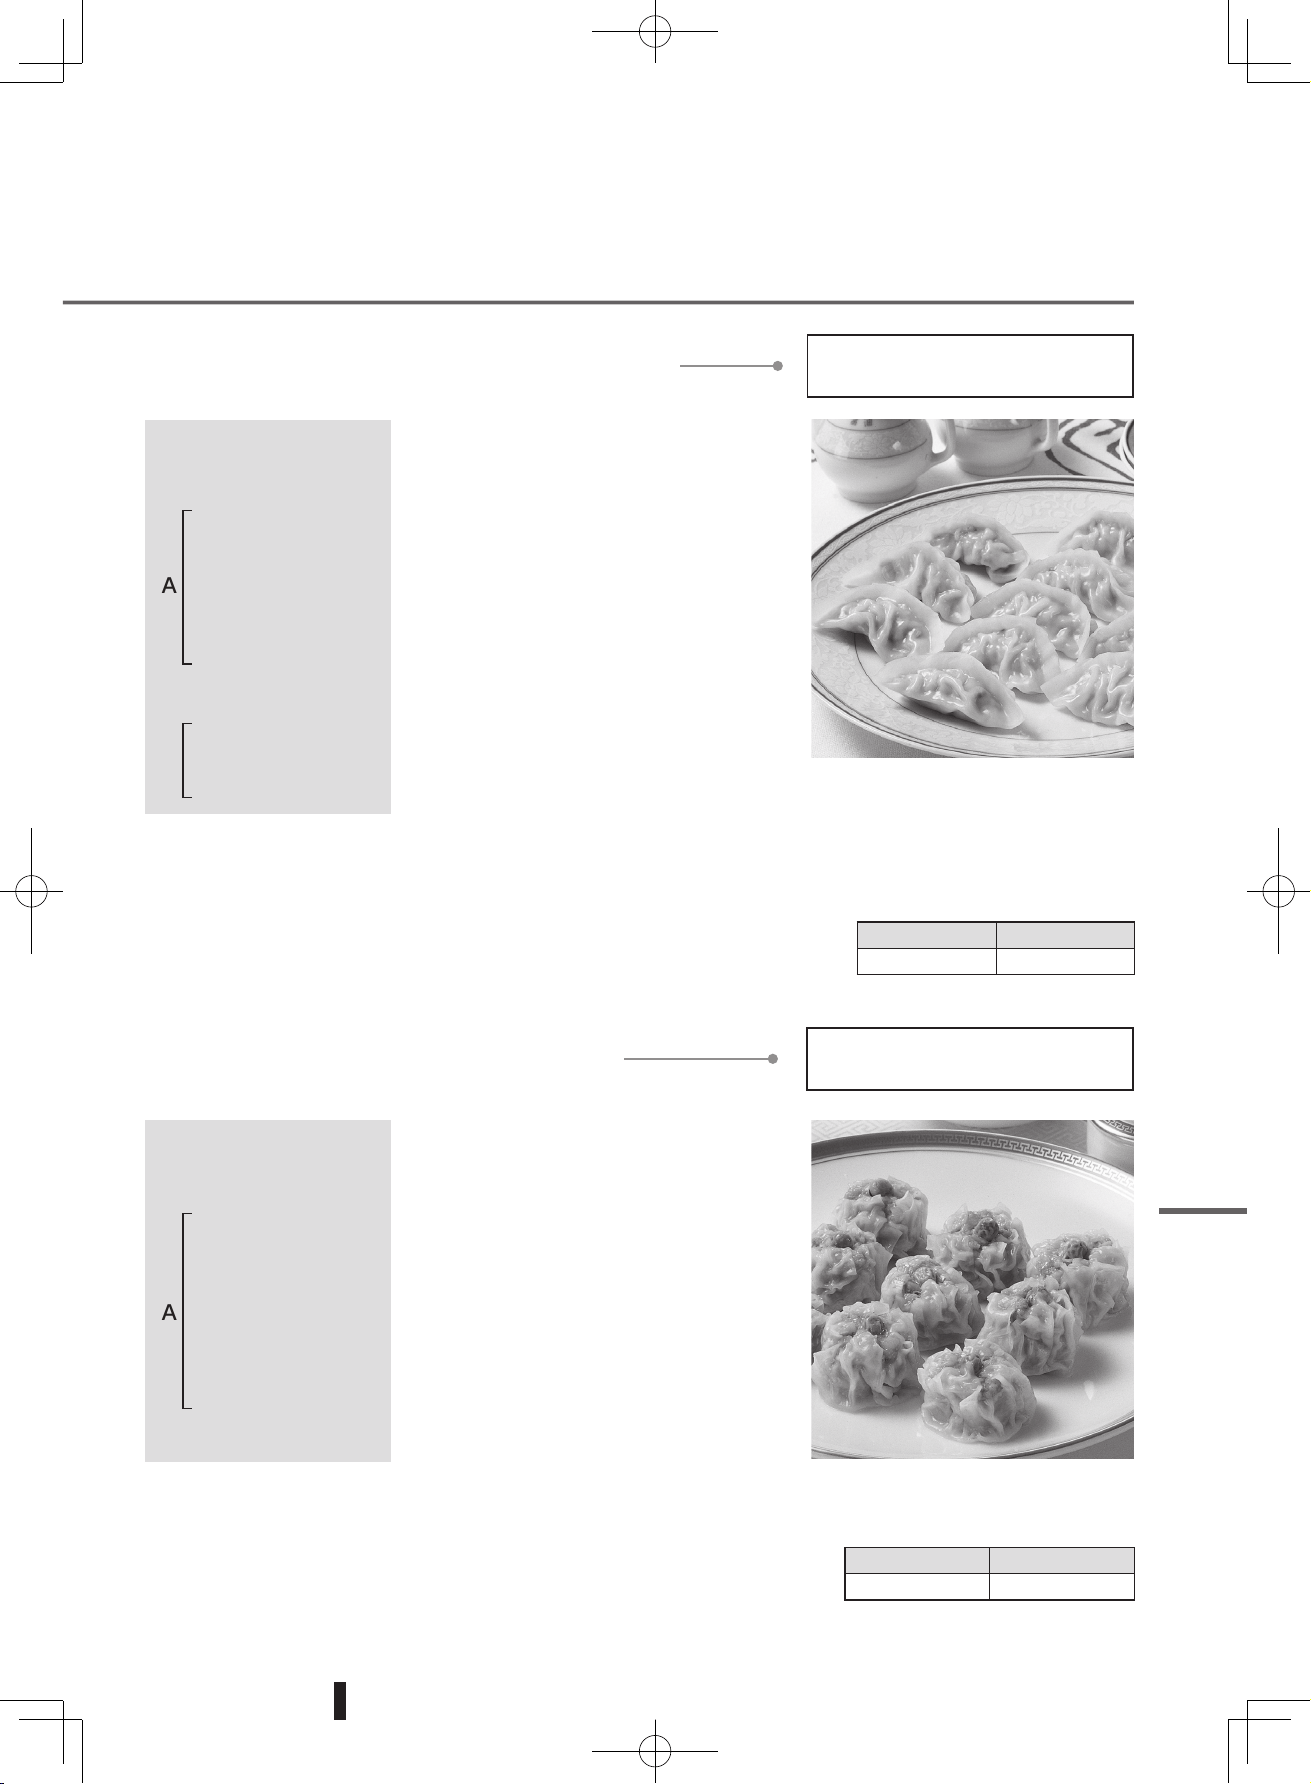
31
Steam
Steamed gyoza (potstickers)
Max. cooking volume
The amount in the recipe (10 pieces)
Ingredients
(for 10 pieces)
Minced pork ………… 70 g
1
/3 of a green onion
Garlic chives
…
1 stalk
Garlic …
1
/3 of a clove
Ginger …
1
/3 of a thumb
A pinch of salt
Soy sauce
………
2
/3
tsp
Sake
……………
2
/3
tsp
Sesame oil
……
2
/3 tsp
10 dumpling wrappers
For the seasoned agar jelly
Powdered agar … 1 g
Water ………… 80 ml
Chinese soup powder
………………
1
/3 tsp
A
B
1
Make the seasoned agar jelly.
Put the ingredients in B in a pot and
bring to the boil while stirring
constantly for 2 minutes until
dissolved. Transfer into a container
to solidify. When the jelly has
solidified, tear it into small pieces.
2
Finely chop the green onion, garlic
chives, garlic and ginger.
3
Put the mince, the jelly from step 1,
and the ingredients in A into a bowl.
Mix the contents well until a paste
state is formed, and divide the
mixture into 10.
4
Place the mixture from 3 onto a
dumpling wrapper, and seal the
edges of the wrapper firmly.
5
Add water for steaming in the pot up
to water level scale 2 for "White rice",
place the steaming stand provided
in the pot, and cover it with cabbage
or napa cabbage (not included in the
ingredients list).
6
Place the gyoza from step 4 on the
steaming stand.
7
Set the cooking course and cooking
time (page 29), and press the START
key.
Cooking course Cooking time
Steam 15 min.
Shumai (pork dumplings)
Max. cooking volume
The amount in the recipe (10 pieces)
Ingredients
(for 10 pieces)
Minced pork ……… 100 g
Peeled shrimp … 50 g
1
/4 of a green onion
Ginger juice ……1 tsp
Soy sauce
………
2
/3
tsp
Sugar ……………1 tsp
Sesame oil ………1 tsp
Salt ……………
1
/3 tsp
Potato starch ……2 tsp
A small amount of
pepper
10 shumai wrappers
10 green peas
A
1
Finely chop the peeled shrimp and
green onion.
2
Put the mince and the ingredients in A
in a bowl, and mix well until a paste
state is formed. Divide the mixture into
10.
3
Make a circle with the fingers of your
left hand and place a shumai wrapper
on top. Place the mixture from step
2 on
the wrapper and push it down using a
knife or spatula so as to form a cylinder.
Stick the end of the wrapper to the
filling, and decorate with a green pea.
4
Add water for steaming into the pot up
to water level scale 2 for "White rice",
place the steaming stand provided in
the pot, and cover it with cabbage or
napa cabbage (not included in the
ingredients list).
5
Place the shumai from step 3 on the
steaming stand.
6
Set the cooking course and cooking
time (page 29), and press the START
key.
Cooking course Cooking time
Steam 15 min.
Mastering the cooker
RC-DS1018K_EN_0809.indd 31 2016/08/09 10:49:25
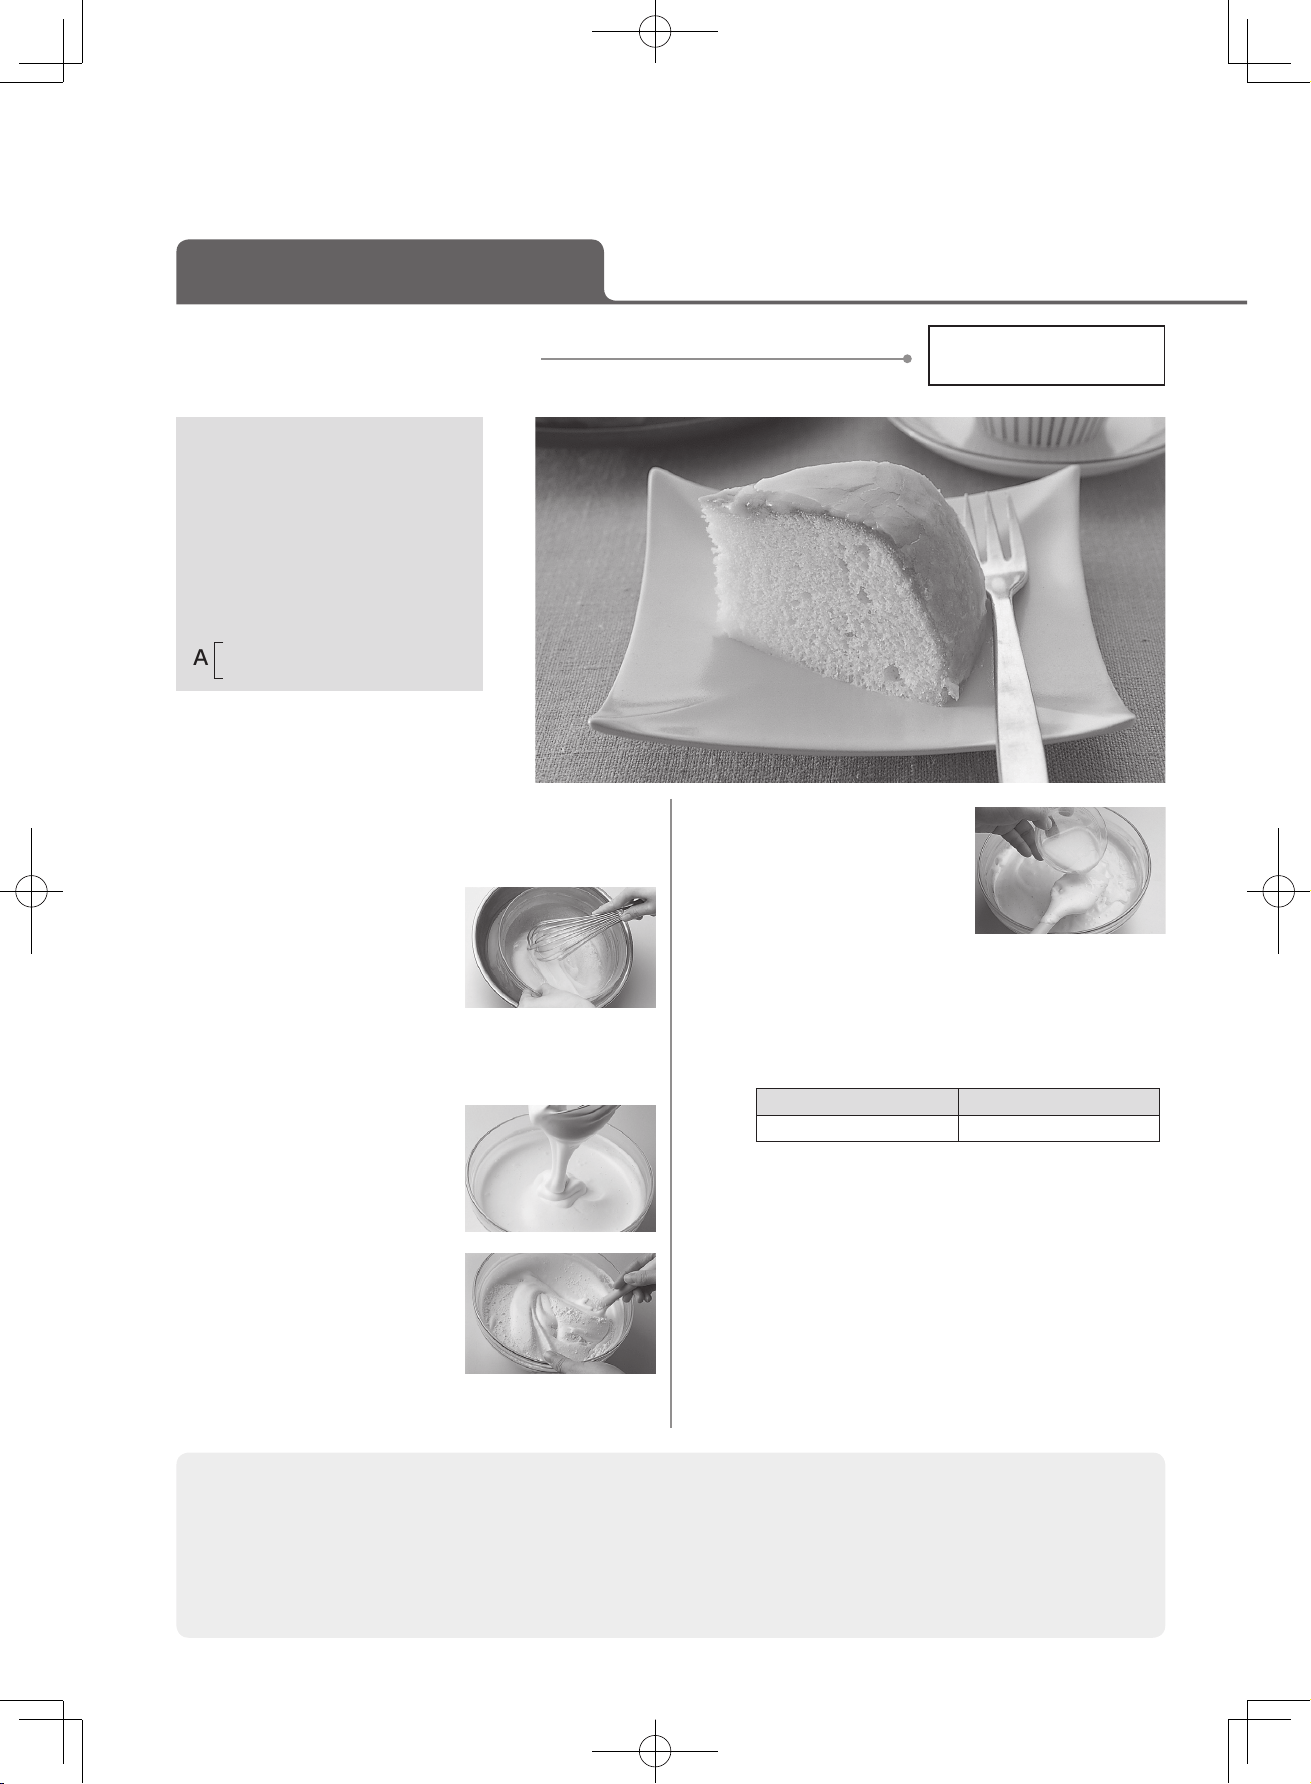
32
Cooking in <Steam>,<Cake> and <Soup> courses
Cooking Notes
• Before beating, wipe off any grease or water from the bowl and whisk.
• You can use an electric mixer for easy beating. (Do not use it inside the inner pot.)
• The top of the cake will not turn brown. Turn the cake upside down before decorating.
• If the icing is too hard or soft, adjust the amount of lemon juice and powder sugar.
• You can decorate the cake with whipped cream and/or cut fruit instead of icing.
Ingredients
Wheat flour …………………… 120 g
Baking powder ………………
1
/2 tsp
4 eggs
Granulated sugar …………… 100 g
A few drops of vanilla essence
Melted butter ………………… 30 g
Milk …………………………… 30 ml
Apricot jam (pureed) … 4 tbsp (80 g)
For the icing
Powder sugar …………… 50 g
Lemon juice ………… 1
1
/2 tsp
A
1
Mix and sift the wheat flour and baking powder.
Grease the inner pot lightly with melted butter (not in
the ingredients list).
2
Crack the eggs in a dry
bowl and add the granulated
sugar. Mix the eggs and the
sugar lightly with a whisk,
then immerse the bowl in
hot water. When the egg
mixture has warmed up to
body temperature (about 40°C), take the bowl out of
the hot water and whisk.
* Do not beat it in the inner pot.
3
Beat the mixture well with
the whisk until it becomes
white and thick, and add 2
or 3 drops of vanilla essence.
4
Sift the flour mixture from
step 1 into the egg mixture
from step 3 gradually, in
two or three times. Mix it
quickly with a wooden
spatula so that the foam
bubbles may not be broken
until the mixture is well mixed.
5
Sprinkle the melted butter
and the milk on the mixture
from step 4, and mix it
quickly so that the foam
bubbles may not be
broken.
6
Pour the mixture from step 5 into the inner pot, and
pat the pot once or twice to break the larger air
bubbles. Put the inner pot in the cooker and close the
outer lid.
7
Set the cooking course and cooking time (page 29),
and press the START key.
Cooking course Cooking time
Cake 40 min.
8
When the buzzer sounds, put a bamboo skewer into
the cake to check that it is cooked through. If the
skewer comes out clean the cake is cooked.
If you find some dough on it, add some more time to
cook the cake.
9
Take the inner pot out of the cooker with an oven
glove. Put a plate over the pot, turn the pot and plate
upside down to place the cake on the plate, and leave
it to cool.
10
Apply apricot jam to the surface of the cake with a brush.
Mix the ingredients in A to make icing, and put the
icing on the cooled cake. Then let the icing dry.
Dome sponge cake
Max. cooking volume -
Wheat flour - Up to 120 g
Cake
RC-DS1018K_EN_0809.indd 32 2016/08/09 10:49:25
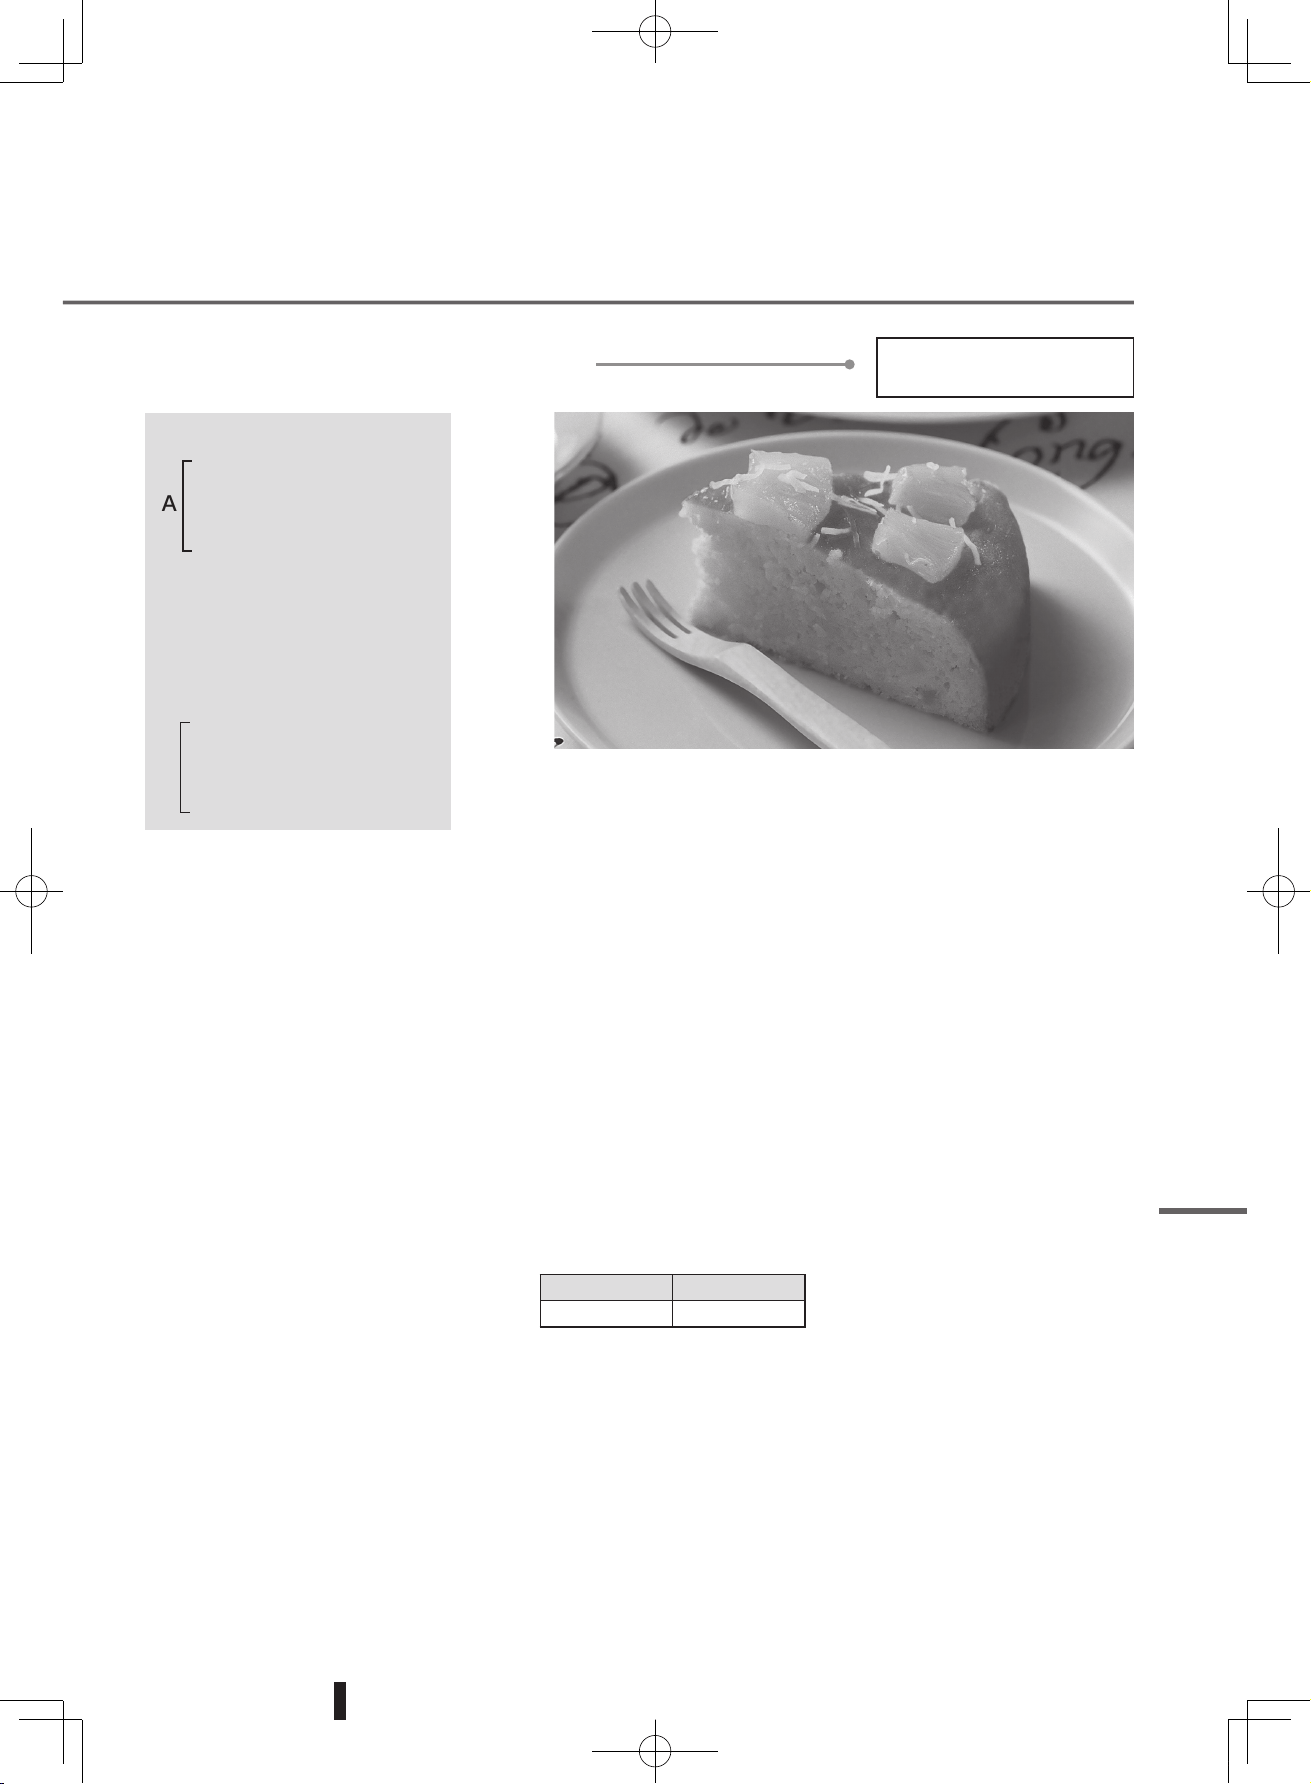
33
Ingredients
Wheat flour ……………… 100 g
Coconut flour ……………2 tbsp
Baking powder
………… 1
1
/2 tsp
Granulated sugar ……… 80 g
A pinch of salt
Milk …………………………… 70 ml
2 small eggs (100 g)
Cooking oil ……………………2 tbsp
A few drops of vanilla oil
Pineapple in syrup
(canned pineapple slices) …… 75 g
Finely shredded coconut …… 15 g
For the topping
Apricot jam ………………1 tbsp
Rum …………………… 2 tsp
Finely shredded coconut
…… 5 g
Pineapple in syrup
(canned pineapple slices)
… 2 slices
A
Pineapple coconut cake
Max. cooking volume -
Wheat flour - Up to 100 g
1
Wipe excess syrup from the
pineapple. Chop the slices for the
cake mixture into 5 mm cubes,
and cut the two slices for the
topping into 8 even pieces.
2
Mix the dry ingredients in A and
sift into a bowl. Add the milk,
eggs and cooking oil in this order.
Mix them with a whisk, then add
the vanilla oil, chopped pineapple
and finely shredded coconut, and
mix well.
3
Grease the inner pot with melted
butter (not in the ingredients list)
and pour in the mixture from step
2.
4
Set the cooking course and cooking
time (page 29), and press the
START key.
Cooking course Cooking time
Cake 45 min.
5
When the cake is cooked, take the
inner pot out of the cooker with
an oven glove, etc. Spread the
apricot jam and rum mixture onto
the cake while it is hot. Decorate
with pineapple, and sprinkle on
the coconut for the topping.
*
This moist cake is made simply by
mixing the ingredients together.
Cake
Mastering the cooker
RC-DS1018K_EN_0809.indd 33 2016/08/09 10:49:26
34
Soup
White radish and pork spare rib soup
Ingredients
Pork spare ribs ……… 80 g
White radish ……… 160 g
Half an onion
Water ……………… 500 ml
Salt ……… as required
A pinch of MSG
A small amount of
sesame oil
A
1
Cut the spare ribs into 3 cm wide
pieces. Slice the white radish thinly,
and finely chop the onion.
2
Put the ingredients from step 1 in the
pot, pour in 500 ml of water and close
the lid.
3
Set the cooking course and cooking
time (page 29), and press the START
key.
Cooking course Cooking time
Soup 60 min.
4
When the buzzer sounds, skim off any
floating oil, and add the ingredients in
A.
* If the ingredients are not fully
cooked, increase the cooking time.
White radish, corn and pork backbone meat soup
Ingredients
Pork backbone
(chine) ……………… 120 g
White radish ………… 60 g
Carrot ………………… 30 g
Ear of corn …………… 30 g
Ginger ………… as required
Water ……………… 500 ml
Salt ……… as required
A pinch of MSG
A few drops of vinegar
A
1
Cut the backbone into 1.5 cm cubes,
and cut the ear of corn into 3 cm
pieces. Cut the white radish and carrot
into cubes, and grate the ginger.
2
Put the ingredients from step 1 in the
pot, pour in 500 ml of water and close
the lid.
3
Set the cooking course and cooking
time (page 29), and press the START
key.
Cooking course Cooking time
Soup 60 min.
4
When the buzzer sounds, skim off any
floating oil, and add the ingredients in
A.
* If the ingredients are not fully
cooked, increase the cooking time.
*
After serving, add vinegar to your
liking.
(
Do not pour vinegar in the inner pot.
)
Attention
• In the <Soup> course, ingredients are brought to the boil first, and then the heat is lowered. Ingredients should
be added from the start.
(Excluding greens and ingredients that cook fast.)
Do not put the following things in the pot.
(The mixture may cause a boil-over, or you may get burnt.)
• Fish pastes, beans, noodles, baking soda, roux (e.g. curry
roux, stew roux), large amounts of oil, ingredients such as
milk that will bubble up easily.
•
Things that float easily to the surface such as greens, plastic
wrap, aluminum foil, oven sheets and scum removing sheets.
Make sure that the water level does
not exceed the "Soup MAX" level scale
when putting ingredients/seasonings/
water in the pot.
( Putting too much in the pot may cause it
to boil over, causing burns.)
Maximum volume
- up to the Soup MAX level scale
Maximum volume
- up to the Soup MAX level scale
Cooking in <Steam>,<Cake> and <Soup> courses
RC-DS1018K_EN_0809.indd 34 2016/08/09 10:49:26
35
Sounds
Buzzer sound
The buzzer sound that the cooker makes cannot be altered or muted.
Sounds while in use (The cooker produces sounds while operating.)
Clicking …… the sound of vacuum pressure regulation
Buzzing …… the sound of electrical conduction through induction heating
(It sometimes makes sounds in the Keep Warm mode.)
Humming … the sound of fan rotation to vent internal heat to the outside
Air rushing … the sound of steam being ejected from the steam vent
Sounds associated with the vacuum operations
The vacuum pump operates to create a vacuum in the cooker. It produces various sounds (clicking,
buzzing, or air-rushing sound) when cooking, starting the timer and in the Keep Warm mode.
• When the open button is pressed while the indication is lit, the vacuum is released, and a clicking noise
can be heard.
• Bubbling sounds etc. are made when steam sucked in by the vacuum pump condenses and escapes from the
pump. This is not a problem.
The vacuum pump operation settings can be changed.
• If the vacuum pump is too noisy in the Keep Warm mode
➡
page 23
• If the vacuum pump is too noisy when the timer is set
➡
page 36
•
If the vacuum pump is too noisy when cooking rice (when soaking)
➡
page 36
If the vacuum pump
is too noisy
Troubleshooting
Mastering the cooker
RC-DS1018K_EN_0809.indd 35 2016/08/09 10:49:26
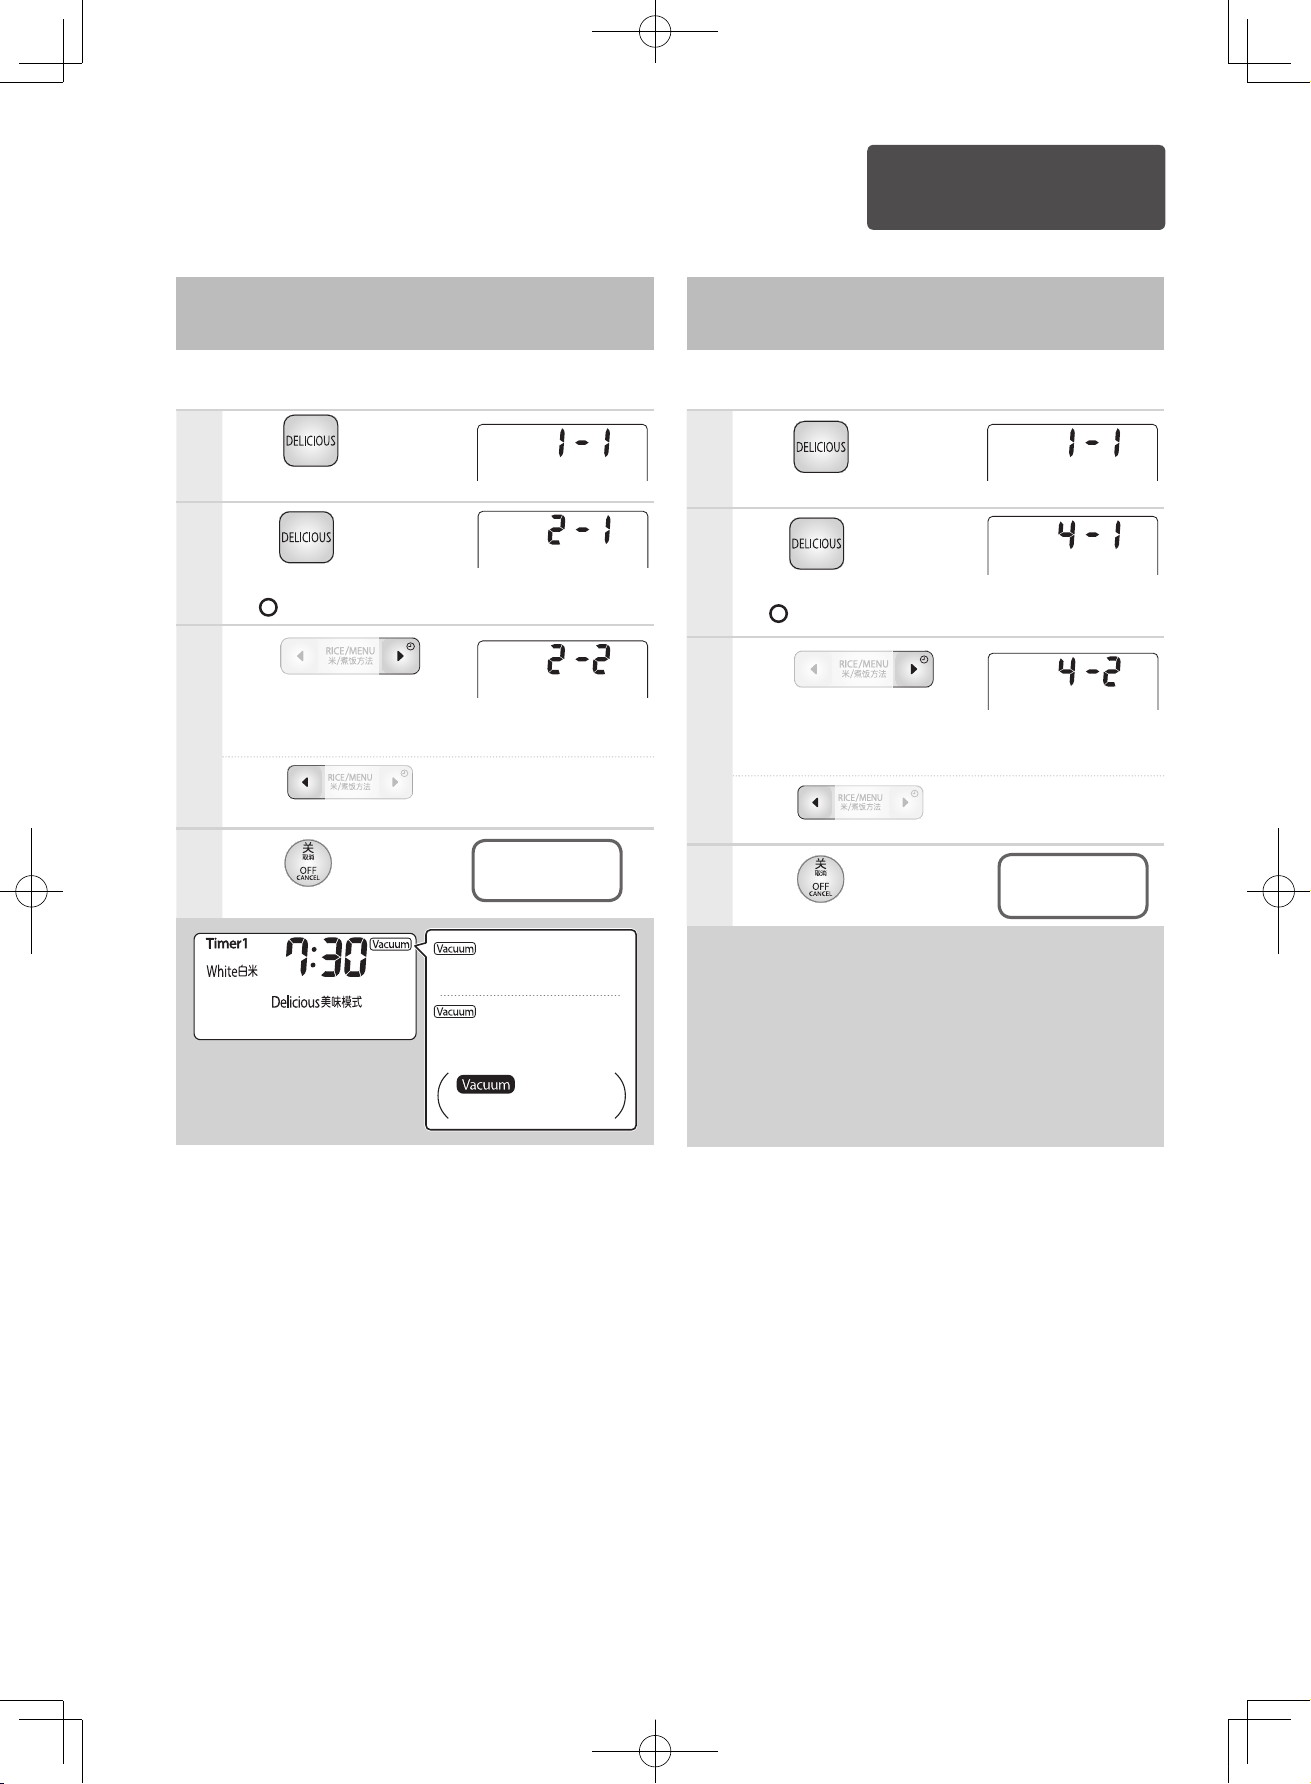
36
Changing the settings
If the vacuum pump is too noisy in
the Keep Warm mode
➡
page 23
To stop the vacuum pump from making
noise when the timer is set
Change the setting to stop the vacuum pump from
operating when the timer is set. (A vacuum is not created.)
1
Press key for 5
seconds or longer.
2
Press key once to
change the setting to
"2- ".
Default setting when shipped
3
Press key
to change the setting.
The vacuum pump does not
operate when the timer is set.
*
Press
key to change back to the
default setting when shipped.
4
Press key to finish.
Returns to the
clock display.
■
Plug in the cooker, and change the settings with the cooker turned off.
Changing the vacuum release settings
when soaking* rice
If the sound of the vacuum releasing when soaking
*
rice is too loud, change the setting from "4-1" to "4-2".
1
Press key for 5
seconds or longer.
2
Press key twice to
change the setting to
"4- ".
Default setting when shipped
3
Press key
to change the setting.
The vacuum release
setting changes.
*
Press
key to change back to the
default setting when shipped.
4
Press key to finish.
Returns to the
clock display.
Change the vacuum release settings to reduce the
sound of rushing air and clicking.
* When soaking rice for the following cooking
course: <Delicious>.
The vacuum release settings cannot be changed
for other cooking courses.
(Go back)
(Go back)
(Go forward)
(Go forward)
is displayed when
the timer is set for "2-1"
is not displayed
when a timer the set
for "2-2"
does not
light up
RC-DS1018K_EN_0809.indd 36 2016/08/09 10:49:28
37
Troubleshooting
Investigate the cause by yourself before requesting for a repair.
If you cannot find the cause, contact the shop from which the product was purchased. (See page 43.)
Problem
Causes/what to check
(reference page)
Rice
...is soft
...is mushy
...coagulates
...is not tasty
• Reduce the amount of water, or use the <Hard> course.
• Loosen the rice immediately after it is cooked.
• For recentry harvested rice, cook it with a little less water.
•
Rice becomes softer when it is soaked before cooking or the timer is set for cooking.
• Washing rice too hard or leaving it in a sieve basket for a long time will cause rice
grains to crack and/or break, resulting in mushy rice.
• Did you use alkaline water of pH 9 or greater, or hot water ?
...is hard
...dries out
...is not tasty
• Increase the amount of water, or use the <Sticky> course.
• Soak rice in water before cooking.
• Did you use hard mineral water ?
...scorches
* Rice becoming a
golden brown is not a
malfunction.
In the following cases, the rice may easily be scorched.
• When rice is not washed sufficiently.
• When rice is soaked for a long time; or When rice is cooked using the timer.
• When pre-washed rice is cooked, wash rice 1 or 2 times before cooking to prevent
scorching.
• When cooking whole rice, or adding seasonings to cook mixed rice.
• When foreign objects are attached on the temperature sensor, lid temperature
sensor, etc.
...does not cook well
...is not tasty
• Did you start cooking while the inside of the cooker or inner lid was hot ? Start
cooking after cooling it down.
• Rice cooked in the <Quick> course may be slightly mushy or hard. (See page 18.)
Try cooking rice using the <Delicious> course.
• Are any foreign objects stuck in the inner lid ? Are any foreign objects stuck on the
lid temperature sensor, temperature sensor, inner lid packing, inner pot rim or
vacuum air inlet/outlet ? (See page 13.)
• Has the inner pot or inner lid been deformed, or did you forget to attach the inner
lid or steam vent ?
• Was there a power failure while cooking ?
Mixed rice
does not cook well
• Did you mix ingredients into the rice ?
For other reasons, see "When you add ingredients and seasonings". (See page 26.)
Troubleshooting
RC-DS1018K_EN_0809.indd 37 2016/08/09 10:49:28
38
Troubleshooting (continued)
Problem
Causes/what to check
(reference page)
Rice kept warm...
...smells bad
* If the rice smells, be sure
to clean the cooker by
boiling before use.
(See page 25.)
• Did you do any of the following ?
Using the Keep Warm mode for too long, using it for mixed rice, using it for cold
rice, leaving the rice scoop in the pot, or using the Keep Warm mode repeatedly
for long periods of time.
• Rice with mixed grains, brown rice, partially milled rice, or whole rice can be kept
warm. However, it is recommended to eat it earlier than usual or store it in the
freezer because keeping it warm could easily cause bad odors or discoloration.
• Are the inner lid, filter, steam vent and/or the main body dirty ?
Be sure to remove the inner lid, filter and steam vent, clean them and dry them
with a clean cloth every time you cook. Also wipe off water droplets in the steam
pathway every time. (See pages 24 and 25.)
• Did you wash the rice sufficiently ? Did you set the timer for too long ? (See page 21.)
• Is the rice still in the pot with the Keep Warm mode off ?
Did you remove and then replace the inner pot in the Keep Warm mode; did you
press the OFF key accidentally; or was the cooker forced off due to a power failure
for a long duration of time ?
...is not hot enough
• "Reheat" the rice before serving. (See page 23.)
...is mushy
• Use the Keep Warm mode after cooking rice with a little less water.
• Loosen the rice immediately after it is cooked.
• Gather the rice stuck to the side surface of the inner pot and loosen the rice
occasionally.
...dries out
...becomes discolored
•
Are there any foreign objects on the inner lid packing, inner pot rim, or main body frame ?
•
Are there any foreign objects on the outer side of the inner pot or the temperature sensor ?
• Is the steam vent properly fitted ?
• Did you use the Keep Warm mode for a long time or repeatedly reheat the rice ?
Opening / closing the outer lid
Opening the outer lid
takes a longer time
• As the cooker creates a vacuum, the lid seals very efficiently, and it takes some
time for the lid to open after the open button is pressed. Especially, when the
main body is warm, e.g. in the Keep Warm mode, it may take longer to open the
outer lid than when it is cool.
The outer lid is hard to
close.
The outer lid does not
close.
• As the cooker creates a vacuum, the sealing performance of the lid is high, and
you may feel it is difficult to close the lid. Especially, when the main body is warm,
e.g. in the Keep Warm mode, you may find it more difficult to close the outer lid
than when it is cool. Push the center of the outer lid front part until it clicks.
• Is the inner lid in place ? The outer lid cannot be closed when the inner lid is not
attached to.
•
Are the both sides of the inner lid properly inserted (at 2 locations) ? (See page 12.)
• Are there any foreign objects on the clamp receiving parts or clamp parts ?
(See page 25.)
• Are any foreign objects stuck in the inner lid ? (See page 24.)
• Close the lid, then press the START key. (See page 14.)
The outer lid opens
during cooking.
• Push the center of the outer lid front part until it clicks.
•
Are there any foreign objects on the clamp receiving parts or clamp parts ? (See page 25.)
• Close the lid, then press the START key. (See page 14.)
The lid does not open
when the open button is
pressed.
• When the
indication is lit in the Keep Warm mode, press the open button
twice: Once to release the vacuum, and the second time to open the lid. (See page 10.)
• When the open button is too heavy to be pressed down in order to open the
outer lid, pressure may be being applied to the inner pot and it is dangerous
to open the outer lid. For your safety, instead of forcibly pressing the open
button to open the outer lid, press the OFF key and wait until the main body
has cooled down and the pressure is reduced. (It takes about 40 minutes.)
After opening the outer lid, remove foreign objects in the inner lid, clamp
receiving parts and clamp parts. (See pages 24 and 25.)
RC-DS1018K_EN_0809.indd 38 2016/08/09 10:49:29
39
Problem
Causes/what to check
(reference page)
Timer setting
Cooking starts
immediately after setting
the timer.
Cooking does not finish
at the preset time.
The timer cannot be set.
• For a timer setting within after an hour or two, cooking starts on the spot.
• Did you misread the clock ? The cooker uses a 24-hour clock.
• Is the current time wrong ?
• Has the lithium battery burnt out ? (See page 42.)
• The actual time for finishing the cooking may be delayed by about 10minutes
when the room temperature or water temperature is low, or when the amount of
water in the pot is increased.
• Was the inner pot in place when you tried to set the timer ?
• Did you forget to set the timer or press the START key after setting the timer ?
Cooking / keeping warm
Steam leaks out of the
cooker
* Check the reason after
cooking is finished.
• Are there any foreign objects on the inner lid packing, inner pot rim or frame ?
(See page 13.)
• Are there any foreign objects on the inner lid, clamp receiving parts or clamp parts ?
(See pages 24 and 25.)
• Has the inner lid packing been damaged, or has the inner lid or inner pot become
deformed ?
• Is the inner lid properly fitted ? (See page 12.)
There are water droplets
near the steam vent
• Water droplets may form when the steam cools. This is not a problem.
There are water droplets on
the inner lid or inner pot.
• Water droplets may form on the inner lid or inner pot to prevent the rice from
drying out. This is not a problem.
When the outer lid is
opened, water drips from
the packing, etc.
• Water may drip onto the frame, etc., depending on the timing of opening the
outer lid, the room temperature, and so on. Wipe it off.
• When the lid is not opened completely, or opened slowly, condensation on the
inner lid may fall on the inner pot (rice) instead of the outer frame.
• If the power or Keep Warm setting is turned off while rice is in the pot, a large
amount of condensation will accumulate on the lid.
• Are there any foreign objects on the temperature sensors or the outer surface of
the inner pot ?
The cooker...
...boils over
...spatters
• Steam or droplets come out from the steam vent to release the pressure. This is
not a malfunction.
• Was the amount of rice too small ? Was the water too much ? Did you wash the
rice insufficiently ?
•
Did you select a wrong cooking course when cooking congee or brown rice ? (See
page 16.)
•
Are foreign objects attached to the temperature sensor or the lid temperature
sensor ?
• Is the inside of the steam vent dirty ?
• Have you attached the steam vent, inner lid and filter ?
• Are any foreign objects stuck in the inner lid ? (See page 24.)
• If there is a power failure during cooking, boiling over may occur.
A thin film is formed on
the inner pot.
• Thin films like wafer paper are dried starch in the rice. This is not a problem.
The center of the rice has
hollowed out.
• This is caused by the inner pot heating itself in the unique IH cooking system.
Loosen the rice in whole.
• When the filter is not attached, the center part of the cooked rice may become
hollowed out.
Rice grains become
attached to the inner
surface of the inner pot
and / or the inner lid
• If the filter is not attached, rice grains may scatter when the vacuum pressure is
released.
Troubleshooting
RC-DS1018K_EN_0809.indd 39 2016/08/09 10:49:29
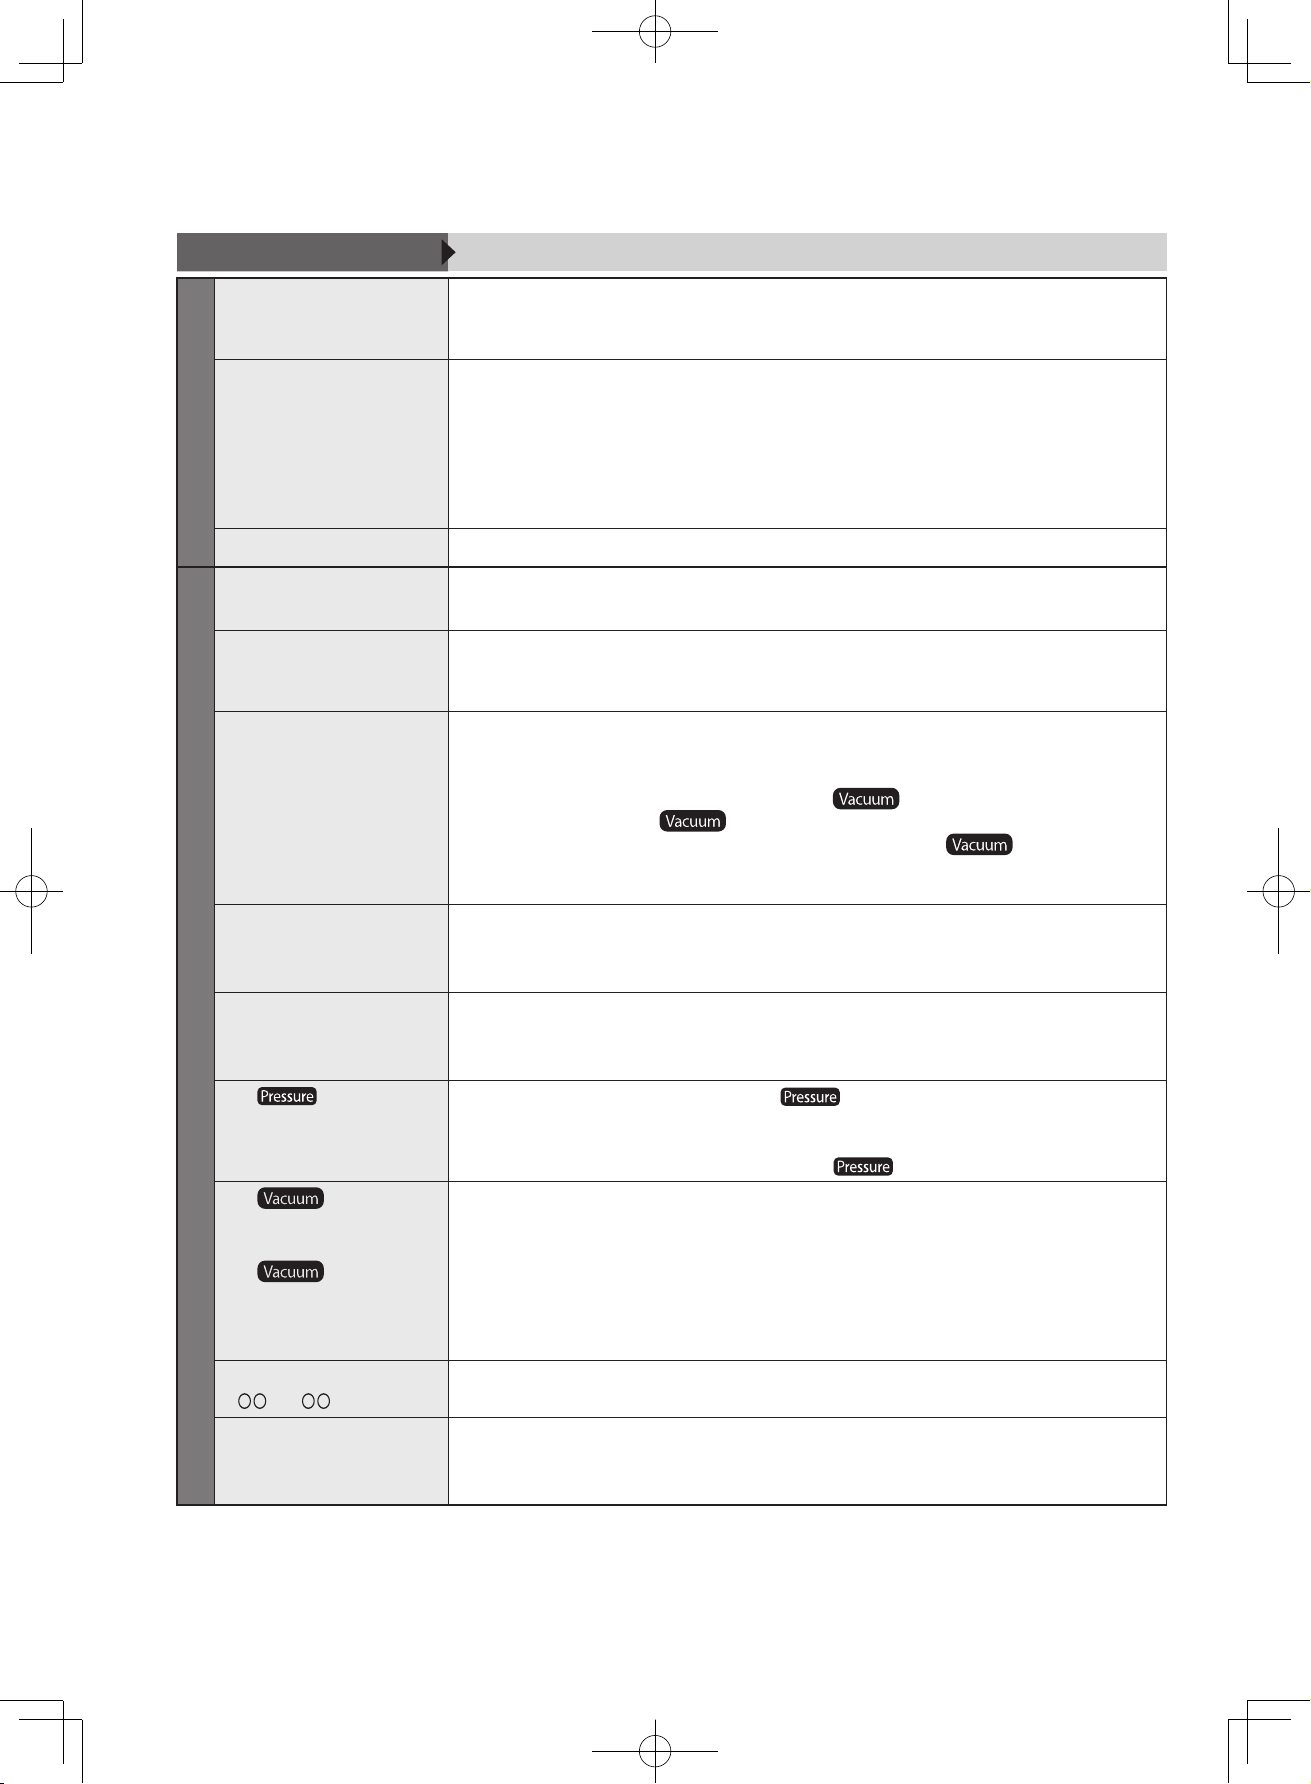
40
Troubleshooting (continued)
Problem
Causes/what to check
(reference page)
Cooking
Cooking takes a longer time.
The displayed time does
not change.
• The preset clock will start changing when the temperature for cooking is reached.
The actual time period required to finish cooking will be longer as it includes the
time during which the temperature increases to the target temperature.
The cooked food does
not turn out tasty.
• Doneness varies depending on the kinds of ingredients and how they have been
measured. Check the recipe or change the setting time.
• In the following cases, the cooked food may not turn out tasty.
The outer lid is not fully closed; steam is leaking (page 39); foreign objects are
attached to the temperature sensor or the lid temperature sensor; the inner pot is
deformed; cooked rice was left in the pot; or there was a power failure while cooking
(page 42).
The timer cannot be set.
• The timer cannot be set for <Steam>,<Cake> and <Soup> courses.
Display / keys
Key operation is not
possible.
• Is the power plug connected ? Is the inner pot in place ?
• Is an error message, e.g. "C10", "F01", etc. being displayed ? (See page 41.)
"1-1" is displayed when
the DELICIOUS key is
pressed.
• When the DELICIOUS key is pressed for 5 seconds or longer, the "1-1" display for
changing the settings appears. Press the OFF key and start the procedure from the
beginning. (See page 23.)
The lamps are off.
Cooking is stopped
halfway.
• If you remove the inner pot during use, power will be cut off.
•
If you press the OFF key accidentally, or there is a long-time power failure, the power will
be cut off.
• See page 11 for information about the indication. See page 22 for
information about the
indication in the Keep Warm mode.
•
Did you touch the open button or open the outer lid, when the indication was lit ?
The timer will continue / the rice will be kept warm after the vacuum is released.
(See page 11.)
Display of remaining
time is different from the
actual cooking time.
• The actual cooking time may differ from the displayed time. This is not a
malfunction.
See "Cooking time display" on page 11 for details.
The elapsed time
displayed in the Keep
Warm mode is flashing.
• This is to notify you that rice is being kept in the Keep Warm mode for too long.
Stop the Keep Warm mode. (See page 22.)
The
indication is
flashing or lighting up.
•
Do not open the outer lid while the indication is flashing or lighting up.
Pressure is applied in the inner pot. It is dangerous to open the outer lid. During
pressure cooking, if the OFF key is pressed, the plug is unplugged, or the rice cooker
is in a situation similar to a power failure, the
indication flashes.
The
indication
does not light up.
(No vacuum is created.)
The
indication
has turned off.
( The vacuum has been
released)
• See page 11 for information about the Vacuum indication during cooking and
when the timers is set.
• See page 22 for information about the Vacuum indication in the Keep Warm mode.
• Did you press the open button or open the outer lid ? (See page 11.)
• Did you change the vacuum pump operation settings ? (See pages 23 and 36.)
Buzzer sounds and
(C or F ) is displayed.
• See "Error Display" on page 41.
The display disappears.
The time display 0:00 is
flashing.
• The lithium battery fixed on the inside of the main body has run out. (See page 42.)
RC-DS1018K_EN_0809.indd 40 2016/08/09 10:49:29
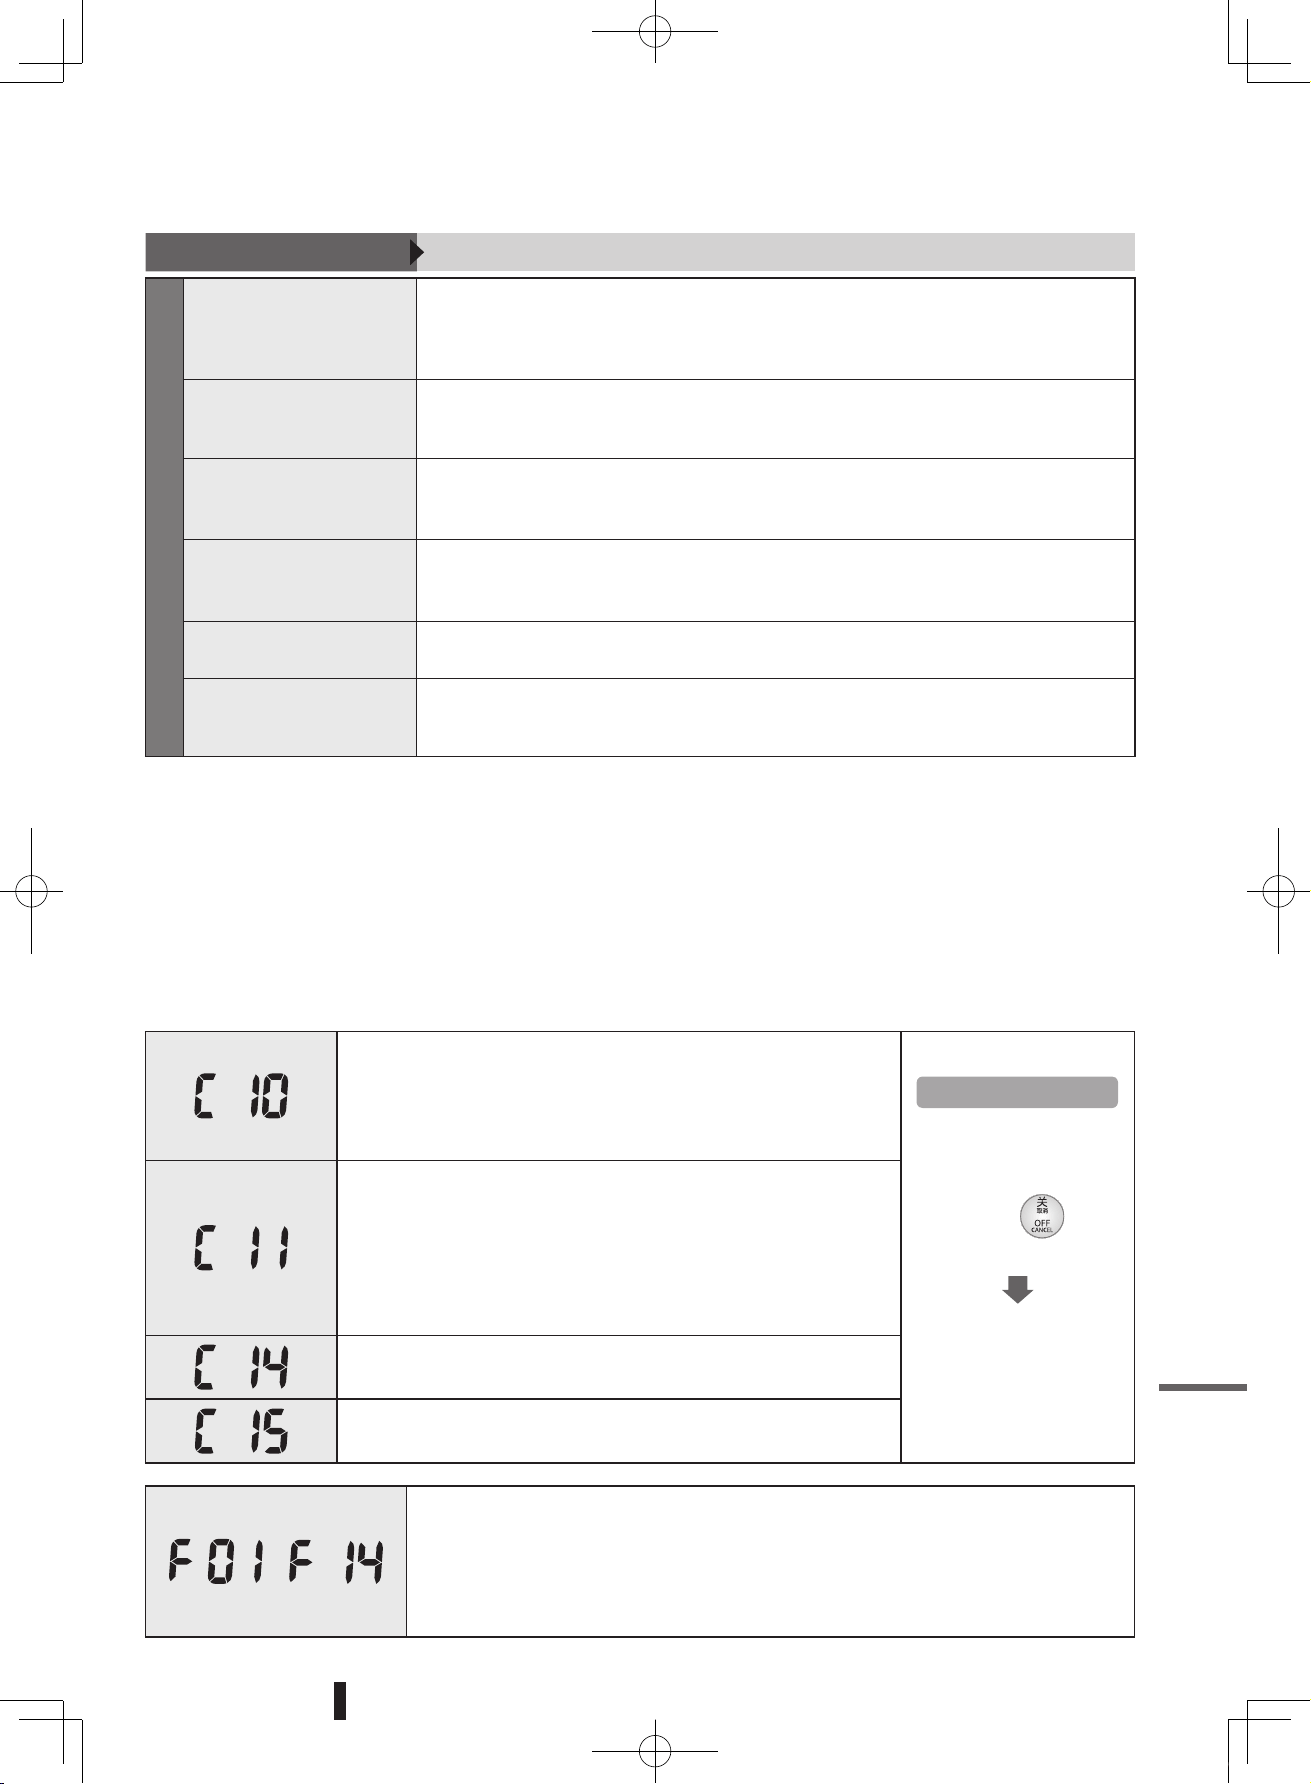
41
Error display
• Remove dust from the air inlet / outlet at the bottom part of the
main body.
• Do not use the rice cooker on a soft surface such as paper,
cloth, carpet, plastic bags etc., or in a place where the air inlet /
outlet is blocked.
Resetting the display
After taking the
recommended action(s),
plug in the power plug,
and press
key.
(Error display is reset.)
Resume the operation
after cooling down the
inside of the body, inner
pot and inner lid.
• Remove foreign objects such as rice grains adhered to the outer
bottom part of the inner pot and the temperature sensor.
• Has too much water been added ? (Reduce the amount of
water)
• Are you using the same electrical outlet with other appliances ?
→
Use a 220 V AC outlet with a rating of 10 A or more. Do not
share the outlet with other appliances.
• This error alerts you to prevent damage to some parts when
high voltage is applied.
• Are you sharing an inner pot other than the specified one ?
→
Use the specified inner pot.
to
When “F13” is displayed, the KEEP WARM and START lamps flash and the buzzer
sounds continuously.
• These displays indicate the malfunctioning of the printed circuits, temperature
sensors, etc.
Immediately stop using the cooker, unplug the power plug, and contact the shop
from which the product was purchased.
Unplug the power plug (power supply side) from an electrical outlet, and take the following suited action(s).
Problem
Causes/what to check
(reference page)
Other problems
The cooker makes noises
while in use.
• See "Sounds while in use" on page 35.
• Clicking is the sound of vacuum pressure regulation, humming is the sound of fan
rotation, buzzing is the sound of electrical conduction and air rushing is the sound
of steam being released.
There is a smell of plastic,
etc.
• The cooker may smell at first, but the smell will decrease with use.
If you are worried about the smell, ventilate the room or clean the cooker by
boiling. (See page 25.)
There is a gap between
the outer lid and the
main body.
• There is the gap between the outer lid and the main body but it is sealed with the
inner lid packing. Although the gap may be widened due to application of
pressure during cooking, it is not a problem.
The coating on the outer
surface of the inner pot is
scratched or dirty.
• The coated outer surface of the inner pot may become scratched or dirty with use.
You can use the cooker to cook rice and keep it warm without any problems.
Sparks come out of the
power plug.
• Small sparks are sometimes generated when plugging or unplugging the power
plug. This is inherent to the IH (induction heating) method and is not a malfunction.
The circuit breaker is
tripped during cooking.
• If you use the cooker together with other electrical appliances at the same time,
electricity use may exceed the rating and trip the breaker. Do not share the
electrical outlet used for the cooker with other appliances.
Troubleshooting
RC-DS1018K_EN_0809.indd 41 2016/08/09 10:49:30
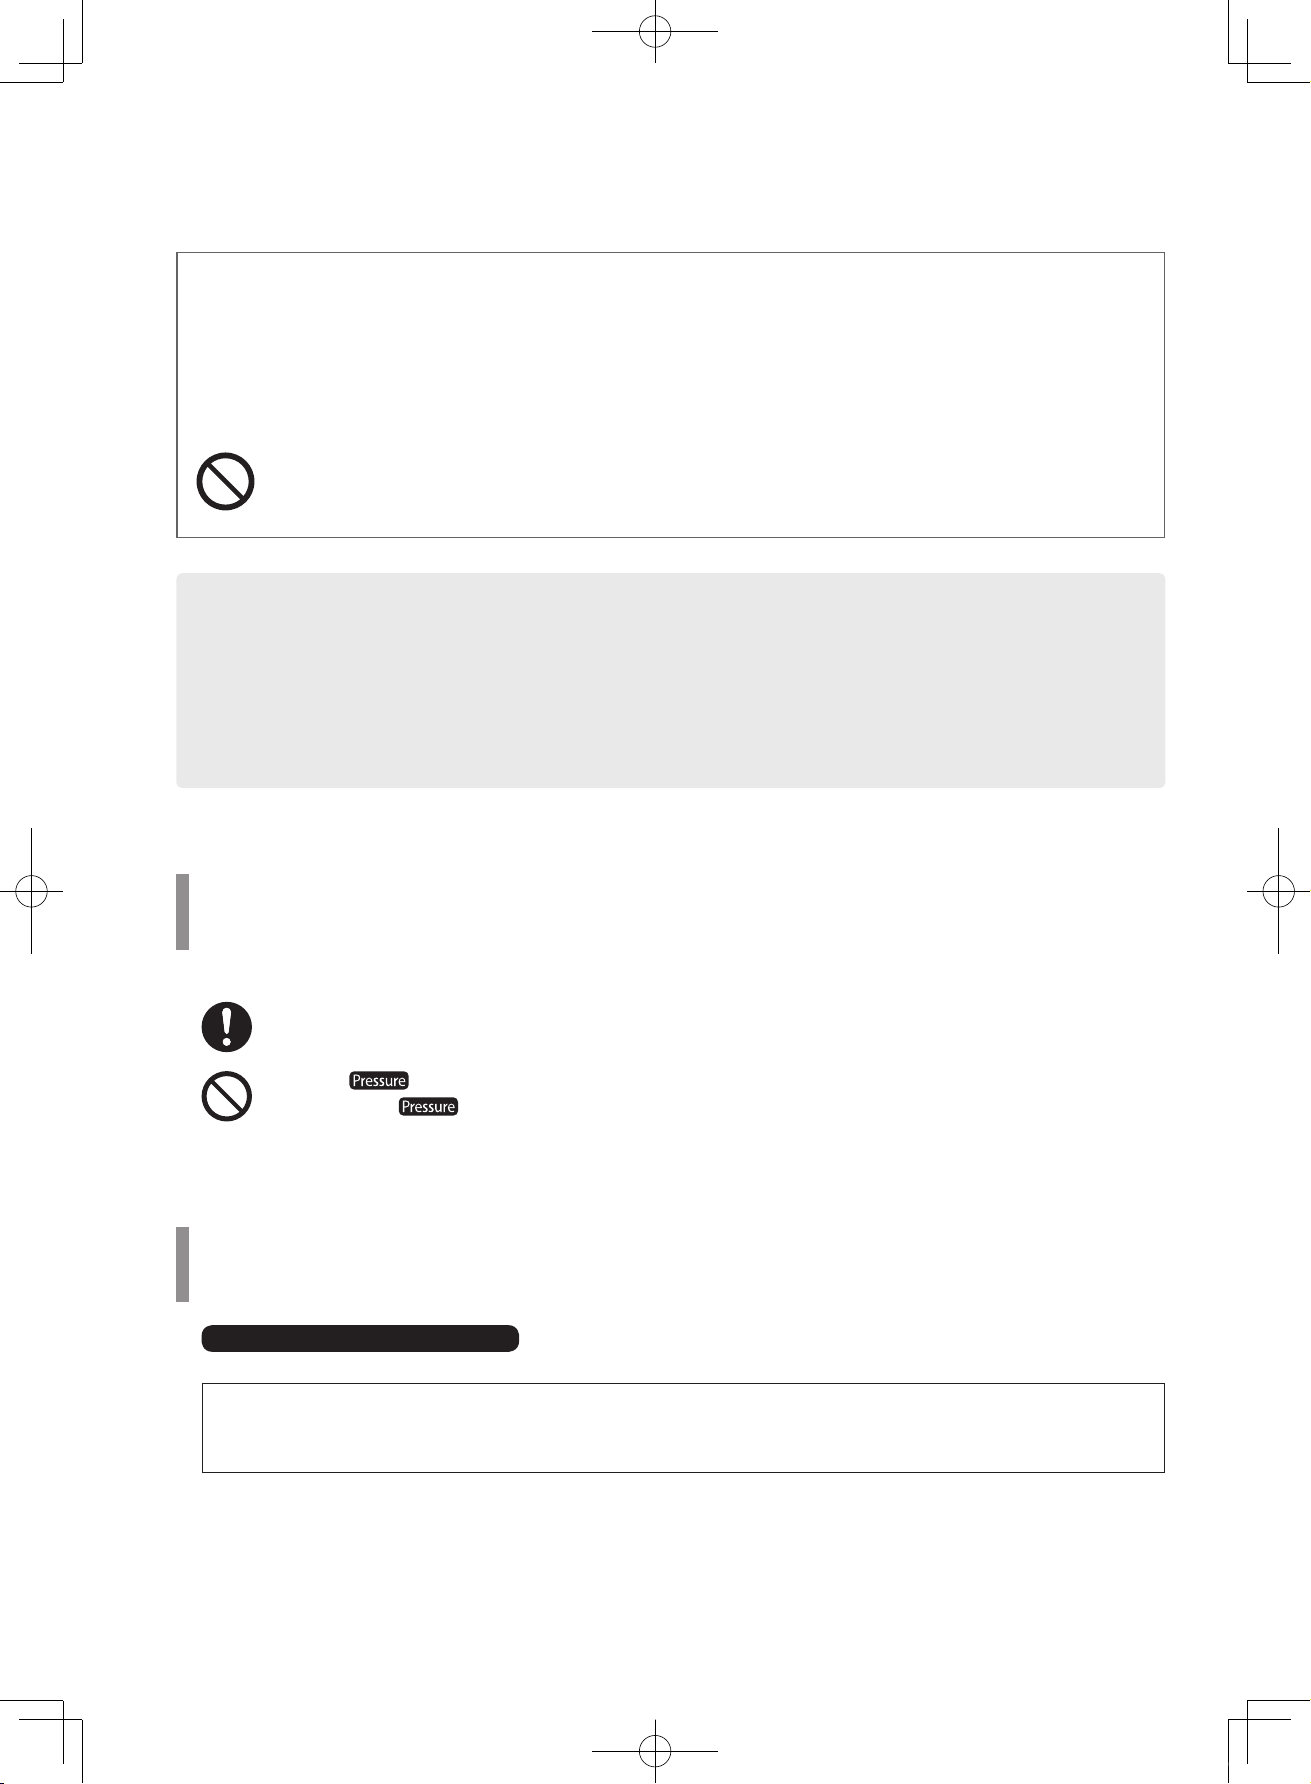
42
Lithium battery
The lithium battery attached to the main body is used to work the clock when the power plug is unplugged, and
memorize cooking courses.
If the lithium battery is exhausted
When the power plug is unplugged, timer settings and memorized cooking courses are cleared.
To use the rice cooker, plug it in, and press the OFF key to stop the 0:00 display from flashing. The cooker
can then be used normally.
(Be sure to set the current time before using the timer.)
➡
To replace the battery, contact the store from which the product was purchased. (Cost borne by user.)
The lithium battery is attached to the inside of the main body. Do not disassemble the main body.
You cannot replace it by yourself.
When a power failure occurs
After recovering from a power failure, the cooker will resume cooking rice or keeping it warm.
However, the cooked rice may not be tasty, the power may be cut off, or the preset finishing time may be delayed.
* The same phenomena occur when you unplug the power plug or the circuit breaker is tripped.
If the power is cut off due to a power failure during pressure cooking, watch out for steam that may be
expelled from the steam vent.
While the indication is flashing, pressure is applied in the inner pot. Do not open the outer lid.
Even when the
indication is not displayed, do not forcibly open the outer lid if you feel it hard to
press the open button.
If the filter is damaged / lost
Please contact the store from which the product was purchased or any distributor listed in
"
东芝小家电产品全国指定特约维修网点名录
" enclosed in the packing box.
The filter prevents foreign objects from becoming stuck in the pressure regulating part. Be sure
to attach the filter.
The rice cooker can be used without the filter, but do not use it to cook mixed rice or rice with mixed grains
or do not use the <Quick> course, as the inner lid can easily become blocked.
Contact the store from which the product was purchased in the
following cases.
• When you put rice or water directly in the cooker instead of the inner pot.
• When you have damaged or lost the inner pot, filter, inner lid, steam vent seal packing or power cord.
• When any plastic parts or packing become damaged. (They may become damaged after several years of use.)
RC-DS1018K_EN_0809.indd 42 2016/08/09 10:49:30
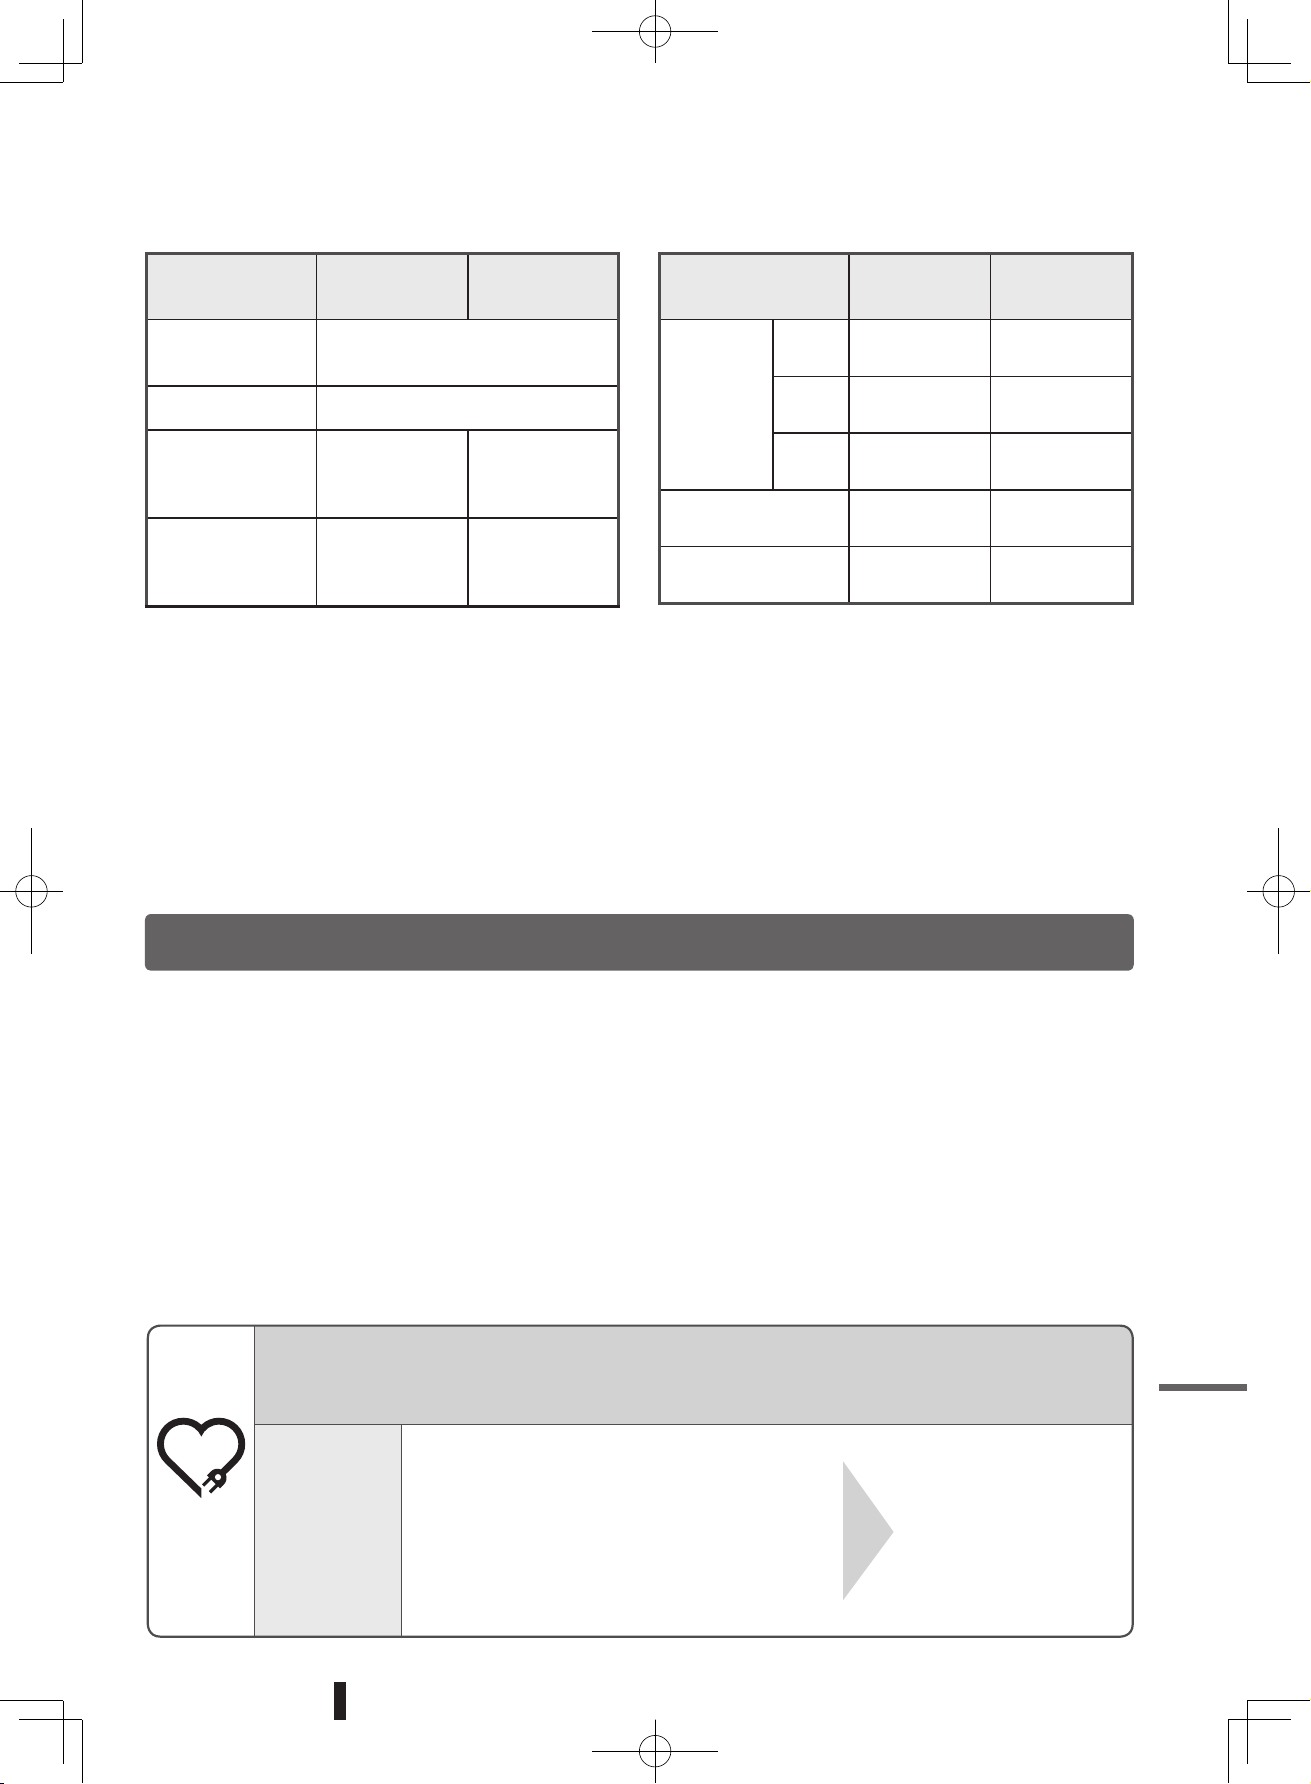
43
Specifications
Model No. RC-DS10K RC-DS18K
Type Rice cooker with keep-warm function
Power supply 220 V AC, 50 - 60 Hz
Rated power
consumption
(Cook)
1100 W 1250 W
Rated power
consumption
(Keep Warm)
Average 32 W* Average 42 W*
Model No. RC-DS10K RC-DS18K
Outer
Dimensions
Width 26.9 cm 29.9 cm
Depth 33.3 cm 36.4 cm
Height 22.8 cm 26.7 cm
Mass 5.7 kg 6.9 kg
Length of cord 1.2 m 1.2 m
Regular
check up
Inspect the Rice Cooker
you have been using
for a long time!
Please check "Instructions for safety" and "Attention" regularly when using the
cooker.
Parts may deteriorate with heating, humidity, dust, etc. due to improper use
or long-term use of the Rice Cooker, resulting in damage or accidents.
Does your
cooker have any
of following
problems?
Remove dust
accumulated on
the power plug
and the electrical
outlet.
•
The power plug or cord becomes abnormally hot.
• The main body smells burnt.
• The main body has a crack, looseness or rattling.
• The inner pot, outer lid or inner lid is deformed
or damaged.
• The bottom fan does not run during cooking.
• Other abnormalities or failures are observed.
Stop use
To prevent damage and
accidents, stop using the
cooker, unplug the power
plug from the electrical
outlet and contact the store
from which the product was
purchased in order to have
it inspected or repaired.
*
Power consumption per hour in the Keep Warm mode.
(Conditions: maximum amount of rice; at a room temperature of 23°C; and with application of 220V.)
• See page 16 and pages 26 to 28 for cooking capacity.
• See the pages listed below for information on preparing food.
• <Steam>: pages 30 and 31
• <Cake>: pages 32 and 33
• <Soup>: page 34
• This product is not intended to be used at altitudes of over 2000 m.
Repair service
• A warranty is attached to this product.
• Please make sure that the purchase date, dealer’s name and other information are filled in on the warranty. Read the
warranty thoroughly and keep it handy.
• Please contact the store from which the product was purchased for any questions or service.
If you have any questions or requests in China, please contact any distributor listed in
"
东芝小家电产品全国指定
特约维修网点名录
".
Based on the Warranty, your product is repaired free of charge during the warranty period.
Any repair service will be for charge after the warranty period.
All the costs of shipping, packing, parts and repair of the service are the responsibility of the customer.
Troubleshooting
RC-DS1018K_EN_0809.indd 43 2016/08/09 10:49:31

44
2570-1 Urasuda, Kamo, Niigata 959-1393, Japan
THT-TBCI
(
TB
)
RC-DS1018K_EN_0809.indd 44 2016/08/09 10:49:31