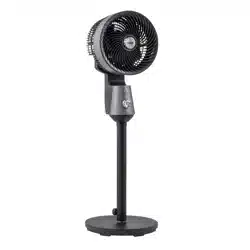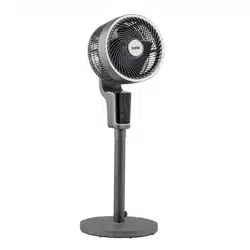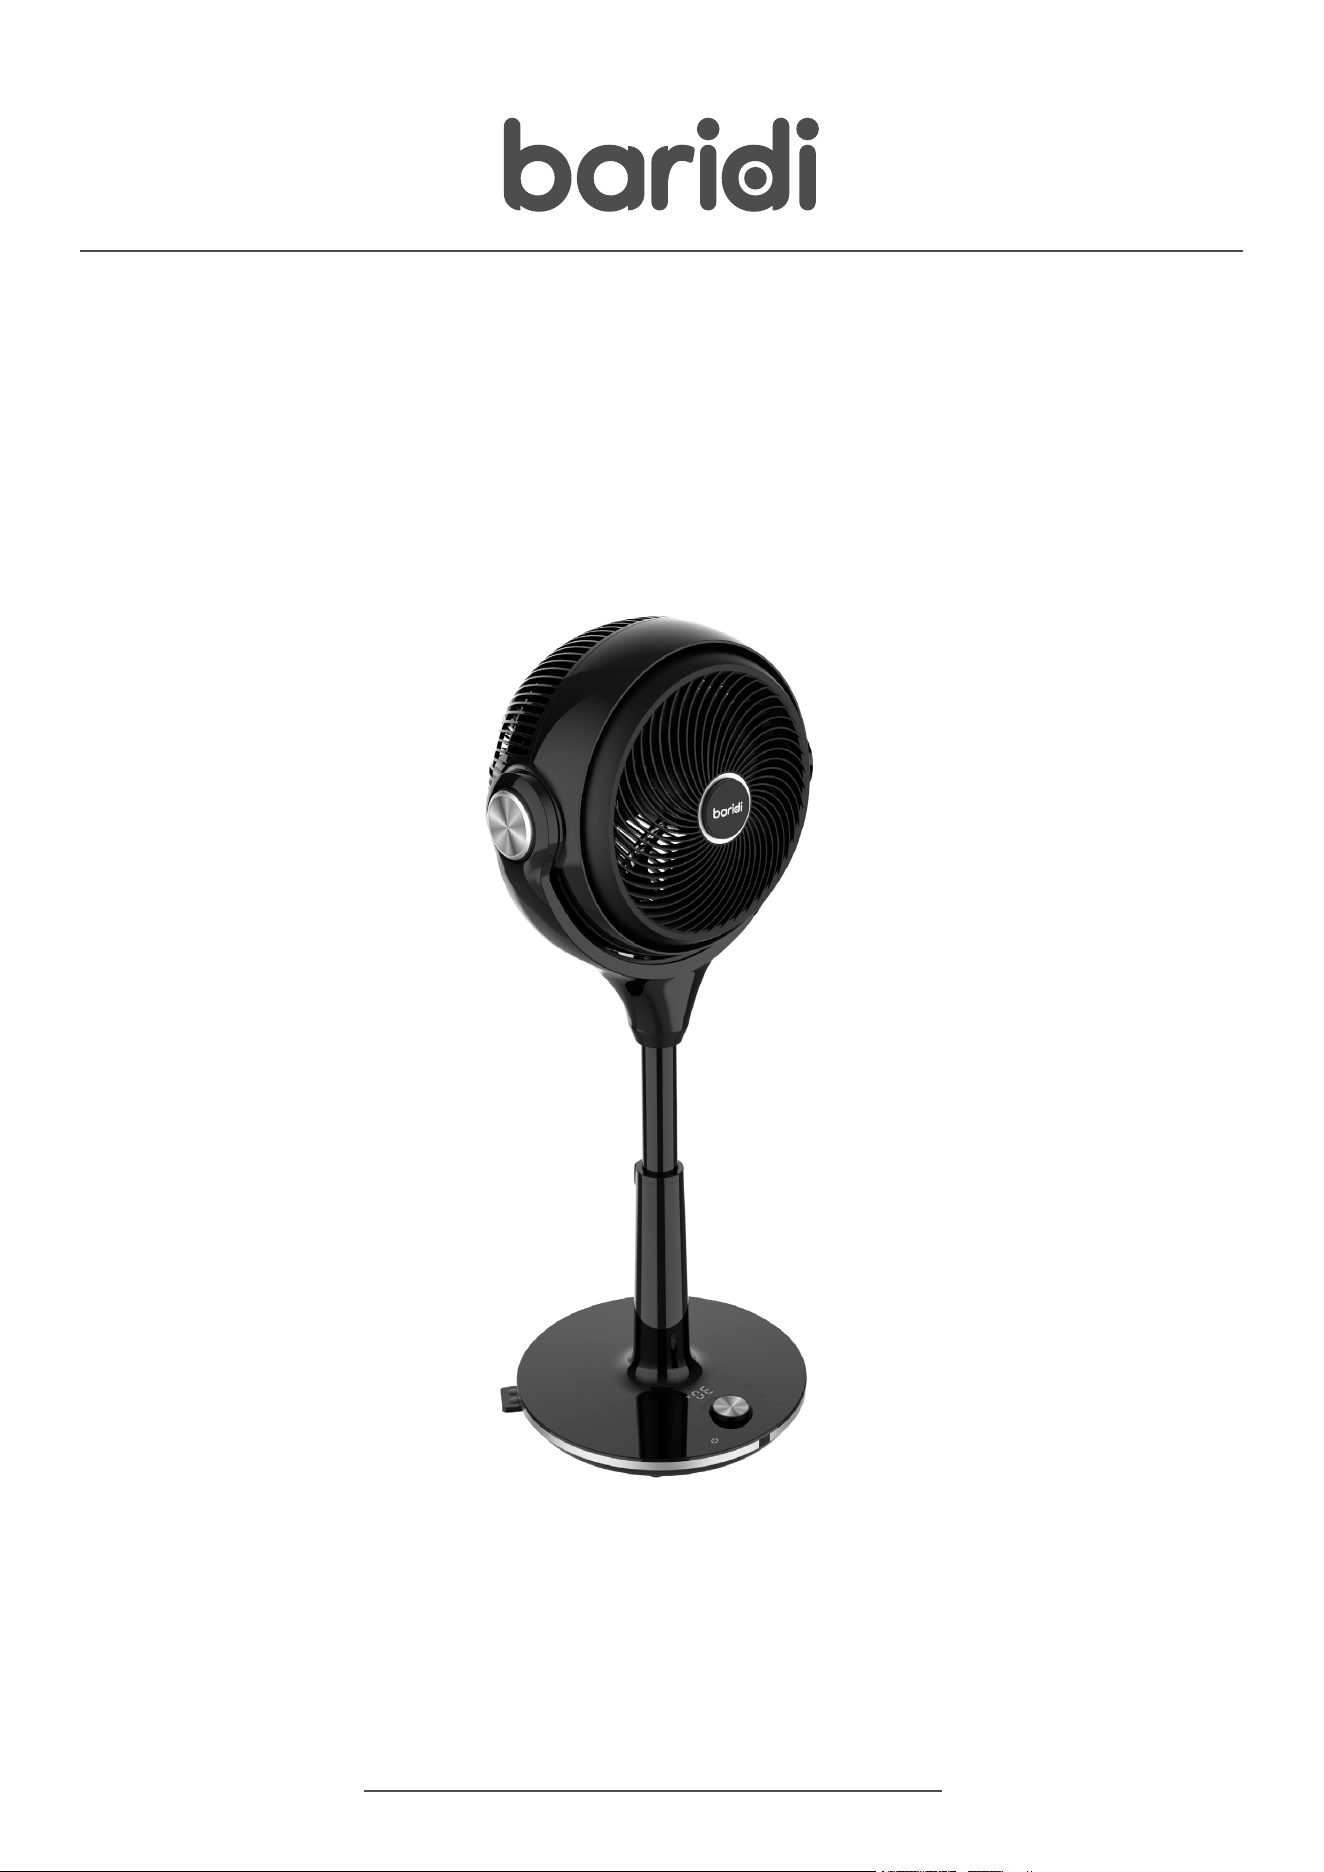
Baridi 10-Inch Pedestal Fan with Remote Control, 3 Operational
Modes and 30 Speeds, Adjustable Height & Pivoting Head,
12hr Timer
Thank you for purchasing a Dellonda product. Manufactured to a high standard, this product will,
if used according to these instructions, and properly maintained, give you years of trouble free performance.
DH143 Issue:1 20/12/24
www.dellonda.co.uk
Models: DH143
Important Information
Please read these instructions carefully. Note the safe operational requirements, warnings & cautions. Use the product correctly and with care
for the purpose for which it is intended. Failure to do so may cause damage and/or personal injury and will invalidate the warranty. Keep these
instructions safe for future use.
SPECIFICATION
SAFETY INSTRUCTIONS
WARNING! The warnings, cautions and instructions in this manual cannot cover all possible conditions and situations that may occur.
It must be understood by the operator that common sense and caution are factors which cannot be built into this product, but must be
applied by the operator.
This manual explains the proper use of your fan, please read it carefully before using even if you are familiar with the product. The
manual should be kept in a safe place for future reference.
ELECTRICAL SAFETY
WARNING! It is the user’s responsibility to check the following:
Check all electrical equipment and appliances to ensure that they are safe before using. Inspect power supply leads, plugs and all
electrical connections for wear and damage. Dellonda recommend that an RCD (Residual Current Device) is used with all electrical
products.
Electrical safety information: It is important that the following information is read and understood.
Ensure that the insulation on all cables and on the appliance is safe before connecting it to the power supply.
Regularly inspect power supply cables and plugs for wear or damage and check all connections to ensure that they are secure.
Important: Ensure that the voltage rating on the appliance suits the power supply to be used and that the plug is tted with the correct
fuse - see fuse rating in these instructions.
8 DO NOT pull or carry the appliance by the power cable.
8 DO NOT pull the plug from the socket by the cable.
8 DO NOT use worn or damaged cables, plugs or connectors.
9 Ensure that any faulty item is repaired or replaced immediately by a qualied electrician.
WARNING! If the supply cord is damaged, it must be replaced by the manufacturer, its service agent or similarly qualied persons in
order to avoid a hazard.
9 Ensure that repairs are carried out by a qualied electrician.
GENERAL SAFETY
Read all safety warnings, instructions, illustrations and specications provided with this product. Failure to follow all instructions listed
below may result in electric shock, re and/or serious injury.
WARNING! Children from age 8 years and above, persons with reduced physical, sensory, or mental capabilities those with lack of
Refer to
instruction
manual
Indoor use
only
MODEL NO: DH143
Colour of Product: Black
Electrical Class: Class II
Fan Diameter: Φ227 x 72.5mm
Fuse Rating: 13A type plug with 3A fuse
Height: 718mm shortest 854mm tallest
Maximum Airow: 24.5 m³/min (with a 10% tolerance)
Nett Weight: 3.5kg
Noise Power/Pressure: 55dB(A)
Plug Type: 3-Pin BS
Power Supply Cable Length: 1.6m
Power: 35W
Product Depth (Front to Back): 36
Product Dimensions (W x D x H): 320 x 360 x 854mm (to full height) 320 x 360 x 708mm (shortest height)
Product Height (Floor to Top): 71.8
Product Width (Side to Side): 32
Supply: 230V - 50Hz
Warning
Electricity
shock hazard
experience and knowledge can use the appliance, if they have been given supervision or instruction concerning use of the appliance in
a safe way to understand the hazards involved.
WARNING! Children shall NOT play with the appliance.
WARNING! Cleaning and user maintenance on the appliance shall not be made by children without supervision.
WARNING! The appliance shall be disconnected from its power source during service and when replacing parts.
WARNING! Check the voltage indicated on the rating plate. This product is designed for a 220‐240V~/50Hz electric supply.
WARNING! Periodically check the power cord of this fan.
WARNING! Place the fan on a at, rm, safety surface before use.
WARNING! Disconnect the plug from socket when not in use.
WARNING! Make sure that the fan will not touch any obstruction when oscillating.
8 DO NOT put your ngers or any other object into the front grill when the fan is operating. Please pay special attention when in use near
children, children should not play with the fan at any time.
8 DO NOT let hair, net curtains, tablecloth, clothes or curtains near to the openings of the fan. They could be entangled into the fan,
causing damaged or injuries.
8 DO NOT use the fan when the cord or plug damaged, fan blade has fallen or has any other damage.
8 DO NOT use this fan outside; it is for indoor use only.
8 DO NOT use this fan in a damp area such as bathroom.
8 DO NOT use this fan near a window and under direct sunshine.
8 DO NOT use this fan with any semi‐conductors speed control.
8 DO NOT operate the fan in an area where gasoline is used or stocked, painting or such ammable liquids.
8 DO NOT try to disassemble this fan; there are not any parts that could eventually be repaired by the user. If you need maintenance,
please call the Dellonda Service Centre.
8 DO NOT use extension cord.
WARNING! Unplug the unit before serving or moving, including for cleaning purpose.
WARNING! The fan should not be operated without a base nor used when if tipped over.
WARNING! Unplug the unit before moving, including for cleaning.
WARNING! Always unplug it when not in use.
WARNING! Use this fan only as it is described in this manual.
WARNING! Keep the fan clean and maintain in good condition (use an
authorised service agent).
FUNCTION
• 30 speeds: 1-30.
• Timer function.
• Remote control function.
• Continuous electric memory function.
• Oscillation: 3D oscillation automatically (Up & Down, Left & Right 80°
respectively).
• 3 wind modes: Normal, Natural Breeze, Sleep.
• Touch control function(Capacitive touch).
• Adjustable height: stand & table use.
• LED light off automatically without any operation after 1 minute.
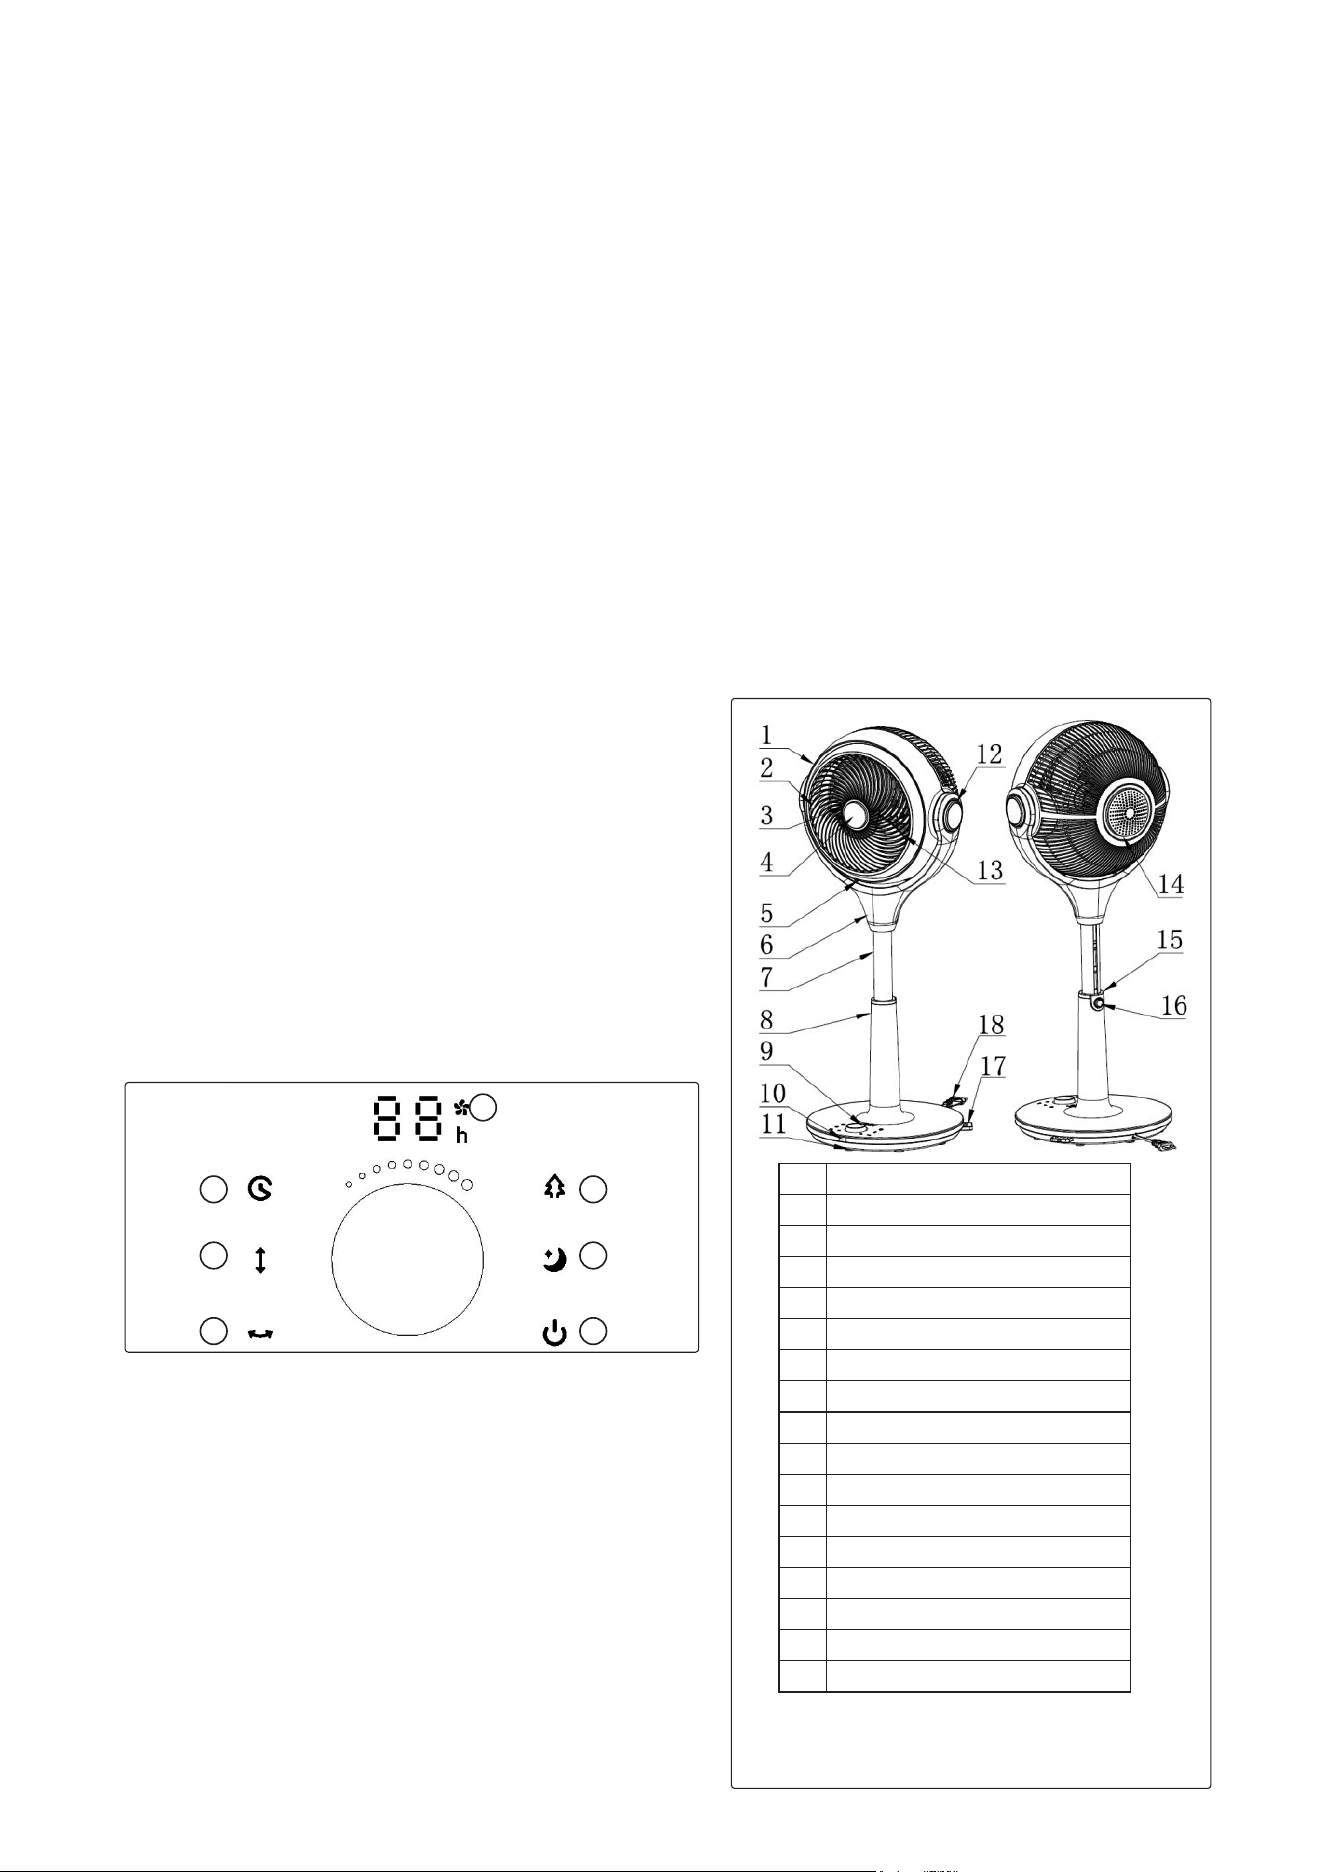
CONTROL PANEL
OPERATION
• Open the packaging and take out the manual, remote control, (batteries
not included) and accessories, ensure all parts are present.
• Plug in the unit, you will hear a beep sound twice. The unit is in standby
mode. The light is off.
• When there is no operation within 1 minute, the LED light will turn off
automatically. Press any button to restart the panel.
ON/OFF
• While in stand-by mode, press/touch ON/OFF Button to change to
working status. The function (6) and (7) will be illuminated, and the LED
light will present the current speed.
• When plugged into the mains, press/touch (6) to turn off the fan, and
the beep sounds the alarms. The unit will turn to the stand-by mode, no
output and display of the system. (If the oscillation function is on, the
motor will be back to the central point then the fan will be in standby
mode. If the swing button is off, the whole fan will be in stand-by mode
directly).
NOTE: If there is a power cut while in operation the head of the fan may
1 Front Grill
2 Ventilation Net
3 Grill Ring
4 Decoration Cover
5 Bracket Cover
6 U Shape Bracket
7 Lifter
8 Upper Base Cover
9 Dial
10 Remote receiving window
11 Base Bottom
12 U Shape Bracket Decoration Cover
13 Fan Blade
14 Back Grill
15 Button Decoration Cover
16 Button
17
Remote Control
1
2
3
4
5
7
6
DIAL
not go back to the centre. Plug the fan back in again and press the button (3) The head will go back to centre position.
DIAL
• When the fan is on, rotate the dial clock-wise to increase the speed of the fan. The range of the speed is 1 - 30 will display on the panel
accordingly.
NOTE: 30 is the highest speed after rotating the dial fully clock-wise.
• To decrease the speed rotate the dial anti-clockwise. A beep will sound at the lowest speed setting.
NATURAL BREEZE MODE (4)
• Function: Pressing this button will activate the Natural Breeze mode. The pattern will be on. Pressing the button twice will exit the Natural
Breeze mode.
• When the fan is set to Natural Breeze mode, 30 speeds are divided by 3 groups. Speed 1-10 is group 1, Speed 11-20 is group 2, and Speed
21-30 is group 3. Each group corresponds with each mode of air.
•
NOTE: The Natural Breeze & Sleep mode are selected using the coding switch, even if you choose any speed during the 1-10, 11-20 & 21-
30, the panel will only be shown with Speed 10, 20 or 30, which corresponds with Low, Middle, & High Natural Breeze mode. If the Natural
Breeze mode exits to Normal mode, the panel will rstly show Speed 10, 20 or 30, rotate the dial again to choose the speed of your choice.
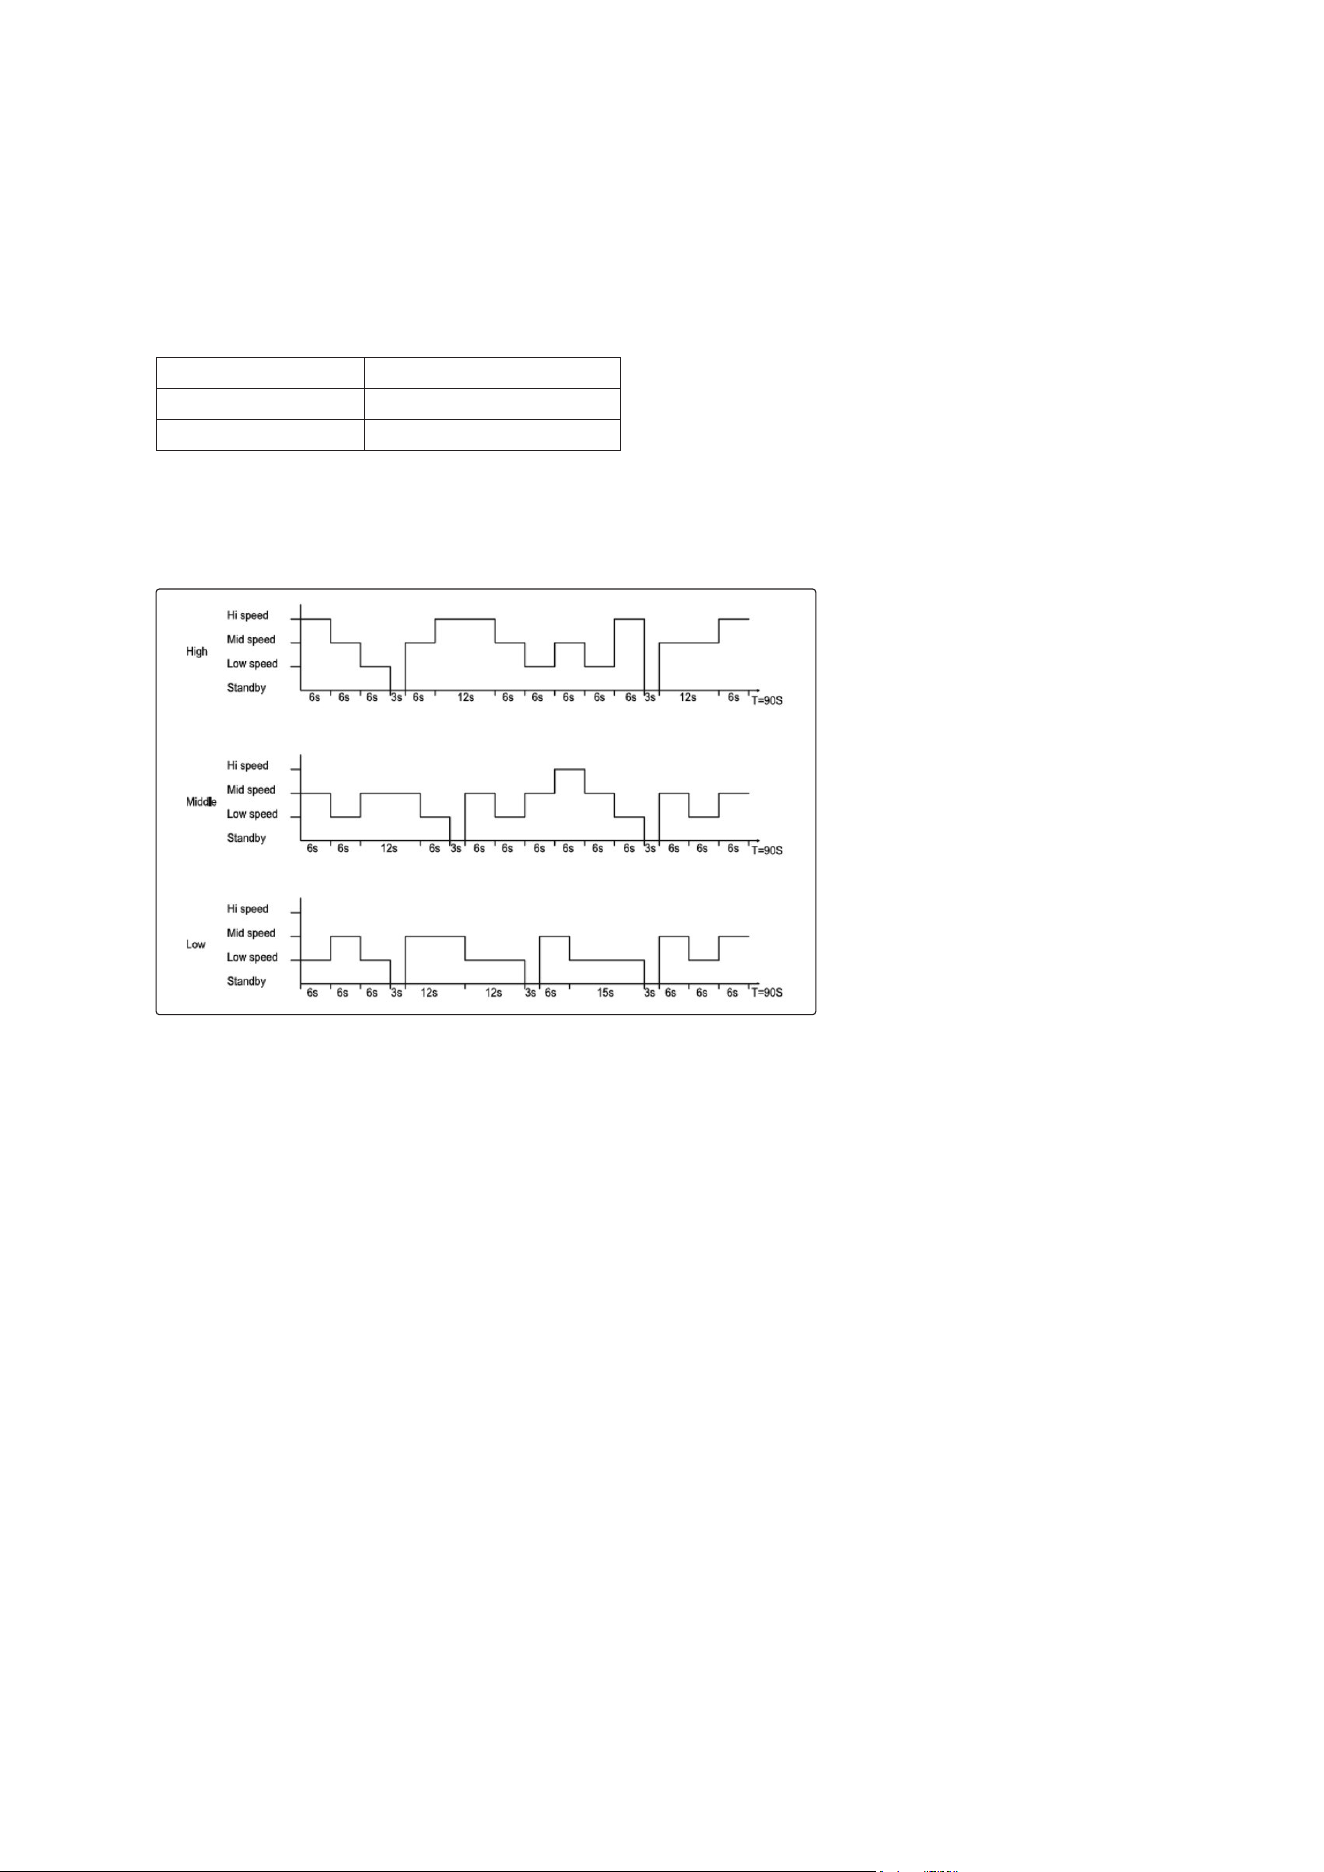
• The detail progress waveform shows as following picture:
SLEEP MODE (5)
• Press this button will enter Sleep mode. The pattern will be on. Pressing the button twice will exit the Sleep mode.
• High Sleeping Mode: 30 minutes High Speed + Natural Mode = 30 minutes Middle Speed + Natural Mode = Low Speed+ Natural Mode.
• Middle Sleeping Mode: 30 minutes Middle Speed + Natural Mode = Low Speed + Natural Mode.
• Low Sleeping Mode: Low Natural Mode.
TIMER (1)
• Timer boost button is used for timing the ON/OFF function, its time range is 1-12 hours, advance in hours, knob adjustment, digital tube
display.
• In the power-on state, press this button to set up the fan's working time, the timer indicator and the time indicator light up, the digital tube
ashes to show the timing time, indicating that it is in the timing time setting state. To set the timing time , press any button (except the
switch button) or wait 5 seconds to exit the setting. After the timing is completed, the digital tube alternately displays the timing time and
current wind speed at 10 second intervals, and the wind speed indicator and time indicator are displayed accordingly. When the internal
timing program reaches the time, the machine will be turned off and in standby.
• In standby mode, press this button to make a selection for the working time of the fan, the timer / selection indicator and the time
indicator light up, the digital LED ashes to show the selection time, indicating that the selection time is set, and the coding switch can
be rotated to set the selected time, wait 5 seconds or press this key again to exit the setting. After making an selection, the digital LED
displays the remaining time of the selected, and the time indicator lights up. When the internal timing program is displayed, the fan will
turn on at the last preset time, the function before the last shutdown.
LEFT AND RIGHT OSCILLATION (3)
• When the unit is on, press/ touch (3) will start the oscillation function. The LED indicator shows its working status accordingly.
• The oscillation angle is 80°, and the direction switch will keep 1 second for transition. When the fan is rst plugged in, the fan will oscillate
30° to calibrate its setting. (Turn left 30°, then stop for 9s, and turn right 80°, then stop for 15s.).
NOTE: If the oscillation angle is less than 30° or 80°, the fan needs to nish the whole process, then it can work normally.
UP AND DOWN OSCILLATION (2)
• Power-on status, press/touch (2) will begin the up & down oscillation function. The LED indicator shows its working status accordingly.
Group 1(Speed 1-10): Low Natural Breeze Mode
Group 2(Speed 11-20): Middle Natural Breeze Mode
Group 3(Speed 21-30): High Natural Breeze Mode
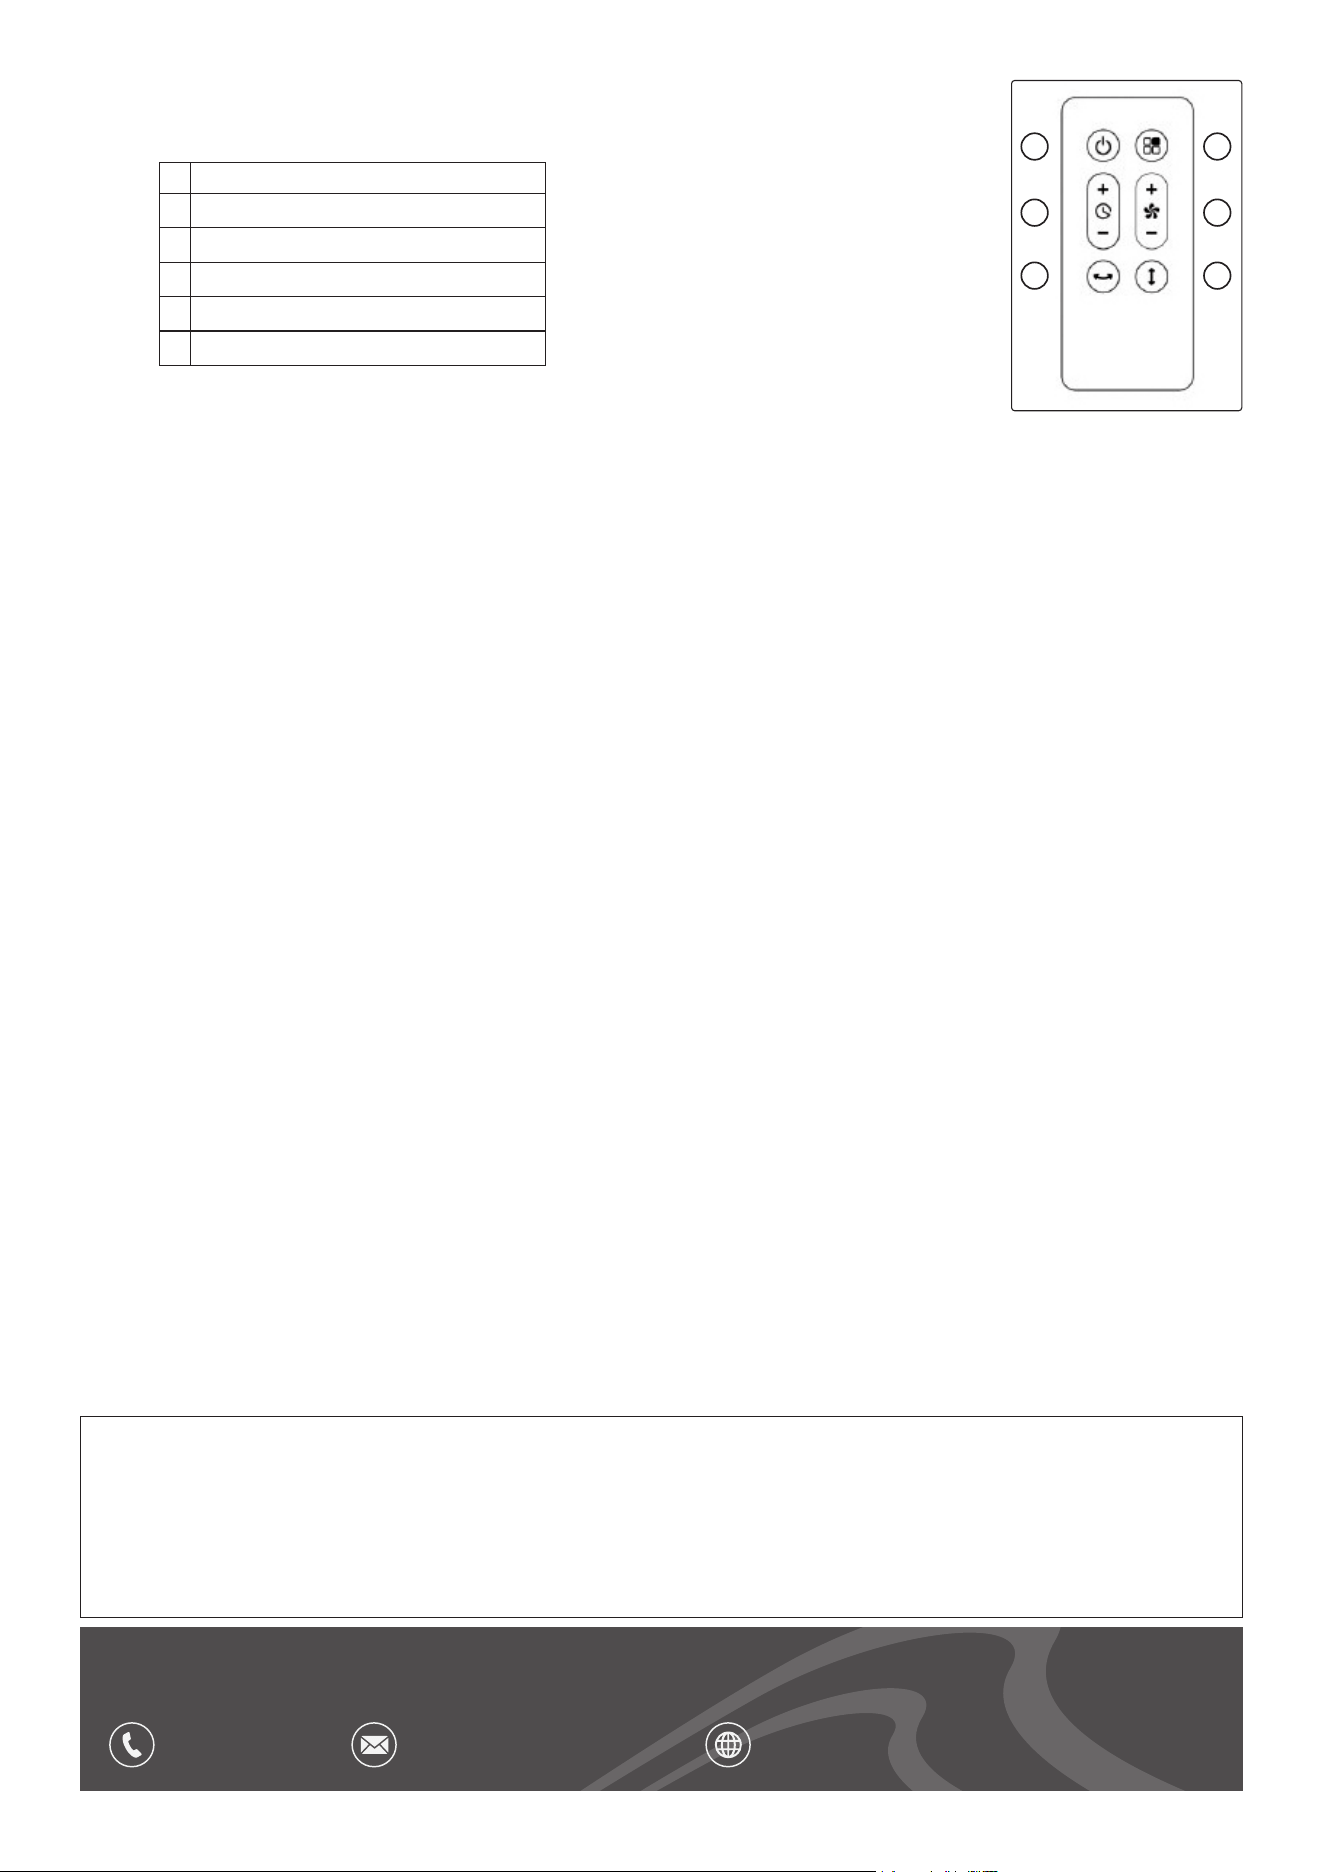
REMOTE CONTROL
• Use the remote control to control the functions of the fan.
• The function buttons on the remote control are the same as on the control panel of the fan.
MAINTENANCE
WARNING! Cut o power supply and remove the plug from the socket before cleaning the fan, or this
may result in an electric shock, or cause damage to the fan.
9 If there is too much dust, or dirt on the back cover of the fan, it will affect the performance of air-ow, so we suggest to clean the fan
once a month at least.
CLEANING
• The exterior of the fan may be cleaned with a damp cloth. DO NOT use abrasive cloths or creams, as this will spoil the nish of the fan. DO
NOT use a water jet or spray.
8 DO NOT immerse the appliance or accessories (cable) in water or other liquids. Keep the appliance away from direct sunlight, rain and
moisture.
SAFETY-CHECK AFTER MAINTENANCE
• Is the power cord broken or damaged?
• Is the power plug rmly inserted into the socket?
• Is the power plug abnormally overheated.
NOTE: Electric shock and re accident may be caused in case the power cord and plug is damaged or stained by dust. If any abnormality,
please unplug the power plug and get in contact with the vendor.
DECOMMISSIONING/ LIFE TIME OF THE PRODUCT/ DISPOSAL
9 Through years of normal wear, the fan will eventually become unserviceable. When this happens ensure that it is disposed of in
accordance with local authority regulations.
STORAGE
9 Store in a dry safe place out of the reach of children.
Dellonda Limited, Sole UK Distributor of Baridi
Kempson Way, Suffolk Business Park, Bury St Edmunds, Suffolk. IP32 7AR
01284 757575 suppor[email protected] www.dellonda.co.uk
Environment Protection and Waste Protection and Electrical Equipment Regulations (WEEE)
Recycle unwanted packaging materials. When this product is no longer required, or has reached the end of it’s useful life,
please dispose of it in an environmentally friendly way. Drain any uids (if applicable) into approved containers, in accordance
with local waste regulations. Under the Waste Batteries and Accumulators Regulations 2009, Dellonda would like to inform the
user that this product contains one or more batteries. It is our policy to continually improve products and we reserve the right
to alter data, specications and parts without prior notice. No liability is accepted for incorrect use of this product. Guarantee
is 12 months from purchase date, proof of which is required for any claim.
1
2
3
4
5
6
1 ON/OFF
2
Timer function
3
Left and Right oscillation
4
Function
5
Fan speed
6
Up and Down oscillation