SFN 4091WH
EN
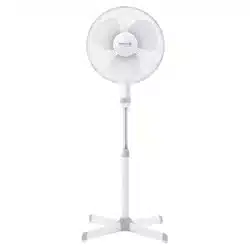
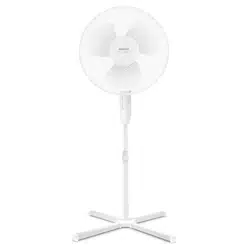
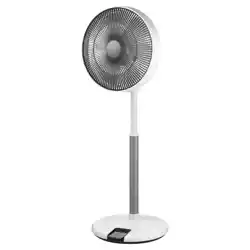
PEDESTAL FAN 3D ULTRASILENT 14”
Translation of the original manual
SFN 4091WH
A
1
7
2
3
4
5
6
8
9
B
1
2
3
4
5
9
10
11
12
6
7
8
13
C
1
2
3
4
5
6
7
8
D
D1 D2
D3 D4
D5 D6
D7
E
- 1 -
11/2025
2025, .
EN
Pedestal Fan 3D UltraSilent 14”
User Manual
IMPORTANT SAFETY INSTRUCTIONS
READ CAREFULLY AND STORE FOR FUTURE USE.
• This appliance may be only used by children aged
8 years and older and by persons with physical, sensory
or mental impairments or lack of experience and
knowledge, if they are supervised or have been instructed
on the safe use of the appliance and understand the
potential hazards.
• Children must not play with the appliance. Cleaning and
maintenance must not be performed by children without
supervision.
• If the power cable is damaged, have it replaced in
aprofessional service centre in order to prevent
adangerous situation. Never use the appliance if the
power cable is damaged.
• The fan is not intended tobe mounted on external
windows or walls.
• Before removing the protective grille, ensure that the fan is
disconnected from the mains.
. . . . . . . . . . . . . . . . . . . . . . . . . . . . . . . . . . . . . . . . . . . . . . . . . . . . . . . . . . . . . . . . . . . . . . . . . . . . . . . . . . . . . . . . . . . . . . . . . . . . . . . . . . . . . . . . . . . . . . . . . . . . . . . . . . . . . . . . . . . .
Additional Important Safety Instructions forUse of the Appliance
• Before connecting the appliance to apower socket, check that the rated voltage on its rating label matches the electrical voltage in the power socket.
• Connect the appliance only to aproperly earthed socket. Do not use an extension cord.
• The power socket must remain easily accessible in the event of asudden disconnection.
• The appliance is designed for use in household, offices and similar types of areas. Do not use it in very dusty or humid rooms such as laundries or
bathrooms, in areas where chemical or explosive substances are stored, in industrial surroundings or outdoors.
• Do not place the appliance in the vicinity of an open flame or appliances that are sources of heat.
• Make sure that the fan, the power cord and the power cord plug do not touch ahot surface.
• Do not use this appliance with aprogrammer, timer, remote control system or any other component that would switch the appliance on
automatically.
• To prevent electric shock, do not immerse the fan, power cord or power cord plug in water or other liquid, or rinse them under running water.
PEDESTAL FAN 3D ULTRASILENT 14”
- 2 -
11/2025
2025, .
• Always turn off the appliance and disconnect it from the power socket when leaving it without supervision, when not using it and before assembly,
disassembly or cleaning.
• Never touch the appliance with wet or damp hands or when standing on awet floor.
• Do not carry the appliance by the power cord. Always grasp the body of the appliance with both hands.
• Before using the appliance, make sure it is assembled correctly.
• Unplug the appliance from the power socket by pulling the plug, not the power cord. Otherwise, damage to the power cable or socket could occur.
• Make sure the power cord does not hang over the edge of atable or that it does not touch ahot surface. Do not place the appliance on unstable
surfaces such as carpets with very long and thick fibres. Place the appliance only on aclean, flat, dry and smooth surface.
• Do not expose children, the elderly or people who are bedridden to acold air current for an extended period of time.
• Do not cover the appliance with any items during operation.
• Never stick your fingers or other objects through the protective grille when the appliance is connected to apower socket. This is especially true when
the appliance is inoperation.
• Do not use the appliance if it is not working correctly, if it has been damaged or has been submerged in water. To avoid ahazardous situation arising,
do not repair the device yourself or modify it in any way. All repairs should be carried out by an authorised service centre. Tampering with the
appliance may result in the loss of your legal rights regarding faulty performance or warranty for quality.
Special safety instructions regarding batteries
• The fan remote control uses aCR 2032 type button cell battery topower it.
• The batteries are not atoy. Ensure that children do not play with the batteries. Keep new and old batteries out of the reach of children. Batteries pose
aserious health risk in the event of ingestion (chemical burns withserious consequences or suffocation) within avery short time. If the battery is
suspected to be ingested, seek medical help immediately.
• Use only the battery types recommended by the manufacturer.
• Do not combine new and old batteries, various brands or types of batteries (alkaline or rechargeable).
• The batteries must be correctly inserted according to the polarity. Improperly inserted batteries can damage the product, causing the battery to
short-circuit or leak.
• Before inserting, check that the batteries are not damaged, deformed or inflated. Using damaged batteries in any way poses arisk of fire, explosion
or serious injury.
• After inserting or replacing the batteries, check that the battery compartment cover is not damaged, that it is properly closed to prevent the batteries
from falling out. If the battery compartment cover is damaged, cracked or missing, do not use the product andhave it repaired.
• Do not use the product withdischarged batteries. Replace discharged batteries with new ones. This will prevent possible damage to the product or
leakage of the batteries.
• Wash your hands before andafter replacing the batteries. You will prevent the transfer of dirt.
• If you do not use the product for an extended period of time, remove the batteries to prevent them from leaking and damaging the product.
• Store the batteries and the product with the batteries in adry, cool andwell ventilated place. The recommended storage temperature is 5 to 45 °C.
Do not store batteries or the product withbatteries in wet or dusty environments, inextreme temperatures, or inenvironments where toxic, chemical,
or explosive substances are stored or used.
• Do not expose the battery or product with the batteries to direct sunlight.
• Do not throw batteries into afire or use open flames near them, e.g. candles. The battery may explode when exposed to high temperatures.
• Do not submerge the batteries in water or in any other liquid. Do not place any containers filled with water, e.g. avase on the batteries.
• Do not expose batteries to mechanical damage, disassemble or deform them. There is arisk of electrolyte leakage, explosion andserious injury
dueto chemical burns.
• Do not short-circuit the battery. Do not leave the batteries loose, e.g. in adrawer, withmetal items (paper clips, coins, keys, etc.). There is arisk of
short-circuiting.
• Do not attempt to recharge batteries that are not intended to be rechargeable. There is arisk of explosion andserious injury dueto chemical burns.
• Batteries contain environmentally damaging compounds and therefore do not belong in standard municipal waste. Take used batteries for proper
disposal at adesignated battery collection point.
• In theevent of abattery leak, do not touch the leaked electrolyte with your bare hands. Use protective aids (protective gloves, goggles or
arespirator). We recommend opening windows or doors to ensure adequate ventilation of the space. When skin is affected, rinse the affected area
with clean cold water; rinse the affected eyes with plenty of clean water andseek medical help; when swallowed, immediately contact emergency
medical help, rinse mouth, but do not induce vomiting.
. . . . . . . . . . . . . . . . . . . . . . . . . . . . . . . . . . . . . . . . . . . . . . . . . . . . . . . . . . . . . . . . . . . . . . . . . . . . . . . . . . . . . . . . . . . . . . . . . . . . . . . . . . . . . . . . . . . . . . . . . . . . . . . . . . . . . . . . . . . .
EXPLANATION OF SYMBOLS PLACED ON THE PRODUCT OR INTHE ACCOMPANYING DOCUMENTATION
The product meets all the basic requirements of the applicable EU directives.
This symbol on products or original documents means that used electric or electronic products must not be added to ordinary municipal
waste.
Product with protection class II
This symbol on the accumulator or battery means that the used battery must not be added to normal municipal waste.
. . . . . . . . . . . . . . . . . . . . . . . . . . . . . . . . . . . . . . . . . . . . . . . . . . . . . . . . . . . . . . . . . . . . . . . . . . . . . . . . . . . . . . . . . . . . . . . . . . . . . . . . . . . . . . . . . . . . . . . . . . . . . . . . . . . . . . . . . . . .
- 3 -
11/2025
2025, .
• Thank you for purchasing our SENCOR product; we hope it will serve
to your satisfaction.
• Prior to using this appliance, please read the user manual thoroughly,
even in cases when you are already familiar with the use of similar
types of appliances. Use the appliance only as described in this user
manual. Keep the manual for future reference. If you pass the appliance
on to another person, ensure that this user manual is included.
• Carefully unpack the appliance and make sure not to discard any part
of the packaging material until you have removed all its components.
It is recommended that you keep the original packaging, packing
material, receipt and confirmation of the extent of the seller'sliability
or warranty certificate at least for the duration of the legal right to
file adefect claim or the quality warranty. When transporting the
appliance, we recommend repackaging it in the original box provided
by the manufacturer.
. . . . . . . . . . . . . . . . . . . . . . . . . . . . . . . . . . . . . . . . . . . . . . . . . . . . . . . . . . . . . . . . . . . .
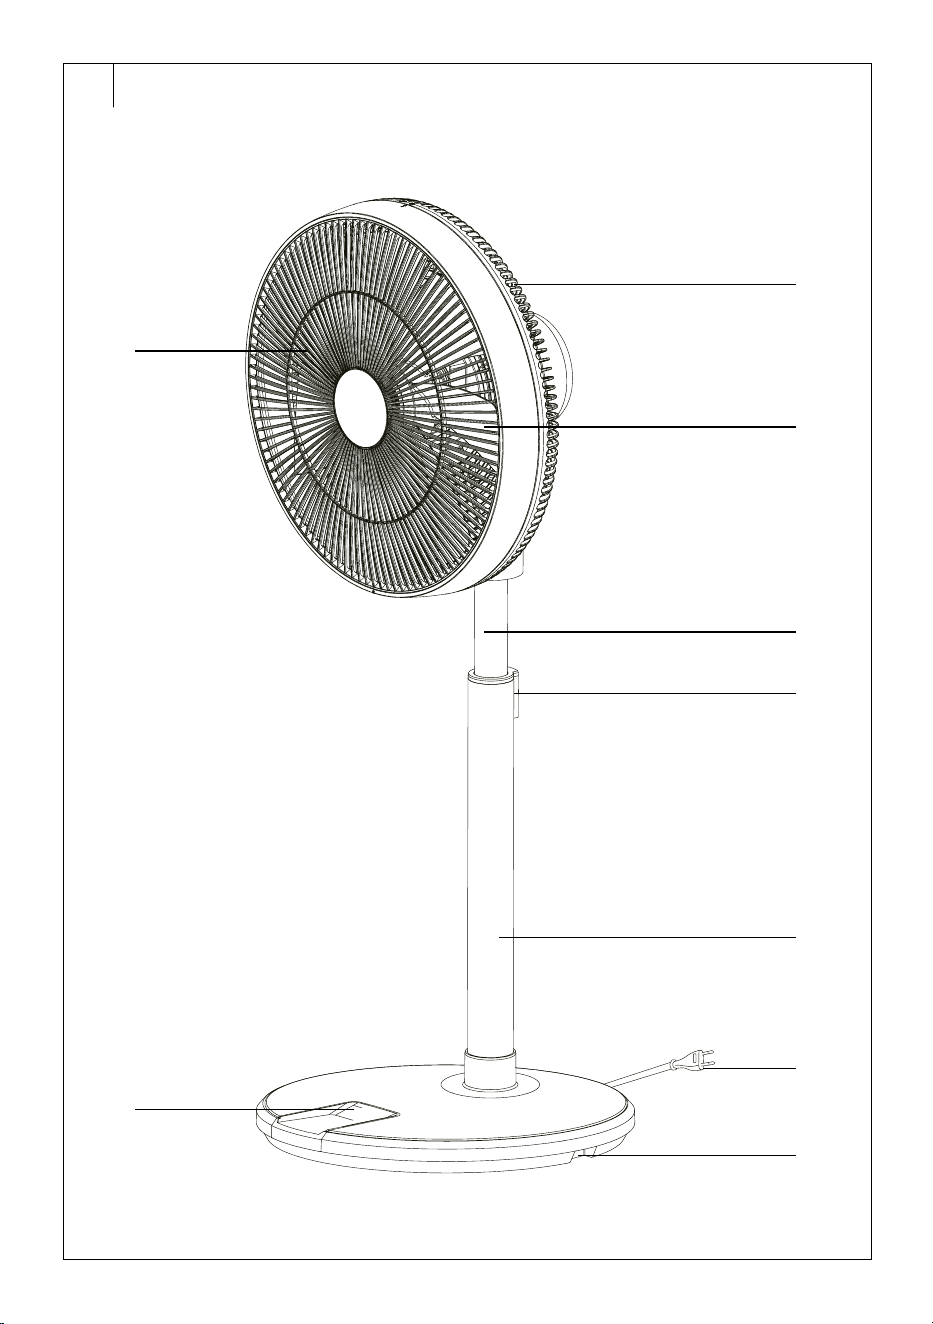
FAN DESCRIPTION
A1 Front protective grille
A2 Rear protective grille
A3 Fan blades
A4 Retractable pole
A5 Retractable pole release
button
A6 Stand
A7 Control panel with display
A8 Power cable
A9 Base
. . . . . . . . . . . . . . . . . . . . . . . . . . . . . . . . . . . . . . . . . . . . . . . . . . . . . . . . . . . . . . . . . . . .
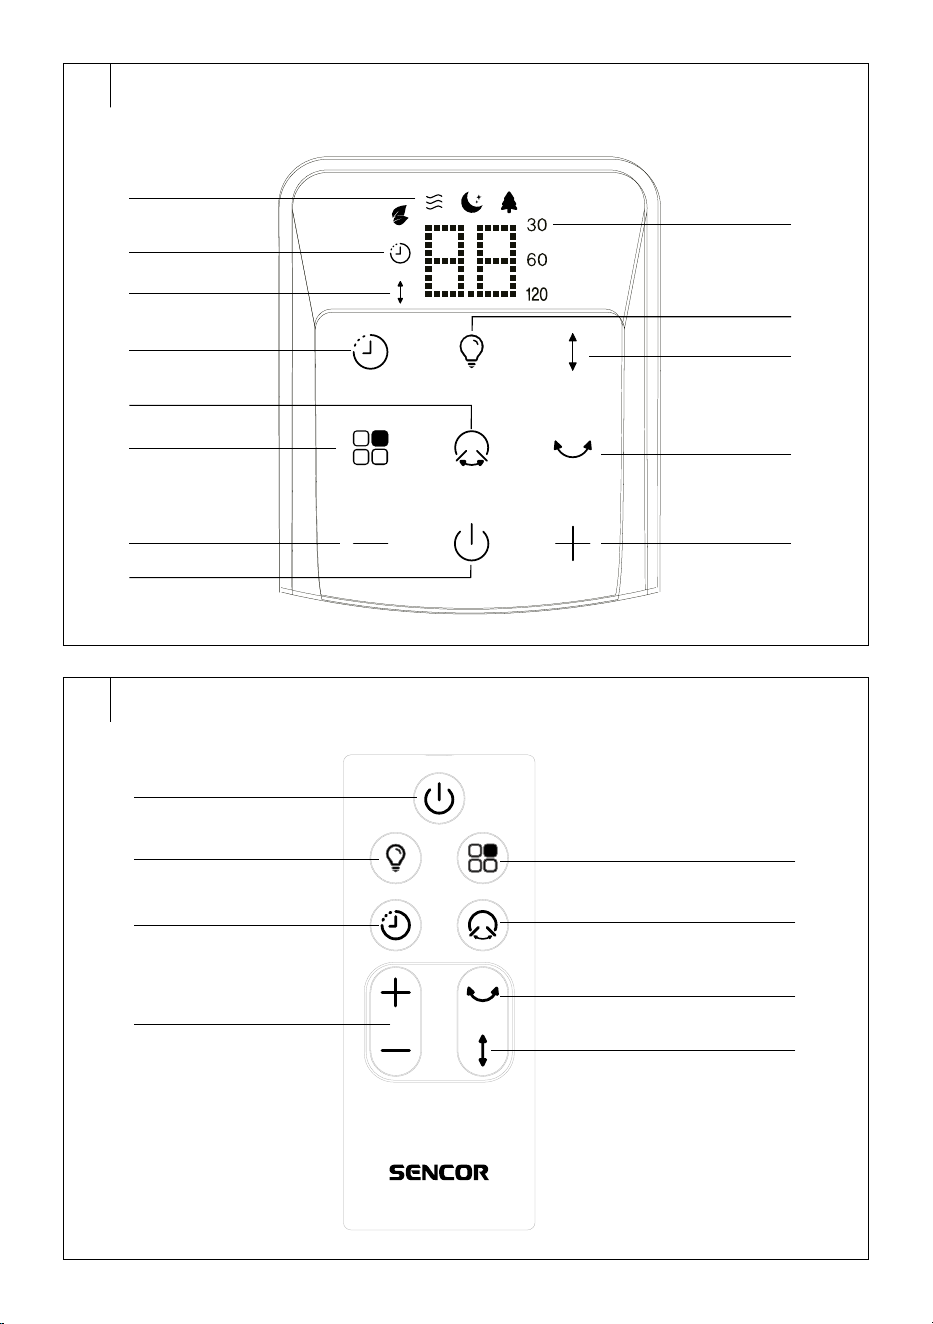
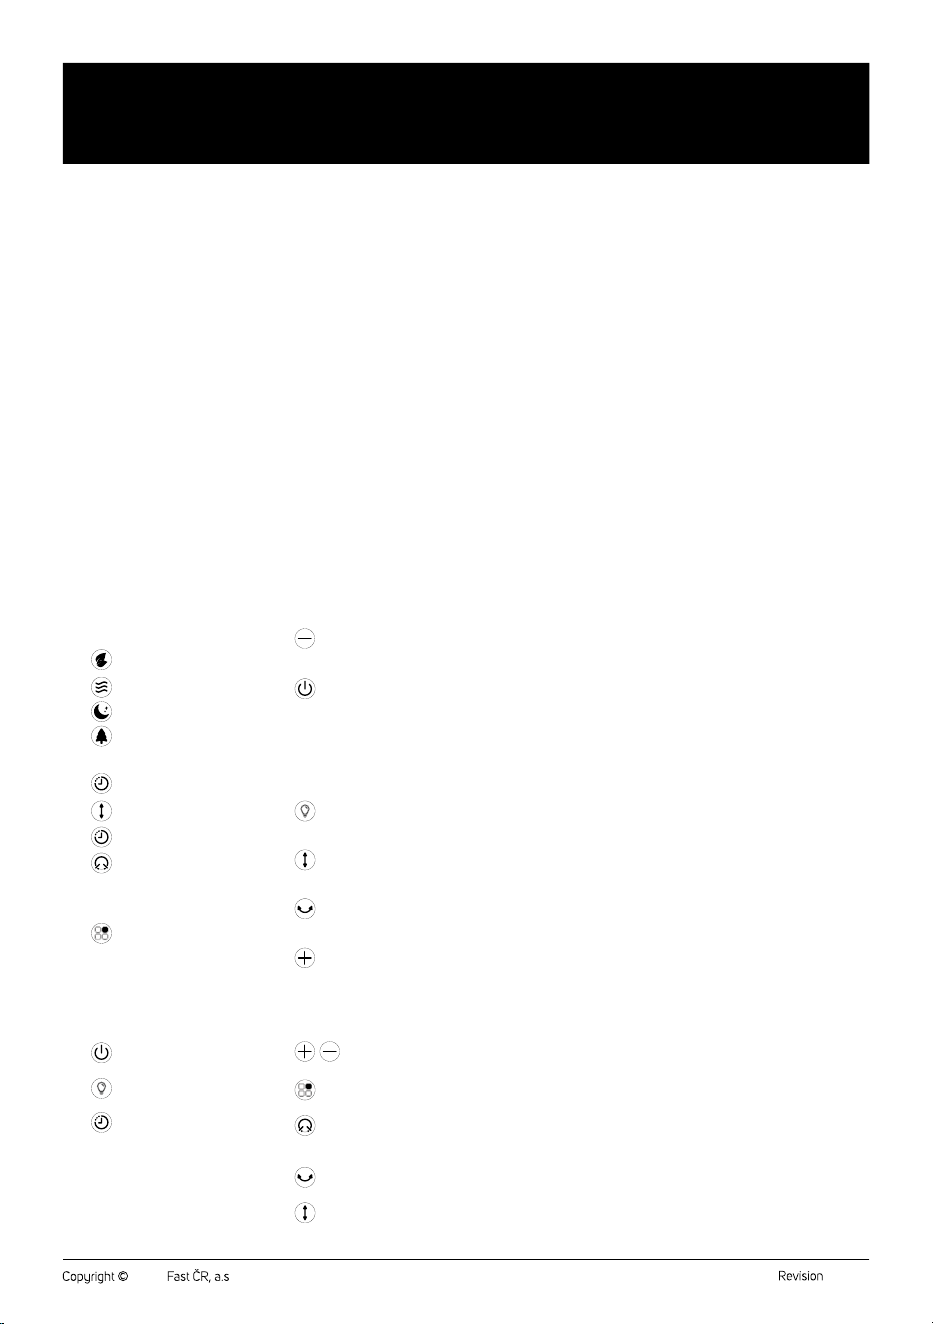
DESCRIPTION OF THE CONTROL PANEL
B1 Icons of preset modes
: Eco mode icon
: Normal mode icon
: Night mode icon
: Natural breeze mode
icon
B2
timer icon
B3
vertical oscillation icon
B4
button to set the timer
B5
button toadjust the
horizontal oscillation range of
the fan head
B6
button to select the
operating mode
B7 button to adjust fan
speed/set the timer
B8
button to switch the fan
on/off
B9 Icons of the set range of
horizontal oscillation of the fan
head
B10
button to switch the
control panel backlight on/off
B11
button to switch vertical
oscillation on/off
B12
button to switch
horizontal oscillation on/off
B13
button to adjust fan
speed/set the timer
. . . . . . . . . . . . . . . . . . . . . . . . . . . . . . . . . . . . . . . . . . . . . . . . . . . . . . . . . . . . . . . . . . . .
REMOTE CONTROL DESCRIPTION
C1 button to switch the fan
on/off
C2
button to switch the
control panel backlight on/off
C3
button to set the timer
C4
/ buttons to set the fan
speed/timer
C5
button to select the
operating mode
C6
button toadjust the range
of horizontal oscillation of the
fan head
C7
button to switch
horizontal oscillation on/off
C8
button to switch vertical
oscillation on/off
. . . . . . . . . . . . . . . . . . . . . . . . . . . . . . . . . . . . . . . . . . . . . . . . . . . . . . . . . . . . . . . . . . . .
PURPOSE OF USE
• The stand fan is used fortargeted air circulation in theroom to improve
the perceived temperature andensure amore pleasant environment
onhot days. Its advantage is the ability to adjust the height andangle
of the air flow so that the air flows exactly where it is needed. Thanks
to this, it can quickly andeffectively cool aspecific zone without the
need for air conditioning.
. . . . . . . . . . . . . . . . . . . . . . . . . . . . . . . . . . . . . . . . . . . . . . . . . . . . . . . . . . . . . . . . . . . .
BEFORE FIRST USE
• Before first use, remove the appliance and its accessories from the
packaging and discard all promotional labels and tags. Check that
neither the appliance nor any of its components is damaged.
. . . . . . . . . . . . . . . . . . . . . . . . . . . . . . . . . . . . . . . . . . . . . . . . . . . . . . . . . . . . . . . . . . . .
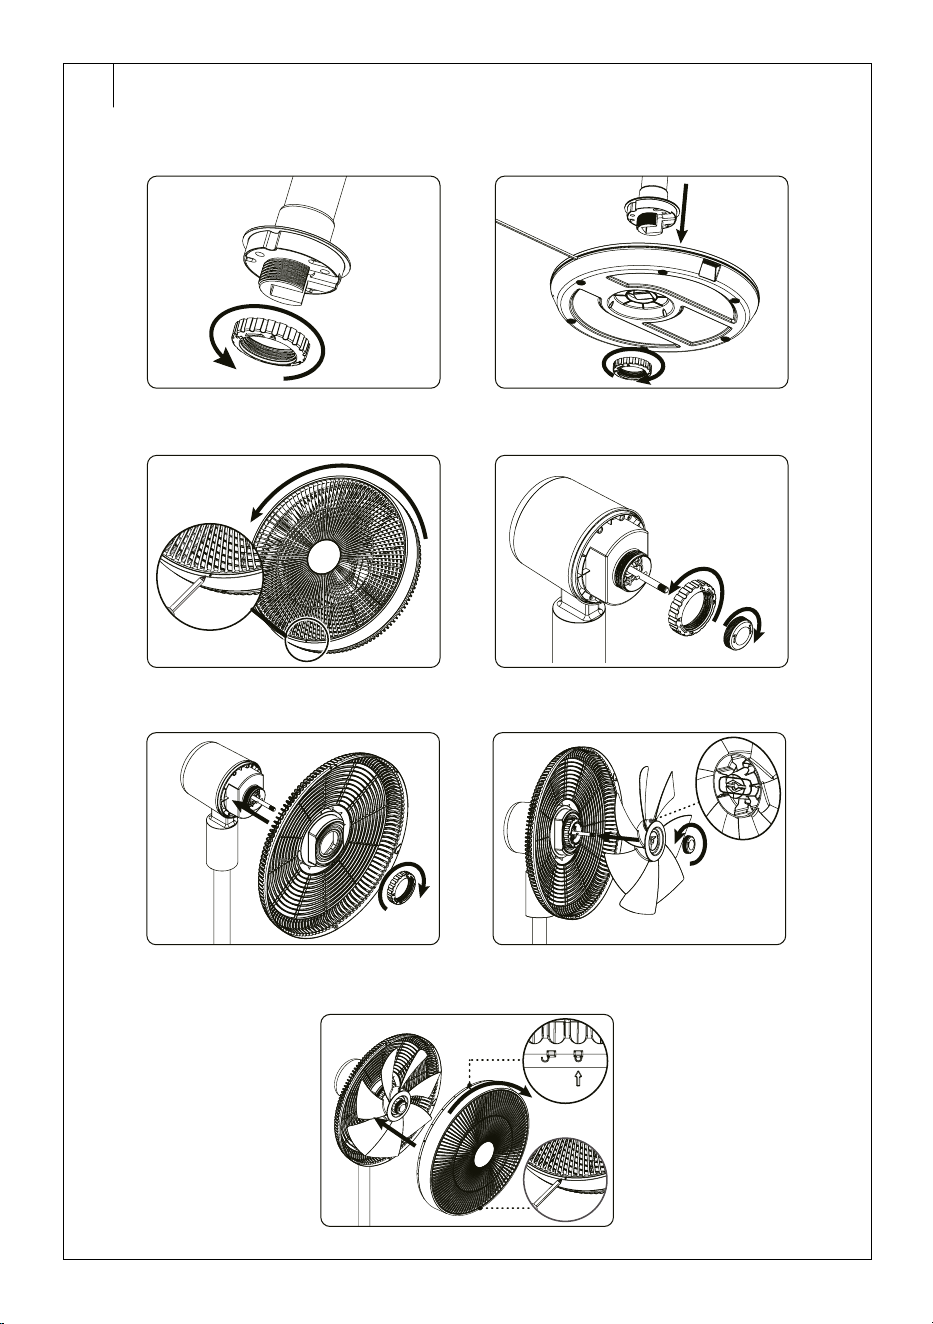
ASSEMBLY
• The fan is supplied disassembled and must be assembled before use.
Follow these steps.
1. Unscrew the nut counterclockwise andremove it from the bottom of
the stand – see figure D1.
2. Insert the bottom part of the stand into the hole in the base and screw
the nut from below – see figure D2. Make sure that the stand is firmly
attached to thebase. However, do not tighten the nut with excessive
force to avoid damaging the thread.
3. Using asuitable tool, remove the rubber screw cap in the lower part
of the front protective grille. Use across head screwdriver to loosen
the screw. Remove the screw and put it aside together with the rubber
cover. Hold the rear grille with one hand and turn the front grille
counterclockwise with the other until the line is aligned with the open
lock symbol – see Figure D3. This will release the front protective
grille.
4. Unscrew two nuts from the shaft – see Figure D4. Each nut is
loosened in adifferent direction.
5. Place the rear protective grille on the motor head of the fan andsecure
with alarger nut – see Figure D5. Tighten thoroughly.
6. Fit the fan blades onto the shaft andsecure by means of asmaller nut
– see Figure D6. When installing the blades, check that the groove on
the fan blade is aligned with the pin on the motor shaft. Tighten the nut
thoroughly.
7. Place the front protective grille against therear protective grille so that
the arrow on the rear protective grille aligns with the open lock symbol
on the front protective grille – see Figure D7. Turn the front grille
clockwise until the arrow on the rear grille is aligned with the closed
lock symbol on the front grille. Insert the screw into the hole in the
bottom part of the front protective grille and tighten it using the Phillips
screwdriver. Reattach the rubber cap.
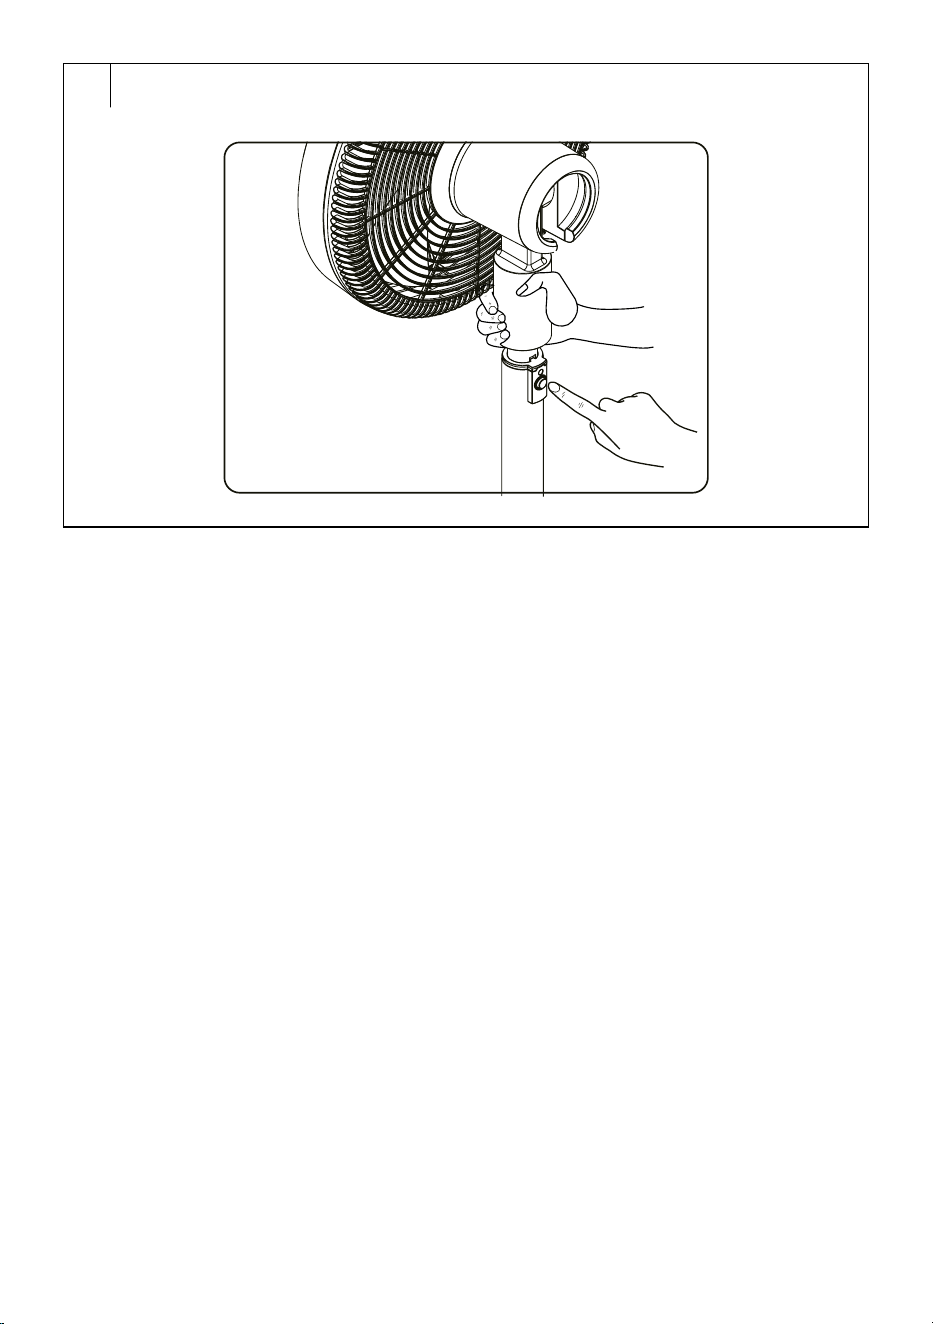
Setting the fan height (Fig. E)
1. With one hand, grasp the extended upper part of the pole, which is
located under the fan head.
2. Press the button torelease the retractable pole with the other hand.
3. Pull up or down to adjust the height of the retractable bar.
4. Release the button and the height of the retractable pole is locked
atthe given level.
. . . . . . . . . . . . . . . . . . . . . . . . . . . . . . . . . . . . . . . . . . . . . . . . . . . . . . . . . . . . . . . . . . . .
OPERATING THE APPLIANCE
Switching the appliance on
• Fully unwind the power cord and connect the power cord plug in the
mains socket.
EN
Pedestal Fan 3D UltraSilent 14”
User Manual
- 4 -
11/2025
2025, .
• If the fan was switched off before disconnecting from the mains, it will
automatically switch to the stand-by mode.
• If the fan was switched on before disconnecting from the mains, an
audible warning sounds, the control panel lights up briefly, then goes
out and the fan switches to standby mode.
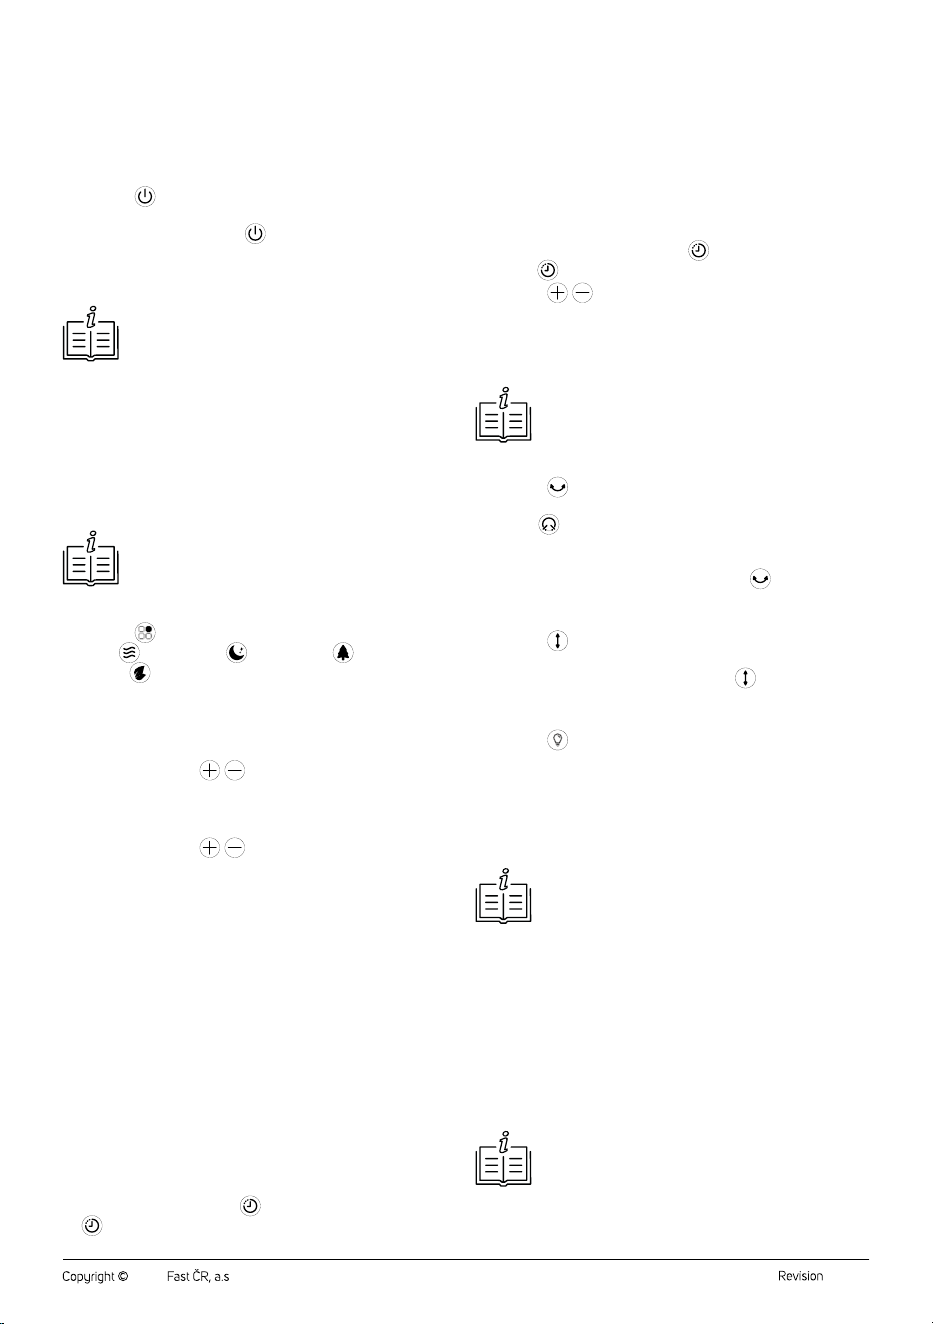
Switching the Fan On/Off
• Press the button briefly to switch the fan on. The fan beeps briefly.
It will then start at the lowest speed 1 and “1” will appear on the display.
• Toswitch the fan off, press the
button. The fan makes along beep
and switches to standby mode. The fan head turns to the central
position. To switch off completely, disconnect the plug from the mains
socket.
Note:
When the fan is switched off with the button and switched
to standby mode, the last set mode andspeed are stored
inmemory (exceptfor the timer). If you disconnect the fan
from the mains socket, it will start on the lowest speed
when you switch it on again.
Fan Speed Setting
• The +/− buttons are used to set the fan speed. Press the +/− button
repeatedly to set the desired fan speed from 1 to 12, where 1 is the
lowest fan speed and 12 is the highest fan speed. The display will
show the numerical value of the relevant speed. The +/− icon will light
up regardless of the set speed.
Note:
In theeco mode it is not possible to set the fan speed.
Selecting amode
• Press the button repeatedly to select the mode in the following
order: ( ) normal mode, ( ) sleep mode – ( ) natural breeze
mode – ( ) eco mode. Each time it is pressed, the respective
indicator light will be lit.
1. Normal mode
• LED display shows current fan speed level. The speed level is
adjustable by tapping
/ keys.
2. Sleep Mode
• LED display shows current fan speed level. The speed level is
adjustable by tapping
/ .
• Fan speed will decrease one level after a certain time period, and will
continue to decrease until wind speed level is finally down to 1, after
which it will stay at level 1 until you exit the Sleep mode.
3. Natural breeze mode
• LED display shows chosen speed level, and the fan will automatically
alternate the speed level to mimic natural breeze.
4. Eco Mode
• LED display shows current speed level, the fan will automatically
adjust the speed according to ambient temperature.
Timer Setting
• The timer can be used toset both the off andon time.
Sleep timer
• Set the amount of time that the fan will run and after which it will
switch off and go into standby mode.
• When the fan is on, press the
button to set the timer. “1” and the
timer icon will start flashing on the display.
• Use the +/− buttons to set the timer time from 0,5 to 8 hours. The
display will show the timer value.
• Wait approximately 3 seconds for the time to be saved in memory.
The countdown will start and the display will alternate between the
remaining time and the set fan speed.
• After the set time has elapsed, the fan turns off and enters standby
mode.
On timer
• Set the time after which the fan will turn on.
• While the fan is turned off, press the
button to set the timer. “1”
and the
timer icon will start flashing on the display.
• Press the
/ buttons repeatedly to set the timer time from 0,5 to
8 hours. The display will show the timer value.
• Wait approximately 3 seconds for the time to be saved in memory.
The countdown starts.
• After the set time has elapsed, the fan turns on.
Note:
If you need to cancel the on or off timer, repeat the same
process as for the setting until “0.0” appears on the display.
Horizontal oscillation
• Press the button to switch on horizontal oscillation. The fan starts
to rotate from side to side.
• Use the
button to set the range in which the fan head will rotate,
namely 30°, 60° or 120°. The chosen range icon will illuminate on
the display.
• To switch off the horizontal oscillation, press the
button again.
Vertical oscillation
• Press the button to switch on vertical oscillation. The fan head will
start to move up anddown.
• To switch off the vertical oscillation, press the
button again.
Backlight of the control panel
• Press the button to turn the control panel lights on/off.
. . . . . . . . . . . . . . . . . . . . . . . . . . . . . . . . . . . . . . . . . . . . . . . . . . . . . . . . . . . . . . . . . . . .
REMOTE CONTROL
• The functions of the buttons on the remote control and the control
panel are identical. To use the remote control, point it at the fan. The
maximum range of the signal sent from the remote control is 4 m.
Note:
For the proper functioning of the remote control, it is
necessary to ensure direct visibility between the remote
control and the base. If there are obstacles between them,
transmission of the signal may notoccur.
Inserting and Replacing Battery
• From the bottom part of the remote control pull out the battery
compartment andinsert the 3V CR2032 battery into it. When
inserting the battery, make sure the polarity is correct.
• If the battery in theremote control is discharged, replace it with anew
battery of the same type.
• If you will not be using the remote control for an extended period of
time, we recommend removing the battery. If the battery were to leak
into the interior of the remote control, it could be damaged.
Note:
Never put batteries in afire, short-circuit or damage them
in any way. Dispose of them in an environmentally friendly
manner at the end of their lifespan. Never dispose of
batteries in municipal waste.
. . . . . . . . . . . . . . . . . . . . . . . . . . . . . . . . . . . . . . . . . . . . . . . . . . . . . . . . . . . . . . . . . . . .
- 5 -
11/2025
2025, .
CLEANING AND MAINTENANCE
• Disconnect the power plug from the power socket before cleaning.
• Do not use abrasive cleaning agents, solvents, etc. to clean any parts
of the appliance, as these could damage the surface.
Warning:
To prevent the risk of electric shock, do not immerse
the appliance, power cable, or plug into water or any
other liquid.
Cleaning the outer casing
• To clean the outer casing, use acloth slightly dampened with
lukewarm water and neutral detergent.
• You can also use avacuum cleaner with the brush nozzle attached to
remove dust from the protective grilles.
• If the fan blades are heavily soiled and need to be wiped, make sure
that the fan is turned off and the power cable disconnected from the
mains socket. Loosen the screw andthen remove the front grill. Wipe
the blades with aslightly damp cloth. Then wipe with adry cloth.
Then fit the front grille andsecure with screw. Follow the instructions
inthe “ASSEMBLY” section.
Storage
• If you will not be using the appliance for an extended period of time,
unplug the plug from the power socket and clean it according to the
instructions in the chapter “Cleaning and Maintenance”.
• Before storing, ensure that the appliance and all accessories are
thoroughly clean and dry.
• Remove the battery from the remote control.
• Store the appliance in adry, clean, and well-ventilated place away
from extreme temperatures and out of the reach of children or pets.
. . . . . . . . . . . . . . . . . . . . . . . . . . . . . . . . . . . . . . . . . . . . . . . . . . . . . . . . . . . . . . . . . . . .
TECHNICAL SPECIFICATIONS
Rated voltage............................................................................................100–240 V~
Rated frequency ..........................................................................................50–60 Hz
Power consumption .............................................................................................33 W
Fan blade diameter .............................................................................................36 cm
Maximum fan flow rate .........................................................................36.7 m
3
/min
Operating value .................................................................................3.0 (m
3
/min)/W
Maximum air velocity ......................................................................................4.9 m/s
Contact for further information
FAST ČR, a.s., USanitasu 1621, 251 01 Říčany, Czech Republic
Noise level
Speed
Noise level (dB)
1
22.7
2
23.8
3
26.3
4
27.8
5
30.9
6
31.7
7
44.6
8
45.7
9
46.6
10
47.5
11
49.7
12
52.5
. . . . . . . . . . . . . . . . . . . . . . . . . . . . . . . . . . . . . . . . . . . . . . . . . . . . . . . . . . . . . . . . . . . .
INSTRUCTIONS AND INFORMATION ON DISPOSAL
OF USED PACKAGING MATERIAL
Dispose of used packaging material at the designated municipal waste
disposal site.
. . . . . . . . . . . . . . . . . . . . . . . . . . . . . . . . . . . . . . . . . . . . . . . . . . . . . . . . . . . . . . . . . . . .
DISPOSAL OF USED ELECTRICAL AND ELECTRONIC
EQUIPMENT
Used electrical andelectronic products must not be disposed of in
ordinary municipal waste. To enable the proper disposal, renewal and
recycling of these products, deliver them to the designated collection
points. Alternatively, in some European Union states or other European
countries the products can be returned to the local retailer when buying
an equivalent new product. By disposing of this product correctly, you
help to conserve valuable natural resources and prevent any potential
adverse impact on the environment and human health that could result
from improper waste disposal. For more details, contact your local
authority or nearest collection point. Fines may be imposed for the
improper disposal of this type of waste as per national regulations.
For business entities in European Union States
If you wish to dispose of electrical and electronic equipment, please
request the necessary information from your retailer or supplier.
Disposal in other countries outside the European Union
To dispose of this product elsewhere, request the necessary information
on the correct disposal method from local authorities or your retailer.
. . . . . . . . . . . . . . . . . . . . . . . . . . . . . . . . . . . . . . . . . . . . . . . . . . . . . . . . . . . . . . . . . . . .
Changes to text and technical parameters are reserved.