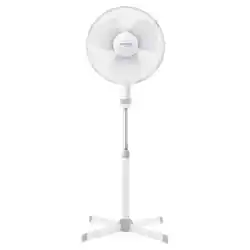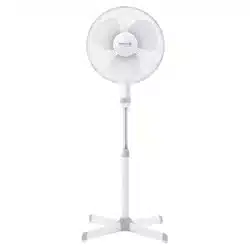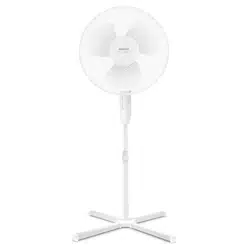

SFN 3040BK
EN
PEDESTAL FAN 3D ULTRASILENT 12”
Translation of the original manual
SFN 3040BK
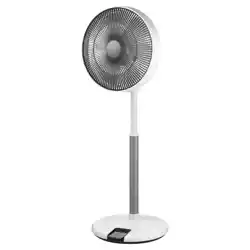
A
1
2
3
4
8
9
10
11
13 14
12
5
6
7
17
15
16
B
7 8 9 10
3 4 51 2
6
C
1
2
3
4
5
6
7
D1 D2
D3 D4
D5 D6
D7
F
E1 E2
COLD AIR
G1 G2

- 1 -
05/2024
2024, .
EN UltraSilent 12”3D Pedestal Fan
Important Safety Instructions
READ CAREFULLY AND STORE FOR FUTURE USE.
• This appliance may be only used by children 8 years of
age and older and by persons with physical, sensory or
mental impairments or by inexperienced persons, if they
are properly supervised or have been informed about how
to use of the product in a safe manner and understand the
potential dangers.
• Children must not play with the appliance. Cleaning and
maintenance must not be performed by children without
supervision.
• If the power cord is damaged, have it replaced in a
professional service centre in order to prevent a dangerous
situation. It is forbidden to use the appliance with the
power cord damaged.
• The fan is not intended tobe mounted on external
windows or walls.
• Before removing the protective grille, ensure that the fan is
disconnected from the mains.
• Before connecting the appliance to apower socket, check that the rated voltage on its rating label matches the electrical voltage in the power socket.
• Connect the appliance only to a properly grounded socket. Do not use an extension cord.
• Use only with the supplied adapter.
• The power socket must remain easily accessible in the event of a sudden disconnection.
• The appliance is designed for use in household, offices and similar types of environment. Do not use it in very dusty or humid rooms such as
laundries or bathrooms, in areas where chemical or explosive substances are stored, in industrial surroundings or outdoors.
• Do not place the appliance in the vicinity of an open flame or appliances that are sources of heat.
• Make sure that the fan, the power cord and the power cord plug do not touch a hot surface.
• Do not use this appliance with a programmer, timer, remote control system or any other component that would switch the appliance on
automatically.

- 2 -
05/2024
2024, .
• To prevent electric shock, do not immerse the fan, power cord or power cord plug in water or other liquid, or rinse them under running water.
• Always turn off the appliance and disconnect it from the power socket when leaving it without supervision, when not using it and before assembly,
disassembly or cleaning.
• Never touch the appliance with wet or damp hands or when standing on a wet floor.
• Do not carry the appliance by the power cord. Always grasp the body of the appliance with both hands.
• Before using the appliance, make sure it is assembled correctly.
• Unplug the appliance from the power socket by pulling the plug, not the power cord. Otherwise, damage to the power cord or the socket could occur.
• Make sure the power cord does not hang over the edge of a table or that it does not touch a hot surface. Do not place the appliance on unstable
surfaces such as carpets with very long and thick fibres. Place the appliance only on a clean, flat, dry and smooth surface.
• Do not expose children, the elderly or people who are bedridden to a cold air current for an extended period of time.
• Do not cover the appliance with any items during operation.
• Never stick your fingers or other objects through the protective grille when the appliance is connected to a power socket. This is especially true when
the appliance is inoperation.
• Do not use the appliance if it is not working correctly, if it has been damaged or has been submerged in water. To avoid ahazardous situation arising,
do not repair the device yourself or modify it in any way. Have all repairs or adjustments performed at an authorised service centre. By tampering
with the appliance, you expose yourself to the risk of losing your legal rights regarding faulty performance or warranty for quality.
- 3 -
05/2024
2024, .
• Thank you for purchasing our SENCOR product; we hope you will be
satisfied with it.
• Before using this appliance, please familiarise yourself with the
user’smanual, even if you are already familiar with using similar
types of appliances. Use the appliance only as described in this
user'smanual. Keep the manual for future reference.
• It is recommended to keep the original shipping carton, packing
material, receipt and confirmation of the extent of the seller'sliability
or warranty certificate at least for the duration of the legal right of
defective performance or quality guarantee. When transporting the
appliance, we recommend packaging it again in the original box
provided by the manufacturer.
. . . . . . . . . . . . . . . . . . . . . . . . . . . . . . . . . . . . . . . . . . . . . . . . . . . . . . . . . . . . . . . . . . . .
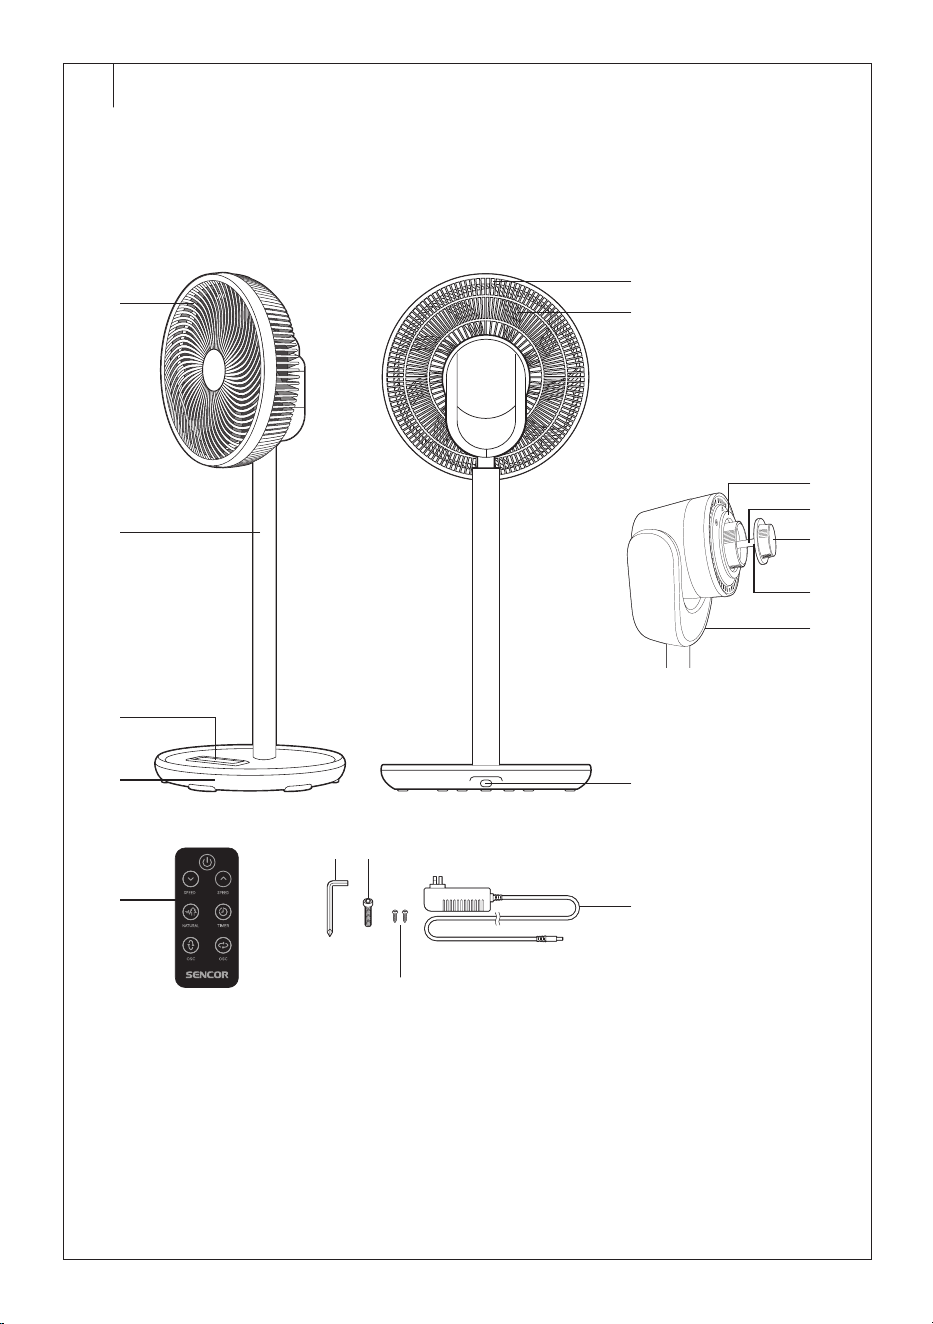
FAN DESCRIPTION
A1 Front cover
A2 Aluminium fan rod
A3 Control panel
A4 Base
A5 Rear grille
A6 Fan blades
A7 Power adapter plug
connection socket
A8 Rear grill locknut
A9 Motor shaft
A10 Fan blade screw cap
A11 Motor shaft pin
A12 Motor unit
A13 Hexagon
A14 Hex bolt
A15 Power adapter
A16 Screw forfixing the front
andrear grill (1 + 1 spare
screw)
A17 Remote control
. . . . . . . . . . . . . . . . . . . . . . . . . . . . . . . . . . . . . . . . . . . . . . . . . . . . . . . . . . . . . . . . . . . .
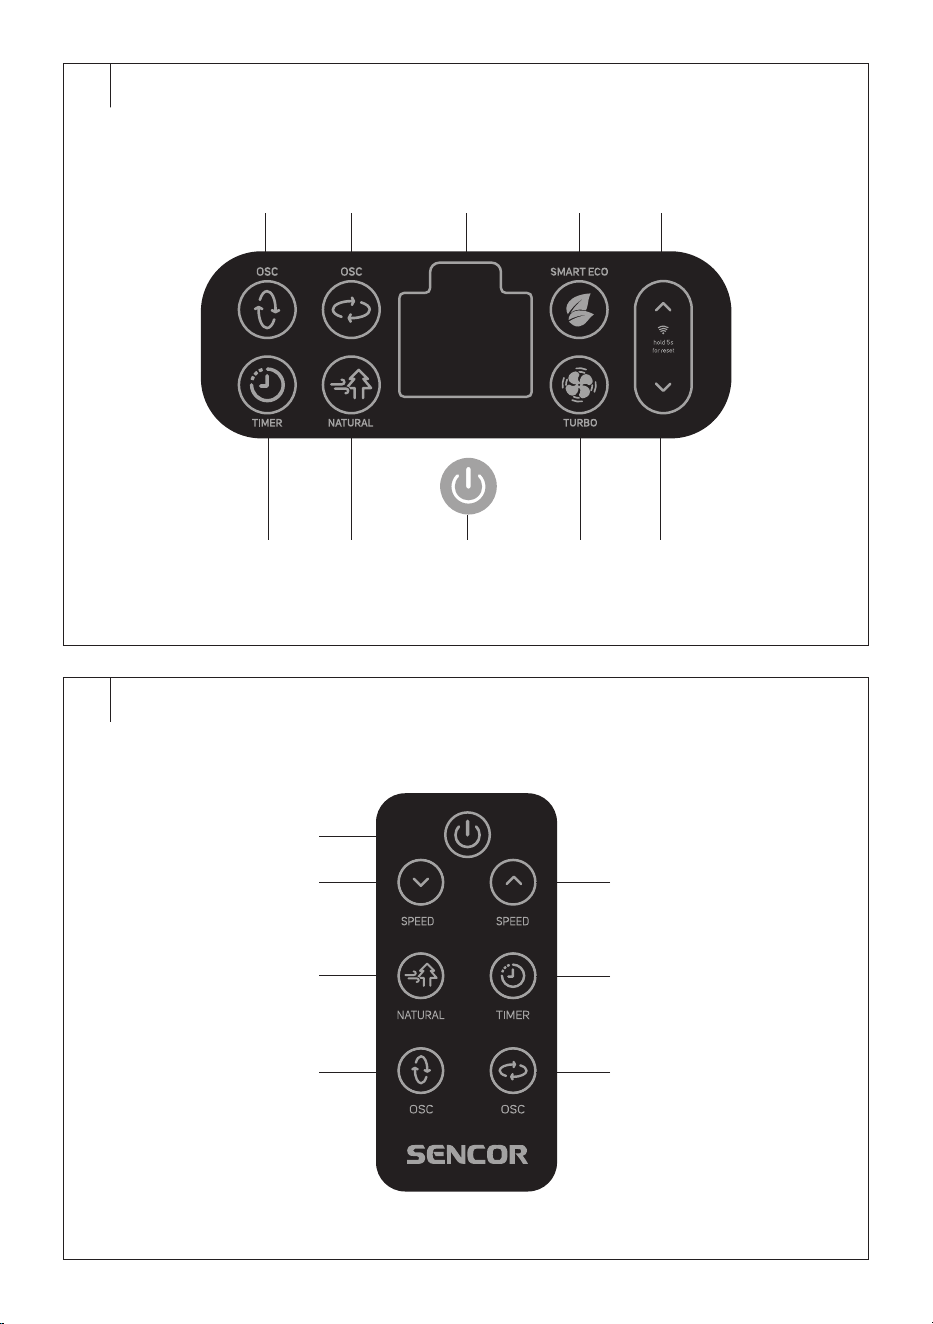
CONTROL PANEL DESCRIPTION
B1 button to switch vertical
oscillation on/off
B2 button to switch horizontal
oscillation on/off
B3 Display
B4 button toswitch the
SMART ECO mode on/off
B5 button to increase the fan
speed
B6 button to set the automatic
shutdown time
B7 button to select the natural
breeze mode
B8 button to switch the fan
on/off
B9 button to switch the turbo
mode on/off
B10 button to decrease the fan
speed
. . . . . . . . . . . . . . . . . . . . . . . . . . . . . . . . . . . . . . . . . . . . . . . . . . . . . . . . . . . . . . . . . . . .
REMOTE CONTROL DESCRIPTION
C1 button to switch the fan
on/off
C2 button to decrease fan
speed
C3 button to select the natural
breeze mode
C4 button to switch vertical
oscillation on/off
C5 button to increase fan
speed
C6 button to set the automatic
shutdown time
C7 button to switch horizontal
oscillation on/off
. . . . . . . . . . . . . . . . . . . . . . . . . . . . . . . . . . . . . . . . . . . . . . . . . . . . . . . . . . . . . . . . . . . .
BEFORE FIRST USE
Before first use, remove the appliance and its accessories form the
packaging and discard all promotional labels and tags. Check that neither
the appliance nor any of its components is damaged.
. . . . . . . . . . . . . . . . . . . . . . . . . . . . . . . . . . . . . . . . . . . . . . . . . . . . . . . . . . . . . . . . . . . .
ASSEMBLY
Warning:
Before assembling, make sure that you have
unpacked all the components.
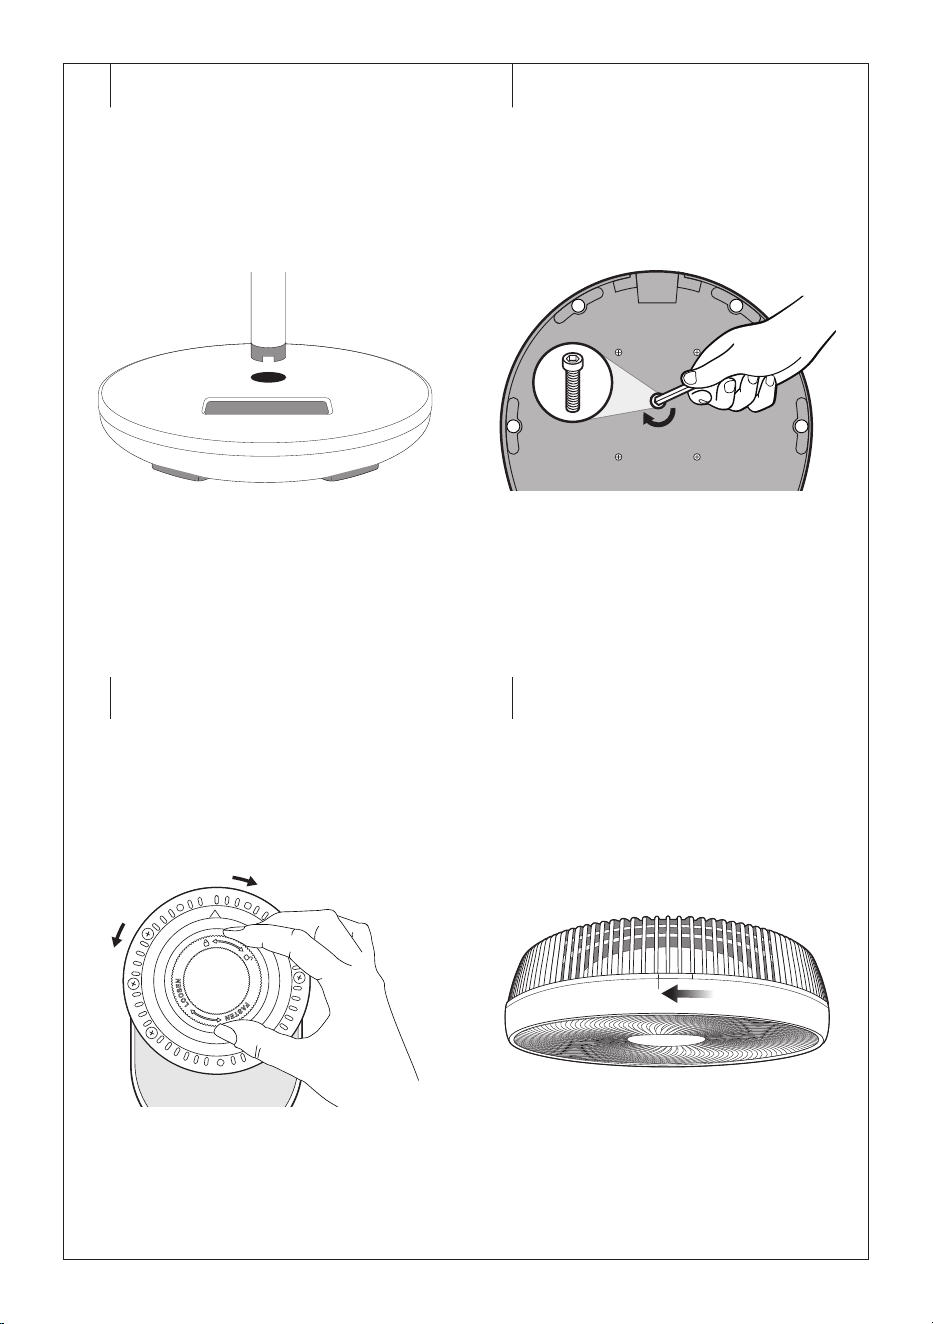
Base assembly
1. Insert the aluminium rod end with the cutout into the hole in thebase
– see Figure D1. Push gently so that the rod fits properly into the
hole.
2. Turn the base upside down, insert the hex bolt into the hole in the
bottom part of the base and tighten with the Allen key – see Figure
D2.
3. Return the base andplace it on an even andstable surface.
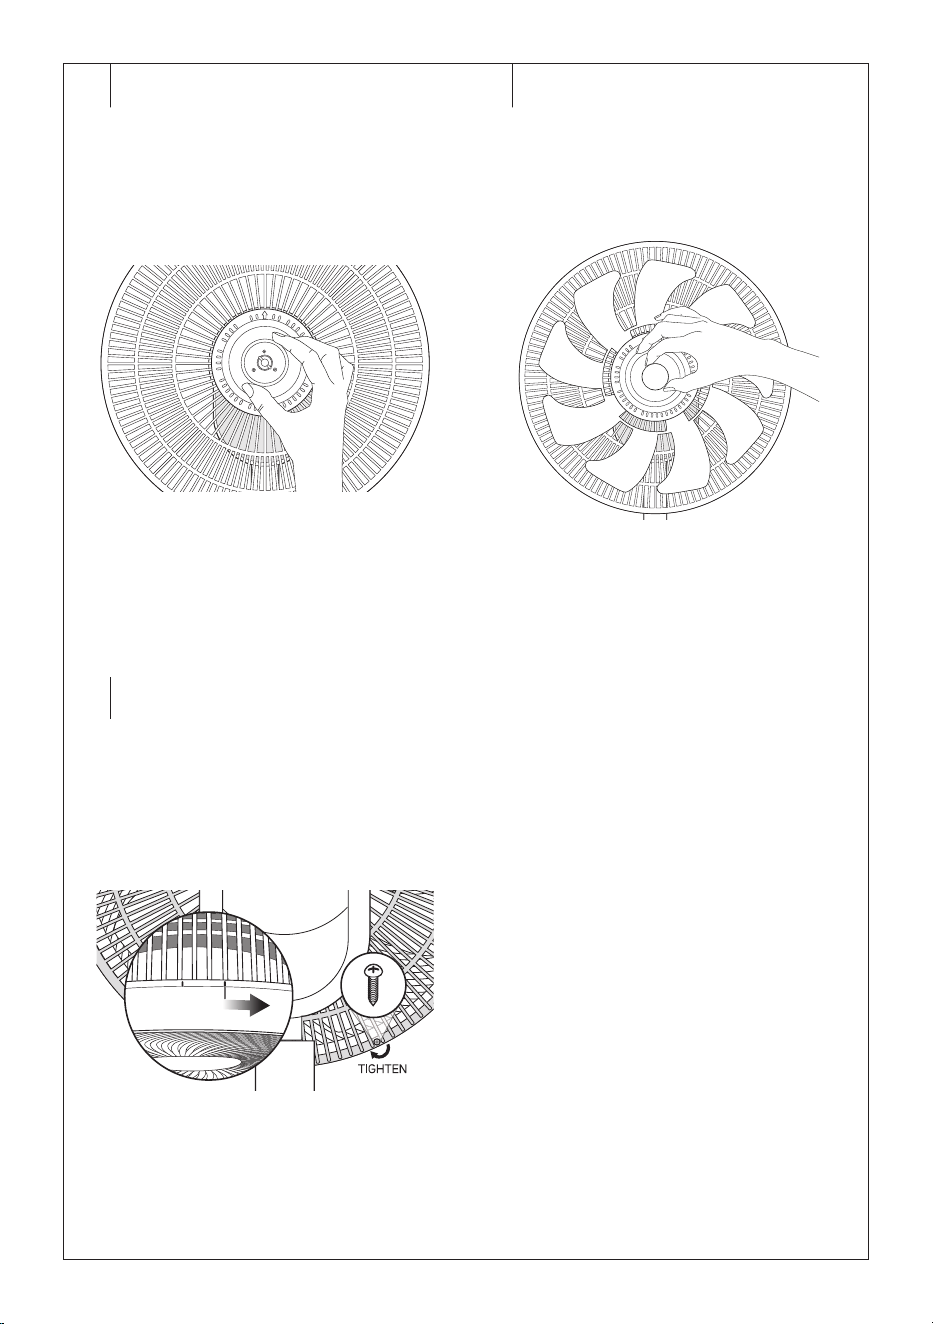
Swivel head assembly
1. Unscrew the fan blade cap from the motor shaft by turning
clockwise, then unscrew the rear grille locknut by turning
anticlockwise – see Figure D3.
2. Separate the front grille from the rear grille by turning the front grille
anticlockwise – see Figure D4.
3. First remove the packaging material, then the fan blades and set
them aside.
4. Align the motor unit withthe protrusion on the rear grille. Check that
the up arrow on the motor unit is aligned with the up arrow on the
rear grille.
5. Screw on the rear grille locknut by turning clockwise – see Figure
D5. Make sure that the rear grille has not slipped off thepositioning
pins before tightening. Hand tighten the nut. Do not use excessive
force to tighten the lock nut.
6. Align the grooves on the rear side of the fan blades with the motor
shaft pin andpush all the way back. The back side of the fan blades
is marked with the symbol “O”.
7. Screw the fan blade cap onto the motor shaft by turning
anticlockwise – see Figure D6. Hand tighten the cap. Do not apply
excessive force to tighten the cap.
8. Place the front grille on the rear grille so that the left line atthe top of
the rear grille is aligned with the line mark on the front grille. Turn the
front grille clockwise to attach it. The front andrear grill are attached
correctly when the Sencor logo is positioned horizontally.
9. Fasten the front andrear grill with the supplied screw – see Figure
D7.
10. The fan is assembled now.
. . . . . . . . . . . . . . . . . . . . . . . . . . . . . . . . . . . . . . . . . . . . . . . . . . . . . . . . . . . . . . . . . . . .
SELECTING THE INSTALLATION LOCATION
• Place the fan on ahorizontal, stable, dry and smooth surface within
easy reach of apower socket.
• Ensure that there is enough free space around the fan.
• Do not place the fan in the vicinity of an open fire, sources of heat (e.g.
heating) or do not expose it to direct sunlight.
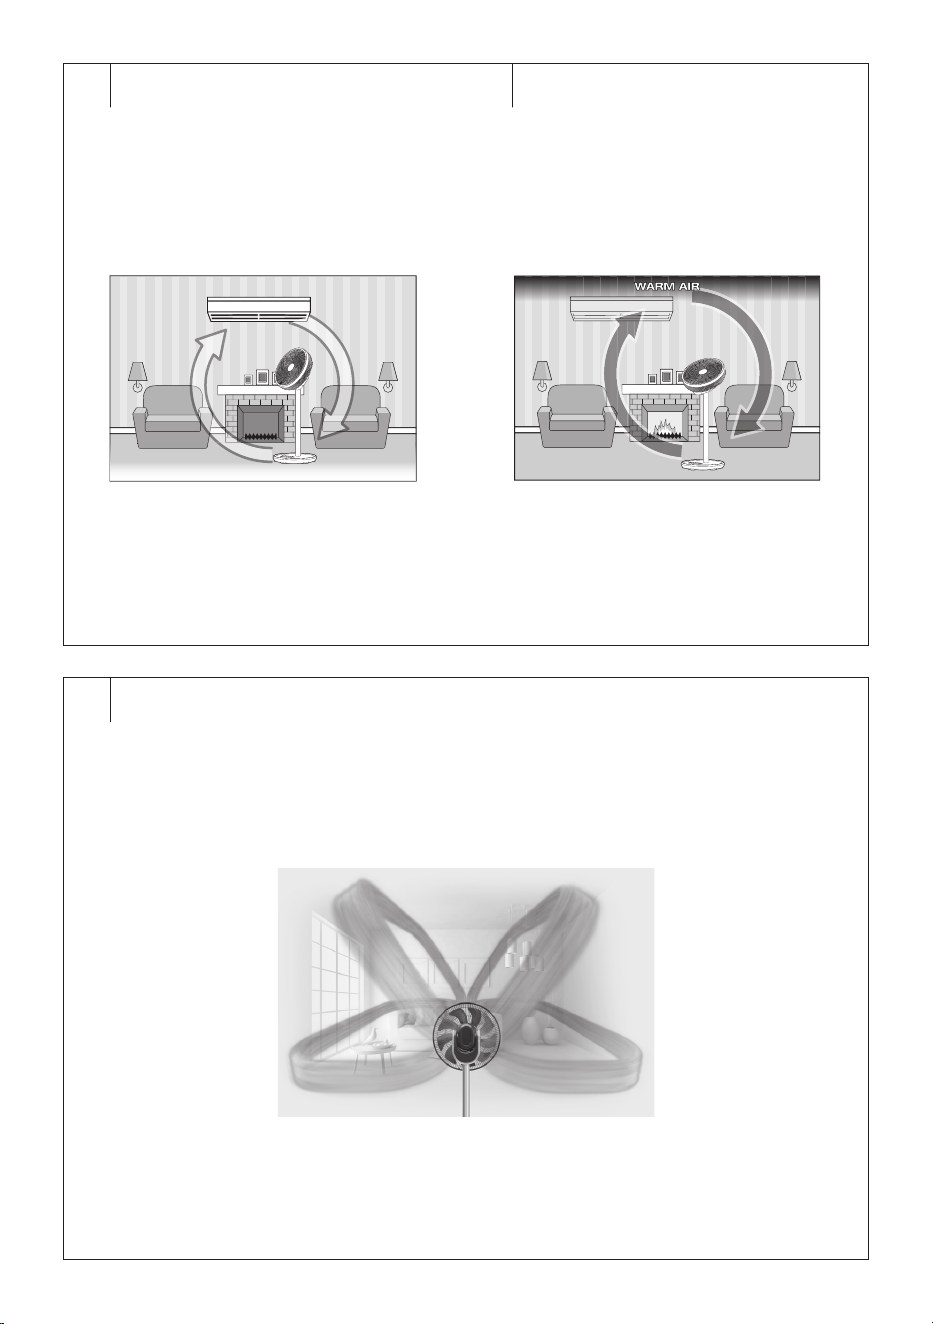
Warm months
Cool air naturally stays close to thefloor. During warm weather, set ahigh
speed anddirect the fan head towards the wall atan angle of about 45°
between the ceiling and the floor – see Figure E1. The circulator will
effectively cool the room by forcing cool air tomove, thuscreating air
circulation patterns.
If you use an air conditioner to cool the room, you can use afan to
increase the cooling efficiency. Direct the fan so that the air flow is
directed to the bottom of the air conditioning outlet at an angle of about
30°. This will increase the intensity of the cool air, which will be distributed
faster andmore efficiently throughout the room. For an even better layout,
use the horizontal oscillation.
Cold months
Warm air rises naturally up to the ceiling. If you use heaters or warmers,
the warm air will rise. Therefore, point the fan head upwards at an angle of
about 90° – see Figure E2.
The fan directed in this way will condense the hot air towardsthe floor
where the temperature is lower, which will create abetter temperature
distribution in theroom.
. . . . . . . . . . . . . . . . . . . . . . . . . . . . . . . . . . . . . . . . . . . . . . . . . . . . . . . . . . . . . . . . . . . .
EN
UltraSilent 12”3D Pedestal Fan
User’sManual
- 4 -
05/2024
2024, .
POWER SUPPLY CONNECTION
• Connect the end of the power adapter plug to the socket, then connect
the power adapter to aproperly earthed power outlet.
• The display lights up briefly and the current room temperature is
displayed. The fan will switch to the standby mode.
. . . . . . . . . . . . . . . . . . . . . . . . . . . . . . . . . . . . . . . . . . . . . . . . . . . . . . . . . . . . . . . . . . . .
OPERATION VIA THE CONTROL PANEL
Switching the fan on/off
• While the fan is instand-by mode, press the button briefly, the fan
will start innormal operating mode and the fan speed will be set to “1”.
• If you need to switch the fan off, press the button briefly and the
fan will switch to the standby mode.
Warning:
Do not stick fingers, pencils or other objects through
the grille when the fan is connected to the power
supply and especially when it is running. There is
arisk of serious injury.
Note:
Disconnect the power cord from the mains socket only
when the fan is to be stored. Otherwise, you will not be able
to control it via the app or the remote control.
Room temperature display
The fan is equipped with atemperature sensor that detects the
temperature in theroom anddisplays it on the display. The displayed
temperature is only an indication of theroom temperature andmay differ
dependingon the location of the fan in theroom.
The display shows the ambient temperature or alternately shows ambient
and set temperature dependingon the selected fan operating mode.
Speed setting
The buttons and are used to set the airflow speed. Press the
button to increase the speed and the button to decrease the speed.
You can set the speed in the range of 1 to 8. The selected speed will flash
briefly on the display, andas soon as the value stabilizes, the fan will start
running in full at your selected speed.
Operating mode selection
The buttons of the respective operating modes are used to select the
operating mode. The following operating modes are available: normal
mode, natural breeze mode, silent mode and turbo mode.
1. Normal mode
Normal operating mode is the default mode. Inthis mode, no button is lit.
The current room temperature will be shown on the display.
Adjust the fan speed manually as described above.
2. Natural breeze mode
The natural breeze mode creates agentle breeze by simulating the
rhythm of the natural wind and alternating fan speeds automatically
according to pre-programmed cycles.
In this mode, there are 3 programs.
• While the fan is inoperation, press . The button will light up and the
display will show “n1”. The fan speed will be adjusted automatically
according to programme No. 1.
• Press the button again and the display will show “n2”. The fan
speed will be adjusted automatically according to programme No. 2.
• Press the button once again and the display will show “n3”. The
fan speed will be adjusted automatically according to programme
No. 3.
• Press the button again to switch off the natural breeze mode and
the fan will switch to normal mode.
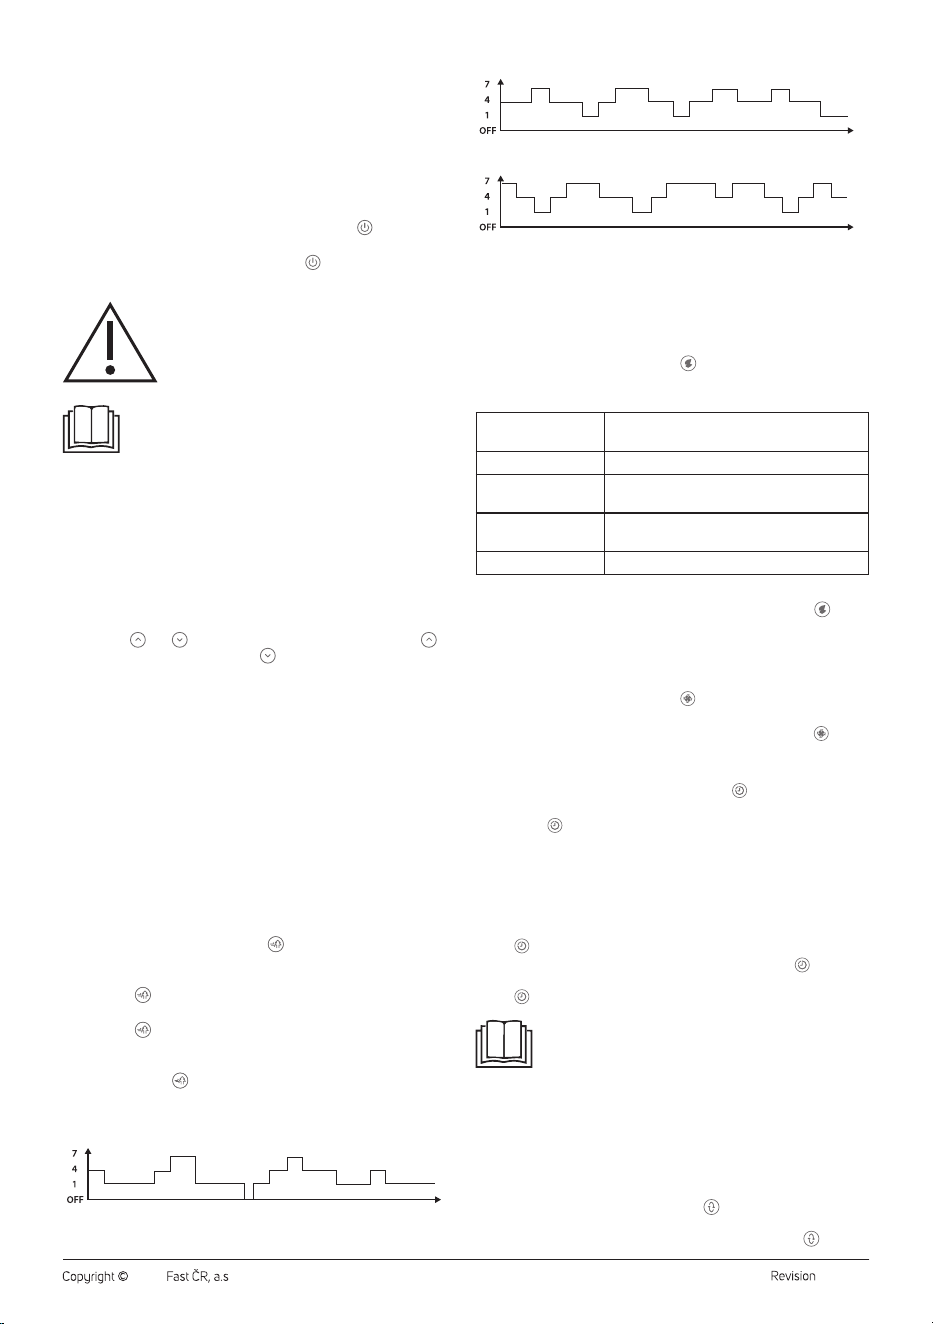
Schemes of the natural breeze inindividual programmes
Programme 1 (n1)
Programme 2 (n2)
Programme 3 (n3)
1 = low speed; 4 = medium speed; 7 = high speed
3. Smart ECO mode
Silent mode will automatically adjust the fan speed according to the
ambient temperature in theroom. This mode ensures optimal air
circulation withregard to quiet operation and energy savings. Therefore,
it is advisable to use it during sleep or when the fan is switched on for an
extended period of time.
• While the fan is inoperation, press . The button will light up and
the fan will switch to silent mode. The fan speed will be adjusted
automatically according to the room temperature as follows:
Room temperature
(°C)
Fan speed
<26 1
26–28
The speed will vary from 2 to 4 and each
speed will be inoperation for 5 seconds.
29–34
The speed will vary from 5 to 7 and each
speed will be inoperation for 5 seconds.
>35 8
The fan speed cannot be adjusted manually.
• When you need to turn off the silent mode, press the button and
the fan will switch to normal mode.
4. Turbo mode
Turbo mode creates extra comfort onhot days as the fan speed is set to
high 8.
• While the fan is inoperation, press . The button will light up and the
fan will switch to turbo mode. The fan speed will be set to 8.
• When you need to turn off the turbo mode, press the button and
the fan will switch to normal mode.
Automatic shutdown
• To set the automatic shutdown time, use the button. The button
will light up.
• Press the button repeatedly to set the time from 1 to 12 hours.
When this time has elapsed, the fan will turn off automatically.
• As soon as time on the display stops flashing, it will be stored
inmemory and the countdown will start.
• When the set time has elapsed, the fan will switch off and go to
standby automatically.
• If you need to check the remaining automatic shutdown time, press
the button briefly.
• If you need to cancel the automatic shutdown, press the button
repeatedly until “0” appears on the display and the green light above
the button turns off.
Note:
If you need to ensure continuous fan operation, do not turn
on the automatic power off function.
The automatic shutdown can be set in all operating modes.
Oscillation setting
The fan allows you to set both vertical andhorizontal oscillation
simultaneously. This allows you to achieve aunique air circulation – see
Figure F.
1. Vertical oscillation
To turn the vertical oscillation on, press the button. The button will light
up and the fan head will slowly rotate up anddown in both directions.
If you need to turn the vertical oscillation feature off, press the button.
- 5 -
05/2024
2024, .
2. Horizontal oscillation
To turn the vertical oscillation on, press the button. The button will light
up and the fan head will slowly rotate from left to right in both directions.
Note:
If you turn the fan off, the fan head will automatically return
to the home position.
If you need to adjust the fan head to the desired angle,
press the corresponding button when the fan head is atthe
desired angle.
Power-saving mode
The fan is equipped with apower-saving mode that dims the display
about 15seconds after making the last setting. Pressing any button will
turn the display on in full again.
. . . . . . . . . . . . . . . . . . . . . . . . . . . . . . . . . . . . . . . . . . . . . . . . . . . . . . . . . . . . . . . . . . . .
USING THE REMOTE CONTROL
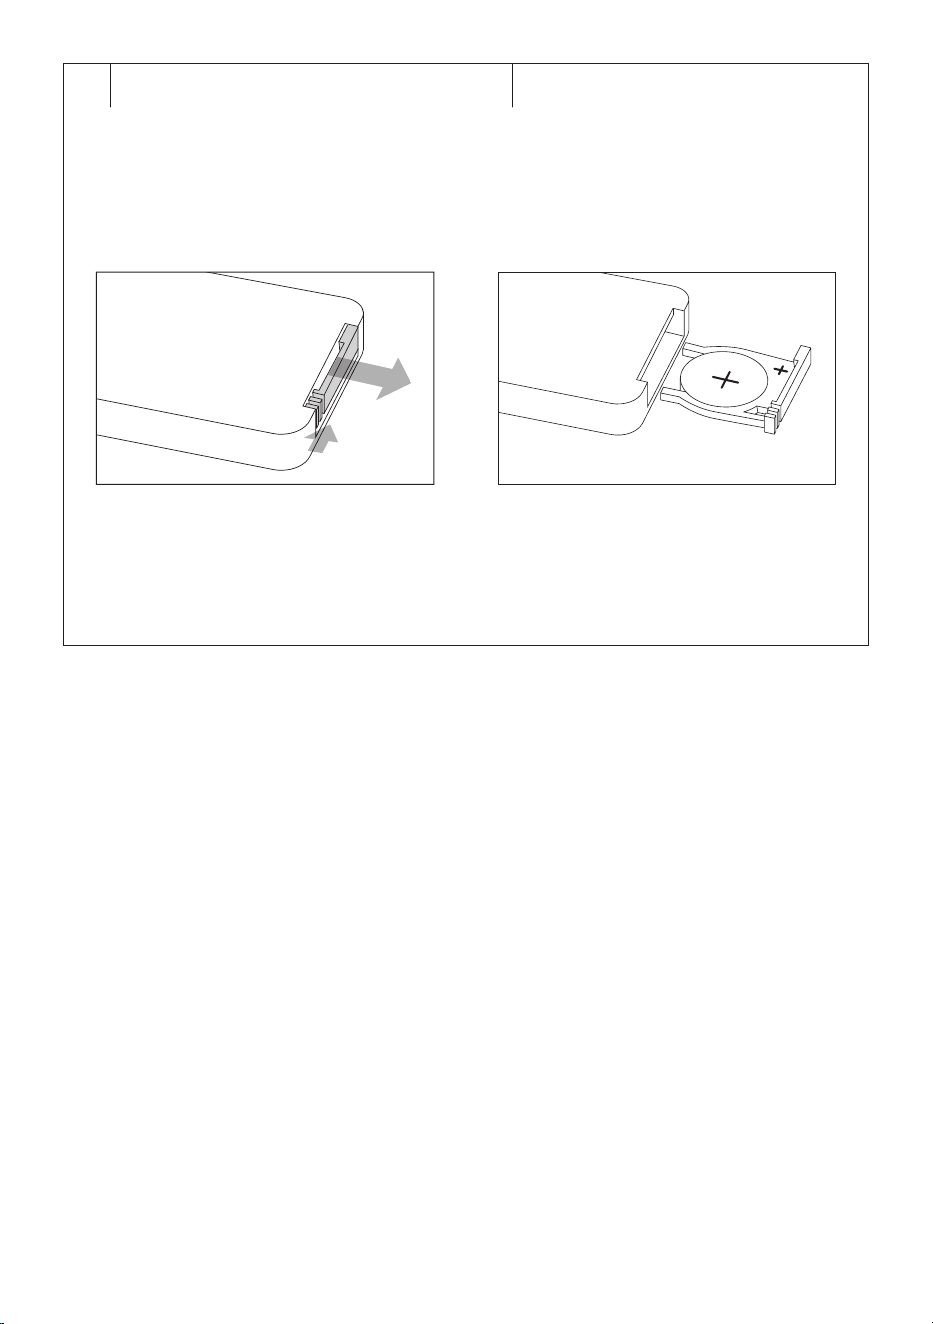
Inserting batteries into the remote Control
1. Push the latch of the battery holder on the rear side of the remote
control andpull out the holder – see figure G1.
2. Insert anew CR2032 type battery into the holder. When inserting,
take care to observe the correct polarity – see Figure G2. This is
marked on the rear side of the remote control.
3. Insert the holder back into the remote control.
• To use the remote control, point it at the fan. The maximum
signal range is 6m. If you place the remote in such away that the
transmission of the signal is blocked by barrier, the signal may not be
transmitted at all.
• If you are replacing the batteries, follow the same procedure, but
remove the old batteries first.
Note:
If you plan not to use the remote control for an extended
period of time, remove the batteries. Never put batteries in
afire, short-circuit or damage in any way. Dispose of them
in an environmentally friendly manner at the end of their
useful life. Never dispose of batteries in municipal waste.
The principle of operating the fan by remote control is the same as that
described in chapter “OPERATION VIA THE CONTROL PANEL”.
. . . . . . . . . . . . . . . . . . . . . . . . . . . . . . . . . . . . . . . . . . . . . . . . . . . . . . . . . . . . . . . . . . . .
CONTROL USING THE SENCOR HOME APP
The fan can be controlled via the Sencor HOME application.
Download the application to your smart phone, register and control the
fan via the application.
• If you already have the application installed, add the fan among your
devices.
Adding the fan to the device list via Bluetooth
You can add the fan to the Sencor HOME application by pairing it via
Bluetooth.
1. Turn on the Bluetooth function on your mobile phone.
2. Turn on the fan.
3. Open the app and on the app'shome page, click the “+” icon in the
top right corner.
4. The device itself will offer the “Add Device” option.
5. Click and the app will automatically guide you through adding it.
Note:
If the Bluetooth connection fails or is not available, make
sure there are no solid obstacles between your phone and
the fan and that both devices are close to each other.
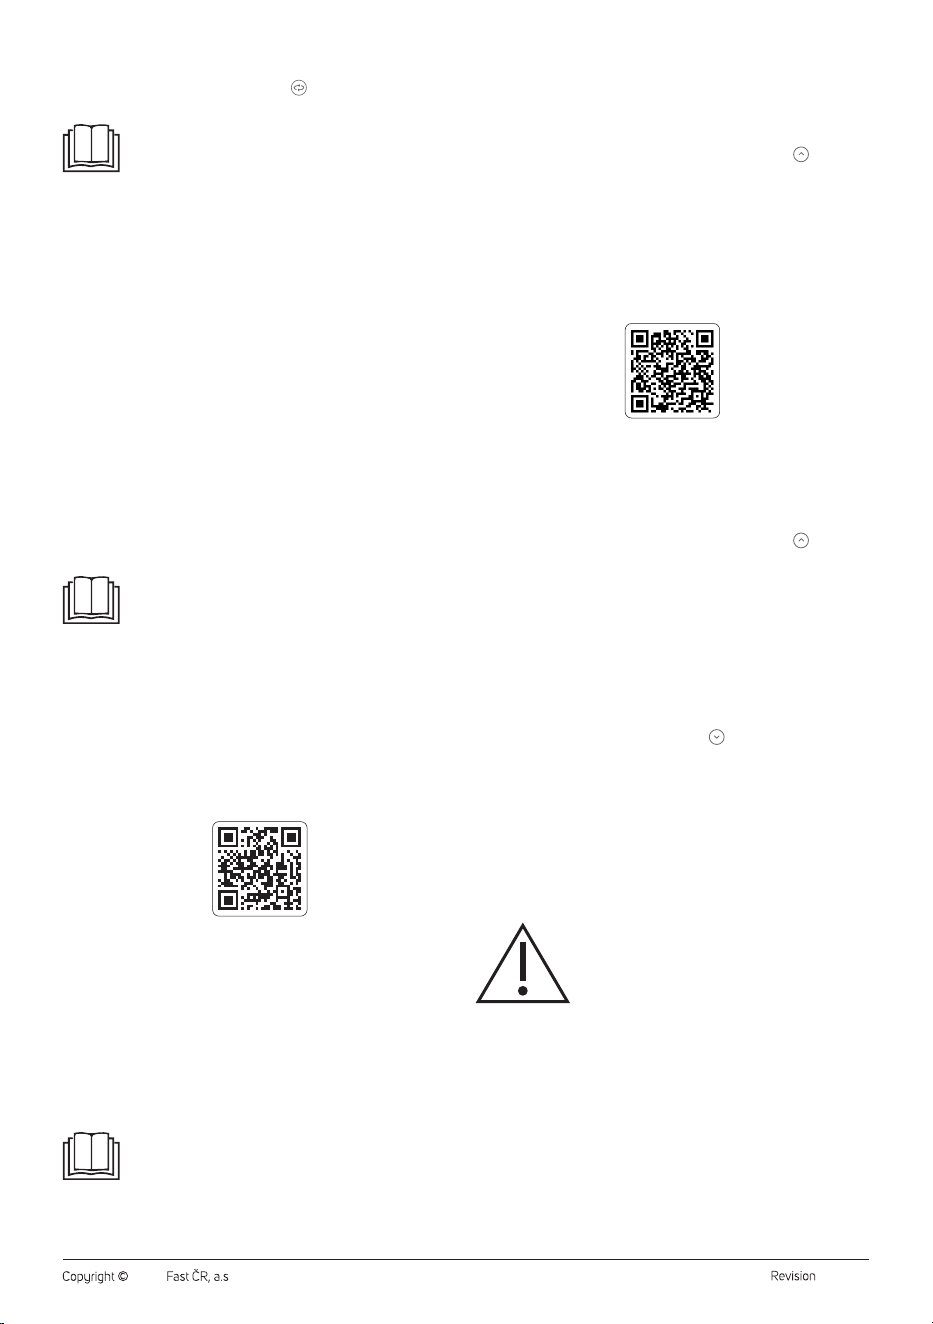
Adding the fan to the device list via aQR code
• The fan can also be added to the Sencor HOME application using the
QR code provided below. On the app'shome page, click the “+” icon
and in the top right corner of the Add device screen, click “[-] Scan
QR Code”.
• You will be prompted toreset the device. Hold down the button
for about 5 seconds. The Wi-Fi indicator light is flashing. This means
that the fan is ready to be paired. Instructions can also be found on the
application screen.
• Inthe app, confirm that the (Wi-Fi) light is flashing, then click “Next”.
• The process of adding the device starts. Wait until the fan is paired.
• In the device list on the main screen, click the fan icon to enter the
control interface.
QR code for adding the fan control panel to the Sencor HOME App
Adding the fan to the device list manually
• Inthe upper right corner of the main screen, click “Add device” or “+”,
then click “Add device”.
• Ascreen with appliance categories and alist of appliances will appear.
• Click “Cooling” and select the fan model from the list of products.
• You will be prompted toreset the device. Hold down the button
for about 5 seconds. The Wi-Fi indicator light is flashing. This means
that the fan is ready to be paired. Instructions can also be found on the
application screen.
• Inthe app, confirm that the (Wi-Fi) light is flashing, then click “Next”.
• On the next screen, you will be prompted toselect aWi-Fi network.
Select the network, enter your password andclick “Next”.
• The process of adding the device starts. Wait until the fan is paired.
• In the device list on the main screen, click the fan icon to enter the
control interface.
Wi-Fi Reset
While the fan is in operation, hold down the button for at least 5
seconds. The Wi-Fi settings will be reset and the Wi-Fi icon will flash
quickly (twice per second).
. . . . . . . . . . . . . . . . . . . . . . . . . . . . . . . . . . . . . . . . . . . . . . . . . . . . . . . . . . . . . . . . . . . .
CLEANING AND MAINTENANCE
• Before cleaning, make sure the fan is switched off and disconnected
from the power socket.
• Do not use abrasive cleaning agents, solvents, or any substances to
clean any parts of the appliance that could damage the surface of the
appliance.
Warning:
To prevent the risk of electric shock, do not submerge
the appliance, plug or power cord in water or any
other liquid.
• Use aclean, slightly damp cloth to clean the outer surface of the fan.
Then wipe everything dry thoroughly. Make sure that when cleaning,
no water leaks into the ventilation holes.
• You can alsouse avacuum cleaner with abrush nozzle attached to
clean the fan blades.
• If the fan blades are heavily soiled and need to be wiped, make sure
that the fan is turned off and the power adapter disconnected from the
power socket. Loosen the screw andthen remove the front grill. Wipe
the blades with aslightly damp cloth. Wipe with adry cloth. Then fit
the front grille andsecure with screw. Follow the instructions inthe
“ASSEMBLY” section.
- 6 -
05/2024
2024, .
Warning:
Before reinstalling the front grille, make sure that the
fan blades are completely dry.
Storage
• If you plan not to use the appliance for an extended period of time,
disconnect the power plug from the mains socket and clean the fan
according to the instructions above.
• Before storing, ensure that the appliance and all accessories are
thoroughly clean and dry.
• Store the appliance in adry, clean, and well-ventilated place away
from extreme temperatures and out of the reach of children or pets.
. . . . . . . . . . . . . . . . . . . . . . . . . . . . . . . . . . . . . . . . . . . . . . . . . . . . . . . . . . . . . . . . . . . .
TECHNICAL SPECIFICATIONS
Fan
Rated voltage.......................................................................................................12VDC
Power consumption ..............................................................................................26W
Noise level ..............................................................................................................48dB
Fan blade diameter ..............................................................................................30cm
Maximum fan flow rate ..........................................................................32.4m
3
/min
Operating value ............................................................................... 1.42 (m
3
/min)/W
Maximum air velocity .......................................................................................6.5m/s
Contact for further information .....................................................................................
.....................FAST ČR, a.s., USanitasu 1621, 251 01 Říčany, Česká republika
Power adapter
Input voltage ................................................................100–240V~ 50/60Hz 1.2A
Output voltage ................................................................................... 12.0 V 3.0 A
Power consumption ..............................................................................................36W
Name of manufacturer
FAST ČR, a.s.
U Sanitasu 1621
CZ -251 01 Říčany
Model identification number DZ036CHL120300V
Input voltage 100–240 V~
Input frequency 50/60 Hz
Output voltage 12 V
Output current 3 A
Output power 36 W
Average efficency in the active mode 87.41 %
Efficiency at low load (10%) 85.92 %
Power consumption without load 0.09 W
We reserve the right to change the text and technical specifications.
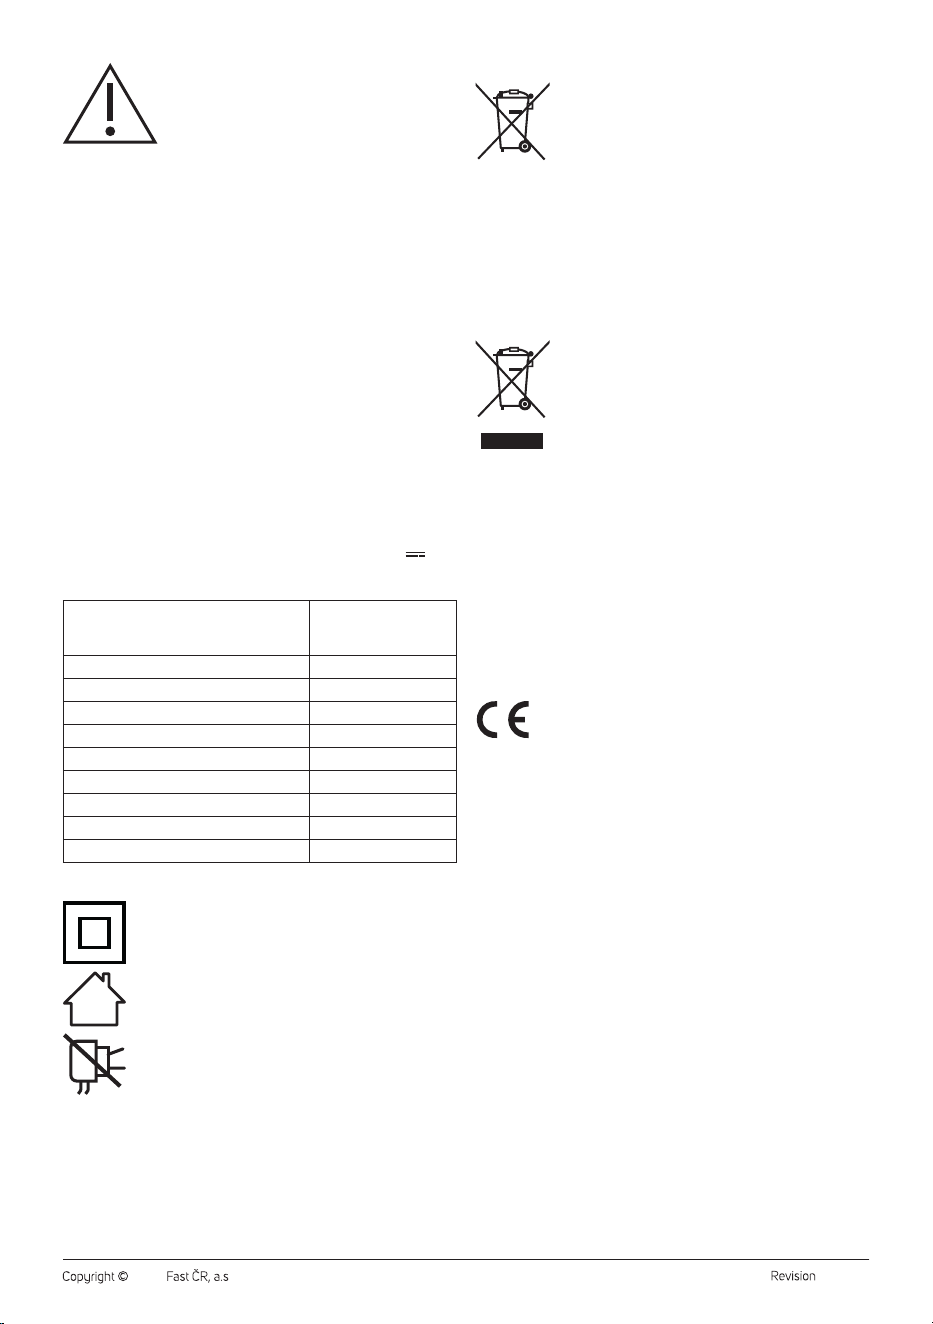
Safety Class for Electric Shock Protection:
Class II – Electric shock protection is provided by double or
heavy-duty insulation.
The product is intended for household use only. The product
is not intended for outdoor use.
This symbol indicates that the appliance must not be used if
the power plug is damaged.
SENCOR hereby declares that the radio device SFN 3040BK type
conforms to the 2014/53/EU directive. The full version of the EU
Declaration of Conformity is available at: www.sencor.eu.
. . . . . . . . . . . . . . . . . . . . . . . . . . . . . . . . . . . . . . . . . . . . . . . . . . . . . . . . . . . . . . . . . . . .
BATTERY DISPOSAL
Prior to disposing of the product or handing it over at
aspecialised collection facility, it is necessary to ensure
that the battery is removed. Before removing the battery,
itis necessary to start the fan and wait until it is completely
flat. The battery contains environmentally damaging
compounds and therefore does not belong in standard
household waste. Its proper disposal shall be ensured by the relevant
collection point.
. . . . . . . . . . . . . . . . . . . . . . . . . . . . . . . . . . . . . . . . . . . . . . . . . . . . . . . . . . . . . . . . . . . .
INSTRUCTIONS AND INFORMATION ON DISPOSAL OF USED
PACKAGING MATERIAL
Dispose of used packaging material in the designated waste disposal area
determined by the municipality.
DISPOSING OF USED ELECTRICAL AND ELECTRONIC EQUIPMENT
This symbol on the products or accompanying documents
indicates that used electrical and electronic products
should not be disposed of with regular municipal waste.
For proper disposal and recycling of these products, deliver
them to designated collection points. Alternatively, in some
European Union states or other European countries the
products can be returned to the local retailer when buying
an equivalent new product. By properly disposing of this
product, you help preserve valuable natural resources and contribute to
preventing potential negative impacts on the environment and human
health resulting from improper waste disposal. For further details, contact
your local authorities or the nearest collection point. Fines may be
imposed for improper disposal of this type of waste in accordance with
national regulations.
For Business Entities in European Union States
If you want to dispose of electric or electronic devices, ask your retailer or
supplier for the necessary information.
Disposal in Other Countries Outside the European Union
This symbol is valid in the European Union. To dispose of this product
elsewhere, request necessary information on the correct disposal method
from local authorities or your retailer.
This product complies with all the essential requirements of
the applicable EU directives.

FAST ČR, a.s.
U Sanitasu 1621
CZ-251 01 Říčany
www.sencor.eu