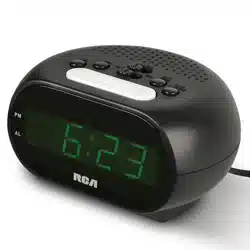
Alarm Clock
User’s Guide
Getting Started
Step 1: Install Batteries
Your alarm clock requires 3 AAA batteries (not included).
To install batteries:
Battery compartment
1. Open the battery compartment on
the back of the clock.
2. Insert 3 AAA batteries (not
included). Follow the + and
– indications printed on the
compartment.
3. Close the battery compartment.
Battery Precaution: Always remove
old, weak or worn-out batteries
promptly and recycle or dispose of
them in accordance with Local and
National Regulations.
Step 2: Set the Time
1. Put the LOCK-SET switch on the
back of the clock in the TIME SET
position.
2. Press the HOUR-MONTH button
on the back of the clock to adjust
the hour.
3. Press the MIN/DATE-ºC/ºF button
to adjust the minutes.
Everyday Use
Setting the Alarm
1. Put the LOCK-SET switch on the back of the clock in the AL. SET position.
2. Press the HOUR-MONTH button on the back of the clock to adjust the hour.
Note: If the clock is on AM/PM time, make sure the display shows the correct
hour, AM or PM, for your alarm.
3. Press the MIN/DATE-ºC/ºF button to adjust the minutes.
4. Whenyou’venishedsettingthealarmtime,puttheLOCK-SET switch in the
LOCK position.
To turn the alarm on/off: Put the AL. switch on the back of the clock in the
AL.ON or AL.OFF position. The display shows the
and icons when the
alarm is on.
Notes:
• The alarm sounds for one minute when activated.
• Press the SNOOZE/LIGHT button to activate snooze. The
icon ashes on the
clock display until the alarm sounds again.
• Put the AL. switch in the AL.OFF position to stop the alarm. The and
icons disappear from the display. Put the switch back in the AL.ON position to
have the alarm sound at the same time tomorrow.
Using Backlighting
To turn on the clock display backlighting: Press the SNOOZE/LIGHT button
on the top of the clock.
Using the Light Sensor
Youcansettheclocksothatitautomaticallyprovidesdisplaybacklightingde-
pendingontheamountofambientlightitdetects.
To turn the light sensor on/off: Put the SENSOR switch on the back of the clock
in the ON or OFF position.
Displaying the Temperature
The alarm clock measures and displays the ambient temperature between 32°
and122°F(0°—50℃).
To switch between Fahrenheit and Celsius: Make sure the LOCK-SET switch is
in the LOCK position, then press the MIN/DATE-ºC/ºF button on the back of the
clock.
Tour of the Alarm Clock
Back
AL.ON-AL.OFF switch turns the alarm
on or off.
12/24-YEAR button switches
between AM/PM and 24-hour time
formats;adjuststheyearwhensetting
the date.
MIN/DATE-ºC/ºF button adjusts the
minuteswhensettingthetimeor
alarm;adjuststhedaywhensetting
thedate;switchestemperaturereadingbetweenCelsiusandFahrenheit.
HOUR-MONTH button adjuststhehourwhensettingthetimeoralarm;adjusts
themonthwhensettingthedate.
LOCK-SET switch lets you set the time (TIME SET), adjust the date (DATE SET),
adjust the alarm time (AL.SET), or lock it for everyday use.
SENSOR switch turnsautomaticdisplaybacklightingonoroff.
SNOOZE/LIGHT button (top, not shown) activates snooze while the alarm is
sounding.Turnsondisplaybacklighting.
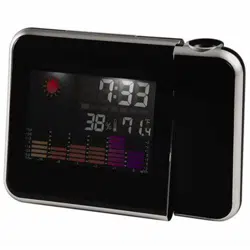
Display
AM/PM indicate whether the time
displayed is AM or PM (does not apply
to 24-hour format).
indicates that an alarm is set (solid)
orbeingset(blinking).
indicates that snooze has been
activated.
ALARM shows the time the alarm is
set for.
MONTH - DATE shows the current month and date.
TEMP shows the ambient temperature.
LOCK-SET switch
Note: The clock defaults to AM/PM time. If you want to use the 24-hour time
format, press the 12/24-YEAR button.
4. Whenyou’venishedsettingthetime,puttheLOCK-SET switch in the LOCK
position.
Step 3: Set the Date
1. Put the LOCK-SET switch on the back of the clock in the DATE SET position.
2. Press the 12/24-YEAR button on the back of the clock to adjust the year. A
singlepressgoes1yearatatime.Pressandhold12/24-YEARtogofaster.
Note: If you pass the current year, press and hold 12/24-YEAR to go through
the years to 2099, after which the years will return to 2000 and you can start
again.
3. Press the HOUR-MONTH button on the back of the clock to adjust the month.
4. Press the MIN/DATE-ºC/ºF button to adjust the date.
5. Whenyou’venishedsettingthetime,puttheLOCK-SET switch in the LOCK
position.
Guide de l’utilisateur
du réveil matin
Guide de démarrage
Étape 1 : Installation des piles
Leréveilmatinexige3pilesAAA(nonincluses).
Installation des piles :
Compartiment des piles
1. Ouvrir le compartiment des piles
situé au dos du réveil.
2. Insérer les 3 piles AAA (non
incluses). Respecter les indications
+ et - imprimées dans le
compartiment.
3. Refermer le compartiment des piles.
Précautions à propos des piles :
Toujours enlever les piles anciennes,
faibles ou usagées et les recycler
rapidement ou les mettre au rebut en
conformité avec les réglementations
locales et nationales.
Étape 2 : Réglage de l’heure
1. Placer l’interrupteur LOCK-SET
(Verrouillage-réglage)situéaudos
du réveil en position TIME SET
(Réglagedel’heure).
2. Appuyer sur le bouton HOUR-
MONTH (Heure-mois) sur le dos du
réveilpourréglerl’heure.
3. Appuyer sur le bouton MIN/DATE-
ºC/ºF(Minutes/date/degrésºC/ºF)
pourréglerlesminutes.
Interrupteur LOCK-SET
Remarque : Le réveil est conguré par défaut pour afcher les heures selon le
format AM/PM. Si le format 24 heures est désiré, appuyer sur le bouton 12/24-
YEAR (12/24-année).
4.Unefoisleréglagedel’heureterminé,placerl’interrupteurLOCK-SET
(Verrouillage-réglage)enpositionLOCK(Verrouillage).
Étape 3 : Réglage de la date
1. Placer l’interrupteur LOCK-SET(Verrouillage-réglage)situéaudosduréveilen
position DATE SET(Réglagedeladate).
2. Appuyer sur le bouton 12/24-YEAR (12/24-année) sur le dos du réveil pour
réglerl’année.Appuyersurlebouton12/24-YEAR et le maintenir enfoncé
pour aller plus vite.
Remarque : Si l’année en cours est dépassée, appuyer sur le bouton 12/24-
YEAR et le maintenir enfoncé pour parcourir les années jusqu’en 2099, après
quoi les années reviendront à 2000 et il sera possible de recommencer.
3. Appuyer sur le bouton HOUR-MONTH (Heure-mois) sur le dos du réveil pour
réglerl’heure.
4. Appuyer sur le bouton MIN/DATE-ºC/ºF(Minutes/date/degrésºC/ºF)pour
réglerladate.
5. Lorsque la mise à l’heure est terminée, placer l’interrupteur LOCK-SET
(Verrouillage-réglage)enpositionLOCK(Verrouillage).
Utilisation quotidienne
Réglage de l’alarme
1. Placer l’interrupteur LOCK-SET(Verrouillage-réglage)situéaudosduréveilen
position AL. SET(Réglagedel’alarme).
2. Appuyer sur le bouton HOUR-MONTH (Heure-mois) sur le dos du réveil pour
réglerl’heure.
Remarque :Sil’afchagedel’heureesteffectuéselonleformatAM/PM,
s’assurerquel’heurecorrecteestafchée,AMouPM,pourl’alarmeencours
deréglage.
3. Appuyer sur le bouton MIN/DATE-ºC/ºF(Minutes/date/degrésºC/ºF)pour
réglerlesminutes.
4. Lorsque la mise à l’heure de l’alarme est terminée, placer l’interrupteur LOCK-
SET(Verrouillage-réglage)enpositionLOCK(Verrouillage).
Pour activer / désactiver l’alarme : Placer l’interrupteur AL. situé au dos du
réveil en position AL.ON ou AL.OFF (Alarme activée ou Alarme désactivée).
L’écranafchelesicônes
et lorsque l’alarme est activée.
Remarques :
• L’alarme retentit pendant une minute lorsqu’elle est activée.
• Appuyer sur le bouton SNOOZE/LIGHT (Répétition/lumière) pour activer la
répétition. L’icône
clignote sur l’afchage du réveil jusqu’à ce que l’alarme
retentisse de nouveau.
• Placer l’interrupteur AL. en position AL.OFF (Alarme désactivée) pour arrêter
l’alarme. Les icônes et disparaissent de l’écran. Remettre l’interrupteur en
position AL.ON (Alarme activée) pour que l’alarme retentisse à la même heure
le lendemain.
Utilisation du rétro-éclairage
Pour activer le rétro-éclairage du réveil : Appuyer sur le bouton SNOOZE/
LIGHT (Répétition/lumière) situé sur le dessus du réveil.
Utilisation du capteur de lumière
Ilestpossiblederéglerleréveildemanièreàcequ’ilajusteautomatiquement
lerétro-éclairagedel’écranenfonctiondelaquantitédelumièreambiante
détectée.
Pour activer / désactiver le capteur de lumière : Placer l’interrupteur SENSOR
(Capteur) situé au dos du réveil en position ON ou OFF (Activé ou désactivé).
Afchage de la température
Leréveilmatinmesureetafchelatempératureambianteentre0°Cet50°C(32
°F et 122 °F).
Changer entre Fahrenheit et Celsius : S’assurer que l’interrupteur LOCK-SET
(Verrouillage-réglage)enpositionLOCK(Verrouillage),puisappuyersurlebou-
ton MIN/DATE-ºC/ºF(Minutes/date/degrésºC/ºF)àl’arrièreduréveil.
RCD11 IB 02

Présentation du réveil matin
Arrière de l’appareil
L’interrupteur AL.ON-AL.OFF active
ou désactive l’alarme.
Le bouton 12/24-YEAR (12/24-an-
née) permet de commuter entre les
formats AM/PM et 24 heures et de
réglerl’annéelorsduréglagedela
date.
Le bouton MIN/DATE-ºC/ºF ((Min-
utes/date/degrésºC/ºF)permetde
réglerlesminuteslorsduréglagedel’heureoudel’alarme.Ilpermetderégler
lejourlorsduréglagedeladateetpermetdecommuterl’afchagedela
températureentrelesdegrésCelsiusetFahrenheit.
Le bouton HOUR-MONTH (Heure-mois)permetderéglerl’heureoul’alarmeet
deréglerlemoislorsduréglagedeladate.
L’interrupteur LOCK-SET (Verrouillage-réglage)permetderéglerl’heure(TIME
SET)(Réglagedel’heure),deréglerladate(DATE SET)(Réglagedeladate),de
réglerlemomentdel’alarme(AL.SET)(Réglagedel’alarme),oudeverrouillerles
réglagespourl’utilisationquotidienne.
L’interrupteur SENSOR (Capteur) permet d’activer ou de désactiver le rétro-
éclairageautomatiquedel’afchage.
Le bouton Snooze/Display Brightness(Répétition/luminositédel’afchage)
(sur le dessus, non illustré) permet d’activer la répétition de l’alarme lorsqu’elle
retentit.Activelerétro-éclairagedel’afchage.
Afchage
AM/PMindiquesil’heureafchée
est AM ou PM (ne s’applique pas au
format 24 heures).
indiquequ’unealarmeestréglée
(xe)ouencoursderéglage(cligno-
tant).
indique que la répétition a été
activée.
ALARM indique l’heure pour laquelle
l’alarmeestdénie.
MONTH - DATEafchelemoisetladateactuels.
TEMP indique la température ambiante
Guía del usuario
del reloj despertador
Para empezar
Paso 1: Instale las baterías
Su reloj despertador requiere 3 baterías AAA (no se incluyen).
Para instalar las baterías:
Compartiment des piles
1. Abra el compartimiento de baterías
ubicado en la parte posterior del
reloj.
2. Introduzca 3 baterías AAA (no se
incluyen). Respete las indicaciones
depolaridadpositivaynegativa
impresas en el compartimiento.
3. Cierre el compartimiento de baterías.
Precaución sobre las baterías: Siem-
pre retire oportunamente las baterías
viejas, con poca carga o desgastadas,
y recíclelas o deséchelas de conformi-
dad con la normativa local y nacional.
Paso 2: Ponga la hora
1. Lleve el interruptor LOCK-SET
ubicado en la parte posterior del
reloj a la posición TIME SET.
2. Oprima el botón HOUR-MONTH
ubicado en la parte posterior del
reloj para ajustar la hora.
3. Oprima el botón MIN/DATE-°C/°F
para ajustar los minutos.
Interrupteur LOCK-SET
Aviso: De forma predeterminada, el reloj adopta el formato de hora AM/PM.
Si desea usar el formato de 24 horas, oprima el botón 12/24-YEAR.
4. Cuando haya terminado de poner la hora, lleve el interruptor LOCK-SET a la
posición LOCK.
Paso 3: Ponga la fecha
1. Lleve el interruptor LOCK-SET ubicado en la parte posterior del reloj a la
posición DATE SET.
2. Oprima el botón 12/24-YEAR ubicado en la parte posterior del reloj
para ajustar el año. Oprima y no suelte el botón 12/24-YEAR para avanzar
rápidamente.
Aviso: Si se pasa del año actual, oprima y no suelte el botón 12/24-YEAR para
avanzar a través de los años hasta 2099, después del cual los años regresarán a
2000 y usted podrá empezar otra vez.
3. Oprima el botón HOUR-MONTH ubicado en la parte posterior del reloj para
ajustar el mes.
4. Oprima el botón MIN/DATE-°C/°F para ajustar la fecha.
5. Cuando haya terminado de poner la fecha, lleve el interruptor LOCK-SET a la
posición LOCK.
Uso diario
Programación de la alarma
1. Lleve el interruptor LOCK-SET ubicado en la parte posterior del reloj a la
posición AL. SET.
2. Oprima el botón HOUR-MONTH ubicado en la parte posterior del reloj para
ajustar la hora.
Aviso:SielrelojestáusandoelformatodehoraAM/PM,veriquequela
pantalla indique la hora, AM o PM, a la que desea que suene la alarma.
3. Oprima el botón MIN/DATE-°C/°F para ajustar los minutos.
4.Cuandohayaterminadodeprogramarlaalarma,lleveelinterruptorLOCK-
SET a la posición LOCK.
Para activar o desactivar la alarma: Lleve el interruptor AL. ubicado en la parte
posterior del reloj a las posiciones AL.ON o AL.OFF. En la pantalla aparecen los
iconos
y cuando la alarma está activada.
Avisos:
• La alarma suena durante un minuto cuando se activa.
• Oprima el botón SNOOZE/LIGHT para activar la repetición de la alarma. El
icono XXX parpadeará en la pantalla del reloj hasta que vuelva a sonar la
alarma.
• Lleve el interruptor AL. a la posición AL.OFF para apagar la alarma. Los iconos
y desaparecen de la pantalla. Devuelva el interruptor a la posición
AL.ON para que la alarma suene a la misma hora al día siguiente.
Uso de la luz de fondo
Para encender la luz de fondo de la pantalla del reloj: Oprima el botón
SNOOZE/LIGHT ubicado en la parte superior del reloj.
Uso del sensor de luz
Puedecongurarelrelojparaqueenciendaautomáticamentelaluzdefondo
segúnsealaintensidaddelaluzambientalquedetecte.
Para activar o desactivar el sensor de luz: Lleve el interruptor SENSOR
ubicado en la parte posterior del reloj a las posiciones ON (ACTIVAR) u OFF
(DESACTIVAR).
Indicación de la temperatura
El reloj despertador mide e indica la temperatura ambiente entre 32 °F y 122 °F
(0 °C y 50 °C).
Para cambiar entre grados Fahrenheit y grados centígrados: Cerciórese de
que el interruptor LOCK-SET esté en la posición LOCK y después oprima el
botón MIN/DATE-°C/°F ubicado en la parte posterior del reloj.
Recorrido del reloj despertador
Parte posterior
Interruptor AL.ON-AL.OFF activa y
desactiva la alarma.
Botón 12/24-YEAR cambia entre los
formatos AM/PM y 24 horas; ajusta el
año cuando se pone la fecha.
Botón MIN/DATE-°C/°F ajusta los
minutos cuando se pone la hora o se
programalaalarma;ajustaeldíacuan-
do se pone la fecha; cambia la lectura
detemperaturaentregradoscentígradosygradosFahrenheit.
Botón HOUR-MONTHajustalahoracuandoseponelahoraoseprogramala
alarma; ajusta el mes cuando se pone la fecha.
Interruptor LOCK-SET le permite poner la hora (TIME SET), poner la fecha
(DATE SET),programarlaalarma(AL.SET)ojar(LOCK) los ajustes para el uso
diario.
Interruptor SENSORenciendeoapagaautomáticamentelaluzdefondo.
Botón SNOOZE/LIGHT (en la parte superior; no se muestra) activa la repetición
de la alarma cuando la alarma está sonando. Además, enciende la luz de fondo
de la pantalla.
Pantalla
AM/PM indica si la hora en pantalla es antes o después del mediodía (no se
enciendesisehaelegidoelformatode24horas).
indicaquesehaprogramadolaalarma(luzja)oqueseestáprogramando
(luz intermitente).
indica que se ha activado la repet-
ición de la alarma.
ALARM indica la hora a la que sonará
laalarmaprogramada.
MONTH-DATE indica el mes y la fecha
actuales.
TEMP indica la temperatura ambiente
RCD11 IB 02