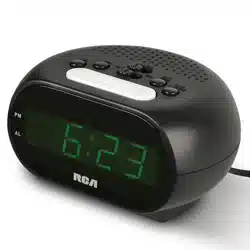
Clock Caddy with USB Charging
User’s Guide
Getting Started
Step 1: Remove the protective lm from the clock’s display
Gently peel off the protective lm covering the display.
Step 2: Plug In the Clock
1. Plug the included power adapter into the DC 5V
jack on the back of the clock.
2. Plug the other end into a working power outlet.
RCDC45 IB 01
Everyday Use
Setting the Alarms
1. Press and hold the SET button on the back of the clock to enter time/date/preferences
set mode.
2. Press the SET button repeatedly until --:AL1 appears on the display. This is the setting for
Alarm 1.
3. Use the UP and DOWN buttons on the back of the clock to turn Alarm 1 on (on:AL1) or
off (--:AL1). Press SET to proceed.
4. Use the UP and DOWN buttons to adjust the hour for the alarm. Press the SET button to
set it.
5. Use the UP and DOWN buttons to adjust the minutes for the alarm. Press the SET button
to set them. You’ve nished setting Alarm 1.
If you want to set Alarm 2, follow steps 3-5 when the display shows --:AL2. If you want to
set Alarm 3, follow steps 3-5 when the display shows --:AL3.
Notes:
• The alarm sounds for one minute when activated.
• Press any button to turn the alarm off completely.
Setting the Display Mode
The clock has two display modes: time/date/temperature cycle and time only. The default
setting is time/date/temperature cycle.
To change the display mode: Press the SET button. dp-1 cycles through the time, date, and
ambient temperature. dp-2 shows the time only.
Setting Temperature Display Preference (Celsius / Fahrenheit)
The clock displays the ambient temperature in time/date/cycle display mode. It can display
the temperature in degrees Celsius or Fahrenheit.
To change the temperature display: Press the UP button.
Setting Power Saving Mode
The clock offers a power-saving mode, which turns the display off after 15 seconds without
a button press (you turn the display back on by pressing one of the buttons on the back). In
regular display mode, the clock display stays on all the time (as long as the clock is plugged
in).
To turn Power-Saving Mode On/Off: Press the DOWN button. on:Sd means that power-
saving mode is on. --:Sd means power-saving mode is off.
Setting Display Brightness
By default, the clock offers automatic brightness adjustment for the display: dimmed (L-0)
from 6pm to 6:59am, and normal brightness the rest of the time. You can also set the
brightness manually, from L-0 (dim) to L-3 (bright).
To set Brightness manually: Press and hold the UP button for 3 seconds until the
brightness setting appears. Then use the UP and DOWN buttons to adjust to the level
desired. The display will return to normal time display in 5 seconds without a button press.
Charging your Mobile Device
The clock offers a USB charging port for your mobile
device on the back panel.
To charge your mobile device: Plug your device into
its charging cable (not included). Plug the charging
cable into the USB port on the back of the clock.
Step 3: Set the Date, Time, and Clock Preferences
You will need to set the clock the rst time you plug it in.
To set the date, time, and clock preferences: Press and
hold the SET button on the back of the clock to enter
time/date/preferences set mode. For each setting, use
the UP and DOWN buttons to adjust. Then press SET to
proceed. These settings go in the following order:
USB
DC5V
DOWN
UP SET
Clock , back
BATTERY BACKUP
Your clock has a pre-installed battery backup that will keep the time in case
power is interrupted (like by a power outage, for example). If you notice that
battery backup is no longer working, simply replace the CR2032 coin-cell
battery in the battery compartment on the bottom of the clock. Loosen the
screw holding the door in place, then remove the door and replace the battery.
Then put the door and screw back in place and tighten the screw to fasten the door.
USB
DC5V
DOWN
UP SET
Clock , back panel
USB
DC5V
DOWN
UP SET
Clock , back panel
Year: Use UP and DOWN to adjust, SET to set it and proceed.
Month: Use UP and DOWN to adjust, SET to set it and proceed.
Date: Use UP and DOWN to adjust, SET to set it and proceed.
12/24-Hour Clock: Use UP and DOWN to switch between 12- and 24-hour time formats (for
example, 5:00 pm in 12-hour format would be 17:00 in 24-hour format). Press SET to set
your preference and proceed.
Hour: Use UP and DOWN to adjust, SET to set it and
proceed.
Minutes: Use UP and DOWN to adjust, SET to set it and
proceed.
Alarm 1 On/Off and Time: Use UP and DOWN to turn Alarm
1 on or off. Then use UP and DOWN to adjust the alarm
hour (SET to set it), and UP and DOWN to adjust the alarm
minutes (SET to set it and proceed).
Alarm 2 On/Off and Time: Use UP and DOWN to turn Alarm
2 on or off. Then use UP and DOWN to adjust the alarm
hour (SET to set it), and UP and DOWN to adjust the alarm
minutes (SET to set it and proceed).
Alarm 3 On/Off and Time: Use UP and DOWN to turn Alarm
3 on or off. Then use UP and DOWN to adjust the alarm
hour (SET to set it), and UP and DOWN to adjust the alarm
minutes (SET to set it and proceed)
Power Saving Mode: Use UP and DOWN to turn power sav-
ing mode on and off. Press SET to save your preference and
exit setup. In power saving mode, the display turns off after 15
seconds without a button press.
Panier horloge avec chargeur USB
Guide de l’utilisateur
Guide de démarrage
Étape 1 : Retirer le lm protecteur de l’écran de l’horloge
Retirer délicatement le lm de protection qui recouvre l’écran.
Étape 2 : Branchement de l’horloge
1. Brancher l’adaptateur d’alimentation inclus dans la
prise DC 5V située à l’arrière de l’horloge.
2. Brancher l’autre extrémité sur une prise secteur
opérationnelle.
Étape 3 : Conguration de la date,
de l’heure et des préférences de l’horloge
Il est nécessaire de régler l’horloge la première fois
qu’elle est branchée.
Pour congurer la date, l’heure et les préférences de l’horloge : Appuyer sur le bouton
SET (Régler) à l’arrière de l’horloge et le maintenir enfoncé pour entrer en mode de réglage
de l’heure, de la date et autres préférences. Pour chaque paramètre, utiliser les boutons UP
(Haut) et DOWN (Bas) pour le réglage. Puis appuyer sur SET (Régler) pour continuer. Ces
réglages s’effectuent dans l’ordre suivant :
USB
DC5V
DOWN
UP SET
Horloge, panneau arrière
PILE DE SECOURS
Votre horloge dispose d’une pile de secours préinstallée qui garde l’heure
en cas de coupure de courant (par exemple, en cas de panne de courant). Si
la pile de secours ne fonctionne plus, remplacer simplement la pile bouton
CR2032 située dans le compartiment à pile situé au bas de l’horloge. Desserrer
la vis qui maintient le couvercle en place, puis le retirer et remplacer la pile.
Remettre ensuite le couvercle et la vis en place et serrer la vis pour le xer.
USB
DC5V
DOWN
UP SET
Horloge, panneau arrière
Année : Utiliser les boutons UP et DOWN pour le réglage, SET pour conrmer et continuer.
Mois : Utiliser les boutons UP et DOWN pour le réglage, SET pour conrmer et continuer.
Date : Utiliser les boutons UP et DOWN pour le réglage, SET pour conrmer et continuer.
Horloge 12/24 heures : Appuyer sur UP et DOWN pour basculer entre les formats horaires
12 heures et 24 heures (par exemple, 5:00 PM au format 12 heures correspond à 17:00 heu-
res au format 24 heures). Appuyer sur SET pour conrmer vos préférences et continuer.
Heure : Utiliser les boutons UP et DOWN pour le réglage,
SET pour conrmer et continuer.
Minutes : Utiliser les boutons UP et DOWN pour le réglage,
SET pour conrmer et continuer.
Alarme 1 Marche/arrêt et Heure : Utiliser les boutons UP et
DOWN pour activer ou désactiver l’alarme 1. Puis utiliser les
boutons UP et DOWN pour régler l’heure de l’alarme (SET pour
la régler), et UP et DOWN pour régler les minutes de l’alarme
(SET pour conrmer et continuer).
Alarme 2 Marche/arrêt et Heure : Utiliser les boutons UP et
DOWN pour activer ou désactiver l’alarme 2. Puis utiliser les boutons UP et DOWN pour
régler l’heure de l’alarme (SET pour la régler), et UP et DOWN pour régler les minutes de
l’alarme (SET pour conrmer et continuer).
Alarme 3 On/Off et Heure : Utiliser les boutons UP et DOWN pour activer ou désactiver
l’alarme 3. Puis utiliser les boutons UP et DOWN pour régler l’heure de l’alarme (SET pour la
régler), et UP et DOWN pour régler les minutes de l’alarme (SET pour conrmer et continuer)

Utilisation quotidienne
Réglage des alarmes
1. Appuyer sur le bouton SET à l’arrière de l’horloge et le maintenir enfoncé pour entrer en
mode de réglage de l’heure, de la date et autres préférences.
2. Appuyer sur le bouton SET à plusieurs reprises jusqu’à ce que --:AL1 apparaisse à
l’écran. Il s’agit du réglage de l’alarme 1.
3. Utiliser les boutons UP et DOWN à l’arrière de l’horloge pour activer (AL1) ou désactiver
(--:AL1) l’alarme 1. Appuyer sur SET pour continuer.
4. Utiliser les boutons UP et DOWN pour régler l’heure de l’alarme. Appuyer sur le bouton
SET pour conrmer.
5. Utiliser les boutons UP et DOWN pour régler les minutes de l’alarme. Appuyer sur le
bouton SET pour conrmer. Le réglage de l’alarme 1 est terminé.
Pour régler l’alarme 2, suivre les étapes 3 à 5 lorsque l’écran afche --:AL2. Pour régler
l’alarme 3, suivre les étapes 3 à 5 lorsque l’écran afche --:AL3.
Remarques :
• L’alarme retentit pendant une minute lorsqu’elle est activée.
• Un appui sur n’importe quel bouton désactive complètement l’alarme.
Réglage du mode d’afchage
L’horloge dispose de deux modes d’afchage : cycle heure/date/température et heure seule.
Le réglage par défaut est le cycle heure/date/température.
Pour modier le mode d’afchage : Appuyer sur le bouton SET. dp-1 fait déler l’heure, la
date et la température ambiante. dp-2 afche uniquement l’heure.
Réglage de la préférence d’afchage de la température
(Celsius / Fahrenheit)
L’horloge afche la température ambiante en mode d’afchage heure/date/température. Elle
peut afcher la température en degrés Celsius ou Fahrenheit.
Pour modier l’afchage de la température : Appuyer sur le bouton UP.
Conguration du mode économie d’énergie
L’horloge dispose d’un mode d’économie d’énergie qui éteint l’écran après 15 secondes
sans appuyer sur un bouton (pour le rallumer, il suft d’appuyer sur l’un des boutons situés à
l’arrière). En mode d’afchage normal, l’écran de l’horloge reste allumé en permanence (tant
que l’horloge est branchée).
Pour activer / désactiver le mode économie d’énergie : Appuyer sur le bouton DOWN.
on:Sd signie que le mode d’économie d’énergie est activé. --:Sd signie que le mode
d’économie d’énergie est désactivé.
Réglage de la luminosité de l’écran
Par défaut, l’horloge offre un réglage automatique de la luminosité de l’écran : luminosité
atténuée (L-0) de 18 h à 6 h 59, et luminosité normale le reste du temps. Il est également
possible de régler manuellement la luminosité, de L-0 (faible) à L-3 (forte).
Pour régler la luminosité manuellement : Appuyer sur le bouton UP et le maintenir
enfoncé pendant 3 secondes jusqu’à ce que le réglage de la luminosité apparaisse. Utiliser
les boutons UP ou DOWN pour régler le niveau de luminosité désiré. L’écran revient à
l’afchage normal de l’heure en 5 secondes sans appui sur un bouton.
Chargement d’un appareil mobile
L’horloge offre un port de charge USB pour un
appareil mobile sur le panneau arrière.
Pour charger un appareil mobile : Brancher
l’appareil sur son câble de chargement (non fourni).
Brancher le câble de chargement dans le port USB
située à l’arrière de l’horloge.
USB
DC5V
DOWN
UP SET
Horloge, panneau arrière
Mode économie d’énergie : Utiliser les boutons UP et DOWN
pour activer ou désactiver le mode économie d’énergie.
Appuyer sur SET pour conrmer vos préférences et quitter la
conguration. En mode d’économie d’énergie, l’écran s’éteint
au bout de 15 secondes sans pression sur un bouton.
Reloj con carga USB
Guía de usuario
Primeros pasos
Paso 1: Extraiga la película protectora de la pantalla del reloj
Despegue con suavidad la película protectora que cubre la pantalla.
Paso 2: Enchufe el reloj
1. Conecte el adaptador de alimentación incluido al
conector de CC de 5 V ubicado en la parte posterior
del reloj.
2. Enchufe el otro extremo a un tomacorriente de
alimentación en funcionamiento.
Paso 3: Ajuste las preferencias de recha, hora y reloj
Debe ajustar el reloj la primera vez que lo enchufe.
Para ajustar la fecha, hora y preferencias del reloj:
mantenga oprimido el botón SET ubicado en la parte
posterior del reloj para ingresar en el modo de ajuste de
hora/fecha/preferencias. Para cada conguración, utilice
los botones UP y DOWN. A continuación, oprima SET para continuar. Estos ajustes tendrán
el siguiente orden:
USB
DC5V
DOWN
UP SET
Reloj, panel posterior
BATERÍA DE RESPALDO
El reloj incluye una batería de respaldo preinstalada que conservará la hora en
caso de que se interrumpa el suministro de alimentación (por ejemplo, si ocurre
un corte en el suministro eléctrico). Si advierte que la batería de respaldo ha
dejado de funcionar, simplemente reemplace la batería de celda tipo moneda
CR2032 en el compartimiento de la batería ubicado en la parte inferior del reloj.
Aoje el tornillo que sujeta la tapa en su lugar y, a continuación, extraiga la tapa y reemplace la
batería. Vuelva a colocar la tapa y el tornillo en su lugar y apriete el tornillo para sujetar la tapa.
USB
DC5V
DOWN
UP SET
Reloj, panel posterior
Año: utilice UP y DOWN para ajustar y SET para establecer y continuar.
Mes: utilice UP y DOWN para ajustar y SET para establecer y continuar.
Fecha: utilice UP y DOWN para ajustar y SET para establecer y continuar.
Reloj de 12/24 horas: utilice UP y DOWN para cambiar entre los formatos de hora de 12 y
24 horas (por ejemplo, 5:00 p. m. en el formato de 12 horas serán las 17:00 en el formato de
24 horas). Oprima SET para establecer su preferencia y continuar.
Hora: utilice UP y DOWN para ajustar y SET para establecer
y continuar.
Minutos: utilice UP y DOWN para ajustar y SET para esta-
blecer y continuar.
Alarma 1 activada/desactivada y hora: utilice UP y DOWN para
activar o desactivar la alarma 1. A continuación, utilice UP y
DOWN para ajustar la hora de la alarma (SET para establecerla),
y and UP y DOWN para ajustar los minutos de la alarma (SET
para establecerlos).
Alarma 2 activada/desactivada y hora: utilice UP y DOWN para
activar o desactivar la alarma 2. A continuación, utilice UP y DOWN para ajustar la hora de la
alarma (SET para establecerla), y and UP y DOWN para ajustar los minutos de la alarma (SET
para establecerlos).
Alarma 3 activada/desactivada y hora: utilice UP y DOWN para activar o desactivar la alarma
3. A continuación, utilice UP y DOWN para ajustar la hora de la alarma (SET para establecer-
la), y and UP y DOWN para ajustar los minutos de la alarma (SET para establecerla).
Uso diario
Ajuste de las alarmas
1. Mantenga oprimido el botón SET ubicado en la parte posterior del reloj para ingresar en
el modo de ajuste de hora/fecha/preferencias.
2. Oprima el botón SET varias veces hasta que aparezca --:AL1 en la pantalla. Esta es la
conguración para la alarma 1.
3. Utilice los botones UP y DOWN ubicados en la parte posterior del reloj para activar
(on:AL1) o desactivar (--:AL1) la alarma 1. Oprima SET para continuar.
4. Utilice los botones UP y DOWN para ajustar la hora de la alarma. Oprima el botón SET
para jar la hora.
5. Utilice los botones UP y DOWN para ajustar los minutos para la alarma. Oprima el botón
SET para jar los minutos. Finalizó la conguración de la alarma 1.
Si quiere establecer la alarma 2, siga los pasos 3 a 5 cuando la pantalla muestre --:AL2. Si
quiere establecer la alarma 3, siga los pasos 3 a 5 cuando la pantalla muestre --:AL3
Notas:
• La alarma suena durante 1 minuto cuando está activada.
• Oprima cualquier botón para apagar por completo la alarma.
Conguración del modo de pantalla
El reloj ofrece dos modos de pantalla: ciclo de hora/día/temperatura y solo hora. La congu-
ración predeterminada es ciclo de hora/día/temperatura.
Para cambiar el modo de visualización: oprima el botón SET. dp-1 cambia entre la hora, la
fecha y la temperatura ambiente. dp-2 muestra solo la hora.
Cómo congurar la preferencia de visualización de temperatura
(Celsius/Fahrenheit)
El reloj muestra la temperatura ambiente en el modo de visualización de ciclo de hora/día/
temperatura. Puede mostrar la temperatura en grados Celsius o Fahrenheit.
Para cambiar la visualización de temperatura: oprima el botón UP.
Cómo congurar el modo de ahorro de energía
El reloj ofrece un modo de ahorro de energía, que apaga la pantalla después de 15
segundos sin que se oprima un botón (puede volver a encender la pantalla si oprime uno
de los botones ubicados en la parte posterior). En el modo de visualización normal, la
pantalla permanecerá encendida todo el tiempo (siempre y cuando el reloj esté enchufado).
Para activar o desactivar el modo de ahorro de energía: oprima el botón DOWN. on:Sd
indica que el modo de ahorro de energía está activado. --:Sd indica que el modo de ahorro
de energía está desactivado.
Conguración del brillo de la pantalla
De forma predeterminada, el reloj ofrece un ajuste automático del brillo para la pantalla:
atenuada (L-0) de 6 p. m. a 6:59 a. m. y brillo normal el resto del día. También puede ajustar
el brillo de forma manual: desde L-0 (atenuado) hasta L-3 (brillo máximo).
Para ajustar el brillo de forma manual: mantenga oprimido el botón UP durante 3 segundos
hasta que aparezca la conguración de brillo. A continuación, utilice los botones UP y
DOWN para ajustar al nivel deseado. La pantalla regresará a la visualización normal de hora
en un plazo de 5 segundos si no se oprime ningún botón.
Carga de dispositivos móviles
El reloj incluye un puerto de carga USB para su
dispositivo móvil ubicado en al panel posterior.
Para cargar su dispositivo móvil: conecte el
dispositivo al cable de carga (no incluido). Conecte el cable de carga al puerto USB ubicado
en la parte posterior del reloj.
USB
DC5V
DOWN
UP SET
Reloj, panel posterior
Modo de ahorro de energía: Utilice UP y DOWN para activar
y desactivar el modo de ahorro de energía. Oprima SET para
guardar su preferencia y salir de la conguración. En el modo
de ahorro de energía, la pantalla se apaga después de 15
segundos sin oprimir un botón.
RCDC45 IB 01