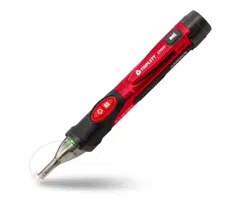
ETFB10
Non-Contact Optical Fiber & AC Voltage Detector
1. WARNINGS
2.Int
ernational Saf
ety Symbols
3.General Specifications
4.Detector Description
5.Oper
ation
5-5. NCV Test
5-1.Turning the Tester On
5-2. T
urn
off
the
t
es
t
er
5-3.Mode Sel
ect F
unction
5-4.Verify Operation
• Read under
s
t
and and f
oll
o
w saf
ety rul
es and oper
ating ins
tructions in the
manual
bef
or
e using
this
tester.
• The tester’s safety features may not protect the user if not used in accordance with the manufacturer’s
instructions.
• Check on a known live source within the rated AC voltage range of the tester before use to ensure it is
in working order.
• Insulation type and thickness, distance from the voltage source, shielded wires, and other factors may
effect reliable operation. Use other methods to verify live voltage, if there is any uncertainty.
• Do not use if the tester appears damaged or if it is not operating properly. If in doubt, replace the tester.
• Do not use on
v
olt
ages that ar
e higher than as mark
ed on
the
t
es
t
er
.
• Use caution with voltages above 30 volts AC as a shock hazard may exist.
• Comply with all applicable safety codes. Use approved personal protective equipment when working
near live electrical circuits-particularly with regard to arc-flash potential.
• When measuring the optical fiber signal, try to keep the tester and the optical interface in the same
line, and try to be close to the optical fiber interface.
• Avoid using the meter around strong electromagnetic fields.
• Do not expose tester to extremes in temperature or high humidity.
Briefly press the ON/OFF button of the tester to start the machine, and the green LED of the tester
will light up quickly twice every 2 seconds, indicating that the tester is working in fiber mode and ready.
Press and hold the ON/OFF button of the tester for a long time to start the machine. The tester is in
silent mode. The green LED will light up quickly twice every 2 seconds, indicating that the tester is
working in fiber mode and ready.
Not
e: If the
ON/OFF butt
on is pr
es
sed f
or a
l
ong
time,
aft
er the po
w
er LED is
lit, the po
w
er butt
on is
still in the "long press" state, and it is judged as wrong operation after about 5 seconds. After two
beeps, the tester will automatically turn off.
After the tester is turned on, press the ON/OFF button again, the tester will beep twice and turn off
the test function.
When
the t
es
t
er is w
orking, pr
es
s the "M" k
e
y
briefly
each time t
o swit
ch the w
orking mode of
the
t
es
t
er
.
The flashing
gr
een
LED
indic
at
es that
it is running in the fiber t
es
t mode, and
the flashing r
ed
LED
indic
at
es that it is
running in the NC
V mode.
Before using the tester, (1) make sure that the battery is sufficient and the tester can be turned on
normally. (2) use it within the test voltage range specified by the tester.
• Place the tip of the tester close to the AC voltage.
• If the AC voltage detected by the tester is greater than 50V, the red LED will switch to the normally lit
state, and the buzzer will make a quick sound.
If the AC voltage detected by the tester is less than 50V, the red LED will switch to the flashing state,
and the buzzer will not make a sound.
Note: When the instrument is in non-silent mode, the buzzer will sound.
P
ot
ential danger
. Indic
at
es the user
mus
t r
ef
er t
o the manual
f
or import
ant saf
ety
inf
ormation.
Indic
at
es hazar
dous v
olt
ages may be pr
esent.
Equipment is pr
ot
ect
ed by doubl
e or r
einf
or
c
ed insulation.
Detection Voltage Range 50V to 1000VAC
Frequency Range 50/60Hz
Optical fiber wavelength detection range 850~1700nm
Batteries Two AAA 1.5V batteries
Operating Temperature 0 to 50°C (32 to 122°F)
Storage Temperature -10 to 60°C (14 to 140°F)
Humidity 80% max
Altitude 2000 meters
Pollution Degree 2
Safety Compliance CAT IV 1000V
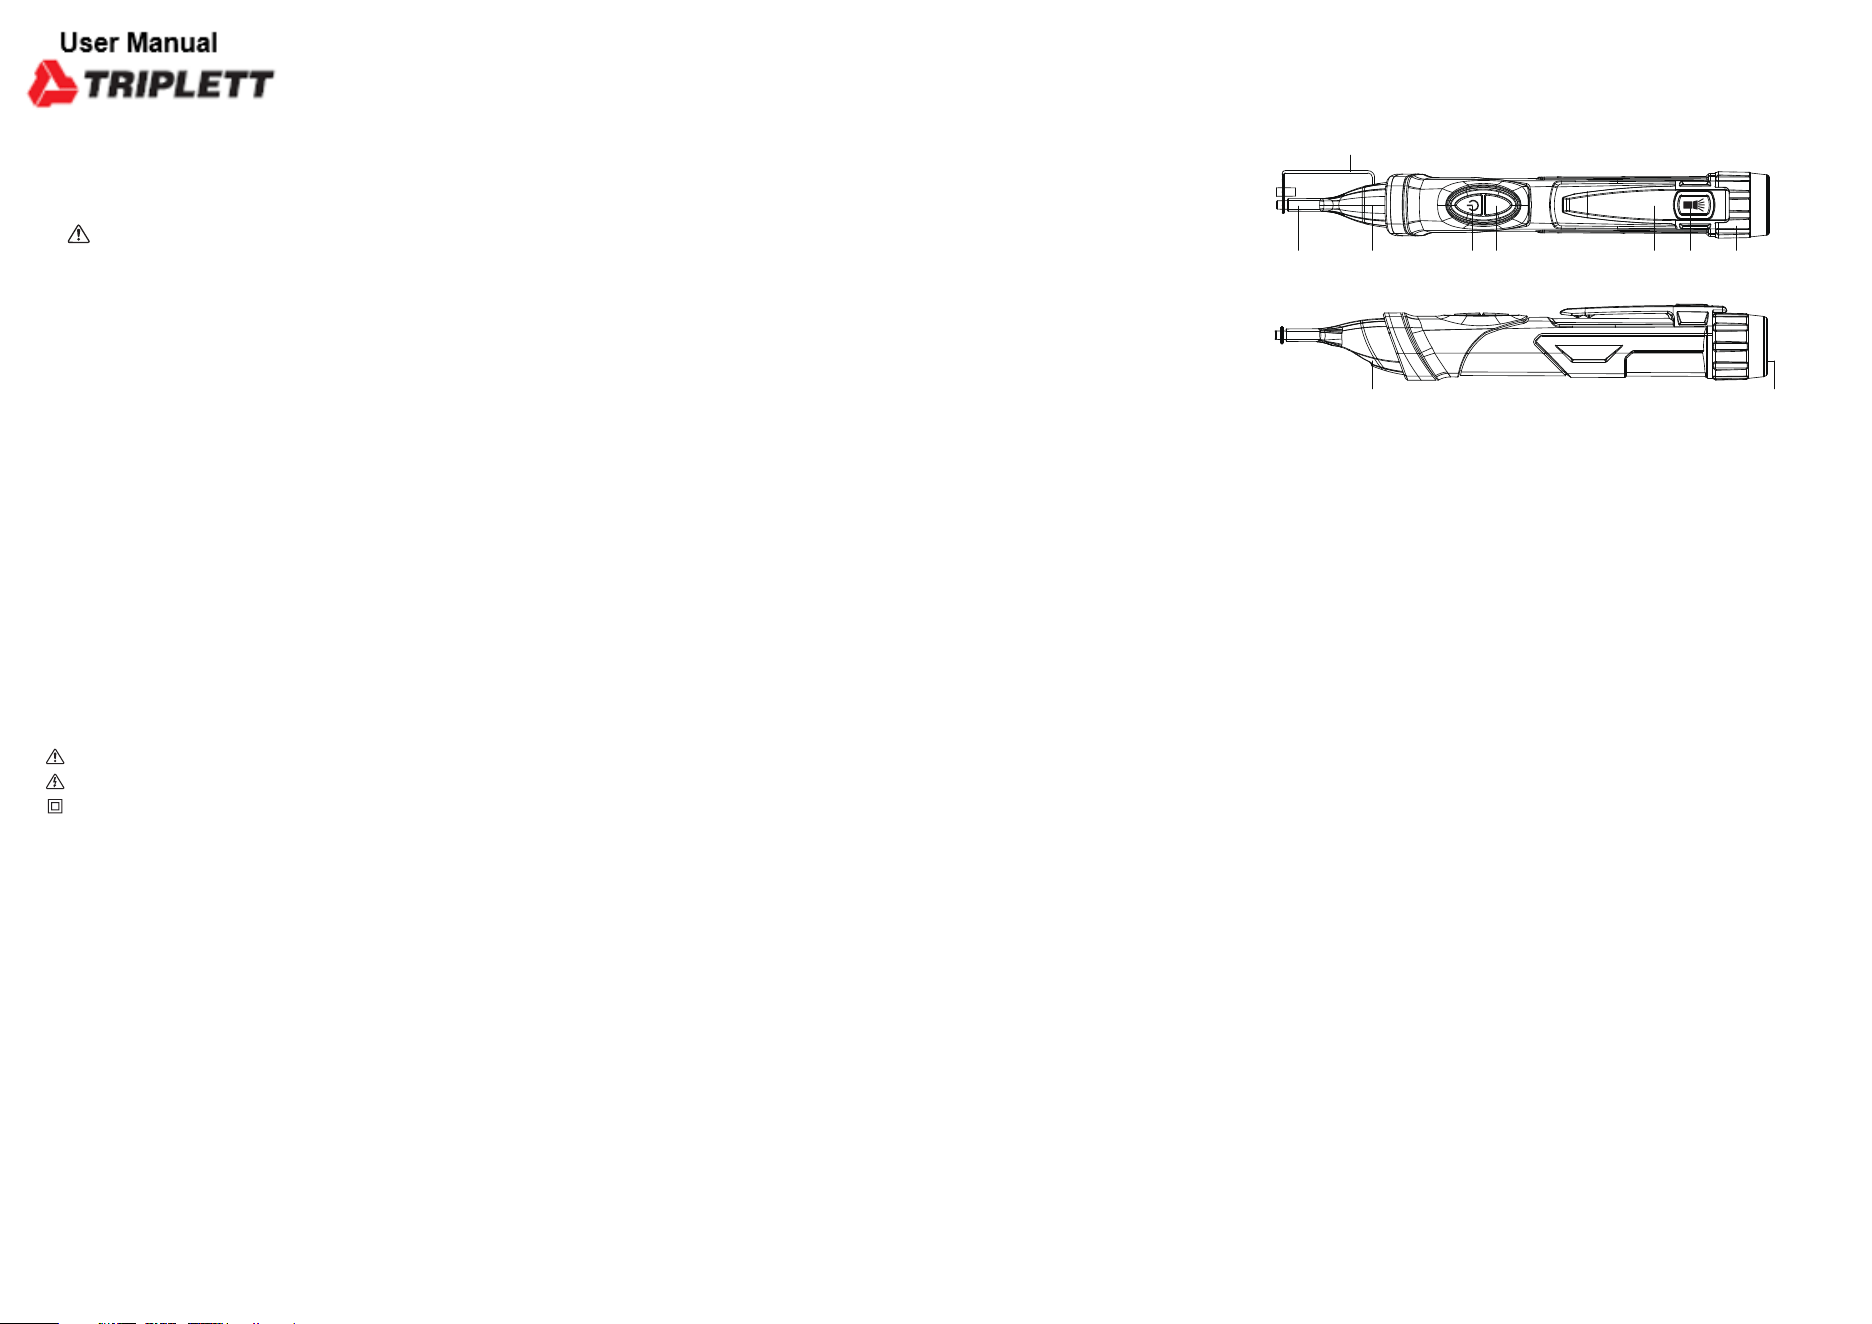
1-Optical fiber insert and NCV induction probe
2-Optical fiber plug protection cover
3-St
atus
indic
at
or LEDs
4-Power button
5-Mode and flashlight button
6-Tester pen holder
7-Flashlight button
8-Battery rear cover cap
9-Worklight
10-Flashlight
M
1 3
9
10
4
5
6
7 8
2
5-6. Optical Fiber Signal Test
5-7. Lo
w batt
ery indic
at
or
5-8. Auto Power Off
5-9. Flashlight
5-10. Worklight
6.Changing Batteries
• After switching the tester to the optical fiber detection mode, put the tip close to the optical fiber jack,
and keep the tester and the optical fiber plug on the same horizontal line. If the optical fiber signal is
not det
ect
ed, the t
es
t
er will flash the gr
een LED twic
e e
v
ery tw
o sec
onds, and
the buzzer
will not
sound. If the optical fiber signal is detected, the optical fiber indicator will switch to the normally open
state, and the buzzer will also ring all the time.
Note:The buzzer will sound when the instrument is in non-silent mode.
• When the tester is turned on and the battery power is lower than 2.4V and cannot operate reliably, the
tester will beep three times and the power indicator will go out, indicating that the tester is not running.
• Replace the battery to resume operation.
• To extend battery life, the tester will automatically turn off after approximately 5 minutes of inactivity.
• When the power is turned off, the tester will emit two beeps, all status indicators will go out, and the
t
es
t
er c
annot t
es
t.
NOTE: When batteries are loaded for the first time, please remove the white,rectangular security strip
before installing batteries.
NOTE:When replacing the battery, be sure to tighten the battery cover.
• Momentarily press the Flashlight button to turn the flashlight on or off.
• To conserve battery life, the flashlight will automatically turn off after approximately 5 minutes.
• The beeper will beep twic
e as the
flashlight turns off
.
• Press and hold the M Button about two seconds , the tester will turn off or turn on the worklight.
• The status of the worklight can only be changed by long press of the M Button.
• To prolong the battery life, the worklight will automatically turn off after about 5 minutes when no
signal is detected.
• If the "M" key is not released within 5 seconds after turning on the flashlight, the tester will judge it as
wrong operation and turn off the worklight .
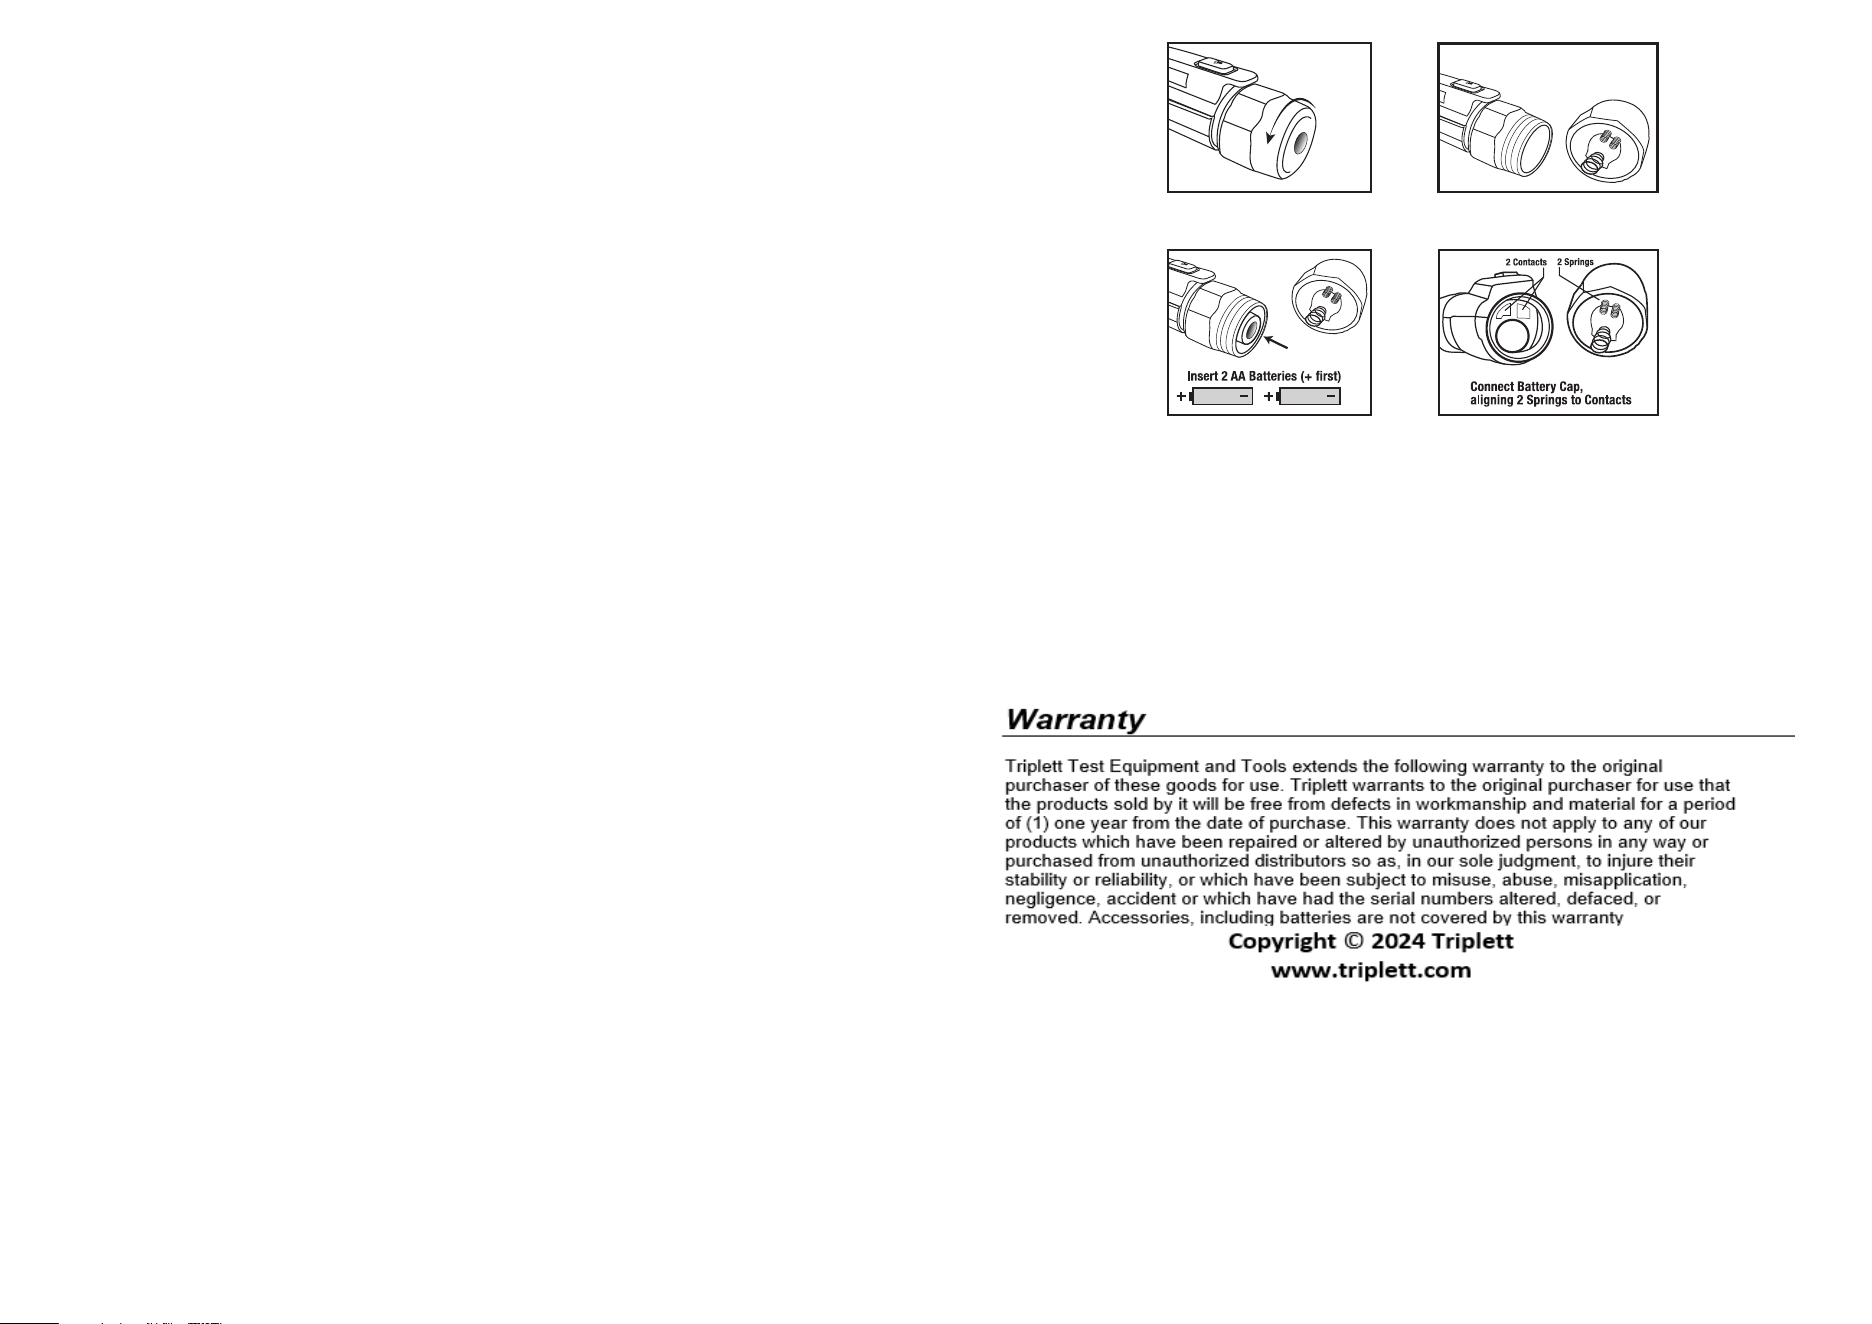
1.Car efully unscr ew battery cap at the rear(flashlight end)of the tester.
2.Replace batteries with two AAA 1.5V batteries.Observe polarity.
3.Carefully align cover with tester as shown below.
4.Screw cover onto tester until it feels tight,Do not use excessive force.
5.Verify operation by using the tester on a known live AC voltage within the defined detection rang
of the tester.
Observe correct polarity
when installing batteries.
Push IN and Rotate Cap
back onto Tester Body
End of the T
ester
Cap with springs to align