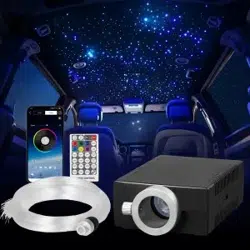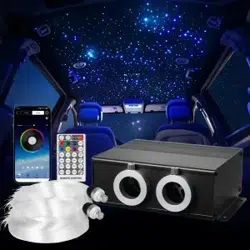

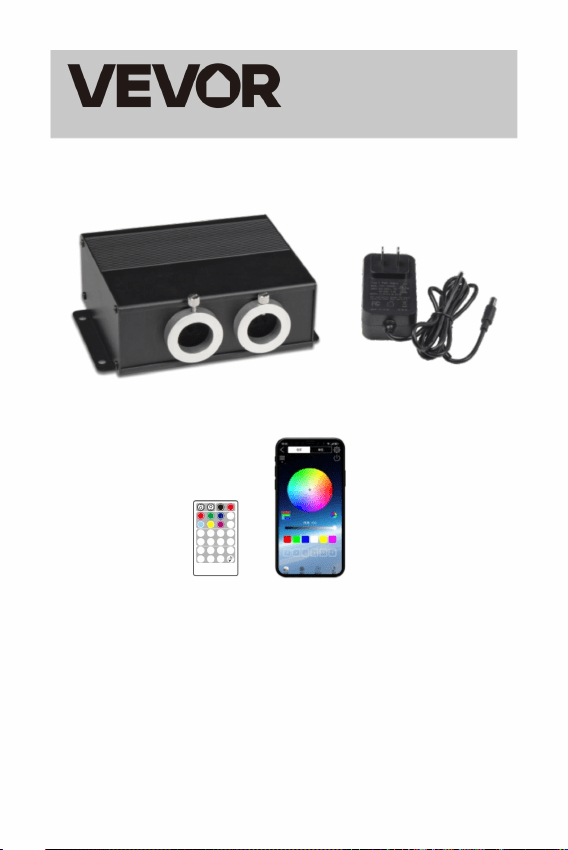
FIBER OPTIC LIGHTS STAR CEILING LIGHT
MODEL:LEC-432
Technical Support and E-Warranty Certificate
www.vevor.com/support
Affordable.Reliable.Home Improvement.


FIBER OPTIC LIGHTS
STAR CEILING LIGHT
MODEL: LEC-432
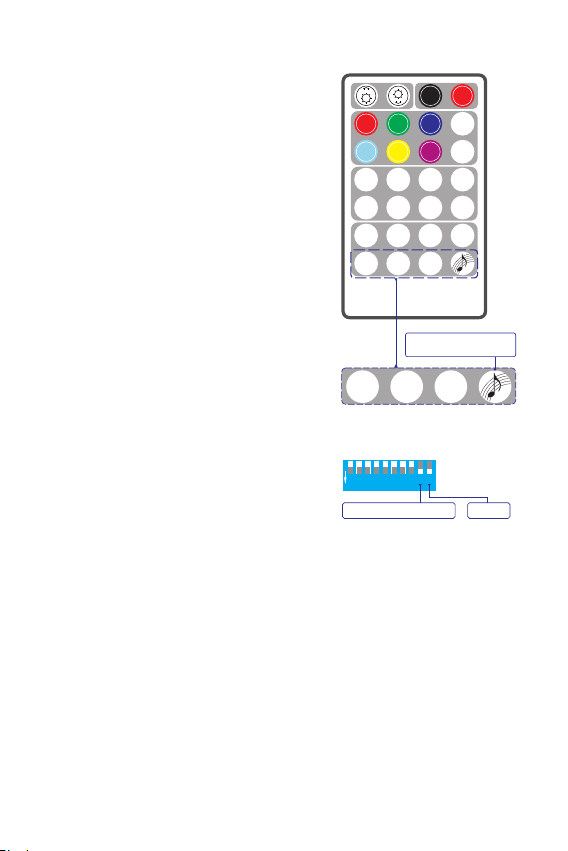
OFF ON
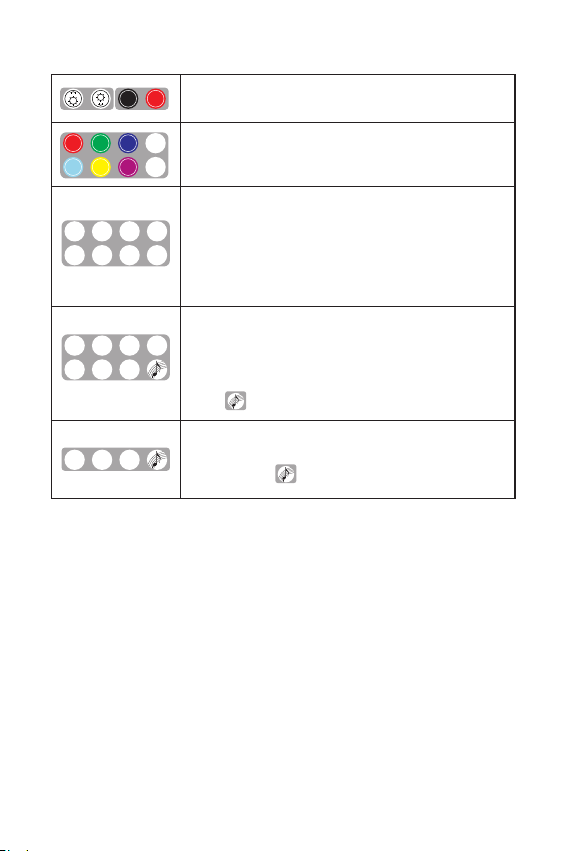
RED
GREE N
BLUE
WHIT E
YELL OW
PURP LE
RGBW
COLO R
FADE2
CYAN
JUMP 6JUMP 4JUMP 2
SP+
COLO R
SP
-
FADE4
FADE6
BREAT H
+
BREAT H
-
FLAS H
+
FLAS H
-
TWIN KLE
+
TWIN KLE
-
FUN.
OFF
RE MOT E CON TRO L
This is the original instruction, please read all manual instructions
carefully before operating. VEVOR reserves a clear interpretation of
our user manual. The appearance of the product shall be subject to the
product you received. Please forgive us that we won't inform you again
if there are any technology or software updates on our product.
- 1 -
Affordable.Reliable.Home Improvement.
INSTRUCTIONS
Welcome to use Fiber Optic Lights Star Ceiling Light. Please read the
manual carefully before turning on the light engine
- 2 -
LEC-432
1
2
3
4
5 6
7
8 9
ON
1
0
DIP
MIC DC 12 V
AER IAL
1
2 3 4 5 6 7 8 9
ON
1 2 3 4 5 6 7 8 9 10
126
65
58
154
165
Warning-To reduce the risk of injury, user must read
instructions manual carefully.
This device complies with Part 15 of the FCC Rules.Operation
is subject to the following two conditions: (1)This device may
not cause harmful interference, and (2)this device must accept
any interference received, including interference that may cause
undesired operation.
Safety Notes:
1. Make sure the input voltage is correct.
2. Avoid placing the light engine in the rain or in moist areas. Please
ensure that the light engine has sufficient ventilation and is not
placed in a completely sealed area.
3. Avoid using the device above 40 ℃ temperature.
The fiber strands cannot be folded in half, and the bending radius
should not be less than 10mm.
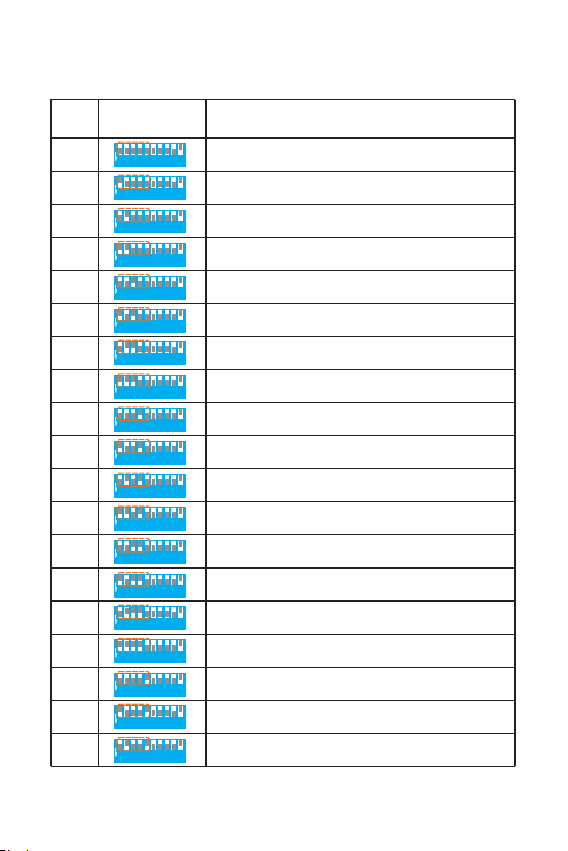
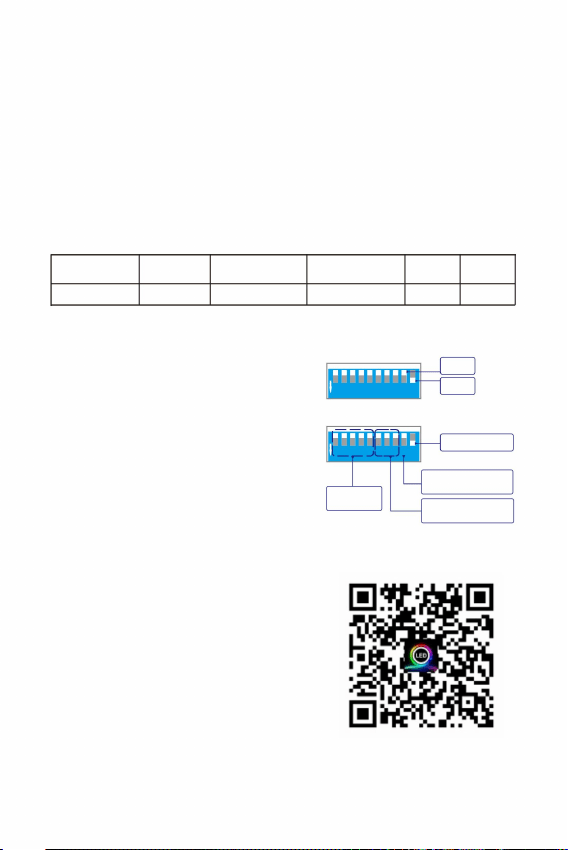
I. Light engine information and dimensions
Aerial MIC
Power
DIP

II. Technical parameters:
III. Fiber optic light engine settings
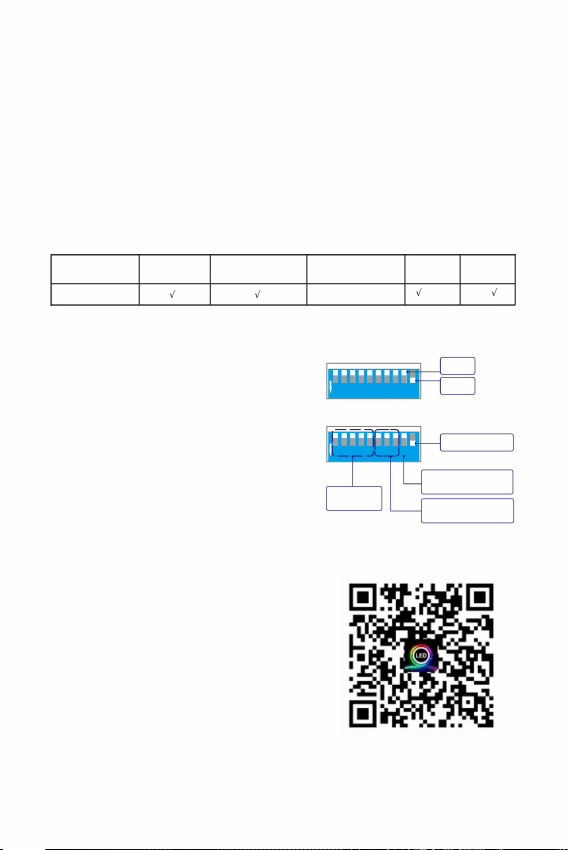
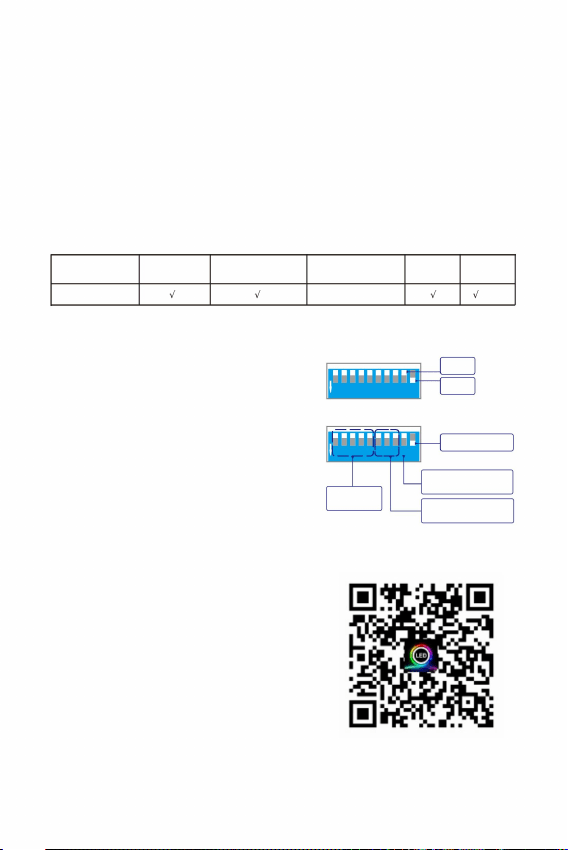
Those light engines are the regular version, and the control is the following:
√ √
Standalone
Remote control
Sound
APP
× √ √
DMX controller
Built-in
Programs
Working Status
When using a remote control and APP,
th th
set the 9 and 10 DIP switches to the
st th
"ON" position, and other 1 to 8 DIP
switches to "OFF" position.
Model: LEC-432
Input Voltage: 12V DC
Emitting Colors: RGBW Mixing
Remote Control: Yes
Sound Control: Yes
Port Aperture: MAX: Φ20mm
Fiber Strands: 900pcs 9.8ft 0.03"
Power : 20W
LED: RGBW*4 LEDs
Sound Control: Yes
Twinkle: Yes
APP: Yes
APP Download
- 3 -
1.Standalone mode settings
1
2 3 4 5 6 7 8 9
ON
1 2 3 4 5 6 7 8 9 1 0
Built-in
1
2 3 4 5 6 7 8 9
ON
1 2 3 4 5 6 7 8 9 1 0
ON
OFF
DIP
Remote control/
Standalone
programs
Twinkle wheel
speed
Bluetooth
(1)
When the remote control and APP
are not in use and the light engine is
controlled by the built-in programs,
th
set the 10 DIP switch to the "ON"
th
position and the 9 DIP switch to the
st th
"OFF" position. The 1 -8 DIP switches
st th
can set the built-in programs.The 1 -5
DIP switches are for the programs of
th th
the standalone machine, and the 6 -8
DIP switches are for the twinkle wheel
speed.
(Pull the switch downward for "ON",
and the flat position is "OFF")
(2)
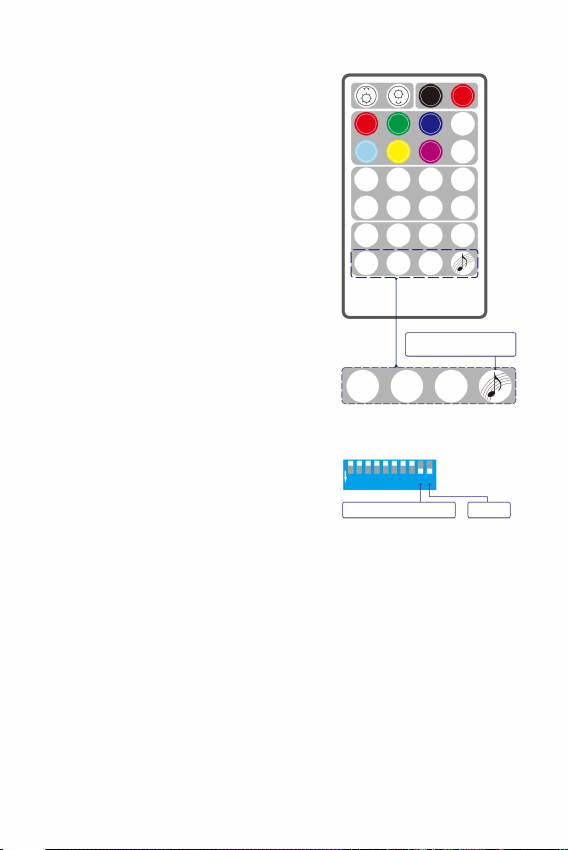
2. Remote control Instructions:
By default, the light engine and the
remote control in the same box has
been paired. The light engine can be
controlled by the paired remote control
only. Do not mix the light engine with
other remote controls
(1)
Before using the remote control, make
sure that the remote control has a fresh
button cell.
(Need to purchase CR2032H by yourself).
(2)
If necessary, you can pair the current
light engine with more remotes. It is
also possible to pair the current remote
with more light engines.
(3)
How to pair the remote control and the
light engine:
Turn on the light engine. At the same time,
press one of the four pairing keys 3 times
in a row to start the pairing.
The light engine will flash 3 times.
The pairing is complete.
(2)
(3)
The pairing rules:
The four keys on the last row of the remote are the four pairing keys.
Each Pairing Key can be paired with multiple light engines and will have
the same effect。
Each Pairing Key can be paired with multiple light engines and
will have the same effect. Pairing Keys with different icons can be from
different remote controls.
Once the device is successfully paired with the remote control, the
For the same light engine, a new pairing key will overwrite the previous
pairing key with the same icon.
pairing function cannot be canceled, but can be overwritten.
(1)
(2)
(4)
(5)
(3)
- 4 -
Remote function is on
1
2 3 4 5 6 7 8 9
ON
1 2 3 4 5 6 7 8 9 1 0
Master
th th
Make sure that the 9 and 10 DIP switches
of the light engine have been set to ON
(shown on the right).
(1)
4 Pairing Keys
Paired with the light
OFF ON
RE D
GR EEN
BL UE
WH ITE
YE LLOW
PU RPLE
RG BW
CO LOR
FA DE 2
CYA N
JU MP6JU MP4JU MP2
SP +
CO LOR
SP
-
FA DE 4
FA DE 6
BR EATH
+
BR EATH
-
FL ASH
+
FL ASH
-
TW INKLE
+
TW INKLE
-
FU N.
OF F
REMOTE CONTROL
BRE AT H
-
FLA SH
-
TWI NKLE
-
engine by default
2. The keys of the remote control
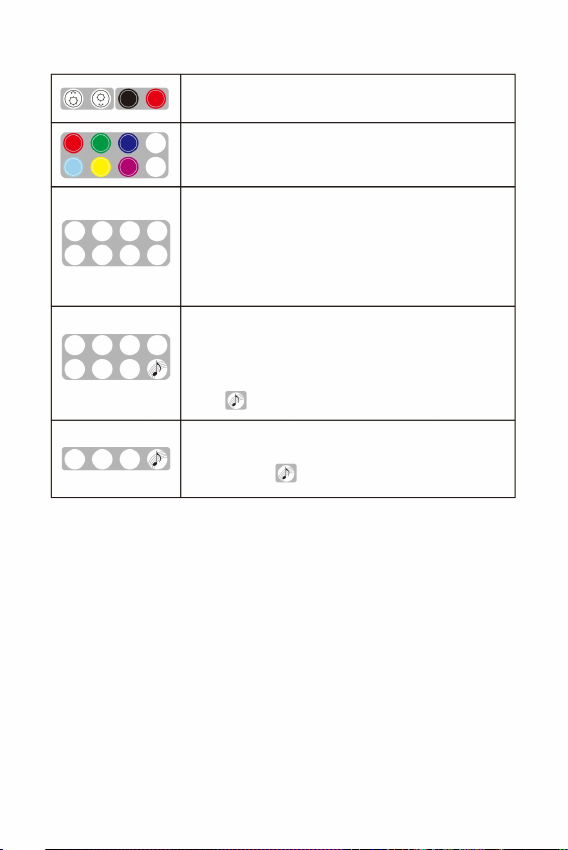
Dimming+/- (7-tier)
ON/OFF
OFF ON
RE D
GR EEN
BL UE
WH ITE
YE LLO W
PU RPL E
RG BW
CYA N
CO LOR
FA DE2
JU MP6JU MP4JU MP2
SP +
CO LOR
SP
-
FA DE4
FA DE6
Static colors
(Red,Green,Blue,White,Cyan,Yellow,Purple,RGBW)
JUMP2: W 、 B Jump
JUMP4: W、B、G、R Jump
JUMP6: W、B、G、R、Y、C Jump
FADE2:
FADE4:
FADE6:
COLOR SP +/-: Color Cycling Speed Adjustment(7-tier)
W、B、G、R Fade
W、B、G、R、Y、C Fade
W、B Fade
BR EATH
+
BR EATH
-
FL ASH
+
FL ASH
-
TW INK LE
+
TW INK LE
-
FU N.
OF F
BR EATH
-
FL ASH
-
TW INK LE
-
BREATH+/- : Breathing Effect.(7-tier)
FLASH+/- : Strobe Effect.(7-tier speed)
TWINKLE+/- : Twinkle Effect.(7-tier speed)
FUN.OFF : Termination of Breathe / Flashing / Sound control /
Activate the Sound Control mode
4 Pairing Keys: To match the light engine and the
remote control for use. By default,
is paired with the light engine.
Twinkle effect.
Remarks:
Press “Breath” or “Flash”, the light engine will breathe or flash in a static
color of the last emitted color. If “FUN.OFF” is pressed, the current
breathing, flash or twinkle function will be turned off, and the light engine
will resume the last program.
The light engine has a memory function. When it is turned on, it runs
the last program before it is turned off.
(1)
(2)
- 5 -
The "TWINKLE+", "TWINKLE-" and "FUNON" buttons on the remote
control correspond to the "K1", "K2" and "K3" buttons in the APP.
(3)
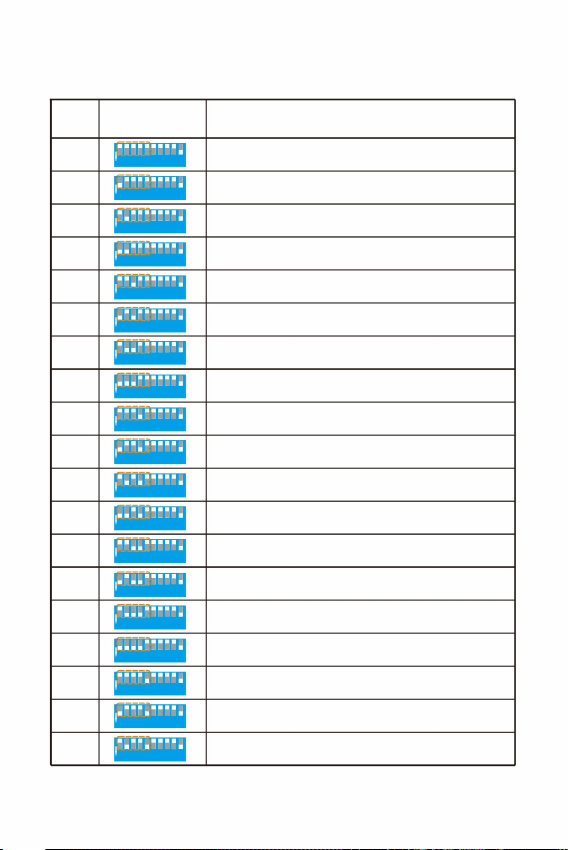
IV.The table of the built-in programs of the Master light engine
- 6 -
White、 Blue、 Green、 Red、 Yellow、Cyan Jump 2S
White、 Blue、 Green、 Red、 Yellow、Cyan Jump 4S
White、 Blue、 Green、 Red、 Yellow、Cyan Jump 8S
White、 Blue、 Green、 Red、 Yellow、Cyan Fade 2S
1
2 3 4 5 6 7 8 9
ON
1 2 3 4 5 6 7 8 9 1 0
1
2 3 4 5 6 7 8 9
ON
1 2 3 4 5 6 7 8 9 1 0
1
2 3 4 5 6 7 8 9
ON
1 2 3 4 5 6 7 8 9 1 0
1
2 3 4 5 6 7 8 9
ON
1 2 3 4 5 6 7 8 9 1 0
1
2 3 4 5 6 7 8 9
ON
1 2 3 4 5 6 7 8 9 1 0
1
2 3 4 5 6 7 8 9
ON
1 2 3 4 5 6 7 8 9 1 0
1
2 3 4 5 6 7 8 9
ON
1 2 3 4 5 6 7 8 9 1 0
1
2 3 4 5 6 7 8 9
ON
1 2 3 4 5 6 7 8 9 1 0
1
2 3 4 5 6 7 8 9
ON
1 2 3 4 5 6 7 8 9 1 0
1
2 3 4 5 6 7 8 9
ON
1 2 3 4 5 6 7 8 9 1 0
1
2 3 4 5 6 7 8 9
ON
1 2 3 4 5 6 7 8 9 1 0
07
08
09
10
11
12
13
14
1
2 3 4 5 6 7 8 9
ON
1 2 3 4 5 6 7 8 9 1 0
White、 Blue、 Green、 Red、 Yellow、Cyan Fade 4S
White、 Blue、 Green、 Red、 Yellow、Cyan Fade 8S
White、 Blue Jump 2S
White、 Blue Jump 4S
White、 Blue Jump 8S
White、 Blue Fade 2S
White、 Blue Fade 4S
White、 Blue Fade 8S
15
16
17
18
th th
Built-in Programs List of the Master (1 to 5 DIP Switches)
Function
Light off, Motor stops
White
Blue
Green
Red
Yellow
Cyan
1
2 3 4 5 6 7 8 9
ON
1 2 3 4 5 6 7 8 9 1 0
1
2 3 4 5 6 7 8 9
ON
1 2 3 4 5 6 7 8 9 1 0
1
2 3 4 5 6 7 8 9
ON
1 2 3 4 5 6 7 8 9 1 0
1
2 3 4 5 6 7 8 9
ON
1 2 3 4 5 6 7 8 9 1 0
1
2 3 4 5 6 7 8 9
ON
1 2 3 4 5 6 7 8 9 1 0
1
2 3 4 5 6 7 8 9
ON
1 2 3 4 5 6 7 8 9 1 0
1
2 3 4 5 6 7 8 9
ON
1 2 3 4 5 6 7 8 9 1 0
00
01
02
03
04
05
06
DIP Switches
st th
(1 to 5 )
Settings
Pro.No.
- 7 -
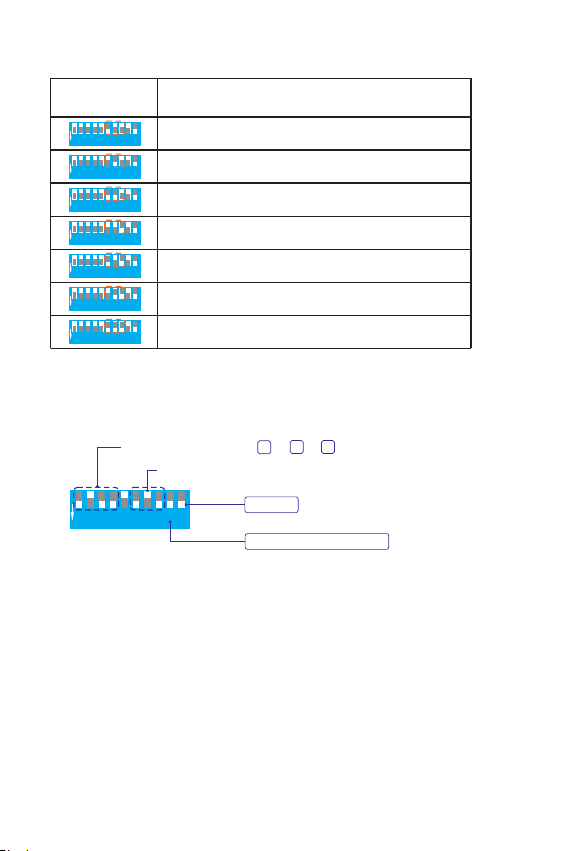
0.5RPM
1.0RPM
1.5RPM
2.0RPM
3.0RPM
4.0RPM
6.0RPM
1
2 3 4 5 6 7 8 9
ON
1 2 3 4 5 6 7 8 9 1 0
1
2 3 4 5 6 7 8 9
ON
1 2 3 4 5 6 7 8 9 1 0
1
2 3 4 5 6 7 8 9
ON
1 2 3 4 5 6 7 8 9 1 0
1
2 3 4 5 6 7 8 9
ON
1 2 3 4 5 6 7 8 9 1 0
1
2 3 4 5 6 7 8 9
ON
1 2 3 4 5 6 7 8 9 1 0
1
2 3 4 5 6 7 8 9
ON
1 2 3 4 5 6 7 8 9 1 0
1
2 3 4 5 6 7 8 9
ON
1 2 3 4 5 6 7 8 9 1 0
th th
Built-in Twinkle Wheel Speed of the Master (6 to 8 DIP Switches)
Function
DIP Switches
st th
(6 to 8 )
Settings
For example: Master built-in program P13 + twinkle speed 3.0RPM
1
2 3 4 5 6 7 8 9
ON
1 2 3 4 5 6 7 8 9 10
Master
Remote function is on
Master program P13=4 +3 +1
Twinkle Speed 3.0RP M
8
4
1

- 8 -
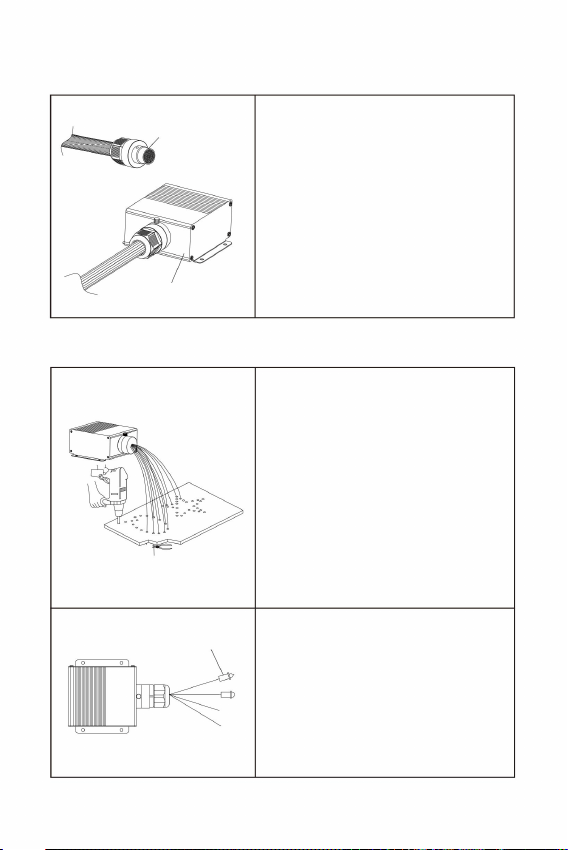
2. Fiber strands installation on ceilings
With end fittings
V. Fiber Bundle Assembly and Installation
1. Fiber connectors / couplings Assembly
Loosen the screws on the light
engine port ferrule, and insert
the ready fiber connector into
the ferrule. Then tighten the
screws against countersunk
holes on the fiber connector.
Fiber bundle
LED Light engine
Fiber tail ends can be mounted with
end fittings to present more optical
effects.
1. Drill holes on the ceiling as
required by the pattern. Insert
the fiber strands into the holes
and glue them with the resin
adhesive. Cut the fiber ends
flush with the ceiling or leave
2-3mm protrusion
2. The fiber strands cannot be
folded in half, and the bending
radius should not be less than
10mm.

2. Reasons and troubleshooting methods for the APP being out of control:
(1) If the APP is installed normally and the APP cannot search for the light
engine, it is necessary to confirm whether this light engine is occupied
by other mobiles.
(2) If the light engine is occupied by other mobiles, it needs to be released
and then powered on for search and connection.
(3) One mobile supports connecting to about 5 light engines. The specific
number varies depending on the mobile signal reception.
Manufacturer: Shanghaimuxinmuyeyouxiangongsi
Address: Shuangchenglu 803nong11hao1602A-1609shi, baoshanqu,
shanghai 200000 CN.
Imported to AUS: SIHAO PTY LTD. 1 ROKEVA STREETEASTWOOD
NSW 2122 Australia
Imported to USA: Sanven Technology Ltd. Suite 250, 9166 Anaheim
Place, Rancho Cucamonga, CA 91730
YH CONSULTING LIMITED. C/0 YH Consulting
Limited office 147, Centurion House, London
Road, Staines-upon-Thames, Surrey, TW18 4AX
E-CrossStu GmbH
Mainzer Landstr.69,
60329 Frankfurt am Main.
Precautions:
1. Reasons and troubleshooting methods for the remote control being out
of control:
(1) Check whether the remote control indicator light is on. If the indicator
light is not on or the brightness is low, please replace the battery.
(2) If the remote control is out of control after replacing the battery,re-pair it.
(3) Ensure that the remote control is used within a range of 10 meters.
- 9 -

Technical Support and E-Warranty Certificate
www.vevor.com/support

MODÈLE:LEC432
PLAFONNIERÉTOILÉÀFIBREOPTIQUE
Abordable.Fiable.Améliorationdel'habitat.
Assistancetechniqueetcertificatdegarantie
électroniquewww.vevor.com/support
Machine Translated by Google

Machine Translated by Google

ÉCLAIR
ÉCLAIR
DÉSACTIVÉ
AMUSANT.
SAUT2SAUT4SAUT6
COULEUR
FADE2
COULEUR
SP
SP+
JAUNEVIOLETRGBW
FONDU4FONDU6
BLEUBLANC
ROUGEVERT
CYAN
++ +
OFFON
HALEINE
HALEINE
Abordable.Fiable.Améliorationdel'habitat.
MODÈLE:LEC432
Veuillezlireattentivementcemanuelavanttouteutilisation.VEVORseréserveledroit
d'interpréterclairementcemanueld'utilisation.L'apparenceduproduitestsujetteàmodification.
PLAFONNIERÉTOILÉ
LUMIÈRESÀFIBREOPTIQUE
1
TÉLÉCOMMANDE
SCINTILLEMENT
SCINTILLEMENT
Ceciestl'instructionoriginale,veuillezliretouteslesinstructionsdumanuel
produitquevousavezreçu.Veuilleznousexcuserdeneplusvousinformer.
s'ilyadesmisesàjourtechnologiquesoulogiciellessurnotreproduit.
Machine Translated by Google

LEC432
INSTRUCTIONS
TREMPER
AÉRIEN
MICRODC12V
126
65
58
Cetappareilestconformeàlapartie15desrèglesdelaFCC.Fonctionnement
154
165
AlimentationDIPMICaérienne
Lesbrinsdefibresnepeuventpasêtrepliésendeuxetlerayondecourbure
3.Évitezd'utiliserl'appareilàunetempératuresupérieureà40.
2.Évitezdeplacerlemoteurd'éclairagesouslapluieoudansdesendroitshumides.
Assurezvousqu'ilestsuffisammentventiléetqu'iln'estpasplacédansun
endroitcomplètementfermé.
nedoitpasêtreinférieureà10mm.
Notesdesécurité:
1.Assurezvousquelatensiond’entréeestcorrecte.
Bienvenuesurlesiteduplafonnierétoiléàfibresoptiques.Veuillezlireattentivementle
manuelavantd'allumerlemoteurd'éclairage.
Lisezattentivementlemanueld'instructions.
I.Informationsetdimensionsdumoteurléger
2
AvertissementPourréduirelerisquedeblessure,l'utilisateurdoitlire
estsoumisauxdeuxconditionssuivantes:(1)Cetappareilnedoitpasprovoquer
d'interférencesnuisibles,et(2)Cetappareildoitacceptertouteinterférencereçue,y
comprislesinterférencessusceptiblesdeprovoquerunfonctionnementindésirable.
88
8
112345612345672345677
9
9910
SUR
SUR
10
Machine Translated by Google

123456789
123456789
Lorsquelatélécommandeetl'APP
Lorsquevousutilisezunetélécommandeetuneapplication,
ste
peutdéfinirlesprogrammesintégrés.Les1à5
SUR
vitesse
Autonome
DÉSACTIVÉ
Programmesintégrés
Télécommande/
Rouescintillante
nesontpasutilisésetlemoteurd'éclairageest
contrôléparlesprogrammesintégrés,réglezle
commutateurDIP10sur«ON»
Position«ON»etautres1à8DIP
contrôleurDMX
Programmes
Télécommande
Intégré
Applicationsonore
Statutdetravail
Autonome
ste
√√
×
√√
passeenposition«OFF».
Contrôleduson:Oui
III.Paramètresdumoteurd'éclairageàfibreoptique
3
Twinkle:Oui
(2)
Puissance:20W
Ouvertureduport:MAX:Φ20mm
réglezlescommutateursDIP9et10sur
etlecommutateurDIP9surlaposition«OFF».
LescommutateursDIP1à8
LED:4LEDRGBW
Brinsdefibres:900pièces9,8pieds0,03"
Émissiondecouleurs:mélangeRGBW
1.Paramètresdumodeautonome
vitesse.
II.Paramètrestechniques:
Télécommande:Oui
(1)
(Tirezl'interrupteurverslebaspour«ON»,et
lapositionplateest«OFF»)
Modèle:LEC432
Contrôleduson:Oui
APP:Oui
LescommutateursDIPsontdestinésauxprogrammes
delamachineautonomeetlescommutateurs6à8
Tensiond'entrée:12VCC
SUR
SUR
ee
12345678910
12345678910
Cesmoteurslégerssontlaversionstandard,etlecontrôleestlesuivant:
ème
St
TREMPER
Bluetooth
ème
Téléchargementdel'application
èmeème
ème
LescommutateursDIPsontdestinésàlarouescintillante
Machine Translated by Google

avecdesmoteurspluslégers.
Avantd'utiliserlatélécommande,assurezvous
Sinécessaire,vouspouvezcouplerlemodule
d'éclairageactuelavecd'autrestélécommandes.Il
estégalementpossibledecouplerlatélécommandeactuelle.
TÉLÉCOMMANDE
12345678910
HALEINE
HALEINE
èmeème
++ +
ÉCLAIR
Lesquatretouchesdeladernièrerangéedelatélécommandesontlesquatretouchesd’appairage.
dumoteurd'éclairageontétérégléssurON
AssurezvousquelescommutateursDIP9et10
(montréàdroite).
JAUNE
Pourlemêmemoteurd'éclairage,unenouvellecléd'appairageécraseralaclé
d'appairageprécédenteaveclamêmeicône.
Unefoisl'appareilcoupléavecsuccèsàlatélécommande,lafonctiondecouplage
nepeutpasêtreannulée,maispeutêtreécrasée.
DÉSACTIVÉ
ÉCLAIR
ÉCLAIR
AMUSANT.
Pardéfaut,lemoteurd'éclairageetlatélécommande
danslemêmeboîtieront
Lesrèglesd'appariement:
4clésd'appairage
Lafonctionàdistanceestactivée
moteurpardéfaut
Associéàlalumière
Maître
OFFON
assurezvousquelatélécommandeaunenouvellepile
123456789
CYAN
ROUGEVERTBLEUBLANC
SCINTILLEMENT
SCINTILLEMENT
HALEINE
SUR
SCINTILLEMENT
SAUT2SAUT4SAUT6
COULEUR
FADE2
FONDU4FONDU6
COULEUR
SP
SP+
VIOLETRGBW
(VousdevezacheterleCR2032Hparvousmême).
Chaquecléd'appairagepeutêtreassociéeàplusieursmoteurslumineuxetaura
lemêmeeffet.Lesclésd'appairageavecdesicônesdifférentespeuventprovenirde
différentestélécommandes.
Chaquecléd'appairagepeutêtreassociéeàplusieursmoteursd'éclairageetaura
lemêmeeffet.
(1)
appairé.Lemoduled'éclairagenepeutêtre
contrôléqueparlatélécommandeappairée.Ne
pasutiliseravecd'autrestélécommandes.
(1)
(5)
Commentcouplerlatélécommandeetle
(4)
(3)
pilebouton.
Allumezlemoteurlumineux.Appuyezsimultanément
surl'unedesquatretouchesd'appairagetroisfois
desuitepourlancerl'appairage.
(3)
2.Instructionsdelatélécommande:
(3)
(1)
(2)
4
moteurléger:
(2)
(2)
L'appariementestcomplet.
Lemoteurlumineuxclignotera3fois.
Machine Translated by Google
HALEINE
HALEINE
HALEINE
FADE2
COULEUR
SAUT2SAUT4SAUT6
SP+
SP
COULEUR
VIOLETRGBW
FONDU4FONDU6
++ +
OFFON
Lesboutons«TWINKLE+»,«TWINKLE»et«FUNON»delatélécommande
correspondentauxboutons«K1»,«K2»et«K3»del'APP.
Lemoteurd'éclairagedisposed'unefonctionmémoire.Lorsqu'ilestallumé,il
exécuteledernierprogrammeavantsonextinction.
VERTBLEUBLANC
ROUGE
CYANJAUNE
ÉCLAIR
ÉCLAIR
DÉSACTIVÉ
AMUSANT.
ÉCLAIR
FUN.OFF:Finducontrôledelarespiration/duclignotement/duson/
(1)
5
Remarques:
2.Lestouchesdelatélécommande
(3)
(2)
COLORSP+/:Réglagedelavitesseducycledecouleur(7niveaux)
Effetscintillant.
ActiverlemodeContrôleduson
JUMP6:WBGRYCSaut
FLASH+/:Effetstroboscopique.(Vitesseà7niveaux)
4clésd'appairage:pourassocierlemoteurd'éclairageetla
télécommande.Pardéfaut,
FADE2:
TWINKLE+/:Effetscintillant.(Vitesseà7niveaux)
estassociéaumoteurléger.
MARCHE/ARRÊT
BSaut
JUMP4:WBGRSaut
RESPIRATION+/:Effetderespiration.(7niveaux)
Fondublanc,bleu,vertetrouge
FADE6:
JUMP2:Dans
Gradation+/(7niveaux)
Couleursstatiques
FonduW,B,G,R,Y,C
Fondublancetbleu
(Rouge,Vert,Bleu,Blanc,Cyan,Jaune,Violet,RGBW)
FADE4:
Appuyezsur«Souffle»ou«Flash»pourquelemoteurlumineuxsouffleouclignoted'une
couleurstatiquecorrespondantàladernièrecouleurémise.Sivousappuyezsur
«FUN.OFF»,lafonctiondesouffle,deflashoudescintillementencoursestdésactivéeet
lemoteurlumineuxreprendledernierprogramme.
SCINTILLEMENT
SCINTILLEMENT
SCINTILLEMENT
Machine Translated by Google

16
00
Blanc,bleu,vert,rouge,jaune,cyanJump8S
Bleu
Blanc,bleu,vert,rouge,jaune,cyanfondu4S
Blanc,bleufondu4S
04
Cyan
Blanc,bleu,vert,rouge,jaune,cyanJump2S
13
Blanc,BleuJump4S
Blanc,bleufondu8S
Blanc
10
11
08
Blanc,bleu,vert,rouge,jaune,cyanfondu8S
15
03
Jaune
Rouge
02
06
Blanc,bleu,vert,rouge,jaune,cyanJump4S
12
17
Lumièreéteinte,lemoteurs'arrête
Blanc,bleu,vert,rouge,jaune,cyanFade2S
07
14
Blanc,bleufondu2S
Vert
01
Blanc,BleuJump8S
18
05
Blanc,BleuSaut2S
09
èmeSt
1234567891234
5678910
SUR
SUR
SUR
SUR
SUR
SUR
SUR
SUR
SUR
SUR
SUR
SUR
SUR
SUR
SUR
SUR
SUR
SUR
SUR
Paramètres(1à5)
Commutateurs
DIPPro.No.
Fonction
èmeème
6
IV.Letableaudesprogrammesintégrésdumoteurd'éclairageMaster
Listedesprogrammesintégrésdumaître(1à5commutateursDIP)
1234567891234
5678910
123456789
123456789
1234567891234
5678910
1234567891234
5678910
1234567891234
5678910
1234567891234
5678910
1234567891234
5678910
1234567891234
5678910
1234567891234
5678910
1234567891234
5678910
1234567891234
5678910
123456789
1234567891234
5678910
1234567891234
5678910
1234567891234
5678910
1234567891234
5678910
1234567891234
5678910
12345678910
12345678910
12345678910
Machine Translated by Google

3,0tr/min
4,0tr/min
6,0tr/min
TwinkleSpeed3,0tr/min
1,5tr/min
2,0tr/min
1,0tr/min
0,5tr/min
Maître
ProgrammedemaîtriseP13=4+3+1
Lafonctionàdistanceestactivée
èmeSt
1234567891234
5678910
1234567891234
5678910
123456789
123456789
1234567891234
5678910
1234567891234
5678910
1234567891234
5678910
12345678910
12345678910
Paramètres(6à8)
CommutateursDIP
Fonction
7
Vitessedelarouejumelleintégréedumaître(6à8commutateursDIP)
ème ème
SUR
SUR
SUR
SUR
SUR
SUR
SUR
Parexemple:programmemaîtreintégréP13+vitessedescintillement3,0tr/min
84
1
1234567891234
5678910
SUR
Machine Translated by Google

leconnecteurdefibreprêtdans
1.Percezdestrousdansleplafondselon
lemodèle.Insérezlesbrinsdefibre
danslestrous.
Avecembouts
Faisceaudefibres
Moteurd'éclairageLED
2.Installationdebrinsdefibressurlesplafonds
etcollezlesaveclacolleàrésine.
Coupezlesextrémitésdesfibresau
rasduplafondoulaissezles
sailliede2à3mm
10mm.
Desserrezlesvissurlaviroleduportdu
moteurlégeretinsérez
laférule.Serrezensuitelesviscontre
lestrousfraisésduconnecteurdefibre.
1.Assemblagedeconnecteurs/raccordsdefibres
V.Assemblageetinstallationdufaisceaudefibres
8
Lesextrémitésdelafibrepeuventêtremontéesavec
emboutspourprésenterplusd'effetsoptiques.
2.Lesbrinsdefibresnepeuventpasêtre
pliéendeuxetlerayondecourburene
doitpasêtreinférieurà
Machine Translated by Google

(3)Assurezvousquelatélécommandeestutiliséedansunrayonde10mètres.
(2)Silatélécommandeesthorsdecontrôleaprèsleremplacementdelabatterie,réassociezla.
2.Raisonsetméthodesdedépannagepourlesquellesl'applicationesthorsdecontrôle:
1.Raisonsetméthodesdedépannagepourlatélécommandedéfectueuse
(1)Vérifiezquelevoyantdelatélécommandeestallumé.S'ilestéteintousila
luminositéestfaible,remplacezlapile.
decontrôle:
Précautions:
9
(1)Sil'APPestinstalléenormalementetquel'APPnepeutpasrechercherle
moteurlumineux,ilestnécessairedeconfirmersicemoteurlumineuxest
occupépard'autresmobiles.
Shanghai200000CN.
ImportéenAustralie:SIHAOPTYLTD.1ROKEVASTREET,ASTWOOD
NSW2122Australie
Lieu,RanchoCucamonga,CA91730
(3)Unmobilepeutseconnecteràenviron5moteurslumineux.Lenombreexactvarieen
fonctiondelaréceptiondusignalmobile.
Adresse:Shuangchenglu803nong11hao1602A1609shi,Baoshanqu,
Fabricant:Shanghaimuxinmuyeyouxiangongsi
(2)Silemoteurlégerestoccupépard'autresmobiles,ildoitêtrelibéré
YHCONSULTINGLIMITED.Adresse:YHConsulting
Limited,bureau:147,CenturionHouse,LondonRoad,
StainesuponThames,Surrey,TW184AX
ECrossStuGmbH
MainzerLandstr.69,
60329FrancfortsurleMain.
ImportéauxÉtatsUnis:SanvenTechnologyLtd.Suite250,9166Anaheim
puismissoustensionpourlarechercheetlaconnexion.
Machine Translated by Google

Assistancetechniqueetcertificatdegarantie
électroniquewww.vevor.com/support
Machine Translated by Google

MODELL: LEC-432
Technischer Support und E-Garantie-Zertifikat
www.vevor.com/support
Glasfaserleuchten Sternendeckenleuchte
Erschwinglich. Zuverlässig. Heimwerkerbedarf.
Machine Translated by Google

Machine Translated by Google

Sprung 2 Sprung 4 Sprung 6
SP-
FADE2
FADE4 FADE6
SP+
FARBE
FARBE
GELB LILA RGBW
AUS
BLITZ
SPASS.
BLITZ
ATEM
ATEM
FUNKELN
FUNKELN
AUS AN
CYAN
ROT GRÜN
BLAU WEISS
Erschwinglich. Zuverlässig. Heimwerkerbedarf.
MODELL: LEC-432
STERNEN-DECKENLEUCHTE
Glasfaserleuchten
- 1 -
sorgfältig vor der Inbetriebnahme. VEVOR behält sich eine klare Auslegung
unserer Bedienungsanleitung vor. Das Aussehen des Produkts unterliegt der
++ +
Dies ist die Originalanleitung. Bitte lesen Sie alle Anweisungen im Handbuch.
-- -
Produkt, das Sie erhalten haben. Bitte haben Sie Verständnis, dass wir Sie nicht mehr informieren
ob es Technologie- oder Software-Updates für unser Produkt gibt.
FERNBEDIENUNG
Machine Translated by Google

Antenne DIP M IC Power
165
154
LEC-432
TAUCHEN
ANTENNE
Mikrofon DC 12V
8 8 8
1 1 2 3 4 5 6 1 2 3 4 5 6 7 2 3 4 5 6 7 7
9 9 9 10
Dieses Gerät entspricht Teil 15 der FCC-Regeln.Betrieb
ANWEISUNGEN
2. Stellen Sie die Lichtmaschine nicht im Regen oder in feuchten Räumen auf. Achten Sie darauf,
dass die Lichtmaschine ausreichend belüftet ist und nicht in einem vollständig geschlossenen
Raum aufgestellt wird.
3. Vermeiden Sie die Verwendung des Geräts bei Temperaturen über 40 °C.
Die Faserstränge können nicht in der Mitte gefaltet werden, und der Biegeradius
Sicherheitshinweise:
1. Stellen Sie sicher, dass die Eingangsspannung korrekt ist.
Willkommen bei Fiber Optic Lights Star Ceiling Light. Bitte lesen Sie das Handbuch sorgfältig durch,
bevor Sie die Lichtmaschine einschalten
Lesen Sie die Bedienungsanleitung sorgfältig durch.
sollte nicht weniger als 10 mm betragen.
- 2 -
I. Informationen und Abmessungen des Lichtmotors
unterliegt den folgenden zwei Bedingungen: (1) Dieses Gerät darf keine schädlichen
Störungen verursachen und (2) dieses Gerät muss alle empfangenen Störungen
tolerieren, einschließlich Störungen, die einen unerwünschten Betrieb verursachen
können.
Warnung - Um das Verletzungsrisiko zu verringern, muss der Benutzer
10
AN
126
65
58
AN
Machine Translated by Google
Bei Verwendung einer Fernbedienung und einer APP
1 2 3 4 5 6 7 8 9
1 2 3 4 5 6 7 8 9
DIP-Schalter sind für das Funkelrad
th
th th
st
th
Bei diesen Lichtmaschinen handelt es sich um die reguläre Version und die Steuerung ist wie folgt:
Bluetooth
th
III. Einstellungen des Lichtwellenleiter-Lichtmoduls
Eingangsspannung: 12 V DC
APP: Ja
DIP-Schalter sind für die Programme der
Standalone-Maschine, und die 6 -8
(1)
Modell: LEC-432
Tonsteuerung: Ja
1.Einstellungen für den Standalone-Modus
Emittierende Farben: RGBW-Mischung
II. Technische Parameter:
Fernbedienung: Ja
und der DIP-Schalter 9 in die Position „OFF“. Die
DIP-Schalter 1 -8
Geschwindigkeit.
(Ziehen Sie den Schalter nach unten für „ON“,
die flache Position ist „OFF“)
LED: RGBW*4 LEDs
Faserstränge: 900 Stück 9,8 Fuß 0,03 Zoll
Anschlussöffnung: MAX: ÿ20mm
Leistung: 20W
Funkeln: Ja
Stellen Sie die DIP-Schalter 9 und 10 auf die
(2)
Tonsteuerung: Ja
- 3 -
1 2 3 4 5 6 7 8 9 10
1 2 3 4 5 6 7 8 9 10
AN
AN
√√
×
Schalter in die Position „OFF“.
TAUCHEN
das 1.
DMX-Steuerung
Programme
Fernbedienung
Eingebaut
Sound App
√ √
Arbeitsstatus
Standalone
"ON"-Position und andere 1 bis 8 DIP
das
APP herunterladen
können die eingebauten Programme einstellen.Die 1 -5
Standalone
Fernbedienung/
AN
AUS
Funkelrad
Geschwindigkeit
Integrierte
Programme
Wenn die Fernbedienung und die APP
nicht verwendet werden und die Lichtmaschine
durch die eingebauten Programme gesteuert wird,
stellen Sie den 10 DIP-Schalter auf die Position "ON"
das 1.
Machine Translated by Google

Die Kopplung ist abgeschlossen.
Die Lichtmaschine blinkt dreimal.
mit mehr Lichtmotoren.
Bevor Sie die Fernbedienung verwenden,
Bei Bedarf können Sie die aktuelle Light Engine
mit weiteren Fernbedienungen koppeln. Es ist
auch möglich, die aktuelle Fernbedienung zu koppeln
FERNBEDIENUNG
-- -
(2)
(5)
(2)
(2)
- 4 -
Lichtmaschine:
(1)
2. Anweisungen zur Fernbedienung:
Schalte die Light Engine ein. Drücke gleichzeitig
dreimal hintereinander eine der vier Pairing-
Tasten, um das Pairing zu
starten. (3)
(3)
Knopfzelle.
(3)
(4)
So koppeln Sie die Fernbedienung und die
Die Light Engine kann nur mit der gekoppelten
Fernbedienung gesteuert werden . Verwenden Sie
die Light Engine nicht zusammen mit anderen
Fernbedienungen.
(1)
(1)
Sprung 2 Sprung 4 Sprung 6
SP-
FADE2
SP+
FARBE
FARBE
LILA RGBW
FADE4 FADE6
(CR2032H müssen Sie selbst kaufen).
FUNKELN
der gleiche Effekt.
Jeder Pairing-Schlüssel kann mit mehreren Lichtmaschinen gepaart werden und hat
Jeder Pairing-Schlüssel kann mit mehreren Light Engines gekoppelt werden und
hat die gleiche Wirkung. Pairing-Schlüssel mit unterschiedlichen Symbolen können von
verschiedenen Fernbedienungen stammen.
FUNKELN
FUNKELN
ATEM
AN
CYAN
ROT GRÜN BLAU WEISS
AUS AN
Stellen Sie sicher, dass die Fernbedienung über einen neuen
4 Pairing-Schlüssel
Remote-Funktion ist eingeschaltet
Motor standardmäßig
Gepaart mit dem Licht
Master
1 2 3 4 5 6 7 8 9
Die Paarungsregeln:
BLITZ
BLITZ
AUS
SPASS.
Standardmäßig ist die Light Engine und die
Fernbedienung in der gleichen Box
-- -
GELB
(rechts abgebildet).
Stellen Sie sicher, dass die DIP-Schalter 9 und 10
der Light Engine auf ON gestellt sind
Bei derselben Lichtmaschine überschreibt ein neuer Pairing-Schlüssel den vorherigen
Pairing-Schlüssel mit demselben Symbol.
Sobald das Gerät erfolgreich mit der Fernbedienung gekoppelt wurde, kann die
Kopplungsfunktion nicht mehr abgebrochen, sondern überschrieben werden.
++ +
Die vier Tasten in der letzten Reihe der Fernbedienung sind die vier Pairing-Tasten.
BLITZ
ATEM
ATEM
1 2 3 4 5 6 7 8 9 10
thth
Machine Translated by Google

-
-
--
--
FUNKELN
FUNKELN
FUNKELN
Funkeleffekt.
JUMP6: W, B, G, R, Y, C Sprung
(Rot, Grün, Blau, Weiß, Cyan, Gelb, Lila, RGBW)
FADE4:
BLITZ+/-: Stroboskopeffekt (7-stufige Geschwindigkeit)
Statische Farben
WÿB Fade
FADE6:
JUMP2: In
Dimmen+/- (7-stufig)
W, B, G, R, Y, C Fade
W, B, G, R Fade
ÿ
ATEM+/-: Atemeffekt. (7-stufig)
JUMP4: W, B, G, R Sprung
B-Sprung
EIN/AUS
FADE2:
ist mit der Lichtmaschine gekoppelt.
TWINKLE+/-: Funkeleffekt (7-stufige Geschwindigkeit)
Aktivieren Sie den Sound Control-Modus
4 Pairing-Tasten: Zum Zuordnen der Light Engine zur
Fernbedienung. Standardmäßig
FUN.OFF: Beendigung der Atmung/Blinken/Tonsteuerung/
COLOR SP +/-: Anpassung der Farbzyklusgeschwindigkeit (7-stufig)
(1)
(2)
Bemerkungen:
2. Die Tasten der Fernbedienung
(3)
- 5 -
GRÜN BLAU WEISS
ROT
CYAN GELB
BLITZ
AUS
SPASS.
BLITZ
BLITZ
Drücken Sie „Atmen“ oder „Blitzen“. Die Light Engine atmet oder blinkt in der
zuletzt ausgestrahlten Farbe. Durch Drücken von „FUN.OFF“ wird die
aktuelle Atem-, Blitz- oder Funkelfunktion deaktiviert und die Light Engine
nimmt das letzte Programm wieder auf.
Die Light Engine verfügt über eine Memory-Funktion. Beim Einschalten führt sie
das letzte Programm vor dem Ausschalten aus.
Die Tasten „TWINKLE+“, „TWINKLE-“ und „FUNON“ auf der Fernbedienung
entsprechen den Tasten „K1“, „K2“ und „K3“ in der APP.
AUS AN
SP-
Sprung 2 Sprung 4 Sprung 6
FADE2
SP+
FARBE
FARBE
LILA RGBW
FADE4 FADE6
ATEM
ATEM
ATEM
++ +
Machine Translated by Google

Funktion
08
Licht aus, Motor stoppt
Weiß, Blau, Grün, Rot, Gelb, Cyan, Verblassen 8S
12
17
02
Rot
06
Weiß, Blau, Grün, Rot, Gelb, Cyan Jump 4S
14
Weiß, Blau verblassen 2S
07
Weiß, Blau, Grün, Rot, Gelb, Cyan, Verblassen 2S
Weiß, Blau Jump 8S
18
Grün
01
09
Weiß, Blau Jump 2S
05
Weiß, Blau Verblassen 4S
Blau
Weiß, Blau, Grün, Rot, Gelb, Cyan Jump 8S
Weiß, Blau, Grün, Rot, Gelb, Cyan Fade 4S
00
16
Weiß, Blau, Grün, Rot, Gelb, Cyan Jump 2S
04
Cyan
10
11
Weiß
Weiß, Blau, Verblassen 8S
Weiß, Blau Jump 4S
13
03
Gelb
15
1 2 3 4 5 6 7 8 9 1 2 3
4 5 6 7 8 9 10
AN
AN
AN
AN
AN
AN
AN
AN
AN
AN
AN
AN
AN
AN
AN
AN
AN
AN
AN
Einstellungen (1 bis 5)
DIP-Schalter
Pro.Nr.
thst
thth
Liste der integrierten Programme des Masters (1 bis 5 DIP-Schalter)
IV.Die Tabelle der eingebauten Programme der Master Light Engine
- 6 -
1 2 3 4 5 6 7 8 9
1 2 3 4 5 6 7 8 9 1 2 3
4 5 6 7 8 9 10
1 2 3 4 5 6 7 8 9 1 2 3
4 5 6 7 8 9 10
1 2 3 4 5 6 7 8 9
1 2 3 4 5 6 7 8 9 1 2 3
4 5 6 7 8 9 10
1 2 3 4 5 6 7 8 9 1 2 3
4 5 6 7 8 9 10
1 2 3 4 5 6 7 8 9 1 2 3
4 5 6 7 8 9 10
1 2 3 4 5 6 7 8 9 1 2 3
4 5 6 7 8 9 10
1 2 3 4 5 6 7 8 9 1 2 3
4 5 6 7 8 9 10
1 2 3 4 5 6 7 8 9
1 2 3 4 5 6 7 8 9 1 2 3
4 5 6 7 8 9 10
1 2 3 4 5 6 7 8 9 1 2 3
4 5 6 7 8 9 10
1 2 3 4 5 6 7 8 9 1 2 3
4 5 6 7 8 9 10
1 2 3 4 5 6 7 8 9 1 2 3
4 5 6 7 8 9 10
1 2 3 4 5 6 7 8 9 1 2 3
4 5 6 7 8 9 10
1 2 3 4 5 6 7 8 9 1 2 3
4 5 6 7 8 9 10
1 2 3 4 5 6 7 8 9 1 2 3
4 5 6 7 8 9 10
1 2 3 4 5 6 7 8 9 1 2 3
4 5 6 7 8 9 10
1 2 3 4 5 6 7 8 9 10
1 2 3 4 5 6 7 8 9 10
1 2 3 4 5 6 7 8 9 10
Machine Translated by Google

Funktion
3,0 U/min
2,0 U/min
4,0 U/min
Funkelgeschwindigkeit 3,0 U/min
1,5 U/min
6,0 U/min
1,0 U/min
0,5 U/min
Master
Remote-Funktion ist eingeschaltet
Masterprogramm P13=4 +3 +1
1 2 3 4 5 6 7 8 9 1 2 3
4 5 6 7 8 9 10
1 2 3 4 5 6 7 8 9 1 2 3
4 5 6 7 8 9 10
1 2 3 4 5 6 7 8 9
1 2 3 4 5 6 7 8 9
1 2 3 4 5 6 7 8 9 1 2 3
4 5 6 7 8 9 10
1 2 3 4 5 6 7 8 9 1 2 3
4 5 6 7 8 9 10
1 2 3 4 5 6 7 8 9 1 2 3
4 5 6 7 8 9 10
1 2 3 4 5 6 7 8 9 10
1 2 3 4 5 6 7 8 9 10
DIP-Schalter
Einstellungen (6 bis 8)
thst
Eingebaute Twinkle Wheel-Geschwindigkeit des Masters (6 bis 8 DIP-Schalter)
- 7 -
thth
AN
AN
AN
AN
AN
AN
AN
Zum Beispiel: Master-Einbauprogramm P13 + Funkelgeschwindigkeit 3,0 U/min
1 2 3 4 5 6 7 8 9 1 2 3
4 5 6 7 8 9 10
AN
8 4
1
Machine Translated by Google

den fertigen Glasfaserstecker in
LED-Lichtmaschine
Faserbündel
Mit Endbeschlägen
und verkleben Sie sie mit dem
Harzkleber . Schneiden Sie die
Faserenden bündig mit der Decke ab oder lassen Sie
2-3 mm Vorsprung
Ferrule. Ziehen Sie dann die Schrauben
gegen die Senklöcher am Glasfaserstecker
fest.
10 mm.
Lösen Sie die Schrauben an der Lichtmotor
-Anschlusshülse und setzen Sie
2. Installation von Glasfasersträngen an Decken
1. Montage der Glasfaserstecker/-kupplungen
V. Montage und Installation des Faserbündels
- 8 -
Faserenden können montiert werden mit
Endstücke, um weitere optische Effekte zu
erzielen.
1. Bohren Sie die Löcher in die Decke,
wie im Muster angegeben. Führen Sie
die Faserstränge in die Löcher ein
in der Mitte gefaltet, und der Biegeradius
sollte nicht kleiner sein als
2. Die Faserstränge können nicht
Machine Translated by Google

(2) Wenn die Fernbedienung nach dem Batteriewechsel nicht mehr funktioniert, koppeln Sie sie erneut.
(3) Stellen Sie sicher, dass die Fernbedienung in einer Reichweite von 10 Metern verwendet wird.
(1) Wenn die APP normal installiert ist und die APP nicht nach der Lichtmaschine
suchen kann , muss bestätigt werden, ob diese Lichtmaschine von anderen
Mobiltelefonen belegt ist.
1. Gründe und Methoden zur Fehlerbehebung bei fehlender Fernbedienung
(1) Überprüfen Sie, ob die Kontrollleuchte der Fernbedienung leuchtet. Wenn die Kontrollleuchte
nicht leuchtet oder die Helligkeit gering ist, ersetzen Sie bitte die Batterie.
- 9 -
der Kontrolle:
Vorsichtsmaßnahmen:
2. Gründe und Methoden zur Fehlerbehebung, wenn die APP außer Kontrolle gerät:
NSW 2122 Australien
Adresse: Shuangchenglu 803nong11hao1602A-1609shi, Baoshanqu,
Importiert nach AUS: SIHAO PTY LTD. 1 ROKEVA STREETEASTWOOD
Place, Rancho Cucamonga, CA 91730
Hersteller: Shanghaimuxinmuyeyouxiangongsi
Shanghai 200.000 CN.
(3) Ein Mobiltelefon unterstützt die Verbindung zu ca. 5 Lichtmodulen. Die genaue
Anzahl variiert je nach Mobilfunksignalempfang.
(2) Wenn die Lichtmaschine durch andere Mobiltelefone belegt ist, muss sie freigegeben werden
YH CONSULTING LIMITED. C/0 YH Consulting
Limited, Büro 147, Centurion House, London
Road, Staines-upon-Thames, Surrey, TW18 4AX
E-CrossStu GmbH
60329 Frankfurt am Main.
Mainzer Landstr.69,
Importiert in die USA: Sanven Technology Ltd. Suite 250, 9166 Anaheim
und dann zur Suche und Verbindung eingeschaltet.
Machine Translated by Google

Technischer Support und E-Garantie-Zertifikat
www.vevor.com/support
Machine Translated by Google

MODELLO:LEC-432
Supporto tecnico e certificato di garanzia elettronica
www.vevor.com/support
LUCI A FIBRA OTTICA LUCE DA SOFFITTO A STELLA
Miglioramento della casa conveniente e affidabile.
Machine Translated by Google

Machine Translated by Google

SALTA2 SALTA4 SALTA6
SP-
DISSOLVENZA2
DISSOLVENZA4 DISSOLVENZA6
SP+
COLORE
COLORE
GIALLO VIOLA RGBW
RESPIRO
RESPIRO
FLASH
SPENTO
DIVERTIMENTO.
FLASH
SCINTILLIO
SCINTILLIO
SPENTO ACCESO
BLU BIANCO
ROSSO VERDE
CIANO
Miglioramento della casa conveniente e affidabile.
MODELLO: LEC-432
LAMPADA DA SOFFITTO A STELLA
LUCI IN FIBRA OTTICA
- 1 -
attentamente prima di operare. VEVOR si riserva una chiara interpretazione
del nostro manuale utente. L'aspetto del prodotto sarà soggetto alla
++ +
Questa è l'istruzione originale, si prega di leggere tutte le istruzioni del manuale
-- -
prodotto che hai ricevuto. Perdonaci se non ti informeremo più
se sono disponibili aggiornamenti tecnologici o software sul nostro prodotto.
TELECOMANDO
Machine Translated by Google

154
165
Aerei DIP M IC Potenza
LEC-432
Microfono DC 12V
AEREO
IMMERSIONE
9
9 9 10
1 1 2 3 4 5 6 1 2 3 4 5 6 7 2 3 4 5 6 7 7
8 8 8
Questo dispositivo è conforme alla Parte 15 delle Norme FCC. Funzionamento
ISTRUZIONI
2. Evitare di posizionare il motore luminoso sotto la pioggia o in aree umide. Assicurarsi
che il motore luminoso abbia una ventilazione sufficiente e non sia posizionato
in un'area completamente sigillata.
3. Evitare di utilizzare il dispositivo a temperature superiori a 40 ÿ.
I fili di fibra non possono essere piegati a metà e il raggio di curvatura
Note di sicurezza:
1. Assicurarsi che la tensione di ingresso sia corretta.
Benvenuti a usare Fiber Optic Lights Star Ceiling Light. Si prega di leggere attentamente
il manuale prima di accendere il motore di luce
attentamente il manuale di istruzioni.
non deve essere inferiore a 10 mm.
- 2 -
I. Informazioni e dimensioni del motore leggero
è soggetto alle due condizioni seguenti: (1) Questo dispositivo non può
causare interferenze dannose e (2) questo dispositivo deve accettare
qualsiasi interferenza ricevuta, comprese le interferenze che possono
causare un funzionamento indesiderato.
Attenzione: per ridurre il rischio di lesioni, l'utente deve leggere
10
SU
58
65
126
SU
Machine Translated by Google
Quando si utilizza un telecomando e un'APP,
1 2 3 4 5 6 7 8 9
1 2 3 4 5 6 7 8 9
Gli interruttori DIP sono per la ruota scintillante
ilil
il
il
santo
Questi motori leggeri sono la versione normale e il controllo è il seguente:
Bluetooth
il
III. Impostazioni del motore di luce in fibra ottica
Tensione di ingresso: 12 V CC
APP: Sì
Gli interruttori DIP sono per i programmi della
macchina autonoma e i 6-8
(1)
Modello: LEC-432
Controllo del suono: Sì
1. Impostazioni della modalità autonoma
Colori emessi: miscelazione RGBW
II. Parametri tecnici:
Controllo remoto: Sì
posizione e il DIP switch 9 in posizione "OFF".
I DIP switch 1-8
velocità.
(Tirare l'interruttore verso il basso per "ON" e
la posizione piatta è "OFF")
LED: LED RGBW*4
Filamenti di fibra: 900 pezzi 9,8 piedi 0,03"
Apertura porta: MAX: ÿ20mm
Potenza: 20W
Scintillio: Sì
impostare gli interruttori DIP 9 e 10 su
(2)
Controllo del suono: Sì
- 3 -
1 2 3 4 5 6 7 8 9 10
1 2 3 4 5 6 7 8 9 10
SU
SU
√ √
√√
×
passa alla posizione "OFF".
IMMERSIONE
s th
Controllore DMX
Programmi
Telecomando
Incorporato
Stato di lavoro
APP Suono
Autonomo
Posizione "ON" e altri DIP da 1 a 8
esimo esimo
Scarica APP
può impostare i programmi integrati.1-5
SU
Telecomando/
Autonomo
SPENTO
Ruota scintillante
velocità
Programmi
integrati
Quando il telecomando e l'APP
non sono in uso e il motore luminoso è controllato
dai programmi integrati, impostare l'interruttore
DIP 10 su "ON"
s th
Machine Translated by Google

FLASH
FLASH
SPENTO
DIVERTIMENTO.
Di default, il motore di luce e il telecomando
sono nella stessa scatola
-- -
GIALLO
del motore di luce sono stati impostati su ON
Assicurarsi che gli interruttori DIP 9 e 10
(mostrato a destra).
Per lo stesso motore di illuminazione, una nuova chiave di associazione sovrascriverà la chiave di
associazione precedente con la stessa icona.
Una volta che il dispositivo è stato associato correttamente al telecomando, la funzione di
associazione non può essere annullata, ma può essere sovrascritta.
++ +
I quattro tasti nell'ultima fila del telecomando sono i quattro tasti di associazione.
FLASH
RESPIRO
RESPIRO
1 2 3 4 5 6 7 8 9 10
ilil
Se necessario, puoi associare l'attuale motore
di luce con più telecomandi. È anche possibile
associare l'attuale telecomando
Prima di utilizzare il telecomando, assicurarsi
con motori più leggeri.
L'abbinamento è completo.
Il motore luminoso lampeggerà 3 volte.
TELECOMANDO
-- -
(2)
(5)
(2)
(2)
- 4 -
motore leggero:
(1)
2. Istruzioni per il telecomando:
Accendere il motore della luce. Allo stesso tempo,
premere uno dei quattro tasti di associazione 3 volte
di seguito per avviare l'associazione.
(3)
(3)
pila a bottone.
(3)
(4)
Come associare il telecomando e il
stato abbinato. Il motore di luce può essere
controllato solo dal telecomando abbinato . Non
mischiare il motore di luce con altri telecomandi
(1)
(1)
SALTA2 SALTA4 SALTA6
SP-
DISSOLVENZA2
SP+
COLORE
COLORE
RGBW VIOLA
DISSOLVENZA4 DISSOLVENZA6
(È necessario acquistare autonomamente la CR2032H).
SCINTILLIO
lo stesso effetto.
Ogni chiave di associazione può essere associata a più motori luminosi e avrà
Ogni Pairing Key può essere abbinato a più motori luminosi e avrà lo stesso
effetto. I Pairing Key con icone diverse possono provenire da telecomandi diversi.
SCINTILLIO
SCINTILLIO
RESPIRO
SU
CIANO
ROSSO VERDE BLU BIANCO
SPENTO ACCESO
assicurarsi che il telecomando abbia una nuova
4 Chiavi di associazione
La funzione remota è attiva
motore di default
In coppia con la luce
Maestro
1 2 3 4 5 6 7 8 9
Le regole di abbinamento:
Machine Translated by Google

-
-
--
--
SCINTILLIO
SCINTILLIO
SCINTILLIO
Effetto scintillante.
JUMP6: Salta WÿBÿGÿRÿYÿC
(Rosso, Verde, Blu, Bianco, Ciano, Giallo, Viola, RGBW)
DISSOLVENZA4:
FLASH+/-: Effetto stroboscopico (velocità a 7 livelli)
Colori statici
Dissolvenza W, B
DISSOLVENZA6:
JUMP2: Nel
Oscuramento +/- (7 livelli)
WÿBÿGÿRÿYÿC Dissolvenza
WÿBÿGÿR Dissolvenza
,
BREATH+/- : Effetto respirazione. (7 livelli)
JUMP4: Salta WÿBÿGÿR
B Salto
ACCESO/SPENTO
DISSOLVENZA2:
è abbinato al motore luminoso.
TWINKLE+/-: Effetto scintillio. (velocità a 7 livelli)
Attiva la modalità Controllo del suono
4 Chiavi di associazione: per abbinare il motore di luce e il telecomando
per l'uso. Per impostazione predefinita,
FUN.OFF: Terminazione del controllo Breathe/Flashing/Sound/
COLOR SP +/-: Regolazione della velocità del ciclo di colore (7 livelli)
(1)
(2)
Osservazioni:
2. I tasti del telecomando
(3)
- 5 -
VERDE BLU BIANCO
ROSSO
CIANO GIALLO
FLASH
SPENTO
DIVERTIMENTO.
FLASH
FLASH
Premere "Breath" o "Flash", il motore luminoso respirerà o lampeggerà in un
colore statico dell'ultimo colore emesso. Se si preme "FUN.OFF", la funzione
di respirazione, flash o scintillio corrente verrà disattivata e il motore luminoso
riprenderà l'ultimo programma.
Il motore luminoso ha una funzione di memoria. Quando è acceso, esegue
l'ultimo programma prima di essere spento.
I pulsanti "TWINKLE+", "TWINKLE-" e "FUNON" sul telecomando corrispondono
ai pulsanti "K1", "K2" e "K3" nell'APP.
SPENTO ACCESO
SP-
SALTA2 SALTA4 SALTA6
DISSOLVENZA2
SP+
COLORE
COLORE
RGBW VIOLA
DISSOLVENZA4 DISSOLVENZA6
RESPIRO
RESPIRO
RESPIRO
++ +
Machine Translated by Google
Funzione
Bianco, Blu Salto 8S
18
Verde
01
09
Bianco, Blu Salto 2S
05
Luce spenta, il motore si ferma
12
17
02
Rosso
06
BiancoÿBluÿVerdeÿRossoÿGialloÿCiano Jump 4S
14
Bianco, Blu sbiadito 2S
07
BiancoÿBluÿVerdeÿRossoÿGialloÿCiano Fade 2S
10
11
Bianco
Bianco, Blu sbiadito 8S
Bianco, Blu Salto 4S
13
03
Giallo
15
08
Bianco, blu, verde, rosso, giallo, ciano sbiadito 8S
Bianco, Blu sbiadito 4S
Blu
BiancoÿBluÿVerdeÿRossoÿGialloÿCiano Jump 8S
Bianco, blu, verde, rosso, giallo, ciano sbiadito 4S
00
16
BiancoÿBluÿVerdeÿRossoÿGialloÿCiano Jump 2S
04
Ciano
1 2 3 4 5 6 7 8 9 1 2 3
4 5 6 7 8 9 10
SU
SU
SU
SU
SU
SU
SU
SU
SU
SU
SU
SU
SU
SU
SU
SU
SU
SU
SU
Impostazioni (da 1 a 5)
Interruttori DIP
Pro.No.
ilsanto
ilil
- 6 -
IV.La tabella dei programmi integrati del Master light engine
Elenco dei programmi integrati del Master (da 1 a 5 DIP Switch)
1 2 3 4 5 6 7 8 9 1 2 3
4 5 6 7 8 9 10
1 2 3 4 5 6 7 8 9
1 2 3 4 5 6 7 8 9 1 2 3
4 5 6 7 8 9 10
1 2 3 4 5 6 7 8 9 1 2 3
4 5 6 7 8 9 10
1 2 3 4 5 6 7 8 9 1 2 3
4 5 6 7 8 9 10
1 2 3 4 5 6 7 8 9 1 2 3
4 5 6 7 8 9 10
1 2 3 4 5 6 7 8 9 1 2 3
4 5 6 7 8 9 10
1 2 3 4 5 6 7 8 9 1 2 3
4 5 6 7 8 9 10
1 2 3 4 5 6 7 8 9 1 2 3
4 5 6 7 8 9 10
1 2 3 4 5 6 7 8 9
1 2 3 4 5 6 7 8 9 1 2 3
4 5 6 7 8 9 10
1 2 3 4 5 6 7 8 9 1 2 3
4 5 6 7 8 9 10
1 2 3 4 5 6 7 8 9 1 2 3
4 5 6 7 8 9 10
1 2 3 4 5 6 7 8 9 1 2 3
4 5 6 7 8 9 10
1 2 3 4 5 6 7 8 9 1 2 3
4 5 6 7 8 9 10
1 2 3 4 5 6 7 8 9 1 2 3
4 5 6 7 8 9 10
1 2 3 4 5 6 7 8 9 1 2 3
4 5 6 7 8 9 10
1 2 3 4 5 6 7 8 9
1 2 3 4 5 6 7 8 9 10
1 2 3 4 5 6 7 8 9 10
1 2 3 4 5 6 7 8 9 10
Machine Translated by Google

Funzione
3.0 giri/min
2.0 giri/min
4.0 giri/min
Programma Master P13=4 +3 +1
1,5 giri al minuto
6.0 giri/min
1.0 giri/min
0,5 giri al minuto
La funzione remota è attiva
Maestro
Velocità di scintillio 3,0 giri/min
1 2 3 4 5 6 7 8 9 1 2 3
4 5 6 7 8 9 10
1 2 3 4 5 6 7 8 9 1 2 3
4 5 6 7 8 9 10
1 2 3 4 5 6 7 8 9
1 2 3 4 5 6 7 8 9
1 2 3 4 5 6 7 8 9 1 2 3
4 5 6 7 8 9 10
1 2 3 4 5 6 7 8 9 1 2 3
4 5 6 7 8 9 10
1 2 3 4 5 6 7 8 9 1 2 3
4 5 6 7 8 9 10
1 2 3 4 5 6 7 8 9 10
1 2 3 4 5 6 7 8 9 10
Impostazioni (da 6 a 8)
Interruttori DIP
ilsanto
- 7 -
Ruota Twinkle integrata Velocità del Master (da 6 a 8 DIP Switch)
ilil
SU
SU
SU
SU
SU
SU
SU
Ad esempio: programma Master integrato P13 + velocità di scintillio 3,0 RPM
1 2 3 4 5 6 7 8 9 1 2 3
4 5 6 7 8 9 10
SU
8 4
1
Machine Translated by Google
il connettore in fibra pronto in
Motore di luce a LED
Fascio di fibre
Con raccordi terminali
e incollarli con l' adesivo in resina.
Tagliare le estremità delle fibre a filo
con il soffitto o lasciare
Sporgenza 2-3mm
la ghiera. Quindi serrare le viti contro i
fori svasati sul connettore in fibra.
10 mm.
Allentare le viti sulla ghiera della porta del
motore della luce e inserirla
2. Installazione di fili di fibra sui soffitti
1. Assemblaggio di connettori/giunti in fibra
V. Assemblaggio e installazione del fascio di fibre
terminali per presentare maggiori effetti ottici.
- 8 -
Le estremità della coda in fibra possono essere montate con
1. Praticare i fori sul soffitto
come richiesto dal modello.
Inserire i fili di fibra nei fori
piegato a metà e il raggio di curvatura
non deve essere inferiore a
2. I fili di fibra non possono essere
Machine Translated by Google

(3) Assicurarsi che il telecomando venga utilizzato entro un raggio di 10 metri.
(2) Se il telecomando non funziona più dopo aver sostituito la batteria, rieseguire l'associazione.
(1) Se l'APP è installata normalmente e non riesce a cercare il motore
luminoso, è necessario confermare se questo motore luminoso è occupato
da altri cellulari.
1. Motivi e metodi di risoluzione dei problemi per cui il telecomando non funziona
(1) Controllare se la spia luminosa del telecomando è accesa. Se la spia luminosa
non è accesa o la luminosità è bassa, sostituire la batteria.
- 9 -
di controllo:
Precauzioni:
2. Motivi e metodi di risoluzione dei problemi per cui l'APP è fuori controllo:
Nuovo Galles del Sud 2122 Australia
Indirizzo: Shuangchenglu 803nong11hao1602A-1609shi, Baoshanqu,
Importato in AUS: SIHAO PTY LTD. 1 ROKEVA STREETEASTWOOD
Importato negli USA: Sanven Technology Ltd. Suite 250, 9166 Anaheim
(3) Un cellulare supporta la connessione a circa 5 motori luminosi. Il numero
specifico varia a seconda della ricezione del segnale mobile.
shanghai 200000CN.
Produttore: Shanghaimuxinmuyeyouxiangongsi
(2) Se il motore luminoso è occupato da altri cellulari, è necessario rilasciarlo
Luogo, Rancho Cucamonga, CA 91730
YH CONSULTING LIMITED. C/0 YH Consulting
Limited ufficio 147, Centurion House, London
Road, Staines-upon-Thames, Surrey, TW18 4AX
E-CrossStu GmbH
Via Magonza 69,
60329 Francoforte sul Meno.
e poi acceso per la ricerca e la connessione.
Machine Translated by Google

Supporto tecnico e certificato di garanzia
elettronica www.vevor.com/support
Machine Translated by Google

MODELO:LEC432
Soportetécnicoycertificadodegarantía
electrónicawww.vevor.com/support
LUCESDEFIBRAÓPTICALUZDETECHOESTRELLA
Mejorasparaelhogarasequibles.Confiables.
Machine Translated by Google

Machine Translated by Google
SALTO2SALTO4SALTO6
SP
DESVANECIMIENTO2
DESVANECIMIENTO4DESVANECIMIENTO6
SP+
COLOR
COLOR
AMARILLOPÚRPURARGBW
APAGADO
DESTELLO
DIVERTIDO.
DESTELLO
ALIENTO
ALIENTO
CENTELLEO
CENTELLEO
APAGADOENCENDIDO
CIAN
ROJOVERDE
AZULBLANCO
Mejorasparaelhogarasequibles.Confiables.
LÁMPARADETECHOESTRELLA
MODELO:LEC432
LUCESDEFIBRAÓPTICA
1
Antesdeutilizarlo,leaatentamenteelmanualdeusuario.VEVORsereservaelderecho
deinterpretarlo.Laaparienciadelproductoestarásujetaa...
++ +
MANDOADISTANCIA
Estassonlasinstruccionesoriginales,leatodaslasinstruccionesdelmanual.
Sihayalgunaactualizacióndetecnologíaosoftwareennuestroproducto.
Productoquerecibió.Disculpesinoleinformamosnuevamente.
Machine Translated by Google

LEC432
154
165
AlimentacióndelICDIPaéreo
MicrófonoDC12V
AÉREO
ADEREZO
126
65
58
EstedispositivocumpleconlaParte15delasNormasdelaFCC.Operación
INSTRUCCIONES
2.Evitecolocarelmotordeluzbajolalluviaoenzonashúmedas.Asegúresedequeesté
bienventiladoynoenunáreacompletamentesellada.
3.Eviteutilizareldispositivoatemperaturassuperioresa40.
Lashebrasdefibranosepuedendoblarporlamitadyelradiodecurvatura
Notasdeseguridad:
1.Asegúresedequeelvoltajedeentradaseacorrecto.
LedamoslabienvenidaalalámparadetechoStardefibraóptica.Leaatentamenteel
manualantesdeencenderla.
Leaatentamenteelmanualdeinstrucciones.
nodebeserinferiora10mm.
2
I.Informaciónydimensionesdelmotorligero
estásujetoalasdoscondicionessiguientes:(1)Estedispositivonopuedecausar
interferenciasdañinasy(2)estedispositivodebeaceptarcualquierinterferencia
recibida,incluidaaquellaquepuedacausarunfuncionamientonodeseado.
Advertencia:Parareducirelriesgodelesiones,elusuariodebeleer
910
EN
9
910
112345612345672345677
88
8
EN
Machine Translated by Google
ControladorDMX
Programas
Mandoadistancia
Incorporado
Aplicacióndesonido
Estadolaboral
Autónomo
Posición"ON"yotros1a8DIP
Bluetooth
el
√√
√√
×
cambiaalaposición"OFF".
primeroyúltimo
elel
Cuandoelcontrolremotoylaaplicación
primeroyúltimo
Descargarlaaplicación
Alutilizaruncontrolremotoyunaaplicación,
Puedeconfigurarlosprogramasincorporados.Losdel1al5
Autónomo
Mandoadistancia/
EN
APAGADO
Ruedacentelleante
velocidad
Programas
integrados
noestánenusoyelmotordeluzestácontrolado
porlosprogramasincorporados,coloqueel
interruptorDIP10en"ON"
elel
el
123456789
123456789
LosinterruptoresDIPsonparalaruedacentelleante
Controlremoto:Sí
yelinterruptorDIP9enlaposición"OFF".Los
interruptoresDIP18
velocidad.
LED:RGBW*4LED
Hilosdefibra:900piezas9,8pies0,03"
(Tiredelinterruptorhaciaabajopara
"ENCENDIDO",ylaposiciónplanaes"APAGADO")
Aperturadelpuerto:MÁX:Φ20mm
Potencia:20W
Twinkle:Sí
ColoquelosinterruptoresDIP9y10enla
(2)
Controldesonido:Sí
3
III.Configuracióndelmotordeluzdefibraóptica
Voltajedeentrada:12VCC
APLICACIÓN:Sí
LosinterruptoresDIPsonparalosprogramasde
lamáquinaindependienteylosdel6al8
(1)
Modelo:LEC432
Controldesonido:Sí
1.Configuracióndelmodoindependiente
Coloresdeemisión:mezclaRGBW
II.Parámetrostécnicos:
12345678910
12345678910
EN
EN
ADEREZO
el
calle
Estosmotoresligerossonlaversiónregular,yelcontroleselsiguiente:
Machine Translated by Google

DESTELLO
CENTELLEO
CENTELLEO
ALIENTO
EN
ROJOVERDEAZULBLANCO
CIAN
APAGADOENCENDIDO
Asegúresedequeelcontrolremototengaunabateríanueva.
4clavesdeemparejamiento
Lafunciónremotaestáactivada
motorpordefecto
Emparejadoconlaluz
Maestro
Lasreglasdeemparejamiento:
123456789
Elemparejamientoestácompleto.
Laluzdelmotorparpadeará3veces.
Enciendaelmotordeluz.Almismotiempo,presione
unadelascuatroteclasdeemparejamientotresveces
seguidasparainiciarel
emparejamiento.(3)
(3)
piladebotón.
(3)
(4)
Cómoemparejarelcontrolremotoyel
Sehaemparejado.Elmotordeluzsolosepuede
controlarconelcontrolremotoemparejado.Nolo
combineconotroscontrolesremotos.
(1)
(1)
(5)
(2)
(2)
(2)
4
motorligero:
(1)
2.Instruccionesdelcontrolremoto:
SALTO2SALTO4SALTO6
SP
DESVANECIMIENTO2
DESVANECIMIENTO4DESVANECIMIENTO6
COLOR
COLOR
SP+
RGBWPÚRPURA
(DebecomprarCR2032Hustedmismo).
CENTELLEO
Cadallavedeemparejamientopuedeconectarseavariosmotoresdeluzytendrá
elmismoefecto.Lasllavesdeemparejamientocondiferentesiconospuedenprovenirde
distintoscontrolesremotos.
Cadaclavedeemparejamientosepuedeemparejarconvariosmotoresdeiluminaciónytendrá
elmismoefecto
ALIENTO
ALIENTO
elel
12345678910
conmotoresmásligeros.
Antesdeutilizarelcontrolremoto,asegúrese
Siesnecesario,puedeemparejarelmotorde
luzactualconmáscontrolesremotos.También
esposibleemparejarelcontrolremotoactual.
MANDOADISTANCIA
AMARILLO
(mostradoaladerecha).
AsegúresedequelosinterruptoresDIP9y10
delmotordeluzsehanpuestoenON
DESTELLO
DESTELLO
APAGADO
DIVERTIDO.
Pordefecto,elmotordeluzyelcontrolremoto
estánenlamismacaja.
Paraelmismomotordeluz,unanuevaclavedeemparejamientosobrescribirálaclavede
emparejamientoanteriorconelmismoícono.
Unavezqueeldispositivoseemparejaconéxitoconelcontrolremoto,lafunciónde
emparejamientonosepuedecancelar,perosepuedesobrescribir.
++ +
Lascuatroteclasenlaúltimafiladelcontrolremotosonlascuatroteclasdeemparejamiento.
Machine Translated by Google

APAGADOENCENDIDO
AMARILLOCIAN
ROJO
VERDEAZULBLANCO
DESTELLO
APAGADO
DIVERTIDO.
DESTELLO
DESTELLO
Elmotordeluztienefuncióndememoria.Alencenderse,ejecutaelúltimo
programaantesdeapagarse.
Losbotones"TWINKLE+","TWINKLE"y"FUNON"delcontrolremoto
correspondenalosbotones"K1","K2"y"K3"delaAPP.
ALIENTO
ALIENTO
ALIENTO
SP
SALTO2SALTO4SALTO6
DESVANECIMIENTO2
DESVANECIMIENTO4DESVANECIMIENTO6
SP+
COLOR
COLOR
RGBWPÚRPURA
++ +
CENTELLEO
CENTELLEO
CENTELLEO
FUN.OFF:Terminaciónderespiración/intermitente/controldesonido/
COLORSP+/:Ajustedevelocidaddeciclodecolor(7niveles)
(1)
(2)
Observaciones:
2.Lasteclasdelmandoadistancia
(3)
5
Alpulsar"Respiración"o"Destello",elmotordeluzrespiraráodestellará
conelúltimocoloremitido.Sisepulsa"FUN.OFF",sedesactivarálafunción
derespiración,destelloocentelleoactualyelmotordeluzreanudaráel
últimoprograma.
Efectocentelleante.
ALIENTO+/:Efectoderespiración.(7niveles)
SALTO4:SaltoW,B,G,R
BSalto
ENCENDIDO/APAGADO
DESVANECIMIENTO2:
Estáemparejadoconelmotordeluz.
TWINKLE+/:EfectoTwinkle.(Velocidadde7niveles)
Activarelmododecontroldesonido
4teclasdeemparejamiento:Paraconectarelmotordeluzyelcontrol
remoto.Pordefecto,
SALTO6:W,B,G,R,Y,CSalto
DESVANECIMIENTO4:
(Rojo,Verde,Azul,Blanco,Cian,Amarillo,Púrpura,RGBW)
FLASH+/:Efectoestroboscópico.(Velocidadde7niveles)
Desvanecimientoblancoyazul
Coloresestáticos
DESVANECIMIENTO6:
JUMP2:En
Atenuación+/(7niveles)
DesvanecimientoW,B,G,R,YyC
DesvanecimientodeW,B,GyR
Machine Translated by Google

Función
10
11
07
Blanco,azul,verde,rojo,amarillo,ciandegradado2S
14
Blanco,azuldegradado2S
02
06
Blanco,azul,verde,rojo,amarilloycianJump4S
Rojo
12
17
Luzapagada,motorparado
05
09
Saltoblancoyazul2S
01
Verde
Blanco,AzulJump8S
18
04
Cian
Blanco,azul,verde,rojo,amarillo,cianJump2S
16
00
Azul
Blanco,azul,verde,rojo,amarilloycian.Salto8S.
Blanco,azul,verde,rojo,amarillo,ciandegradado4S
Blanco,azuldegradado4S
08
Blanco,azul,verde,rojo,amarillo,ciandegradado8S
15
03
Amarillo
Jump4Sblancoyazul
13
Blanco,azuldegradado8S
Blanco
1234567891234
5678910
EN
EN
EN
EN
EN
EN
EN
EN
EN
EN
EN
EN
EN
EN
EN
EN
EN
EN
EN
Ajustes(1a5)
InterruptoresDIP
Pro.No.
calle el
el el
6
IV.TabladelosprogramasincorporadosdelmotordeluzMaster
Listadeprogramasintegradosdelmaestro(1a5interruptoresDIP)
1234567891234
5678910
1234567891234
5678910
1234567891234
5678910
1234567891234
5678910
1234567891234
5678910
1234567891234
5678910
1234567891234
5678910
123456789
1234567891234
5678910
123456789
1234567891234
5678910
1234567891234
5678910
1234567891234
5678910
1234567891234
5678910
1234567891234
5678910
1234567891234
5678910
1234567891234
5678910
123456789
12345678910
12345678910
12345678910
Machine Translated by Google

Función
3.0RPM
2.0RPM
4.0RPM
ProgramamaestroP13=4+3+1
1,5RPM
6.0RPM
1.0RPM
0,5RPM
Lafunciónremotaestáactivada
Velocidadcentelleante3,0RPM
Maestro
123456789
1234567891234
5678910
1234567891234
5678910
123456789
1234567891234
5678910
1234567891234
5678910
1234567891234
5678910
Porejemplo:ProgramamaestroincorporadoP13+velocidaddeparpadeo3,0RPM
InterruptoresDIP
Ajustes(6a8)
elcalle
7
Velocidadderuedacentelleanteincorporadadelmaestro(6a8interruptoresDIP)
elel
12345678910
12345678910
1
84
1234567891234
5678910
EN
EN
EN
EN
EN
EN
EN
EN
Machine Translated by Google

Elconectordefibralistoen
MotordeluzLED
Hazdefibras
Conaccesoriosfinales
ypéguelosconeladhesivoderesina.
Cortelosextremosdelafibraalrasdel
techoodéjelos
Protuberanciade23mm
laférula.Acontinuación,aprietelos
tornilloscontralosorificiosavellanados
delconectordefibra.
Losextremosdelacoladefibrasepuedenmontarcon
1.Conjuntodeconectores/acoplamientosdefibra
2.Instalacióndehilosdefibraentechos
Aflojelostornillosdelaféruladelpuerto
delmotordeluzeinsértelos
V.Montajeeinstalacióndelhazdefibras
accesoriosfinalesparapresentarmásefectos
ópticos.
8
10mm.
1.Perforeagujeroseneltechosegúnel
patrón.Insertelasfibrasenlosagujeros.
dobladoporlamitadyelradiode
curvaturanodebesermenorque
2.Lashebrasdefibranopuedenser
Machine Translated by Google

(3)Asegúresedequeelcontrolremotoseutilicedentrodeunalcancede10metros.
(2)Sielcontrolremotoestáfueradecontroldespuésdereemplazarlabatería,vuelvaaemparejarlo.
(1)Silaaplicaciónseinstalanormalmenteynopuedebuscarelmotordeluz,
esnecesarioconfirmarsiestemotordeluzestáocupadoporotrosmóviles.
1.Razonesymétodosdesolucióndeproblemasporlosqueelcontrolremotonofunciona
(1)Compruebesilaluzindicadoradelcontrolremotoestáencendida.Sino
estáencendidaoelbrilloesbajo,reemplacelabatería.
9
decontrol:
Precauciones:
2.Razonesymétodosdesolucióndeproblemasporlosquelaaplicaciónestáfueradecontrol:
NSW2122Australia
Dirección:Shuangchenglu803nong11hao1602A1609shi,Baoshanqu,
ImportadoaAUS:SIHAOPTYLTD.1ROKEVASTREET,EASTWOOD
ImportadoaEE.UU.:SanvenTechnologyLtd.Suite250,9166Anaheim
Fabricante:Shanghaimuxinmuyeyouxiangongsi
Shanghái200000CN.
(3)Unmóviladmitelaconexióndehastacincomotoresdeluz.Lacantidad
específicavaríasegúnlarecepcióndelaseñalmóvil.
(2)Sielmotordeluzestáocupadoporotrosmóviles,esnecesarioliberarlo.
Lugar,RanchoCucamonga,CA91730
ECrossStuGmbH
MainzerLandstr.69,
60329FráncfortdelMeno.
YHCONSULTINGLIMITADA.C/0YHConsulting
Limited,oficina147,CenturionHouse,London
Road,StainesuponThames,Surrey,TW184AX
yluegoseenciendeparabuscaryconectarse.
Machine Translated by Google

Soportetécnicoycertificadodegarantíaelectrónica
www.vevor.com/support
Machine Translated by Google

MODEL:LEC-432
Wsparcie techniczne i certyfikat gwarancji
elektronicznej www.vevor.com/support
ŚWIATŁOWODOWE LAMPA SUFITOWA STAR
Przystępne.Niezawodne.Ulepszanie domu.
Machine Translated by Google

Machine Translated by Google

Skok 2 Skok 4 Skok 6
SP-
ZNIKNIĘCIE2
ZNIKANIE4 ZNIKANIE6
SP+
KOLOR
KOLOR
ŻÓŁTY FIOLETOWY RGBW
ODDECH
ODDECH
BŁYSK
WYŁĄCZONY
ZABAWA.
BŁYSK
MIGOTANIE
MIGOTANIE
WYŁĄCZ WŁĄCZ
NIEBIESKI BIAŁY
CZERWONY ZIELONY
CYJAN
Przystępne.Niezawodne.Ulepszanie domu.
MODEL: LEC-432
LAMPA SUFITOWA GWIAZDA
ŚWIATŁA ŚWIATŁOWODOWE
- 1 -
ostrożnie przed rozpoczęciem użytkowania. VEVOR zastrzega sobie prawo do jednoznacznej
interpretacji naszej instrukcji obsługi. Wygląd produktu podlega
++ +
To jest oryginalna instrukcja, proszę przeczytać wszystkie instrukcje w podręczniku
-- -
produkt, który otrzymałeś. Przepraszamy, że nie poinformujemy Cię ponownie
czy w naszym produkcie pojawiły się jakieś aktualizacje technologiczne lub oprogramowania.
ZDALNE STEROWANIE
Machine Translated by Google

154
165
Mikrofon DIP IC z zasilaniem antenowym
WYKŁAD-432
ZANURZAĆ
ANTENOWY
Mikrofon DC 12V
9 9 9 10
1 1 2 3 4 5 6 2 3 4 5 6 7 7 1 2 3 4 5 6 7
8 8
8
To urządzenie jest zgodne z częścią 15 przepisów FCC.Działanie
INSTRUKCJE
2. Unikaj umieszczania silnika świetlnego na deszczu lub w wilgotnych miejscach. Upewnij
się, że silnik świetlny ma wystarczającą wentylację i nie jest umieszczany w
całkowicie zamkniętym miejscu.
3. Unikaj używania urządzenia w temperaturach powyżej 40 ℃.
Włókna nie mogą być złożone na pół, a promień gięcia jest
Uwagi dotyczące bezpieczeństwa:
1. Upewnij się, że napięcie wejściowe jest prawidłowe.
Zapraszamy do korzystania z Fiber Optic Lights Star Ceiling Light. Przed włączeniem silnika
świetlnego należy uważnie przeczytać instrukcję
uważnie przeczytaj instrukcję obsługi.
nie powinna być mniejsza niż 10 mm.
- 2 -
I. Informacje i wymiary silnika lekkiego
podlega następującym dwóm warunkom: (1) Urządzenie to nie może powodować
szkodliwych zakłóceń oraz (2) Urządzenie to musi akceptować wszelkie odbierane
zakłócenia, w tym zakłócenia, które mogą powodować niepożądane działanie.
Ostrzeżenie – aby zmniejszyć ryzyko obrażeń, użytkownik musi przeczytać
10
NA
58
65
126
NA
Machine Translated by Google

Podczas korzystania z pilota i aplikacji,
1 2 3 4 5 6 7 8 9
1 2 3 4 5 6 7 8 9
Przełączniki DIP są przeznaczone do koła błyskowego
tt
t
Te lekkie silniki są standardową wersją, a sterowanie nimi wygląda następująco:
św.
t
Bluetooth
t
III. Ustawienia silnika światła światłowodowego
Napięcie wejściowe: 12 V DC
Aplikacja: Tak
Przełączniki DIP służą do programowania
samodzielnej maszyny, a przełączniki 6-8
(1)
Model: LEC-432
Kontrola dźwięku: Tak
1. Ustawienia trybu autonomicznego
Emitowanie kolorów: mieszanie RGBW
II. Parametry techniczne:
Zdalne sterowanie: Tak
pozycję i przełącznik DIP 9 w pozycję „OFF”.
Przełączniki DIP 1-8
prędkość.
(Przesuń przełącznik w dół, aby ustawić go w pozycji
„ON”, a w pozycji płaskiej — w pozycji „OFF”)
Diody LED: Diody LED RGBW*4
Pasma włókien: 900 szt. 9,8 stopy 0,03"
Otwór portu: MAKS.: Φ20mm
Moc: 20W
Twinkle: Tak
ustaw przełączniki DIP 9 i 10 w pozycji
(2)
Kontrola dźwięku: Tak
- 3 -
NA
NA
1 2 3 4 5 6 7 8 9 10
1 2 3 4 5 6 7 8 9 10
√
√
√
√
×
przełącza się na pozycję „WYŁ”.
ZANURZAĆ
st th
Kontroler DMX
Programy
Zdalne sterowanie
Wbudowany
Aplikacja dźwiękowa
Status roboczy
Samodzielny
Pozycja „ON” i inne 1 do 8 DIP
th th
Pobierz aplikację
można ustawić wbudowane programy.1 -5
Samodzielny
Zdalne sterowanie/
NA
WYŁĄCZONY
Koło migoczące
prędkość
Wbudowane
programy
Gdy pilot zdalnego sterowania i aplikacja
nie są używane, a silnik świetlny jest sterowany
przez wbudowane programy, ustaw przełącznik
DIP 10 w pozycji „ON”
st th
Machine Translated by Google
BŁYSK
BŁYSK
WYŁĄCZONY
ZABAWA.
Domyślnie silnik świetlny i pilot zdalnego sterowania
znajdują się w tym samym pudełku
-- -
ŻÓŁTY
silnika świetlnego zostały ustawione na WŁ.
Upewnij się, że przełączniki DIP 9 i 10 są ustawione prawidłowo.
(pokazane po prawej).
W przypadku tego samego silnika świetlnego nowy klucz parowania nadpisze
poprzedni klucz parowania tą samą ikoną.
Po pomyślnym sparowaniu urządzenia z pilotem, funkcji parowania nie można
anulować, ale można ją nadpisać.
++ +
Cztery przyciski w ostatnim rzędzie pilota służą do parowania.
BŁYSK
ODDECH
ODDECH
1 2 3 4 5 6 7 8 9 10
tt
W razie potrzeby możesz sparować obecny
silnik świetlny z większą liczbą pilotów.
Możliwe jest również sparowanie obecnego pilota
Przed użyciem pilota należy:
z lżejszymi silnikami.
Silnik świetlny zamiga 3 razy.
Parowanie jest zakończone.
ZDALNE STEROWANIE
-- -
(2)
(5)
(2)
(2)
- 4 -
lekki silnik:
(1)
2. Instrukcja obsługi pilota:
Włącz silnik świetlny. Jednocześnie naciśnij
jeden z czterech przycisków parowania 3 razy
z rzędu, aby rozpocząć
parowanie. (3)
(3)
ogniwo guzikowe.
(3)
(4)
Jak sparować pilota i
sparowane. Silnik świetlny może być sterowany
tylko za pomocą sparowanego pilota . Nie mieszaj
silnika świetlnego z innymi pilotami
(1)
(1)
Skok 2 Skok 4 Skok 6
SP-
ZNIKNIĘCIE2
SP+
KOLOR
KOLOR
FIOLETOWY RGBW
ZNIKANIE4 ZNIKANIE6
(Konieczny jest samodzielny zakup baterii CR2032H).
MIGOTANIE
ten sam efekt.
Każdy klucz parowania można sparować z wieloma silnikami świetlnymi i będzie miał
Każdy klucz parowania może być sparowany z wieloma silnikami świetlnymi i
będzie miał ten sam efekt. Klucze parowania z różnymi ikonami mogą pochodzić z różnych
pilotów.
CZERWONY ZIELONY NIEBIESKI BIAŁY
CYJAN
ODDECH
NA
MIGOTANIE
MIGOTANIE
WYŁĄCZ WŁĄCZ
upewnij się, że pilot ma nową baterię
silnik domyślnie
Funkcja zdalna jest włączona
4 klucze parujące
W połączeniu ze światłem
Gospodarz
1 2 3 4 5 6 7 8 9
Zasady parowania:
Machine Translated by Google

-
-
--
--
MIGOTANIE
MIGOTANIE
MIGOTANIE
Efekt migotania.
JUMP6: Skok W, B, G, R, Y, C
(Czerwony, Zielony, Niebieski, Biały, Cyjan, Żółty, Fioletowy, RGBW)
ZNIKNIĘCIE 4:
FLASH+/-: Efekt stroboskopowy. (7-stopniowa prędkość)
Kolory statyczne
W, B Zanikanie
ZNIKNIĘCIE 6:
JUMP2: W
Ściemnianie+/- (7-stopniowe)
W, B, G, R, Y, C Zanikanie
W, B, G, R Zanikanie
,
ODDECH+/-: Efekt oddychania.(7-poziomowy)
JUMP4: Skok W, B, G, R
Skok B
WŁ./WYŁ.
ZNIKNIĘCIE 2:
jest sparowany z silnikiem świetlnym.
TWINKLE+/-: Efekt migotania. (7-stopniowa prędkość)
Aktywuj tryb sterowania dźwiękiem
4 klucze parowania: Aby dopasować silnik świetlny i pilota do użytku.
Domyślnie,
FUN.OFF: Zakończenie sterowania oddechem/miganiem/dźwiękiem/
COLOR SP +/-: Regulacja prędkości cyklu kolorów (7 poziomów)
(1)
(2)
Uwagi:
2. Klawisze pilota
(3)
- 5 -
CYJAN ŻÓŁTY
CZERWONY
ZIELONY NIEBIESKI BIAŁY
Naciśnij „Breath” lub „Flash”, a silnik świetlny zacznie oddychać lub migać w
statycznym kolorze ostatniego emitowanego koloru. Jeśli naciśniesz „FUN.OFF”,
bieżąca funkcja oddychania, migania lub migotania zostanie wyłączona, a silnik
świetlny wznowi ostatni program.
BŁYSK
WYŁĄCZONY
ZABAWA.
BŁYSK
BŁYSK
Przyciski „TWINKLE+”, „TWINKLE-” i „FUNON” na pilocie odpowiadają przyciskom
„K1”, „K2” i „K3” w aplikacji.
Silnik świetlny ma funkcję pamięci. Po włączeniu uruchamia ostatni program
przed wyłączeniem.
WYŁĄCZ WŁĄCZ
SP-
Skok 2 Skok 4 Skok 6
ZNIKNIĘCIE2
SP+
KOLOR
KOLOR
FIOLETOWY RGBW
ZNIKANIE4 ZNIKANIE6
ODDECH
ODDECH
ODDECH
++ +
Machine Translated by Google

Funkcjonować
Światło wyłączone, silnik zatrzymany
08
Biały, niebieski, zielony, czerwony, żółty, cyjanowy blaknięcie 8S
15
03
Żółty
Biały i niebieski skok 4S
13
Biały, niebieski, blaknący 8S
Biały
10
11
Cyjan
04
Biały, niebieski, zielony, czerwony, żółty, cyjan Jump 2S
16
00
Niebieski
Biały, niebieski, zielony, czerwony, żółty, cyjan Jump 8S
Biały, niebieski, zielony, czerwony, żółty, cyjanowy blaknięcie 4S
Biały, niebieski, blaknący 4S
05
09
Biały i niebieski skok 2S
Zielony
01
Biały, niebieski skok 8S
18
07
Biały, niebieski, zielony, czerwony, żółty, cyjanowy blaknięcie 2S
14
Biały, niebieski, blaknący 2S
02
Czerwony
06
Biały, niebieski, zielony, czerwony, żółty, cyjan Jump 4S
12
17
1 2 3 4 5 6 7 8 9 1 2 3 4
5 6 7 8 9 10
NA
NA
NA
NA
NA
NA
NA
NA
NA
NA
NA
NA
NA
NA
NA
NA
NA
NA
NA
Ustawienia (1 do 5)
Przełączniki DIP
Pro.No.
tśw.
tt
Lista wbudowanych programów Master (1 do 5 przełączników DIP)
IV.Tabela wbudowanych programów silnika Master light
- 6 -
1 2 3 4 5 6 7 8 9 1 2 3 4
5 6 7 8 9 10
1 2 3 4 5 6 7 8 9
1 2 3 4 5 6 7 8 9 1 2 3 4
5 6 7 8 9 10
1 2 3 4 5 6 7 8 9 1 2 3 4
5 6 7 8 9 10
1 2 3 4 5 6 7 8 9 1 2 3 4
5 6 7 8 9 10
1 2 3 4 5 6 7 8 9 1 2 3 4
5 6 7 8 9 10
1 2 3 4 5 6 7 8 9 1 2 3 4
5 6 7 8 9 10
1 2 3 4 5 6 7 8 9 1 2 3 4
5 6 7 8 9 10
1 2 3 4 5 6 7 8 9 1 2 3 4
5 6 7 8 9 10
1 2 3 4 5 6 7 8 9
1 2 3 4 5 6 7 8 9 1 2 3 4
5 6 7 8 9 10
1 2 3 4 5 6 7 8 9 1 2 3 4
5 6 7 8 9 10
1 2 3 4 5 6 7 8 9 1 2 3 4
5 6 7 8 9 10
1 2 3 4 5 6 7 8 9 1 2 3 4
5 6 7 8 9 10
1 2 3 4 5 6 7 8 9 1 2 3 4
5 6 7 8 9 10
1 2 3 4 5 6 7 8 9 1 2 3 4
5 6 7 8 9 10
1 2 3 4 5 6 7 8 9 1 2 3 4
5 6 7 8 9 10
1 2 3 4 5 6 7 8 9
1 2 3 4 5 6 7 8 9 10
1 2 3 4 5 6 7 8 9 10
1 2 3 4 5 6 7 8 9 10
Machine Translated by Google
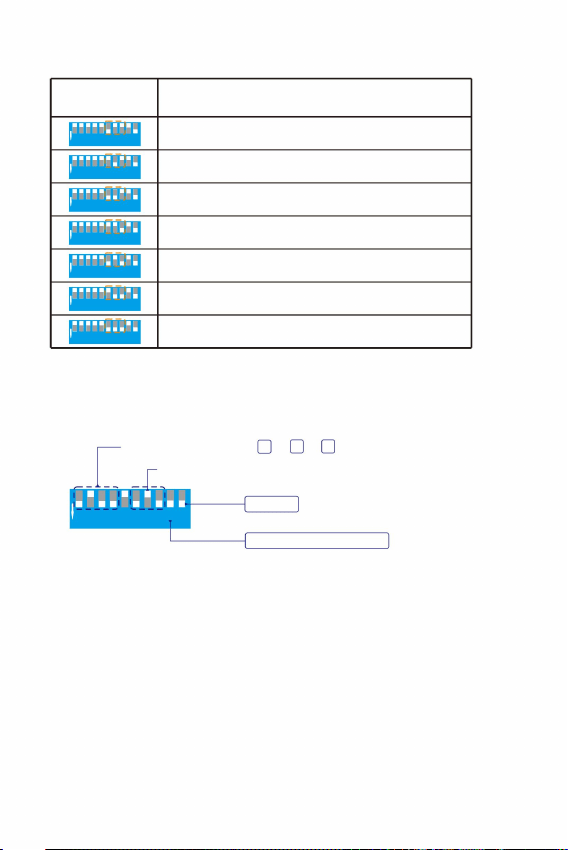
Funkcjonować
3,0 obr./min
2,0 obr./min
4,0 obr./min
Gospodarz
1,5 obr./min
6,0 obr./min
1,0 obr./min
0,5 obr./min
Prędkość Twinkle 3,0 obr./min.
Funkcja zdalna jest włączona
Program magisterski P13=4 +3 +1
1 2 3 4 5 6 7 8 9 1 2 3 4
5 6 7 8 9 10
1 2 3 4 5 6 7 8 9 1 2 3 4
5 6 7 8 9 10
1 2 3 4 5 6 7 8 9
1 2 3 4 5 6 7 8 9
1 2 3 4 5 6 7 8 9 1 2 3 4
5 6 7 8 9 10
1 2 3 4 5 6 7 8 9 1 2 3 4
5 6 7 8 9 10
1 2 3 4 5 6 7 8 9 1 2 3 4
5 6 7 8 9 10
1 2 3 4 5 6 7 8 9 10
1 2 3 4 5 6 7 8 9 10
Przełączniki DIP
Ustawienia (od 6 do 8)
tśw.
Wbudowany Twinkle Wheel Speed Master (6 do 8 przełączników DIP)
- 7 -
tt
NA
NA
NA
NA
NA
NA
NA
Na przykład: Wbudowany program Master P13 + prędkość twinkle 3,0 obr./min.
NA
1
8 4
1 2 3 4 5 6 7 8 9 1 2 3 4
5 6 7 8 9 10
Machine Translated by Google

gotowe złącze światłowodowe do
Silnik światła LED
Pęczek włókien
Z końcówkami
i przyklej je klejem żywicznym. Przytnij
końce włókien równo z sufitem lub
pozostaw
Występ 2-3mm
tuleja. Następnie dokręć śruby do
otworów stożkowych na złączu
światłowodowym.
10 mm.
1. Montaż złączy/sprzęgieł światłowodowych
2. Montaż włókien światłowodowych na sufitach
Odkręć śruby na tulei portu silnika światła
i włóż
V. Montaż i instalacja wiązki włókien
Końce włókien można montować za pomocą
- 8 -
końcówki zapewniające więcej efektów
optycznych.
1. Wywierć otwory w suficie zgodnie z
wymaganiami wzoru. Włóż pasma
włókien do otworów
złożyć na pół, a promień gięcia nie
powinien być mniejszy niż
2. Pasma włókien nie mogą być
Machine Translated by Google

(3) Upewnij się, że pilot zdalnego sterowania jest używany w zasięgu 10 metrów.
(2) Jeśli po wymianie baterii pilot przestał działać, należy go ponownie sparować.
(1) Jeżeli aplikacja jest zainstalowana normalnie i nie może wyszukać modułu
oświetlenia, należy sprawdzić, czy moduł oświetlenia nie jest zajęty przez
inne telefony komórkowe.
1. Przyczyny i metody rozwiązywania problemów z pilotem zdalnego sterowania
(1) Sprawdź, czy kontrolka pilota jest włączona. Jeśli kontrolka nie jest włączona
lub jasność jest niska, wymień baterię.
- 9 -
kontroli:
Środki ostrożności:
2. Powody i metody rozwiązywania problemów w przypadku utraty kontroli nad aplikacją:
NSW 2122 Australia
Adres: Shuangchenglu 803nong11hao1602A-1609shi, Baoshanqu,
Importowane do AUS: SIHAO PTY LTD. 1 ROKEVA STREETEASTWOOD
YH CONSULTING LIMITED. C/0 biuro YH Consulting
Limited 147, Centurion House, London Road,
Staines-upon-Thames, Surrey, TW18 4AX
Producent: Shanghaimuxinmuyeyouxiangongsi
Szanghaj 200000CN.
(3) Jeden telefon komórkowy obsługuje połączenie z około 5 silnikami świetlnymi. Konkretna
liczba różni się w zależności od odbioru sygnału telefonu komórkowego.
(2) Jeżeli silnik świetlny jest zajęty przez inne urządzenia mobilne, należy go zwolnić
Miejsce, Rancho Cucamonga, CA 91730
E-CrossStu GmbH
60329 Frankfurt nad Menem.
Importowane do USA: Sanven Technology Ltd. Suite 250, 9166 Anaheim
Mainzer Landstr.69,
a następnie włącz urządzenie w celu wyszukania i nawiązania połączenia.
Machine Translated by Google

Wsparcie techniczne i certyfikat gwarancji elektronicznej
www.vevor.com/support
Machine Translated by Google

MODEL:LEC-432
VEZELOPTISCHE LAMPEN STERREN PLAFONDLAMP
Betaalbaar. Betrouwbaar. Huisverbetering.
Technische ondersteuning en e-garantiecertificaat
www.vevor.com/support
Machine Translated by Google

Machine Translated by Google

BLAUW WIT
ROOD GROEN
CYAAN
FLASH
FLASH
UIT
PLEZIER.
ADEM
ADEM
-- -
UIT AAN
SP-
SPRINGEN2 SPRINGEN4 SPRINGEN6
KLEUR
KLEUR
FADE2
SP+
GEEL PAARS RGBW
FADE4 FADE6
Betaalbaar. Betrouwbaar. Huisverbetering.
STER PLAFONDVERLICHTING
MODEL: LEC-432
VEZELOPTISCHE LICHTEN
zorgvuldig voor gebruik. VEVOR behoudt zich een duidelijke interpretatie van onze
gebruikershandleiding voor. Het uiterlijk van het product is onderworpen aan de
- 1 -
AFSTANDSBEDIENING
SCHITTEREND
SCHITTEREND
product dat u hebt ontvangen. Vergeef ons dat we u niet opnieuw zullen informeren
Dit is de originele instructie, lees alle instructies in de handleiding
++ +
of er technologische of software-updates voor ons product zijn.
Machine Translated by Google

154
165
Lucht DIP M IC Power
DIP
ANTENNE
Microfoon DC 12V
LEC-432
126
65
58
Dit apparaat voldoet aan Deel 15 van de FCC-regels. Bediening
INSTRUCTIES
De vezelstrengen kunnen niet dubbelgevouwen worden en de buigradius
2. Plaats de lichtmotor niet in de regen of in vochtige ruimtes. Zorg ervoor dat de
lichtmotor voldoende ventilatie heeft en niet in een volledig afgesloten
ruimte staat.
3. Gebruik het apparaat niet bij temperaturen boven de 40 ÿ.
mag niet kleiner zijn dan 10 mm.
Welkom bij Fiber Optic Lights Star Ceiling Light. Lees de handleiding aandachtig
door voordat u de lichtmotor inschakelt.
1. Zorg ervoor dat de ingangsspanning correct is.
Veiligheidsinstructies:
Lees de gebruiksaanwijzing zorgvuldig door.
I. Informatie en afmetingen van de lichte motor
- 2 -
Waarschuwing - Om het risico op letsel te verminderen, moet de gebruiker de volgende informatie lezen:
is onderworpen aan de volgende twee voorwaarden: (1) Dit apparaat mag geen schadelijke
interferentie veroorzaken, en (2) Dit apparaat moet alle ontvangen interferentie accepteren,
inclusief interferentie die ongewenste werking kan veroorzaken.
8 8 8
1 1 2 3 4 5 6 1 2 3 4 5 6 7 2 3 4 5 6 7 7
9
9 9 10
OP
OP
10
Machine Translated by Google

e
e e
kan de ingebouwde programma's instellen.De 1 -5
Op zichzelf staand
Afstandsbediening/
OP
UIT
Twinkelwiel
snelheid
Ingebouwde
programma's
Wanneer de afstandsbediening en APP
niet in gebruik zijn en de lichtmotor wordt
aangestuurd door de ingebouwde programma's,
zet u de 10 DIP-schakelaar op "AAN"
st de
Bij gebruik van een afstandsbediening en APP,
√ √
×
schakelt over naar de "UIT"-positie.
st
√√
de
Afstandsbediening
Programma's
DMX-controller
Ingebouwd
Geluids APP
Werkstatus
Op zichzelf staand
"AAN"-positie en andere 1 tot 8 DIP
e
st
Deze lichte motoren zijn de normale uitvoering en de besturing is als volgt:
Bluetooth
e
II. Technische parameters:
Afstandsbediening: Ja
Kleuren uitzenden: RGBW-menging
1. Instellingen voor de stand-alone modus
Model: LEC-432
Geluidscontrole: Ja
DIP-schakelaars zijn voor de programma's van de
stand-alone machine, en de 6 -8
(1)
APP: Ja
(Trek de schakelaar naar beneden voor "AAN",
en de vlakke stand is "UIT")
Ingangsspanning: 12V DC
snelheid.
III. Instellingen voor glasvezellichtbron
positie en de 9 DIP-schakelaar naar de "UIT"-
positie. De 1 -8 DIP-schakelaars
Geluidscontrole: Ja
Zet de DIP-schakelaars 9 en 10 op de
Twinkelen: Ja
Vermogen: 20W
Poortopening: MAX: ÿ20mm
(2)
LED: RGBW*4 LED's
Vezelstrengen: 900 stuks 9,8ft 0,03"
- 3 -
1 2 3 4 5 6 7 8 9 10
1 2 3 4 5 6 7 8 9 10
OP
OP
DIP
de de
1 2 3 4 5 6 7 8 9
1 2 3 4 5 6 7 8 9
DIP-schakelaars zijn voor het twinkelwiel
APP downloaden
Machine Translated by Google

De koppeling is compleet.
De lichtmotor knippert 3 keer.
SP-
SPRINGEN2 SPRINGEN4 SPRINGEN6
KLEUR
FADE4 FADE6
KLEUR
FADE2
SP+
PAARS RGBW
(U dient zelf de CR2032H aan te schaffen.)
SCHITTEREND
(5)
2. Instructies voor de afstandsbediening:
(2)
(1)
(2)
lichtmotor:
- 4 -
(3)
(2)
Schakel de lichtmotor in. Druk tegelijkertijd 3
keer achter elkaar op een van de vier
koppelingstoetsen om de
koppeling te starten. (3)
gekoppeld. De lichtmotor kan alleen worden
bediend met de gekoppelde afstandsbediening .
Meng de lichtmotor niet met andere
afstandsbedieningen
(3)
(4)
Hoe koppel ik de afstandsbediening en de
(1)
knoopcel.
(1)
hetzelfde effect.
Elke Pairing Key kan worden gekoppeld aan meerdere lichtmotoren en heeft
Elke Pairing Key kan worden gekoppeld aan meerdere lichtmotoren en heeft
hetzelfde effect. Pairing Keys met verschillende iconen kunnen afkomstig zijn van
verschillende afstandsbedieningen.
OP
UIT AAN
zorg ervoor dat de afstandsbediening een nieuwe heeft
4 Koppelingssleutels
De afstandsbedieningsfunctie is ingeschakeld
motor standaard
Gepaard met het licht
Meester
1 2 3 4 5 6 7 8 9
ADEM
De koppelingsregels:
CYAAN
ROOD GROEN BLAUW WIT
SCHITTEREND
SCHITTEREND
++ +
FLASH
Voor dezelfde lichtengine zal een nieuwe koppelingssleutel de vorige koppelingssleutel
met hetzelfde pictogram overschrijven.
Zodra het apparaat succesvol is gekoppeld met de afstandsbediening, kan de
koppelingsfunctie niet meer worden geannuleerd, maar wel worden overschreven.
GEEL
van de lichtmotor zijn op AAN gezet
Zorg ervoor dat de DIP-schakelaars 9 en 10
(rechts afgebeeld).
FLASH
FLASH
UIT
PLEZIER.
Standaard zitten de lichtmotor en de
afstandsbediening in dezelfde doos
-- -
De vier toetsen op de laatste rij van de afstandsbediening zijn de vier koppelingstoetsen.
Indien nodig kunt u de huidige lichtmotor
koppelen met meer afstandsbedieningen. Het is
ook mogelijk om de huidige afstandsbediening te koppelen
Voordat u de afstandsbediening gebruikt, moet u:
met meer lichte motoren.
AFSTANDSBEDIENING
1 2 3 4 5 6 7 8 9 10
ADEM
ADEM
e e
-- -
Machine Translated by Google

SCHITTEREND
SCHITTEREND
SCHITTEREND
SPRINGEN2 SPRINGEN4 SPRINGEN6
SP-
FADE2
SP+
KLEUR
KLEUR
PAARS RGBW
FADE4 FADE6
ADEM
ADEM
ADEM
++ +
CYAAN GEEL
ROOD
GROEN BLAUW WIT
FLASH
UIT
PLEZIER.
FLASH
FLASH
De knoppen "TWINKLE+", "TWINKLE-" en "FUNON" op de afstandsbediening
komen overeen met de knoppen "K1", "K2" en "K3" in de APP.
De lichtmotor heeft een geheugenfunctie. Als hij aan staat, draait hij het laatste
programma voordat hij uit gaat.
UIT AAN
Twinkeleffect.
4 Koppelingssleutels: Om de lichtmotor en de afstandsbediening
te matchen voor gebruik. Standaard,
W, B, G en R vervagen
ÿ
JUMP2: In
Dimmen+/- (7-laags)
WÿBÿGÿRÿYÿC vervagen
FADE6:
Statische kleuren
WÿB vervagen
(Rood, Groen, Blauw, Wit, Cyaan, Geel, Paars, RGBW)
FADE4:
JUMP6: WÿBÿGÿRÿYÿC-sprong
FLASH+/-: Stroboscoopeffect. (7-traps snelheid)
TWINKLE+/-: Twinkle-effect. (7-traps snelheid)
FADE2:
AAN/UIT
B-sprong
is gekoppeld aan de lichtmotor.
JUMP4: WÿBÿGÿR-sprong
ADEM+/-: Ademhalingseffect. (7 niveaus)
Activeer de geluidsregelmodus
FUN.OFF: Beëindiging van ademen/flitsen/geluidscontrole/
KLEUR SP +/-: Kleurcyclussnelheidsaanpassing (7-laags)
(1)
(2)
Opmerkingen:
2. De toetsen van de afstandsbediening
(3)
- 5 -
Druk op “Breath” of “Flash”, de lichtmotor zal ademen of flitsen in een statische
kleur van de laatst uitgezonden kleur. Als “FUN.OFF” wordt ingedrukt, wordt
de huidige ademhalings-, flits- of twinkelfunctie uitgeschakeld en hervat de
lichtmotor het laatste programma.
-
-
--
- -
Machine Translated by Google

est
05
01
Groente
09
WitÿBlauwe sprong 2S
18
WitÿBlauwe sprong 8S
Licht uit, motor stopt
WitÿBlauwÿGroenÿRoodÿGeelÿCyaan Fade 2S
07
14
02
Rood
06
WitÿBlauwÿGroenÿRoodÿGeelÿCyaan Jump 4S
WitÿBlauw Fade 2S
12
17
08
WitÿBlauwÿGroenÿRoodÿGeelÿCyaan Fade 8S
Wit
15
Geel
13
03
WitÿBlauwe sprong 4S
WitÿBlauw Fade 8S
10
11
Blauw
Cyaan
00
WitÿBlauwÿGroenÿRoodÿGeelÿCyaan Jump 2S
16
04
WitÿBlauwÿGroenÿRoodÿGeelÿCyaan Jump 8S
WitÿBlauwÿGroenÿRoodÿGeelÿCyaan Fade 4S
WitÿBlauw Fade 4S
1 2 3 4 5 6 7 8 9 1 2 3
4 5 6 7 8 9 10
OP
OP
OP
OP
OP
OP
OP
OP
OP
OP
OP
OP
OP
OP
OP
OP
OP
OP
OP
Instellingen (1 tot 5)
DIP-schakelaars
Pro.Nr.
Functie
ee
Ingebouwde programmalijst van de Master (1 tot 5 DIP-schakelaars)
IV.De tabel met de ingebouwde programma's van de Master Light Engine
- 6 -
1 2 3 4 5 6 7 8 9
1 2 3 4 5 6 7 8 9
1 2 3 4 5 6 7 8 9 1 2 3
4 5 6 7 8 9 10
1 2 3 4 5 6 7 8 9 1 2 3
4 5 6 7 8 9 10
1 2 3 4 5 6 7 8 9 1 2 3
4 5 6 7 8 9 10
1 2 3 4 5 6 7 8 9 1 2 3
4 5 6 7 8 9 10
1 2 3 4 5 6 7 8 9 1 2 3
4 5 6 7 8 9 10
1 2 3 4 5 6 7 8 9 1 2 3
4 5 6 7 8 9 10
1 2 3 4 5 6 7 8 9 1 2 3
4 5 6 7 8 9 10
1 2 3 4 5 6 7 8 9
1 2 3 4 5 6 7 8 9 1 2 3
4 5 6 7 8 9 10
1 2 3 4 5 6 7 8 9 1 2 3
4 5 6 7 8 9 10
1 2 3 4 5 6 7 8 9 1 2 3
4 5 6 7 8 9 10
1 2 3 4 5 6 7 8 9 1 2 3
4 5 6 7 8 9 10
1 2 3 4 5 6 7 8 9 1 2 3
4 5 6 7 8 9 10
1 2 3 4 5 6 7 8 9 1 2 3
4 5 6 7 8 9 10
1 2 3 4 5 6 7 8 9 1 2 3
4 5 6 7 8 9 10
1 2 3 4 5 6 7 8 9 1 2 3
4 5 6 7 8 9 10
1 2 3 4 5 6 7 8 9 10
1 2 3 4 5 6 7 8 9 10
1 2 3 4 5 6 7 8 9 10
Machine Translated by Google

est
3,0 toeren per minuut
4,0 toeren per minuut
6,0 toeren per minuut
Twinkle-snelheid 3,0 RPM
1,5 toeren per minuut
2.0RPM
1,0 toeren per minuut
0,5 toeren per minuut
Meester
Masterprogramma P13=4 +3 +1
De afstandsbedieningsfunctie is ingeschakeld
1 2 3 4 5 6 7 8 9 1 2 3
4 5 6 7 8 9 10
1 2 3 4 5 6 7 8 9 1 2 3
4 5 6 7 8 9 10
1 2 3 4 5 6 7 8 9
1 2 3 4 5 6 7 8 9
1 2 3 4 5 6 7 8 9 1 2 3
4 5 6 7 8 9 10
1 2 3 4 5 6 7 8 9 1 2 3
4 5 6 7 8 9 10
1 2 3 4 5 6 7 8 9 1 2 3
4 5 6 7 8 9 10
1 2 3 4 5 6 7 8 9 10
1 2 3 4 5 6 7 8 9 10
Instellingen (6 tot 8)
DIP-schakelaars
Functie
- 7 -
Ingebouwde Twinkle Wheel-snelheid van de Master (6 tot 8 DIP-schakelaars)
e e
OP
OP
OP
OP
OP
OP
OP
Bijvoorbeeld: Master ingebouwd programma P13 + twinkle snelheid 3.0RPM
1 2 3 4 5 6 7 8 9 1 2 3
4 5 6 7 8 9 10
OP
1
8 4
Machine Translated by Google

LED-lichtmotor
Vezelbundel
Met eindstukken
1. Boor gaten in het plafond zoals vereist
door het patroon. Plaats de
vezelstrengen in de gaten
de kant-en-klare glasvezelconnector in
2. Installatie van glasvezelstrengen op plafonds
2-3mm uitsteeksel
en lijm ze vast met de harslijm . Snijd
de uiteinden van de vezels gelijk met
het plafond of laat
10 mm.
Draai de schroeven op de
lichtmotorpoorthuls los en plaats
de ferrule. Draai vervolgens de
schroeven vast tegen de verzonken
gaten op de vezelconnector.
1. Vezelconnectoren / koppelingen Montage
V. Montage en installatie van glasvezelbundels
Vezelstaartuiteinden kunnen worden gemonteerd met
eindstukken om meer optische effecten te
creëren.
- 8 -
2. De vezelstrengen kunnen niet
dubbelgevouwen, en de buigradius mag
niet kleiner zijn dan
Machine Translated by Google

1. Redenen en methoden voor het oplossen van problemen met de afstandsbediening die niet werkt
2. Redenen en methoden voor het oplossen van problemen waardoor de APP niet meer onder controle is:
(3) Zorg ervoor dat de afstandsbediening binnen een bereik van 10 meter wordt gebruikt.
(2) Als de afstandsbediening niet meer werkt nadat u de batterij hebt vervangen, koppelt u deze opnieuw.
(1) Controleer of het indicatielampje van de afstandsbediening brandt. Als het indicatielampje
niet brandt of de helderheid laag is, vervang dan de batterij.
- 9 -
van controle:
Voorzorgsmaatregelen:
(1) Als de APP normaal is geïnstalleerd en de APP niet naar de lichtmotor kan zoeken ,
is het noodzakelijk om te bevestigen of deze lichtmotor door andere mobiele
telefoons wordt gebruikt.
en vervolgens ingeschakeld om te zoeken en verbinding te maken.
Sjanghai 200000CN.
Geïmporteerd naar AUS: SIHAO PTY LTD. 1 ROKEVA STREETEASTWOOD
NSW 2122 Australië
Geïmporteerd naar de VS: Sanven Technology Ltd. Suite 250, 9166 Anaheim
Fabrikant: Shanghaimuxinmuyeyouxiangongsi
Adres: Shuangchenglu 803nong11hao1602A-1609shi, Baoshanqu,
(3) Eén mobiel ondersteunt het verbinden met ongeveer 5 lichtmotoren. Het
specifieke aantal varieert afhankelijk van de mobiele signaalontvangst.
(2) Als de lichtmotor door andere mobiele telefoons wordt bezet, moet deze worden vrijgegeven
Mainzer Landstr.69,
YH CONSULTING LIMITED. C/0 YH Consulting
Limited kantoor 147, Centurion House, London
Road, Staines-upon-Thames, Surrey, TW18 4AX
E-CrossStu GmbH
60329 Frankfurt am Main.
Plaats, Rancho Cucamonga, CA 91730
Machine Translated by Google

Technische ondersteuning en e-garantiecertificaat
www.vevor.com/support
Machine Translated by Google

MODELL:LEC-432
Teknisk support och e-garanticertifikat
www.vevor.com/support
FIBEROPTISKA LJUS STJÄRNAN TAK LJUS
Prisvärd.Pålitlig.Hemförbättring.
Machine Translated by Google

Machine Translated by Google

SP-
JUMP2 JUMP4 JUMP6
FADE2
FADE4 FADE6
FÄRG
FÄRG
SP+
GUL LILA RGBW
ANDETAG
ANDETAG
FLASH
FLASH
AV
GYCKEL.
FJÄRRKONTROLL
Prisvärd.Pålitlig.Hemförbättring.
BLÅVIT
RÖD GRÖN
CYAN
AV PÅ
MODELL: LEC-432
STJÄRNA TAK LJUS
FIBEROPTISKA LJUS
noggrant innan användning. VEVOR reserverar sig för en tydlig tolkning av vår
användarmanual. Produktens utseende ska vara beroende av
- 1 -
-- -
produkt du fått. Förlåt oss att vi inte kommer att informera dig igen
om det finns någon teknik eller mjukvaruuppdateringar på vår produkt.
++ +
Detta är den ursprungliga instruktionen, läs alla manualer
TINDRA
TINDRA
Machine Translated by Google

LEC-432
Aer ial DIP M IC Power
165
154
MIC DC 12V
ANTENN
DOPPA
126
65
58
2. Undvik att placera ljusmotorn i regn eller i fuktiga områden. Se till att
ljusmotorn har tillräcklig ventilation och inte placeras i ett helt tillslutet
utrymme.
Fibersträngarna kan inte vikas på mitten, och böjradien
1. Se till att inspänningen är korrekt.
I. Ljusmotorinformation och mått
Välkommen att använda Fiber Optic Lights Star Ceiling Light. Läs
bruksanvisningen noggrant innan du startar ljusmotorn
3. Undvik att använda enheten över 40 ÿ temperatur.
Säkerhetsanvisningar:
bruksanvisningen noggrant.
bör inte vara mindre än 10 mm.
- 2 -
INSTRUKTIONER
Denna enhet överensstämmer med del 15 av FCC Rules.Operation
är föremål för följande två villkor: (1) Den här enheten får inte orsaka skadliga
störningar, och (2) den här enheten måste acceptera alla mottagna störningar,
inklusive störningar som kan orsaka oönskad funktion.
Varning - För att minska risken för skada måste användaren läsa
8 8 8
1 1 2 3 4 5 6 1 2 3 4 5 6 7 2 3 4 5 6 7 7
9
9 9 10
PÅ
PÅ
10
Machine Translated by Google

PÅ
Fjärrkontroll/
Fristående
AV
Blinkande hjul
hastighet
Inbyggda
program
inte används och ljusmotorn styrs av de inbyggda
programmen, ställ in 10 DIP-omkopplaren på "ON"
kan ställa in de inbyggda programmen. 1 -5
När du använder en fjärrkontroll och APP,
När fjärrkontrollen och APP
st th
st th
√
×
växlar till läge "OFF".
"ON" position och andra 1 till 8 DIP
√ √
√
Fjärrkontroll
Fristående
DMX-kontroller
Inbyggt
Arbetsstatus
Ljud APP
Program
Bluetooth
Dessa lätta motorer är den vanliga versionen, och kontrollen är följande:
th
st
th
1 2 3 4 5 6 7 8 9 10
1 2 3 4 5 6 7 8 9 10
Effekt: 20W
(1)
Modell: LEC-432
Ljudkontroll: Ja
1. Inställningar för fristående läge
Emitterande färger: RGBW-blandning
II. Tekniska parametrar:
Fjärrkontroll: Ja
ställ in 9 och 10 DIP-omkopplarna på
Ingångsspänning: 12V DC
hastighet.
(Dra strömbrytaren nedåt för "ON", och det platta
läget är "OFF")
APP: Ja
DIP-switchar är för programmen för den fristående
maskinen och 6 -8
Twinkle: Ja
(2)
Ljudkontroll: Ja
- 3 -
III. Fiberoptiska ljusmotorinställningar
läge och 9 DIP-omkopplaren till läget "OFF". 1-8
DIP-omkopplarna
LED: RGBW*4 lysdioder
Fibersträngar: 900 st 9,8 fot 0,03"
Portöppning: MAX: ÿ20mm
PÅ
PÅ
DOPPA
1 2 3 4 5 6 7 8 9
1 2 3 4 5 6 7 8 9
DIP-switchar är för blinkhjulet
th th
thth
th
Ladda ner APP
Machine Translated by Google

ANDETAG
ANDETAG
thth
(Behöver köpa CR2032H själv).
SP-
JUMP2 JUMP4 JUMP6
FADE2
FADE4 FADE6
FÄRG
FÄRG
SP+
LILA RGBW
TINDRA
samma effekt.
Varje parningsnyckel kan paras ihop med flera ljusmotorer och kommer att ha
Varje parningsnyckel kan paras ihop med flera lätta motorer och kommer att ha
samma effekt. Parningsnycklar med olika ikoner kan komma från olika fjärrkontroller.
Parningen är klar.
Ljusmotorn blinkar 3 gånger.
(4)
(1)
2. Instruktioner för fjärrkontroll:
(3)
(2)
Slå på ljusmotorn. Tryck samtidigt på en av de fyra
parningsknapparna 3 gånger i rad för att starta
ihopparningen. (3)
(2)
(2)
- 4 -
lätt motor:
Hur man kopplar ihop fjärrkontrollen och
har parats. Ljusmotorn kan endast styras med den
parade fjärrkontrollen . Blanda inte ljusmotorn med
andra fjärrkontroller
(1)
(1)
(5)
knappcell.
(3)
4 parningsknappar
Fjärrkontrollen är på
motor som standard
Parat med ljuset
Bemästra
AV PÅ
säker på att fjärrkontrollen har en fräsch
Parningsreglerna:
1 2 3 4 5 6 7 8 9
TINDRA
TINDRA
RÖD GRÖN BLÅ VIT
CYAN
ANDETAG
PÅ
++ +
FLASH
De fyra tangenterna på den sista raden på fjärrkontrollen är de fyra parningsnycklarna.
FLASH
FLASH
AV
GYCKEL.
Som standard har ljusmotorn och fjärrkontrollen i
samma låda
-- -
GUL
av ljusmotorn har satts till PÅ
Se till att 9 och 10 DIP växlar
(visas till höger).
För samma ljusmotor kommer en ny kopplingsnyckel att skriva över den tidigare
kopplingsnyckeln med samma ikon.
När enheten väl har parats ihop med fjärrkontrollen kan ihopparningsfunktionen
inte avbrytas, utan skrivas över.
med mer lätta motorer.
Innan du använder fjärrkontrollen, gör
Om det behövs kan du para ihop den nuvarande
ljusmotorn med fler fjärrkontroller. Det är också
möjligt att para ihop den aktuella fjärrkontrollen
FJÄRRKONTROLL
-- -
1 2 3 4 5 6 7 8 9 10
Machine Translated by Google

JUMP2 JUMP4 JUMP6
SP-
FADE2
FADE4 FADE6
SP+
FÄRG
FÄRG
LILA RGBW
++ +
ANDETAG
ANDETAG
ANDETAG
Knapparna "TWINKLE+", "TWINKLE-" och "FUNON" på fjärrkontrollen motsvarar
knapparna "K1", "K2" och "K3" i APPEN.
Ljusmotorn har en minnesfunktion. När den är påslagen kör den det sista
programmet innan den stängs av.
GRÖN BLÅ VIT
RÖD
CYAN GUL
AV
FLASH
GYCKEL.
FLASH
FLASH
AV PÅ
Blinkeffekt.
B Hoppa
FADE6:
JUMP2: In
Dimning+/- (7-nivåer)
W, B, G, R, Y, C Fade
W, B, G, R Fade
ÿ
(Röd, Grön, Blå, Vit, Cyan, Gul, Lila, RGBW)
FADE4:
Statiska färger
W, B Fade
FADE2:
TWINKLE+/- : Blinkeffekt.(7-stegs hastighet)
är ihopkopplad med ljusmotorn.
Aktivera ljudkontrollläget
JUMP6: W, B, G, R, Y, C Jump
FLASH+/- : Strobeeffekt. (7-stegs hastighet)
4 parningsnycklar: För att matcha ljusmotorn och fjärrkontrollen för
användning. Som standard,
JUMP4: W, B, G, R Jump
BREATH+/- : Andningseffekt.(7-nivåer)
PÅ/AV
COLOR SP +/-: Justering av färgcykelhastighet (7-nivåer)
FUN.OFF: Avbrytande av andning/blinkande/ljudkontroll/
(1)
(2)
Anmärkningar:
2. Knapparna på fjärrkontrollen
(3)
- 5 -
-
-
--
--
Tryck på "Breath" eller "Flash", ljusmotorn kommer att andas eller blinka i en
statisk färg av den senast utsända färgen. Om "FUN.OFF" trycks in stängs den
aktuella andnings-, blixt- eller glimtfunktionen av och ljusmotorn kommer att
återuppta det senaste programmet.
TINDRA
TINDRA
TINDRA
Machine Translated by Google

1 2 3 4 5 6 7 8 9 1 2 3
4 5 6 7 8 9 10
Fungera
VitÿBlåÿGrönÿRödÿGulÿCyan Fade 2S
Vit
10
11
VitÿBlue Jump 4S
13
VitÿBlue Fade 8S
03
Gul
08
Vit, Blå, Grön, Röd, Gul, Cyan Fade 8S
15
Blå
VitÿBlåÿGrönÿRöd,GulÿCyan Jump 8S
VitÿBlåÿGrönÿRödÿGulÿCyan Fade 4S
16
VitÿBlue Fade 4S
00
04
Cyan
VitÿBlåÿGrönÿRödÿGulÿCyan Jump 2S
VitÿBlue Jump 8S
18
01
Grön
VitÿBlue Jump 2S
09
05
Lampan släckt, motorn stannar
Röd
02
06
VitÿBlåÿGrönÿRödÿGulÿCyan Jump 4S
12
14
VitÿBlue Fade 2S
17
07
PÅ
PÅ
PÅ
PÅ
PÅ
PÅ
PÅ
PÅ
PÅ
PÅ
PÅ
PÅ
PÅ
PÅ
PÅ
PÅ
PÅ
PÅ
PÅ
Inställningar (1 till 5)
DIP-omkopplare
Pro.nr.
thst
thth
Inbyggd programlista för mastern (1 till 5 DIP-switchar)
IV. Tabellen över de inbyggda programmen i Master-ljusmotorn
- 6 -
1 2 3 4 5 6 7 8 9 1 2 3
4 5 6 7 8 9 10
1 2 3 4 5 6 7 8 9 1 2 3
4 5 6 7 8 9 10
1 2 3 4 5 6 7 8 9 1 2 3
4 5 6 7 8 9 10
1 2 3 4 5 6 7 8 9 1 2 3
4 5 6 7 8 9 10
1 2 3 4 5 6 7 8 9
1 2 3 4 5 6 7 8 9
1 2 3 4 5 6 7 8 9 1 2 3
4 5 6 7 8 9 10
1 2 3 4 5 6 7 8 9 1 2 3
4 5 6 7 8 9 10
1 2 3 4 5 6 7 8 9 1 2 3
4 5 6 7 8 9 10
1 2 3 4 5 6 7 8 9 1 2 3
4 5 6 7 8 9 10
1 2 3 4 5 6 7 8 9 1 2 3
4 5 6 7 8 9 10
1 2 3 4 5 6 7 8 9 1 2 3
4 5 6 7 8 9 10
1 2 3 4 5 6 7 8 9 1 2 3
4 5 6 7 8 9 10
1 2 3 4 5 6 7 8 9 1 2 3
4 5 6 7 8 9 10
1 2 3 4 5 6 7 8 9 1 2 3
4 5 6 7 8 9 10
1 2 3 4 5 6 7 8 9
1 2 3 4 5 6 7 8 9 1 2 3
4 5 6 7 8 9 10
1 2 3 4 5 6 7 8 9 1 2 3
4 5 6 7 8 9 10
1 2 3 4 5 6 7 8 9 10
1 2 3 4 5 6 7 8 9 10
1 2 3 4 5 6 7 8 9 10
Machine Translated by Google

1 2 3 4 5 6 7 8 9 1 2 3
4 5 6 7 8 9 10
1 2 3 4 5 6 7 8 9 1 2 3
4 5 6 7 8 9 10
1 2 3 4 5 6 7 8 9
1 2 3 4 5 6 7 8 9
1 2 3 4 5 6 7 8 9 1 2 3
4 5 6 7 8 9 10
1 2 3 4 5 6 7 8 9 1 2 3
4 5 6 7 8 9 10
1 2 3 4 5 6 7 8 9 1 2 3
4 5 6 7 8 9 10
Fungera
2,0 RPM
3,0 RPM
6,0 rpm
Masterprogram P13=4 +3 +1
1,5 rpm
4,0 RPM
1,0 RPM
0,5 varv/min
Fjärrkontrollen är på
Twinkle Speed 3,0 RPM
Bemästra
1 2 3 4 5 6 7 8 9 10
1 2 3 4 5 6 7 8 9 10
Inbyggd Twinkle Wheel Speed of the Master (6 till 8 DIP-switchar)
- 7 -
thst
Inställningar (6 till 8)
DIP-omkopplare
thth
PÅ
PÅ
PÅ
PÅ
PÅ
PÅ
PÅ
Till exempel: Master inbyggt program P13 + blinkhastighet 3.0RPM
PÅ
1 2 3 4 5 6 7 8 9 1 2 3
4 5 6 7 8 9 10
1
8 4
Machine Translated by Google

LED-ljusmotor
Fiberbunt
Med ändbeslag
2. Fibersträngarna kan inte vara
den färdiga fiberkontakten in i
och limma dem med hartslimmet . Klipp
fiberändarna i jämnhöjd med taket eller
lämna
2-3mm utsprång
2. Installation av fibertrådar i tak
Fiberändar kan monteras med
Lossa skruvarna på ljusmotorns porthylsa
och sätt i
hylsan. Dra sedan åt skruvarna mot
försänkta hål på fiberkontakten.
1. Fiberkontakter / kopplingar Montering
V. Montering och installation av fiberpaket
ändbeslag för att presentera mer optiska
effekter.
- 8 -
10 mm.
vikta på mitten, och böjradien bör inte
vara mindre än
1. Borra hål i taket enligt mönstret. Sätt in
fibertrådarna i hålen
Machine Translated by Google

1. Orsaker och felsökningsmetoder för att fjärrkontrollen är ute
Adress: Shuangchenglu 803nong11hao1602A-1609shi, Baoshanqu,
Importerad till AUS: SIHAO PTY LTD. 1 ROKEVA STREETEASTWOOD
NSW 2122 Australien
Place, Rancho Cucamonga, CA 91730
Tillverkare: Shanghaimuxinmuyeyouxiangongsi
shanghai 200000CN.
(3) En mobil stöder anslutning till cirka 5 ljusmotorer. Det specifika numret varierar
beroende på mottagningen av mobilsignalen.
(2) Om ljusmotorn är upptagen av andra mobiler måste den släppas
YH CONSULTING LIMITED. C/0 YH Consulting
Limited kontor 147, Centurion House, London
Road, Staines-upon-Thames, Surrey, TW18 4AX
E-CrossStu GmbH
Mainzer Landstr.69,
Importerad till USA: Sanven Technology Ltd. Suite 250, 9166 Anaheim
60329 Frankfurt am Main.
(3) Se till att fjärrkontrollen används inom ett avstånd av 10 meter.
(2) Om fjärrkontrollen inte har kontroll efter att du har bytt batteri, koppla ihop den igen.
(1) Kontrollera om fjärrkontrollens indikatorlampa lyser. Om indikatorlampan inte
lyser eller om ljusstyrkan är låg, byt ut batteriet.
- 9 -
kontroll:
Försiktighetsåtgärder:
och sedan påslagen för sökning och anslutning.
2. Orsaker och felsökningsmetoder för att APP-en inte har kontroll:
(1) Om APP:n är installerad normalt och APP:n inte kan söka efter ljusmotorn
är det nödvändigt att bekräfta om denna ljusmotor är upptagen av andra
mobiler.
Machine Translated by Google

Teknisk support och e-garanticertifikat
www.vevor.com/support
Machine Translated by Google