
Technical Support and E-Warranty Certificate
www.vevor.com/support
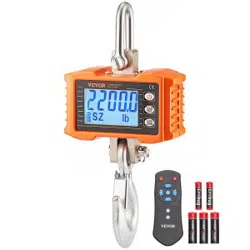
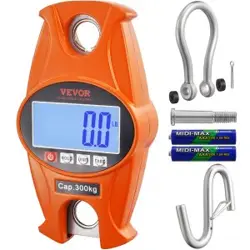
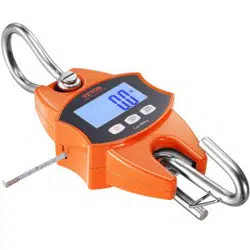
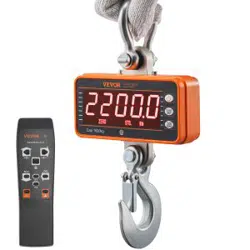
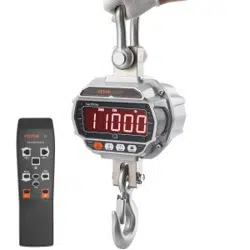
INDUSTRIAL CRANE SCALE
MODEL: OCS-3-D / OCS-5-D
We continue to be committed to provide you tools with competitive price.
"Save Half", "Half Price" or any other similar expressions used by us only represents an
estimate of savings you might benefit from buying certain tools with us compared to the major
top brands and does not necessarily mean to cover all categories of tools offered by us. You
are kindly reminded to verify carefully when you are placing an order with us if you are
actually saving half in comparison with the top major brands.

- 1 -
MODEL: OCS-3-D / OCS-5-D
Have product questions? Need technical support? Please feel free to
contact us:
Technical Support and E-Warranty Certificate
www.vevor.com/support
NEED HELP? CONTACT US!
This is the original instruction, please read all manual instructions
carefully before operating. VEVOR reserves a clear interpretation of our
user manual. The appearance of the product shall be subject to the
product you received. Please forgive us that we won't inform you again if
there are any technology or software updates on our product.
INDUSTRIAL CRANE
SCALE
- 2 -
GENERAL SAFETY RULES
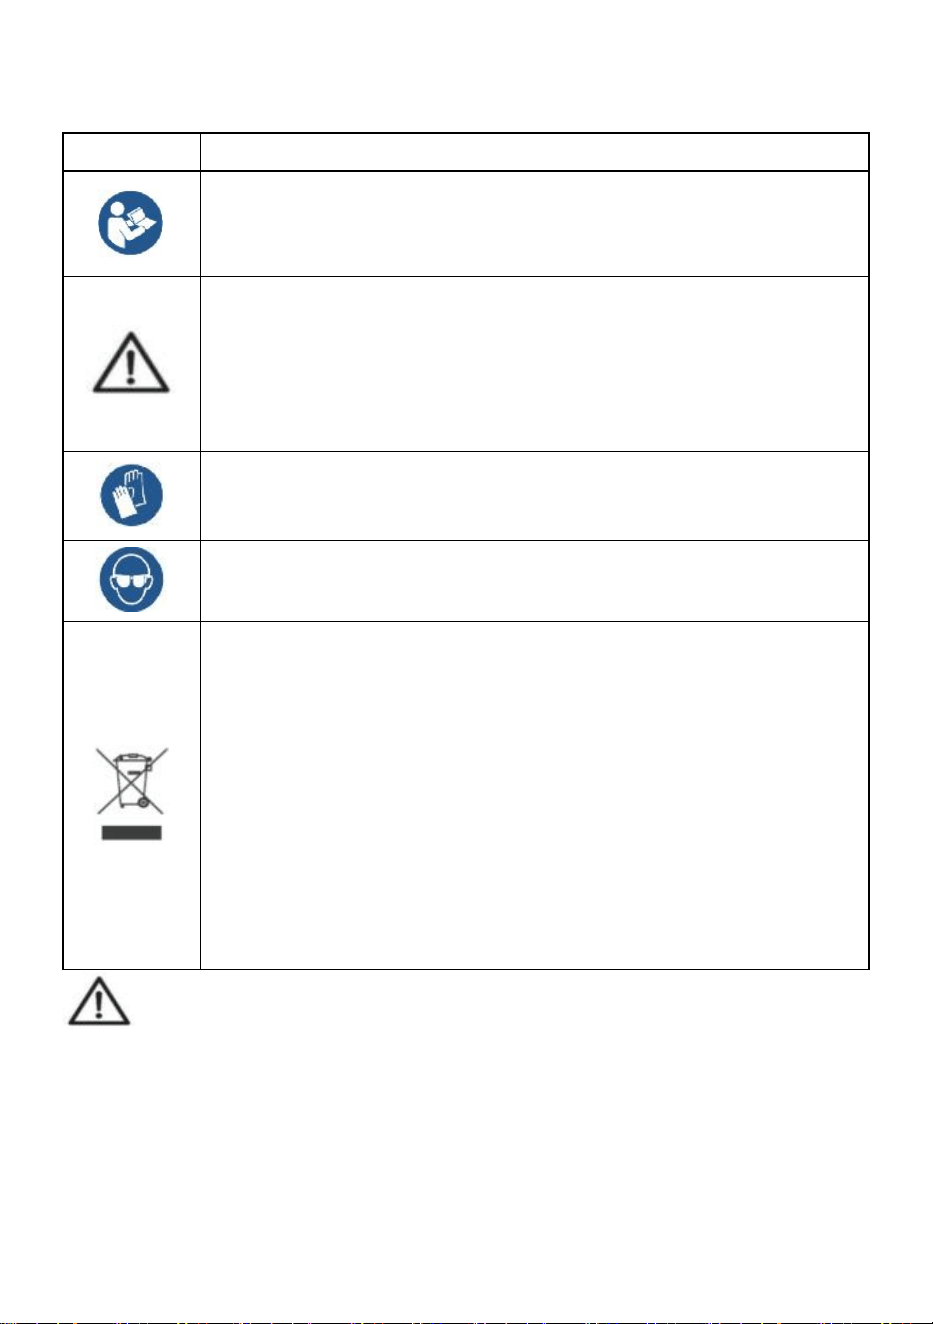
Symbol
Symbol Description
Warning - To reduce the risk of injury, the user must read the
instructions manual carefully.
This symbol, placed before a safety comment, indicates a kind of
precaution, warning, or danger. Ignoring this warning may lead to
an accident. To reduce the risk of injury, fire, or electrocution,
please always follow the recommendations shown below.
Warning- Be sure to wear gloves when using this product.
Warning- Be sure to wear eye protectors when using this product.
Disposal information:
This product is subject to the provision of European Directive
2012/19/EC. The symbol showing a wheelie bin crossed through
indicates that the product requires separate refuse collection in
the European Union. This applies to the product and all
accessories marked with this symbol. Products marked as such
may not be discarded with normal domestic waste but must be
taken to a collection point for recycling electrical and electronic
devices.
General safety instructions
WARNING! Read all safety warnings and notes. Failure to follow the
instructions listed below may result in electrical shock, fire, and/or injury.
For good performance and precise measurement, be careful with daily
operation and maintenance.
WORK AREA SAFETY
a) Keep the application area clean and well-lit. Unclean and dark areas lead to
accidents.
- 3 -
b) Do not use power tools in explosive environments, such as in the
presence of flammable liquids, gases, or vapors. Power tools generate sparks
that can ignite dust or vapors.
c) Keep children and bystanders away when operating the appliance.
Distractions can lead to loss of control over the device.
Usage Note:
Do not overload crane scale, this will damage loadcell;
Do not leave load hung on the digital balance for long. This will decrease scale
accuracy and shorten loadcell life;
Inspect shackle and hook before using. Check clips, pins and screws regularly;
Thank you for your support to our products!
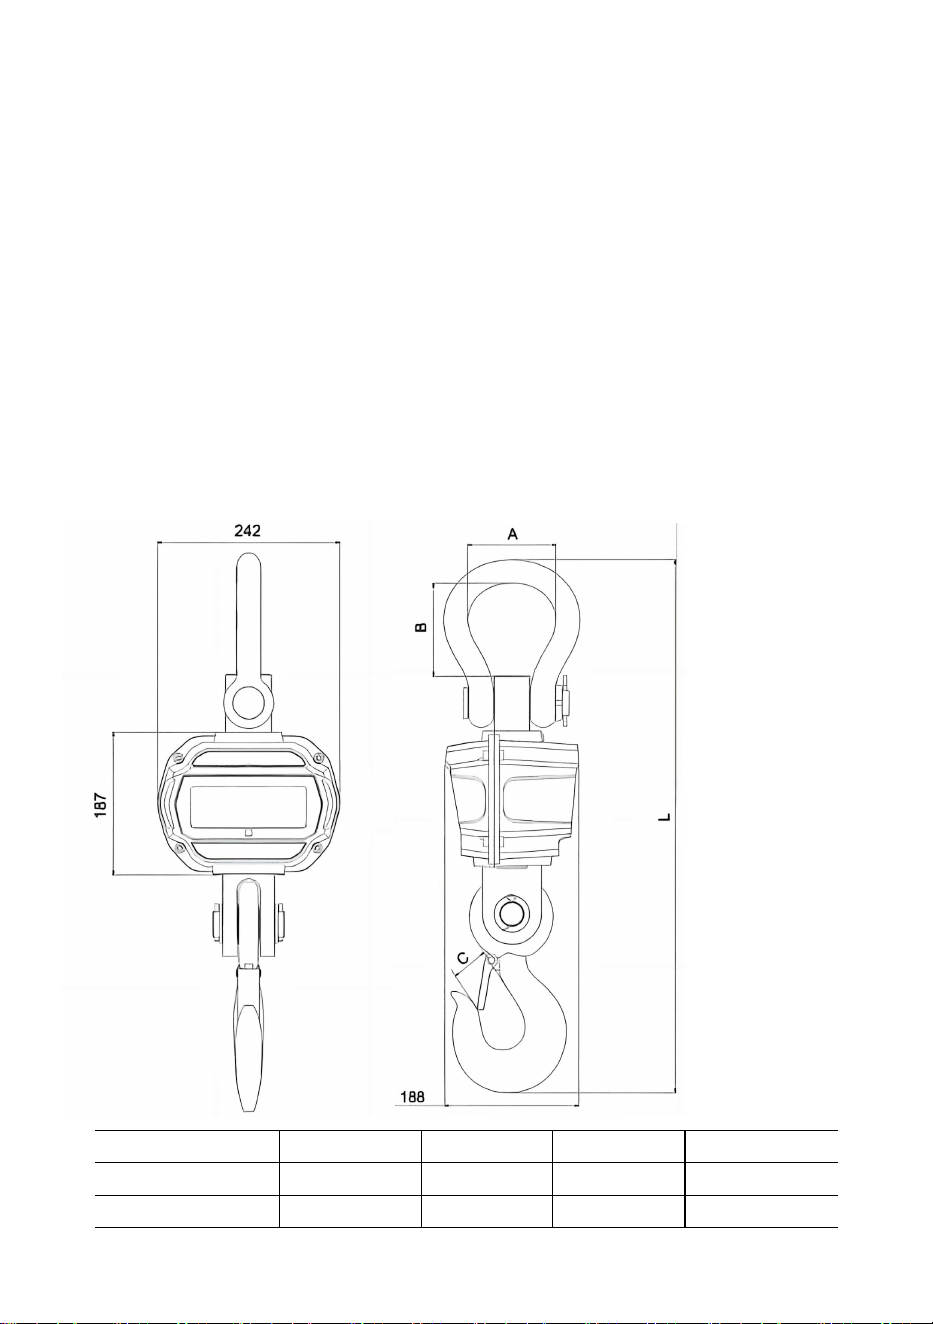
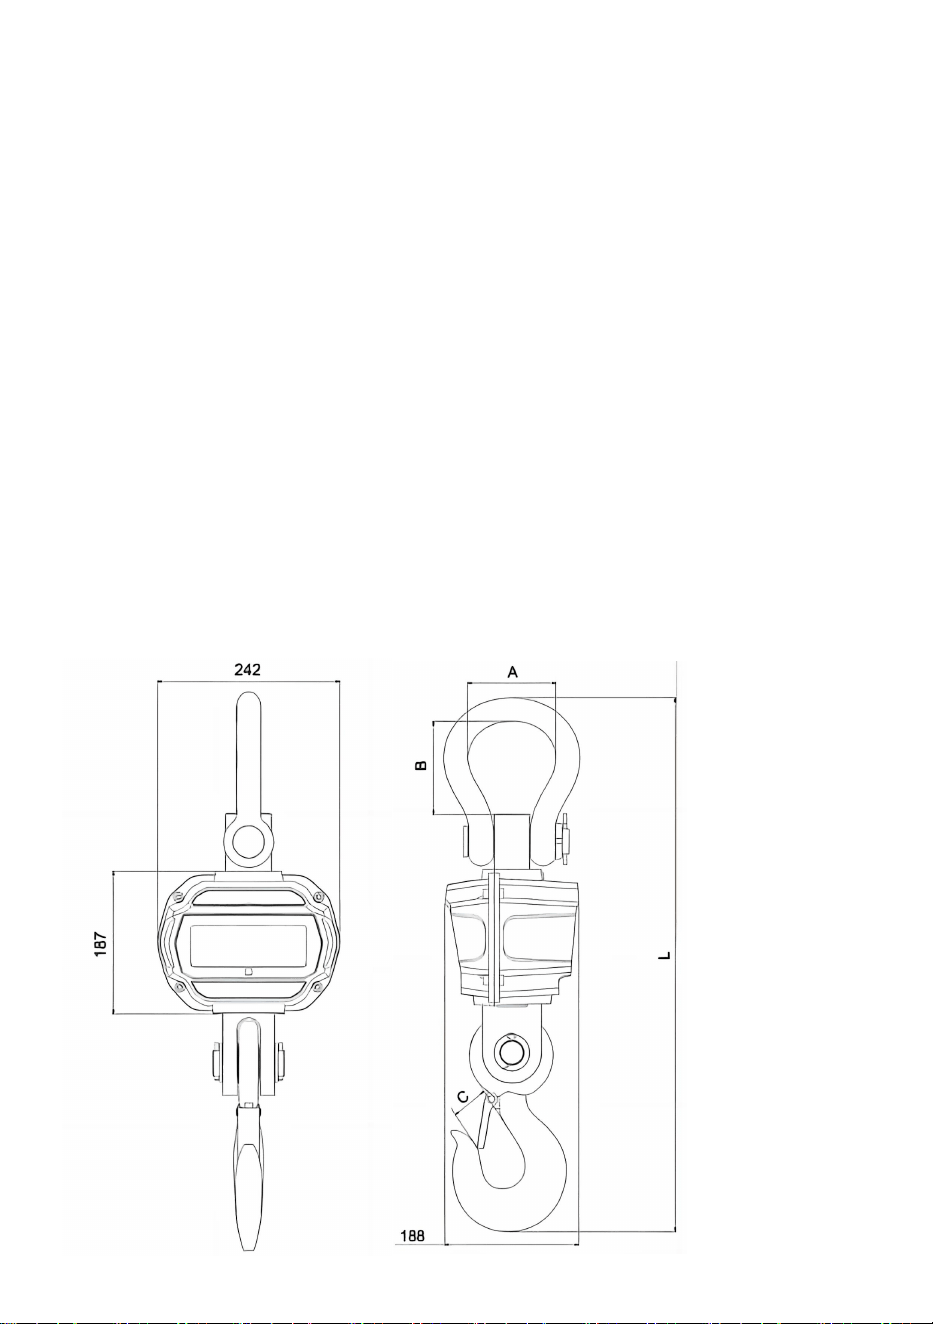
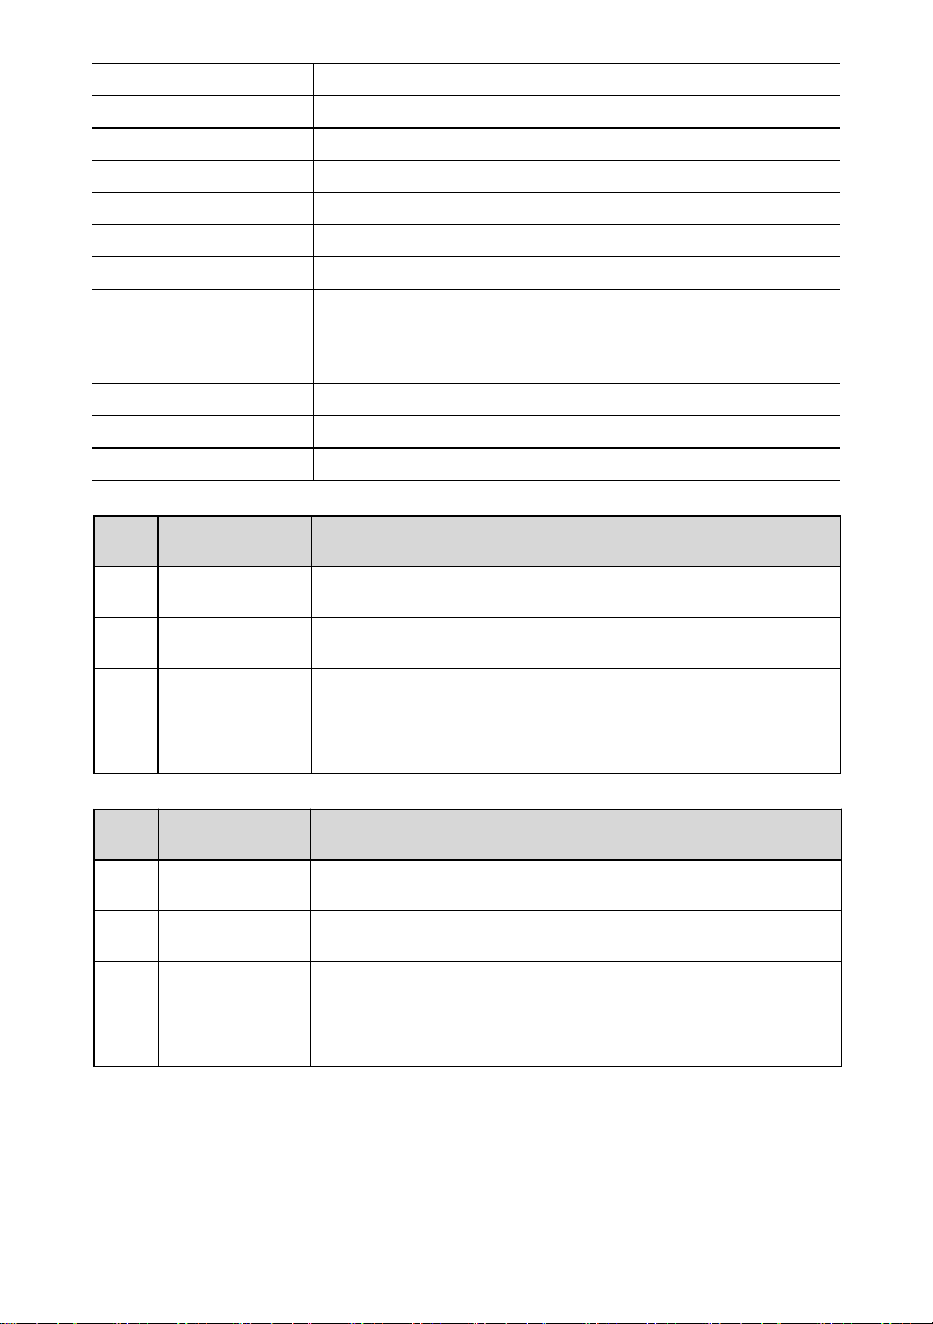
1. Dimension & Weight
Model
A
(
mm
)
B
(
mm
)
C
(
mm
)
L
(
mm
)
OCS-3-D
55
96
35
575
OCS-5-D
78
123
48
675
- 4 -
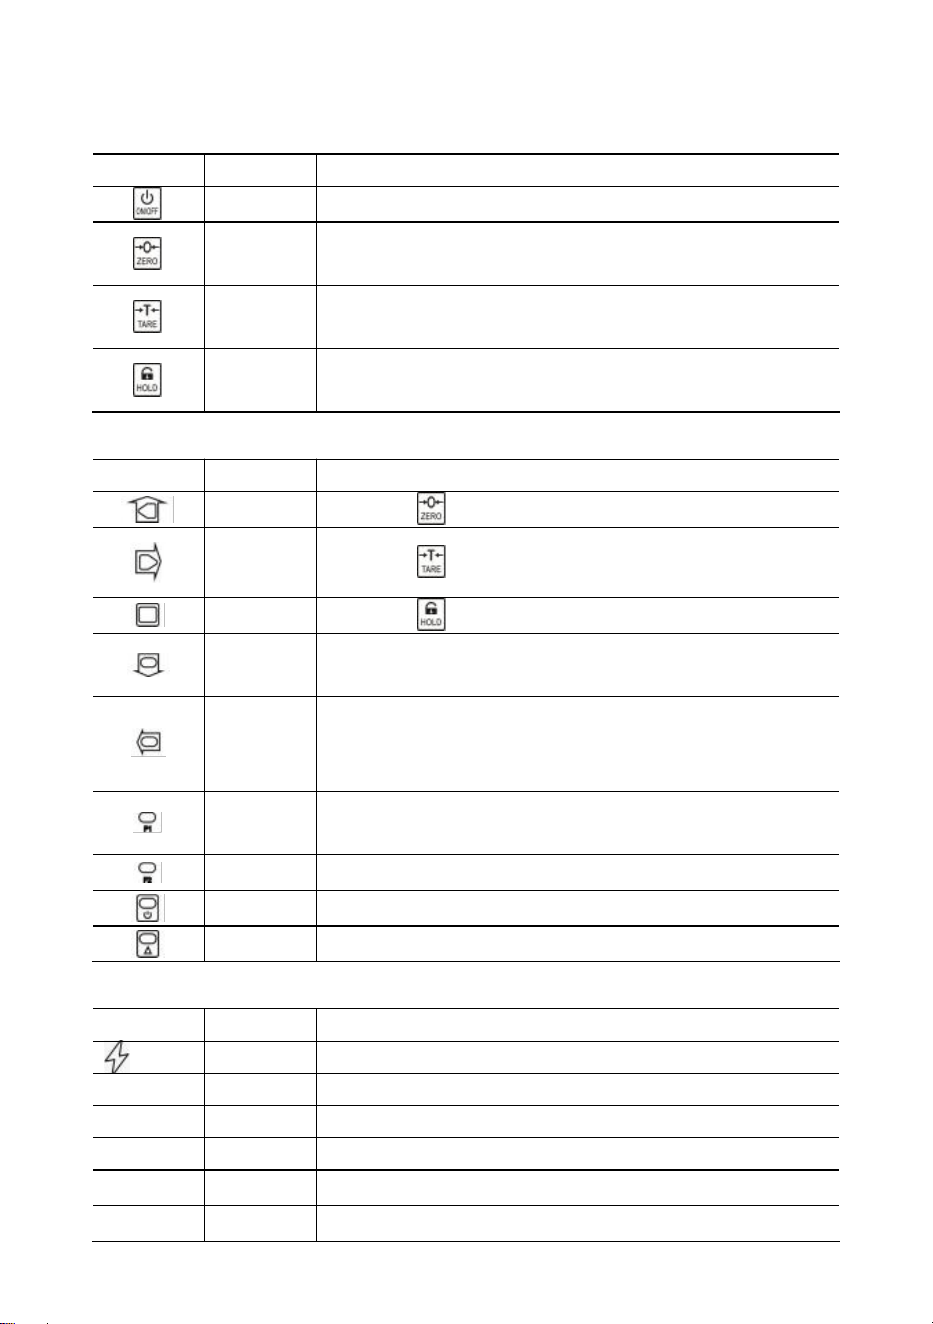
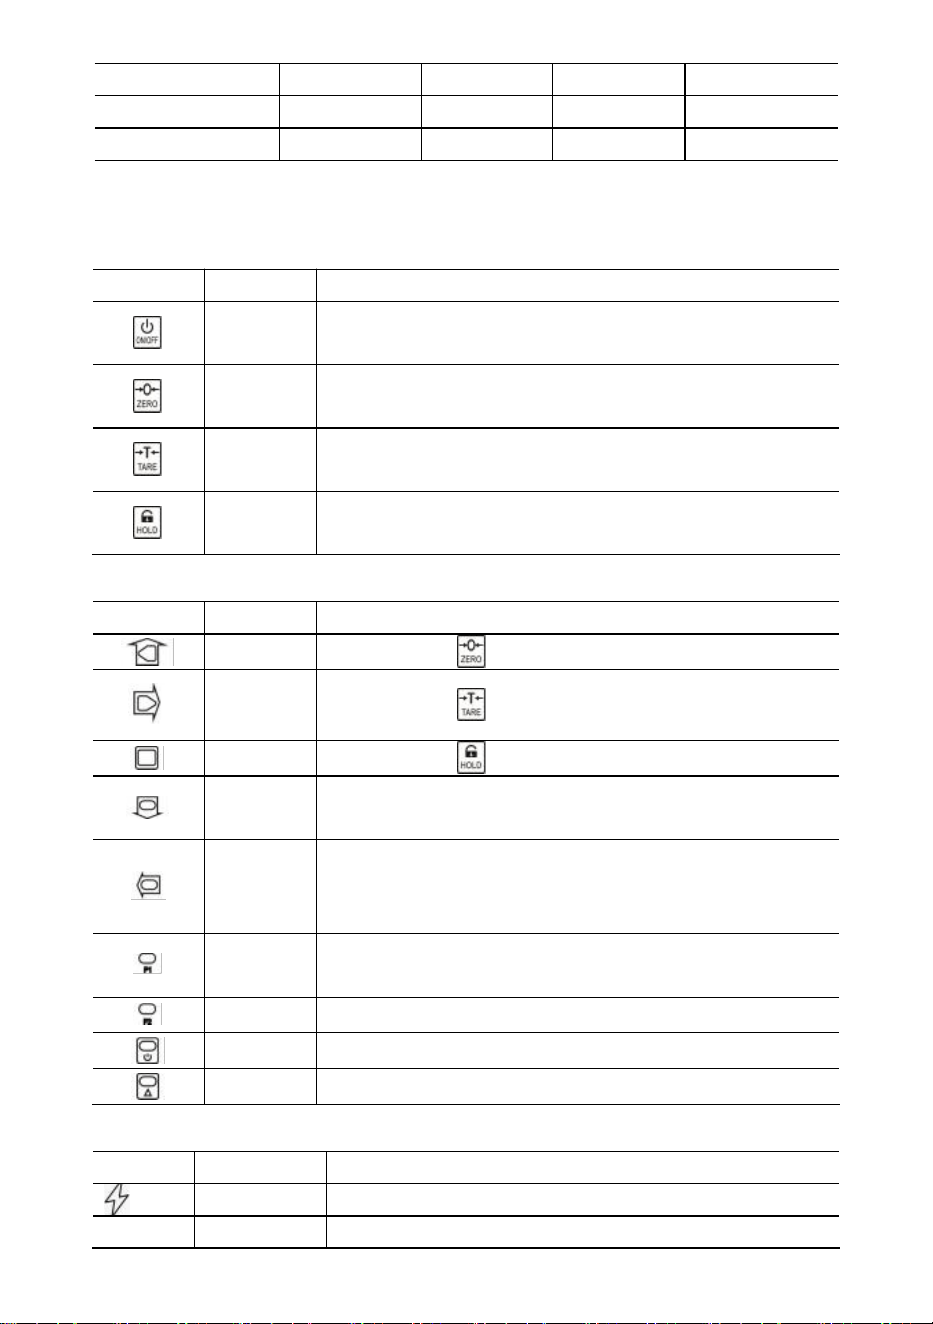
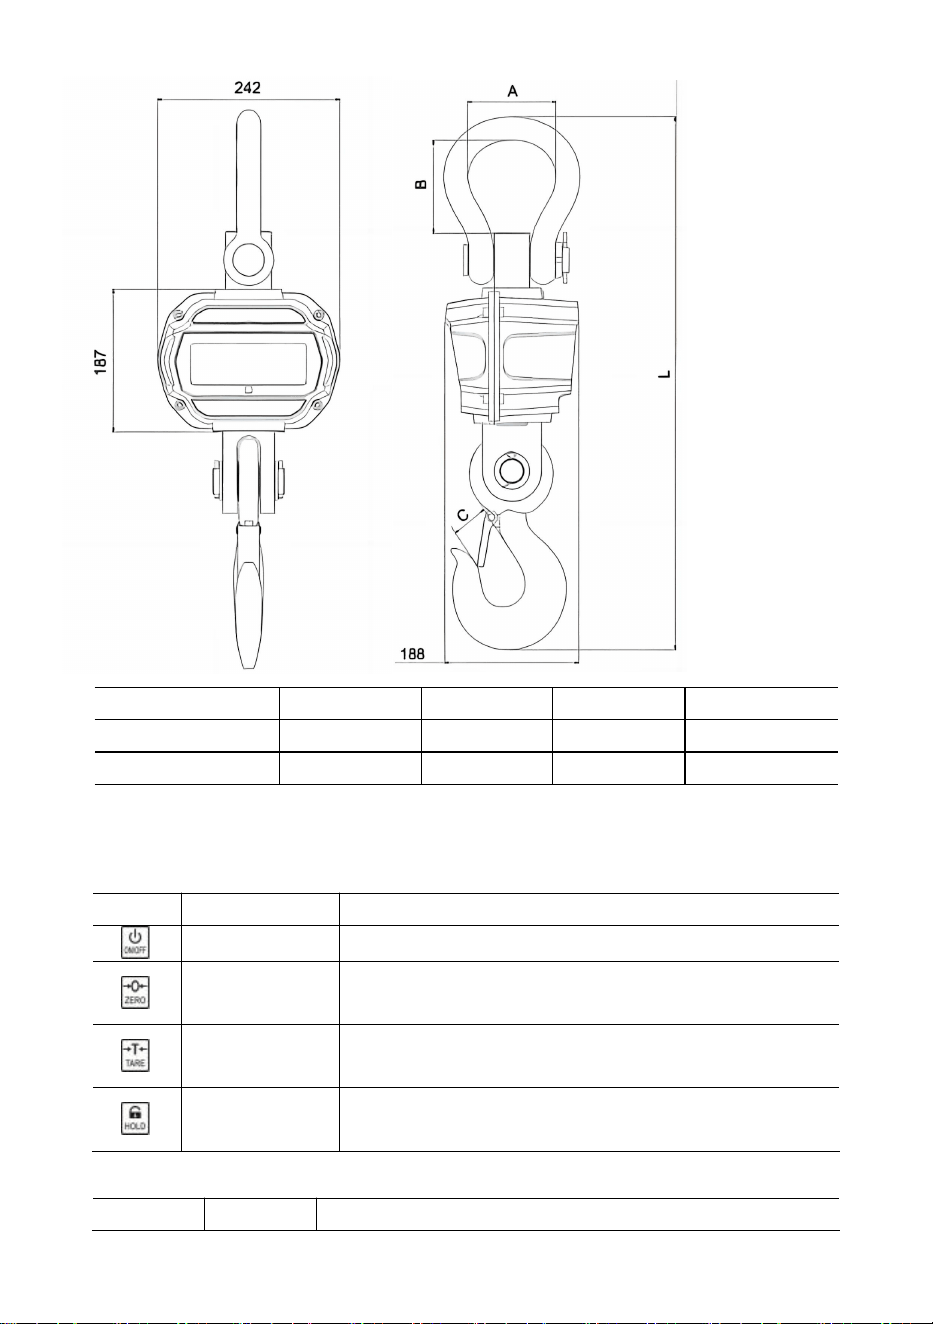
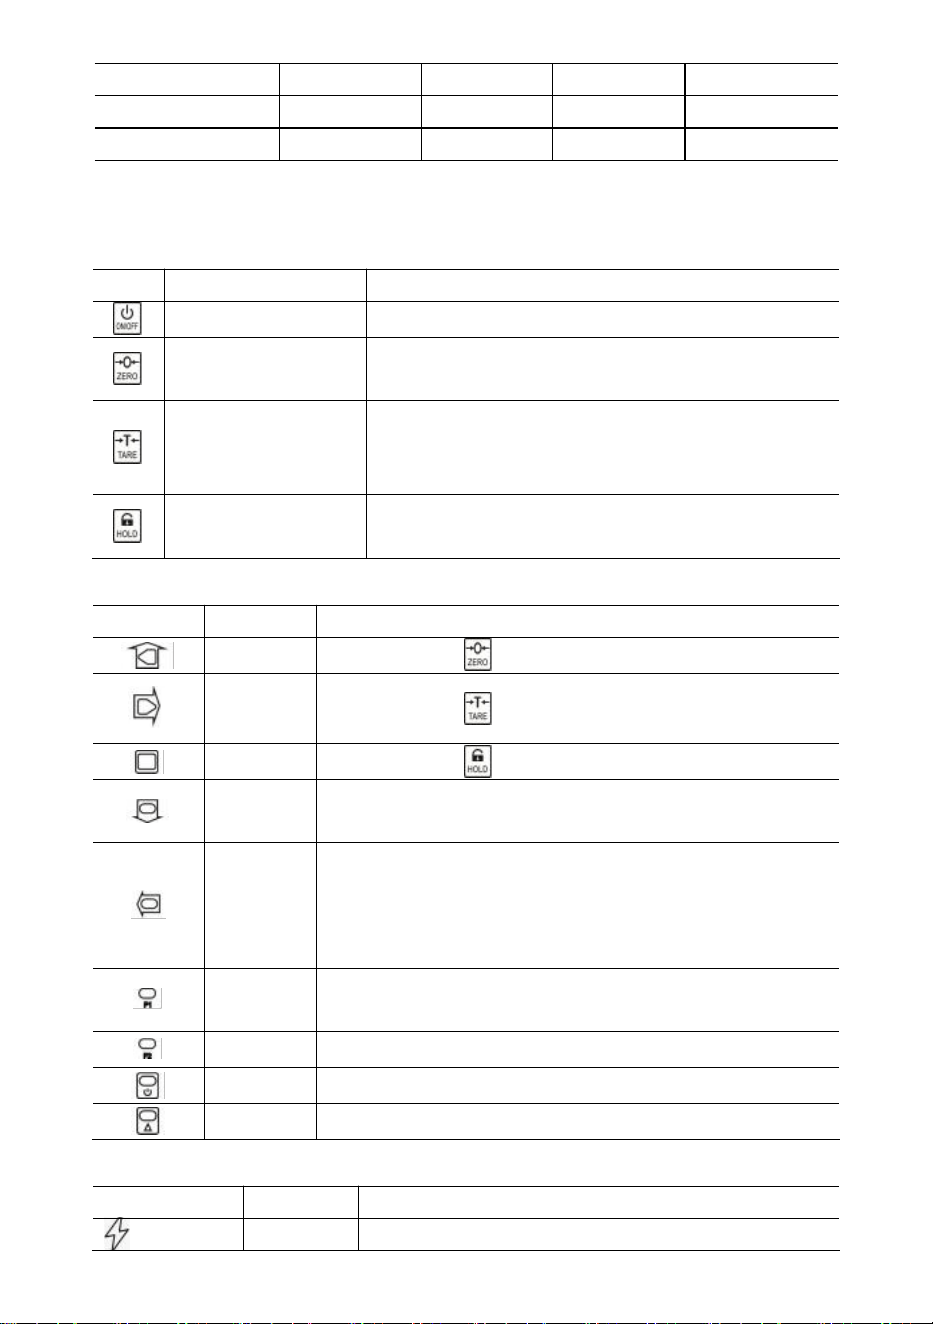
2. Display & Keys
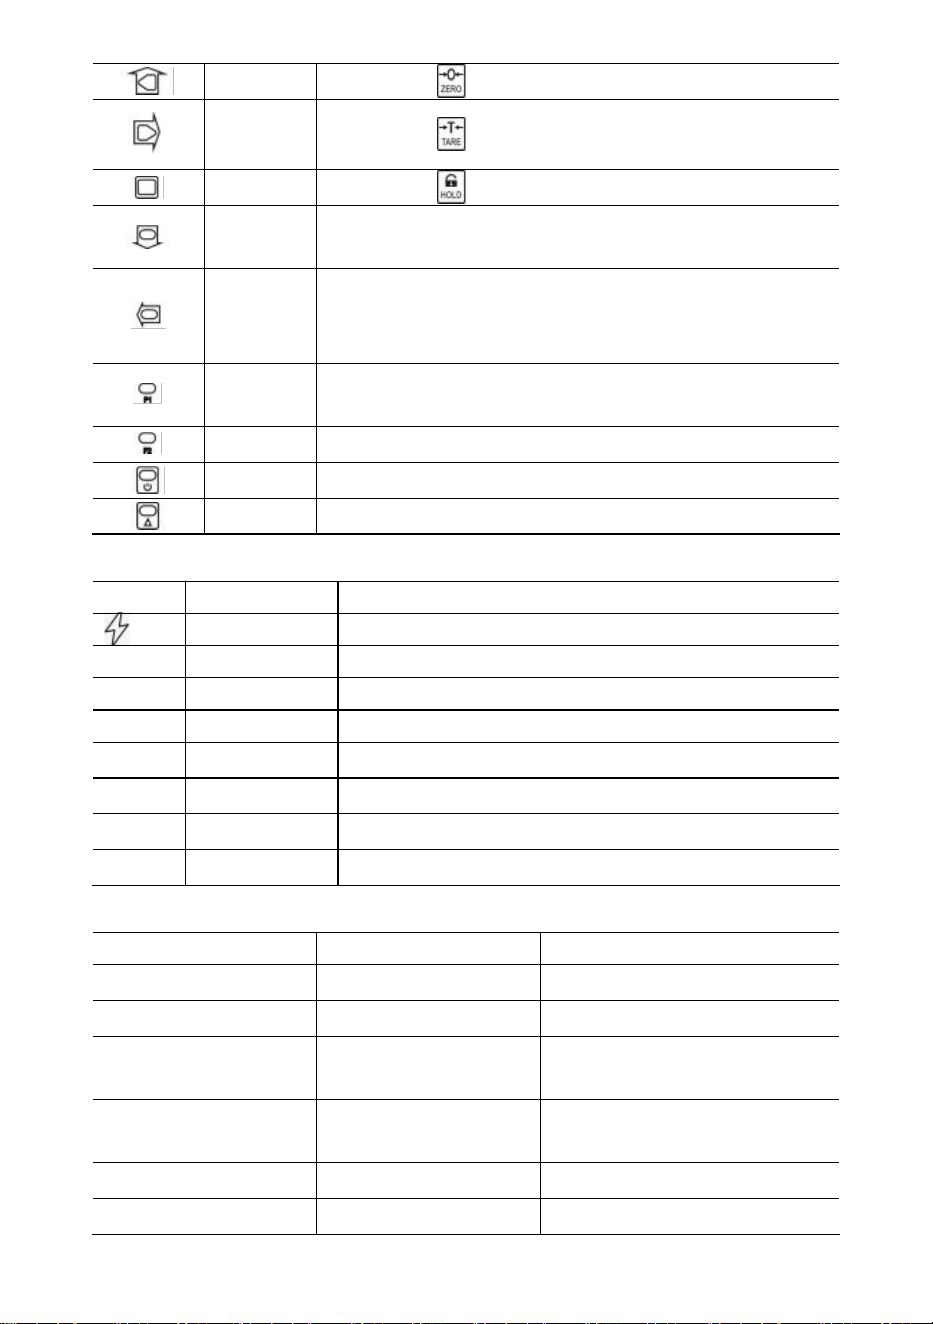
Scale Keys
Key
Name
Function
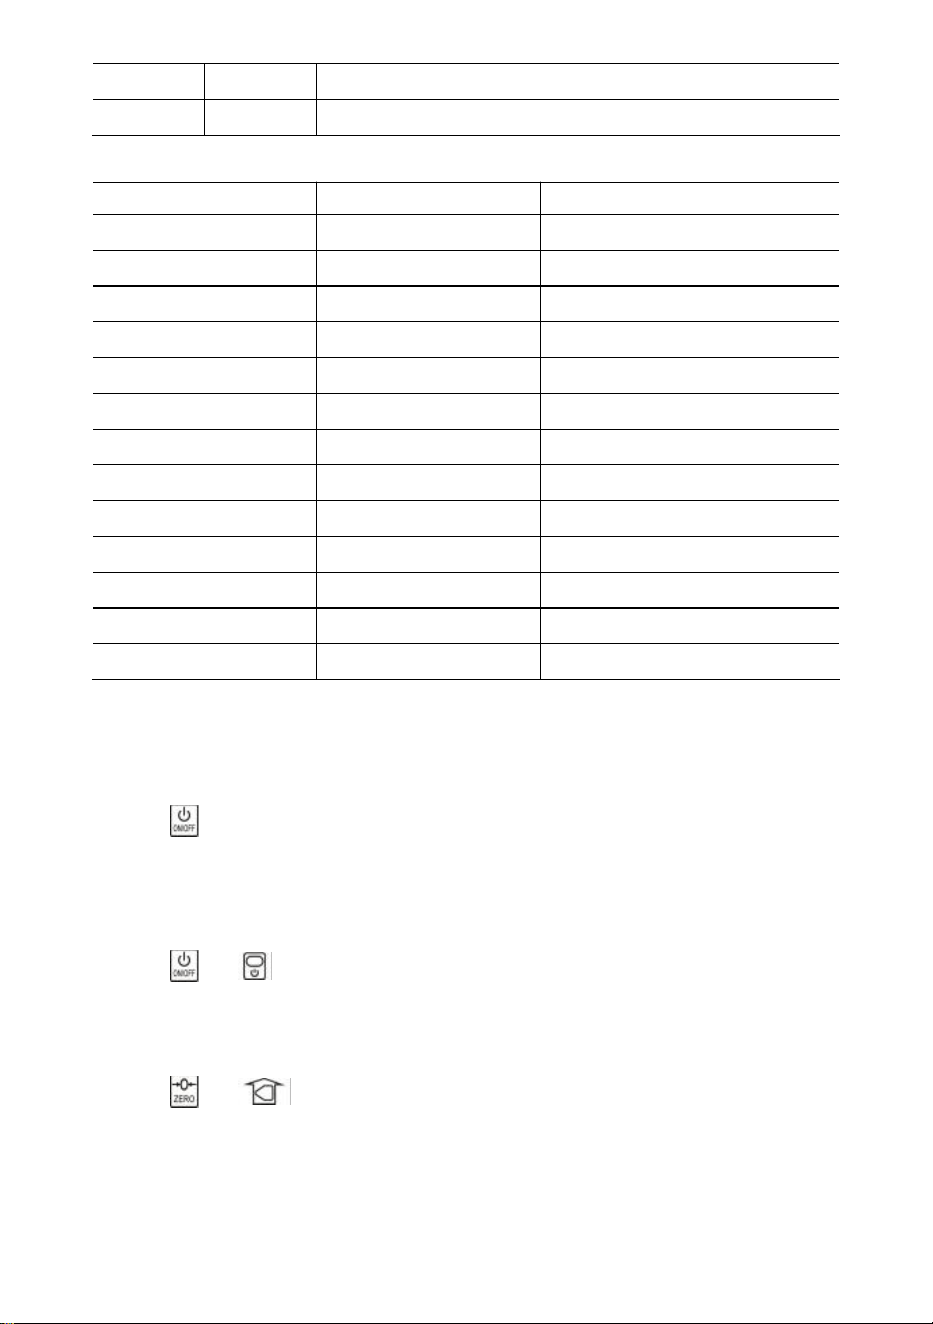
On/Off
Press 1s to power on/off scale.
Zero
Manual Zero.
Increase flashing digit.
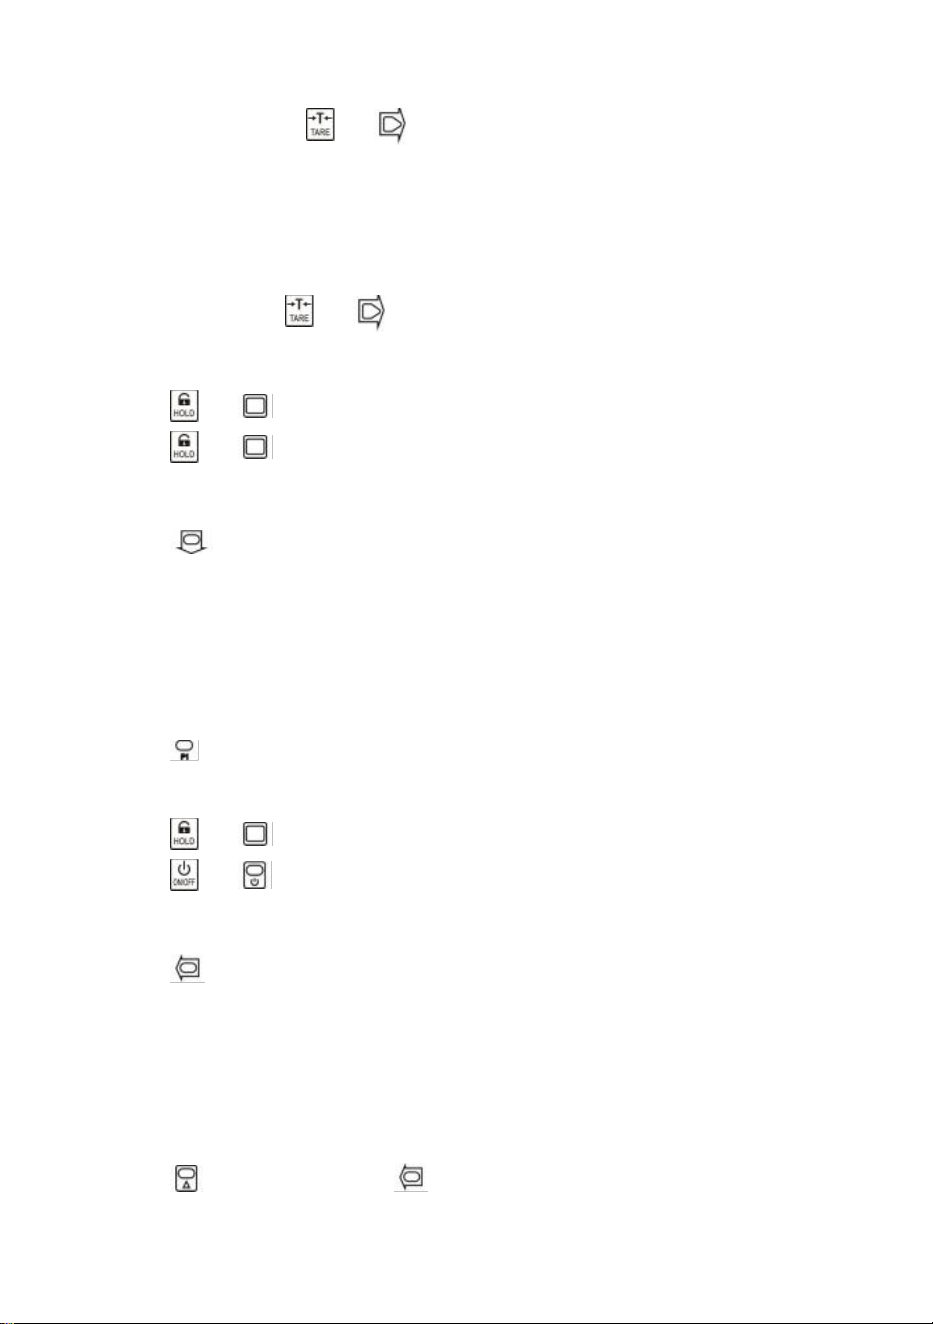
Tare
Tare in/out.
Right scroll flashing digit.
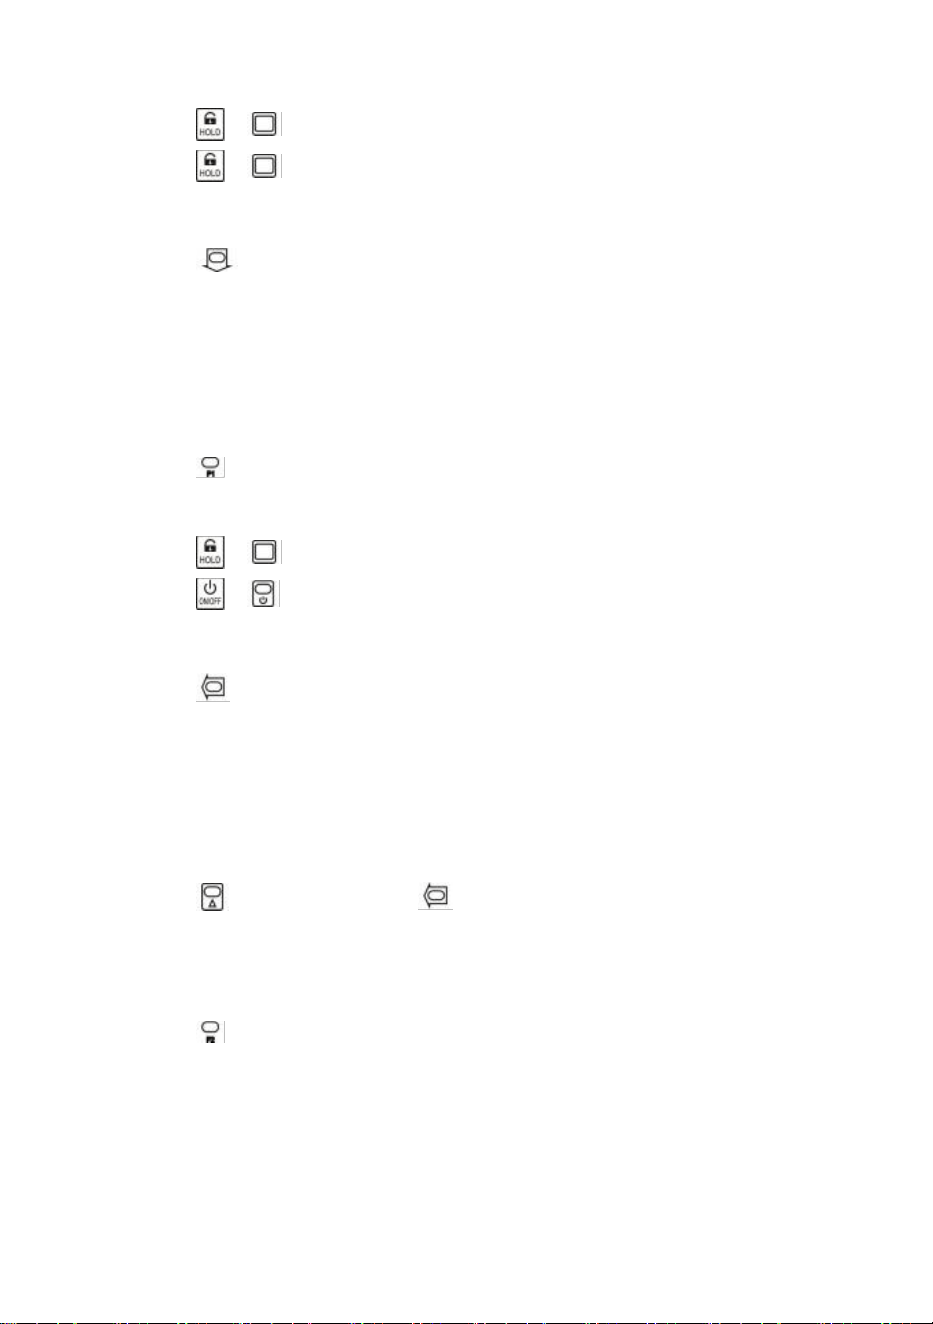
Hold
Lock/unlock reading.
Confirm.
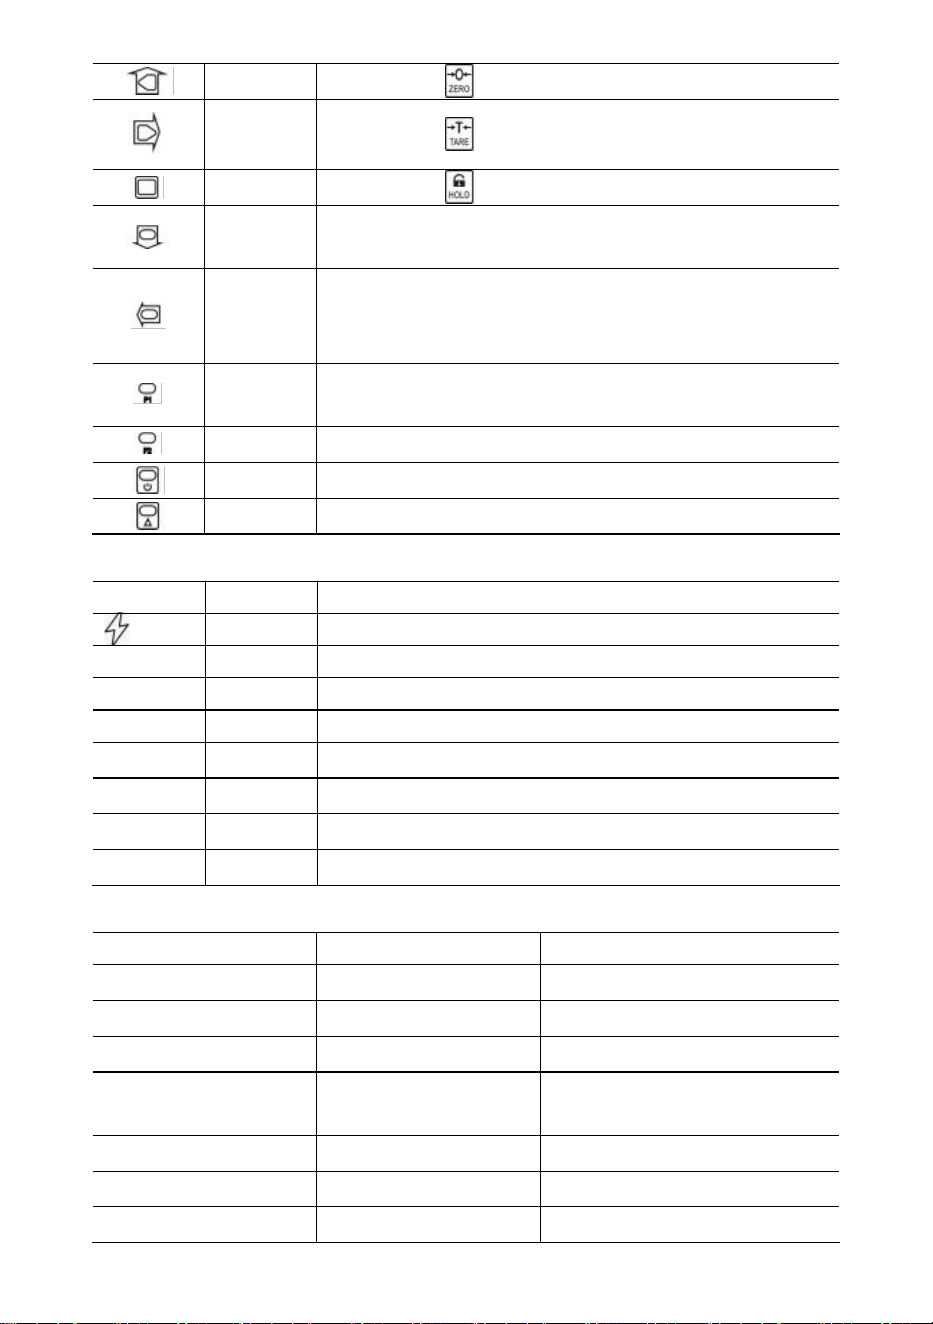
Remote Keys
Key
Name
Function
Zero
Same as .
Tare
Same as .
Hold
Same as .
Acc.
Accumulate weight.
Decrease flashing digit.
Del.
Delete the last weight.
Clear all weight.
Left scroll flashing digit.
F1
View.
Input decimal point.
F2
Unit switch.
Off
Press 1s to power off.
2nd
2nd function.
Indicators
LED
Name
Note
Charging
lit when charging
STB.
Stable
lit when weight is stable
ZERO
Zero
lit when weight is at zero
TARE
Tared
lit when the scale is tared
HOLD
Hold
lit when the scale is locked
lb
lb
lit when the unit is lb
- 5 -
kg
kg
lit when the unit is kg
UN
USER
lit when the unit is a user unit
Message
Message
Stand for
Note
-----
detect weight
-
in Idle Mode
Setup
SETUP
User Setup Menu
Bat--
BATtery
battery life percentage
P0000
Password
in Password Mode
|end|
END
save and exit
|off|
OFF
power off
|over
OVERload
overloading
|2nd|
2ND
2nd function
|err|
ERRor
invalid operation
|acc|
ACCumulate
accumulate weight
|del|
DELete
delete last weight
|Clr|
CLeaR
delete all weight
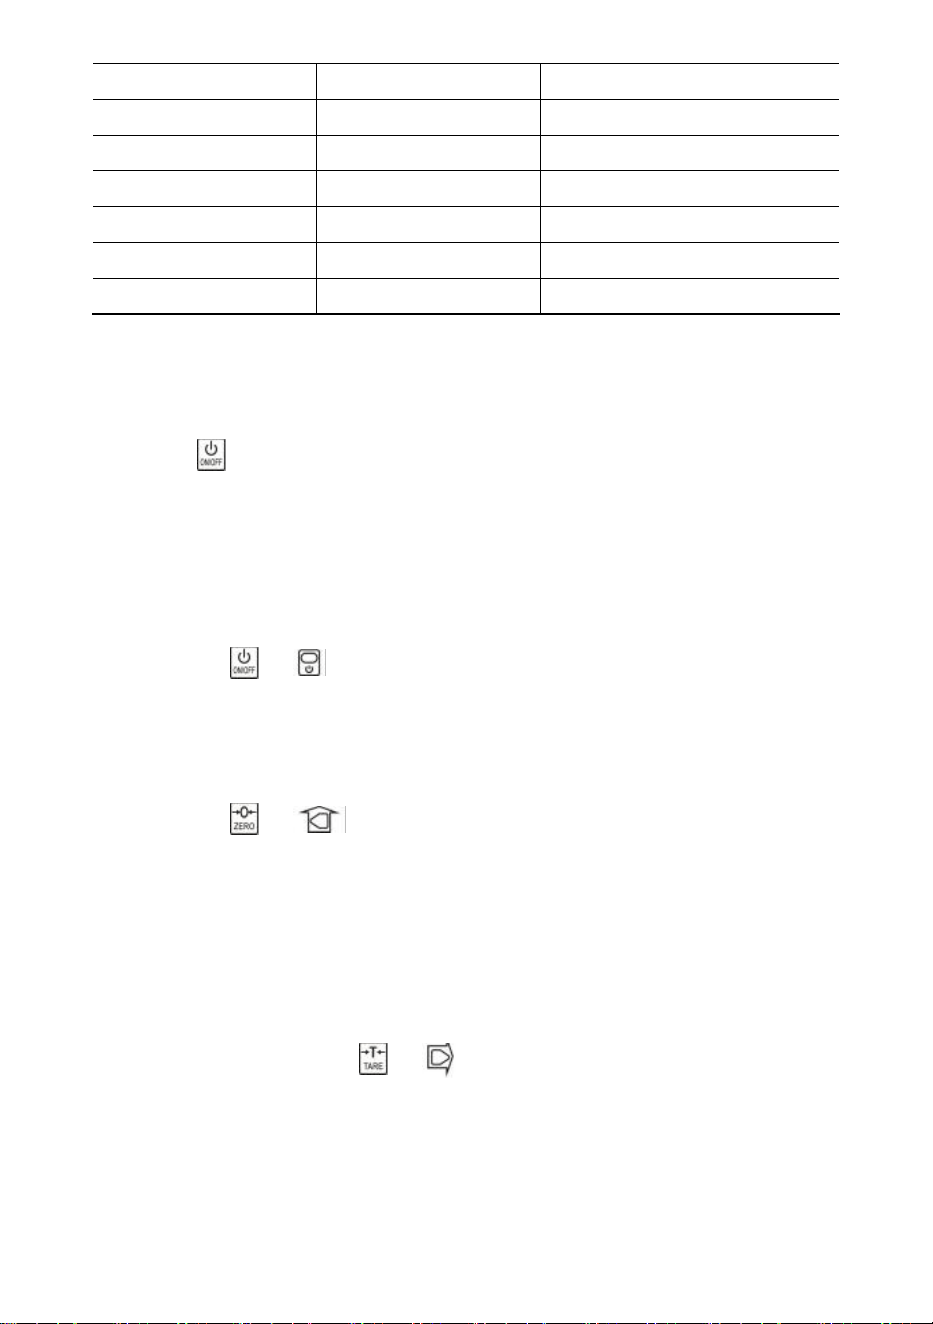
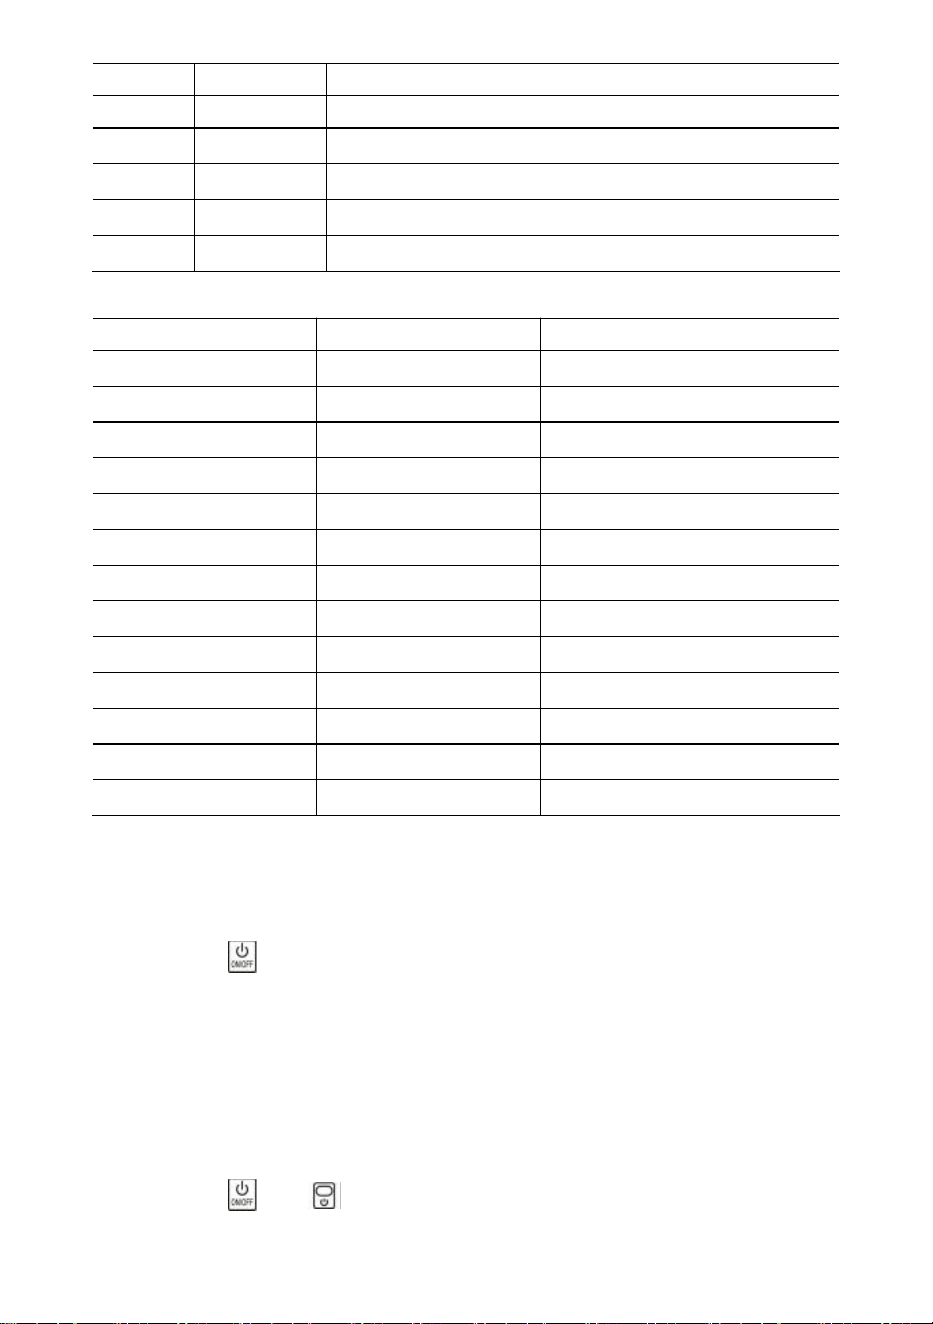
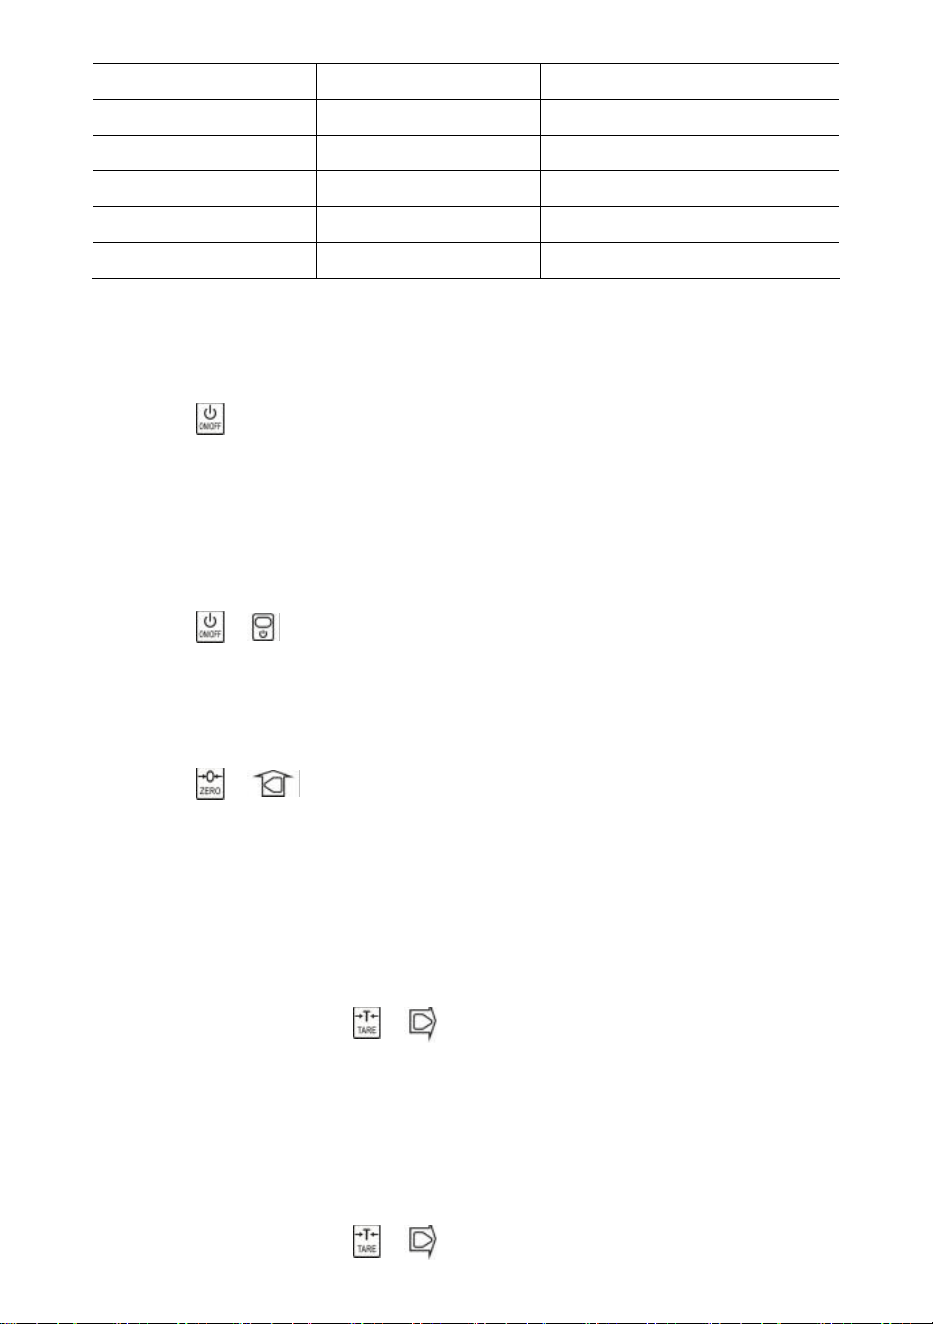
3. Operations
Power On/Off
Press for 1s to power on the scale. Scale performs initialization and power-on
test,
*****
shows twice, then capacity
|5000
shows, battery life percentage
bat90
shows,
weight detection
-----
shows, and then auto zero.
For information about Auto-Zero, refer to Scale Configuration in the Technical Manual.
Press or for 1s to power off the scale. Battery life percentage
bat90
shows,
off message
|off|
shows, and then cuts off power.
Zero
Press or to zero. ZERO light on.
If the load is in motion, tared, or out of Manual-Zero Range,
|err|
shows.
For information about Manual-Zero Range, refer to Scale Configuration in the
Technical Manual.
- 6 -
Tare In/Out
In gross mode, press or to tare in. TARE light on.
If the load is in motion, negative, or out of Tare Range,
|err|
shows.
Tare will reduce the apparent overload range of scale. For example, if a 5000*2kg
scale has a 1000kg container as its tare, the scale will overload at a new weight of
4018kg (5000 – 1000 + additional 9 divisions).
In net mode, press or to tare out. TARE the light off.
Lock/unlock
Press or to lock screen. HOLD the light on.
Press or to unlock screen. HOLD the light off.
Accumulate
Press to accumulate current weight.
|acc|
shows, indicating weight is accumulated. Scale uses displayed weight, so gross
or net weight is added into the same accumulator.
If the load is in motion, negative, or does not return to zero before,
|err|
shows.
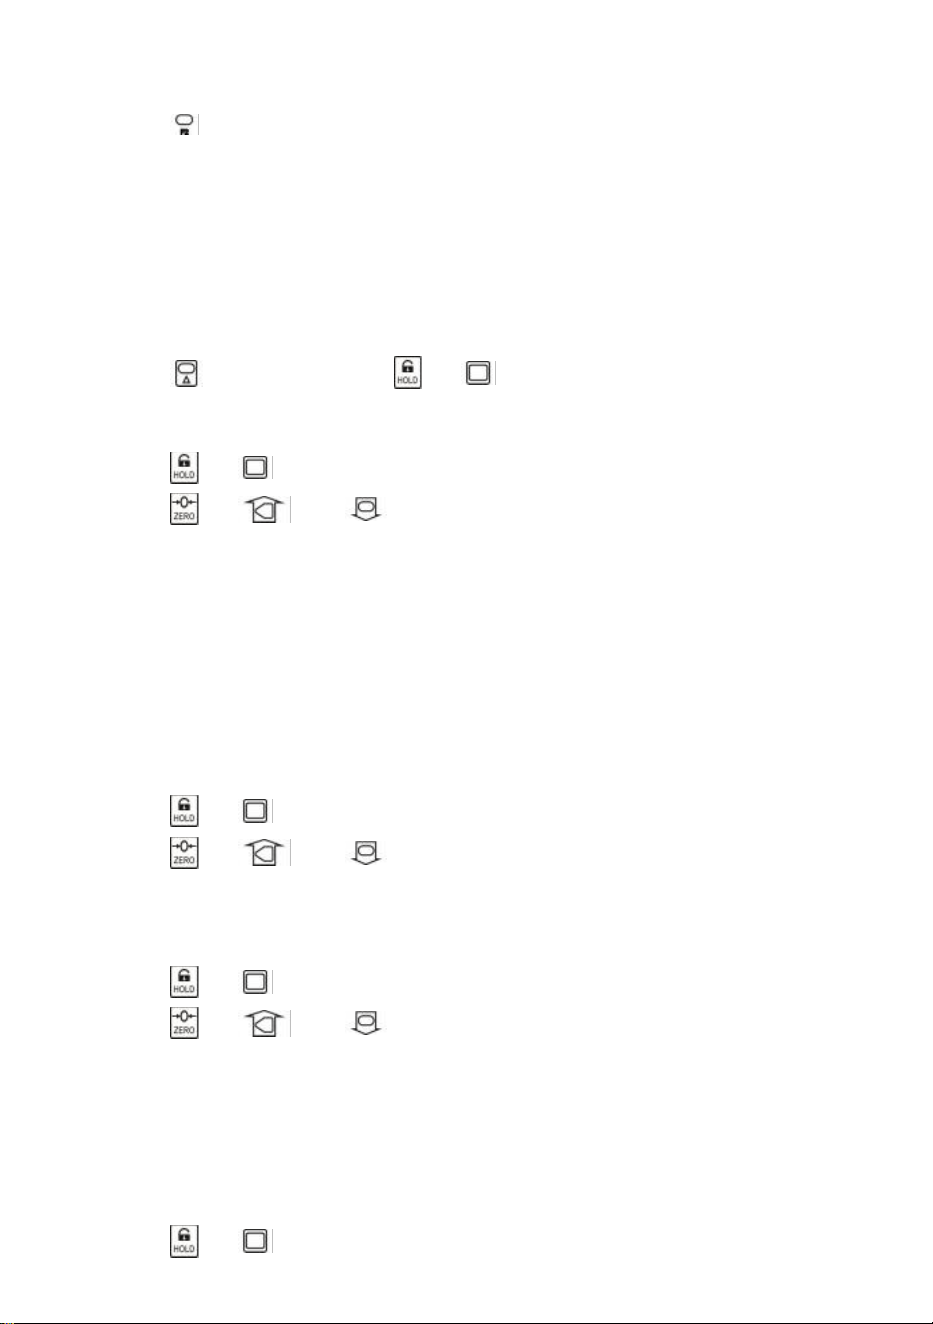
View
Press to enter View mode.
Display flashes accumulated weight.
Press or to view high 5-digit or low 5-digit.
Press or to exit View mode.
Delete Last Weight
Press to delete the last accumulated weight.
|del|
shows, indicating that the last accumulated weight is deleted. The delete function
only deletes the last weight.
If the last accumulated weight has been deleted,
|err|
shows.
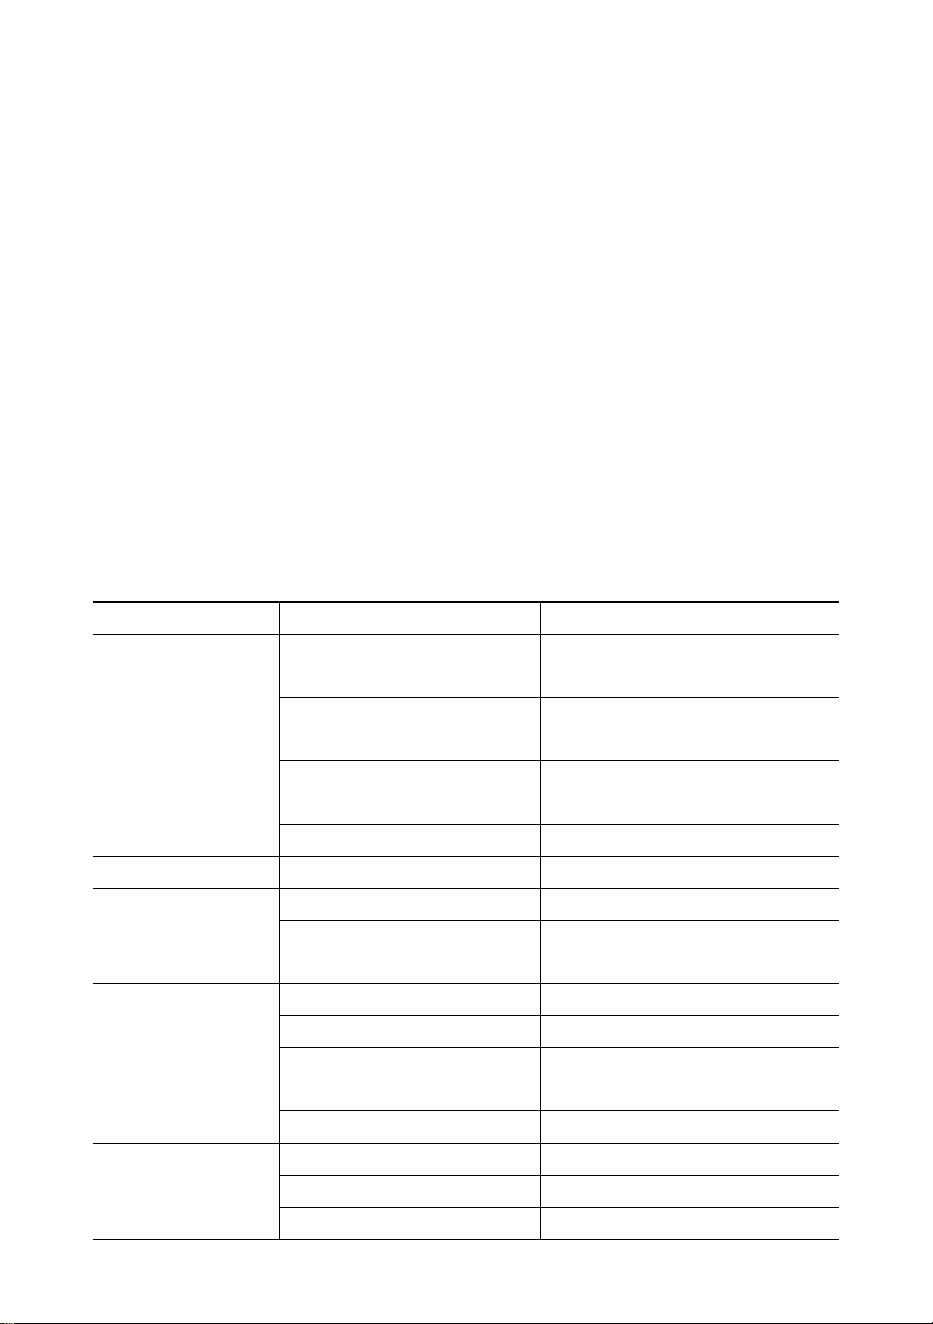
Clear All Weight
Press first and then press to clear all accumulated weight.
|clr|
shows, indicating all weight is cleared.
- 7 -
Unit Switch
Press to switch the unit in between kg, lb, and User Unit.
When the unit is kg, the
kg
LED light is on. When the unit is lb, the
lb
LED light is on.
When the unit is User unit, the
UN
LED light is on.
For more information about the User Unit, refer to Scale Configuration in the Technical
Manual.
4. User Setup
Press first and then press or to enter User Setup menu.
setup
shows.
Auto-Off Timing
Press or to enter Auto-Off Timing.
Off--
shows.
Press or and to change timing value.
Auto-Off Timing can be set to:
0
(disabled),
5
(5min),
10
(10min),
15
(15min),
30
(30min),
60
(60min). It is disabled by default.
Auto-Off function maximizes the scale’s battery life against people’s carelessness not
to power off the scale when it’s not working. Auto-Off starts the countdown timer when
there’s no action, or the load is stable. Any key pressing or motion in the load restarts
the countdown timer.
Display Brightness
Press or to enter Display Brightness.
Br--
shows.
Press or and to change brightness value.
Dim LED brightness saves battery power dramatically.
Idle Mode Timing
Press or to enter Idle Mode Timing.
Idl--
shows.
Press or and to change the timing value.
Idle Mode Timing can be set to:
0
(disabled),
5
(5sec),
10
(10sec),
15
(15sec),
30
(30sec),
60
(60sec). It is 30sec by default.
To maximize battery life, the scale automatically enters Idle Mode when there’s no
action, or the load is stable. In Idle Mode, the scale works in low-power consumption
status. Any key pressing or motion in load wakes up the scale from Idle Mode.
Press or to exit User Setup.
- 8 -
5. Battery Maintenance
To maximize battery life, please note the following battery maintenance guide.
This scale is powered by a 6V4.0Ah rechargeable lead-acid battery.
The battery is permanently fixed inside the battery house.
Depending on LED brightness and idle mode setting, the battery works from 60 hours
to 200 hours.
In order to conserve battery life, enable Auto-Off and Idle Mode to dim LED brightness.
Charging time for a completely discharged battery is approximately 12 hours.
To obtain maximum service life, the battery should be stored between -20℃ (-4°F) and
+50℃ (122°F). Stored batteries should be recharged every three months.
During charging, the green LED indicates full power, while red indicates that charging
is going on.
6. Troubleshooting
Simple problems can be resolved as the below-listed solution. If problems still
exist, please contact your local representative.
Symptom
Possible Cause
Suggested Solution
not power-on after
On/Off is pressed
discharged / defective
battery
check battery and charge
defective On/Off key
press harder and keep
pressing 2s
defective power cable
open the front panel, check the
power cable
defective mainboard
contact representative
display flashes
discharged battery
charge battery
no action was
taken after the
key was pressed
scale is disturbed
re-plug power cable
defective key
contact representative
weight reading is
not stable
load in motion
keep load stable
weak Anti-Motion
change Anti-Motion level
damped loadcell or
mainboard
dry loadcell or mainboard
defective mainboard
contact representative
weight reading is
not zero when
there is no load
discharged battery
charge battery
load-cell stressed too long
hang scale in storage
discharged battery
charge battery
- 9 -
large error in
weight reading
scale not zeroed before
applying the load
manual Zero scale before
loading
wrong unit
switch to the correct unit
scale requires calibration
calibrate scale
defective loadcell or
mainboard
contact representative
battery can not be
recharged
defective charge board
contact representative
defective battery
contact representative
short remote
controlling
distance
discharged / defective
remote battery
replace remote controller
batteries
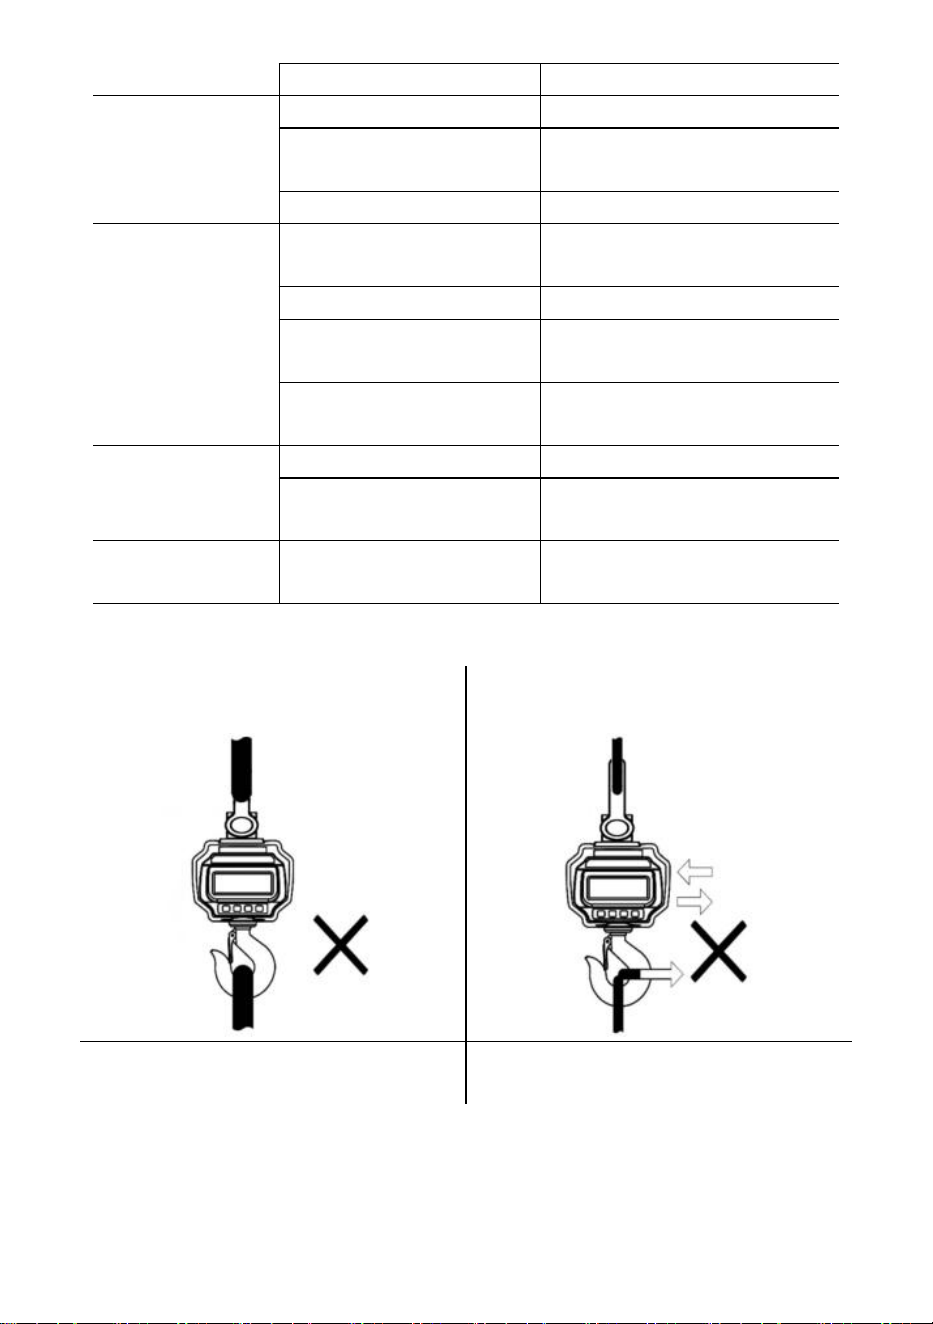
7.
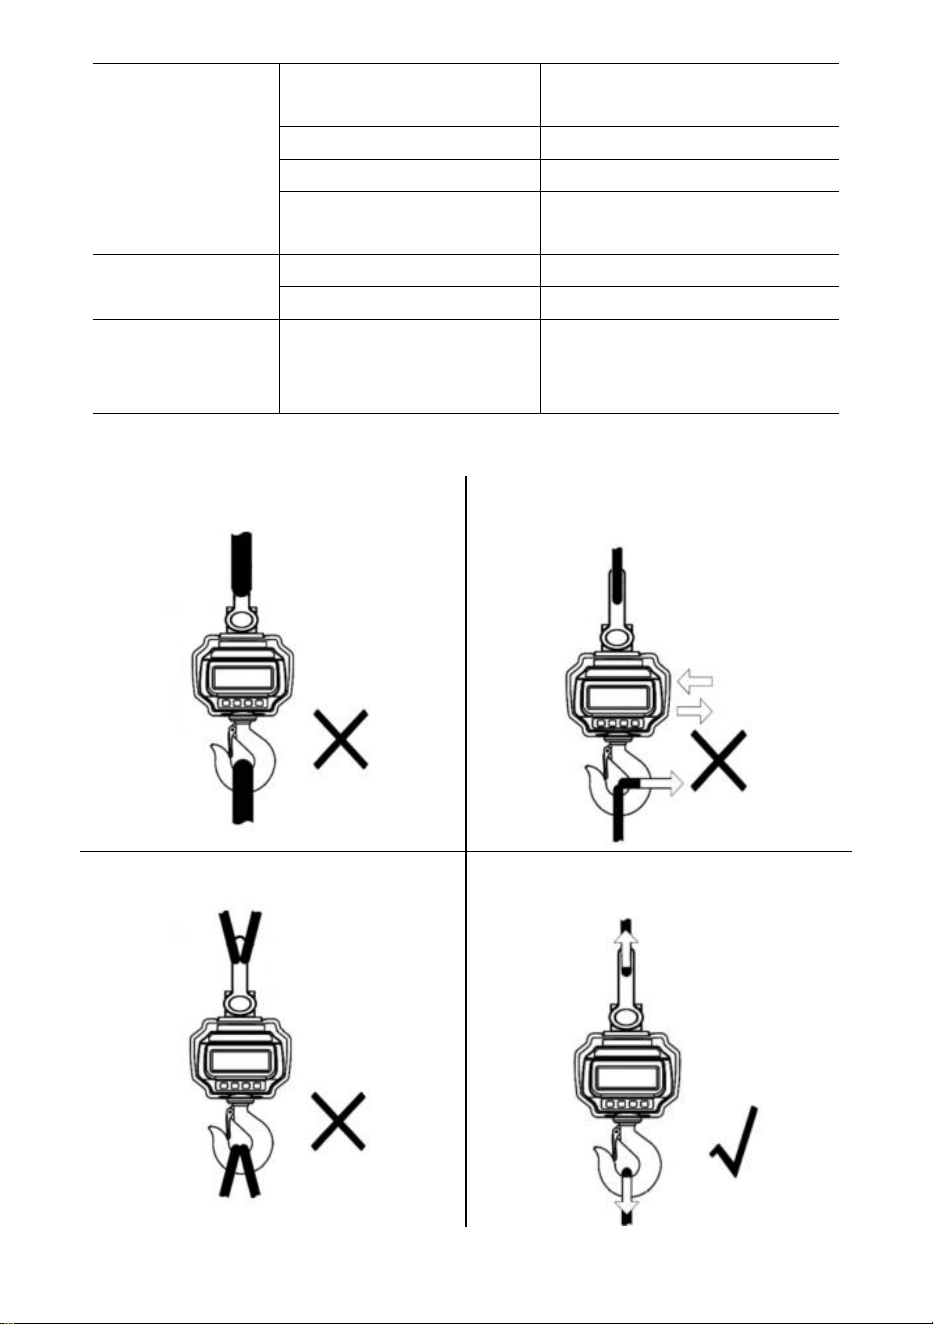
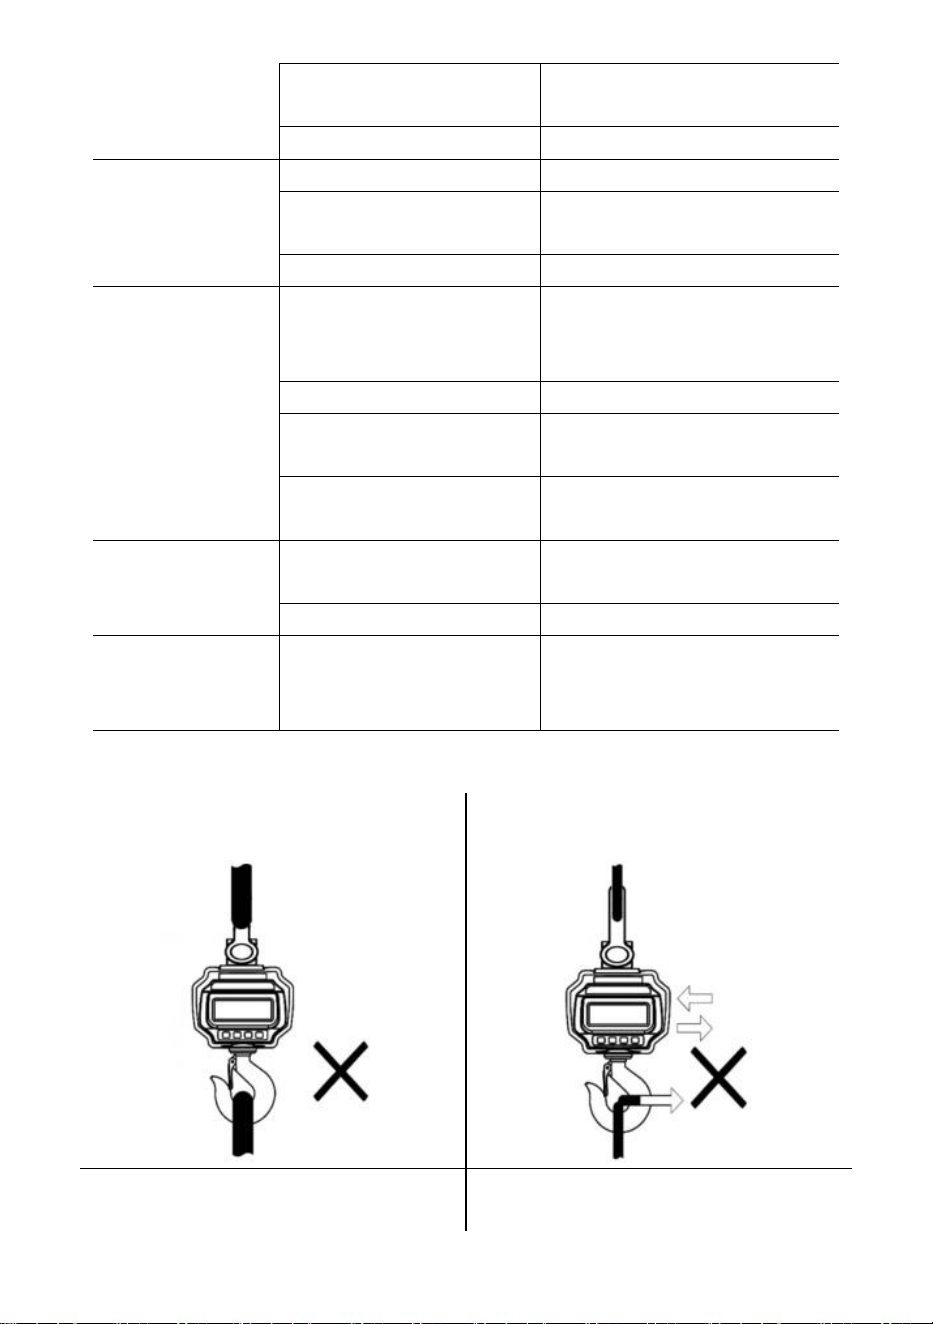
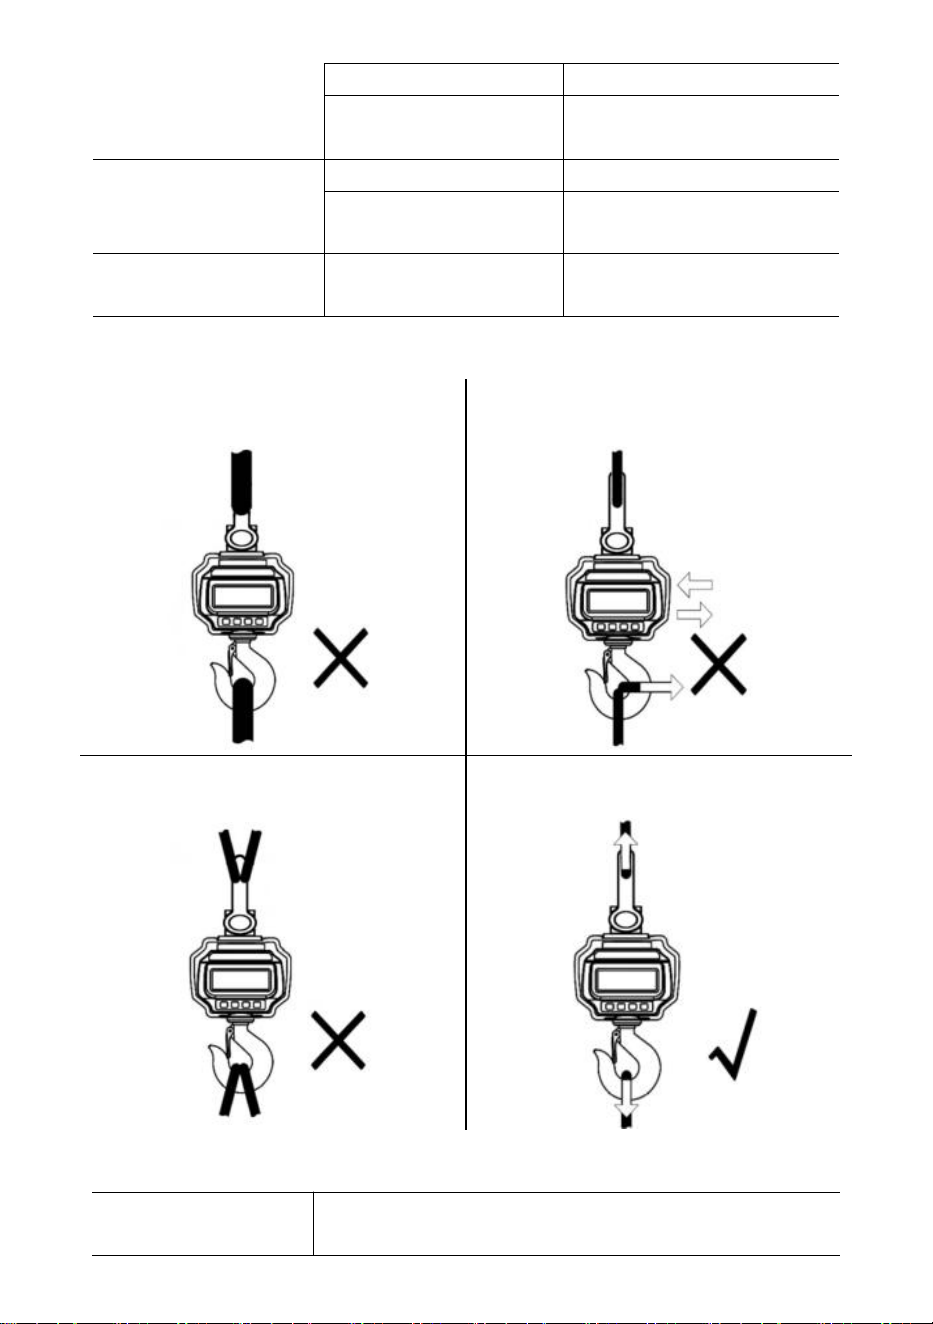
Loading Procedures
DO NOT attach an oversized interface!
DO NOT push/pull on the loaded scale or
directly on the hook!
DO NOT use multiple attachments!
Use hardware that creates single-point
attachments.

- 10 -
8. Specifications
Accuracy Class
Chinese GB/T 11883-2002 Class III
Equivalent to OIML R76
Tare Range
100% F.S.
Zero Range
4% F.S.
Stable Time
≤10sec
Overload
100% F.S. + 9e
Safety Load
150% F.S.
Ultimate Load
400% F.S.
Battery
6V/4.0Ah lead acid rechargeable battery.
Charger
14VDC/1000mA output
(European
,
American standard)
9VDC/1500mA output(Australian Standard)
Display
40mm (1.6inch) LED module
Op. Temp.
-10℃ - +40℃
Op. Humidity
20℃ ≤90%
Items
Description
1
Name
Industrial Crane Scale
2
Model
OCS-3-D
3
Parameter
Rating(s): 6VDC
Capacity: 3000kg/6600Ib
Division: 1lb
Items
Description
1
Name
Industrial Crane Scale
2
Model
OCS-5-D
3
Parameter
Rating(s): 6VDC
Capacity: 5000kg/11000Ib
Division: 2lb
- 11 -
Manufacturer: Shanghaimuxinmuyeyouxiangongsi
Address: Shuangchenglu 803nong11hao1602A-1609shi, baoshanqu,
shanghai 200000 CN.
Imported to AUS: SIHAO PTY LTD, 1 ROKEVA STREETEASTWOOD NSW
2122 Australia
Imported to USA: Sanven Technology Ltd., Suite 250, 9166 Anaheim Place,
Rancho Cucamonga, CA 91730
REP
EC
E-CrossStu GmbH
Mainzer Landstr.69, 60329 Frankfurt am Main.
REP
UK
YH CONSULTING LIMITED.
C/O YH Consulting Limited Office 147, Centurion House,
London Road, Staines-upon-Thames, Surrey, TW18 4AX
Technical Support and E-Warranty Certificate
www.vevor.com/support

- 12 -
Assistance technique et certificat de garantie électronique
www.vevor.com/support
BALANCE À GRUE INDUSTRIELLE
MODÈLE : OCS-3-D / OCS-5-D
We continue to be committed to provide you tools with competitive price.
"Save Half", "Half Price" or any other similar expressions used by us only represents an
estimate of savings you might benefit from buying certain tools with us compared to the major
top brands and does not necessarily mean to cover all categories of tools offered by us. You
are kindly reminded to verify carefully when you are placing an order with us if you are
actually saving half in comparison with the top major brands.

- 1 -
MODÈLE : OCS-3-D / OCS-5-D
Have product questions? Need technical support? Please feel free to
contact us:
Technical Support and E-Warranty Certificate
www.vevor.com/support
NEED HELP? CONTACT US!
This is the original instruction, please read all manual instructions
carefully before operating. VEVOR reserves a clear interpretation of our
user manual. The appearance of the product shall be subject to the
product you received. Please forgive us that we won't inform you again if
there are any technology or software updates on our product.
INDUSTRIAL CRANE
SCALE

- 2 -
RÈGLES GÉNÉRALES DE SÉCURITÉ
Symbole
Description du symbole
Avertissement - Pour réduire le risque de blessure, l'utilisateur
doit lire attentivement le manuel d'instructions.
Ce symbole, placé avant un commentaire de sécurité, indique un
type de précaution, d'avertissement ou de danger. Ignorer cet
avertissement peut entraîner un accident. Pour réduire le risque
de blessure, d'incendie ou d'électrocution, veuillez toujours suivre
les recommandations ci-dessous.
Avertissement – Assurez-vous de porter des gants lorsque vous
utilisez ce produit.
Avertissement – Assurez-vous de porter des lunettes de
protection lorsque vous utilisez ce produit.
Informations sur l'élimination :
Ce produit est soumis aux dispositions de la directive européenne
2012/19/CE. Le symbole représentant une poubelle barrée
indique que le produit doit faire l'objet d'une collecte sélective des
déchets dans l'Union européenne. Cela s'applique au produit et à
tous les accessoires marqués de ce symbole. Les produits
marqués comme tels ne peuvent pas être jetés avec les ordures
ménagères normales mais doivent être déposés dans un point de
collecte pour le recyclage des appareils électriques et
électroniques.
Consignes générales de sécurité
AVERTISSEMENT ! Lisez tous les avertissements et notes de sécurité. Le
non-respect des instructions ci-dessous peut entraîner un choc électrique, un
incendie et/ou des blessures.
Pour de bonnes performances et une mesure précise, soyez prudent lors du
fonctionnement et de l'entretien quotidiens.

- 3 -
SÉCURITÉ DE LA ZONE DE TRAVAIL
a) Maintenir la zone d'application propre et bien éclairée. Les zones sales et
sombres sont propices aux accidents.
b) N'utilisez pas d'outils électriques dans des environnements explosifs, par
exemple en présence de liquides, de gaz ou de vapeurs inflammables. Les
outils électriques génèrent des étincelles qui peuvent enflammer la poussière ou
les vapeurs.
c) Tenir les enfants et les personnes présentes à l'écart de l'appareil pendant
son utilisation. Les distractions peuvent entraîner une perte de contrôle de
l'appareil.
Remarque sur l'utilisation :
Ne surchargez pas la balance à grue, cela endommagerait la cellule de charge ;
Ne laissez pas la charge suspendue sur la balance numérique pendant une
longue période. Cela réduira la précision de la balance et raccourcira la durée de
vie de la cellule de charge.
Inspectez la manille et le crochet avant utilisation. Vérifiez régulièrement les clips,
les goupilles et les vis ;
Merci pour votre soutien à nos produits !
9. Dimensions et poids

- 4 -
Modèle
A
(
mm
)
B (mm)
C (mm)
L (mm)
OCS-3-D
55
96
35
575
OCS-5-D
78
123
48
675
10.
Affichage et touches
Touches d'échelle
Clé
Nom
Fonction
Marche/Arrêt
Appuyez 1 seconde pour allumer/éteindre la balance.
Zéro
Zéro manuel.
Augmenter le chiffre clignotant.
Tare
Tare entrée/sortie.
Défilement vers la droite du chiffre clignotant.
Prise
Verrouiller/déverrouiller la lecture.
Confirmer.
Clés à distance
Clé
Nom
Fonction
- 5 -
Zéro
Identique à .
Tare
Identique à .
Prise
Identique à .
Acc.
Accumuler du poids.
Diminuer le chiffre clignotant.
Déc.
Supprimer le dernier poids.
Effacer tout le poids.
Défilement vers la gauche du chiffre clignotant.
F1
Voir.
Saisissez le point décimal.
F2
Interrupteur d'unité.
Désactivé
Appuyez 1 seconde pour éteindre.
2ème
2ème fonction.
Indicateurs
DIRIGÉ
Nom
Note
Chargement
allumé lors du chargement
STB.
Écurie
allumé lorsque le poids est stable
ZÉRO
Zéro
allumé lorsque le poids est à zéro
TARE
Taré
allumé lorsque la balance est tarée
PRISE
Prise
allumé lorsque la balance est verrouillée
kg
kg
allumé lorsque l'unité est lb
kg
kg
allumé lorsque l'unité est kg
ONU
UTILISATEUR
allumé lorsque l'unité est une unité utilisateur
Message
Message
Défendre
Note
-----
détecter le poids
-
en mode veille
Installation
INSTALLATION
Menu de configuration de
l'utilisateur
Chauve-souris--
Batterie
pourcentage de durée de vie
de la batterie
P0000
Mot de passe
en mode mot de passe
|fin|
FIN
enregistrer et quitter
- 6 -
|désactivé|
DÉSACTIVÉ
éteindre
|plusde
Surcharge
surcharge
|2e|
2e
2ème fonction
|err|
Erreur
opération invalide
|acc|
Accumuler
accumuler du poids
|del|
Supprimer
supprimer le dernier poids
|Clr|
Clair
supprimer tout le poids
11. Opération s
Marche/Arrêt
Appuyez pendant 1 seconde pour allumer la balance. La balance effectue
l'initialisation et le test de mise sous tension,
*****
s'affiche deux fois, puis la capacité
|5000
s'affiche, le pourcentage d'autonomie de la batterie
bat90
s'affiche, la détection
de poids
-----
s'affiche, puis la mise à zéro automatique.
Pour plus d'informations sur la mise à zéro automatique, reportez-vous à la section
Configuration de la balance dans le manuel technique.
Appuyez sur ou pendant 1 s pour éteindre la balance. Le pourcentage
d'autonomie de la batterie
bat90
s'affiche, le message d'arrêt
|off|
s'affiche, puis coupe
l'alimentation.
Zéro
Appuyez sur ou pour mettre à zéro. Le voyant ZERO est allumé.
Si la charge est en mouvement, tarée ou hors de la plage de mise à zéro manuelle,
|err|
s'affiche.
Pour plus d'informations sur la plage de mise à zéro manuelle, reportez-vous à la
configuration de la balance dans le manuel technique.
Tare entrée/sortie
En mode brut, appuyez sur ou pour tarer. Le voyant TARE est allumé.
Si la charge est en mouvement, négative ou hors de la plage de tare,
|err|
s'affiche.
La tare réduit la plage de surcharge apparente de la balance. Par exemple, si une
balance de 5 000 x 2 kg a un conteneur de 1 000 kg comme tare, la balance sera
surchargée à un nouveau poids de 4 018 kg (5 000 – 1 000 + 9 divisions
supplémentaires).
- 7 -
En mode net, appuyez sur ou pour tarer. TARE la lumière éteinte.
Verrouiller/déverrouiller
Appuyez sur ou pour verrouiller l'écran. MAINTENIR la lumière allumée.
Appuyez sur ou pour déverrouiller l'écran. MAINTENEZ la lumière éteinte.
Accumuler
Appuyez pour accumuler le poids actuel.
|acc|
s'affiche, indiquant que le poids est accumulé. La balance utilise le poids affiché,
donc le poids brut ou net est ajouté dans le même accumulateur.
Si la charge est en mouvement, négative ou ne revient pas à zéro auparavant,
|err|
s'affiche.
Voir
Appuyez pour accéder au mode d'affichage.
L'écran affiche en clignotant le poids accumulé.
Appuyez sur ou pour afficher les 5 chiffres supérieurs ou les 5 chiffres
inférieurs.
Appuyez sur ou pour quitter le mode Affichage.
Supprimer le dernier poids
Appuyez pour supprimer le dernier poids accumulé.
|del|
s'affiche, indiquant que le dernier poids accumulé est supprimé. La fonction delete
supprime uniquement le dernier poids.
Si le dernier poids accumulé a été supprimé,
|err|
s'affiche.
Effacer tout le poids
Appuyez d'abord sur puis sur pour effacer tout le poids accumulé.
|clr|
s'affiche, indiquant que tout le poids est effacé.
Interrupteur d'unité
Appuyez pour changer l'unité entre kg, lb et unité utilisateur.
Lorsque l'unité est kg, le voyant LED
kg
est allumé. Lorsque l'unité est lb, le voyant
LED
lb
est allumé. Lorsque l'unité est unité utilisateur, le voyant LED
UN est allumé.
- 8 -
Pour plus d'informations sur l'unité utilisateur, reportez-vous à la configuration de la
balance dans le manuel technique.
12. Configuration de l'utilisateur
Appuyez d'abord sur puis sur ou pour accéder au menu de configuration
utilisateur.
Laconfiguration
s'affiche.
Minuterie d'arrêt automatique
Appuyez sur ou pour accéder au mode d'arrêt automatique.
Off--
s'affiche.
Appuyez sur ou et pour modifier la valeur de synchronisation.
Le délai d'arrêt automatique peut être réglé sur :
0
(désactivé),
5
(5 min),
10
(10 min),
15
(15 min),
30
(30 min),
60
(60 min). Il est désactivé par défaut.
La fonction d'arrêt automatique maximise la durée de vie de la batterie de la balance
en cas d'inattention des personnes qui ne l'éteignent pas lorsqu'elle ne fonctionne pas.
La fonction d'arrêt automatique démarre le compte à rebours lorsqu'il n'y a aucune
action ou que la charge est stable. Toute pression sur une touche ou tout mouvement
dans la charge redémarre le compte à rebours.
Luminosité de l'écran
Appuyez sur ou pour accéder à la luminosité de l'écran.
Br--
s'affiche.
Appuyez sur ou et pour modifier la valeur de luminosité.
La faible luminosité des LED permet d'économiser considérablement l'énergie de la
batterie.
Temporisation du mode veille
Appuyez sur ou pour accéder au mode veille.
Idl--
s'affiche.
Appuyez sur ou et pour modifier la valeur de synchronisation.
Le délai de veille peut être réglé sur :
0
(désactivé),
5
(5 s),
10
(10 s),
15
(15 s),
30
(30 s),
60
(60 s). La valeur par défaut est de 30 s.
Pour maximiser la durée de vie de la batterie, la balance passe automatiquement en
mode veille lorsqu'il n'y a aucune action ou que la charge est stable. En mode veille, la
balance fonctionne en mode de faible consommation d'énergie. Toute pression sur
une touche ou tout mouvement en charge réveille la balance du mode veille.
Appuyez sur ou pour quitter la configuration utilisateur.
- 9 -
13. Entretien de la batterie
Pour maximiser la durée de vie de la batterie, veuillez noter le guide d’entretien
de la batterie suivant.
Cette balance est alimentée par une batterie plomb-acide rechargeable 6V4.0Ah.
La batterie est fixée en permanence à l'intérieur du boîtier de batterie.
Selon la luminosité de la LED et le réglage du mode veille, la batterie fonctionne de 60
heures à 200 heures.
Afin de préserver la durée de vie de la batterie, activez l'arrêt automatique et le mode
veille pour atténuer la luminosité des LED.
Le temps de charge d'une batterie complètement déchargée est d'environ 12 heures.
Pour une durée de vie maximale, la batterie doit être stockée entre -20 ℃ (-4 °F) et
+50 ℃ (122 °F). Les batteries stockées doivent être rechargées tous les trois mois.
Pendant la charge, la LED verte indique la pleine puissance, tandis que la LED rouge
indique que la charge est en cours.
14.
Dépannage
Les problèmes simples peuvent être résolus grâce à la solution ci-dessous. Si
les problèmes persistent, veuillez contacter votre représentant local.
Symptôme
Cause possible
Solution suggérée
ne s'allume pas
après avoir
appuyé sur On/Off
batterie déchargée /
défectueuse
vérifier la batterie et la charger
touche marche/arrêt
défectueuse
appuyez plus fort et continuez
à appuyer pendant 2 secondes
câble d'alimentation
défectueux
ouvrez le panneau avant,
vérifiez le câble d'alimentation
carte mère défectueuse
contacter un représentant
l'affichage
clignote
batterie déchargée
charger la batterie
aucune action n'a
été entreprise
après avoir
appuyé sur la
touche
l'échelle est perturbée
rebrancher le câble
d'alimentation
clé défectueuse
contacter un représentant
la lecture du poids
n'est pas stable
charge en mouvement
maintenir la charge stable
Anti-Mouvement faible
changer le niveau
d'anti-mouvement
- 10 -
cellule de charge amortie
ou carte mère
cellule de charge sèche ou
carte mère
carte mère défectueuse
contacter un représentant
la lecture du poids
n'est pas nulle
lorsqu'il n'y a pas
de charge
batterie déchargée
charger la batterie
cellule de charge sollicitée
trop longtemps
accrocher la balance dans le
stockage
batterie déchargée
charger la batterie
grosse erreur
dans la lecture du
poids
balance non mise à zéro
avant d'appliquer la
charge
Mise à zéro de la balance
avant le chargement
mauvaise unité
passer à l'unité correcte
la balance nécessite un
calibrage
étalonner la balance
cellule de charge ou carte
mère défectueuse
contacter un représentant
la batterie ne peut
pas être
rechargée
carte de charge
défectueuse
contacter un représentant
batterie défectueuse
contacter un représentant
courte distance de
contrôle à
distance
batterie de télécommande
déchargée / défectueuse
remplacer les piles de la
télécommande
15. Procédures de chargement
NE PAS fixer une interface
surdimensionnée !
NE PAS pousser/tirer sur la balance
chargée ou directement sur le crochet !
N'utilisez PAS plusieurs accessoires !
Utilisez du matériel qui crée des fixations
à point unique.

- 11 -
16. Caractéristiques
Classe de précision
Norme chinoise GB/T 11883-2002 Classe III
Équivalent à OIML R76
Plage de tare
100% FS
Plage zéro
4% de matière grasse
Temps stable
≤10 sec
Surcharge
100% FS + 9e
Charge de sécurité
150% de la valeur vénale
Charge ultime
400% FS
Batterie
Batterie rechargeable au plomb-acide 6 V/4,0 Ah.
Chargeur
Sortie 14 V CC/1 000 mA
(norme européenne, américaine)
Sortie 9VDC/1500mA (norme australienne)
Afficher
Module LED de 40 mm (1,6 pouce)
Temp. op.
-10℃ - +40℃
Op. Humidité
20℃ ≤90%
Articles
Description
1
Nom
Balance à grue industrielle
2
Modèle
OCS-3-D
3
Paramètre
Puissance nominale : 6 V CC
Capacité : 3000 kg/6600 lb
Division : 1 lb

- 12 -
Articles
Description
1
Nom
Balance à grue industrielle
2
Modèle
OCS-5-D
3
Paramètre
Puissance nominale : 6 V CC
Capacité : 5000 kg/11000 lb
Division : 2 lb

- 13 -
Fabricant : Shanghaimuxinmuyeyouxiangongsi
Adresse : Shuangchenglu 803nong11hao1602A-1609shi, baoshanqu,
Shanghai 200000 CN.
Importé en Australie : SIHAO PTY LTD, 1 ROKEVA STREET, ASTWOOD
NSW 2122 Australie
Importé aux États-Unis : Sanven Technology Ltd., Suite 250, 9166 Anaheim
Place, Rancho Cucamonga, CA 91730
REP
EC
E-CrossStu GmbH
Mainzer Landstr.69, 60329 Frankfurt am Main.
REP
UK
YH CONSULTING LIMITED.
C/O YH Consulting Limited Office 147, Centurion House,
London Road, Staines-upon-Thames, Surrey, TW18 4AX
Assistance technique et certificat de garantie électronique
www.vevor.com/support

- 14 -
Technischer Support und E-Garantie-Zertifikat
www.vevor.com/support
INDUSTRIELLE KRANWAAGE
MODELL: OCS-3-D / OCS-5-D
We continue to be committed to provide you tools with competitive price.
"Save Half", "Half Price" or any other similar expressions used by us only represents an
estimate of savings you might benefit from buying certain tools with us compared to the major
top brands and does not necessarily mean to cover all categories of tools offered by us. You
are kindly reminded to verify carefully when you are placing an order with us if you are
actually saving half in comparison with the top major brands.

- 1 -
MODELL: OCS-3-D / OCS-5-D
Have product questions? Need technical support? Please feel free to
contact us:
Technical Support and E-Warranty Certificate
www.vevor.com/support
NEED HELP? CONTACT US!
This is the original instruction, please read all manual instructions
carefully before operating. VEVOR reserves a clear interpretation of our
user manual. The appearance of the product shall be subject to the
product you received. Please forgive us that we won't inform you again if
there are any technology or software updates on our product.
INDUSTRIAL CRANE
SCALE
- 2 -
ALLGEMEINE SICHERHEITSREGELN
Symbol
Symbol Beschreibung
Achtung – Um das Verletzungsrisiko zu verringern, muss der
Benutzer die Bedienungsanleitung sorgfältig lesen.
Dieses Symbol vor einem Sicherheitshinweis weist auf eine
Vorsichtsmaßnahme, Warnung oder Gefahr hin. Das Ignorieren
dieser Warnung kann zu einem Unfall führen. Um das Risiko von
Verletzungen, Bränden oder Stromschlägen zu verringern,
befolgen Sie bitte immer die unten aufgeführten Empfehlungen.
Achtung: Tragen Sie bei der Verwendung dieses Produkts
unbedingt Handschuhe.
Warnung: Tragen Sie bei der Verwendung dieses Produkts
unbedingt einen Augenschutz.
Hinweise zur Entsorgung:
Dieses Produkt unterliegt den Bestimmungen der europäischen
Richtlinie 2012/19/EU. Das Symbol einer durchgestrichenen
Mülltonne auf Rädern weist darauf hin, dass dieses Produkt in der
Europäischen Union einer getrennten Müllentsorgung unterliegt.
Dies gilt für das Produkt und alle mit diesem Symbol
gekennzeichneten Zubehörteile. So gekennzeichnete Produkte
dürfen nicht im normalen Hausmüll entsorgt werden, sondern
müssen an einer Sammelstelle für das Recycling von elektrischen
und elektronischen Geräten abgegeben werden.
Allgemeine Sicherheitshinweise
WARNUNG! Lesen Sie alle Sicherheitswarnungen und Hinweise. Die
Nichtbeachtung der unten aufgeführten Anweisungen kann zu Stromschlägen,
Bränden und/oder Verletzungen führen.
Um eine gute Leistung und präzise Messungen zu erzielen, gehen Sie bei der
täglichen Bedienung und Wartung sorgfältig vor.
- 3 -
SICHERHEIT AM ARBEITSBEREICH
a) Halten Sie den Anwendungsbereich sauber und gut beleuchtet. Unsaubere
und dunkle Bereiche führen zu Unfällen.
b) Verwenden Sie Elektrowerkzeuge nicht in explosiven Umgebungen, in
denen sich brennbare Flüssigkeiten, Gase oder Dämpfe befinden.
Elektrowerkzeuge erzeugen Funken, die Staub oder Dämpfe entzünden können.
c) Halten Sie Kinder und andere Personen während des Betriebs des Gerätes
fern. Ablenkung kann zum Verlust der Kontrolle über das Gerät führen.
Nutzungshinweis:
Kranwaage nicht überlasten, da dies zur Beschädigung der Wägezelle führt.
Lassen Sie die Last nicht zu lange auf der Digitalwaage hängen. Dies verringert
die Genauigkeit der Waage und verkürzt die Lebensdauer der Wägezelle.
Überprüfen Sie Schäkel und Haken vor der Verwendung. Überprüfen Sie
regelmäßig Clips, Stifte und Schrauben.
Vielen Dank für Ihre Unterstützung unserer Produkte!
17. Abmessungen und Gewicht
- 4 -
Modell
A (mm)
B (mm)
C (mm)
L (mm)
OCS-3-D
55
96
35
575
OCS-5-D
78
123
48
675
18.
Display & Tasten
Tonleitertasten
Schlüssel
Name
Funktion
Ein / Aus
Drücken Sie 1 Sekunde, um die Waage
ein-/auszuschalten.
Null
Manuelle Nullstellung.
Blinkende Ziffer erhöhen.
Tara
Tara ein-/austarieren.
Nach rechts scrollen, blinkende Ziffer.
Halten
Lesen sperren/entsperren.
Bestätigen.
Funkschlüssel
Schlüssel
Name
Funktion
Null
Dasselbe wie .
Tara
Dasselbe wie .
Halten
Dasselbe wie .
Acc.
Gewicht ansammeln.
Blinkende Ziffer verringern.
Entf.
Das letzte Gewicht löschen.
Sämtliches Gewicht löschen.
Nach links scrollen, blinkende Ziffer.
Formel 1
Sicht.
Dezimalpunkt eingeben.
F2
Einheitenschalter.
Aus
Zum Ausschalten 1 Sekunde drücken.
2. Platz
2. Funktion.
Indikatoren
LED
Name
Notiz
Laden
leuchtet beim Laden
STB.
Stabil
leuchtet, wenn das Gewicht stabil ist
- 5 -
NULL
Null
leuchtet, wenn das Gewicht auf Null steht
TARA
Tariert
leuchtet, wenn die Waage tariert ist
HALTEN
Halten
leuchtet, wenn die Waage gesperrt ist
Pfund
Pfund
leuchtet, wenn die Einheit lb ist
kg
kg
leuchtet, wenn die Einheit kg ist
UN
BENUTZER
leuchtet, wenn das Gerät ein Benutzergerät ist
Nachricht
Nachricht
Stehen für
Notiz
-----
Gewicht erkennen
-
im Leerlauf
Aufstellen
AUFSTELLEN
Menü „Benutzer-Setup“
Fledermaus--
Batterie
Akkulaufzeit in Prozent
P0000
Passwort
im Passwortmodus
|Ende|
ENDE
Speichern und beenden
|aus|
AUS
ausschalten
|Über
Überlast
Überlastung
|2.|
2.
2. Funktion
|ähm|
Fehler
Ungültiger Vorgang
|Zug|
Akkumulieren
Gewicht ansammeln
|entfernen|
Löschen
letztes Gewicht löschen
|Clr|
Klar
alle Gewichte löschen
19. Bedienung
Ein-/Ausschalten
Drücken Sie 1 Sekunde lang, um die Waage einzuschalten. Die Waage führt eine
Initialisierung und einen Einschalttest durch,
*****
wird zweimal angezeigt, dann wird
die Kapazität
|5000
angezeigt, die Batterielebensdauer in Prozent
bat90
wird angezeigt,
die Gewichtserkennung
-----
wird angezeigt und dann wird die automatische
Nullstellung angezeigt.
Informationen zur automatischen Nullstellung finden Sie unter „Waagenkonfiguration
“ im technischen Handbuch.
Drücken Sie oder 1 Sekunde lang, um die Waage auszuschalten. Der
Prozentsatz der Batterielebensdauer
bat90
wird angezeigt, die Ausschaltmeldung
|off|

- 6 -
wird angezeigt und dann wird die Stromversorgung unterbrochen.
Null
Drücken Sie oder zum Nullsetzen. Die ZERO- Leuchte leuchtet.
Wenn die Last in Bewegung ist, tariert ist oder sich außerhalb des manuellen
Nullbereichs befindet, wird
|err|
angezeigt.
Informationen zum manuellen Nullbereich finden Sie unter „Waagenkonfiguration“ im
technischen Handbuch.
Tara Ein/Aus
Drücken Sie im Bruttomodus oder zum Tarieren. Die TARE- Leuchte leuchtet.
Wenn die Last in Bewegung ist, negativ ist oder außerhalb des Tarabereichs liegt, wird
|err|
angezeigt.
Durch das Tara wird der scheinbare Überlastungsbereich der Waage verringert. Wenn
beispielsweise eine 5000 x 2 kg schwere Waage einen 1000 kg schweren Behälter als
Tara hat, wird die Waage bei einem neuen Gewicht von 4018 kg (5000 – 1000 +
zusätzliche 9 Teilstriche) überlastet.
Im Nettomodus drücken Sie oder um auszutarieren. TARA das Licht aus.
Sperren/Entsperren
Drücken Sie oder , um den Bildschirm zu sperren. das Licht an.
Drücken Sie oder , um den Bildschirm zu entsperren. HALTEN Sie das Licht
aus.
Akkumulieren
Drücken Sie, um das aktuelle Gewicht zu addieren.
|acc|
wird angezeigt und gibt an, dass das Gewicht akkumuliert wird. Die Waage
verwendet das angezeigte Gewicht, sodass Brutto- oder Nettogewicht in denselben
Akkumulator addiert werden.
Wenn die Last in Bewegung ist, negativ ist oder nicht vorher auf Null zurückkehrt, wird
|err|
angezeigt.
Sicht
Drücken Sie, um in den Anzeigemodus zu wechseln.
Auf der Anzeige blinkt das kumulierte Gewicht.
- 7 -
Drücken Sie oder , um die höchsten oder niedrigsten 5-Ziffern anzuzeigen.
Drücken Sie oder , um den Anzeigemodus zu verlassen.
Letztes Gewicht löschen
Drücken Sie , um das zuletzt kumulierte Gewicht zu löschen.
|del|
wird angezeigt und bedeutet, dass das letzte kumulierte Gewicht gelöscht wird.
Die Löschfunktion löscht nur das letzte Gewicht.
Wenn das letzte kumulierte Gewicht gelöscht wurde, wird
|err|
angezeigt.
Alle Gewichte löschen
Drücken Sie zuerst und dann , um das gesamte kumulierte Gewicht zu
löschen.
|clr|
wird angezeigt und gibt an, dass das gesamte Gewicht gelöscht ist.
Einheitenschalter
Drücken Sie, um die Einheit zwischen kg, lb und Benutzereinheit umzuschalten.
Wenn die Einheit kg ist, leuchtet die
kg -LED. Wenn die Einheit lb ist,
leuchtet die
lb- LED.
Wenn die Einheit eine Benutzereinheit ist, leuchtet die
UN- LED.
Weitere Informationen zur Benutzereinheit finden Sie unter „Waagenkonfiguration“ im
technischen Handbuch.
20.
Benutzereinrichtung
Drücken Sie zuerst und dann oder , um das Menü
„Benutzer-Setup“ aufzurufen.
DasSetup
wird angezeigt.
Automatische Abschaltung
Drücken Sie oder , um die automatische Abschaltzeit einzugeben.
„Off-“
wird
angezeigt.
Drücken Sie oder und um den Zeitwert zu ändern.
Die automatische Abschaltung kann auf folgende Werte eingestellt werden:
0
(deaktiviert),
5
(5 Min.),
10
(10 Min.),
15
(15 Min.),
30
(30 Min.),
60
(60 Min.).
Standardmäßig ist die Funktion deaktiviert.
Die Auto-Off-Funktion maximiert die Batterielebensdauer der Waage, wenn die Waage
aus Versehen ausgeschaltet wird, wenn sie nicht funktioniert. Die Auto-Off-Funktion
- 8 -
startet den Countdown-Timer, wenn keine Aktion erfolgt oder die Last stabil ist. Durch
Drücken einer Taste oder Bewegung der Last wird der Countdown-Timer neu
gestartet.
Bildschirmhelligkeit
Drücken Sie oder , um die Anzeigehelligkeit einzugeben.
Br--
wird angezeigt.
Drücken Sie oder und um den Helligkeitswert zu ändern.
Durch die gedämpfte LED-Helligkeit wird die Batterieleistung erheblich gespart.
Timing im Leerlaufmodus
Drücken Sie oder , um in den Leerlaufmodus zu wechseln.
Idl--
wird
angezeigt.
Drücken Sie oder und , um den Zeitwert zu ändern.
Die Zeit für den Leerlaufmodus kann auf folgende Werte eingestellt werden:
0
(deaktiviert),
5
(5 Sek.),
10
(10 Sek.),
15
(15 Sek.),
30
(30 Sek.),
60
(60 Sek.). Die
Standardeinstellung ist 30 Sek.
Um die Batterielebensdauer zu maximieren, wechselt die Waage automatisch in den
Leerlaufmodus, wenn keine Aktion erfolgt oder die Last stabil ist. Im Leerlaufmodus
arbeitet die Waage im Status mit geringem Stromverbrauch. Durch Drücken einer
Taste oder Bewegung der Last wird die Waage aus dem Leerlaufmodus geweckt.
Drücken Sie oder , um die Benutzereinrichtung zu beenden.
21.
Batteriewartung
Um die Batterielebensdauer zu maximieren, beachten Sie bitte die folgende
Anleitung zur Batteriewartung.
Diese Waage wird von einer wiederaufladbaren 6V4,0Ah Blei-Säure-Batterie
betrieben.
Die Batterie ist dauerhaft im Batteriegehäuse befestigt.
Je nach LED-Helligkeit und Leerlaufeinstellung beträgt die Betriebsdauer des Akkus
zwischen 60 und 200 Stunden.
Um die Batterie zu schonen, aktivieren Sie die automatische Abschaltung und den
Leerlaufmodus, um die LED-Helligkeit zu dimmen.
Die Ladezeit für einen vollständig entladenen Akku beträgt ca. 12 Stunden.
Um eine maximale Lebensdauer zu erreichen, sollte die Batterie bei Temperaturen
zwischen -20 °C (-4 °F) und +50 °C (122 °F) gelagert werden. Gelagerte Batterien
sollten alle drei Monate aufgeladen werden.
- 9 -
Während des Ladevorgangs zeigt die grüne LED die volle Leistung an, während eine
rote LED anzeigt, dass der Ladevorgang läuft.
22. Fehlerbehebung
Einfache Probleme können mit der unten aufgeführten Lösung behoben werden.
Wenn weiterhin Probleme bestehen, wenden Sie sich bitte an Ihren lokalen
Vertreter.
Symptom
Mögliche Ursache
Vorgeschlagene Lösung
schaltet sich nicht ein,
nachdem Ein/Aus
gedrückt wurde
entladene / defekte
Batterie
Akku prüfen und laden
Ein-/Aus-Taste defekt
Drücken Sie stärker und
halten Sie die Taste 2s
gedrückt
defektes Netzkabel
Öffnen Sie die Frontblende,
überprüfen Sie das
Netzkabel
defektes Mainboard
Ansprechpartner
Anzeige blinkt
entladene Batterie
Akku laden
Nach dem Drücken der
Taste wurde keine
Aktion ausgeführt.
Maßstab ist gestört
Netzkabel wieder
einstecken
defekter Schlüssel
Ansprechpartner
Die Gewichtsanzeige
ist nicht stabil
Last in Bewegung
Ladung stabil halten
schwache
Anti-Bewegung
Anti-Motion-Level ändern
gedämpfte Wägezelle
oder Mainboard
Trockenwägezelle oder
Mainboard
defektes Mainboard
Ansprechpartner
Der Gewichtswert ist
nicht Null, wenn keine
Last vorhanden ist
entladene Batterie
Akku laden
Wägezelle zu lange
beansprucht
Waage im Lager aufhängen
entladene Batterie
Akku laden
großer Fehler bei der
Gewichtsanzeige
Waage vor dem
Aufbringen der Last
nicht auf Null gestellt
manuelle Nullung der
Waage vor dem Laden
falsche Einheit
zur richtigen Einheit
wechseln
Waage muss kalibriert
Waage kalibrieren
- 10 -
werden
defekte Wägezelle oder
Hauptplatine
Ansprechpartner
Batterie kann nicht
wieder aufgeladen
werden
defekte Ladeplatine
Ansprechpartner
defekte Batterie
Ansprechpartner
kurze
Fernbedienungsdistanz
entladene / defekte
Fernbedienungsbatterie
Ersetzen Sie die Batterien
der Fernbedienung
23. Ladevorgänge
KEINE überdimensionierte Schnittstelle
anschließen!
NICHT an der beladenen Waage oder
direkt am Haken drücken/ziehen!
Verwenden Sie NICHT mehrere
Anhänge!
Verwenden Sie Hardware, die
Einzelpunktbefestigungen erstellt.
24.
Technische Daten
Genauigkeitsklasse
Chinesisch GB/T 11883-2002 Klasse III
Äquivalent zu OIML R76
- 11 -
Tarabereich
100 % FS
Nullbereich
4 % FS
Stabile Zeit
≤10 Sek.
Überlast
100 % FS + 9e
Sicherheitslast
150 % FS
Maximale Belastung
400 % FS
Batterie
Wiederaufladbarer Bleiakkumulator mit 6 V/4,0 Ah.
Ladegerät
14 VDC/1000 mA Ausgang
(Europäischer, amerikanischer Standard)
9 VDC/1500 mA Ausgang (australischer Standard)
Anzeige
40 mm (1,6 Zoll) LED-Modul
Betriebstemperatur.
-10℃ - +40℃
Betriebsfeuchtigkeit
20℃ ≤90%
Artikel
Beschreibung
1
Name
Industrielle Kranwaage
2
Modell
OCS-3-D
3
Parameter
Nennleistung(en): 6VDC
Kapazität: 3000kg/6600Ib
Teilung: 1 Pfund
Artikel
Beschreibung
1
Name
Industrielle Kranwaage
2
Modell
OCS-5-D
3
Parameter
Nennleistung(en): 6VDC
Kapazität: 5000kg/11000Ib
Teilung: 2 Pfund

- 12 -
Hersteller: Shanghaimuxinmuyeyouxiangongsi
Adresse: Shuangchenglu 803nong11hao1602A-1609shi, baoshanqu,
Shanghai 200000 CN.
Nach AUS importiert: SIHAO PTY LTD, 1 ROKEVA STREETEASTWOOD
NSW 2122 Australien
Importiert in die USA: Sanven Technology Ltd., Suite 250, 9166 Anaheim
Place, Rancho Cucamonga, CA 91730
REP
EC
E-CrossStu GmbH
Mainzer Landstr.69, 60329 Frankfurt am Main.
REP
UK
YH CONSULTING LIMITED.
C/O YH Consulting Limited Office 147, Centurion House,
London Road, Staines-upon-Thames, Surrey, TW18 4AX
Technischer Support und E-Garantie-Zertifikat
www.vevor.com/support

- 13 -
Supporto tecnico e certificato di garanzia elettronica
www.vevor.com/support
BILANCIA PER GRU INDUSTRIALE
MODELLO: OCS-3-D / OCS-5-D
We continue to be committed to provide you tools with competitive price.
"Save Half", "Half Price" or any other similar expressions used by us only represents an
estimate of savings you might benefit from buying certain tools with us compared to the major
top brands and does not necessarily mean to cover all categories of tools offered by us. You
are kindly reminded to verify carefully when you are placing an order with us if you are
actually saving half in comparison with the top major brands.

- 1 -
MODELLO: OCS-3-D / OCS-5-D
Have product questions? Need technical support? Please feel free to
contact us:
Technical Support and E-Warranty Certificate
www.vevor.com/support
NEED HELP? CONTACT US!
This is the original instruction, please read all manual instructions
carefully before operating. VEVOR reserves a clear interpretation of our
user manual. The appearance of the product shall be subject to the
product you received. Please forgive us that we won't inform you again if
there are any technology or software updates on our product.
INDUSTRIAL CRANE
SCALE

- 2 -
NORME GENERALI DI SICUREZZA
Simbolo
Descrizione del simbolo
Attenzione - Per ridurre il rischio di lesioni, l'utente deve leggere
attentamente il manuale di istruzioni.
Questo simbolo, posto prima di un commento sulla sicurezza,
indica un tipo di precauzione, avviso o pericolo. Ignorare questo
avviso può causare un incidente. Per ridurre il rischio di lesioni,
incendi o folgorazione, seguire sempre le raccomandazioni
indicate di seguito.
Attenzione: assicurarsi di indossare guanti quando si utilizza
questo prodotto.
Attenzione: indossare sempre protezioni per gli occhi quando si
utilizza questo prodotto.
Informazioni sullo smaltimento:
Questo prodotto è soggetto alle disposizioni della Direttiva
Europea 2012/19/CE. Il simbolo raffigurante un bidone della
spazzatura barrato indica che il prodotto richiede la raccolta
differenziata dei rifiuti nell'Unione Europea. Ciò si applica al
prodotto e a tutti gli accessori contrassegnati con questo simbolo.
I prodotti contrassegnati come tali non possono essere smaltiti
con i normali rifiuti domestici, ma devono essere portati in un
punto di raccolta per il riciclaggio di dispositivi elettrici ed
elettronici.
Istruzioni generali di sicurezza
ATTENZIONE! Leggere tutte le avvertenze e le note di sicurezza. La mancata
osservanza delle istruzioni elencate di seguito può causare scosse elettriche,
incendi e/o lesioni.
Per ottenere buone prestazioni e misurazioni precise, prestare attenzione al
funzionamento e alla manutenzione quotidiani.

- 3 -
SICUREZZA NELL'AREA DI LAVORO
a) Mantenere l'area di applicazione pulita e ben illuminata. Le aree sporche e
buie causano incidenti.
b) Non utilizzare utensili elettrici in ambienti esplosivi, come in presenza di
liquidi, gas o vapori infiammabili. Gli utensili elettrici generano scintille che
possono incendiare polvere o vapori.
c) Tenere lontani i bambini e gli astanti quando si utilizza l'apparecchio. Le
distrazioni possono portare alla perdita di controllo sul dispositivo.
Nota sull'utilizzo:
Non sovraccaricare la bilancia della gru, poiché ciò danneggerebbe la cella di
carico;
Non lasciare il carico appeso alla bilancia digitale per lungo tempo. Ciò diminuirà
la precisione della bilancia e accorcerà la durata della cella di carico;
Ispezionare grillo e gancio prima dell'uso. Controllare regolarmente clip, perni e
viti;
Grazie per il supporto ai nostri prodotti!
25. Dimensioni e peso
- 4 -
Modello
La (mm)
B
(
mm
)
C
(
mm
)
L
(
mm
)
OCS-3-D
55
96
35
575
OCS-5-D
78
123
48
675
26.
Display e tasti
Chiavi di scala
Chiave
Nome
Funzione
Acceso/Spento
Premere 1s per accendere/spegnere la bilancia.
Zero
Zero manuale.
Aumenta la cifra lampeggiante.
Tara
Tara in entrata/uscita.
Cifra lampeggiante con scorrimento verso destra.
Presa
Blocca/sblocca la lettura.
Confermare.
Chiavi remote
Chiave
Nome
Funzione
- 5 -
Zero
Lo stesso di .
Tara
Lo stesso di .
Presa
Lo stesso di .
Acc.
Accumulare peso.
Diminuisce la cifra lampeggiante.
Del.
Elimina l'ultimo peso.
Eliminare tutto il peso.
Cifra lampeggiante con scorrimento verso sinistra.
Formula
1
Visualizzazione.
Inserire il punto decimale.
La F2
Interruttore di unità.
Spento
Premere 1s per spegnere.
2°
2a funzione.
Indicatori
GUIDATO
Nome
Nota
Ricarica
acceso durante la carica
STB.
Stabile
acceso quando il peso è stabile
ZERO
Zero
acceso quando il peso è a zero
TARA
Tarato
acceso quando la bilancia è tarata
PRESA
Presa
acceso quando la bilancia è bloccata
libbre
libbre
acceso quando l'unità è lb
kg
kg
acceso quando l'unità è kg
ONU
UTENTE
acceso quando l'unità è un'unità utente
Messaggio
Messaggio
Rappresentare
Nota
-----
rilevare il peso
-
in modalità inattiva
Impostare
IMPOSTARE
Menu di configurazione utente
Pipistrello--
Batteria
percentuale di durata della
batteria
P0000
Password
in modalità password
|fine|
FINE
salva ed esci
|spento|
SPENTO
Spegnere
- 6 -
|oltre
Sovraccarico
sovraccarico
|2°|
2°
2a funzione
|Errore|
Errore
operazione non valida
|conforme|
Accumulare
accumulare peso
|del|
Eliminare
elimina ultimo peso
|Chiuso|
Chiaro
elimina tutto il peso
27. Operazione s
Accensione/spegnimento
Premere per 1s per accendere la bilancia. La bilancia esegue l'inizializzazione e il
test di accensione,
*****
viene visualizzato due volte, quindi capacità
|5000
viene
visualizzato, percentuale di durata della batteria
bat90
viene visualizzato, rilevamento
del peso
-----
viene visualizzato, quindi azzeramento automatico.
Per informazioni sulla funzione Auto-Zero, fare riferimento alla sezione Configurazione
della bilancia nel Manuale tecnico.
Premere o per 1s per spegnere la bilancia. Viene visualizzata la percentuale
di durata della batteria
bat90
, viene visualizzato il messaggio di spegnimento
|off|
,
quindi si interrompe l'alimentazione.
Zero
Premere o per azzerare. La spia ZERO si accende.
Se il carico è in movimento, tarato o fuori dall'intervallo di azzeramento manuale, viene
visualizzato
|err|
.
Per informazioni sull'intervallo di azzeramento manuale, fare riferimento alla sezione
Configurazione della bilancia nel Manuale tecnico.
Tara in entrata/uscita
In modalità lordo, premere o per effettuare la tara. La spia TARA è accesa.
Se il carico è in movimento, negativo o fuori dall'intervallo della tara, viene visualizzato
|err|
.
La tara ridurrà l'intervallo di sovraccarico apparente della bilancia. Ad esempio, se una
bilancia da 5000*2 kg ha un contenitore da 1000 kg come tara, la bilancia si
sovraccaricherà a un nuovo peso di 4018 kg (5000 – 1000 + 9 divisioni aggiuntive).
In modalità netta, premere o per tarare. TARA la luce spenta.
- 7 -
Bloccare/sbloccare
Premere o per bloccare lo schermo. TENERE PREMUTO la luce accesa.
Premere o per sbloccare lo schermo. TENERE la luce spenta.
Accumulare
Premere per sommare il peso attuale.
|acc|
mostra, indicando che il peso è accumulato. La bilancia usa il peso visualizzato,
quindi il peso lordo o netto viene aggiunto nello stesso accumulatore.
Se il carico è in movimento, negativo o non torna prima a zero, viene visualizzato
|err|
.
Visualizzazione
Premere per accedere alla modalità Visualizzazione.
Il display lampeggia per indicare il peso accumulato.
Premere o per visualizzare le 5 cifre alte o le 5 cifre basse.
Premere o per uscire dalla modalità Visualizzazione.
Elimina l'ultimo peso
Premere per eliminare l'ultimo peso accumulato.
|del|
mostra, indicando che l'ultimo peso accumulato è stato eliminato. La funzione
delete elimina solo l'ultimo peso.
Se l'ultimo peso accumulato è stato eliminato, viene visualizzato
|err|
.
Cancella tutto Peso
Premere prima e poi premere per cancellare tutto il peso accumulato.
|clr|
viene visualizzato, indicando che tutto il peso è stato cancellato.
Interruttore unità
Premere per cambiare l'unità tra kg, lb e unità utente.
Quando l'unità è kg, la luce LED
kg
è accesa. Quando l'unità è lb, la luce LED
lb
è
accesa. Quando l'unità è unità utente, la luce LED
UN è accesa.
Per ulteriori informazioni sull'unità utente, fare riferimento alla sezione Configurazione
della bilancia nel Manuale tecnico.
28.
Impostazione utente

- 8 -
Premere prima e poi premere o per accedere al menu Impostazioni
utente. Viene visualizzato il messaggio
Impostazioni
.
Temporizzazione di spegnimento automatico
Premere o per immettere la temporizzazione di spegnimento automatico.
Viene visualizzato
Off--
.
Premere o e per modificare il valore di temporizzazione.
Il tempo di spegnimento automatico può essere impostato su:
0
(disabilitato),
5
(5 min),
10
(10 min),
15
(15 min),
30
(30 min),
60
(60 min). È disabilitato per impostazione
predefinita.
La funzione Auto-Off massimizza la durata della batteria della bilancia contro la
disattenzione delle persone che non la spengono quando non è in funzione. Auto-Off
avvia il timer del conto alla rovescia quando non c'è azione o il carico è stabile.
Qualsiasi pressione di un tasto o movimento nel carico riavvia il timer del conto alla
rovescia.
Luminosità dello schermo
Premere o per accedere alla luminosità del display. Viene visualizzato
Br--
.
Premere o e per modificare il valore della luminosità.
La bassa luminosità dei LED consente di risparmiare notevolmente la batteria.
Temporizzazione modalità inattiva
Premere o per accedere alla modalità Idle Timing.
Idl--
viene visualizzato.
Premere o e per modificare il valore di temporizzazione.
Il tempo di modalità inattiva può essere impostato su:
0
(disabilitato),
5
(5 sec),
10
(10
sec),
15
(15 sec),
30
(30 sec),
60
(60 sec). Per impostazione predefinita, è 30 sec.
Per massimizzare la durata della batteria, la bilancia entra automaticamente in
modalità Idle quando non c'è azione o il carico è stabile. In modalità Idle, la bilancia
funziona in stato di basso consumo energetico. Qualsiasi pressione di un tasto o
movimento sotto carico riattiva la bilancia dalla modalità Idle.
Premere o per uscire dalla Configurazione Utente.
29.
Manutenzione della batteria
Per massimizzare la durata della batteria, si prega di leggere la seguente guida
alla manutenzione della batteria.
- 9 -
Questa bilancia è alimentata da una batteria al piombo ricaricabile da 6V4.0Ah.
La batteria è fissata in modo permanente all'interno del vano batteria.
A seconda della luminosità del LED e dell'impostazione della modalità inattiva, la
batteria funziona da 60 a 200 ore.
Per preservare la durata della batteria, abilitare lo spegnimento automatico e la
modalità inattiva per ridurre la luminosità dei LED.
Il tempo di ricarica di una batteria completamente scarica è di circa 12 ore.
Per ottenere la massima durata di servizio, la batteria deve essere conservata tra
-20℃ (-4°F) e +50℃ (122°F). Le batterie conservate devono essere ricaricate ogni tre
mesi.
Durante la ricarica, il LED verde indica la piena potenza, mentre il rosso indica che la
ricarica è in corso.
30. Risoluzione dei problemi
I problemi semplici possono essere risolti con la soluzione elencata di seguito.
Se i problemi persistono, contattare il rappresentante locale.
Sintomo
Possibile causa
Soluzione suggerita
non si accende
dopo aver
premuto On/Off
batteria scarica/difettosa
controllare la batteria e
caricarla
tasto On/Off difettoso
premere più forte e continuare
a premere per 2 secondi
cavo di alimentazione
difettoso
aprire il pannello frontale,
controllare il cavo di
alimentazione
scheda madre difettosa
contattare il rappresentante
il display
lampeggia
batteria scarica
caricare la batteria
non è stata
intrapresa alcuna
azione dopo che il
tasto è stato
premuto
la scala è disturbata
ricollegare il cavo di
alimentazione
chiave difettosa
contattare il rappresentante
la lettura del peso
non è stabile
carico in movimento
mantenere il carico stabile
Anti-Movimento debole
cambia il livello
Anti-Movimento
cella di carico smorzata o
scheda madre
cella di carico a secco o
scheda madre
- 10 -
scheda madre difettosa
contattare il rappresentante
la lettura del peso
non è zero
quando non c'è
carico
batteria scarica
caricare la batteria
cella di carico sollecitata
troppo a lungo
appendere la bilancia in
magazzino
batteria scarica
caricare la batteria
grande errore
nella lettura del
peso
bilancia non azzerata
prima di applicare il carico
manuale Bilancia a zero prima
del carico
unità sbagliata
passare all'unità corretta
la scala richiede la
calibrazione
calibrare la scala
cella di carico o scheda
madre difettosa
contattare il rappresentante
la batteria non
può essere
ricaricata
scheda di carica difettosa
contattare il rappresentante
batteria difettosa
contattare il rappresentante
breve distanza di
controllo remoto
batteria remota
scarica/difettosa
sostituire le batterie del
telecomando
31. Procedure di caricamento
NON collegare un'interfaccia di grandi
dimensioni!
NON spingere/tirare la bilancia carica o
direttamente il gancio!
NON utilizzare più allegati!
Utilizzare hardware che consenta di
realizzare attacchi a punto singolo.

- 11 -
32. Specifiche
Classe di precisione
Cinese GB/T 11883-2002 Classe III
Equivalente a OIML R76
Intervallo di tara
100% FS
Gamma zero
4% di sconto
Tempo stabile
≤10 secondi
Sovraccarico
100% FS + 9e
Carico di sicurezza
150% di garanzia
Carico massimo
400% di garanzia
Batteria
Batteria ricaricabile al piombo da 6 V/4,0 Ah.
Caricabatterie
Uscita 14 V CC/1000 mA
(standard europeo, americano)
Uscita 9VDC/1500mA (standard australiano)
Display
Modulo LED da 40 mm (1,6 pollici)
Temp. Op.
-10℃ - +40℃
Umidità Op.
20℃ ≤90%
Elementi
Descrizione
1
Nome
Bilancia per gru industriale
2
Modello
OCS-3-D
3
Parametro
Valutazione(i): 6VDC
Capacità: 3000kg/6600Ib
Divisione: 1 libbra

- 12 -
Elementi
Descrizione
1
Nome
Bilancia per gru industriale
2
Modello
OCS-5-D
3
Parametro
Valutazione(i): 6VDC
Capacità: 5000kg/11000Ib
Divisione: 2 libbre

- 13 -
Produttore: Shanghaimuxinmuyeyouxiangongsi
Indirizzo: Shuangchenglu 803nong11hao1602A-1609shi, baoshanqu,
shanghai 200000 CN.
Importato in AUS: SIHAO PTY LTD, 1 ROKEVA STREETEASTWOOD NSW
2122 Australia
Importato negli USA: Sanven Technology Ltd., Suite 250, 9166 Anaheim
Place, Rancho Cucamonga, CA 91730
REP
EC
E-CrossStu GmbH
Mainzer Landstr.69, 60329 Frankfurt am Main.
REP
UK
YH CONSULTING LIMITED.
C/O YH Consulting Limited Office 147, Centurion House,
London Road, Staines-upon-Thames, Surrey, TW18 4AX
Supporto tecnico e certificato di garanzia elettronica
www.vevor.com/support

- 14 -
Soporte técnico y certificado de garantía electrónica
www.vevor.com/support
BÁSCULA DE GRÚA INDUSTRIAL
MODELO: OCS-3-D / OCS-5-D
We continue to be committed to provide you tools with competitive price.
"Save Half", "Half Price" or any other similar expressions used by us only represents an
estimate of savings you might benefit from buying certain tools with us compared to the major
top brands and does not necessarily mean to cover all categories of tools offered by us. You
are kindly reminded to verify carefully when you are placing an order with us if you are
actually saving half in comparison with the top major brands.

- 1 -
MODELO: OCS-3-D / OCS-5-D
Have product questions? Need technical support? Please feel free to
contact us:
Technical Support and E-Warranty Certificate
www.vevor.com/support
NEED HELP? CONTACT US!
This is the original instruction, please read all manual instructions
carefully before operating. VEVOR reserves a clear interpretation of our
user manual. The appearance of the product shall be subject to the
product you received. Please forgive us that we won't inform you again if
there are any technology or software updates on our product.
INDUSTRIAL CRANE
SCALE

- 2 -
NORMAS GENERALES DE SEGURIDAD
Símbolo
Descripción del símbolo
Advertencia - Para reducir el riesgo de lesiones, el usuario debe
leer atentamente el manual de instrucciones.
Este símbolo, colocado antes de un comentario de seguridad,
indica un tipo de precaución, advertencia o peligro. Ignorar esta
advertencia puede provocar un accidente. Para reducir el riesgo
de lesiones, incendios o electrocución, siga siempre las
recomendaciones que se muestran a continuación.
Advertencia: Asegúrese de usar guantes al utilizar este producto.
Advertencia: Asegúrese de usar protectores para los ojos cuando
utilice este producto.
Información de eliminación:
Este producto está sujeto a las disposiciones de la Directiva
Europea 2012/19/CE. El símbolo que muestra un contenedor de
basura tachado indica que el producto requiere una recogida
selectiva de residuos en la Unión Europea. Esto se aplica al
producto y a todos los accesorios marcados con este símbolo.
Los productos marcados como tales no pueden desecharse con
los residuos domésticos normales, sino que deben llevarse a un
punto de recogida para reciclar dispositivos eléctricos y
electrónicos.
Instrucciones generales de seguridad
¡ADVERTENCIA! Lea todas las advertencias y notas de seguridad. Si no
sigue las instrucciones que se indican a continuación, puede sufrir una descarga
eléctrica, un incendio o lesiones.
Para un buen rendimiento y una medición precisa, tenga cuidado con la
operación y el mantenimiento diarios.

- 3 -
SEGURIDAD EN EL ÁREA DE TRABAJO
a) Mantener la zona de aplicación limpia y bien iluminada. Las zonas sucias y
oscuras pueden provocar accidentes.
b) No utilice herramientas eléctricas en entornos explosivos, como en
presencia de líquidos, gases o vapores inflamables. Las herramientas
eléctricas generan chispas que pueden encender el polvo o los vapores.
c) Mantenga a los niños y a otras personas alejadas del aparato cuando lo
utilice. Las distracciones pueden provocar la pérdida de control sobre el aparato.
Nota de uso:
No sobrecargue la báscula de grúa, esto dañará la celda de carga;
No deje cargas colgadas de la balanza digital durante mucho tiempo. Esto
reducirá la precisión de la balanza y acortará la vida útil de la celda de carga.
Inspeccione el grillete y el gancho antes de usarlos. Revise los clips, pasadores y
tornillos con regularidad;
¡Gracias por su apoyo a nuestros productos!
33. Dimensiones y peso
- 4 -
Modelo
A (mm)
B (mm)
C (mm)
Largo (mm)
OCS-3-D
55
96
35
575
OCS-5-D
78
123
48
675
34.
Pantalla y teclas
Claves de escala
Llave
Nombre
Función
Encendido/apagado
Presione 1s para encender/apagar la báscula.
Cero
Cero manual.
Aumentar el dígito parpadeante.
Tara
Tara de entrada/salida.
Dígito parpadeante de desplazamiento hacia la
derecha.
Sostener
Bloquear/desbloquear lectura.
Confirmar.
Llaves remotas
Llave
Nombre
Función
Cero
Lo mismo que .
Tara
Lo mismo que .
Sostener
Lo mismo que .
Acc.
Acumular peso.
Disminuir el dígito parpadeante.
Del.
Eliminar el último peso.
Limpiar todo el peso.
Dígito parpadeante de desplazamiento hacia la
izquierda.
F1
Vista.
Introduzca el punto decimal.
F2
Interruptor de unidad.
Apagado
Presione 1s para apagar.
2do
2da función.
Indicadores
CONDUJO
Nombre
Nota
Cargando
encendido durante la carga
- 5 -
Decodificador.
Estable
Se enciende cuando el peso es estable
CERO
Cero
Se enciende cuando el peso es cero.
TARA
Tarado
Se enciende cuando la báscula está tara
SOSTENER
Sostener
Se enciende cuando la báscula está bloqueada
libra
libra
iluminado cuando la unidad es lb
kilogramo
kilogramo
Se enciende cuando la unidad es kg
Naciones
Unidas
USUARIO
Se enciende cuando la unidad es una unidad de
usuario.
Mensaje
Mensaje
Representar
Nota
-----
detectar peso
-
en modo inactivo
Configuración
CONFIGURACIÓN
Menú de configuración de
usuario
Murciélago--
Batería
porcentaje de duración de la
batería
P0000
Contraseña
en modo contraseña
|fin|
FIN
guardar y salir
|apagado|
APAGADO
Apagado
|sobre
Sobrecarga
sobrecarga
|2do|
2º
2da función
|Error|
Error
operación inválida
|acc|
Acumular
acumular peso
|del|
Borrar
eliminar el último peso
|Borrar|
Claro
eliminar todo el peso
35.
Operación s
Encendido/apagado
Presione durante 1 segundo para encender la báscula. La báscula realiza la
inicialización y la prueba de encendido,
*****
aparece dos veces, luego aparece la
capacidad
|5000
, aparece el porcentaje de vida útil de la batería
bat90
, aparece la
detección de peso
-----
y luego se pone a cero automáticamente.
Para obtener información sobre la puesta a cero automática, consulte Configuración
- 6 -
de la báscula en el Manual técnico.
Presione o durante 1 s para apagar la báscula. Se muestra el porcentaje de
duración de la batería
bat90
, se muestra el mensaje de apagado
|off|
y luego se corta
la energía.
Cero
Presione o para poner a cero. La luz CERO se enciende.
Si la carga está en movimiento, tarada o fuera del rango de cero manual, se muestra
|err|
.
Para obtener información sobre el rango de cero manual, consulte Configuración de la
báscula en el Manual técnico.
Tara de entrada/salida
En modo bruto, presione o para tarar. La luz TARE se enciende.
Si la carga está en movimiento, es negativa o está fuera del rango de tara, se muestra
|err|
.
La tara reducirá el rango de sobrecarga aparente de la báscula. Por ejemplo, si una
báscula de 5000*2 kg tiene un contenedor de 1000 kg como tara, la báscula se
sobrecargará con un nuevo peso de 4018 kg (5000 – 1000 + 9 divisiones adicionales).
En modo neto, presione o para calcular la tara. TARA La luz apagada.
Bloquear/desbloquear
Presione o para bloquear la pantalla. MANTENER La luz encendida.
Presione o para desbloquear la pantalla. MANTENGA la luz apagada.
Acumular
Presione para acumular el peso actual.
|acc|
, lo que indica que se ha acumulado peso. La báscula utiliza el peso mostrado,
por lo que el peso bruto o neto se agrega al mismo acumulador.
Si la carga está en movimiento, es negativa o no regresa a cero antes, se muestra
|err|
.
Vista
Presione para ingresar al modo de visualización.
- 7 -
La pantalla parpadea para indicar el peso acumulado.
Presione o para ver los 5 dígitos altos o los 5 dígitos bajos.
Presione o para salir del modo de visualización.
Eliminar último peso
Presione para borrar el último peso acumulado.
|del|
, lo que indica que se ha eliminado el último peso acumulado. La función delete
solo elimina el último peso.
Si se ha eliminado el último peso acumulado, se muestra
|err|
.
Borrar todo el peso
Presione primero y luego presione para borrar todo el peso acumulado.
|clr|
aparece, indicando que se borró todo el peso.
Interruptor de unidad
Presione para cambiar la unidad entre kg, lb y unidad de usuario.
Cuando la unidad es kg, la luz LED
de kg
está encendida. Cuando la unidad es lb, la
luz LED
de lb está encendida.
Cuando la unidad es la unidad del usuario, la luz
LED
de UN
está encendida.
Para obtener más información sobre la Unidad de usuario, consulte Configuración de
la báscula en el Manual técnico.
36.
Configuración de usuario
Presione primero y luego presione o para ingresar al menú de
configuración de usuario. Se muestra
laconfiguración
.
Temporización de apagado automático
Presione o para ingresar al tiempo de apagado automático. Se muestra
Apagado--
.
Presione o y para cambiar el valor de tiempo.
El tiempo de apagado automático se puede configurar en:
0
(desactivado),
5
(5 min),
10
(10 min),
15
(15 min),
30
(30 min),
60
(60 min). Está desactivado de forma
predeterminada.
La función de apagado automático maximiza la vida útil de la batería de la báscula,
- 8 -
evitando que la gente se olvide de apagarla cuando no está en funcionamiento. La
función de apagado automático inicia el temporizador de cuenta regresiva cuando no
hay acción o la carga está estable. Cualquier pulsación de tecla o movimiento en la
carga reinicia el temporizador de cuenta regresiva.
Brillo de la pantalla
Presione o para ingresar al brillo de la pantalla.
Br--
muestra.
Presione o y para cambiar el valor de brillo.
El brillo tenue del LED ahorra drásticamente la energía de la batería.
Sincronización del modo inactivo
Presione o para ingresar al modo de sincronización inactiva.
Idl--
se muestra.
Presione o y para cambiar el valor de tiempo.
El tiempo de inactividad se puede configurar en:
0
(deshabilitado),
5
(5 segundos),
10
(10 segundos),
15
(15 segundos),
30
(30 segundos),
60
(60 segundos). El valor
predeterminado es 30 segundos.
Para maximizar la duración de la batería, la báscula entra automáticamente en modo
inactivo cuando no hay acción o la carga es estable. En el modo inactivo, la báscula
funciona en un estado de bajo consumo de energía. Cualquier pulsación de tecla o
movimiento durante la carga activa la báscula desde el modo inactivo.
Presione o para salir de la configuración de usuario.
37.
Mantenimiento de la batería
Para maximizar la vida útil de la batería, tenga en cuenta la siguiente guía de
mantenimiento de la batería.
Esta báscula está alimentada por una batería de plomo-ácido recargable de 6 V 4,0
Ah.
La batería está fijada permanentemente dentro del compartimento de la batería.
Dependiendo del brillo del LED y la configuración del modo inactivo, la batería
funciona entre 60 horas y 200 horas.
Para conservar la vida útil de la batería, habilite el apagado automático y el modo
inactivo para atenuar el brillo del LED.
El tiempo de carga para una batería completamente descargada es de
aproximadamente 12 horas.
Para obtener la máxima vida útil, la batería debe almacenarse entre -20 ℃ (-4 °F) y
+50 ℃ (122 °F). Las baterías almacenadas deben recargarse cada tres meses.
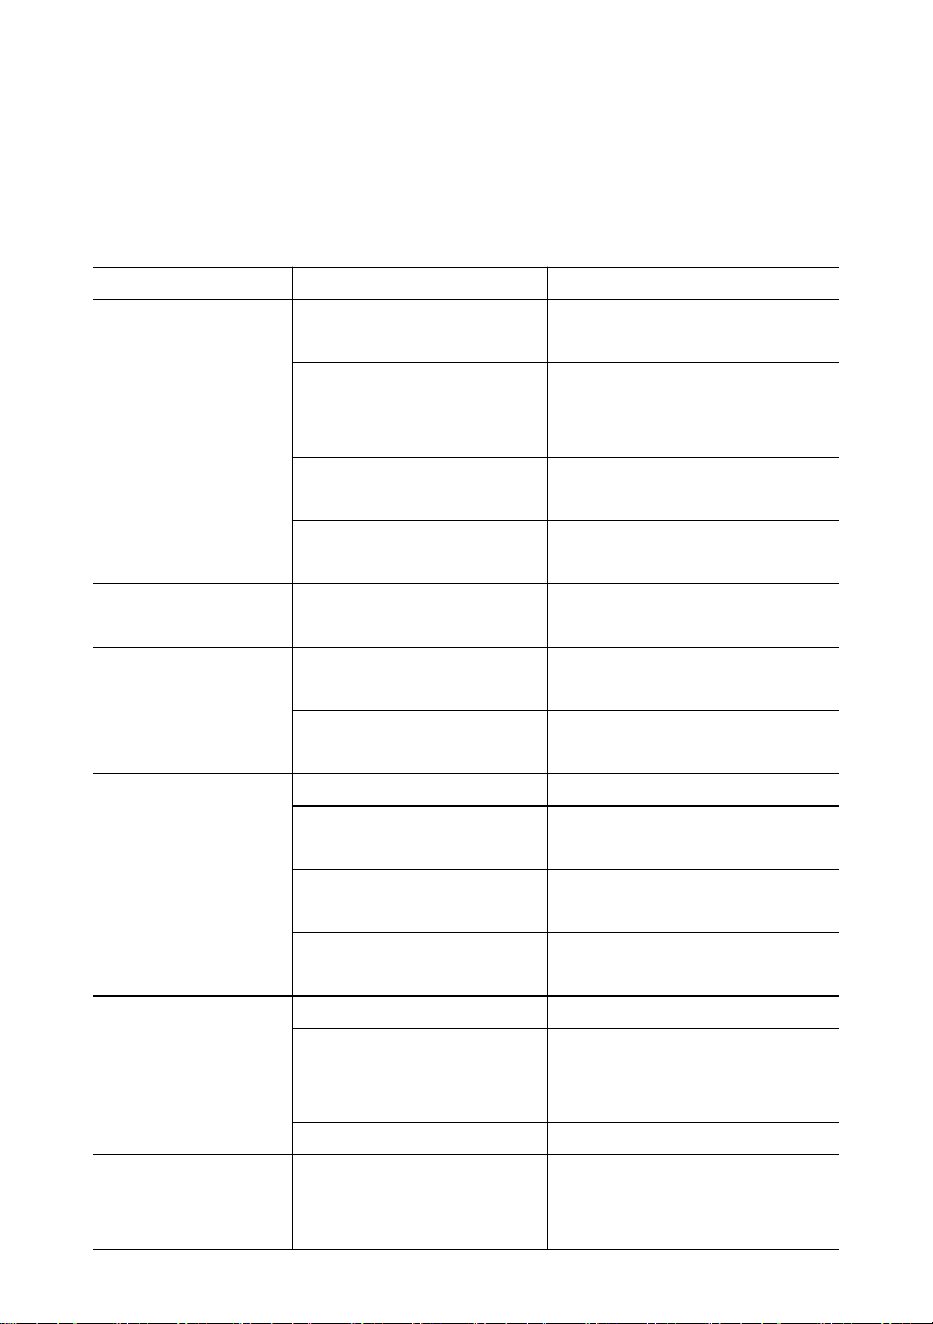
- 9 -
Durante la carga, el LED verde indica potencia completa, mientras que el rojo indica
que la carga está en curso.
38. Solución de problemas
Los problemas simples se pueden resolver con la solución que se indica a
continuación. Si el problema persiste, comuníquese con su representante local.
Síntoma
Posible causa
Solución sugerida
No se enciende
después de
presionar el botón
de
encendido/apagado
batería
descargada/defectuosa
comprobar la batería y
cargarla
Tecla de
encendido/apagado
defectuosa
Presiona más fuerte y sigue
presionando 2s
cable de alimentación
defectuoso
Abra el panel frontal, verifique
el cable de alimentación
placa base defectuosa
Contactar con un
representante
La pantalla
parpadea
batería descargada
cargar la batería
No se realizó
ninguna acción
después de
presionar la tecla
La escala está alterada
Vuelva a enchufar el cable de
alimentación
llave defectuosa
Contactar con un
representante
La lectura del peso
no es estable
carga en movimiento
Mantener la carga estable
Anti-movimiento débil
cambiar el nivel de
Anti-Movimiento
célula de carga
amortiguada o placa base
célula de carga seca o placa
base
placa base defectuosa
Contactar con un
representante
La lectura del peso
no es cero cuando
no hay carga.
batería descargada
cargar la batería
La celda de carga estuvo
estresada durante
demasiado tiempo
colgar la báscula en el
almacenamiento
batería descargada
cargar la batería
Gran error en la
lectura del peso
La báscula no se puso a
cero antes de aplicar la
carga
Poner a cero la balanza antes
de cargar
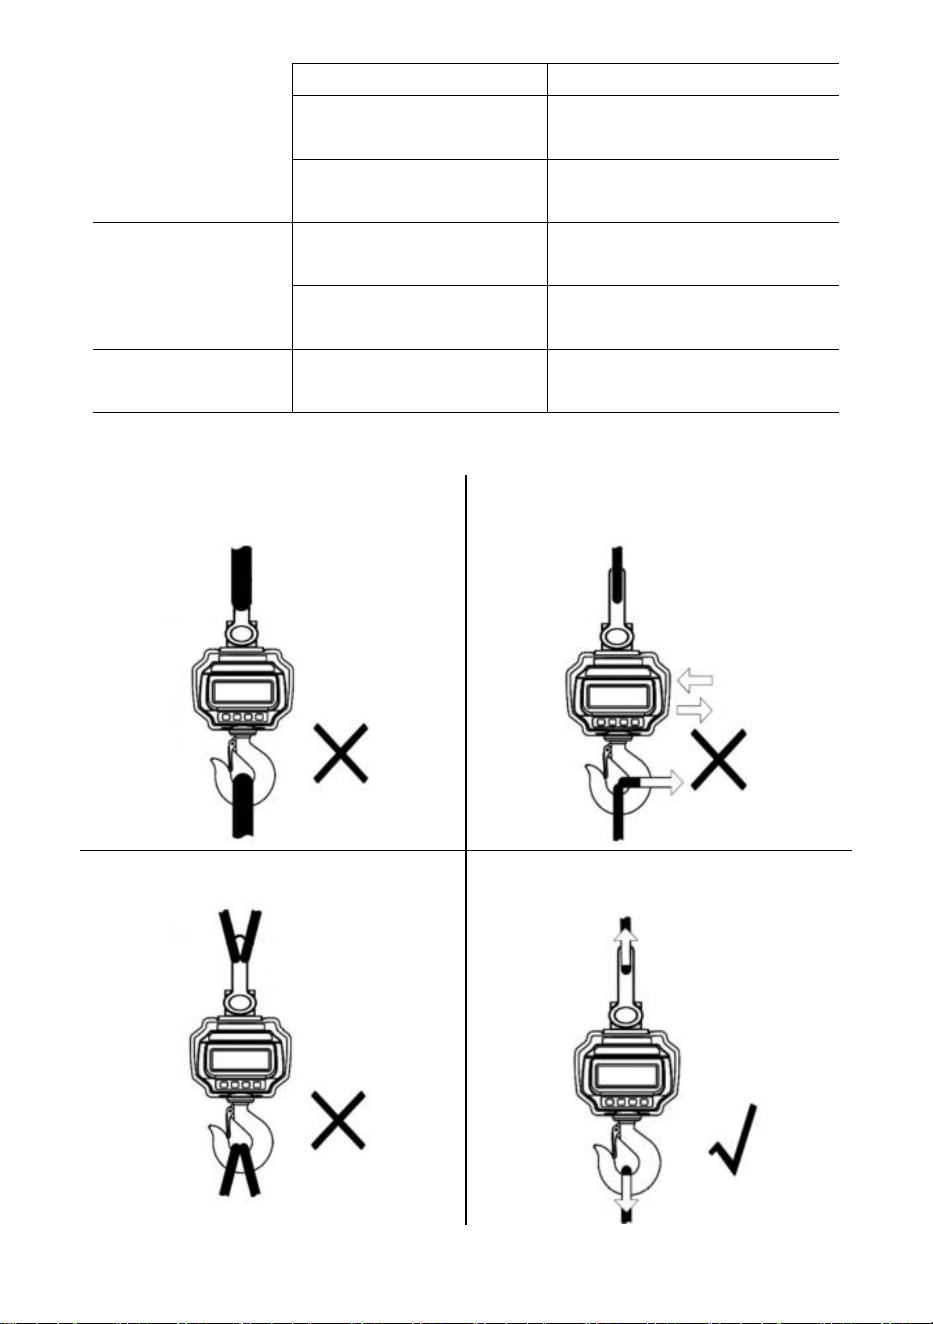
- 10 -
unidad equivocada
cambiar a la unidad correcta
La escala requiere
calibración
calibrar escala
célula de carga o placa
base defectuosa
Contactar con un
representante
La batería no se
puede recargar
placa de carga
defectuosa
Contactar con un
representante
batería defectuosa
Contactar con un
representante
Distancia de control
remoto corta
batería remota
descargada/defectuosa
Reemplazar las baterías del
control remoto
39.
Procedimientos de carga
¡NO conecte una interfaz de gran
tamaño!
¡NO empuje ni tire de la báscula cargada
ni directamente del gancho!
¡NO utilice varios accesorios!
Utilice hardware que cree conexiones de
un solo punto.
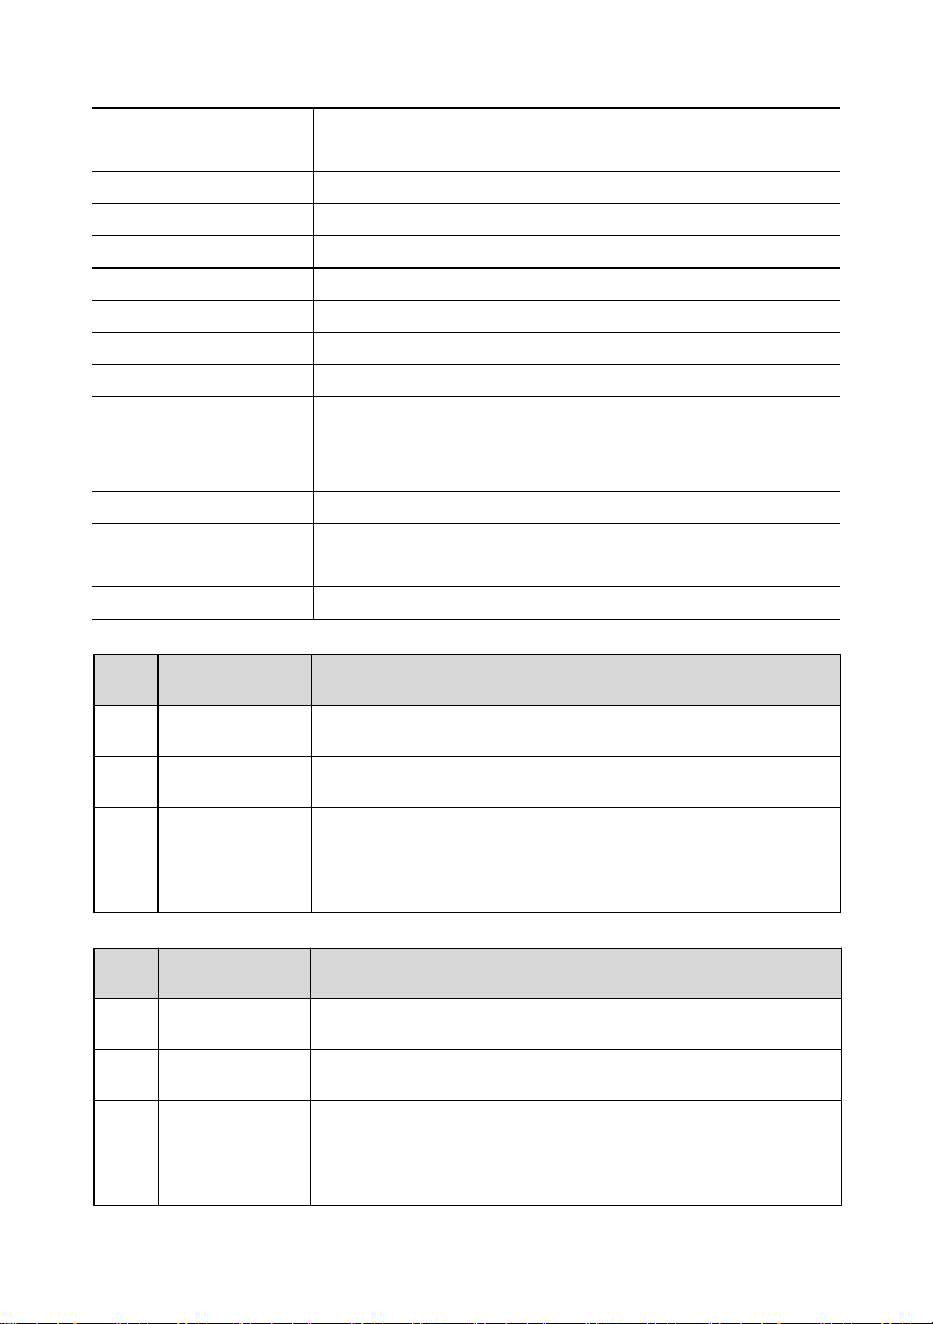
- 11 -
40. Presupuesto
Clase de precisión
GB/T 11883-2002 Clase III en chino
Equivalente a OIML R76
Rango de tara
100% FS
Rango cero
4% de garantía de satisfacción
Tiempo estable
≤10 segundos
Sobrecarga
100% FS + 9e
Carga de seguridad
150% FS
Carga máxima
400% FS
Batería
Batería recargable de plomo-ácido de 6 V/4,0 Ah.
Cargador
Salida 14 V CC/1000 mA
(Estándar europeo y americano)
Salida de 9 V CC/1500 mA (estándar australiano)
Mostrar
Módulo LED de 40 mm (1,6 pulgadas)
Temperatura de
operación
-10℃ - +40℃
Humedad operativa
20℃ ≤90%
Elementos
Descripción
1
Nombre
Báscula de grúa industrial
2
Modelo
OCS-3-D
3
Parámetro
Clasificación(es): 6 VCC
Capacidad: 3000 kg/6600 lb
División: 1 libra
Elementos
Descripción
1
Nombre
Báscula de grúa industrial
2
Modelo
OCS-5-D
3
Parámetro
Clasificación(es): 6 VCC
Capacidad: 5000 kg/11 000 lb
División: 2 libras

- 12 -
Fabricante: Shanghaimuxinmuyeyouxiangongsi
Dirección: Shuangchenglu 803nong11hao1602A-1609shi, baoshanqu,
shanghai 200000 CN.
Importado a AUS: SIHAO PTY LTD, 1 ROKEVA STREETEASTWOOD NSW
2122 Australia
Importado a EE. UU.: Sanven Technology Ltd., Suite 250, 9166 Anaheim
Place, Rancho Cucamonga, CA 91730
REP
EC
E-CrossStu GmbH
Mainzer Landstr.69, 60329 Frankfurt am Main.
REP
UK
YH CONSULTING LIMITED.
C/O YH Consulting Limited Office 147, Centurion House,
London Road, Staines-upon-Thames, Surrey, TW18 4AX
Soporte técnico y certificado de garantía electrónica
www.vevor.com/support

- 13 -
Wsparcie techniczne i certyfikat e-gwarancji
www.vevor.com/support
WAGA DŹWIGOWA PRZEMYSŁOWA
MODELE: OCS-3-D / OCS-5-D
We continue to be committed to provide you tools with competitive price.
"Save Half", "Half Price" or any other similar expressions used by us only represents an
estimate of savings you might benefit from buying certain tools with us compared to the major
top brands and does not necessarily mean to cover all categories of tools offered by us. You
are kindly reminded to verify carefully when you are placing an order with us if you are
actually saving half in comparison with the top major brands.

- 1 -
MODELE: OCS-3-D / OCS-5-D
Have product questions? Need technical support? Please feel free to
contact us:
Technical Support and E-Warranty Certificate
www.vevor.com/support
NEED HELP? CONTACT US!
This is the original instruction, please read all manual instructions
carefully before operating. VEVOR reserves a clear interpretation of our
user manual. The appearance of the product shall be subject to the
product you received. Please forgive us that we won't inform you again if
there are any technology or software updates on our product.
INDUSTRIAL CRANE
SCALE

- 2 -
OGÓLNE ZASADY BEZPIECZEŃSTWA
Symbol
Opis symbolu
Ostrzeżenie - Aby zminimalizować ryzyko obrażeń, użytkownik
powinien uważnie przeczytać instrukcję obsługi.
Ten symbol, umieszczony przed komentarzem dotyczącym
bezpieczeństwa, wskazuje na rodzaj ostrożności, ostrzeżenia lub
niebezpieczeństwa. Zignorowanie tego ostrzeżenia może
doprowadzić do wypadku. Aby zmniejszyć ryzyko obrażeń,
pożaru lub porażenia prądem, zawsze postępuj zgodnie z
zaleceniami podanymi poniżej.
Ostrzeżenie: Podczas stosowania tego produktu należy nosić
rękawiczki.
Ostrzeżenie: Podczas stosowania tego produktu należy nosić
okulary ochronne.
Informacje dotyczące utylizacji:
Ten produkt podlega postanowieniom Dyrektywy Europejskiej
2012/19/WE. Symbol przedstawiający przekreślony kosz na
śmieci na kółkach oznacza, że produkt wymaga oddzielnej zbiórki
odpadów w Unii Europejskiej. Dotyczy to produktu i wszystkich
akcesoriów oznaczonych tym symbolem. Produktów
oznaczonych w ten sposób nie można wyrzucać razem ze
zwykłymi odpadami domowymi, ale należy je oddać do punktu
zbiórki w celu recyklingu urządzeń elektrycznych i
elektronicznych.
Ogólne instrukcje bezpieczeństwa
OSTRZEŻENIE! Przeczytaj wszystkie ostrzeżenia i uwagi dotyczące
bezpieczeństwa. Nieprzestrzeganie poniższych instrukcji może skutkować
porażeniem prądem, pożarem i/lub obrażeniami.
Aby zapewnić dobrą wydajność i precyzję pomiarów, należy zachować
ostrożność podczas codziennej obsługi i konserwacji.

- 3 -
BEZPIECZEŃSTWO W MIEJSCU PRACY
a) Utrzymuj obszar aplikacji w czystości i dobrym oświetleniu. Brudne i
ciemne obszary prowadzą do wypadków.
b) Nie używaj elektronarzędzi w środowiskach zagrożonych wybuchem,
takich jak obecność łatwopalnych cieczy, gazów lub oparów.
Elektronarzędzia generują iskry, które mogą zapalić pył lub opary.
c) Trzymaj dzieci i osoby postronne z dala od urządzenia podczas jego
obsługi. Rozproszenie uwagi może prowadzić do utraty kontroli nad urządzeniem.
Uwaga dotycząca użytkowania:
Nie przeciążaj wagi dźwigowej, gdyż może to spowodować uszkodzenie ogniwa
obciążnikowego;
Nie pozostawiaj ładunku zawieszonego na wadze cyfrowej przez długi czas.
Spowoduje to zmniejszenie dokładności wagi i skrócenie żywotności ogniwa
obciążnikowego;
Przed użyciem sprawdź szeklę i hak. Regularnie sprawdzaj zaciski, sworznie i
śruby;
Dziękujemy za wsparcie naszych produktów!
41. Wymiary i waga
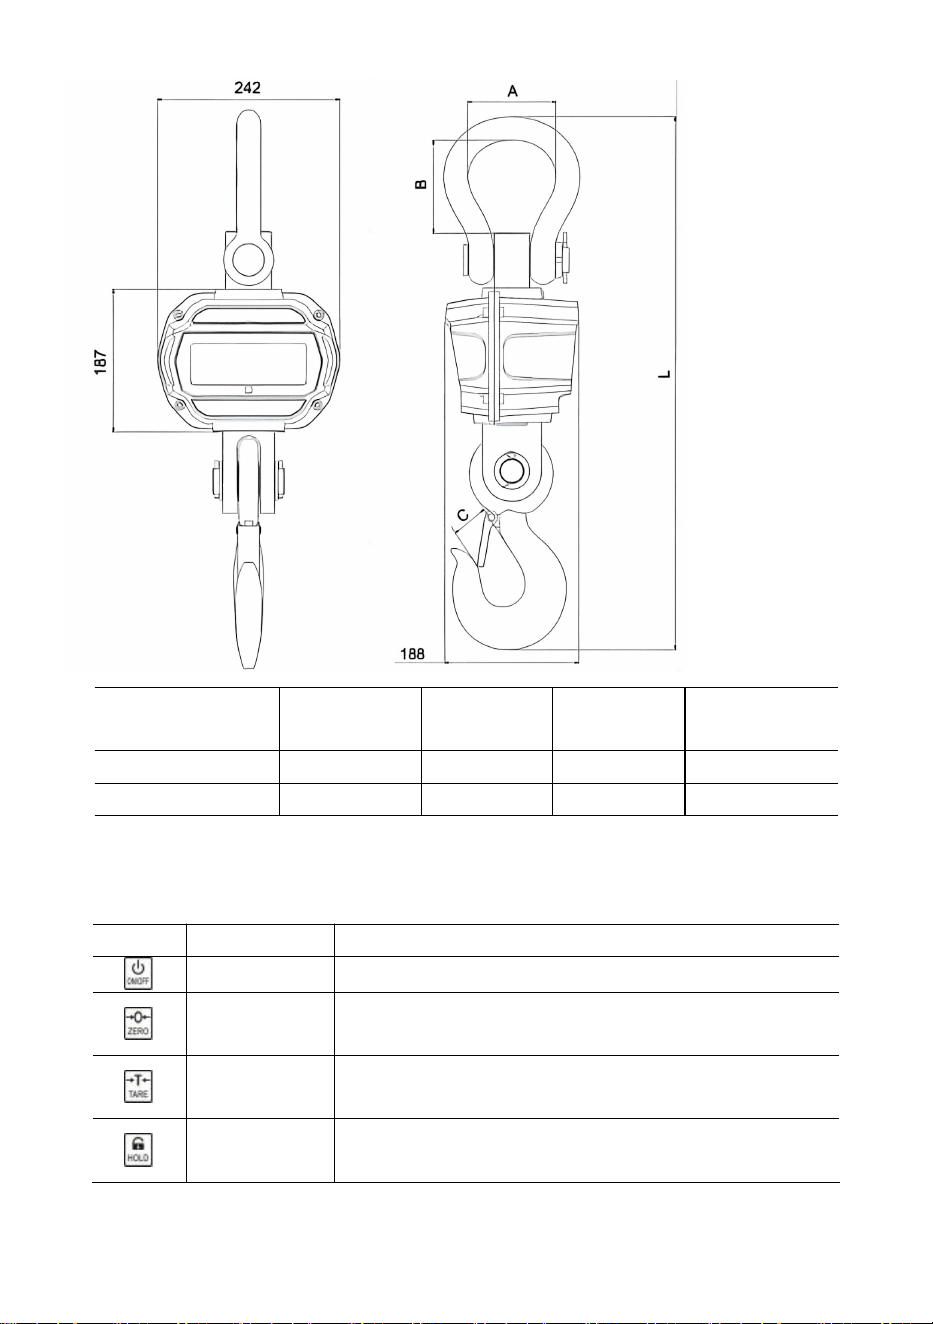
- 4 -
Model
mm
)
Średnica
(mm)
Średnica
(mm)
Długość (mm)
OCS-3-D
55
96
35
575
OCS-5-D
78
123
48
675
42. Wyświetlacz i klawisze
Klucze skalowe
Klawisz
Nazwa
Funkcjonować
Włącz/Wyłącz
Naciśnij 1s, aby włączyć/wyłączyć wagę.
Zero
Ręczne zerowanie.
Zwiększ liczbę migających cyfr.
Tara
Tara wejściowa/wyjściowa.
Przewijanie w prawo - migająca cyfra.
Trzymać
Zablokuj/odblokuj odczyt.
Potwierdzać.
Kluczyki zdalne
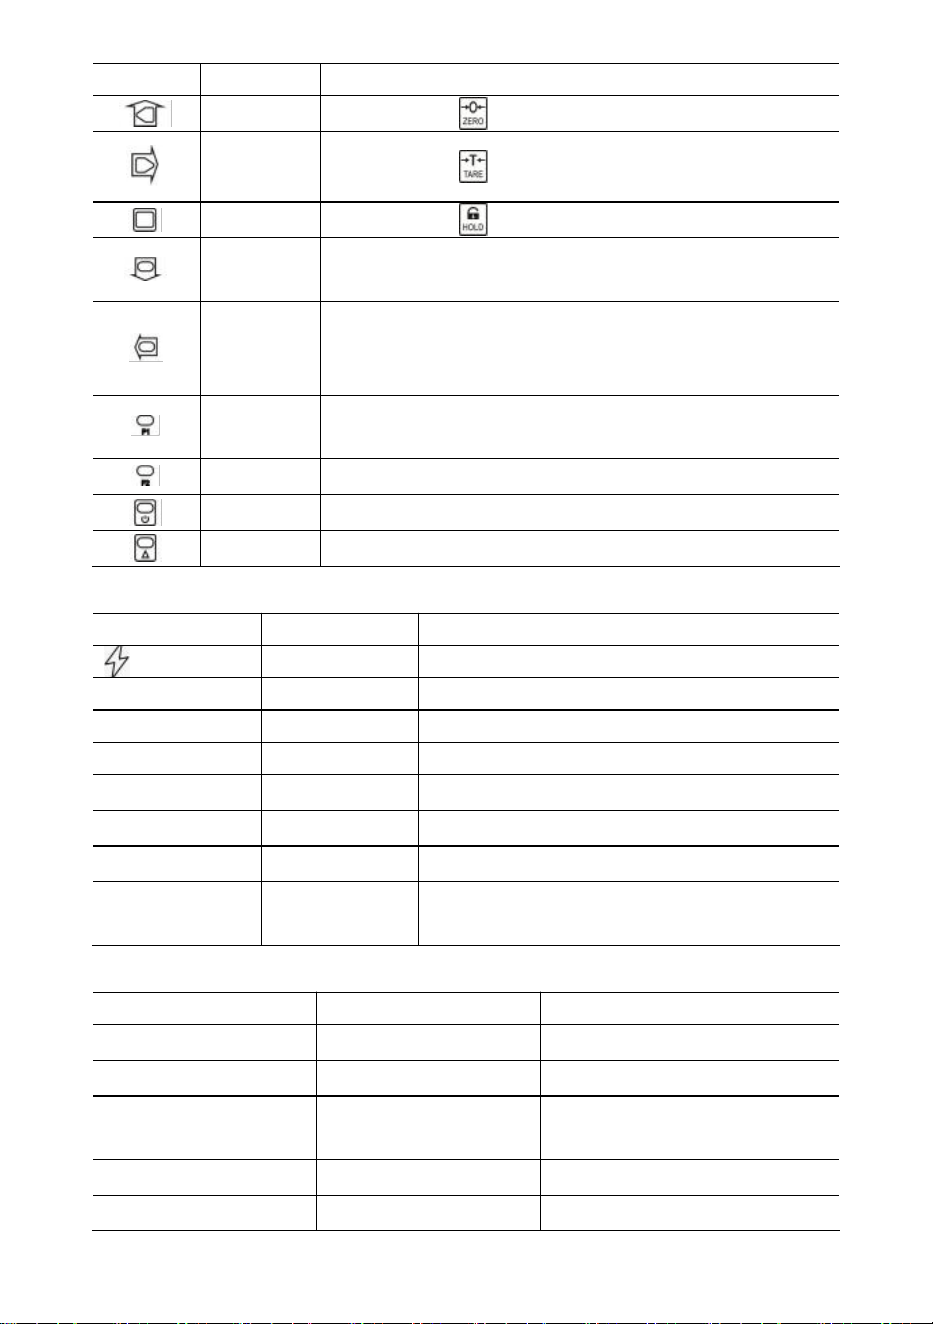
- 5 -
Klawisz
Nazwa
Funkcjonować
Zero
Tak samo jak .
Tara
Tak samo jak .
Trzymać
Tak samo jak .
Ak.
Gromadź ciężar.
Zmniejsz migającą cyfrę.
Usuń.
Usuń ostatnią wagę.
Wyczyść cały ciężar.
Przewijanie w lewo, migająca cyfra.
F1
Pogląd.
Wprowadź przecinek dziesiętny.
F2
Przełącznik jednostki.
Wyłączony
Naciśnij 1s, aby wyłączyć zasilanie.
2.
2. funkcja.
Wskaźniki
PROWADZONY
Nazwa
Notatka
Ładowanie
świeci podczas ładowania
STB-y.
Stabilny
świeci, gdy ciężar jest stabilny
ZERO
Zero
świeci, gdy waga wynosi zero
TARA
Tarowany
świeci, gdy waga jest wytarowana
TRZYMAĆ
Trzymać
świeci, gdy waga jest zablokowana
funt
funt
świeci, gdy jednostką jest lb
kg
kg
świeci, gdy jednostką jest kg
ONZ
UŻYTKOWNIK
świeci, gdy jednostka jest jednostką
użytkownika
Wiadomość
Wiadomość
Oznaczać
Notatka
-----
wykryć wagę
-
w trybie bezczynności
Organizowaćcoś
ORGANIZOWAĆ
COŚ
Menu konfiguracji użytkownika
Nietoperz--
Bateria
procent żywotności baterii
P0000
Hasło
w trybie hasła
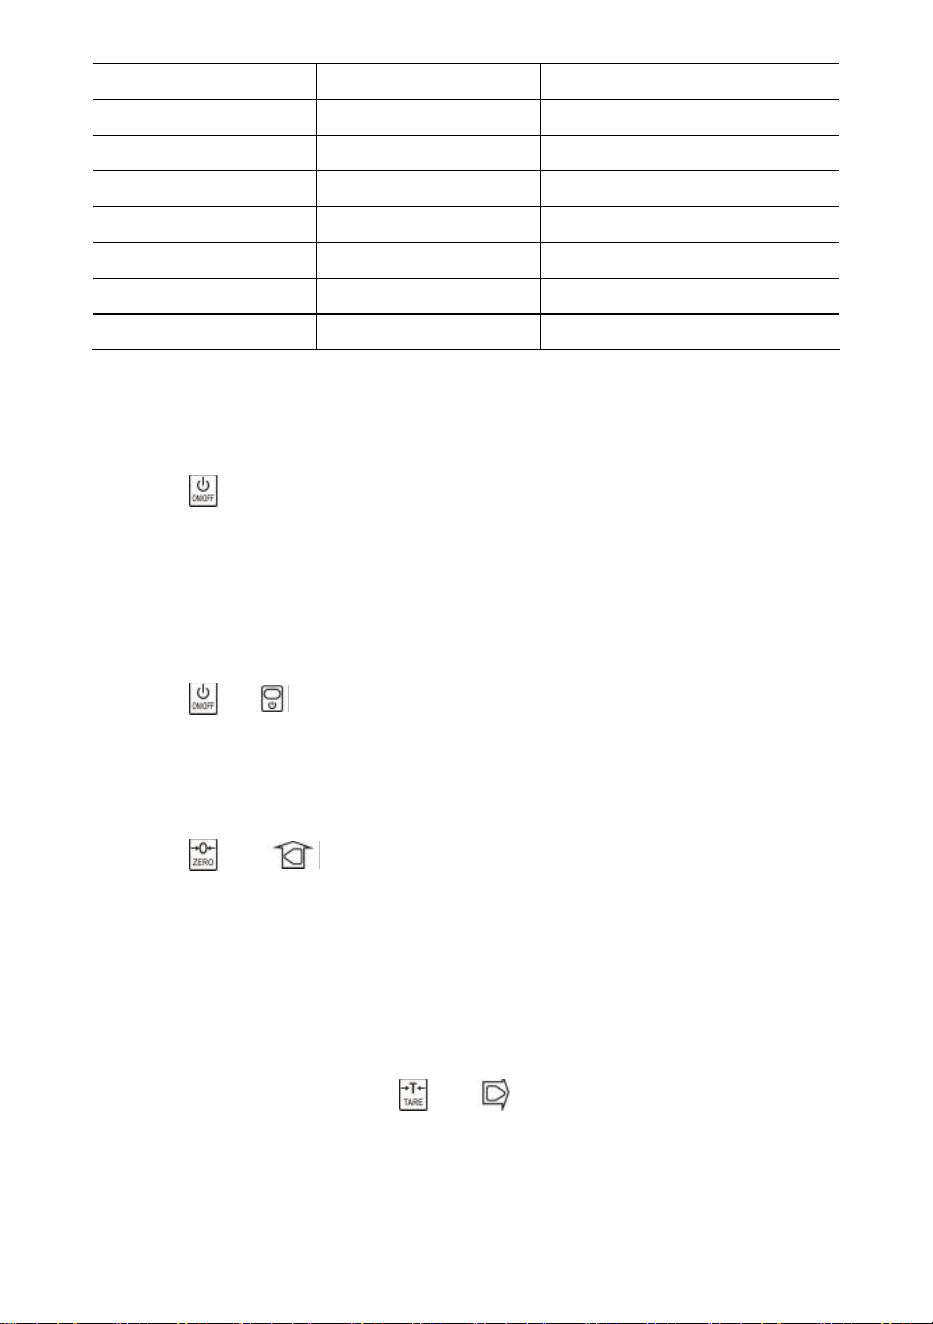
- 6 -
|koniec|
KONIEC
zapisz i wyjdź
|wyłączone|
WYŁĄCZONY
wyłączyć
|ponad
Przeciążać
przeciążenie
|2.|
2.
2. funkcja
|błąd|
Błąd
nieprawidłowa operacja
|acc|
Gromadzić
gromadzić wagę
|usuń|
Usuwać
usuń ostatnią wagę
|Kl|
Jasne
usuń całą wagę
43.
Operacja s
Włączanie/wyłączanie zasilania
Naciśnij przez 1 s, aby włączyć wagę. Waga wykonuje inicjalizację i test włączania,
*****
wyświetla się dwukrotnie, następnie wyświetla się pojemność
|5000
, wyświetla się
procent żywotności baterii
bat90
, wyświetla się wykrywanie wagi
-----
, a następnie
automatyczne zerowanie.
Informacje na temat funkcji Auto-Zero można znaleźć w Podręczniku technicznym, w
rozdziale Konfiguracja wagi.
Naciśnij lub przez 1 s, aby wyłączyć wagę. Wyświetla się procentowy
wskaźnik żywotności baterii
bat90
, wyświetla się komunikat off
|off|
, a następnie
wyłącza zasilanie.
Zero
Naciśnij lub , aby wyzerować. Kontrolka ZERO zapala się.
Jeśli ładunek jest w ruchu, wytarowany lub znajduje się poza zakresem zera ręcznego,
wyświetla się komunikat
|err|
.
Informacje na temat ręcznego zakresu zerowego można znaleźć w Podręczniku
technicznym, w rozdziale Konfiguracja wagi.
Tara wejściowa/wyjściowa
W trybie brutto naciśnij przycisk lub , aby dokonać tarowania. Kontrolka
TARA zapali się.
Jeśli ładunek jest w ruchu, jest ujemny lub znajduje się poza zakresem tary, wyświetla
się komunikat
|err|
.
Tara zmniejszy zakres pozornego przeciążenia wagi. Na przykład, jeśli waga 5000*2
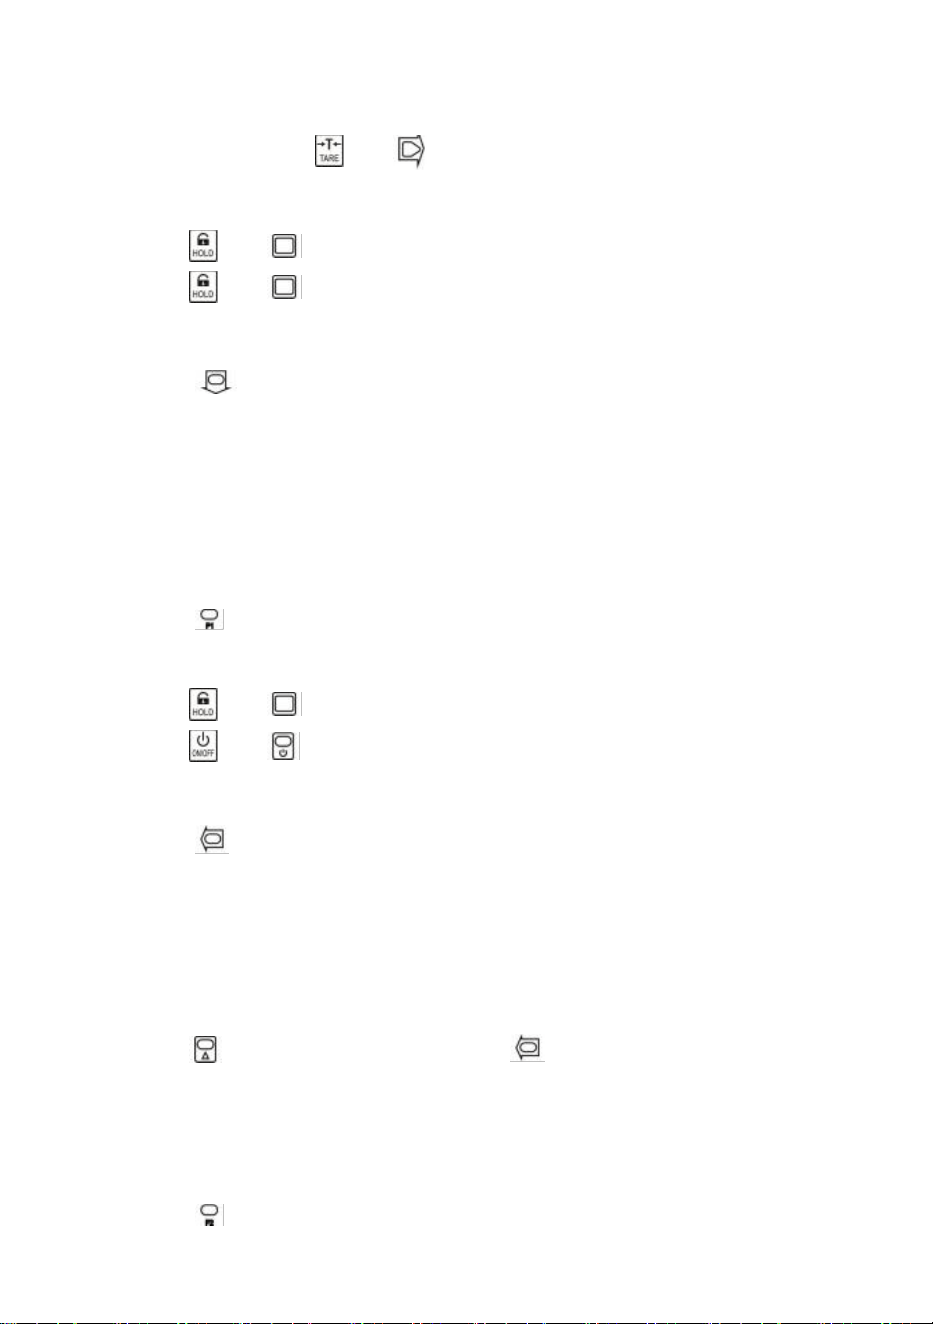
- 7 -
kg ma pojemnik o wadze 1000 kg jako tarę, waga zostanie przeciążona przy nowym
ciężarze 4018 kg (5000 – 1000 + dodatkowe 9 działek).
W trybie netto naciśnij lub , aby wytarować. TARA zgasić światło.
Zablokuj/odblokuj
Naciśnij lub , aby zablokować ekran. PRZYTRZYMAJ światło włączone.
Naciśnij lub , aby odblokować ekran. PRZYTRZYMAJ światło wyłączone.
Gromadzić
Naciśnij, aby zgromadzić aktualną wagę.
|acc|
pokazuje, że masa jest skumulowana. Waga używa wyświetlanej masy, więc
masa brutto lub netto jest dodawana do tego samego akumulatora.
Jeżeli ładunek jest w ruchu, jest ujemny lub nie powrócił wcześniej do zera, wyświetla
się komunikat
|err|
.
Pogląd
Naciśnij, aby przejść do trybu widoku.
Na wyświetlaczu miga łączna waga.
Naciśnij lub , aby wyświetlić 5 najwyższych lub najniższych cyfr.
Naciśnij lub , aby wyjść z trybu widoku.
Usuń ostatnią wagę
Naciśnij, aby usunąć ostatnią zmierzoną wagę.
|del|
pokazuje, że ostatnia zgromadzona waga została usunięta. Funkcja delete usuwa
tylko ostatnią wagę.
Jeżeli ostatnia zgromadzona waga została usunięta, pojawi się komunikat
|err|
.
Wyczyść wszystko Waga
Naciśnij najpierw , a następnie naciśnij , aby wyczyścić cały zgromadzony
ciężar.
|clr|
, informując, że cały ciężar został usunięty.
Przełącznik jednostki
Naciśnij, aby przełączać jednostki pomiędzy kg, lb i jednostką użytkownika.
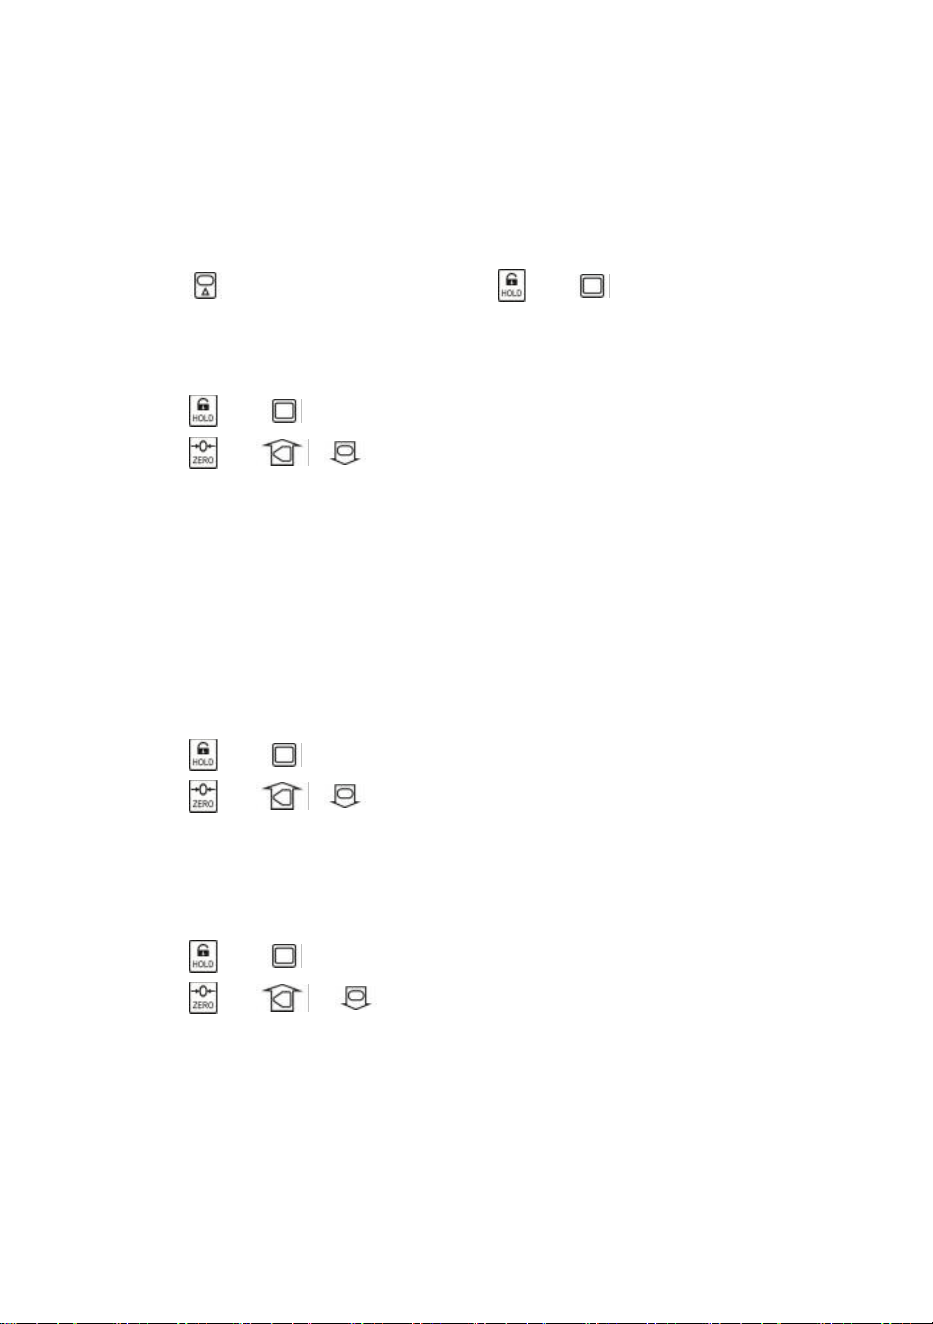
- 8 -
Gdy jednostką jest kg, świeci się dioda LED
kg
. Gdy jednostką jest lb, świeci się
dioda LED
lb.
Gdy jednostką jest jednostka użytkownika, świeci się dioda LED UN
.
Więcej informacji na temat jednostki użytkownika można znaleźć w Podręczniku
technicznym, w rozdziale Konfiguracja wagi.
44.
Konfiguracja użytkownika
Naciśnij najpierw , a następnie naciśnij lub , aby wejść do menu Ustawień
użytkownika. Zostanie wyświetlone
menuustawień
.
Czas automatycznego wyłączania
Naciśnij lub , aby wejść w tryb automatycznego wyłączania. Pokazuje
Off--.
Naciśnij lub i aby zmienić wartość czasu.
Auto-Off Timing można ustawić na:
0
(wyłączone),
5
(5 min),
10(
10 min),
15
(15 min),
30
(30 min),
60
(60 min). Domyślnie jest wyłączone.
Funkcja Auto-Off maksymalizuje żywotność baterii wagi, chroniąc przed nieuwagą
ludzi, którzy nie wyłączają wagi, gdy nie działa. Funkcja Auto-Off uruchamia odliczanie,
gdy nie ma żadnej akcji lub obciążenie jest stabilne. Każde naciśnięcie klawisza lub
ruch w obciążeniu ponownie uruchamia odliczanie.
Jasność wyświetlacza
Naciśnij lub , aby wprowadzić jasność wyświetlacza. Pokazuje się
Br--
.
Naciśnij lub i aby zmienić wartość jasności.
Przyciemnione światło diod LED pozwala znacznie zaoszczędzić energię
akumulatora.
Czas trybu bezczynności
Naciśnij lub , aby wejść w tryb Idle Mode Timing. Pokazuje się
Idl--
.
Naciśnij lub i , aby zmienić wartość czasu.
Czas trybu bezczynności można ustawić na:
0
(wyłączone),
5
(5 sek.),
10
(10 sek.),
15
(15 sek.),
30
(30 sek.),
60
(60 sek.). Domyślnie jest to 30 sek.
Aby zmaksymalizować żywotność baterii, waga automatycznie przechodzi w tryb
bezczynności, gdy nie ma żadnej akcji lub obciążenie jest stabilne. W trybie
bezczynności waga pracuje w stanie niskiego zużycia energii. Każde naciśnięcie
klawisza lub ruch w obciążeniu wybudza wagę z trybu bezczynności.
- 9 -
Naciśnij lub , aby wyjść z Ustawień użytkownika.
45.
Konserwacja akumulatora
Aby wydłużyć czas pracy akumulatora, należy zapoznać się z poniższą instrukcją
konserwacji akumulatora.
Waga zasilana jest akumulatorem kwasowo-ołowiowym 6V4.0Ah.
Akumulator jest na stałe zamontowany wewnątrz obudowy akumulatora.
W zależności od jasności diody LED i trybu czuwania bateria działa od 60 do 200
godzin.
Aby oszczędzać baterię, włącz funkcję automatycznego wyłączania i trybu czuwania,
aby przyciemnić jasność diody LED.
Czas ładowania całkowicie rozładowanego akumulatora wynosi około 12 godzin.
Aby uzyskać maksymalną żywotność, akumulator należy przechowywać w
temperaturze od -20℃ (-4°F) do +50℃ (122°F). Przechowywane akumulatory należy
ładować co trzy miesiące.
Podczas ładowania zielona dioda LED sygnalizuje pełną moc, a czerwona informuje,
że ładowanie jest w toku.
46.
Rozwiązywanie problemów
Proste problemy można rozwiązać za pomocą poniższego rozwiązania. Jeśli
problemy nadal występują, skontaktuj się z lokalnym przedstawicielem.
Objaw
Możliwa przyczyna
Sugerowane rozwiązanie
nie włącza się po
naciśnięciu
przycisku Wł./Wył.
rozładowany/uszkodzony
akumulator
sprawdź baterię i naładuj
uszkodzony klawisz
włączania/wyłączania
naciśnij mocniej i naciskaj
przez 2 sekundy
uszkodzony kabel
zasilający
otwórz panel przedni, sprawdź
kabel zasilający
uszkodzona płyta główna
skontaktuj się z
przedstawicielem
wyświetlacz miga
rozładowany akumulator
naładować baterię
po naciśnięciu
klawisza nie
podjęto żadnej
akcji
skala jest zaburzona
podłącz ponownie kabel
zasilający
uszkodzony klucz
skontaktuj się z
przedstawicielem
odczyt wagi nie
jest stabilny
ładunek w ruchu
utrzymuj ładunek na stabilnym
poziomie
- 10 -
słaby anty-ruch
zmień poziom anty-ruchowy
tłumiony czujnik
obciążenia lub płyta
główna
sucha cela obciążeniowa lub
płyta główna
uszkodzona płyta główna
skontaktuj się z
przedstawicielem
odczyt wagi nie
jest zerowy, gdy
nie ma obciążenia
rozładowany akumulator
naładować baterię
ogniwo obciążnikowe było
obciążone zbyt długo
waga do powieszenia w
magazynie
rozładowany akumulator
naładować baterię
duży błąd w
odczycie wagi
waga nie została
wyzerowana przed
zastosowaniem
obciążenia
manualna Zerowanie wagi
przed załadunkiem
zła jednostka
przełącz na właściwą
jednostkę
waga wymaga kalibracji
skalibrować skalę
uszkodzona tasiemka lub
płyta główna
skontaktuj się z
przedstawicielem
baterii nie można
naładować
uszkodzona płytka
ładująca
skontaktuj się z
przedstawicielem
uszkodzona bateria
skontaktuj się z
przedstawicielem
krótka odległość
zdalnego
sterowania
rozładowana/uszkodzona
bateria pilota
wymień baterie pilota
47.
Procedury ładowania
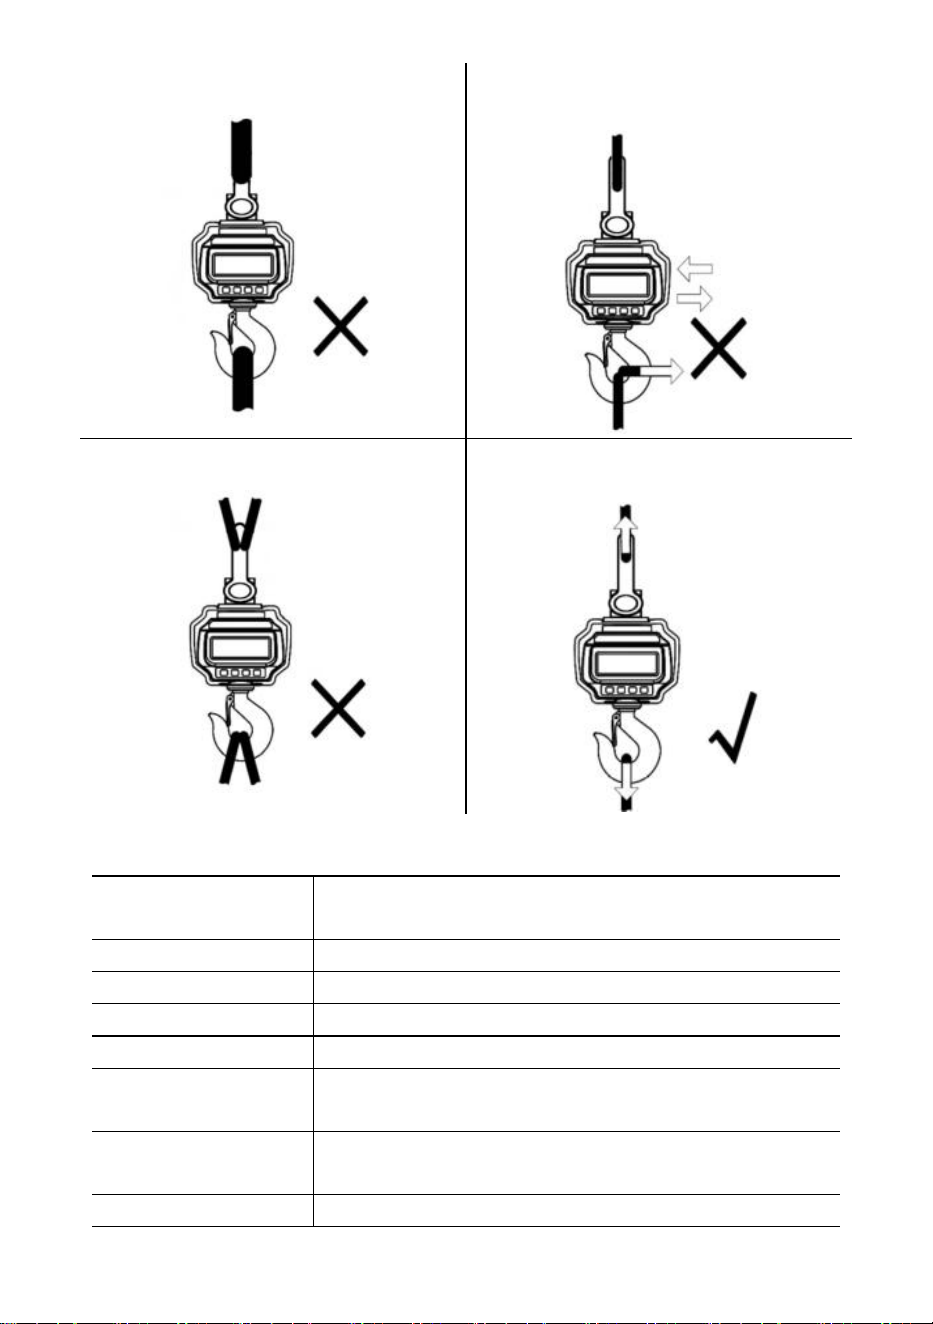
- 11 -
NIE mocuj zbyt dużego interfejsu!
NIE pchaj/nie ciągnij za obciążoną wagę
ani bezpośrednio za hak!
NIE stosuj wielu załączników!
Użyj osprzętu, który umożliwia tworzenie
mocowań jednopunktowych.
48. Specyfikacje
Klasa dokładności
Chiński GB/T 11883-2002 Klasa III
Odpowiednik OIML R76
Zakres tary
100% FS
Zasięg zerowy
4% FS
Stabilny czas
≤10 sek.
Przeciążać
100% FS + 9e
Obciążenie
bezpieczeństwa
150% FS
Maksymalne
obciążenie
400% FS
Bateria
Akumulator kwasowo-ołowiowy 6V/4,0Ah.
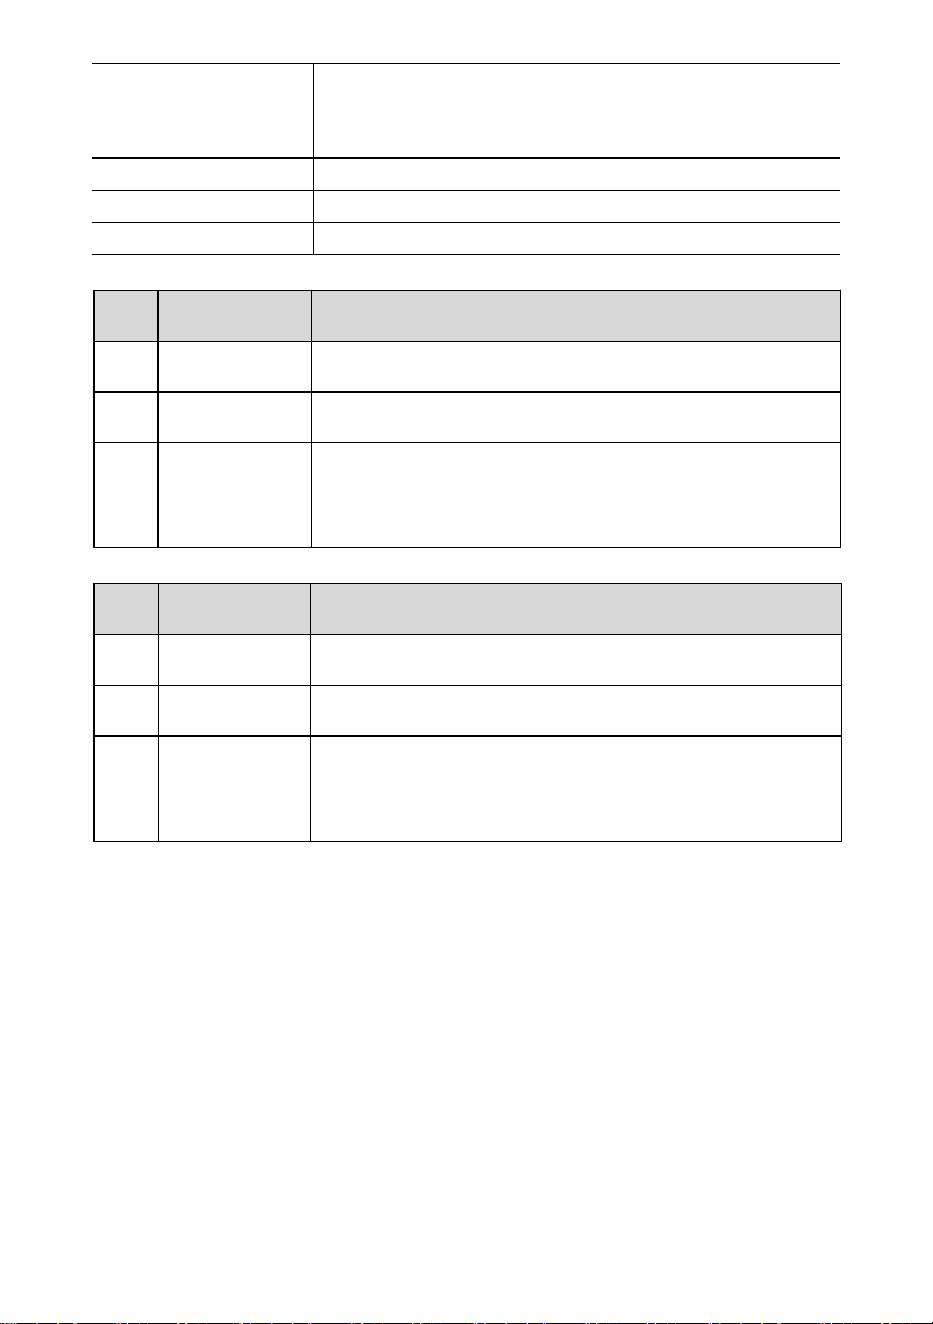
- 12 -
Rumak
Wyjście 14 V DC/1000 mA
(europejski, amerykański standard)
Wyjście 9VDC/1500mA (standard australijski)
Wyświetlacz
Moduł LED 40 mm (1,6 cala)
Temp.
-10℃ - +40℃
Op. Wilgotność
20℃ ≤90%
Rzeczy
Opis
1
Nazwa
Waga dźwigowa przemysłowa
2
Model
OCS-3-D
3
Parametr
Napięcie znamionowe: 6 V DC
Nośność: 3000 kg/6600 funtów
Podział: 1 funt
Rzeczy
Opis
1
Nazwa
Waga dźwigowa przemysłowa
2
Model
OCS-5-D
3
Parametr
Napięcie znamionowe: 6 V DC
Nośność: 5000 kg/11000 funtów
Podział: 2 funty

- 13 -
Producent: Shanghaimuxinmuyeyouxiangongsi
Adres: Shuangchenglu 803nong11hao1602A-1609shi, baoshanqu, szanghaj
200000 CN.
Importowane do AUS: SIHAO PTY LTD, 1 ROKEVA STREETEASTWOOD
NSW 2122 Australia
Importowane do USA: Sanven Technology Ltd., Suite 250, 9166 Anaheim
Place, Rancho Cucamonga, CA 91730
REP
EC
E-CrossStu GmbH
Mainzer Landstr.69, 60329 Frankfurt am Main.
REP
UK
YH CONSULTING LIMITED.
C/O YH Consulting Limited Office 147, Centurion House,
London Road, Staines-upon-Thames, Surrey, TW18 4AX
Wsparcie techniczne i certyfikat e-gwarancji
www.vevor.com/support

- 14 -
Technische ondersteuning en e-garantiecertificaat
www.vevor.com/support
INDUSTRIËLE KRAANWEEGSCHAAL
MODEL: OCS-3-D / OCS-5-D
We continue to be committed to provide you tools with competitive price.
"Save Half", "Half Price" or any other similar expressions used by us only represents an
estimate of savings you might benefit from buying certain tools with us compared to the major
top brands and does not necessarily mean to cover all categories of tools offered by us. You
are kindly reminded to verify carefully when you are placing an order with us if you are
actually saving half in comparison with the top major brands.

- 1 -
MODEL: OCS-3-D / OCS-5-D
Have product questions? Need technical support? Please feel free to
contact us:
Technical Support and E-Warranty Certificate
www.vevor.com/support
NEED HELP? CONTACT US!
This is the original instruction, please read all manual instructions
carefully before operating. VEVOR reserves a clear interpretation of our
user manual. The appearance of the product shall be subject to the
product you received. Please forgive us that we won't inform you again if
there are any technology or software updates on our product.
INDUSTRIAL CRANE
SCALE
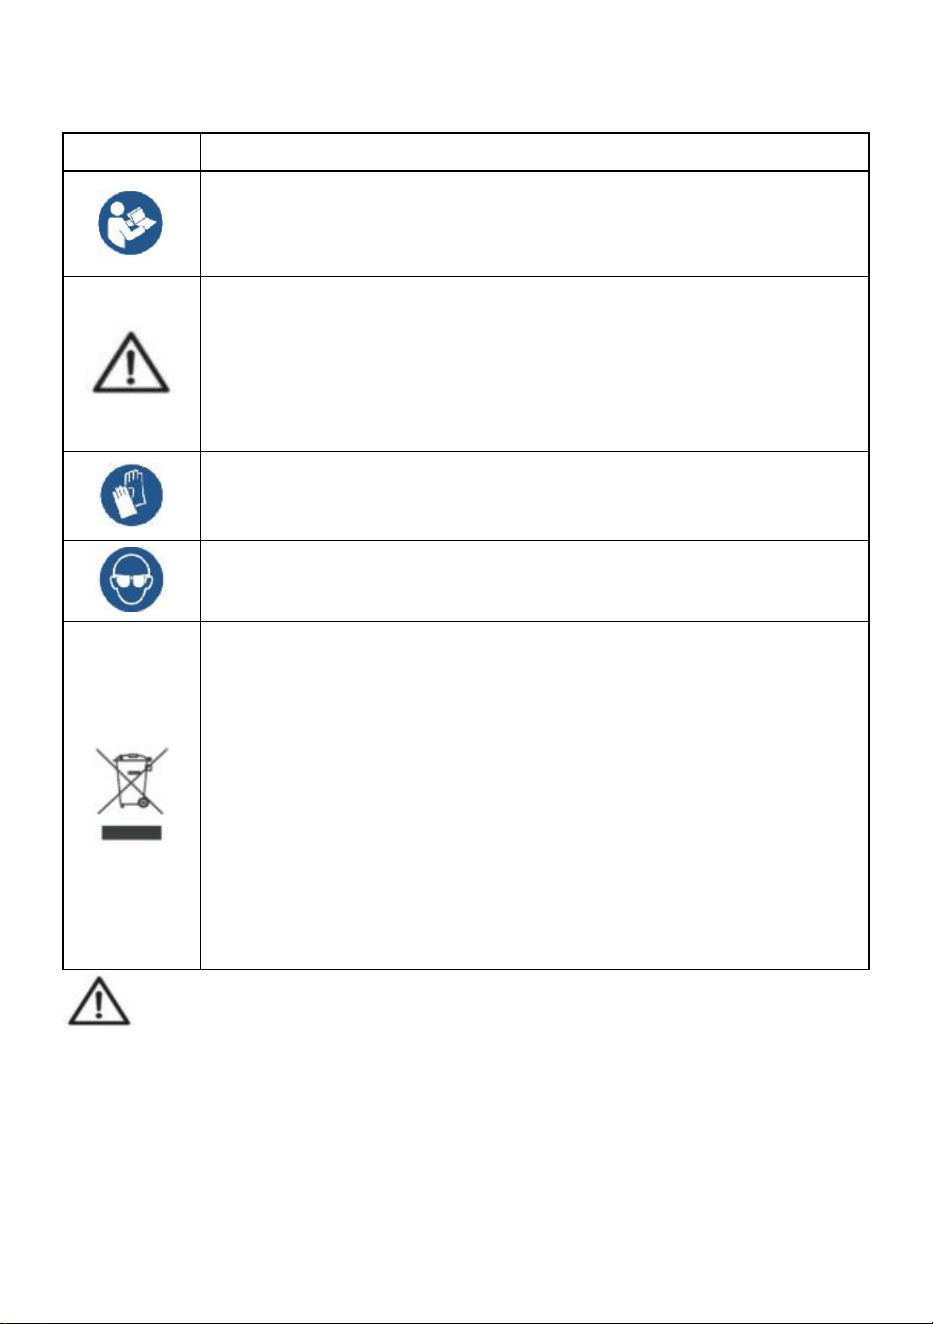
- 2 -
ALGEMENE VEILIGHEIDSREGELS
Symbool
Symbool Beschrijving
Waarschuwing - Om het risico op letsel te verkleinen, moet de
gebruiker de gebruiksaanwijzing zorgvuldig lezen.
Dit symbool, geplaatst voor een veiligheidsopmerking, geeft een
soort voorzorgsmaatregel, waarschuwing of gevaar aan. Het
negeren van deze waarschuwing kan leiden tot een ongeluk. Om
het risico op letsel, brand of elektrocutie te verminderen, dient u
altijd de onderstaande aanbevelingen op te volgen.
Waarschuwing: draag handschoenen wanneer u dit product
gebruikt.
Waarschuwing: draag altijd een oogbescherming wanneer u dit
product gebruikt.
Informatie over verwijdering:
Dit product valt onder de bepalingen van de Europese richtlijn
2012/19/EG. Het symbool met een doorgestreepte afvalbak geeft
aan dat het product in de Europese Unie gescheiden
afvalinzameling vereist. Dit geldt voor het product en alle
accessoires die met dit symbool zijn gemarkeerd. Producten die
als zodanig zijn gemarkeerd, mogen niet met het normale
huishoudelijke afval worden weggegooid, maar moeten worden
ingeleverd bij een inzamelpunt voor recycling van elektrische en
elektronische apparaten.
Algemene veiligheidsinstructies
WAARSCHUWING! Lees alle veiligheidswaarschuwingen en -opmerkingen.
Het niet opvolgen van de onderstaande instructies kan leiden tot elektrische
schokken, brand en/of letsel.
Voor goede prestaties en nauwkeurige metingen dient u voorzichtig te zijn
bij de dagelijkse bediening en het onderhoud.

- 3 -
VEILIGHEID OP DE WERKPLEK
a) Houd het toepassingsgebied schoon en goed verlicht. Onreine en donkere
gebieden leiden tot ongelukken.
b) Gebruik geen elektrisch gereedschap in explosieve omgevingen, zoals in
de aanwezigheid van ontvlambare vloeistoffen, gassen of dampen. Elektrisch
gereedschap genereert vonken die stof of dampen kunnen ontsteken.
c) Houd kinderen en omstanders uit de buurt wanneer u het apparaat bedient.
Afleidingen kunnen leiden tot verlies van controle over het apparaat.
Gebruiksaanwijzing:
Overbelast de kraanweegschaal niet, dit kan schade aan de weegcel veroorzaken;
Laat de lading niet te lang op de digitale weegschaal hangen. Dit zal de
nauwkeurigheid van de weegschaal verminderen en de levensduur van de
loadcell verkorten;
Controleer de beugel en haak voor gebruik. Controleer clips, pennen en
schroeven regelmatig;
Bedankt voor uw steun aan onze producten!
49. Afmetingen en gewicht

- 4 -
Model
Een (mm)
B (mm)
C (mm)
Lengte (mm)
OCS-3-D
55
96
35
575
OCS-5-D
78
123
48
675
50.
Weergave en toetsen
Toonladders
Sleutel
Naam
Functie
Aan/Uit
Druk op 1s om de weegschaal in of uit te schakelen.
Nul
Handmatige nulstelling.
Verhoog het knipperende cijfer.
Tarra
Tarra in/uit.
Knipperend cijfer rechts scrollen.
Uitstel
Lezen vergrendelen/ontgrendelen.
Bevestigen.
Afstandsbedieningen
Sleutel
Naam
Functie
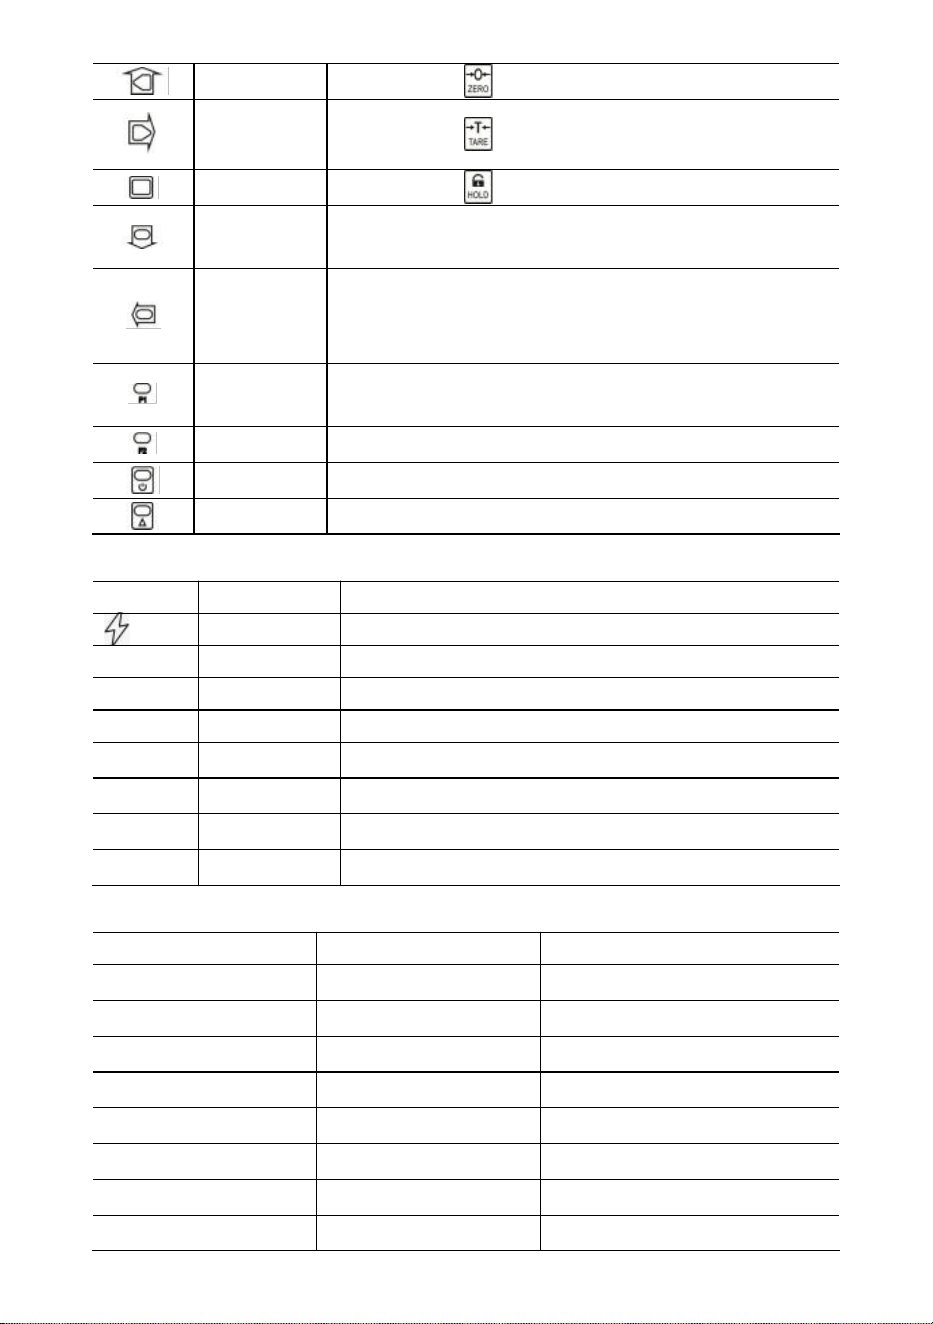
- 5 -
Nul
Hetzelfde als .
Tarra
Hetzelfde als .
Uitstel
Hetzelfde als .
Toepasselijk
Gewicht verzamelen.
Verlaag het knipperende cijfer.
Verd.
Verwijder het laatste gewicht.
Verwijder al het gewicht.
Knipperend cijfer aan de linkerzijde.
Formule 1
Weergave.
Voer een decimaal punt in.
F2
Eenheid schakelaar.
Uit
Druk op 1s om uit te schakelen.
2e
2e functie.
Indicatoren
LED
Naam
Opmerking
Opladen
brandt tijdens het opladen
STB.
Stabiel
verlicht wanneer het gewicht stabiel is
NUL
Nul
verlicht wanneer het gewicht op nul staat
TARRA
Getareerd
brandt wanneer de weegschaal getarreerd is
UITSTEL
Uitstel
brandt als de weegschaal vergrendeld is
pond
pond
verlicht wanneer de eenheid lb is
kg
kg
brandt als de eenheid kg is
VN
GEBRUIKER
brandt wanneer de eenheid een gebruikerseenheid is
Bericht
Bericht
Sta voor
Opmerking
-----
gewicht detecteren
-
in de inactieve modus
Instellen
INSTELLINGEN
Gebruikersinstellingenmenu
Vleermuis--
Batterij
batterijduur percentage
P0000
Wachtwoord
in wachtwoordmodus
|einde|
EINDE
opslaan en afsluiten
|uit|
UIT
uitschakelen
|meerdan
OVERbelasting
overbelasting
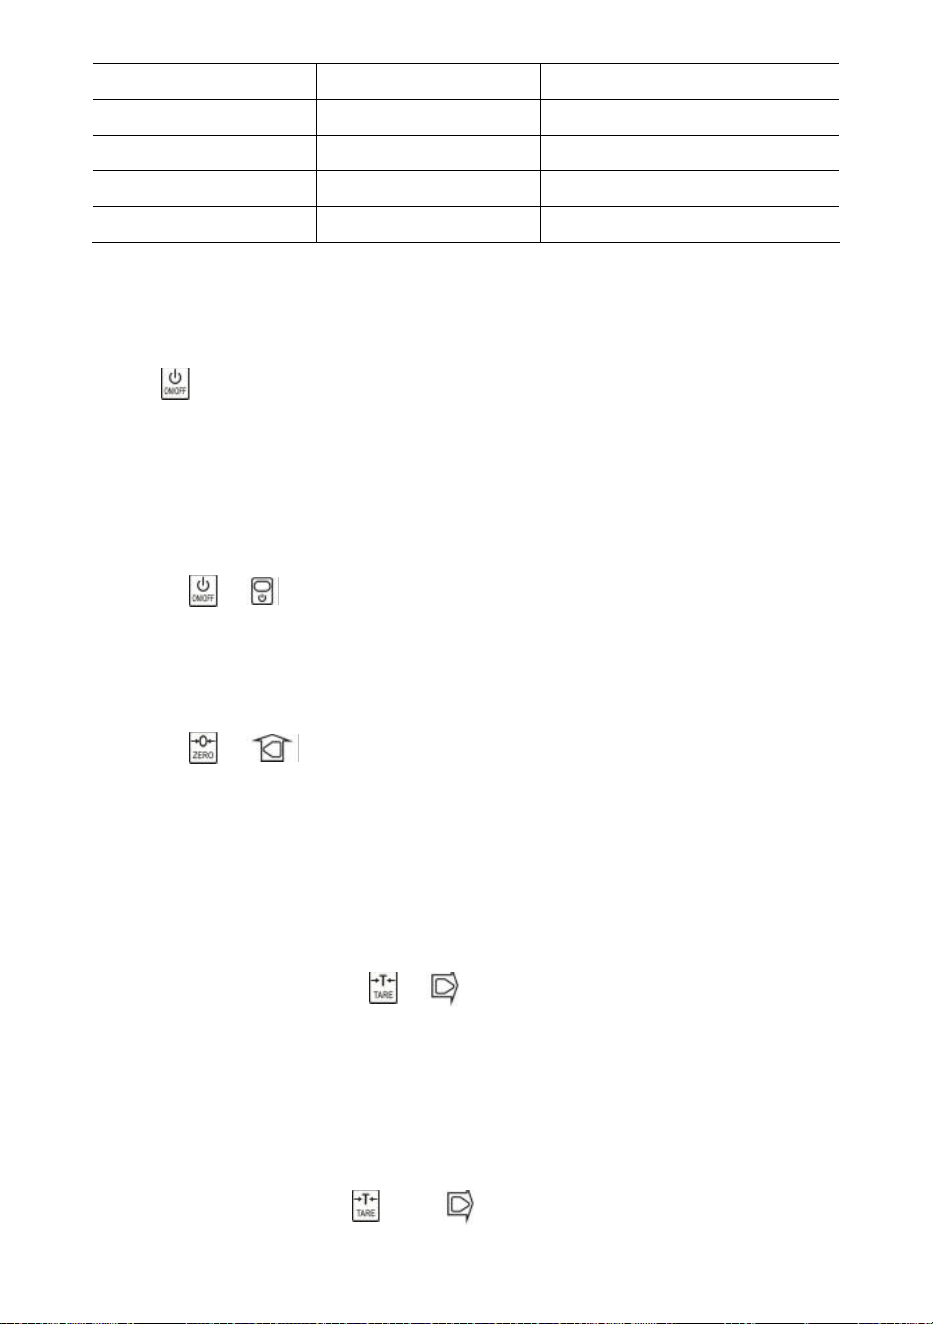
- 6 -
|2e|
2e
2e functie
|fout|
Fout
ongeldige bewerking
|acc|
Accumuleren
gewicht verzamelen
|del|
Verwijderen
verwijder laatste gewicht
|Clr|
Duidelijk
verwijder alle gewichten
51. Operatie s
Aan/uit
Druk 1s in om de weegschaal in te schakelen. De weegschaal voert initialisatie en
power-on test uit,
*****
wordt twee keer weergegeven, vervolgens wordt capaciteit
|5000
weergegeven, batterijlevensduurpercentage
bat90
wordt weergegeven,
gewichtsdetectie
-----
wordt weergegeven en vervolgens automatisch op nul.
Raadpleeg het hoofdstuk Schaalconfiguratie in de technische handleiding voor
informatie over Auto-Zero.
Druk op of gedurende 1 seconde om de weegschaal uit te schakelen.
Batterijduurpercentage
bat90
wordt weergegeven, uitbericht
|off|
wordt weergegeven
en schakelt vervolgens de stroom uit.
Nul
Druk op of om op nul te zetten. Het lampje ZERO brandt.
Als de last in beweging is, getarreerd is of zich buiten het handmatige nulbereik
bevindt, wordt
|err|
weergegeven.
Raadpleeg voor informatie over het handmatige nulbereik het onderdeel
Schaalconfiguratie in de technische handleiding.
Tarra in/uit
In de brutomodus drukt u op of om te tarreren. Het TARE- lampje brandt.
Als de last beweegt, negatief is of buiten het tarrabereik valt, wordt
|err|
weergegeven.
Tare zal het schijnbare overbelastingsbereik van de weegschaal verkleinen.
Bijvoorbeeld, als een 5000*2kg weegschaal een 1000kg container als tarra heeft, zal
de weegschaal overbelasten bij een nieuw gewicht van 4018kg (5000 – 1000 + extra 9
divisies).
In de netmodus drukt u op of om te tarreren. het licht uit.
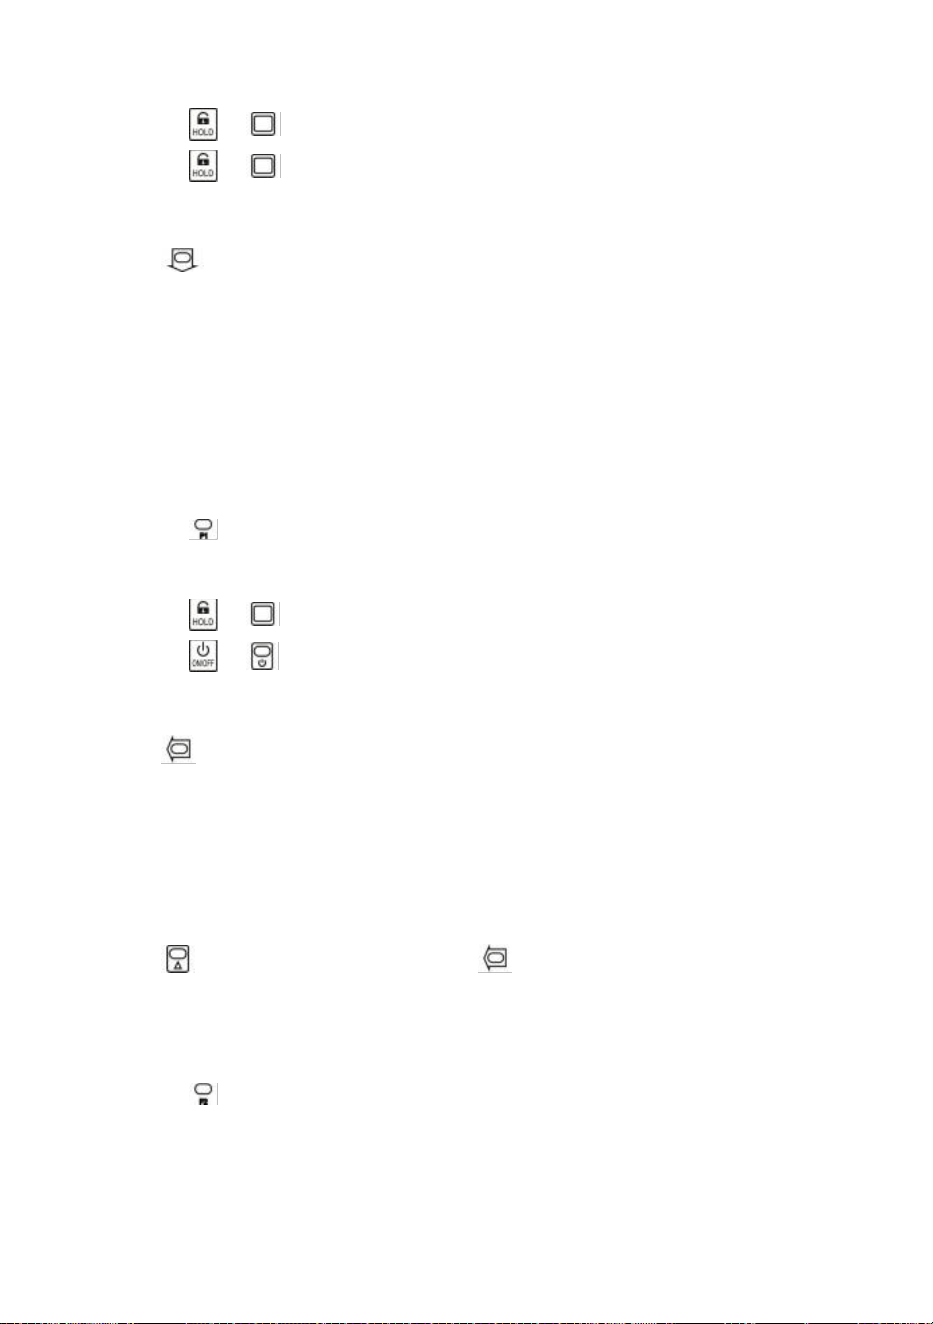
- 7 -
Vergrendelen/ontgrendelen
Druk op of om het scherm te vergrendelen. HOUD VAST het licht aan.
Druk op of om het scherm te ontgrendelen. HOUD het licht uit.
Accumuleren
Druk om het huidige gewicht te verzamelen.
|acc|
toont, wat aangeeft dat gewicht is verzameld. De weegschaal gebruikt het
weergegeven gewicht, dus bruto- of nettogewicht wordt toegevoegd aan dezelfde
accumulator.
Als de belasting in beweging is, negatief is of niet eerder naar nul terugkeert, wordt
|err|
weergegeven.
Weergave
Druk op om de weergavemodus te openen.
Het display toont het geaccumuleerde gewicht.
Druk op of om de hoogste 5-cijferige of laagste 5-cijferige waarde te bekijken.
Druk op of om de weergavemodus te verlaten.
Laatste gewicht verwijderen
Druk om het laatst gemeten gewicht te verwijderen.
|del|
toont, wat aangeeft dat het laatste geaccumuleerde gewicht is verwijderd. De
verwijderfunctie verwijdert alleen het laatste gewicht.
Als het laatste verzamelde gewicht is verwijderd, wordt
|err|
weergegeven.
Alles wissen Gewicht
Druk eerst op en druk vervolgens op om al het verzamelde gewicht te wissen.
|clr|
wordt weergegeven, wat aangeeft dat alle gewichten zijn gewist.
Eenheidsschakelaar
Druk op om te wisselen tussen kg, lb en gebruikerseenheid.
Als de eenheid kg is, brandt het
kg -ledlampje. Als de eenheid lb is,
brandt het
lb
-ledlampje.
Als de eenheid User unit is, brandt het
UN
-ledlampje.
Voor meer informatie over de gebruikerseenheid raadpleegt u het onderdeel
Schaalconfiguratie in de technische handleiding.
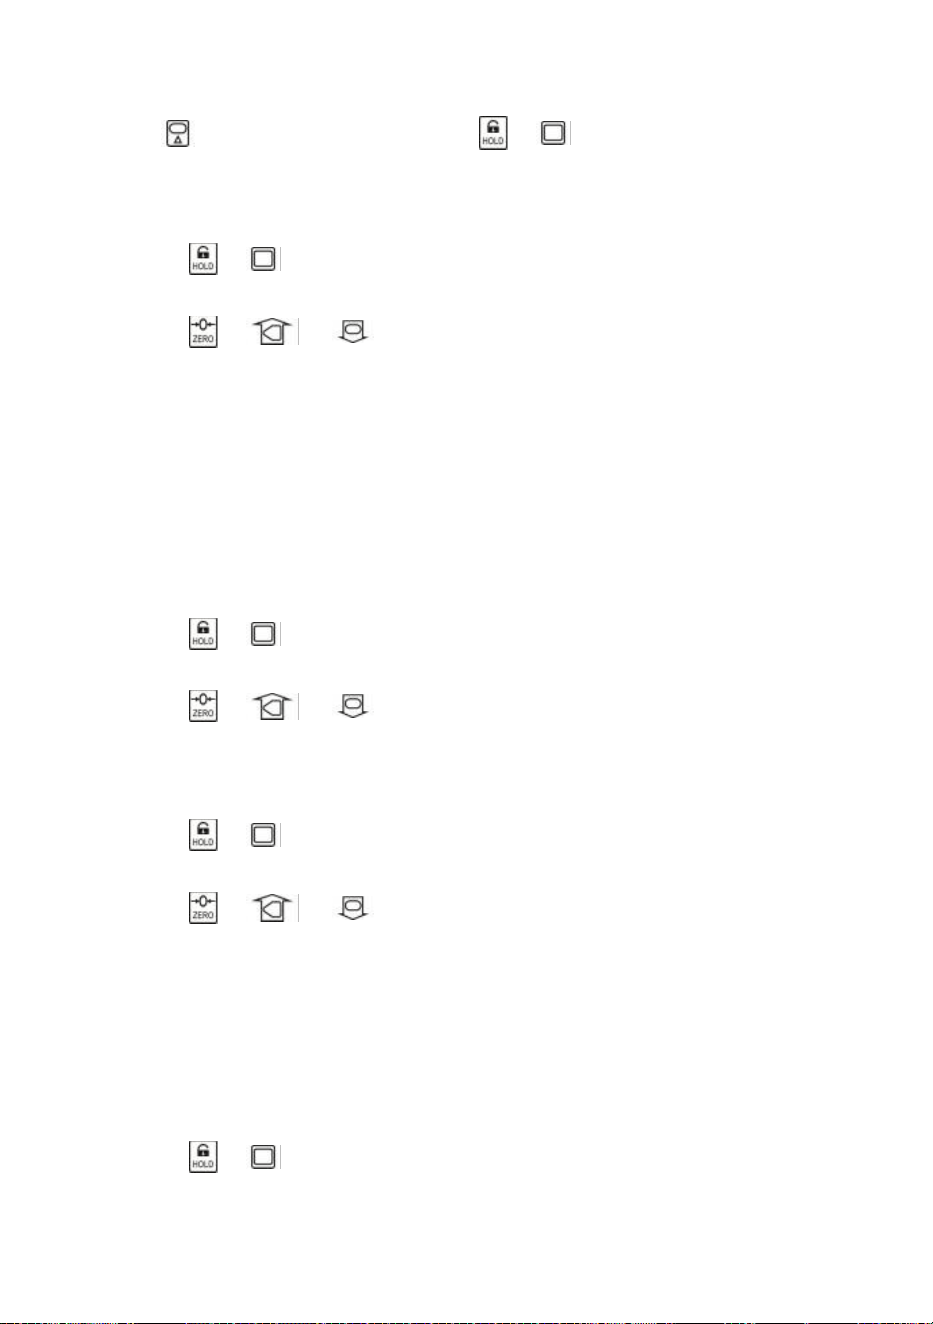
- 8 -
52. Gebruikersinstellingen
Druk eerst op en druk vervolgens op of om het menu
Gebruikersinstellingen te openen.
HetmenuInstellingen
wordt weergegeven.
Automatische uitschakeltijd
Druk op of om de automatische uitschakeltijd in te voeren.
Uit--
wordt
weergegeven.
Druk op of en om de timingwaarde te wijzigen.
Auto-Off Timing kan worden ingesteld op:
0
(uitgeschakeld),
5
(5min),
10
(10min),
15
(15min),
30
(30min),
60
(60min). Standaard is deze uitgeschakeld.
De Auto-Off-functie maximaliseert de batterijduur van de weegschaal tegen de
onachtzaamheid van mensen om de weegschaal niet uit te schakelen wanneer deze
niet werkt. Auto-Off start de afteltimer wanneer er geen actie is of de belasting stabiel
is. Elke toetsaanslag of beweging in de belasting start de afteltimer opnieuw.
Weergave helderheid
Druk op of om de helderheid van het display te openen.
Br--
wordt
weergegeven.
Druk op of en om de helderheidswaarde te wijzigen.
Door de helderheid van de LED's te dimmen, bespaart u aanzienlijk op de batterij.
Timing inactieve modus
Druk op of om de timing van de inactieve modus te openen.
Idl--
wordt
weergegeven.
Druk op of en om de timingwaarde te wijzigen.
De timing voor de inactieve modus kan worden ingesteld op:
0
(uitgeschakeld),
5
(5
sec),
10
(10 sec),
15
(15 sec),
30
(30 sec),
60
(60 sec). Standaard is dit 30 sec.
Om de batterijduur te maximaliseren, gaat de weegschaal automatisch naar de Idle
Mode wanneer er geen actie is of de belasting stabiel is. In de Idle Mode werkt de
weegschaal in een status met laag stroomverbruik. Elke toetsaanslag of beweging in
de belasting wekt de weegschaal uit de Idle Mode.
Druk op of om de gebruikersinstellingen te verlaten.
53.
Batterijonderhoud
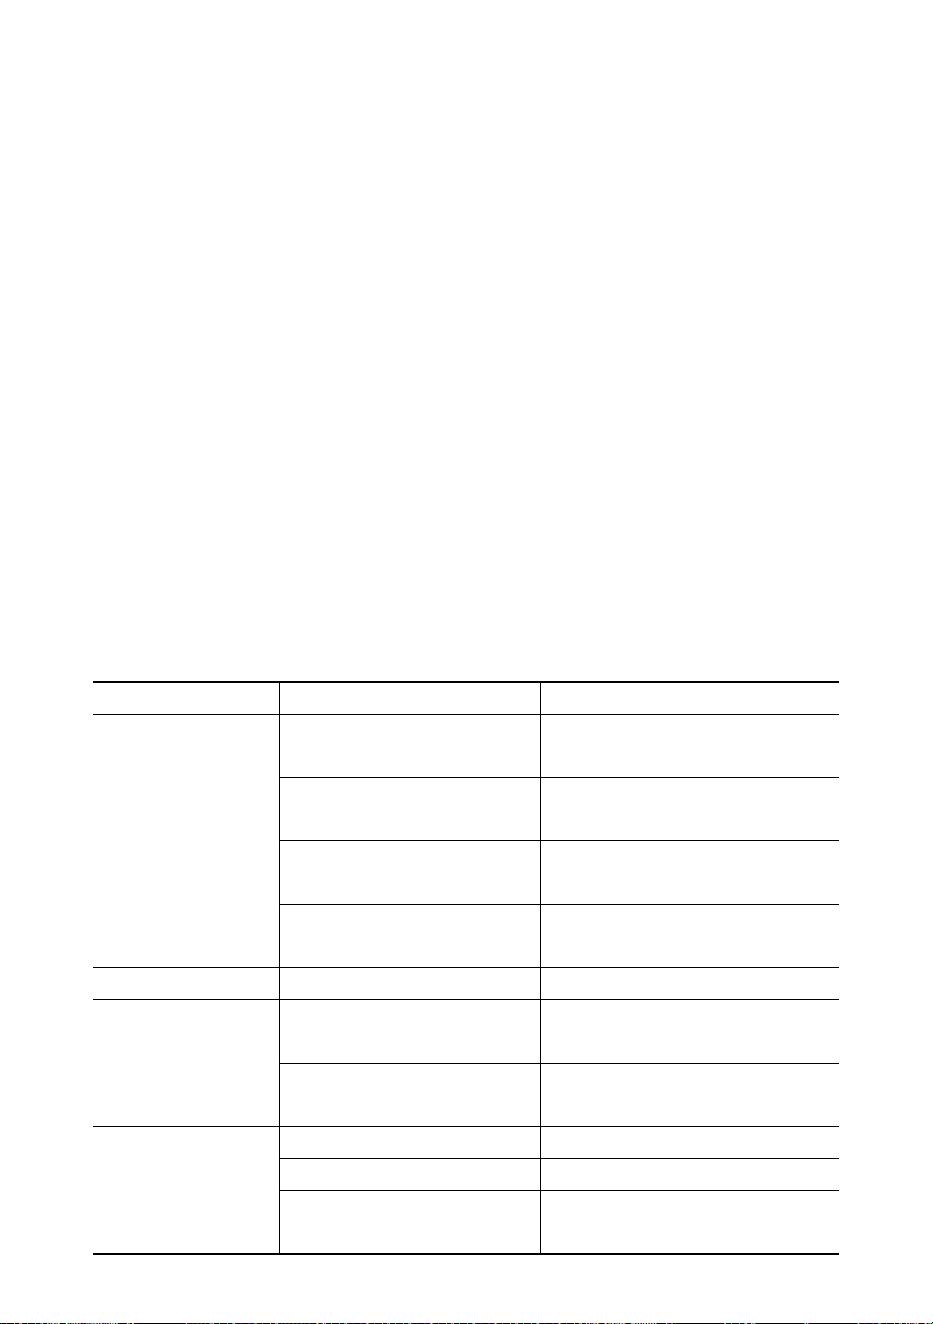
- 9 -
Om de levensduur van de batterij te maximaliseren, dient u de volgende
batterij-onderhoudsgids te volgen.
Deze weegschaal wordt gevoed door een 6V4.0Ah oplaadbare loodzuuraccu.
De batterij is permanent bevestigd in het batterijhuis.
Afhankelijk van de helderheid van de LED en de instelling van de inactieve modus,
werkt de batterij 60 tot 200 uur.
Om de batterij te sparen, kunt u de automatische uitschakeling en de inactieve modus
inschakelen om de helderheid van de LED te dimmen.
De oplaadtijd voor een volledig lege batterij bedraagt ongeveer 12 uur.
Om een maximale levensduur te verkrijgen, moet de batterij worden opgeslagen
tussen -20℃ (-4°F) en +50℃ (122°F). Opgeslagen batterijen moeten elke drie
maanden worden opgeladen.
Tijdens het opladen geeft de groene LED aan dat de batterij vol is, terwijl de rode LED
aangeeft dat er wordt opgeladen.
54.
Probleemoplossing
Eenvoudige problemen kunnen worden opgelost met de onderstaande oplossing.
Als er nog steeds problemen zijn, neem dan contact op met uw lokale
vertegenwoordiger.
Symptoom
Mogelijke oorzaak
Voorgestelde oplossing
niet inschakelen
nadat aan/uit is
ingedrukt
ontladen / defecte accu
controleer de batterij en laad
deze op
defecte aan/uit-toets
druk harder en blijf 2 seconden
drukken
defecte stroomkabel
open het voorpaneel,
controleer de stroomkabel
defect moederbord
contact opnemen met
vertegenwoordiger
display knippert
ontladen batterij
batterij opladen
er is geen actie
ondernomen
nadat de toets is
ingedrukt
schaal is verstoord
sluit de stroomkabel opnieuw
aan
defecte sleutel
contact opnemen met
vertegenwoordiger
gewichtsmeting is
niet stabiel
lading in beweging
houd de lading stabiel
zwakke anti-beweging
verander Anti-Motion niveau
gedempte weegcel of
moederbord
droge loadcell of moederbord
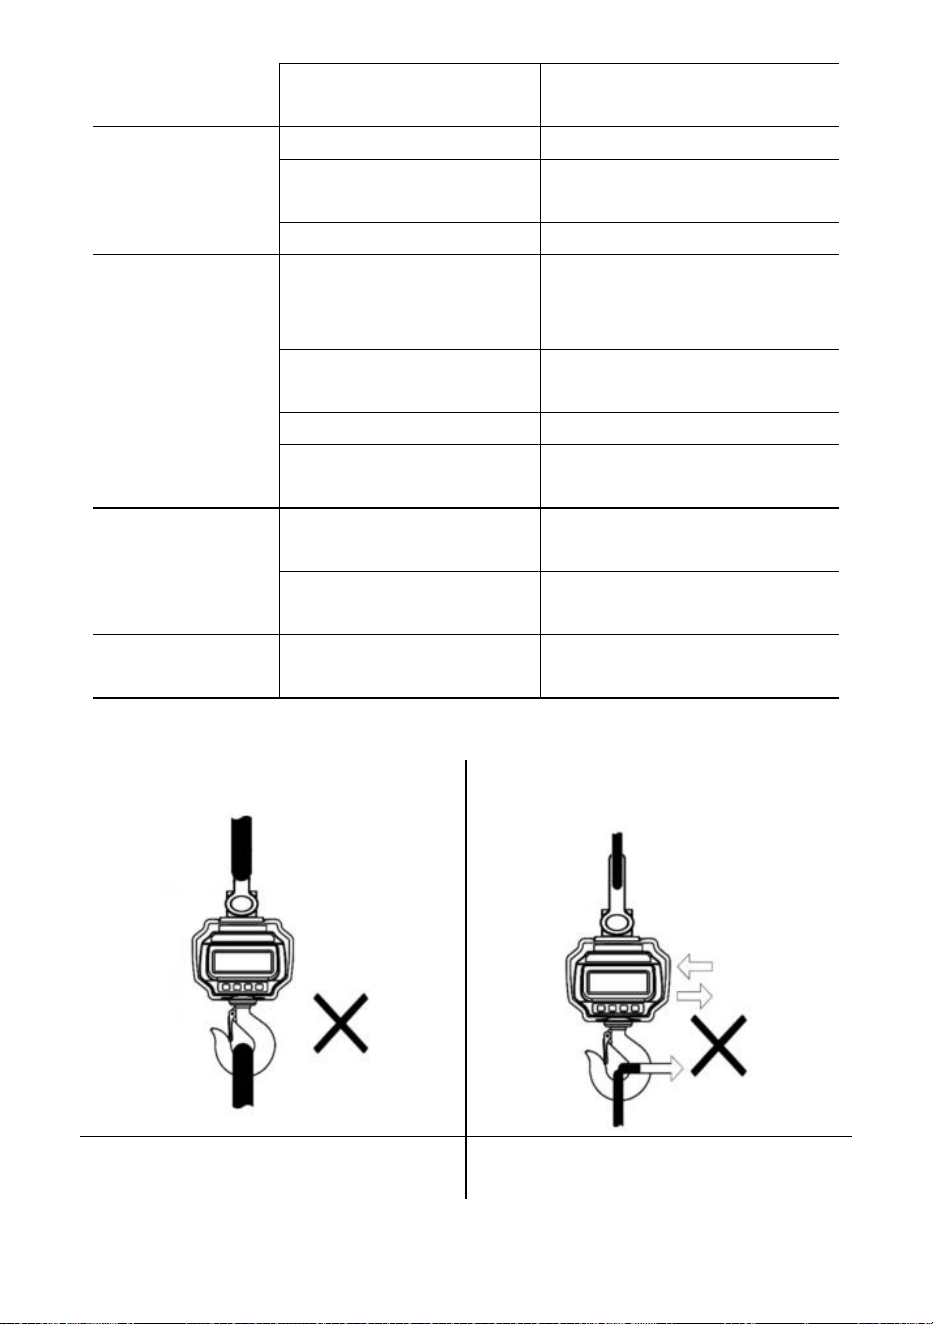
- 10 -
defect moederbord
contact opnemen met
vertegenwoordiger
gewichtsaflezing
is niet nul als er
geen belasting is
ontladen batterij
batterij opladen
lastcel te lang belast
weegschaal ophangen in
opslag
ontladen batterij
batterij opladen
grote fout bij het
aflezen van het
gewicht
schaal niet op nul gezet
voordat de belasting wordt
toegepast
Handleiding Nul weegschaal
voor het laden
verkeerde eenheid
overschakelen naar de juiste
eenheid
schaal vereist kalibratie
weegschaal kalibreren
defecte loadcell of
moederbord
contact opnemen met
vertegenwoordiger
batterij kan niet
worden
opgeladen
defect laadbord
contact opnemen met
vertegenwoordiger
defecte batterij
contact opnemen met
vertegenwoordiger
korte afstand voor
afstandsbediening
ontladen / defecte
afstandsbedieningsbatterij
batterijen van de
afstandsbediening vervangen
55. Laadprocedures
Bevestig GEEN te grote interface!
Duw/trek NIET aan de beladen
weegschaal of direct aan de haak!
GEBRUIK GEEN meerdere bijlagen!
Gebruik hardware die een enkelvoudig
bevestigingspunt creëert.
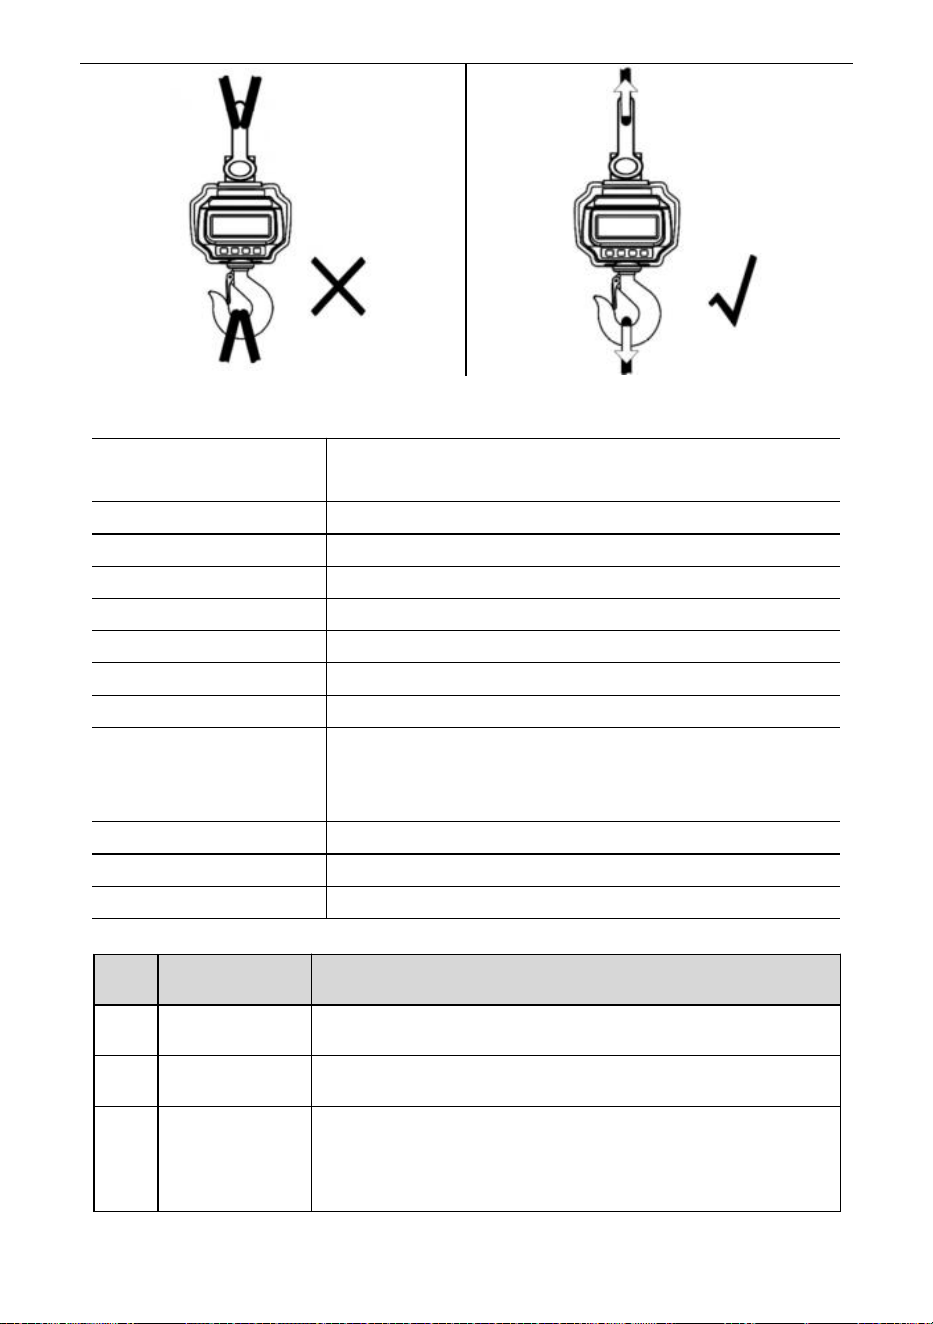
- 11 -
56. Specificaties
Nauwkeurigheidsklasse
Chinees GB/T 11883-2002 Klasse III
Gelijkwaardig aan OIML R76
Tarrabereik
100% veilig
Nulbereik
4% vol
Stabiele tijd
≤10 seconden
Overbelasting
100% FS + 9e
Veiligheidsbelasting
150% vol
Ultieme belasting
400% vol
Batterij
6V/4.0Ah loodaccu.
Oplader
14VDC/1000mA-uitgang
(Europese, Amerikaanse standaard)
9VDC/1500mA-uitgang (Australische standaard)
Weergave
40mm (1,6 inch) LED-module
Op.Tijd.
-10℃ - +40℃
Op. Vochtigheid
20℃ ≤90%
Artikelen
Beschrijving
1
Naam
Industriële kraanweegschaal
2
Model
OCS-3-D
3
Parameter
Nominale waarde(n): 6VDC
Capaciteit: 3000kg/6600Ib
Divisie: 1lb

- 12 -
Artikelen
Beschrijving
1
Naam
Industriële kraanweegschaal
2
Model
OCS-5-D
3
Parameter
Nominale waarde(n): 6VDC
Capaciteit: 5000kg/11000Ib
Divisie: 2lb

- 13 -
Fabrikant: Shanghaimuxinmuyeyouxiangongsi
Adres: Shuangchenglu 803nong11hao1602A-1609shi, baoshanqu, shanghai
200000 CN.
Geïmporteerd naar AUS: SIHAO PTY LTD, 1 ROKEVA
STREETEASTWOOD NSW 2122 Australië
Geïmporteerd naar de VS: Sanven Technology Ltd., Suite 250, 9166
Anaheim Place, Rancho Cucamonga, CA 91730
REP
EC
E-CrossStu GmbH
Mainzer Landstr.69, 60329 Frankfurt am Main.
REP
UK
YH CONSULTING LIMITED.
C/O YH Consulting Limited Office 147, Centurion House,
London Road, Staines-upon-Thames, Surrey, TW18 4AX
Technische ondersteuning en e-garantiecertificaat
www.vevor.com/support

- 14 -
Teknisk support och e-garanticertifikat
www.vevor.com/support
INDUSTRIELL KRANVÅG
MODELL: OCS-3-D / OCS-5-D
We continue to be committed to provide you tools with competitive price.
"Save Half", "Half Price" or any other similar expressions used by us only represents an
estimate of savings you might benefit from buying certain tools with us compared to the major
top brands and does not necessarily mean to cover all categories of tools offered by us. You
are kindly reminded to verify carefully when you are placing an order with us if you are
actually saving half in comparison with the top major brands.
- 1 -
MODELL: OCS-3-D / OCS-5-D
Have product questions? Need technical support? Please feel free to
contact us:
Technical Support and E-Warranty Certificate
www.vevor.com/support
NEED HELP? CONTACT US!
This is the original instruction, please read all manual instructions
carefully before operating. VEVOR reserves a clear interpretation of our
user manual. The appearance of the product shall be subject to the
product you received. Please forgive us that we won't inform you again if
there are any technology or software updates on our product.
INDUSTRIAL CRANE
SCALE
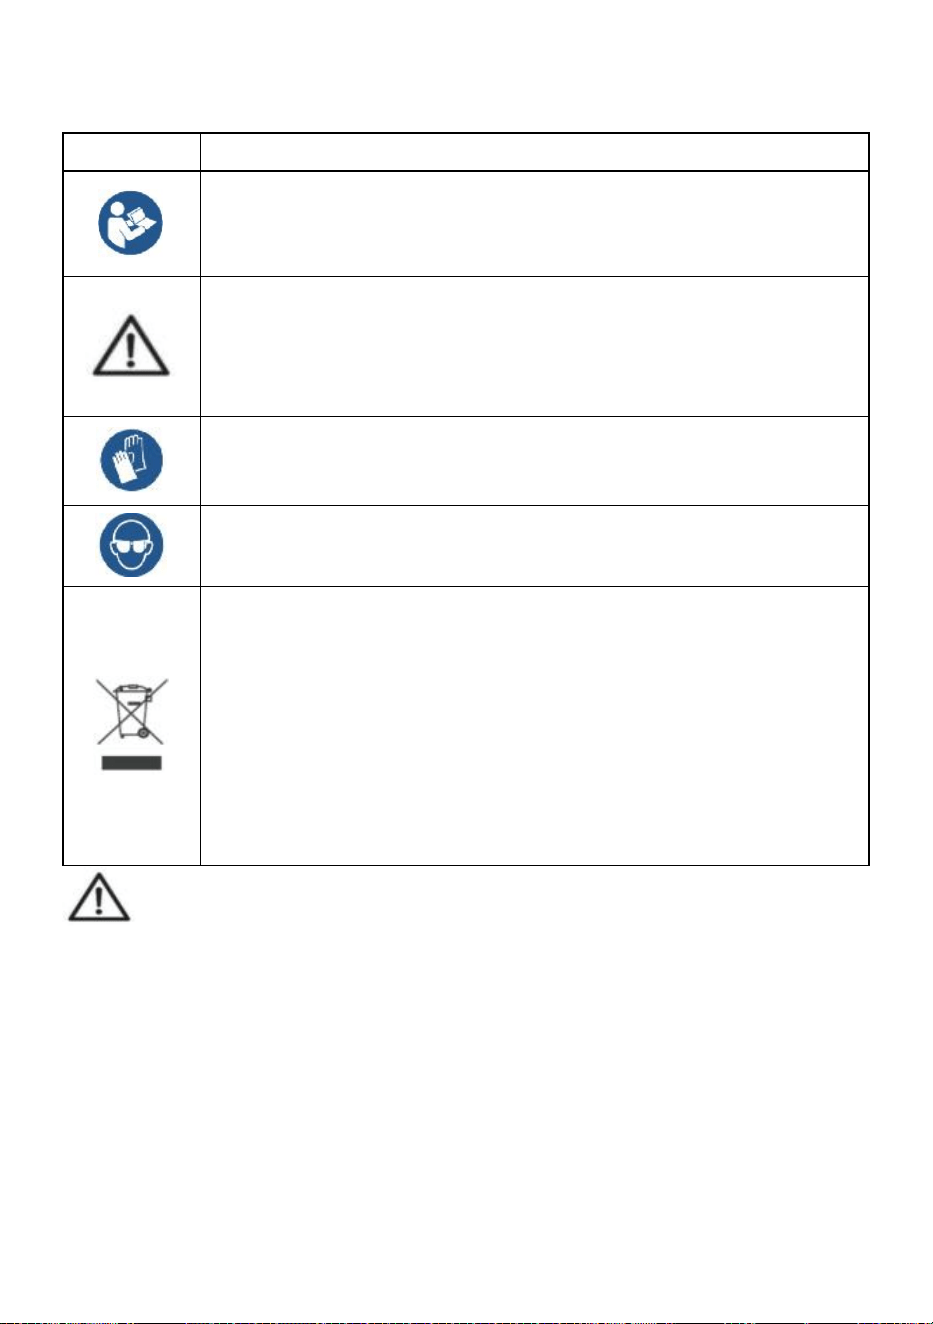
- 2 -
ALLMÄNNA SÄKERHETSFÖRESKRIFTER
Symbol
Symbol Beskrivning
Varning - För att minska risken för skada måste användaren läsa
bruksanvisningen noggrant.
Denna symbol, placerad före en säkerhetskommentar, indikerar
en slags försiktighetsåtgärd, varning eller fara. Att ignorera denna
varning kan leda till en olycka. För att minska risken för skada,
brand eller elstöt, följ alltid rekommendationerna nedan.
Varning- Var noga med att bära handskar när du använder denna
produkt.
Varning- Var noga med att bära ögonskydd när du använder
denna produkt.
Avfallshanteringsinformation:
Denna produkt omfattas av bestämmelserna i det europeiska
direktivet 2012/19/EC. Symbolen som visar en soptunna korsad
anger att produkten kräver separat sophämtning i EU. Detta gäller
för produkten och alla tillbehör märkta med denna symbol.
Produkter märkta som sådana får inte kasseras tillsammans med
vanligt hushållsavfall utan måste lämnas till en insamlingsplats för
återvinning av elektriska och elektroniska apparater.
Allmänna säkerhetsanvisningar
VARNING! Läs alla säkerhetsvarningar och anmärkningar. Underlåtenhet att
följa instruktionerna nedan kan leda till elektriska stötar, brand och/eller skada.
För bra prestanda och exakt mätning, var försiktig med daglig drift och
underhåll.
SÄKERHET FÖR ARBETSOMRÅDE
a) Håll applikationsområdet rent och väl upplyst. Orena och mörka områden
leder till olyckor.
b) Använd inte elverktyg i explosiva miljöer, som i närvaro av brandfarliga
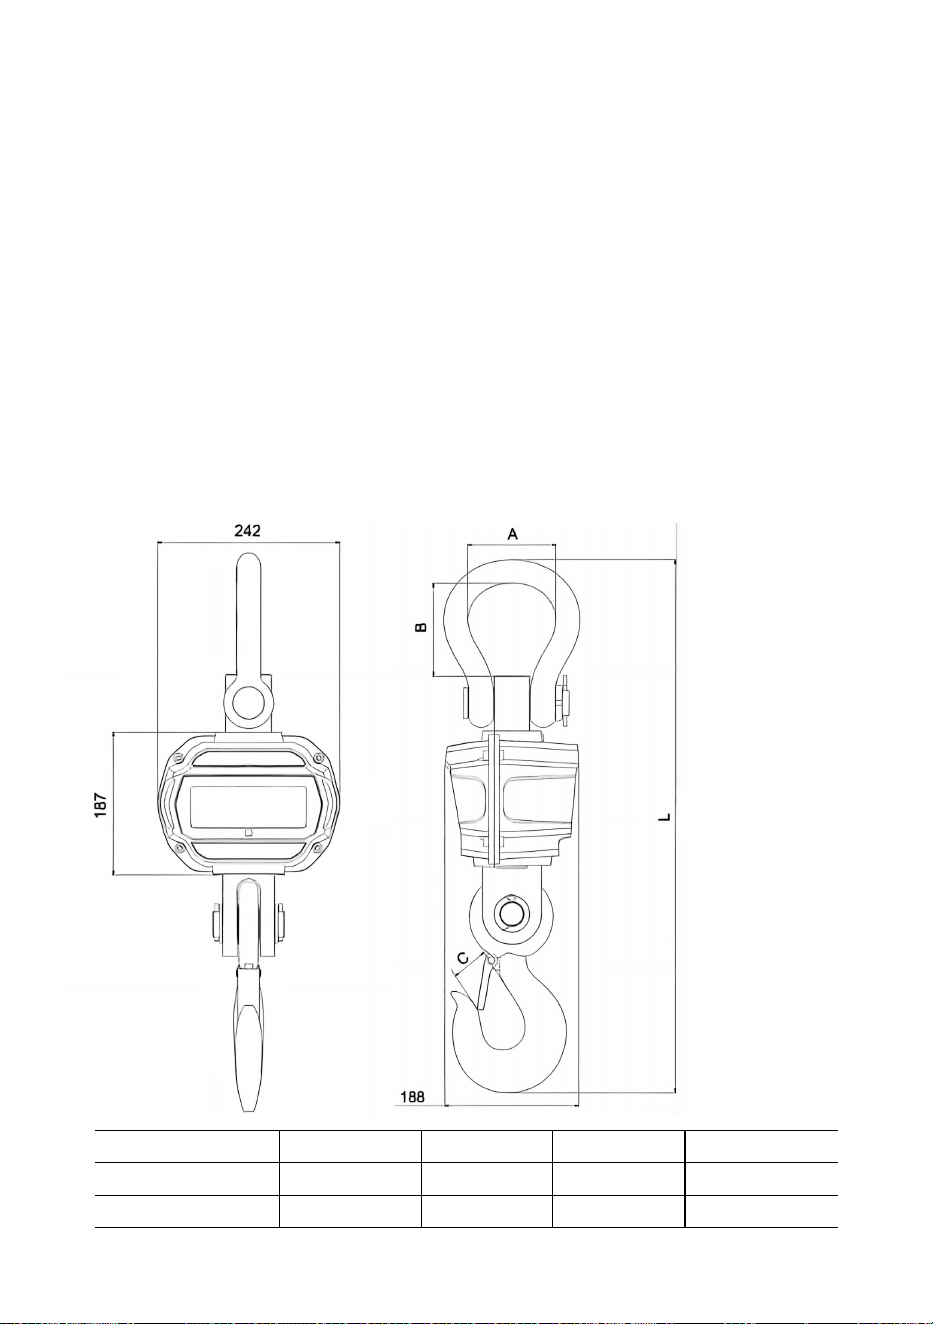
- 3 -
vätskor, gaser eller ångor. Elverktyg genererar gnistor som kan antända damm
eller ångor.
c) Håll barn och åskådare borta när du använder apparaten. Distraktioner kan
leda till att du förlorar kontrollen över enheten.
Användningsanmärkning:
Överbelasta inte kranvågen, detta kommer att skada lastcellen;
Låt inte lasten hänga på den digitala vågen länge. Detta kommer att minska
skalningsnoggrannheten och förkorta lastcellens livslängd;
Inspektera bygeln och kroken före användning. Kontrollera regelbundet klämmor,
stift och skruvar;
Tack för ditt stöd till våra produkter!
57. Mått & Vikt
Modell
A
(
mm
)
B (mm)
C (mm)
L
(
mm
)
OCS-3-D
55
96
35
575
OCS-5-D
78
123
48
675
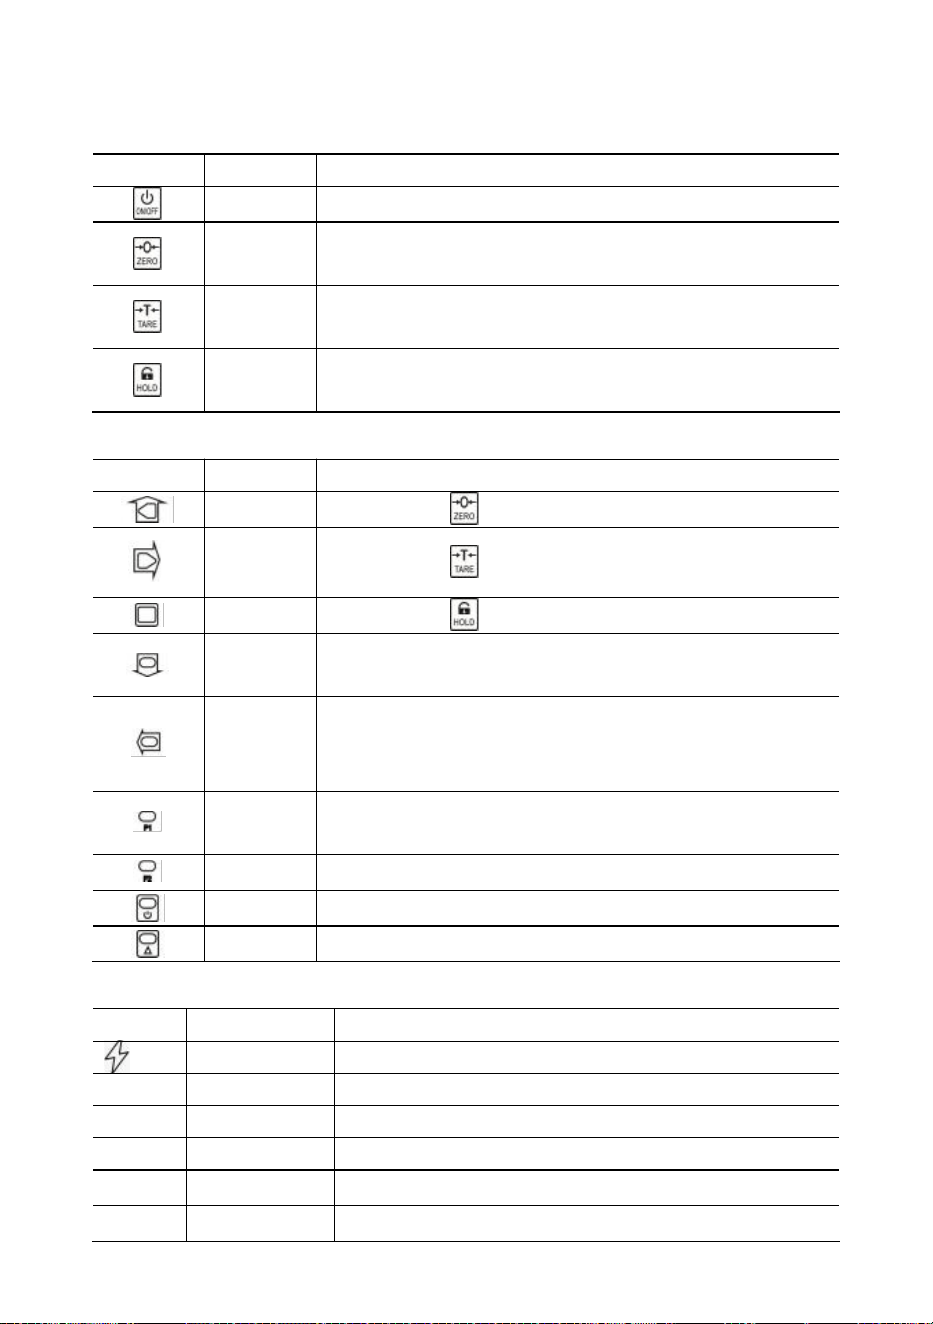
- 4 -
58. Display & tangenter
Skala nycklar
Nyckel
Namn
Fungera
På/Av
Tryck 1s för att slå på/av vågen.
Noll
Manuell noll.
Öka den blinkande siffran.
Tara
Tarera in/ut.
Höger rulla blinkande siffra.
Hålla
Lås/lås upp läsning.
Bekräfta.
Fjärrknappar
Nyckel
Namn
Fungera
Noll
Samma som .
Tara
Samma som .
Hålla
Samma som .
Enl.
Ackumulera vikt.
Minska blinkande siffra.
Del.
Radera den senaste vikten.
Rensa all vikt.
Vänster bläddra blinkande siffra.
F1
Se.
Mata in decimalkomma.
F2
Enhetsbrytare.
Av
Tryck 1s för att stänga av.
2:a
2:a funktion.
Indikatorer
LED
Namn
Notera
Laddar
lyser vid laddning
STB.
Stabil
tänds när vikten är stabil
NOLL
Noll
tänds när vikten är noll
TARA
Tarerad
tänds när vågen är tarerad
HÅLLA
Hålla
tänds när vågen är låst
lb
lb
lyser när enheten är lb
- 5 -
kg
kg
lyser när enheten är kg
FN
ANVÄNDARE
lyser när enheten är en användarenhet
Meddelande
Meddelande
Stå för
Notera
-----
upptäcka vikt
-
i viloläge
Inställning
INSTÄLLNING
Användarinställningsmeny
Bat--
Batteri
batteritid i procent
P0000
Lösenord
i lösenordsläge
|slut|
AVSLUTA
spara och avsluta
|av|
AV
ström av
|över
Överbelastning
överbelastning
|2:a|
2:A
2:a funktion
|fel|
Fel
ogiltig operation
|acc|
Ackumulera
samla ihop vikt
|del|
Radera
radera senaste vikten
|Clr|
Rensa
radera all vikt
59. Operation s
Ström på/av
Tryck i 1s för att slå på vågen. Vågen utför initialisering och starttest,
*****
visar två
gånger, sedan visar kapacitet
|5000
, batterilivslängd i procent
bat90
visar,
viktdetektering
-----
visas och sedan automatisk nollställning.
För information om Auto-Zero, se Skalkonfiguration i den tekniska handboken.
Tryck på eller i 1 s för att stänga av vågen. Batterilivslängd i procent
bat90
visar, av meddelande
|av|
visas och stänger sedan av strömmen.
Noll
Tryck på eller för att nollställa. NOLL lampa tänd.
Om lasten är i rörelse, tarerad eller utanför manuellt nollområde,
|err|
visar.
För information om Manual-Zero Range, se Skalkonfiguration i den tekniska
handboken.
- 6 -
Tarera in/ut
I bruttoläge, tryck på eller för att tarera in. TARE- lampan tänds.
Om lasten är i rörelse, negativ eller utanför tareringsområde,
|err|
visar.
Tara kommer att minska den uppenbara överbelastningen av skalan. Till exempel, om
en 5000*2kg våg har en 1000kg container som tara, kommer vågen att överbelasta vid
en ny vikt på 4018kg (5000 – 1000 + ytterligare 9 divisioner).
I nätläge, tryck på eller för att tarera ut. TARA ljuset släckt.
Lås/lås upp
Tryck på eller för att låsa skärmen. HÅLLA ljuset på.
Tryck på eller för att låsa upp skärmen. HÅLL ljuset släckt.
Ackumulera
Tryck för att samla aktuell vikt.
|acc|
visar, vilket indikerar att vikt har ackumulerats. Vågen använder visad vikt, så
brutto- eller nettovikt läggs till i samma ackumulator.
Om lasten är i rörelse, negativ eller inte återgår till noll innan,
|err|
visar.
Se
Tryck för att gå in i visningsläget.
Displayen blinkar ackumulerad vikt.
Tryck på eller för att visa hög 5-siffrig eller låg 5-siffra.
Tryck på eller för att lämna visningsläget.
Ta bort senaste vikt
Tryck för att radera den senast ackumulerade vikten.
|del|
visar, vilket indikerar att den senaste ackumulerade vikten har raderats.
Raderingsfunktionen raderar bara den senaste vikten.
Om den senaste ackumulerade vikten har raderats,
|err|
visar.
Rensa hela vikten
Tryck först och tryck sedan för att rensa all ackumulerad vikt.
|clr|
visas, vilket indikerar att all vikt är raderad.
- 7 -
Enhetsbrytare
Tryck för att växla enheten mellan kg, lb och användarenhet.
När enheten är kg lyser
kg LED-lampan.
När enheten är lb lyser
lb LED-lampan.
När enheten är en användarenhet lyser UN LED- lampan
.
För mer information om användarenheten, se Skalkonfiguration i den tekniska
handboken.
60. Användarinställningar
Tryck först och tryck sedan på eller för att gå in i
användarinställningsmenyn.
inställningar
visar.
Timing för automatisk avstängning
Tryck på eller för att öppna Timing för automatisk avstängning.
Av--
visar.
Tryck på eller och för att ändra tidsvärdet.
Timing för automatisk avstängning kan ställas in på:
0
(inaktiverad),
5
(5 min),
10
(10
min),
15
(15 min),
30
(30 min),
60
(60 min). Den är inaktiverad som standard.
Auto-Off-funktionen maximerar vågens batteritid mot folks slarv att inte stänga av
vågen när den inte fungerar. Auto-Off startar nedräkningstimern när det inte finns
någon åtgärd eller när belastningen är stabil. Varje knapptryckning eller rörelse i lasten
startar om nedräkningstimern.
Displayens ljusstyrka
Tryck på eller för att öppna displayens ljusstyrka.
Br--
visar.
Tryck på eller och för att ändra ljusstyrka.
Dim LED-ljusstyrka sparar batteriström dramatiskt.
Timing för viloläge
Tryck på eller för att gå in i vilolägestid.
Idl--
visar.
Tryck på eller och för att ändra tidsvärdet.
Idle Mode Timing kan ställas in på:
0
(avaktiverad),
5
(5 sek),
10
(10 sek),
15
(15 sek),
30
(30 sek),
60
(60 sek). Det är 30 sekunder som standard.
För att maximera batteritiden går vågen automatiskt in i viloläge när det inte görs
någon åtgärd eller när belastningen är stabil. I viloläge fungerar vågen i låg
strömförbrukning. Varje knapptryckning eller rörelse under belastning väcker vågen
- 8 -
från viloläge.
Tryck på eller för att avsluta User Setup.
61.
Batteriunderhåll
För att maximera batteriets livslängd, observera följande batteriunderhållsguide.
Denna våg drivs av ett 6V4,0Ah uppladdningsbart blybatteri.
Batteriet är permanent fixerat inuti batterihuset.
Beroende på LED-ljusstyrka och vilolägesinställning fungerar batteriet från 60 timmar
till 200 timmar.
För att spara på batteriets livslängd, aktivera automatisk avstängning och viloläge för
att dämpa LED-ljusstyrkan.
Laddningstiden för ett helt urladdat batteri är cirka 12 timmar.
För att få maximal livslängd bör batteriet förvaras mellan -20 ℃ (-4°F) och +50 ℃
(122°F). Förvarade batterier ska laddas var tredje månad.
Under laddning indikerar den gröna lysdioden full effekt, medan röd indikerar att
laddning pågår.
62. Felsökning
Enkla problem kan lösas som lösningen nedan. Om problemen kvarstår,
kontakta din lokala representant.
Symptom
Möjlig orsak
Föreslagen lösning
slås inte på efter
att På/Av har
tryckts
urladdat/defekt batteri
kontrollera batteriet och ladda
defekt på/av-knapp
tryck hårdare och fortsätt att
trycka 2s
defekt strömkabel
öppna frontpanelen,
kontrollera strömkabeln
defekt moderkort
kontakta representant
displayen blinkar
urladdat batteri
ladda batteriet
ingen åtgärd
vidtogs efter att
knappen tryckts
ned
skalan är störd
koppla in strömkabeln igen
defekt nyckel
kontakta representant
viktavläsningen är
inte stabil
last i rörelse
hålla lasten stabil
svag Anti-Motion
ändra antirörelsenivå
dämpad lastcell eller
moderkort
torr lastcell eller moderkort
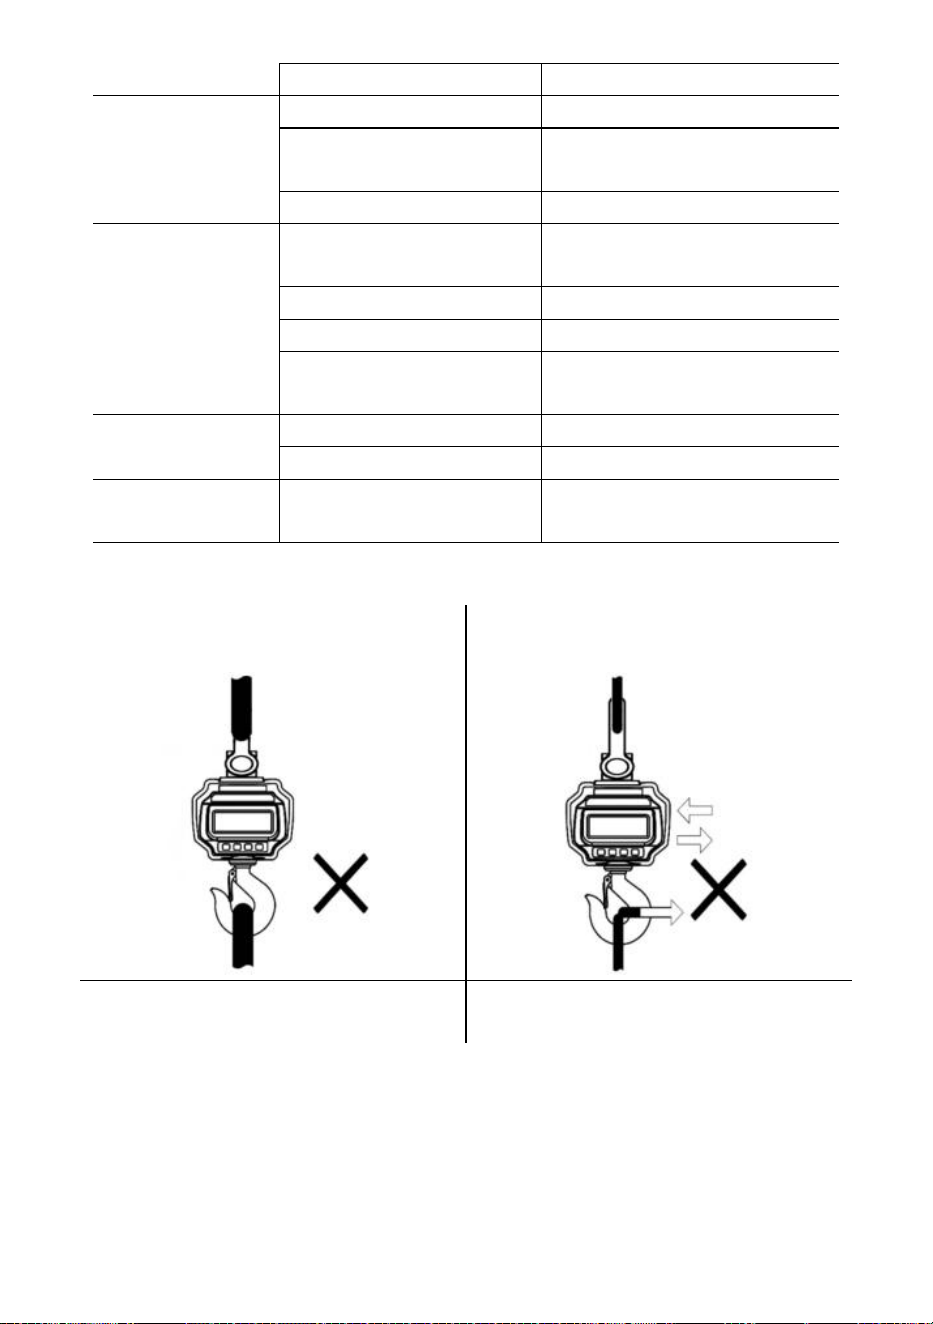
- 9 -
defekt moderkort
kontakta representant
viktavläsningen är
inte noll när det
inte finns någon
belastning
urladdat batteri
ladda batteriet
lastcellen stressad för
länge
hänga våg i förvaring
urladdat batteri
ladda batteriet
stort fel i
viktavläsning
skalan inte nollställd innan
belastningen applicerades
manuell Nollskala före
laddning
fel enhet
byta till rätt enhet
vågen kräver kalibrering
kalibrera vågen
defekt lastcell eller
moderkort
kontakta representant
batteriet kan inte
laddas
defekt laddningstavla
kontakta representant
defekt batteri
kontakta representant
kort
fjärrkontrollsträcka
urladdat/defekt fjärrbatteri
byt batterier i fjärrkontrollen
63. Laddningsprocedurer
Fäst INTE ett överdimensionerat
gränssnitt!
Tryck/dra INTE i den laddade vågen eller
direkt i kroken!
ANVÄND INTE flera bilagor!
Använd hårdvara som skapar
enpunktsbilagor.

- 10 -
64. Specifikationer
Noggrannhetsklass
Kinesiska GB/T 11883-2002 Klass III
Motsvarar OIML R76
Tara Range
100 % FS
Nollområde
4 % FS
Stabil tid
≤10 sek
Överbelastning
100 % FS + 9e
Säkerhetsbelastning
150 % FS
Ultimat belastning
400 % FS
Batteri
6V/4,0Ah laddningsbart blybatteri.
Laddare
14VDC/1000mA utgång
(Europeisk, amerikansk standard)
9VDC/1500mA utgång (australisk standard)
Visa
40 mm (1,6 tum) LED-modul
Op. Temp.
-10℃ - +40℃
Op. Fuktighet
20℃ ≤90 %
Föremål
Beskrivning
1
Namn
Industriell kranvåg
2
Modell
OCS-3-D
3
Parameter
Klassificering(er): 6VDC
Kapacitet: 3000kg/6600Ib
Division: 1 lb

- 11 -
Föremål
Beskrivning
1
Namn
Industriell kranvåg
2
Modell
OCS-5-D
3
Parameter
Klassificering(er): 6VDC
Kapacitet: 5000kg/11000Ib
Division: 2lb

Tillverkare: Shanghaimuxinmuyeyouxiangongsi
Adress: Shuangchenglu 803nong11hao1602A-1609shi, baoshanqu,
shanghai 200000 CN.
Importerad till AUS: SIHAO PTY LTD, 1 ROKEVA STREETEASTWOOD
NSW 2122 Australien
Importerad till USA: Sanven Technology Ltd., Suite 250, 9166 Anaheim
Place, Rancho Cucamonga, CA 91730
REP
EC
E-CrossStu GmbH
Mainzer Landstr.69, 60329 Frankfurt am Main.
REP
UK
YH CONSULTING LIMITED.
C/O YH Consulting Limited Office 147, Centurion House,
London Road, Staines-upon-Thames, Surrey, TW18 4AX
Teknisk support och e-garanticertifikat
www.vevor.com/support