Warm tips:
Please ensure 5ZQF$64#$ data wire is connected well with deviceinterface.
This product supports GVMM function of 5ype-$64#$ DBCMFXIJDIintegrateT
DIBSHJOHBOEWJEFPJOUPone line. 1MFBTFTVQQMZFYUFSOBMQPXFSPG7"Jf UIF
QPSUBCMFscreen cannot be powered on or restarted,.
The 5:1&$64#$UP)%.*PD interface used to connect the product must
use the HDMI UPTYPE-C64#$ data cable JODMVEFEin the package and TIPVMEbe
externally powered.
USER GUIDE
,&'&:" S2 Laptop TriQMFScreen Extender
DVTUPNFS@TFSWJDF!LFGFZBDPN

Product Introduction
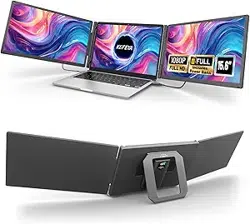
,&'&:"4JTBNVMUJGVODUJPOQMVHBOEQMBZEVBMTDSFFOMBQUPQNPOJUPSUIBUJTQPSUBCMFBOEGPMEBCMF*UDBO
IFMQRVJDLMZCVJMEBQFSTPOBMNPCJMFXPSLTUBUJPO1SPWJEFBQFSGFDUTPMVUJPOGPSMBQUPQVTFSTXJUINVMUJTDSFFO
TZODISPOPVTEJTQMBZBOENVMUJTDSFFOTFQBSBUFEJTQMBZXIJDIDBOJNQSPWFZPVSXPSLFGmDJFODZCZVQUP
BOEBDIJFWFFGmDJFOUNVMUJUBTLJOH*UTVQQPSUTUIFTBNFTDSFFOEJTQMBZPGTPNFNPEFMTPG4BNTVOH)VBXFJ
BOEPUIFST"OESJPEDFMMQIPOFBOEUBCMFUTXJUIGVMMGFBUVSFE64#$QPSU*UBMTPTVQQPSUTUIFDPNQVUFSNPEF
PGUIFTNBSUQIPOFTZTUFNBTXFMMBTBVEJPBOEWJEFPUSBOTNJTTJPOFUD
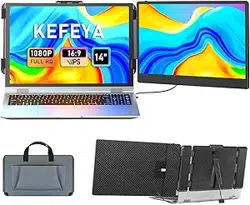
,&'&:"4IPMEFSJTFBTZUPVTF$MBNQUIFIPMEFSUPUIFUPQPGUIFDPNQVUFSQBOFMBOEJUDBOCFFBTJMZ
mYFEXJUIPVUGBMMJOHPGG*UDBOTVQQPSUUIFDBTFPGMBQUPQGSPNJODIFTUPJODIFTBOEDBOCFSFNPWFE
BOEVTFEBTBTJOHMFTDSFFO5IFTDSFFOIBTJUTPXOTVQQPSUUIBUDBOCFBEKVTUFEGPSEJGGFSFOUBOHMFTQSPWJEJOH
EJGGFSFOUGVOFYQFSJFODFGPSQSPGFTTJPOBMTPGmDFXPSLFSTHBNFSTTUPDLUSBEFSTFOUSFQSFOFVSTQSPHSBNNFST
BOETUVEFOUT
5IF,&'&:"4TDSFFODBOJOEFQFOEFOUMZBEKVTUQBSBNFUFSTTVDIBTCSJHIUOFTTTPVOEBOEDPOUSBTU*UJT
FRVJQQFEXJUI)%.*5ZQF$JOUFSGBDFTBMMPXJOHGPSWFSTBUJMFWJEFPBOEEBUBFYQBOTJPOXJUIPVUUIFOFFEGPSB
EPDLJOHTUBUJPO"TMPOHBTJUJTB5ZQF$64#$5IVOEFSCPMUMBQUPQXJUIDPNCJOFETJHOBMBOEQPXFS
DBQBCJMJUJFTZPVDBOBDIJFWFBTFBNMFTTDPOOFDUJPOBOEEJTQMBZ%FWJDFTTVDIBTEFTLUPQDPNQVUFSTMBQUPQT
NJOJ1$TTFUUPQCPYFTBOEHBNJOHDPOTPMFTXJUI)%.*PVUQVUJOUFSGBDFTDBOEJSFDUMZDPOOFDUUPUIFEJTQMBZ
)PXFWFSUIFTDSFFOOFFETUPCFQPXFSFEFYUFSOBMMZJOPSEFSUPMJHIUVQVTJOHUIFDVTUPN)%.*505:1&$
DBCMFUPDPOOFDUUIFQSPEVDUUPUIFDPNQVUFSBOEUIF64#"UP64#$DBCMFUPQPXFSUIFQPSUBCMFTDSFFOT
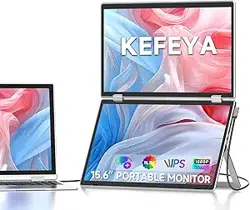
'JOBMMZ,&'&:"4TDSFFOTQMJUUFSDBOQSPWJEFBDPNQMFUFEFHSFFSPUBUJPOPOBTJOHMFTDSFFO:PVDBO
DIPPTFZPVSCFTUWJFXBOHMFGPSUIFPQUJNVNWJTVBMFYQFSJFODF

Contents of Instruction
Product Attributes
1. Product host
2. Accessories
3. Parameters
Installation and Storage
1. Expand the monitor
2. Stretch the frame
3. Adjust the stand
4. Opening Sequence
5. Closing Sequence
Key Definitions
Connection Mode
Connect4with Laptop
Device power supply connection mode
Audio Settings
1. Change sound settings of Windows 10 / Windows 11
2. Change sound settings of MAC OS PC
Display Mode
1. Windows 10 / Windows 11 Display Settings
2. MacOS 13 Ventura Display Settings
Transportation, Storage and Safety Information
1
1
1
2
2
2
3
3
3
4
4
5
6
7
8
9
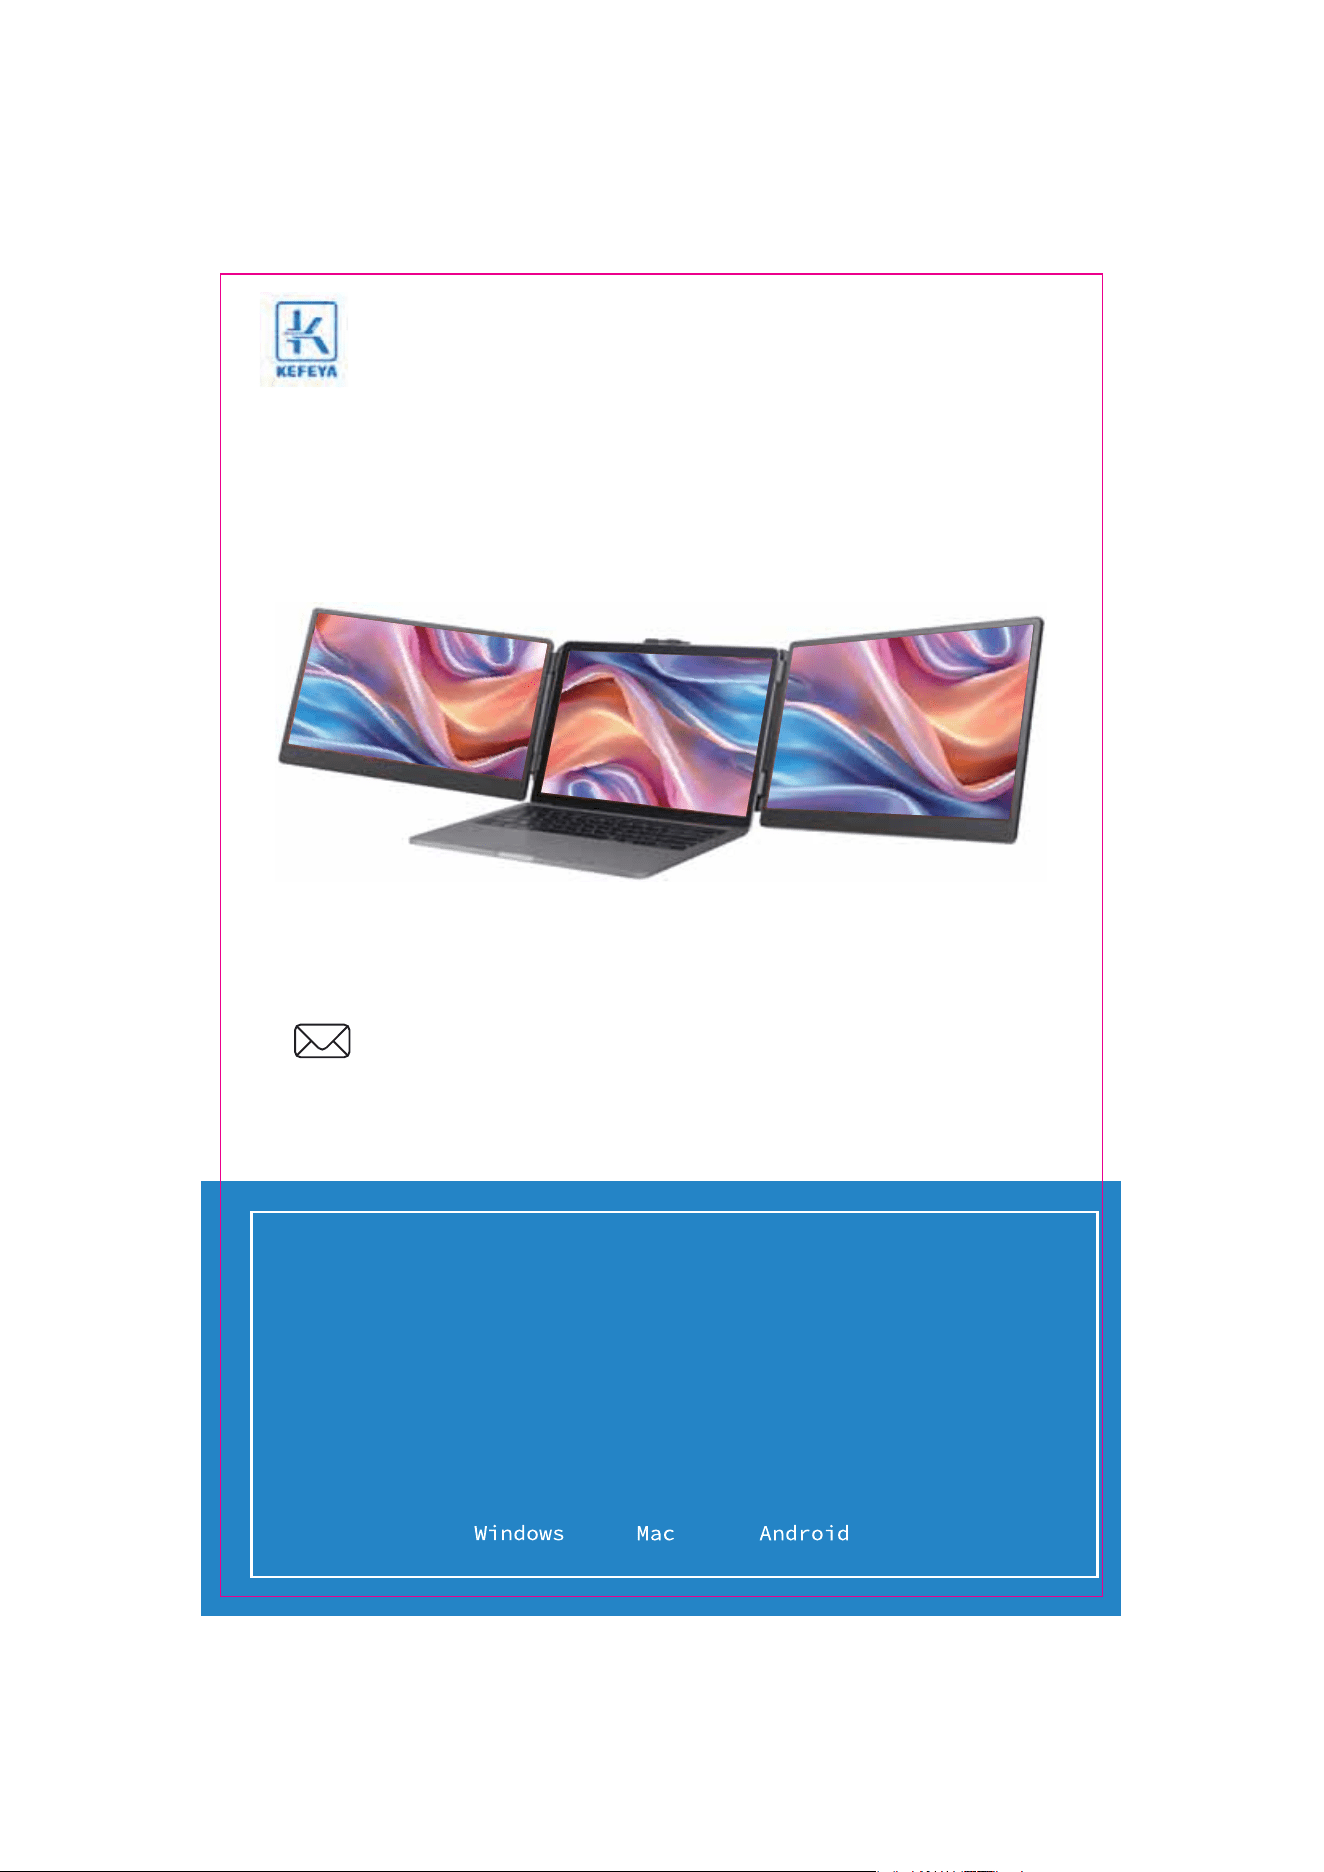
Product Attributes
HOST USB-A to USB-C *2 USB-C to USB-C *2 HDMI to TYPE-C
2. Accessories
1. Product host
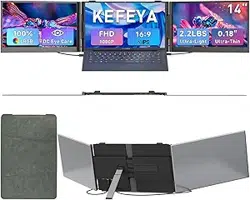
3. Parameters
353x207x38.7mm
Weight: Screen Size:
Panel Type:
Average Brightness:
Type-C Input:
Type-C Output:
Ports:
1.62 Kg
16:9
60Hz
1920x1080 P
Aspect Ratio:
Size:
Refresh Rate:
Resolution:
Speakers:
14 Inches
IPS Wide Viewing Angle
5V-20V / 5A Max
5V-20V / 4.25A Max
Type-C x32
1
300CD/M
2
Multi-function button Multi-function button
Speaker
TYPE-C
TYPE-C
Kickstand
Speaker
TYPE-C
TYPE-C
TYPE-C
(for video only)
TYPE-C
(for video only)
BAG
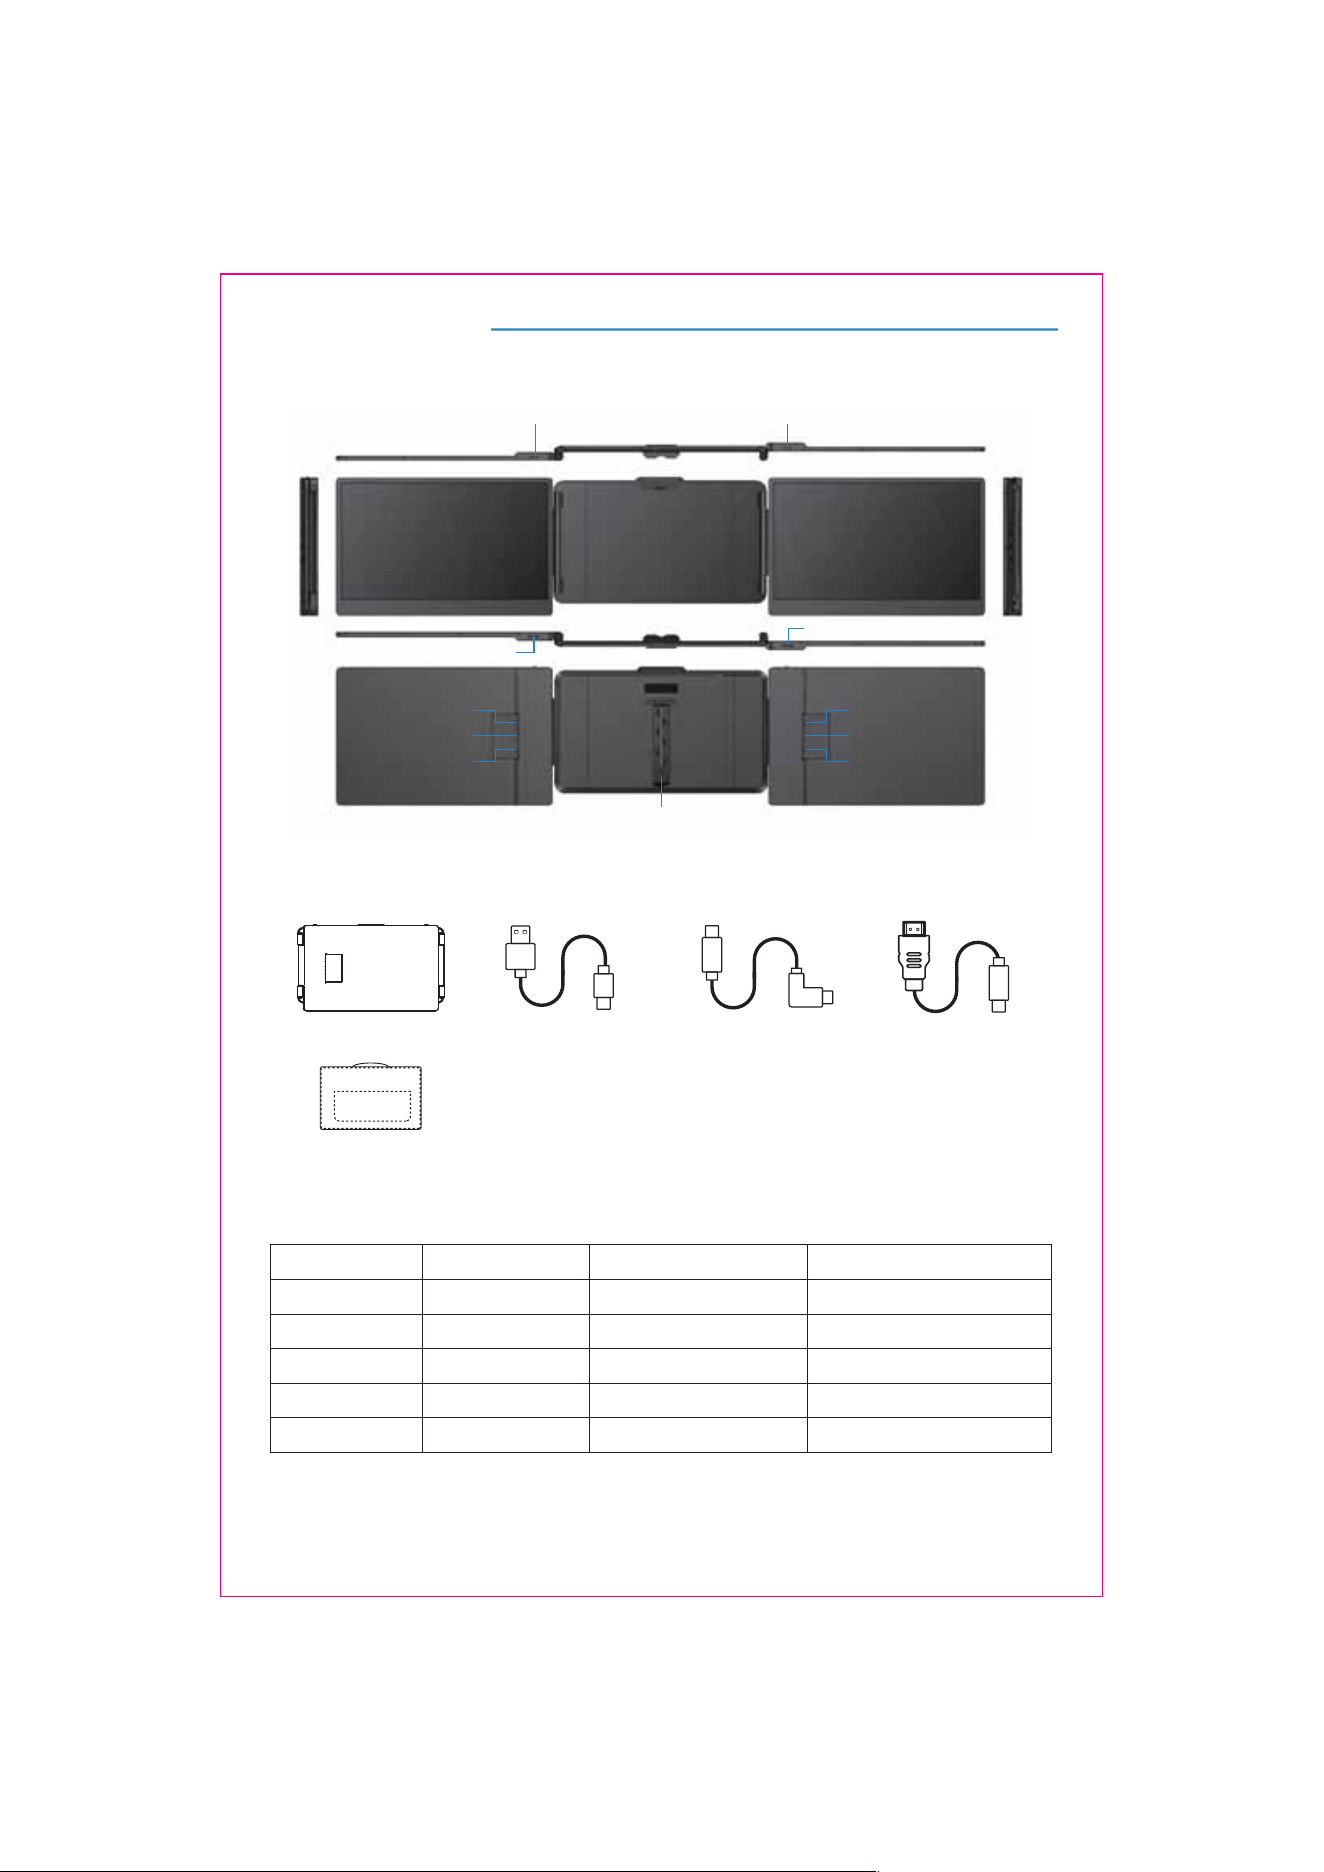
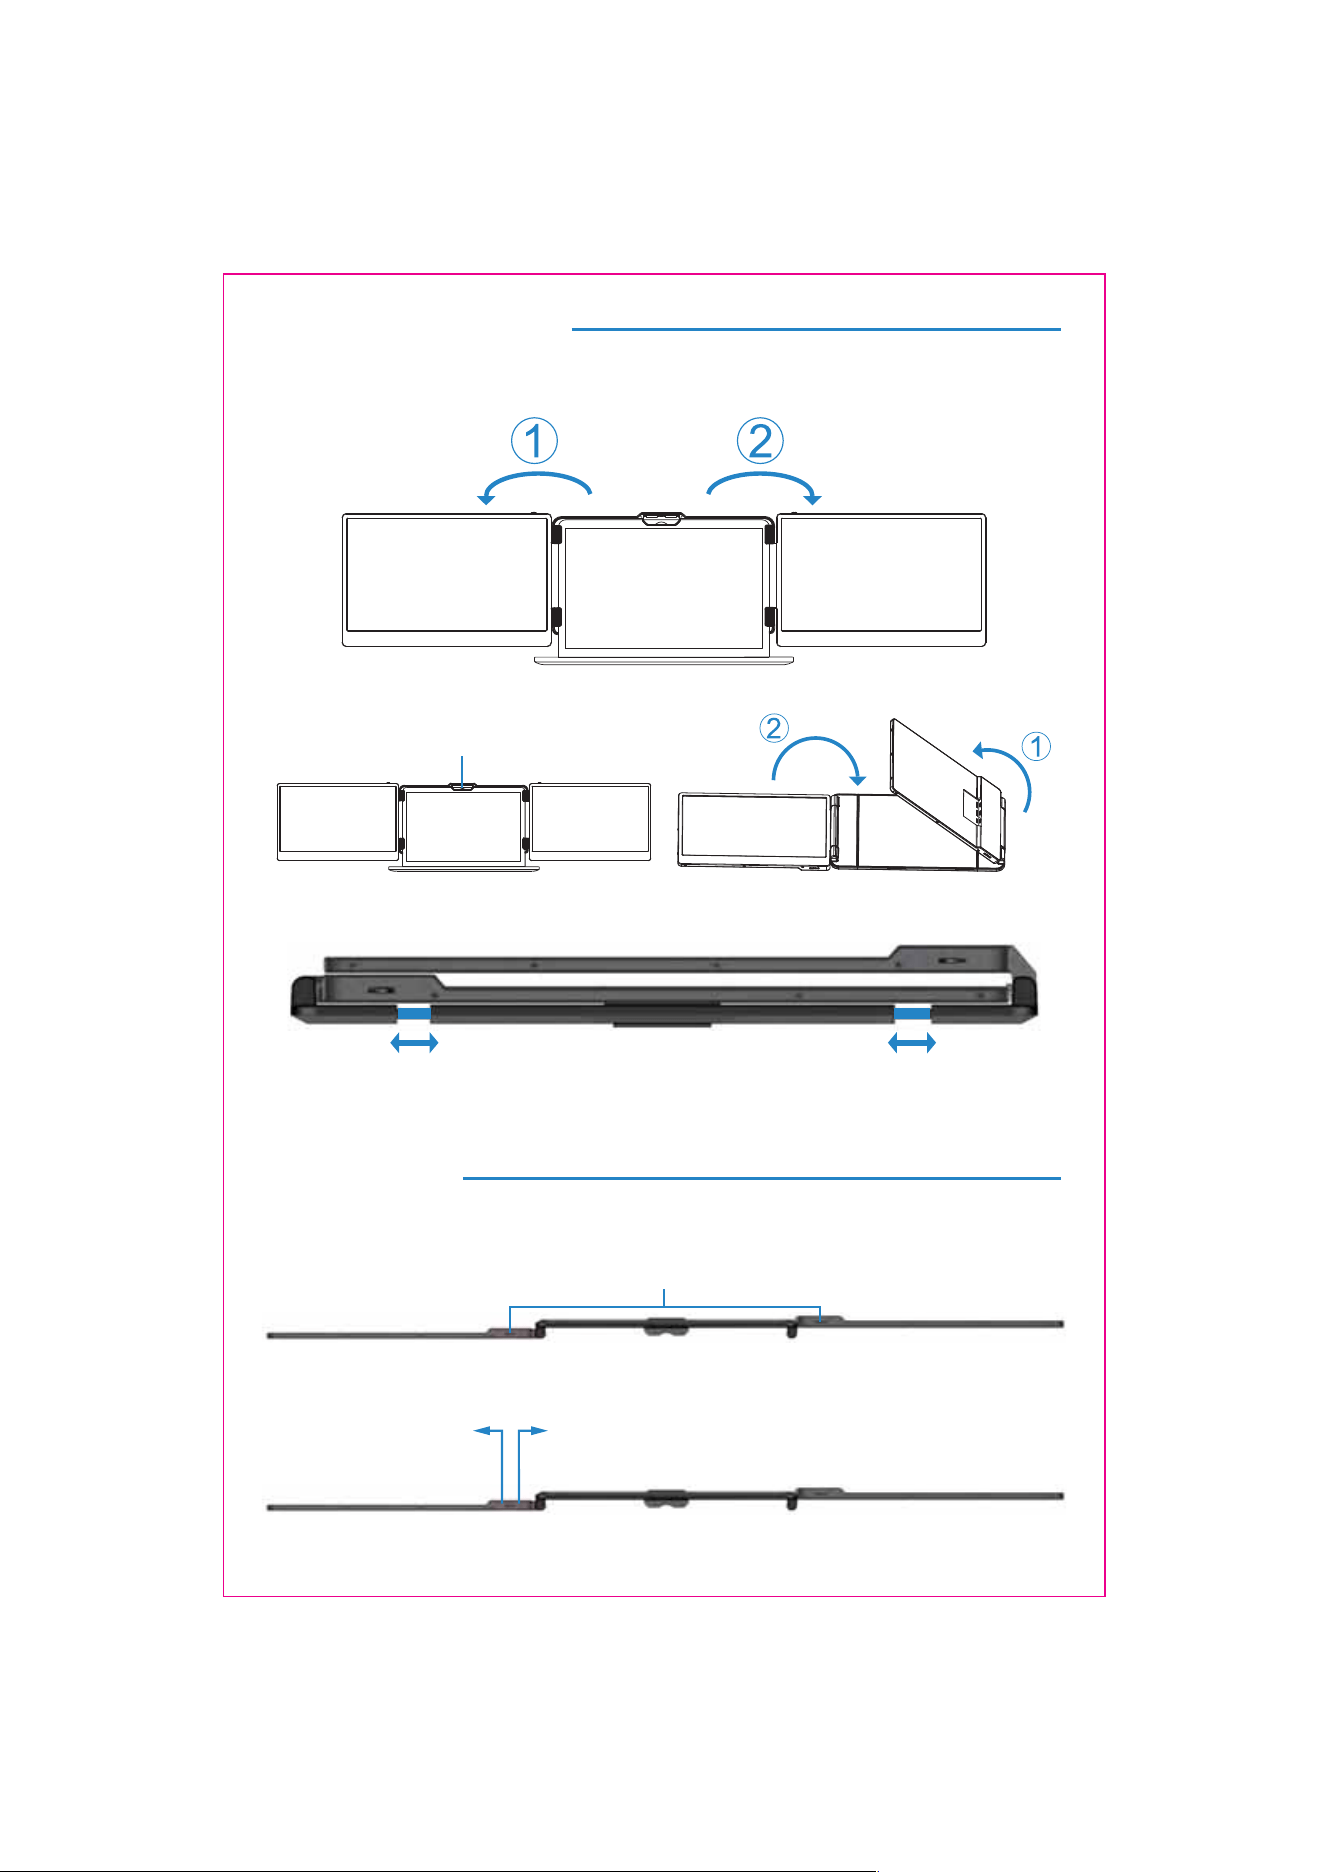
Installation and Storage
1. Expand the monitor
2. Stretch the frame
OpenUIFCVDLMF
3.Adjust the LJDLTUBOE
*Note: Please expand the monitors in order to avoid damage.
2
TIGHT
TIGHT
LOOSE
Installation and Storage
4. Opening Sequence
5. Closing Sequence
Note: Please follow the sequence of opening and closing to avoid damage of the device.
When folding the screen, pull the bracket out to the appropriate position, and fix the screen in
the silicone of the bracket. Otherwise,forcibly closing it will damage the screen!
3
Key Definitions
Menu/Selection/Confirmation Button
Press and hold for 2 seconds to return. Press and hold for 3 seconds to shut down
Toggle left "Minus”
Backlight Adustment
Toggle right "Plus”
Volume Adjustment
Fold the top buckle
1. Connect S2 with Laptop
4
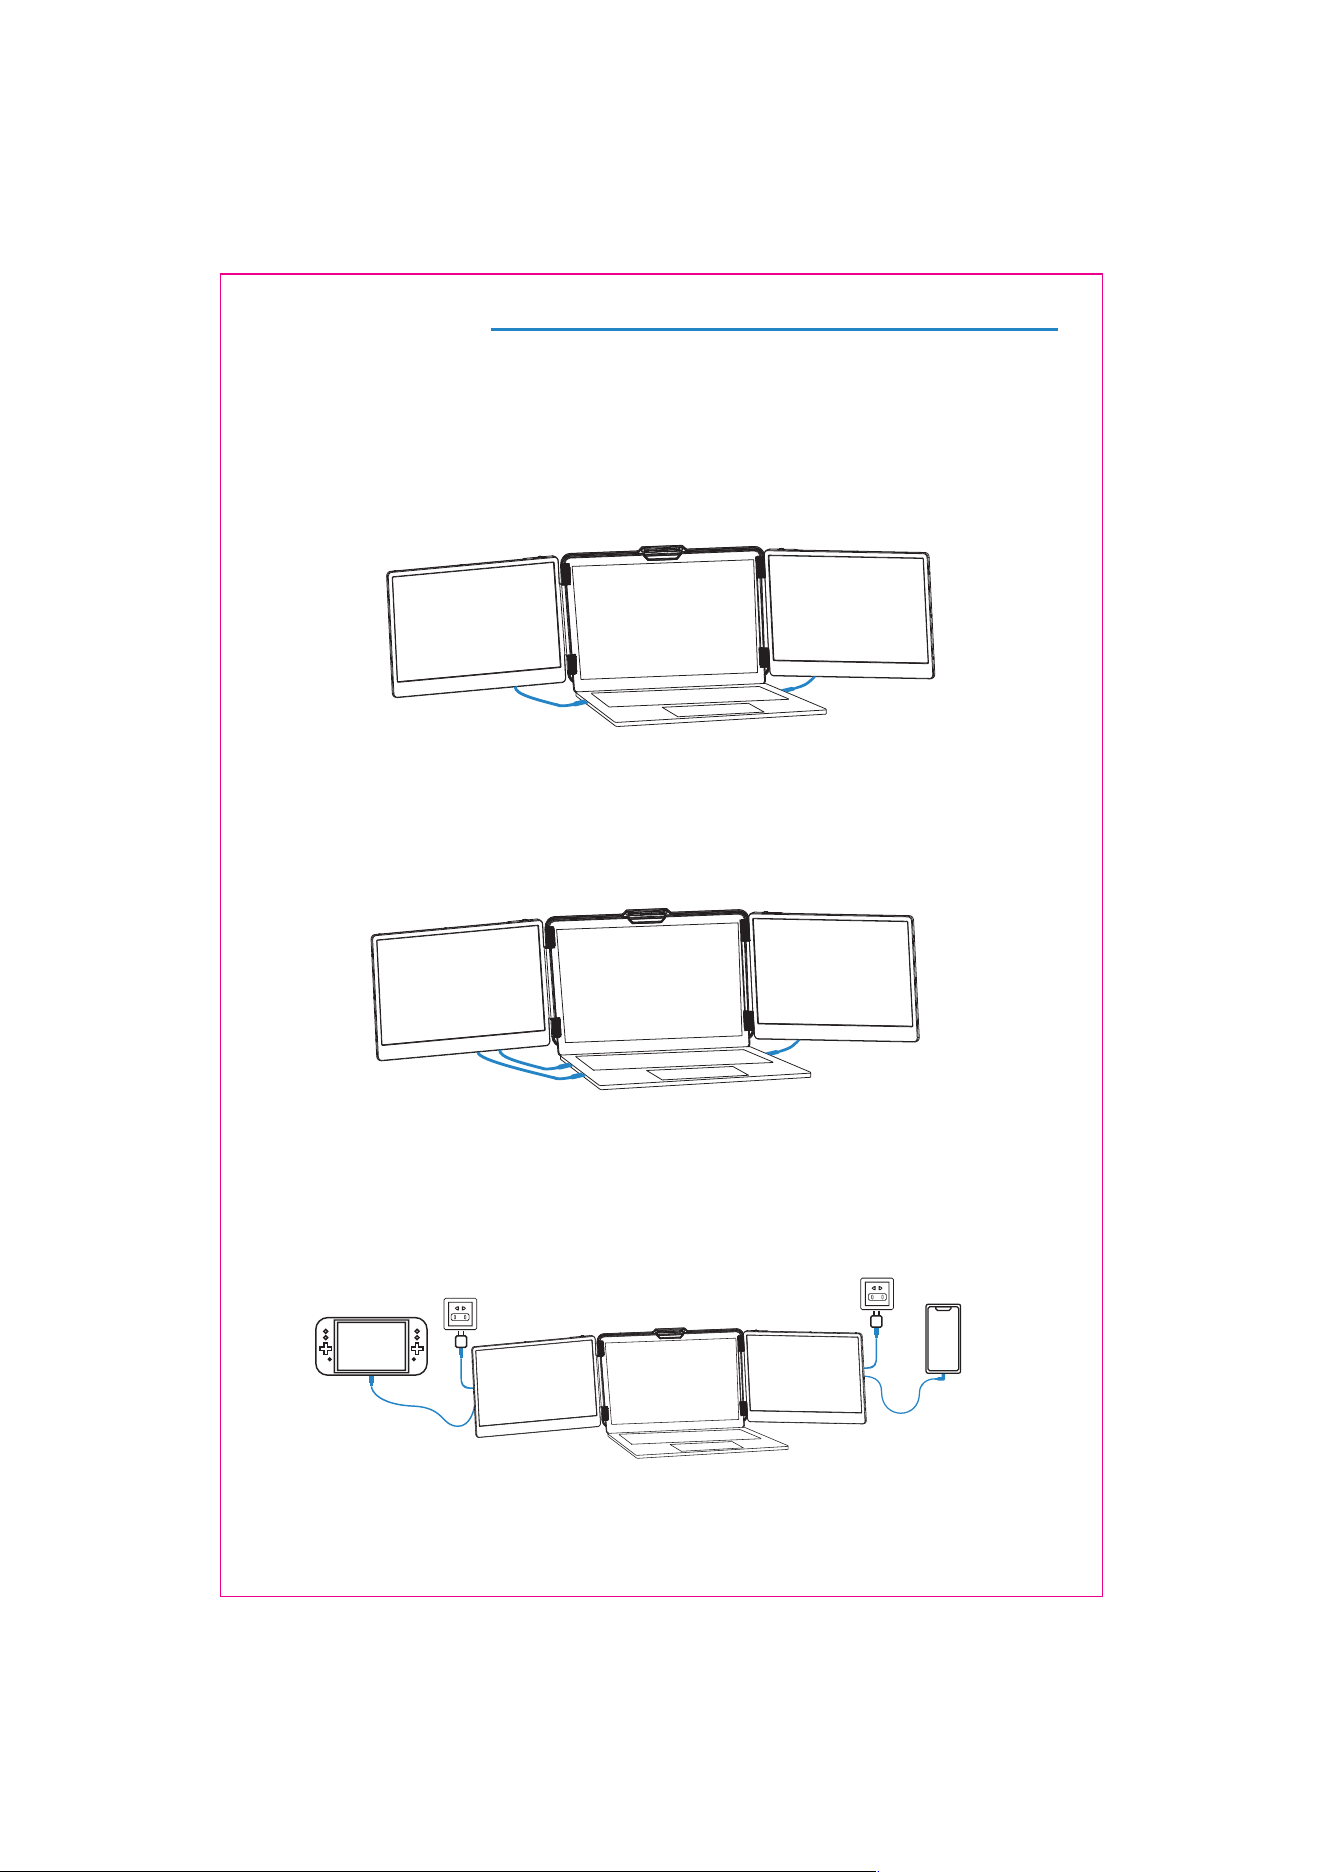
Connection Mode
TYPE-C & HDMI & USB-A Connection:
If your laptop has one full-featured Type-c port, one USB-A port and one HDMI port, please first
connect one monitor using the USB-C cable. Then connect the other monitor using the USB-A to
USB-C cable and the HDMI to Type-C cable.
TYPE-C Connection:
If your laptop has two full-featured Type-C ports, you can connect the S2 directly to your laptop with
two Type-C cables.
Notice:
If the display has no signal or the signal is unstable after connection, please connect an external
5V/2A power adapter to power the laptop
2. Connect S2 with Mobile Phone with Other Devices
Switch connection mode
(External power suply required)
Mobile phone connection mode
(External power supply required)
Audio Settings
5
S2
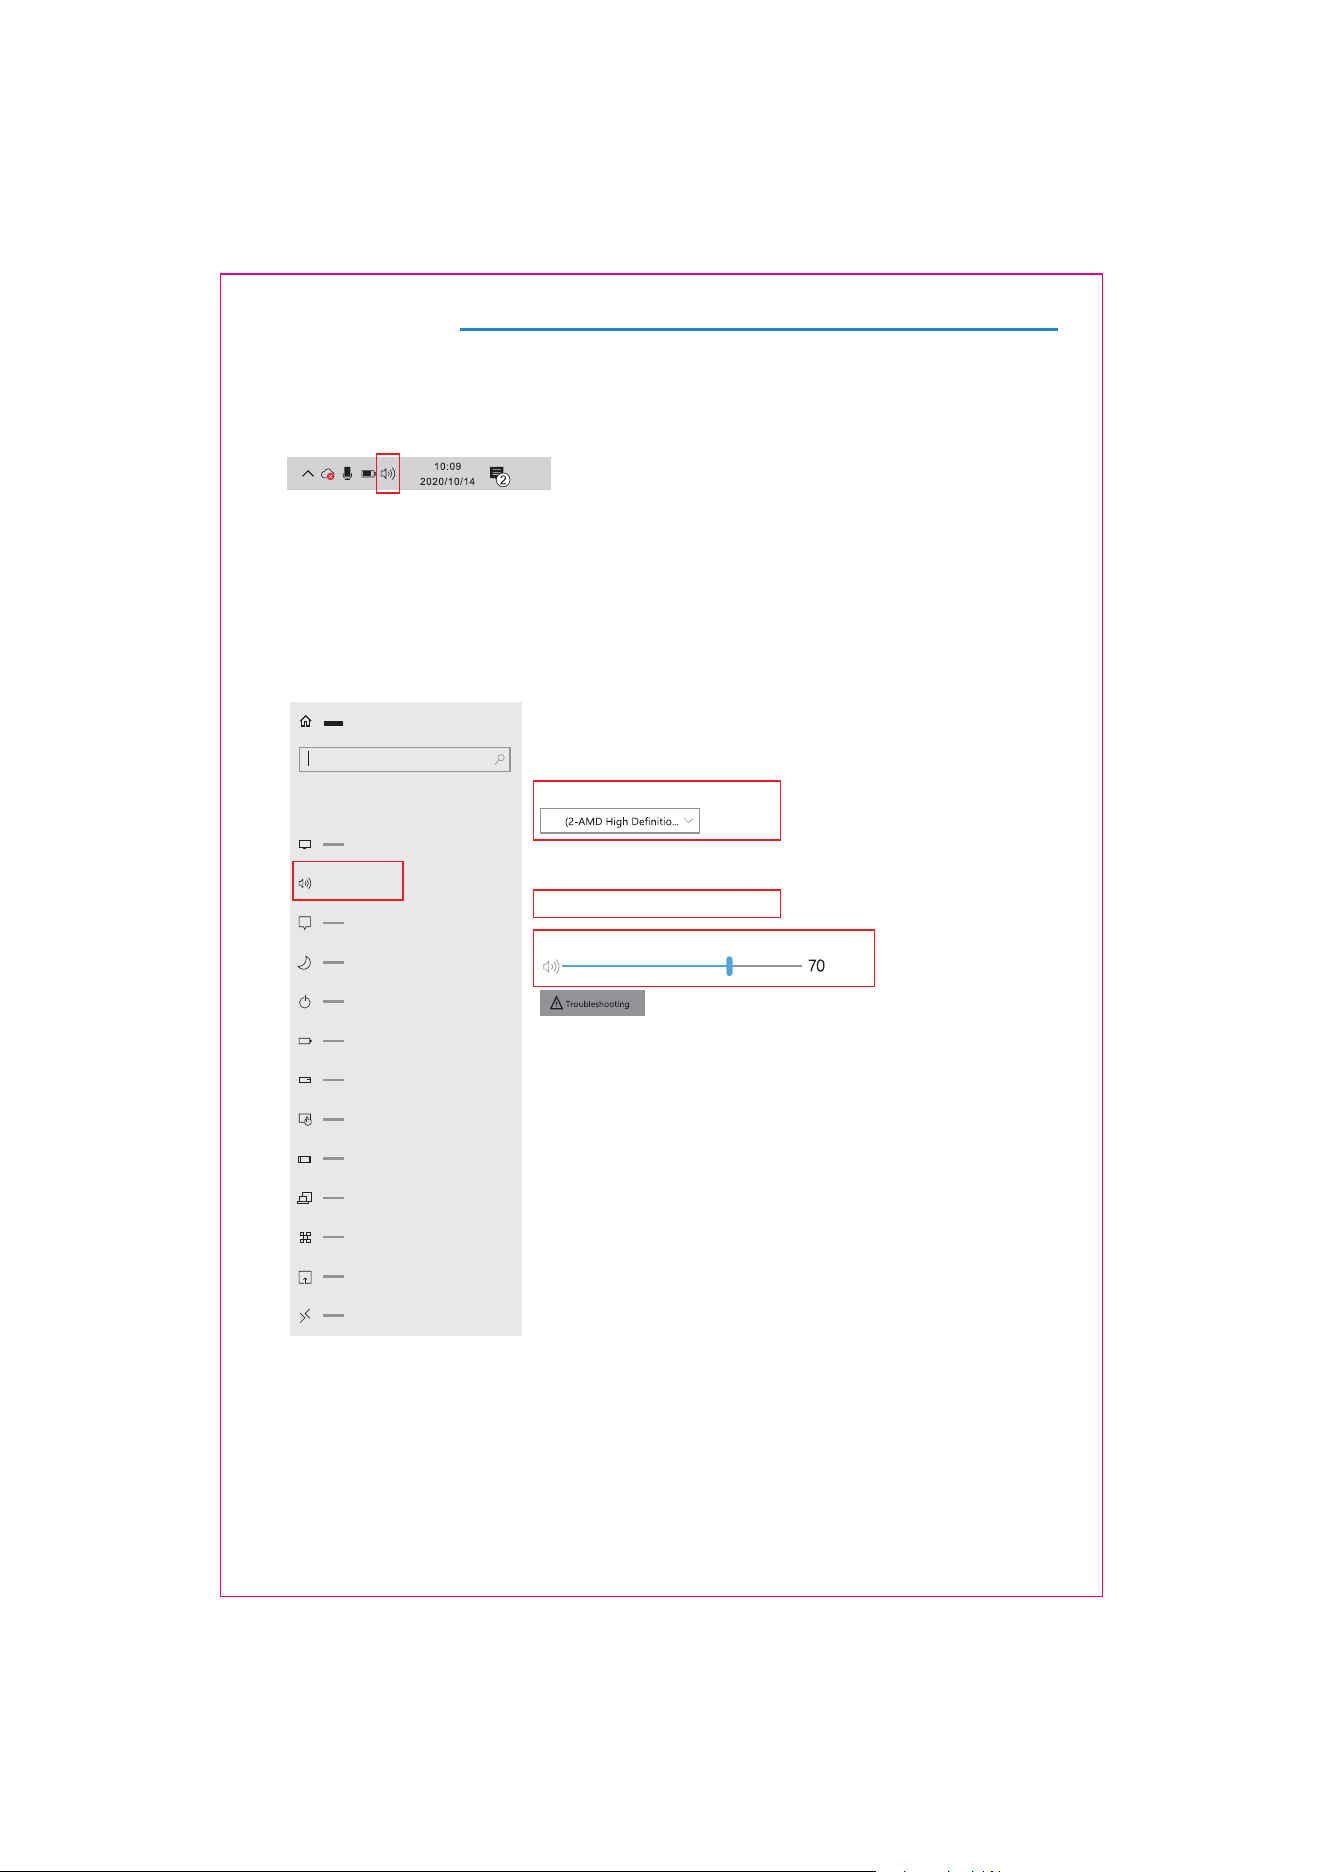
1. Change sound settings of Windows 10 / Windows 11
1.1 Right click the loudspeaker icon located in the bottom-right corner.
1.2 Select "switch on sound " in pop-up dialog box
1.3 Left click "turn on sound settings" and pop-up the box as provided, here users can set about sound
Here users can set about sound
1. Master volume;
2. Select output device: ( S2 / Speaker );
3. Device attributes.
Sound
Sound
output
System
Some apps can be set to use a different sound device than the one selected here.
Please customize the app volume and device in advanced sound selection.
Select output device
Device attribues
master volume

Audio Settings
6
2. Change sound settings of MAC OS PC
2.1. Choose Apple menu > System Settings
2.2. Click "Output", then select the device you want use fSPN the list of BWBJMBCMFsoundPVUQVUPQUJPOT
output devices:( S2 / Speaker )
7
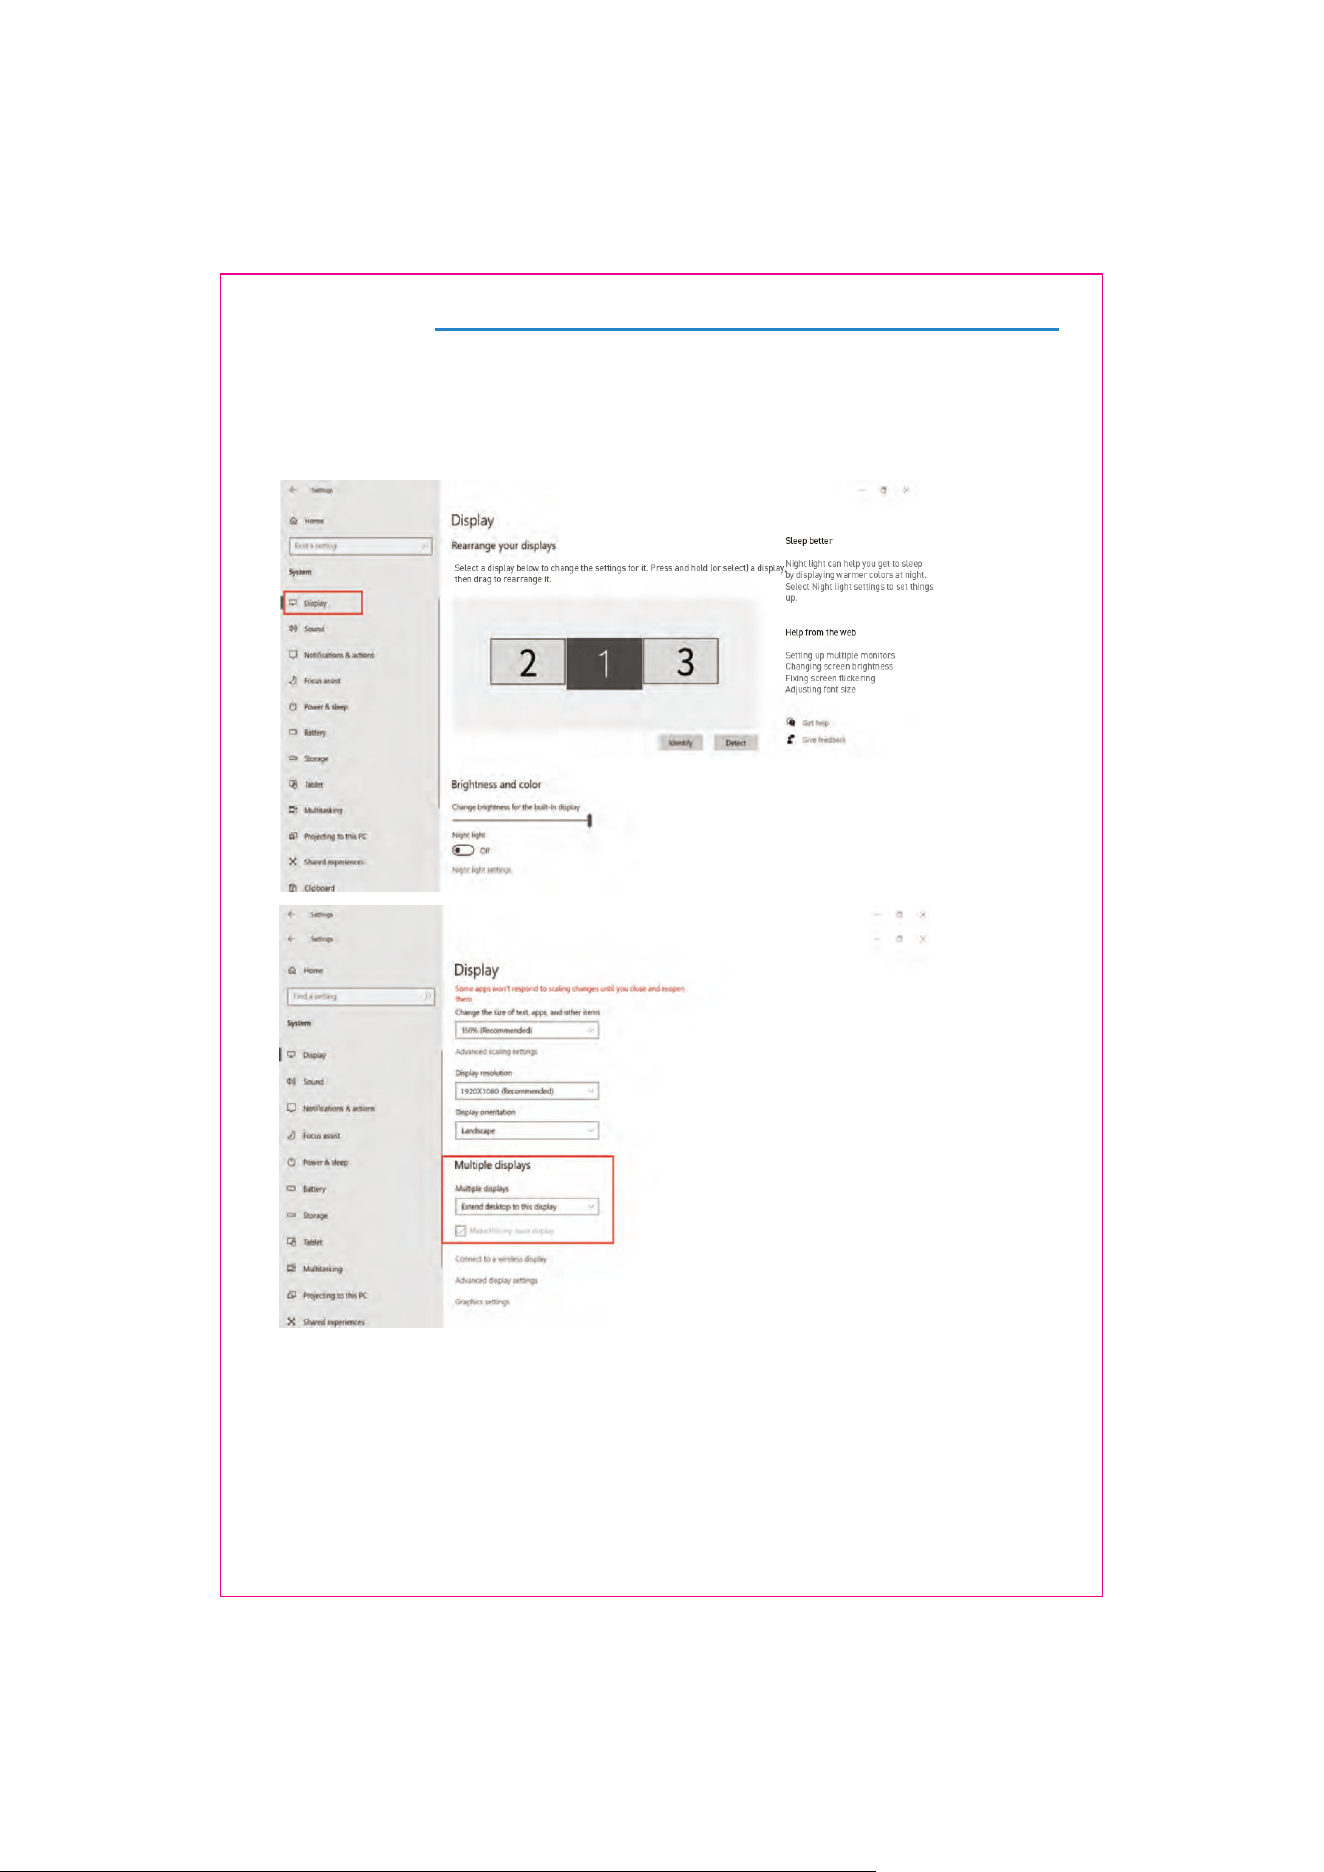
Display Mode
1.2 Under the "Rearrange displays" section, drag and drop each display to rearrange them according to their
physical layout of your desktop. Scroll down to the bottom of the page to further configure the display for
extended or mirrored mode.
1.1 Right-click a blank area of the desktop. Select 'Display Settings' from the pop-up dialogue box.
Left click "Display Settings" to open the settings dialogue box, shown in the figure:
1. Windows 10 / Windows 11 Display Settings
Display Mode
8
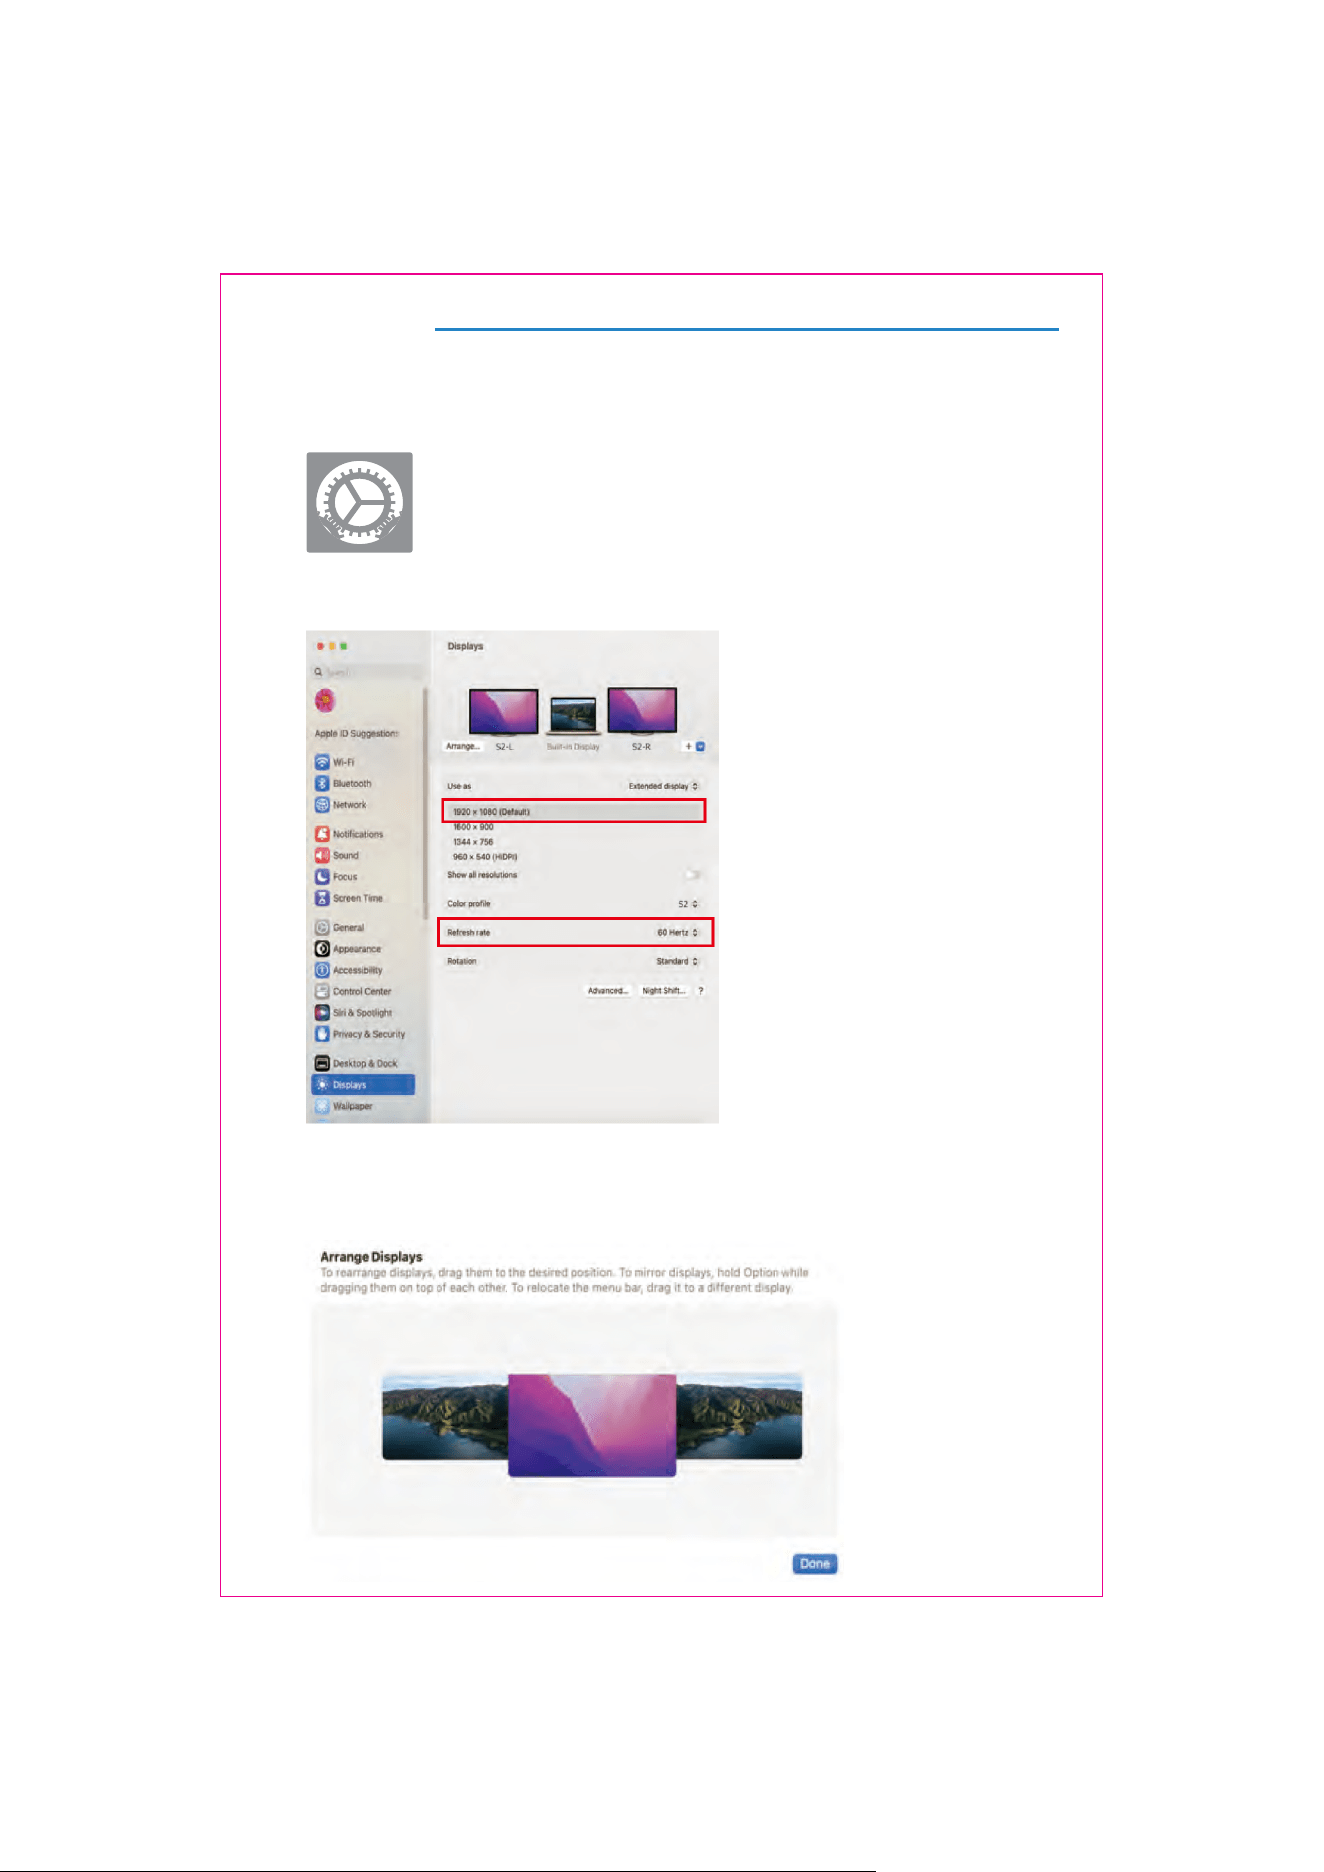
2.1 Enter the “System Preferences” menu
2.2 Configure your monitor
2.3 Arrange Displays
To rearrange displays, drag them to the desired position.
To mirror displays, hold Option key while dragging them on top of each other.
To relocate the menu bar, drag it to a different display.
In this menu, you can set the resolution and mirror/extend the display you want.
2. MacOS 13 Ventura Display Settings

9
Transportation, Storage And Safety Information
5PFOTVSFUIFTBGFBOEQSPQFSVTFPGUIJTQSPEVDUBOEQSFWFOUBDDJEFOUTTVDIBTFMFDUSJDTIPDLPSmSFQMFBTF
SFBEBOEVOEFSTUBOEBMMVTFSFRVJSFNFOUTBOEPQFSBUJPOQSPDFEVSFTCFGPSFVTJOH1MFBTFBEIFSFTUSJDUMZUP
UIFGPMMPXJOHHVJEFMJOFT
#FGPSFVTFSFNPWFUIFQSPUFDUJWFmMNGSPNUIFTDSFFOTVSGBDF
5IJTQSPEVDUSFRVJSFTB%$QPXFSTVQQMZUISPVHIBO"$%$QPXFSBEBQUFS&OTVSFUIBUUIFBEBQUFSJT
QMBDFEBXBZGSPNIFBUTPVSDFTJOBXFMMWFOUJMBUFEMPDBUJPO5IF"$QPXFSTPDLFUBOE"$QPXFSMJOFTIPVME
CFBEFRVBUFMZHSPVOEFEUPIBOEMFUIFDVSSFOUEFNBOET
5IF%$QPXFSJOQVUSFRVJSFEGPSUIJTQSPEVDUJT777
5BLFQSFDBVUJPOTUPQSFWFOUFYDFTTJWFIVNJEJUZBOEEVTUBDDVNVMBUJPOBTUIFZDBOMFBEUPDJSDVJUDPSSPTJPO
BOENBMGVODUJPO
"WPJETVCKFDUJOHUIFTDSFFOTVSGBDFUPFYUFSOBMGPSDFTPSJNQBDUT
%POPUVTFTIBSQUPPMTUIBUNBZEBNBHFUIFTDSFFOTVSGBDF
5IJTQSPEVDUJTTVJUBCMFGPSHFOFSBMCVTJOFTTBOEEPNFTUJDVTFBOEJUJTSFDPNNFOEFEUPPQFSBUFJUXJUIJOBO
BNCJFOUUFNQFSBUVSFSBOHFPG¡$UP¡$1MFBTFUVSOPGGUIFQPXFSXIFOZPVTUPQVTJOHQSPEVDF
3FNFNCFSUPQPXFSPGGUIFEFWJDFCZEJTDPOOFDUJOHUIFQPXFSTPVSDFXIFOOPUJOVTF


$POUBDU6T
'PSBOZTVQQPSUZPVOFFEGFFMGSFFUPDPOUBDUVTWJBFNBJMBUDVTUPNFS@TFSWJDF!LFGFZBDPN
8FBSFIFSFUPIFMQBOEXJMMEPPVSCFTUUPSFTQPOEXJUIJOIPVST