Mini DLP Projector
INSTRUCTION
MANUAL
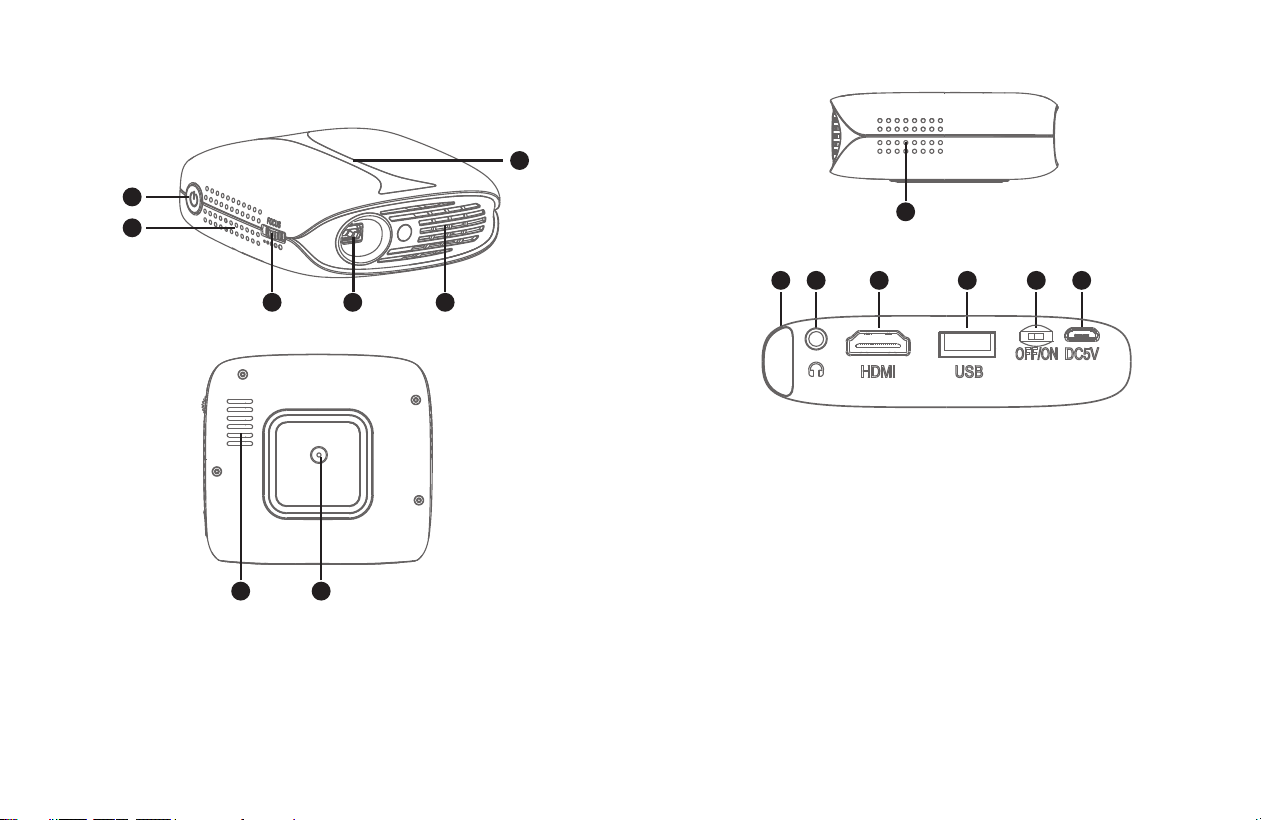
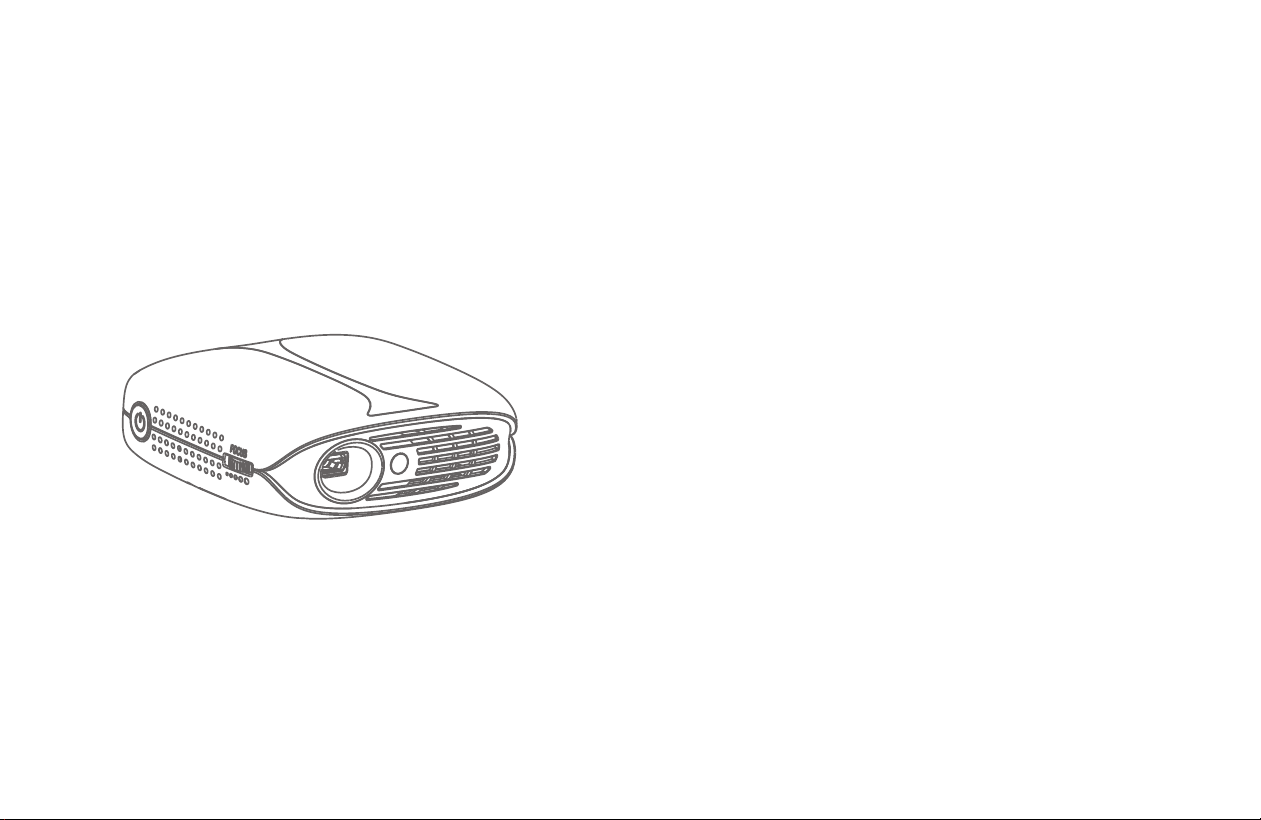
●Projector Overview
1
1
2
3
7 8
4
5
6
1. Power on / o button
2. Ventilation slots
3. Focus ring
4. Projector lens
5. Ventilation slots
6. Charge LED (charge blue, full o)
7. Ventilation slots
8. Stand hole (1/4inch)
1
2
32 4 5 6 7
Warning tips:
It’s strictly prohibited to block the air intake window.
This may cause over heating and damage the projector.
1. Speaker
2. IR Remote control receiver
3. AUX cord jack (Earphone jack)
4. HDMI port
5. USB port
6. Master Switch
7. Micro USB Charging port
2
●Specifications
3
Optical Parameters:
Physical Parameters:
Display chip:
Lens:
Brightness uniformity:
NTSC:
Resolution:
3D display:
0.2" DMD RGB-LED
High light transmittance coating glasses
98%
≥120%
Max support 1080p
Yes
Projection size:
Throw ratio:
Oset:
Keystone:
Focus mode:
Power adapter:
Power:
Speaker:
Size:
N.W.:
20-100 inch
1.2:1
100%
Electronical adjusting±40°
manual focus
DC5V/3A
15W
4Ω/3W
100×108×40mm
280g
Accessories:
Make sure your projector box includes all of these parts:
1 Projector
2 Remote control (batteries are not included)
3 Projector bag
4 Power cord
5 Bracket
6 Manual
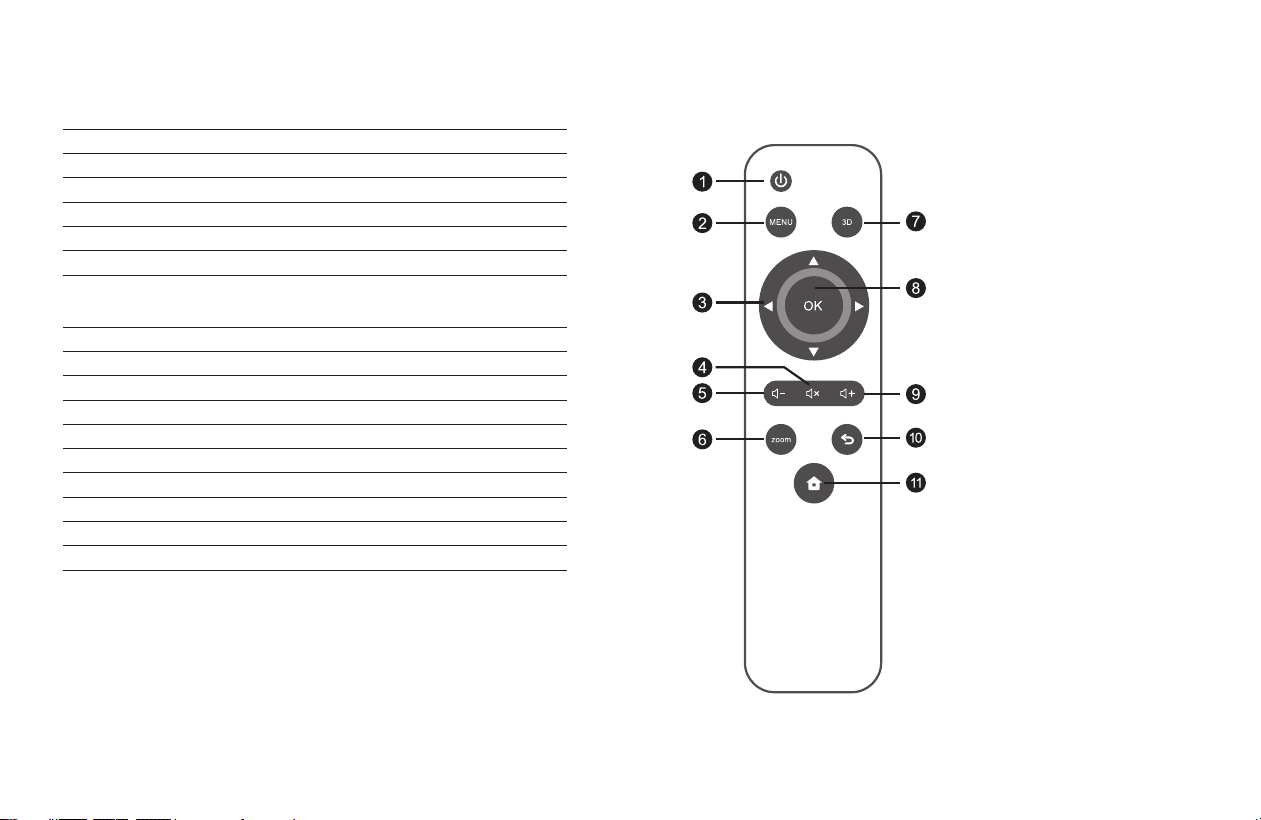
●Remote Control
4
1. Power
2. Menu
3. Arrow keys
4. Mute
5. Volume Down
6. Aspect Ratio
7. 3D conversion
8. Enter
9. Volume Up
10. Exit
11. Homepage
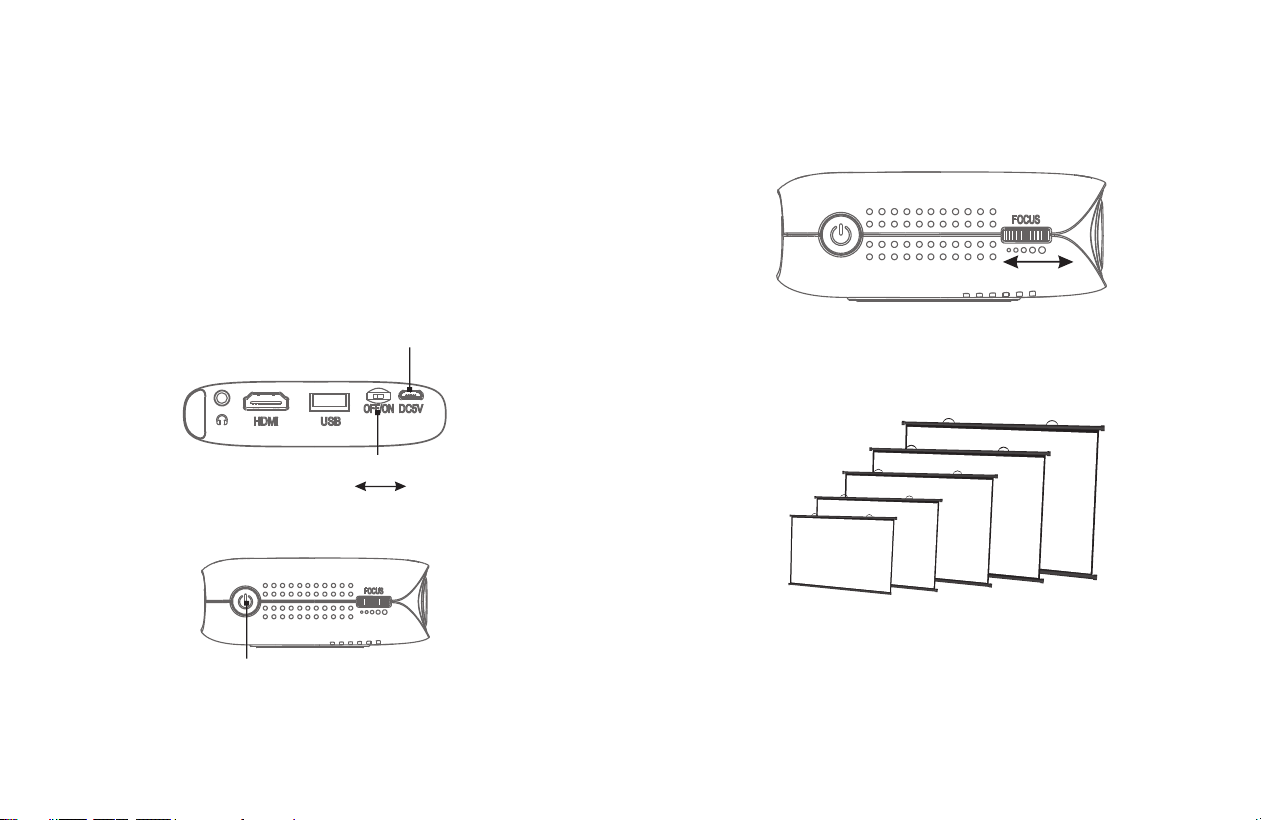
Master Switch
Micro USB Charging port
Towards the left is OFF
Towards the right is ON
●Powering ON/OFF
Powering ON
Step1: Plug the DC terminal of the power adaptor into “Micro USB Charging
port” terminal of projector.
Step2: Move the master switch right to “ON”, press the power key.
Powering OFF
Step1: Press the power key, the projector is o.
Step2: When the projector is o, return the master switch to the o position.
Failure to do so may result in the projector turning on while in transit
resulting in electrical fires.
Power key
5
6
Adjust the focus ring front or back lightly until the image is clear.
●Focusing
Focus Ring
100 inch
80 inch
60 inch
40 inch
20 inch
0.5m
1.0m
1.6m
2.1m
2.6m
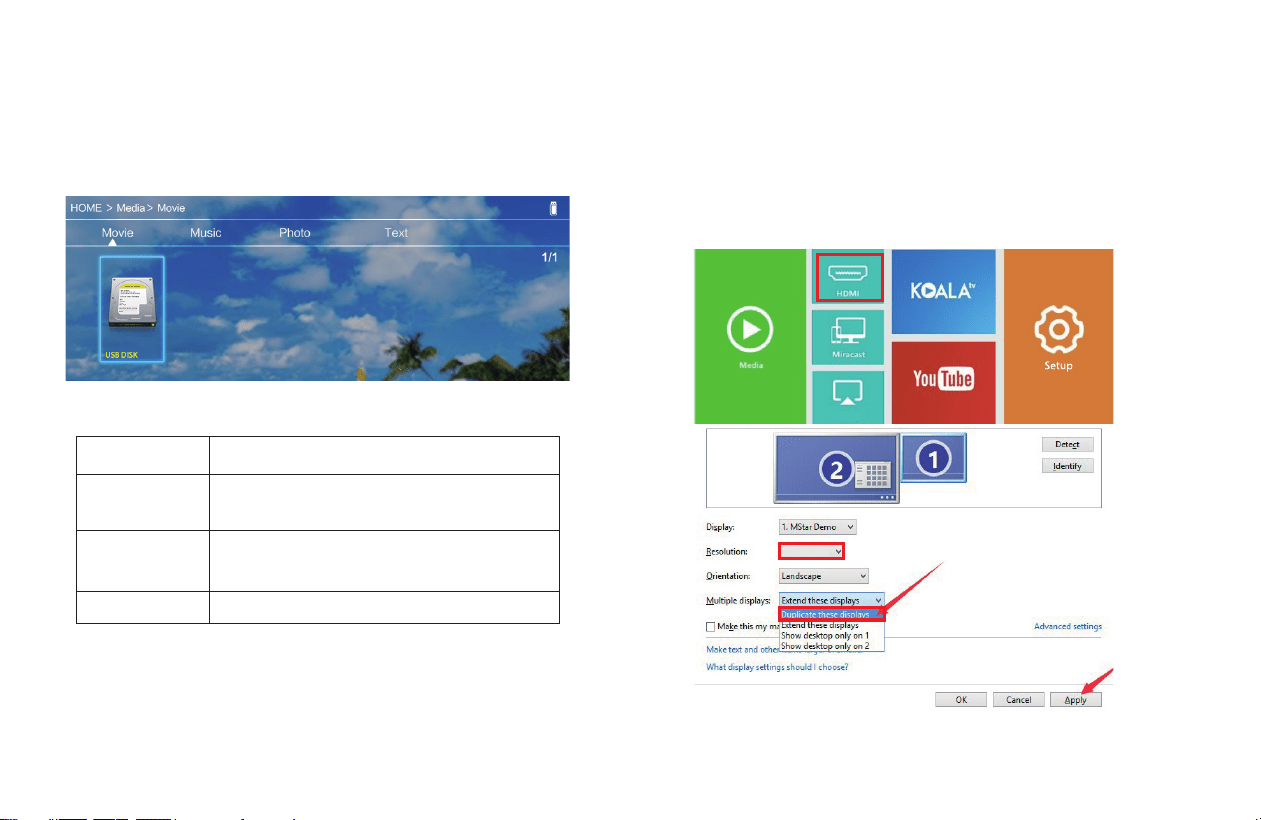
●Using the USB Interface
Step1: Connect the USB disk to the projector's USB port, then select “Media”
Step2: To project images and other content after connected, You can choose
“Movie” , “Music” , “Photo” , and “Text” from the list.
Supporting File Formats:
Image Format:
Audio format:
Video format:
Text format:
JPG, JPEG, BMP, PNG
MP3, WMA, MP2, MP3, OGG, M4A, MA4,
FLAC, 3GP, WAV, M3U, RM, WMV
MP4, MOV, 3GP, AVI, FLV, ISO, M2TS, MKV,
MPG, RMVB, TP, TRP, TS, WMV, VOB, DAT, ASF.H.265.
TXT
7
●Using the HDMI Interface
Please select the HDMI, the projector could be connected with DVD player, Game
box, HDD player etc.
Connecting to PC
Step1: Connect the projector to your laptop or other HDMI sources via HDMI cable
Step2: Select the HDMI source of the home page.
Tips: Adjust the PC display resolution to about “1024×768”.
8
1024×768
iOS Cast
9
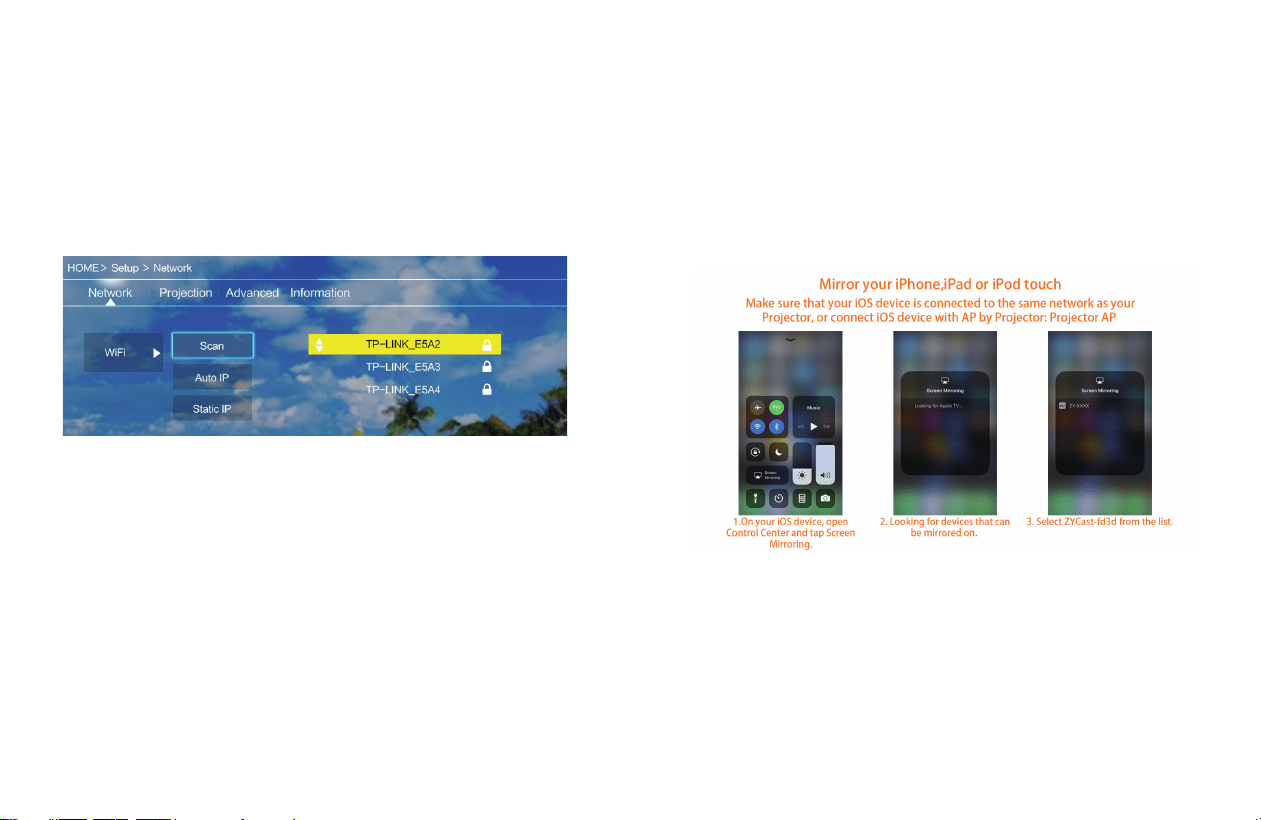
●WiFi Connection
Step1: Choose “Setup” on the right of the interface, then nd “Network”.
Step2: Find “WiFi”.
Step3: Choose “Scan”. Select your wireless network from list and type in the
password.
Step4: Press the “Exit” key on the remote control and then conrm the
connection.
10
●iOS Cast
Step1: Select “iOS Cast” of the home page.
Step2: iOS devices and projectors must be connected to the same network, or
connect the iOS device to the wireless network issued by the projector.
Step3: Select the name of the projector device “ZYCAST-****’
Attention: After the rst use or upgrade of the software, the projector needs
to be connected rst.
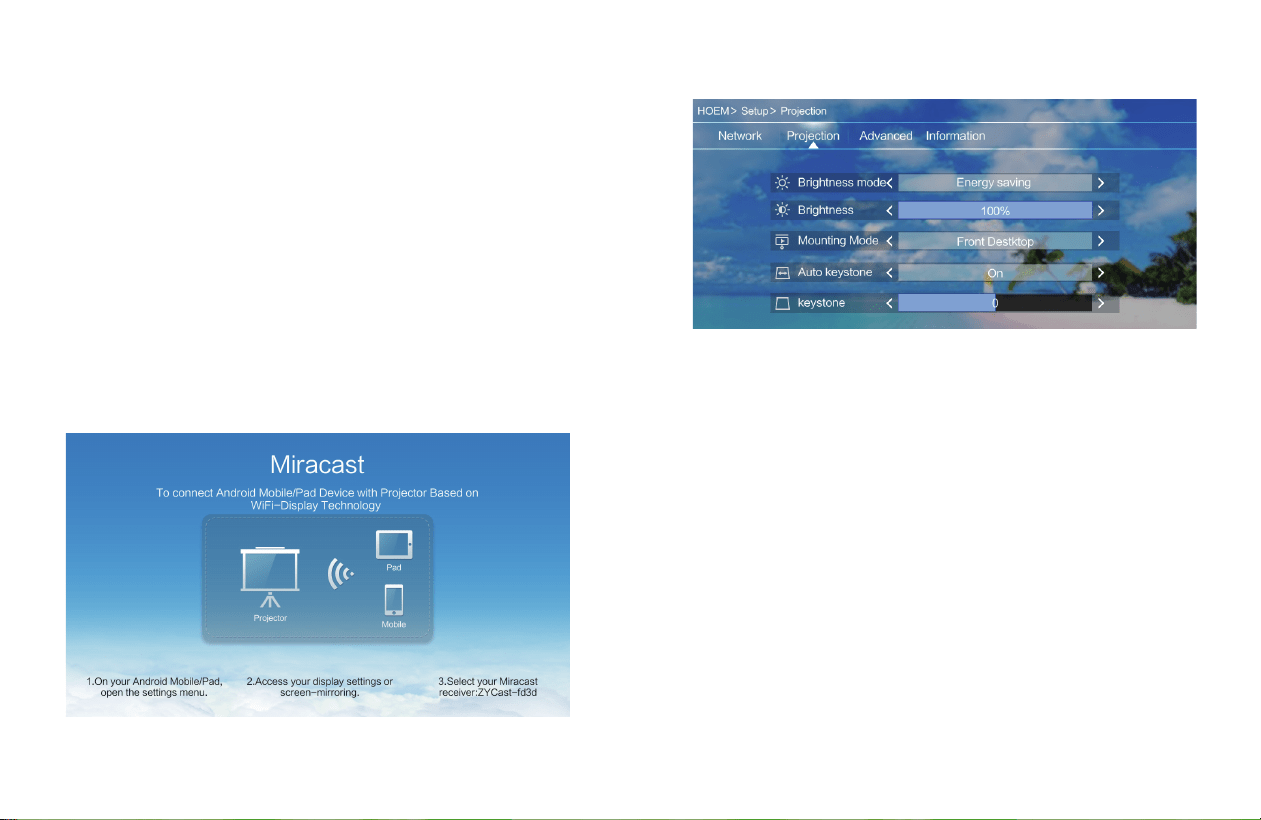
●Miracast
Step1: Select the “Miracast” of the home page.
Step2: Open the “wireless display ”function of your device.
Step3: Select the corresponding projector device name“ZYCAST-****”
Attention: Note that dierent Android devices have dierent ways to open
the “wireless display”. For details, please refer to the instructions for Android
devices.
The following information is for your reference only:
• Samsung: Please open the "Smart View" function on your device and then
connect it with the projector.
• Google Pixel: Please used Chromecast to cast your phone's screen to the
projector.
• Xiaomi: Please open the “Wireless display” function on your device and
then connect it with the projector.
• Huawei: Please open the “Multi-screen” function on your device and then
connect it with the projector.
• Motorola: Please open the “Wireless screen” function on your device and
then connect it with the projector.
11
●Setup
Set submenu function
Network:
Scan / Auto IP / Static IP
Projection:
Brightness Mode: Standard / Energy Saving / Customize
Mounting Mode: Front Desktop / Front Ceiling
Automatic trapezoid: On/O
Keystone correction: -40~+40
Advanced:
Language/Boot Source/Local update/Online update/Restore Factory
12

●How to Charge
1. To charge when the projector is o:
When the projector is connected with the power adapter, put the
switch in the “OFF” position, it means it is charging.
2. To charge when the projector is on:
When the projector is connected with the power adapter, put the
switch in the “ON” position, and press the switch, the charging icon
will be displayed on the upper right of the main interface, it means
it is charging.
Tips:
• Please charge the battery with the original power adapter;
• The product is only suitable for a low temperature environment;
• When it is charging, do not block the battery cooling holes;
• Please don’t stab or crash the battery when it is charging;
• Do not get the battery wet.
Attention: This function is only for projector with battery.
13
14
●Safety Instruction
Installation
You can place the projector on almost any at surface to enjoy your movie
time. Keep these considerations in mind as you select a projector location:
• Place the projector on a sturdy, level surface.
• Use this projector in a dark room to get the better watching.
• Please use this projector carefully, dropping or crash may damage parts or
result in blurred image, abnormal displaying.
Power
• Be careful while using the power cord, avoid to excessive bending; the
damage of power cable may cause electric shock and re.
• It is better to unplug the power cord after power o.
Cleaning
• Unplug the power cable rst.
• Clean the shell regularly with a damp cloth, neutral detergent can be used.
• Please use a glasses cloth or lens paper, not to scratch the lens.
• Please clean projector's vents and speakers regularly by banister brush, or
the vents will be blocked.
High temperature attention
• When in projection or just nish use, near the exhaust port will be very hot,
and may scald if touch it.
• While projection, please do not look at the lens directly, or may hurt eyes.
*Warm tips
• Do not disassemble the projector, with a risk of electric shock, also aect the
normal warranty.
• Please do not put any liquid or heavy stu on the projector.
• Leave plenty of space around and under the projector for ventilation, and do
not place it on top of or next to anything that could block the vents.
