All in One Coffee House
VCF117
VCF117_19EM1 (UK).indd 1 7/10/19 08:28

2
3
Cleaning and user
maintenance shall not be
made by children unless
they are older than 8 and
supervised. Keep the
apppliance and cord out
of reach of children aged
less than 8 years.
5. Close supervision is
necessary when any
appliance is used near
children. Children
shall not play with the
appliance.
6. Unplug appliance from
outlet when not in use
and before cleaning.
Allow to cool before
putting on or taking off
parts, and before cleaning
the appliance. See
Cleaning section for full
details.
7. Do not operate any
appliance with a damaged
cord or plug or after the
appliance malfunctions,
or has been damaged
in any manner. If the
supply cord is damaged
it must be replaced by
the manufacturer, its
service agent or similarly
qualied persons in order
to avoid a hazard.
8. The use of an accessory
not recommended by the
appliance manufacturer
for use with this appliance
may result in re, electric
shock or injury to persons.
9. Do not let cord hang over
edge of table or counter,
or touch hot surfaces.
10. Do not place on or near a
hot gas or electric burner,
or in a heated oven.
11. Always attach plug to
appliance rst, then
plug cord into the wall
outlet (for appliances
with detachable cords).
To disconnect, turn any
control to the off position,
then remove plug from
wall outlet.
12. This appliance is for
household use only. Do
not use the appliance for
anything other than its
intended use. Do not use
this appliance outdoors.
13. All lids should be closed
during use.
14. Scalding may occur if
the lid is removed during
or immediately after the
brewing cycles. Contents
may be hot. Allow to cool
before removing the lid.
15. Misuse of this aplliance
may result in electric
shock and/or injury to
persons.
IMPORTANT SAFEGUARDS
When using electrical
appliances, basic safety
precautions should always
be followed to reduce the risk
of re, electric shock, and/or
injury to persons including
the following:
1. Read all instructions.
2. This appliance generates
heat during use. Adequate
precaustions must be
taken to prevent the risk
of burns, scalds, res or
other damage to persons
or property caused by
touching the exterior
whilst in use or during
cooling.
3. To protect against
electric shock, do not
place or immerse cord,
plugs, or main body of
the appliance in water or
other liquids.
4. This appliance can be
used by children aged
from 8 years and above
and by persons with
reduced physical, sensory
or mental capabilities or
lack of experience and
knowledge if they have
been given supervision
or instruction concerning
use of the appliance in a
safe way and understand
the hazards involved.
Warning; take care
handling the Capsule
portalter as it
incorporates a sharp
needle in the bottom.
SAVE THESE INSTRUCTIONS
HOUSEHOLD USE ONLY
PRODUCT NOTICES
1. Place the appliance on a
hard, at, level surface
to avoid interruption of
airow underneath the
Coffee House.
2. Do not operate the
appliance with an empty
water tank.
3. Keep the area above the
appliance clear during
use, as hot steam will
escape the appliance.
VCF117_19EM1 (UK).indd 2-3 7/10/19 08:28
4
5
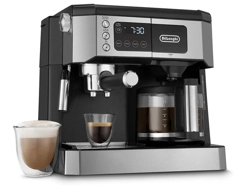
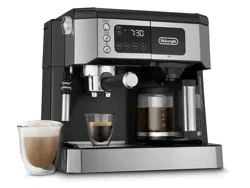
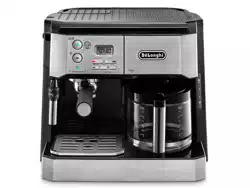
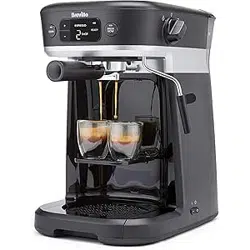
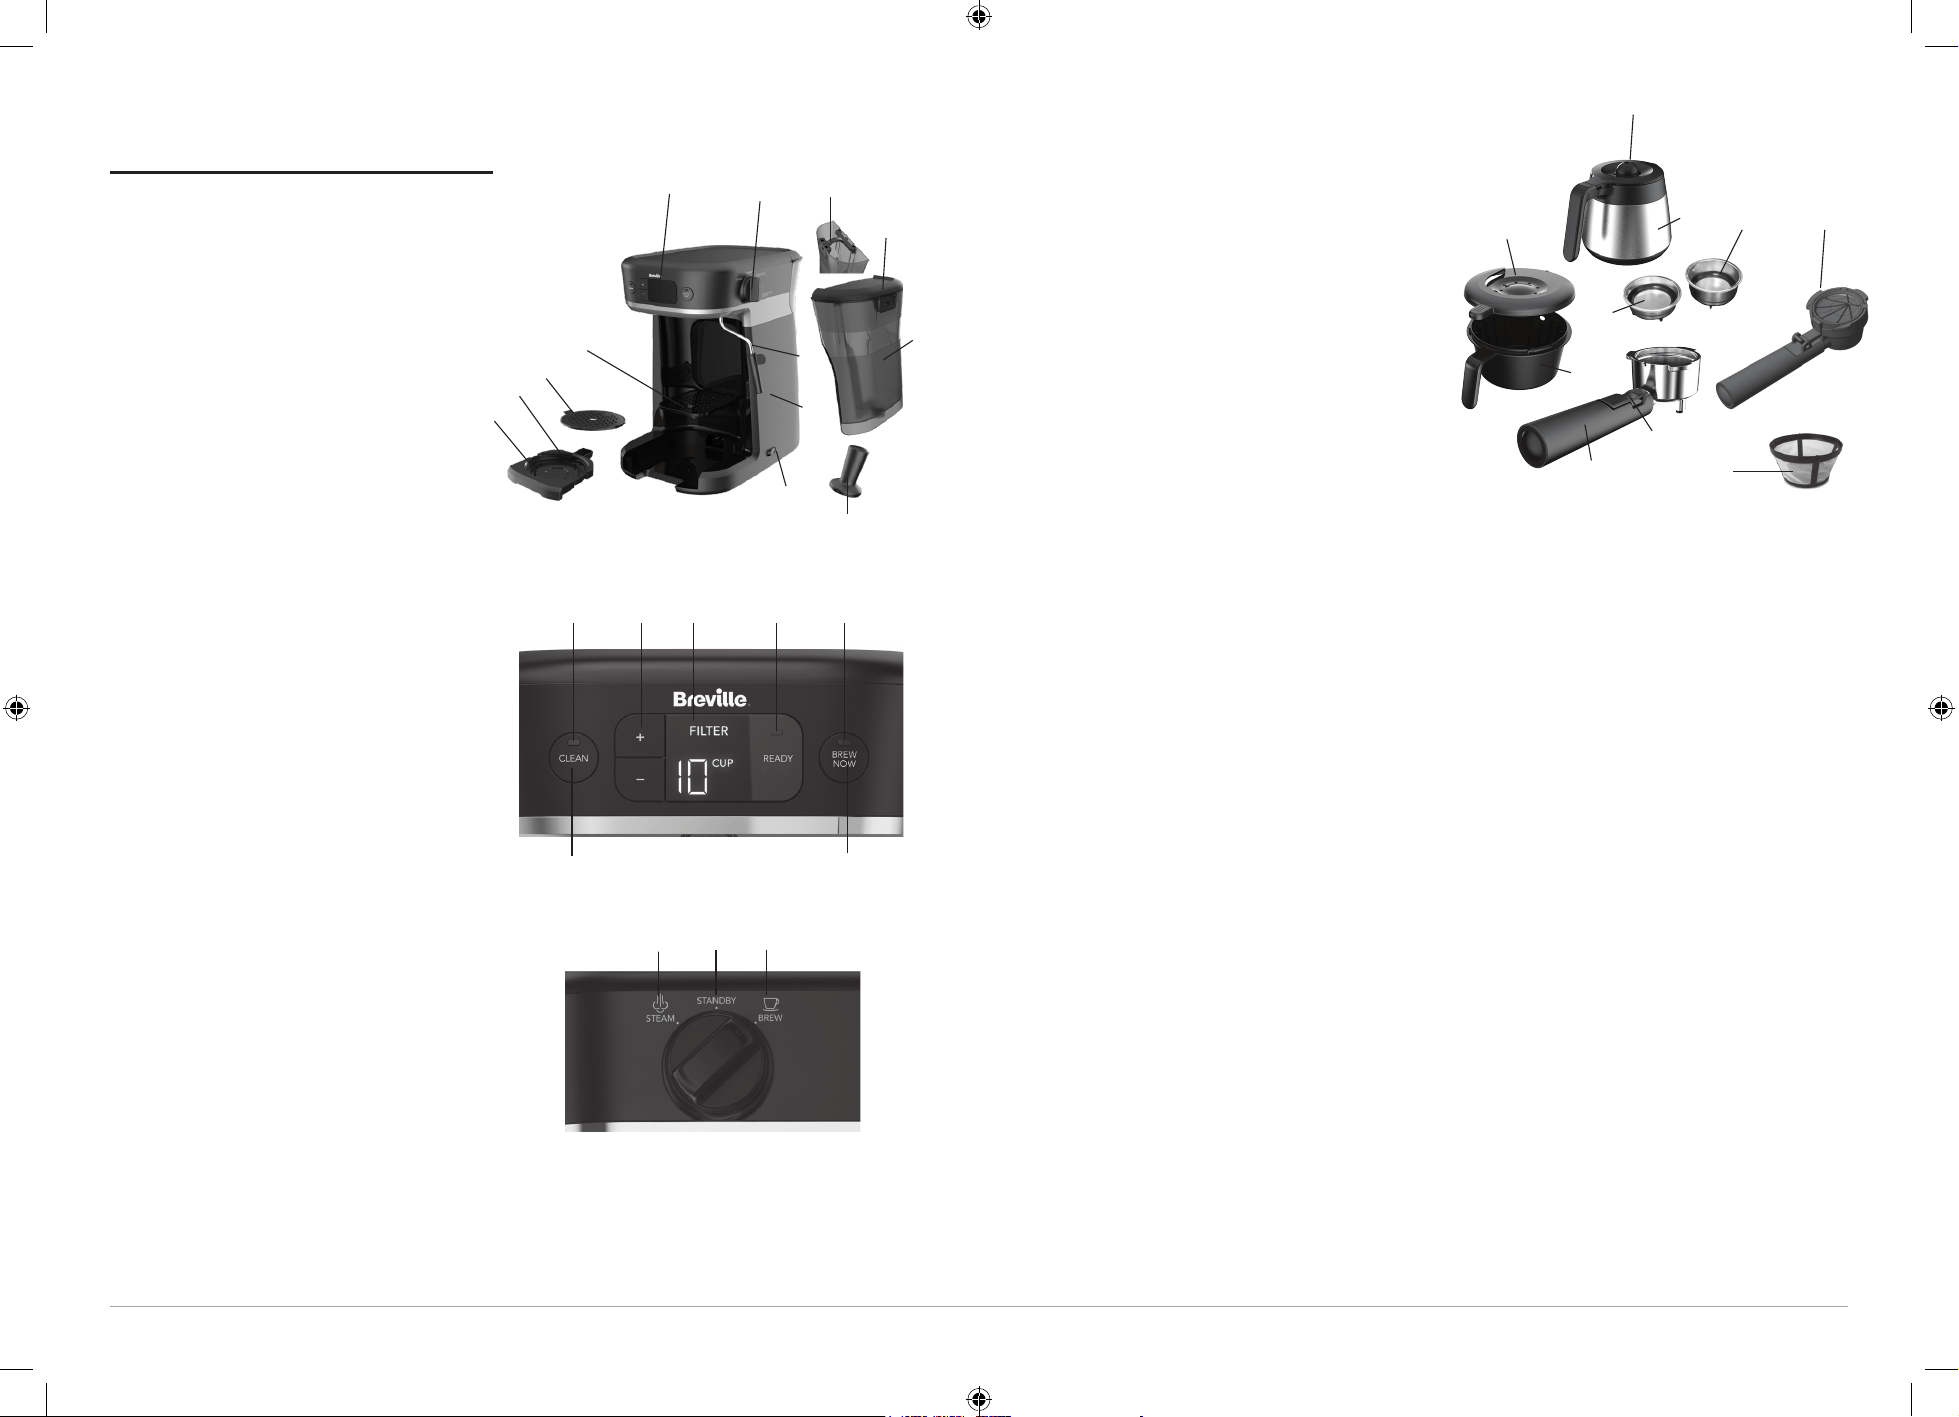
GET TO KNOW YOUR COFFEE
HOUSE
Coffee House:
1. Power Switch
2. Display
3. Knob
4. Milk Frothing Wand
a) Milk Frothing Wand Cover
5. Height Adjustment Tray
6. Drip Tray
a) Drip Tray Cover
b) Water Level Indicator
7. Water Tank
a) Water Tank Lid
b) Water Tank Handle
8. Espresso Tamper
Control Panel:
1. Clean Button
2. Cleaning Indicator
3. Brew Size Selector
4. Display
5. Ready Indicator
6. Brew Now Button
7. Brew Now Indicator
Knob:
1. Steam milk
2. Standby
3. Brew coffee, espresso, Capsule
Attachments:
1) Coffee Pot
a) Coffee Pot Lid
2) Brew Basket
a) Brew Basket Lid
3) EspressoPortalter
a) Filter Retainer Clip
b)1Shotlter
c)2Shotlter
4) CapsulePortalter
5) Permanent Filter Basket
1a
2
3
4a
4
7b
1
2
2 3 4 5 7
3
7a
7
8
1
6
1
5
6a
6b
6
43c
1
2a
2
3
3a
5
3b
VCF117_19EM1 (UK).indd 4-5 7/10/19 08:28
6
7
QUICK START GUIDE
WARNING: This Quick Start Guide is not
intended to be a substitute for the rest of
the user manual, and you should read and
understand the warnings and instructions
in the user manual before using this
appliance.
Brief Guide to Brewing on the Breville
All in One Coffee House:
1. Clean & prime the Coffee House before
brewingcoffeeforthersttime.
2. Fill the water tank to the “MAX” marking
withclean,lteredwater.
3. Turn the Coffee House ON by using the
power switch on the side.
NOTE: The ready indicator light will
pulse while the Coffee House heats up
and turn solid when the Coffee House
is ready to use.
4. Insertthedesiredattachmentlled
with coffee, espresso or a Dolce Gusto
compatible capsule into the Coffee
House.
5. Place the pot or coffee mug on the drip
tray or height adjustment tray.
6. Turn the knob to the “Brew” position.
7. Use the brew size selector to select the
desired brew size on the display.
8. Press “brew now” button.
9. When the Coffee House beeps and the
brew now indicator light turns off, turn
knob to the “standby” position.
10. Enjoy!
USER MANUAL
GETTING STARTED
1. Unpack your Coffee House and remove
plastic bags, cartons and any tape on
the Coffee House.
2. Position the Coffee House on a dry,
stable, horizontal counter top.
IMPORTANT: KEEP PLASTIC BAGS
AWAY FROM CHILDREN.
CLEAN & PRIME COFFEE HOUSE
BEFORE USE
Just follow these simple steps:
Do not immerse main body of the
appliance, power cord and plug in water or
any other liquid.
1. Wash all of the removable parts in
warm water with a mild liquid soap.
2. Fill the water tank to the “MAX” marking
withclean,lteredwater.
3. Turn the Coffee House ON by using the
power switch on the side.
NOTE: The ready indicator light will
pulse while the Coffee House heats up
and turn solid when the Coffee House
is ready to use.
4. Lock the brew basket lid onto the brew
basket and slide it into the Coffee
House. Then, lock the coffee pot lid
onto the coffee pot and place the coffee
pot on the drip tray cover.
5. Turn knob to the “brew” position.
6. “10 cups” will illuminate on the screen.
7. Press the clean button.
NOTE: The ready indicator light will
turn off and the clean indicator light will
illuminate.
8. When the Coffee House beeps and the
clean indicator light turns off, turn knob
to the “standby” position.
9. Discard the water in the coffee pot.
Your Breville
®
Occasions Coffee House
is ready to use!
HOW TO MAKE YOUR FIRST POT
OF COFFEE
1. Fill the water tank to the “MAX” marking
withclean,lteredwater.
2. Turn the Coffee House ON by using the
power switch on the side.
3. NOTE: The ready indicator light will
pulse while the Coffee House heats up
and turn solid when the Coffee House
is ready to use.
4. Remove the brew basket lid from the
brew basket by twisting it to the right.
5. Placeacoffeelterorthepermanent
lterbasketintothebrewbasketand
pour the desired amount of coffee into
thelter.
6. Lock the brew basket lid onto the brew
basket by twisting it to the left.
7. Slide the brew basket into the Coffee
House.
8. Place the coffee pot on the drip tray
cover.
9. Turn knob to “brew” position.
10. Use the brew size selector to select the
desired brew size on the display.
11. Press the brew now button.
NOTE: The ready indicator light will
turn off and the brew now indicator light
will illuminate.
12. When the Coffee House beeps and the
brew now indicator light turns off, turn
knob to the “standby” position.
13. Enjoy!
NOTE: The UK model has the blooming
feature which pauses the brewing cycle
for 30 seconds after all of the coffee
grounds have been pre-soaked with
water. This allows the coffee grounds to
thenreleasetherichestcoffeeavors
during the remaining brew cycle.
During this blooming phase, the pump
will cycle on and off every few seconds,
then return to full brewing mode after
30 seconds.
HOW TO MAKE YOUR FIRST
SHOT(S) OF ESPRESSO
1. Fill the water tank to the “MAX” marking
withclean,lteredwater.
2. Turn the Coffee House ON by using the
power switch on the side.
3. NOTE: The ready indicator light will
pulse while the Coffee House heats up
and turn solid when the Coffee House
is ready to use.
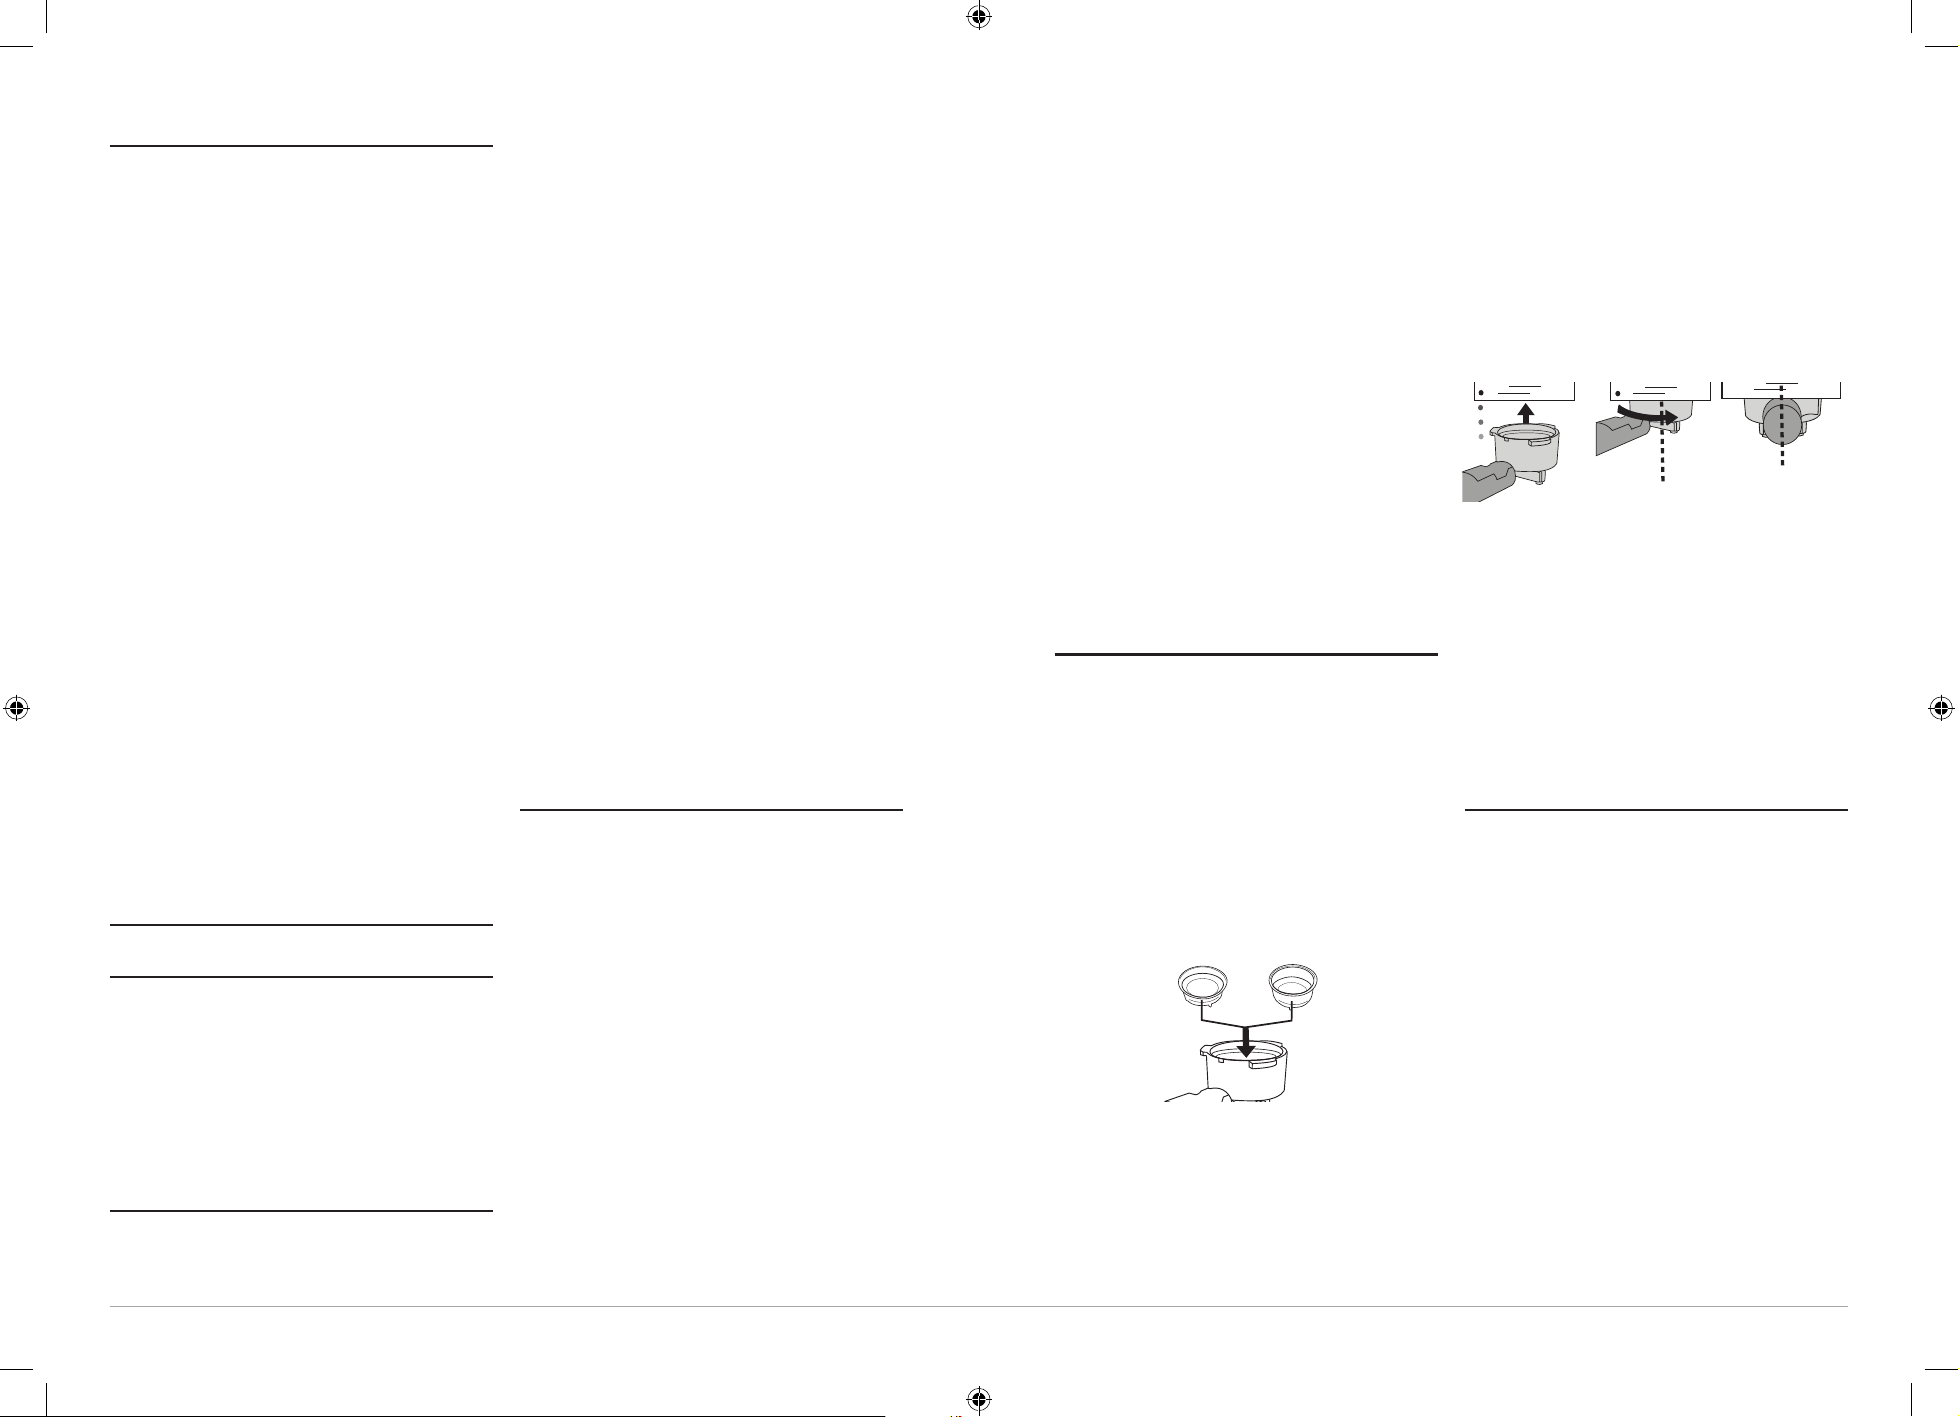
4. Selectltersize:1-shotlteror2-shot
lter.Makesurethebumponthe
lterisalignedwiththenotchonthe
espressoportalterandplacelterinto
theespressoportalter.
5. Addespressogroundsintothelter.
a. Using the tamper, evenly tamp
(press) espresso grounds.Then,
wipe the edges to clear any excess
grinds.
6. If using a small cup, lower the height
adjustment tray. If using a larger cup,
leave the height adjustment tray in the
upright position.
7. Inserttheespressoportalterintothe
Coffee House:
a.Keeptheespressoportalterhandle
at.
b.Inserttheespressoportalterhead
at a 45° angle (left).
c.Turntheespressoportalterhandle
to a 90° angle. The espresso
portaltershouldbeinacentered
position.
8. Place cup underneath the espresso
portalter.
9. Turn the knob to the “brew” position.
10. Use the brew size selector to select 1
shot or 2 shots.
11. Press the brew now button.
12. When the Coffee House beeps and the
brew now indicator light turns off, turn
knob to the “standby” position.
13. Enjoy!
HOW TO MAKE YOUR FIRST
CAPSULE COFFEE
NOTE: The Capsule Portafilter of the
Coffee House is designed to take Dolce
Gusto compatable capsules only.
1. Fill the water tank to the “MAX” marking
withclean,lteredwater.
2. Turn the Coffee House ON by using the
power switch on the side.
3. Note: The ready indicator light will
pulse while the Coffee House heats up
and turn solid when the Coffee House
is ready to use.
4. Place a capsule inside the capsule
portalterandlightlyplacethelidoverit.
5. If using a small cup, lower the height
adjustment tray. If using a larger cup,
leave the height adjustment tray in the
upright position.
6. Insertthecapsuleportalterintothe
Coffee House:
a.Keepthecapsuleportalterhandle
at.
1-SHOT
2-SHOT
TURN
TURN
VCF117_19EM1 (UK).indd 6-7 7/10/19 08:28
8
9
b.Insertthecapsuleportalterhead
at a 45° angle (left), ensuring the lid
closes during insertion.
c.TurntheCapsuleportalterhandle
to a 90° angle. The capsule
portaltershouldbeinacentered
position.
7. Place the cup underneath capsule
portalter.
8. Turn the knob to the “brew” position.
9. Use the brew size selector to select the
desired brew size on the display.
10. Press the brew now button.
11. When the Coffee House beeps and the
brew now indicator light turns off, turn
knob to the “standby” position.
12. Enjoy!
WARNING: There is a sharp needle
inthelidoftheCapsulePortalter.
HOW TO STEAM MILK
1. Fill the water tank to the “MAX” marking
withclean,lteredwater.
2. Fill a milk pitcher or cup about 1/3 to ½
full with cold milk.
NOTE: Any type of milk can be used –
soy, rice, almond, coconut, etc. – but
full fat dairy milk creates the best froth.
3. Insert the milk frothing wand tip just
below the surface of the milk.
4. Turn the knob to the “steam” position.
NOTE: The ready indicator light will
pulse while the water is heating up.
Once the Coffee House reaches the
correct temperature, the ready indicator
light will turn solid. Some water and
steam may come out of milk frothing
wand while the Coffee House heats
up, and it will take a few moments for
steam to reach full operating pressure.
5. Steam your milk until it reaches the
desired texture and temperature.
NOTE: Steaming milk makes a hissing
noise. Take care near hot steam to
avoid burns and scalds.
6. Whennished,turntheknobtothe
“standby” position. Then, remove the
milk frothing wand from the milk pitcher
or cup.
NOTE: After steaming milk, the knob
must be turned to the “standby” position
for approximately 35 seconds before
starting the next brew cycle. If the knob
is turned directly to the “brew” position
after steaming milk, the Coffee House
will beep, the display will go blank, and
the Coffee House will not brew coffee.
Toxtheerror,theknobwillneedto
be turned to the “standby” position for
approximately 35 seconds.
7. Remember to clean the milk frothing
wand after every use. For instructions
on how to do so, please refer to the
cleaning section.
8. Enjoy!
NOTE: When the knob is turned to
the “standby” position after steaming
milk, the Coffee House will enter an
automatic cool-down cycle that lasts
approximately 35 seconds. During this
cycle, the ready indicator light will pulse
and water will be released into the
drip tray though an internal channel. A
notable volume of steam will be emitted
from the drip tray. When the ready
indicator light turns solid, the Coffee
House has cooled down and is ready to
use.
Helpful Tips for Steaming Milk:
1. Insert the milk frothing wand
tip just below the surface of the
milk.
2. Position the milk frothing wand
and milk pitcher or cup at an
angle that allows the milk to
move in a whirlpool pattern.
3. As the milk level rises, lower the
milk pitcher or cup to keep the
milk frothing wand tip just below
the surface.
4. When the desired texture is
achieved, immerse the milk
frothing wand half way.
ROUTINE CLEANING
Make sure your Coffee House is unplugged
and has cooled completely before
cleaning. We recommend hand washing
all parts to help preserve their appearance.
Do not immerse the main body of the
appliance, power cord and plug in water or
any other liquid.
Filter Coffee
1. Remove the brew basket, brew basket
lid,lter,coffeepotandcoffeepotlid
and wash them with warm water and
mild liquid soap. Dry thoroughly.
Capsule
1. Removethecasuleportalterand
discard capsule
2. Rinsethecapsuleportalterwithwater,
shake the water off and dry it on the
outside.
WARNING: There is a sharp needle in
the lid of the Capsule Portafilter.
Espresso
1. Removetheespressoportalterand
discard espresso grounds. Release the
lterretainerclipandpressoverthe
lter;holdingitinplaceasyoudiscard
espresso grounds. This helps keep the
ltersecuredandinplacewhiletapping
against trash bin to discard espresso
grounds.
2. Removethelterfromtheespresso
portalterbytwistingthelteruntilthe
bump is aligned with the notch. Wash
thelterandtheespressoportalter
with water and mild liquid soap.
3. Placethelterbackintotheespresso
portalterandinserttheespresso
portalterbackintotheCoffeeHouse.
Follow the same steps for brewing
espresso, but with no espresso in the
lter.Discardthewaterinthecup.
4. Removetheespressoportalterfrom
the Coffee House and dry thoroughly.
NOTE:TheespressoportalterisNOT
dishwasher safe.
Milk Frothing Wand
1. Remove the milk frothing wand cover
and wash with warm water and mild
liquid soap.
2. With a damp cloth, wipe down the
metal on the milk frothing wand.
3. Fill water tank and place a jug under
the milk frothing wand.
4. Turn the knob to the “steam” position
and press the clean button. The clean
indicator light will illuminate and the
Coffee House will enter a 2-minute
clean cycle, and will emit water and
steam from the steam wand.
5. When the clean indicator light turns off,
turn the knob to the “standby” position.
NOTE: The Coffee House will then
enter an automatic cool-down cycle
that lasts approximately 35 seconds.
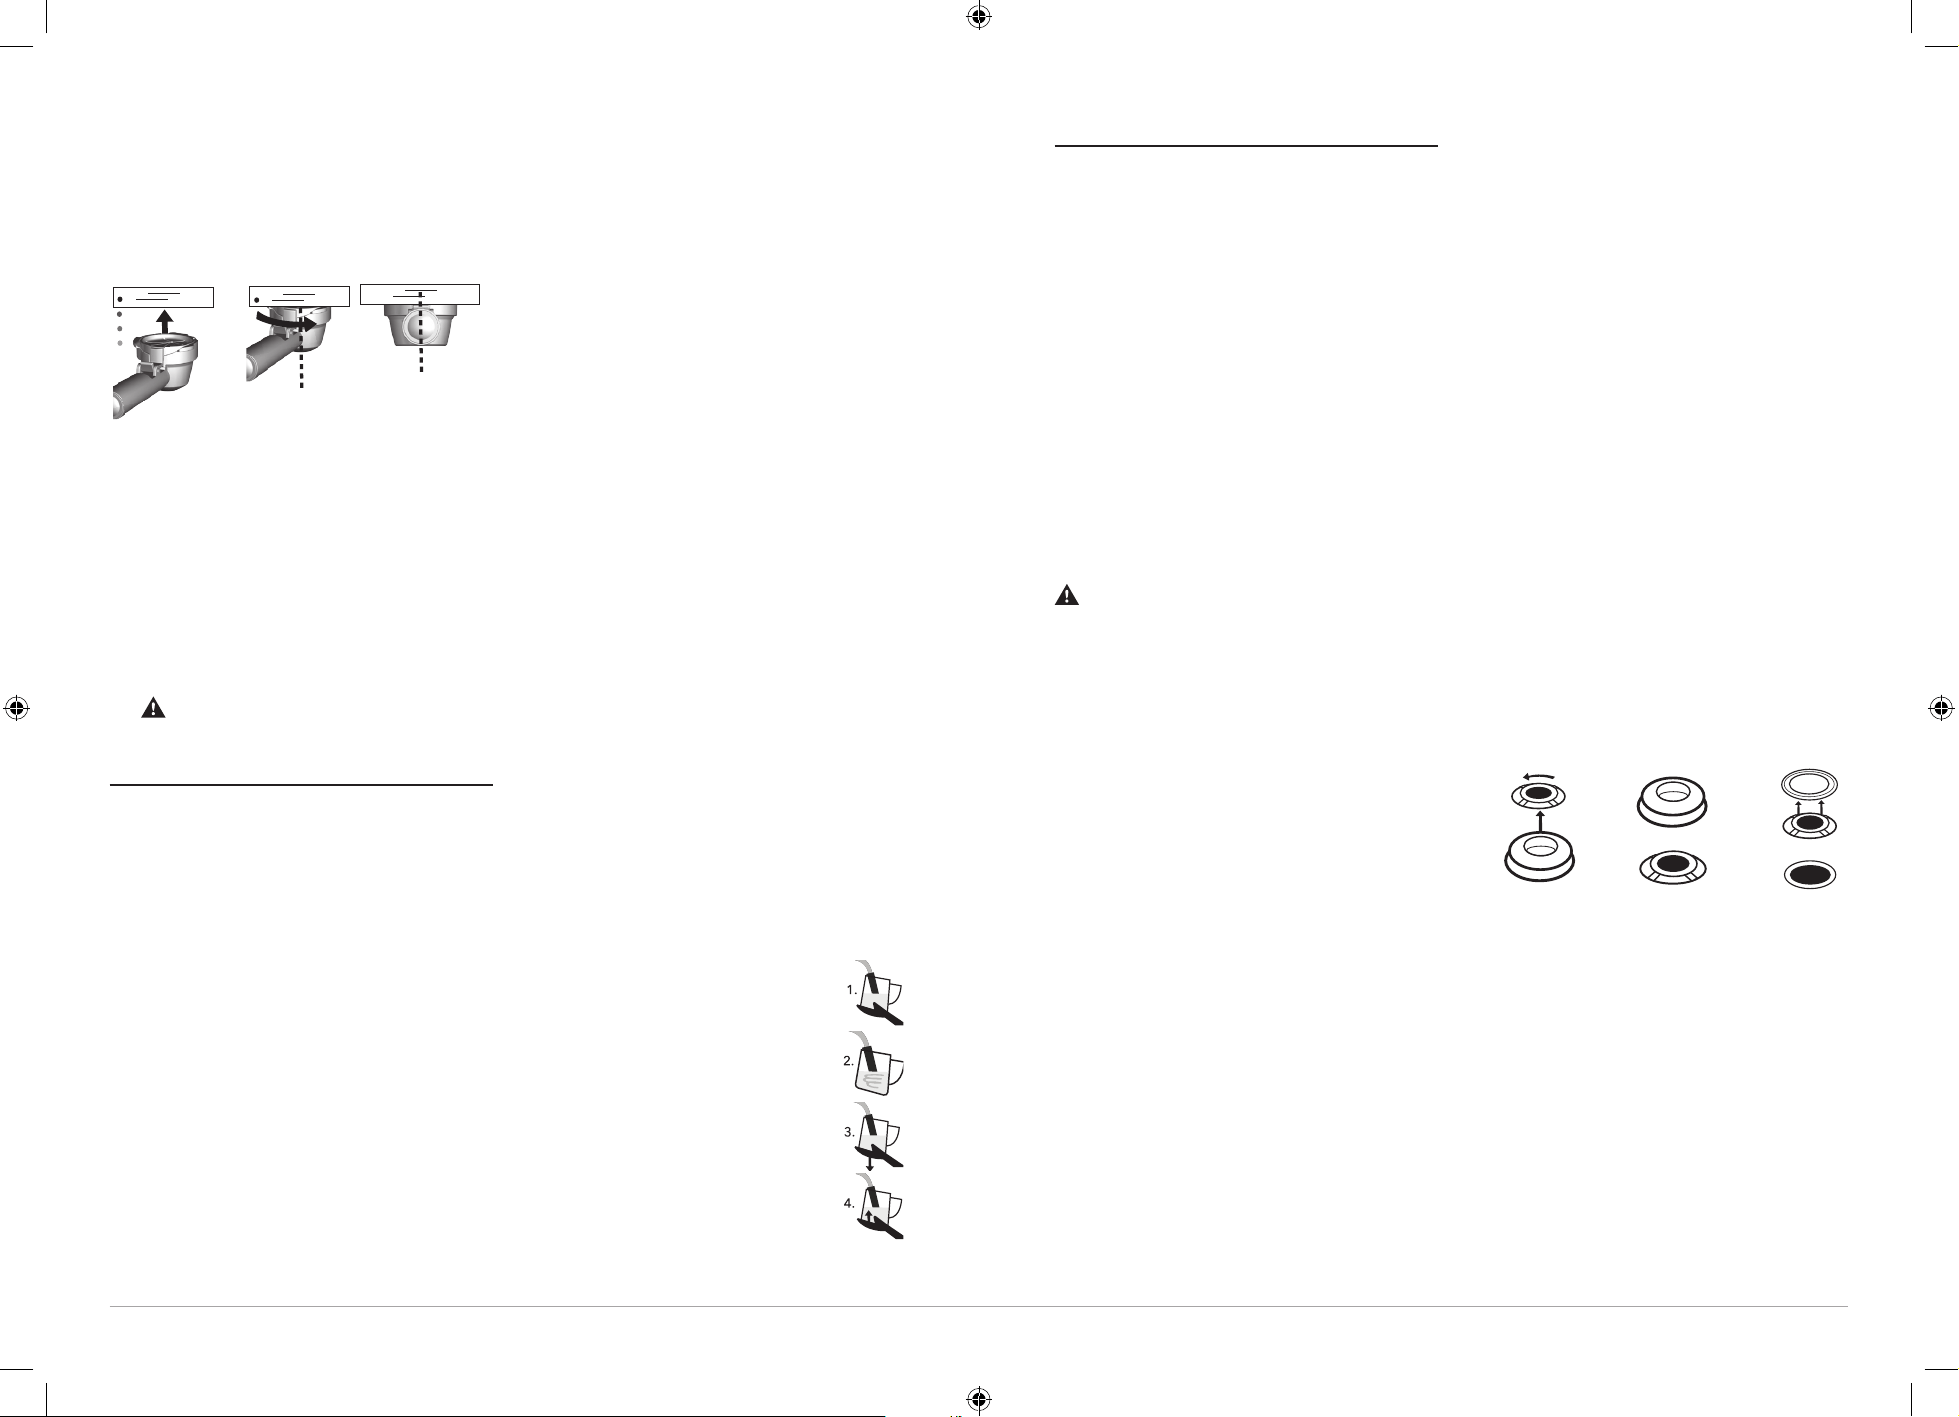
Deep Cleaning the Espresso Filters
- Make sure to deep clean your espresso
ltersevery90daysforoptimalbrewing
performance. Follow these disassembly
instructions and rinse the pieces in a
large bowl of warm water. Once rinsed
thoroughly, wipe dry and reassemble.
Emptying the Drip Tray
1. When the water level indicator rises
above the drip tray cover, carefully slide
the drip tray out from the Coffee House,
remove the drip tray cover, and discard
the water.
2. Place the drip tray cover back on the
drip tray and slide it into the Coffee
House.
TURN
TURN
TURN
TURN
TURN
TURN
TURN
TURN
STEP 1
Unlock
Push
Remove
Seal
Remove
Filter
Remove
Lift
STEP 2 STEP 3
TURN
1. ALIGN AND
INSERT
2. TURN 3. CENTER
VCF117_19EM1 (UK).indd 8-9 7/10/19 08:28
10
11
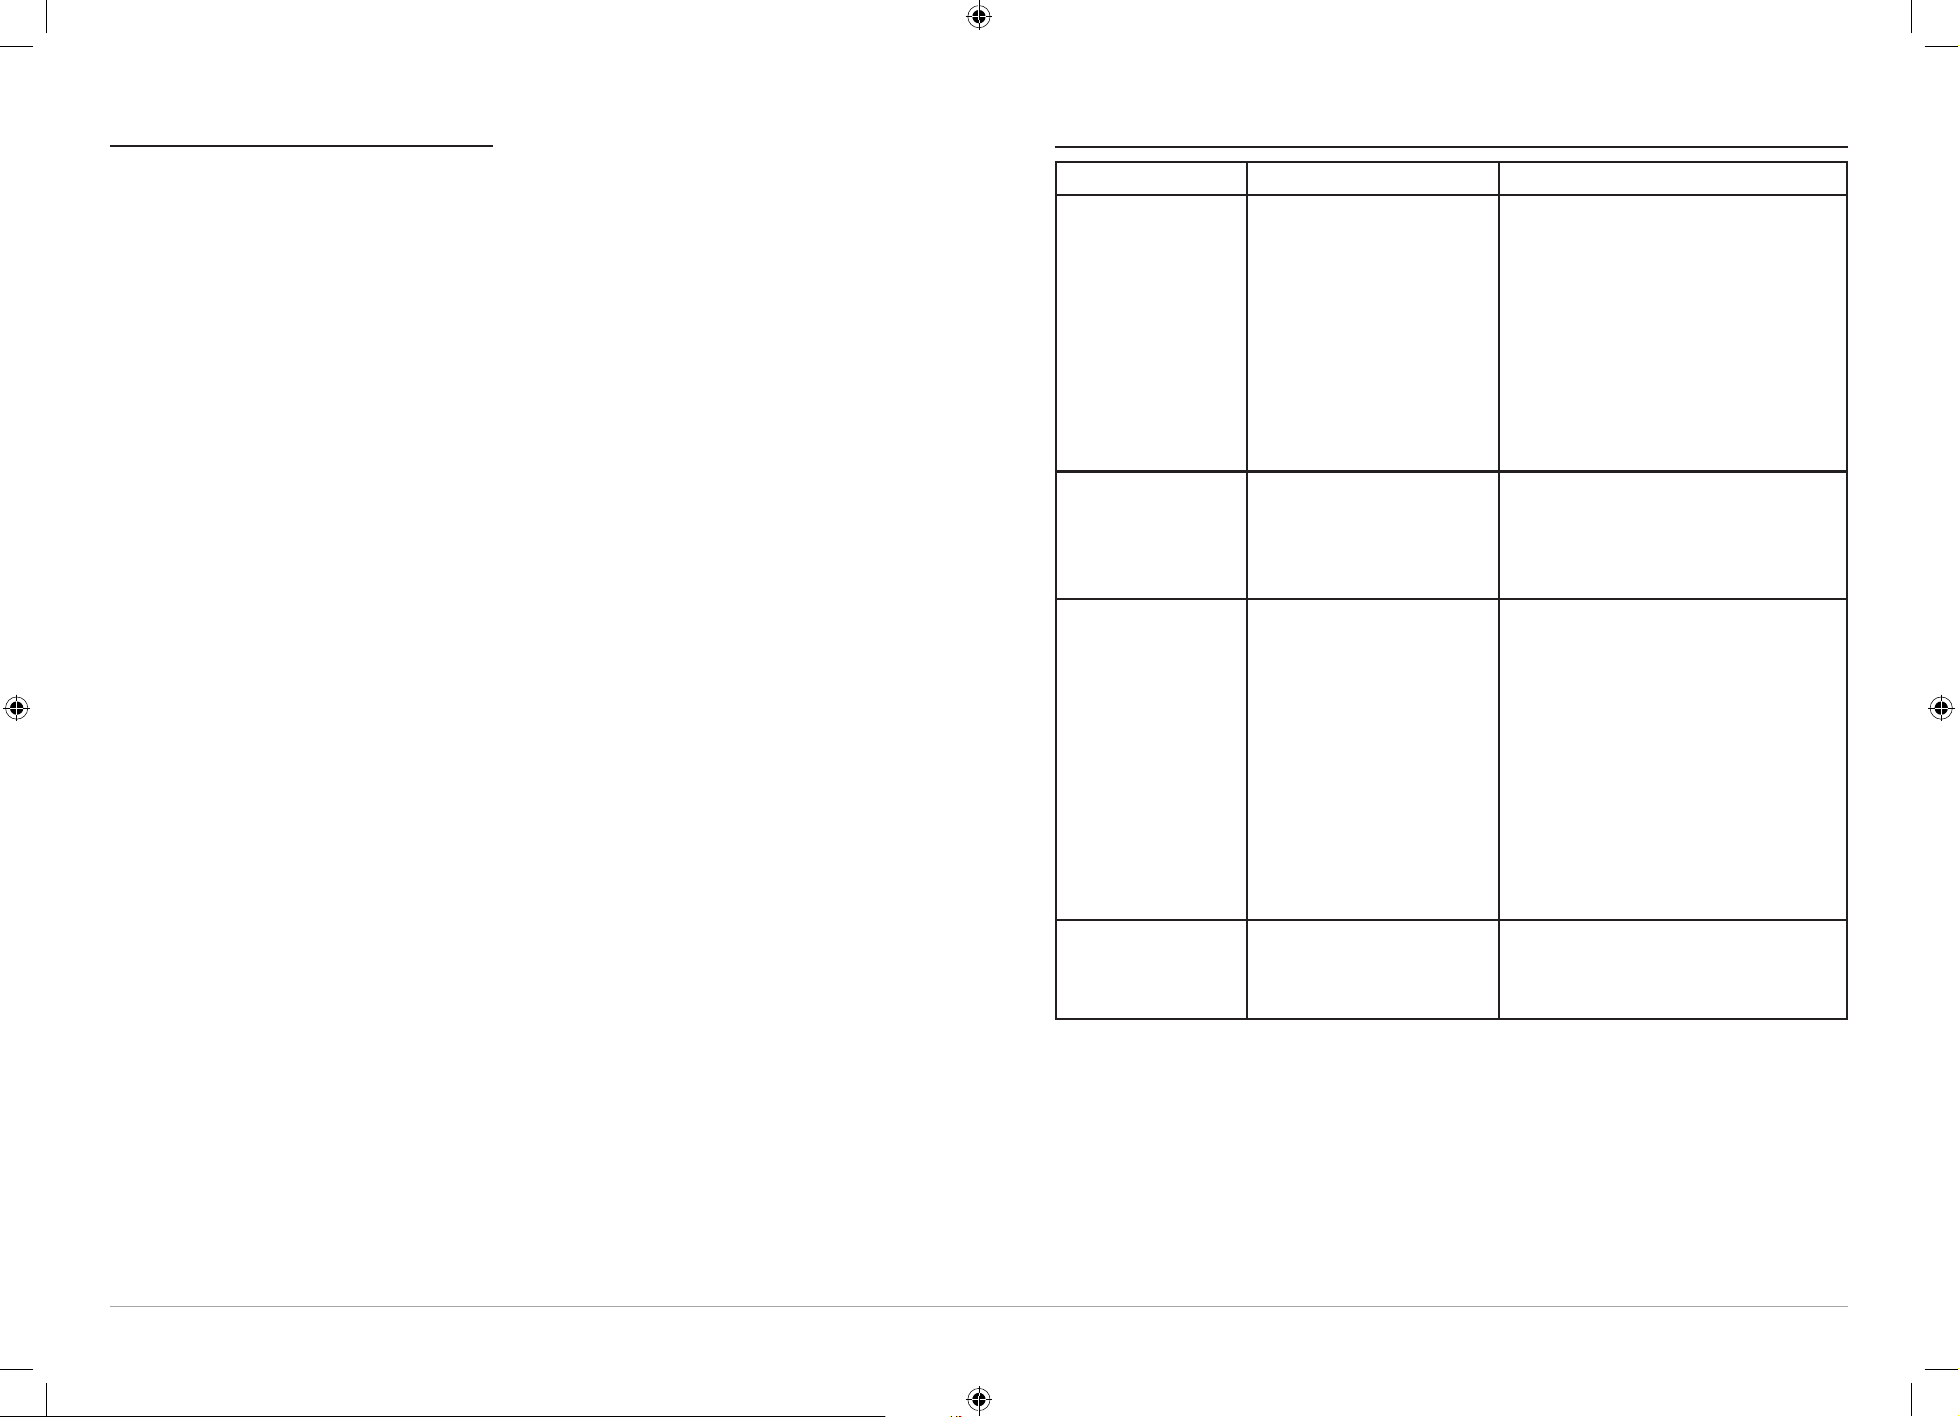
TROUBLESHOOTING GUIDE
Problem Possible Causes Solutions
Brew size options
don’t show up
on the display,
even though the
attachment is in the
Coffee House.
1. Attachment is placed
incorrectly in the
Coffee House or isn’t
fully locked into place.
2. The knob was moved
from the “steam”
position directly into
the “brew” position
withoutrstbeingin
the “standby” position
for 35 seconds after
steaming.
1. Reinsert the attachment into
the Coffee House until it locks
in properly and is in a horizontal
position.
2. Turn the knob to the “standby”
position for approximately 35
seconds.
Capsule:
Coffee House
leaks when
brewing Capsule
pods.
Capsule portafilter isn’t
inserted properly.
Remove the Capsule portafilter and
make sure it is inserted properly and
locked into place. It must lock at a
90° angle.
No steam is
generated.
1. Water tank is empty.
2. Appliance is not
turned on.
3. Frothing wand is
blocked.
1. Add water to water tank and turn
the knob to the “standby” position
for approximately 35 seconds.
Then, turn the knob back to the
“steam” position.
2. Turn the Coffee House ON and
follow the operating instructions.
3a. Perform the milk frothing wand
auto clean cycle.
3b. Turn off the Coffee House,
remove the milk frothing wand
cover and use a needle or
toothpick to unclog the nozzle
opening.
Milk is not foamy
after frothing.
1. Milk is not cold
enough.
2. Milk frothing wand is
too deep in milk.
1. Chill milk prior to steaming.
2. Submerge the milk frothing wand
just below the milk surface.
DESCALING
After continued use, your Coffee House
may develop a build-up of mineral
deposits, and therefore require descaling.
We recommend descaling your Coffee
House every 4-6 months, although this
period will depend on the hardness of
water and frequency of use.
IMPORTANT: If the descaling process is
not completed or stopped part way through
any of the descaling steps, then you will
need to start the descaling process again
from the beginning.
Descaling: Coffee House
1. In an empty water tank, add 1½
tablespoons of white vinegar. Add 1L
of water to the water tank. Allow the
solution to mix thoroughly.
2. Place the water tank into position.
3. Insert the brew basket into the Coffee
House, without coffee in it.
4. Place the coffee pot on the drip tray
cover.
5. Turn ON the Coffee House.
6. Turn the knob to the “brew” position.
7. Press the clean button. During the
cleaning cycle the cleaning indicator
light will be on.
NOTE: When the descaling process is
complete, the cleaning indicator light
will turn off and the ready indicator light
will illuminate.
8. When the cleaning indicator light turns
off, discard the water in the coffee pot.
9. Rinse the water tank, brew basket and
brew basket lid, and coffee pot with
warm water and mild liquid soap.
10.RellwatertanktoMaxwithclean
water and repeat from step 2.
VCF117_19EM1 (UK).indd 10-11 7/10/19 08:28
12
13
REPLACEMENT PARTS
For additional or replacement parts, please
visit www.breville.co.uk or call us on
0161 621 6900.
TROUBLESHOOTING
For troubleshooting and FAQs visit:
www.breville.co.uk/faqs
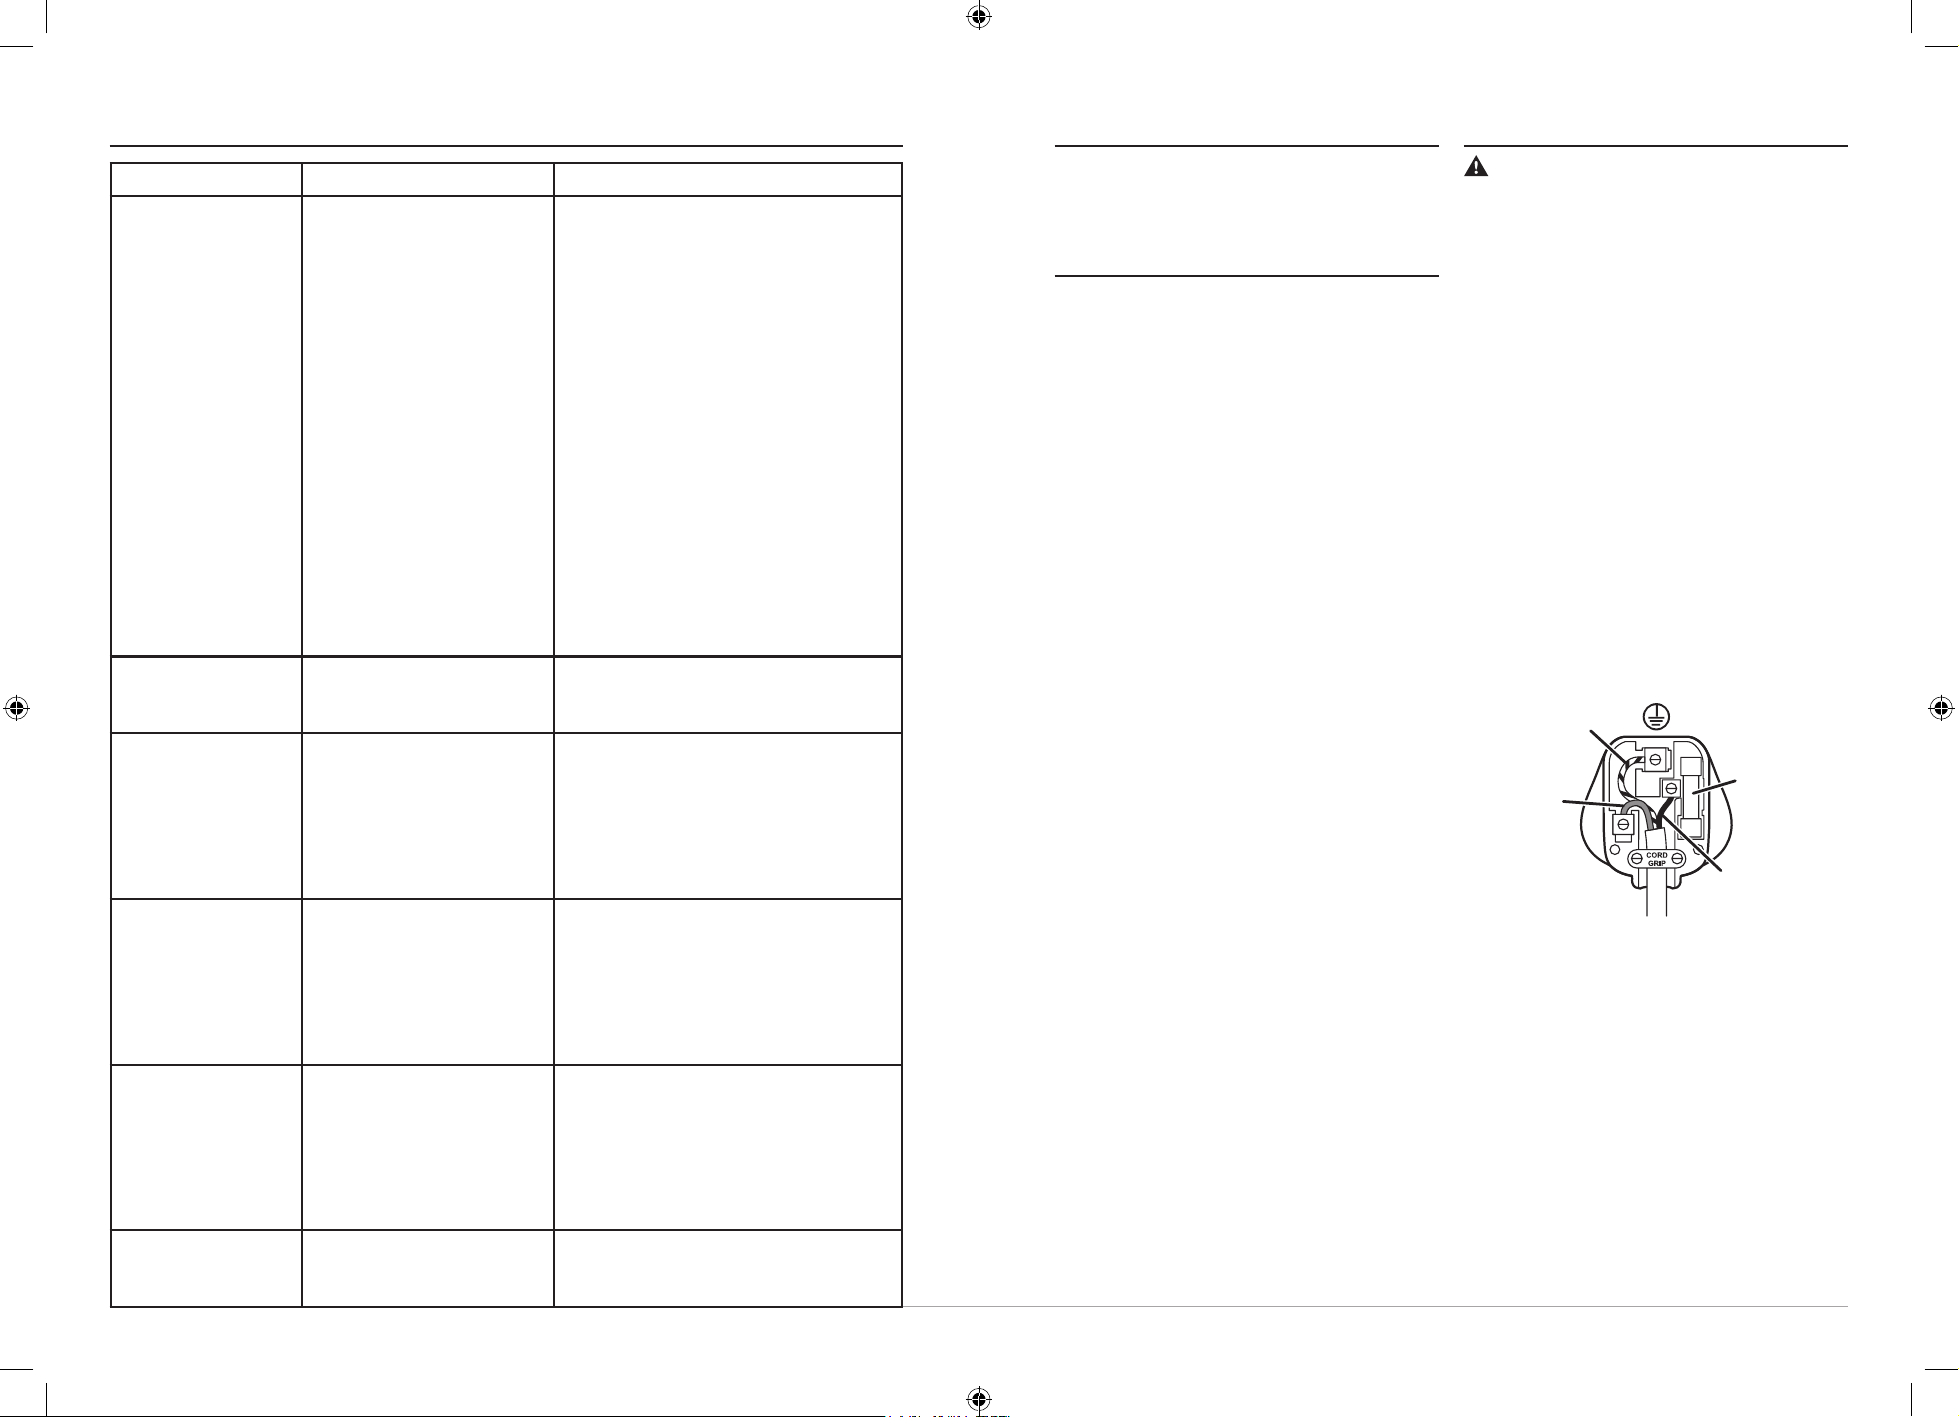
ELECTRICAL SAFETY
This appliance must be earthed.
If the plug is not suitable for the socket
outlets in your home, it can be removed
and replaced by a plug of the correct type.
If the fuse in a moulded plug needs to be
changed,thefusecovermustberetted.
The appliance must not be used without
thefusecovertted.
If the plug is unsuitable, it should be
dismantled and removed from the supply
cordandanappropriateplugttedas
detailed. If you remove the plug it must not
be connected to a 13 amp socket and the
plug must be disposed of immediately.
If the terminals in the plug are not marked
or if you are unsure about the installation
oftheplugpleasecontactaqualied
electrician.
Blue
(Neutral)
Brown
(Live)
13A Fuse
Green/Yellow
(Earth)
Plug should be ASTA approved to BS1363
Fuse should be ASTA approved to BS1362
Ensure that the outer sheath of
the cable is firmly held by the cord grip
TROUBLESHOOTING GUIDE
Problem Possible Causes Solutions
Espresso:
1. Coffee does
not come out
when brewing
espresso.
2. Coffee comes
out too quickly.
and/or is too
weak.
1a. No water in water
tank.
1b. Espresso grind is too
ne.
1c. Espresso grinds were
tamped with too much
pressure.
1d. Too much espresso in
thelter.
1e. Filter is clogged and
needs to be cleaned.
1f. Appliance is not
turned ON.
2a. Ground coffee is too
coarse.
2b. Not enough coffee in
lter.
1a. Add water to water tank and turn
the knob to the “standby” position
for approximately 35 seconds.
Then, turn the knob back to the
“brew” position.
1b. Grind coffee to espresso ground
levelofneness.
1c. Tamp (press) the espresso grinds
with less pressure.
1d.Fillthelterwithlesscoffee.
1e.Cleanthelter.
1f. Plug the Coffee House into
electrical outlet.
2a.Useanergroundcoffee.
2b. Use more coffee.
“0” on the display. No water is in water tank. Add water to water tank and turn the
knob to the “standby” position for
approximately 35 seconds.
The display is
blank when trying
to brew coffee and
the ready indicator
light is flashing.
The knob was turned
directly from the “steam”
position to the “brew”
position without being
in the “standby” position
for approximately 35
seconds.
Turn the knob to the “standby”
position for approximately 35
seconds. When the ready indicator
light turns solid, turn the knob to the
“brew” position to continue.
Steam is emitted
from the drip
tray and the
pump operates
intermittently.
The Coffee House has
overheated and entered
the automatic cool-down
cycle where it will purge
excess water and steam
from inside the unit into
the drip tray.
The Coffee House will complete
the automatic cool-down cycle. The
ready indicator light will pulse during
the cool- down cycle and will turn
solid when the cycle is complete.
The drip tray fills
with water on its
own.
The Coffee House has
gone through a few
automatic cool-down
cycles, where it will purge
excess water and steam
from inside the unit into
the drip tray.
When the water level indicator rises,
pull out the drip tray and discard the
water.
The unit has
automatically
switched off.
There is a 5 minute
Auto off function on the
machine.
Press any button to reactivate the
unit.
VCF117_19EM1 (UK).indd 12-13 7/10/19 08:28

14
15
AFTER SALES SERVICE
These appliances are built to the very
highest of standards. There are no user
serviceable parts. Follow these steps if the
unit fails to operate:
• Check the instructions have been
followed correctly.
• Check that the fuse has not blown.
• Check that the mains supply is
functional.
If the appliance will still not operate, return
the appliance to the place it was purchased
for a replacement. To return the appliance
to the Customer Service Department,
follow the steps below:
1. Pack it carefully (preferably in the
original carton). Ensure the unit is
clean.
2. Enclose your name and address and
quote the model number (located on
the rating label) on all correspondence.
3. Give the reason why you are returning it.
4. If within the guarantee period, state
when and where it was purchased
and include proof of purchase (e.g. till
receipt).
5. Send it to our Customer Service
Department at the address below:
Customer Service Department
Jarden Consumer Solutions (Europe) Limited
Middleton Road, Royton, Oldham
OL2 5LN, UK
Telephone: 0161 621 6900 Fax: 0161 626 0391
e-mail: [email protected]
GUARANTEE
Please keep your receipt as this will
be required for any claims under this
guarantee.
This appliance is guaranteed for 1 year
after your purchase as described in this
document.
During this guaranteed period, if in the
unlikely event the appliance no longer
functions due to a design or manufacturing
fault, please take it back to the place of
purchase, with your till receipt and a copy
of this guarantee.
Therightsandbenetsunderthis
guarantee are additional to your statutory
rights, which are not affected by this
guarantee. Only Jarden Consumer
Solutions (Europe) Limited (“JCS
(Europe)”) has the right to change these
terms.
JCS (Europe) undertakes within the
guarantee period to repair or replace the
appliance, or any part of appliance found
to be not working properly free of charge
provided that:
• you promptly notify the place of
purchase or JCS (Europe) of the
problem;and
• the appliance has not been altered
in any way or subjected to damage,
misuse, abuse, repair or alteration by a
person other than a person authorised
by JCS (Europe).
Faults that occur through, improper use,
damage, abuse, use with incorrect voltage,
acts of nature, events beyond the control
of JCS (Europe), repair or alteration by
a person other than a person authorised
by JCS (Europe) or failure to follow
instructions for use are not covered by this
guarantee. Additionally, normal wear and
tear, including, but not limited to, minor
disColouration and scratches are not
covered by this guarantee.
The rights under this guarantee shall only
apply to the original purchaser and shall
not extend to commercial or communal
use.
If your appliance includes a country-
specicguaranteeorwarrantyinsert
please refer to the terms and conditions of
such guarantee or warranty in place of this
guarantee or contact your local authorized
dealer for more information.
Waste electrical products should not be
disposed of with household waste. Please
recycle where facilities exist. E-mail us at
[email protected] for further
recycling and WEEE information.
Jarden Consumer Solutions (Europe) Limited
5400 Lakeside
Cheadle Royal Business Park
Cheadle
SK8 3GQ
UK
VCF117_19EM1 (UK).indd 14-15 7/10/19 08:28

VCF117_19EM1 (UK) 04/19 P.N. 197229
GCDS-BRE592245-JC
Jarden Consumer Solutions (Europe) Limited
Cheadle Royal Business Park, Cheadle, SK8 3GQ, United Kingdom
e-mail: [email protected]
Telephone: 0161 621 6900
For Customer Service details, please see the website.
www.breville.co.uk
© 2019 Jarden Consumer Solutions (Europe) Limited
All rights reserved. Imported and distributed by Jarden Consumer Solutions (Europe) Limited,
5400 Lakeside, Cheadle Royal Business Park, Cheadle, SK8 3GQ, United Kingdom.
Jarden Consumer Solutions (Europe) Limited is a subsidiary of Newell Brands Inc. (NASDAQ: NWL).
The product supplied may differ slightly from the one illustrated due to continuing product development.
Dolce Gusto
®
is a trademark of Société des Produits Nestlé S.A. Société des Produits
Nestlé S.A. is not afliated with Jarden Consumer Solutions (Europe) Limited
Printed in China
VCF117_19EM1 (UK).indd 16 7/10/19 08:28